


Eclectic Motorworks
www.eclecticmotorworks.com
 By Carl Heideman
Jan 17, 2023
|
seat,
Interior
| Posted in
Shop Work
| From the March 2007 issue
| Never miss an article
Photography by Carl Heideman
It’s a question we’re often asked: What can be done about the uncomfortable seats found in so many classics? The follow-up question usually asks about swapping in modern or aftermarket seats.
We usually counter that the original seats are actually very comfortable—if they are in good condition. Fix them and all will be well.
And by “good condition,” we mean that the entire seat needs to be perfect. In addition to good upholstery—no rips, wear or fade—the cushions and support webbing or diaphragms also need to be in flawless shape. Don’t forget that a good-looking seat may be concealing worn-out innards.
Fortunately, renewing a seat’s support assemblies is an easy and inexpensive job, requiring about $25, only a few tools, and no upholstery experience. Follow along as we rejuvenate the seat from a 1978 MGB by replacing the seat diaphragm. The process is similar for many other types of cars, and the result is a dramatic improvement in comfort for just a couple of hours of work.
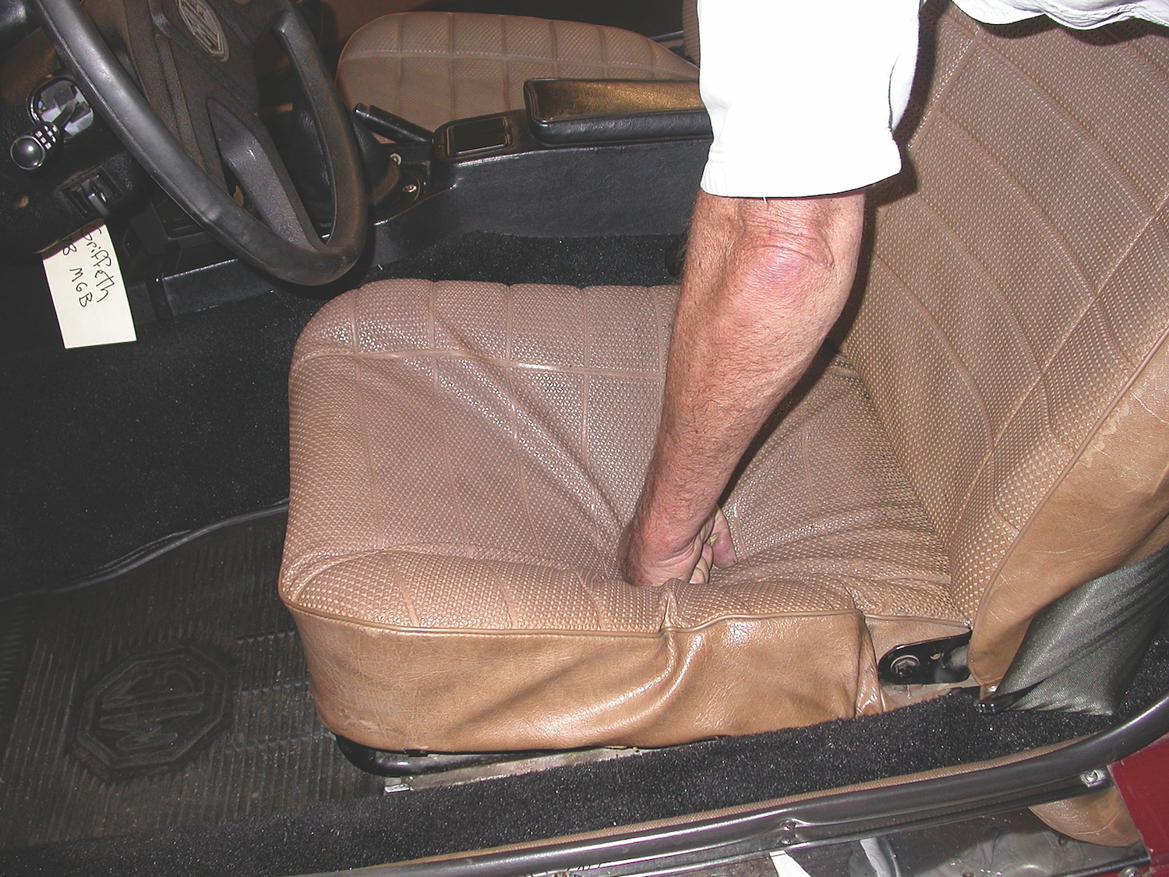
Slightly faded but with an otherwise good outward appearance, these MGB seats were very uncomfortable. Notice how much the seat gives way to moderate pressure. Time for repairs.

Probably the hardest part of this job is getting the seat out of the car, since the mounting bolts are often hard to reach and rusted in place. It’s usually wise to spray some penetrant on the bolts a day or two before removing the seats.

We’d rather work on seats when they’re at our height. Save your back by using a workbench. Once the seat was on the bench, we removed the back with a couple of wrenches.

With the back removed and the seat bottom flipped over, the weak and damaged webbing clearly revealed why this seat was so uncomfortable. To start the replacement of the webbing, we removed the spring clips that hold the upholstery to the seat frame.

Once the clips were removed, we carefully pulled back the upholstery from the frame, leaving the upholstery attached to the cushion. If the foam and seat covers can be saved, you don’t need any upholstery experience for a job like this.

We then pulled the seat bottom off the frame.

We removed the old webbing by undoing the clips with needle-nose pliers.

In the case of MGBs, there were two types of seat support used—later cars used webbing, while earlier cars used a full diaphragm. We find that the diaphragms offer more support and thus make a good retrofit for the newer cars. We paid $20 for each seat replacement diaphragm.

Again using our pliers, we stretched the diaphragm and hooked it into the frame. Having an assistant hold the frame while you’re stretching the diaphragm usually helps a lot.

Next we put the seat bottom upholstery and cushion back on the frame. Since it was previously fitted, it went on easily and almost fell into its original position.

No glue was necessary to secure the upholstery, as we simply used the spring clips.

With everything refitted, the bottom was finished.

The seat bottom was ready to be reunited with its back.

We attached the finished seat back to the bottom.

Before lubricating the seat sliders, we cleaned out the built-up dirt and old, gummy grease. This will allow the seats to slide much more easily.

Before reinstalling the seat, we used a rethreading tool to chase the threads of the mounting weld-nuts. We then liberally greased the weld-nuts and the mounting bolts so that they would be less likely to seize in the future.

Once it was reinstalled, we gave the seat the fist test again. It was significantly firmer. Our butt confirmed these findings.

Looking the same as they did only a few hours earlier but now feeling brand-new, the rejuvenated seat made the car comfortable and much more enjoyable.

Having rebuilt the cusions and installed new covers on my TR7 Spider seats in the past year I have a strong recommendation. Buy a T handled hook tool for use to install the diaphragm hooks. I found the ones used to install the exhaust springs on motorcycle or snow mobile 2 cycle engine pipes work well and only cost a few bucks. It made what was an incredibly difficult step easy for just one person. After struggling for two days the hook enabled me to do the job in a few minutes.

And despite working during warmer weather it helped to have a small electric ceramic fan heater playing on the diaphragm to soften it a little to ease the stretching effort.
For those with seat foam cushions that are built up from several pieces, like the TR7/8 seats, they may find the factory cotton stripes bonded to the foam has dried and split. I discovered that for $1 at my local Dollar Tree store I could buy 2" wide genuine hessian fabric in a small roll that was perfect to replaced the original material. I used a slow setting 3M spray adhesive to reconstruct the seat cusions just like they left the factory around 40 years ago.

Job done, they look great and are very comfortable too.

Years ago I rebuilt my TR6 seats. The kit I bought included new diaphrams with the new seat covers. Since my old diaphrams were good, I added the new diaphrams and doubled up.
It is possible to have too much support.
Instead of bucket seats, it felt like I was sitting on a ball.
Displaying 1-2 of 2 commentsView all comments on the CMS forums
You'll need to log in to post.


