In reply to volvoclearinghouse: You don't need telemetry just a long cold winter day and a video of a few laps.. Aim your video camera at the track and have your tach in the view. A stop watch of some sort will give you segment times.. Now go back to your Computer print out and do some simple calculations..
You will be amazed at what you learn..
Well, that's not gone well.
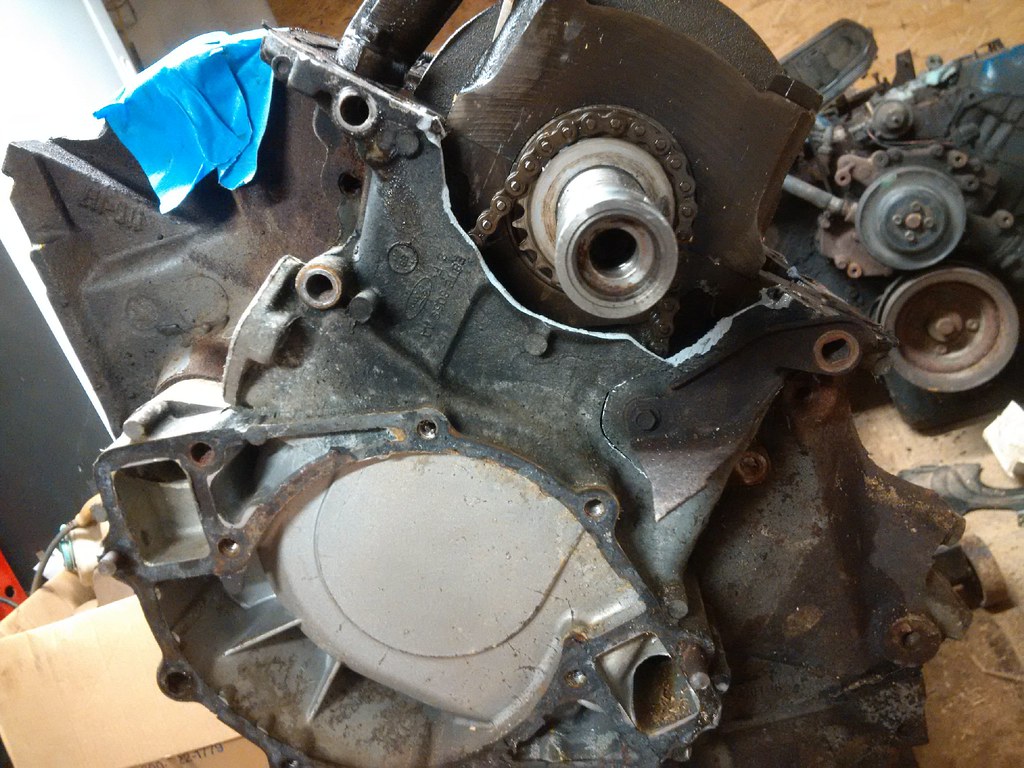
The timing cover -slash- water pump housing is aluminum, bolted to the cast iron block by steel fasteners. Over the past 30 years of mostly sitting (as 30,000 mile RV engines do) a couple of the bolts corroded themselves to various types of metals. Bolts broke, and the cover is "welded" in place.
Somewhat injudicious application of a big berkeleying pry bar landed us here. Then I gave up, sweaty, put the chickens away, and went to bed. I have a feeling this timing cover is going to be in a few more pieces before it's completely removed... 

Knowing that it would ultimately come to this, I skipped all of the intermediate, sure-to-be-increasingly-frustrating steps, and simply broke out the big guns.
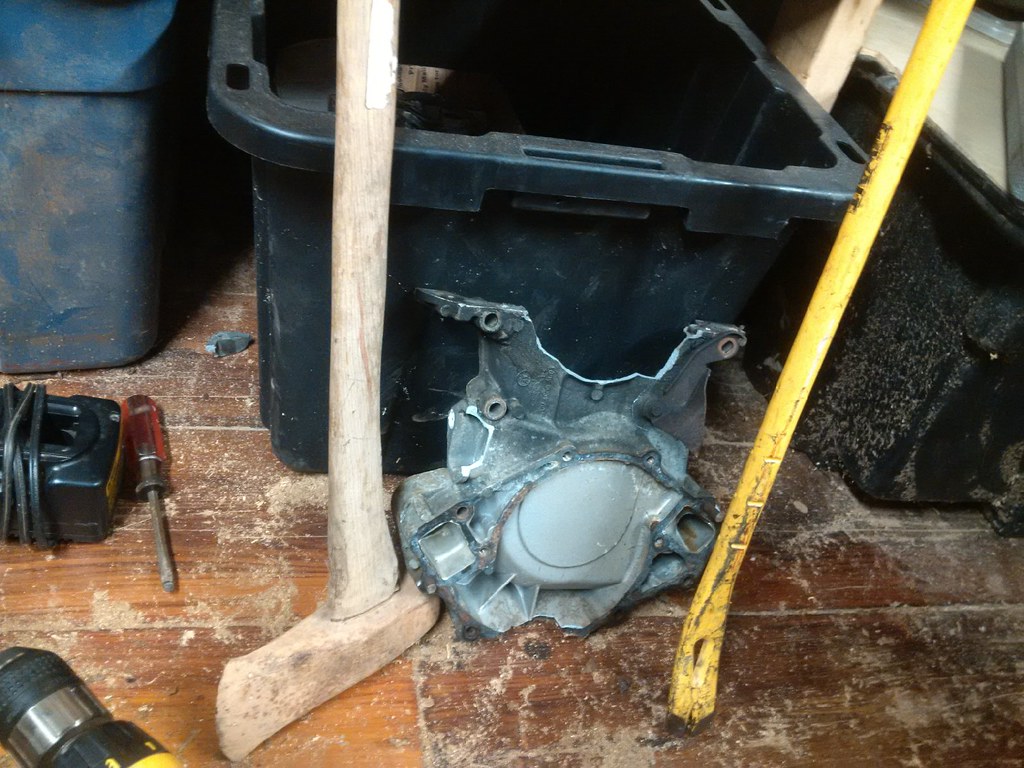
(Alternate caption: I couldn't sleep Friday night, so I went out into the garage and beat it off)
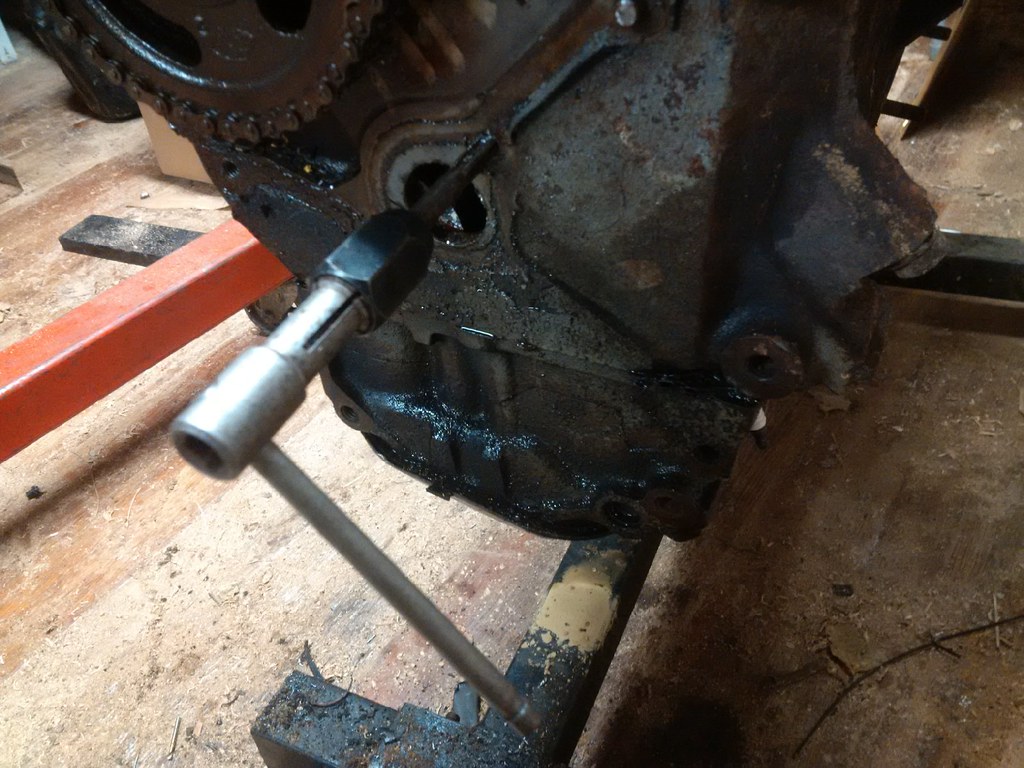
As it turns out, 3 of the timing cover bolts were the culprits behind the cover not letting go of the engine block. All three had to be drilled and backed out with various broke-screw extraction techniques. Finally, I ran a tap down all the threads.
Huh. Interesting. Ford looks to have put a double roller timing chain in there from the factory.
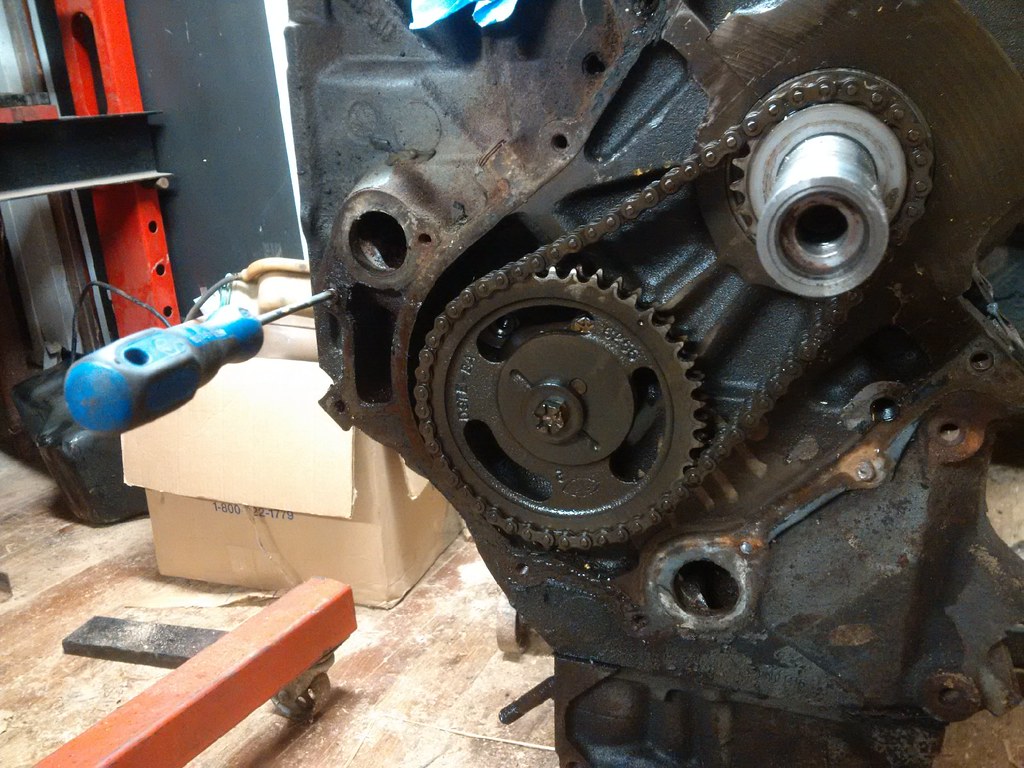
I'm fairly certain it's stock; it has the ford markings on the casting. The chain seems somewhat sloppy, though, and the markings on the crank sprocket indicate it has the timing retard gear set, so it's going in the trash bin.
The cam and lifters from noddoz are quietly soaking in a bath of new, clean engine oil. The next step will be to install this new cam, with the new timing set, and check valve operation with the piston valve reliefs filled with Play Doh.

Brian
MegaDork
8/1/16 6:44 a.m.
Fun! I apologize for my skepticism earlier regarding the ability for this work to be done within a LeMons budget. I have similar but slightly higher budget ambitions should I ever acquire a smog era MK.
I just bought some pistons. Details at eleven.
I got excited because I found a really smoking deal on the perfect pistons for this build. The best OEM slugs, the early FI ones, would just nudge the engine over 9:1 compression, which is sort-of borderline for this cam. A nice set of flat top hypers were what this old BBF really longed for, but sadly they commanded too dear a price. When I ran across a NIB set for a hefty discount off every other online price I'd found, the pressure was on to make sure they'd work.
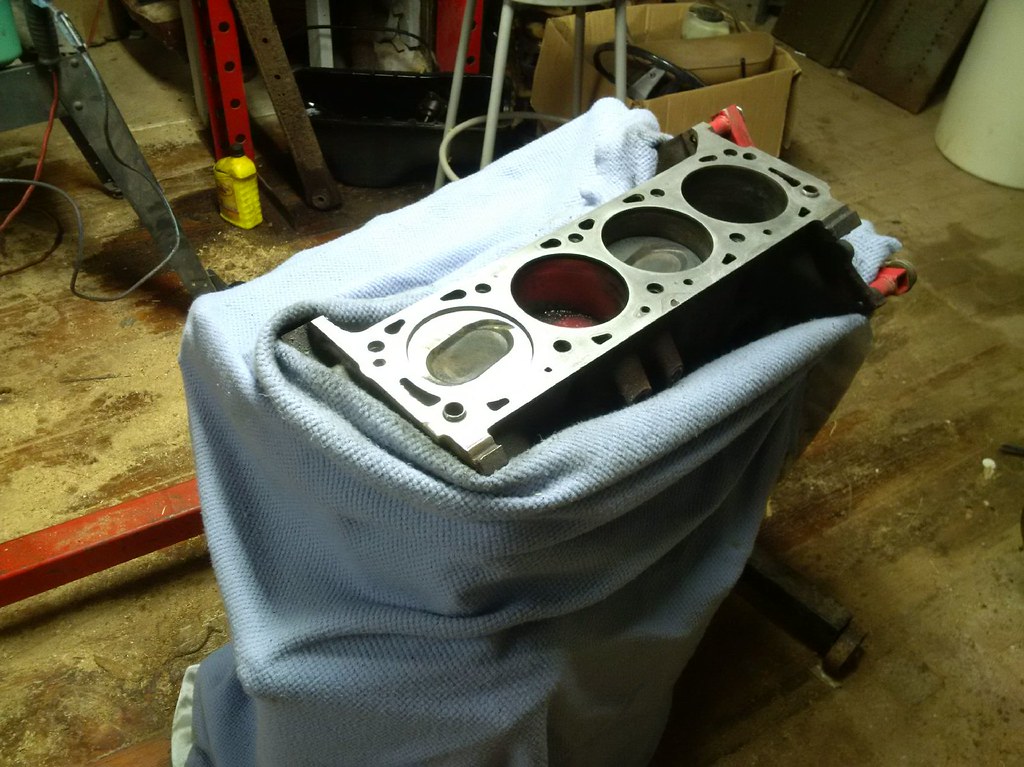
Last night, the Noddaz cam (Cobra-Jet grind) went in place of the stock bump-stick, the straight-up timing chain set followed, and I filled the dish in the stock piston with grease to check the valve clearance. Here's what the piston looked like before I bolted the head on:
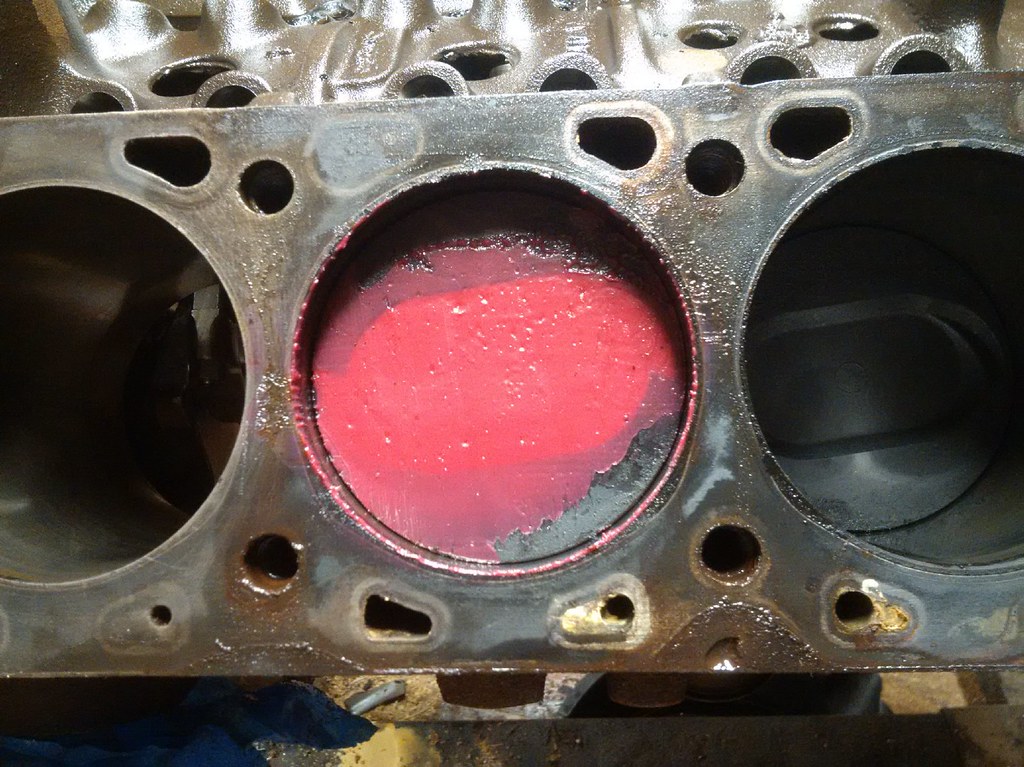
And here's what the piston looked like after bolting on the head sans-gasket, installing the lifters and pushrods, tightening down the valves, checking the lash, and running the crank around a few times with a breaker bar:
OK, admittedly that's the same picture. No valves touched the grease! I ran inside, opened my laptop, and committed to the flat tops. This makes everything else simple- no machine work, no disassembly of the crank bearings. The flat tops will scrunch the fuel/air mix at about a 9.7:1 ratio, and miss the cylinder heads by around 45 thousandths of an inch, for that sweet quench.
Are you sure the compression height of the two pistons are the same?
In reply to Stampie:
The listed CH of the hypers is 0.002" more than what I measured on these pistons. Just to be safe, the above test was done with no head gasket, when in reality there will be a 0.027" thick HG in place.
volvoclearinghouse wrote:
The flat tops will scrunch the fuel/air mix at about a 9.7:1 ratio, and miss the cylinder heads by around 45 thousandths of an inch, for that sweet quench.
almost seems to good to be true........ and if it is... you may want to make sure your "new" third member can take the power..... 
oldeskewltoy wrote:
volvoclearinghouse wrote:
The flat tops will scrunch the fuel/air mix at about a 9.7:1 ratio, and miss the cylinder heads by around 45 thousandths of an inch, for that sweet quench.
almost seems to good to be true........ and if it is... you may want to make sure your "new" third member can take the power.....
Well, I like to think it's not "luck" that we are where we are...though certainly the nearly-free cam and other parts was a stroke of good fortune.  As for the rest...there's countless hours of preparation, calculations, research, and experience with other 460's and engines in general. Many busted knuckles, lots of time spent thrashing on hot engines at races...swapping engines, burned skin and frazzled nerves.
When I was 14 years old, I dragged home a push mower that I'd bought at a garage sale for a dollar, tore that one-lung engine apart, put it all back together, and sold it for $25. 25 years later, there have been many many many other pistons and cylinders that have passed through my hands. Some were made better; many more were failures. All that collective knowledge and experience brings us to where we are today.
MrJoshua wrote:
 It looks so cozy.
Look! I turned a 460 into a 230!

Engine stands are great. 
After what was apparently a month's hiatus, last night I got back to the 460 build. No, I wasn't being lazy or procrastinating- for the record, the Corvair front disc brake project was completed, allowing us to enjoy some good fall weather in the convertible, the wife's Suburban needed some maintenance, we made two family reunion trips out of state, I worked on two other cars that I'm fixing up to sell, and the wife broke her left foot, leaving me to take care of, well, almost everything. When I wasn't at work.
After tidying up the workspace a bit (Harbor Freight was running some specials on their plastic storage bins with the latching covers, so I picked up like 4 of them yesterday) the scraper and sander came out and did this nice little bit of work on the left cylinder bank. The blanket was to keep debris (which must, in my garage, be pronounced "duh-BRISS") out of the rest of the engine.
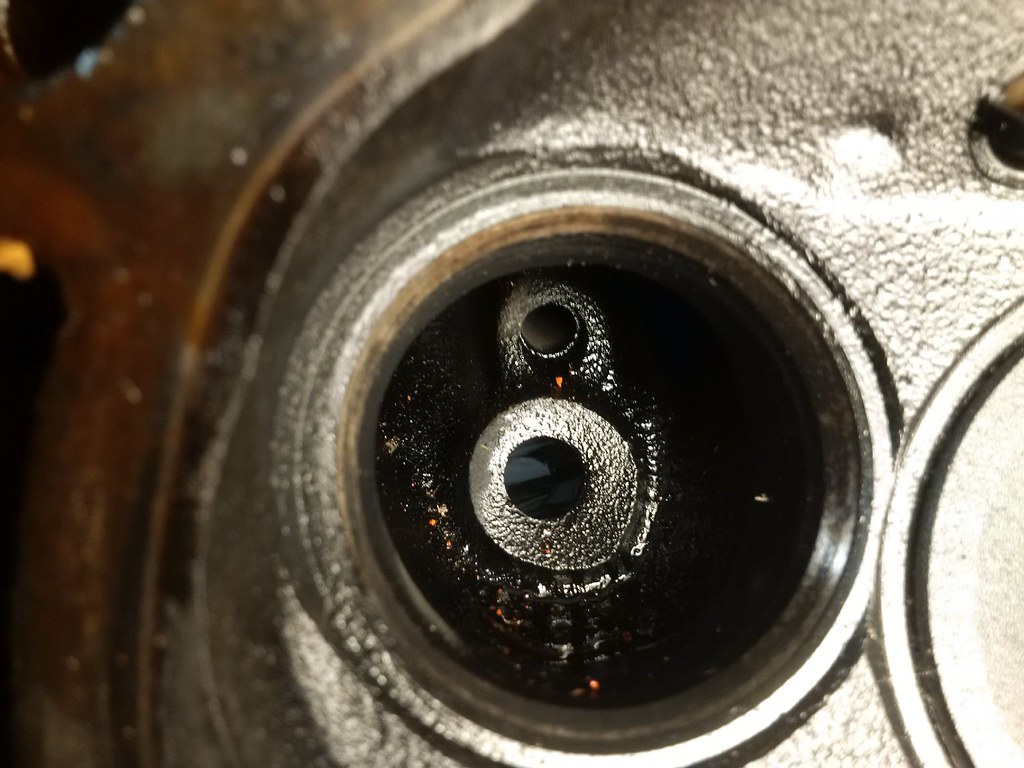
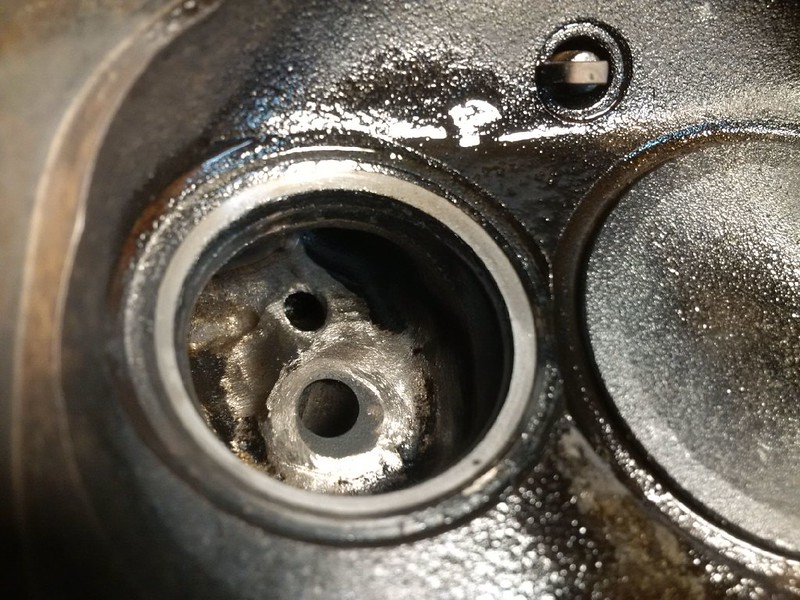
As you can see from the other pics, I pulled an exhaust valve to see what I'm up against on the exhaust porting project. Looks like it'll be pretty easy: knock off those smog bumps, smooth out around the valve stem hole, clean up any major casting imperfections, and port-match with a gasket.
Anyone got any other advice?
Looking at headers. Anyone have any opinion on shorties?
THESE are pretty cheap.
Casting those ports into the head is very expensive solution (relatively speaking).
Reminds me of the Star Trek movie where Doc called late 20th century surgeons barbarians.
Any chance you have a spare set and flow stand?
Interestingly, even the D0VE heads I picked up recently have these exhaust ports. And they were pre-EGR. Makes you wonder if they knew EGR was coming and started casting those in in advance.
And yeah, they suck.
I have another set of D3VE heads, but no flow bench and even less time. I'm basically going for low-hanging fruit here, not 10/10ths of the performance. We may not even get headers on this race.
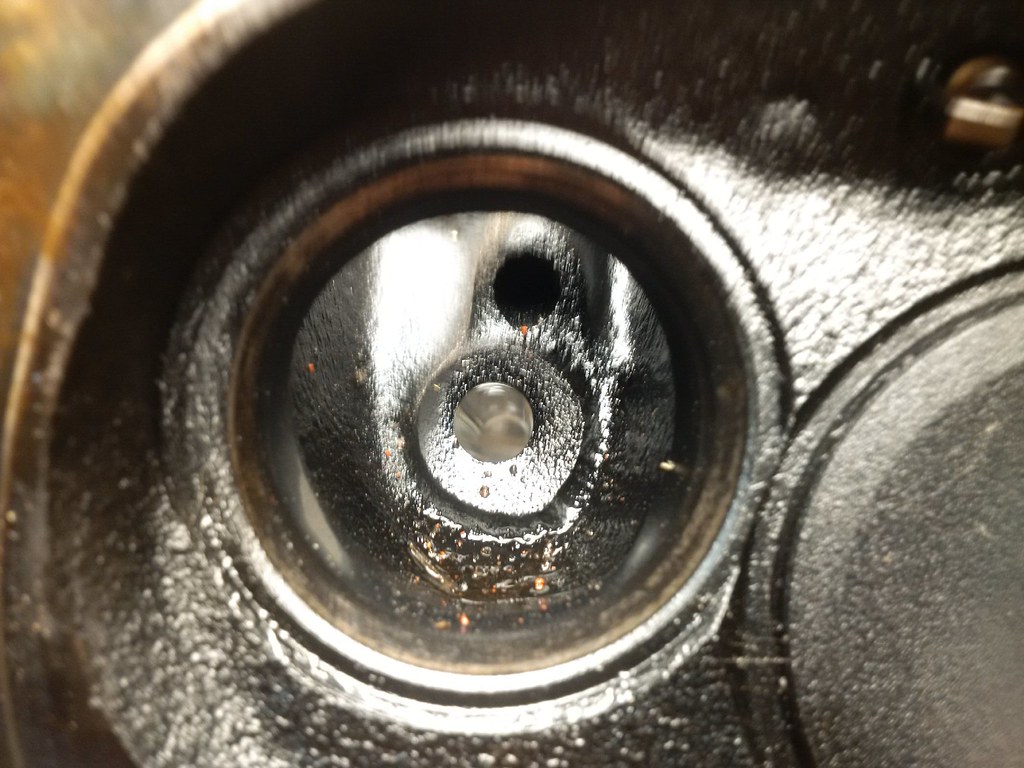
Last night I did one cylinder. It took about 30 minutes with a long-reach die-grinder to grind off the smog hump, feather the edge of the valve stem boss, knock off some casting bumps, and match the port to the exhaust gasket.
The result:
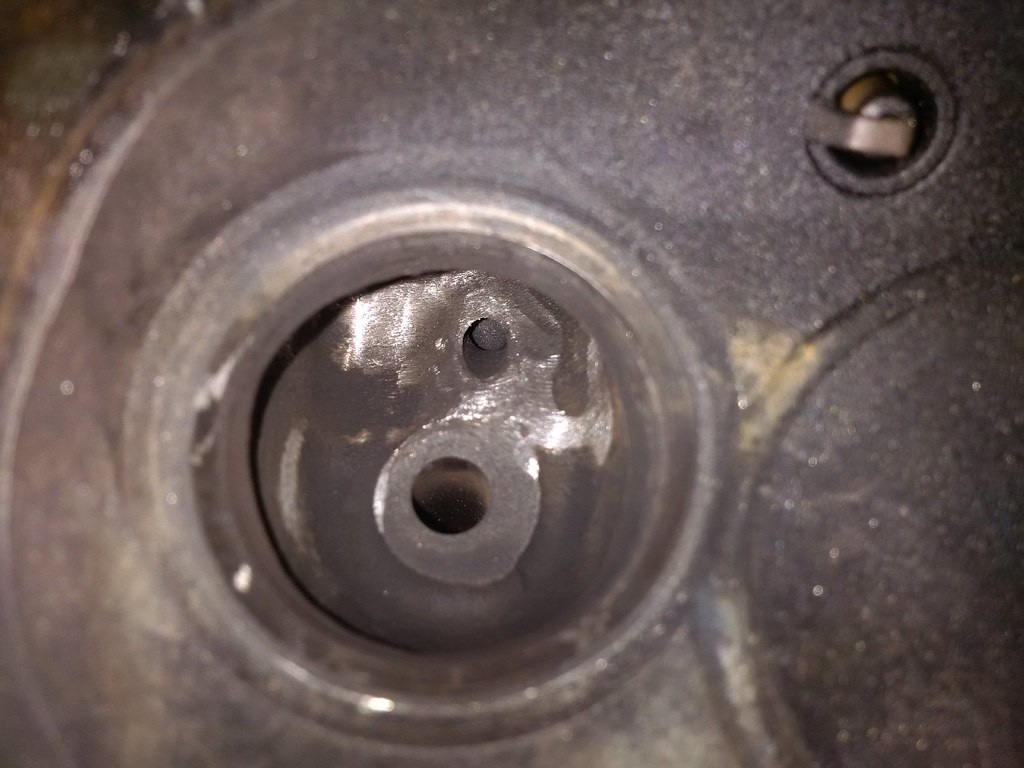
Not bad. I can definitely go more aggressive on the valve guide boss edge though. I've seen them whittled down to almost no flat area remaining.
As I sat there, grinder in hand, air compressor chugging away, I kept thinking to myself, I'm grinding the lap times down.
Depending on your confidence/capability... you might try to make the valve "guide" (stem boss) more uniform...
Also... take a caliper and measure the bowl diameter, and measure the valve head... you can "open" the bowl to about 85% of the valve's diameter.
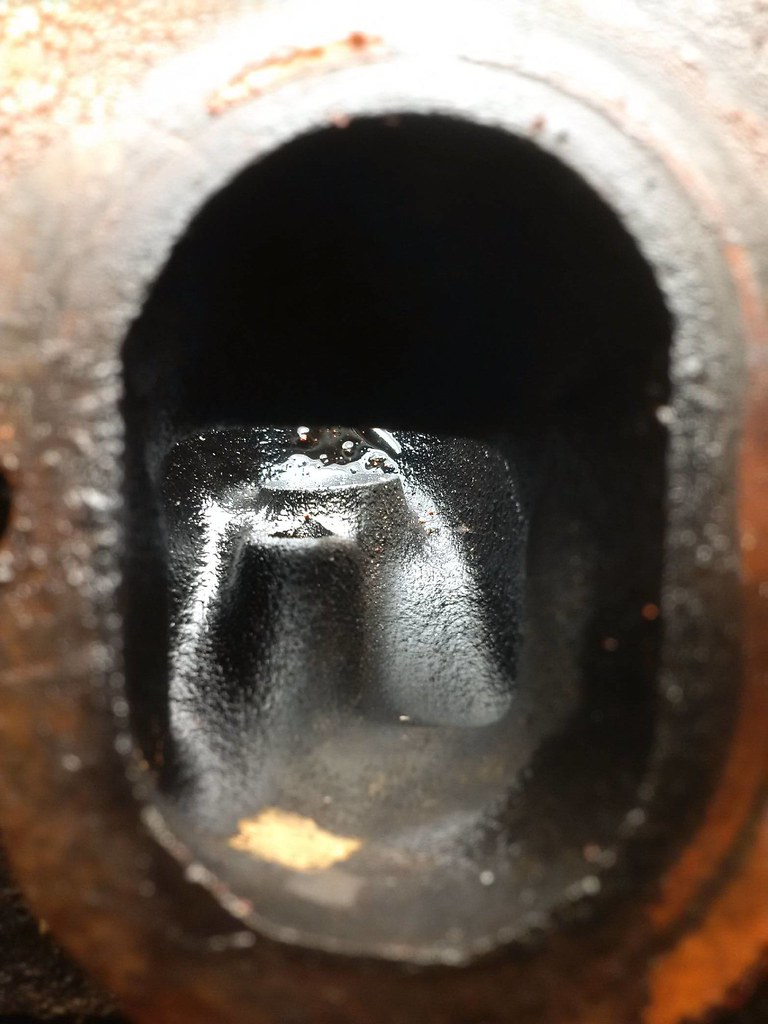
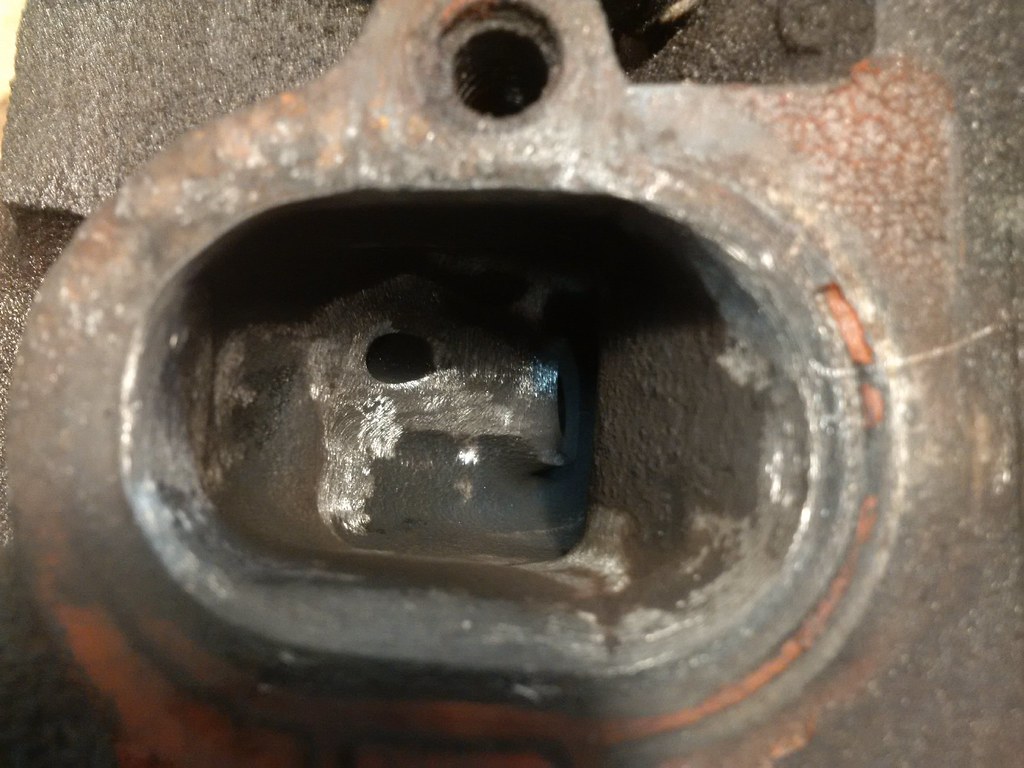
One head, ported and port-matched. I took oldeskewl's advice and opened up the bowls a bit. Conventional wisdom on the D3 head is that the port "floor" is already low enough, and to leave that alone. The stem boss got a bit more work to smooth out the flow there, and the smog port bosses are history.
One thing to watch out for with the port-matching is the cylinder head bolts go through the head perilously close to the exhaust ports. There may have been some core-shift going on, as the ports weren't all off of the gasket holes by the same amount. 
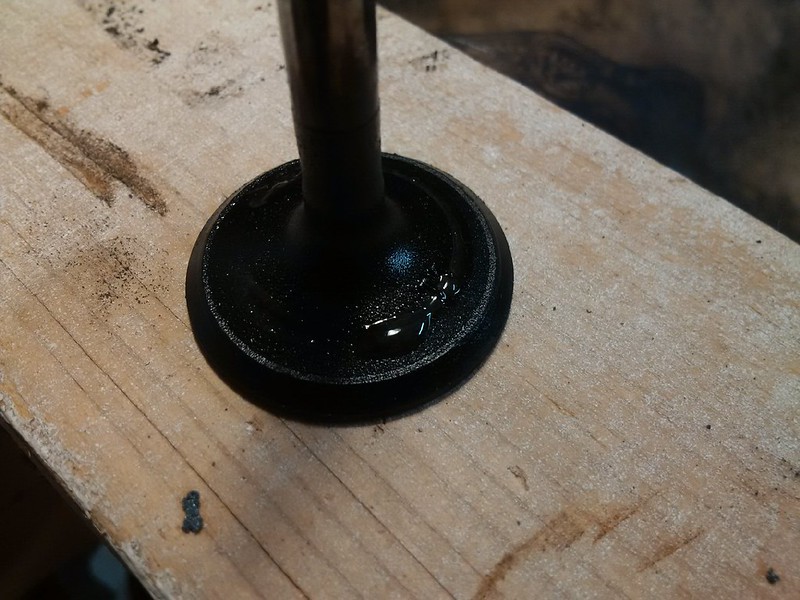
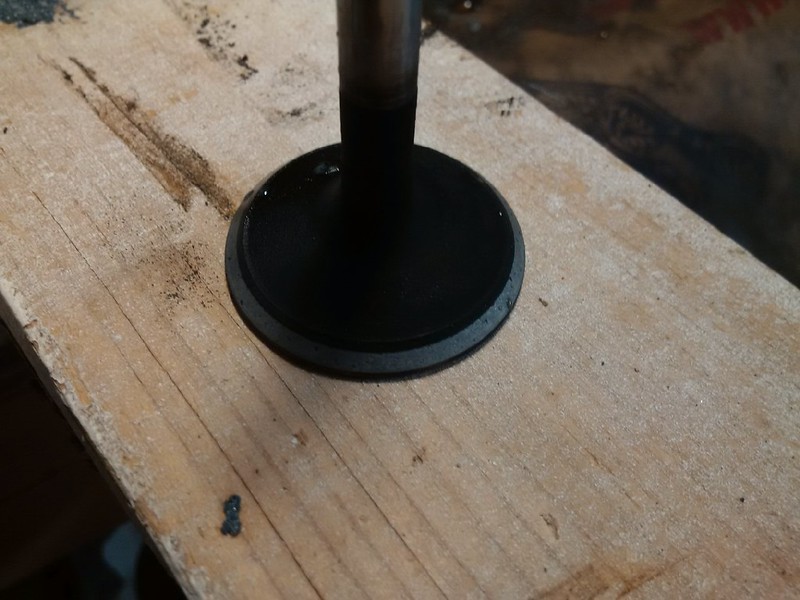
One valve responded well to a quickie lap with a suction cup spinner tool and some water-based paste, so as soon as the rest of them are knocked out this head will be ready to go. Then we move on to the pistons in this bank of cylinders.
Lapped the valves on this head on Tuesday night, with a suction cup tool and some water-based lapping grit. Before and After:

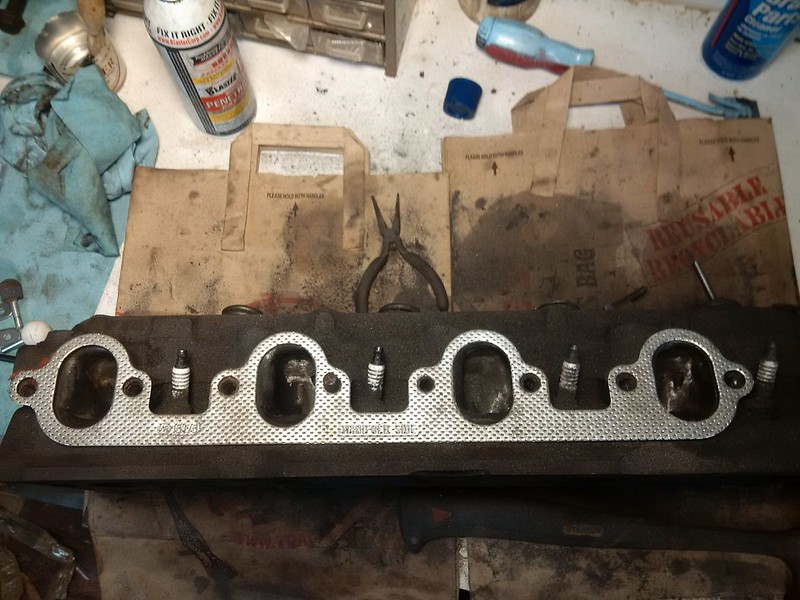
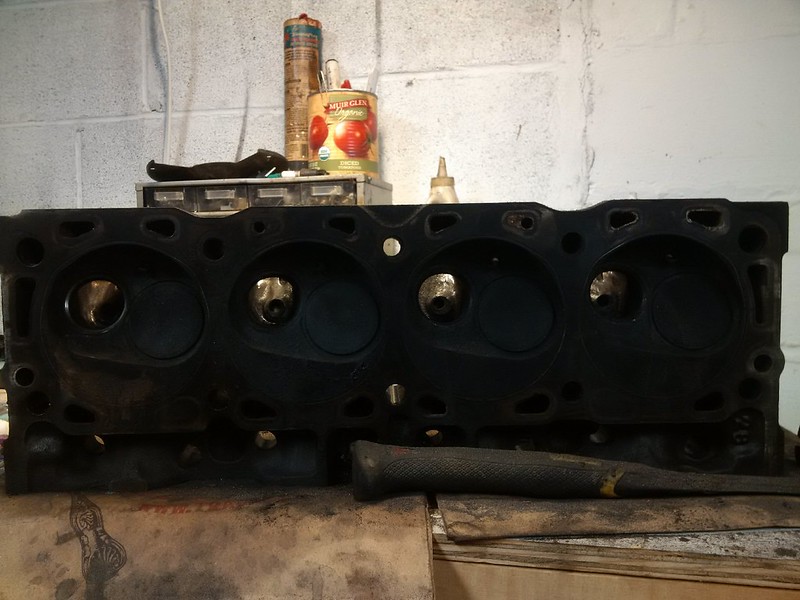
Last night I cleaned off all four sides of the head where crap bolts to: valve cover gasket surface, exhaust manifold mating surface, head gasket surface, and intake manifold surface. All threaded holes that are used to clamp a gasket were chased.
Just wondering/thinking outloud.... are those seats @ 45 degrees? The valve kinda looks like it, but the seat in the head looks far shallower.
also in the pre lapped photo... might it be possible (within your capability) to "soften", and better shape the bowl? In particular I'm speak from about 1 o'clock to about 5 o'clock

Javelin
MegaDork
9/22/16 11:48 a.m.
I am very excited at seeing the true budget-build going on here! Loving the home-porting and valve job.
In reply to Javelin:
Thanks for the encouragement! Its fun, though chipping away 30 to 45 minutes of work per night takes patience and a long-term view- 2 things I've never been good at. I realized last night that it'll take me 2 weeks to get all the pistons in. 
In reply to oldeskewltoy:
The angles are the same. The gray band there showing where the two surfaces lapped together indicates this. I think the perspective in the photos just isn't very clear.
I appreciate your input on the porting, and don't want to discourage it, but the valves are already back in. At the ~400 HP level we're hoping to make, hopefully this will be good enough. I'm taking a very "The Perfect is the enemy of the Good" mantra on this build.
Posting THIS LINK here for reference on piston ring installation.
http://www.enginebuildermag.com/2012/04/piston-ring-installation-tips/
I did one last night. Setting ring end gaps "loose" for racing.