


Still a Great Build, Staying with it say's a lot about You..so Kudo's

Still a Great Build, Staying with it say's a lot about You..so Kudo's

I'm getting excited. I'm tearing the old carb and ignition setup off this week, and installing the efi. Then we'll see if it will run on a stock ecm calibration. Once I can confirm that it runs again, no matter how poorly, I'll blow it apart for the wiring harness and other stuff.
I'm stupid excited about this. Years of planning and parts gathering are coming to fruition.
Spent today rebuilding and modifying the lean burn distributor for ecm control, plumbing, harness rough draft, etc.
Not a whole lot to look at.
Update time!
Previous budget: 8804.07
Money spent:
Misc brass fittings at lowes: 6.50ish
O2 sensor (4 wire), e coil, o2 sensor bung, and another set of gaskets 75
Sold intake, carb, distributor and fuel pump -350
Reman lean burn distributor 32
New total: 8567.57
So, I finally got around to the start of the major overhaul here.
But before that, I worked on finishing the intake up. Wanted to mount the fuel pressure regulator or the rail originally, but had decided that it wouldn't fit. Them I couldn't find anywhere else I wanted it. So I went back to the rail idea. Picked up some brass fittings from lowes, and here is where we wound up.
[URL=http://s54.photobucket.com/user/dusterbd13/media/duster/20160124_111726_zpsqgkshs4p.jpg.html]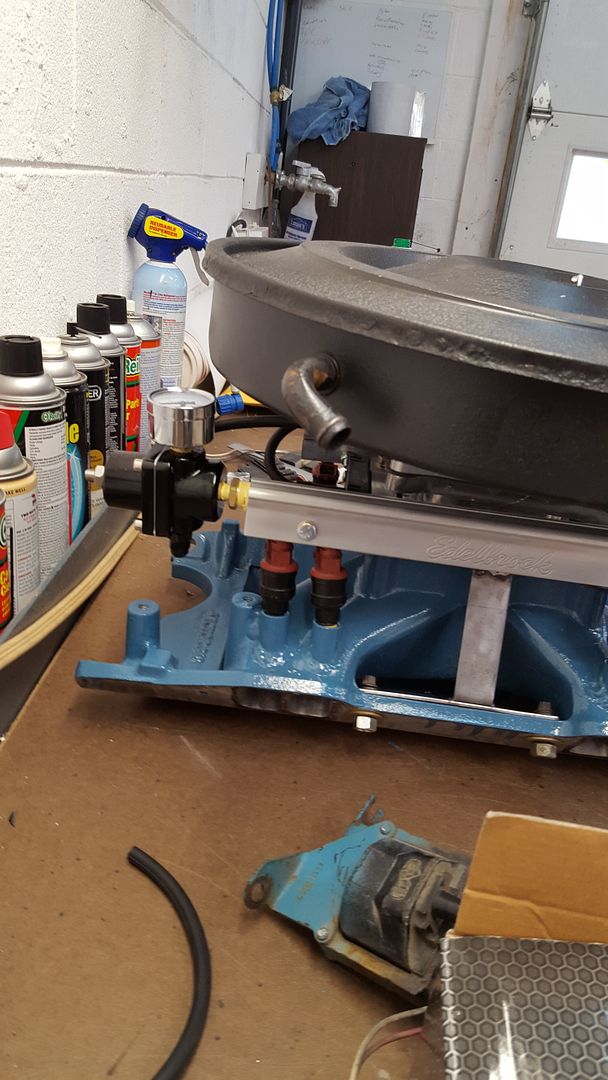 [/URL]
I then went to test this cheap ebay regulator. It leaked, both fuel and vacuum. Not good. Not good at all.
So I tore it apart, hoping it was something simple. It was. The Chinese kids that built it pinched the o-ring when they put it together. And left metal shavings throughout. So I cleaned it up, put in a new o-ring, and put it back together. Much success was had.
[URL=http://s54.photobucket.com/user/dusterbd13/media/duster/20160124_105542_zpsahuxhms4.jpg.html]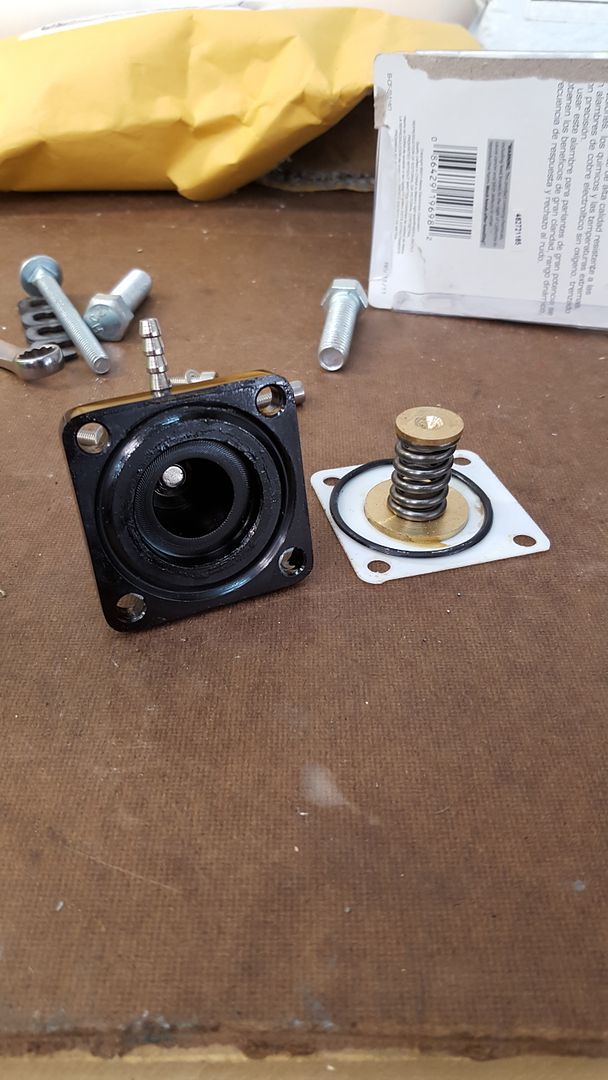 [/URL]
So, now ive got all the fab work done. In theory.
[URL=http://s54.photobucket.com/user/dusterbd13/media/duster/20160124_111722_zpsgqxicln4.jpg.html]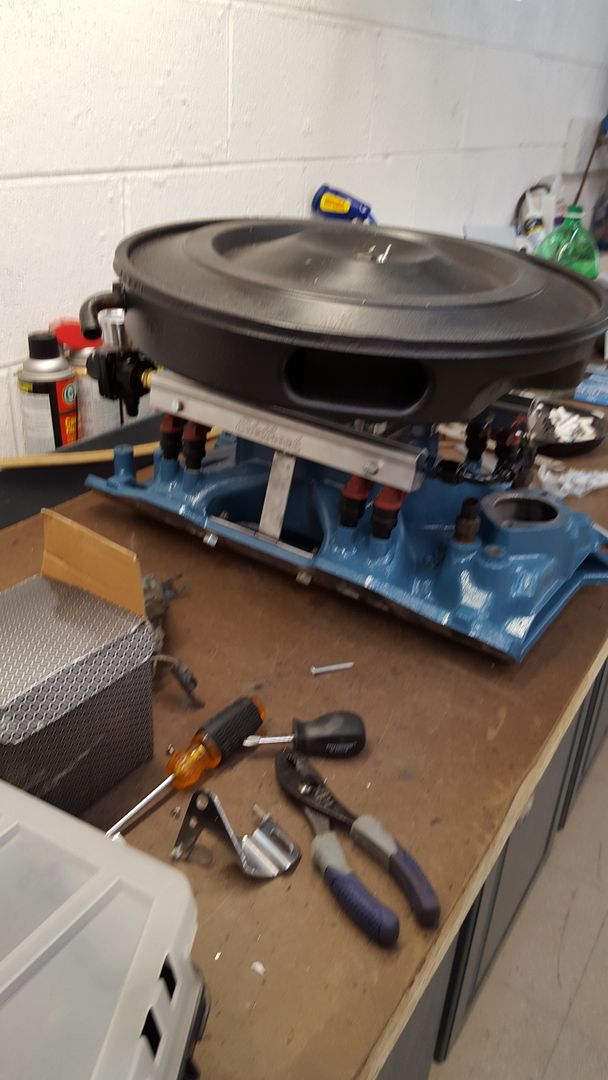 [/URL]
I was stoked. Moved onto distributor modification. All that I wanted to do was mount the ignition control module under the distributor where it would be nice and out of the way. So I used the infamous CAD (cardboard aided design) and made a bracket. Dissembled the lean burn unit I had picked up years ago, and cleaned it all up, etc.
[URL=http://s54.photobucket.com/user/dusterbd13/media/duster/20160124_151622_zpsuc9laech.jpg.html]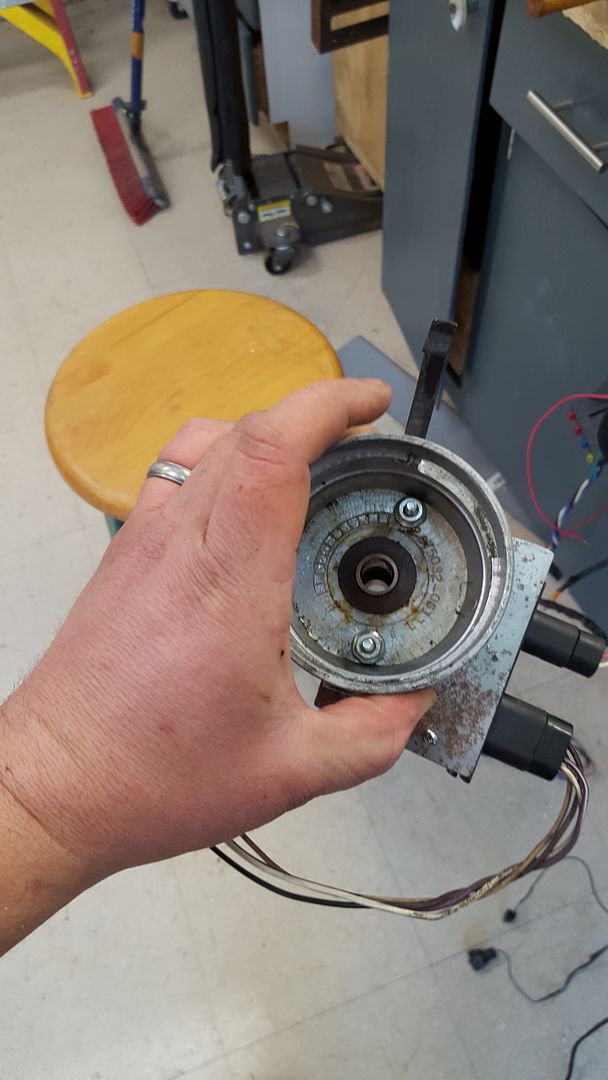 [/URL]
[URL=http://s54.photobucket.com/user/dusterbd13/media/duster/20160124_151620_zpsmwmeojev.jpg.html]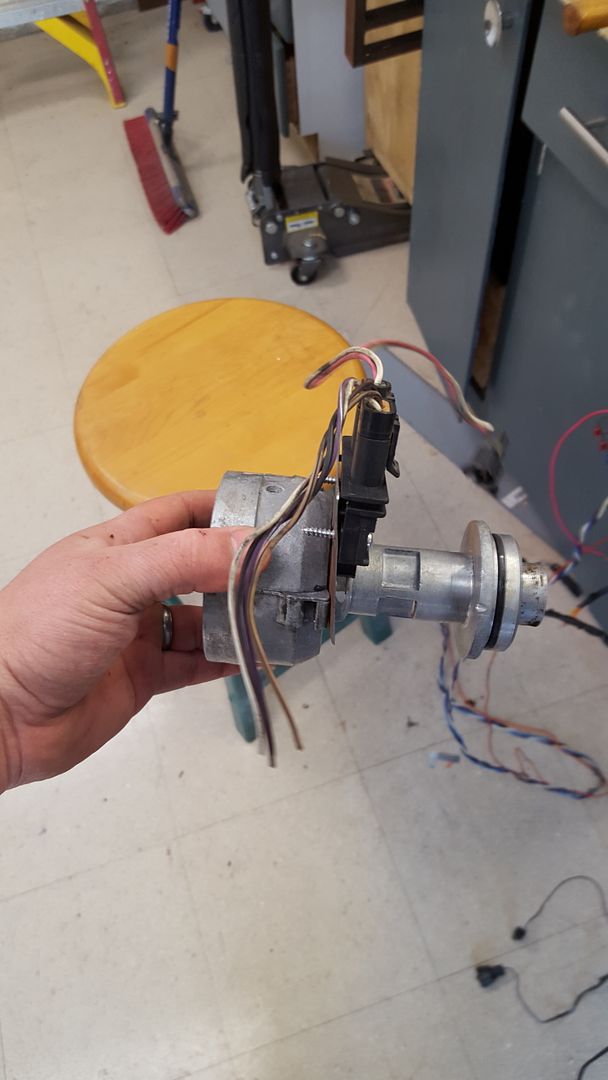 [/URL]
It got scrapped for two reasons. 1, I lost one of the hold down clips for the cap over the years, and I was unable to locate a replacement. 2. There was no way to service the module once I installed the distributor in the car. 3. The hall effect sensor was fried. And then I dropped it. So.... I ordered a cardone reman unit from work. First one was bent. Second one works great!! I also wound up relocating the module to a piece of angle aluminum held down under one of the coil mount bolts.
So then a guy on craigslist actually showed up with cash for the intake setup. So we pulled the car out, pulled the hood, and removed it all.
[URL=http://s54.photobucket.com/user/dusterbd13/media/duster/20160126_165118_zpsinmipyk9.jpg.html]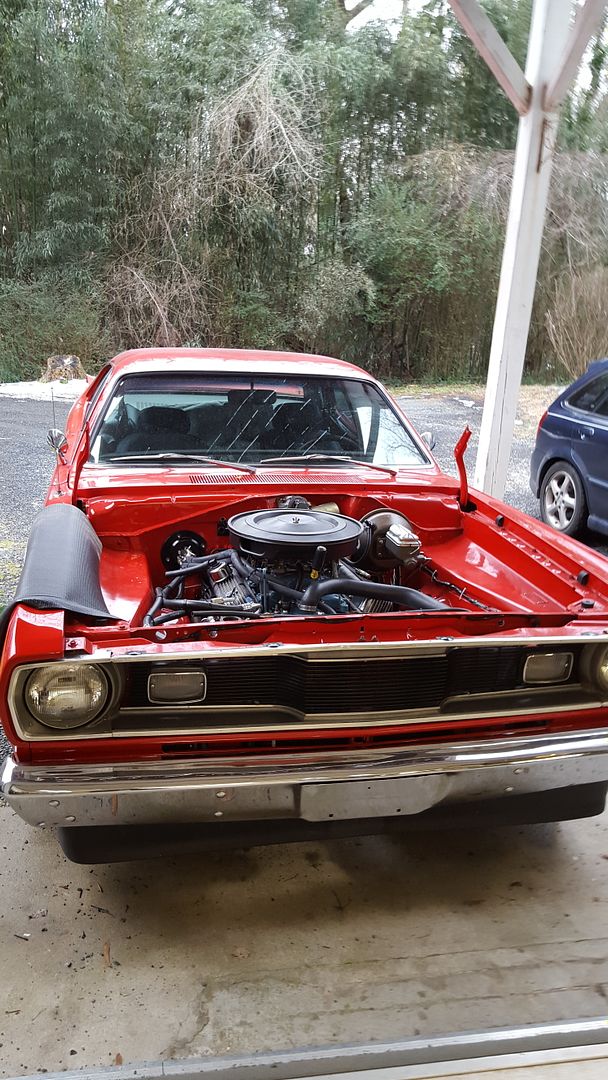 [/URL]
[URL=http://s54.photobucket.com/user/dusterbd13/media/duster/20160127_192903_zps34og9d3a.jpg.html] [/URL]
[URL=http://s54.photobucket.com/user/dusterbd13/media/duster/20160128_170455_zpsx1hpyzi1.jpg.html]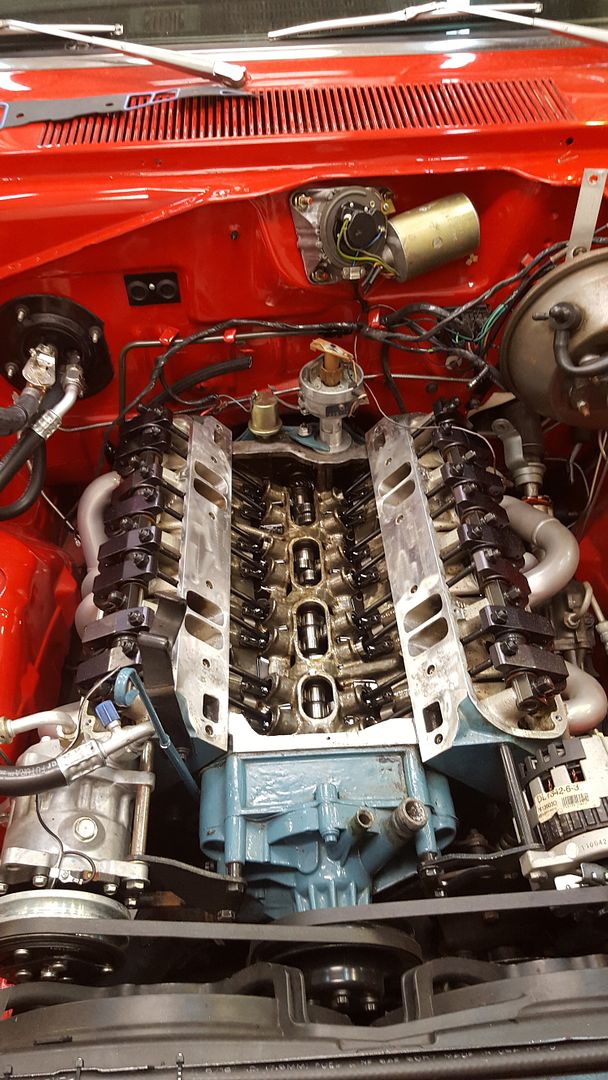 [/URL]
Went ahead and drained the block as well, and installed the knock sensor in the passengers side water jacket plug hole.
[URL=http://s54.photobucket.com/user/dusterbd13/media/duster/20160201_161743_zpsvwqajtcz.jpg.html]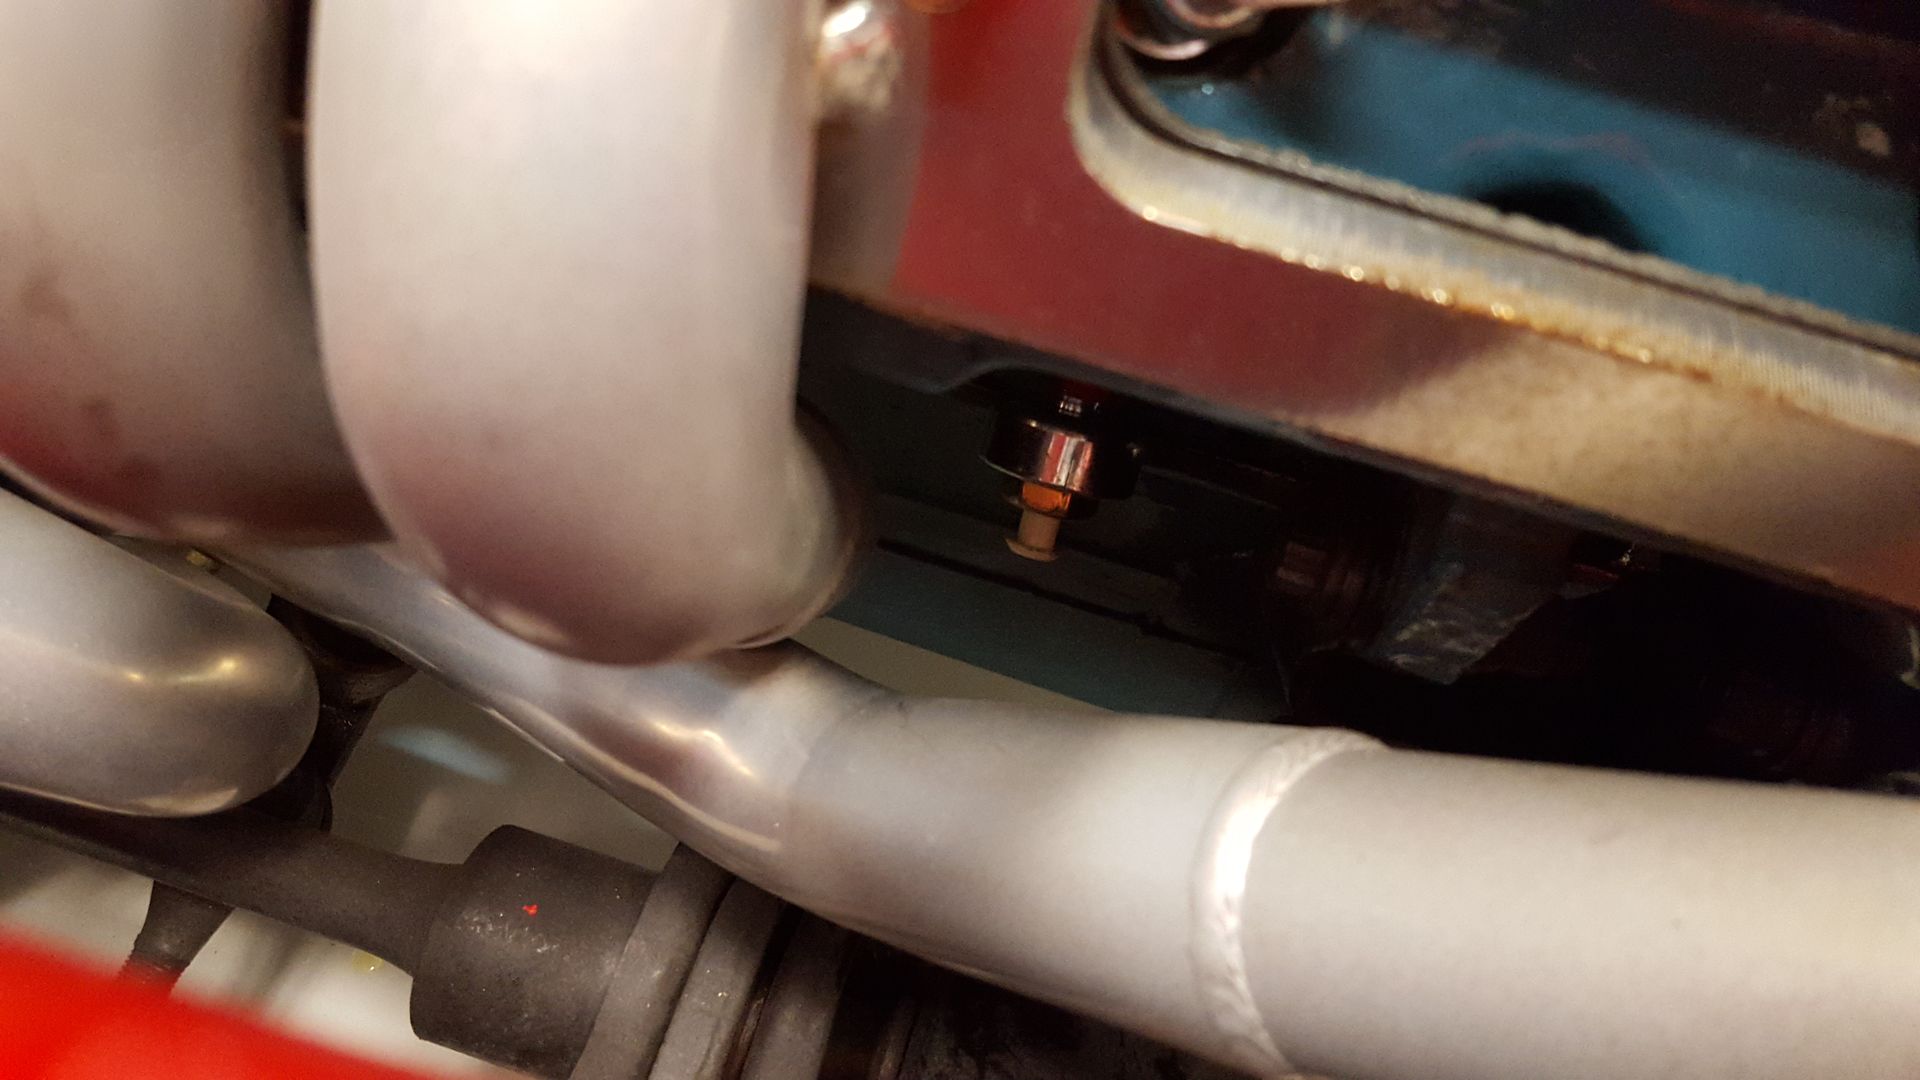 [/URL]
I then went ahead and installed the efi intake, and plumbed it. Came out different than I expected, but it is satisfactory. I dig it.
[URL=http://s54.photobucket.com/user/dusterbd13/media/duster/20160201_161752_zpsgvt8lb3c.jpg.html]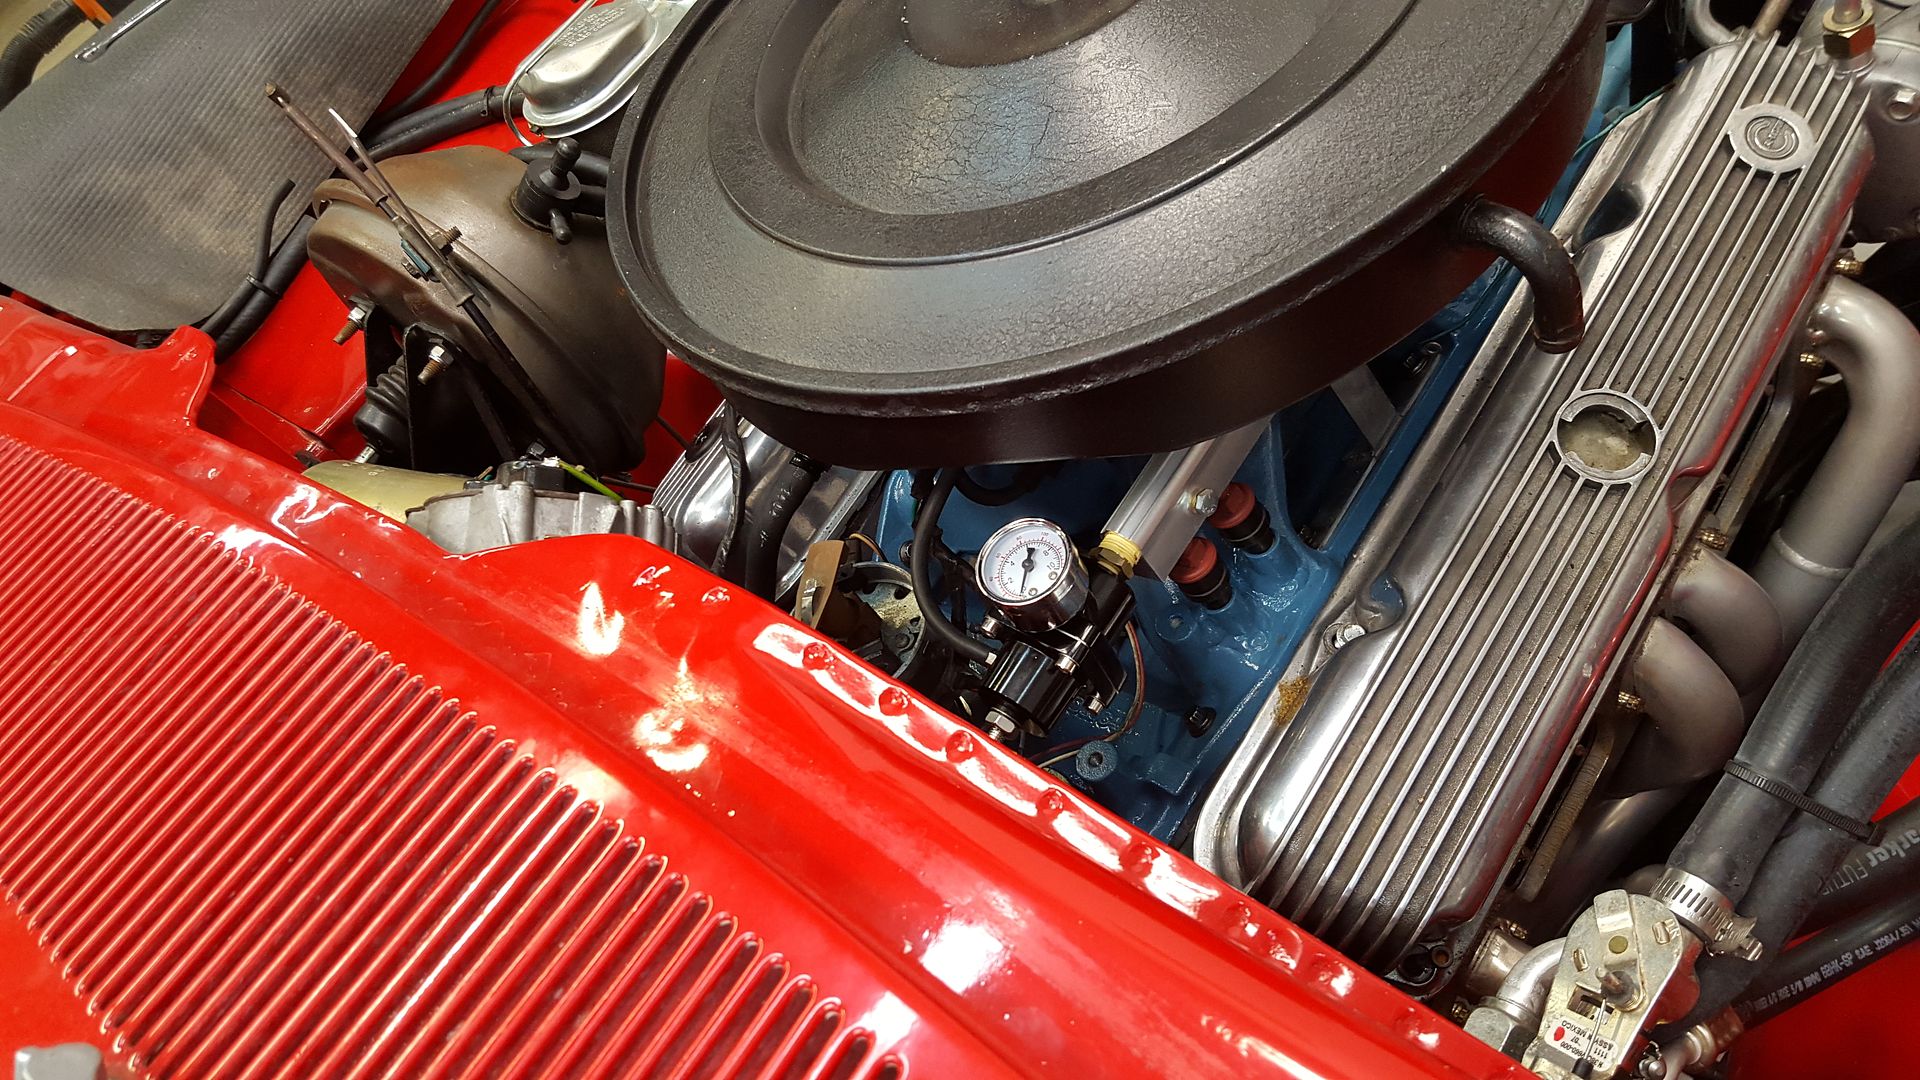 [/URL]
[URL=http://s54.photobucket.com/user/dusterbd13/media/duster/20160201_161709_zpstb05gzbn.jpg.html]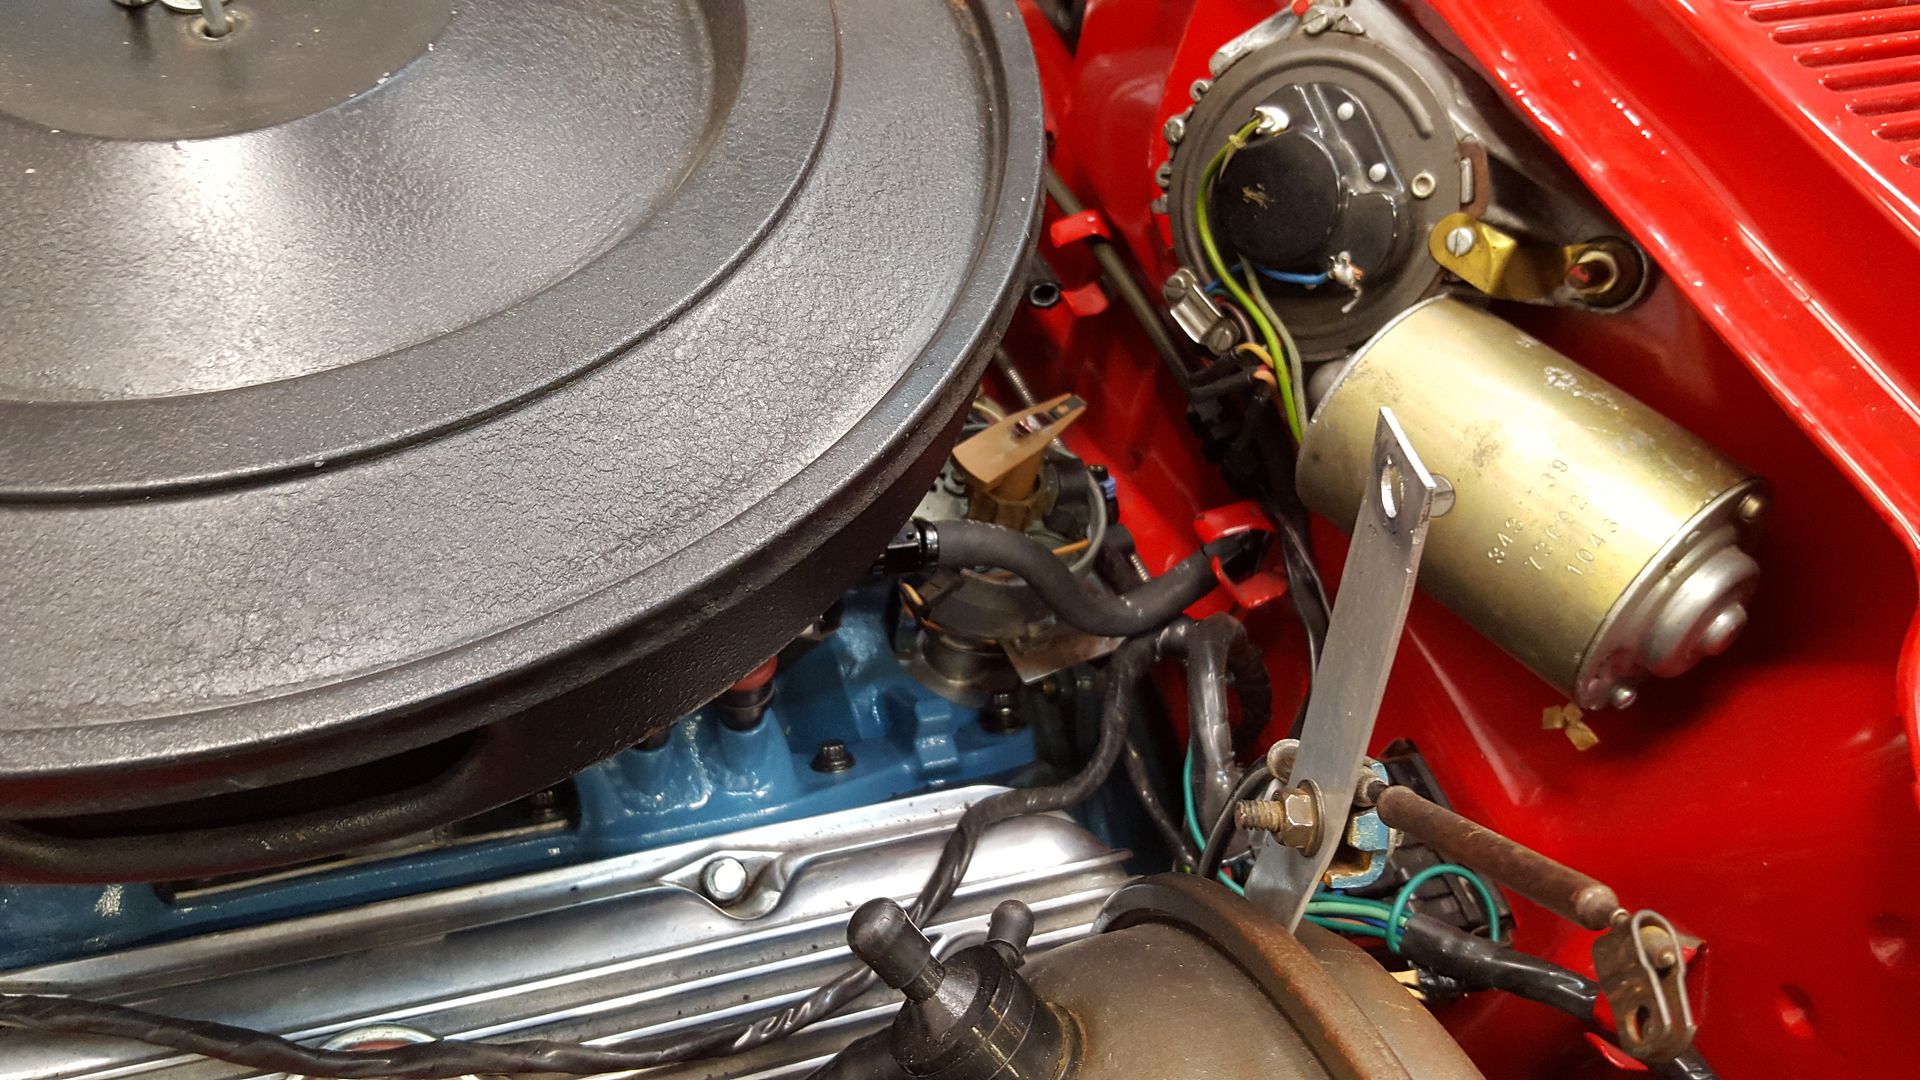 [/URL]
[URL=http://s54.photobucket.com/user/dusterbd13/media/duster/20160201_161718_zpsa2wl288n.jpg.html]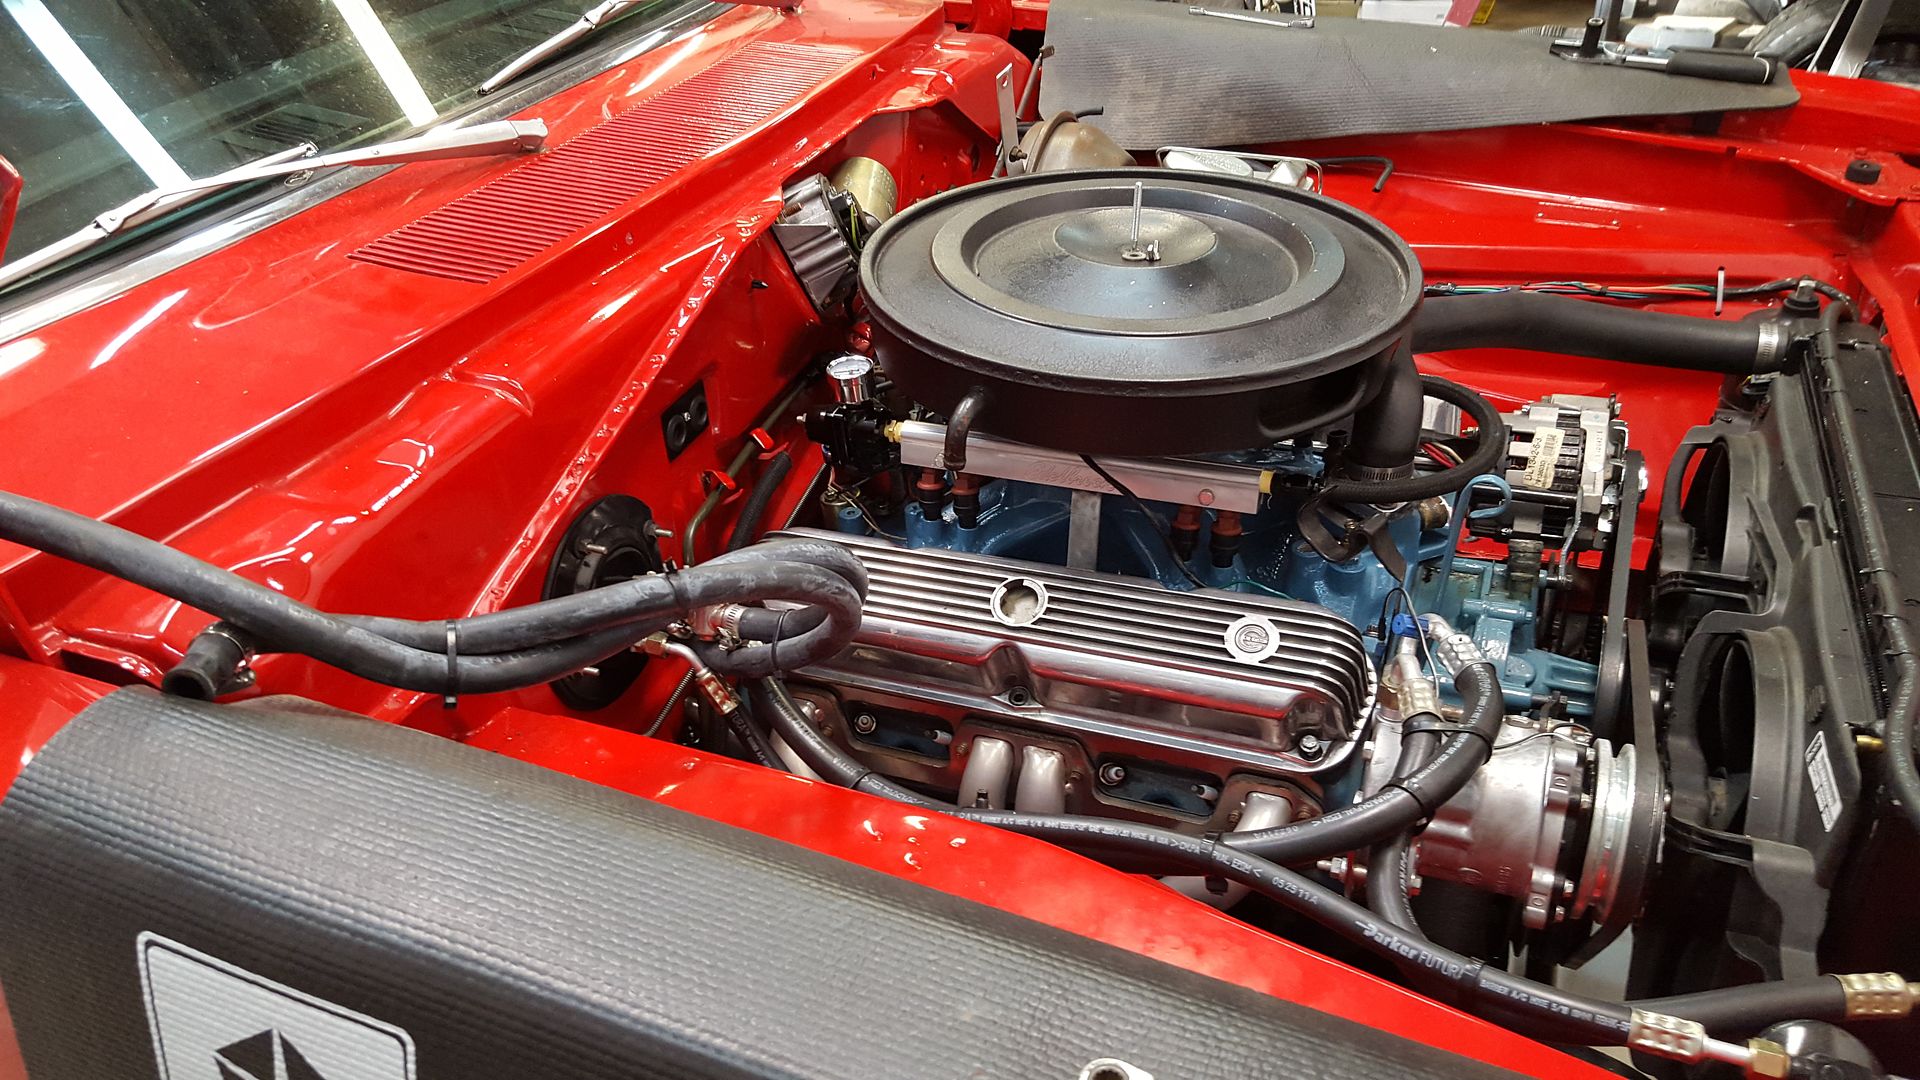 [/URL]
At this point, I have fired it on ether, and started chasing lots of fuel leaks. Unfortunately, im now pulling the intake back off, as I lost a pintle cap down into the head. Better safe than sorry. Then, back onto fuel leaks. Im hoping to be able to test fire on full efi in the near future. Then, rewire and tuning!!

Very cool build!

In reply to Dusterbd13:
The bird shot made me LOL. Without even having to think about it, I immediately said "berkeley you, carburetor!"
In reply to AngryCorvair:
That's what I said when I took the picture. Only in actually said berk. I'm trying to watch my mouth these days, and have mostly replaced the f bomb with berk.

Dusterbd13 wrote: I'm trying to watch my mouth these days, and have mostly replaced the f bomb with berk.
Nice! I think we'll give that a try here. The 14 y/o man child says "effing" way too much. Probably my fault for "watching" my mouth.

The Duster is looking sweet under the hood! Nice work!
You didn't post a picture on the finial position of the ignition control module, keep in mind these types of modules need to be mounted on a heat sink with thermal conductive grease. The heat sink also needs a solid ground, preferably grounded to the engine block. A flat piece of 1/8 thick aluminum about 3 x 4 inches should be enough to keep the module happy.
Looking forward to the first start!
this thing is kicking my butt right now.
but she fired again on ether last night, the injector rail that was leaking is now holding fuel to 120psi, and im down to two fuel leaks.
I also think I finally have the laptop to ecm communication issues sorted out.
maybe tonight ill set base timing and work on those fuel leaks, and see if I can fire on full efi.
question: any reason not to set the TPS senser per what the ecm is seeing, vs a multimeter at the sensor?

An inspirational build. I love the platform and all of the detail work. I'm definitely going to be following the progress. Great work.
http://s54.photobucket.com/user/dusterbd13/media/duster/20160301_190639_zpsb1wjzbr4.mp4.html
It runs! Congratulations!
Do I dare ask why the video ends abruptly?
Massive fuel leaks onto the headers. No cooling system. And the key didn't shut it down.
Also, my daughter was asleep, and this thing is LOUD.

Just an observation, GM MAP sensors are mounted nipple down and the hose should run downhill so it is self draining.
As I am typing this I say "Drain what?".
But someone with a pay grade much higher than mine made sure they were all mounted that way.
Glad you were able to make the Ebay regulator work. I never had the nerve to try one and always stuck with the Aeromotive.
I hope you have better luck with the Detonation sensor than I did in my Neon racer. It would retard the timing so far it made the exhaust manifold do a lava lamp imitation! An MS2 and eventually an MS3 solved that issue.

bentwrench wrote: Just an observation, GM MAP sensors are mounted nipple down and the hose should run downhill so it is self draining. As I am typing this I say "Drain what?". But someone with a pay grade much higher than mine made sure they were all mounted that way.
some sensor are very delicate when it comes to moisture, when i do prototype engine installs for Cummins we have sensors in the exhaust that have to be angled down so that they can drain any moisture. If a sensor needs to be mounted at a certain angle its always a good idea to do so.
Budget first:
Previous total 8567.57
Parts:
Two -6 to 3/8 compression fittings: 29 from summit Alternator from 89ish buick 3800 31 pull a part Two new gates belts 22 Tuning from tpichips.com 250 Mr gasket throttle cable 21 5 relay panel, from britian via eBay, 41 12.5 ft of black, and 12.5 ft red 4 gauge cable, eBay, 21 Edelbrock steel carb “spacer” 20ish Roll of cork gasket paper (had it) 42lb injectors, eBay 100
New total (ish. I'm having a hard time keeping up with the receipts at this point. Too much work, not enough organization) 9102.57
When I last updated, it was mostly sorta running. Not well, and not consistently, but running.
The first order of business was to get the fuel leaks stopped. There were a bunch of them. Compression fittings above the header. Flare from steel line to 6an male/male (both!). O rings on injectors slightly.
To fix the compression fittings, I just had to tighten them. The flares I cut off, and tried the earls compression to AN adapters from summit. These things were wonderful to work with. Very nice product. O rings were piddled with, then swapped out for 42lb ev1 style injectors. These are slightly shorter, which gives me the ability to lower my throttle body, and maybe fit the hood back on. They also don't leak, because they are running at 43.5psi vs the 65psi that I was running the 30lb injectors at. This engine made 390 at the rear wheels previously, which would pretty much max out 36lb injectors. Running the 30lb at 65psi, they were effectively 38lb injectors. Which were marginal. The 42s allow a little headroom (if I manage to make more power with the efi), and lower fuel pressure, which I deem safer.
[URL=http://s54.photobucket.com/user/dusterbd13/media/duster/20160302_171633_zpsrga7pifb.jpg.html] [/URL]
Next up is a picture of the new mount for the ignition control module. Forgot to add a picture. Its a pretty simple piece of angle aluminum bolted to one of the old mounts for the stock coil. I have a heat sink from a vortec powered Chevy truck to add when I get to it, as these things get really hot and need all the help with cooling they can get.
[URL=http://s54.photobucket.com/user/dusterbd13/media/duster/20160219_140601_zpshu7xce8w.jpg.html]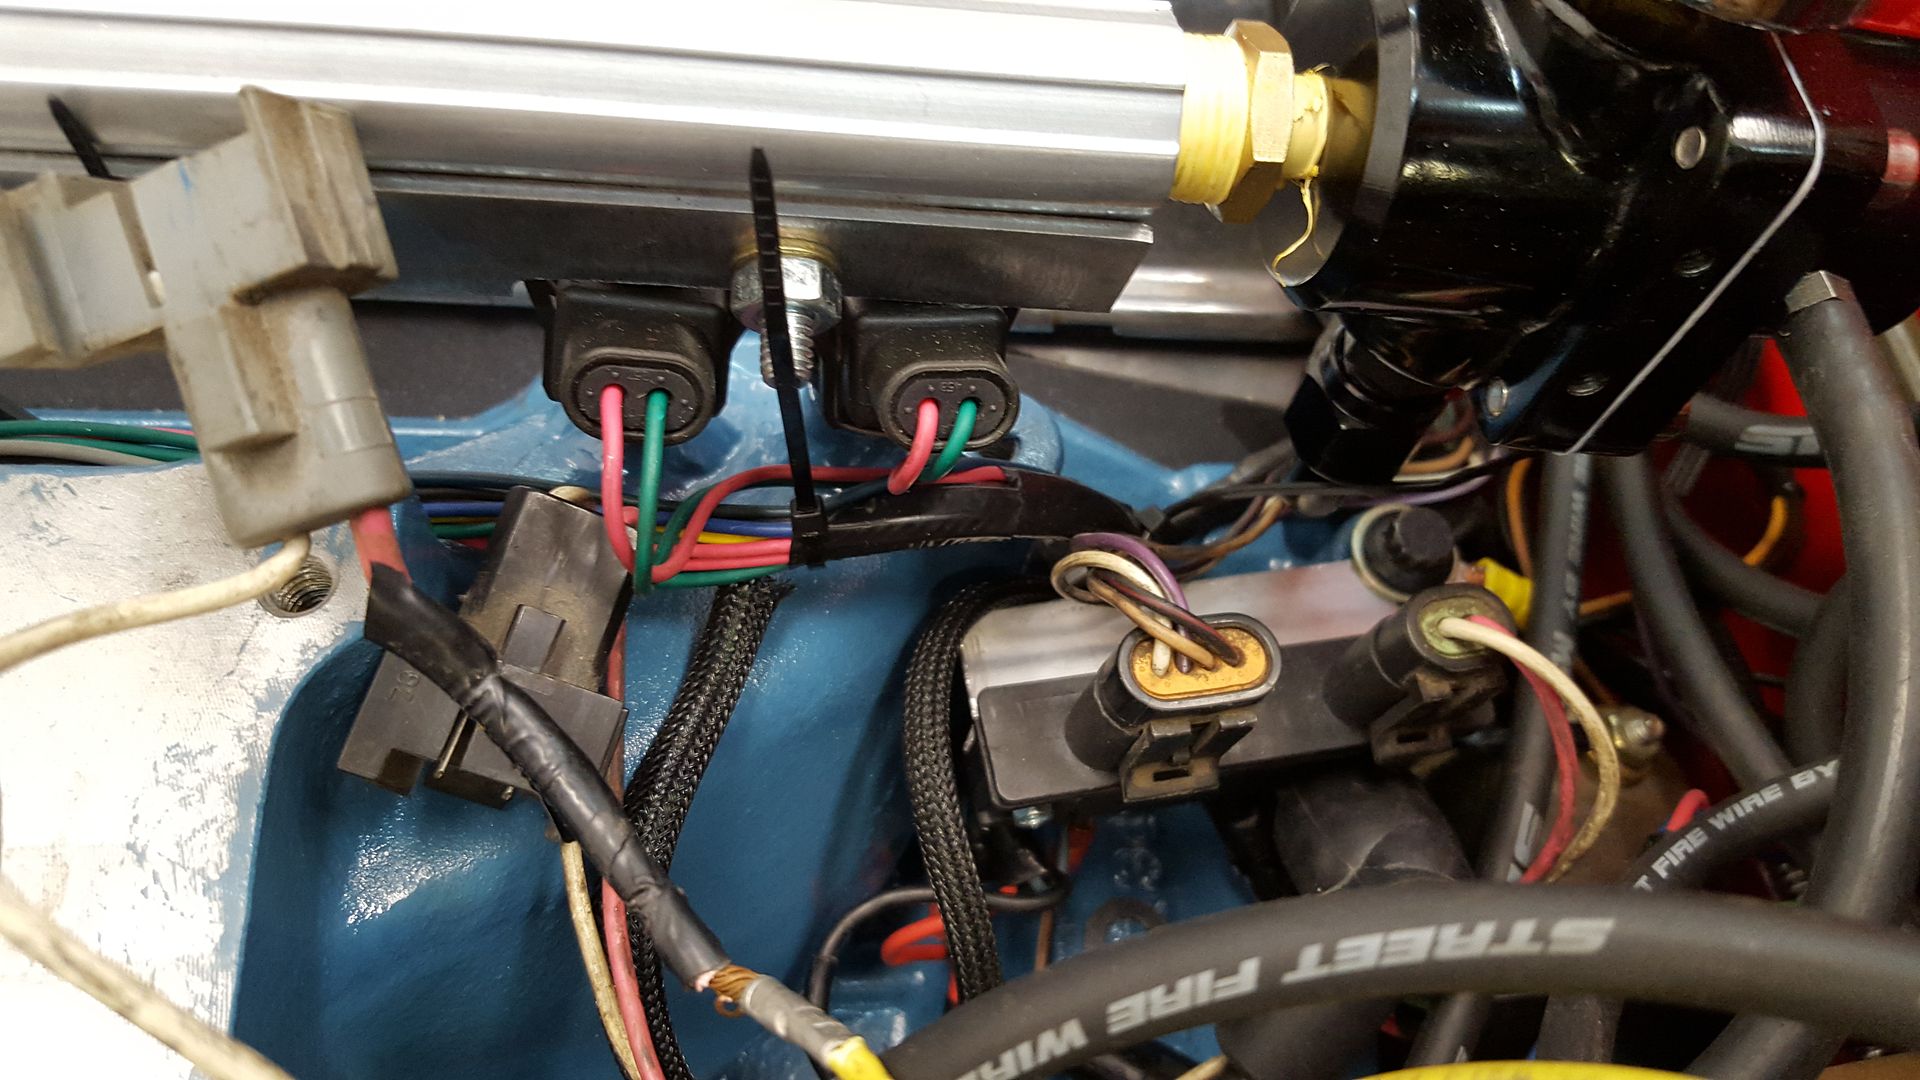 [/URL]
With the fuel leaks stopped, it was time to add an 02 sensor. Drilled the driver side head pipe just behind the 3 bolt collector flange, and welded in a bung. No pictures. Ran it there so I can only have one wiring leg to the trans and 02 sensor, making a cleaner installation. Its also not in the collector due to the ceramic coating. Most recommendation are to put it in the collector so as to keep heat in it. I am running the heated sensor so I don't have to worry about it.
Then we moved onto coolant in preparation for tuning. Hooked bu the heater hoses, tightened, filled with water, etc. All ready to go.
[URL=http://s54.photobucket.com/user/dusterbd13/media/duster/20160319_191139_zpsdyhgcyya.jpg.html]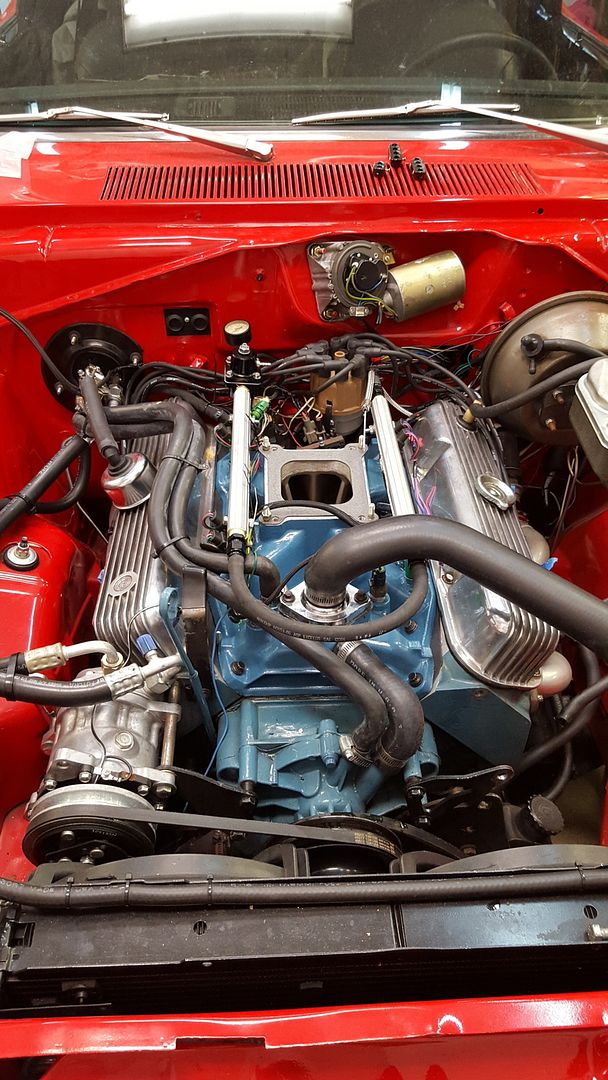 [/URL]
Up next was the vacuum for the PCV and power brakes. These both have 3/8 line. I had no vacuum ports left. But I did have that nice 2 inch spacer, a rabbits foot, and no fear of failure.
[URL=http://s54.photobucket.com/user/dusterbd13/media/duster/20160319_191132_zpsy4fxeujg.jpg.html]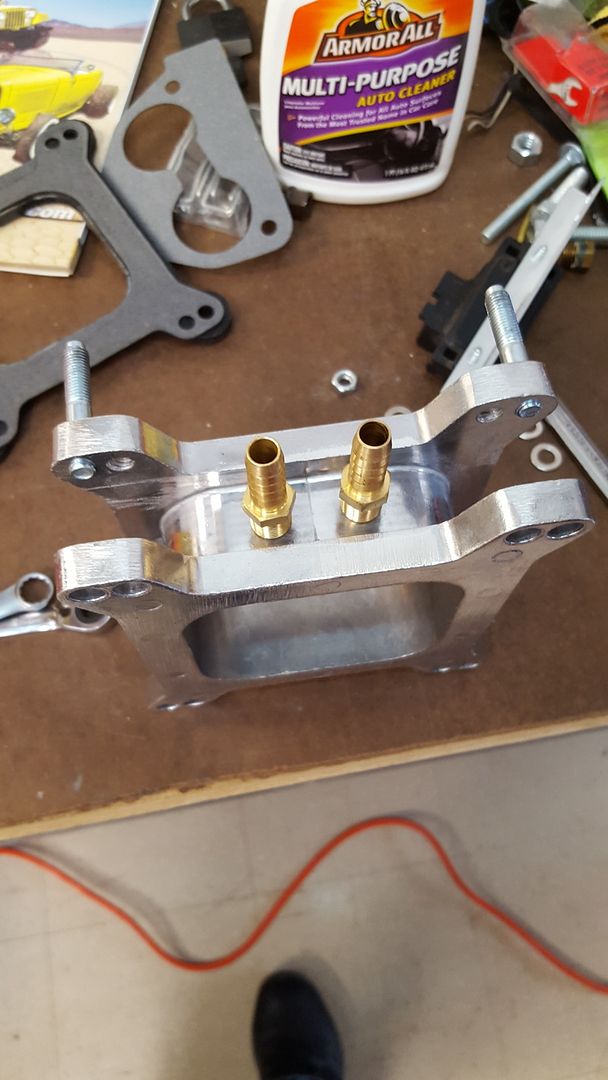 [/URL]
Hit them with the drill press, a tap, and...
[URL=http://s54.photobucket.com/user/dusterbd13/media/duster/20160319_205825_zpscgl69if9.jpg.html]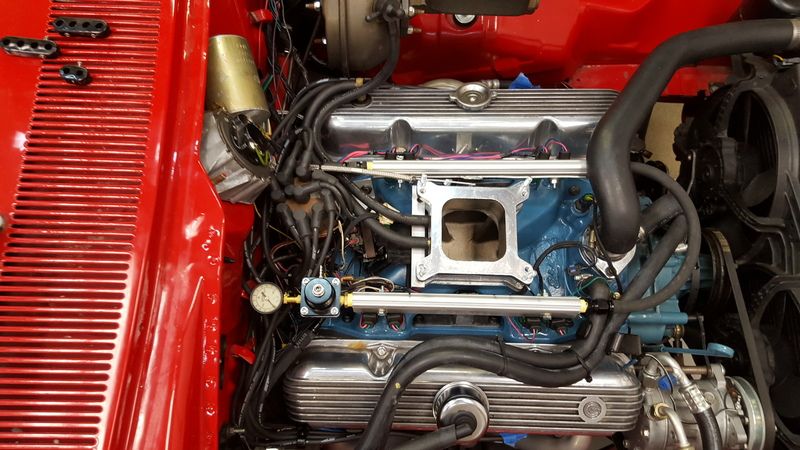 [/URL]
In the previous picture, you can kind of see the Mr gasket throttle cable. What a worthless piece of E36 M3. It binds, the part in the kit don't fit one another out of the box, etc. Completely unusable. But I cut to fit and modified, and....
It still is unusable crap. I'm buying a lokar. Maybe then my throttle wont hang up.
I then had to mount my GM E coil. Wanted to mount it in the valley between the throttle body and distributor. You know, in all that wide open real estate I don't have. I bent a piece of aluminum, and did it though.
[URL=http://s54.photobucket.com/user/dusterbd13/media/duster/20160319_205836_zpswcwwhg3g.jpg.html]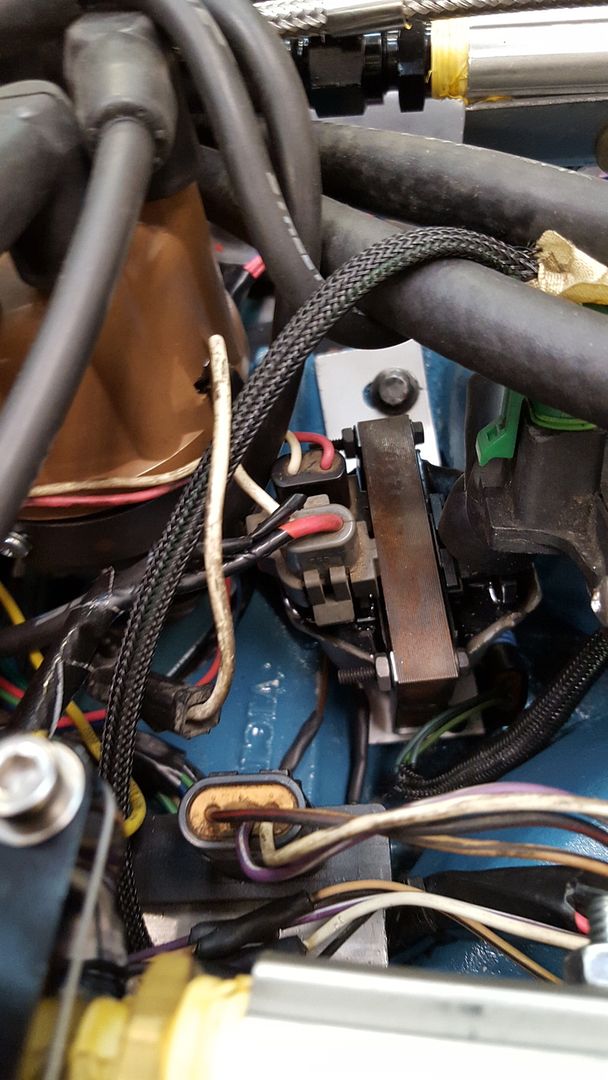 [/URL]
So with all that done, it was time to start getting it tuned. I had to get my laptop to talk to my chip burner, then talk to the ecm, then get tuner-pro to work, etc. I hate how complicated my new laptop and windows 10 has made all this. Wound up having to get a windows 10 compatible serial to USB adapter, and using a 10k resistor to get everything to working. The 10k resistor makes the ecm go into diagnostic mode, which jacks the IAC wide open, jacks timing, etc. Does some very funky things. I didn't know about that until I was trying to set IAC counts and idle speed. So I need to figure out how to access the ALDL stream without the 10k resistor. Anyway, while fighting with a high idle, I found an issue.
[URL=http://s54.photobucket.com/user/dusterbd13/media/duster/20160319_210811_zpsc671e0ic.jpg.html] [/URL]
The scorch is from where it backfired. Through the IAC port. To OPEN AIR.
The IAC port was a giant vacuum leak. Apparently, this early Holley throttle body has a different design from the later in the IAC port, which makes the IAC port overhang a normal carb gasket by 3/8 of an inch. Massive, massive vacuum leak. Aint no way its going to idle or run properly. I managed to find an off the shelf solution though. The edelbrock sheet metal carb spacer/adapter thing.
[URL=http://s54.photobucket.com/user/dusterbd13/media/duster/20160320_151326_zpsahjjce8u.jpg.html]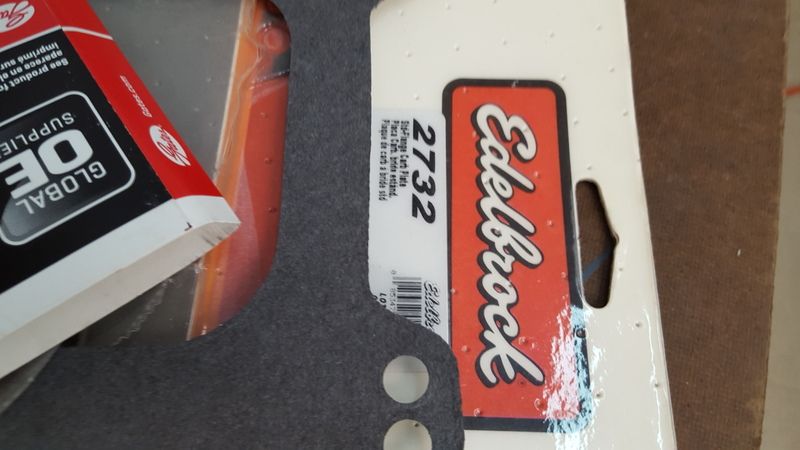 [/URL]
It was within a couple of thousandths of covering the whole hole. I could see light through the crack when I shone a flashlight down the IAC port from the top, but only if I looked from the right angle. Close enough with a nice thick cork base plate gasket, as no off the shelf gasket exists that covers the IAC hole.
[URL=http://s54.photobucket.com/user/dusterbd13/media/duster/20160320_151318_zps8bfh5jwd.jpg.html]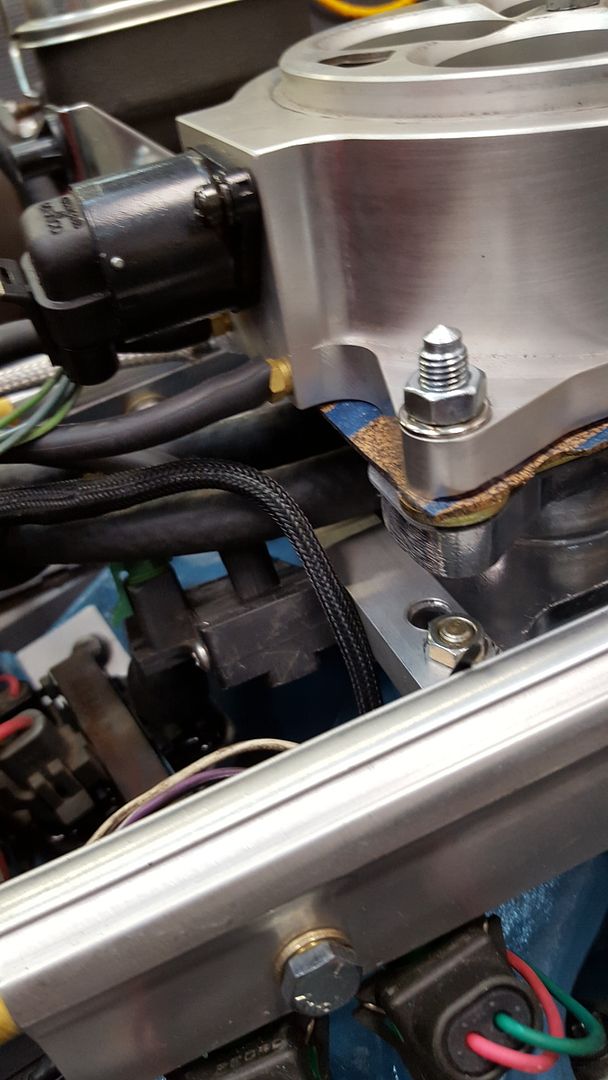 [/URL]
Now that that's done, we move on to something unrelated, but necessary.
I wanted a better accessory drive, with more fail safe, and more belt wrap.
So I started with a different alternator. The mounting lugs on the previous one were maybe 90 degrees apart, not 180 like mother mopar intended. It was also clocked wrong and dead. So, time to make it better. When I designed this accessory drive, I used a single belt to run the alternator, power steering pump, crank, and water pump. Also a belt from crank, water pump, air compressor. I wanted more of a fail safe. And the fact that I only got a roughly 1/4 wrap on the alternator/power steering pullies didn't help.
So, using a Buick 3800 alternator, with a 180 mounting design got me closer. At least better angles on the adjusters and mounts. But still not what I wanted. I wanted to be able to move the alternator in between the head and bracket and run a third belt. Started with re-clocking the case, which got me closer. The, broke out the dremel fro that last 1/8 of an inch.
[URL=http://s54.photobucket.com/user/dusterbd13/media/duster/20160319_230527_zpscwtbkwvh.jpg.html]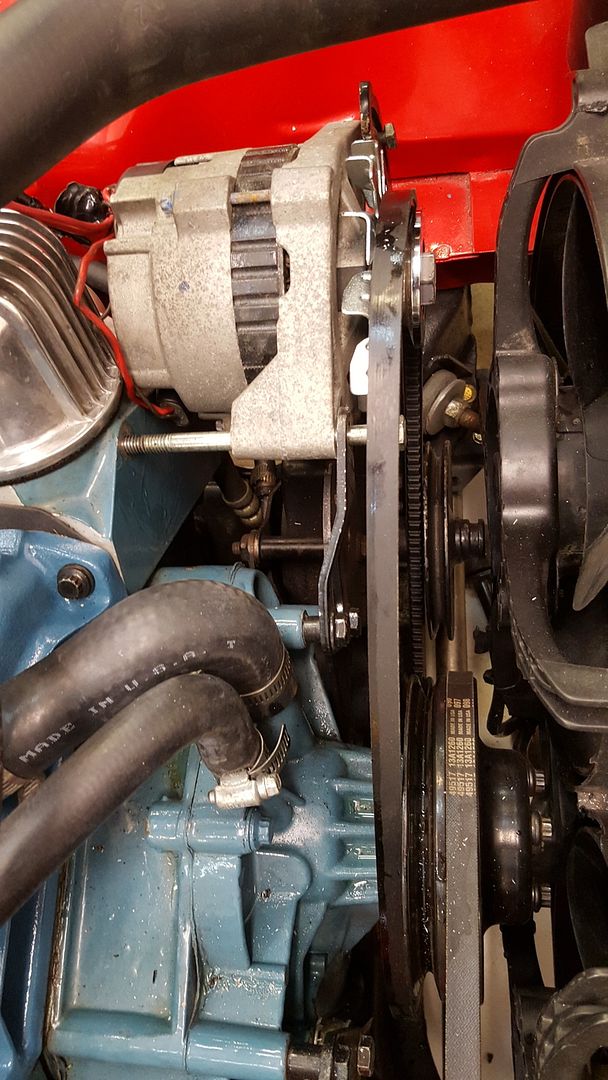 [/URL]
[URL=http://s54.photobucket.com/user/dusterbd13/media/duster/20160320_151147_zps6ipxc4w6.jpg.html]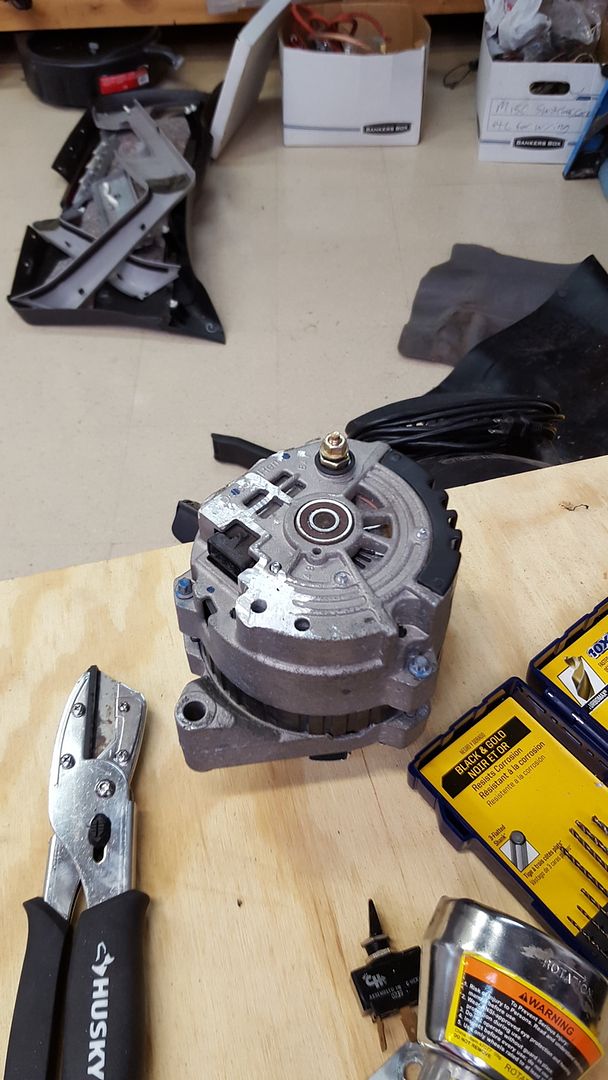 [/URL]
[URL=http://s54.photobucket.com/user/dusterbd13/media/duster/20160320_151153_zpskidcsbau.jpg.html] [/URL]
[URL=http://s54.photobucket.com/user/dusterbd13/media/duster/20160320_151156_zps09xpbiul.jpg.html]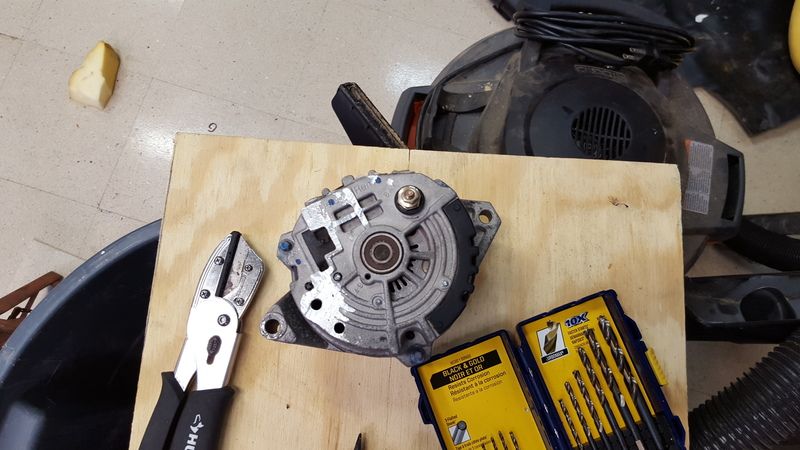 [/URL]
Whee!!!
We then paid the tuner to send me a base map for me to try, and data log. Using Brian at www.TPIchips.com so far, hes been a pleasure to work with. He doesn't answer the phone, but is prompt with emails. Anyway, he sent me a base tune to try. First one was pretty rich still.
[URL=http://s54.photobucket.com/user/dusterbd13/media/duster/20160320_160634_zpsn3ayjhxv.jpg.html]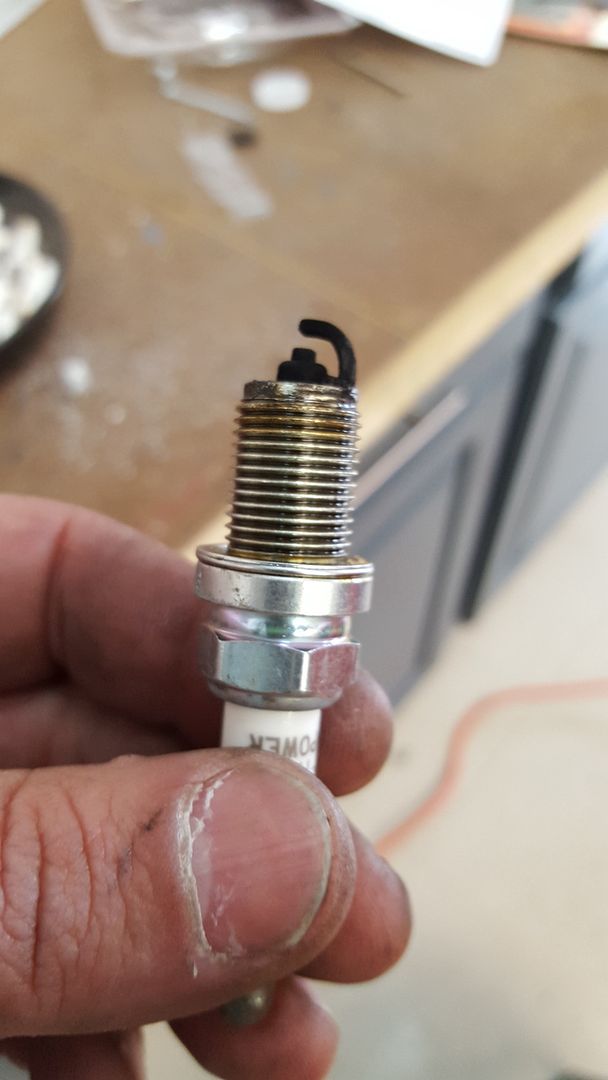 [/URL]
[URL=http://s54.photobucket.com/user/dusterbd13/media/duster/20160320_160817_zps729zo4ia.jpg.html]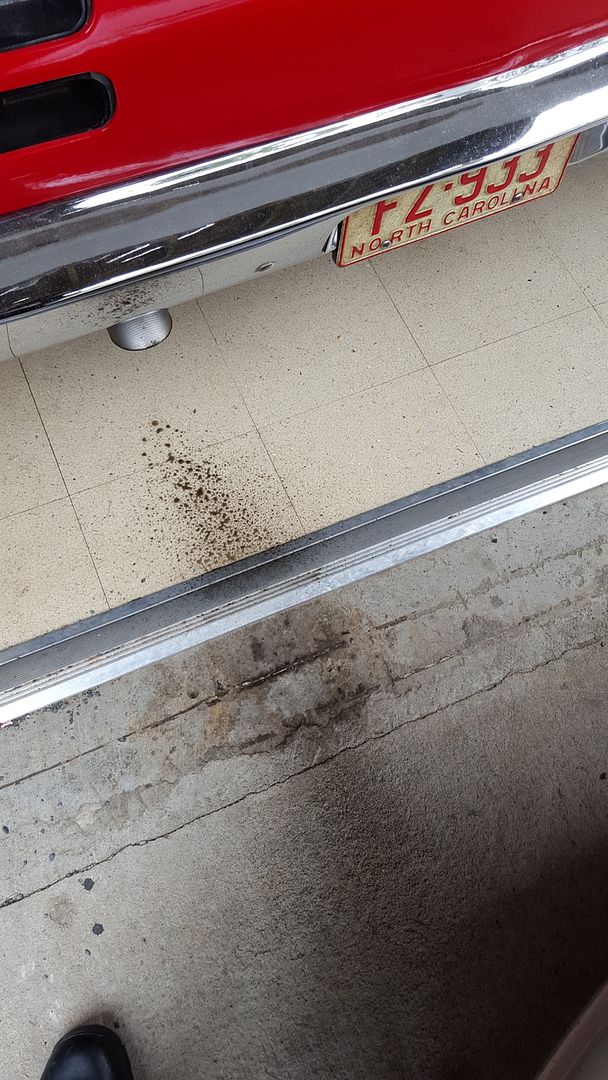 [/URL]
Second one got a whole lot better. Enough that I was able to move the car under its own power on EFI. I have no signal from the oxygen sensor, and need to work on tuning some more, then run it around the block a few times before I blow it apart for the wiring harness.
http://vid54.photobucket.com/albums/g108/dusterbd13/duster/20160321_140642_zpslx8nx0a8.mp4

Are those green injectors a Bosch-esque eBay special? What was your source for them?
Yes. Bosch even style. I just searched 42lb injectors. Ultimate components was the seller.
Very cool, thank you. I'm piecing together the components to tunnel ram my '77 C10, and watching this build closely (and enjoying this immensely).
Tunnel ram multiport?
A pair of dodge magnum 5.2/5.9 throttle bodies will flow 1200ish cfm, and interface with the gm ecm.
Yes, multiport. I ~believe~ I can get rid of all the driveability problems of a tunnel ram by going multi-port, and still have a large hella-cool factor.
Was planning on using a pair of empty TBI units which I already have, but those look like a neat idea (quick Google image search).... It's important to me to be able to fit traditional air filters on the throttle body units.
Stage 1 will just be adapting a big block TBI unit just to have more refined fueling and spark than the current Rochester/HEI.
Stage 2 will come....
Thank you for documenting all your progress on your Duster - I love it!
Alright, first things first. I need to get better with the budget.... I cant seem to keep track of what I spend lately. I know roughly, but need to get better about it.
Last budget: 9102.57
Money spent and made:
Sold the autometer gauges and adjustable shift light: -450 Bought a full on speedhut revolution package (they had a sale, and I'm a sucker...) 625ish 4 relay waterproof relay rack (80s GM) pull a part: 12 Electric antenna: 5.50 Experimental bilstien shocks:30 Sold 340 leaf springs: -100 and a set of sacked 4 leaf springs LC1 wide-band 20 25 feet 6 gauge cable and terminals for alternator: 27 Rostra cruise control unit 75
That's the best I can remember....
New total: 9347.07ish
So, when we left off, I was having issues. It sorta ran, my laptop wouldn't connect properly to the ECM, the tune was wrong, and....
Well, I decided to start parting the car out while it was moved into the storage bay. I had a guy call me and ask me to build him a wiring harness. I had closed shop last year, and was no longer taking new customers. He convinced me. He also wanted a custom gauge cluster built just like mine. Now, one of the issues I had with my gauge cluster was that I found the white gauges tiring after a long drive. He didn't find the white gauges in his daily that way, and he loved the arctic white setup. So I sold him mine and ordered speedhuts. I love having warning lights, and with the small block mopar, and the EFI, there are just no extra ways without added complexity and failure points to do warning lights. Speedhuts have them built in. And they were black. And....
Anyway, I bought them, and started down the really steep part of the slippery slope.
Here they are in a quick duct tape mock-up:
[URL=http://s54.photobucket.com/user/dusterbd13/media/customer%20cars/20160523_163420_zpswpospzby.jpg.html]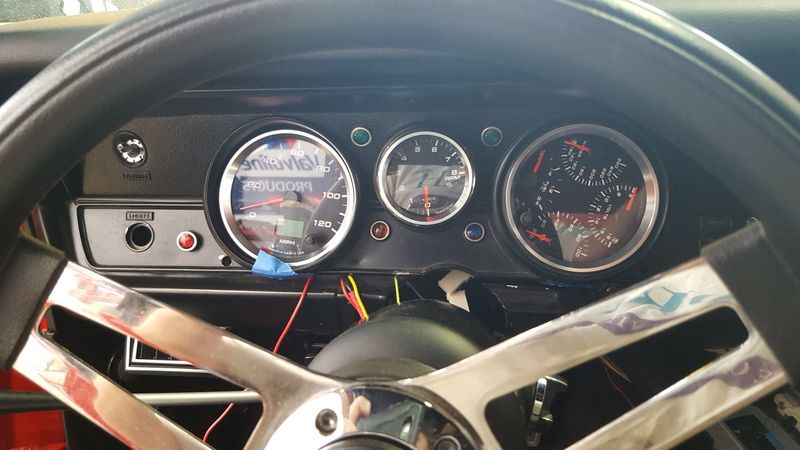 [/URL]
[URL=http://s54.photobucket.com/user/dusterbd13/media/customer%20cars/20160523_163417_zps47l0nw8u.jpg.html]
[/URL]
[URL=http://s54.photobucket.com/user/dusterbd13/media/customer%20cars/20160523_163417_zps47l0nw8u.jpg.html]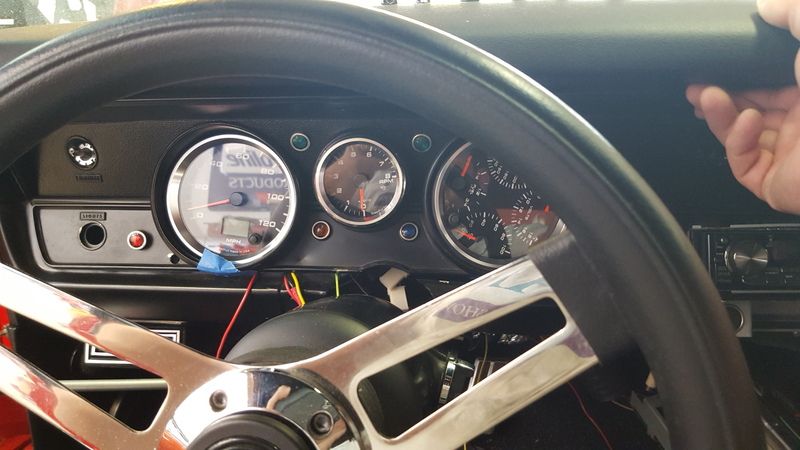 [/URL]
And then I stuffed the thing back in the corner. And did thus:
[URL=http://s54.photobucket.com/user/dusterbd13/media/customer%20cars/20160523_183251_zps6wwrkegf.jpg.html]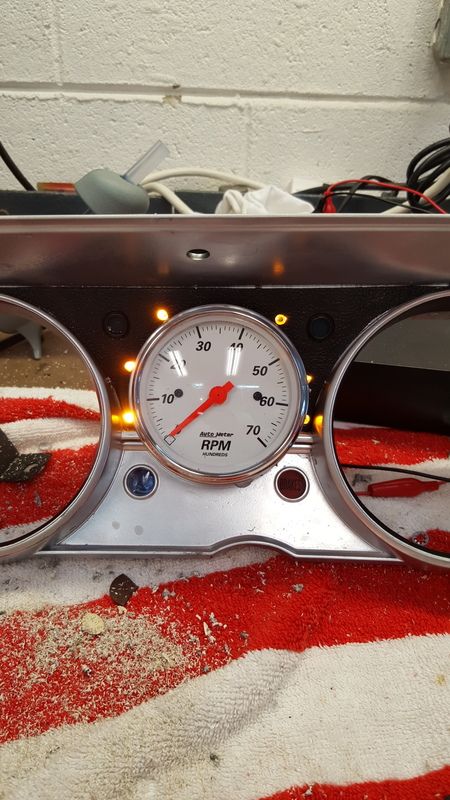 [/URL]
[URL=http://s54.photobucket.com/user/dusterbd13/media/customer%20cars/20160523_190624_zpsza6vlfw6.jpg.html]
[/URL]
[URL=http://s54.photobucket.com/user/dusterbd13/media/customer%20cars/20160523_190624_zpsza6vlfw6.jpg.html]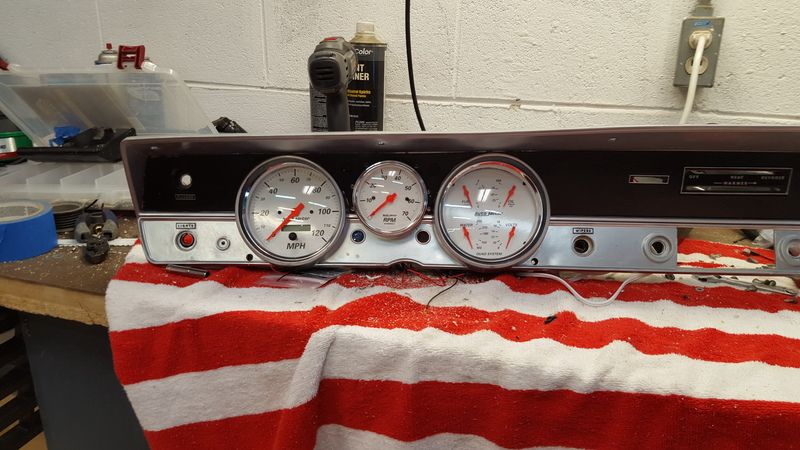 [/URL]
[URL=http://s54.photobucket.com/user/dusterbd13/media/customer%20cars/20160528_135255_zpsswjnejaw.jpg.html]
[/URL]
[URL=http://s54.photobucket.com/user/dusterbd13/media/customer%20cars/20160528_135255_zpsswjnejaw.jpg.html]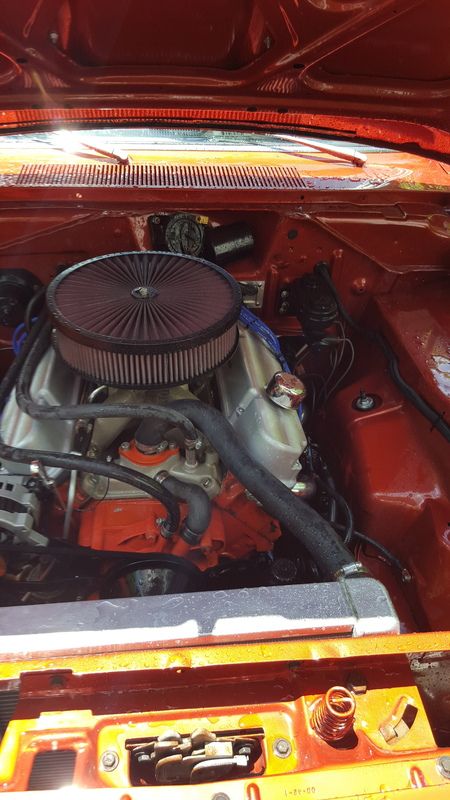 [/URL]
[URL=http://s54.photobucket.com/user/dusterbd13/media/customer%20cars/20160528_135326_zpsuazprt8d.jpg.html]
[/URL]
[URL=http://s54.photobucket.com/user/dusterbd13/media/customer%20cars/20160528_135326_zpsuazprt8d.jpg.html]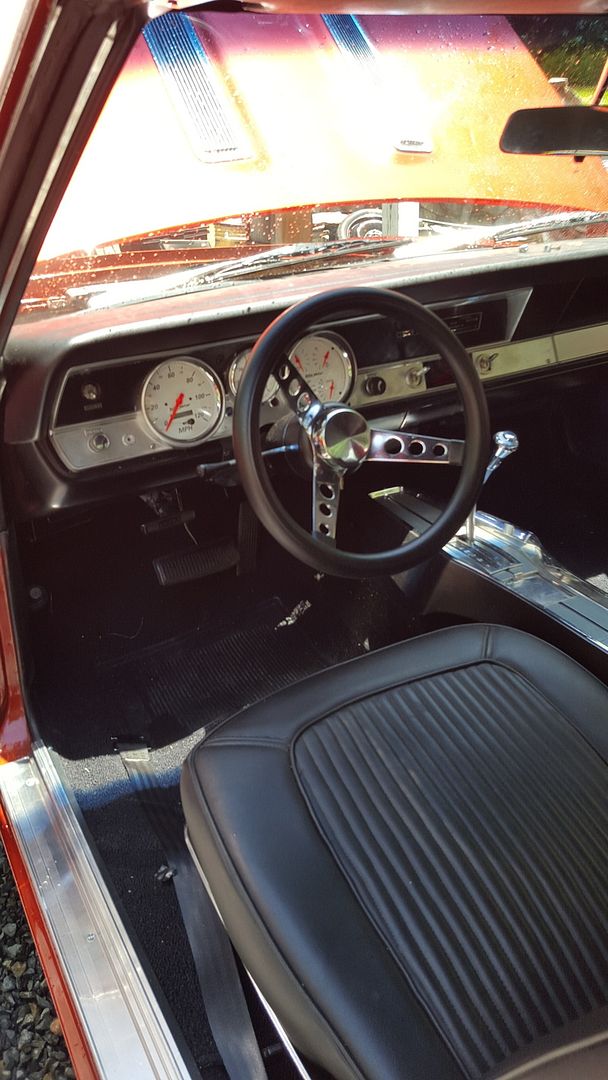 [/URL]
[URL=http://s54.photobucket.com/user/dusterbd13/media/customer%20cars/20160528_135345_zps3xlzhlfu.jpg.html]
[/URL]
[URL=http://s54.photobucket.com/user/dusterbd13/media/customer%20cars/20160528_135345_zps3xlzhlfu.jpg.html]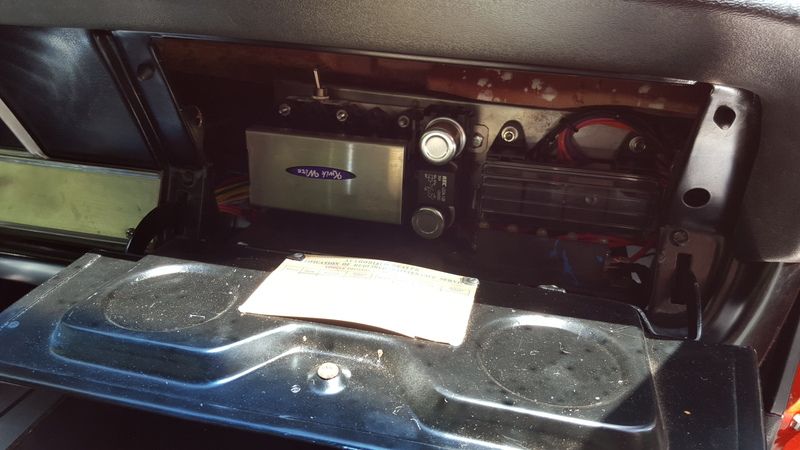 [/URL]
i[URL=http://s54.photobucket.com/user/dusterbd13/media/customer%20cars/20160528_135443_zpsqlw6xzqh.jpg.html] [/URL]
In the process, I helped to design a new mopar product. Its a CNC aluminum bulkhead eliminator. Used the factory gasket, fits in the hole perfectly, and has a reinforcement plate on the outside. We actually made a run of them just like this, and if you want one, just ask. We haven't tested on anything but a-bodies yet, because That's all we own....
[URL=http://s54.photobucket.com/user/dusterbd13/media/customer%20cars/20160528_121203_zpsxgc5j7mn.jpg.html]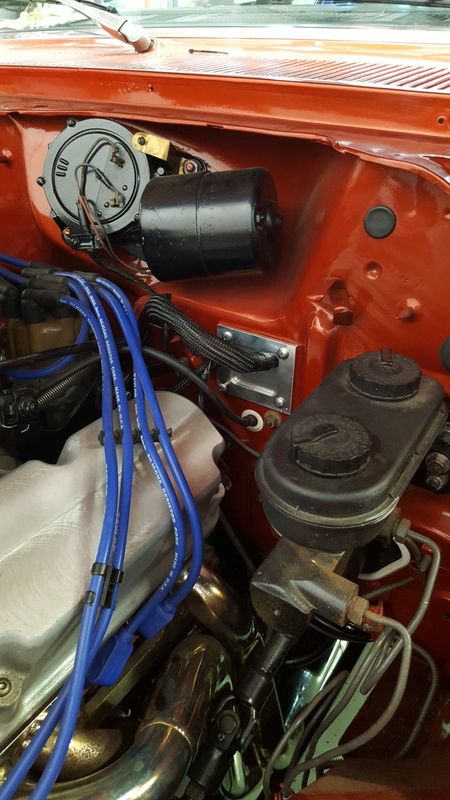 [/URL]
[URL=http://s54.photobucket.com/user/dusterbd13/media/duster/20160528_121219_zps8twnkqel.jpg.html]
[/URL]
[URL=http://s54.photobucket.com/user/dusterbd13/media/duster/20160528_121219_zps8twnkqel.jpg.html]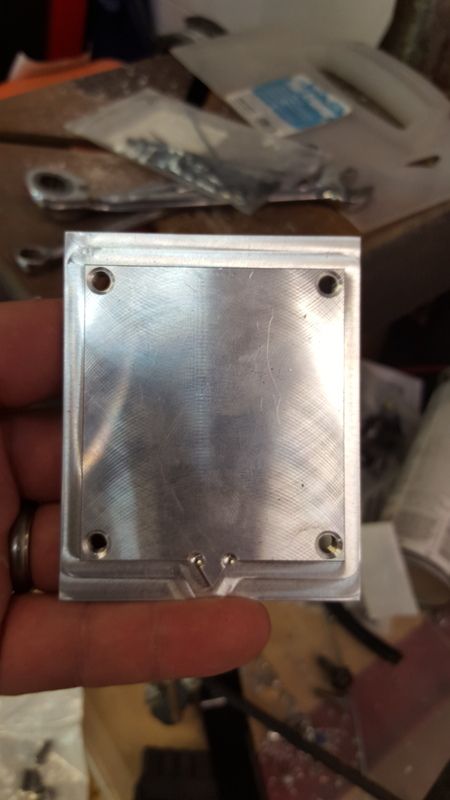 [/URL]
He also wants my leaf springs, so I sold them to him. I've been planning on building a custom pack with all the tricks I can throw at them, so this just spurred me on. Same with getting rid of the KYB shocks. To that end, I bought some used GM fitment bilstein shocks. The KYBs are up on the local craigslist, along with my big block torsion bars. That's all time for another post though.....
Anyway, the cuda left Saturday morning. Which meant than it was time for duster. But first I had to clean the shop. Which meant I had to move the duster. Spent the rest of the day trying to get it running again, culminating in letting the magic smoke out of the ECU and fouling another set of plugs. After picking tools and such up from the driveway (sort of lost my temper a bit...) I did some soul searching and talking with the wife. We decided that, as there is limited resources for the OBD1 GM ECM, and all the troubles I've had out of them in various uses over the years, and the incredible difficulty in tuning, and lack of tuners, to go megasquirt. So tomorrow, ill be ordering all the stuff for a full MS2 install.
Still didn't help the junkyard that my shop looked like. So I spent yesterday and today cleaning and reorganizing and moving the car. And helping dad replace a hot water heater in a crawlspace. That was fun....
As a point of reference, my wife and daughter got me the harbor freight wheel dollies for fathers day a few year ago. Last time I used them, I learned that the casters and ease of use left much to be desired. So before putting the duster on them, I re-greased all the bearings. They still suck. Once you adjust the direction of all 16 casters to point the direction you want to go with a 2x4 and hammer, its still a mother to push. On a clean, shiny floor. But we got it moved. And then cleaned. And cleaned. And...
[URL=http://s54.photobucket.com/user/dusterbd13/media/duster/20160528_195600_zpslvryv6qo.jpg.html]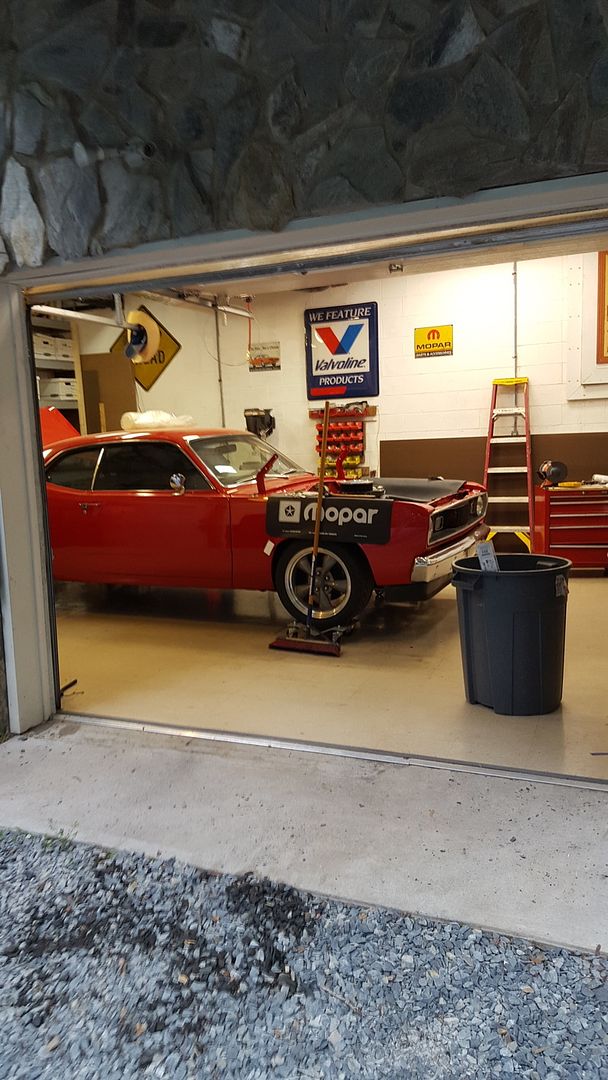 [/URL]
[URL=http://s54.photobucket.com/user/dusterbd13/media/duster/20160529_191012_zps8aoyljdp.jpg.html]
[/URL]
[URL=http://s54.photobucket.com/user/dusterbd13/media/duster/20160529_191012_zps8aoyljdp.jpg.html]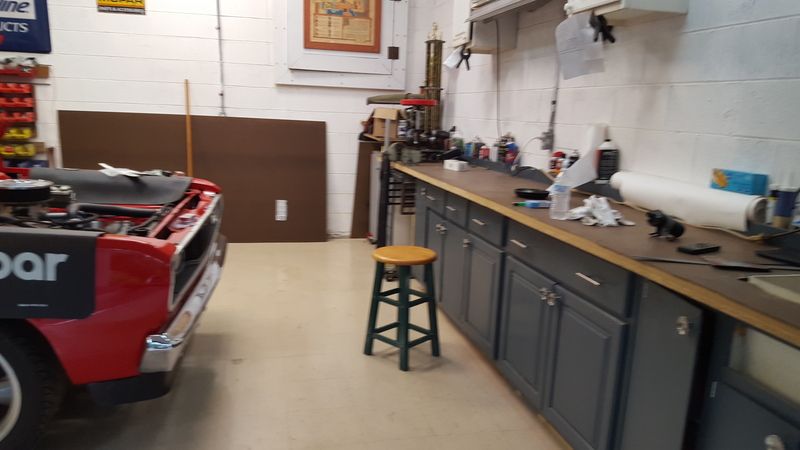 [/URL]
[URL=http://s54.photobucket.com/user/dusterbd13/media/duster/20160529_191020_zpsonlk5dce.jpg.html]
[/URL]
[URL=http://s54.photobucket.com/user/dusterbd13/media/duster/20160529_191020_zpsonlk5dce.jpg.html]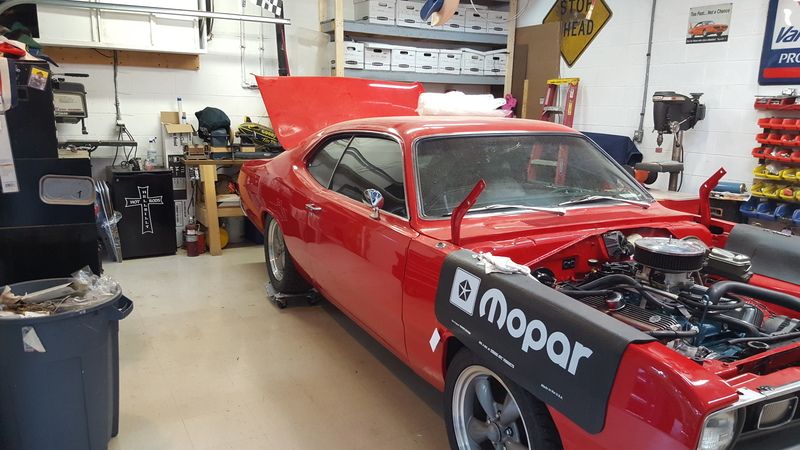 [/URL]
[URL=http://s54.photobucket.com/user/dusterbd13/media/duster/20160529_191025_zpskcf66etg.jpg.html]
[/URL]
[URL=http://s54.photobucket.com/user/dusterbd13/media/duster/20160529_191025_zpskcf66etg.jpg.html]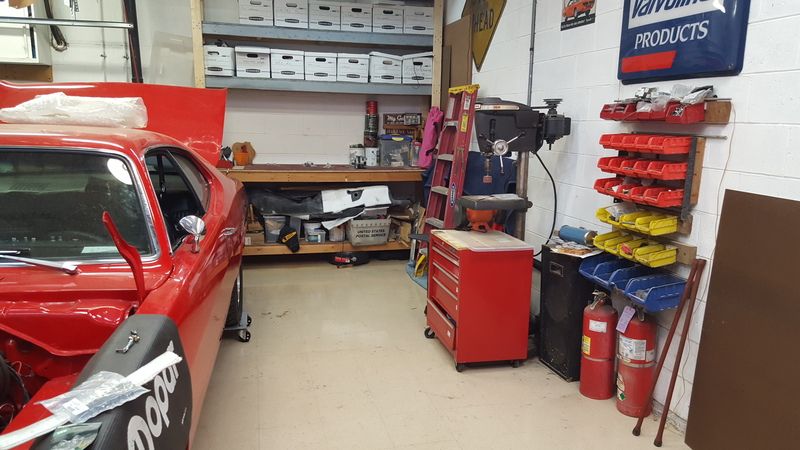 [/URL]
I finished today by organizing all the parts that had been packed in the duster, removing the OBD1 harness and computer, and attempting to build a bi-xenon projector retrofit. Well, I built them, but I would have to cut clearance into the inner fenders for them to fit. Which makes it a no go, as it puts it directly into the path of water when in the rain. So, guess ill keep looking for reasonable priced alternatives. For now, the silver star sealed beams will stay, only with relays for added brightness.

Shop looks good now!

Just got caught up on this. I left off where the carb got evicted and the EFI got bolted on. Since I plan on being out of time money and patience by the time I get to the engine fueling stage of the project, I am praying that the Fitech is all its cracked up to be.
We see what happens, but I'm hoping megasquirt is all it's cracked up to be. It's a shame that the gm stuff ended the way it did, but oh well. It's on Craigslist now too...
You'll need to log in to post.


