
JoeTR6
HalfDork
2/19/17 6:19 p.m.
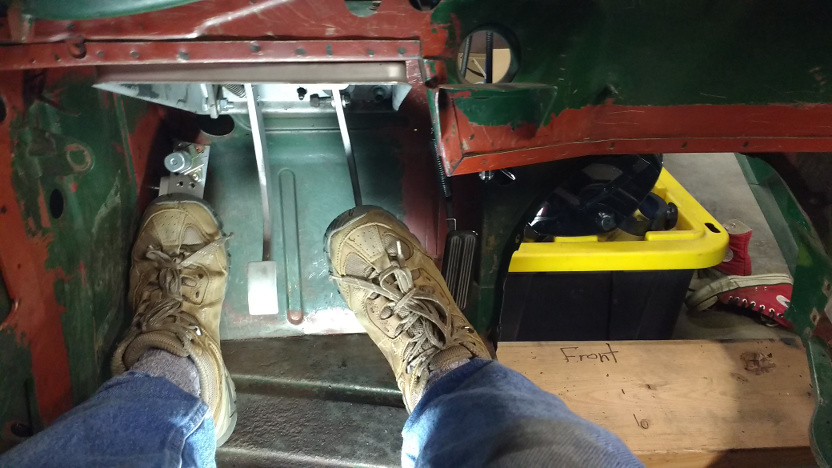
Sorry this isn't terribly exciting, but I'm feeling good because the body is almost done. Today I finished the pedals including fitting a throttle cable. I ended up moving the pedal to the other side of the mount and adding a spacer to lower it 1/2". The top of the spacer matches the curvature of the body where it bolts through, so this stabilized the mount. Widening the holes in the body allows the pedal to be adjusted side-to-side, and I can always make a thicker spacer to lower it.

I bolted a seat in the tub to test the pedals and do a little pretend racing.
JoeTR6
HalfDork
3/5/17 5:14 p.m.
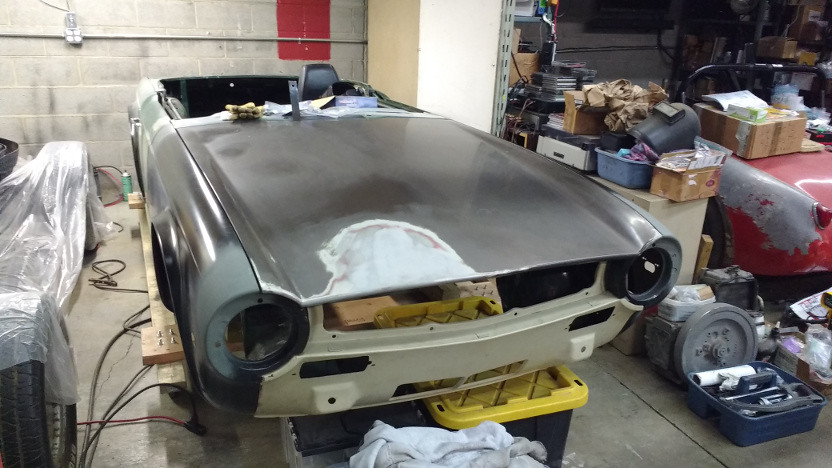
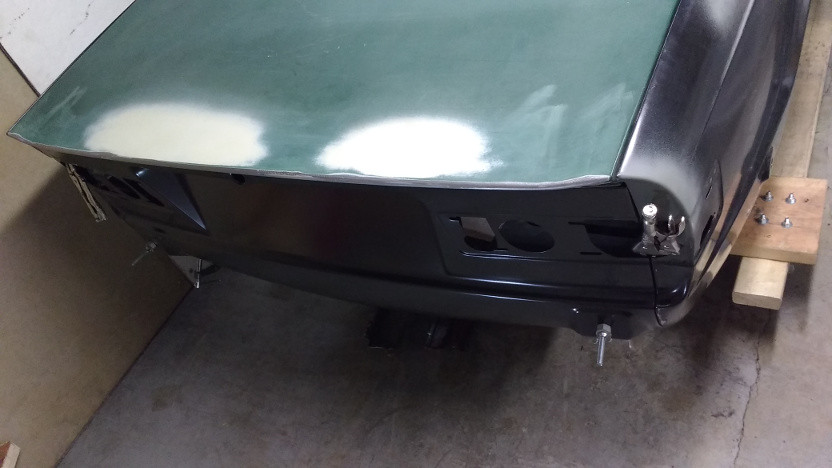
I'm reassembling the body shell one last time. If anything, this simplifies transport, but it also allows the guy shooting paint (which is most likely not me) to see what he has to work with. Today, I dragged the trunk lid from storage where it sat next to a hardtop in this older photo.
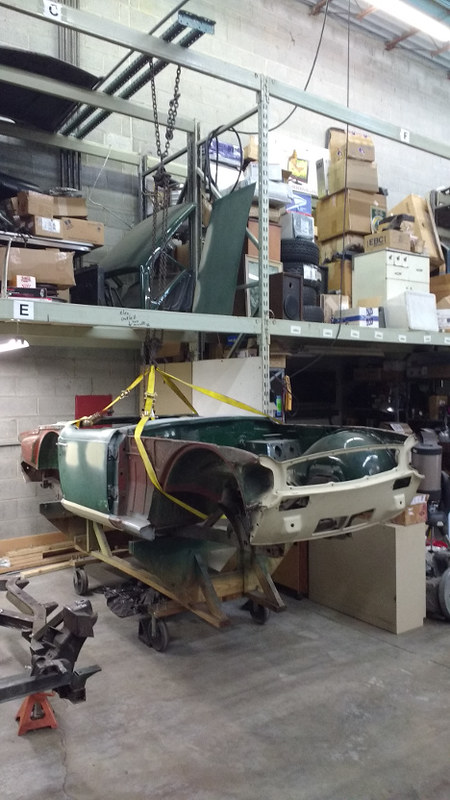
The last panel is the hood which is sitting on top of the mezzanine. That's about 15 feet above the floor, and I'm a little nervous about getting it down. Another hood that was just leaning against the side got damaged from moving stuff around (it was bent anyway), so putting the one I intend to use up top wasn't a bad idea. Until now.
The trunk lid fits really well on this car (for a Triumph). I ordered some fibreglass wheel arch liners from England, and they should be here this week. Then it's time to paint.
JoeTR6
HalfDork
3/12/17 7:35 p.m.
Yesterday the hood was (carefully) brought down from storage and mounted. Today's job was to fit the wheel arch liners. These are the liners made by Revington TR. They fit quite well. I was surprised how low they go and how much of the metal they cover. Here is the back of the front arch. I had to lift the body up with stacked 2x4s to clear the wooden dolly.
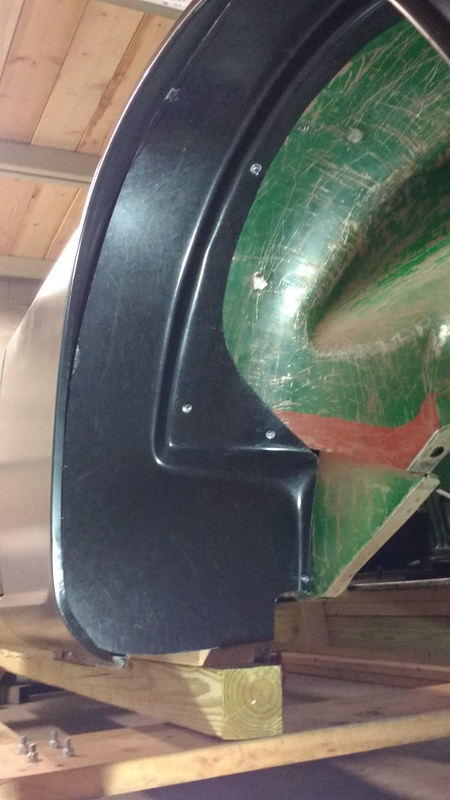
In the front, I'm simply bolting through the metal with 10-32 hardware using nylocs. For the rear, nuts were welded to the inside of the shell since access to the nuts will be blocked by interior panels. The outer edges needed a little trimming, but thin fiberglass is easy to cut. I wish these were made of ABS plastic. If a cone gets caught in the wheel well, these liners may just crack into pieces. At least they add very little weight.
And with that, the body is done and ready for paint.
JoeTR6
HalfDork
3/24/17 6:06 p.m.
I spoke with the paint guy this week. He warned me that the materials alone for painting the entire car could cost $2500, especially if I wanted red or any sort of metallic paint. Fortunately, I'm pretty much settled on Sapphire Blue in a solid color. I'd prefer no clear coat for it's ease of repair given the possibility of cone damage. Seeing how well the quality urethane paint has held up on my other TR6 (22 years and counting), I'm still leaning towards a quality sprayed paint job. Time to swallow hard and write a large check.
This weekend, I may go strip some paint off of the tub. Any little bit of work I can do myself at this point is that much less money it costs. Plus, I'm still not certain the rear valance and door sills aren't scabby under the paint/primer on them now.
JoeTR6
HalfDork
3/27/17 12:47 p.m.
I took the primer off the lower rear valance and was not too surprised to find lots of dents and large areas of filler. It doesn't appear to be rusted out, but looks fairly mangled as if someone had backed into something and it hit below the bumper. A new BMH panel is $300 and a day of work, so that may be easier and certainly produce a better result than filling the dents. This also provides an opportunity to fit panels from the front to the back and put the rear valance where it needs to be (i.e., close up the door gaps). I can also address any internal rust issues while the panel is off. Since this tub was from a '76, I can also use the correct panel from a '72 that didn't have license light holes above the plate.
And I thought I was done.
JoeTR6 wrote:
And I thought I was done.
You are doing too nice a job to be done yet. Never fear, you shall TRIUMPH!
JoeTR6
HalfDork
4/1/17 11:18 a.m.
I have a new rear valance panel and most of the stuff to replace it, but I'm waiting for the spot weld cutters to show up. If they arrive today, the panel will get replaced tomorrow. The last time I did this, I simply drilled through the welds. But that made for some hard to reach plug welds.
JoeTR6
HalfDork
4/8/17 8:46 p.m.
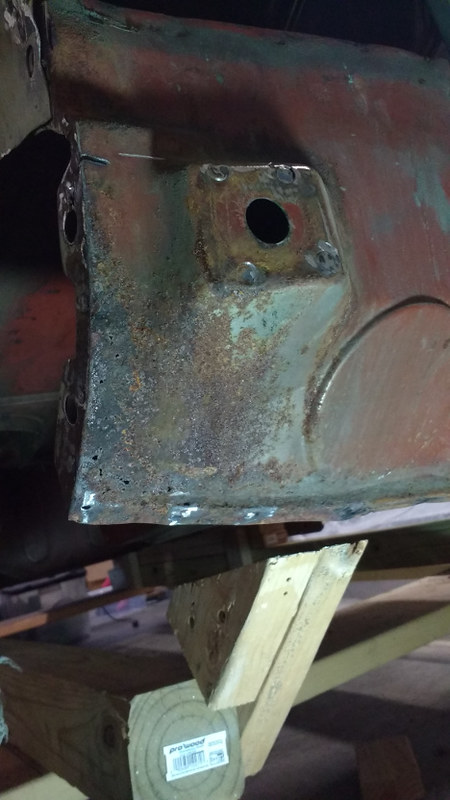
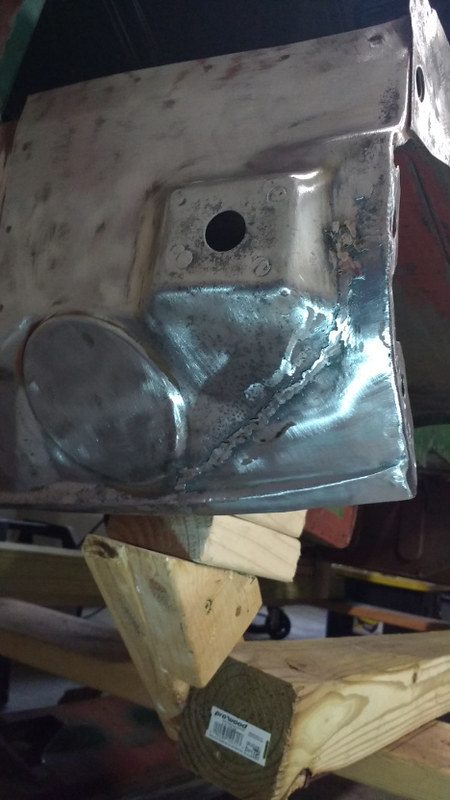
I finally found some time to work on the rear panel. Here's what I started with. The other corner was just as bad.
After removing the valance, I'm glad I did. The lower corners were patched with metal, but there was a lot of rusty metal left behind the bondo. This is what the insides of the corners looked like.

The inner valance panel on the driver's side isn't so nice either.
The new valance panel fits well and has just a few places that will need to be leveled with some filler. Tomorrow I can hopefully replace the rusty parts of the inner valance and inner fenders and start adjusting panels.

wspohn
HalfDork
4/9/17 12:33 p.m.
Graefin10 said:
To continue the thought, just like I'm still mad @ JRT for not whipping up a nice twin cam 4 and IRS to save the MGB.
They had one - back in 1958 with the MGA Twin Cam, but had dropped the ball in one aspect of design and decided to kill the project before they found out why the pistons were getting burned. Had the persisted we would probably have had an 1800 or 2000 cc DOHC MGB, perhaps as a special cost plus model. They also played with IRS in the MGA era and discarded it as not providing enough benefit to offset the considerable cost.
Triumph went for it but screwed up the spring rates - which is why every time a TR6 boots it reminds me of a dog squatting to pee.
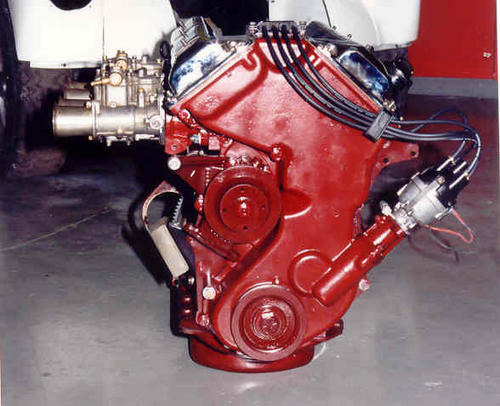
Here you go - real MG engine (out of my race car)
wspohn
HalfDork
4/9/17 12:39 p.m.
JoeTR6 said:
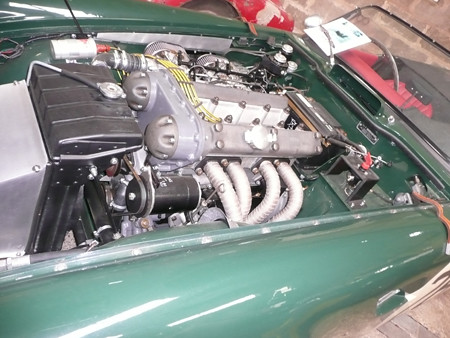
The 3 liter BMW motor puts out 228 HP and 221 lb/ft of torque.
Yeah, but why settle for that? Not sure which spec that M motor is, but the one sitting outside my door is an S54 3.2 that puts out 340 bhp @ 8,000 rpm/270 Tq. That would put a gleam in a TR-6 owner's eye. Might as well use the close ratio 6 speed as well.
JoeTR6
HalfDork
4/9/17 7:46 p.m.
Triumph developed an overhead cam inline 4 (codenamed Sabrina) in the late 50s that would have been spectacular. I believe it was considered too expensive for production. It would have been wonderful in the TR4 chassis.
wspohn wrote:
Triumph went for it but screwed up the spring rates - which is why every time a TR6 boots it reminds me of a dog squatting to pee.
Yeah, the factory dropped the ball there. Having the half-shafts above the frame rails limited travel which also didn't help. I'm using 470 lbs/in rear springs that mostly fixes this issue. We're running 600 lb/in springs in a more dedicated-to-autocross TR6, but that is a little too stiff to enjoy on public roads.
More progress was made on the valance. I patched the inner fender panel that had some rust pinholes and cleaned up the entire inner valance. The lower corners will take some time to correct, but I almost have one patch ready for welding to replace the swiss cheese shown earlier.

NOHOME
PowerDork
4/10/17 5:54 a.m.
I did some rust remediation on a TR6 once. The rear valence sticks in my mind as a challenging job and/or a very expensive panel.
JoeTR6
HalfDork
4/10/17 7:39 a.m.
NOHOME wrote:
I did some rust remediation on a TR6 once. The rear valence sticks in my mind as a challenging job and/or a very expensive panel.
Compared to the Molvo thread, this is a walk in the park. I had forgotten how physically demanding bodywork is.
$300 for the BMH panel, but it's worth it. It's probably the best fitting panel made for a TR6. The outer sills OTOH, those are a horrible fit. Or at least they were 20 years ago with the reproduction pieces available then.
JoeTR6
HalfDork
4/12/17 2:07 p.m.
I considered moving the battery to the trunk. With a stock-sized battery, the weight is significant. I'll most likely run a smaller battery in the stock location and carry a Lithium jump start battery in the trunk. There are Lithium batteries that can replace the stock sized battery but weigh less than 5 lbs. That's about the same as the extra cable to reach the trunk. Even a Miata battery would about cut the weight in half.
NOHOME
PowerDork
4/12/17 2:13 p.m.
JoeTR6 wrote:
NOHOME wrote:
I did some rust remediation on a TR6 once. The rear valence sticks in my mind as a challenging job and/or a very expensive panel.
Compared to the Molvo thread, this is a walk in the park. I had forgotten how physically demanding bodywork is.
$300 for the BMH panel, but it's worth it. It's probably the best fitting panel made for a TR6. The outer sills OTOH, those are a horrible fit. Or at least they were 20 years ago with the reproduction pieces available then.
The one TR6 that I did was enough fun that I have passed on offering my services to any more owners! They do have a charm of their own when it comes to panel fit; more Big Healey challenge than MGB.
JoeTR6
HalfDork
4/14/17 7:49 p.m.
The inner valance is patched up. Making those corners was a pain as they have a slight compound curve with a tapering z-bend at the bottom. I used my Project Binky knowledge here. They came out good enough for an inner panel.
For some reason, my welder was making a lot of spatter at the end. It shouldn't have been near the duty cycle. Hopefully it will hold together long enough to get the valance welded on. I suppose I should hit the inner valance with some self etching primer and paint in the middle and weld-through coating on the edges. The factory only used red oxide primer in there.
JoeTR6
HalfDork
4/16/17 7:42 p.m.
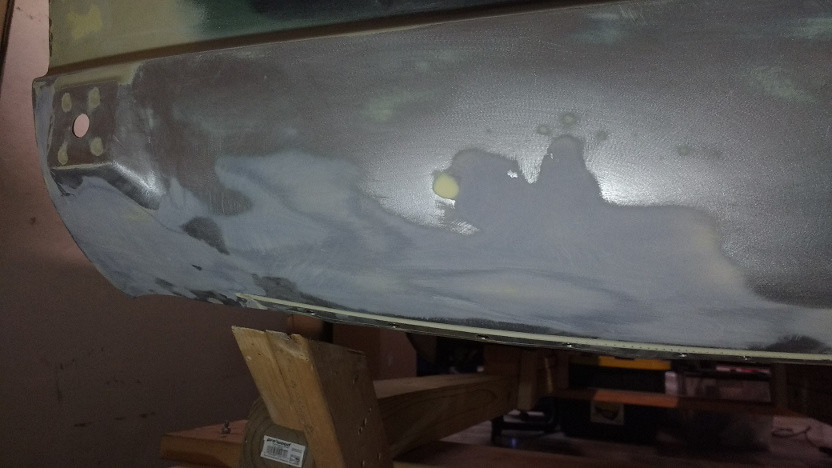
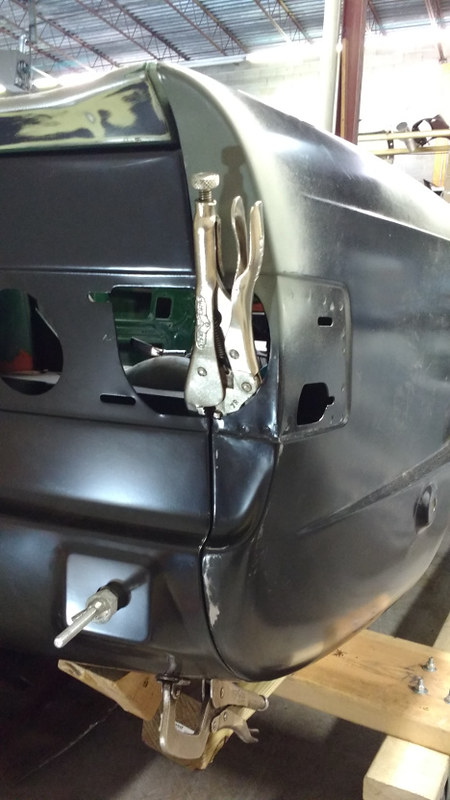
I didn't get the rear valance welded on, but at least did the panel adjustment and a slight bit of hammering to get it ready to weld.
Sorry for the horrible pictures. This one reminds me that I need a third light on the side of my bay where the body sits. I also broke an old fluorescent drop light, so may as well go LED with the replacement.
The panel fit is much better than before. This will take almost zero filler to get it ready for paint. As a bonus, I closed the door gaps up 1/16". Here's a better look at the right side.
JoeTR6
HalfDork
4/29/17 6:01 p.m.
After a trip to visit family last weekend, I finally got back to work on this. Primer was cleaned from areas of the valance where welding would occur, plug weld holes drilled, and weld-through coating applied. The panel was fitted, welder set up, and the first plug weld turned out E36 M3ty. It spattered and the wire jammed up in the gun. So I cleaned the tip, cleared the jamb, and tried again. It instantly jammed, and this time the wire couldn't be pulled out of the gun. A kink in the wire stretched the end of the gun liner. I had to cut the liner with a Dremel tool just to clear the jam.
Part of the problem is that I'm using 0.030" wire, and my liner is really meant for 0.025". It's worked before, but I think the liner just has too many tight spots and the wire is getting kinked near the feed roller. It's time for a whole new gun, assuming that I can still get one for a nearly 30 year old Hobart Handler 120. Otherwise, it's time for a new welder.
I may try again tomorrow with 0.025" wire if I can find some locally.
JoeTR6
HalfDork
4/30/17 9:35 p.m.
The welder is fixed, my bay is brighter, and the rear valance is finished.
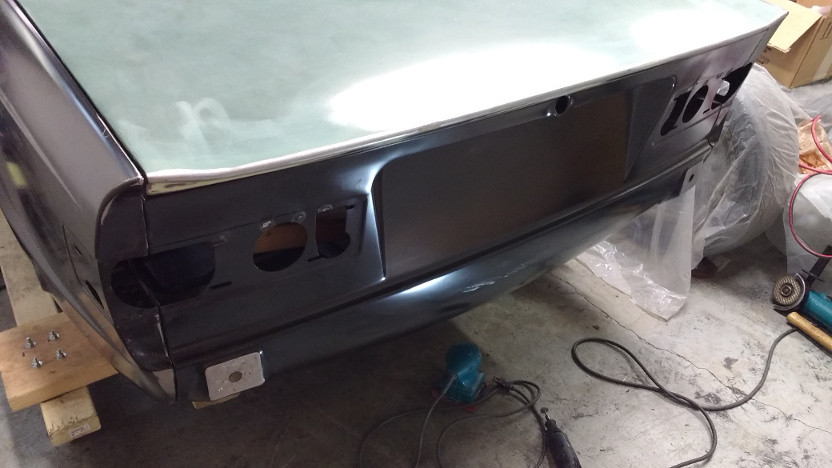
But I still can't take a decent picture. There's a cinder block wall behind me, so this is the best angle I can manage.
I spoke with the guy that I want to do my paint today at a car show. He's just starting another car, but it's a Mini. Those are small, right, and shouldn't take too long? Anyway, we may meet this week so that he can take a look at the shell, so I wanted it to be back in one piece. Today was a marathon session where I skipped dinner and worked until the last weld was ground down. Damn, I don't know how NOHOME does it. I know that I did more than this 20 years ago, but my body doesn't take abuse the way it used to. The lower seam where the plug welds were upside down was particularly nasty to weld and grind.
JoeTR6
HalfDork
5/1/17 9:30 p.m.
NOHOME wrote:
I use a rotisserie!
Putting a TR6 shell without a frame on a rotisserie could be interesting. I'm not certain the frame would help keep it from twisting like a pretzel either. Even if I had a rotisserie and a car that could use it, I'd still be worn out after grinding down over 50 plug welds. It's just mind and muscle numbing work. The welding is actually fun. At least when it's not 80+ degrees in your shop.
JoeTR6
HalfDork
5/6/17 5:49 p.m.
No call from the paint guy this week about coming by to just look at the shell. It's been 6 weeks, and I'm getting tired of being ignored. Time to find a new paint guy. If this keeps up, I'll paint the damn thing myself and live with a sub-professional job.


