


Whoa, fancy gas pedal, right height and everything.
Too bad you have to powdercoat the other two pedals too, now. ![]()

Whoa, fancy gas pedal, right height and everything.
Too bad you have to powdercoat the other two pedals too, now. ![]()

Wow I had no idea there were so many small detail issues with swapping to the 1500 FI engine. I'll have to keep those in mind if I ever plan to swap to "big block" power in my X.![]()

Since the X eventually came with a 1500, I would expect the majority of this to not apply to you since all those "swap" parts exist. The 128 never got a 1500 and I'm using a bizarre selection of 128, late Yugo, and Strada parts. The Strada throttle linkage stuff probably would have worked, but I don't have any of it. I'm still looking for the EFI Yugo intake manifold, as things are a little cheesy on the throttle body end of the throttle cable right now.
I just picked up a pair of more different control arms for experimental swaybar sciencing. Hopefully my idea works out and I will solve the age old question of "How do I fit a Yugo swaybar in a 128 sedan?"

Burrito wrote: "How do I fit a Yugo swaybar in a 128 sedan?"
Sigh... If I had a dime for every time someone asked me that!

Hey Burrito your car is Awesome! There seems to be a bunch of these rare sedans around the northwest. I've had my 128 two door for a few years now and had never seen another one before I bought it. It really is fun to drive and keeps getting better as I restore it. Thanks for the inspirational build that really got me excited about working on one of these unique and stylish cars

Bender, your car is awesome! I just now noticed that you are in Portland. We will have to get together at some point once the Sedan is back on the road.
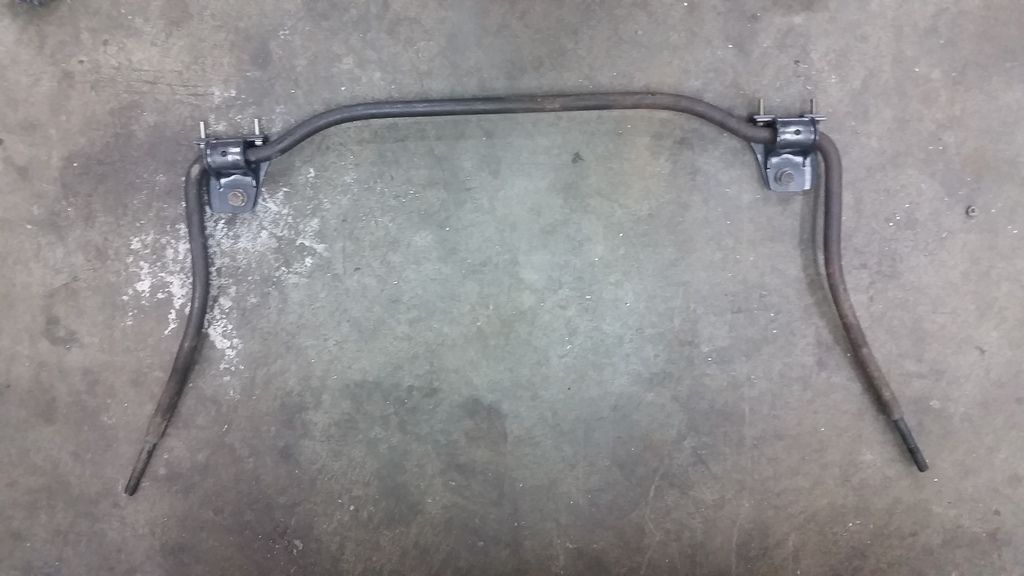
Onto the 128. I couldn't ignore the swaybar dilemma any longer. It turned out to be a little more work than I had anticipated, but it is mostly done now. For those of you not in the know, the Yugo swaybar is about an inch longer that the 128 bar. If you were to try to install in the stock orientation you would end up with fairly extreme negative caster. So, here's how to mount the more bendy 5 speed Yugo swaybar to a 128.
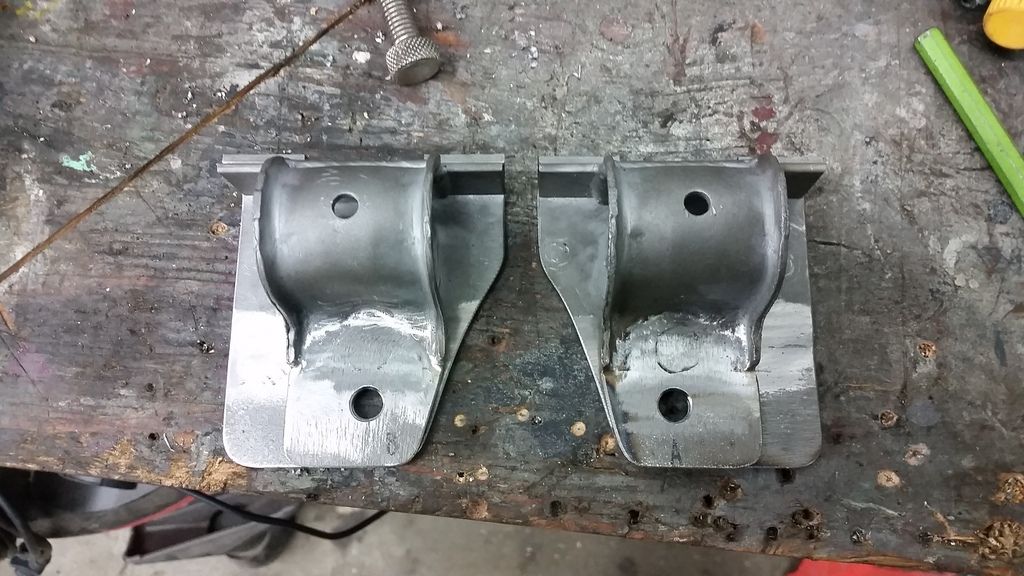
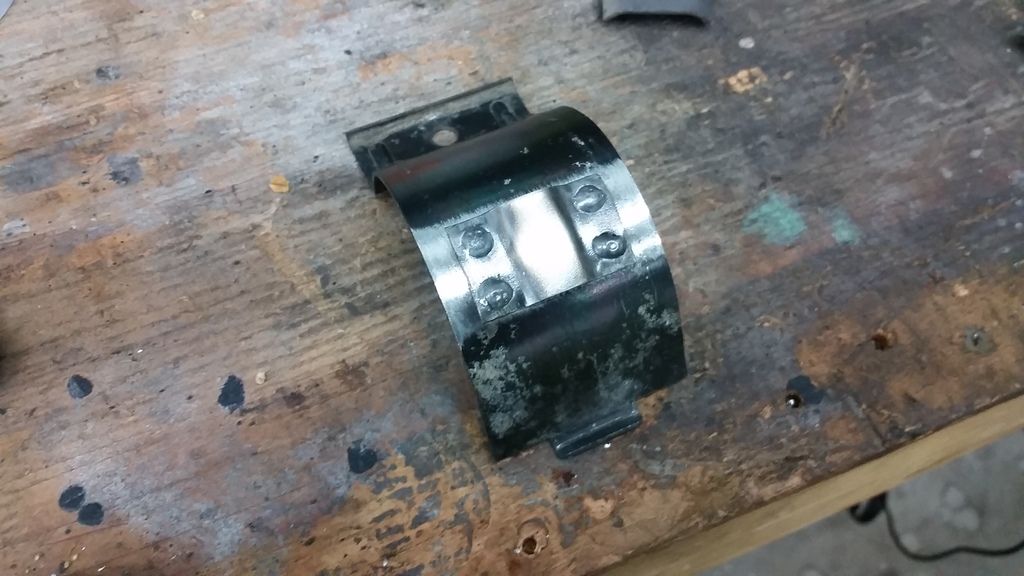
Drill the rivets out of the stock swaybar brackets and hack one ear off.
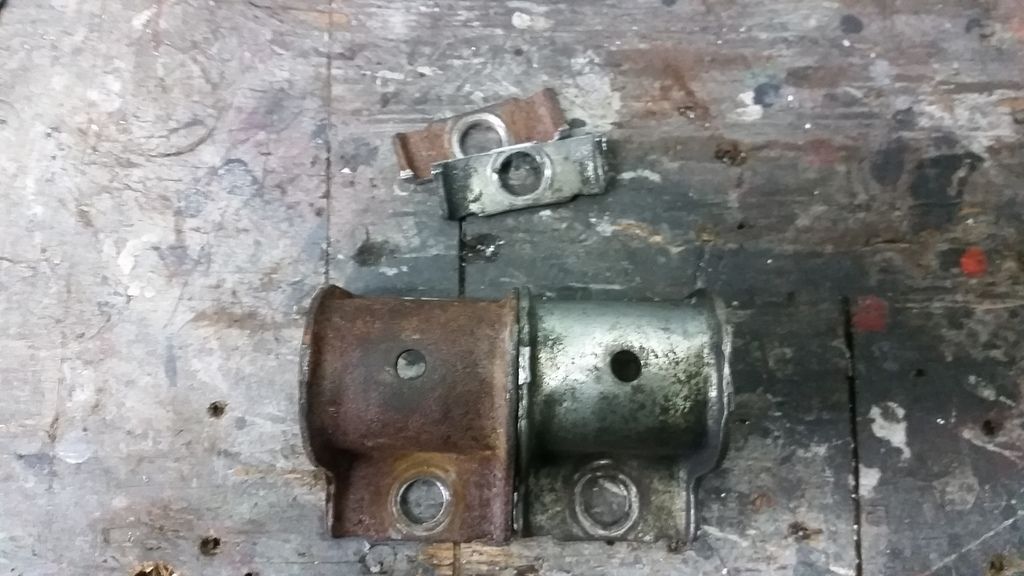
Uhhh, add some pieces.
The lump on the bottom bracket comes from the stock bracket. The stock bracket material is 10ga, I used .125" flat strap because that's what was in the scrap bin...
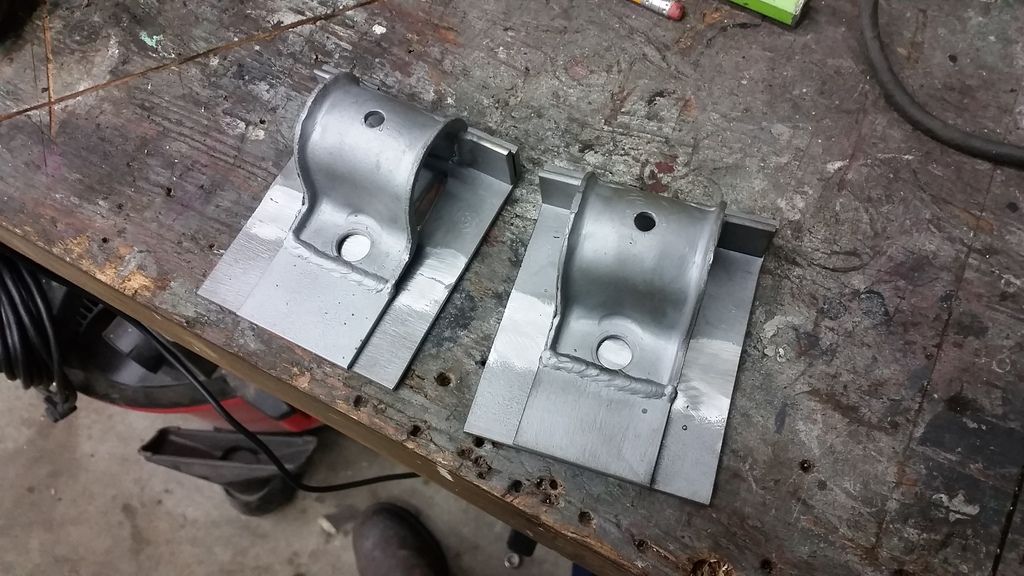
You can kinda see where I'm heading here. Move the swaybar mounts forward, regain some caster.
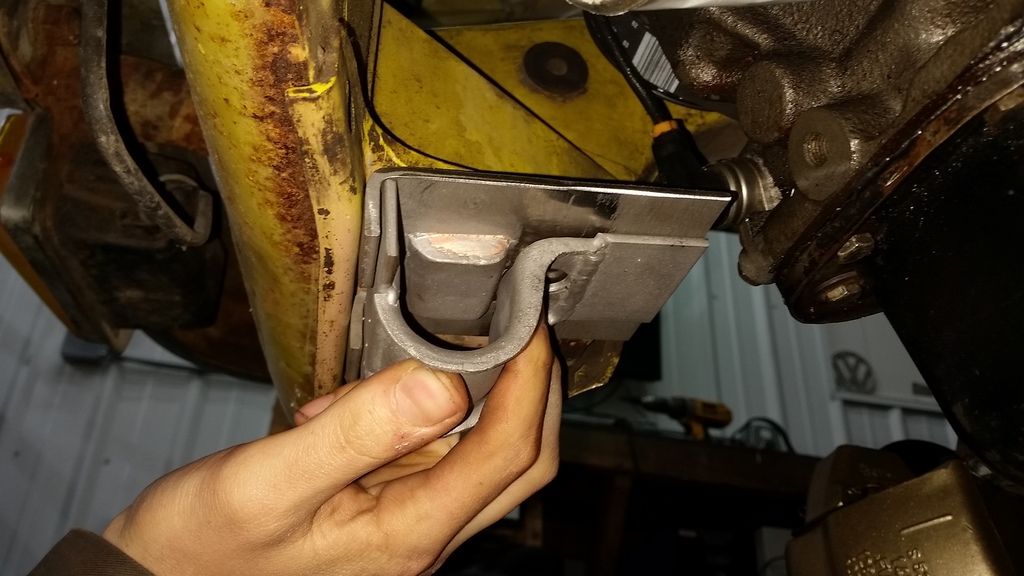
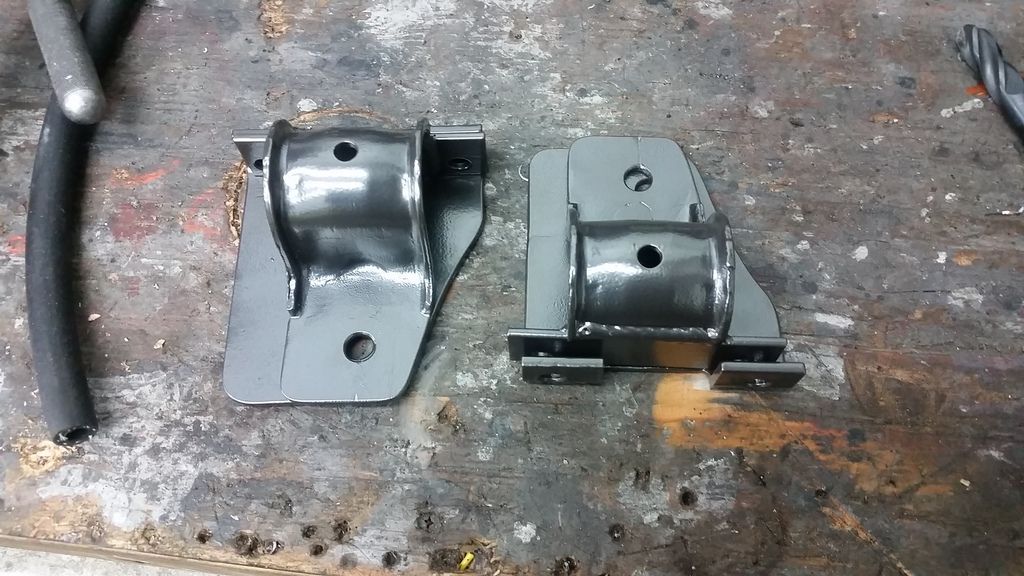
Here's the proposed installation.
After some profiling, grinding, filling old holes, and making new ones we have a pretty good looking bracket.
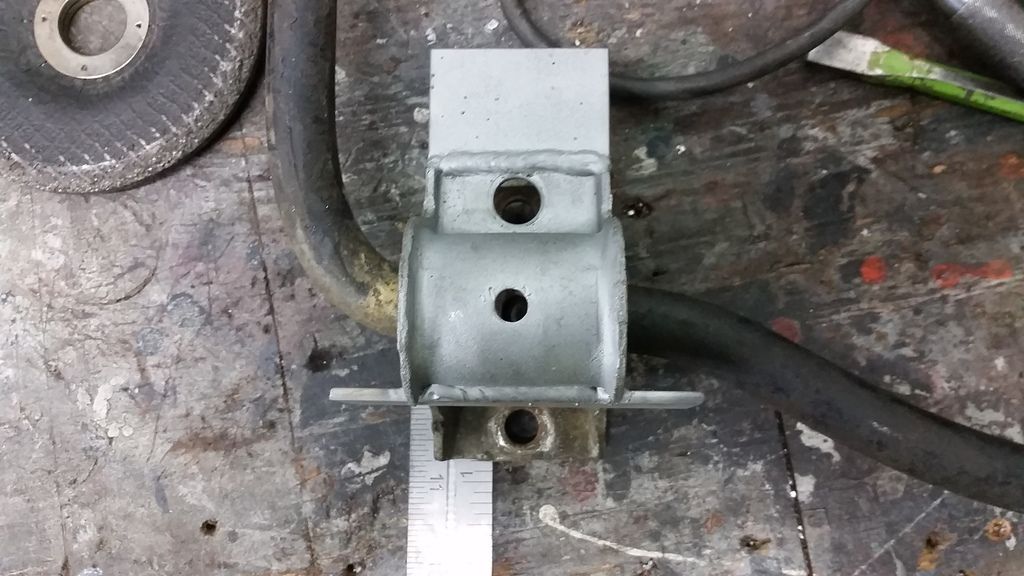
After some powder coat.
And bolts.
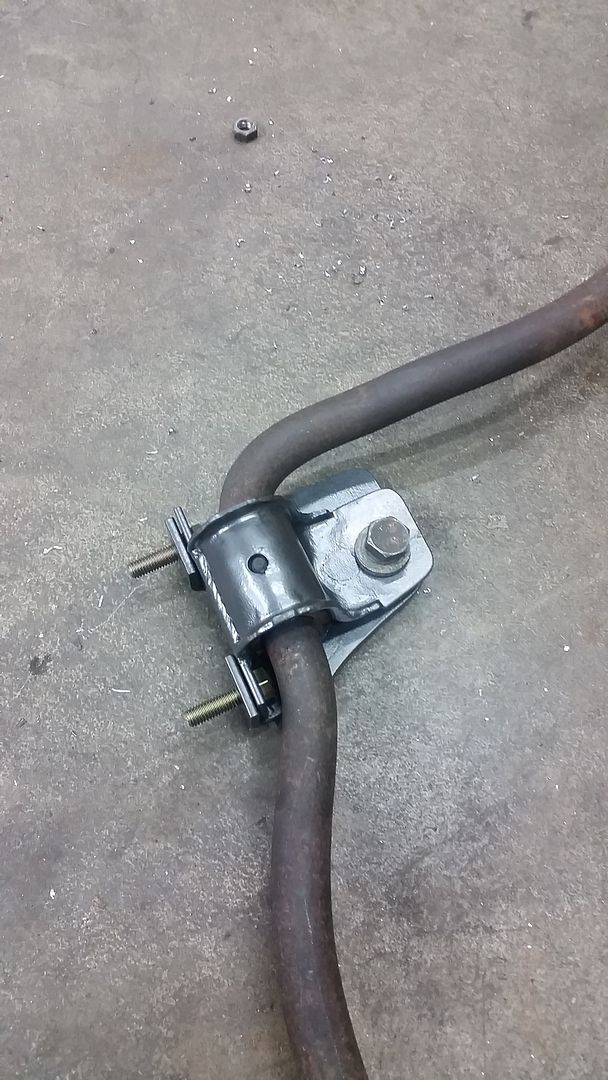
And a motha' truckin' swaybar.
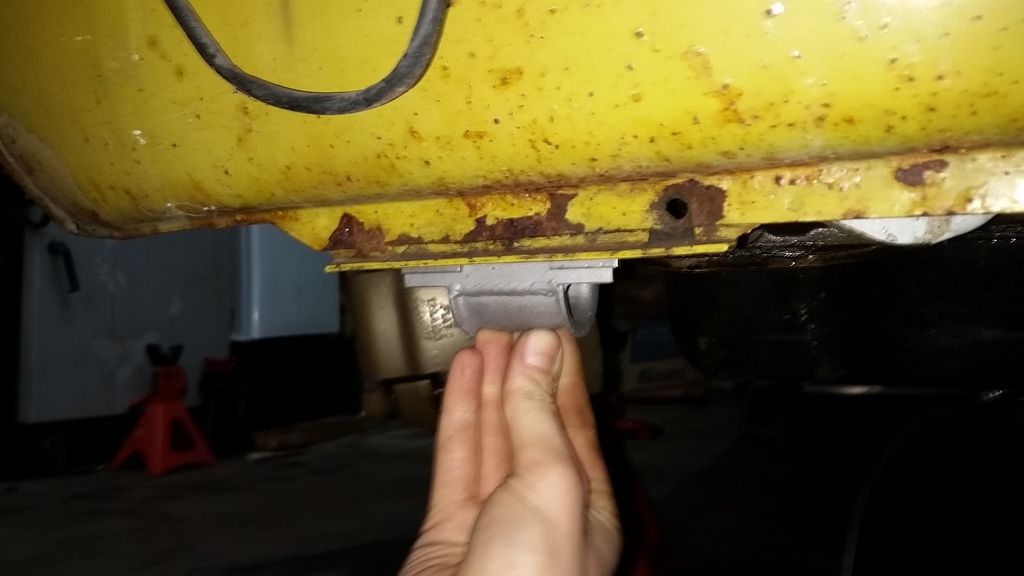
I still need to make 2 small brackets out of some 12ga to space the nuts out flush with the little lip here
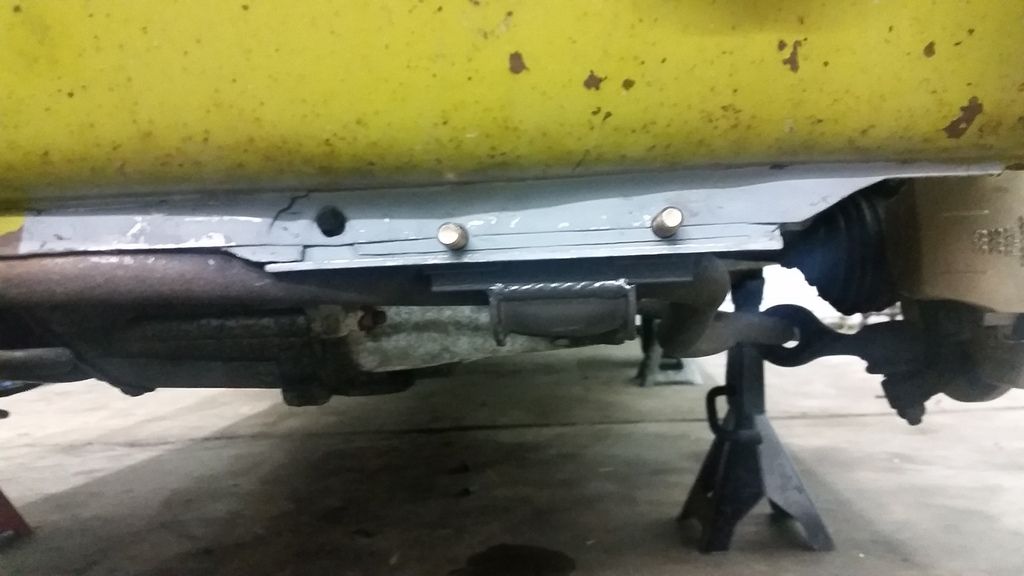

I did have to massage the lower valance ever so slightly to clear the swaybar in its slightly more forward position.
Once I know that everything is copasetic and this actually works I will gladly post dimensions so other 128 dorks can do the same, if there's any interest.

Very cool solution.

Very dorky![]()
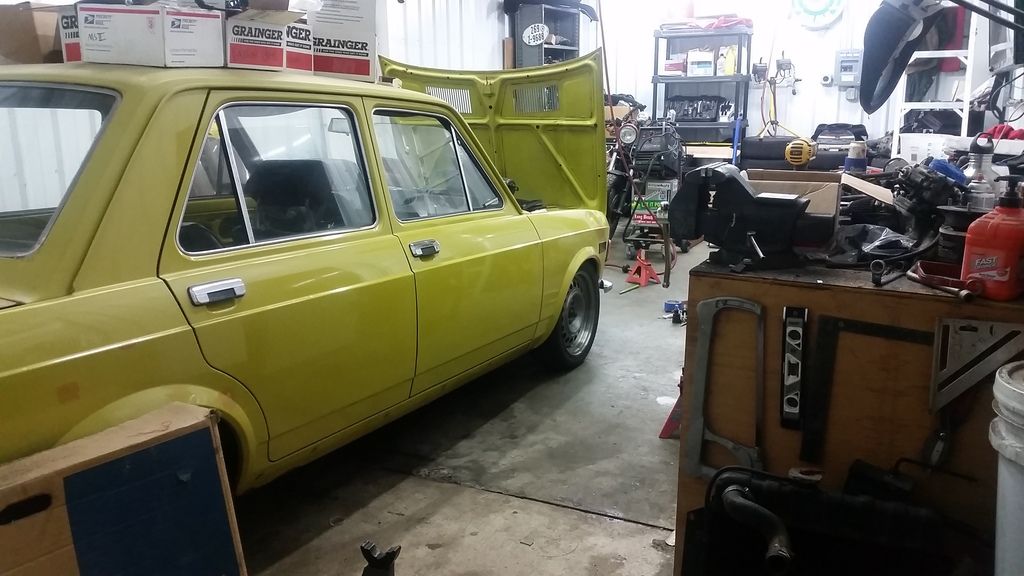
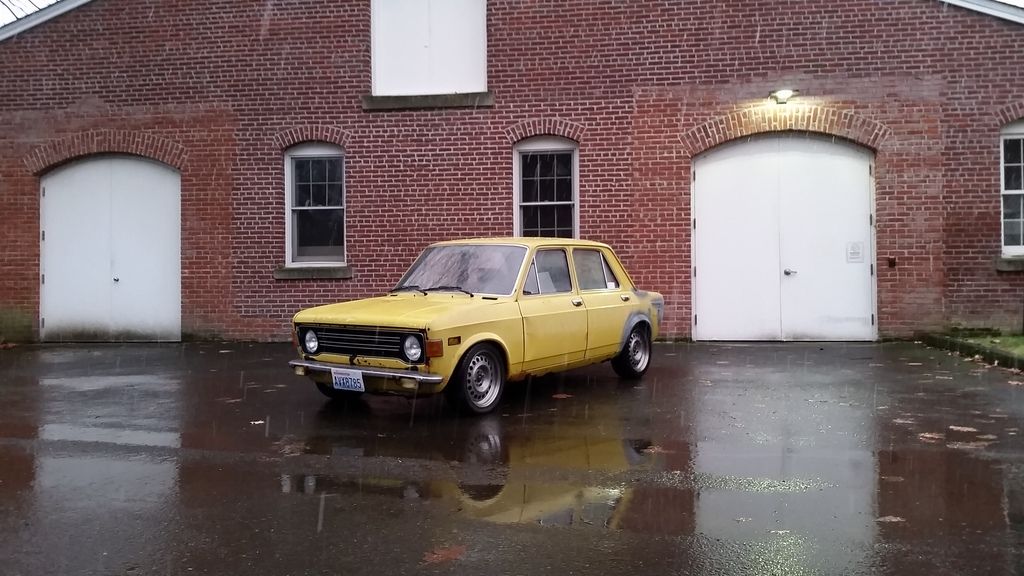
We have a roller again!
I would have taken some pictures, but it was completely uneventful. So, I'm calling the swaybar mounts a success for the time being. I put 2 alignment shims per side back in as a total guess. It had 5 on each side with the old swaybar. I really won't know how far off it is until I take it to get aligned.
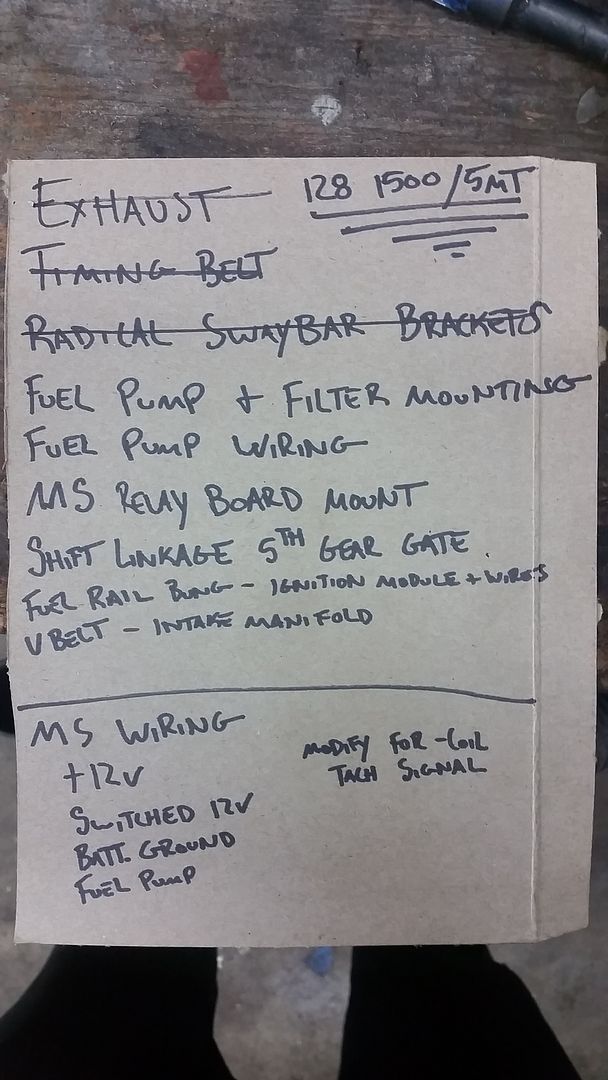
In other news, we are almost down to just a good old fashioned carb to MS install.
It feels good to get back into the swing of things. Hopefully another update Thursday or Friday.

Excellent! I love this thread.
Rollers and punch-list rule.
Not much fun stuff to report on this end.
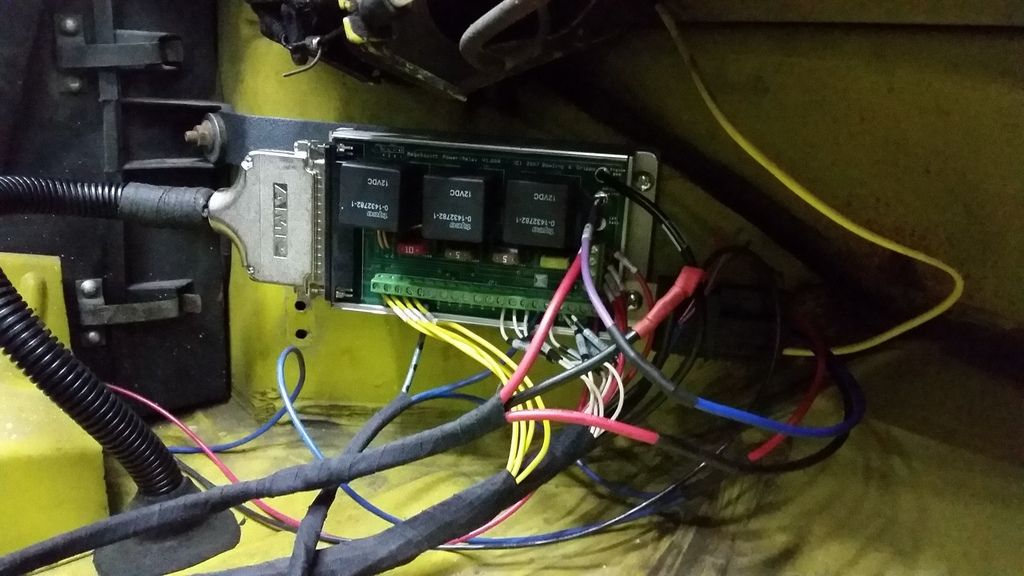
The MS Relay Board bracket I made for the Yugo didn't work out on the 128, so I knocked out a new one of those out of the same 16ga I made the last one out of and powder coated it in the black wrinkle I do almost everything in now.
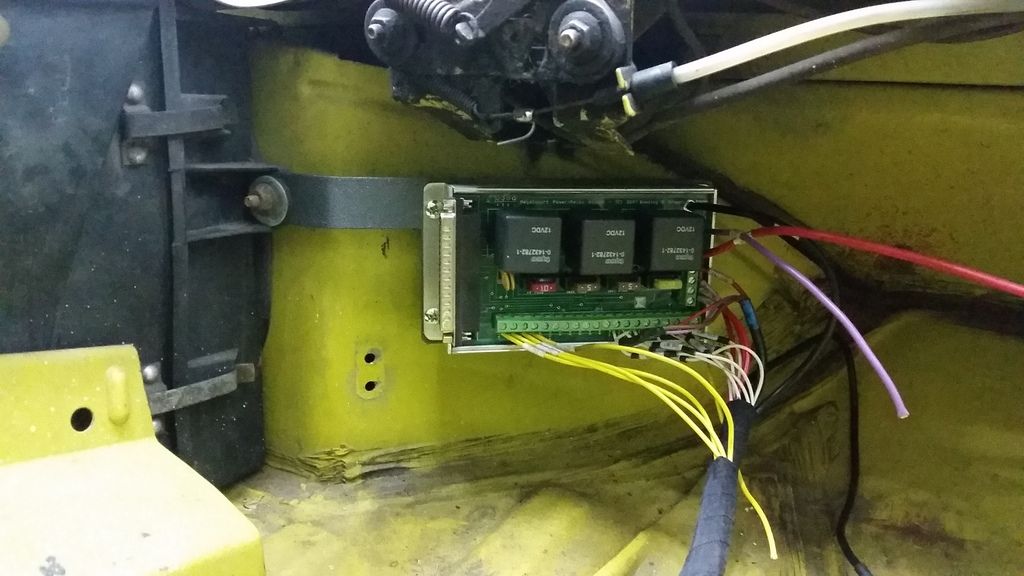
It tucks up under the cowl nicely and is sturdier that you might think.
I also tracked down and liberated the wire that heads back to the Fuel Pump. Theoretically the wiring should be very straight forward at this point; it should just need switched 12v, constant 12v, the analog output from the wideband controller, and the fuel pump wire.
Despite my lack of trying, I was unable to get the shorter EFI Yugo belt to work with any tensioner setup, so I lost the 60-2 crank pulley. The car is now wearing a proper 1500 timing belt with an eccentric tensioner from a 1991 SOHC Isuzu Stylus. The tensioner is a hair on the small side, but it should work for now. I'll have to dive back into the MS board and go back to the optoisolator circuit instead of the VR circuit. Not really worried about it since we aren't controlling spark at this point. I'll play around with the 1300 on the bench and see if I can't come up with different pulley arrangement to get the toothed wheel back on at some point in the future.
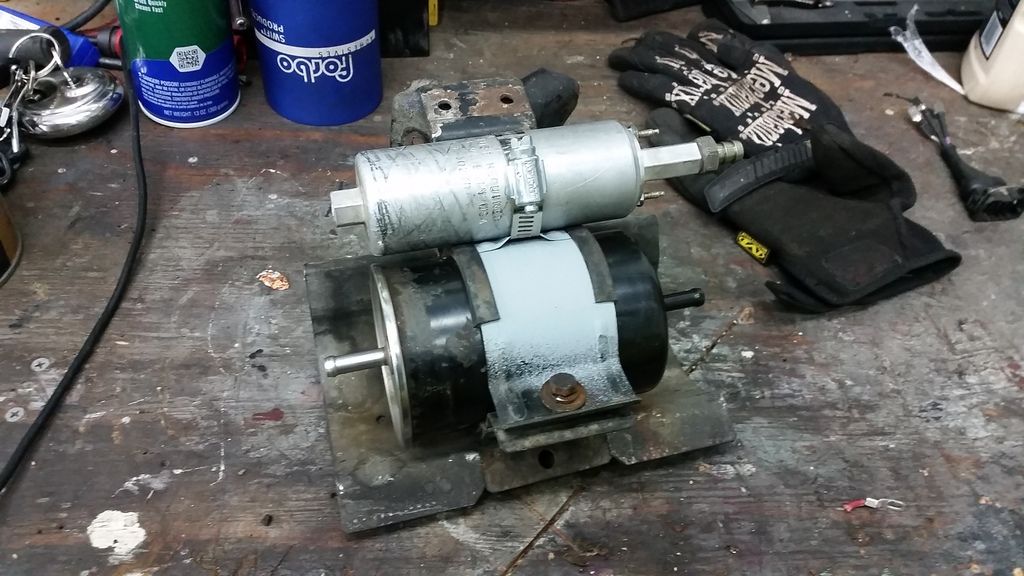
The Yugo donated it's fuel filter bracket to the cause. It took a little fiddling and some creative bending, but it bolts on the 128 in the factory fuel pump location now. I also added a little hoop for a hose clamp, so it holds the inline Walbro now. Waiting on another M10x1.0->5/16" barb fitting before I can install it.
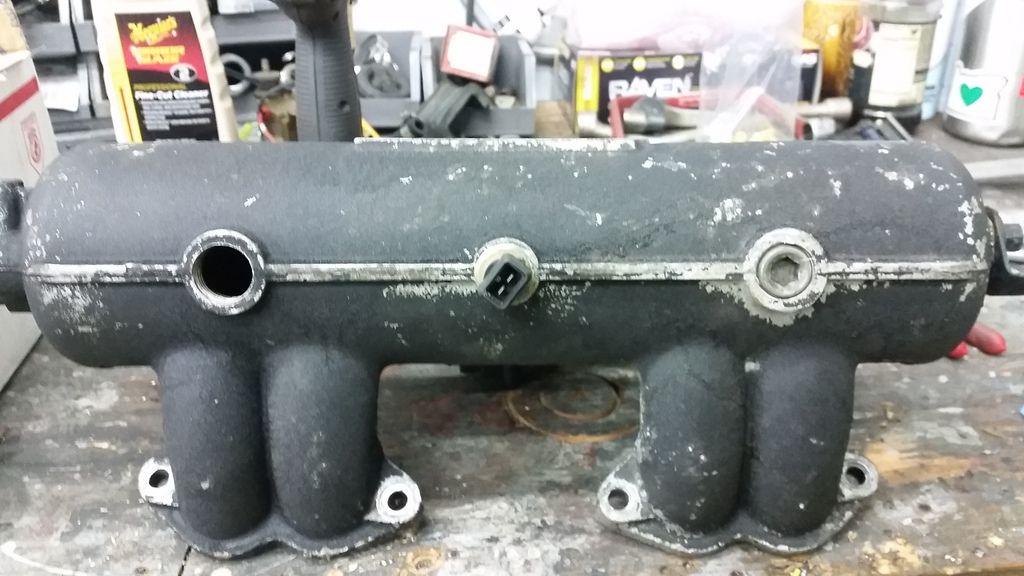
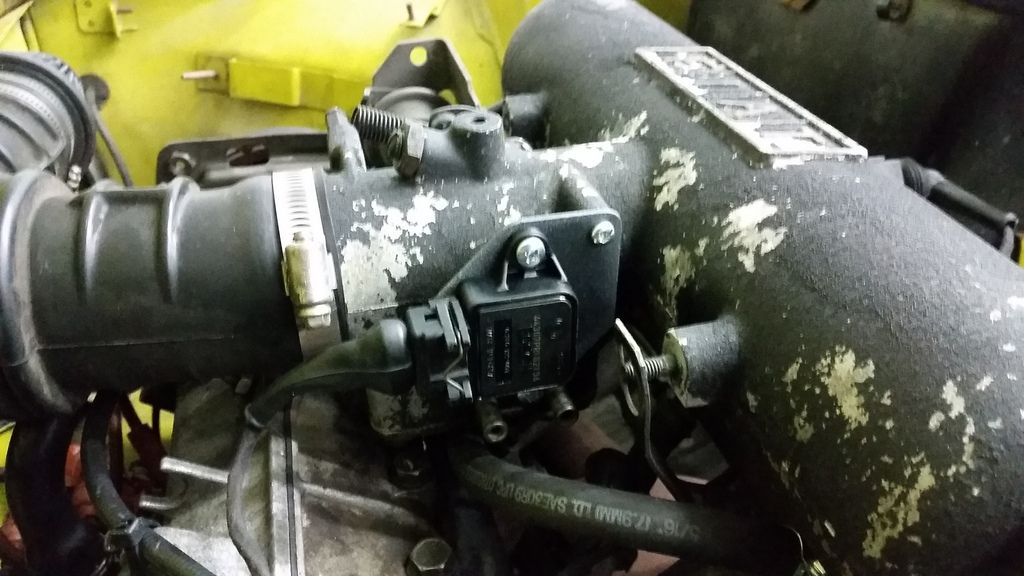
The IAT bung on the backside of the intake manifold was stripped out and had been "repaired" with some JB Weld at some point in it's life. I drilled it out to 1/2" NPT and threaded in a brass plug, then tapped the brass plug to M12x1.5 (or whatever the sensor was) and called it a day.
"Honey-do 128 Edition" is getting shorter by the day!

Oh! A few months back on the Facespace I asked if anybody had any 2 post AM/FM radios kicking around that needed a new home. I've been wanting to see if I could get bluetooth connectivity through one of these for a while now; vintage good looks + modern functionality = perfect for this project. I was expecting a Blaupunkt out of a German built Rabbit or maybe something from a Saab. Then, at a little house party a few week ago, my buddy John handed me this:
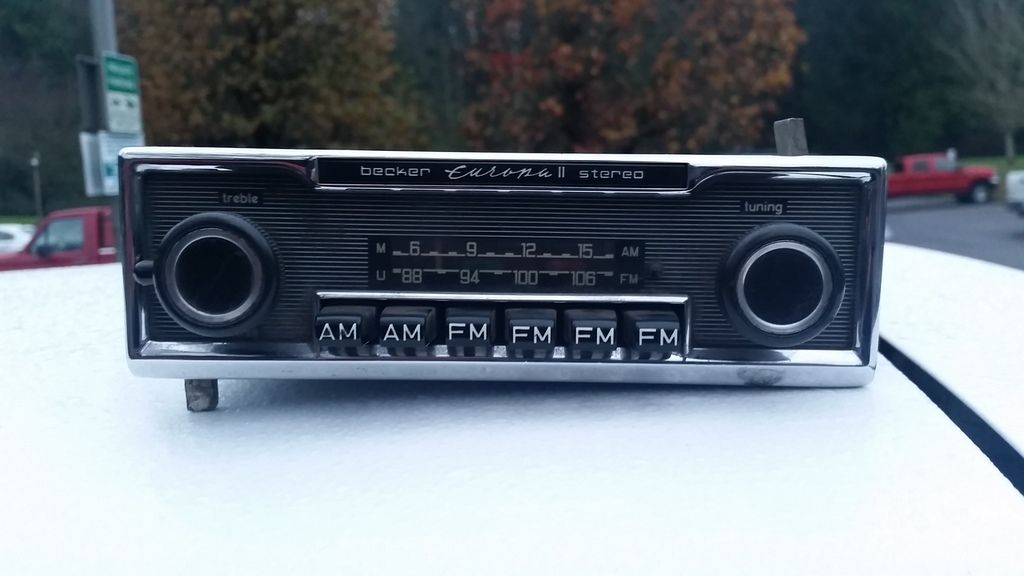
And I am completely over the moon with it. And thanks to modern Science and some foresight from Becker, bluetooth connectivity is going to be extremely simple. That's a project for another time, though.
Whoa that's neat. I especially like how it was obviously made in an era that didn't understand why someone would have six FM presets.
Should be really easy to build the Bluetooth module, too bad the Germans didn't expose control pins so you could control your phone from the head unit but that would probably be asking for a lot from something of that vintage.
edit: Whoa those things go for ridiculous money on eBay. I bet I could buy a car with one already in it for less.

After getting the '84 Mercury, I'm diggin on 2 post radios. That Becker is boss.

Very interested in the Becker/Bluetooth conversion. My wife wants a radio for the 911 that is more period that the disco flash light one that's in there now.

Now I don't want to be telling tales out of school but I just got a video of this car idling and a very pleased looking burrito.
Yep. The little 128 roared back into the land of the living last night around 10:00pm. I had a few teething issues right off the bat; an overlooked hose clamp on the return side of the fuel system, a small coolant leak at the heater core, and a forgotten ground on the ignition module. Once I took care of those issues and found the settings menu for tach input filtering, the car started almost immediately. Without the filtering the MS thought the car was cranking at around 27,000rpm, so some shielded Belden cable is probably needed for the Tach input run.
I'll probably shoot a little video and give you guys a real update once everything is cleaned up properly, Thursday maybe. No news tonight as I'm doing a rocker panel on a Hyundai for a car dealer acquaintance.

Great going, Burrito! This makes me happy.
Twenty-seven thousand RPM is probably a little bit past fuel cut if I had to guess. Congrats on getting it running!
Alright, so here is the update that didn't come on Thursday.
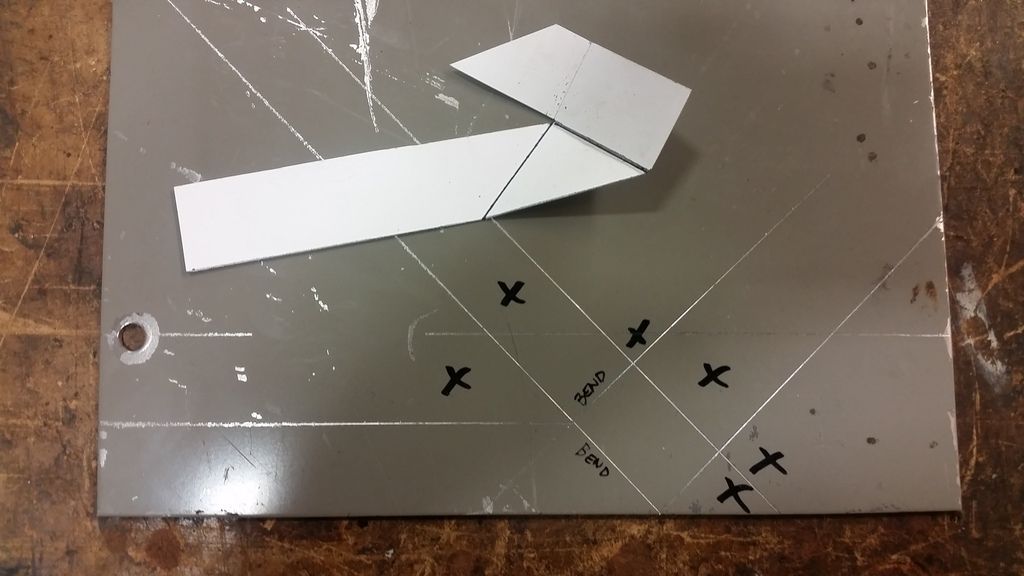
The bracket that held the TPS that PO had made was a giant pile of crap. It put the TPS in enough of a bind for it fail completely. The Bosch part number brought up a Saab and Volvo part, so a new one was easy enough to source and only set us back $30.
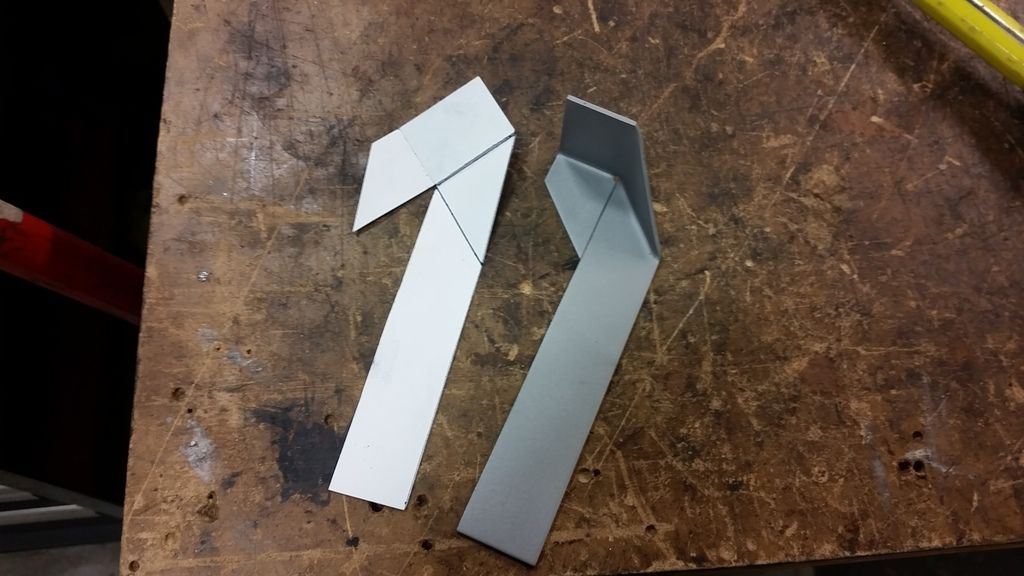
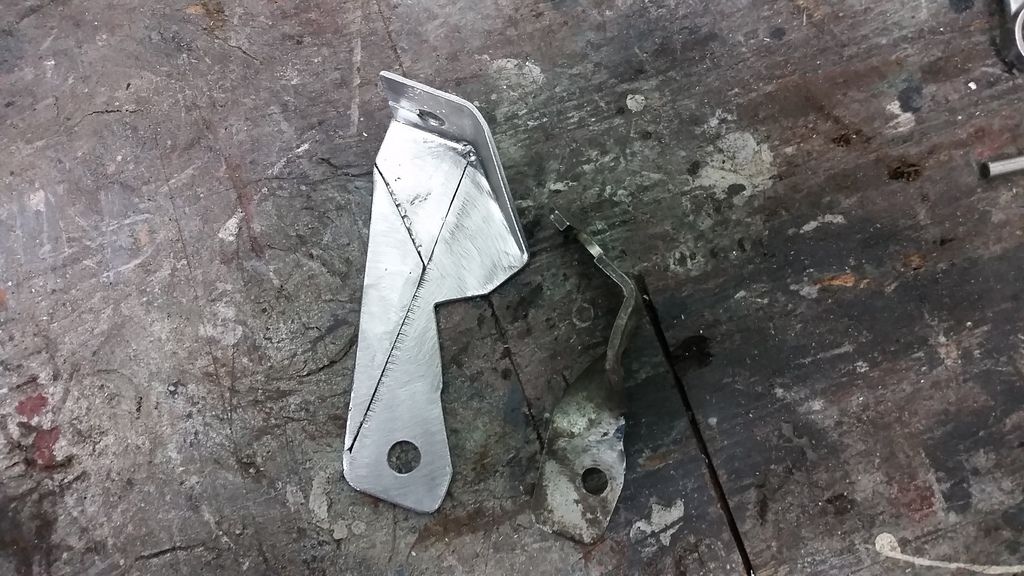
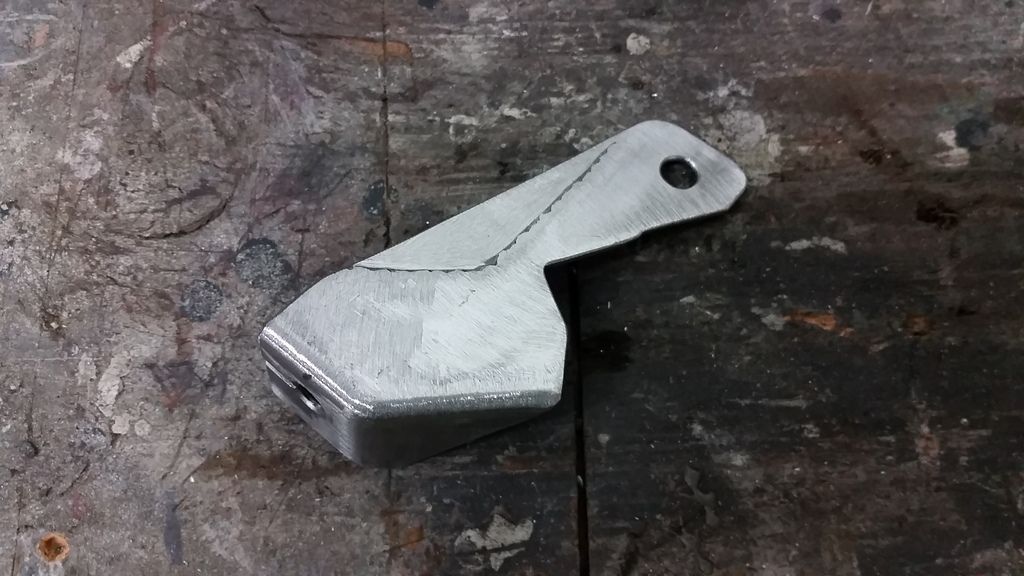
Here's the template and the finished TPS bracket knocked out of some 16ga.

It slipped nicely into place after a trip through the oven with some black wrinkle coat.
The same loving attention was used to make the old throttle cable bracket. I would have let the old one stay, but since I changed a bunch of stuff on the other end of the cable I needed more adjustment. I had a reaaaaaally slow day at work, so I got started on a new one with out any sort of measurements.
After a fair amount of fiddling I had this (that's the old bracket next to it).
Admittedly, I took a bit of a long way 'round on this one, but it is done and does it's job nicely.
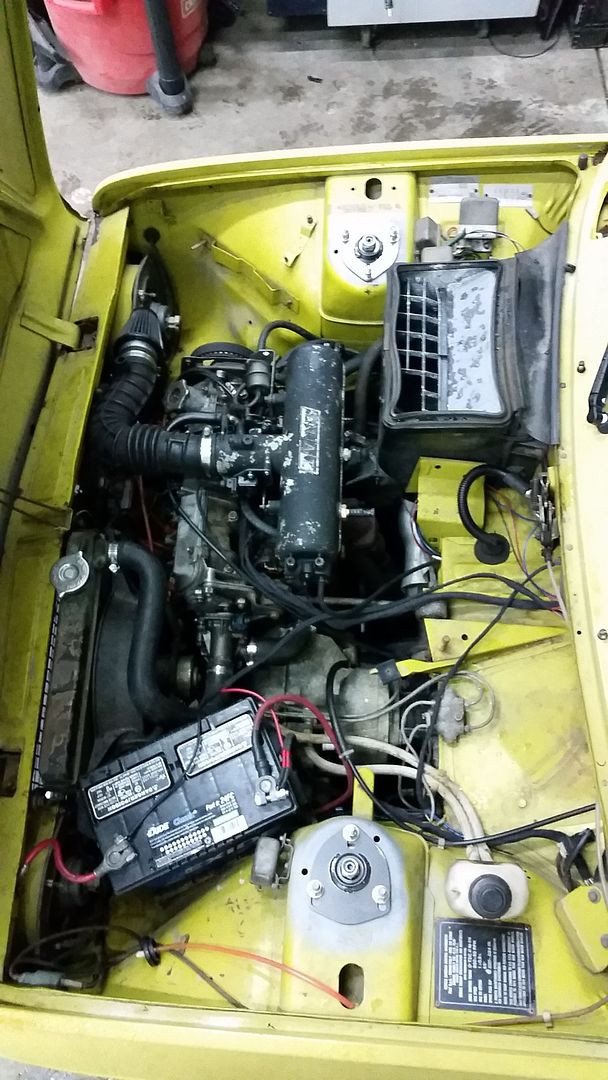
Other than those few things I have just been keeping busy with the tail end of the megasquirt install. The terminations on the relay board have seen better days, but whatever. I will get to cleaning this up in the next week or so.
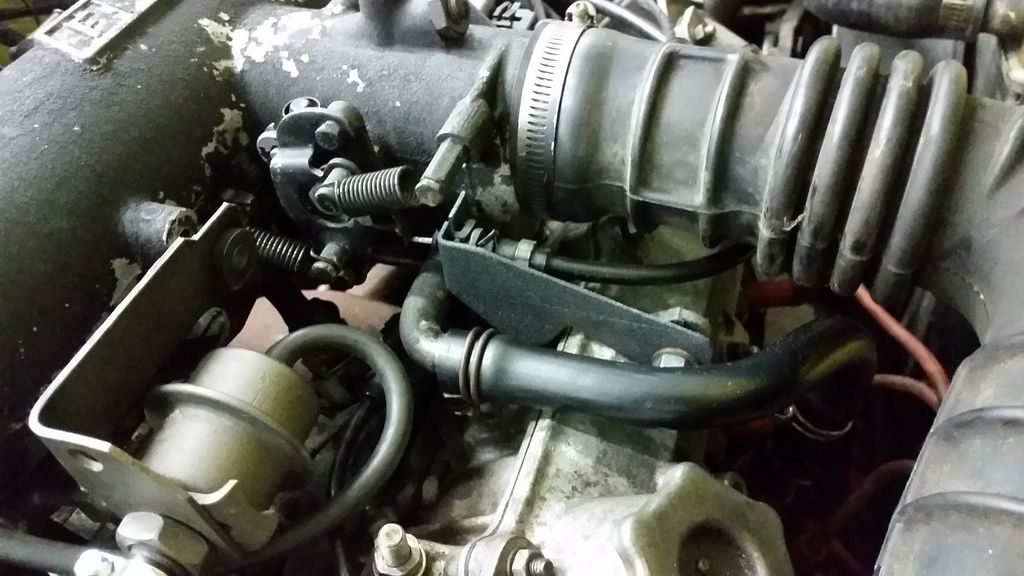
The bay is looking pretty good overall. The ugly intake manifold is really letting things down. I might be powder coating that this week as well.
The car is running berkeleying fantastic now after a bit of basic tuning. The laptop I'm using has very limited battery life so I'm just doing what I can to make sure the engine is safe and isn't going to have a meltdown. It turns out that if you put a F.I. 1300 yugo head on a stock 1500 bottom end you end up with roughly 10.6:1. So, as you can imagine, it berkeleying rips. Hopefully once we roll some miles on it, the rings will seat in and it will be even better.
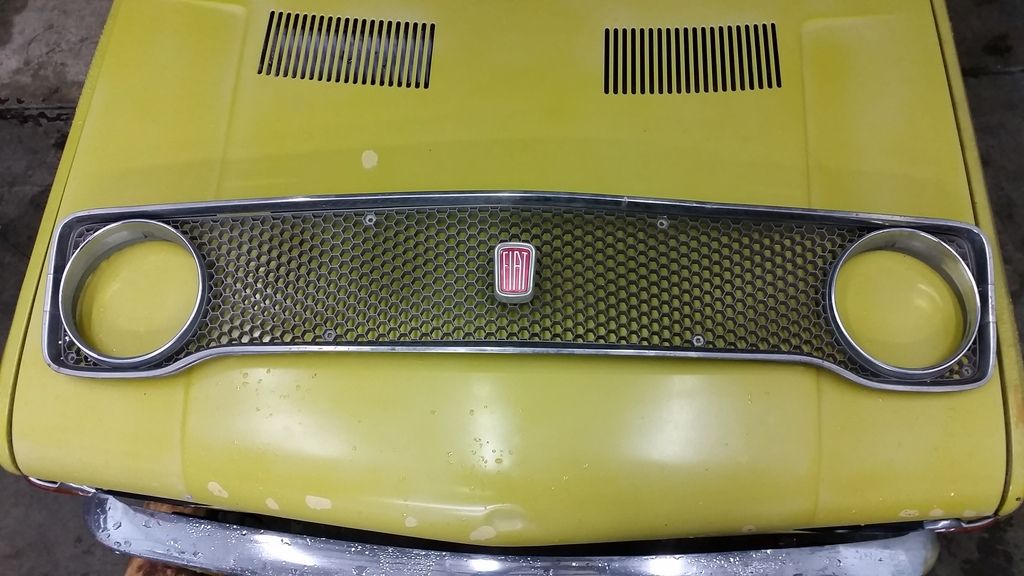
And, since the holidays are now behind us, I can finally share with you guys the little surprise I picked up fory wife.
Hopefully I can get back to updating more frequently now that the boring MS install is done.
That grille is going to make the entire car. I like the one that's on it now, but that's a huge step up.
10.6:1 is a pretty healthy compression ratio for that engine.
Are you going to use the same black wrinkle coat for the intake manifold, or are you going for a lighter gunmetalish grey to make it pop?

That grill looks incredible! I'm very happy to hear that she is up and running - I can't wait to see this thing in person!

Maybe have the intake coated the same color as the wheels?
Really cool project.
Honestly, I'm probably just going to do it in the black wrinkle then sand back and polish the raised FIAT lettering. I've bought more than a couple powders for specific purposes in the past and they never get used up. Also, I'm broke a berkeley right now between the holidays and buying a house.
The grille is a little rough around the edges and needs a little love, so that'll be coming down the pipe here in a bit, too. It doesn't fit in the oven, so it's just getting a good old fashioned rattle can job.
There's a little clunk that I need to chase down in the meantime. Hopefully it's just something loose that I've overlooked. Typical engine swap woes, I suppose. Every squeak and rattle has you questioning yourself. "Did I torque down those trans mount bolts? I must have. But did I really?" So a little nut and bolting is in my future.
I'm also looking at raising the engine up a half inch or so to buy me more space on the swaybar which is currently perilously close to the end of the trans. Should be able to do it fairly easily. More on that later. ![]()
Timing belt info...
The 128 type engine came in basically 2 sizes, 1200 and 1500. Of course the Yugo could have several differences... They each use a slightly different timing belt, and the tensioner roller is also different (different outside diameter). Using the Fiat parts gives you 2 belts to pick and two tension rollers to pick.
So if using a combination of parts, or if the head and or the cam box has been milled. You can try using a combination of timing parts. I bet if you were to contact someone at Bayless racing, or ask at the Xweb forum, you could find out which belt is slightly longer and which tensioner roller is larger. Or all 4 parts are fairly cheap, could just buy all of them and see which combination works.
Often a aftermarket cam (regrind) will require much thicker shims, or mill some off the bottom of the cam box to account for the re-grind. This will put the cam timing wheel closer to the crank timing wheel.
Also the front sway bar is a interesting mode for the street. But for racing a front drive car, typically there is no front sway bar, just one at the rear. Stiff front springs and only a rear sway bar, helps to reduce wheel spin while accelerating thru a turn. Might lift a rear wheel off the ground, but that won't matter. The idea with front drive, brake a little early, stop braking at turn in and get back on the gas right at turn in and power thru the turn.
Great build and great story. I would have used some sort of carb or pair of carbs, interesting you went with injection.
I have a X1/9 that I modified for a pair of side draft dellorato carbs, intakes are available and used carbs can be found.
Of course the trick to either set-up is in the tuning, some find injection to be easier to tune.
You'll need to log in to post.


