


That powdercoat on the backing plates looks pretty awesome.
I'm almost afraid to ask what that lab oven used to cook, because it looks like it escaped a few times.

That powdercoat on the backing plates looks pretty awesome.
I'm almost afraid to ask what that lab oven used to cook, because it looks like it escaped a few times.

In reply to ssswitch:
Hot-Melt Adhesive. As soon as I turned it on the shop reeked like my work, but hey, free is free.

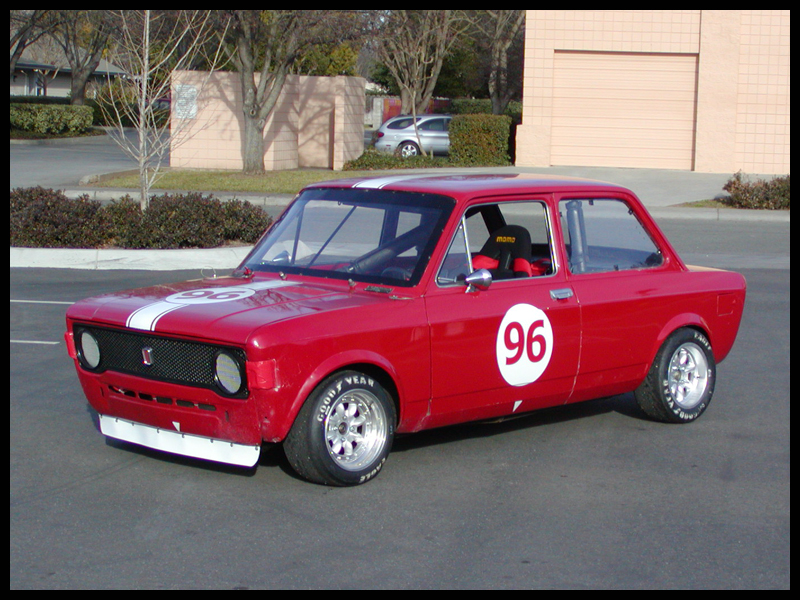
Fun project. I really enjoyed my 128 the few years I had it. Lots of autocross and track days with the thing.
Just a small update tonight. The patch inside the wheel well is all ground flush and ready for seam sealer. Forgot to take pictures of that, but it'd be pretty boring anyways.
I investigated the passenger side in the same area and it is solid on the cabin side of that area, so good news there.
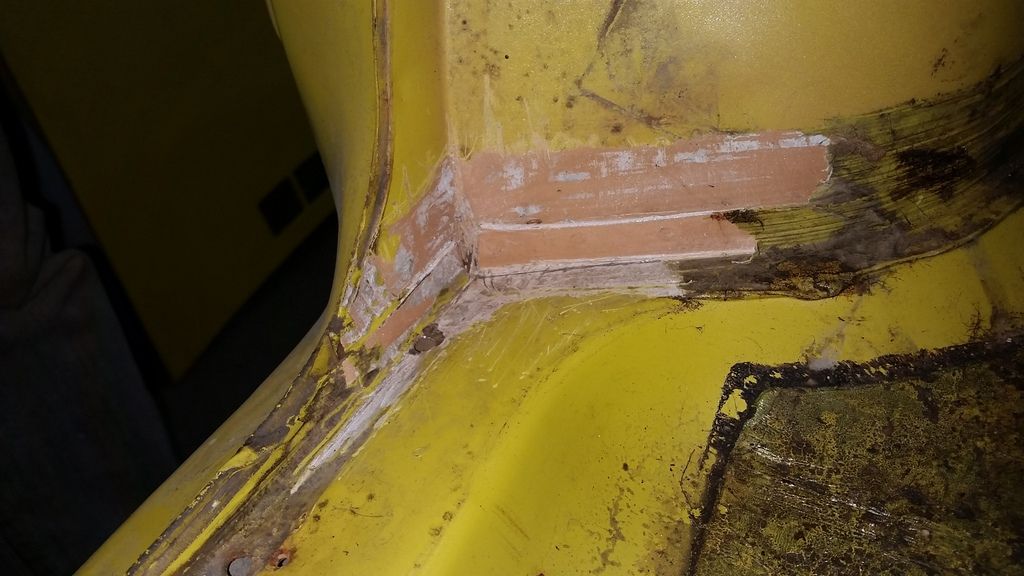
I will still need to make a small patch in the wheel well, but that should be an easy enough task.
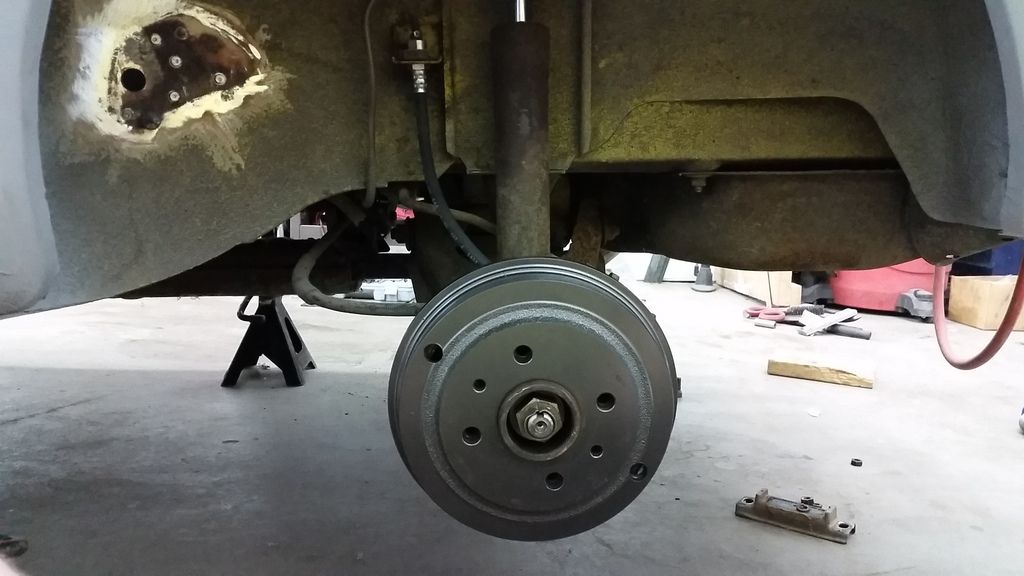
I had David reassemble the rear brakes while I was dicking around. They went together well after some initial confusion. New shoes, wheel cylinders, hardware, drums, and hoses. I'm hoping we don't have any drama when it comes time to bleed them.

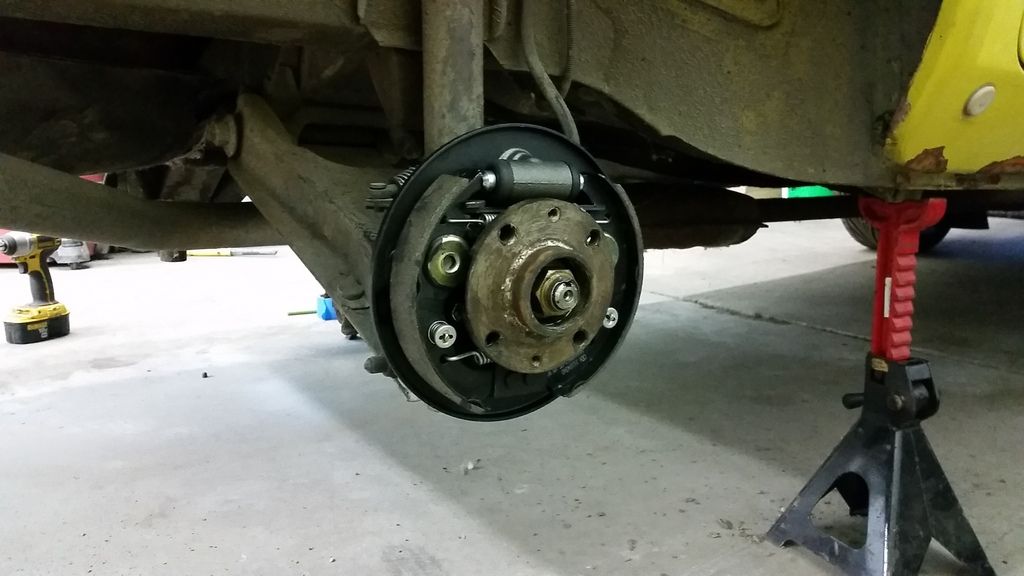
I'm fresh out of brake cleaner, so the drums will have to wait. We'll be giving them a coat of paint before they go on, too. Both sides will need wheel bearings before we roll any real miles on the car, so I'll give the hubs some love at that time.

Powder coat those drums! If you have the time, get some of the high temp tape and cover the friction surface and bearing areas. A couple other options are regular tape and then remove it right as the powder starts to flow out, around 300F or so. Compressed air can be used to blow powder off of areas as well.
Invest in silicone pull plugs. Powder will plug up threads enough to break a grade 5 bolt.
I started coating anything that didn't run away from me when I got my first set up. The best part is no waiting for paint to dry for a day to assemble stuff.
Check out powder365.com for supplies.
In reply to jgrewe:
Huh. I wouldn't have thought that would be ok. I know brakes get impressively hot and that cast iron is quite inert, but I thought that would warp them or summat.
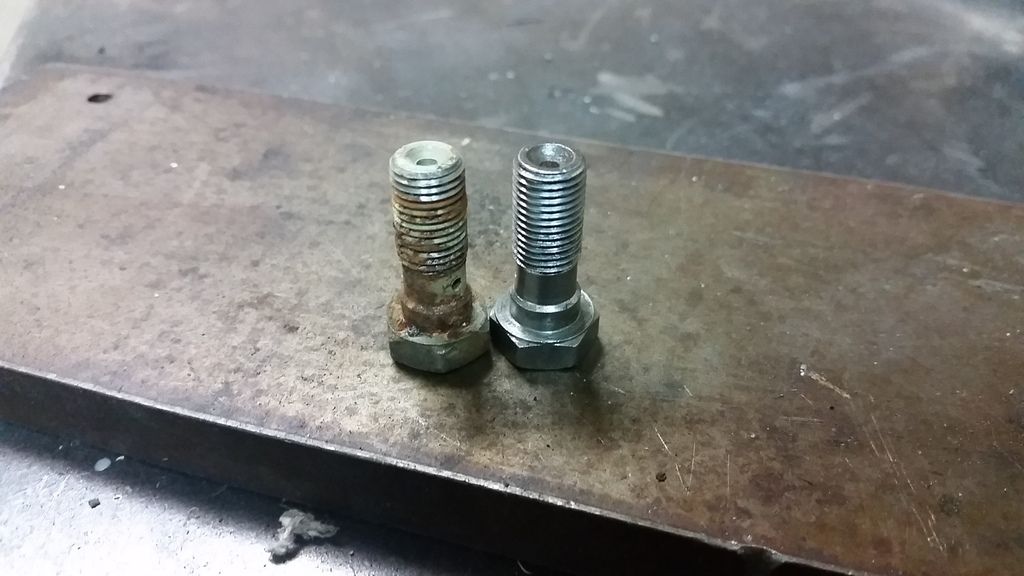
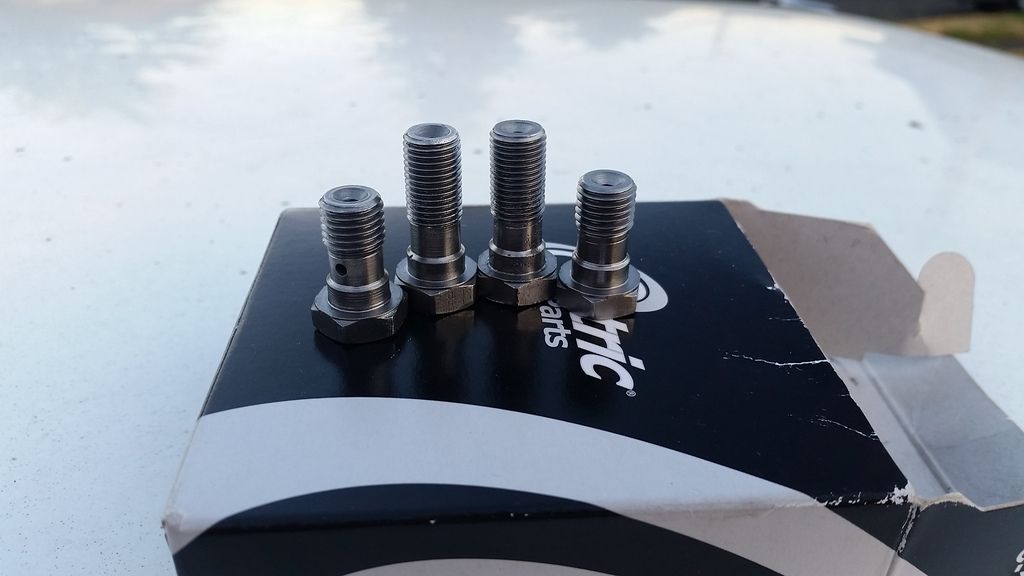
Anyways, I took the night off to recoup and spend some time with the lady, but I did steal a few minutes on my last break to fix the very rusty banjo bolts for the brakes.
One step closer to brakes means one step closer to a first drive.

In reply to Burrito:
How'd you clean those up so nicely?
Thread file, blast cabinet, and a soft (brass, I think) wire wheel.
I'd rather not admit how much time I have into cleaning 4 bolts...
I'm guessing about an hour.![]() Probably time well spent though, IIRC FIAT uses some weird threads on some things. They might be hard to find items. Or, if you have my luck, you clean them up and find they are a dime a dozen.
Probably time well spent though, IIRC FIAT uses some weird threads on some things. They might be hard to find items. Or, if you have my luck, you clean them up and find they are a dime a dozen.
No problem coating brakes. I do it all the time. You don't even need high temp powder for a street car drum.
Radical. I'm trying to not let the powder coating thing get out of hand. You aren't helping. ![]()
The funny about those banjo bolts is two of them were M10x1.0 and the other two are 3/8-24. berkeleying Italia, I tell yas.

The flare nuts on these cars are all M10 with a weird pitch that only Fiats and Yugos used (and I think a fer Ferraris). Very, very, hard to find.
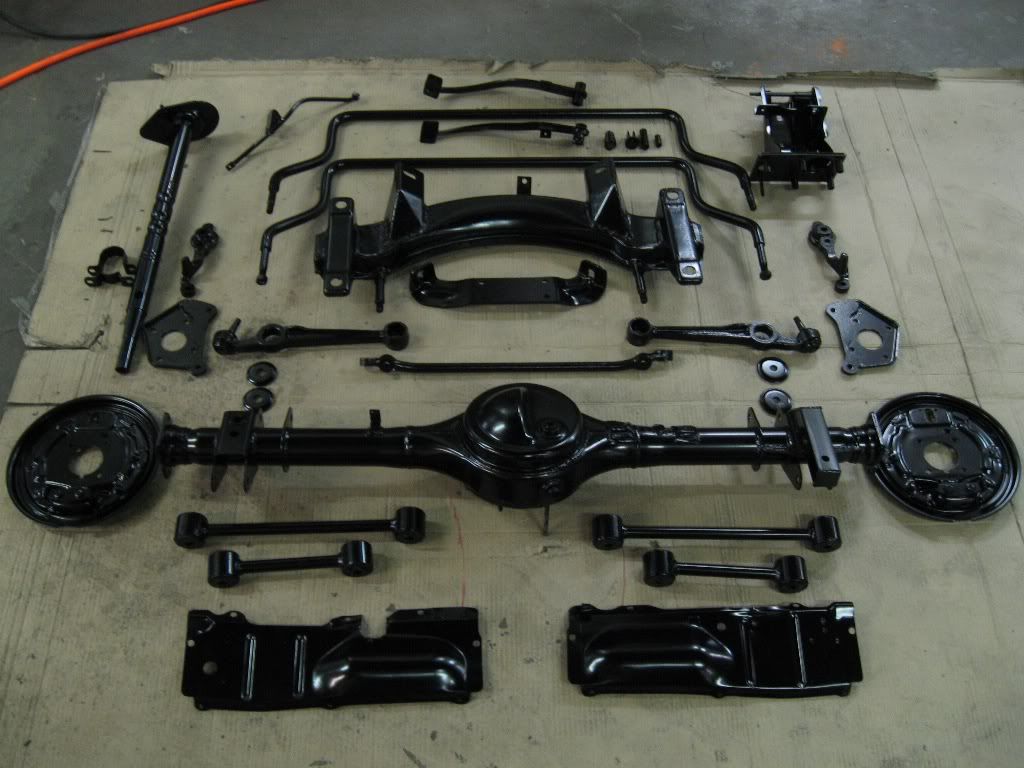
What were you saying about powder coating getting out of hand?![]()
Here is everything that goes under my IMSA RX2. I've got a '59 Bugeye that got the same treatment...
You can ceramic coat too... just sayin'
July is going to be a very busy month. We have something planned for every weekend this month and usually it's an out-of-town affair. We also have guests in from Texas for a week (different from the last bunch). That said, I'm still hopeful for some good progress.
I only had a few minutes to dedicate to the car tonight, but I got the rear drums cleaned up and powder coated.
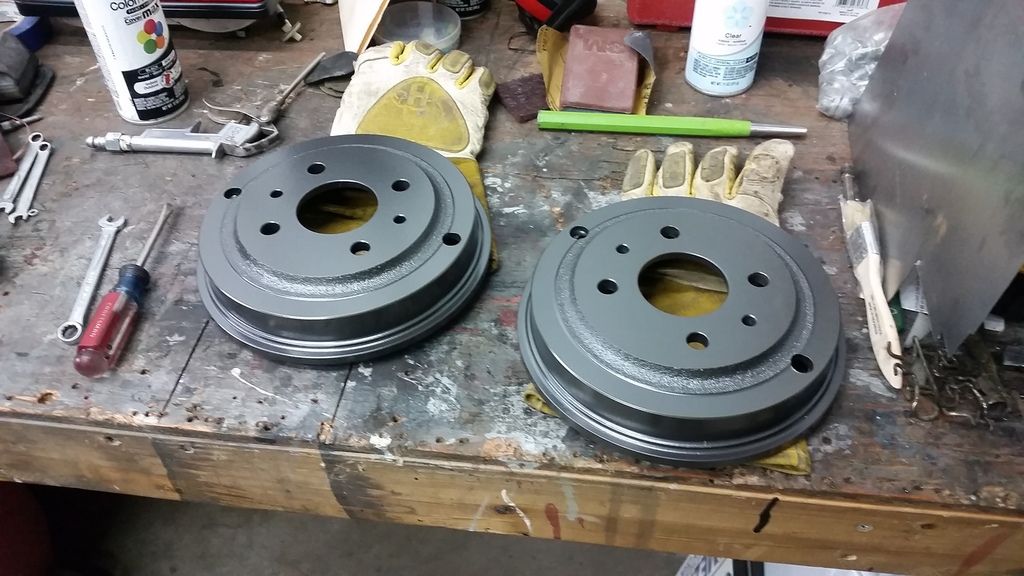
This is Columbia Coatings Cast Iron TGIC. Looks good enough for whose it's for. I didn't know that Prismatic Powders was only a few miles away when I placed my order from the other side of the states...
I've been soaking all of the brake fittings in Kroil for the last week or so and have successfully removed all of the old dry rotting rubber lines without destroying any of the fittings, so, hoorah! I'm giving the lines on the master cylinder a few more days in the juice before I give them a go. Hopefully tomorrow I can call the rear brakes "done".

I got this from prismatic:


Hard to see but it is chrome, then black prismatic tint, then clear. Pretty bitching. I need to get an oven....
Rear brakes are complete, installed, and ready to be bled.
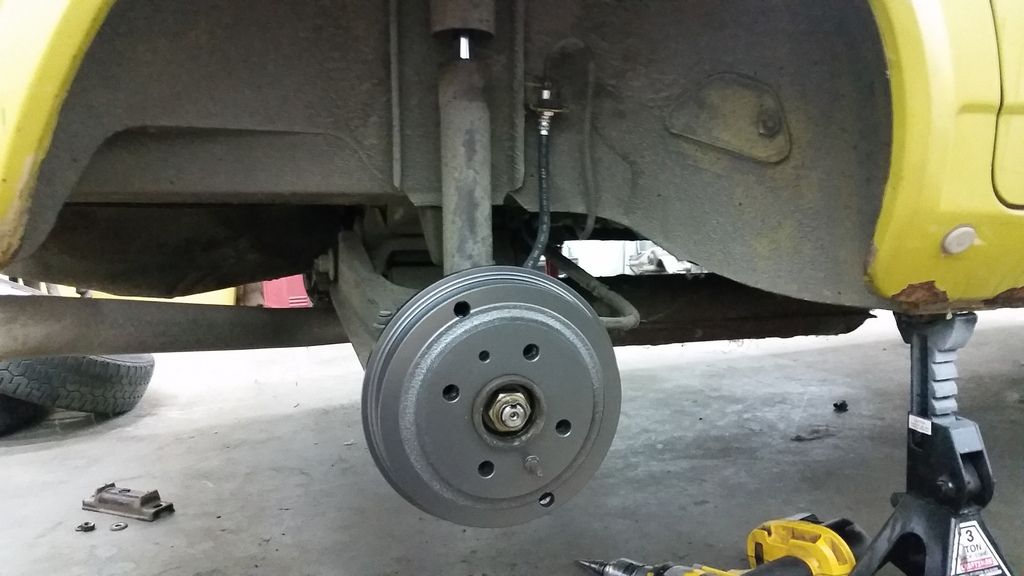
Much rejoicing.
And, because I absolutely couldn't help myself, I tossed on one of the new wheels and moved it up into the arch for the first time.
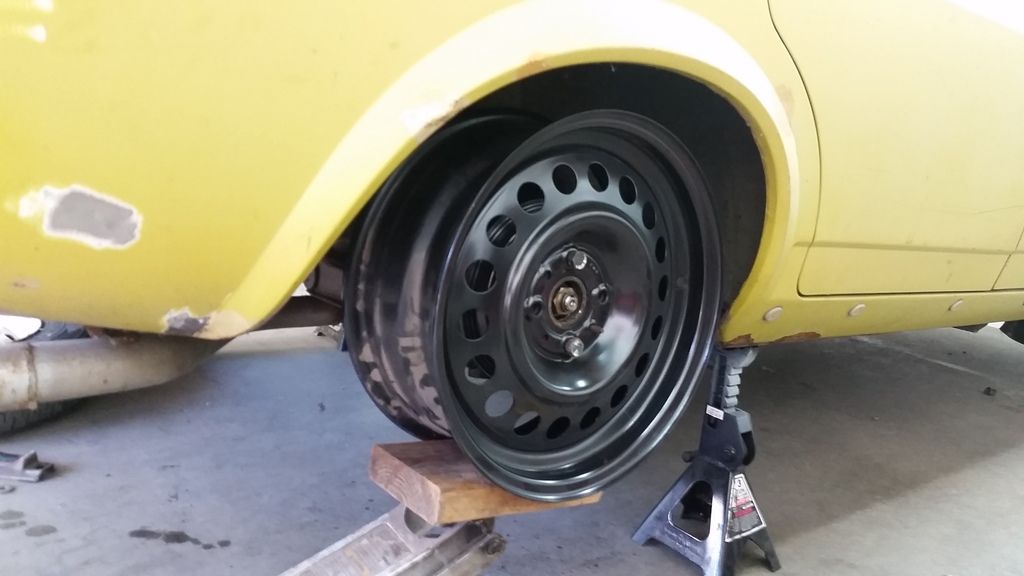
Yep. That will work. They could use to come out a little in the arches, but I have a plan for that that doesn't involve money or spacers. Seeing a wheel up in the arch for the first timr is always a good mojo boost.
Looks like you're right on track to develop a bad powder habit. You will be needing some of this at some point. http://www.bencosales.com/powder-coating-and-aircraft-strippers/b17-powder-coating-stripper
I get mine from a local paint supply store so don't worry about having it shipped in. Call them and see who has any of their products near you and you can save money having them add it to an order. It is the ONLY stuff that works. When it is fresh and above 80F the powder will just fall off in sheets! One droplet on you will light you up in about 2 seconds, not like normal stripper that takes a few minutes.
The car is looking good. I caught myself looking for another X1/9. Must....resist...
Looks great with those steelies. Will it rub at all once you get an actual tire on there? Looks like it should have tons of clearance even at the show-off ride height.
In reply to ssswitch:
I'll be rolling the fenders before it goes off to paint, so we should have plenty of clearance for tires, even at showoff height. ![]() We're going to steal the tires off of the VTOs to get this thing on the road, so it'll be wearing 195/45-15s (which are very nearly the same diameter of the stock setup).
We're going to steal the tires off of the VTOs to get this thing on the road, so it'll be wearing 195/45-15s (which are very nearly the same diameter of the stock setup).
We started stripping the wheels tonight in preparation of powder coating. The blast cabinet is on a mezzanine at work and we're experiencing something of a heat wave right now. The less time I can spent hunkered over a blast cabinet in nearly hundred degree temps, the better. The way I see it, any time spent drinking beer, dorking around with my buddies, and playing with paint stripper is time not spent being miserable and sweaty.
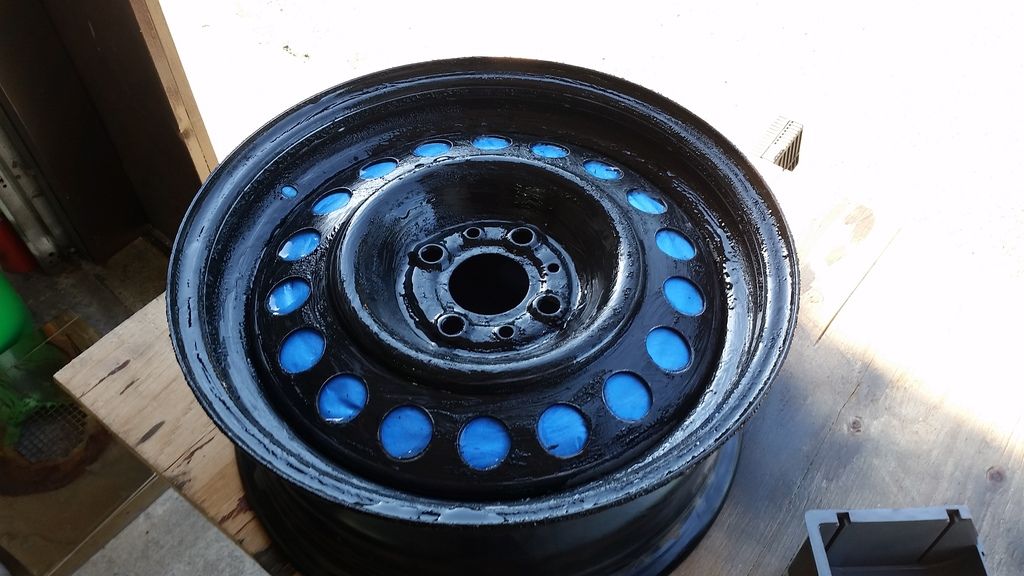
We started two wheels tonight. I wondered what would be better, scuff then stripper or stripper straight out of the box. For any one who might still be reading this, the answer is straight out of the box.
Since last weekend I've been feeling a little indifferent on the wheel silver powder coat front. I love it 95% of the time, but I feel like there might be a better look for this car. I kinda want beauty rings, but I really don't want cheap ABS plastic beauty rings. I also really don't want to spend the coin on the real deal. I think what I really want is a polished lip.
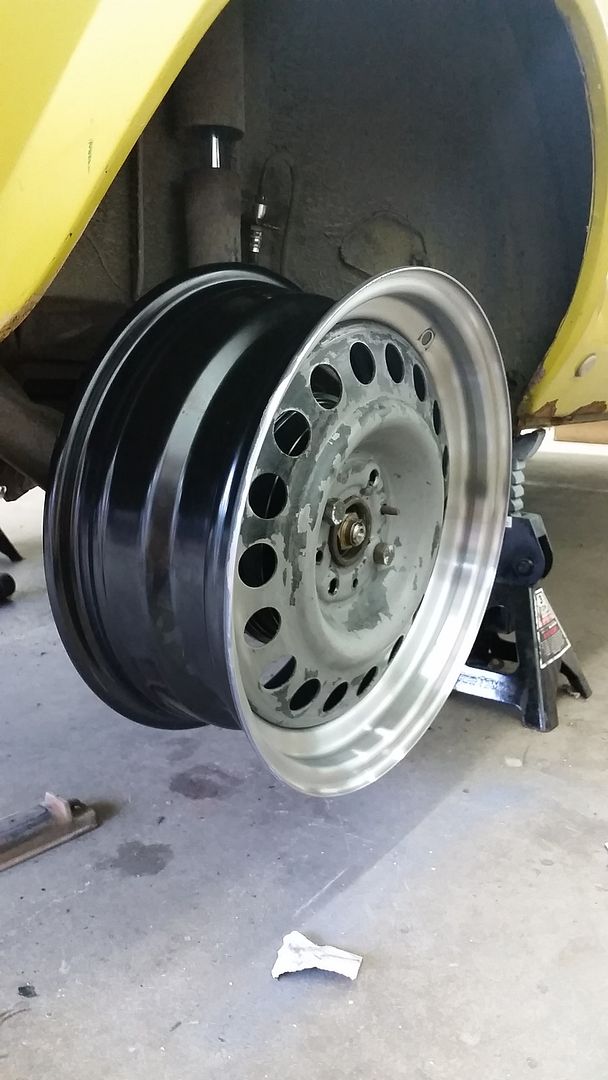
So, I'm going to try something a little different. I'm going to sandblast the center of this wheel for the raw look, but polish the lip. I'm not looking for a mirror finish, just a difference in texture. I'll then shoot the entire wheel in a high gloss clear powder, possibly with a hint of silver.
Thoughts? Criticisms? Concerns? I would really like some feedback on this. So far my bicycle friends say it will be bad ass, and my car friends say they have mixed feelings. I'll be doing one start to finish before wasting too much time on what might turn out gaudy and undesirable.
Cheers.

In reply to Burrito: Ha, I was just coming here to ask if white wheels from the Russian gangster sedan were in the plan. I think your plan is outstanding. Raw metal can be way cool, especially when you can still have different treatments. I studied metals in art school, and using different processes as design elements always fascinated me. A prime example is the raw titanium expansion pipes on motorcycles. The rainbow is way cool. My opinion is worth, of course, exactly what you paid for it.
Question; dog dishes, or bare steelies? Not sure how all 3 will jive.
Polished lip could be really cool. How would you do it, just chuck it in a lathe and set a polishing jig up?
I feel like you would definitely need something to aesthetically balance the polish out otherwise the car's wheel will look like a bright ring from far away and then the rich detail of the steelies will disappear even more into all that black.
I think the idea of sandblasting the centre is probably the right one, then, as long as the roughed-up surface doesn't trap dirt after the clear powder (does it go on smooth?).
I wonder how it would look with kind of a diffuse grey like on header paint, or go the other way and do a slightly complementary colour in metalflake trapped under clear coat instead of powder.
Otherwise, a dog dish (or baby moons) are always cool.
I like the plan for different textures. The only thing I can add from powder experience is don't bake the wheels face up. I did this on my stock RX2 steelies after hitting them with wheel silver. The crevice where the wheel center meets the ring will grow bubbles and screw up the whole project.
If you think sandblasting one layer of powder off is tough, try two! I use aluminum oxide in my cabinet and it still took a couple hours to get the wheel silver and low gloss clear off just the face of the rim. (see previous post about B17, purchased shortly after that fiasco)
Also, when coating silver that needs a clear, the part has to be absolutely spotless with no trace of anything of color on it. I have blasted stuff extra carefully and have had stuff bleed through after clear is applied. Silver won't hide anything. I did a set of Lycoming valve covers for a friend's airboat and previous paint that was not visible to the naked eye caught in the stamped letters on the cover showed back up after they were cleared. I've stopped doing silvers for other people.
Continuing on with the mechanical stuff has brought me to lowering the car. First up was the rear. I'm planning on fabricating a new spring perch at some point, but for now we are just going with the tried and true coupling nut method, as ghetto as it may look.
First step was to knock out these studs.
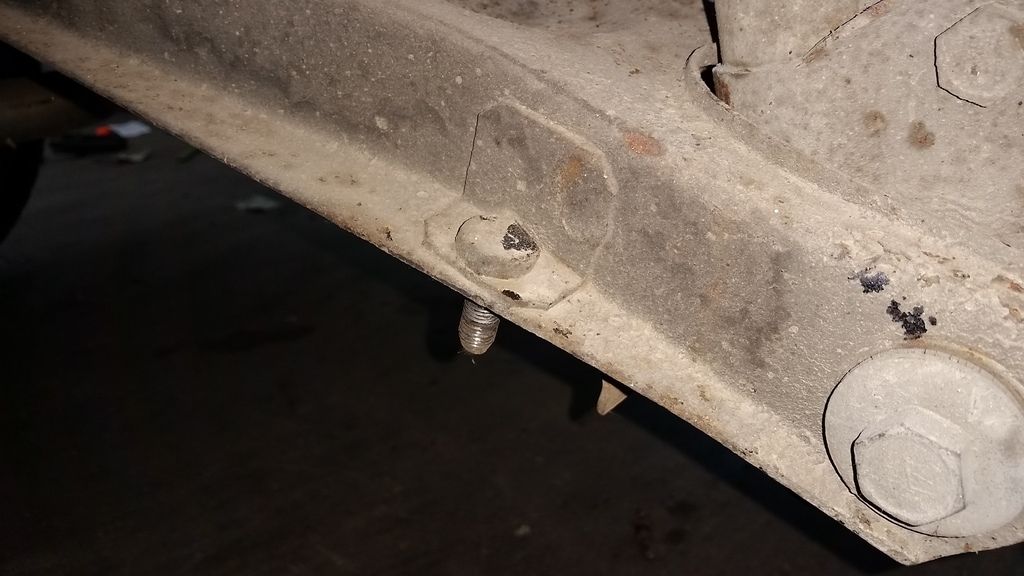
Which involved a fair amount of cutoff wheel and hammering, but all four came out without incident.
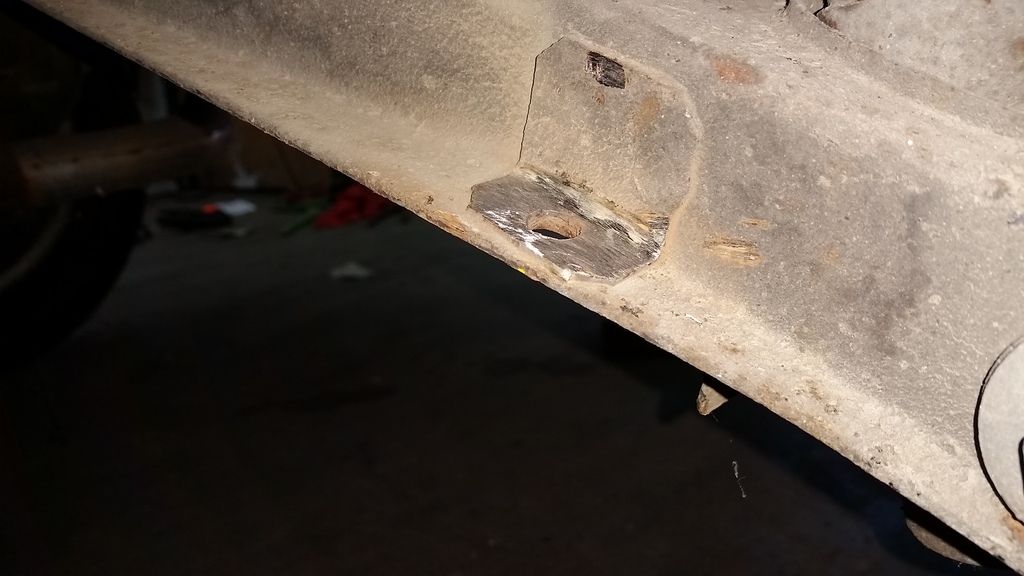
Then I sourced some 3/8-16x1.75" coupling nuts and hardware to match. This should lower the rear by a little more than 2".
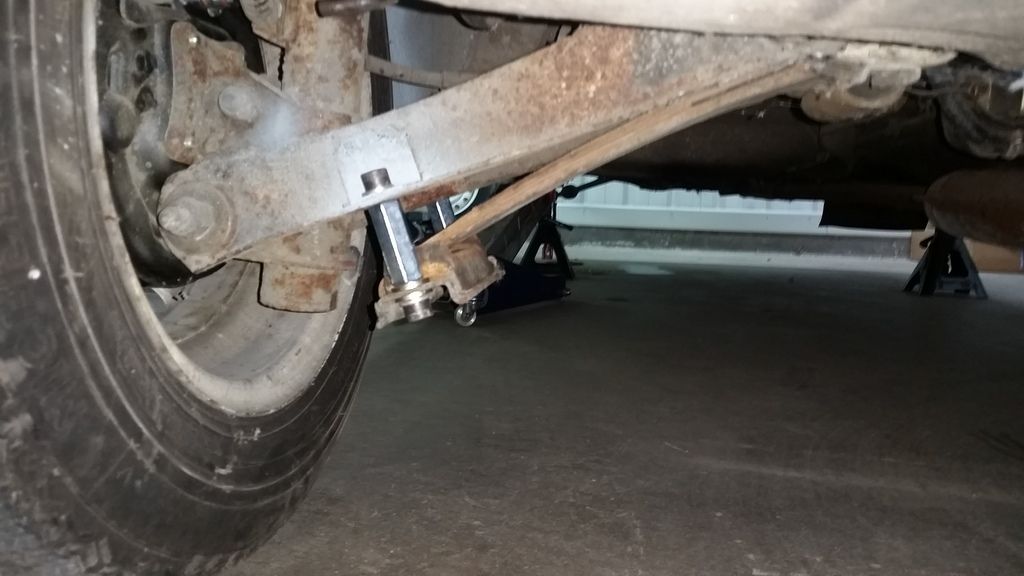
Yeah, pretty cheesy, but it works. I'll be putting the wagon rear spring in before too long, too. I expect that to stiffen things up and raise the rear back up a little bit.
Up next is the front. The Internet told me to cut 2 or 2.5 coils. Yeah, berkeley that.
Trent/Ditchdigger gave us a really awesome wedding present. A pair of NIB Bilstein Sports, some rabbit front strut tubes, and enough coilover parts to do 2 struts. That's some serious friendship right there. ![]() These are mostly boomerang parts: I sold the coilover pieces and strut tubes to him for his Triumph project about a year and a half ago. The strut tubes came off of the Scirocco.
These are mostly boomerang parts: I sold the coilover pieces and strut tubes to him for his Triumph project about a year and a half ago. The strut tubes came off of the Scirocco. ![]()
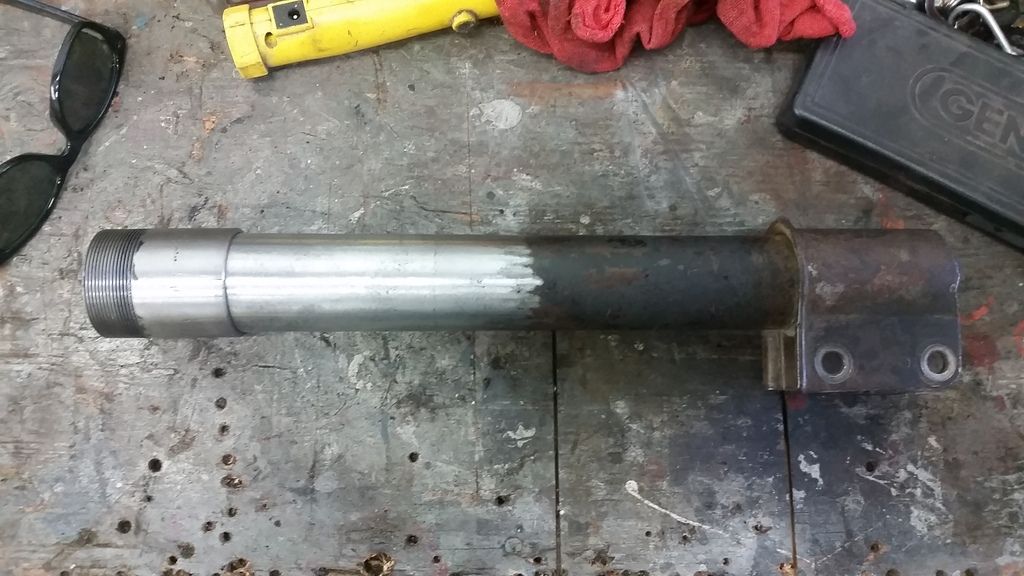
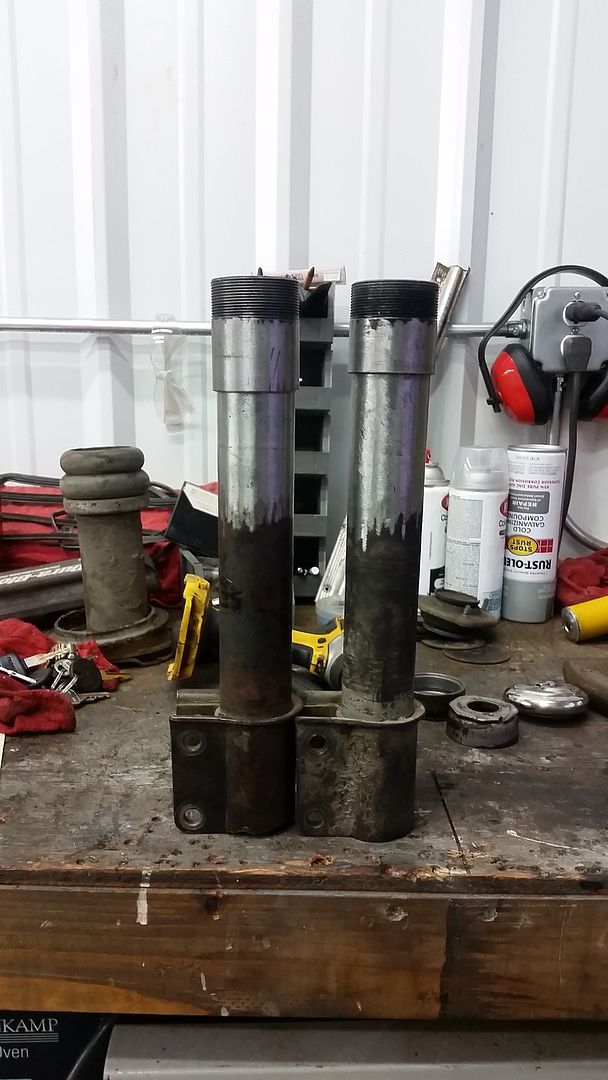
So, here's a Fiat 128 strut tube (left) next to a rabbit strut tube (right).
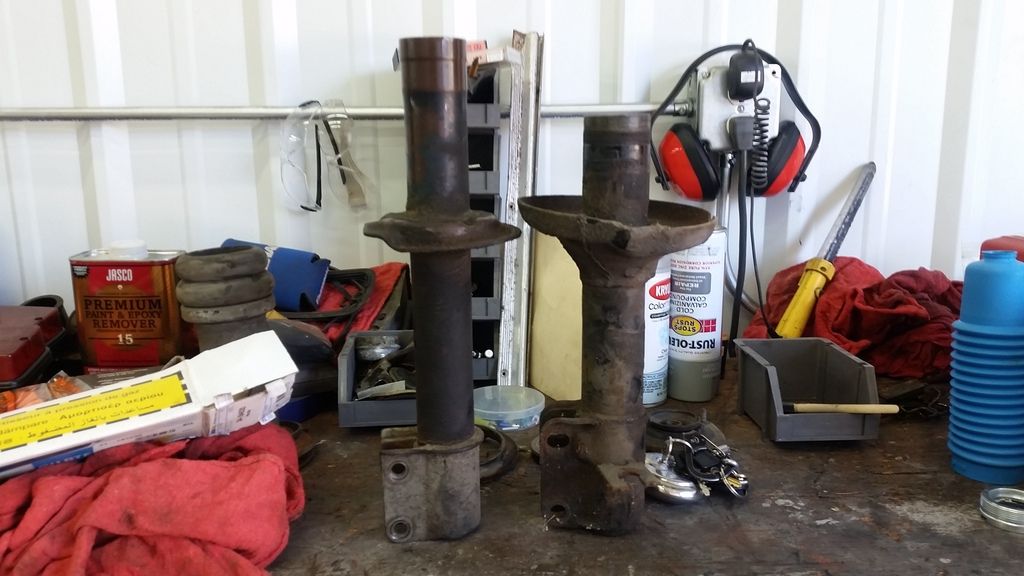
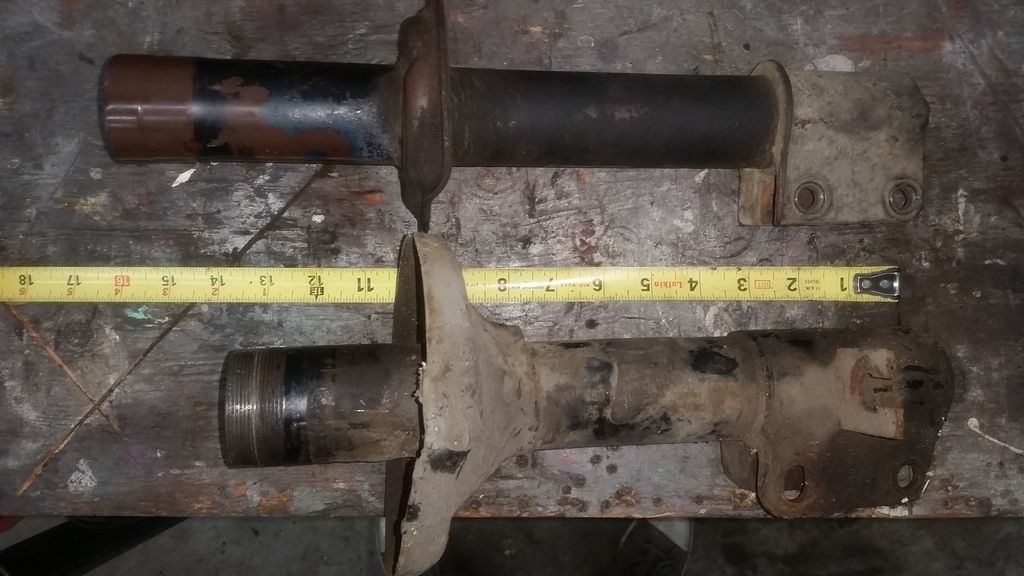
Rabbit:
128:
As you can see, there's quite the difference in height.
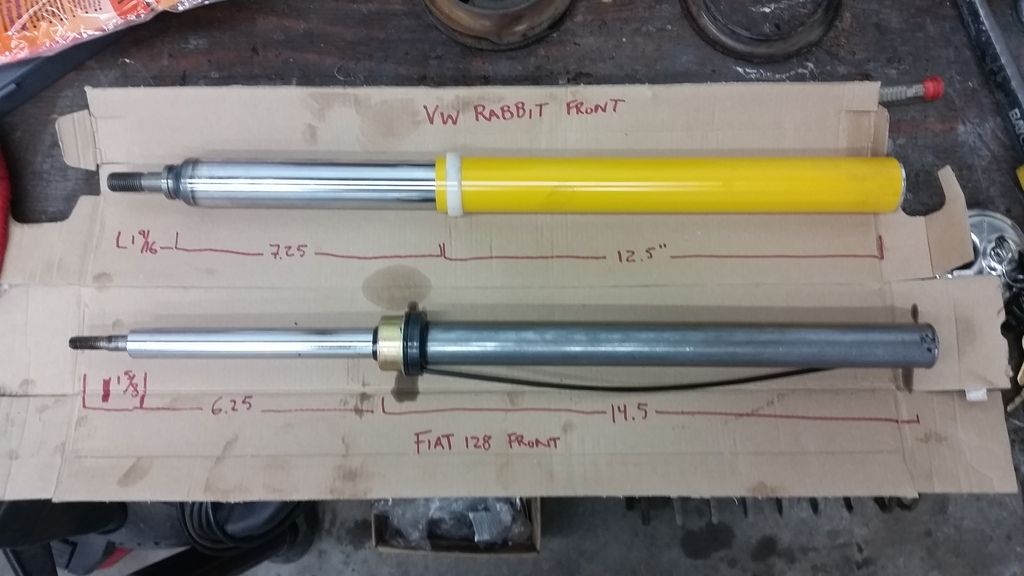
Here's the two inserts side by side with approximate dimensions.
My first thought on combining these two was to cut the bracket that attaches to the knuckle off both tubes and weld the Fiat bracket to the VW tube. But that looks like a lot of weld to cut through, and there's quite the discrepancy in outside diameters.
On to plan B:
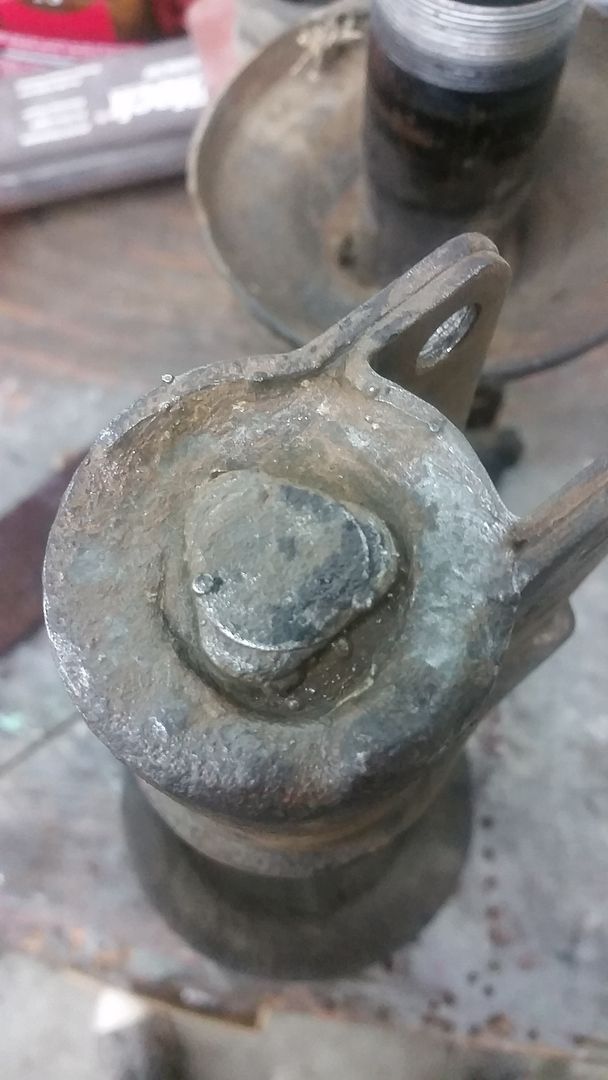
Remove spring perch from Fiat strut tube.
Grind it flush.
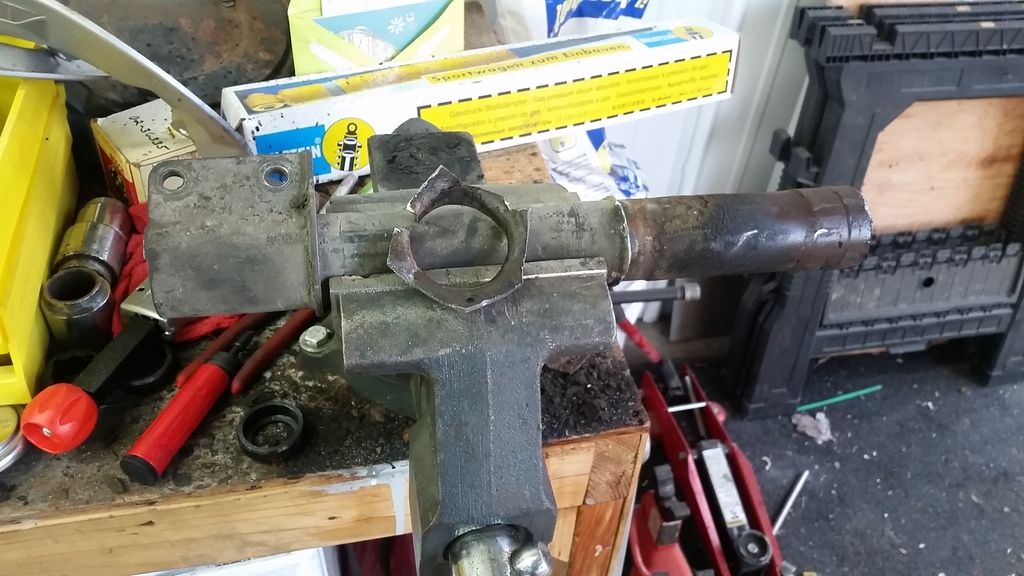
Bifurcate the Rabbit strut tube with the gratuitous use of a hacksaw (because the sawzall is all the way over there).
The VW strut tube has 3 different inside diameters, not 2 like I thought.

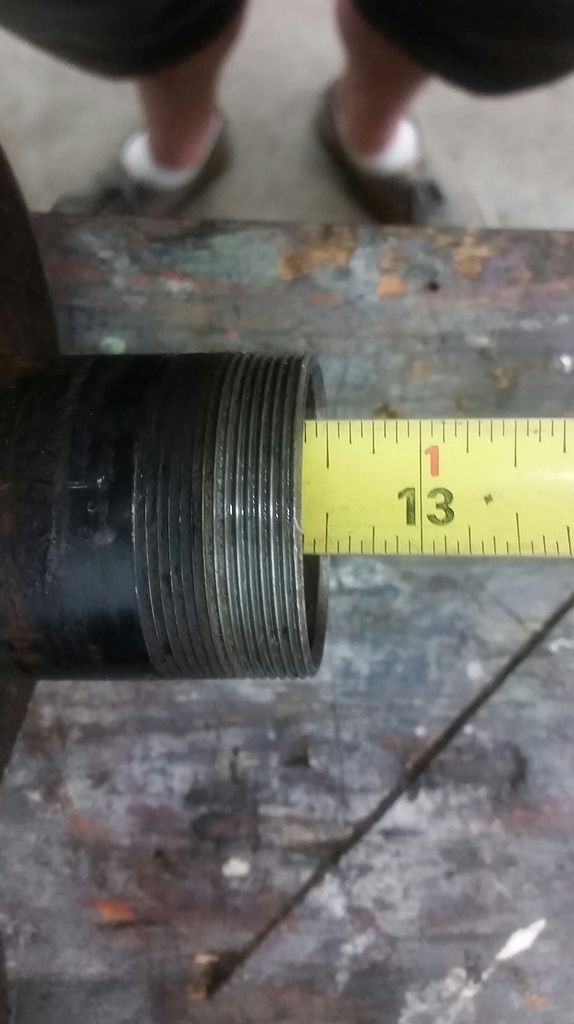
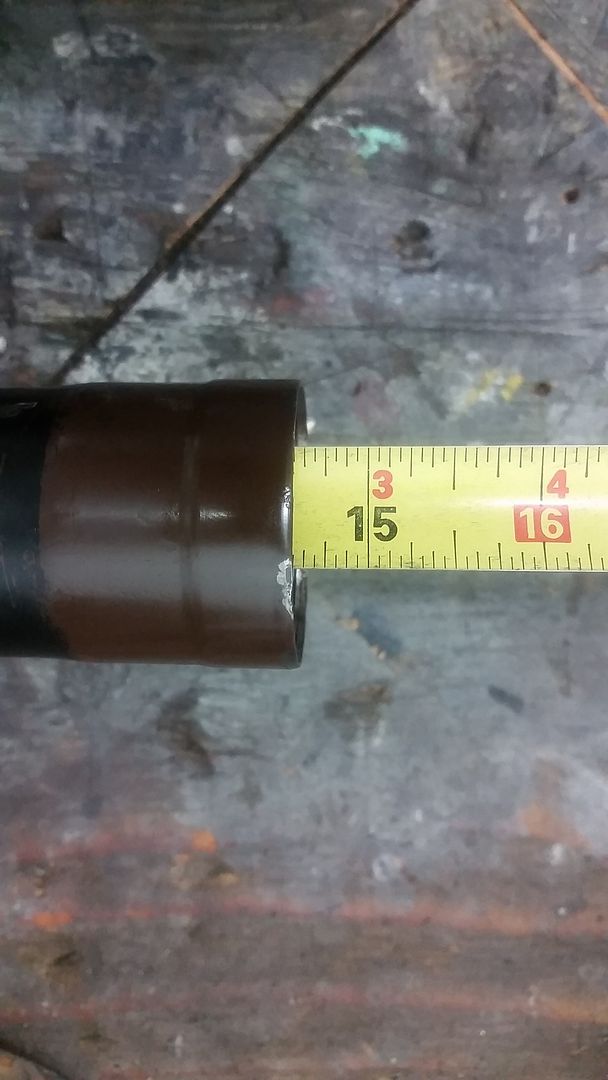
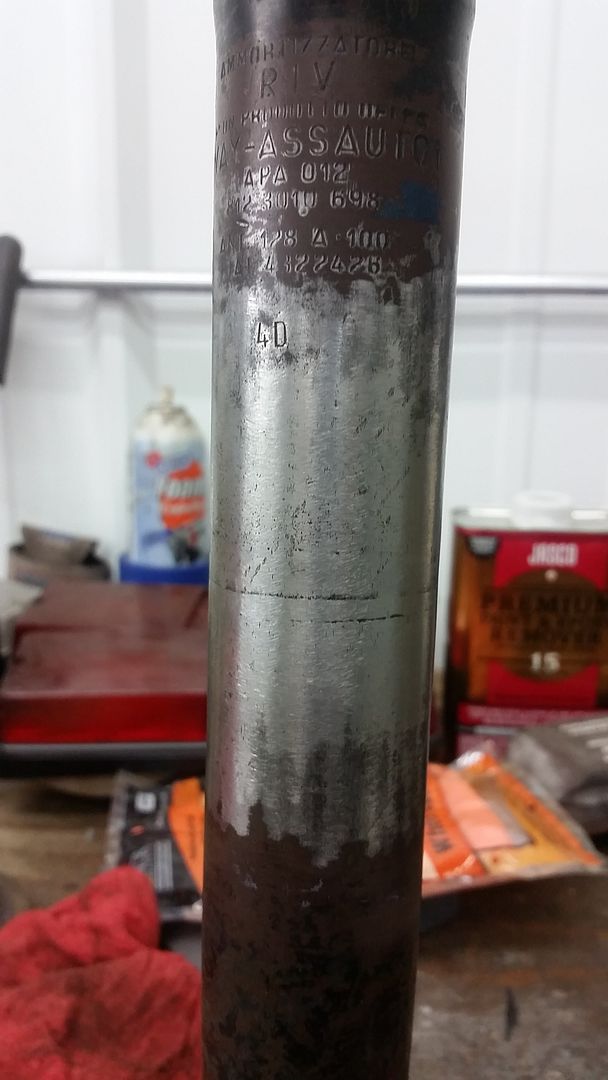
Toss everything but the top 2-3/8" of the VW strut tube and square up the cut on the belt sander. Stuff a bunch of crap under your calipers to show the nice Internet people the ID.
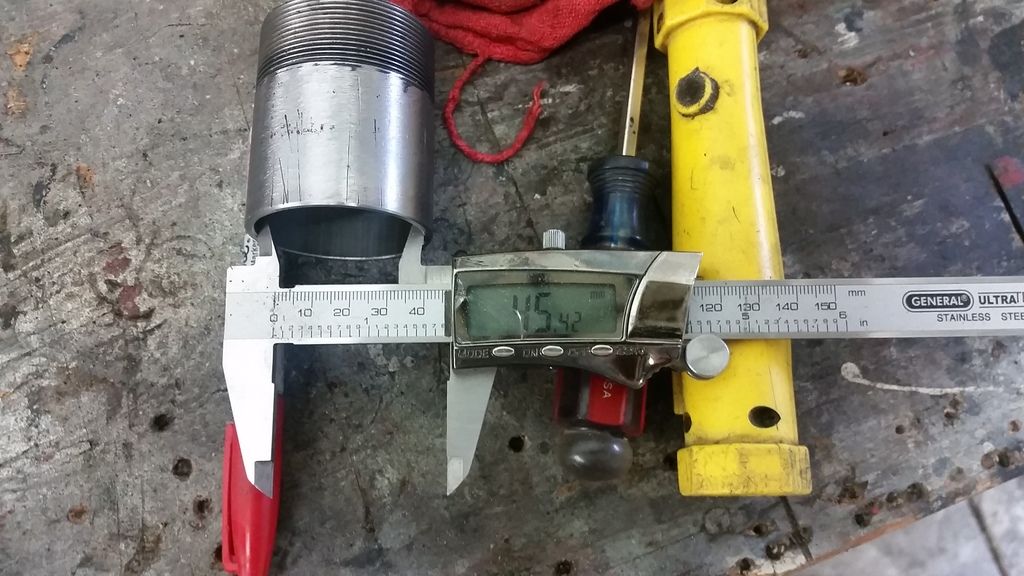
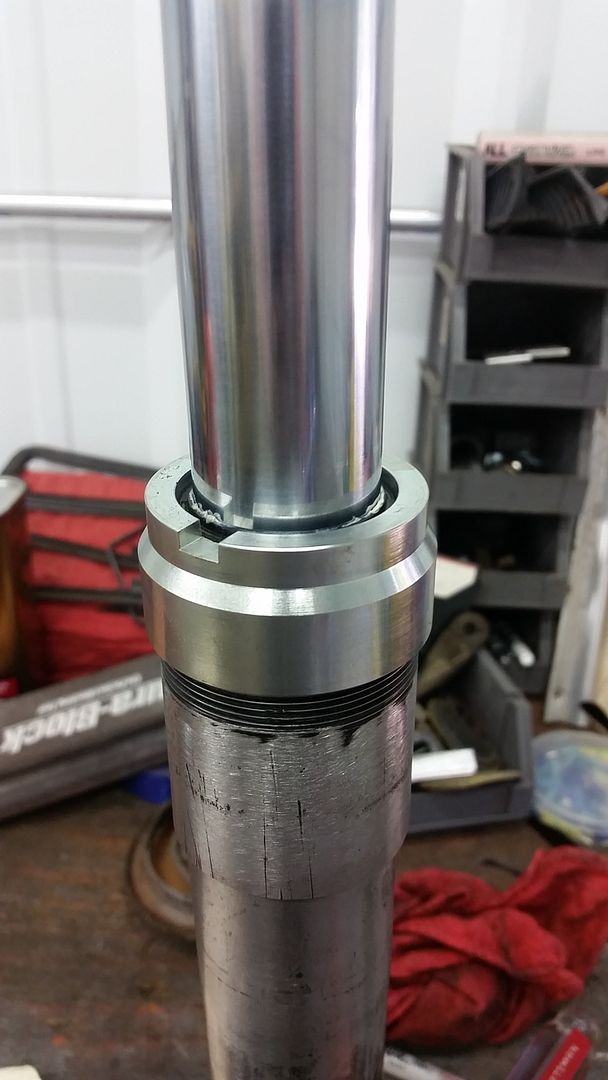
Do the same for the Fiat strut tube, and get really, stupidly, impossibly lucky.
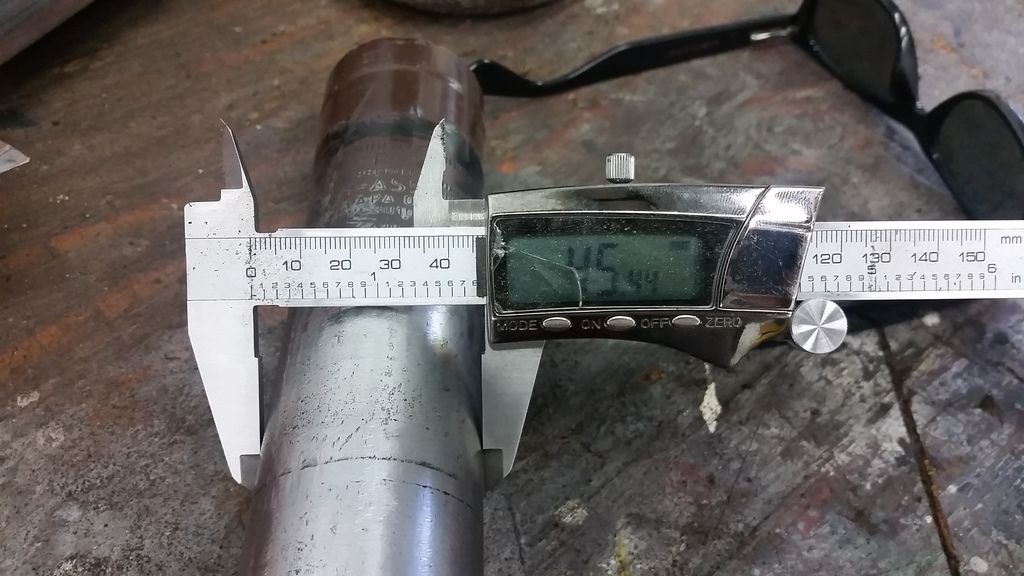
Test fit, just to make sure this is actually going to work. I honestly couldn't have engineered a better press fit.
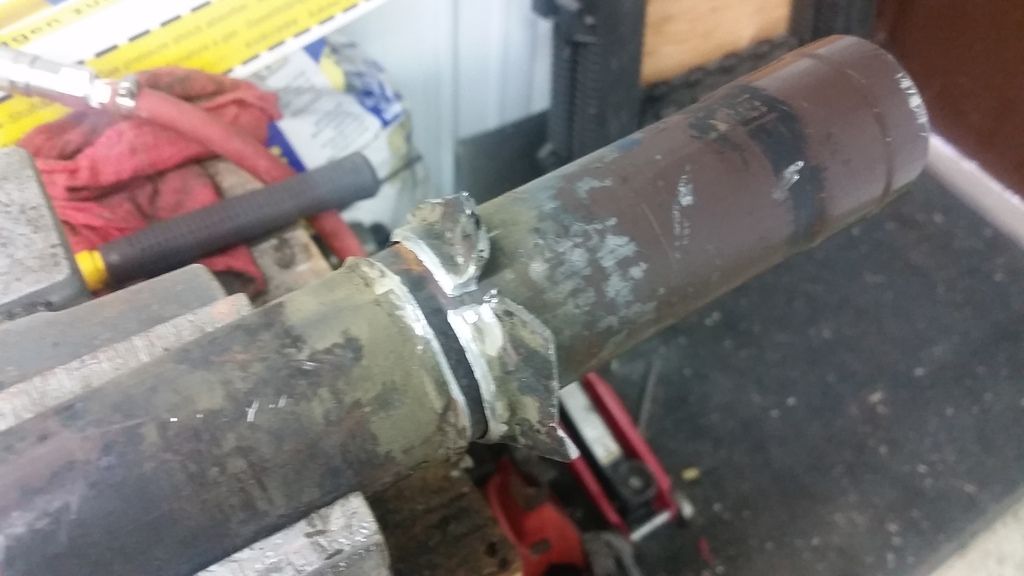
Do some quite math and cut the Fiat strut tube to the right length. Berkeley up the math and shrug. I ended up with about 7/16-1/2" of overlap between the two pieces instead of the 3/8" like I was shooting for.
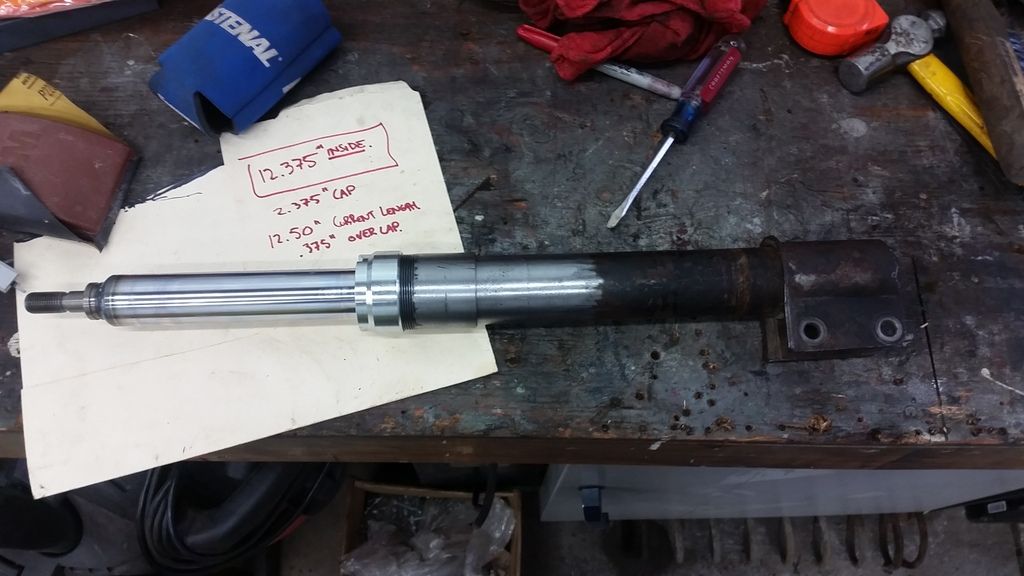
I'll take it in to work and weld the perimeter before moving on to the new spring perches. I also need to get the other strut up to this point. I'm quite pleased with how easily this is coming along.

That was impressive!
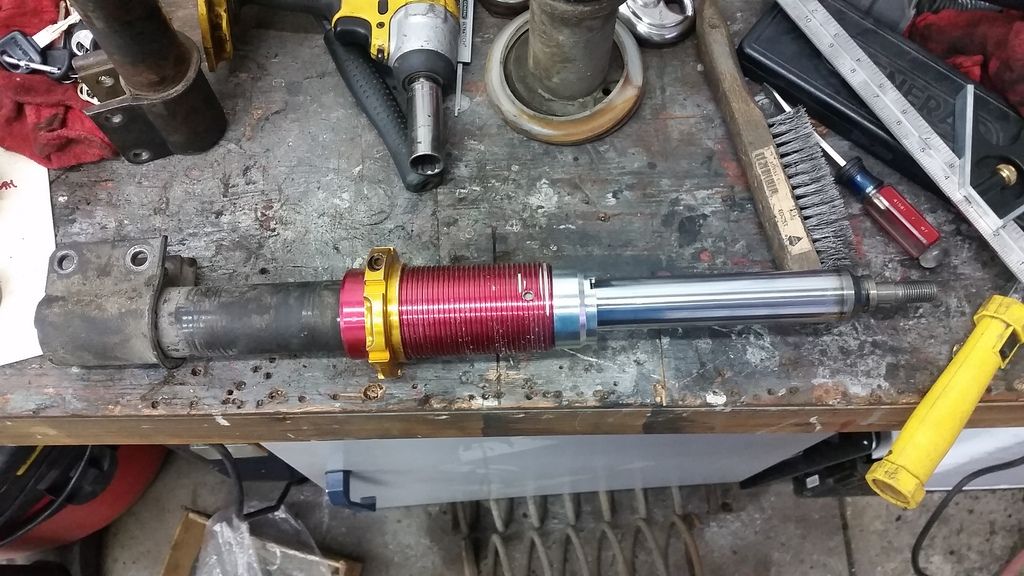
Did the other strut last night. Pretty much the exact same process, but with a sawzall and a pipe cutter.
Had to move the cut on the Rabbit strut up a little to get the pipe cutter to start square. This will be hidden under the threaded coilover sleeve, so it is a real non-issue.
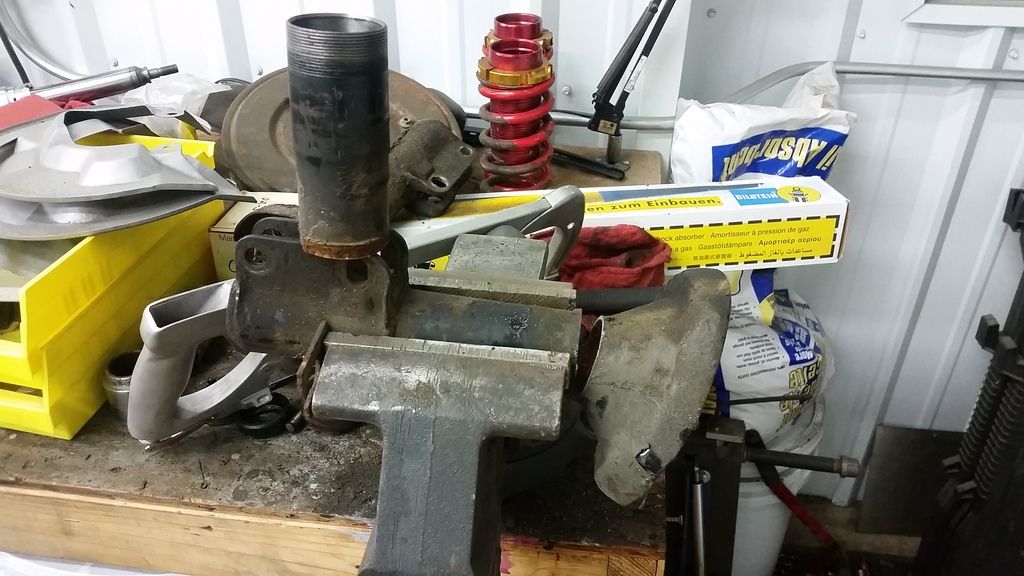
Just down to welding up some perches and where the tubes meet and these will be ready for sandblasting and powder coating.
Here's everything you don't need to make short tube 128 coilovers. ![]()
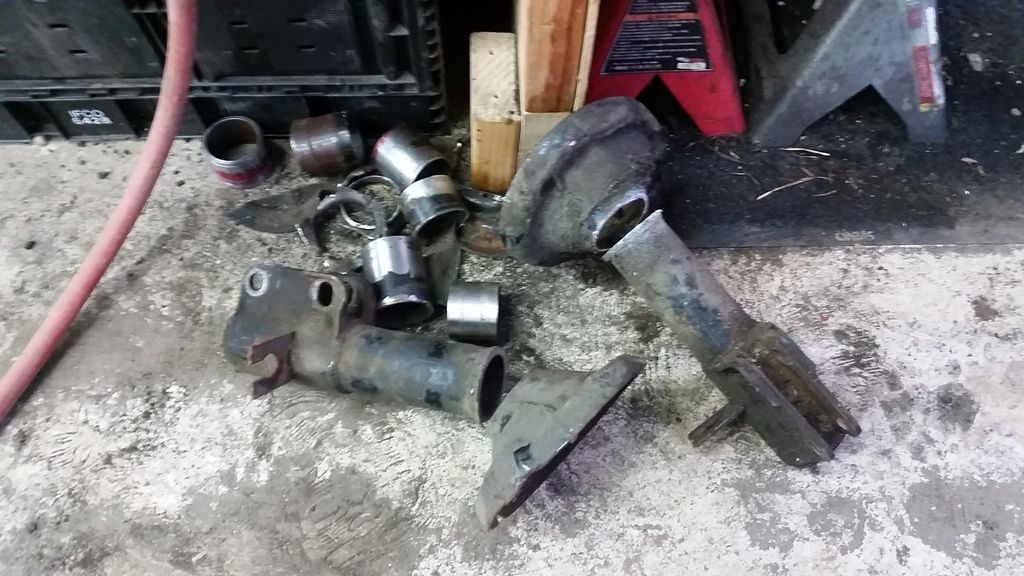
Hopefully tonight is wheel powder coating night.
You'll need to log in to post.


