1 2 3 4
therealpinto
therealpinto New Reader
3/9/16 10:12 a.m.

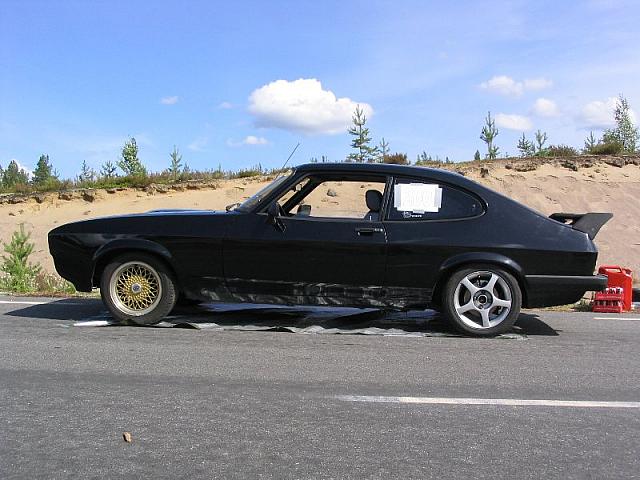
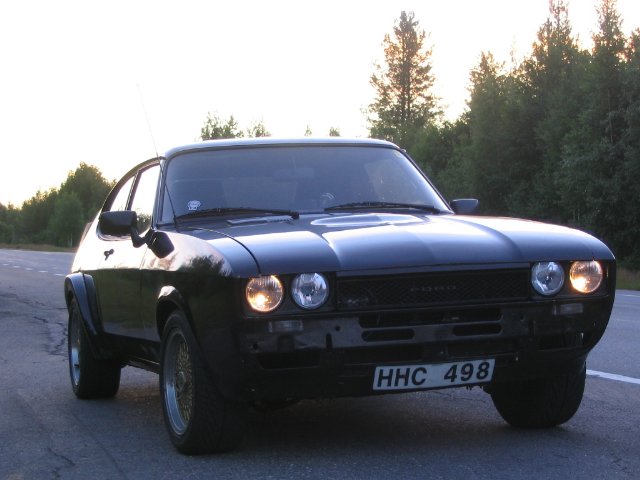
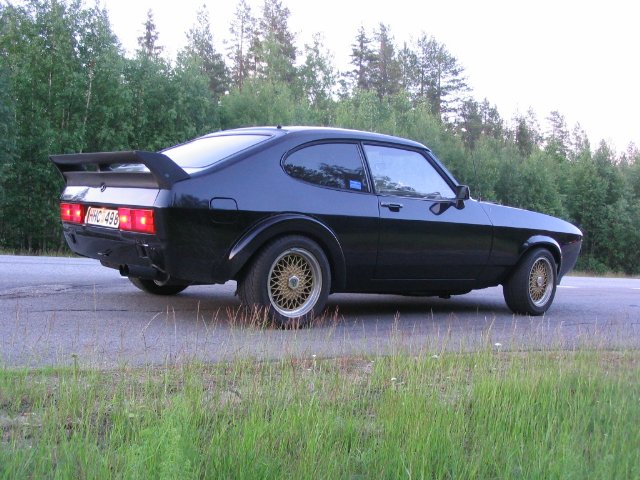
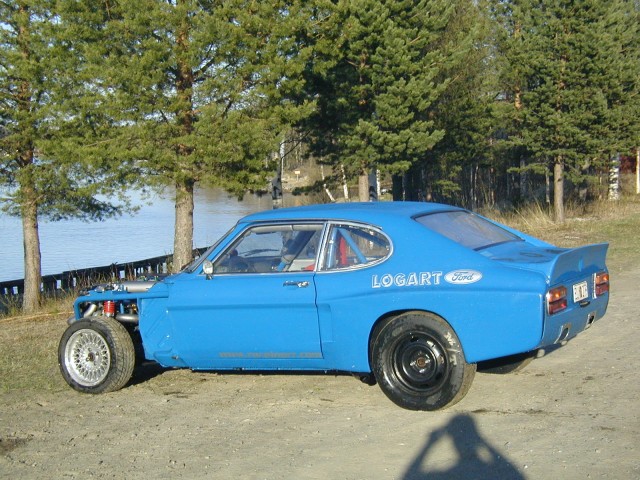
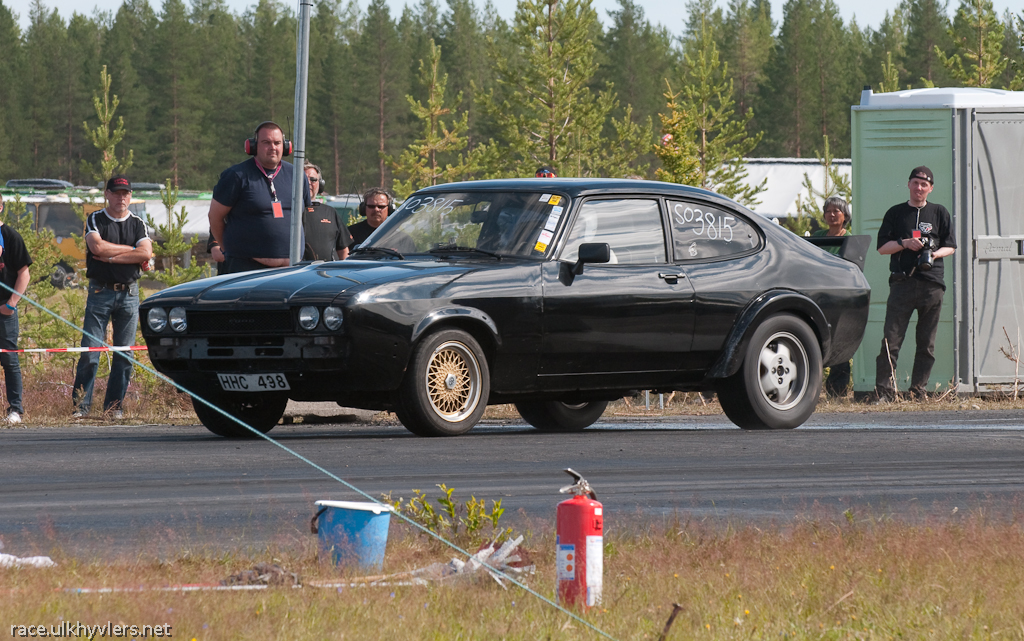
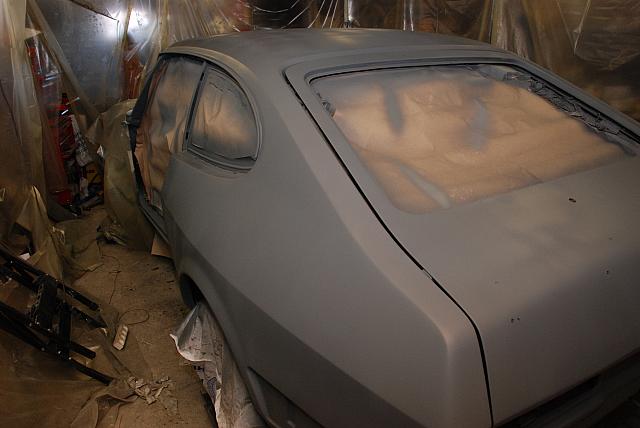
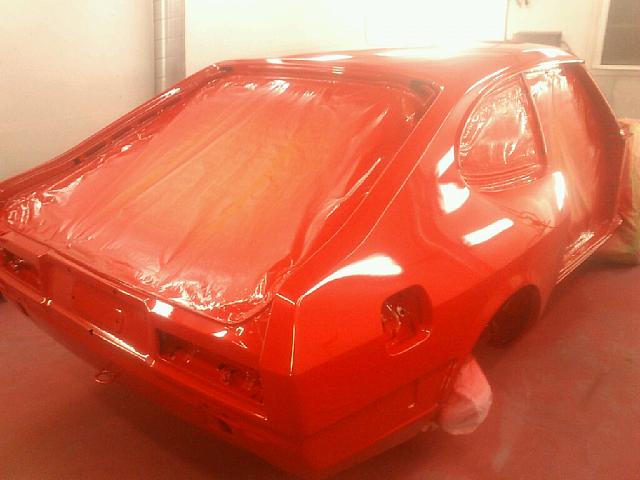
Yes, the MkI body works so well with the flares...

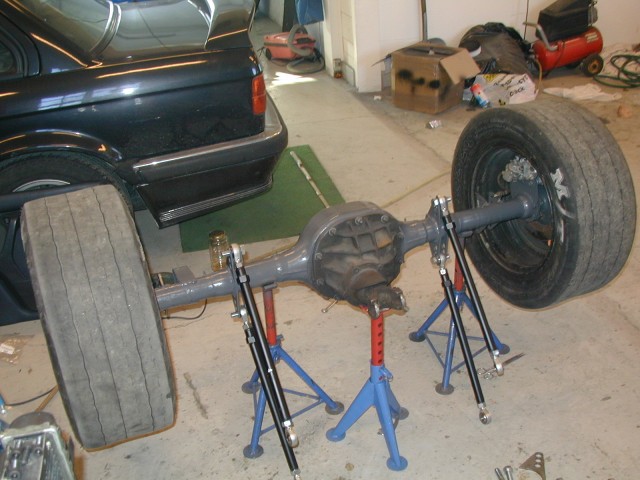
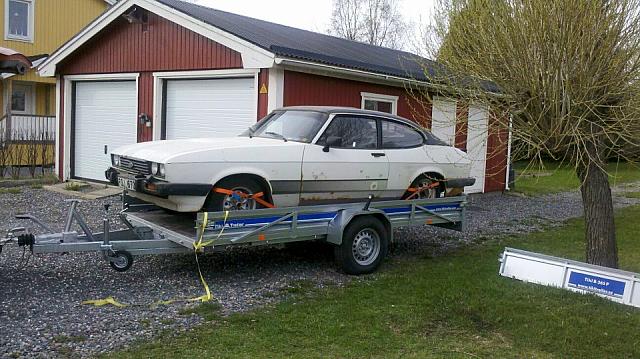
The Sierra XR4x4 that donated the engine block for Tomas Capri was still outside his fathers tractor workshop. That got me thinking - it had an LSD rear end, and Tomas would gladly swap that for my work on his car. Free LSD, how hard can it be to fit a Sierra rear axle to a Capri?

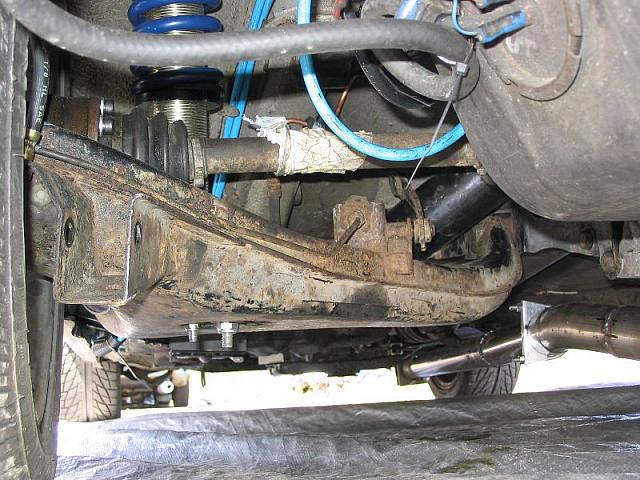
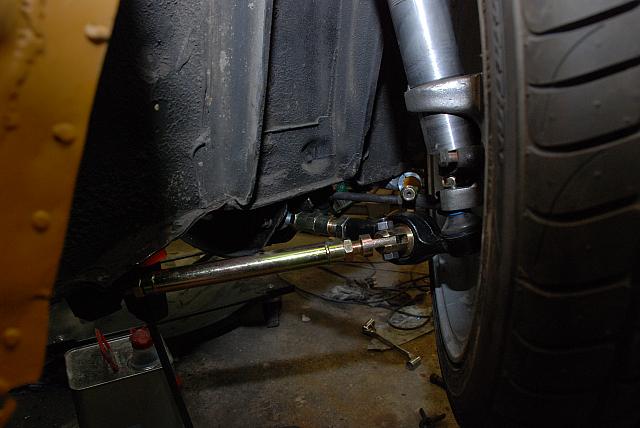
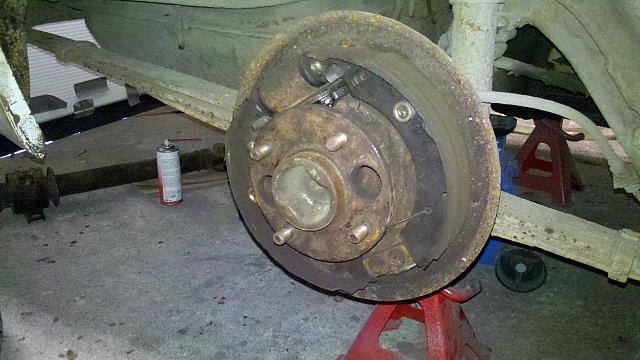
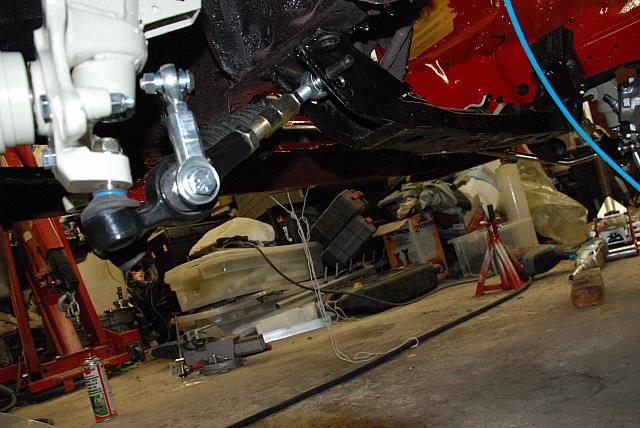
I took the parts home and started to measure it up. Not impossible, I deemed... So I started to cut holes. As you do.

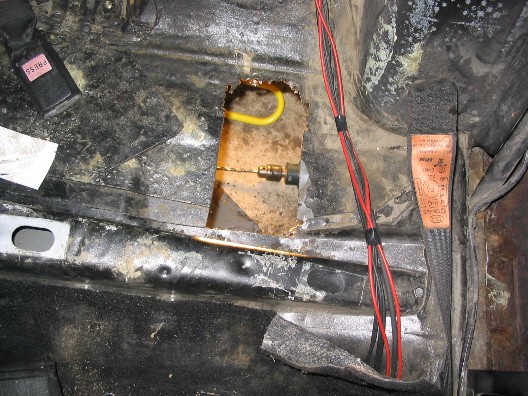
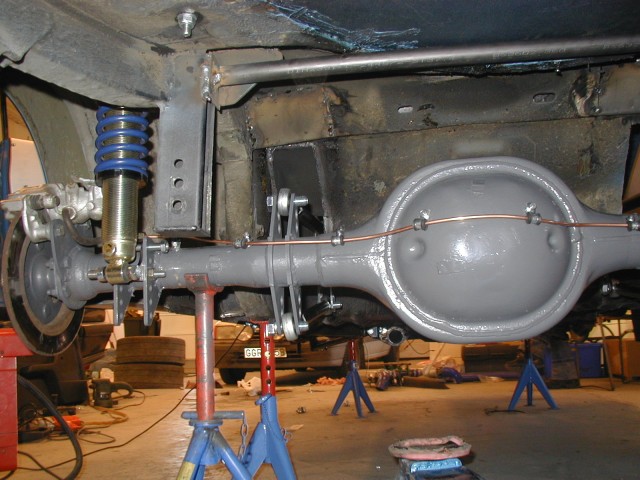
Then, I tried to fill them with something to bolt the Sierra beam to.

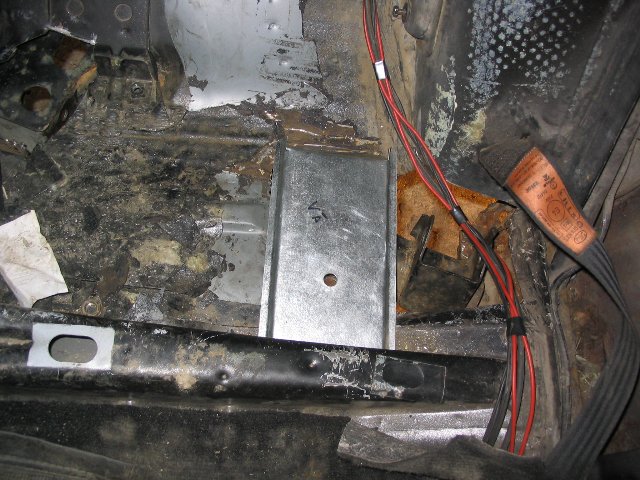
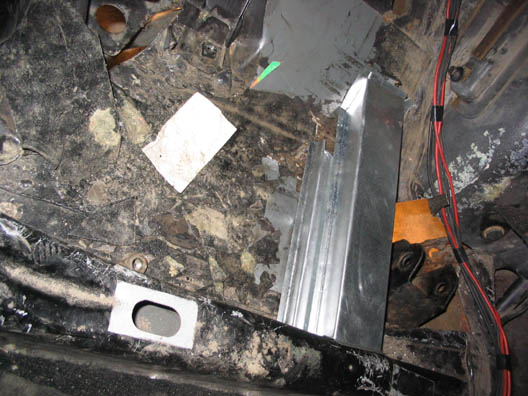
I wanted to make sure I could get the car low enough, that meant more fabrication that really necessary. The mounting points are something like 15-20 mm above the Capri standard floor line. But I reasoned it is always easier to space the beam downwards if necessary.
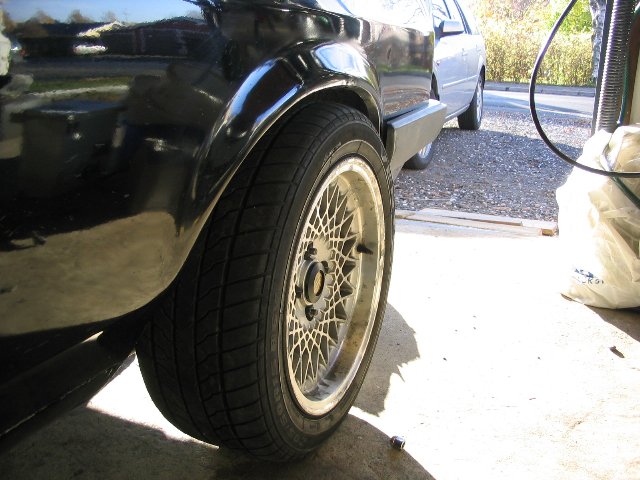
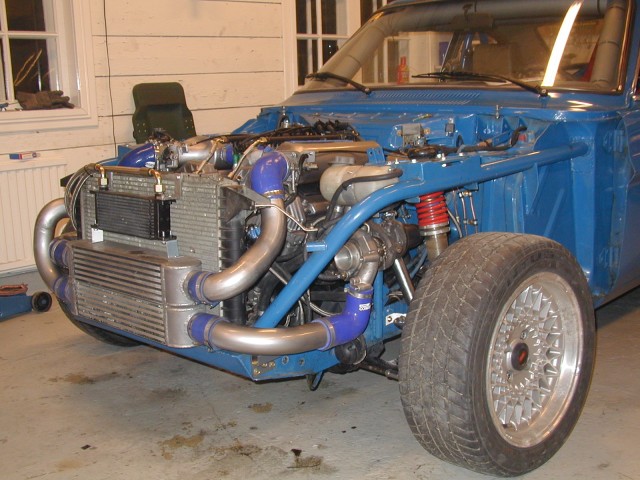
Clearance check:

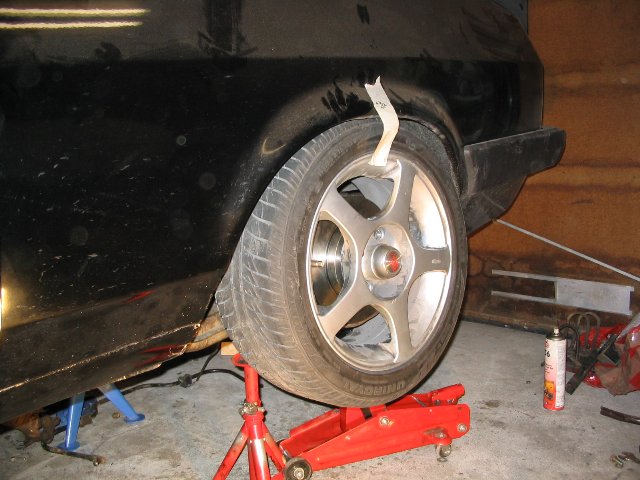
With Sierra wheels it would just clear the arches.

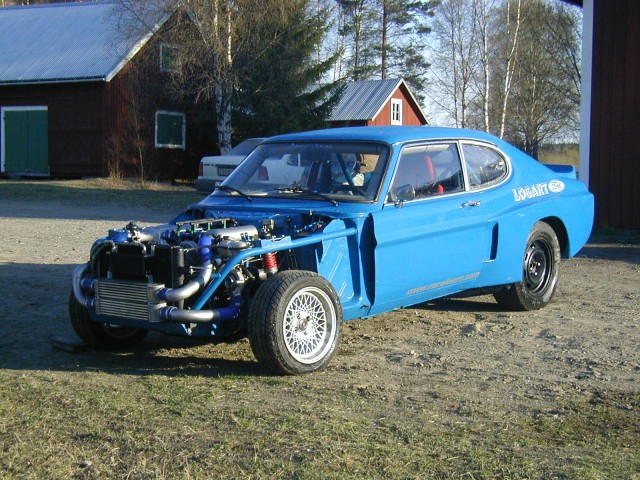
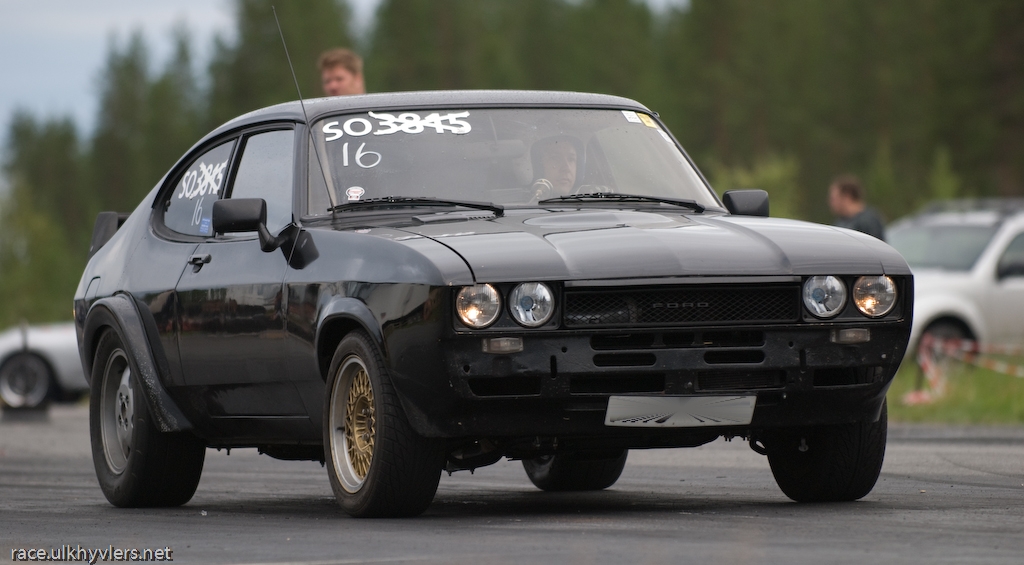
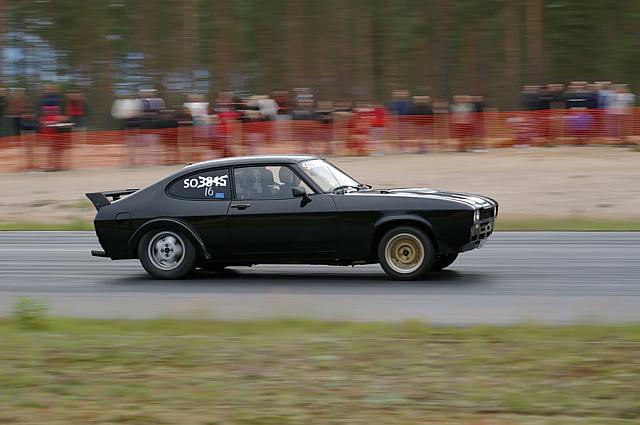
This was April or May but still lots of fabrication to do before the car would run. I had set a deadline for the local dragrace, in mid-July, and I got the car running just a couple of days before. But it did run. The LSD was a bonus but I had issues with wheel hop. And the wheels I used were Tomas old front wheels, running narrow tyres.

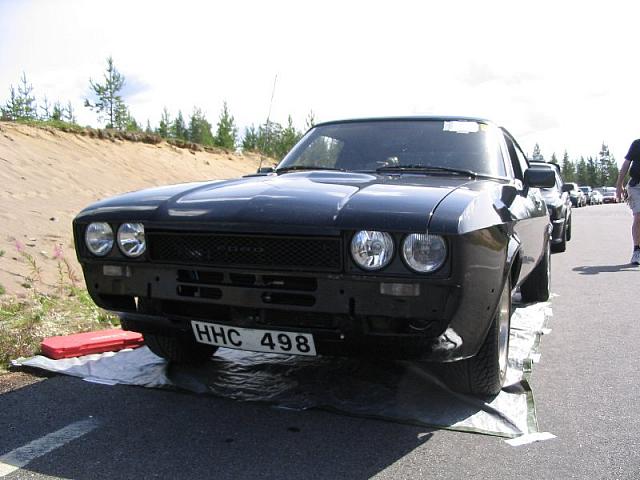
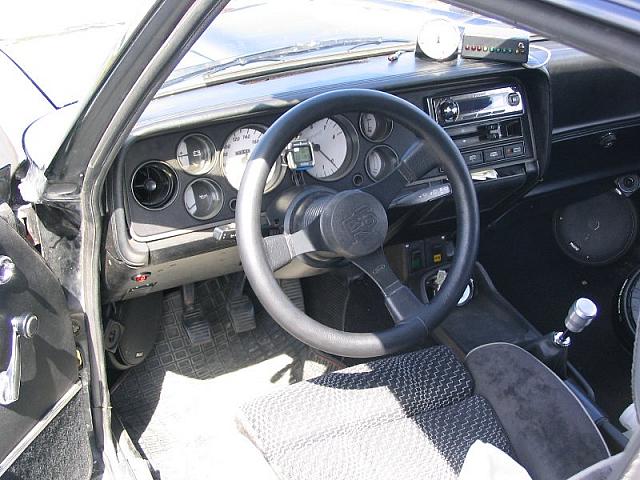
It was a rush to get it there, not all things were pretty (few were, to be honest) but at least it drove. I also see that I sometime made some interior changes - the brown seats were swapped to Opel Monza Recaros, and the brown dash and door cards were also swapped for black parts.

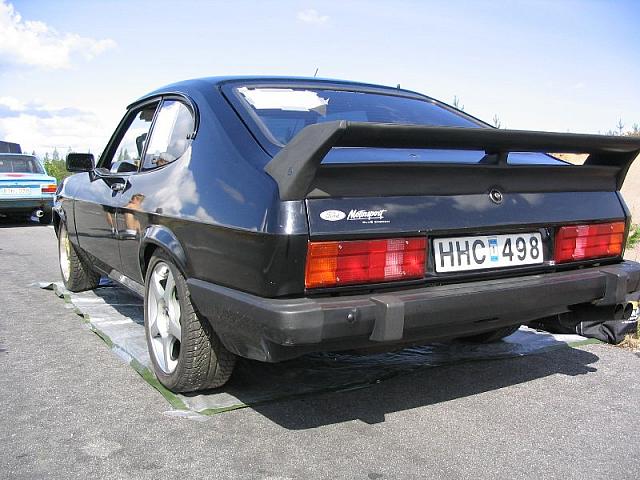
Now, the Sierra rear wheels did not look too god. I decided to see what could be done to fit Capri offset wheels again (to have a matched set).

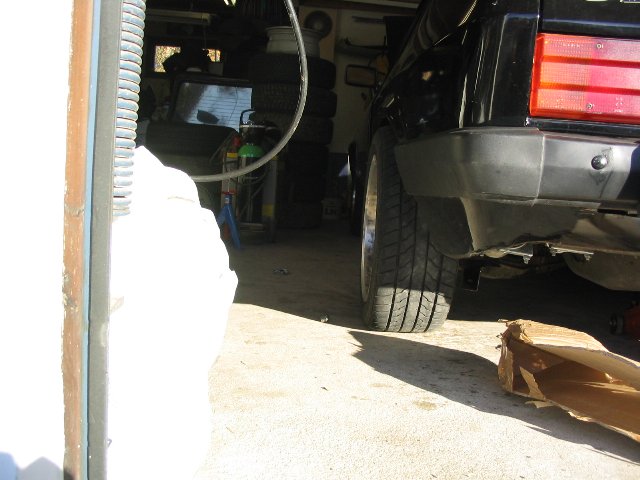
Close enough for some rolling? Maybe it could have been, if the arches wouldn't have been made of filler :-/ Thank you PO!

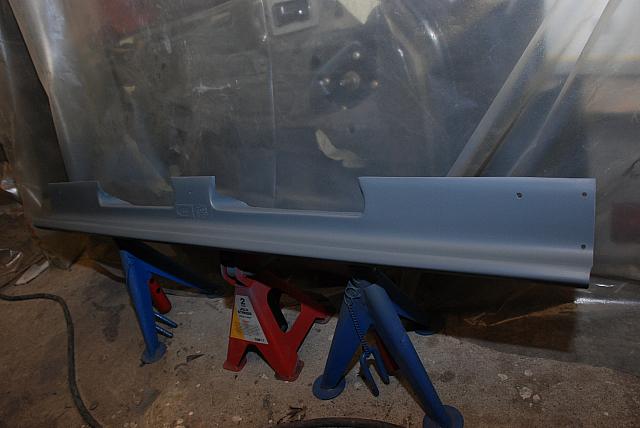
Time for plan B, MkII Escort forest arches. No, they don't "fit"...but...

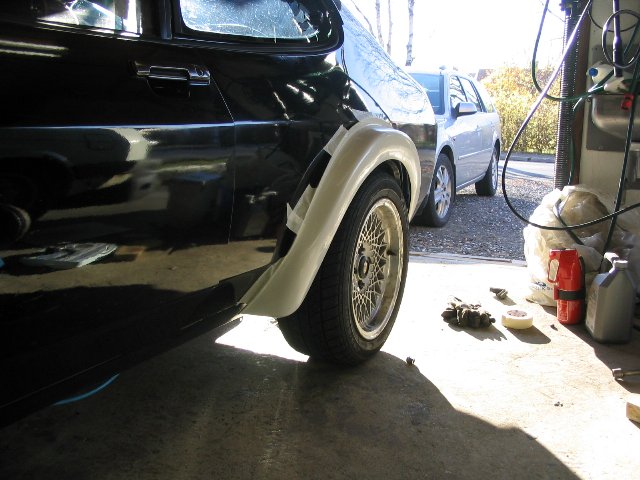
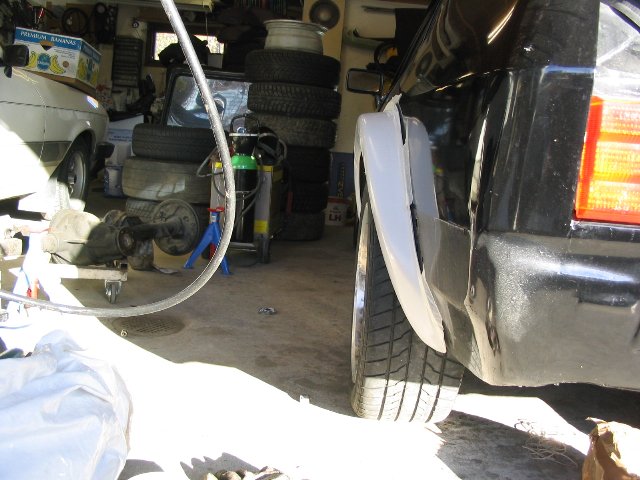
Not too far away so I decided they would be part of the plan for 2006.

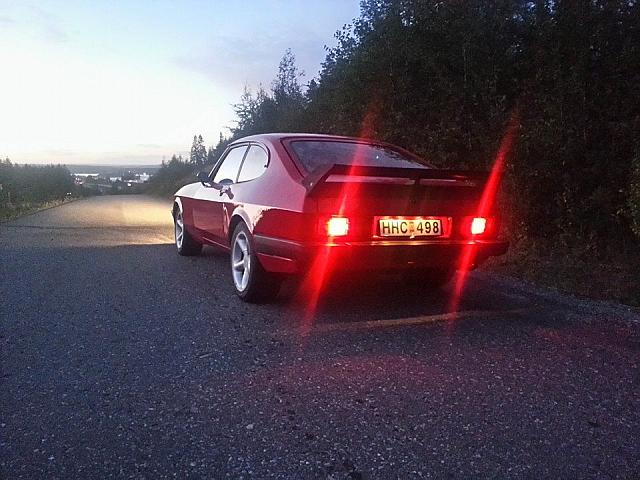
The rest of 2005 was spent on different sized wheels front to back. Hey, at least I got to drive!

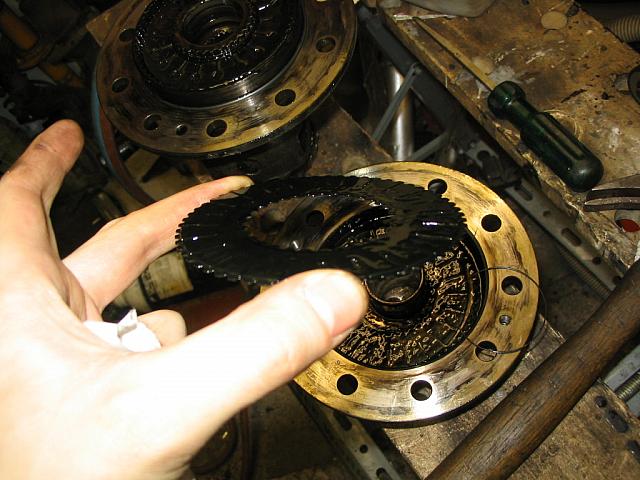
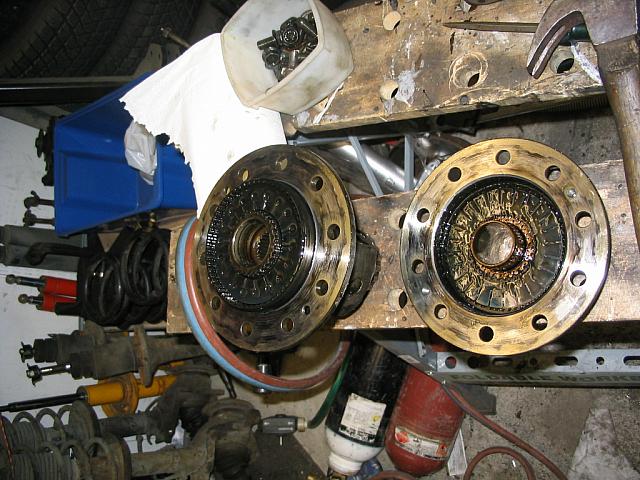
I also decided to do something about the LSD. Gearboxman services and overhauls the Sierra viscous LSD and offered to tighten it up a bit.

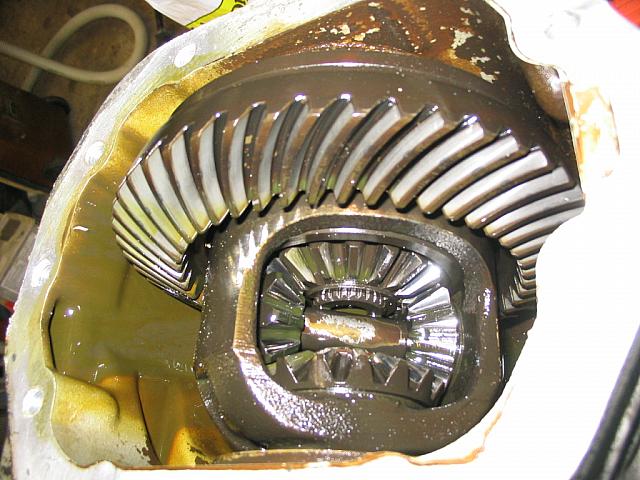
But before I sent it off, I couldn't resist opening it up to see what's in there. Goo is in there.

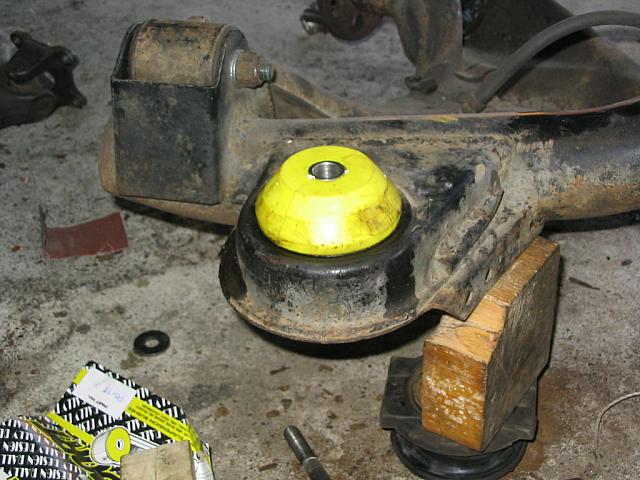
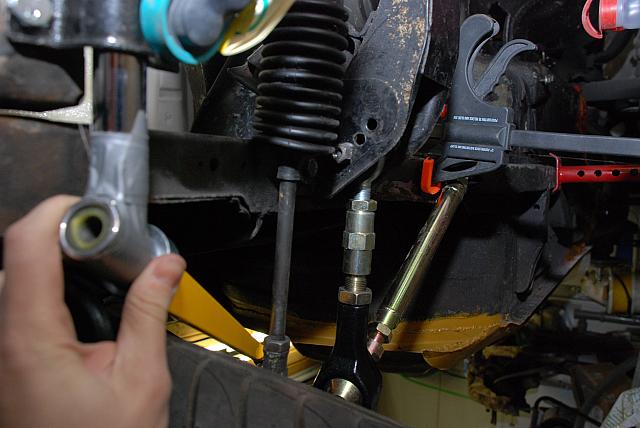
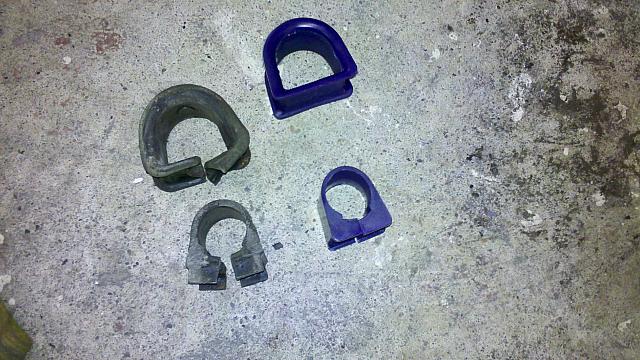
While I was "diff-less" I popped some nice yellow bushes into the beam too.

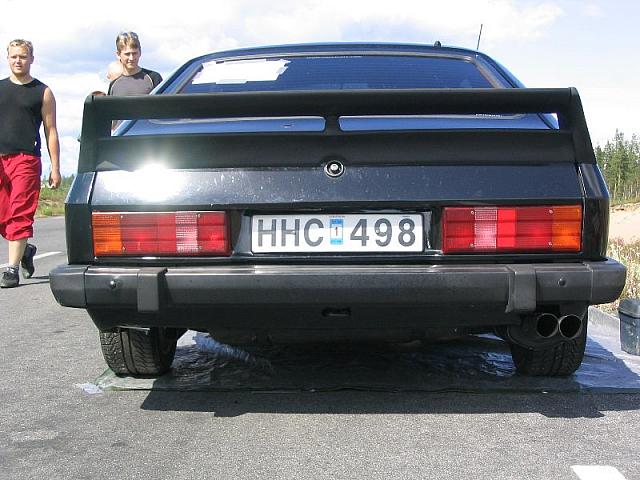
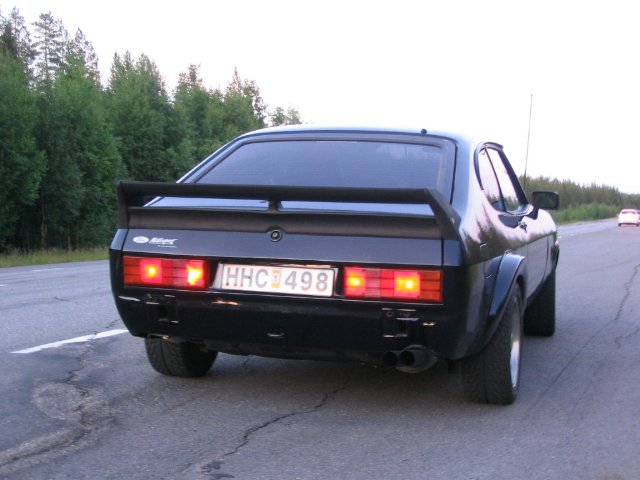
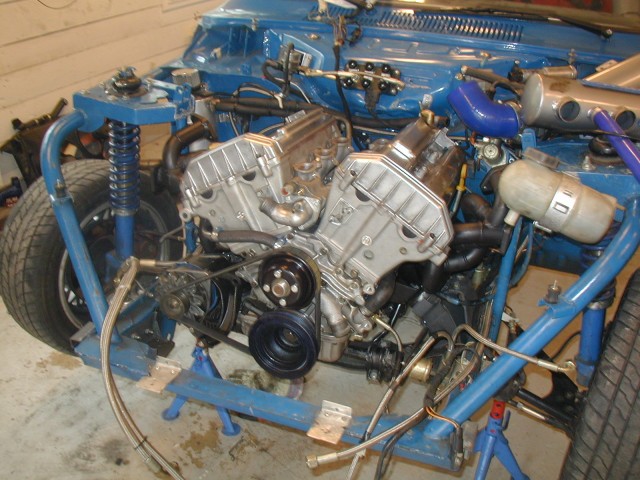
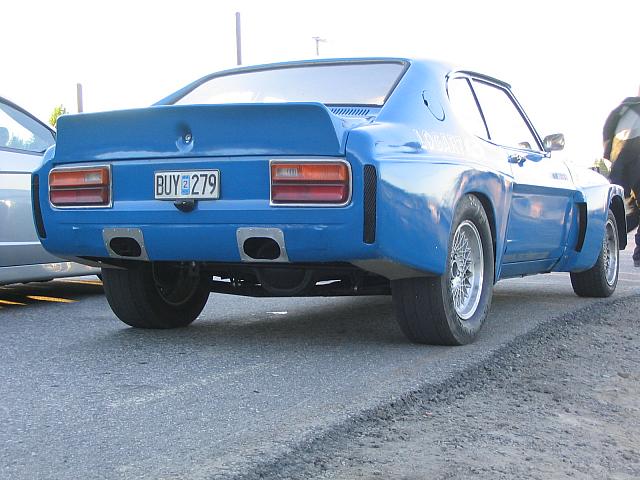
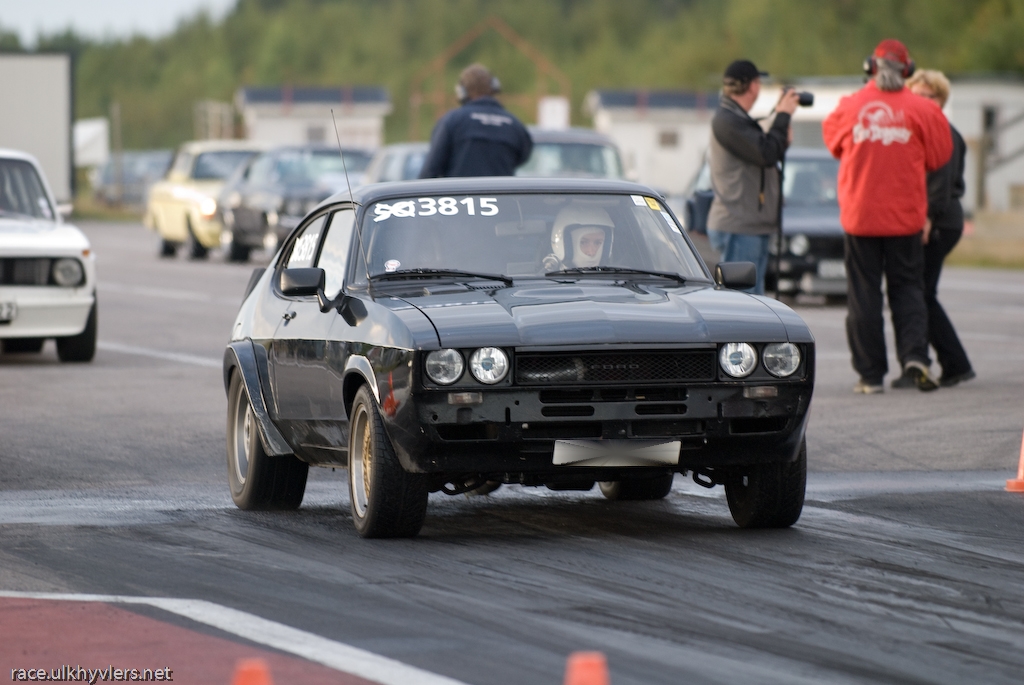
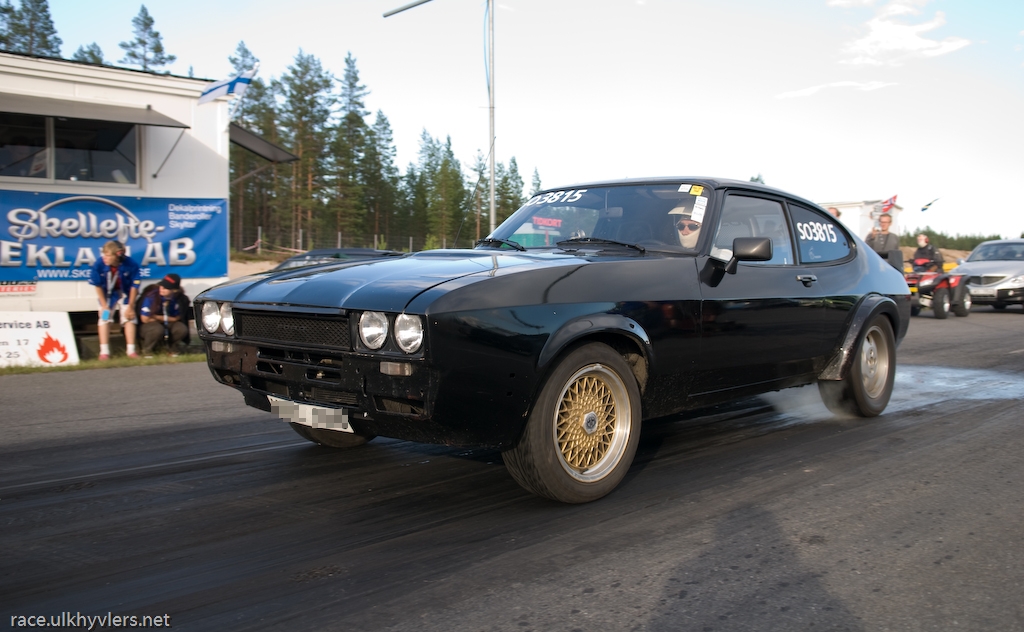
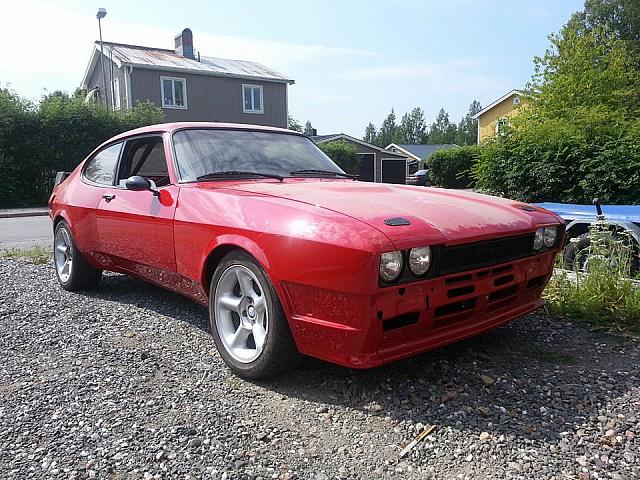
In June 2006 the car was up and running again, now with a wider bum.

Still loads of wheel hop though. Tried messing with the rear damper settings, other springs, and it got a little bit better. The uprated LSD was a nice improvement at least.

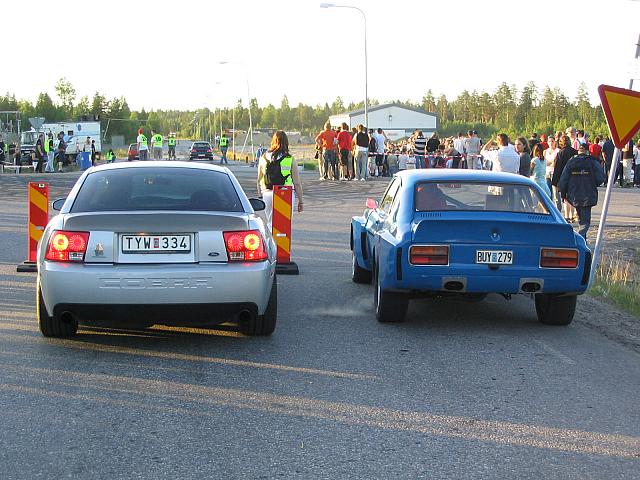
For the next race I redesigned the boost control system, the Saab APC system was ditched and a new wastegate actuator fitted. The boost was set to 1,2 bar and spool was very quick. But the first round gave no boost at all? I had made a mistake fitting the actuator so it loosened off. Tightened it back up for round two and then I had severe over boost and hit the boost cut hard. Still improved the trap speed by 10 km/h (165 km/h, just over 100 mph). On the right track!

Third run with reset boost. Felt great in the water but started running on 3 cylinders on second gear :-(

A quick compression test with my thumb showed no compression at all on cylinder no 1. Game over, just try to find a trailer and take it back home.

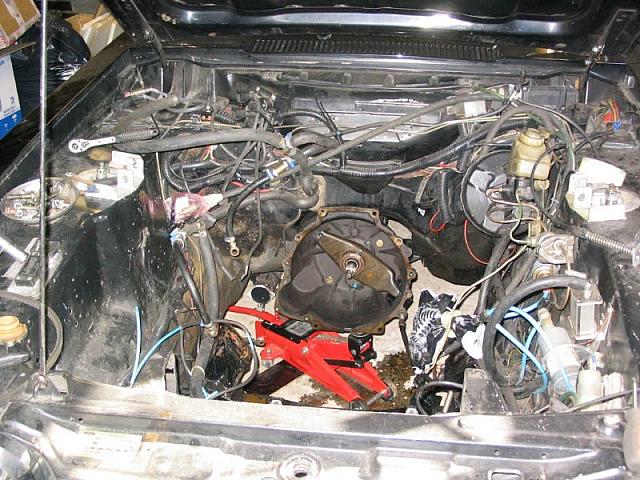
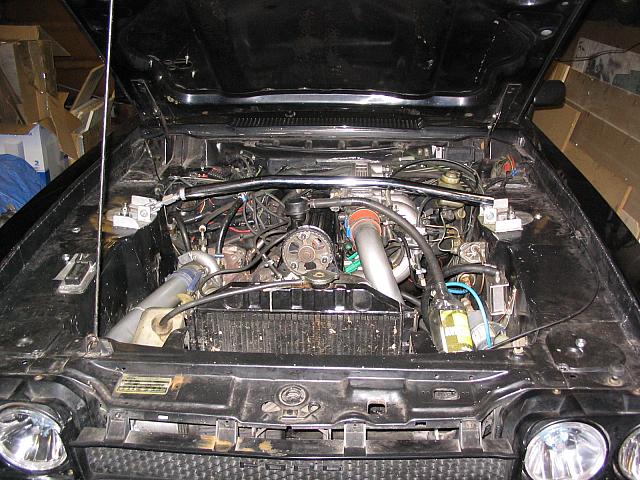
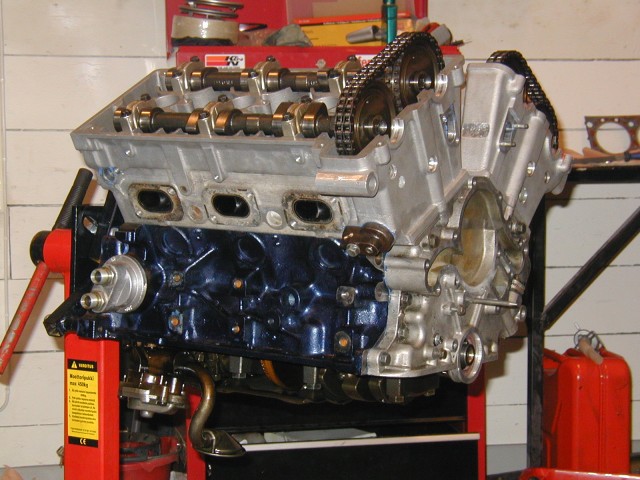
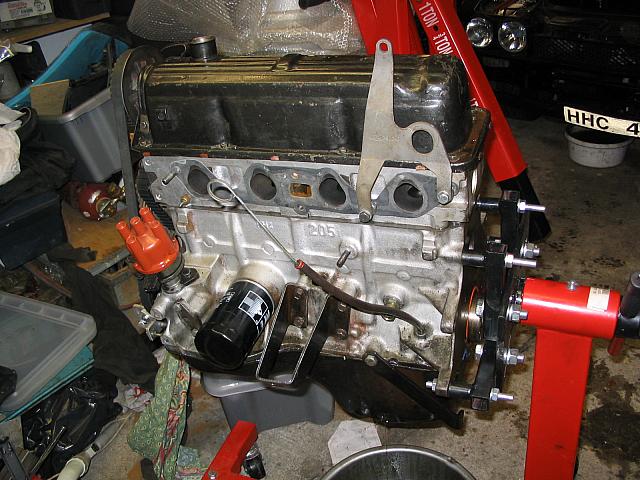
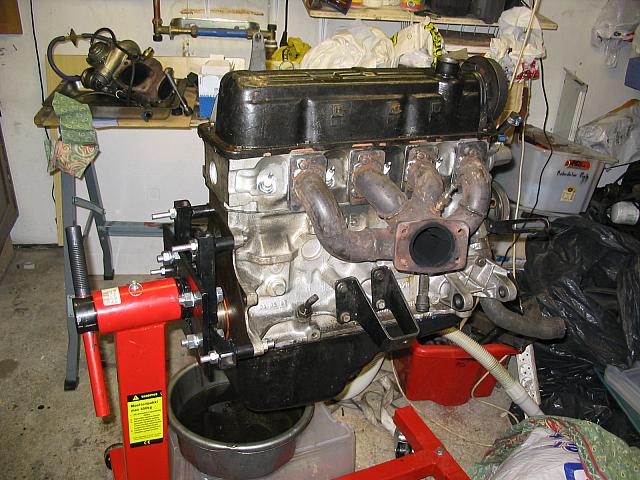
I pulled the engine:

Then whipped the head off to find...a broken follower?!

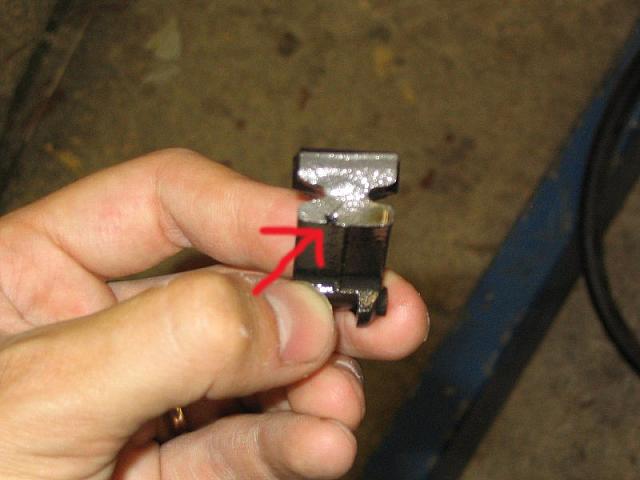
It does seem to have a slight casting flaw where the arrow points...not sure if that's what made it snap or not. No other faults were seen so I was a bit annoyed that I pulled the engine. Could I just have swapped in another lifter and continued the race?

Well, I decided to get a new set of lifters and put it all back together.

The engine ran, but smoked and the compression was still down on cylinder 1. Well, it was worth a try...

To cheer myself up a built a chrome strut brace.

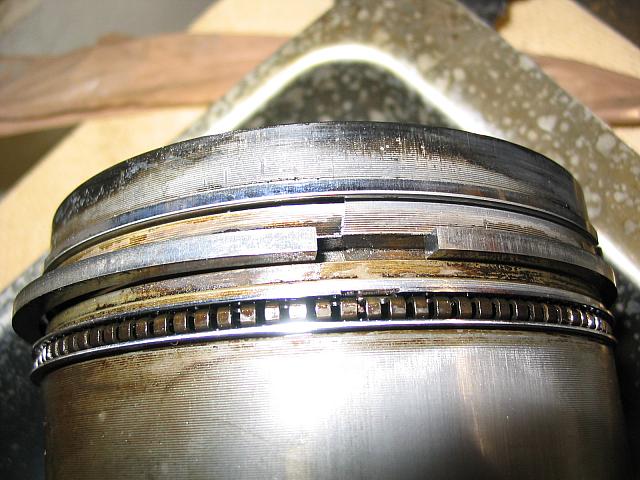
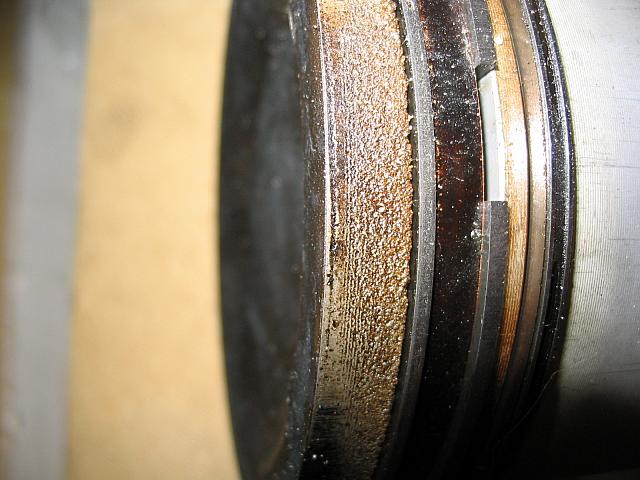
But I knew I had to pull the engine again and probably be greeted by a cracked piston. So 2006 was over...

Gustaf

therealpinto
therealpinto New Reader
3/9/16 12:25 p.m.

I see now that I went past 2005 a bit too quickly. I need to share what happened to Tomas blue Capri too. We put a great deal of work into that car as well. I also forgot that during 2004, we swapped the Atlas rear axle for a Mustang II 8", it has the right width for a Capri, and the right bolt pattern. We used the standard leaf springs but added radius arms and a panhard rod.

I should also say that the front track was widened to match the arches, we made new "A-shaped" track control arms and moved the strut tops outwards - this was when the space frame was built.

The high 11s run in 2004 was good but we felt there was more to improve. We planned a swap to a 2.9 V6, to get the better flowing heads and also get a more modern water system. Tomas built an engine with modified combustion chambers to lower the compression ratio a bit, but then we was offered another engine - the honorable 24v 2.9 V6 from a Scorpio 24V. This engine is breathed upon by Cosworth (but the Scorpio was never badged a Scorpio Cosworth), apart from the obviuos 4-valve heads, the block is also strengthened. Back in 2004 this engine was only 10 years old, but the early ones had an oil sludge issue. That's why he got it cheap. The valves were stuck thanks to the sludge but it all freed up nicely.

With one exception - the valve chain guides were worn, and Ford had already discontinued them. No aftermarked parts were available. We ended up buying strips of teflon (or something) and re-lined the old chain guides and tensioners.

As usual, we could not keep our hands away from anything. The BOA 24v has an intake manifold that looks terribly restrictive.

Word is that Ford and Cosworth had to fight to keep the power down, this one is rated at 194 bhp. Some say they didn't want it to be too close to the YB powered Escort Cosworth at 227 bhp. We had already built a twin plenum for the old 2.8 so we did it again.

We also decided to use two injectors per cylinder, with the E85 you need lots of fuel and in 2005, large injectors were expensive.

Tomas built some pretty pulse split manifolds for the twin turbos, a V6 will divide them very nicely.

But we also decided to do some work on the rear suspension, a 4-link seemed like the natural way forward.

The front end was pretty busy at the time for startup.

This was a rather nice engine, the highish compression ratio (9.7:1), the small turbos and the E85 meant it was quick spooling. But it was not without issues, at something like 1.2 bar we blew a head gasket in the middle of the summer. A few weeks of contemplation, and the Tomas decided to O-ring the heads and pray.

In July of 2005 we went to a legal street race, but no great success. We had gearbox trouble, ISTR that we already shot one or two gearboxes and now they were getting thin on the ground.

But we got to race Per Elofsson in his supercharged Mustang. Per is a world champion cross country skier :-)

Then we broke the propshaft. As usual, the car was driven to the event, 130 kms from home. We borrowed a welder and melted the loose parts back on, to drive home.

In August we finally made it to a 1/4-mile dragstrip again. It was a bit now or never... But Tomas decided to take it a bit easy on the first run, starting easy and shifting early. Still, an 11.305 @ 204 km/h is not too bad.

For the next run, we had sorted some issues, set the shift light at the 6500 where it should be, and...the prop broke again.

Unfortunately, that was it for Tomas. The car had gotten a bit too extreme, and he felt that he had reached the end. I did not have finances (I thought...) or the space (I thought...) to buy the car from him. Plus, I still had my own Capri to care for.

So the blue racer was sold, and it went to Norway. The last news I have, is that it is still sitting in a garage, the owner having big plans for it. Tomas went on to BMWs but that's another story.

Gustaf

therealpinto
therealpinto New Reader
3/13/16 3:31 p.m.

Allright, back to my Capri. The driving season of 2006 ended with a bang.

But, formally 2006 was not really over. I still had time to work on the car. October saw the engine out again.

I removed the pistons. Sure thing, if someone wonders what 1,5 bar of boost does to a cast Pinto piston, this is usally the answer:

A cracked ring land.

Now, I was not too disappointed. The block was built basically from scrap parts and this was the perfect excuse to try something else. From the short test drives with decent boost (above 1 bar) I knew I wanted that kind of power. So enter some YB (that's Sierra Cosworth unless you knew) pistons and rods! Now, the Pinto and YB are very similar but some differences are there. For example, the YB has oil squirters under the pistons, the Pinto has holes in the rods that squirt. You can modify the YB rods to squirt (!!!) but I felt like keeping things a bit standard - meaning it would be easier to replace things if need be (no need to modify the parts to go in). So I got me the oil squirters from a rwd YB, and ordered a new YB oil pump. No problem there, but the oil pump was sent less lif - the lid that has the fittings for the squirter. The very respectable seller (well known company) stated that "all" YB pumps were sold like that. I managed to sort a good second hand lid, finally.

Oh, one important thing. The YB pickup tube does not work with a Capri oil sump. It needs a Sierra sump to clear...glad I checked!

Still on a budget, I needed second hand YB pistons too.

But not THAT second hand... No shadow over the seller, it was agreed that I should check if the pistons were suitable. Another set was sourced and the bottom end could go back together.

But the urge for power (boost addiction) wanted more. A new turbo perhaps?

Yes, the mighty Holset HX35, twin scroll and with potential for lots of power! Of course a new manifold was needed.

Getting there! This is kind of fun, but time consuming and messy...

External wastegate with pulse split practically all the way to the valve.

Just fits!

The finished article, in June 2007. 6 months to build the engine and exhaust manifold? Well...

Gustaf

Dammit
Dammit New Reader
3/13/16 4:39 p.m.

Fantastic thread, great project.

As a side note my ex-girlfriends father ran a car in LMP-2, initially using that 2.9 Scorpio engine - at higher revs it kept flinging the flywheel off so they switched to the 6R4 engine (which was in production at that time).

therealpinto
therealpinto New Reader
3/14/16 3:35 a.m.

Thanks!

The block was given a lick of paint and then dropped into the car.

Things were fitted...

An old dizzy stripped of its drive gear:

...in order to get oil pressure before cranking.

And then, fire in the hole!

It runs!

Almost forgot, I also swapped in a new one-piece propshaft, rewired the engine management and swapped to a smaller alternator. I'm sure I did something else I can't rembember...it was almost 9 years ago! Time flies...

By the beginning of July I was mapping it on the road with a big grin :-) 1.2 bar was all we could get with the injectors at hand. But that meant it was quite quick.

The first race was coming up and I swapped in some softer rear springs. A slow start but 13.993 s and 169 km/h was still an improvement. Second run - still a bogged start but 13.587 and 177 km/h, the third one was a bit better, 13.287 and 178.92 km/h. 180 km/h trap speed felt in reach!

With all the bogging I decided to try the street wheels instead of the M/T Drag Radials, and that made the wheel hop come back in all it's glory. A marginal improvement though, 13.237s.

To beat the 180 km/h barrier I advanced the timing 3 degrees from 5000 rpm and upwards. Still a bogged down start but trap speed went up to 180,54 km/h! Result.

Now I decided to try a not-so-nice start. 5500 rpm and dumped clutch - now it boosted from the start line but that burst of Pinto power killed the clutch...slip-slip-slip. But still the best et of the weekend, 13.173s.

Time to ponder a bit.

I ordered a 4-puck sinter friction plate and got the car ready for the next race. And I saw that the dump valve had popped loose from the intercooler...doh.

Out mapping the car suddenly went rich and then wouldn't restart...battery voltage 9 V! Here's a good thing with using aftermarket engine management - I could go back in the logs to see the battery voltage...and it seemed like the alternator never had charged properly. That's my reward for using a cheap, small, 45 A alternator. Now the car was on the battery charger when in the garage, and the alternator could just keep up for short bursts.

To beat the problems with bogged down starts I enabled the launch control in my Megasquirt. Set some settings, choose a suitable rpm, clutch down, full throttle and blam, 1 bar of boost! :-)

Now, I messed up some settings so the lauch wouldn't work on race day. But to compensate I blew something in the driveline in the first start... Still, a low 9 s 1/8-mile time is quite good for a car with a blown diff.

As usual, I had driven the car to the track. So I had to leave it there and hitch a ride back home. Renting a trailer with a winsch on a Sunday was impossible, so I got one without and bought my own winsch. I had a funny feeling this would not be the last time I would have use for that.

Still, the car looked pretty fast as it blew up!

So, back home and drop the diff. Oil plug out...with the obligatory pieces of Fords best diff material:

Darned! Now, the gears and stub shafts could be replaced but the damaged splines meant I was not sure the diff would be ok.

There was one race left of the season, not enough time to build a new diff, but enough time to bodge something together. A friend had just scrapped a Scorpio 2.0 estate (1997-ish), I could have that diff for free. Sure, a 7,5" Scorpio diff does not really "fit" a 7" Sierra beam but I had read online that some grinding would fix that. Add some chemical metal to fill in the holes you create, and good to go. Plus some weld in the diff to imitate a spool. Oh, the 2.0 Scorpio estates have a very sporting 4.27:1 ratio!

It was back together and despite the rain, a couple of days before the race I had to test drive. The diff seemed OK but the noise from the gearbox was another issue. Double-darned!

Not only did I break my diff. I also broke the rebuilt, uprated, V6-based heavy duty type 9! How on earth I managed to break a gearbox with a broken diff I don't know.

I had two choices of backup gearboxes. The old one I took out because the housing was cracked and the bearings were whining. And a completely un-known gearbox that came with a friends Escort MkI project. I opted for the un-known.

Now the lauch control was working again but using that on street tyres, with the 2-liter type 9 stump pulling 1st gear and 4.27:1 in the rear axle was just silly. But it was silly funny. :-)

Last race. If you didn't know, dragracing is a competition in waiting. This time, almost 10 hours for the rain to stop and track to dry. Then a "friend" hit my finger with a BFH while I helped him fixing the dragging brakes on his E30. First run on a cold track meant lots of wheel spin. Second run, the last chance of the day...now or never. Lower tyre pressure to aid traction, a nice long burnout to get some grip. Launch control, clutch up, snap. That's a new sound, I thought.

Loss of drive again. But this time I had already pre-booked a ride on a friends trailer back home.

At least I got a nice picture, again.

Some quick surgery showed that both drive shaft had snapped clear.

Now it was pretty obvious I had built a Pinto turbo that effectively killed all parts behind it (bar the 3" proshaft!). So detune, or throw stupid amounts of money at the drive train. Easy choice! Stupid money time!

Gustaf

therealpinto
therealpinto New Reader
3/15/16 2:18 a.m.

I did quite a lot of research and thinking about the drive train upgrades. At that point, I had been running mostly standard, and quite cheap parts. A reconditioned type 9 (although, as mentioned, based on a V6 gearbox with the larger bearings), a reconditioned Sierra viscous LSD and standard drive shafts.

The car started out as a true low-budget build but as I grew older I started to realise that I didn't have unlimited time any more, and that funds were a bit easier to find. It's easier to save up money, than it is to put hours in a bank account.

I did ponder to keep using cheap, standard parts. An MT-75 gearbox (standard fit in 2-litre Sierras here) should hold up a bit better (but then I would need a new propshaft again). But not many people have used it in high powered applications (or at least not in 2007). I could have gone for a 7,5" viscous LSD and hoped that it would last better, and another set of used driveshafts (I suspect the wheel hop issues earlier on is the main cause for them finally breaking).

But I felt upgrades to the drive line should be sort of "do it once". I'd rather spend some more during the winter, and not have to repair the car during our (short!) summer.

Another factor was that I preferred using parts that were somewhat "replaceable" if they break - if possible, no complicated machinework that I don't have the skills or machinery to perform myself. That ruled out a BMW Getrag or ZF gearbox modified to fit a Pinto. A BMW diff was also discarded for much the same reasons (plus, they are hard to find with ratios that suit other gearboxes than the BMW 'boxes).

So I decided to go for a BW T-5 gearbox from a rwd Sierra Cosworth. Not indestructible but reasonably strong. A Quaife differential should take the power and also be quite "fit and forget" - no friction discs to service. And I decided to splash out for a set of custom made steel drive shafts. These can flex a bit and are known to protect the rest of the drive line.

Santa came early in 2007, in November...

I wanted to keep the Pinto sized clutch/flywheel (spent some money on that...) so I got a special Pinto-T5 bellhousing. The YB bellhousing needs modifications to work with the smaller Pinto flywheel.

I read up a bit on T5 failures and in the US people speak about bending the shift forks. Apparently, if you slam it into gears there is no stop for the gearlever and the forks take up all the force. A "inspired" driver can bend them. So all US people say you need an aftermarket shifter with stops. My research showed that the Steeda Tri-Ax was "the best" and with the dollar exchange rate favourable...I went shopping.

But the credit card was not the only tool I used during the winter. Now all bushes in the rear axle were swapped (wheel hop, remember?).

I also changed some of the mounting points for more clearance and better location.

The gearbox crossmember was adapted to fit the T5.

It is in!

And finally, the steel drive shafts arrived. Fitted to used joints though...

In 2008, I actually had the car up and running beginning of May, that was rather nice.

I have only really written about the dragraces earlier. But from 2006 or we have also had a number of simple track days (or really cone track days, close to Autocross but a bit larger track). With the Quaife diff the car was lots more fun in the twists but my quest for eliminating the wheel hop meant I used soft rear springs...and that's not ideal for the turns. But as long as you have a smile on your face :-)

And, after a good cone track day, you will see marks all over the car!

Then I got the chance to try some drifting too. It was not easy. A large turbo car like this one needs to be driven with a good deal of agression to drift properly and it took me three tries to find out. And then a front tyre caught the frame rail and ruptured :-(

After some more track use it was time for the drag strip again. Now I fitted a line lock and fiddled with the launch control. And I added a flatshift function - the ECU cuts fuel when the clutch is pressed so you can shift with full throttle. Very nice!

The first runs gave similar results as the year before, 12.4 something and around 180 km/h trap speed. I worked with tyre pressures and launch rpms and got down to a 1.87s 60-foot time, 12.26s and 180 km/h.

Sunday was elimination day and I went out against a friends turbo Sierra. We had been racing quite closely all weekend, his best was a 12.143s and 190 km/h. Could be a close race... But Jonny had turned up the boost and beat me!

The elimination run:

Elimination run

(if the link works)

We then had a good test&tune day where I really tried to find the best way to start. But that was not nice to the clutch...and the diff mount broke.

With everything cooled down the clutch seemed to work again so in time for the last race I swapped in some larger injectors and raised the boost a bit. But it was no success. Using the Megasquirt with the 1,5 bar map sensor does not work great with 1,5 bar of boost. Any small overshoot in boost means the ECU activates the boost cut and then that race is lost. Plus, the wheel hop came back.

So now it seemed that the drive line (with doubts about the clutch) would hold up. So time to get rid of the wheel hop...

Gustaf

therealpinto
therealpinto New Reader
3/15/16 3:49 p.m.

With the season of 2008 ended some plans were drawn. Get rid of wheel hop, try a smaller turbo for more low end response and some other small stuff.

When I mounted the Sierra IRS I took the easy route with the coilovers, and used the standard Capri shock towers. But this places the coilover where the Sierra has the spring, in front of the wheel center. This means quite some leverage on the shocks, and I suspected that the damping could not be set stiff enough to counteract wheel hop.

Moving the coilovers back, to the Sierra shock mounting points (behind the wheel) should work better.

But just moving the bottom mount wouldn't work. Too much angle and the coilover would foul the drive shaft. So new turrets were needed.

Something like this...

That's better!

Then I found a custom made intake at a decent price.

I also swapped in a smaller brake booster and master cylinder to give more room.

Turbo choice then. The Holset HX35 felt a bit laggy and my favourite turbo supplier, Airtune, had a new version coming in, the HX32. Almost a bolt-on replacement, but 9 cm2 exhaust housing instead of 12 cm2.

I also decided to swap the final drive, from 3.62:1 to a 3.92:1 (from a DOHC 4x4 Sierra). Another attempt to better the low end response.

Up and running again then! I did some track runs and the smaller turbo was a bit better for response but maybe not really ideal. The wheel hop seemed to be cured but the clutch was slipping! Doh.

A mid season break to think about a "cure".

Now about the clutch...while being in the states (could have been christmas 2008?) I got the mother of all tough clutch discs, the Black Magic iron sintered disc:

This is a solid thing, known to be able to slip a fraction first and then grip like crazy. I was not sure I would like it at all but it's quite cheap. And since I had it laying around I decided to give it a shot.

The old clutch did look a bit battered:

Result? Better than I thought but the noise was something else. No sprung centre and quite heavy so it was very loud. But it gripped nice!

I did some more cone track driving and it started to feel better. But in slow corners the inner rear wheel would lift enough to let the Quaife diff spin that wheel. I swapped in some softer rear springs and raised the ride height a bit. From 400 lbs/inch to 250 lbs/inch. That made the rear end work better so I tried even softer springs, 200 lbs/inch. Now it actually felt good!

A friend talked me into swapping back to the HX35 for the upcoming dragrace. So I did, along with a pressure test of the turbo system. Some leaks were found and a quick adjustment to the fuelling map, that should give me some more power!

The first race day was a bit disappointing. I had issues getting boost on the launch control and trap speed was down to 175 km/h. Instead of relaxing before the next race day I re-checked for boost leaks and actually found some. I also adjusted the launch control (more revs) and added 2 degrees of timing at the top end.

Result! 11.991s @ 180.82 km/h! That's one target point to check off the list...an 11 second Capri :-) I didn't improve on that but was still happy.

No, I didn't run on those rear wheels...just for transportation :-)

The way back from the track was a good time for a small photo shoot too.

Good results and the season was not really over just yet :-)

Next stop was the Bilsport Action Meet at Mantorp, it's a big show/dragrace/cone track outing with lots of people. First time for me there and it was quite cool. Rain on Friday spoiled my planning though, so I only managed two dragstrip passes and one cone track. I had swapped back to the smaller turbo to try it out, so no record times at all.

Since I didn't like driving the Black Magic clutch disc I had decided to take the plunge and go for a 241 mm size clutch, instead of the 215 mm Pinto size. But a YB flywheel does not fit the Pinto crank...so...more credit card work:

A really nice thing from TTV Racing...and a 6 pad Sachs racing clutch pack. Now the clutch was nice to drive and gripped like it should. Cool.

A new outing on the cone track showed good results. The softer rear springs worked good and with Yoko A048's the car was really fun to drive. And pretty fast.

In mid October we had the last cone track of 2009. Cold, but fun and finally I managed to set the fastest time of the day.

And, as always, new plans were being made. I now had a decent drive line but the body started to show quite a lot of scars. The long term plan had always been to do something about the body when the mechanics were more sorted. So a big box arrived...

Yes, finally the X-pack (courtesy of Fibresports). To be honest, the box arrived in January 2009 so the plans had been going for a while. But now I was out of excuses and started the largest project I had ever taken on. Little did I know back then...

Gustaf

crankwalk
crankwalk Dork
3/15/16 8:20 p.m.

YES

therealpinto
therealpinto New Reader
3/16/16 7:43 a.m.

Indeed! In the first post I wrote about the turbo Capri Milan Knezevic built way back in the 1980's. It was featured in a magazine in 1986 and that's when my love for Capri's started. But I was only 11 years old back then... The car he built had a turbo Pinto, like mine, but boosting through twin Dellorto carbs. While the turbo was interesting it was really the bodywork that got me. The car had the Ford X-pack widened arches and they just looked so good!

Fords X-pack programme was sprung from the RS and competition parts, and in the late 1970's to early 1980's you could either buy X-pack parts for retrofit, or, at least in some areas, you could factory-spec a X-pack. The content differed a bit for different models and years. But in Capri's and Escort you could get widened arches, tuned engines, uprated brakes and LSD's for example.

When Ford brought out the MkIII Capri 2.8 turbo, it had a set of wider fibreglass arches that also were available as the X-pack kit (with a more mundane front spoiler). While the 2.8 turbo was LHD only, UK got the 3.0 X-pack, available with a triple Weber setup for the Essex V6.

Now, these X-pack arches widen the Capri quite a bit and gives the car nice rich hips... Ever since 1986 I had wanted an X-pack Capri and when I finally decided to fix the bodywork, the X-pack had do go on. I even managed to find some rather logical reasons;

  • the Sierra IRS is wider than the Capri rear axle, with Capri offset wheels it should match the X-pack pretty well

  • steel Capri MkIII fenders are very expensive, pattern parts are ill-fitting

So when the pound vs Swedish krona was favourable, a complete X-pack kit (with complete front fenders) was less that one (1) good steel fender. Done deal.

Before cutting up too much, I had to check that there was a reasonable chance the wheels would fit in the X-pack arches.

Looks promising with the track wheels! What about the dragracing setup?

Not too bad, some trimming in order but pretty much OK. Last test then, the "road wheels"...

The tyre profile is wrong but, there's room to spare.

I thought that I would start with the front wings though. In theory, it would be possible to run the car for one season with X-pack front wings and forest arches on the rear. Because at this time I thought I would have the car running by spring. This next spring.

Capri doors are heavy, the engine hoist comes to good use.

Removing front wings is never fun...Capri wings are welded to the body. These were not great but decent so I wanted to keep them salvageable just in case (later they were scrapped anyway - nobody wanted them).

Off, at last...revealing some tin worm, of course.

The mounting flange was completely gone, actually, the old wings were mounted with just some flat pieces of metal spotwelded across where the flange shound have been. One of the many reasons for going X-pack.

Mandatory trial fit - not bad at all. Thank you Fibresports!

More welding and I duplicated some V6 shell strengthening plates while I was at it.

Many hours later, another trial fit.

As Haynes say, repeat on the other side:

Trial fit again...

Prop a wheel somewhere that looks good...

Then sit back and think, that this might work out pretty well!

Gustaf

RossD
RossD UltimaDork
3/16/16 7:59 a.m.

That's looking awesome!

therealpinto
therealpinto New Reader
3/16/16 4:07 p.m.

Thanks, that's what I thought too!

Wide front wings mean the wheels have to come out a bit, enter adjustability and wideability.

Adjustable track control arms for the front suspension. But let's put that on hold for a bit (the standard suspension can still be driven if need be). Let's attack the rear instead, a sawsall makes quick work of shredding metal.

Now there was no return. And already April of 2010... The thought of running the car in 2010 was put aside.

The pace slowed a bit for a while here but eventually the rear tubs were sort of finished.

I also took the decision to convert the car into a proper 2-seater, roll cage (rear cage/half cage) and a proper drivers seat.

The cage was bought as a kit and a nice notcher was bought - it saves a lot of time!

Growing a bit tired of body work I ordered more parts. An annoying alternator belt slip was to be cured by a poly V setup (Escort Cosworth).

Rather nice stuff from Graham Goode, ISTR, complete with 36-1 trigger wheel.

Then I stumbled upon a sump.

The gates may be overkill but better safe than sorry. Oh, and the YB sump has a convenient mount for the crank sensor.

Cage time. The main hoop was made to my measurements and had a great fit.

But the Capri floor, where the hoop wants to go, is shaped in a very strange way.

All bends and curves. I decided to put the hoop on a box, to make it simple - it also makes it easier to take out, if need be.

Crush tubes for the bolts...

That worked out pretty decent.

Now back to the body work. I had made acquaintances with a company that produces GRP parts and since I had helped them out some, they were prepared to help me. And then the car magazine I freelance a bit for, was interested in an article of bonding GRP parts to a bodyshell. Win-win-win situation...

One drawback; some copyright issues mean I really can't post all the pictures. But we started by trimming the GRP parts and then thinned the edges where they would meet the steel. Adjust the positioning and fix with self tapping screws. Then sand off the paint and scour the steel with a course grinding disc, to give the resin something to really dig in to.

Glassfibre matting was torn (to give softer edges) into strips, and then resin rolled onto the body.

Let it cure a short while, then add some matting and wet propery with more resin. Then we rolled out all air bubbles and wetted the GRP parts edges too.

Then using the self tappers, we put it all together. At 2.35 AM. Let it cure over night (short night!).

Then the edges were sanded a bit more, more matting and resin applied over the join.

This was pretty easy to write down but it was two long days of hard work. And then, most of what was left of 2011 was spent sanding and filling...

Gustaf

therealpinto
therealpinto New Reader
3/20/16 3:58 a.m.

Another thing that I spent some time thinking about around this time was the front suspension. The X-pack arches are a good deal wider than standard. Wheels need to fill the arches for the car to look right and the track widths needs to be in the ballpark (front vs rear) in order to have a good balance in the car. Actually the way I had been running the car, with a wider rear track, meant it would understeer quite a lot.

Ford just slammed on wider wheels with lower ET (offset outwards) on their X-pack cars. But this increases the already large scrub radius on the Capri, so the car will tramline and be pretty nervous to drive. I did not want that. A number of ideas was explored but I finally settled on using new strut knuckles from GRP 4 Fabrications, but re-machined for a higher KPI angle. Put simply, the strut tube leans more into the car. Keeping the strut top at standard position (or close) this will move the wheel outwards and reduce scrub radius. I had custom strut tubes fabricated and I put the tubes as low as possible in the knuckles. But I cant find the pictures of this :-(

I choose this way to be able to keep as much standard Capri parts as possible. In hindsight, it might have been better to use Sierra uprights, a concept we developed for a friends MkI Escort. The Sierra struts are a bit easier to maintain and it is easier to fit larger brakes and swap strut tubes round.

I also wanted to be able to add caster, and I wanted an adjustable anti roll bar. I decided that I would mock up for both compression struts (running rearwards from the TCA) and tension struts (running forwards) to see what I would like better.

Compression struts means it's a bit easier to find a place for the blade type ARB.

Tension struts means less room. I spent many hours thinking about this. Compression struts feed the braking forces into the frame rails where they are not designed to take any rearwards/sideways force. And the struts, being in compression, needs to be pretty much straight. The tension struts feed the forces into a place in the body structure that is meant to deal with the braking, and being in tension, can easier tolerate a bend if need be.

But, I started to have a deadline for paint on the body to honour. The front suspension would have to wait for a while, now that the welding needed for the mounts was done.

I started to fix all the body panel gaps, and sanded more, and more... A makeshift paint booth was built in order to spray the floor pan, wheel arches etc. in black 2-pack polyurethane.

Not too bad actually.

I had made an agreement with my painter, I would lay the base coat and he would do the final sanding and add the top coats. I had never sprayed anything serious before (bar using rattle cans and airbrush for Lexan R/C bodies). So I was a bit nervous...and the garage really is too small to paint in!

Nobody remembers a coward.

Well, let's say it's good that this wasn't the top coat :-)

It was quite fun to do but I realized that you need more space and a better exhaust fan to do a decent job. But what a milestone! In March 2012 the car was a uniform grey colour. Now just wait for the painter to have some time to take it on.

Gustaf

therealpinto
therealpinto New Reader
3/24/16 2:25 a.m.

So now we had to find a day with decent weather so I could trailer it all to the painter (140 km trip). That failed of course, we were in April (and northern Sweden) after all... I tried to pack the car but of course the packing left some scuff marks.

But I did get there in one piece.

Now the garage was strangely empty and I knew that the painter would need several months on the car. The instructions were not to rush it, but rather to take his time. I had severe withdrawal problems from not running a track car for years (I even took my MkI Focus flexi fuel on track to cure it). A substitute was desperately needed and I thought about different options. A cheap Sierra or MkII Escort would be fun. But our Escorts only came with underpowered, emissions controlled X-flows. And no Sierras of interest were seen (ideally a manual 2.9). Thoughts of a Puma or MkI Focus 2.0 were dismissed (too fwd, too expensive). Then I remembered something. We do have another Capri! The 1982 2.0S we used run daily was put in storage waiting for restoration. The sills were bad and overall a bit rough around the edges. But it did run when I put it away and I had lots of parts...

Let's give it a week and some moderate amount of cash, shall we?

Now, this car had provided some sideways fun earlier:

Home on the trailer...

Some work to free off the brakes, as always.

All front suspension bushes were swapped to polyurethane, the steering rack ones being most important.

Then some sill material.

After a first test run I decided to whip the head off too. I knew the valve stem seals were bad.

And, I knew the manifold was bad;

But the body is decent, at least the front wings. Thanks Ford of Sweden for fitting plastic inner wings to all 1981-82 Capris :-)

Valve stem seals?

Yup.

Oh, and what do think about the Swedish emissions control? Pretty clos to US standards I guess.

Anyway, of course I could not just fix the problem. A FR34 cam kit, a slightly ported head and a ported intake manifold was just a slight deviation from the plan. Add the nice exhaust with tubular manifold I had laying around, and the rejetted 32/36DGAV that came on the black car. And top it off with the track wheels. There, a proper track day substitute!

https://www.youtube.com/embed/w_w1mQ8XIlU

https://www.youtube.com/embed/6d62OL0JOKA

Not extremely fast, but fast enough to spin out in the wet... And loads of fun!

Gustaf

therealpinto
therealpinto New Reader
3/29/16 12:34 a.m.

With the proper Capri sent away, I had time to ponder a bit about things to prepare when the garage was pretty clear. I had quite hastily removed the pedal box before I sent the car off for paint. The thought of a bias pedal box had been lingering for a while and now I decided to go ahead. Much thanks to some inspirational pictures of Capri pedal boxes on Turbosport.

The reasons for going this way were mostly my desire to test different solutions. I was not entirely sure that my chosen brake setup (Mondeo V6 discs and calipers) would be sufficient, and a bias pedal box makes it easier to adopt to different calipers. Another reason was that the space for a normal brake booster and master cylinder was quite tight - I had another thought of trying out different intake/plenum designs.

But just to be safe, I got myself another pedal box to use for the conversion - meaning I could always swap in the old one if need be.

The end result was pretty good I think. This is obviously before painting it... Compared to the MkI/II Escort pedal boxes I have seen, this one is stronger. Two issues - swapping the master cylinders will be hard, and the space where the ventilation duct hose used to go is now occupied...

I also finalised the struts. Some sheet metal was formed into strut bottoms:

Then fixed to the strut tubes for welding:

Welded:

And then, a complete strut:

The thing that sticks out the back is a mount that can be used for a droplink to the ARB.

Then it was mostly waiting - and running the substitute a bit. But one night, on a ferry between Stockholm and Tallinn, the MMS's started dropping in...

Looks pretty much like it did several months ago...only more smooth (I hope!).

More MMS:

These are the images my painter sent me, straight from the paint booth.

Now...this was in November. Not the best time to drag a freshly painted car around on a trailer. We decided to wait a few weeks for dry weather. I set out with the trailer on a day when the forecast said a few degrees below zero centigrade and no rain or snow. I should have known better :-)

The snow started falling just as the car was loaded up on the trailer. Fortunately, it was cold snow, that is clean and no salt on the roads either.

Back into the garage again...

So, you could say that in 2012, christmas came early with a large red package. How nice!

Gustaf

RossD
RossD UltimaDork
3/29/16 7:31 a.m.

Looking sharp!

therealpinto
therealpinto New Reader
3/30/16 1:12 a.m.

Thanks, I was quite happy too :-)

I went to the US over christmas/new year 2012-2013 but I was itching to get back and get started on the Capri. A strange feeling working on a car with fresh paint, and a bit nervous at times.

First I decided to try to get the pedal box in.

It is in there...impossible to take a decent photo...

Engine bay side turned out pretty clean.

Then I had to turn my attention to the front suspension again. Not having had the time to do a proper, complete mockup before the body went off to paint meant I had many small details to solve. And since basically everything has changed it turned out to be a bit of a chore...

With the drop links the way I had planned it, the ARB blade would hit the steering tie rod, and the uniballs in the droplink would bind at full lock. Shortening the drop link to clear the steering was one option but it wouldn't solve the binding issue.

Next option was to use droplinks connected to the TCA instead. This takes care of the binding (the TCA doesn't turn like the strut). Seemed good enough to continue on that.

Then I realized that the tension struts would also interfere with the steering tie rods at full lock and full droop.

Thankfully, GRP4 Fabrications came to the rescue again with their cranked (really cranked) tension struts.

The mount for the tension strut is made from rectangular box section steel and bolts to the standard ARB mount. The thought here is to make a mount that can be shimmed for height, and can be remade if another design is needed - without having to alter anything in the body.

While waiting for some parts, I fitted the brake lines on the rear axle. Special order, black steel braided lines with a protective sleeve, and stainless fittings. A really good French company make these at a decent price.

The Sierra has a hard line running along the rear trailing arms, I used flexible lines all way now and that also means you can remove a trailing arm without having to disconnect the brake lines.

I went on with the hydraulic hand brake, now the line runs inside the car from the rear circuit master cylinder.

Engine bay brake lines with the line lock:

Then, the GRP4 Fabrications tension struts arrived.

That meant I could sort of finalize the front ARB.

I also refitted the Sierra rear ARB (I had not used that for some years), and converted it to adjustable, semi rose jointed droplinks (using MkII Mondeo/Cougar droplinks).

Working on the front suspension and steering took a lot of time - these pictures are from August of 2013... Getting the alignment in the ballpark and also having the wheel centered in the wheel arch took a lot of time. It is also very hard to measure things, you need to (or I need to...) mock things up and try. And then you need to check through the suspension travel that it works...

Another issue, not seen here, is that I had to shift the rear axle over a bit. When it was mounted back in 2005 I had it centered the best I could, with reference to the arches. But both rear arches had been swapped or repaired by previous owners and they were not spot on. With the X-pack kit on, I had different wheel arch gaps. This is something I should have checked before sending the car off to paint - now I was not too keen on cutting and welding new mounts.

In the end I had offset bush tubes made for the Sierra beam mounts (to the body). This is a solution that is used on Sierras too, sometimes, to correct thrust angle of the rear suspension. Apparently, Fords tolerances when building the bodies are not all that great.

Fixing these things takes a lot of time, as you know.

Next on the list was getting the cage back in. Before fitting it I had to get the rear "door cards" back and I had decided use the ones I had, with space for 6x9" speakers. Now, this car is never going to be a proper listening room but it gets enough street use to warrant some kind of music player. The Infinity 6x9" were on sale and I kind of liked the styling.

I also cut the plastic trim pieces, to allow for the cage and the rear coilover turrets.

Next came the tailgate. I ended up using a GRP tailgate from Smith & Deakin (just as I did with the bonnet). My old one had some rust and I did not have time to sort that.

And, the spoiler...

Then some glass and trim!

So, fitting the glass to the tailgate then. Ford changed their tailgate design in 1981/82, from a screen held in with a normal rubber trim, to a bonded screen. Of course Smith&Deakin made the tailgate for the bonded screen, I had a seal for the old type. And with 1982 being the last year for Capris in Sweden, finding a seal set here was not easy. Tickover (Capri specialist) offered a good used seal set at a good price, and the delivery was quick.

However, the GRP tailgate has a much thicker lip than the steel tailgate (of course). The bonded screen have two rubber strips, one inner that fits around the lip and an outer one that is the "cosmetic" trim between the glass and the tailgate. The inner seal would not fit...and the measurements were a bit special. But I managed to find an E-bay shop that had the last stock of universal U-channel that could work.

With that in place I got some windscreen glue (a special Terabond, primerless), and made an effort.

The first try was not a great success. I glued the screen in place and thought that I could fit the outer seal afterwards. It has a lip that should go between the glass and tailgate but it was impossible to get it to seat correctly when the glue had set.

So I had to cut the newly bonded screen loose, and do it all over again - this time putting in the outer seal before the glue had set.

This was as far as I got during 2013...

Gustaf

jimbob_racing
jimbob_racing Dork
3/30/16 1:01 p.m.

Thanks for posting. I love reading about your progress.

therealpinto
therealpinto New Reader
4/4/16 1:12 a.m.

Thanks for reading! :-)

Of course I did some more track time with the substitute during 2013 too. I wrecked the English axle that was on the car and swapped to the Atlas that came off the "proper" Capri earlier. It was great fun to drive still.

https://www.youtube.com/embed/4FJpTuWeEcE

But early 2014 I tried to focus on the turbo Capri. As you may recall I had gotten some poly V pulleys and I got a nice, compact alternator to go with them. It's a 75A unit from a 2010 Suzuki Swift.

The issue here is of course that it is really tight with the turbo, the boost outlet and the manifold. To be honest, when I built the manifold I did not measure the clearance vs. the alternator with enough detail. But maybe this time I could work around it.

The YB oil pan came with a crank sensor mount, and the YB pulleys have a 36-1 trigger wheel. So I decided to use that, instead of my old crank sensor mount.

It lines up pretty good but the YB crank has a longer snout than the Pinto crank. So I needed to get a spacer machined.

Another un-tried factor was if the YB oil pan would fit in the Capri engine bay. Normally it works fine. But I had added a new blade ARB and my engine was also lowered something like 10 mms. So I needed to dig out my old empty block for testing.

A bit hard to judge the clearance with no gearbox but it looked hopeful. Raising the engine 2-3 mms and some slight filing of the oil pan should do it. You may also see that the steering rack is lifted something like 8 mms - to correct bump steer (the pivot points for the TCAs are also moved, outwards and upwards, for more negative camber and to correct the roll center on a lowered car). Lifting the rack also gives less sump clearance... Kind of a nervous moment here.

But with that settled, the crank spacer machined, I could put the correct engine back in.

That was another milestone and something that also meant I could go ahead on many other things that had been held up for a while.

The exhaust was one of those things. Previously, I had a rather simple exhaust, 2,5", most of it cobbled together from old stuff and more of a temporary solution to get the car on the road with the Sierra IRS back in 2005. I had never really spent the time on a proper exhaust since then. But when I did the body work now, I also lifted the floor behind the passenger seat to give some more room for another muffler.

I had always built exhausts from the front and back but now I decided to try something else. The rear section is the complicated one, it has to fit around the rear suspension, but the front part is pretty simple. So I started with trying to get the back box in a good place.

Then it has to snake around the rear wheel and coilover (with enough space for the drag semi slicks), curve to miss the differential and trailing arm....

The center muffler is a Thrush, inlet center and offset exit. It is fitted with V-bands to allow for a replacement straight through bit - I suspect that this kind of muffler can be a restriction. But it needs to be relatively silent to pass the tech inspection and it's always easier to remove a muffler than to add one.

The downpipe connection is by a 3" "compensator", a spring loaded flange that can take some movement. Not that it should move, but if the exhaust scrapes or one of the mounts let go, this is the sacrificial joint...

Spring came and for me that means time is the tight sector. I really have too many other obligations that demand attention :-(

But I managed to squeeze in some garage time every now and then. I had my father come over for a weekend to help us with some painting on the house, and one night it was raining. Rain = no paint so instead we put the doors and bonnet back on the car. A nice couple of hours - my father helped me get the car driveable back in 1997 so we sort of closed the circle here.

I managed to do the small odd jobs but no camera time. Then a vacation trip to Italy followed by a work trip to Spain for a week. But in the hotel room in Spain, I started to make the list of what was left to do. I was scheduled to work as a speaker on the dragraces the weekend I came back, and then, the week after, the biggest motor event in northern Sweden was taking place. We had already decided to leave for that on Friday, towing the caravan behind the Kuga. It's a really nice event with different activities for 1,5 weeks, and we usually are a couple of families that bring the caravans and camp together.

Looking and the list, I felt it might be doable. I could have the car running in time, if I really put my mind to it. The MOT was booked for Wednesday, thinking that if the car did not run by then (and pass), I would just leave it at home. Not wanting to do any improper quick fixes...

Sunday after the races saw the car outside the garage, on it's own wheels!

Not without difficulties - the injectors were clogged so I had to swap in a smaller set I had saved from before. The parking brake rod hit the propshaft, so a shield was quickly fabricated. Then I had to sort some bumpers. I had 3 front bumpers to choose from, plus a full set of GRP bumpers. All in different stages of "readiness". In the end, I decided to use the brand new bumper I had. But then all my Capri indicators looked manky... I had bought a set of BMW E30 indicators, with the intent to modify a Capri bumper. Now I decided to use them and make som "RS500" style mesh things to cover the part where the smaller E30 indicators left a gap. Then I did not have a full set of bumper brackets... A MkII bumper bracket was modified to work with some spacers.

Tuesday evening the car was "ready" for the MOT!

I can assure you that the feeling was pretty good here....

Wednesday and MOT time. Always a bit nervous...the car is registered and road legal with a turbo and many other changes but now I had done a bit more. I was quite prepared to fail on modifications (needing a new inspection for those parts) but that should at least give me a month to drive the car. The MOT man was the same guy who took on the Kuga earlier this year, and while he is a nice guy, I was sure he overheard me speaking to the station manager about all the changes to this car back then. But he was just very happy with the Capri!

Now I had "time to spare"...before doing the 130 km trip to Lycksele and the big event.

I have to add - this entire week we had a really hot spell, 30 degrees centigrade or more. But the Capri made the trip, the only small issue was that the alternator seemed to get a bit hot and charging output went down to around 12,8 volts after 10-15 minutes. But it stayed there so I was not too worried.

So here it is, during the "Bring your toy" event...

It took longer than I ever though but in July of 2014 the Capri was back, shinier than ever...

Gustaf

Rodan
Rodan New Reader
4/4/16 6:14 a.m.

Looks fantastic!

RossD
RossD UltimaDork
4/4/16 7:49 a.m.

She's a beaut.

crankwalk
crankwalk Dork
4/4/16 1:51 p.m.

Nice!

therealpinto
therealpinto New Reader
4/4/16 2:51 p.m.

Thanks for the kind words!

It was great going to the Motor Week in Lycksele, but really, this car is built to be driven, on track.

When I got back I went through the mapping a bit before the first track day outing. But I did keep the boost down, I wanted to try the new suspension with a bit less power, just to be safe.

https://www.youtube.com/embed/7GURViZ92u8

https://www.youtube.com/embed/XmDPu4heyac

Two clips that might illustrate a slight problem - low grip! Now, these runs were made on the street tyres and they are more for cruising. Both ARBs are probably a bit hard for street tyres but it was also quite apparent that I needed to do a proper wheel alignment. Then the alternator tensioner broke off in a weld, so I had to tie-wrap the alternator to get back home.

I redesigned the alternator mount and fitted a longer belt to get it a bit further away from the heat. That worked great, now the voltage stays nice and high all the time.

But apart from the suspension work, I had an issue with my nice stealth gauges (boost and voltage). The black panel is very clean when the ignition is off...

Unfortunately, it is not very bright in daylight when it's on either;

Now, there are numerous suppliers of gauges but I liked the 270 degree sweep on these. Especially for voltage it is good, the 90 degree gauges just don't give enough resolution to see if the charge is good or great. I could have gone to a digital voltage gauge but that was the last resort.

Finally, R-Spec in the UK had the solution. Not very cheap (stepper motor!) but good support, decent looks and nice installation (piggybacking connectors reduce the wiring quite a lot).

The blue light is a bit over the top but it actually works good. The warning function is not programmable so that is of little use though.

With that sorted I turned my attention to the engine and boost level. I decided to turn up the boost as much as my small injectors would allow - that is somewhere around 1,2 bar. A healthy increase in power...and time for another track day.

I made some small adjustments to the ARBs (softening them) but still had the same feeling of low grip. Then I had a fuel leak from the fuel rail, and an oil leak from the turbo drain pipe. So more work to do.

The list for next track day was quite extensive and most of the hours was used on the front suspension. The track rods had been an issue during the early assembly and now I faced those problems again. The issue is that the longer TCAs means I need to wind out the track rod ends quite far - to set decent toe. Track rod extensions are a possibility but they have a minimum extension of something like 25-30 mm. Too much for me. I had tried to shorten some track rods a bit but still did not get it right. Now I tried to adjust around that but I had to give up. I knew I needed to come up with a better solution during the winter - either I get some new longer track rods (available in Australia with only one UK distributor) or see if I could increase the front track even more.

But I also had a closer look at the front ARB.

The drop links between the blades and the TCA had quite a big angle. Unfortunately I have no images to show that... But the angle meant that the drop link would try to push the blade sideways more than up when the suspension compresses. I suspected that it meant that the ARB would act as an extra spring and not transfer too much force to the other side.

I made a new mount that clamps around the TCA instead.

This should give to effects: 1. The wheel will have a larger leverage towards the ARB, in effect making it softer 2. The drop link will be straighter, pushing the blade at a better angle and transferring more force to the other side in roll

Now I also used the Yoko A048R racing tyres, hoping for more grip.

https://www.youtube.com/embed/4NbEgkrAluc

The new track layout was quite tight in places. I still had low grip but now it was easier to handle, and actually my times were quite good and very consistent (hard to believe when you see the sliding perhaps...). When I left I had the 4th time, only beaten by two Impreza WRXs (quite heavily modified ones) and a Corvette C6. The tyres are old (bought in 2007 I think) and are worn so new rubber will probably help.

Still. The car is great fun to drive and dare I say so myself, looks pretty good :-)

Gustaf

therealpinto
therealpinto New Reader
4/6/16 1:28 a.m.

This was the summer of 2014, just to remind you.

The car was by no means "finished" but other obligations in life meant that I couldn't (or can't...) spend all the time on the car. The first weekend of September 2014 there was a rather large car meet here and I spent some hours tidying up some small stuff and gave it a good wash and wax. The car creates some interest from people who know but it's a bit stealth to the un-initiated. I had a good day out though.

On the way back from the one of the track days I had some small misfires when cruising. On the way to and from the car meet it got worse. Every time the car would misfire, the shift lights would also flicker. That lead me to think I had some noise on the crank signal. But since I still ran a complete EDIS system with EDIS module, it should be pretty tolerant. I checked the wiring in the engine bay and found no signs of error.

One night I went for a drive with the computer connected to log the issues.

Rather nice way to search for problems...

The log files actually did not show the rpm spikes I anticipated, but you could see that the AFR would spike high and sometimes other sensor values spiked too. So I dove deeper into the wiring and found a loose earth connection for the engine management loom, on the relay plate. I tightened that up nicely and the issues apparently went away :-) Simple problems are sometimes good problems.

With that sorted I closed the 2014 season, and made some plans for the winter upgrades. The plans were to swap out the intake manifold and get some larger front brakes fitted.

The old manifold was maybe not too bad...

It had some shortcomings though, no intake trumpets inside and more alarmingly, the fuel rail had a severe wish to come loose. Not nice.

I had a friend combine a YB (Cosworth that is) base plate with an EFI Pinto manifold flange, like so:

Another friend laser cut some flanges and I spent countless hours building a plenum, and not taking pictures :-(

It turned out pretty OK.

A standard YB fuel rail is used and is now rock solid.

The brake upgrade went badly. I got some nice Focus MkI ST170 300 mm discs and Brembo 4-pots.

Looks nice but the disc offset is too low, the calipers won't clear the wheels. Darned.

I got some Peugeot discs instead to mount behind the hub, standard Capri way. Looks good...

But then I realised I need spacers for the road wheels to clear the struts and then the center spigot is too short. I decided to put the brakes on the back burner for a while since I wanted to drive the car during the summer of 2015.

As it turned out, the summer of 2015 was really bad weather wise. Rain, rain and more rain. I did some track days but soon the misfires got worse and in the middle of the summer I decided to swap to a MS3/MS3X management system instead. In theory a simple swap but some extra work was required. But it was worth it, misfires gone and more features to play with. Also swapped in the 875 cc injectors...

Towards the end of the summer I also brought a nice alloy radiator. Specced for a RS3100 it did not really "fit" but I have stopped expecting stuff to fit this car...

Shrouding is now completed and I got an idea...a friend with a dyno, that can only mean good things.

The spec is basically;

205 block with standard crank

YB pistons, rods, oil pump with spray bar and YB winged sump

Moderatly ported head, standard valves, NH206 cam

YB intake with "Swedish" style plenum, 3" throttle body

4x4 Cosworth Sierra intercooler

Custom pulse split exhaust manifold, 60 mm wastegate

Holset HX32 turbo (8 cm2 single inlet exhaust housing)

MS3 management with MS3X, crank trigger and EDIS coil in wastespark mode

875 cc/min injectors (runs on pump fuel, 98 octane)

We had an issue with a trigger fault at 6300 rpm so all runs were ended at 6000 rpm. Base line boost is 1,1 bar (16 psi) and with minor adjustments we made 226 whp @ 5960 rpm and 325 Nm @ 4574 rpm.

The engine seemed to like boost (and igniton advance) so we turned the go-fast knob a bit and ended up at 1,8 bar (26,1 psi). 284 wph @ 5964 rpm and 398 Nm @ 4410 rpm.

At this power level the intercooler is a bit small, it gets saturated so it needs to cool down a bit to repeat the results.

The roads were cold and damp after the dyno day, almost icy, so a test drive only gave wheel spin. And a grin! :-)

So that was a short brief of 2015, but there is a good reason for it being brief, something that I will explain in another post as soon as I have the time.

Gustaf

Happy Carmore
Happy Carmore MegaDork
4/6/16 5:50 a.m.

epic thread

therealpinto
therealpinto New Reader
4/7/16 1:42 a.m.

I'm not really sure if the briefness reason should be split it into another thread but for now I will start it here at least.

I have always wanted to do real racing (road tracks), but where I live there is something like a 10-12 hour drive to the closest track with any racing series. So I never even really considered that. But a couple of years ago the people who now own the abandoned airfield where we do our track days, ran some company events with 6 hour endurance races for "scrap cars". That evolved into a cheap 4 hour endurance series with rules to keep costs down.

In the summer of 2014, when I had my Capri at the Motor Week event, some people I hang around with started talking about getting a team together for the races. I said that I would be in, if someone had a workshop and if the other people were serious about going racing. Since one of the guys owns a metal working company he could provide the workshop space.

During the fall we started to make the plans more in detail. The rules are strict, the car has to be available for 5000 SEK (around 600 USD) on our "Craigslist", maximum 150 bhp, no engine modifications, no forced induction, no coilovers and "road tires".

We made a list of available cars and tried to rate them on weight vs performance. Of course, things like Honda Civic CRX 16v are in a class of their own, but cheap examples are disappearing fast. We also had a limit on how far we could travel to pick the car up.

Eventually we had a number of prime suspects when we saw this listing:

"Grannys car is for sale", and I remembered that the Primera GT (Infiniti G20 in the US) got a lot of praise in the early 1990's. With 149 bhp it should be in BMW 320i territory looking at the power-to-weight ratio.

The car had a failed emissions test but we did some researh on the SR20DE engine and it seemed to be rather bullet proof so we took the plunge. The car was a good 2,5 hour drive away, not too bad. The two other team mates went off and I got a picture:

That meant we were on a roll for 2015, already in december 2014. And perhaps it's time for the next project thread.

Gustaf

1 2 3 4

You'll need to log in to post.

Our Preferred Partners
AdJ9JRSGwjXJn5qufOTSFzh7NteG7SfLJ6OVFqeJvSAbUvMxpMQQRiBowgDRP49V