1 2 3 4
oldeskewltoy
oldeskewltoy HalfDork
8/21/12 2:47 p.m.

Oh.... that timeslip... was with the 5 speed (remember the criticism R&T had...) and my car is still equipped with the original highway gearing - 3.58 final drive!!!

Now... not only add in a 6 speed with oh so better ratios... but the final plan also incorporates running a 3.9 final drive as well!

Back when I ran the 15.77, I didn't give much thought to it... but the 6 speed and shorter gear might even allow ME to get her into the 14s

oldeskewltoy
oldeskewltoy Dork
4/20/13 5:38 p.m.
oldeskewltoy wrote: Oh.... that timeslip... was with the 5 speed (remember the criticism R&T had...) and my car is still equipped with the original highway gearing - 3.58 final drive!!! Now... not only add in a 6 speed with oh so better ratios... but the final plan also incorporates running a 3.9 final drive as well! Back when I ran the 15.77, I didn't give much thought to it... but the 6 speed and shorter gear might even allow ME to get her into the 14s
from another forum wrote: So I've been wondering. How's the 6speed working out? (btw interiors looking good)

Well... with the S series 3.58 final drive... in reality... I don't need any gears beyond the first 4

Sooooooo... its time to swap in a final drive more appropriate. Here is Richmond Racing's 3.9 T series diff...... (originally for Legends/Dwarf cars) fitted into a GT-S housing.

The Richmond is assembled with zenki spider gears... so zenki axles are the call. The emergency brake cables need a fabricated bracket on the driverside(thank you Jesse), and a zip tie around the axle hop line mount to secure the passenger side cable.

Now... along with the diff, I have to swap in a different brake proportioning valve, because instead of drum brakes... I'm now running rear discs.

Doing some research All AE86 drum brake cars use valve 22040, while the GT-S uses valve 12040. I then look up my car, and low and behold, the valve is the same as a drum brake AE86 - 22040. So even though I have a different master cylinder, AND the proportioning valve is mounted slightly lower, the lines will not have to be customized to fit the GT-S valve! So I remove the drum brake valve, and swap in the GT-S valve. Then I go about bleeding the brakes. At this point brake bleeding can be a REAL pain... because there is no longer any fluid in the master OR the proportioning valve... so I go about palm bleeding. What is palm bleeding??? You fill the master most of the way, and you put your palm over the reservoir and work your hand like you would a toilet plunger.... This slowly pumps the fluid through the master, and the proportioning valve allowing me to circulate the fluid without having to pump the brake pedal, or use a power bleeder.

All new TRD suspension bushings will tighten up the whole rear end keeping the axle properly placed under the back of the car. Many folks don't know but there is a right way... and a wrong way to install TRD suspension bushings....... Care was used to install the bushings correctly.

More to come....... :D

Strike_Zero
Strike_Zero Dork
4/20/13 6:38 p.m.

Awesome!! I need to shoot you a PM with some questions

Jake
Jake Dork
4/21/13 8:08 p.m.

Super cool resto mod/ hot rod/ project. Love it.

oldeskewltoy
oldeskewltoy Dork
4/24/13 4:36 p.m.

thanks... still an on going (living?) project.

crankwalk
crankwalk Reader
4/24/13 4:46 p.m.

Very nice! Love the engine and valve covers especially.

mrhappy
mrhappy HalfDork
9/5/13 7:17 p.m.

Got any upedates on this?

oldeskewltoy
oldeskewltoy Dork
9/5/13 8:11 p.m.
mrhappy wrote: Got any upedates on this?

Its funny you should ask....... http://grassrootsmotorsports.com/forum/grm/seeking-ideas-help-me-build-a-box/70137/page1/

I'm working on finishing and re-assembling the interior... now that I actually found the door panel I was looking for....

oldeskewltoy
oldeskewltoy Dork
9/13/13 7:29 p.m.

for now I'm proceeding with the box....

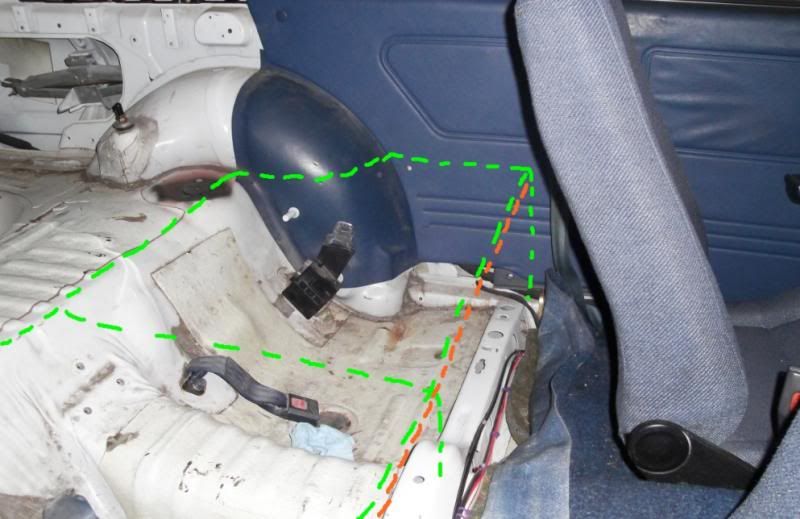
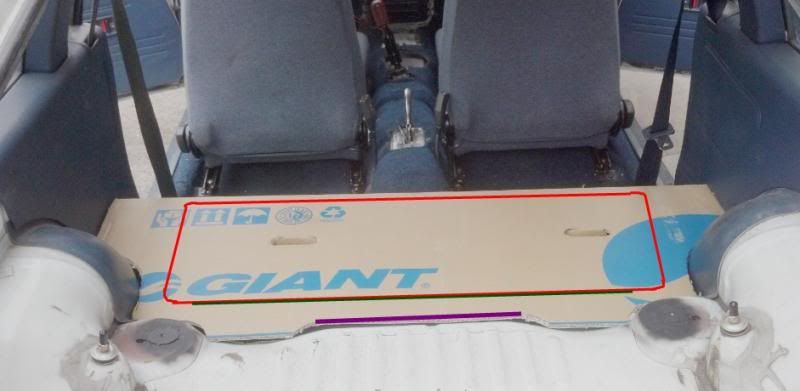
Using the tried and true version of C.A.D., I go from dotted lines to a template.....

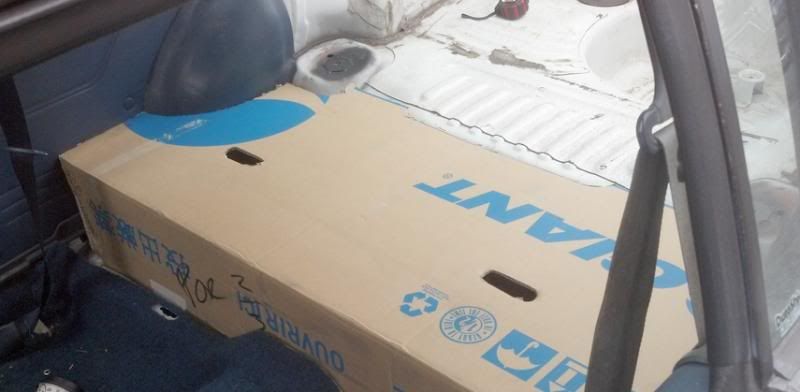
version number one (note lack of handle holds on this one....

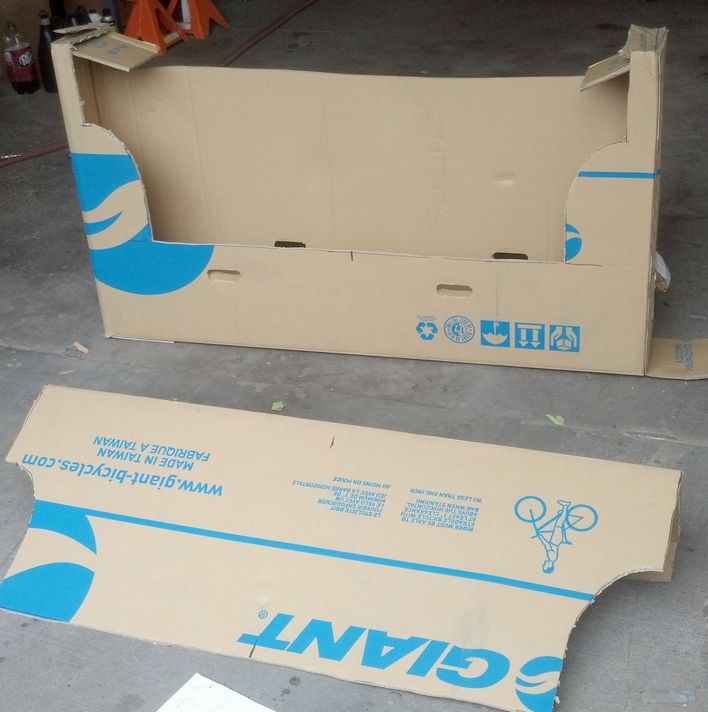
version #2 with corrections made after fitment of #1

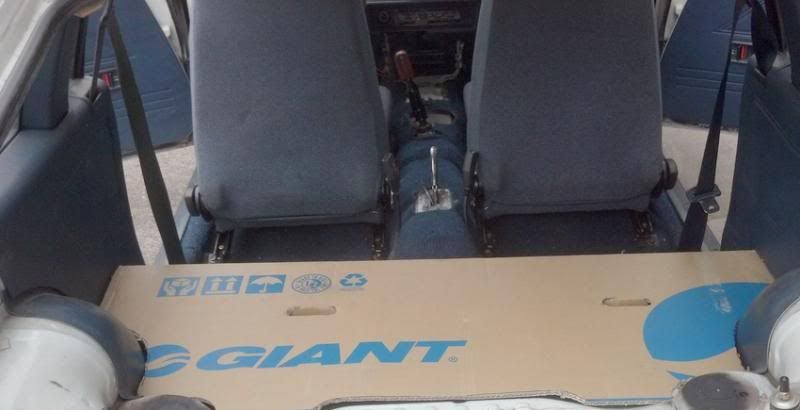
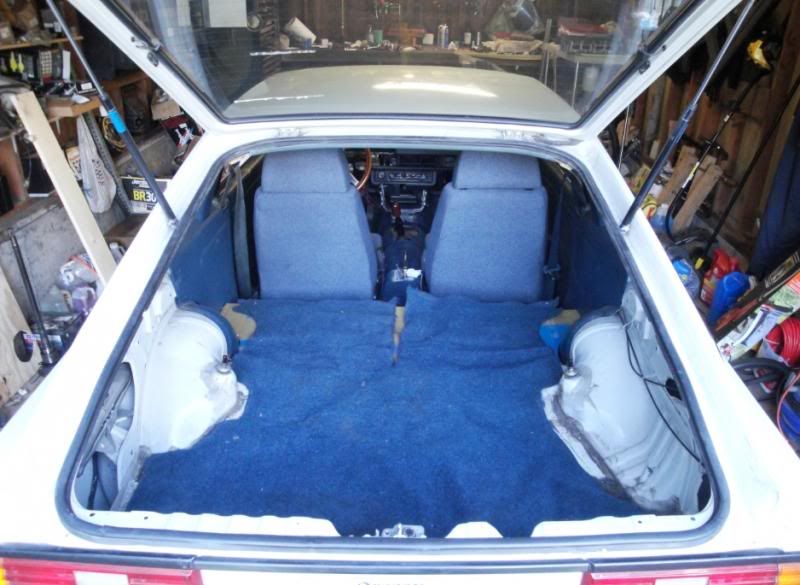
Digging out the original rear carpet... the new carpet will need to be a bit larger... but you get the idea....... :)

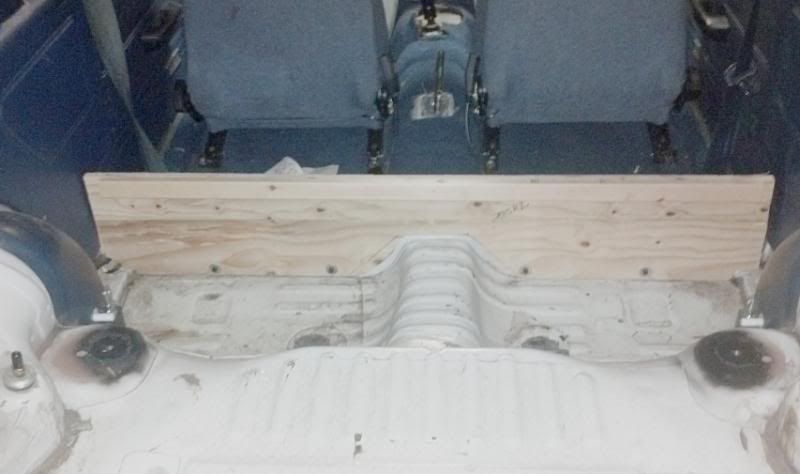
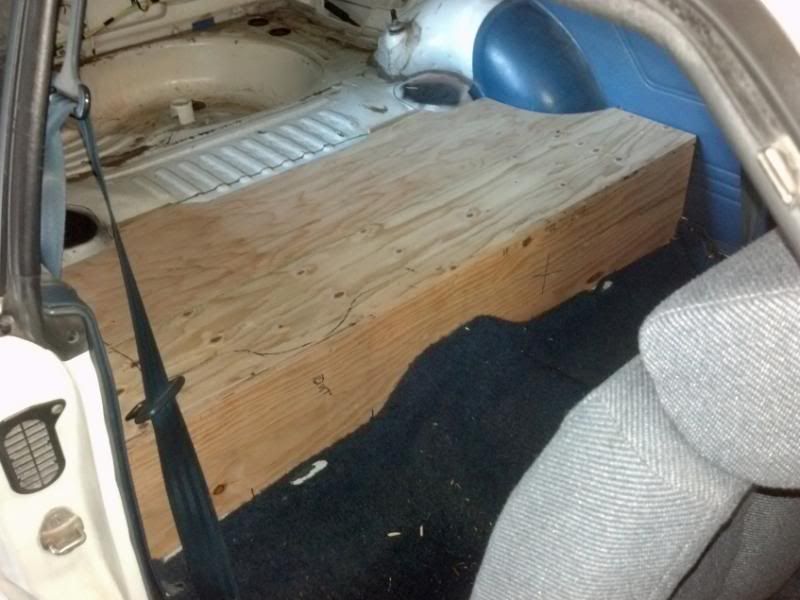
Now I go out and get a bit of plywood, and some hardware... :D

I'm still not sure yet what type of access I'll be utilizing. I've been giving a lot of thought into RX7 FC type rear bins..., or even making a pair of hinged rectangular openings in the plywood, instead of the entire top hinged (split along the lines of the carpet split)

from another forum said: Quite cool Dan. split opening might work best. Maybe do a small reinforcement on the lid.

thanks....

the template was the first key factor... getting something the fits all the contours. Now that that is done, I have to look at what exactly I want.

The RX7 bins would be obvious to even a casual viewer that there is some concealed storage, where as the split hinged lids would be less obvious that they are storage. The RX7 type (bins) is the strongest design type for I affix the lid to the front - adding support/structure to both, and then cut out sections in the lid for the RX7 bins...

I do have the ability to support the front wall so it could stand and fully support the entire width of the lid... if you look carefully at the dotted line drawing, at the front base of the wheel well you can see a 6mm hole, I can add a rivnet there and use that to brace/support the front adequately to support the top. This would allow for the most usable space... but would be the least overall strong.

A possible 3rd idea is to make my own bins... using the strength of the affixed lid to the front, but cutting out large enough panels to allow good access and then mounting the panels back into their cut out locations using a small steel strip to support the hatches, the carpet can then lay over the 2 lids. This way I get strength and stealth (hidden, secure, lockable storage)

carbon
carbon Reader
9/14/13 10:01 p.m.

cool build! good job

accordionfolder
accordionfolder Reader
9/16/13 4:40 p.m.

Great build, thanks for your very detailed documentation: it looks amazing. Hopefully my little EG can be this cool when it's done.

oldeskewltoy
oldeskewltoy Dork
9/16/13 7:04 p.m.

thanks for the nice comments....

oldeskewltoy said: Now I go out and get a bit of plywood, and some hardware...

the width across what use to be the back seat measures out to about 51"....
that sucks.... because instead of getting a half sheet of 5/8" plywood and using about 60%... I now have to go out and buy a 4' x 8' sheet just so I can accomodate 51".........
The waste..... (about 65%) -- I'm using (for this project) 2 pieces totaling..... a length of 51, and a width of 29" (20" for the top piece, and 9" for the front piece)

So... I went to Lowes picked up a sheet of 5/8" plywood, had it cut to the rough overall dimensions (one 9" x 51" piece, and one 20" x 51" piece).

I shape the front piece, remove the lower corners to accommodate the frame and wiring, along the top I add a 1 x 2 as a stiffener/ledge to allow me a wide mounting area for the top piece. To mount it I use 4 - 6mm clip nuts, and 40mm long 6mm bolts, it is strong... strong enough to allow me to put my weight on it..... then it began to rain... the rest will have to wait for now...

I've modified the original idea a little... instead of the whole top opening, or both sides opening fully, I'm going to use some of the top to add structure, and then open a hatch. Something like what you see below

red - opening/hatch green - piano hinge purple - mounting location for attaching deck to car

more to come........

SyntheticBlinkerFluid
SyntheticBlinkerFluid PowerDork
9/16/13 10:42 p.m.

Great build!

I never have considered an AE71 as a possibility, but after this build, I'm certainly interested.

oldeskewltoy
oldeskewltoy Dork
9/17/13 2:22 p.m.

one step further.....

now I need a piano hinge, and some angle mounting hardware.

More to come.....

oldeskewltoy
oldeskewltoy Dork
9/18/13 12:05 p.m.

Besides working on finishing the rear enclosure.... I managed to come across some Cibie headlamps. These are not E code, but DOT approved

Now before I go to far off track... US road lighting laws SUCKED... or they use too... (prior to the Taurus)

I sent an email to Daniel Stern Lighting.....

and now for a brief history lesson

Daniel Stern Lighting said: You bought a set of Cibie BOBI headlamps. BOBI stands for "Bloc Optique à Ballon Incoloré", which is French for "Headlamp unit with clear balloon". Remove the bulb and you'll see a glass balloon separates the bulb chamber from the space between the lens and the reflector. This is what is meant by "Bulb-type sealed beam". These are not European-code headlamps; they are US-spec headlamps [u]that were briefly available in the early 1980s[/u] until the US domestic sealed-beam industry hollared bloody murder ("THAT'S NOT A SEALED BEAM!!!") and the US Federal Department of Transportation, in the spirit of market protection, hastily rewrote the rules to define a replaceable-bulb sealed beam out of the regulations. The space between the glass balloon and the headlamp lens is filled with helium. The idea was to combine the corrosion resistance of a sealed beam with the optical efficiency and convenience of replaceable bulbs. There were two or three different versions of the 200mm x 142mm BOBI lamp with substantially different lens optics and bulb clocking. These are not bad lamps, but all of them produce a very American beam pattern (central hot spot with wings, not a European-code cutoff-and-upsweep or cutoff-and-upstep beam. For best performance use an Osram 70/65w bulb. (price edited out) Some BOBI lamps take a standard H4 bulb; others have a ridge in the bulb seat and a matching notch in the modified-special-H4 bulb (in the latter case, grind down the bulb seat ridge to use standard H4 bulbs).

"that were briefly available in the early 1980s" - making them period correct for Surreptitious...

yesterday I found a Cibie catalog dating from 1985.... I took a screen capture to show the differences between E code, and bobi/Z-beams

view on left is light pattern on a wall in front of car, view on right is light pattern as viewed from above

more to come......

carbon
carbon Reader
9/20/13 3:07 a.m.

Cibies are cool! Looks like they have dust covers too. Nice. Another option for those of us cursed with sealed beams, is to convert to replaceable bulb E codes by hella called vision plus. (Not all vision plus are E codes). I had vision plus E codes made for an e30 in my ra29 celica (direct fitment). I have them in my Hilux and fj40 too, they're wicked. If that's still not enough light , ddm tuning has bi-xenon conversions for these now too! They have a servo actuated shade over the top portion of the bulb for low beam mode, so you dont have to be "that guy", and they come in color temperatures that are conservative looking so as to not disturb the vintage look of older vehicles.

4cylndrfury
4cylndrfury MegaDork
9/20/13 7:59 a.m.

In other news, do you work for a bike shop? Its atypical to see someone with an unbuilt bike box in their possession unless they know some people who know some people...They do make great templating material. Also, they make great impromptu creepers (carboard is easy to slide across, and soaks up spilled oil and what not well.

still love this build BTW. Keep up the good work!

oldeskewltoy
oldeskewltoy Dork
9/21/13 2:29 a.m.

Carbon.... besides the Cibie headlamps... I'm running the Hella DE2000 driving lamps too... I've got plenty of lighting....

4cylndrfury.... I do not work for a bike shop... BUT I know someone who does - ae86andkp61

carbon
carbon Reader
9/21/13 1:23 p.m.

looks great.

johnnytorque
johnnytorque Reader
9/21/13 6:40 p.m.

Gorgeous car. great job!

JtspellS
JtspellS Dork
9/21/13 7:24 p.m.

Wow a silly amazing build, Keep up the good work!

DaewooOfDeath
DaewooOfDeath SuperDork
9/21/13 11:16 p.m.

I want another one of these so much. Thanks for the inspiration.

ae86andkp61
ae86andkp61 Reader
9/23/13 12:47 a.m.

Looks good in person and looks good online too!

Someone in the other thread was asking about what kind of bike came in the box. If you must know, it was either a Defy or Avail (men's/women's carbon recreational road bikes) or a TCX cyclocross bike, or else an Anthem/Lust (men's/women's 27.5" wheel full-suspension mountain bike) all three have been flying off the shelves here.

I'm proud to have helped in some small degree on this car. It is a great all-arounder. It has been built with performance in mind, and tuned a bit without really sacrificing too much practicality. She looks good, but isn't a total trailer queen show car. Can't wait to see her done sometime soon!

oldeskewltoy
oldeskewltoy Dork
9/23/13 3:00 p.m.
ae86andkp61 wrote: I'm proud to have helped in some small degree on this car.

HA...... an understatement if I ever heard one...

YOU are one of the few people I TRUST to help in tempering my thoughts and ideas.....

oldeskewltoy
oldeskewltoy Dork
1/30/14 4:06 p.m.

Another eternity since an update.... sorry.

Even years (2010, 2012, now 2014) are the years that my car must be emissions capable to go through and get registered...

Back in 2010, Drift Office in Auburn managed to get her passed emissions... with a 6mm hole in the intake

Two years later (2012) she failed on her first try, and I had PSI try their hand @ tuning her... they were a bit less successful then Drift Office, but a new cat helped get her through....

2014 - Its time for inspection again... Loynings has a go at tuning her. They put her on their steady state dyno and tune her to have AFRs in the 12.5 to 13 range. I take her through, and she promptly fails 1100HC, 5.0CO - similar numbers to when PSI attempted. She goes back into Loynings, they move idle timing to 2 degree BTDC, and open up the throttle body a little to compensate for the timing. I take her back through and she passes!!!

Not super clean @ 214HC and 0.455CO, but clean enough. And now there is an added benefit... she seems to idle well now....

so well that during the test... the cooling fan came on... and she not only didn't stall, she still passed emissions even with the fan on

Took her out and enjoyed the nice sunny day... on our way home we encountered an AMG C36... he went home less happy.......

1 2 3 4

You'll need to log in to post.

Our Preferred Partners
ZoCQxAi9jZxn5lt7tvEupeVvt94DH8eduIySSDTK9Dw5b1w14rVhAM583M28n47c