1 2
krautastic
krautastic New Reader
6/15/18 12:56 a.m.

Keeping the updates going…


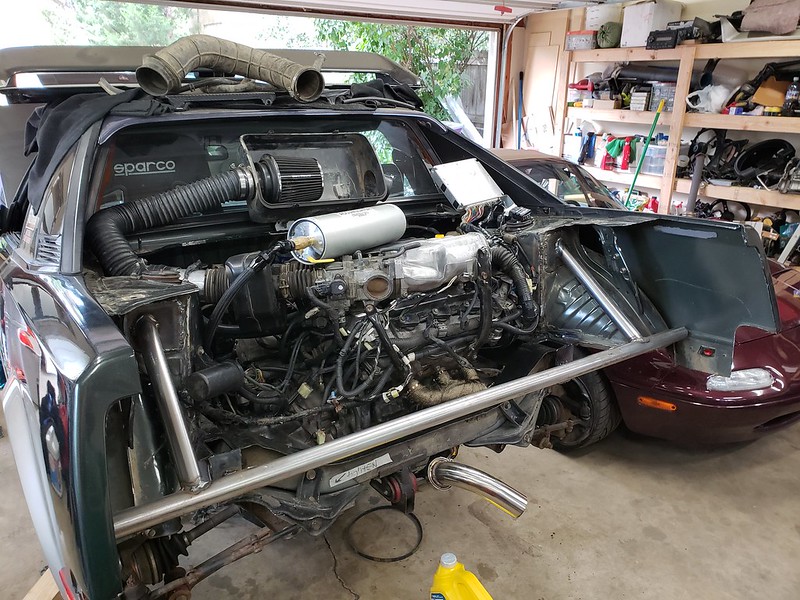
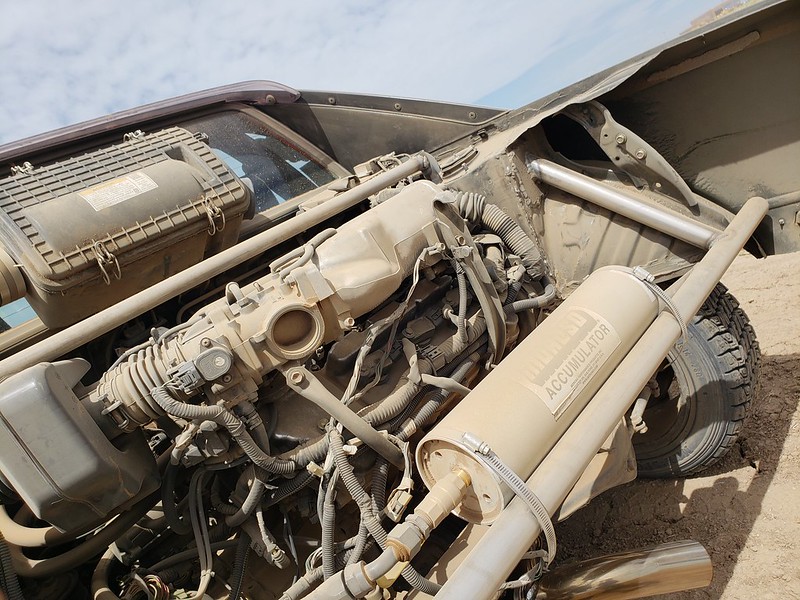
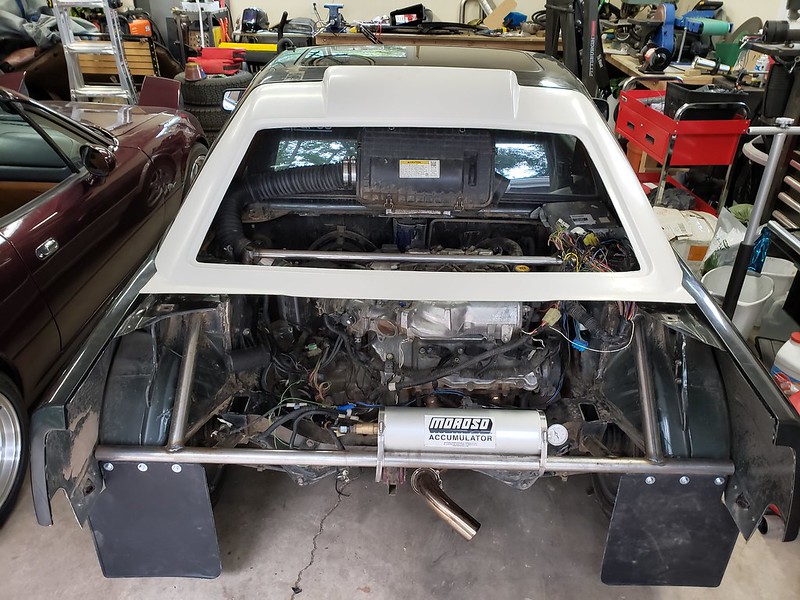
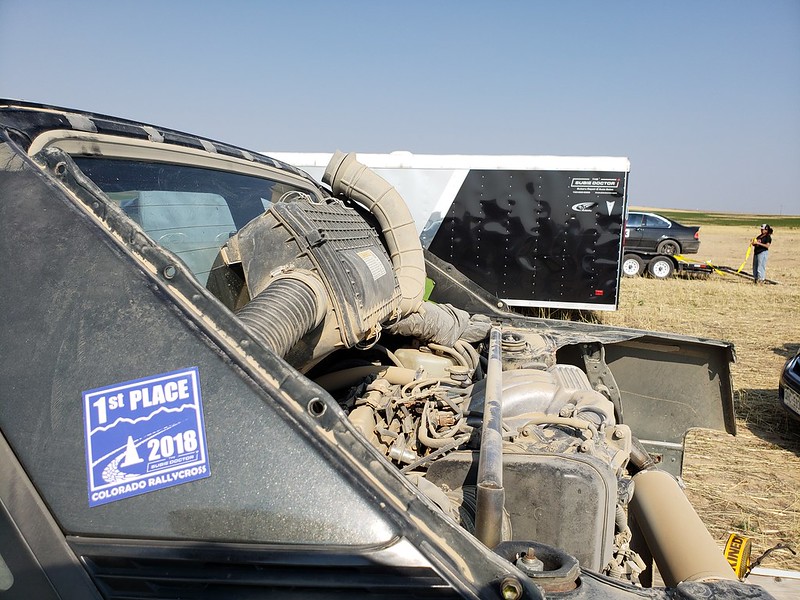
I intend to run a Polaris RZR turbo airbox with a donaldson air filter. The filter is huge, has really good fine dust filtration, and the hose sizes match up to the 1mz. It'll be mounted to the rear window, because I'm out of room. Also, because I'll be running some kind of roofscoop to feed it air. This is what it looks like:


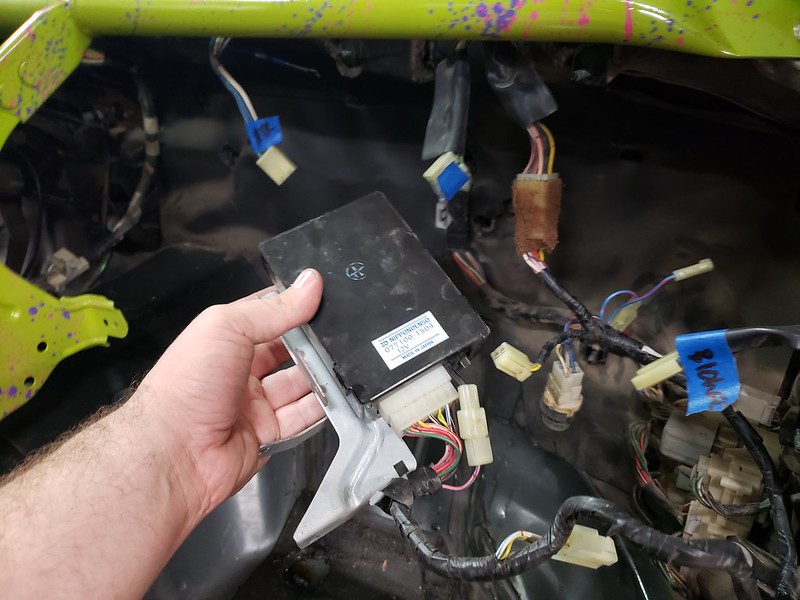
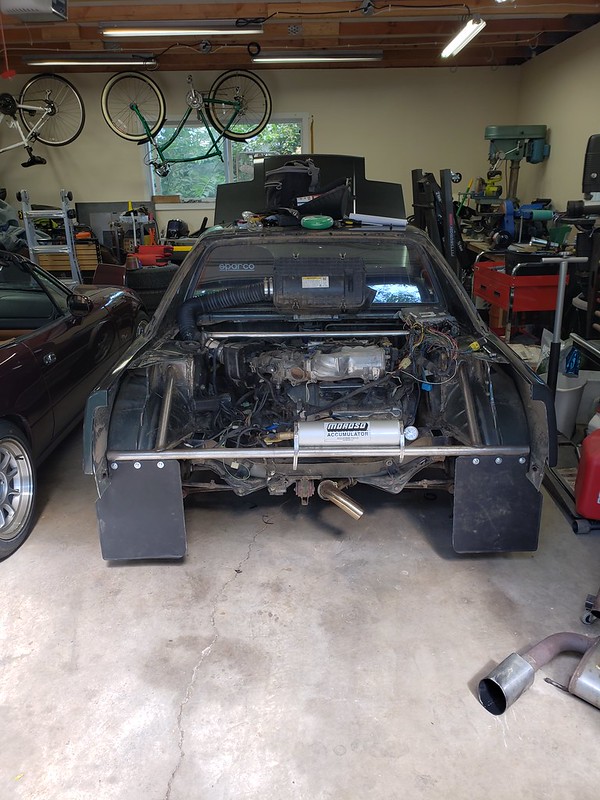
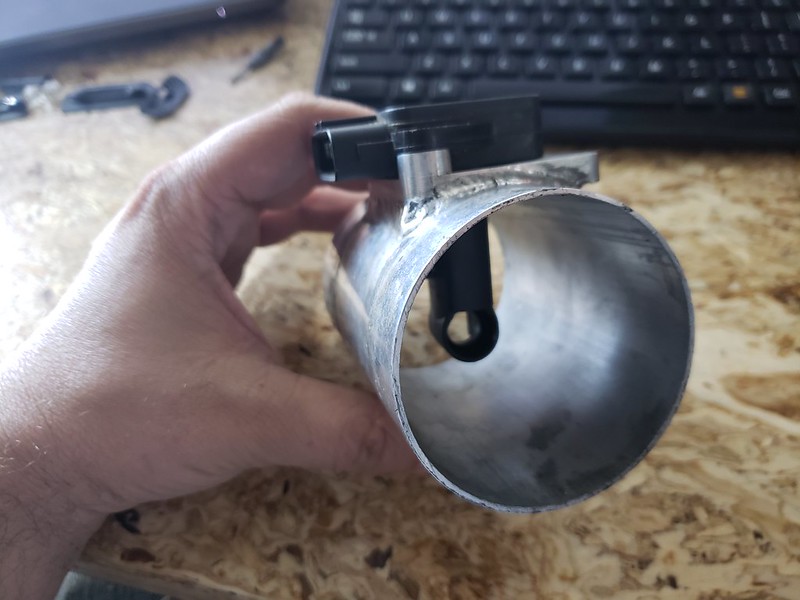
the 1MZ MAF is attached to the airbox. Avalon intakes are in short supply, but I found out that certain WRX's and EVO's use the same denso MAF sensors as toyotas. Well, the same bolt pattern and module, but they are different part numbers because they probably have different value ranges. Anyway, a fellow rallycrosser gave me this MAF tube from his WRX. Score! I found out later the tube diameter was too small.. so more on that later. I have a car I'm trying to start!


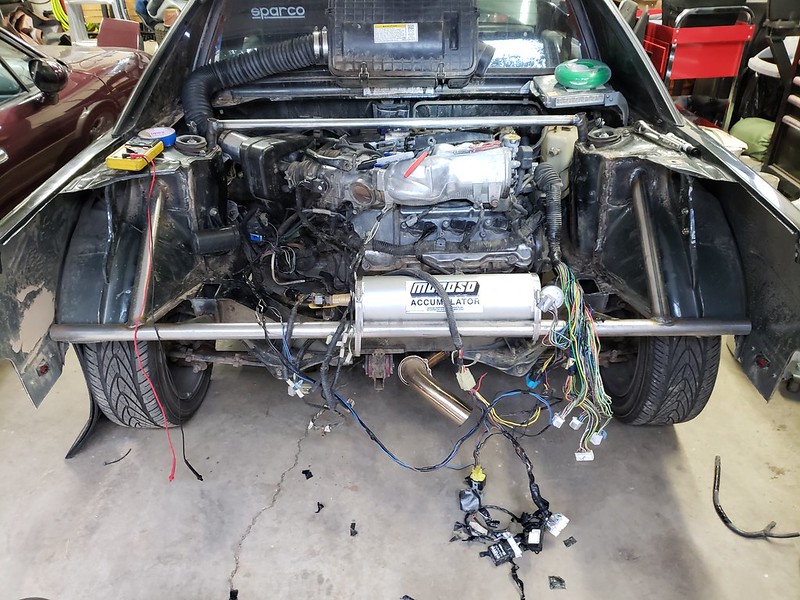
The maf tube along with a couple odds and ends were pretty much the last things keeping me from starting the car. After filling the transmission and rigging up some battery cables I went to start the car annnnnnnnnnnnd….. nothing. Not a click, no cranking, nothing. Dashboard lights up, there's power. There's power at the battery, but it is not starting. 


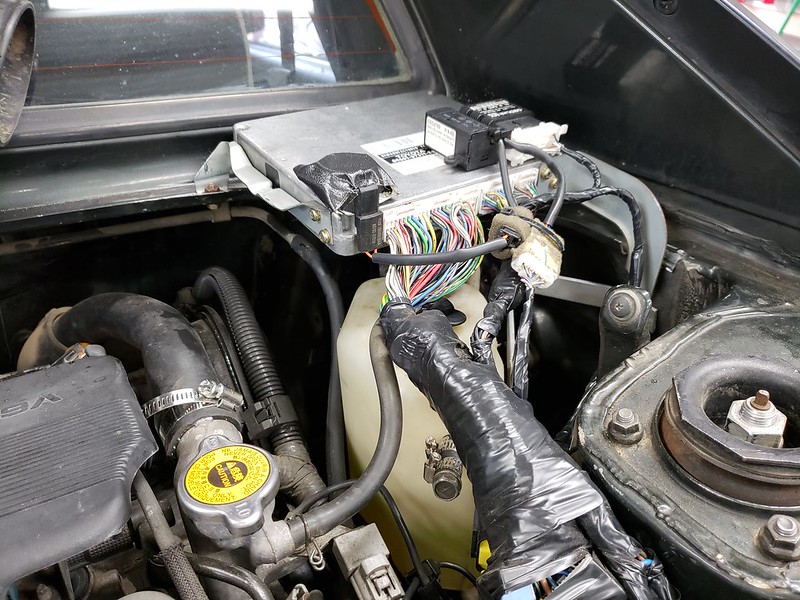
Debugging with the person in the UK that did the wiring harness we discovered two issues. One is that I didn't have the EFI Circuit open Relay plugged in. This relay lives in the trunk of the MR2, and needs to migrate to the new harness. The second issue I don't discover for a bit. So he tells me how I can bypass the starter relay. The result is this video which I only include because, there's so many "engine swap first start" videos on youtube where everything goes flawless. For me? No. I get a face full of solar flux and an engine that won't stay running. (solar flux is a paste you apply to the underside of stainless steel welds to prevent oxidation when you aren't using an argon back purge, the alcohol in the paste evaporates and a fine dust layer is left adhered to the pipe):


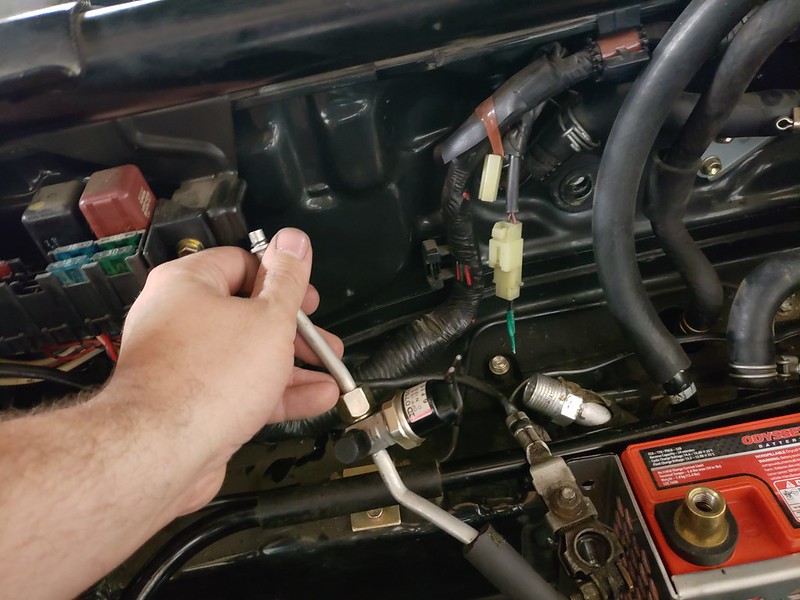
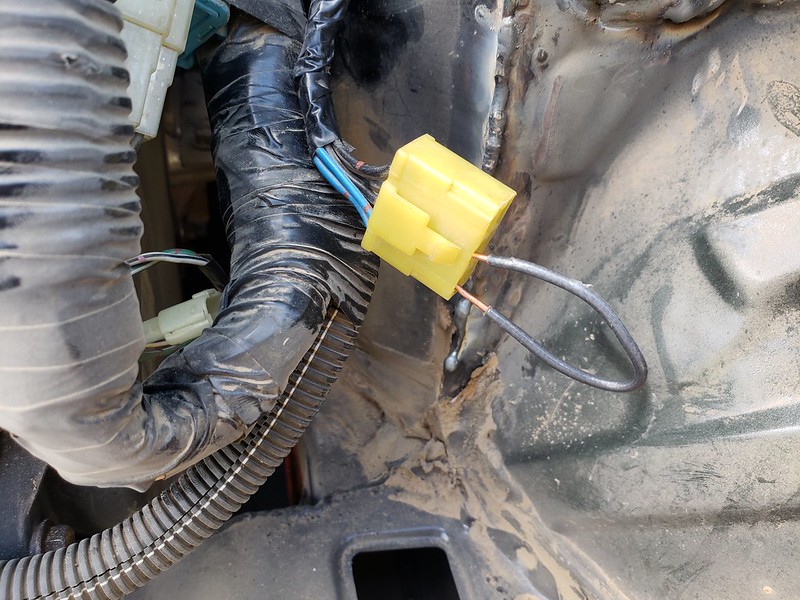
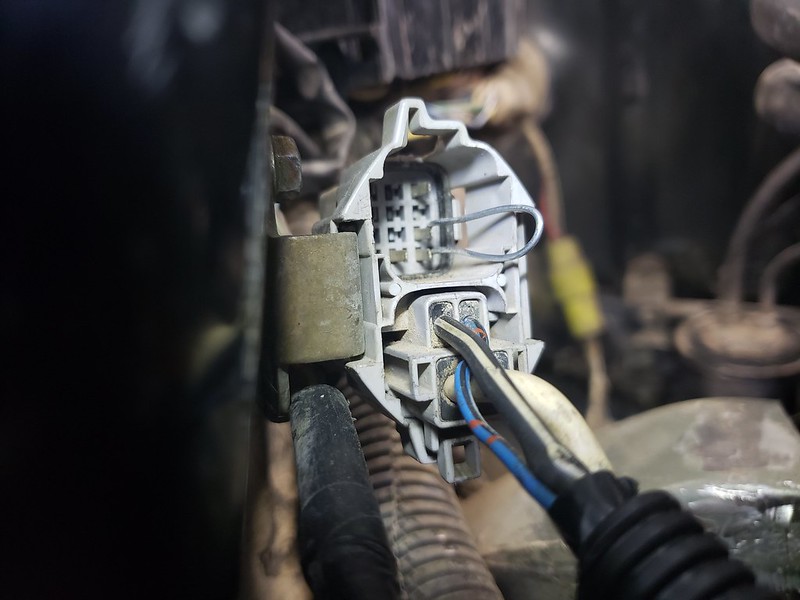
The car won't stay idling and adding throttle doesn't help. So, after work the next two nights I debug the start issue and the idle issue. The start issue is traced to a difference between US and UK mk1 mr2's. There's a main chassis to engine connector that goes to the majority of the engine bay fuses. On the US car there's two of these connectors and in the UK there's only 1. So my harness obsoleted the top connector which has two pins that need to cooperate to ground my clutch start switch. A bit of wire and the car starts reliably!


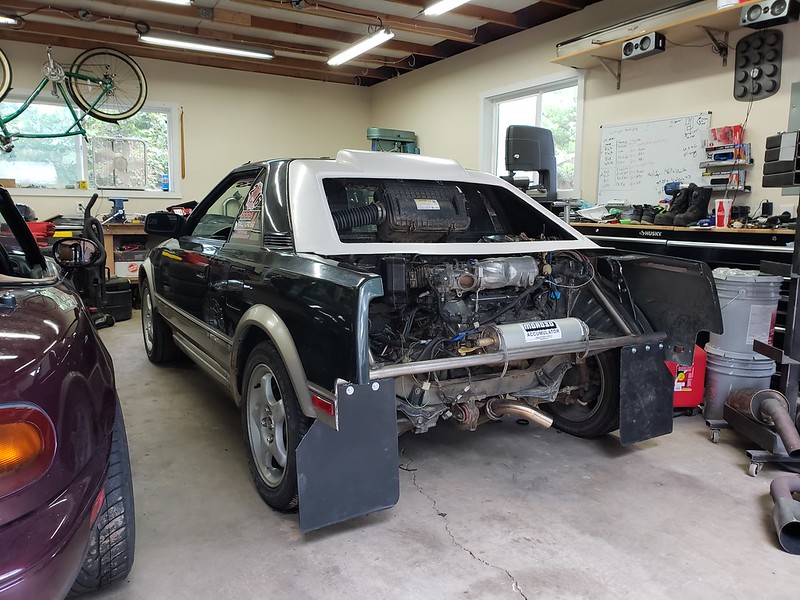
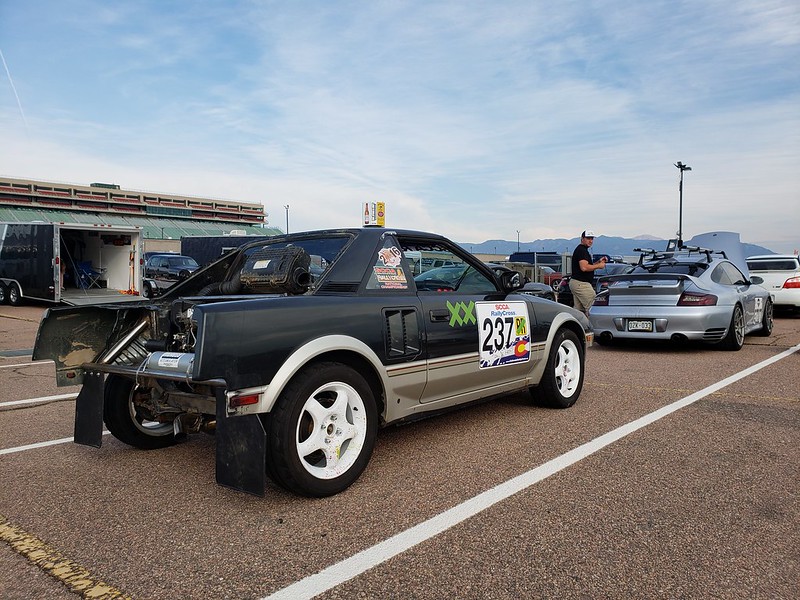
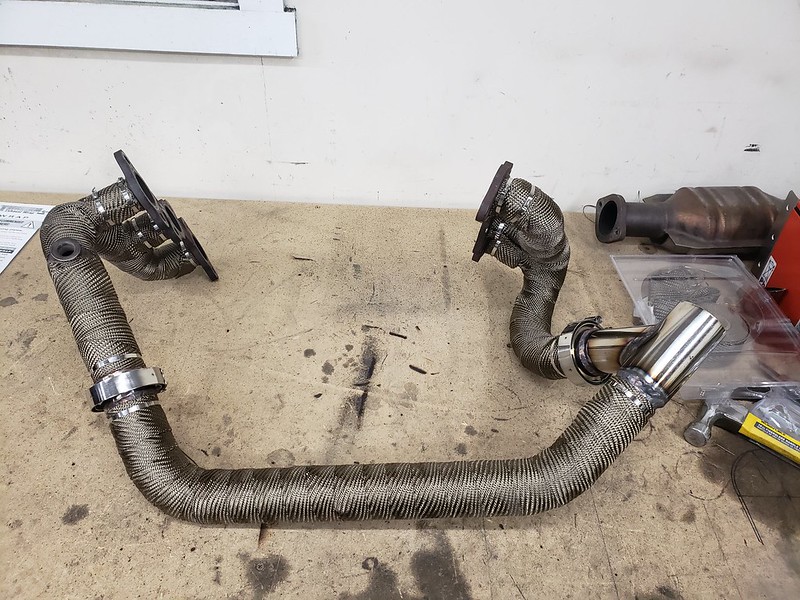
Now the idling issue I thought was a fuel pump issue, but it turns out that MAF sensors are directional… So when my friend and I threw on the maf tube, we didn't pay attention to orientation. Flipping it around made the car run like a champ! So here's that video! My super subaru style unequal length headers don't appear to be making the engine sound crazy burbly. We'll see how the rest of the exhaust changes the sound.


For posterity, this simplified wiring diagram helped me debug the wiring issues: http://mr2.run/mod/fuel-pump-kill-switch/


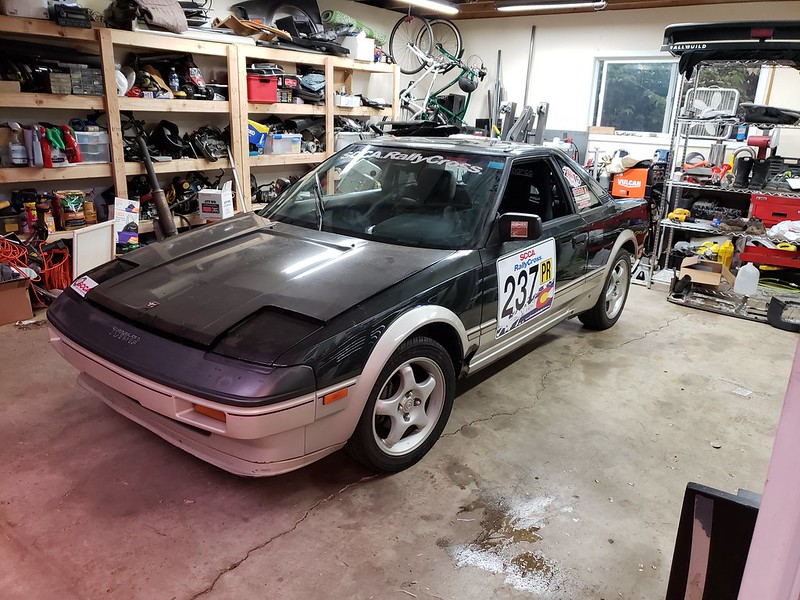
So yes! Starting the car was a huge motivational boost. I at this point have an upcoming race in a week and a half, so i condense my work list to items that I need to accomplish to be race ready, but the car not necessarily complete.


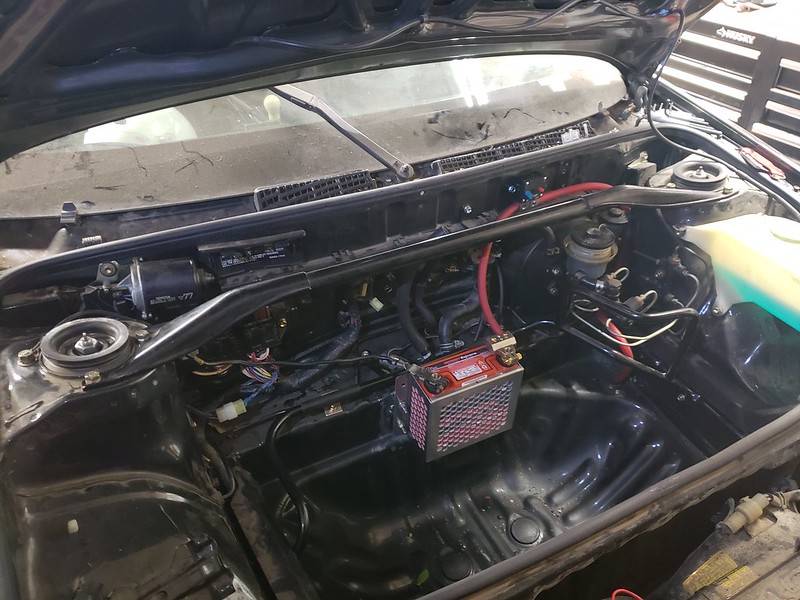
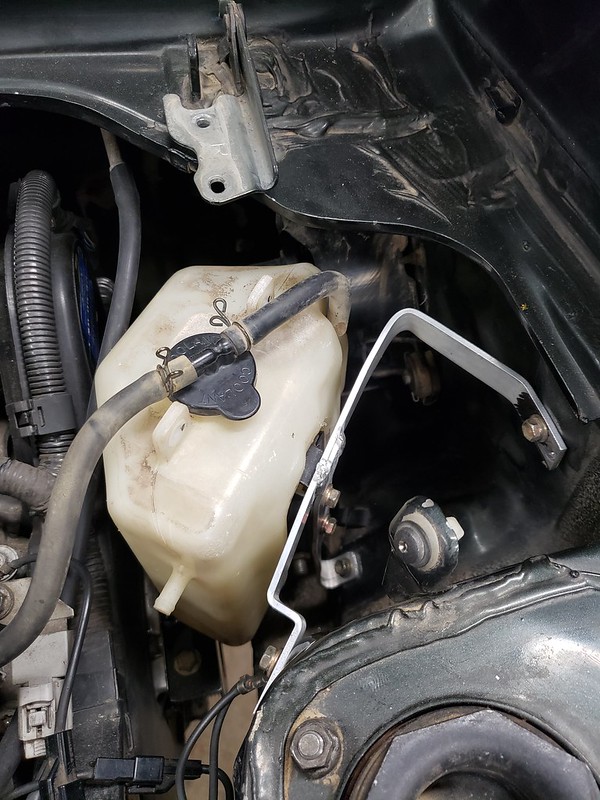
There's some easy things and some tougher things on that list. This was an easy one. Coolant overflow bottle mount:


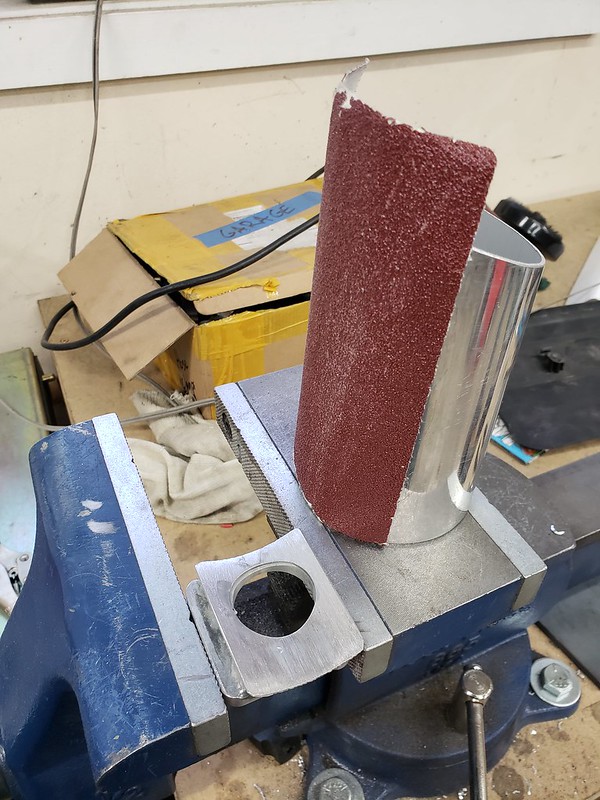
Then I had to modify that MAF tube to fit a 3" tube. After chopping out the mounting block for the sensor, I used the wrap sandpaper around the shape you want method.


I'm mounting my battery in the frunk. Since I can't run AC, I found some DIY articles for a frunk mount battery where they use the AC line grommets to run their wiring. Out comes the AC… but I ended up pulling the entire havoc system out…


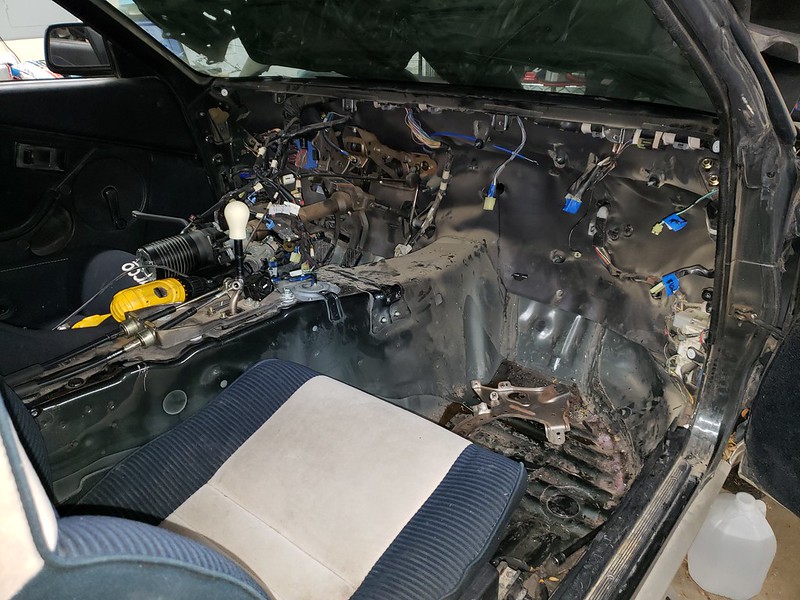
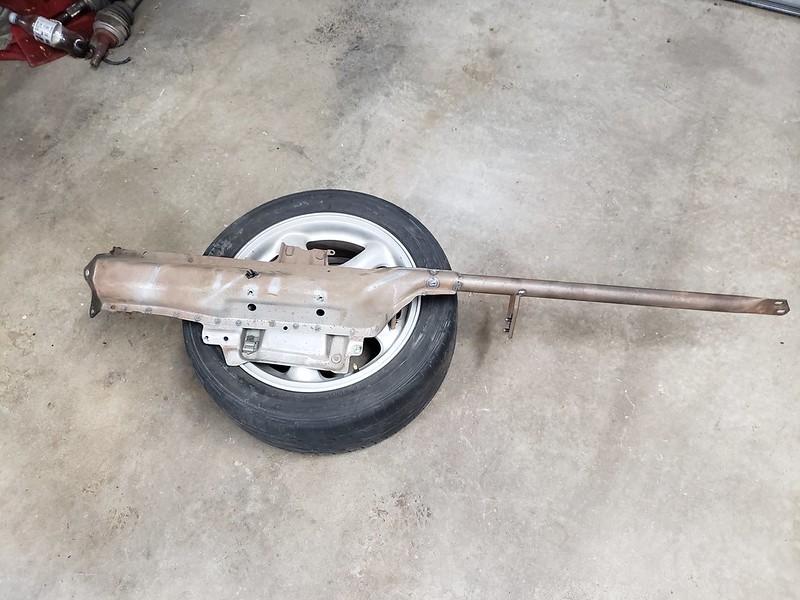
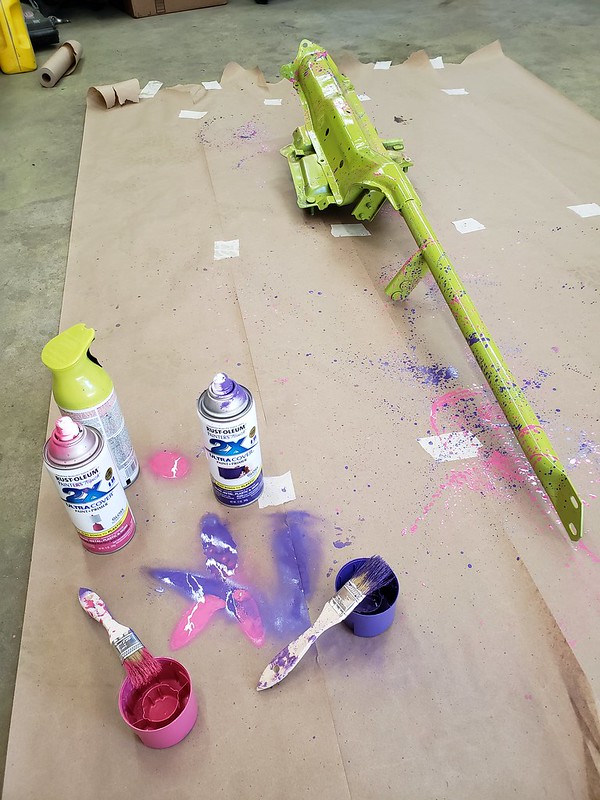
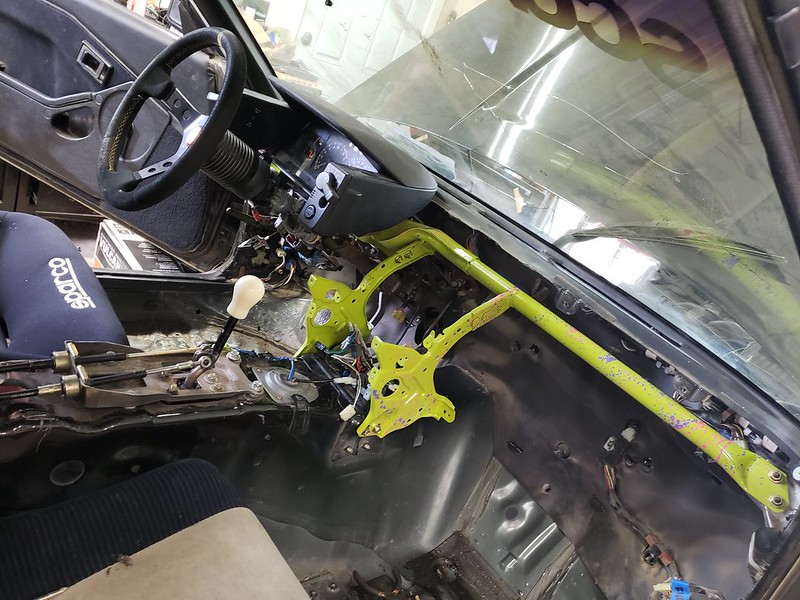
While removing the hvac, I pulled the steering support and dash support bar. This will get painted. I have maybe a terrible idea for the paint job. The interior of this small car all of a sudden feels massive.


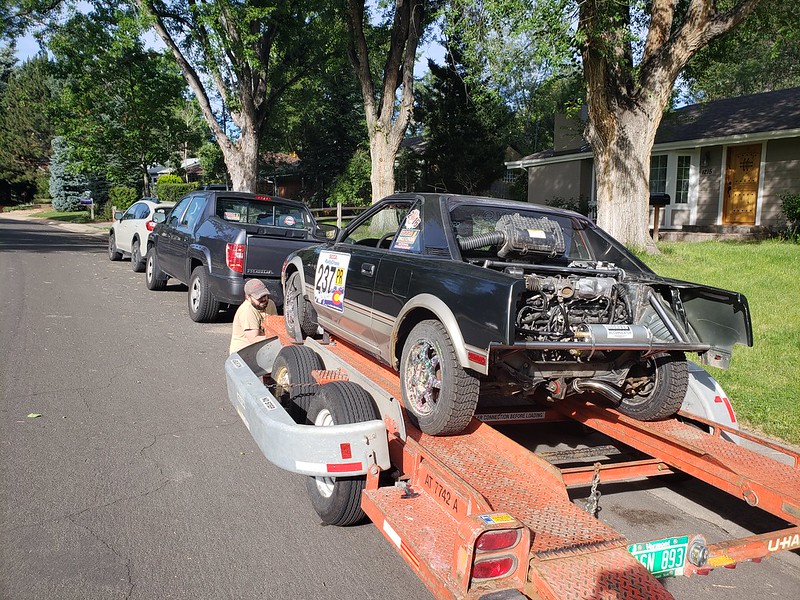
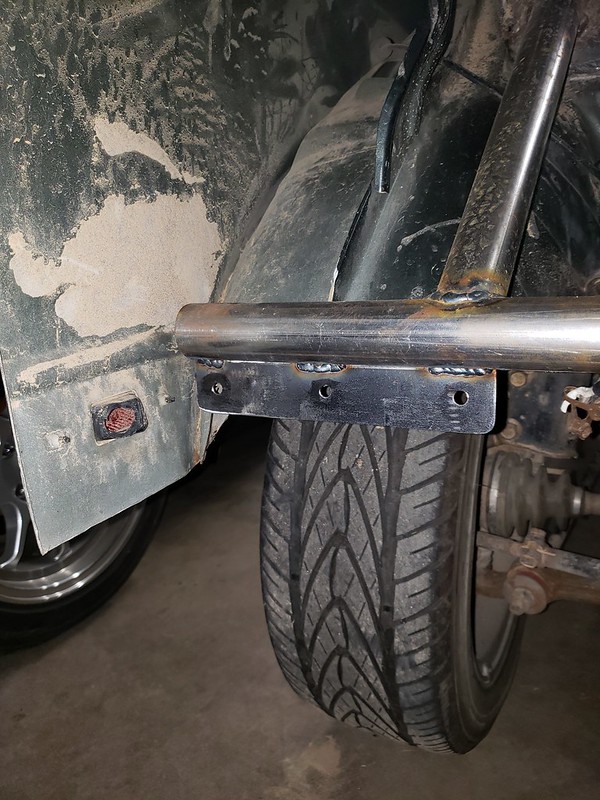
Anyway, the next rallycross is just over a week away. I'm going to get the car race ready and as much done as possible for other items. I need to reinforce the rear strut towers, which may end up being a temporary strut bar until I can build a more integrated bumper structure into the rear of the car. I'll likely be updating this thread a number of times this week as I go into full blitz mode to get it ready enough to get dirty. The project has lots of other things that will take the car well into next year, so even when I can drive it, it'll be far from done!

krautastic
krautastic New Reader
6/15/18 6:40 p.m.

Probably going to be a love/hate thing, but I loved my splatter paint wheels, but I don't get to see them when I'm driving. So I brought the 80's inside:

This will be the interior for now. Those center column supports will be chopped up some. I feel like keeping the one nearest the driver is at least a good idea to support the steering wheel. The hydro e-brake will go somewhere in that space, along with a smaller heater setup.

Other progress today included patching up that big bite mark I made in the rear cross member to clear the header.

krautastic
krautastic New Reader
6/18/18 10:47 a.m.

Began work on the rear tube bumper. I underestimated how difficult it would be to add the spreader plates to the strut towers. Two sides were very hard to access. Even the sides that were easy to get to, things would go well and then I'd have a small blow out from the sheet metal. And I don't mean blowing through the sheet metal with the welder, its like a pocket of air that pops. I encountered this with my tig, and it seemed to be in areas where two sheets are close together, as if there's an air pocket there that heats up and blow out when the welder gets there... The frame plates and tubing went way better although I guess I didn't get a picture with those done. For the Project Binky fans, I had to make the noise:


I wrapped the headers too. Mostly to avoid melty shifter cables and wiring harnesses. Now that i've wrapped a set of headers, I don't feel like I need to do anymore. Man that stuff sucks, and I bought the good stuff. Looks cool though!

[/url]

krautastic
krautastic New Reader
6/25/18 9:58 p.m.

I drove the car! I raced the car!

But first, the last steps to getting there. I mounted the PC680 in the frunk. I read a number of people having issues with the battery move and they all recommended grounding at the strut. Ran the battery cable up to a resettable 100amp fuse, then down through one of the AC grommets, along the bottom of the car, tied to the radiator pipes.

Mounted the airbox using some aluminum angle bolted to the airbox. Then I used RTV along the top piece of angle, and for the bottom angle I just captured it using some window weld and bending a lip over at the base of the windshield. Also, rear bumper structure is welded in. Not finished, but far enough along.

I mounted the ECU re-using one of the factory mounts and a modified miata ECU mount, stuck on the various extra bits (OBDII plug/reader and immobilizer amplifier/receiver). I'd like to extend the wires into the cabin eventually.

When i plugged everything back in and went to start the car to burp the coolant, the radiator fans were running as soon as I keyed on. After lots of googling, the issue came from the AC delete and the HVAC delete. There's a pressure switch in the frunk. When pressure is 0 or low, the switch has continuity. So jumping the connector does the trick:

Well it would do the trick if you still have the HVAC system in place. I didn't. So, I needed to add this module back in. It usually sits under the havoc system:

I dropped the car, and made an epic video reveal with the garage door opening, the engine firing up, and the car driving out…. and the camera didn't capture it. But I went for a quick test drive. The car is exhibiting a weird behavior where it feels held back until you hit like 4000rpm (estimating, because the tach doesn't work) and then all of a sudden it has double the power. When it has full power it pulls real strong:

https://youtu.be/G1gHHGWeMh4

It felt so good to have the car down on the ground after being on jackstands for so long. Also these cars look so good with miata wheels.

The last bit of work was to make a strut bar to help support the strut towers since that bumper structure doesn't really have any triangulating members.

krautastic
krautastic New Reader
6/25/18 10:00 p.m.

Saturday was a test and tune and intermediate rallycross school. I loaded the car on the rented trailer and went to the test and tune. All loaded up:

I went around for 4 laps. The car felt strong. Still had the hitch in the power band, but at full throttle it felt pretty good. No issues with oil pressure or cooling. I then shut the car off and chatted with other racers for 10 minutes. When I tried to start the car again, it sounded like it was idling on one cylinder and it really didn't like me adding any throttle. It would sputter and try to die. I limped it to the trailer. I tried resetting the ECU by pulling the battery, but then it just refused to start at all. It would just crank and crank. I checked connections and grounds, but couldn't find any issues. 

Looking dusty:

I ended up taking the car home to diagnose since I didn't have any lengths of wire and no multimeter. It felt like it wasn't getting fuel. So I unplugged the EFI circuit open relay and jumpered the fuel pump and it fired right up.

Sunday was the race. The wheat field wasn't harvested, so a car drove a course to knock down the wheat. Still, it was hard to look far enough ahead when you couldn't see the cones. You had to trust the track was there, and learn where the slow sections were.

The car started fine. Idled fine. But the second you tried to give it gas, it would bog and sputter. Over a certain RPM 3/4-full throttle would work. So it seems like closed loop operation wasn't working, but open loop was working. I tried unplugging the O2 sensor to force it into open loop only operation, that didn't work. I tried unplugging the maf, that didn't work (both were suggestions from honda owners, so I guess toyota plays a different game). Nothing worked, so I just had to drive at full throttle. The car is a RIOT. Much faster, and with the limited slip, it is much more predictable. It used to be a 50/50 chance of whether the car would oversteer or understeer with the open diff. With the LSD, the car is very easy to rotate with the throttle. I had to apologize to the starter because I could only launch at high rpm and it meant I was roosting him every time.

https://youtu.be/_WZNyhTfrLo

The car didn't have any issues beyond the closed loop issues. Unfortunately the weather didn't cooperate and the day ended with only 3 runs… 3 Runs where I picked up 14 cone penalties haha. I'm usually a very clean driver, so, apparently I need to adjust to the new power levels. Raw time I was competing with the top cars/drivers. And even with 28 seconds in penalties I finished mid pack for the mod 2WD cars.

It does look like I need to adjust the exhaust, it's hanging just a touch low:


Now, maybe some toyota people can chime in. I'm trying to fix the O2 sensor issues. These O2 sensors are 4 wire wideband sensors. Both the front and rear banks are throwing codes. P1135 and P1155. The avalon uses Denso 89467-41040. I was unable to find any in the junkyard. New they are $110/each. I did find a toyota sienna and a toyota highlander both with VVTI motors, but their connectors ended up being different. They use part number 89467-41011. They look identical other than the connectors. They have the same leading number. What I'm curious is if these are the same O2 sensors and the part number designates the connectors, or whether they have different calibration values. If they are the same, I can re-pin the connectors and see if they fix the problem. I bought both of them for $16 which is a much nicer experiment cost compared to $220. If you all have any ideas let me know!

java230
java230 UltraDork
6/26/18 10:13 a.m.

In reply to krautastic :

Not 100% sure on the o2 sensors, but I would guess they are the same with different connectors.... As far as my understanding goes they output a pretty standard value range, and the heaters can have a bit different resistance.

hhaase
hhaase HalfDork
6/26/18 5:55 p.m.

Considering all the work needed,  I’m seriously impressed you’re at the point of driving and competing already.

krautastic
krautastic New Reader
6/28/18 5:25 p.m.

I think that's a compliment... thanks? Don't know if you mean all the work it needed or still needed haha. 

hhaase
hhaase HalfDork
6/28/18 5:45 p.m.

Well,  that's a significant engine swap and a lot of interior work.    You made a LOT of progress in a short time getting it running and driving.  Not only that, but it's all clean work too.  

It's a compliment for sure.

krautastic
krautastic New Reader
6/29/18 3:53 p.m.

Well thanks! THe project really kicked off in november. I just started recording it here a few months ago. Still, the few weeks before the race I took fridays off and the week and a half before the race I was pulling 6pm to 1am working stints, so alot came together at the last minute.

I talked to the guy who did the wiring harness. Sounds like its an issue with the fact that its a "california" emissions model which uses wideband air fuel sensors on the exhausts vs narrowband O2 sensors. Slightly different wiring, so I'll see if I can resolve the closed loop/open loop issue.

hhaase
hhaase HalfDork
6/29/18 4:30 p.m.

Factory wideband O2?   Score!

krautastic
krautastic New Reader
7/2/18 9:55 a.m.

I did what I could this weekend diagnosing the closed loop issues. The O2 sensors are getting power, and they have continuity to the correct ECU pins. So, I've pulled the trigger and purchased new one. In trying to diagnose why the car sometimes doesn't want to start, I cut the splice I did that I thought was the clutch switch wiring. I now have to poke a wire in the starter circuit to start the car, but the car ran much better. So something about what I thought was the clutch switch circuit made the car run like poo. It was so bad, I couldn't even back the car down the driveway to move the car. Now it works at partial throttle, although, still not like it should. Hopefully the new sensors will fix the remaining closed loop issues.

krautastic
krautastic New Reader
7/25/18 4:40 p.m.

Went on an Alaskan cruise with the girlfriend which was awesome. The alaska part, not the cruise part. Not sure how people enjoy cruises. Not my scene, but holy cow. Alaska, what an amazing place.

Still trying to diagnose my CEL codes. I've taken the harness apart quite a bit to trace some wires. I found the issue on my idle valve was that it wasn't getting 12v in. Then it was a matter of finding where the other end of the wire was... It ended up being inside the transmission side of the harness and had been cut. This has significantly helped the situation at partial throttle. Also, I was very thankful for all the room I had to work in!

I wanted a victory, so I mounted the mud flaps. They really transform the look of the back end:


And then a large box came from brown van santa. And it totally transforms the back end!! This fiberglass 222D replica engine cover is 1 of 20 made by Wim Hapers in Belgium. Wim made a 222D molded body kit from pictures of the 222D. He's never even seen it in real life. Pretty amazing what he was able to accomplish. He's decided to move on from cars due to some health problems, but the MR2 community wanted his engine cover so he did a 20 part run for a group buy and I picked one up! Here's an article about him and his car: http://www.thedrive.com/news/15347/one-mans-journey-to-clone-toyotas-never-raced-222d-group-s-rally-car

I'll be using the engine cover as a baseline but I will be adding the trunk/wing and tail lights and make a new fiberglass buck. More of a winter project... Also, the air box will get its inlet modified to take advantage of the fresh air!

edizzle89
edizzle89 Dork
7/26/18 11:52 a.m.
krautastic said:

mmmmmhhhhh i like that a loooooot. Has a hint of Lancia 037 to it


krautastic
krautastic New Reader
7/26/18 1:31 p.m.
edizzle89 said:

mmmmmhhhhh i like that a loooooot. Has a hint of Lancia 037 to it


Yep! I will probably do a similar mesh screen between the tail lights, along with the integrated spoiler. Here's the 222D for comparison:

java230
java230 UltraDork
7/26/18 1:32 p.m.

Yeah that is looking awesome, l love the flaps and truck lid

krautastic
krautastic New Reader
7/26/18 1:55 p.m.

Thanks java320!

I forgot, last night also had some other awesome news. My rallycross buddy Jeff came over and was helping diagnose why I was still getting O2 sensor codes. Here's a taster:

Here's the details:

I was getting P1135 and P1155. These are O2 heater circuit failures. In Torque, we were mappin the voltage response of the sensors as well as short and long term fuel trim, and the voltage never deviated and the fuel trims were steady as well. Essentially nothing was happening. I had already triple checked the wiring, and all wires going into the ECU were routed correctly. We hooked up a probe to the B+ (12v) line into the O2 sensor circuit, and with the key on motor off, the line was showing 12v. Start the car, and the line was jumping all over, 3v, 6v, 8v, repeat. It would do this for a little while and then go to a steady 14v. I thought this meant that the ECU was doing a square wave signal to ground and my probe was just picking points where it could. He proved to be the smarter of us two and said that we shouldn't be seeing anything bu 14v on the supply side of the circuit, because the heater was the resistor, and we were measuring before it. So we hooked up a temporary power line from the power block I used for getting power from the frunk to the starter. We hooked that into the circuit and boom, the circuit held steady at 14v, and after a small warm up period, one of the O2 sensors started showing the voltages moving around and the fuel trims adjusting. Turned out, one of the brand new toyota/lexus O2 sensors I bought was broken out of the box. (Yay discount ebay stores!) I swapped an old O2 sensor back in, and it wasn't working either. My buddy, again, had the ingenious idea that because the code was still present the ECU wasn't even trying to turn that circuit on. We cleared the code, the O2 sensor warmed up, and bam, it was reading and adjusting fuel trims. We let the car idle and come up to temperature, we played with the throttle, and all the while, the car was running better and better. It idles worlds better and the response to throttle is spot on. I need to go ahead and make all these temporary connections permanent, clean up the wiring, wrap it, etc... and then I can get the car on the road and see if its on road characteristics are fixed. But, the car now has no codes except the automatic transmission codes, and a few evap codes, neither of which affect the motor's performance.

J1000
J1000 New Reader
8/6/18 12:04 p.m.

I thought I recognized this car. I checked it out yesterday at PPIR but I didn't see you around. Looks like a lot of fun, especially on dirt. Looking forward to seeing the body mods come together.

krautastic
krautastic New Reader
8/20/18 11:10 p.m.

Hey J1000! Sorry I didn't see this until now. And sorry we didn't get to catch up at PPIR. I was around my car quite a bit and talked to a number of people, but I guess we didn't cross paths. I did hear I had the loudest car there haha.

So, after getting the electrical figured out (further diagnosed the issue that the O2 sensors were wired on the injector circuit… the injector circuit that still had the injector resistor box in line)… I'll update the post above-

So, after figuring that out, I was really itching to drive the car! So, I took it to the local time attack group (Pikes Peak International Raceway Time Attack series, or PPIR T/A). I bought a friend's set of of take off tires, painted up some fresh splatter paint wheels, set the shocks to full stiff in front and full stiff minus a turn in back and had some fun on pavement. My camera died after I left it running in the car. Also, its a point and shoot camera, and the threaded mount is getting fatigued so the videos I'm posting are super shaky. Hopefully I can buy a new camera set up soon.

https://youtu.be/_SeeK3YcHz4

Anyway, I wasn't looking to be competitive, but really just wanted to shake down the car, and it performed flawlessly throughout the day! Set a time that was good enough for mid pack in the class it should be in (it was in an X class because its not street legal yet).

The following weekend was a rallycross race. I realized I was wasting a lot of money renting trailers. So I bought a used trailer! Still figuring out the best position for the car. May need to back the car onto the trailer. I know the grassroots crew used a G1 ridgeline for a number of years for towing duty. I've been very happy with mine. Averages just over 15mpg when towing on flat highways.

The circuit was wide open with minimal outside cones. It meant that I could really hammer the car and let the back end hang loose. I was running similar times to two national champions piloting a supercharged CRX, until that car broke an axle two separate times. They packed it in, so I took first place on the day. Not bad for it's second outing! 

https://youtu.be/Qrg2ZufWnvM

(the professional photos are courtesy of Brent Murphy: https://www.brentmurphyphoto.com/)

Matt B (fs)
Matt B (fs) UltraDork
7/7/21 9:17 a.m.

BTD pointed me here so I'll have to be the one to say it's almost been 3 years since an update and apparently I'm on a mission to post in every MR2-related thread on this board.  Exceptionally cool build btw.

singleslammer
singleslammer PowerDork
7/8/21 2:54 p.m.

In reply to Matt B (fs) :

I will follow you around. I have a parts AW11 in this color behind the shed that has been begging me for a dune buggy build (not dissimilar to this one).

AWSX1686 (Forum Supporter)
AWSX1686 (Forum Supporter) UltraDork
8/17/21 7:18 a.m.

This thing is cool, good job!

1 2

You'll need to log in to post.

Our Preferred Partners
YsWdrL3hcEAjGfaKoL1IOPi0uh1sEPgwqtkXpbQ63R7NN6hX5RFjuRYKE6O8QfRe