1 2 3
TheDailyDownshift
TheDailyDownshift None
11/30/21 12:32 p.m.

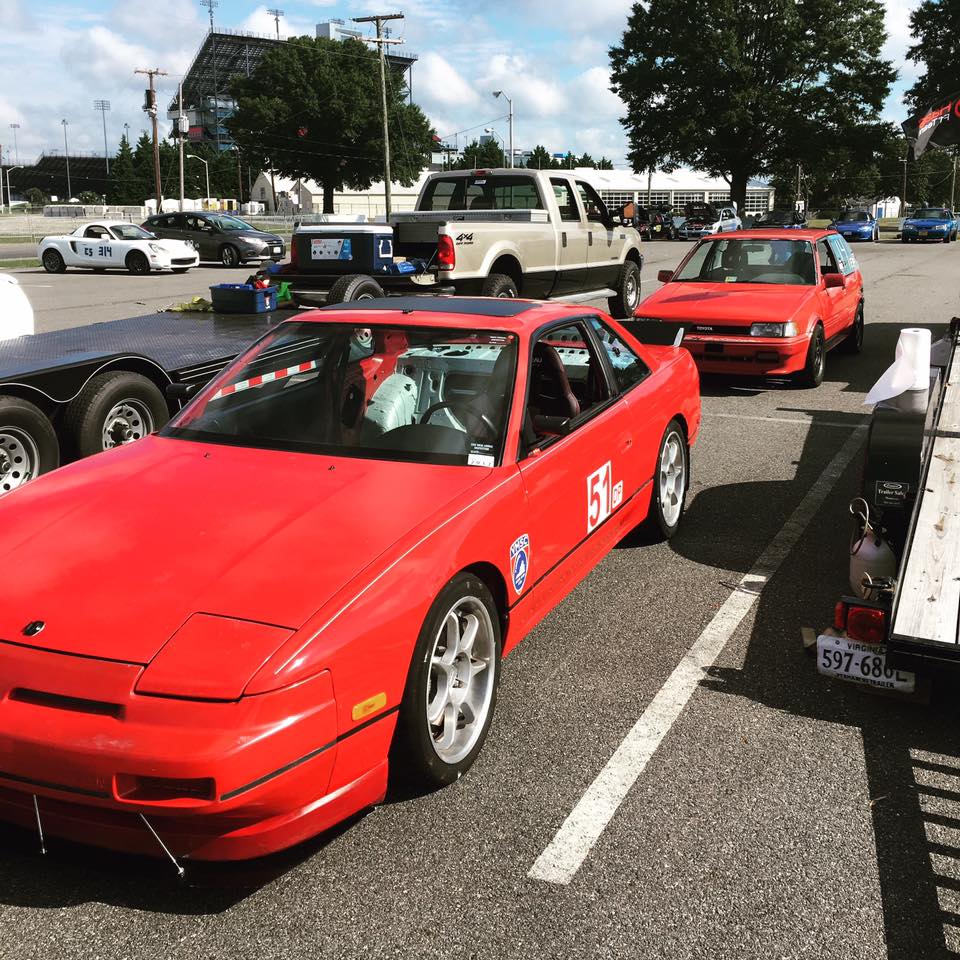
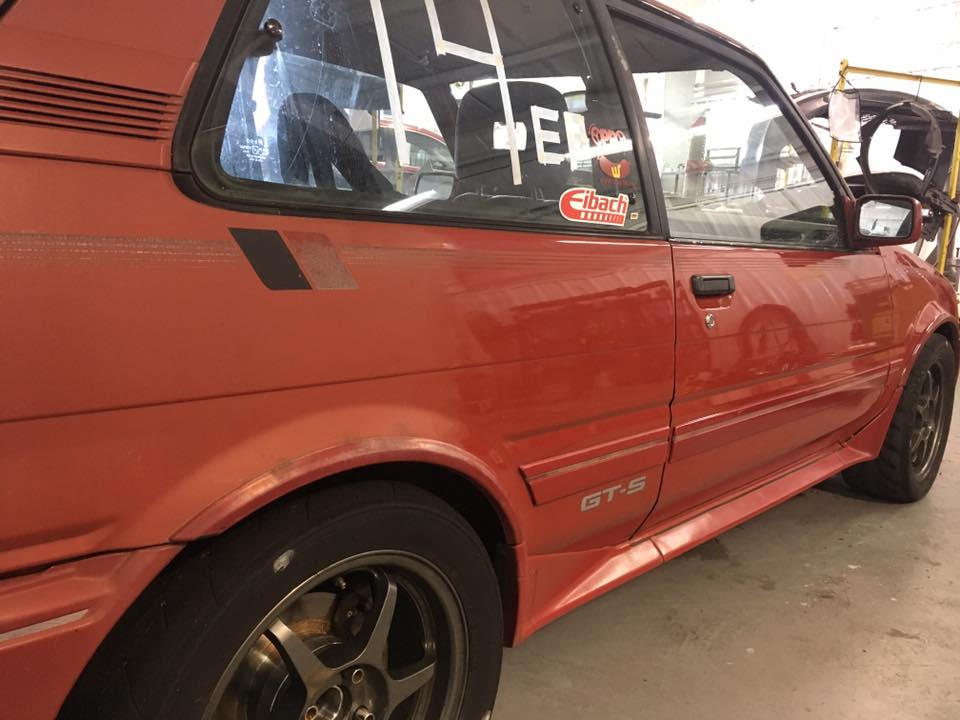
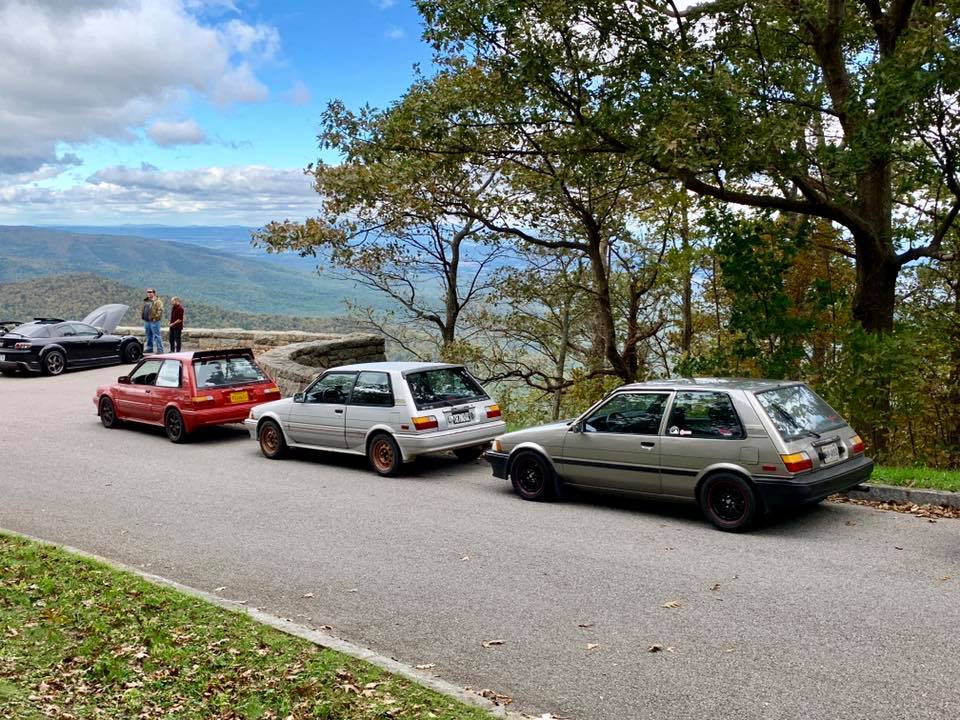
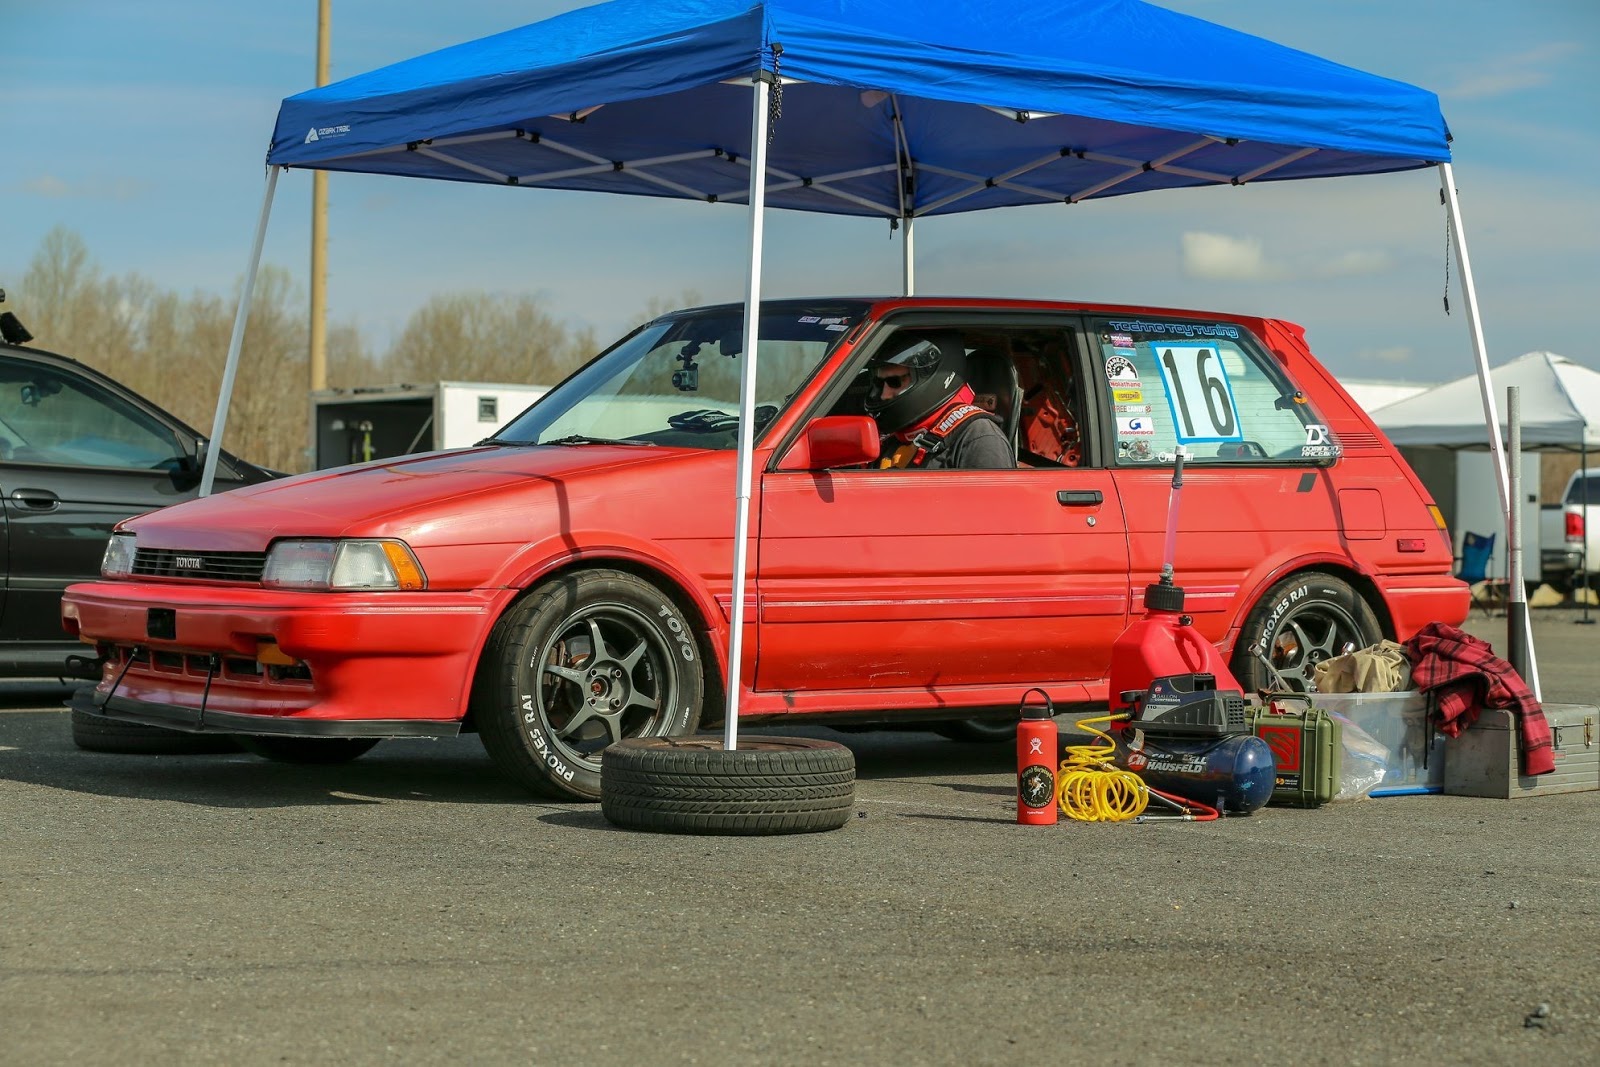
Hey everybody. This year I'm making the leap to road course events with this Corolla I've been working on for the last few years. I'd been autocrossing in my MR2 Supercharged for 10 year or so, but I went full track-toy with this car, and would love to get input from you guys (and gals) on what I've done so far, as well as things to aim for in the future of the project. I welcome any constructive criticism on making this thing more reliable and safer for trackcross/HPDE events. Thanks for reading!

June 2017

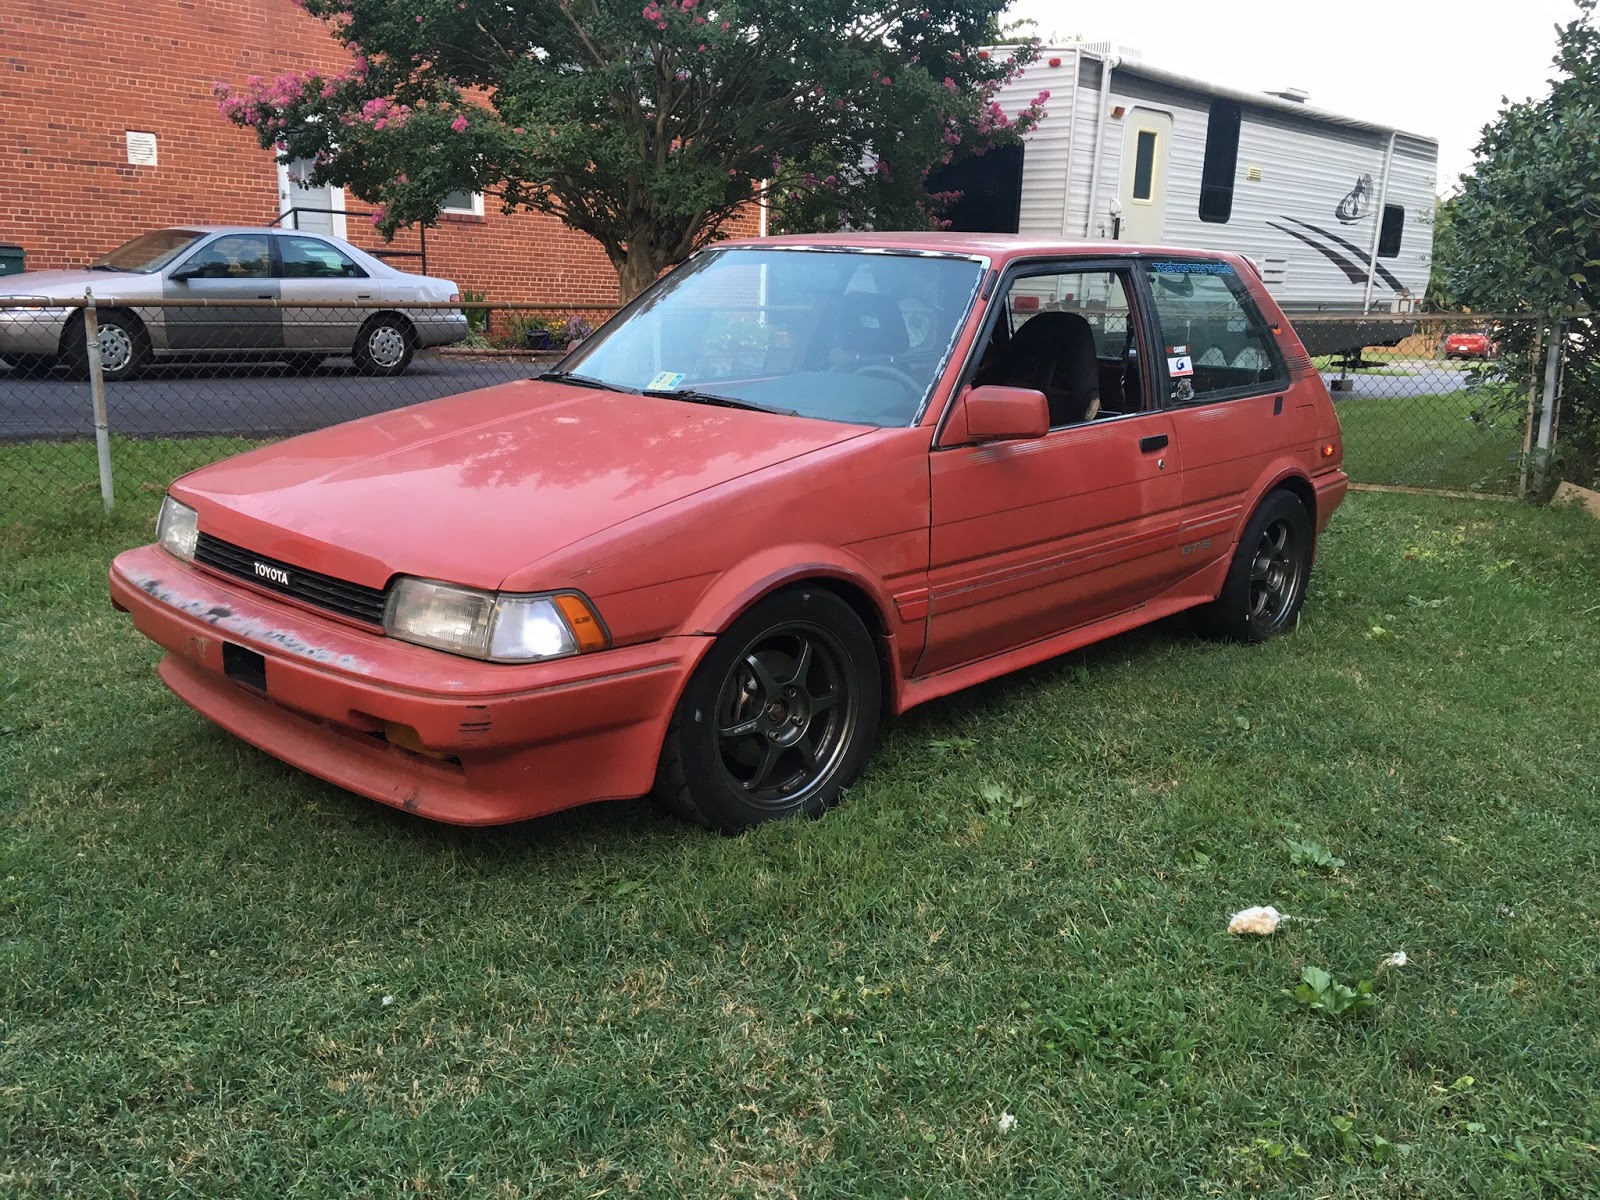
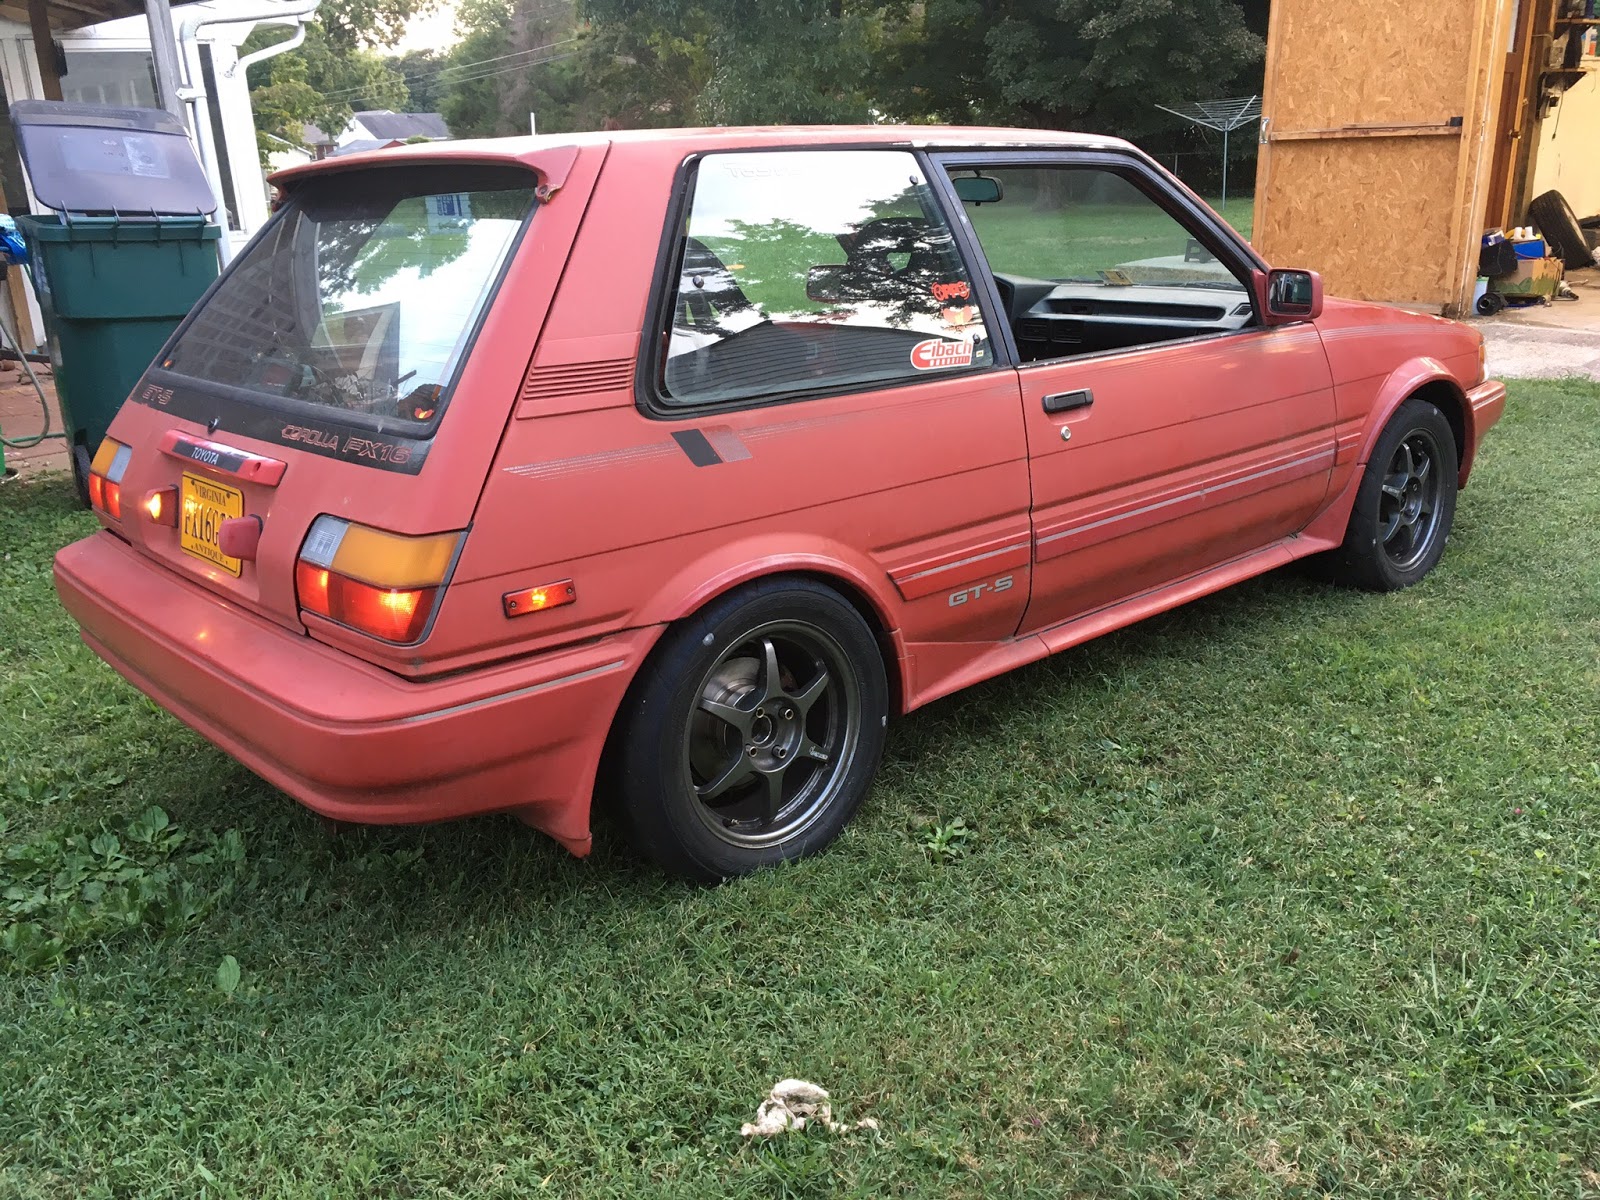
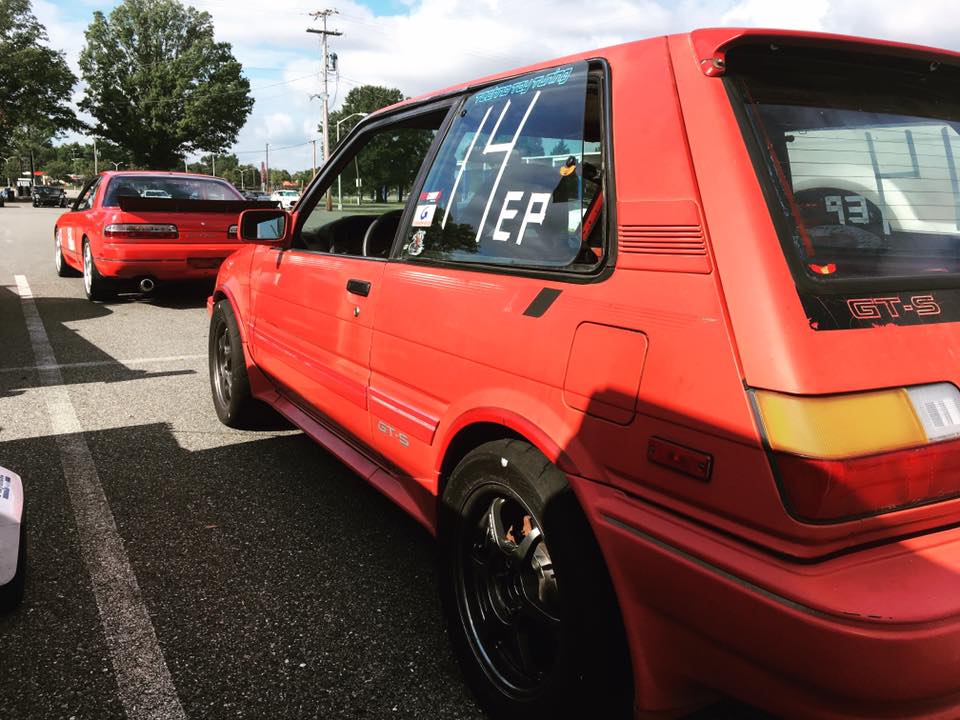
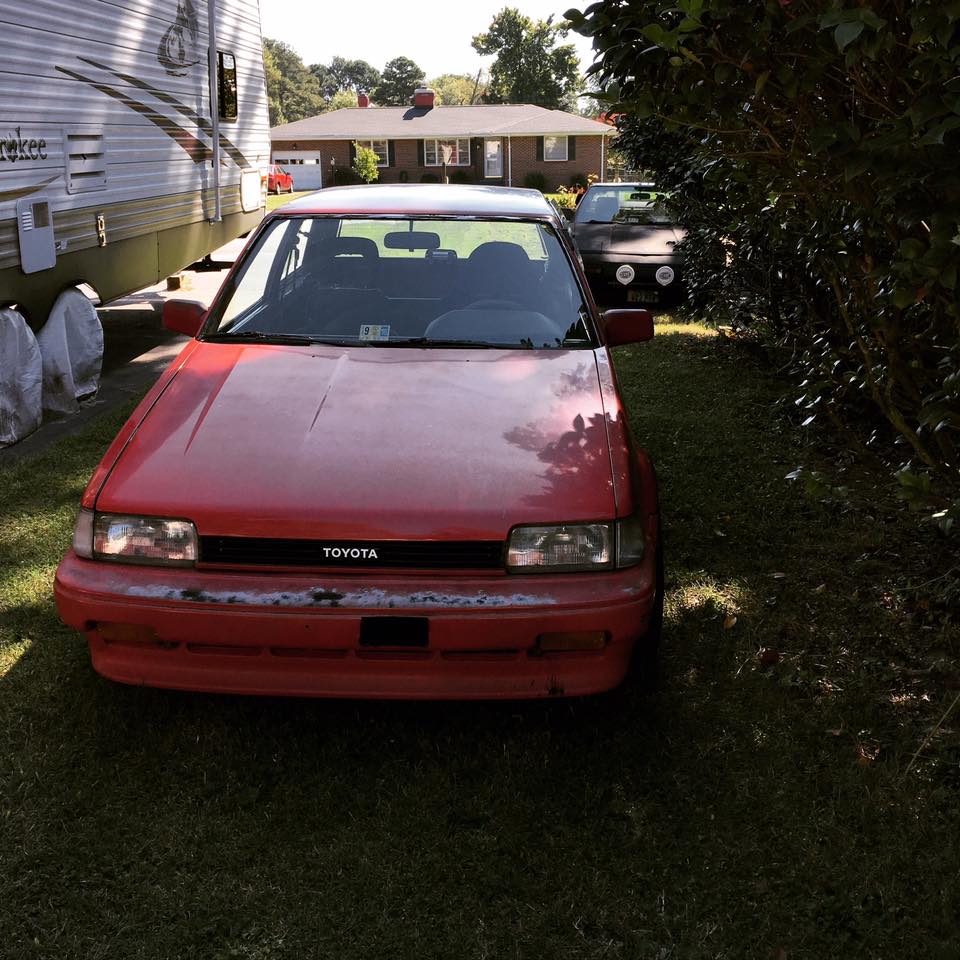
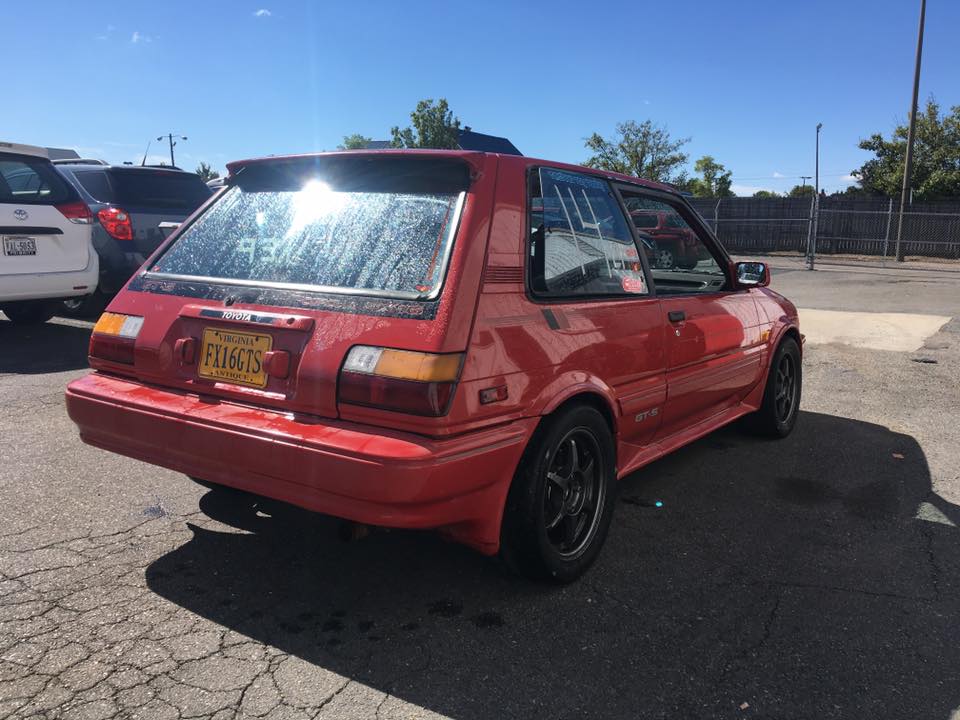
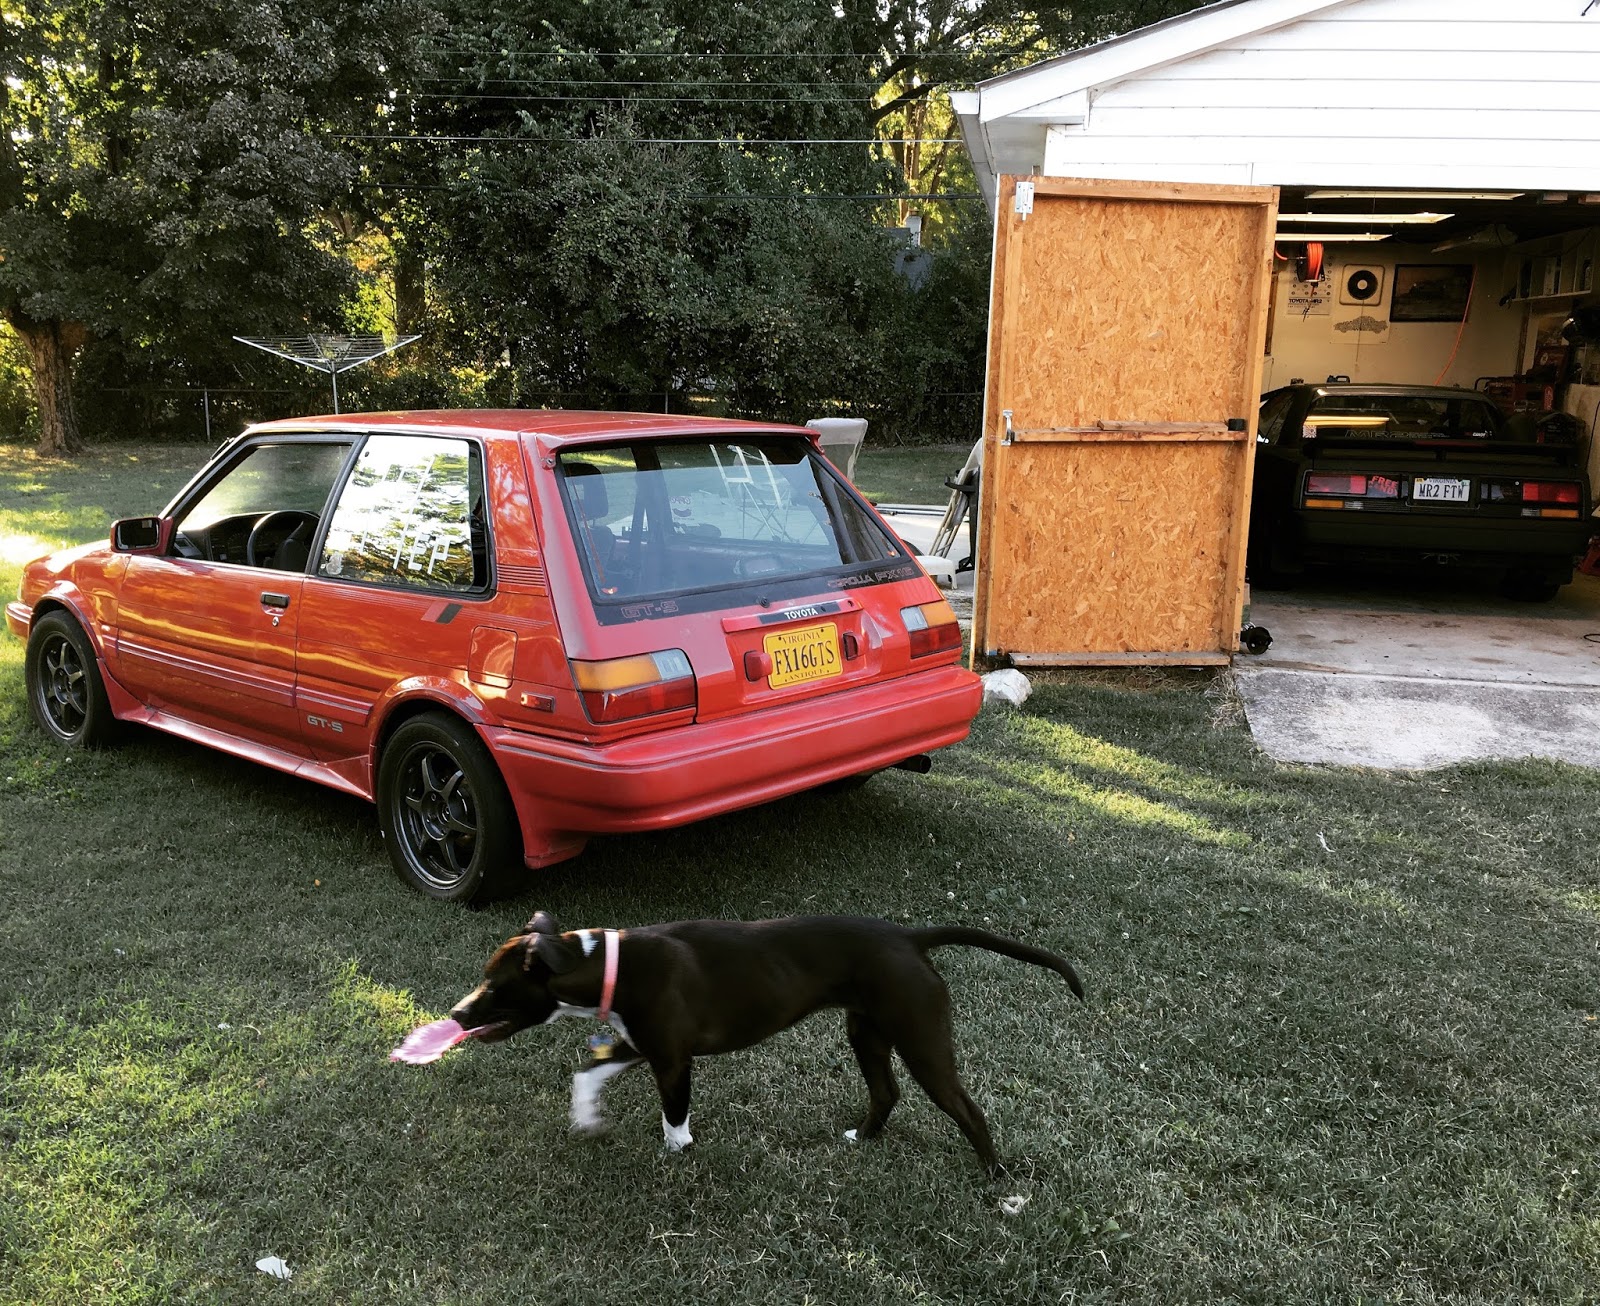
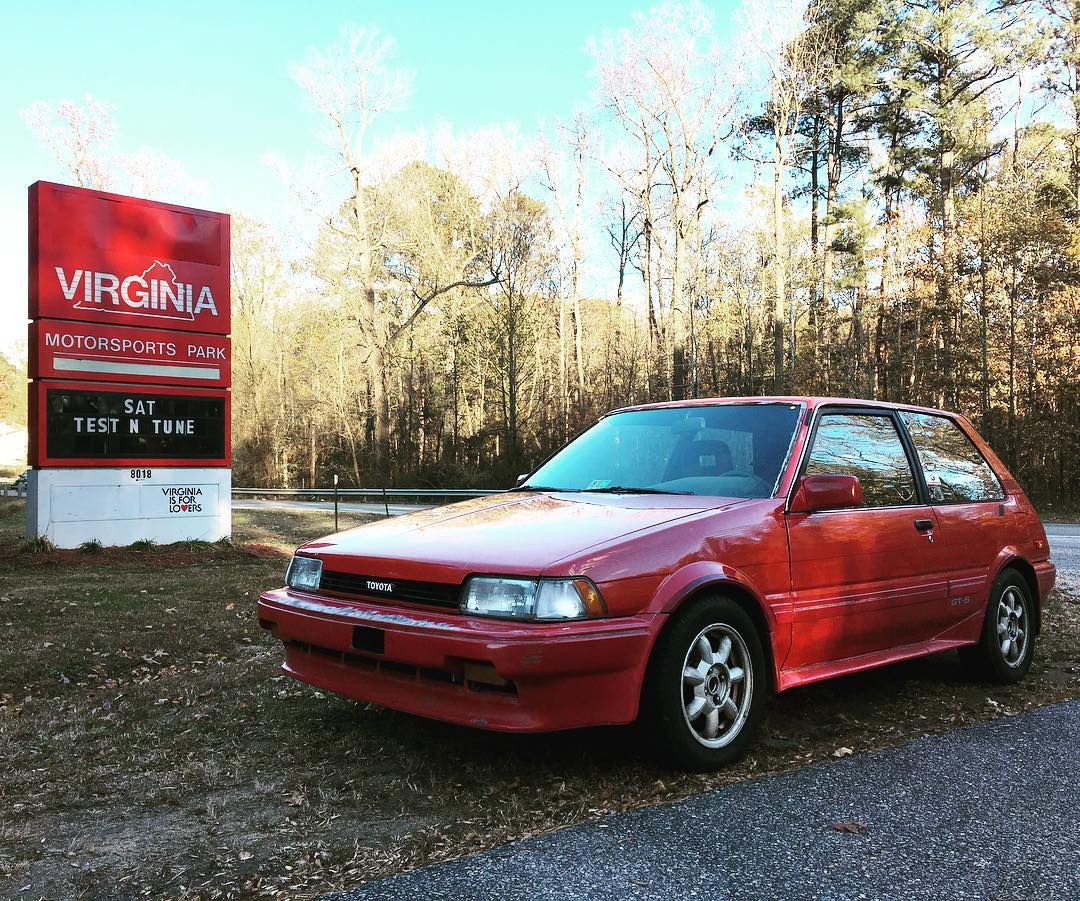
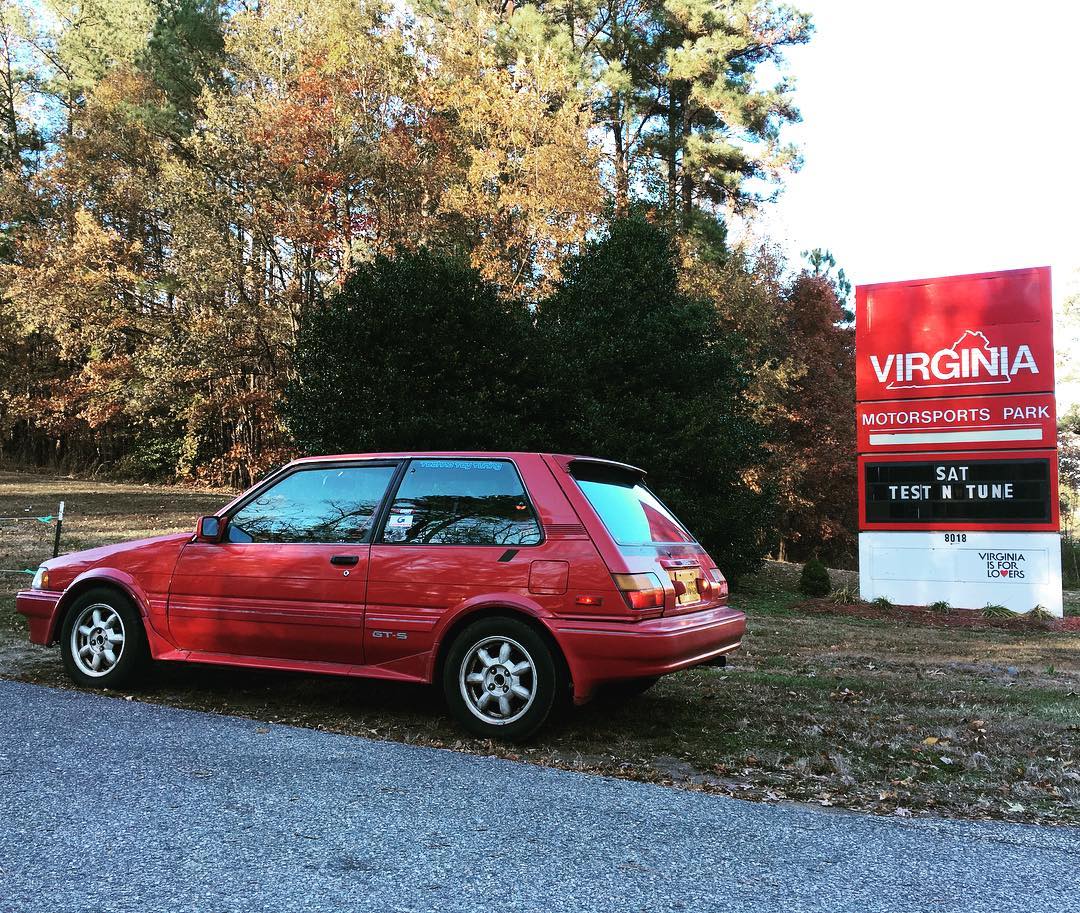
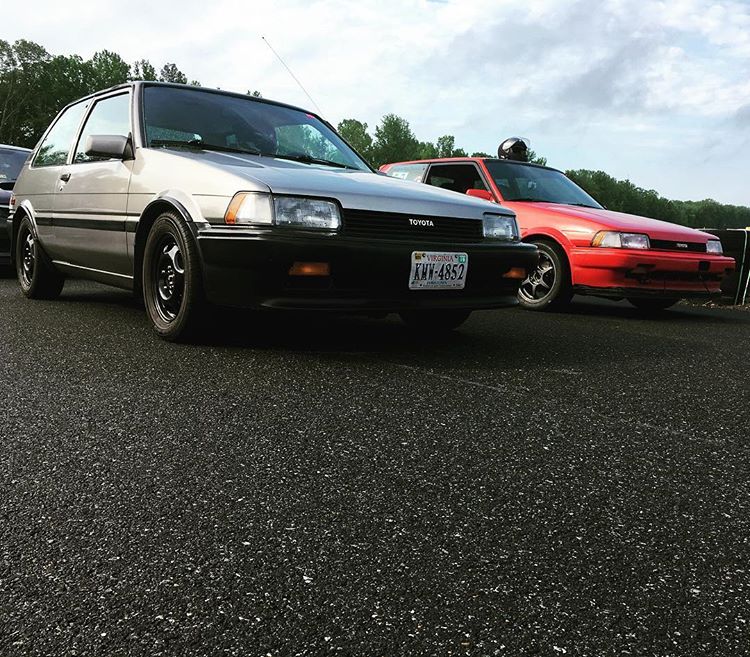
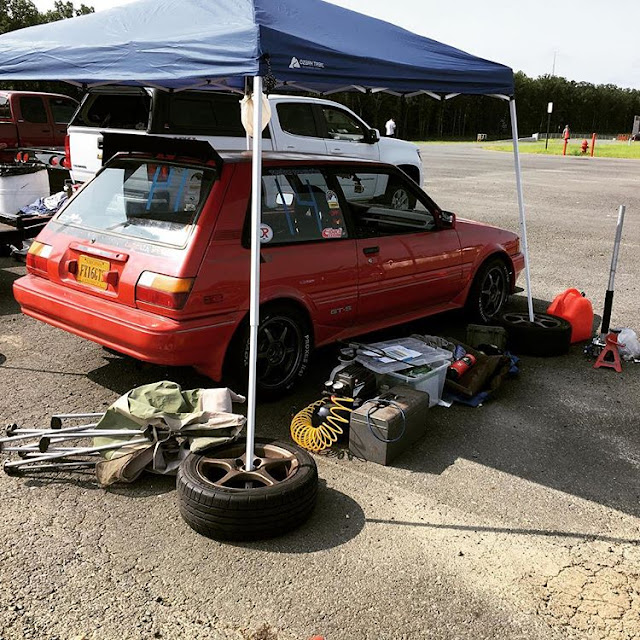
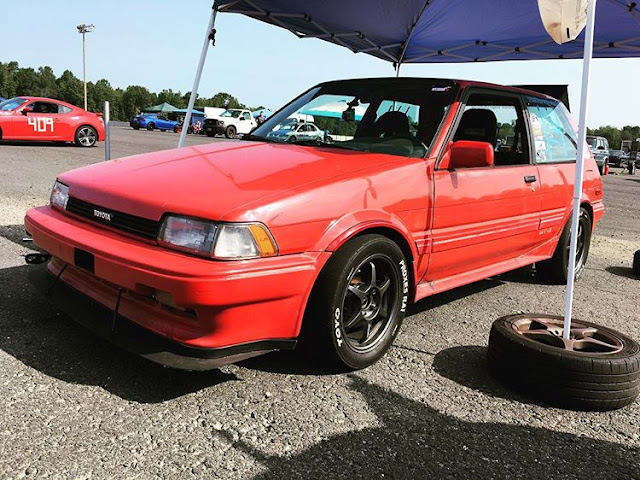
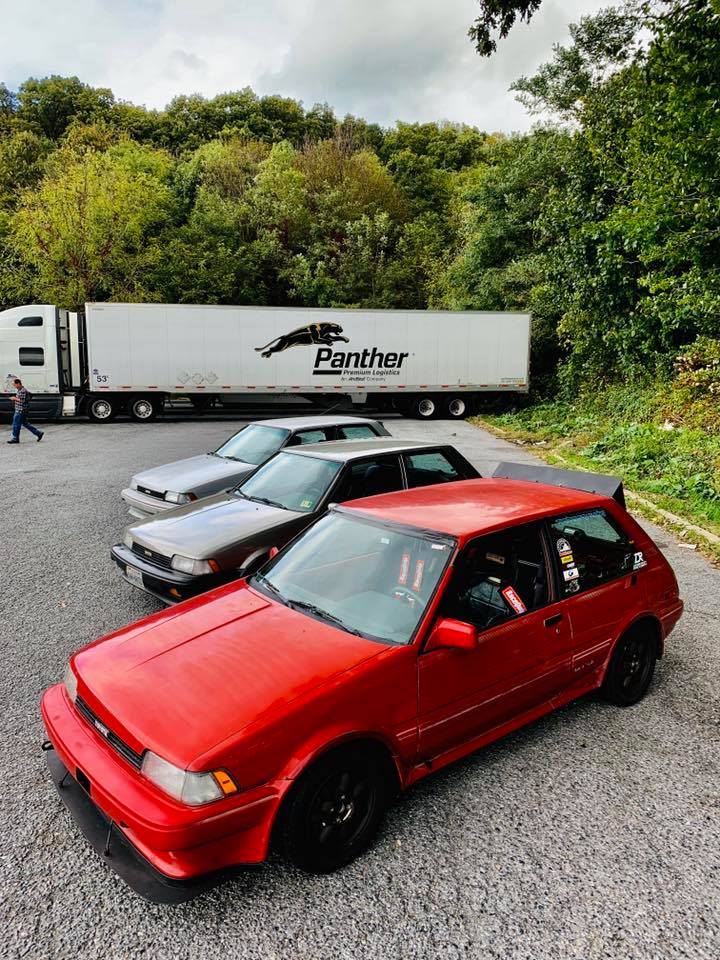
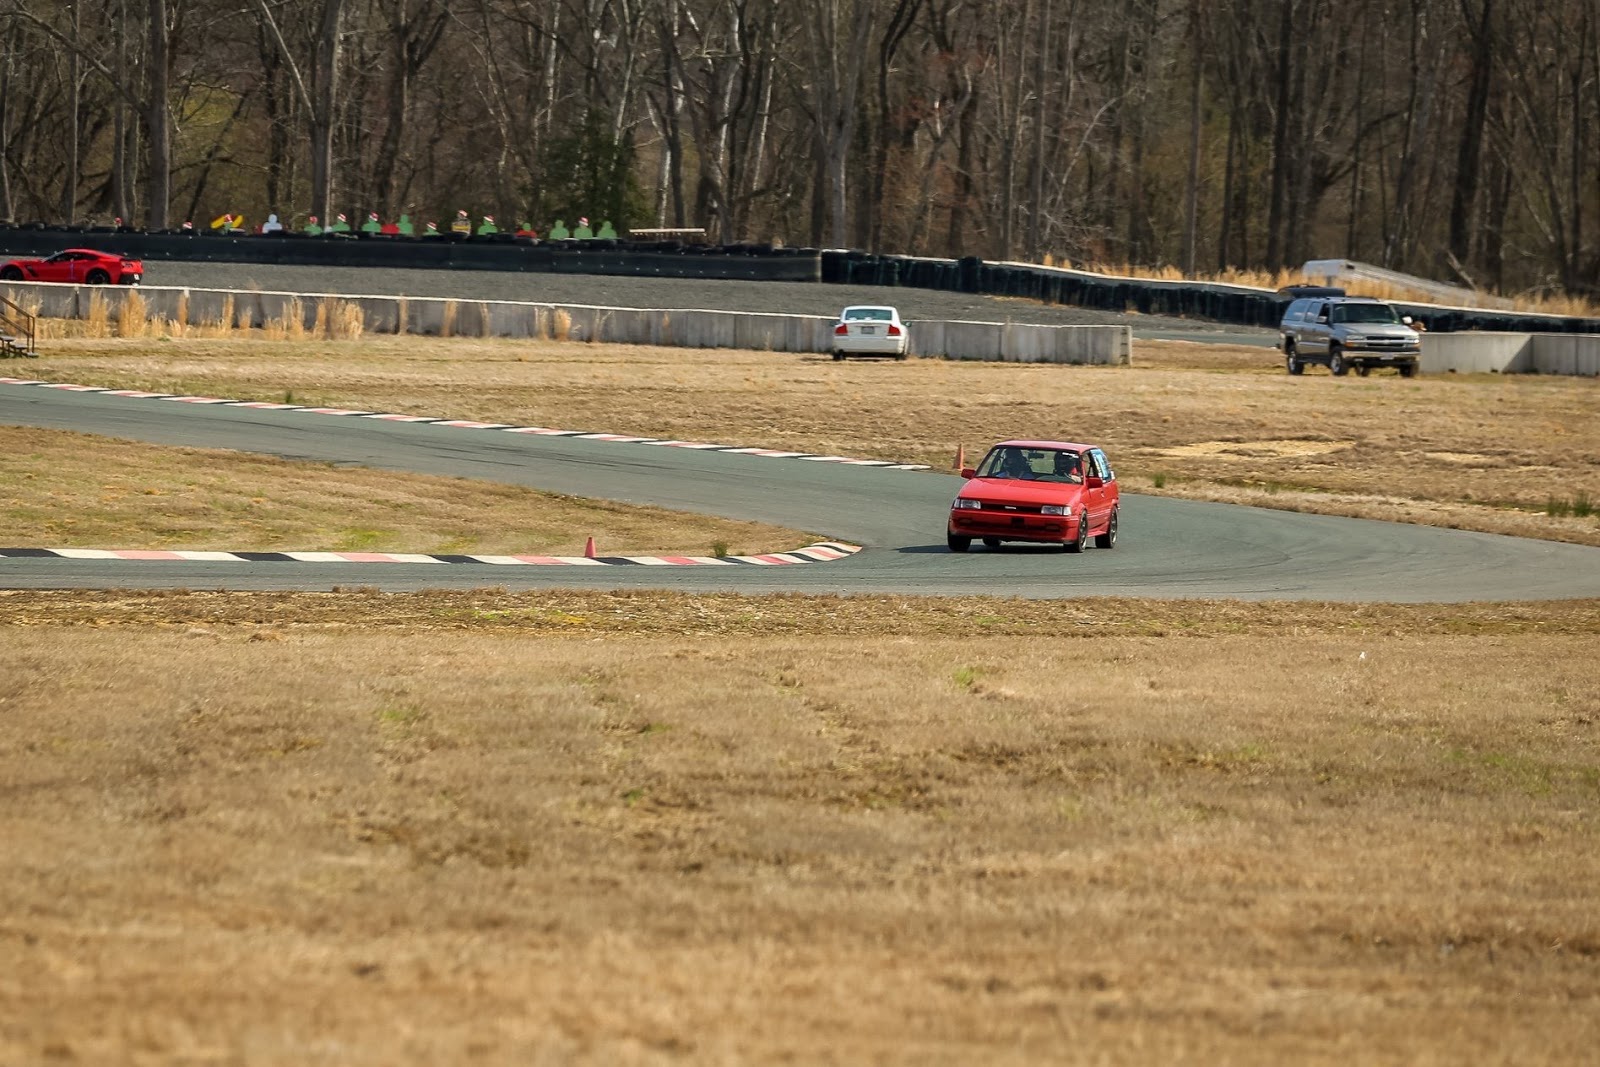
I recently finally sold my 1986 Cressida wagon, not due to any fault of the car, but just due to lost interest. As much as I liked that car it just didn't have that spark for me any longer. I realized as cool as the wagon was, I wasn't driving it often enough, and didn't enjoy the car as much as I used to. After riding with some friends in their Miatas as VIR, I realized I had to get on track. I have too much emotional attachment with my MR2 to flog it on a road course, what I really need is a normally aspirated light weight car that I can be confident in flogging - both mechanically, and with regards to my own personal driving skill (or lack thereof). As it just so happens, a friend of mine recently moved and was unable to bring his 1987 Corolla FX16 GTS with him, and it had just sat at his place of employment for over a year. He offered me what I think was a good price, and I brought the little 'Rolla home with the intention of making it a track car.
 

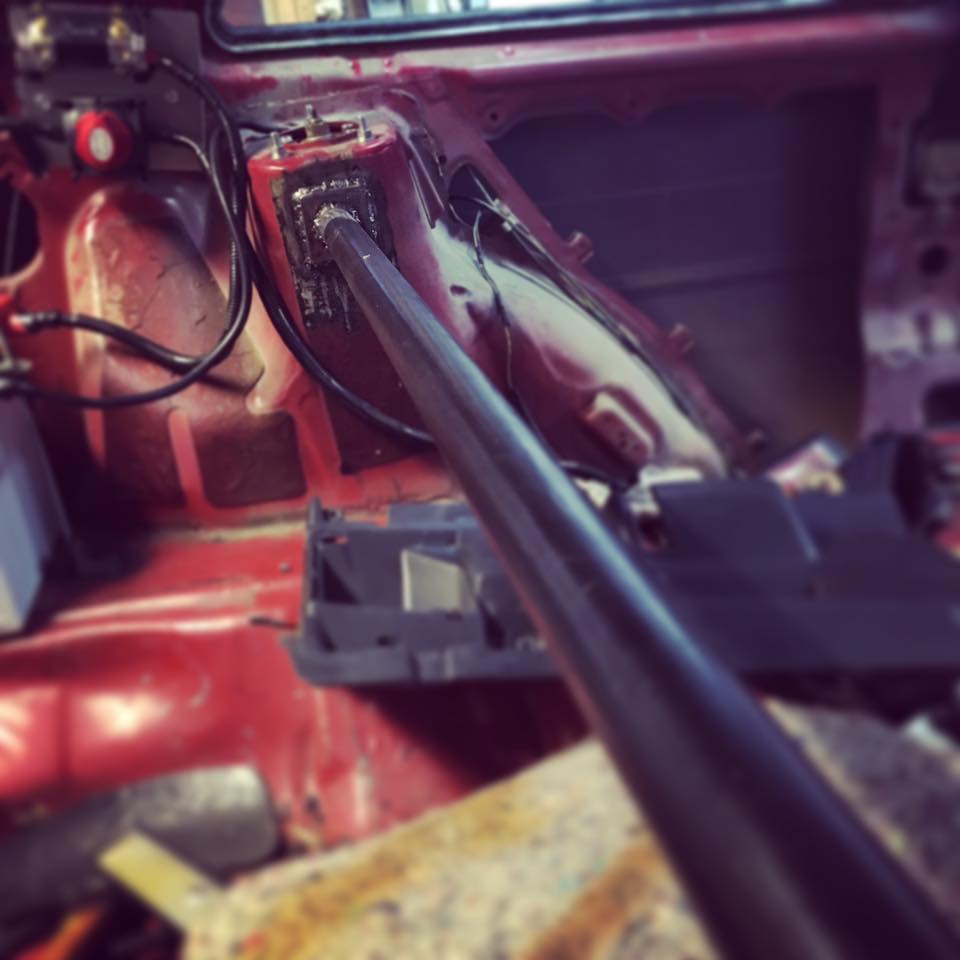
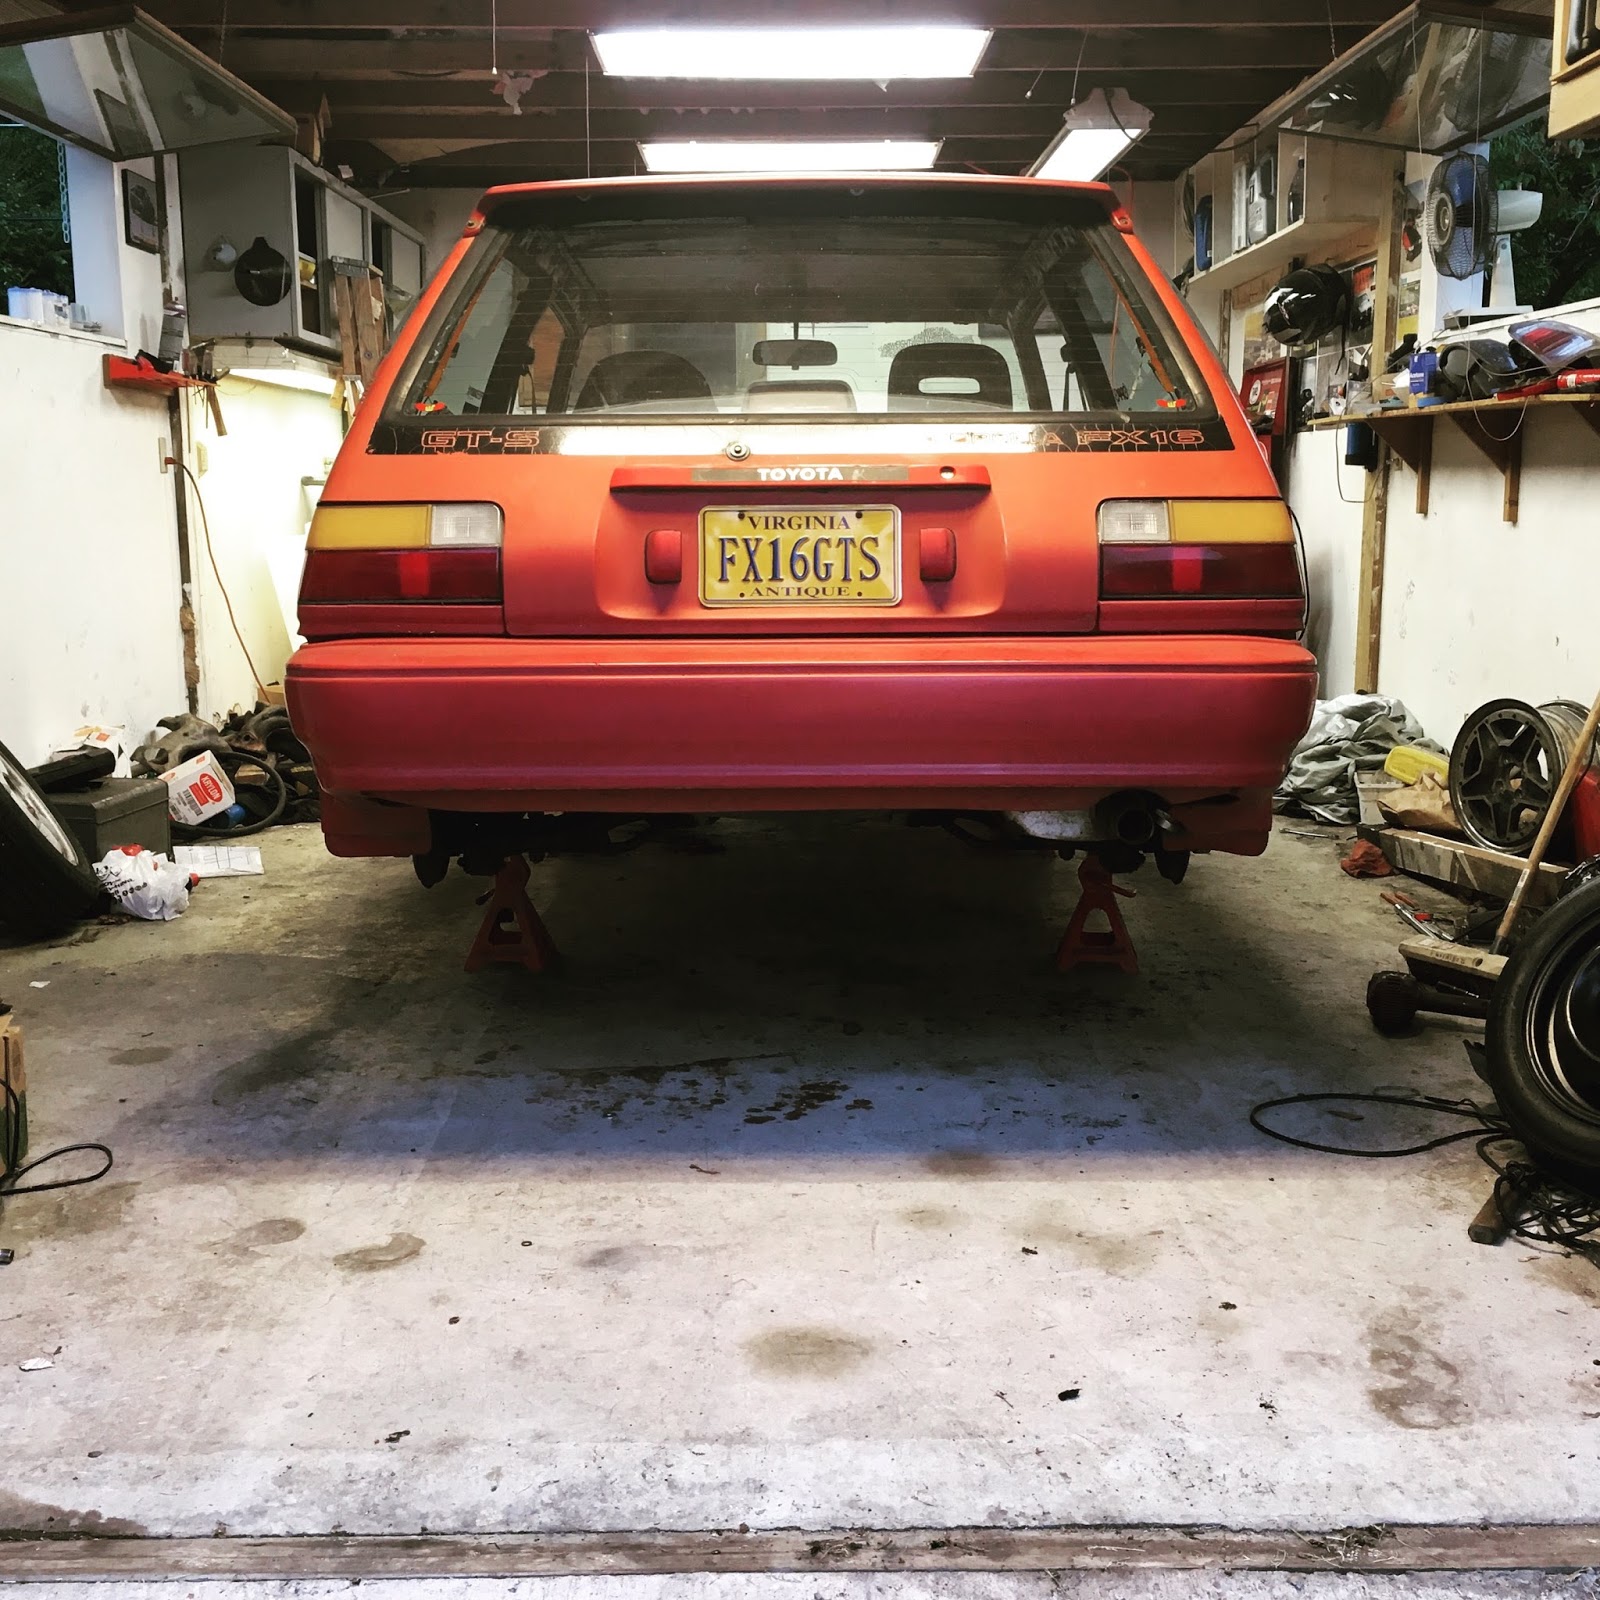
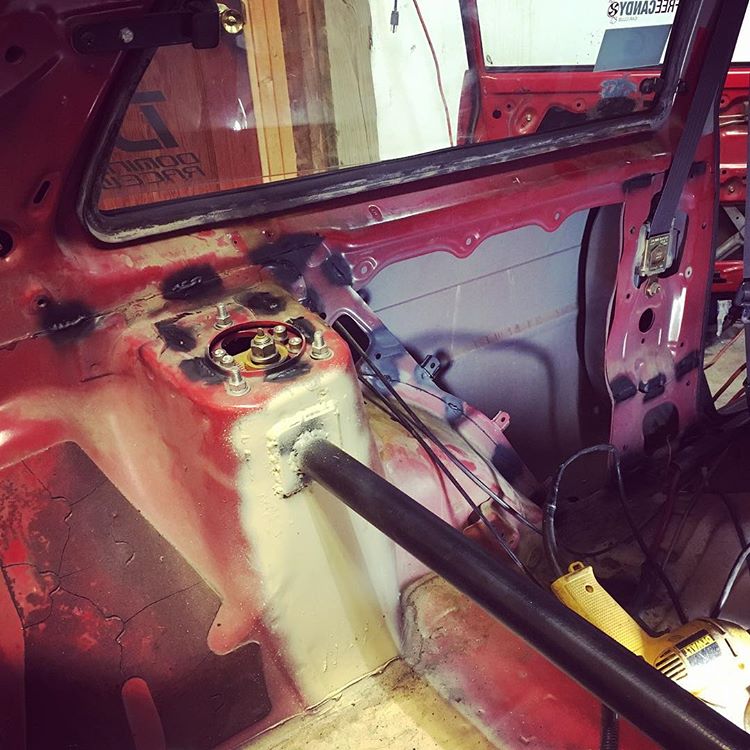
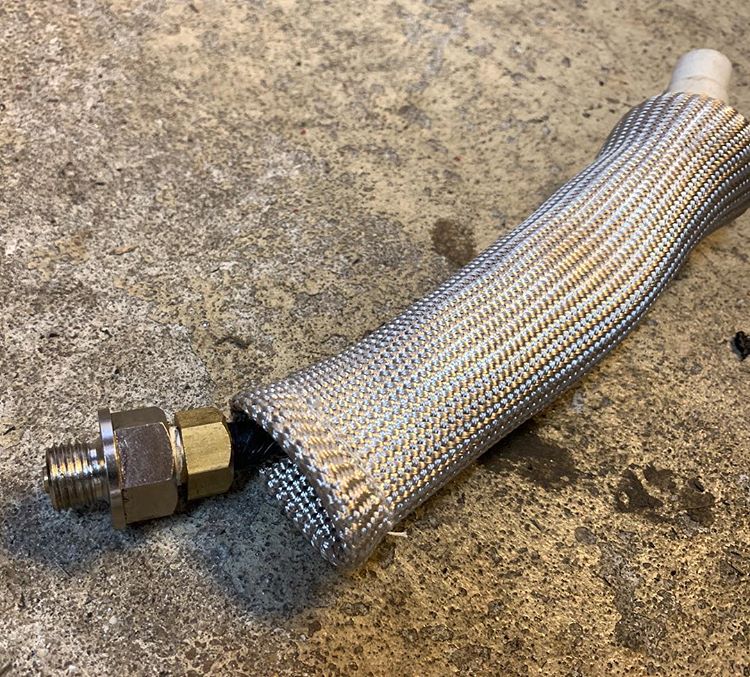
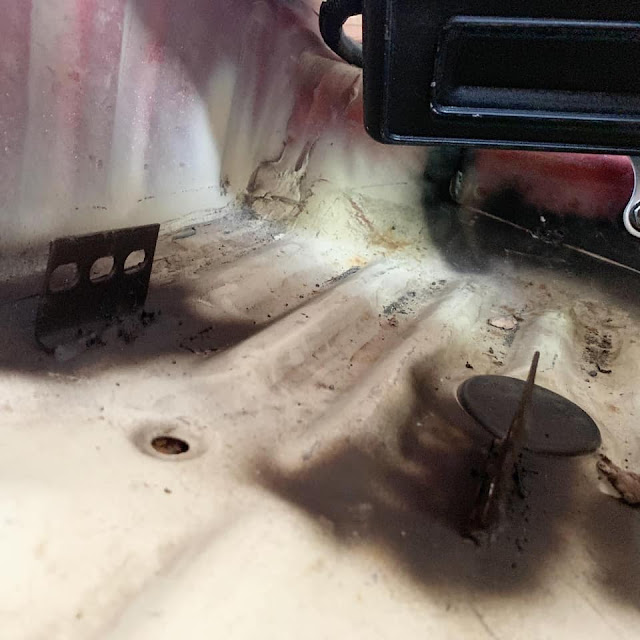
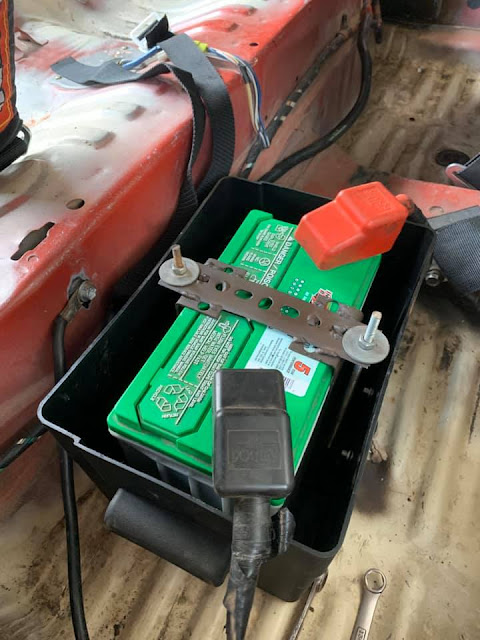
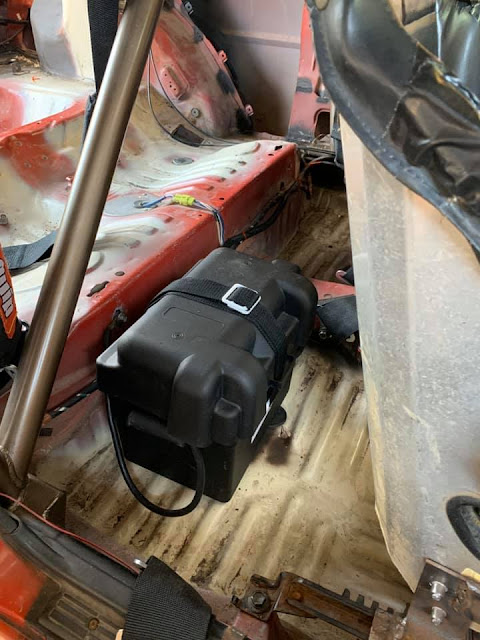
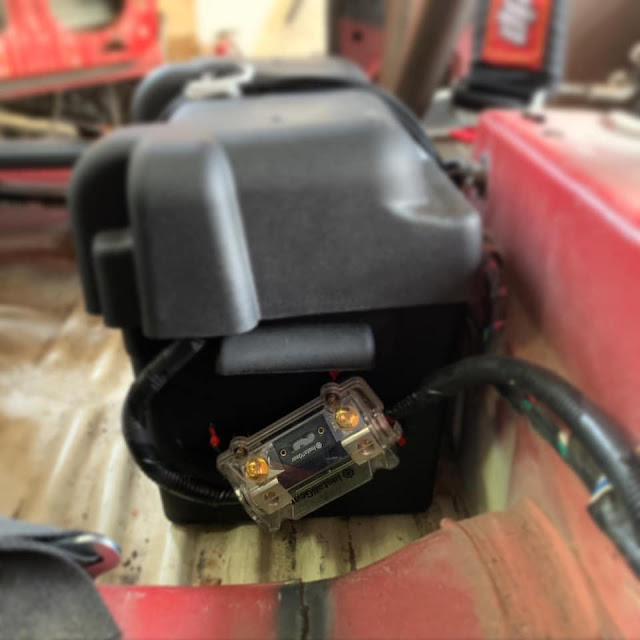
When I went to pick the car up, it started right up when jumped, and drove onto the trailer under its own power. However when I got home, the car would just crank and crank without starting. It was then pushed into the garage so I could start tearing into it. The first step was a new battery so I didn't have to jump it every time. The previous owner had already relocated the battery to the trunk/hatch area, so I replaced the (very dead) group 35 battery with a new group 51R for a little weight savings. I also refined the relocation by adding corrugated plastic sheathing over the power wire to protect it, as well as adding a cutoff switch and a 150A fuse, mounted to a panel I made out of totally-not-a-stop-sign.
 

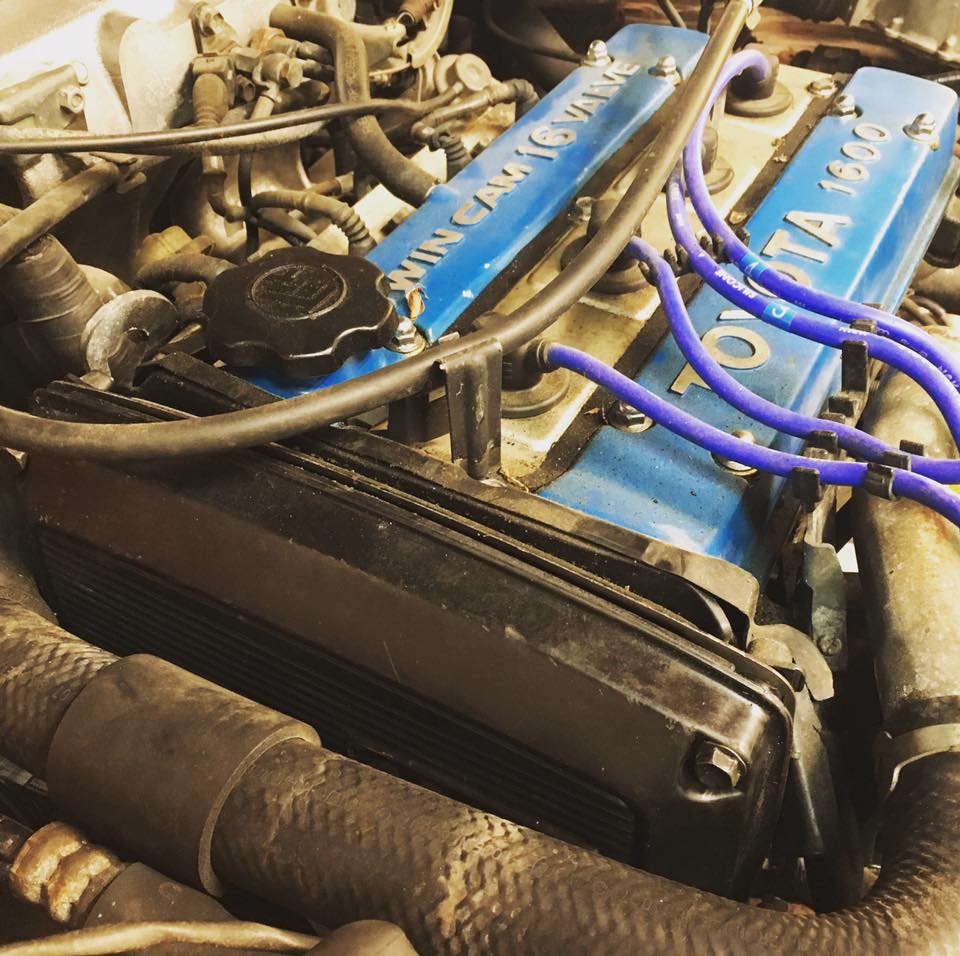
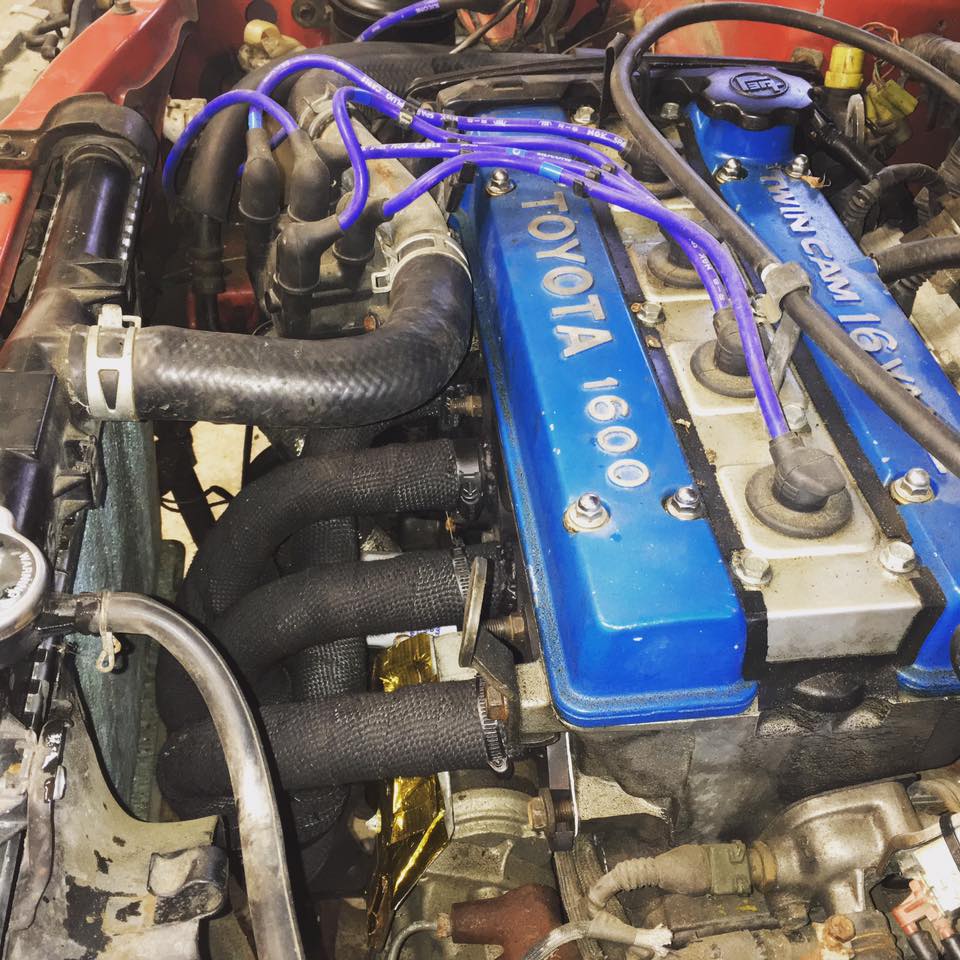
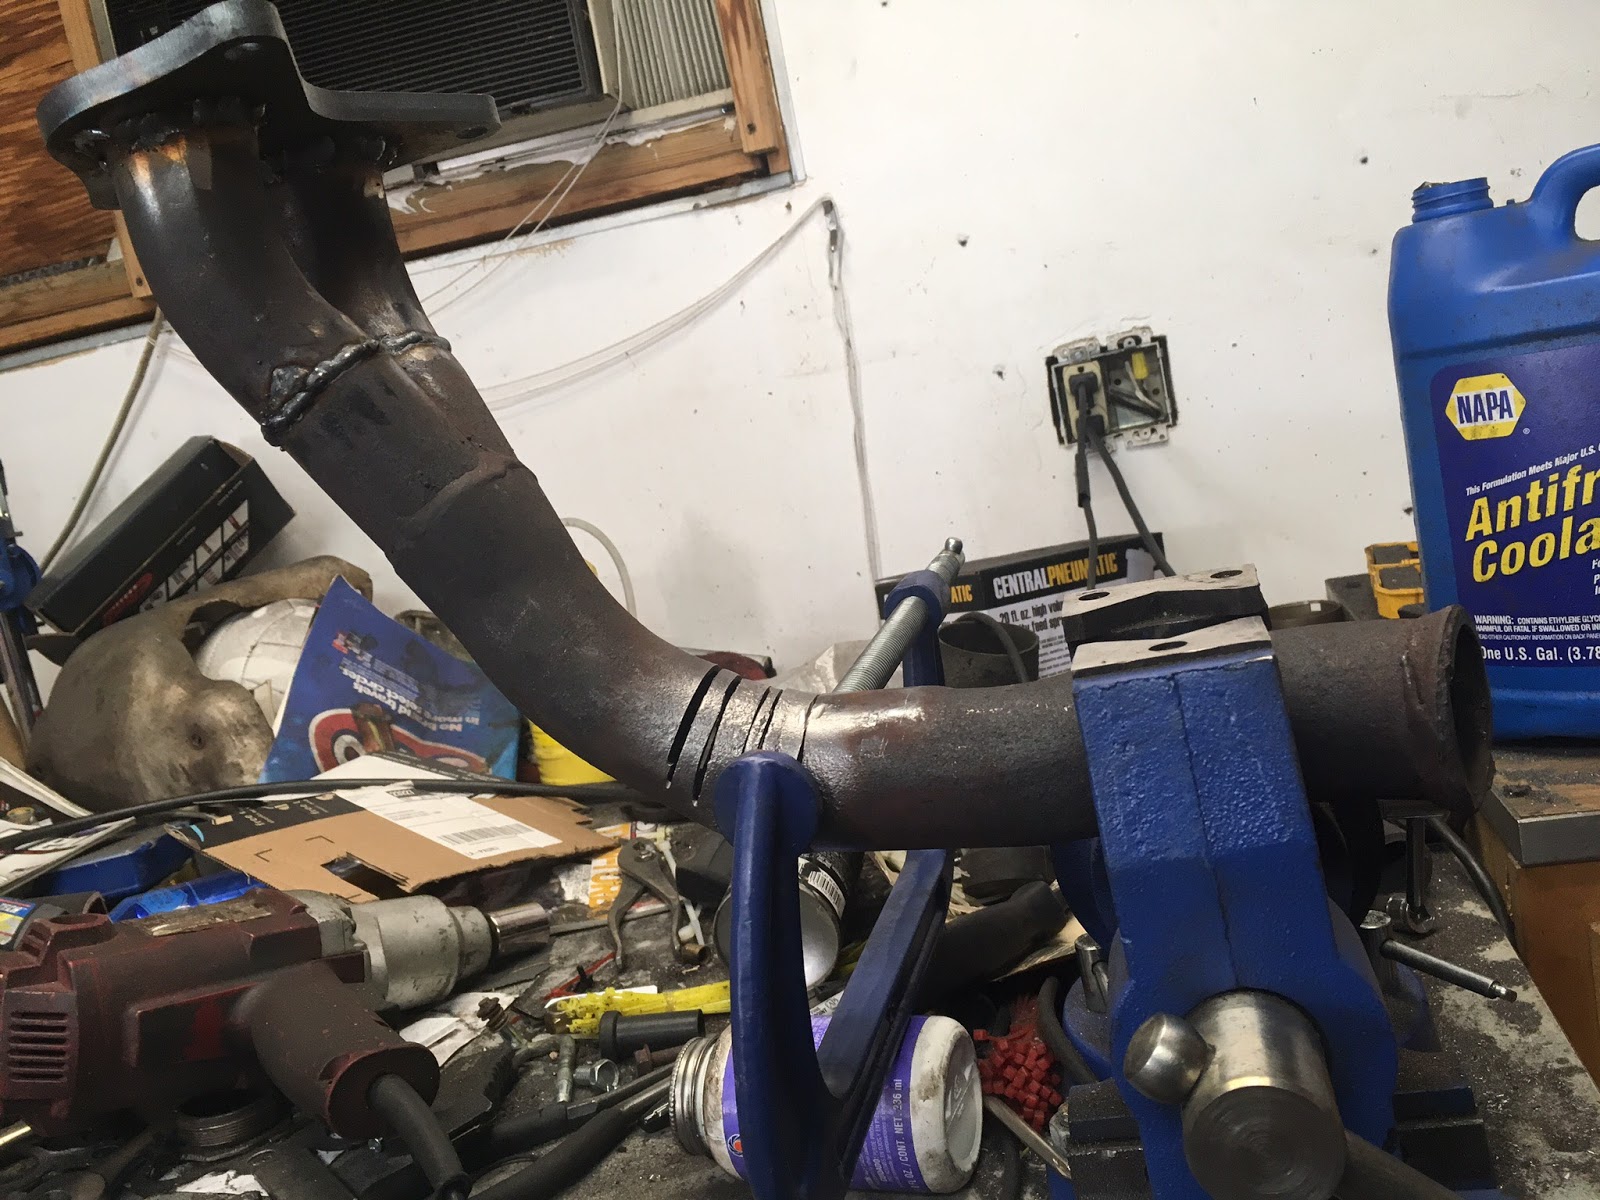
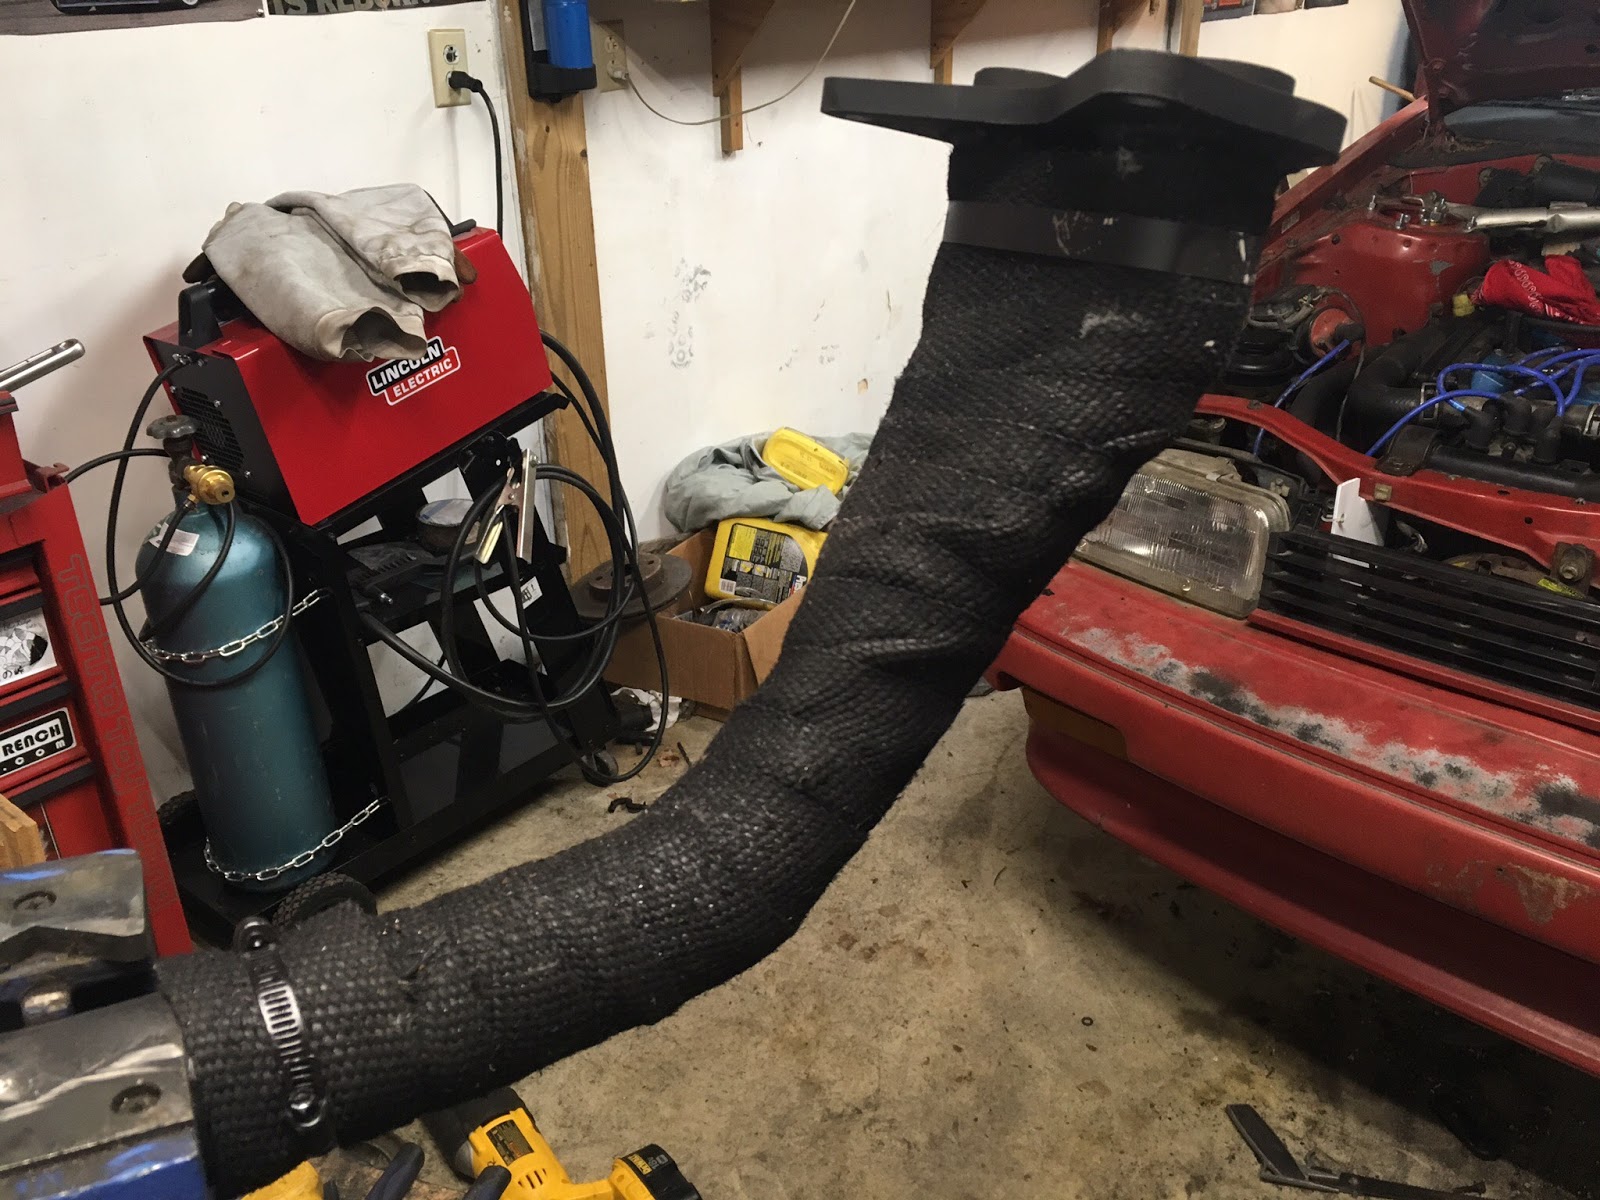
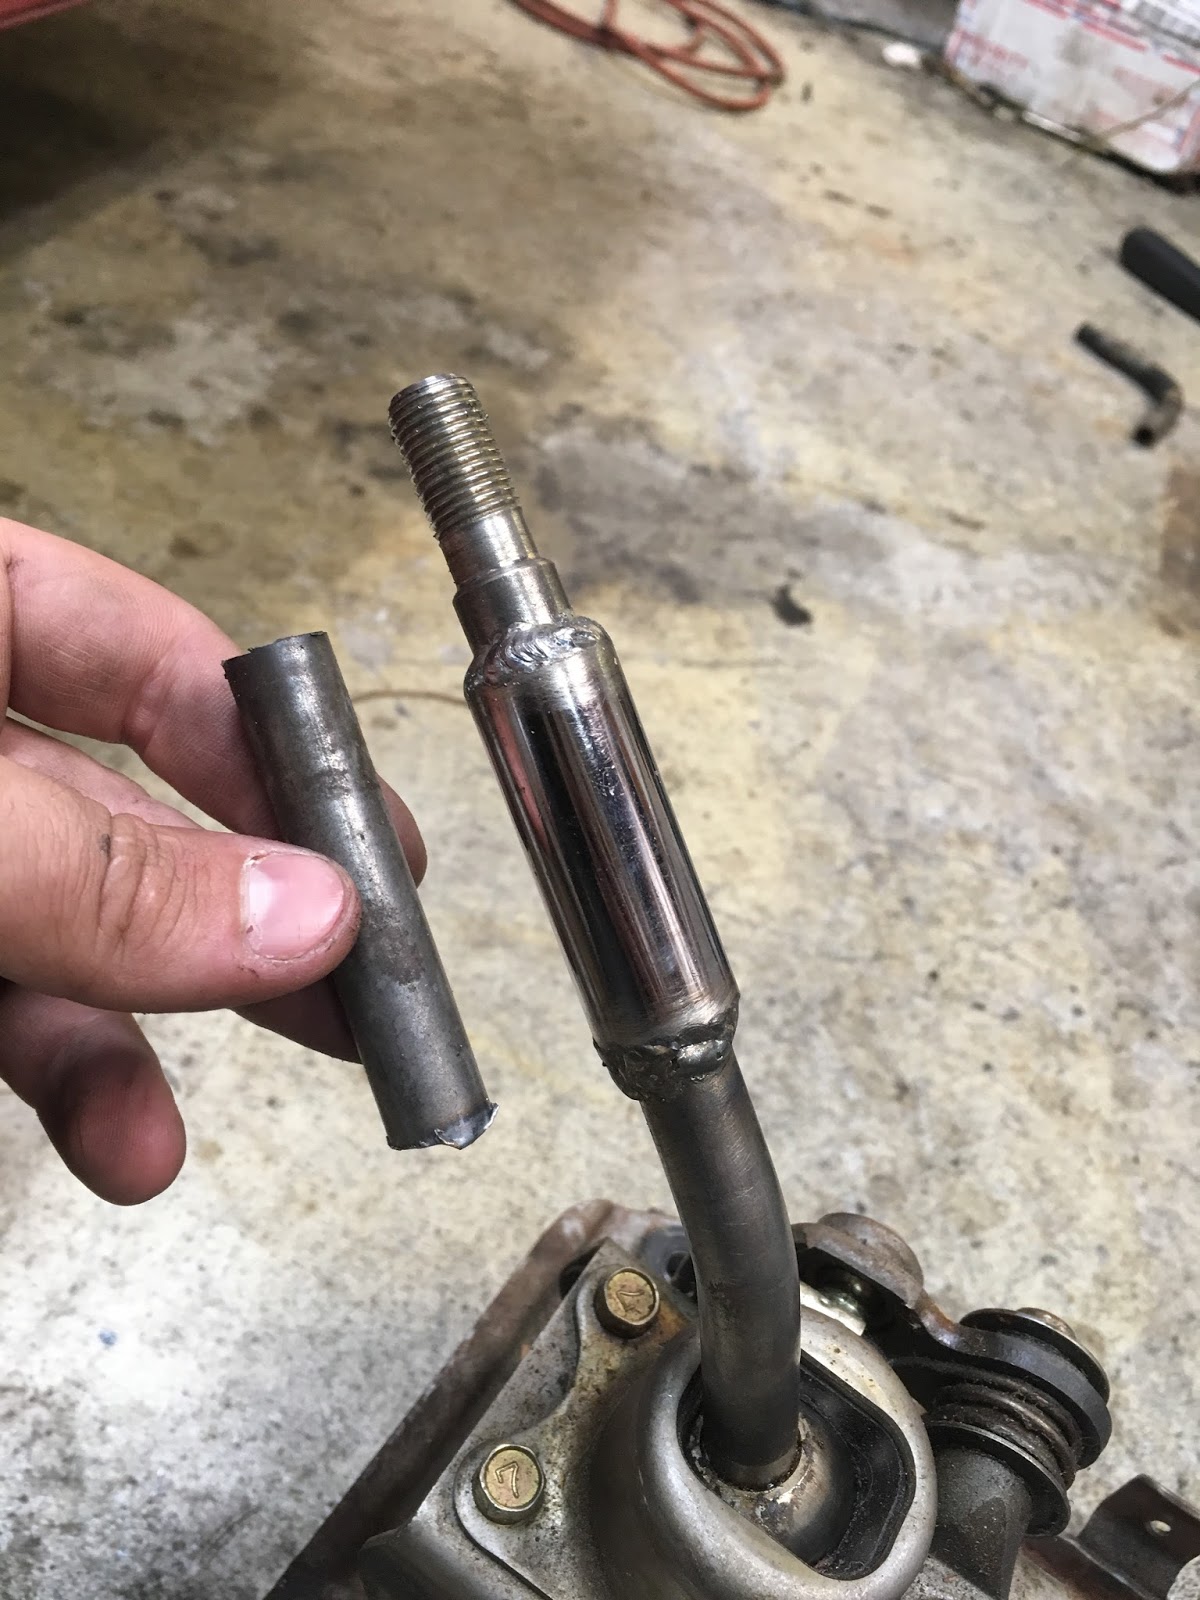
The first thing I had noticed when I opened the hood was the intake duct from the airbox was wrapped with duct tape and possibly a huge vacuum leak. The previous owner had left an intake pipe from a Jeep or something in the car, so I chopped that up and welded it back together to fit.
 

Considering it was my first attempt at welding, I don't think it looks too terrible. I did do a couple extra passes to make sure it's air tight.
 

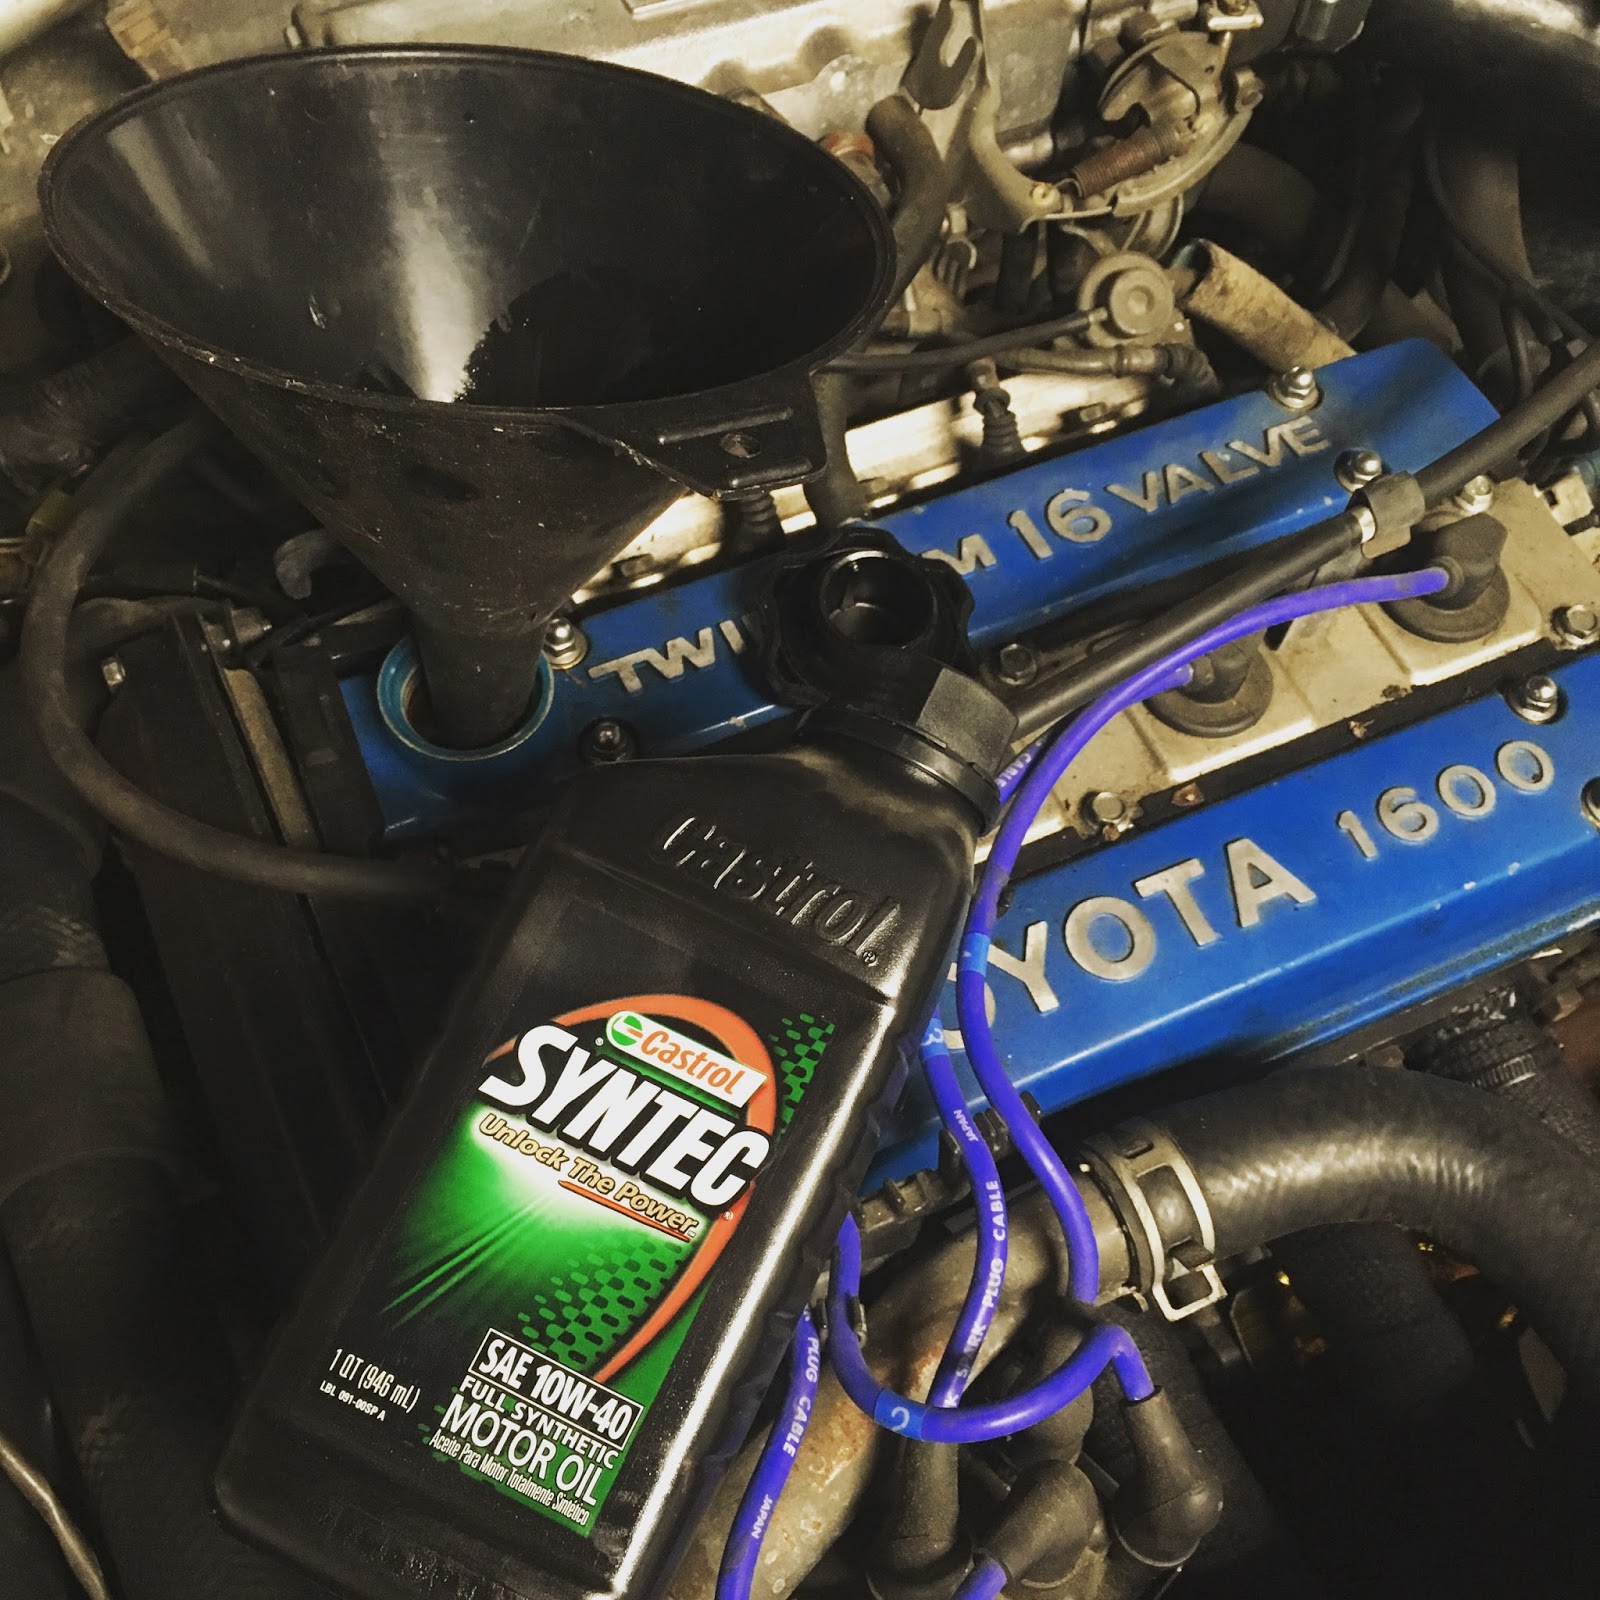
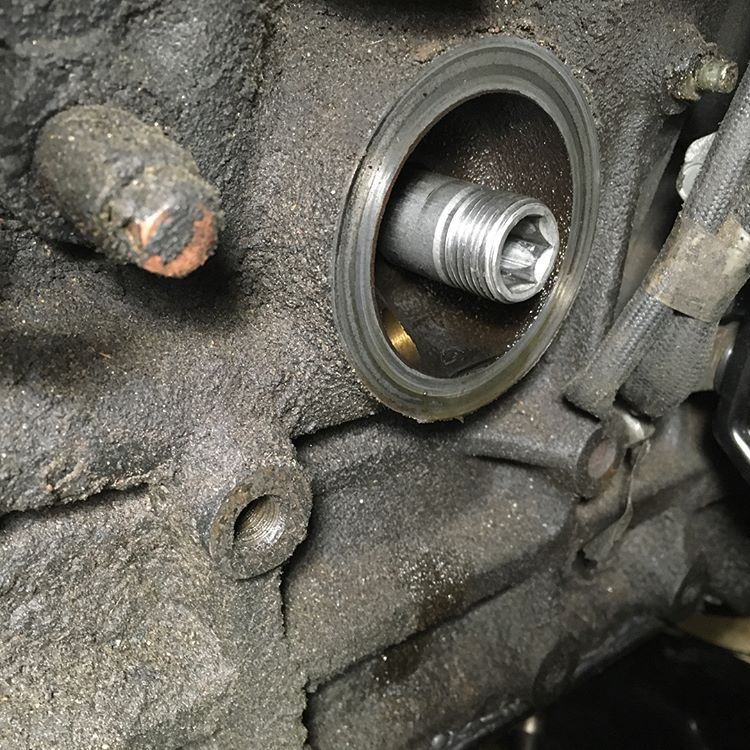
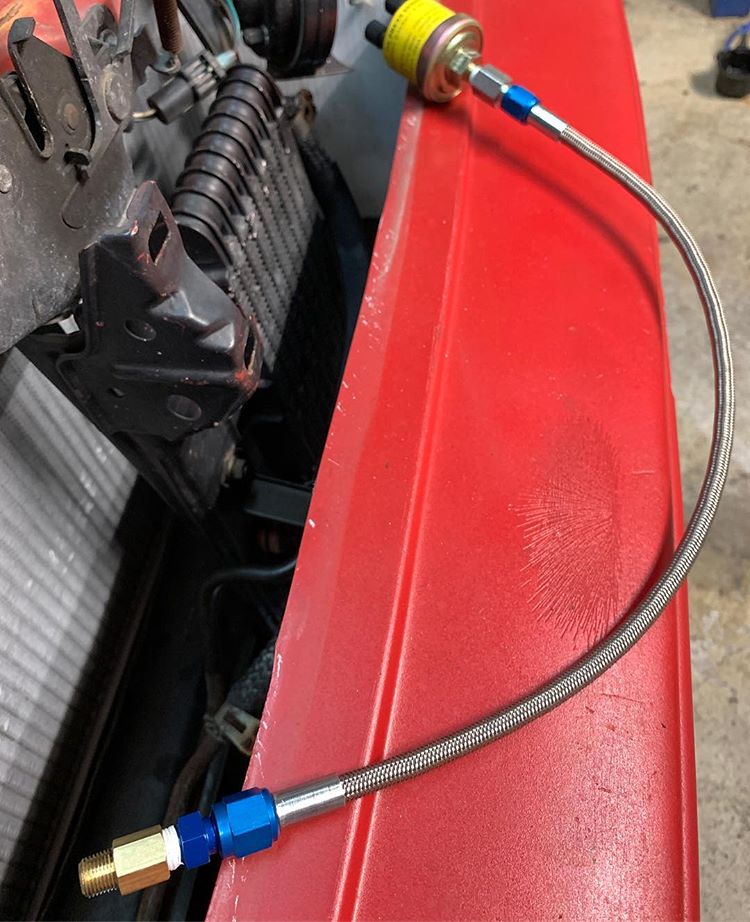
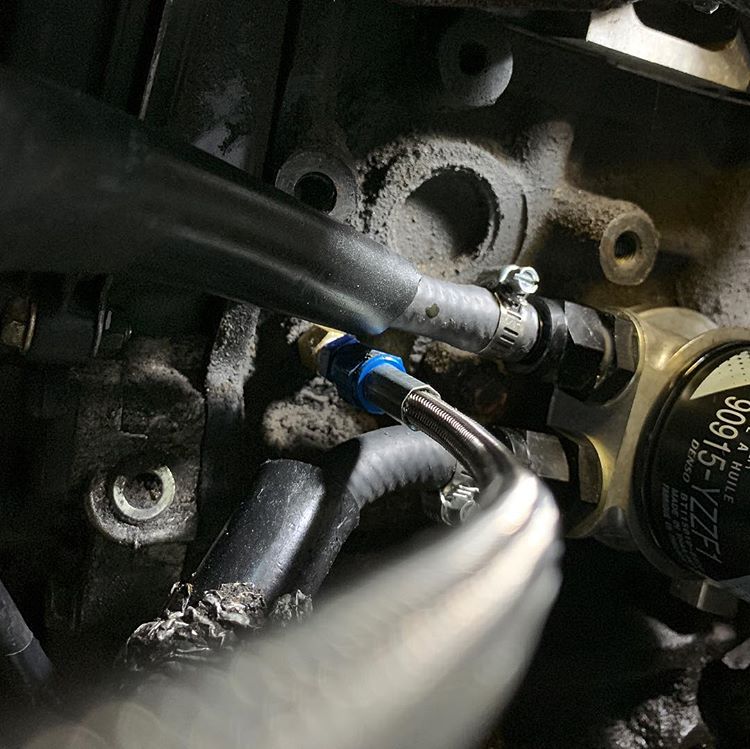
I also had to add a barb for some vacuum lines. A quick coat of paint later and it was installed in the car. However it still wouldn't start. At this point I had a feeling it was a fuel issue, so I loosened the fuel line fitting at the cold start injector and cranked the car again. Some fuel came out, but it didn't seem like the pressure was quite where it should be. The big thing I notice though was the fuel smelled like paint thinner. I ordered a new Denso fuel pump, and with the help of some friends, spent a Saturday dropping the tank.
 

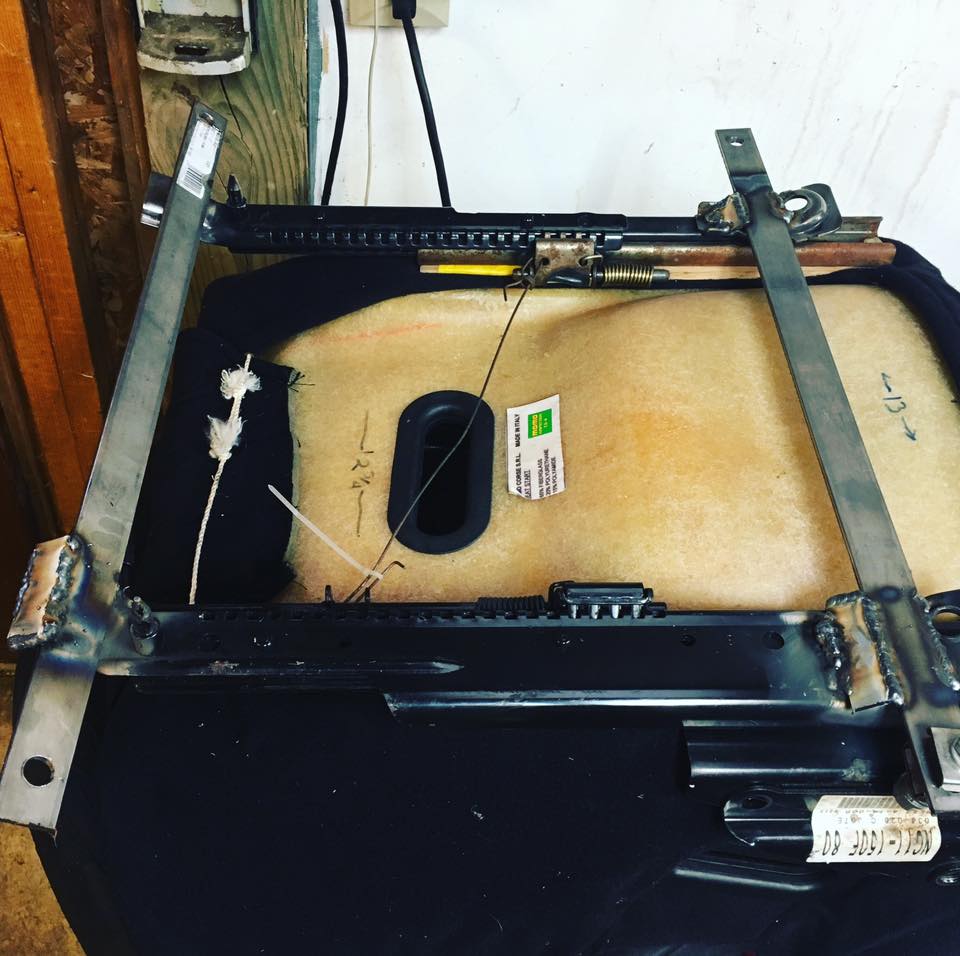
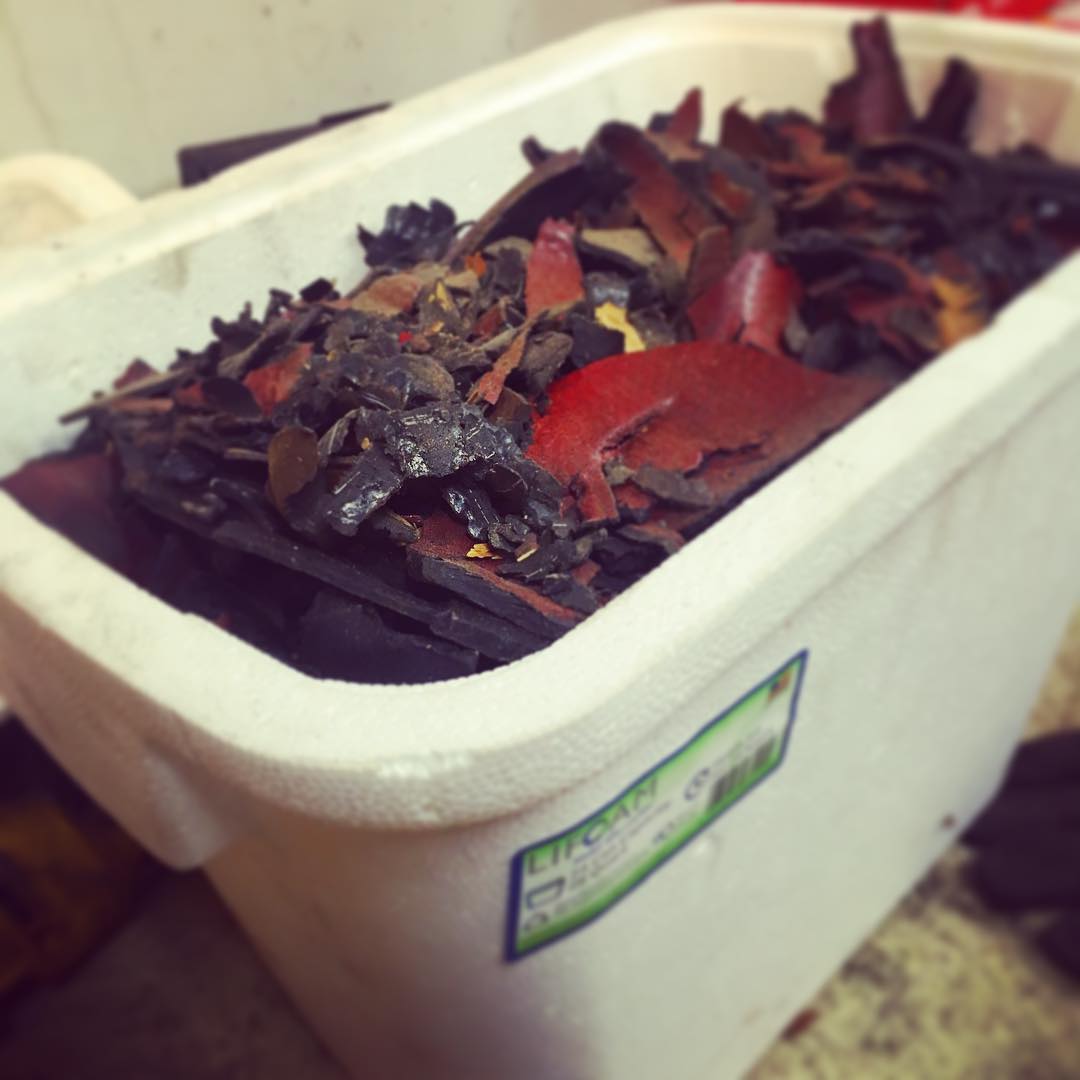
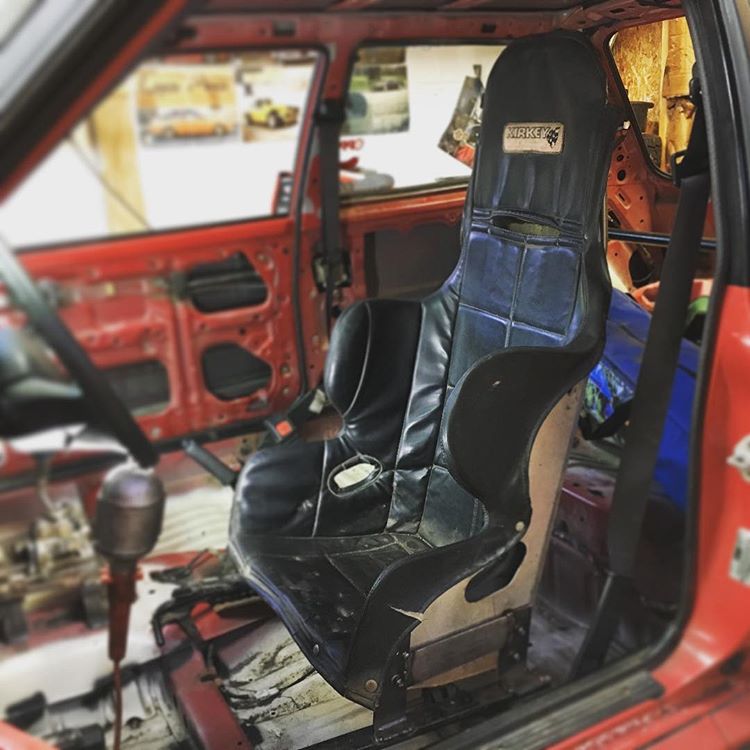
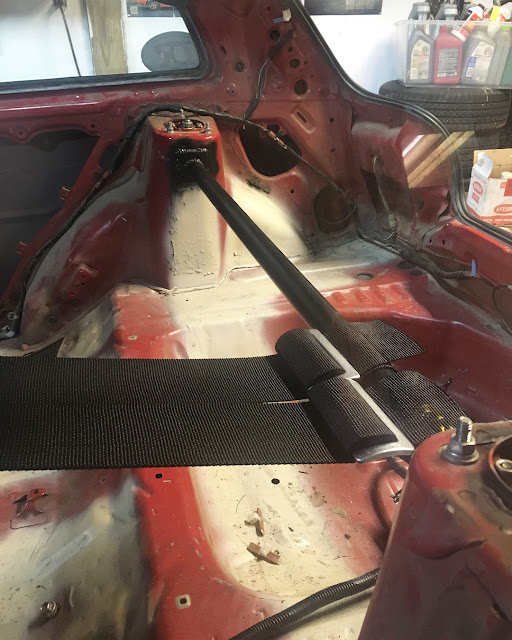
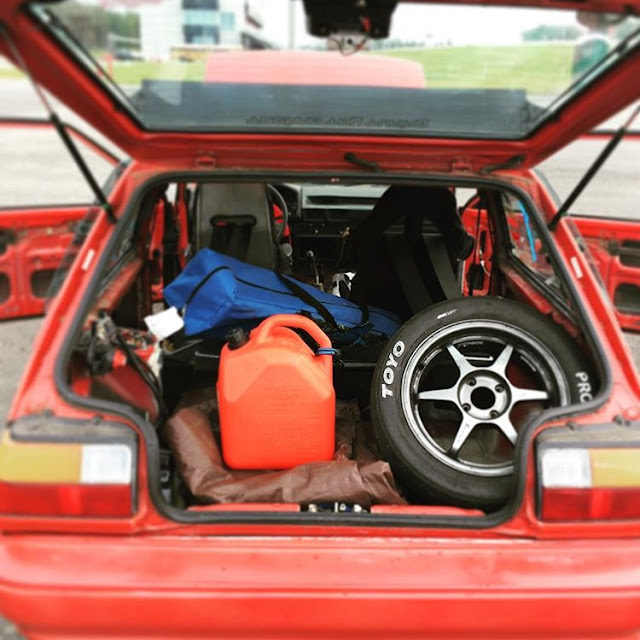
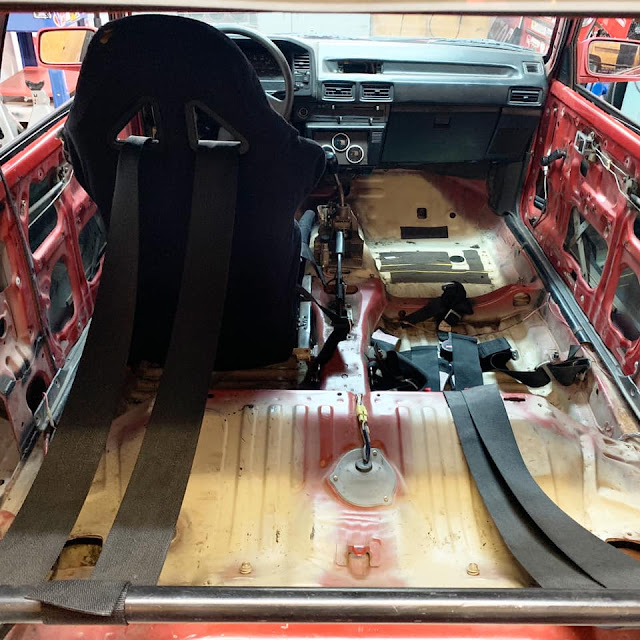
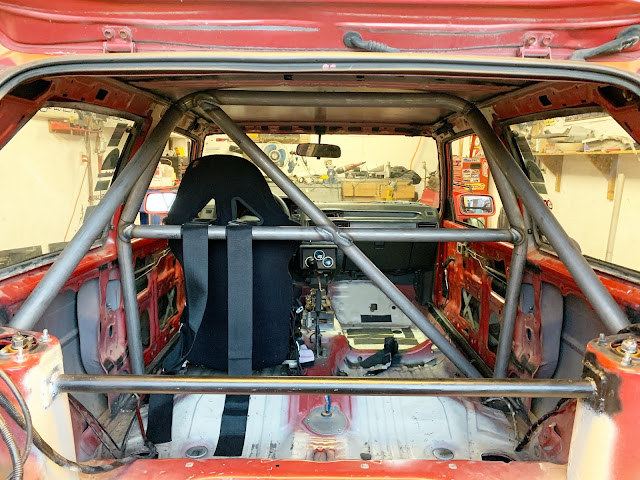
Once the bad fuel was removed, new pump installed, and fresh gas poured in, the car started right up. Now that the car was running, I could start thinking about some weight reduction modifications. The rear half of the interior came out pretty quickly, as well as the spare tire. I also removed the rear wiper arm and motor, partially for weight savings, and partially because it's ugly as hell.
 

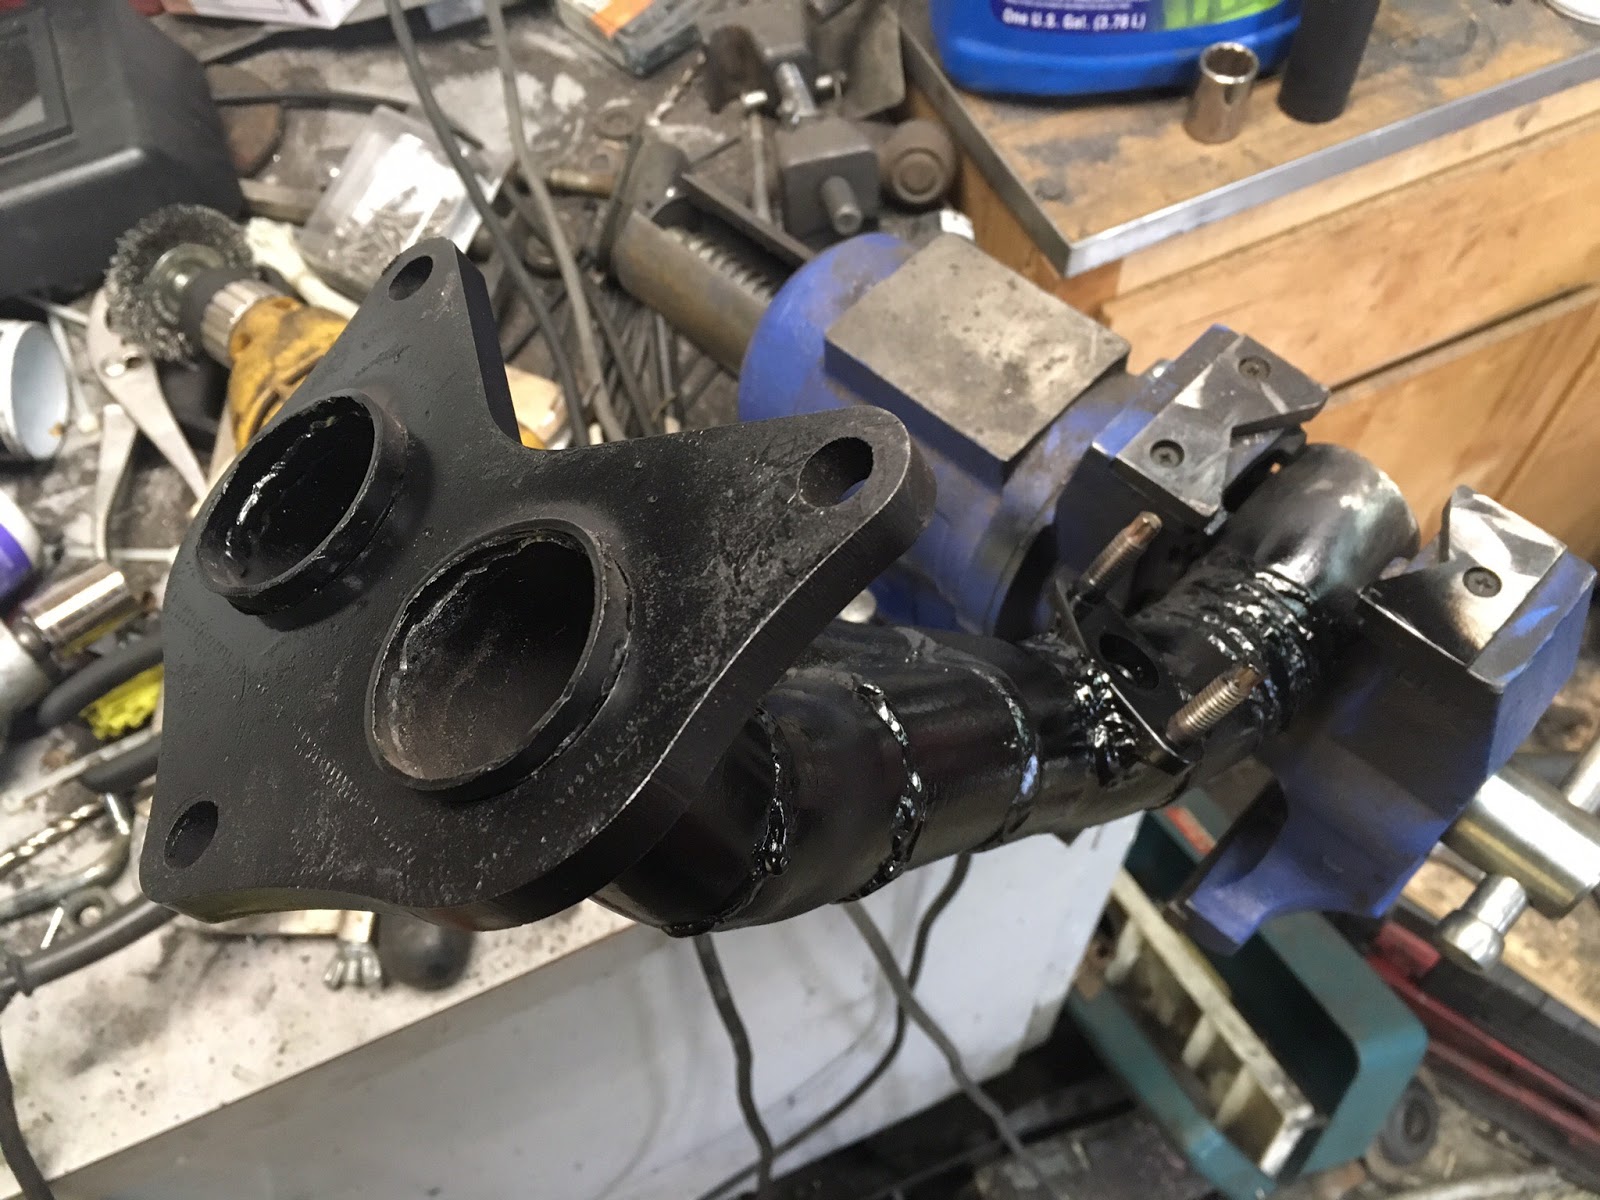
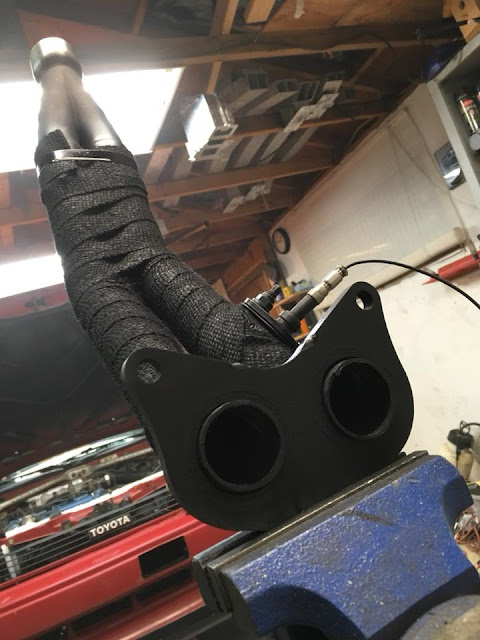
Being a front-heavy car, I want to remove as much weight up there as possible. On my MR2, I replaced the heavy cast iron exhaust manifold with a stock 20v 4A-GE part, so I wanted to do the same on this car. The 20v manifold is tubular steel so it weighs less, can be heat wrapped, and flows a little better. However unlike the MR2, the FX's starter is on the exhaust side of the engine, which means more extensive modification of the manifold is required. That will be covered in future posts, as I am currently waiting on parts.
 

While the exhaust was off, I went ahead and removed the EGR. Just say "no" to higher underhood temperatures, carbon buildup inside your intake, and extra weight, folks.
 

Also included in the car was the original front grille, which really ties the looks of the front end together. However that had to be removed again so I could start removing AC components.
 

An anonymous local dumpster kindly donated a few large alumacore signs for future aero projects. Alumacore basically consists of two thin layers of aluminum sandwiching a layer of rubber or plastic between them. It's not the lightest thing ever, but it's very rigid for how thin it is, and is a great cheap material to make splitters and other aero parts from.
 

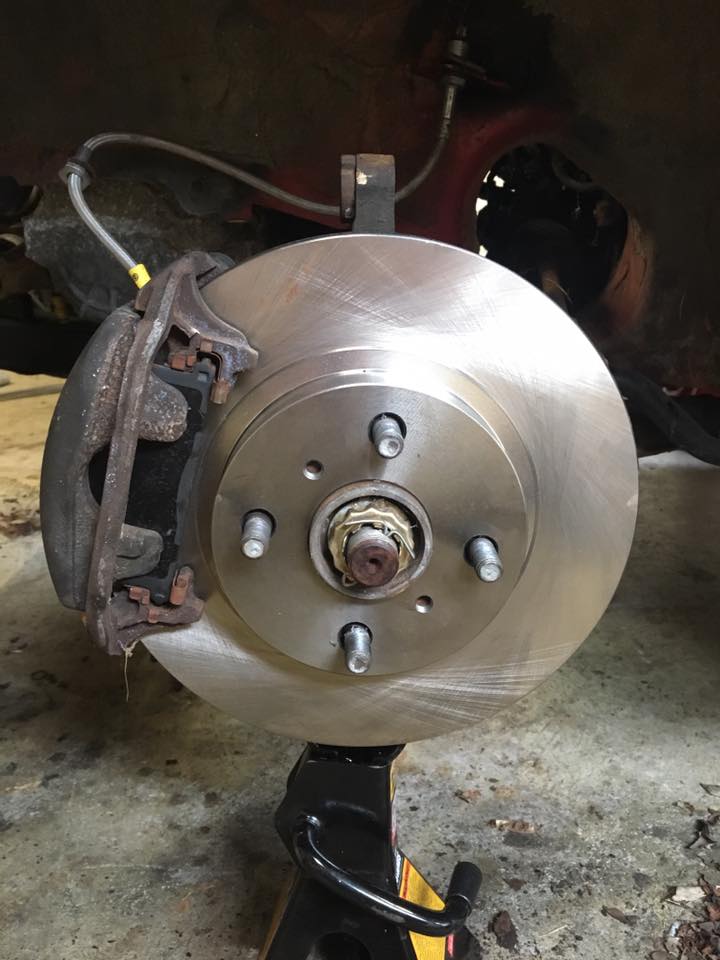
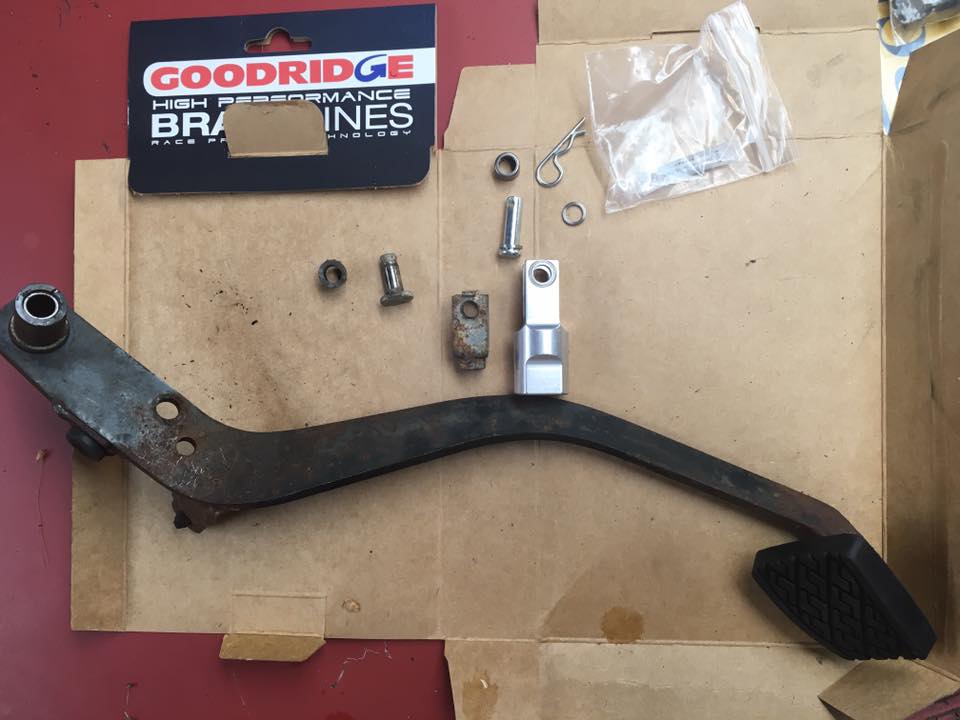
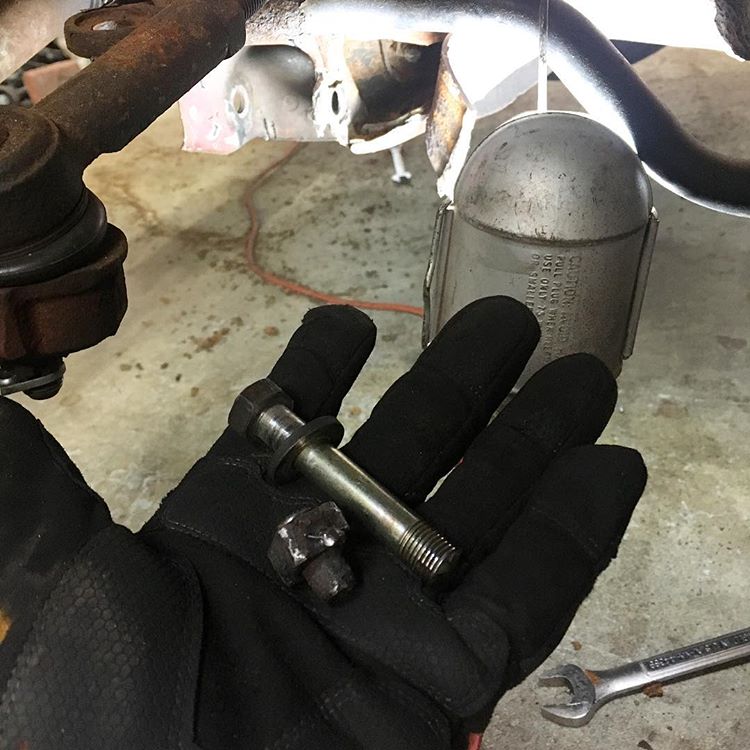
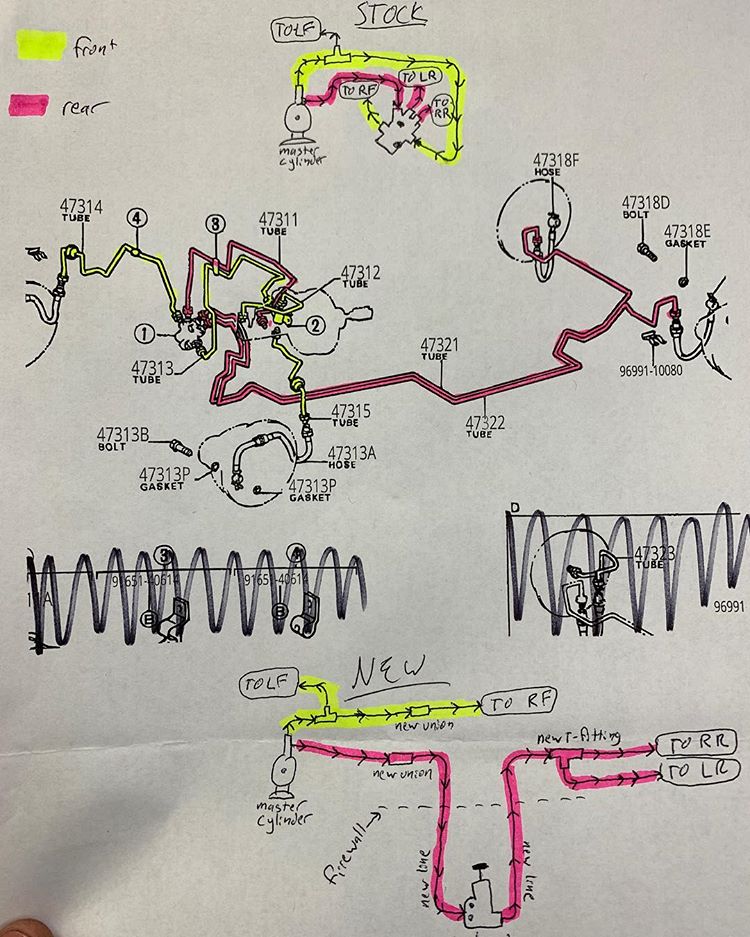
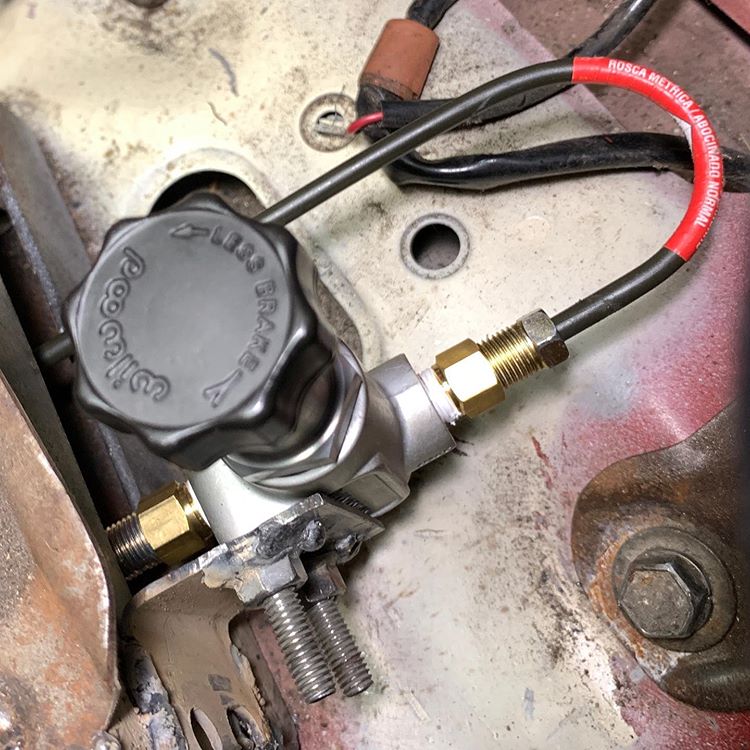
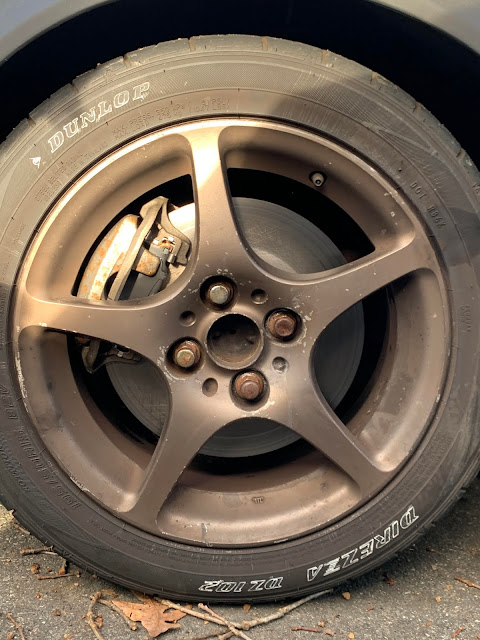
Next on the list of stuff to be upgraded was the brake system and shifter. The aftermarket for the FX16 is basically nonexistent so I spent a lot of time cross-referencing part numbers to see what parts from other cars would fit. I discovered that the front brakes are identical to 85-86 MR2s, which means 87-89 MR2 front brakes are a bolt-on upgrade. Unfortunately the guy I ordered calipers from sent me the wrong ones, so I'm currently waiting on the correct caliper brackets to come in. The upgrade is really in the rotors, as the calipers and pads are the same, you just need the correct brackets to accommodate the larger MR2 rotors. For pads, I discovered that rear pads for a Celica All-Trac are the same, so Porterfield HP R4S pads were selected front and rear, and Motul 600*F synthetic fluid will be going in. I've had great luck with those on my MR2 in the past.
 

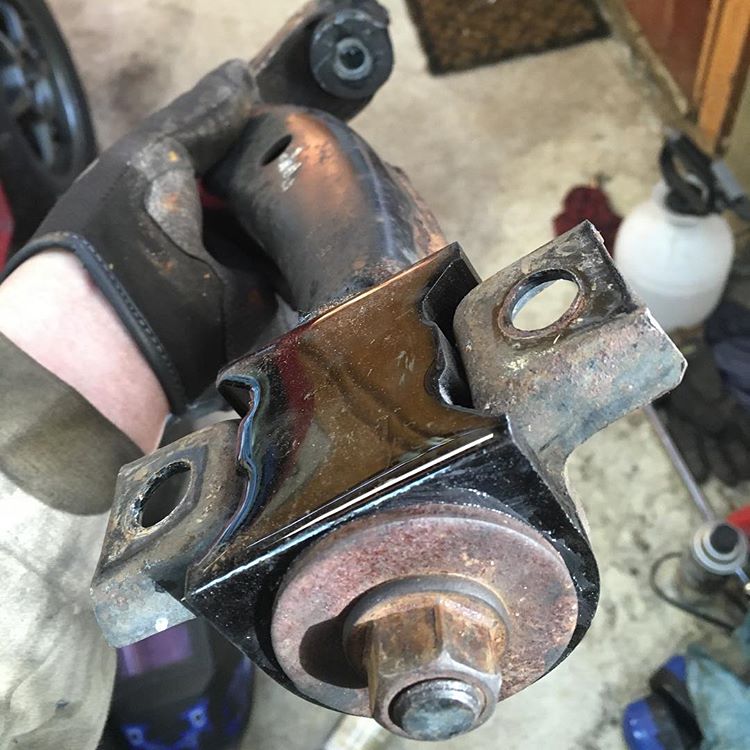
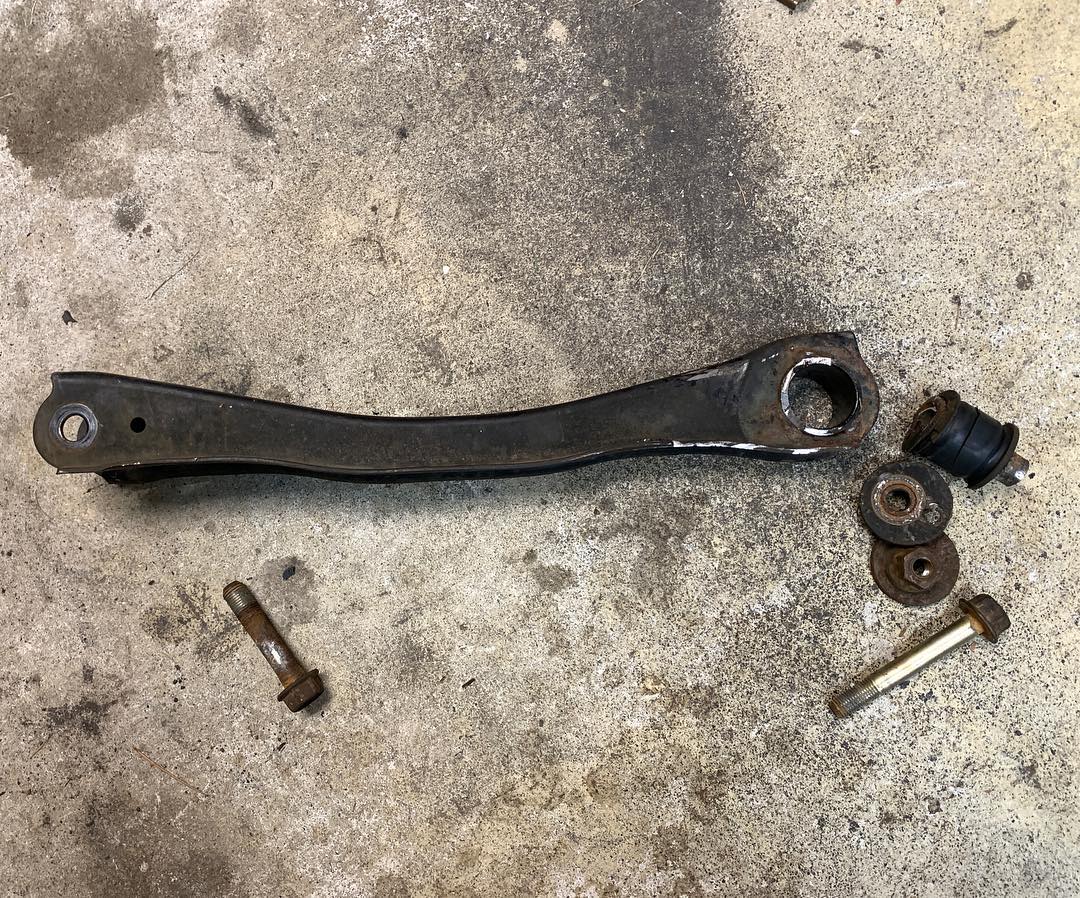
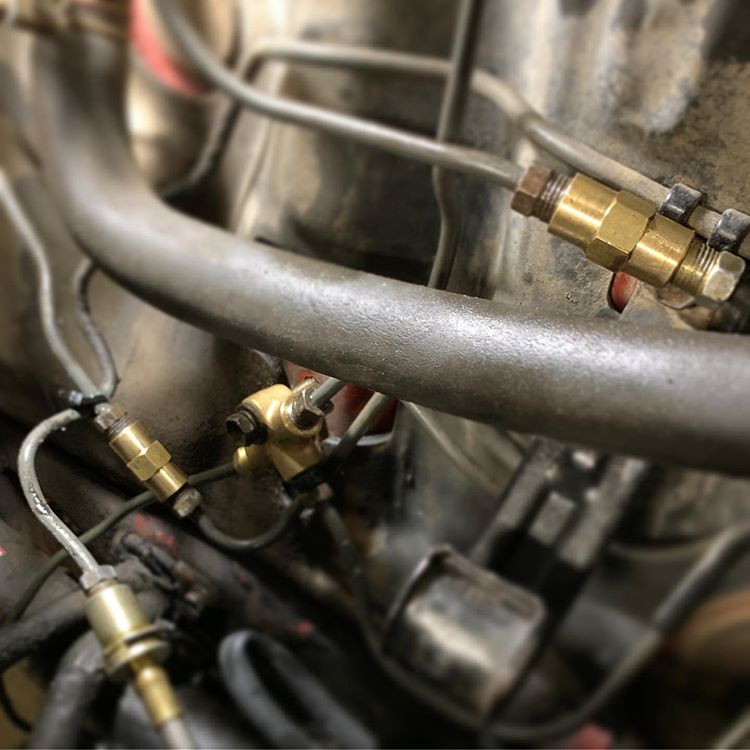
AW11 MR2 stainless lines, Celica All-Trac rear pads, new stock rotors, and Motul 600* fluid should work great for a rear brake setup. Also note in this picture that the rear struts have been replaced with KYB's. This will make building my own coilovers much more difficult for the rear. I'll cross that bridge later.
 

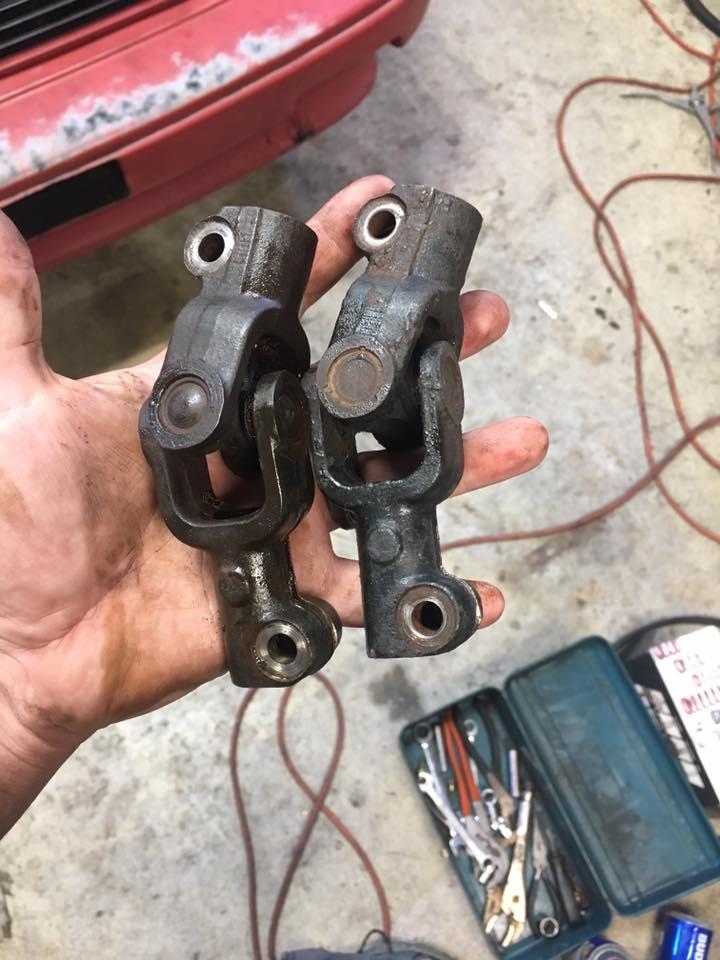
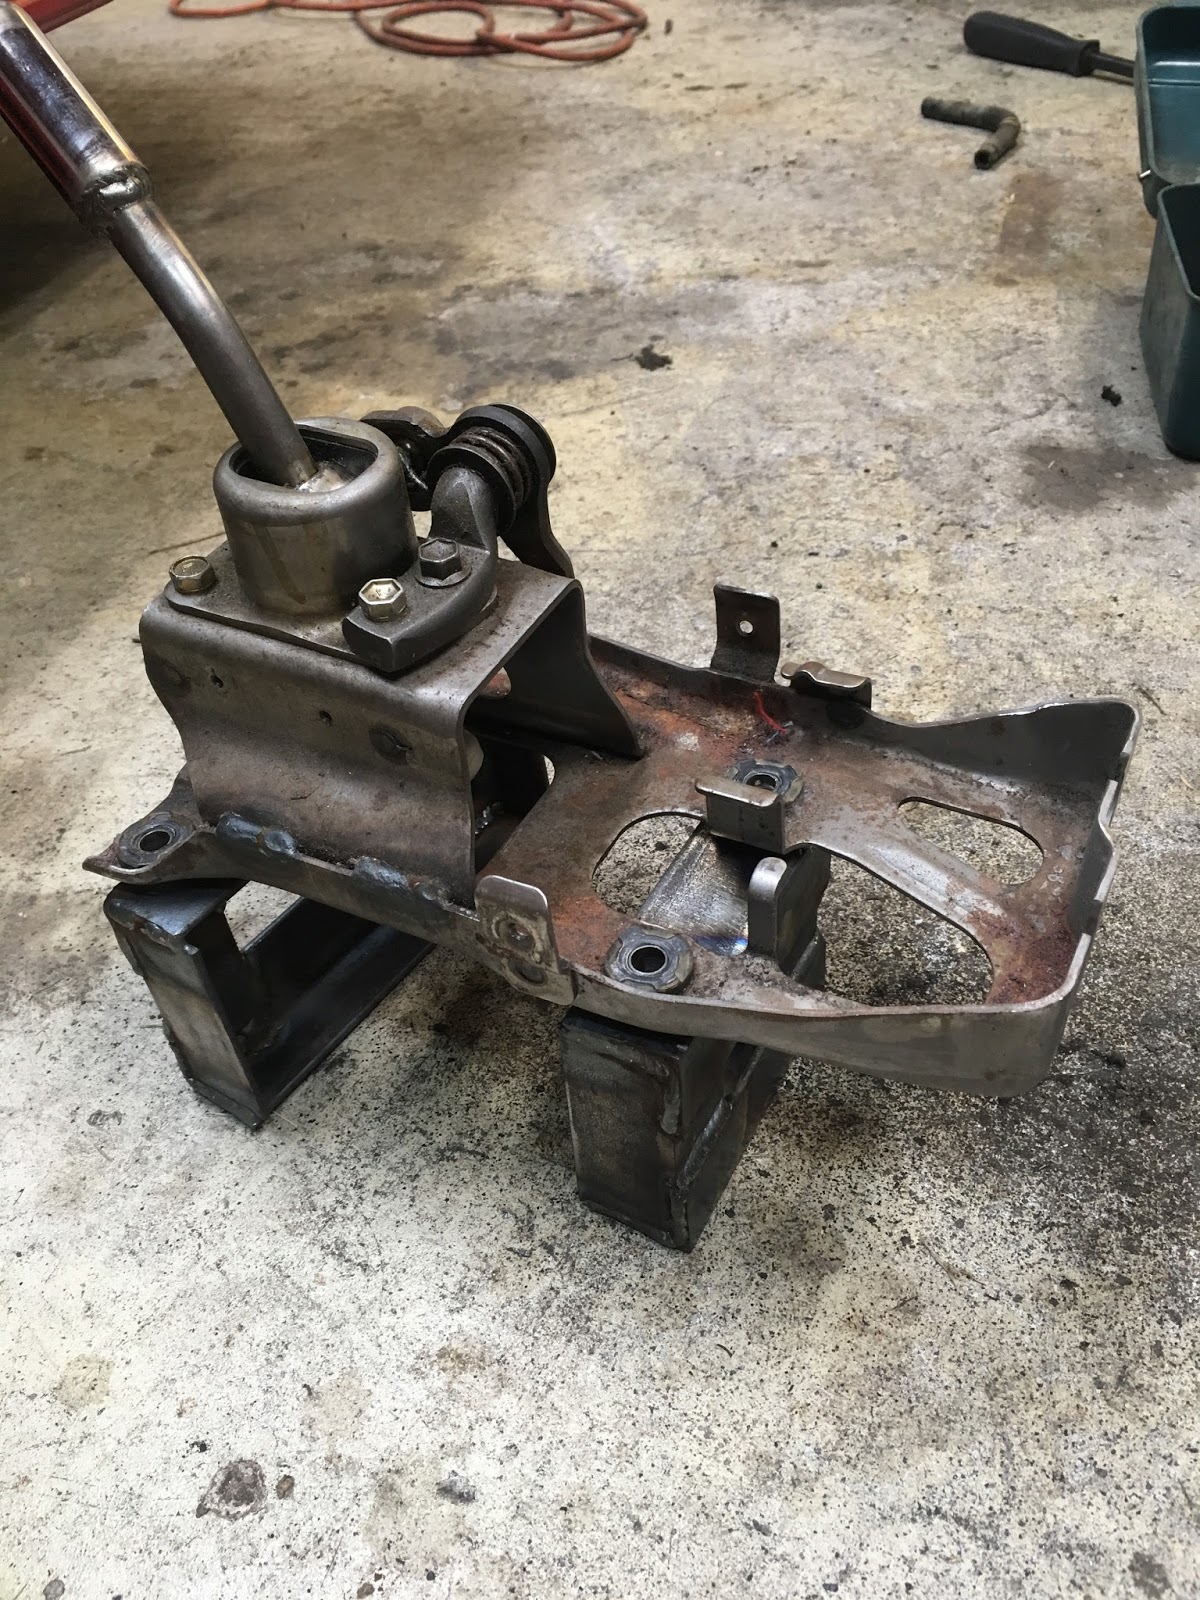
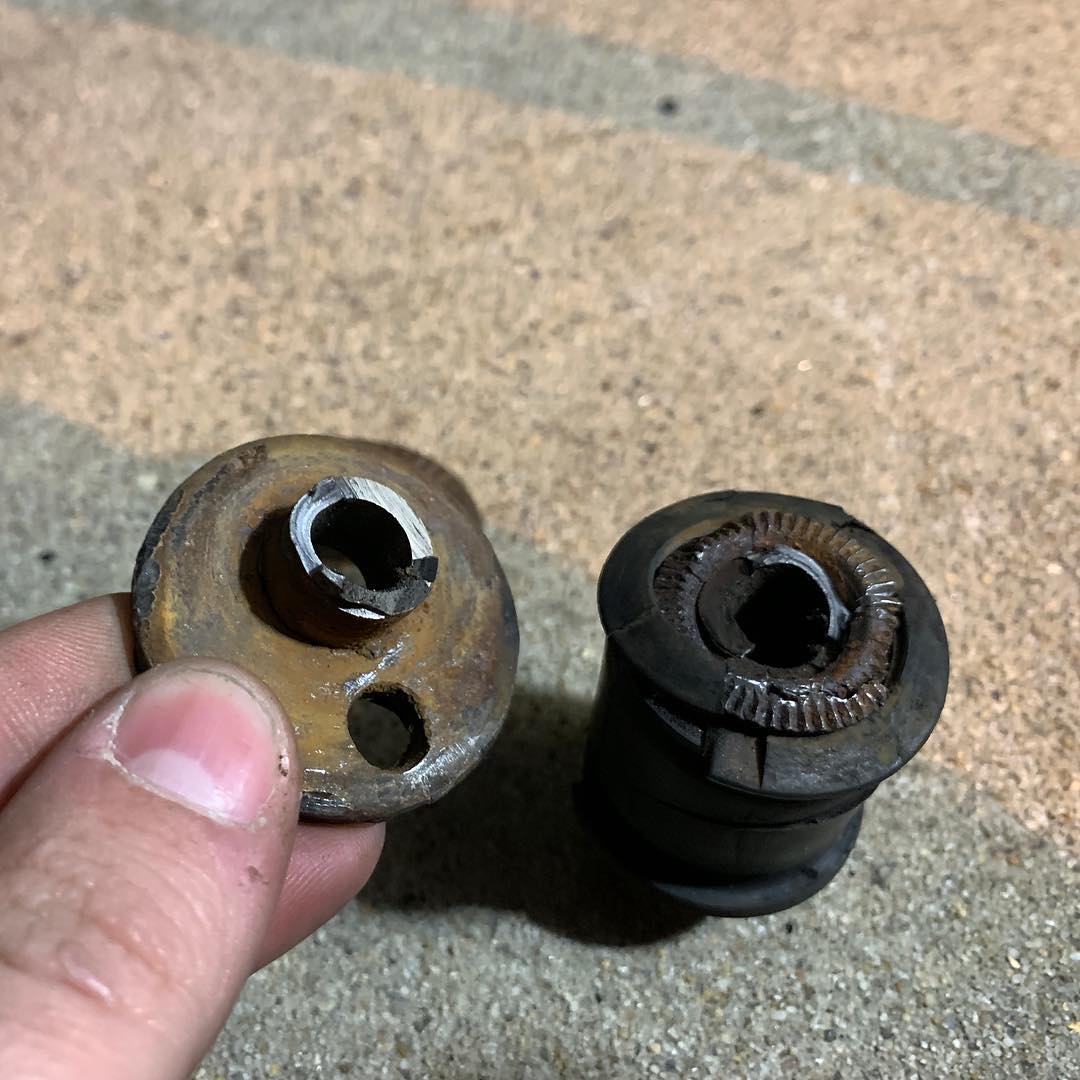
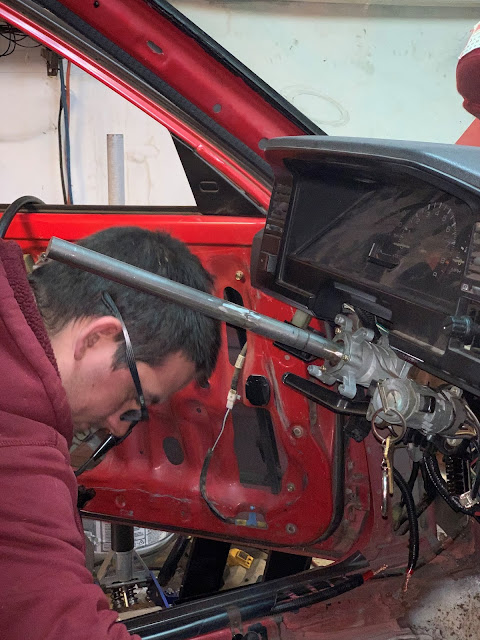
MR2 brass shifter bushings fit great, but are a serious pain to install. AC lines, intake, and charcoal canister all get in the way. It was so much easier on the MR2! I also took the opportunity to grease all the pivot points and rotate the 'little square bushing' where the arms meet for much better shifter feel.
 

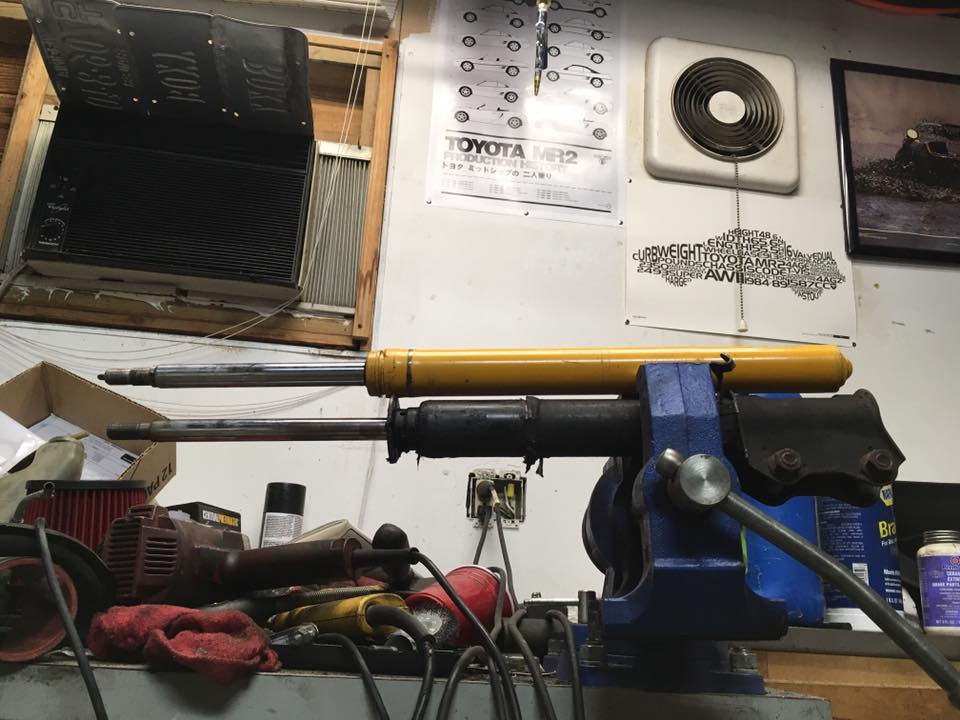
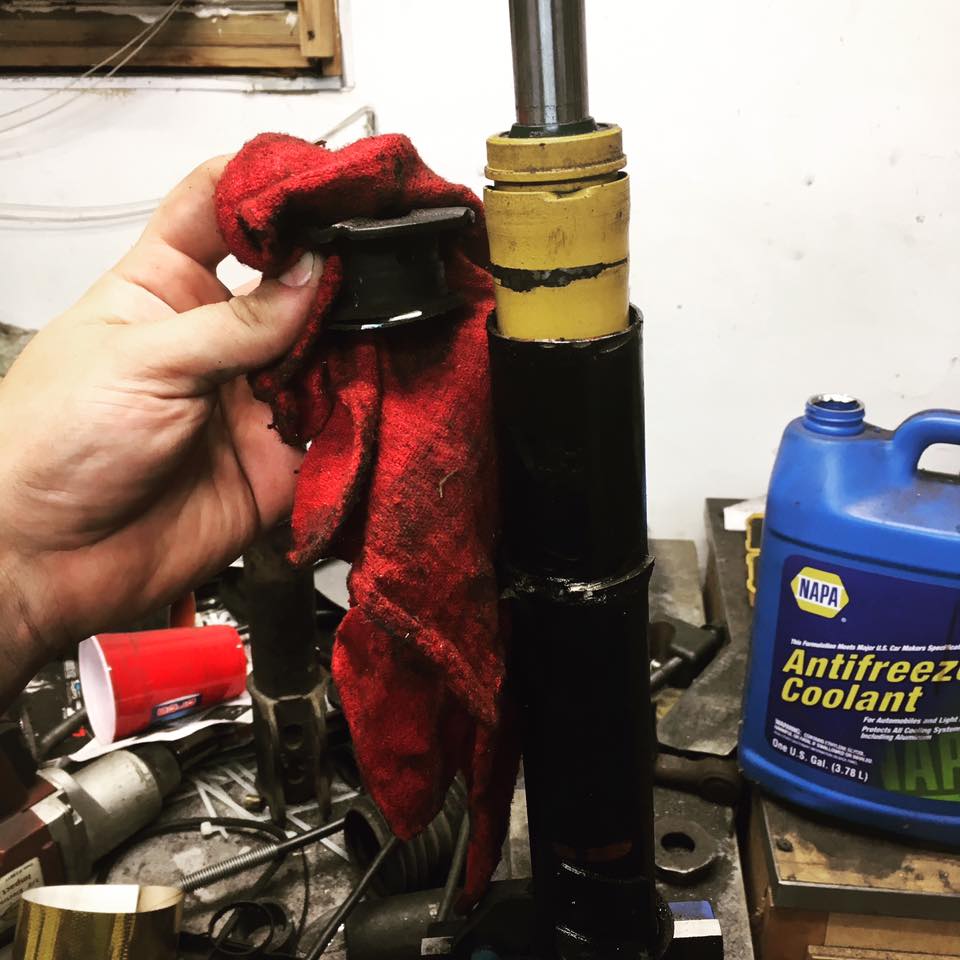
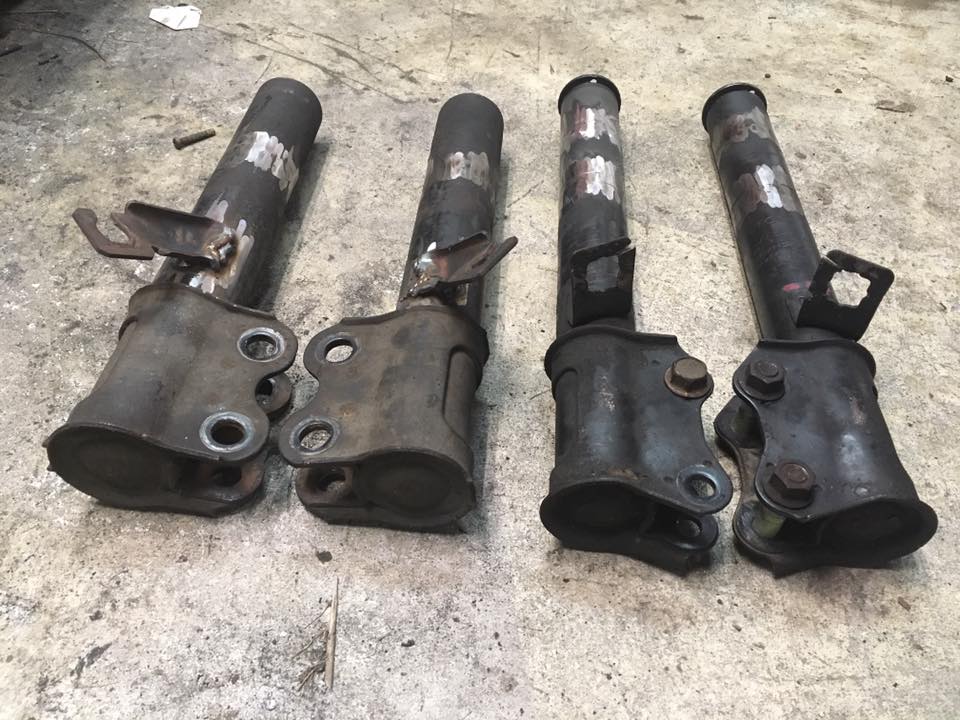
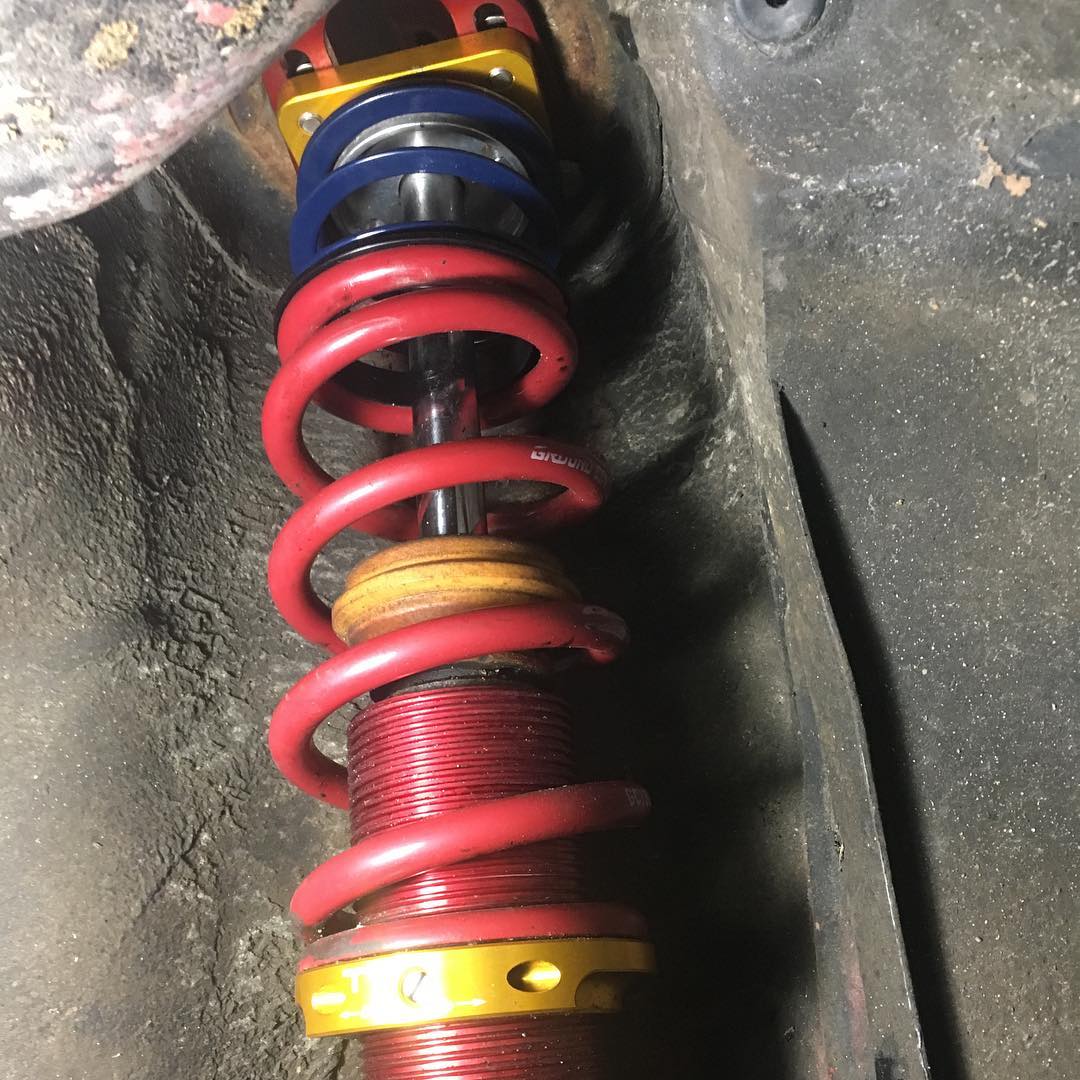
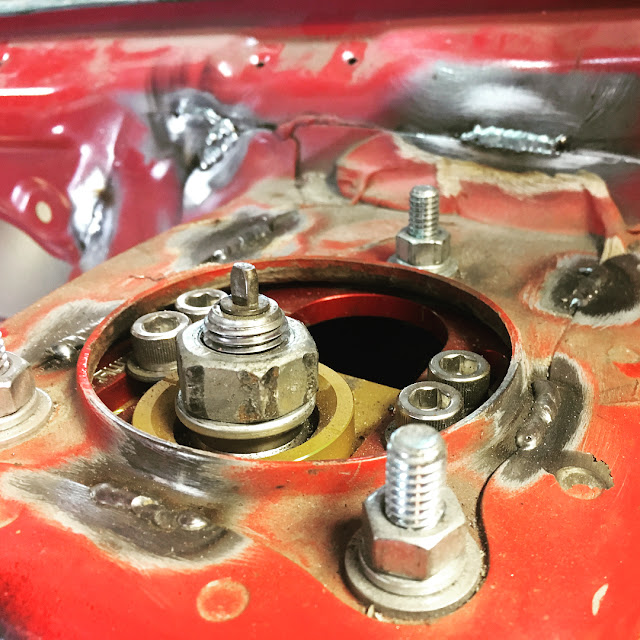
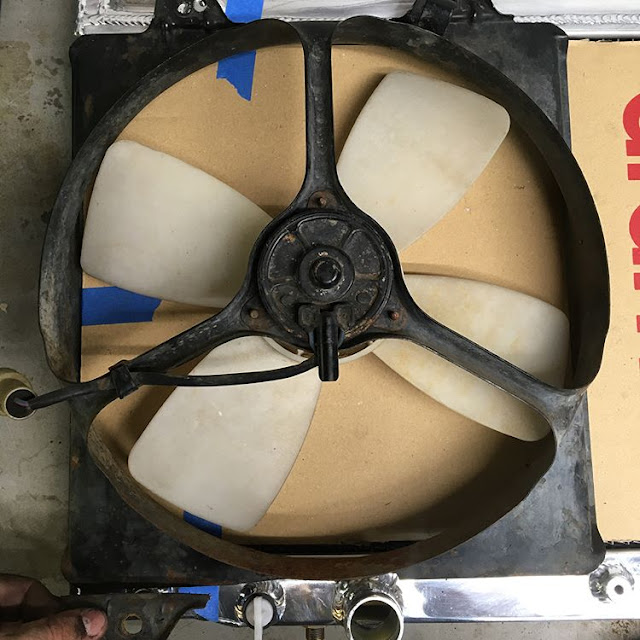
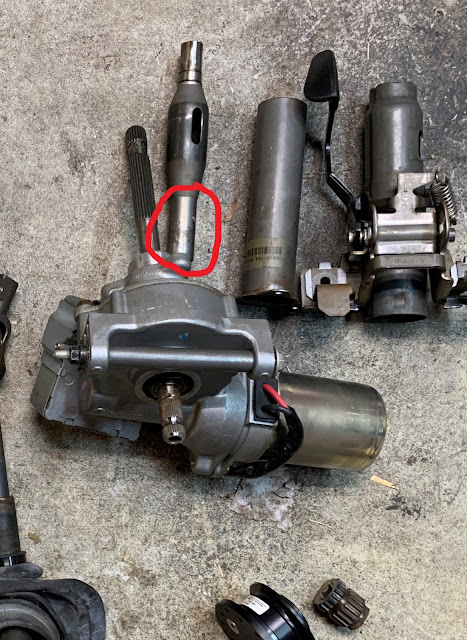
Remember how I said aftermarket support for the FX16 was nonexistant? That includes shocks. Koni no longer makes inserts for the FX so I'll be forced to use parts from other cars. BC makes a set of coilovers, but I've heard that while that brand is perfectly adequate for spirited street driving, something a little more established is better for track duty. That's why I'll be going with a DIY coilover solution using Koni adjustable shocks. I removed one of the front struts to take measurements and compare with some MR2 parts I had laying around. Left to right, we have AW11 front (modified for coilovers), AW11 87-89 rear, SW20 rear, and finally the FX16 front.
 

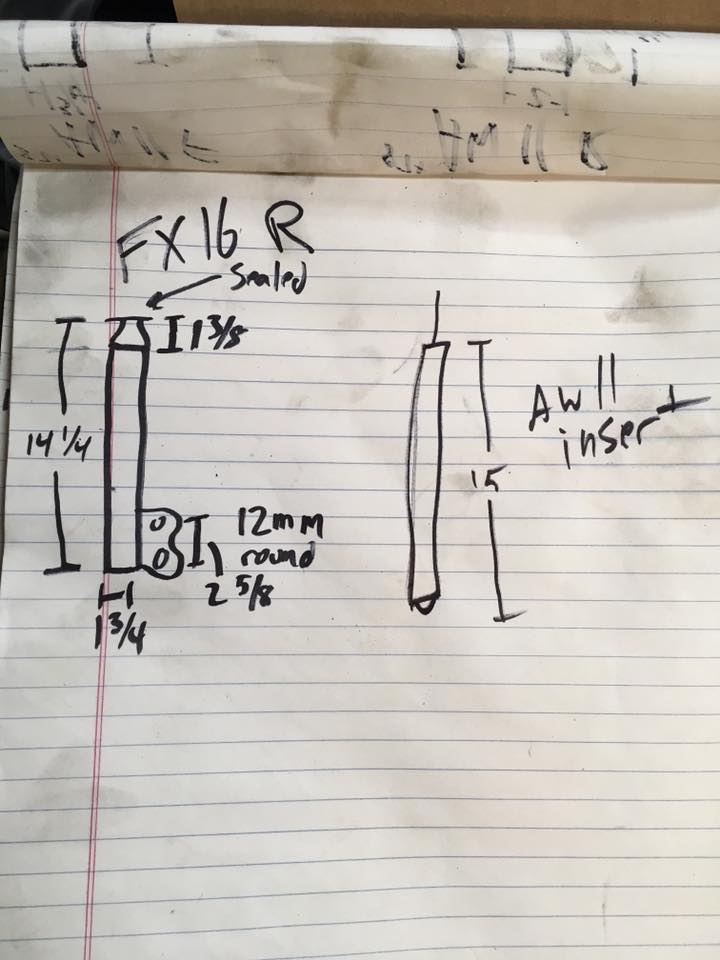
Here are the rough measurements I took. The FX16 front and AW11 rear housings are almost identical, with the AW11 housing being a couple mm longer. The SW20 rear housings are similar, but are a little longer still, and do not have an eccentric upper bolt hole. Another big difference is the MR2 housings have a courser thread for the gland nut, but the FX16's thread is much finer.

TheDailyDownshift
TheDailyDownshift New Reader
11/30/21 12:37 p.m.

July, 2017

With the front suspension measurements sorted, it was time to figure out what to do with the rear. The design of the mounting flange is completely different from any of the MR2 housings, and the struts themselves are sealed units.
 

However the diameter is identical to an AW11 front housing, and the length is within an inch or so. I thought by removing the top of the FX housing, and welding on the threaded top portion of an AW11 housing, I could make it work.
 

After a little time with the angle grinder, I removed the top of the FX housing, and used a blown AW11 Koni to test fit. The diameter is indeed perfect, it just needs a little extra length.
 

My old AW11 housings donated their top few inches. These were left over after I upgraded my MR2 to SW20 front housings. After being tacked in place and another test fit, they were welded up and ground smooth.
 

Here's all the housings welded up, ground down and waiting for parts. Note on the left, the AW11 rear housings, going on the front of the FX, have the brake line bracket transferred over. Having a CV shaft wear through a brake line at the track would be an absolute disaster.
 

Since I was waiting on coilover bits to come in, I got to work on a few other tasks, including lining the heat shields for the starter and distributor with DEI reflective tape.
 

I also finally got around to making a block off plate for the intake side of where the EGR went.
 

The engine mounts on the FX16 are notoriously weak, especially the front which takes the brunt of the engine's forces. I used urethane casting compound (available from Energy Suspension or McMaster-Carr) to fill the voids in the mounts and hopefully stiffen things up a bit. I've had good luck using this technique on various applications in the past, so here's hoping it works here.
 

For some reason the timing belt covers were not installed when I got the car, so those got put back on as I don't like having fragile vital components exposed like that. This was way harder than it had any right to be.
 

The front brake parts I was waiting on came in and the 87-89 MR2 front brake upgrade was complete.
 

After having a closer look at the front end I realized how little air flow actually gets to the oil cooler. The bumper cover was in pretty rough shape anyway, so I figured a little ghetto cooling mod was in order. A couple hours of sweating in 105*F+ heat with an angle grinder and sawzall later, and this is the result.
 

It's not pretty, but it will work. I plan on finding some sort of duct opening to disguise my crooked horrible cuts at some point.
 

To do the planned 20-valve exhaust manifold conversion, a new downpipe flange and O2 sensor relocation are required. These flanges from MatrixGarage will go on the downpipe when the time comes.
 

After finding some appropriately-sized piping from a local metal store, I attempted to extend the runners of the manifold to clear the starter. It worked, but I was not happy with how the welds turned out. I was still learning, and the weld quality was just not satisfactory yet. This particular project will likely be shelved until a later date, with the stock manifold going back on for now.
 

At long last, a package arrived from TechnoToyTuning with the front coilover conversion parts, as well as my new custom antique plates.
 

After welding the rings to the housings (with much better welds than the manifold), the front coilovers were assembled and installed. The final parts combination was 87-89 MR2 rear housings with Koni adjustable shocks, MR2 rear T3 coilover sleeves with 450lb/in springs, roller bearing upper hats, and AE82 camber plates.

TheDailyDownshift
TheDailyDownshift New Reader
11/30/21 12:43 p.m.

August, 2017

Once the front suspension was together, I took a few days off from working on the car until the rear parts arrived. Is there anything better than getting car parts in the mail? I submit that there is not.
 

An interesting thing to note - the FX16 rear camber plates say "AW11" on them because, like so much else on this car, they are the same. I did have to reverse the center sections though, as they were set up backwards.
 

And here it is on the car. Final parts combination - FX16 GTS rear housings, top sections cut off, AW11 front top sections welded on for proper length and gland nut thread. AW11 front Koni adjustable shocks, T3 coilovers/camber plates with 350lb/in springs.
 

Remember the motor mounts that got filled with polyurethane? Those were installed as well. I hope they hold up as well as ones I've made in the past.
 

As I was redoing all the welds on the exhaust manifold, I ran out of gas. Not terribly excited about the possibility of running out mid-project again, I swapped out my 20lb bottle for a 40lb one. Time to rock and roll.
 

With the welds significantly improved, it was time to add some wrap to help keep underhood temps down.
 

The manifold fit great, clearing the starter and the radiator, just. Now the trickiest part will be making a downpipe so the rest of the exhaust can connect to it. That will be part of a later post.
 

With the welder running at full steam again, I addressed an issue that had been bothering me since I got the car. The chassis has several points where flex will happen under heavy cornering loads, with the rear strut towers being the most obvious. Nobody makes any bolt-in rear bar for the FX (of course) and I'd also like a solid point to mount harnesses in the future. I decided to make my own bar and weld it in. The attachments at the towers are 1/4" plate steel. These are stupid strong and aren't going anywhere.
 

When it came to the bar itself, it was nature that provided the answer in the form of a neighbor's tree falling on a section of my fence. An undamaged section of the top rail I replaced was ground down (to get the galvanization off) and welded in place. This bar is very thick wall and incredibly sturdy, much stronger than the new rail I got to replace the damaged section on the fence. I would feel comfortable running a tow strap around this thing and pulling the car, it's that strong.
 

A friend of mine just got fancy new Sparco seats for his NA Miata track car, so he sold me his old well-worn Momo for a good price. Miata rails are significantly narrower than the FX, so some thick steel bar and reinforcement plates were welded on to allow the seat to bolt in.
 

My welds are still far from perfect, but it's satisfying to see how much improvement has taken place.
 

Here's the seat bolted in. The cover is well worn, but it will do the job just fine. The seating position is several inches lower than stock, which will improve the driving experience immensely. The stock seats are actually really awesome, but they sit really high up in the car, as well as lacking adequate side bolstering for track work.
 

The clutch pedal on this car had some pretty terrible feel. Every time I pressed the pedal, I was greeted with crunchy, squeaky action. I had installed a roller bearing clevis on my MR2, so I ordered one for the FX thinking it would be pretty close to the same. The threads are indeed the same, but the AW11 clevis is much longer than the stock part. I ended up having to cut around 3/8" off the back side to allow for enough adjustment, but it does work.
 

Here is the clevis installed. Pro tip - when you cut aluminum with a cutting disc, it gets REALLY hot. Like melt your glove into your finger in a split second hot. Just, you know, FIY.
 

Since I was already fiddling around the pedal box area, I removed the gas pedal and used my bench vice to apply a slight bend in it. This moved it "out" towards the driver slightly, and closer to the brake pedal, allowing for super easy heel-toe action.
 

Using a sheet of coroplast (corrugated plastic, often used for yard signs), I made air block off panels to keep air flowing through the radiator, rather than tumbling around behind the headlights. This stuff is very cheap, easy to work with, very light, and fairly rigid for its weight.

TheDailyDownshift
TheDailyDownshift New Reader
11/30/21 12:48 p.m.

September 2017

Now that the suspension was done, it was time to move on to getting the car back to a drivable state.

That meant finally finishing the exhaust. The 20-valve manifold has a completely different flange and sits at a different angle than the stock part. To fit the flange, I made two cuts in the downpipe to allow me to spread the "Y" portion wider, then welded the seams back up.
 

I used the same "slice/bend/re-weld" method to alter the angle of the downpipe.
 

Here's the downpipe painted and wrapped. Unfortunately shortly after I took this picture I realized I forgot to add the O2 sensor flange, so it all had to come right back off. Oh well.
 

Once the downpipe was mounted to the manifold, I was able to weld up the new flex pipe to complete the exhaust.
 

Before I ran the car too much I went ahead and changed the oil and filter. It seems like 10w40 is the preferred weight for track use with the 4A-GE, so that's what I went with.
 

Time for a test drive. The Miata wheels that came with the car wouldn't clear the upgraded front brakes, so the track wheels were used. I ordered spacers for the front that evening.
 

Looks pretty sharp. However on the test drive there was some immediately apparent issues. The power steering pump was making quite a bit of noise, the clutch engagement point was far too high, the gas pedal was a little too close to the brake, and the alignment was terrible. How terrible? Enough toe-in that the front tires were squealing over 15mph, and the car was almost uncontrollable. Once warmed up, the idle would surge over and over as well, which was very irritating.
 

Back on jackstands it went. The gas and clutch pedals were re-modified and front wheel spacers added. As for the toe-in, when I went to adjust it enough to limp the car to work, I found the outer and inner tie rods seized on one side. Rather than cut them off and replace them, I decided to remove the steering rack and use the vice to help separate them. Then, while it was out of the car, I could de-power the whole thing properly.
 

After reading some guides online for de-powering racks in Miatas and RX7s, I felt comfortable enough to tackle it myself. After disassembling the rack, I removed the rotary valve from the pinion and welded the shaft solid. I also removed the rack itself from the housing and cut off the internal seal. This will allow for less internal friction and less effort behind the wheel.
 

Here's the rack reassembled, re-greased, and all the ports blocked off. The effort behind the wheel is totally acceptable and is actually less effort than my MR2 with it's quick ratio rack and smaller aftermarket steering wheel.
 

This is all the stuff I was able to remove by ditching power steering. Due to the way the belt and tensioner are routed, I couldn't remove the AC compressor without also removing the power steering pump. Both of these heavy accessories and brackets are on the very front side of the engine, in the worst spot for weight balance in the car. It also frees up the engine with less things to turn. The only belt left on the motor is for the water pump and alternator. Like Colin Chapman once said - "simplify, then add lightness".
 

Once the toe was reset using my very scientific 'eyeball' method, I was finally able to take the car to work to get a much needed proper alignment. Hopefully soon I'll be able to figure out the surging idle, clean the car up a little, and have it ready for it's first autocross event this coming weekend!

TheDailyDownshift
TheDailyDownshift New Reader
11/30/21 12:52 p.m.

September 2017

Here's the final specs I ended up with. Just a hair toe out all around, for better turn-in and easier rotation from the back end.
 

After getting home, it was time to add numbers and class. Eventually I'd like to get a vinyl or magnetic number set, which will look much nicer.
 

While I was aligning the car, a co-worker decided to reverse-vandalize the car by polishing half of one fender.
 

The paint went from a faded flat pinkish orange to a shiny almost new factory red! You can even see the reflection of my 4A-GZE phone case! Looks like I have work to do now.
 

That Sunday I drove over to RIR where the Virginia Motor Sport Club was hosting an autocross event. I met up with my friend Billy, who's S13 has been my benchmark for a few year now.
 

It's a little ironic, I went from autocrossing a rear wheel drive sports car (MR2) to a front drive platform, and Billy went from a front drive sedan (Maxima) to a rear drive sports coupe.
 

This thing loves to three-wheel. This being my first event in an unfamiliar chassis, on untested suspension, I wasn't very fast. But there is definitely room for improvement and some tweaks to be made.
 

I came home a little disappointed in my performance, but with some clear goals for the future.
 

After a long day, back into the garage it went until the next time I was able to work on it.
 

One major issue that was immediately apparent was around 15* of play in the steering. No new u-joints are available, but when I cross-referenced the OE part number, I found that Previa vans with tilt steering columns use the same part. One trip to the junkyard later, and I had myself a new joint with no play.
 

One evening I grabbed some dry ice from the local Kroger and went to work chipping out the sound insulation in the hatch. I got around 7-8lbs of it out before it got too late to be hammering in the garage making all kinds of noise.
 

One Saturday I had to go into work in case there were any issues closing tickets for month end, which mean usually I don't have much actual work to do. So I pulled the car in and decided to finish what my reverse-vandal co-worker had started.
 

It's amazing how well the paint responded to some compound. From flat pink-orange to shiny red!
 

There are still spots that can only be fixed with a respray on the front bumper, roof, and rear hatch, but the rest of the car looks almost brand new!
 

I'm so happy with how it turned out!

That's it for this post. Hopefully soon I'll have the IACV block off parts, more of the sound insulation removed, and some kind of limit strap solution to keep the rear suspension from unloading too much under hard cornering, as it clunks when that inside rear wheel decides to come back down to the ground.

TheDailyDownshift
TheDailyDownshift New Reader
11/30/21 12:53 p.m.

November 2017

After bringing the faded paint back to a shiny glory in the last update, it was time to address one of the most annoying problems with the car - the bouncing idle. 

Bouncing idle is a common problem on the 4A-GE, and can be caused by any number of things. After checking the timing, looking for vacuum leaks, and burping the coolant, the last thing to try was bypassing the Idle Air Control Valve (IACV). This fixed the issue, so I a ordered block-off plate from KSD Engineering to do away with the valve altogether. 

The main drawback of deleting the IACV is that when the car is cold on first startup, you have to keep your foot on the gas to keep the engine running for a minute or so until the engine starts to warm up. On a car rarely driven on the street, I think this is perfectly acceptable. 

I also took the time to clean up where the sound insulation was removed in the back of the car. Remaining residue was cleaned off with a wire wheel, and the areas were coated in some off-white spray paint I had laying around to prevent corrosion. 

The MR2 needed some garage time, so when I moved the cars around I decided to take a few quick glamour shots. Pupper bonus pic too!

I got a fever. And the only prescription....is more 80's Toyotas!

I got really tired of the hilariously long shifter throws on this car, especially compared to the MR2, so I decided to try something I spotted in an Instagram picture from someone in Latin America and make my own short shifter. The first step was to cut a 2.5" chunk out of the middle of the lever itself. As a sleeve, I used a standard socket and welded it all together. Who uses standard sockets anyways?

Of course, shortening the lever would make the shifter harder to reach, so I built a stand out of angle iron to lift the entire shifter assembly up around 3". The shifter is welded to the stand, and the stand bolts to the floor. 

The end result is a shifter that's as easy to reach as stock, but with a much shorter throw. Obviously this wouldn't work in a car that still had an interior, but it works great in this application!

Unfortunately, at the next autocross event I went to, the clutch went out in a cloud of stinky smoke. I was able to limp the car home, but if I gave it any more than 1/4 throttle, the clutch would just slip. So for the next event I was relegated to racing the daily driver Matrix XRS in the rain. Looks like I wasn't the only one there using my daily. 

While disconnecting things to prepare for transmission removal, I noticed the outer CV boot on the RH axle was leaking a little bit of grease. Another thing to add to the list, I suppose. 

After unbolting the starter, shifter cables, thermostat housing, speedometer cable, removing the axles, and dropping the crossmember, I braced the back of the oil pan with a jackstand and a 2x4 to keep the whole thing from tilting too far down. 

In around 2.5 hours from jacking the car up, I had the transmission sitting on the ground. Next time I'll have a new clutch and hopefully a few other things to add.

TheDailyDownshift
TheDailyDownshift New Reader
11/30/21 12:54 p.m.

January 2018

As part of the whole "while you're in there" thing, I went ahead and replaced the rear main seal, because I really don't feel like taking this trans off again any time soon.

The flywheel showed obvious signs of overheating and clutch slippage. 

The clutch disc itself actually looked decent. It was worn, but not excessively so.

Because I'm on a pretty tight budget, I couldn't afford to upgrade to a larger flywheel/clutch setup from an 87-89 MR2, so I just had the stock flywheel resurfaced instead.

I went with a stock replacement clutch kit from Exedy. If it can last me a year or two until I can afford an LSD and drop the trans again, I'll be happy.

With everything reassembled, it was time for the last autocross event of the year. I even invited my friend Steve to co-drive, since he's not really ready to commit to racing his Miata. 

Racing with good friends is a really fantastic way to finish out the season.

On the way out at the end of the day, I couldn't resist the opportunity for a mini photo op by the entrance. 

See you next year, VMP!

Over the first half of the winter, I haven't had quite as much time to work on the car as I'd like, but I did get a few small things taken care of, such as removing the rest of the sound insulation from the car.

A few more hours with a heat gun, hammer and chisel, and the rest of the heavy matting was removed.

After cleaning up and painting the formerly-insulated areas, I added some grip tape to the floor which really helps with getting in and out of the car.

I saved all the insulation to weigh. By the time I was done, around 20lbs of weight was removed from the car.

Next I wanted to address something that had been in the back of my head for a while - the driver's seat mount. The way I had set it up before just didn't look strong enough to be safe in the event of an accident. 

By disassembling (by which I mean hacking up with a power drill and angle grinder) the Miata rails on the seat, as well as the rails from the original stock seat, I was able to weld up something with much more weld area that feels much stronger than before.

TheDailyDownshift
TheDailyDownshift New Reader
11/30/21 12:57 p.m.

March 2018

With the driver's seat now safely mounted in place, I decided it was time to start playing with some aero. Using an old sign generously donated by an anonymous dumpster, lawn edging, and some other bits I was able to make a basic splitter.

A little black spraypaint and it was looking pretty snazzy. I also modified one of the tie-down hooks for use as a tow hook. The lawn edging on the splitter allowed me to keep it lower than the stock lip would have allowed, while being light, cheap, and easy to work with.

Adding in a pair of Longacre support struts and it's pretty much done. This is only version 1.0, and it definitely can't support the weight of someone standing on it, but for now it will do. I'll continue to refine it over time.

With the first event of the year fast approaching, there were a couple small jobs I wanted to finish first. The main one being reducing the noise in the rear suspension. Given this car's propensity to three-wheel through turns, clunking rear coiloves were very annoying. A pair of Hyperco helper springs and Eibach couplers helped greatly. 

A relatively minor annoyance was the screeching belt on cold starts. A new Gates belt quieted that right down. Having only the bare necessities on this engine makes working on it so much simpler than it could otherwise be.

I still don't have any fancy magnetic or vinyl numbers yet, so printed paper taped inside the rear windows will do for now.

With those jobs out of the way, it was time to kick off the new season with my first trackcross at Dominion Raceway. A trackcross is formatted similarly to an autocross, with the cars staging on the main straight of the track, and running the twistiest sections (roughly turns 1 - 9) for time. No cones, no work assignments, and tons of fun.

I was running around like a maniac between heats, trying to get different angles with my trusty old GoPro Hero2 which is practically an antique at this point.

Second heat was delayed a bit by a particularly bad crash by a young man in a 370Z Nismo. Fortunately he seemed ok, a testament to how safe modern cars have become, and how dangerous track driving can be sometimes. 

The little Corolla made it home safe and sound. The only problems I encountered throughout the day was the windshield trim nearly blowing off on the highway (hence the blue tape), and a slightly leaky fuel pulse damper. 

What an amazing way to start the season. I can't believe I waited so long to check out a track that was so close to where I live, I can't wait to go back. 

The results of my frantic GoPro positioning really paid off too. Check out the videos below!


TheDailyDownshift
TheDailyDownshift New Reader
11/30/21 1:10 p.m.

May 2018

After a very successful trackcross event, a few small issues made themselves known that needed to be addressed. The most obvious issue was a strong fuel smell coming from the engine bay. Turns out the culprit was the pulse damper for the fuel rail. It had failed internally and was leaking out from the screw on top.

This was replaced with a banjo bolt to prevent future failures. I had done a similar mod on my old Cressida Wagon and had no issues, so hopefully this will be the same.

The next issue to tackle appeared when reviewing GoPro footage from the trackcross. In the suspension video you could see the rear-most bushing on the front control arm has a ton of lateral play and needs to be replaced.

Obviously this was a perfect opportunity for an upgrade to polyurethane bushings by Nolathane. 

Of course, nothing about working on older cars is as easy as it seems. The front control arm bolts thread into a captive nut inside the chassis, and on both sides these captive nuts broke loose. This resulted in the bolt just spinning but not coming out. The only way to remove them was to cut them.

With the bolts out, I was still left with the issue of the captive nuts in the chassis. By cutting an access hole, I was able to remove the old nuts and solidly weld in replacements. This should be much stronger than the rusty cage brackets holding the original nuts. 

Some new bolts were ordered from Toyota and went right in. Unfortunately I don't have any pictures of the "after" from cutting the holes, but they were welded shut and everything received a generous coat of rubberized undercoating.

Here are the new polyurethane bushings installed on the control arms. They really helped stabilize the front end. 

The wheels that came on the car were these NA Miata daisy wheels. I'll throw these on for occasional street driving or to go to events more than 10 minutes away. These wheels were looking pretty bad so I gave them a coat of brown paint I had laying around.

Next up was painting the tired trim a nice coat of satin black. Just because it's a track toy doesn't mean it can't look decent.

Much better. 

Another cheap upgrade to keep the front end nice and tight was this set of polyurethane steering rack bushings from Ricochet Polyurethane Technologies I found on eBay.

I had forgotten how much of a pain it is to get to these bolts. For the driver's side I had to remove the rear engine mount and bracket from the transmission!

With these mods installed clearly the best way to test them is.....another trackcross event! This time my buddy Brian in his 4A-GE swapped FX came along. I don't know that I've ever seen two of these in the same place together before.

Brian did great for his first trackcross event. We even swapped cars for one run just to see the differences between them. His car is much cleaner and is his daily driver street car so it was definitely softer, but still loads of fun. Of course the day wouldn't be complete without some sort of mechanical oddity. Brian's distributor cap and rotor essentially melted, resulting in an emergency trip to the auto parts store after the event. Fortunately it happened near the end of the day so he still got almost all his runs in.

 I didn't get away scot-free either.This time it was an apparent fuel leak from inside the chassis rails, as it was leaking from the pinch welds. Upon further inspection it was determined that the charcoal canister vents to inside the chassis rail right above where the fuel was leaking from. Usually this type of issue is caused by overfilling the tank, but I only filled to the first "click" as always. Additionally, the fact that this happened at the end of the day after driving an hour to the track, the whole morning session, and half of the afternoon session leads me to believe it was a fuel sloshing issue. I was definitely pushing the car much harder later in the day, and I think the fuel in the tank sloshed up into the pressure vent tube, filling the canister.

 With the canister essentially ruined by fuel saturation, I decided to remove it along with all the other vacuum lines I no longer needed from other accessories long since deleted. I extended the vent line all the way back under the car, exiting roughly near the left rear wheel well, away from anything hot. I also re-routed the throttle cable behind the engine, under the intake manifold. All of this really cleaned up and simplified the engine bay.

TheDailyDownshift
TheDailyDownshift New Reader
11/30/21 1:13 p.m.

July 2018

It's been a little while since I've posted an update on the FX, and a few little fun things have happened in the intervening couple of months. The first thing of note was that I acquired a rivnut tool.


This is something that's been on my list for a while and has come in extremely handy multiple times already. Most notably for using rivnuts (also called nutserts) to attach Billy's updated rear wing on his S13.

I also used them to replace the plastic threaded clip inserts for the rear wing on the FX16, allowing for the ghetto spoiler to make a return, secured much more sturdily.

I also ran an autocross event with Billy, where I fully realized the extent of how dead my R888 tires really are, as well as having some awesome pictures snapped by the very talented Brian Kay (curiousBK Photography), who took the photo used at the top of this post.

Now, since going to Hyperfest, a couple good friends Corey and Pierce have caught the track bug. Unfortunately the car Pierce was going to track this year needs an engine rebuild (not saying because rotary, but....) and I told Pierce that if he supplied me with a seat that we could both fit in, he could autocross the car. So a week after making the offer, he showed up with a used Kirkey seat and the three of us spent an evening fabricating a mounting solution that would work for all 3 of us.

Since personally, I'm looking to do less autocrossing and more HPDE/Trackcross type events, I decided that a little neck safety was in order. Now, I know this is no substitute for a HANS device, but since I'm on a limited budget and the cheapest HANS out there is around $500, I figured a $30 foam collar was better than nothing.

Another consideration when doing higher speed track events is oil starvation. Since I'd already experienced fuel sloshing in the tank, I decided to add in some baffles from TwosRUs to the oil pan just to be safe. These little trap doors will hopefully keep the oil around the pickup where it belongs, even in long right-hand sweepers.

Since my first HPDE day is coming up in August, I wanted to make sure that the oil cooler was doing it's job. The FX16 GTS comes with an oil cooler from the factory, but the sandwich plate sending the oil to the cooler opens and closes based on oil pressure, not temperature. Instead, I'm using a Mocal thermostatic sandwich plate with Derale fittings to run to the stock oil cooler.

First, remove the huge, bulky factory sandwich plate assembly.

To delete the thick factory plate, you have to get an oil filter union from a 4A-FE or 4A-C engine (Toyota part number 90404-19001).

Now just run the stock lines to the new plate, put a plug in oil pan where the old return line went, and you're good to go.

I've also been making my way around the interior stitch welding the seams to get this chassis as strong as I can. I'm about half way done so far I think. Next time hopefully I'll have a new battery setup, all the stitch welding done, and maybe some other bits and bobs.

TheDailyDownshift
TheDailyDownshift New Reader
11/30/21 1:20 p.m.


Since the last update I finished going around the interior and stitch welding the seams. 


The B-pillars, roof rails, and strut tower areas were the areas I concentrated on most.


I was also able to start installing the driver's harness. The lap belts bolt into the stock seatbelt mounting points, as they are already pretty reinforced and seem to allow the belts to sit at a good angle according to RaceQuip's instructions.


The shoulder belts wrap around the welded in rear strut tower bar. I was concerned about the length of the straps, but according to RaceQuip as long as there is 4" of tail left after properly routing the belt, it should be acceptable. Obviously in the future once I have a proper roll bar, the harness will be mounted to that, but this should do for now.


For the 5th point, I welded in a reinforcement plate and a double-shear mount I had leftover from the limit straps from my Cressida. The mount is angled so the belt pulls more or less straight. 


With all 5 belts mounted, the harness is done. As far as I can tell, all the belts are mounted in such a way that the angles match the instructions supplied by RaceQuip, meeting SFI specs (for whatever that's worth).


Though not directly related to the FX, I took the time to finally give my workspace a much-needed cleaning. 


Look at all that metal dust. That's 2.5 years worth of metal grinding/cutting.


Making a semi-organized pile is my preferred method of sorting.


To think, the floors by the walls were packed with stuff to the point I could barely make room to jack up the car!


Larger specialized tools took up residence in the workbench cabinet.


Nothing like a semi-organized toolbox. Now maybe I'll be able to find a damn 10mm when I need one (which is always).


I really hate the process of cleaning, but man the finished product really is worth it.

TheDailyDownshift
TheDailyDownshift New Reader
11/30/21 1:24 p.m.

August 2018

With a nice clean workspace, getting the car prepped for HPDE was a much more pleasant experience. 


The passenger harness install went smoothly. Now the instructor will have the same level of safety equipment as the driver. 


The length of the shoulder straps is a little long, but still within spec per the instructions included.


I also whipped up this little metal bracket to keep the intake from flopping around. This was one of those little things that was just nagging in the back of my head for a while.


Finally the day of the HPDE arrived. After a brief panic over a forecast for 80% chance of thunderstorms, it ended up being a beautiful day.


I was really glad to be able to run the shaved RA1's I'd bought used a while back. These tires are so freaking sticky it's nuts. 


In the first session everyone was still getting used to just being on track. Having done a few trackcross events at Dominion before, I was casually familiar with the twistiest section. I was even able to chase down a Chevy SS and a Nissan 350Z, two much more powerful cars. 


By the end of the day, multiple people had walked by and asked what I had done to the engine to be able to keep up with much more powerful cars. The look on their face when I replied telling them that the motor is basically stock, making around 100 horsepower, was priceless. Lots of people were also surprised that I was able to fit all my stuff in such a small car. Hatchbacks for the win!


Here's one of the quicker laps I got on camera. I wish I had remembered to record the third session when I got to play around with my friend in his EK Civic, but alas I forgot to hit the "record" button.


The car performed nearly flawlessly at the track. The only issue I encountered was the water temperature gauge going up to 3/4 after being on track for 10 minutes or so. It never went above that, but still that's not good. Before I even left the track I had ordered a radiator on Amazon. Of course, nobody makes a drop-in radiator for the AE82, so I ordered one for an AE92 knowing I'd have to do some tweaking to get it to fit. 


As it turns out, the AE92 radiator is pretty darn close, but there are a few key differences. The most obvious is the upper hose fitting is in a completely different spot. This is not an issue if you just order an upper hose for an AE92. The lower hose fitting is slightly different as well, but not enough to need to change hoses. 


One thing I really don't like about this specific radiator is these plastic drain plugs. They sit too close to the exhaust manifold for my liking, so I will be replacing them with metal plugs instead. 


The fan mounting points are slightly different as well. For the top two mounts, you just need to drill new holes a few mm over from the stock ones. The bottom mount needs to be cut off of the shroud, as it interferes with the drain plug and lower hose fitting. 


I welded on a little tab in the right spot and now the stock fan is mounted up, ready to rock.


For the upper brackets, I drilled a hole in the radiator support and put in a riv-nut to relocate the passenger side bracket. Both brackets need a new hole drilled and the excess cut off to fit.


And it's in! Hopefully this will keep temperatures under control at the track. Having to back it off  in the middle of the session sucks. Other than the little plastic plugs and a longer hose for the overflow, it's pretty much ready to go. I'm really happy with how little modification this needed to fit, and recommend it to anyone with an FX that isn't afraid of doing a little drilling/welding.

TheDailyDownshift
TheDailyDownshift New Reader
11/30/21 1:33 p.m.

January 2019

It's been six months since the last time I posted an update and some pretty cool stuff has happened in that time.

I added some aluminized tape to seal off the gap along the top of the radiator. This will help keep air flowing through, rather than around it, increasing it's cooling efficiency.

Two M16x1.5 oil drain plug bolts replaced the plastic plugs in the radiator. The exhaust is too close for comfort when it comes to plastic right there.

With the radiator to keep things cool, it was time for another trackcross. Unfortunately the weather was less than ideal.

On one of the last runs of the day the car suddenly became 100x louder. I limped the car back to the paddock, ears ringing, and found a broken downpipe. The slice/bent/re-weld method had bitten me in the ass. Fortunately a good friend of mine towed me home and then the car sat while I accumulated parts to fix it.

After  getting the right wire to weld stainless I was finally ready to start creating a new downpipe.

It's not pretty but it should be stronger and flow better than the old one.

Can't forget the wrap! Heat is the enemy.

The car was up and running just in time to make it to the fall cruise. Clay and Brian also brought out their FX's!

I've never seen three in the same place before, so this was a really cool experience. 

I love boxy cars!

That's it for this update, the next one will be up very soon and covers some nitty gritty suspension work.

TheDailyDownshift
TheDailyDownshift New Reader
11/30/21 2:15 p.m.

January 2019

With the fancy new downpipe all welded up, what better way to stress test it than one more trackcross for the year? After the event, it was time to put the Corolla up on jackstands and start taking measurements for the winter project ahead.

Last time I tried to align the car I just could not get the rear toe right. This is because of the eccentric cam sleeve design of the adjuster. What often happens on these is the bolt, cam, and inner sleeve of the arm bushing all seize together. I already planned on replacing all the rear bushings, and really wanted to get rid of this stupid system at the same time.

Yep, the cam was definitely seized to the bushing sleeve. The only way to remove the arm from the car was to cut the cam out. 

That thing was not budging. Even a sawzall wouldn't go though, I had to use an angle grinder. 

This is where the cams allow the bolt to slide back and forth to adjust rear toe. The goal is to eliminate this as a point of adjustment, and instead use an arm that has an adjustable length.

Theoretically you are supposed to be able to turn the round part independently, but rust and time have eliminated that possibility.

I had replaced the front bushings with polyurethane a  year or so ago, now it's time to finish the rear as well. The following Super Pro part numbers will do all of the rear suspension arms:

SPF0825K - outer bushings for the control arm and toe arm (go in the knuckle)

SPF1216K - inner bushings for the control arm and toe arm (go in the arms)

SPF0823K - bushings for the trailing arm (one pair in the arm, one pair in the knuckle)

Once you remove the brakes and sway bar the whole assembly can just drop down. Easy peasy. Well, after you cut through the stupid cam sleeves.

A combination of propane torch, hammer, and various size sockets in the vice will get the old bushings out. This makes a huge mess and lots of very toxic smoke so definitely wear a respirator, glasses, gloves, etc. 

After a few very messy hours you'll end up with this!

I contacted TechnoToyTuning about making some custom arms, giving them the measurements from the stock arm for reference. They did a great job, except that I had totally mis-measured somehow and ended up with arms that were 2 inches too long! Once I realized my mistake we swapped out the center sections with ones of the appropriate length. 

Since these arms are using off-the-shelf components for other cars, there was a little shimming necessary at the knuckle end, but T3 included most of the washers I needed.

I did have to special order some bolts and nuts to replace the sleeves that were cut out. These are the part numbers I ordered from Fastenal:

Bolts: 11114726 - M12x80 960-10.9 bolts (2x)

Nuts: 11508302 - M12x1.25 nylock nuts (2x)

Washers: 1140359 (bag of 25)

Total spent on hardware: $7.23

Not only do these look great, but they will make adjusting the toe much easier.

Pardon the ugly welds, as my welder was running out of gas. I do think I may end up changing this, as I'm not sure the washers are up to the task of keeping the bolts securely located. I may end up cutting/drilling plates to fit in the little tabs where the cam used to ride. But this works for now.

And here's the progression of how I eliminated the stock adjuster. No more seized sleeves for me!

TheDailyDownshift
TheDailyDownshift New Reader
11/30/21 2:37 p.m.

April 2019


I had the opportunity to strap the car down at a local dyno day last month and put down a whopping 105 wheel horsepower. For a stock (other than intake, exhaust, and removing accessories) 16 valve 4AGE with over 260k miles, those are phenomenal numbers. No smoke out the exhaust either! 

I was the lowest power car there that day and was probably the most excited about the results. The next car up was a Corvette that made more than 5 times the power and he was not excited at all! Big thanks to Kevin at FlimFlam Speed for hosting the dyno day!

Something that's been in the back of my mind for a while with this car is the need for some auxiliary gauges. I was fortunate enough to pick up lightly used oil pressure and oil temperature gauges for a good deal.

 The oil pressure sender is surprisingly heavy, and hanging off the block can fatigue and crack the fittings over time. Solution: remote mount sender to chassis and run a -4AN line to the port on the block. The block is actually threaded for 1/8 BSPT, so some adapter daisy-chaining is needed. 

The sender is mounted to an aluminum bracket, surrounded by some foam insulation from an old radiator hose for extra protection. 

For water temperature, this will go in the upper radiator hose. It has a 1/8 NPT thread for the sender, and makes for a simple, clean install. 

This was probably the easiest of the senders to install. After this picture was taken, all the wiring was covered with a corrugated sleeve and secured. 

For the oil temperature sender, I got an m12x1.25 to 1/8 NPT adapter that will thread into the oil pan. I used a two-wire plug from a spare scrap harness I had laying around, in case I ever need to disconnect it. Due to proximity to the exhaust, I put a sleeve of insulation around the wires for protection. 

The old location where the stock oil cooler return line bolted up is going to be my first try, but it looks like it may be too high up to get a reliable reading. If not, I'll put it in the drain plug location. 

Here's the sensor installed. Hopefully this location gets a good reading, and that this is even the right sensor. It was included with the used gauge so it may or may not even be the right one for this application. 

I made a mounting plate where the factory radio went, and all three gauges are easy to read from the driver's seat. 

At the last HPDE, my hands were covered in blisters by the end of the day. A decent pair of gloves should make that last session much more comfortable. By the third session the fuel level starts to run low, and my standard gas can was a massive pain to use without spilling fuel everywhere. This new can fits into the filler on the car much easier and without spilling. 

The first track day of 2019 is coming up in less than a week, hopefully all this stuff works!

TheDailyDownshift
TheDailyDownshift New Reader
11/30/21 2:41 p.m.


The alarm went off at 5:30am, far too early for any reasonable person to wake up on a weekend. Fumbling around in the dark, I throw on the clothes I had set out the night before, trying not to wake my wife or the dogs sleeping peacefully. Picking up the GoPro case and water bottle, I head out to the car which was already packed and ready to make the short 45-minute trip up 95 to Dominion Raceway, AKA the "Thornburgring". 


Arriving at the track just as the sun was peaking over the horizon, I passed through registration and tech with no problems and ventured out to the paddock to stake out a spot to set up. The first order of business was to remove everything from the car so the track wheels can be swapped on. The other wheels act as anchors for the pop-up canopy, as it is always very breezy here.


After getting set up, everyone attended the mandatory driver's meeting. Afterwords we had about two hours of down time before the first "green" session at 10:30. The car got a good once-over, checking lug nut torque, fluid levels, and tire pressures, making sure there are no loose items inside, setting up the GoPro, and making sure my helmet, neck brace, and gloves are in the car.


One of the best things about track events is hanging out with the other drivers. Adam had brought out his awesome Honda CRV "RaceUV". If there's ever a car event going on around central VA, odds are you can see this crazy thing out there. 


My good friend Micki was gracious enough to come out to take pictures. Every shot in this post was taken by her!


The first session is always taken a little easy, as the car is getting warmed up and the drivers are getting to know the instructors. 


Adam and I were both in the "green" group for newbies with fewer than 5 track days under our belts. 


By the second session, most people are getting more comfortable on track. Temperatures are coming up, and people really start to push. 


My instructor for this event, Emil, pushed me really hard - which is just what I needed. I think I'll be hearing him say "brake harder!" and "open the wheel!" in the back of my head for a long time. 


Over the course of the day, Emil had me braking so much later than before. I had no idea how well this car responded to trail braking, which I need to practice a lot more!


This front drive platform requires completely different driving style than the MR2 I've been driving for so long. Trying to break those habits is extremely difficult, but I slowly started to get the hang of it, if only a little. 


By the last session, I was keeping pace with a Subaru which I was told was making over 400 horsepower. That's four times the power my little quarter-million-mile 4A-GE puts down.


The trusty Corolla made it through the whole day without any mechanical problems. When swapping the street wheels back on I did notice that only roughly 25% of the brake pads remain up front, so perhaps getting a spare set of pads and rotors would be a good idea to have on hand next time. 


I can't wait to get strapped back in for the next event and apply what I've learned. Hopefully they announce the next HPDE date soon!

TheDailyDownshift
TheDailyDownshift New Reader
11/30/21 2:42 p.m.

May 2019


With the car safely home from HPDE back in April, a few issues that had made themselves apparent now needed fixing. 


The valve cover gaskets were seeping oil, so I went ahead and painted my spare set of covers and put them on with fresh gaskets. I love the white/black/red NASA-inspired color theme. 


The biggest takeaway from HPDE was how much I was under-using the brakes, and needed to brake harder. By the end of the day the front brakes were pretty toasty, with the pads starting to glaze and the rotors starting to warp after the last session's cooldown. The rear brakes were basically like-new though. 


Solution: remove the stock proportioning valve and install an adjustable valve for the rear brakes. This will accomplish two things: allow me to fine tune how much force goes to the rear brakes, and split the front and rear circuits for safety/redundancy. 


I wanted to be able to reach the adjuster knob from the driver's seat so I made a little mounting bracket and welded it to the shifter riser. 


A couple adapters and two 4-foot sections of steel brake tubing complete this end of the circuit. 


The lines run under the shifter and through a pre-existing grommet in the firewall. 


Without much room to hand-bend the lines, it's not the prettiest install ever, but so far nothing leaks or rattles and it seems to work as intended. Fortunately all of this is hidden behind the engine so you don't have to look at it.


I'd had a stainless clutch line laying around for a while, and this seemed as good a time as any to install it. What's one more bleeder valve when you're already doing the brakes anyway?


If you've been keeping up with this build so far it's probably pretty clear that this is a low-budget endeavor. That means funds for events are hard to come by, but I'm hoping to make it out to my first two-day HPDE event at Dominion in September. I can't wait!

pk386
pk386 New Reader
11/30/21 2:43 p.m.
This was my solution: 
Adopt a Miata / Ford style IAC valve.
TheDailyDownshift said:

November 2017

After bringing the faded paint back to a shiny glory in the last update, it was time to address one of the most annoying problems with the car - the bouncing idle. 

Bouncing idle is a common problem on the 4A-GE, and can be caused by any number of things. After checking the timing, looking for vacuum leaks, and burping the coolant, the last thing to try was bypassing the Idle Air Control Valve (IACV). This fixed the issue, so I a ordered block-off plate from KSD Engineering to do away with the valve altogether. 

The main drawback of deleting the IACV is that when the car is cold on first startup, you have to keep your foot on the gas to keep the engine running for a minute or so until the engine starts to warm up. On a car rarely driven on the street, I think this is perfectly acceptable. 


TheDailyDownshift
TheDailyDownshift New Reader
11/30/21 2:45 p.m.

June 2019

I've known for a while that the design of the original splitter I made for the car had some problems. The Dibond sign material is just not strong enough to provide meaningful downforce, and the bracketry attaching it to the car was weak as well. It definitely did not pass the "stand on it" test. It was also a little too narrow, limited by the width of the sign from which it was made. 


Here you can see the original design. The air dam is only like 1.5" tall, the splitter is only one layer of material, and is not wide enough to extend to the edge of the fender. 


To add strength and width, I created a new splitter with two layers of material. The layers are glued together with a whole tube of Liquid Nails, then riveted. I figured if it's good enough to hold Lotus cars together, it's good enough for this. 


To allow the splitter to mount lower and be more effective, I used a piece of vinyl house siding roughly 4" tall, rather than a 1" strip of garden edging. 


To make sure the air dam doesn't fold back in the wind, it's held in place by ten steel brackets, riveted in. The strip of siding cost roughly $7, the brackets were 65 cents each. This is a VERY budget build.


The air dam was painted black to blend in.


One day at work I noticed this splash shield from a Chrysler 300 that was getting replaced had some pretty nice diffuser-like structures in it.


There are places online that sell diffusers for like $150, I figured why not cut these out and use these for free? This thing was just going in the dumpster anyway.


Here they are roughly mocked up on the splitter. They are a little uneven but I think I can make these work pretty well, especially for the low, low price of $0


Final placement and orientation will depend on where the quick-release mounts go, which are currently in the mail. 


Here's a mockup of what the new splitter could look like on the car. I may order a couple more struts just to be safe. 


I also may do something about the corners to fill in that gap by the wheel arch, but I think it looks pretty good.


Oh and I almost forgot - I made this little brake master cylinder brace out of some scrap metal and a $2 door stop. 

As of right now I don't have any events lined up until September, but that event will be my first two-day HPDE weekend at Dominion. Hopefully all these little things will add up to a more capable car on track!

TheDailyDownshift
TheDailyDownshift New Reader
11/30/21 2:52 p.m.

July 2019


With funds running low this year, I've been pretty selective about what events to attend. Thus far I'd only done one HPDE back in April, but when I found out a bunch of friends were going to the July trackcross I couldn't say no.


There was, however a problem. The last HPDE completely toasted my front brakes. Having run Porterfield's street and autocross HP-R4S pads for almost a decade on other cars, that's what I put on the Corolla as well. While they perform flawlessly on the street and even at trackcross events, the temperatures generated during HPDE are just too intense. The pads glazed and basically melted to the rotors, leaving deposits causing a vibration. Also the pad material had lost most of its friction, requiring much harder pedal pressure to slow the car. 


With only a few days to spare, a new set of rotors (whopping $13 a piece!) were installed, along with a set of pads that should be able to handle the heat. These R4 pads are rated for track use and are supposedly not very street friendly. 


Another issue that had popped up was air in the brake system. After installing the proportioning valve, I'd had trouble getting all the air out of the system by traditional two-person means. I've never been a huge fan of vacuum-based bleeders, so I picked up a pressure bleeder and proper master cylinder adapter off Amazon. After a.... somewhat messy learning phase, all the air was removed and a solid pedal returned. 


With the work done just in time, trackcross was a great way to test out the new splitter and brake system. 


With the heat index hovering close to 100*F, conditions were good for a heat stress test on every component (check out those blued rotors!), including the nut behind the wheel. I almost tapped out of the last run of the day due to the heat, but luckily I didn't as it ended up being my fastest run!


Fortunately everything held together well and, with some adjustments, the new brake system performed flawlessly. 


Next up: two-day HPDE weekend in September!


Miscellaneous non-Corolla stuff - I had to do the oil pan seal on my daily driver Matrix XRS and found something kinda interesting. 


The Toyota 2ZZ-GE engine has exactly zero baffling in the oil pan. No wonder they have slosh/starvation issues. Apparently the lame 1ZZ even has a factory baffle. Why Toyota would omit that from the high performance version is completely.....baffling. 


Supposedly a 1ZZ oil pan will fit with minor modification and only cost like $25 on RockAuto so next oil change I might swap pans.  Seriously though, WTF Toyota?


And since I don't know how to finish this up, here's a picture from the last Cars and Coffee of my MR2 with its Italian uncle.

TheDailyDownshift
TheDailyDownshift New Reader
11/30/21 2:53 p.m.

September 2019

Not a whole lot has been done on the Corolla this summer, as it's mostly just been sitting waiting for the event this past weekend - my first two-day HPDE weekend, at Dominion Raceway. This one was a bit of a rollercoaster so beware - wall-o'-text incoming.

Friday:
Since it was a two day event and I anticipated that the likelihood of mechanical malady to be high, I went ahead and rented a tow dolly from Uhaul. Last Monday, 5 days in advance, I had to go to two separate locations to place a reservation because the first didn't have one on hand. The second one did so I reserved it for Friday evening through the weekend. Friday rolls around and suddenly they don't have it even though I reserved one. So I have to go all the way across town to pick one up, and they tell me that as long as I return it before open of business Monday morning I will only be charged two days' rental. Whatever. 


Saturday:
I rolled up to Dominion nice and early, got all set up and ready to go. First few sessions went well, classroom times were interesting and informative, things went smoothly on track. With a lot of first-timers in HPDE1 this time around, traffic was the worst I'd yet encountered so learning to deal with that was a good experience for sure. On session 2 the car started to get much louder, so over the lunch break I determined one of the exhaust hangers had broken, causing the flex pipe to start leaking. After a trip up the road to NAPA, the exhaust was secured with a few big metal hose clamps. Still loud, but at least it wouldn't potentially crack and fall down. Session 3 came around and all seemed well until around lap 8 or so when the car started to develop a bit of a shimmy at high speeds. 


We finished the session and put the car up on jack stands to have a look around. We found the right front ball joint was a little loose, so I started calling around to find parts. No AE82 parts were around, but there were some nearly-bolt-on AE92 ball joints back in Richmond.  Deciding to skip the last session, I instead packed up and took the car back home to fix that evening, so I could get back out the next day.


 Of course nothing ever goes smoothly, and such was the case with these ball joints. There are supposed to be two pressed-in studs in each joint, but these were loose in a bag. When I went to go press the first one in by tightening the nut to draw the stud into the flange, the threads on the stud stripped clean and the nut just spun. I ended up using a bolt and nut instead, and using the bench vice with a socket to press in the rest of the studs. I also took a page out of Eric Kutil's book and wrapped each joint in heat reflective tape. I feel that the half inch clearance between the joint and the hot rotor may have lead to its premature wear. 


Sunday:
Back at the track nice and early, I was excited to see how the car would feel with the new ball joints. First session starts off well, but after a few laps, the shimmy comes bad harder than ever and seems to be getting worse by the lap. I pulled into the pits, jacked up the front, put the car in gear, and let the wheels spin to see if there was something wrong with the wheel, tire or axle.


Right away the problem was obvious - a huge tumorous bulge in the right front tire, caused by a broken belt inside. Being the awesome friend he is, my instructor Eric offered to let me use his Miata's rain tire setup to finish out the day. So off came the shaved RA1's and on went some fresh-ish RA1's just in time for second session. 


Things went well for most of session 2 until right at the very end when the mechanical bug bit again. This time, while at high speed in the uphill esses I heard a faint "pop" and suddenly the car was very unstable and the brake pedal was very very soft. Limping to the pits once again, we jacked up the car and that right front wheel/rotor had a ton of play, while the caliper remained still. The toasted wheel bearing would signal the end of the Corolla's weekend at the track. However, determined to not miss out on the two remaining sessions, I packed up everything as fast as possible and towed the crippled Corolla home. Running in the house long enough to pick up the keys, I hopped in the trusty MR2 and flew back to the track with only a few minutes to spare before session 3.


With approval from the track day director, Eric and I went out for session 3 in the MR2. While on similar suspension as the Corolla, the MR2 is on 400tw staggered 195/205 tires and street/autox brake pads, all while being 400lbs heavier and with 50% more power. This was quite the change in driving style for sure, being basically the complete reverse of the FWD FX16. 
Eric was so impressed with my improvement over the weekend, plus my existing familiarity with the track and how I was able to adapt to driving two completely different cars, he gave his blessing for me to go out solo for the last session. All of the struggles and frustration of the weekend up to that point were immediately forgotten as soon as went out on the track by myself that first time. It was absolutely sublime, even in an under-prepared car. Not wanting to push my mechanical luck any further, I pulled in after 5-6 laps and called it a day, with a huge smile on my face. 

End tally for the weekend: 1 trailer misadventure, 3 mechanical failures, 2 cars driven on track, 1 session solo.

Here's a video of what happened with the wheel bearing/axle:


And here's the best lap I managed over the hectic weekend:


TheDailyDownshift
TheDailyDownshift New Reader
11/30/21 2:57 p.m.

October 2019


Have you ever just completely run out of motivation for a project, only to have a sudden deadline creep up, and have to kick it in high gear to just barely make it by the skin of your teeth? That was what the last month was like. 


Since I had no more events planned for the Corolla, with only our annual fall cruise left in my automotive calendar for the year - an event for which I prefer driving the MR2 - I didn't really think about much wrenching in the weeks after HPDE. We even took a day trip down to VIR to watch some SCCA Runoffs practice sessions and record a podcast episode while we were there.


 The Monday before the cruise, I went to flush the MR2's old brake fluid (now spongy from unexpected HPDE use) and immediately snapped a bleeder valve on one of the rear calipers. After failing to extract or drill out the remains, the only solution was to replace the caliper. Unfortunately these calipers are not available any more from anywhere I could find, so it was time to scramble and get the Corolla ready instead.


I had already gotten the new bearing and hub pressed into the knuckle, it was mostly a matter of assembling everything at this point, with only a couple evenings to finish in time. First thing to go in was the axle. The old axle had a M19 or M20 thread, where the new axle has an M22 thread. Hopefully this will prevent it from shearing in the same way. 


Not a bad way to spend an evening, honestly.


Friday night - the night before the cruise - everything had been assembled, with only lubricating the brake slide pins left to do. I had been using Permatex ceramic-based lubricant, but it seems like over time/heat cycles this stuff can't take it. It basically turns into cement which literally the opposite of what you want. 


I took everything apart, cleaned it, and re-lubricated it all with this rubber-safe silicone lubricant. Hopefully this will do a better job.


With a wonky alignment (so much toe out) and the MR2 wheels put on, the Corolla made it out to the mountains just fine. 


There were absolutely zero mechanical problems all day. The car did feel quite twitchy with the crazy toe up front, but overall it felt perfectly solid as far as the bearing/ball joint/axle was concerned. 


We had a great crowd with some really cool cars. The weather could not have been better either. Overall it was a great day, and the little FX16 held up like a champ. 

Next project: hopefully a bigger-brake swap with factory components on the MR2. Something cheap, off-the-shelf, and readily available. That's if it all fits!

TheDailyDownshift
TheDailyDownshift New Reader
11/30/21 2:58 p.m.

February 2020


This winter there hasn't been much in the way of major work done to the FX16, but there's been a bunch of smaller projects on all my vehicles I felt like sharing. A while back I borrowed a pair of EG Civic hatch wing mounts from a friend, just to test fit and see if that's an option for the future. With some very minimal modification they could work out really well!


After the fall cruise, the Corolla basically sat for a while. The alignment was way out after all the repairs from the last HPDE with massive toe out up front, causing very unpredictable handling. After few hours in the garage with the proper tools and a lot of patience, the car drives much better with the tires pointed in the right direction. 


Next up was a mod I'd wanted to do for a while, ever since I changed my fuel tank evap hose layout. After reading some info on the Lemons forums, it seems what those guys do is direct the hose up from the tank, then loop it several times before terminating at a safe low point. This, in combination with a check valve, ensures that fuel doesn't start a siphon effect under fuel slosh or if the car flips upside-down.


This $30 ball valve from Pegasus Racing seems to be the popular solution with the Lemons crowd. The ball inside is free-floating, and closes when upside down. This means that the tank will be able to vent pressure, but if a large volume of fuel tries to go through, or if the car is upside-down, the ball will close. 


With a couple adapters to make the 3/8 valve fit up to my 1/4 fuel line, the tank vent is now safe. 


I also took the time to remove the OE seatbelts, as well as the passenger seat, to make it easier on the guy who will be fabricating a four-point roll bar. This will not only make the car safer in event of a rollover, but also bring the harness attachment points much closer to the seats. While they are technically within SFI spec as it is, the long reach for the shoulder straps is far from ideal, as they can stretch in a crash. 


Over on the 4Runner side of things, something that's bugged me since I bought the truck has been lack of rear visibility at night. The stock reverse lights are so puny you can't see anything!


An easy/inexpensive solution was a pair of LED lamps from Amazon, mounted to tabs I welded on the inside of the trailer hitch. 


As with most things electrical, running the wiring through the interior and making the relay wiring took the most time. 


However I think the results speak for themselves. I also upgraded the stock reverse bulbs to LEDs and now I may as well have headlights back there!


Here in central VA we don't get a lot of snow, but considering that this truck is 2WD I figured it could be a little fun to slide around in the event we do see some white stuff. According to people on the forums, the VSC and TRAC systems on these trucks can be very intrusive in low-grip situations - sometimes to the point of being downright dangerous. With no way of defeating these safety systems from the factory, you have to DIY a solution. 


The common way to do this is to interrupt the signal from the brake master cylinder pressure sensor. Simply wire in a switch so when it's "on" the system functions as normal, but when the switch is turned "off", it cuts all ABS, VSC, and TRAC functions. 


To turn the nannies back on, simply hit the switch again and restart the truck. 


Of course with the threat of snow in VA comes salt - lots and lots of salt. 4th-gen 4Runners are known for frame rust problems, but this particular truck spent most of its life in Texas so the frame is completely rust-free. To keep it that way, I coated the inside of the frame with Fluid Film. This stuff is insanely nasty, but from everything I've read it works great. 


After emergency use for the last two HPDE sessions last event, the MR2's brakes were on their last legs. After snapping off bleeder valves when trying to flush the fluid, I decided to upgrade the system with some 5th-gen Celica GTS front brakes.


Not only are the rotors a larger diameter, but they are also much thicker. They just need to be re-drilled for 4x100 to fit. Even the hub bore is the same.


The pads are significantly beefier as well. Since the MR2 is a street car that only sees track time if the Corolla breaks down, it's getting the Porterfield HP R4S street/autocross pads I've been running for years.


After raiding my local hardware store for parts, I made a power bleeder adapter for the MR2's master cylinder. No more air in the system!


After driving around with the larger brakes, it does feel like there is a slight increase in pedal travel, but it works well. Perhaps one day a larger master cylinder is in the cards, but it's good enough for now.


While this wasn't on any of my vehicles, this was one of the crazier things I've seen in a while. My grandfather wanted me to look at his car because his power steering stopped working. When I got under it, this is what I found. The rack housing had split in half, breaking the bracket on the passenger side end as well. He swears he didn't hit anything but I can't imagine how else something like this happens. 

Anyways, that's all for now. Hopefully there will be more Corolla content coming up here soon!

TheDailyDownshift
TheDailyDownshift New Reader
11/30/21 2:59 p.m.

March 2020


Finally something to update! Back in February I dropped the car off with a reputable local guy to have a roll bar put in. It still needs a few little additions, plus paint, but I think it turned out fantastic.

First things first though - electric power steering


This is out of a first generation Saturn Vue. I pulled this out of a junk yard for under $75 for everything. It's a self-contained system that, when combined with an eBay controller, makes for a very cheap way to convert basically anything to electric power steering. 


Here's the rough plan so far. The upper portion of the Vue housing will get cut out and act as a sleeve around the lower Vue housing (the one that bolts up to the EPS). That will allow the upper Corolla housing to fit snugly and weld up to the Vue lower. This is good for a few reasons, namely that the Corolla support bearing is 3/4" (or so I thought) so it will fit any universal 3/4" shaft (turns out that's not precisely right), as well as allowing me to retain the ignition, turn signals, and wiper controls. 


Here's the section I'm taking out of the Vue housing to make a sleeve. The tapered upper portion also got removed. 


The lower mount was very simple to make, just two 90*- ish bends in some flat 1/8" steel and a few drilled holes lets it mount up.


After turning the bracket 180* from where it was in the previous picture, and with a little bit of finessing, the front mounts bolt right up to the factory location.


Next up is the intermediate shaft between the EPS output and the rack u-joint. To create this, I used the Saturn upper intermediate u-joint, the lower spline from the Corolla column, and part of the Saturn's upper column to piece it together.


And there we go. We now have a mechanical connection to the car!


While I was messing about under the dash, I went ahead and modified (read: destroyed) the factory rear wiper switch to use as a mounting point for the EPS assist adjustment knob.


The next step was to take everything apart again and weld up the input shaft. There were some weird constraints involving shaft diameters for the support bearing to consider, and this was the best way to do this as far as I could determine.


To make sure it was straight, the two pieces were clamped in some 90* steel when tacked. 


After welding all the way around, it was then ground flat for sleeving. 


The lower part of the Corolla column was cut and used as the sleeve to reinforce the new setup.


If this thing is going to break it's not going to be here, that's for sure.


And here's the whole thing reassembled, ready to go back in the car.


Since the stock steering wheel has a deep dish to it, and the Momo going in this car is flat, I needed some extra shaft length (phrasing) to get the wheel closer to me. 


To do this, the end of the stock shaft was chopped and welded to some 3/4 steering shaft from Speedway Motors.


To sleeve this part, I used the splined lower Saturn shaft, drilled out to 3/4".


After some grinding......


...and more welding...


We have a steering column ready for a wheel.


Obviously this needs some cleaning up, but everything is together and very strong. The wheels turn lock to lock with no binding in the joints or bearings anywhere, and the steering wheel is in a fantastic position. 

All that remains is some electrical work to improve the less-than-stellar battery wiring from the previous owner, and then this will be ready for proper testing!


After further thought, I wasn't happy with the intermediate shaft design. Rather than relying on two flat-surface to flat-surface welds, I wanted to do something a little more safe in event of a weld failure. So I took a piece of the 3/4" steering shaft and made one end a DD profile with a locating dimple, and the other end was drilled out to fit the splined end into.


A replacement u-joint was ordered from epowerstering.com that has a splined end to go on the EPS motor output, and one end is a 3/4 DD. Both ends have set screws to keep things from sliding in and out, which is what the dimple on my new and improved shaft is for. In addition to the weld, I also drilled a hole through both pieces and ran a bolt through as an extra backup.


With a bit of paint to keep rust away, it was all ready to go back together. Once everything was wired up, everything works 100% as expected. The only thing I don't like about it so far is that the effort is a little too light, even with the knob at it's lowest setting. I may investigate to see what the resistance range of the rheostat is, and maybe either try some resistors or a different range rheostat, just to try and get a little less assist, without the motor turning off completely.

TheDailyDownshift
TheDailyDownshift New Reader
11/30/21 3:06 p.m.

March 2020


The previous owner had already relocated the battery to the trunk. I had already added additional cable protection, fuse, and basic cutoff switch. However the location high up and at the very rear of the driver's side of the car - and the lack of a battery box - always bugged me. 


The floor behind the passenger seat seemed like prime real estate. I welded in a few brackets for the battery tie-down to attach to after hammering a spot nice and flat. 


I cut two small slots in the bottom of the box for the brackets to go through. This way the battery will be held to the floor, holding the box in place. 


A few pieces of scrap metal were welded together to make a secure-fitting tie-down.


The box lid is held on with a nylon strap that came with the box. One of the bolts that held in the rear seat makes a great location for the ground cable. 


The fuse is mounted to the side of the box with some zip-ties. Eventually I'd like to install a proper 4-pole cutoff switch - one that allows the alternator to discharge when shut down, rather than potentially blowing out the voltage regulator. However until then, the fuse should protect the car in the event that the main power line grounds out for whatever reason. 


To prevent the passenger seat from hitting the box, I added bolts to each side of the slide rails to limit rearward travel. 


All installed, nice and clean. I think this will work out much better than the old setup. One less thing to worry about the possibility of failing tech. 

With this whole Covid-19 thing going around, the VIR track event I was supposed to do this weekend was cancelled. Then the backup date in August was cancelled when they re-scheduled Hyperfest, so as of right now I'm scheduled to take this car to VIR in mid-May. I'm not holding my breath that this one doesn't get cancelled too, but here's hoping.

1 2 3

You'll need to log in to post.

Our Preferred Partners
yXUXvKjKQYC1uEES0CWwTJyr1nR70SET7UvRiwkZ8tAZdgvozD2RYO4Tq6ImV5rB