CrookedRacer
CrookedRacer Reader
11/24/19 10:55 a.m.

Getting further into the engine, taking off the timing pulleys, I found more evidence that the culprit could be a loose front crank bolt.

There was some evidence the washer between the main timing pulley and the oil pump sleeve had been spinning.

First, some wear on the pulley:

Then some evidence of heat on the washer itself:

And finally, inside the engine, I noticed quite a bit of thrust wear on just one side of the center crank bearing. I'm thinking a loose crank bolt might let the crankshaft slide towards the rear more than it normally would? Not sure about this one, but it's definitely worn here a lot worse than the other side:

At any rate, I think it's time to get organized...

I'm going to take this crankshaft, and one that I just bought, to the machinist. I'll let him decide which one we should use.

AnthonyGS
AnthonyGS Dork
12/26/19 5:47 p.m.

Wow.  I've read all the posts and some of the stuff on RL over the past two days.  Why?  I'm looking at another 944 this Sunday (most likely).

I do have one comment that was never addressed and an observation and one question, maybe two.

Comment on "performance valve job:"  In this case the bottom or face of the valve gets an angled backcut.  This is supposed to allow air to flow around the valve easier.  In the rebuilt head photo you can see the shiny back cuts on all valves.  When you put valves from #2 into the other used heads, you can see the back cuts in that cylinder only in that photo.  

The observation:  Getting front crank bolts torqued is always a pain and in this case caused your oiling problems. Buy the crank locking pin and use it!!!!!

Question 1: When were you having the most fun with this car?  HPDEs or racing?  I think it may be to come though if you get the oiling issue sorted. I'm also worried about debris in your cooler now.

Questiom 2: What would you do different if anything?

And of course thanks for sharing good and bad.


CrookedRacer
CrookedRacer Reader
12/29/19 11:04 a.m.

Hi, I hope my response isn't too late!

On the comment... I didn't think the face of the valves get a backcut in any case. Here's the "competition valve job" picture. This is the head that has remained on the car ever since I had that done.

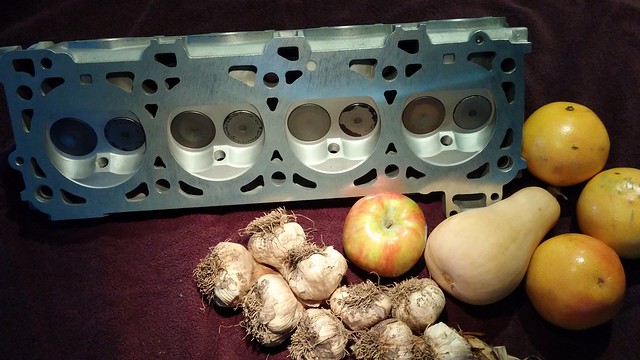
If there's a shiny edge here, I think it's just because it's clean, not because it was beveled on the face side.

My understanding of a competition (aka performance) valve job was that the valves themselves are given a multi-angle grind on the seat side instead of just the usual 45 degree seating surface. I could be wrong about that.

Maybe I'm misunderstanding your comment, but: I retained the same head (pictured above) and all its valves except the #2 cylinder when I changed engines. I stole the valves from the donor engine's head and installed those in the head pictured above.

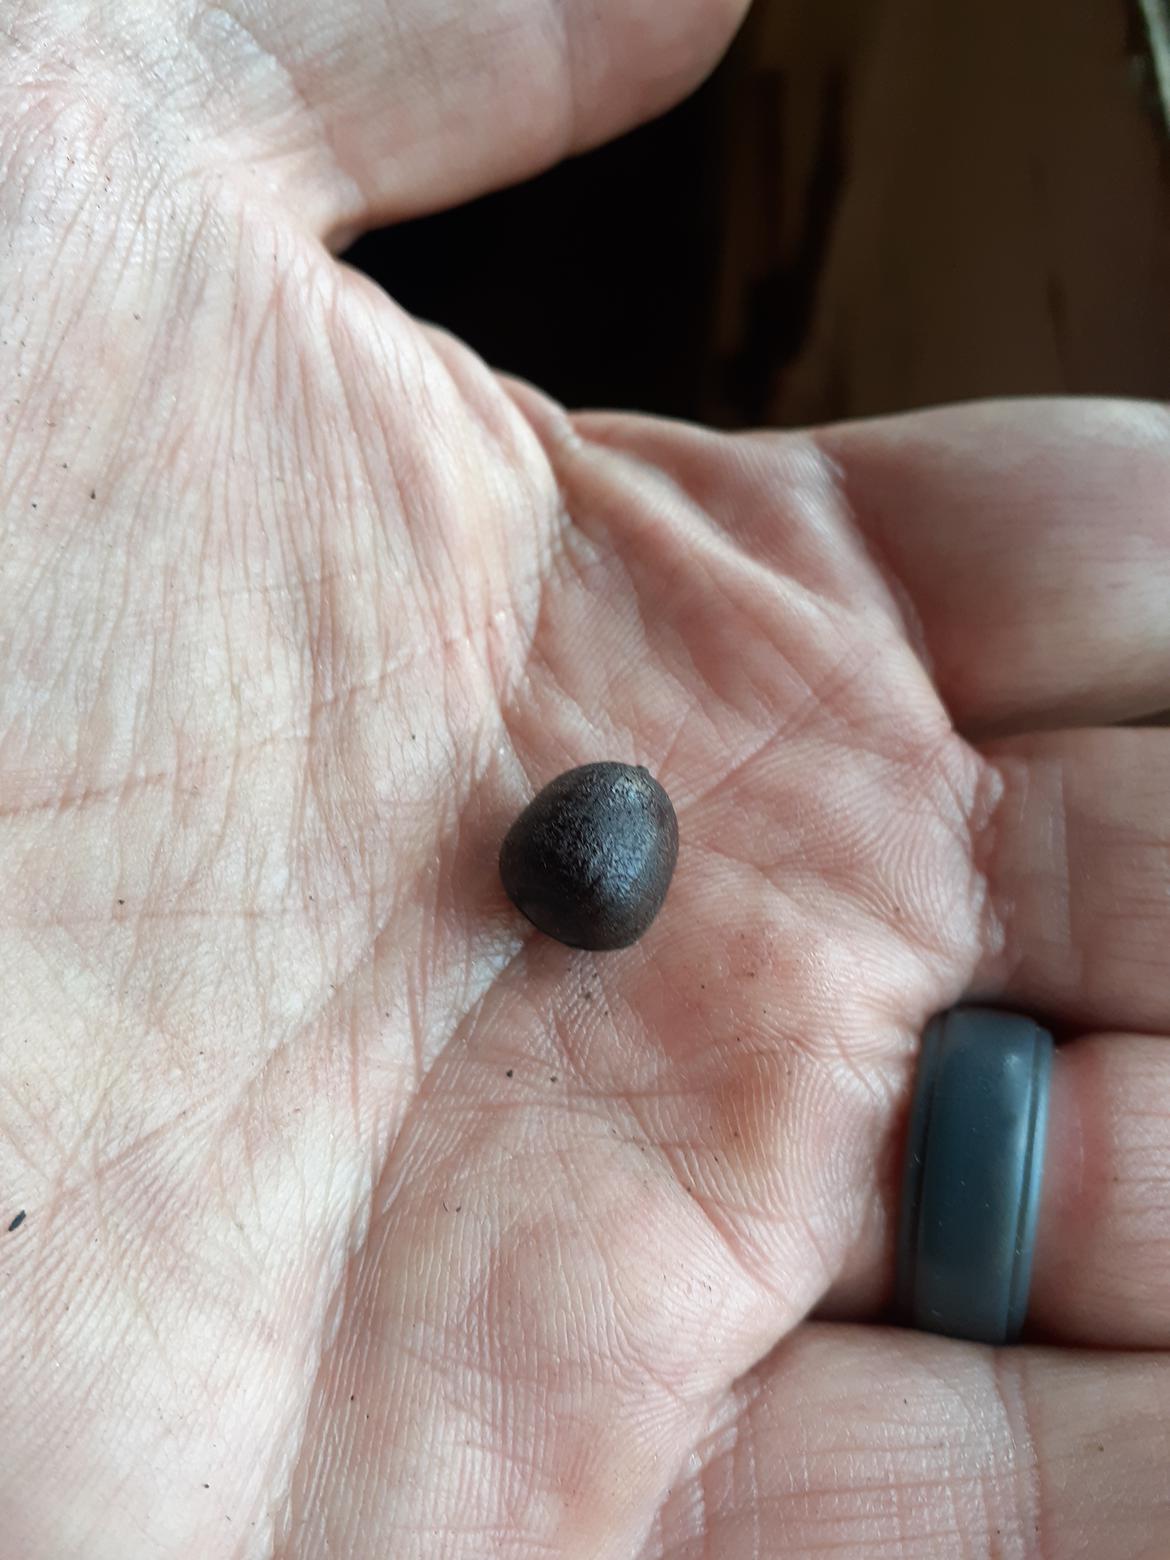
So I took two valves from this head (type of valve job unknown)...

...and put them into my original head. Your comment did get me to wondering if there was anything special about the donor engine's valves. I never really thought about it. I just lapped the seals and ran with it.

Which resulted in this:

https://s3.us-east-2.amazonaws.com/prod.mm.com/uploads/2019/05/05/1557107296_20190505_194359_mmthumb.jpg

And the only reason #2 looks shiny is that those valves have been cleaned up a bit, and I never touched the others. Again, this is a picture of my original "competition valve job" head, with two valves from the donor engine installed.

The observation:  Getting front crank bolts torqued is always a pain and in this case caused your oiling problems. Buy the crank locking pin and use it!!!!!

On the observation about getting a lock pin... Point taken! I really ought to have a tool that does the job most properly, considering the number of times I've needed one lately.

Question 1: When were you having the most fun with this car?  HPDEs or racing?  I think it may be to come though if you get the oiling issue sorted. I'm also worried about debris in your cooler now.

I think I enjoy racing far more than HPDE's for two reasons. One, I love my racing "family" at NASA-Mid Atlantic. HPDE can be lonely when you've graduated to solo. I'm sure I'll stay friends will all my racer pals if I were to return to HPDE, but there's nothing more fun than sharing all the stories about our adventures on track. Two, racing is simply more exciting and challenging than just going round and round. And those challenges aren't just on track. It's about time management, weight & fuel management, car preparation, and more. I still consider myself a novice in all of those departments at this point.

Consider Time Trials, though. I kind of skipped that step, but it seems to me that you can get the best of both worlds at much lower risk.

Question 2: What would you do different if anything?

I can't think of anything. It was a natural progression from track toy to race car, and one of the least expensive ways to get into racing (even though that wasn't my goal when I bought the car). But if I were to buy another car at this point (now that I'm a racer with a trailer and a mess of tools), I think I'd get one that was already race-prepped and ready to go.

AnthonyGS
AnthonyGS Dork
12/29/19 3:45 p.m.

Any good valve job should be multiple angle which will allow the valve and seat to wear in together.  Most high end valve jobs I've seen are 3 to 5 angles.  Any 5 angle job I've seen involved 3 on the seat side and two back cuts on the valve face.  The face on your valves looks shiny to me like they were backcut and in the new head the #2 valves still have a bit of shine on that face.  Given the really dark color of the intake valve metal, it really does look like a small back cut in the photos.  

GCrites80s
GCrites80s Reader
12/29/19 7:52 p.m.

Competition valve jobs can be a good way to pick up power in engines where it is difficult to find more -- which is definitely the case with the 944 NA engine.

CrookedRacer
CrookedRacer Reader
1/12/20 6:19 p.m.

On Thursday I dropped by the machinist's and left both cranks with them. They'll check the better looking one for tolerance, Magnaflux it, cross drill #2 and #3 rod journals, polish all journals, and balance it. They'll check the beat up one for tolerance and Magnaflux it, and put it in a bag if it's still acceptable for future use. I'll put that one on a shelf.

Then I took advantage of a warm weekend... and did some cleaning of the engine bay.

I've always wanted to be rid of the aluminum foil heat shields partly because I always feared they were harboring rust or something. But it was sooo oily back there. That fear was unfounded.

I knocked off all the posts in the area and I'll hit it with a rattle can at some point.

It's looking like a cleaner engine bay without this crap in there:

I think I'm going to find some adhesive foil to apply directly to the frame rail. The "trans tunnel" doesn't really need heat shielding, but it's definitely easiest to do that now while the engine and clutch are out.

It's also easier to fit these AeroCatch hood pins (that I bought two years ago) while I've got the engine out. So I started working on those. At first I thought I was going to be able to mount them without carving into the sub-structure, but the pins would foul the cam tower timing pulley cover on the passenger side, and the airbox on the right side. So I had to move them forward. Fortunately I hadn't cut them... Measure thirty times, cut twice or so, I always say.

Here I've marked the first location but fortunately I checked some pictures of the engine bay with the engine in it before drilling and cutting. There's a real advantage to fabricating these while the engine is out, but the problem is you don't really know if you're clear of the engine itself when you put it back in.

I had actually hit it with a center punch from beneath to mark the first location, but fortunately that dimple lies within the cutout of the second location.

A dremel cutting wheel made quick work of this. I was able to retain a lot of the strength in this area by keeping the cut above the bend here. And I'll round all the edges to try to avoid any stress crack formation in those corners.

When the catch is installed, it will fit into this slot and will scoot toward the front of the hood so that the hood pins can move forward to clear the engine and stuff.

I didn't get it all done today, but it's not something I want to rush. Gotta get it right the first time.


AnthonyGS
AnthonyGS Dork
1/12/20 7:03 p.m.

And just think you lost another pound in grime crud and aluminum!

CrookedRacer
CrookedRacer Reader
1/25/20 11:03 a.m.

I started work on cleaning some really messy pieces and parts, and moved on to the block.

Here's my advice up front: use Dawn and HOT water. Forget parts cleaner solvent, unless you have a parts cleaner that actually heats it up.

The front end was a mess and there was a busted seal collar on the lower balance shaft bearing housing:

So I started cleaning up the housing from the block I purchased (which was just as dirty), and quickly gave up on the solvent due to the fumes .

I didn't pass out, though. I had the garage door wide open, and I was set up near the door, but the fluid just wasn't very effective because it was so cold.

So I got a tub of hot tap water with some Dawn added, and it really worked well to cut all the grease when using a wash cloth. And it was much more pleasant to work with.

It worked well for about 15 minutes until the water became cold.

It worked really well on the block too... no fumes, and a really nice clean surface:

All of this made me think, if I just had a more convenient source for hot water, I'd get through this a lot faster. And I thought... what about one of these?

I ordered this Bissel SteamShot device, since I've seen it work well on things like wheels and tile grout. Has anyone else used these for cleaning your engine or engine bay?

Anyway, we'll see how it goes.

In the mean time, I picked up my crankshafts from the machinist yesterday. The race-prepped crank looks great, and the other iffy one checked out. It is true, crack-free, and can be polished within specs. I figure if some other racer ever needs one, I could offer this one to them.

Here's the race-prepped one after I wiped it down with some engine oil to prevent rust while it awaits assembly. The fibers you see came off the paper towel I used, but as long as it's protected, I'll just wipe it all clean when I assemble it.

CAinCA
CAinCA New Reader
1/25/20 11:15 a.m.

FEIW: WD40 works really well to clean up oil and grease. Use a stiff nylon brush to break up the bigger stuff. I used this method on a really dirty lathe and it got all of the 25 year old cosmoline off. 

AnthonyGS
AnthonyGS Dork
1/28/20 11:43 p.m.

Looking good!  

CrookedRacer
CrookedRacer Reader
7/7/20 9:30 a.m.

How has it been this long since I updated?

One factor was my garage renovation to make it bearable to work in during cold winter evenings and sweltering summer afternoons.

How I Learned To Love The Tiny Garage

All that stuff you saw me doing above with the hood pins is still on hold.

But I bought a pressure washer to do the block, and that worked out pretty well, with the help of a bored kid. He was stuck at my mother's house while his mom was helping with finances. So I let him come over and play with the new toy.

I didn't realize he had removed his safety goggles because he couldn't see, but he and his vision survived the ordeal.

I got it back into the garage, and it was too cold to do anything in there for a while.

One unnerving thing that happened: when I was spinning the engine on the stand, a small acorn dropped out of the block. Not sure what orifice it came out of, but it wouldn't be good if there are more in there.

I got the crank and pistons installed before the renovation started.

For the garage renovation, I wrapped the short block in plastic right on the stand to keep it relatively clean.

And time stood still while we all got used to wearing masks, distancing from neighbors, family, and friends, and sharing our screens on Zoom.

CrookedRacer
CrookedRacer Reader
7/7/20 9:41 a.m.

So in the new garage, I resumed the reassembly of the block, starting with the balance shafts and covers.


So this is what a balance shaft cover looks like, but as I was cleaning all the bolts that fasten it down, one of the bolts that secure the bearing just broke in my hand. I was only holding it gently, and cleaning the threads with a brass brush, and it just let go... I'm grateful it didn't make it into the block before it let go.

That would have been a nightmare. I never thought I'd need to try to break each bolt with my fingers before installing it, but I ended up doing that anyway!

I marked the covers "upper" and "lower" when I took it apart... and installed them as such... but I must have been distracted or confused because I had marked them incorrectly. And when they get swapped, most likely the shafts will seize. They did.

So I read the manual. Yes. RTFM indeed. It turns out I didn't even need to mark the covers. There are numbers stamped on them that match the number stamped on the block and on the crank girdle. It's a whole set. When viewing the covers from above, you should be able to read the stamped numbers. I swapped them so that was possible.

Balance shafts are spinning!

CrookedRacer
CrookedRacer Reader
7/7/20 9:48 a.m.

Other progress: cleaning up the head and torquing it on.

Otherwise, a straightforward assembly that you've all seen before.

CrookedRacer
CrookedRacer Reader
7/7/20 10:12 a.m.

Ok, so we're back to the present day now.

But one thing I wanted to do was address this:

That's where coolant normally emerges from the head and goes to the heater core, which I deleted. But the cap I put on it is about to give it up.

So a while ago, back in February, I got my welder out one day and decided I'd turn that plate into a solid one. Simple enough, right? Start with a spare one you've got lying around...

And cut off the tube so you've got a flat plate...

Then just stick a bolt head in there and fill it in with a quick weld bead. Easy, right? (In my own defense, I hit that bolt with a wire wheel and some acetone first... I didn't leave it like that)

Well, no matter how many times I welded, then grinded, then welded, then grinded, it still had inclusions and pits and cavities. I couldn't trust that it would hold water ever.

I had wasted a whole morning on this dumb little thing, and I was so disgusted with myself that I put this whole project aside. For four months.

So yesterday, I was ordering a new oil pan baffle from Lindsey Racing. They sell  one of these block-off plates made from 1/4" aluminum. I figured it would be super easy to just fabricate one, but I don't have any 1/4" aluminum around. I wasn't going to pay $32 for a little slab of aluminum with two holes in it.

Then I remembered Van Svenson (944 guru on YouTube) had just ordered a bunch of parts from SendCutSend.com for his 1.8T->944 swap, and they looked pretty neat.

I drew the part to the best of my ability on FreeCAD open source CAD software which can save drawings to a variety of formats, including .dxf.

The sendcutsend.com website accepted my drawing on the first try! It helpfully asked if I wanted my part created in Inches or Millimeters. Millimeters, thank you!

The part cost about $5 apiece, but the minimum order is $29, so I got six copies for just $31. Christmas-in-July presents for my fellow 944 racers! So yeah, I saved one dollar over the Lindsey Racing one.

I should get the parts later this week and I'll let you know how they came out. Hopefully I measured and drew it properly.

CrookedRacer
CrookedRacer Reader
7/8/20 6:55 p.m.

I don't know why I've never replaced this gasket that goes between the timing gear cover and the distributor cap. It's crunchy. And I think it's supposed to be pliable. So I've ordered one locally. I think it must be the only Porsche part they sell at the dealership that costs less than $6.

Progress. I consulted Van's youtube videos on how to adjust tension by methods other than Porsche's $150 tool.

And with that, the front end of this engine is all wrapped up! Note the crusty distributor cap gasket has been cleaned off the cam gear cover:


Finally...

When tightening the head bolts the other night, they all felt the same except the one at the rear of the engine on the intake side.

You know when you're over-tightening a bolt and it suddenly feels easier to turn? It's a really scary feeling, since it usually means you just broke your bolt. Or some threads somewhere. In either case, it would be a build-stopper here.

Stage 1: 20 Nm
Stage 2: 90 degrees
Stage 3: 90 degrees

It felt like it "let go" a bit a the very end of the Stage 3 tightening. That troubled me. I thought about what the Porsche service manual had said: The washers are NOT to turn. Rough them with sandpaper if re-using.

Well, I decided I'd go back and loosen just that one, and this time I'd mark it and check to see if the washer spins.

Sure enough, the washer spun, this time on just the beginning of Stage 2. And that feeling of release coincided with the spinning washer. So that was encouraging since I was way more worried about stripped threads on the stud,in the block or at the nut.

Here you can see the texture I had created on the washer the first time, marred with concentric circles made by the unwanted spinning.

So I roughed up the washer even more than I had the first time (coarser sandpaper), and I scratched the bearing surface of the head to give it a bit of a "knurl".

And I took some scotchbrite to clean and smooth the top of the washer and the bottom side of the nut, to be sure they wouldn't do anything unexpected.

And this time, the washer stayed on its mark, and the tightening process felt really consistent throughout the three stages of tightening.

Yeah, it wasn't tightened in order with all the others, but it'll be fine. I have peace of mind now for sure.


CrookedRacer
CrookedRacer Reader
7/8/20 7:08 p.m.

My oil pan baffle should get here tomorrow. I've got the pan all ready for welding it in:

Mmm that's purty.

CrookedRacer
CrookedRacer Reader
7/12/20 11:58 a.m.

More of the same stinking pictures you’ve all seen before. Assembling the final pieces of the engine. Yesterday I got the car off the trailer and towed it to the operating theater:

And I got the oil pan back from the welder. She did a great job.

...and finally, I put that oil pan back on the block. The windage tray, oil pickup, and level sensor all fit!

Note to self:

If you think you are saving time by installing the clutch first, necessitating the block’s removal from the engine stand and then having to install the oil pan while the engine is hanging from the hoist, you aren’t.

Readers with keen eyes will notice the Panda Bar™ doing a nice job as a spreader bar on this hoist.

For more information on Panda Bar™, how it came about, and how it got its name, please check out the Panda saga at DogparkRacing.com. It’s worth a look in case you ever need to transport a 700-pound bear. 

CrookedRacer
CrookedRacer Reader
7/13/20 7:23 p.m.

Ok, so I picked up the dizzy gasket...

Much better!

I also bought a reinforced silicone cap for the water pump side of the deleted heater core.

It was pricey but I think it will hold up better than a plain rubber one like the one that’s giving out on the other end of the engine... speaking of which, my sendcutsend.com parts arrived today!

Before:

After:

Pretty neat! Anyone need one? I’ve got extras.

I am definitely pleased with the service. I’ll be looking out for other applications, too.

CrookedRacer
CrookedRacer Reader
7/21/20 8:22 a.m.

So the engine's about ready to go in, but first I wanted to sort out the radiator mounting situation.

I had purchased a radiator which was advertised as a 944, but it appears to be for a 924, a turbo, S, or some other application. It doesn't have the indents that accept the rubber positioners at the top and bottom. And it barely fits in the space. Bigger is better, though, so I think I'm going to just work with it.

So for my last couple events, I wrapped it in some tough plastic to lubricate any contact points, and fashioned little tabs to keep it from sliding out of the pocket it sits in. The tabs are shown below on the left, and they had started to dig into the plastic, but the aluminum radiator looked ok so far. Still, it wasn't an ideal setup.

On the right is the new bracket to hold the radiator into its place.

For some reason, there are two holes on the core support on each side, but only the passenger side had captured nuts welded behind them. The driver's side was just open holes. That made it difficult to attach the little tab on that side, so I installed riv-nuts there to make them equivalent.

Notice where the old tab was pressing against the radiator. The plastic protected it fairly well for now, but eventually that could be a problem.

That makes installation of my tabs super easy now.

I needed spacers to make room for padding foam, so I cut some thick-walled aluminum tube I had around. I countersunk the hole in each spacer to make room for the riv-nut which isn't quite flush.

I like the way the padding is captured by the spacers so it won't go anywhere. There's more of that padding at the top and bottom of the radiator.

For the last event, I noticed that one of the two stock cooling fans wasn't turning on. Troubleshooting indicated that somewhere in the harness, the hot wire is broken. It wasn't necessary to have both when I was last running last spring, but I need to address that now.

So I'll clean all this up and later today I'll make some fan plenum pieces to mount the new SPAL fans to the stock mounting points. Then I'll have to address the wiring issue and give those new, lighter, more efficient fans some juice.

SpeedTheory
SpeedTheory Reader
7/21/20 7:23 p.m.

When are you planning on getting back out? I am pretty likely going to join  you all next year and cage my TT6 car over winter :). 

CrookedRacer
CrookedRacer Reader
7/23/20 6:57 a.m.

In reply to SpeedTheory :

That's awesome!  ST6 in NASA Mid-Atlantic is a fun group. I'm excited to hear about your ride!

I will not be at VIR for Not-So-HyperFest but I hope to make the remaining races this season.

I made a sorta-solemn oath to myself a few years ago: "I will not do VIR in August."

Someday, I might add "...without a coolshirt" to that promise, but I don't have a coolshirt right now anyway.

Let us all know about your project and how it goes!


CrookedRacer
CrookedRacer Reader
7/23/20 12:48 p.m.

I moved on to fabbing a shroud / mounting brackets for the SPAL-like fans that came with the radiator.

I thought about drawing it and then sending out for laser cutting, but I'm not yet fast enough with the cad software to make it worth my while. So I just transferred the stock fans' mounting holes to a piece of foam core and traced the new fans onto it as well.

My aluminum piece wasn't large enough to make a complete shroud so I made up two pieces using plenty of fasteners to use the rigidity in the fans themselves.

Yes, those are reading glasses. I'm suddenly appreciating a lot of E36 M3 my dad used to have to deal with.

Anyway, I put my riv-nut tool through its paces today, that's for sure.

So how did we do compared to the stock fans?

Well, Kendra and I both couldn't discern much difference in weight, but the scale says otherwise...  the old fan assembly:

...and the new fan assembly:

Five pounds!!!!

This really was a worthwhile and satisfying project!

Hopefully it fits in the car and with even more luck, the wiring will be straightforward. 


CrookedRacer
CrookedRacer Reader
7/24/20 12:45 p.m.

So, the holes on the stock fans don't quite line up with the aftermarket radiator's mounting holes. I made it work before, but the aluminum of my new fan pack isn't as forgiving. So I filed the holes a bit to make everything line up. The stock fans were really close to the temp sensor and to the inlet and overflow bungs, which I never realized were that close before. I had to clearance those as well on the new fan pack.

At some point, I intend to remove and replace all the little screws with some loc-tite blue on the threads. Would I regret using loc-tite red?

Having done all that, this part is done, and we move on to wiring it up. Ugh. I wish I had a good plan for wiring at this point.


TurnerX19
TurnerX19 SuperDork
7/24/20 7:36 p.m.

In reply to CrookedRacer :

Loctite red is too strong for anything that small. Blue will work fine.

CrookedRacer
CrookedRacer Reader
8/7/20 8:42 a.m.

In reply to TurnerX19 :

I love this post.

You'll need to log in to post.

Our Preferred Partners
SPs1cytaQbrZuJBLo86R8PmpprdM6JnXIh0Pynduld6u5pqYB9v5VCuUMuApr4r4