


Nice! I am very jelly

Nice! I am very jelly

This past weekend was my second track weekend with the 944, and it was just about perfect, all things considered.
The car performed heroically. It hauled itself, me, four race tires, a 10'x10' canopy, jack, stands, tools, and a duffel 350 miles to the track. Then it went eight 20-25 minute sessions on track without a complaint, and then 350 miles home again. I am once again pleased with my purchase.
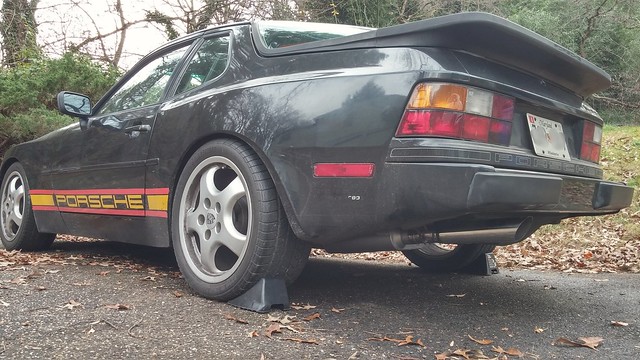
Here's a picture of my steed in the paddock that I took with an 80mm prime portrait lens, which makes the car look 100x better than it does when you're standing next to it:
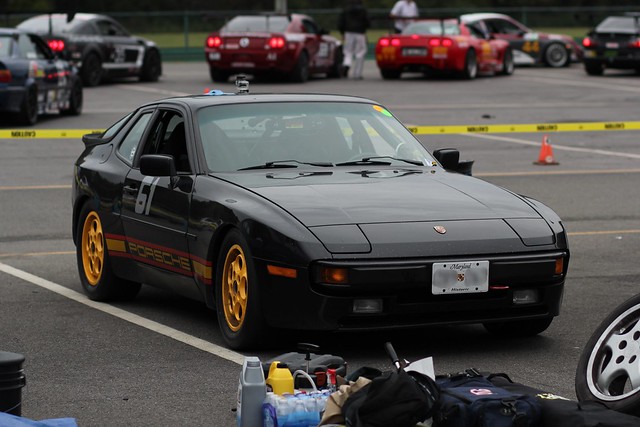
I guess portrait lenses are as good for cars as they are for people.
Driving the 944 at VIR
Anyway, I had a great time building up confidence, gradually re-learning each turn in a RWD car. I didn't have an instructor this weekend, but I did capture all but my first session on my lap timer / gps recorder. I'm looking forward to evaluating the data in the off-season, comparing it to the Fiesta.
Speaking of the Fiesta, it is still the faster car even at VIR. My best times in the Fiesta were 2:25's. In the 944, I pared it down to a 2:28 by the end of the weekend. But I'm sure I can find three seconds out there, because late on Sunday I realized I wasn't flooring the gas pedal in many places that I could have been. I guess I thought I was being smooth, but the fact is, I could have been smooth and still gotten the pedal all the way down!
Also, because of the large groups in HPDE-2, I was usually right up behind a train of cars by the time I reached Oak Tree, so I really didn't get a lot of practice taking that turn properly. And it's the most important turn on the course for a momentum car, carrying into the longest straight on the circuit.
For reference, the 2015 NASA Eastern Nationals champion in GTS-1 in his 944 was doing 2:17's, and another 944 qualified with a 2:24. I was pretty happy with what I did out there this weekend.
Brake Pad Success!
Before the first session on day 2, I changed all the brake pads to Performance Friction PFC-08's, which are an endurance racing compound. When I was installing them I filed down the rough edges where they ride on the caliper guides, and I think that made a huge difference in letting them float where they needed to. When I took them off at the end of the day, they looked like they hadn't been used at all! Wow! I saw no evidence of a "lazy piston" or uneven wear. Finally, some brake pads that perform like they should! I have high hopes that these pads will last me quite a few weekends, if not a whole season.
Marathon Drive
The drive home from VIR is a trial, though. First of all, they load up all the DE group sessions late on Sunday afternoon so the racers can go home early. (It's not really fair, but the argument is that racers need the extra time to manage impound, protests, and other activities that the DE groups don't. That's a bunch of hooey, but that's the way it is.) So at 5:40 PM I can start to put my car back together- changing tires and brake pads back to street ones. And third, loading the car is a Tetris exercise that really can't be pre-staged, since so much stuff is needed to do that re-assembly work. Fourth, the car's muffler is shot, so I had to stop and buy some earplugs (I couldn't find the ones I used on the way down) Even with the ear plugs, the car drones along the dark 2-lane highway, which tends to hypnotize and sedate an already-exhausted driver. With some breaks for 10-minute naps to prevent death-by-guardrail, I arrived home at 1 AM on Monday morning. I was a zombie at work.
So there you have it. A great weekend at VIR, beautiful cool fall weather with only a spritz of rain on Saturday, and no issues with the car (or the brakes!).

Here it is at dusk, just about ready to be loaded up. You can see I was one of the very last to head home from VIR on October 11.
Since then, I've been autocrossing and doing some other family stuff, but I managed to find some evenings and a weekend afternoon to start putting the car on a diet. I have one more event at Summit Point, WV before the long winter.
I started out in the back, working my way forward, by hacking off these brackets. They were good for about one pound:
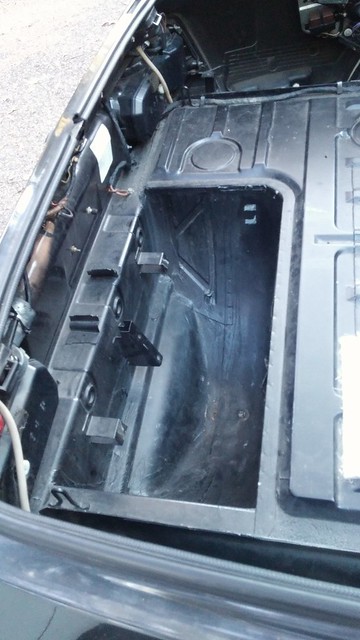
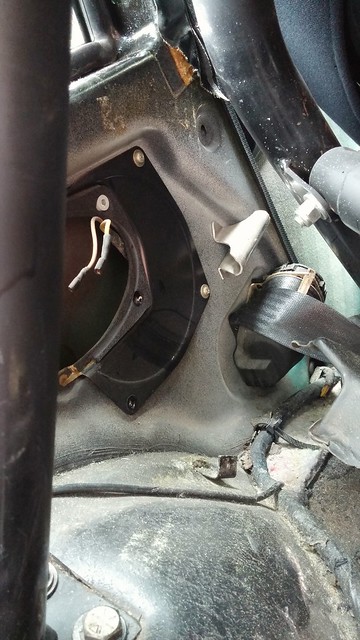
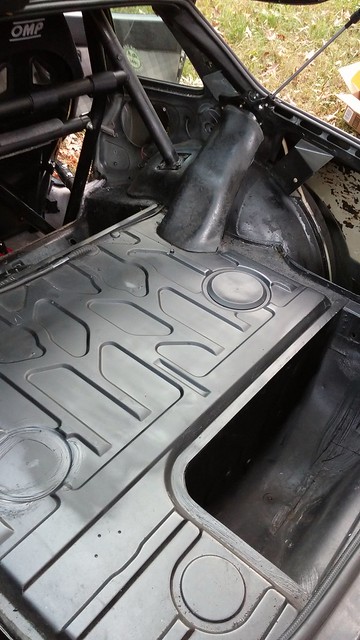
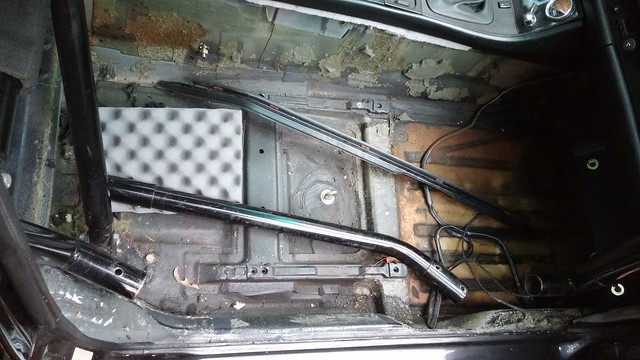
Then I removed these interior panels, and everything behind them.
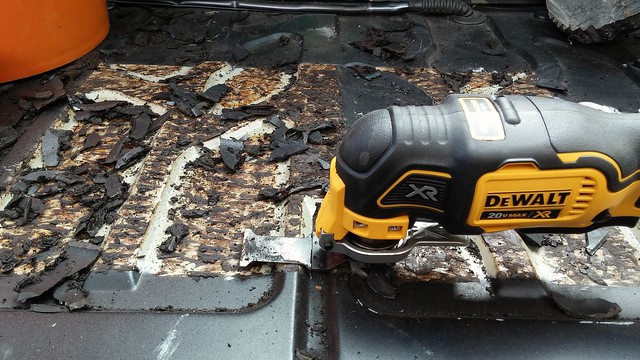
And I started taking out the sound deadening material wherever I came across it. Which is everywhere. But I love my new birthday present - this cordless oscillating tool. The bit I'm using is worn to nubs but it works its way under the material, leaving just the goo which can be cleaned with acetone or Goof-Off (Xylene-based stuff).
Gotta be careful to do this on a nice breezy day and keep your face out of it.
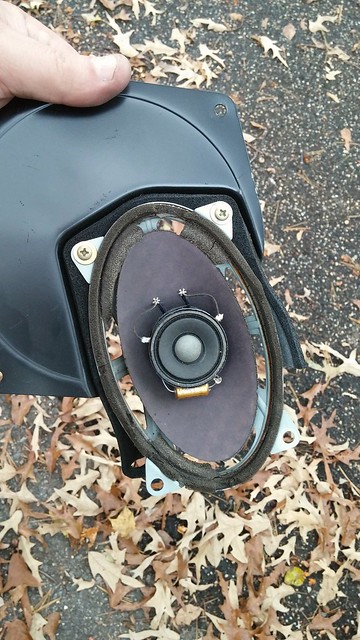
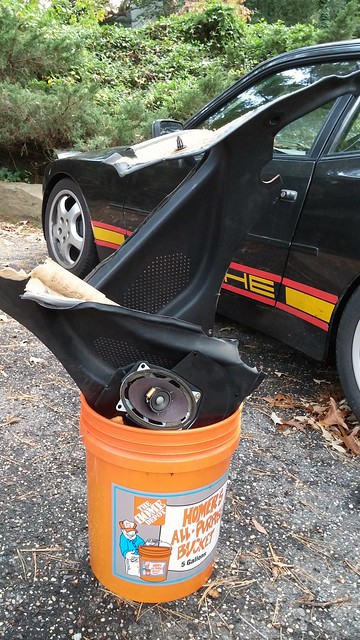
The speakers were shot. What do you expect? They're nearly thirty years old!
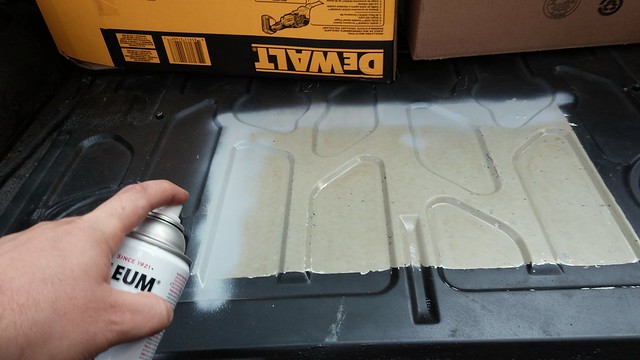
Scrape, Clean, Prime, Paint. I'm doing all the steps as I go to be sure I finish anything I've started before the upcoming track event.
All in all, I've taken 14 pounds of material and panels out so far (the previous owner had already taken the rear seats and most of the interior behind them out). I still have the front carpet, tunnel console, headliner, some more steel, and quite a few more areas of sound-deadening material to go. Hopefully there is a lot more weight to be removed.
There will be scales at the next event, so I'll have my baseline corner weights in just a couple weeks from now.

Looks like fun, I keep thinking about a 944 race car sometime in the future.

From what I recall, ALL of the sound deadening in the car is on the border of 100 lbs...
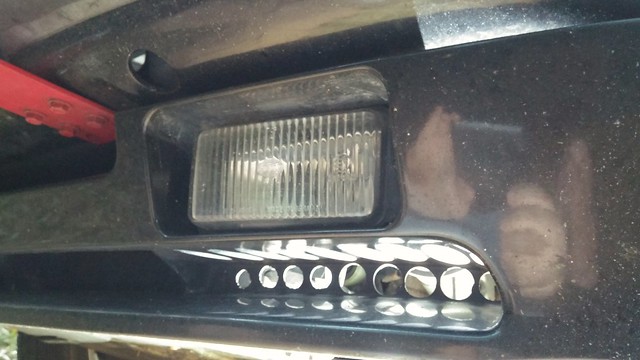
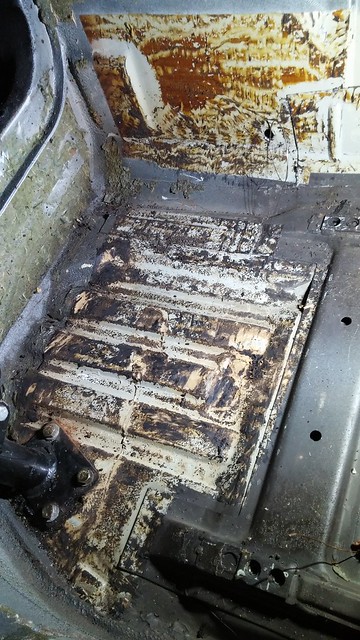
I took off the bumper (really easy) and a shroud below the a/c condenser that is no longer connected to anything.
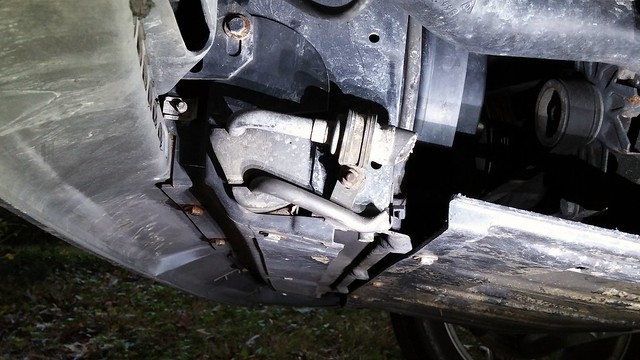
While I was under there I noticed someone had fashioned what looks like some extra brake ventilation. This isn't stock, is it?
But I was pretty pleased about getting it out with fairly little pain.
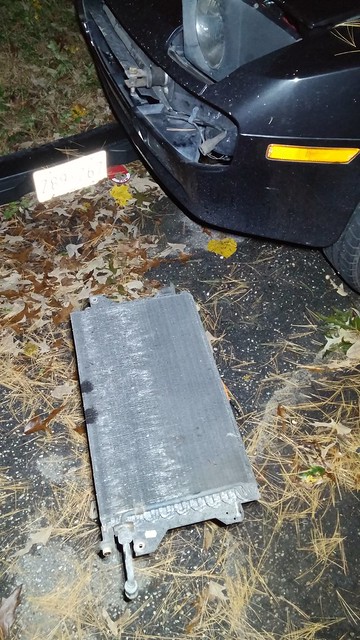
I feared it would be more of an ordeal than it was. There were only about ten screws holding the shroud below the condenser core, and just two bolts holding the core to the radiator. The core just dropped straight down, being located at the top by a couple pins.
It might weigh 2 pounds at the most. :-/
It should make for better cooling, but the a/c condenser was acting as a shield, protecting the radiator from rocks and big bugs. I think I will install some kind of screen to perform that function now that it is gone.
I weighed the condenser core and happily it's twice what I thought it weighed... 4.75 pounds.
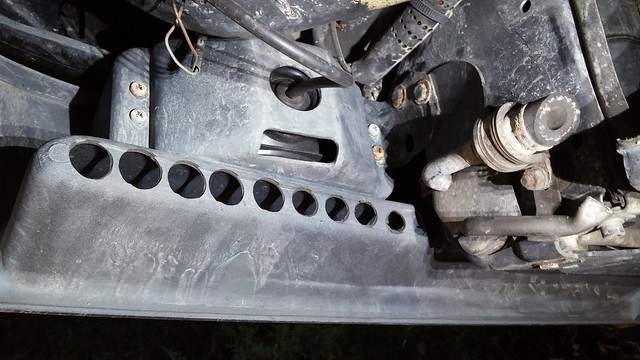
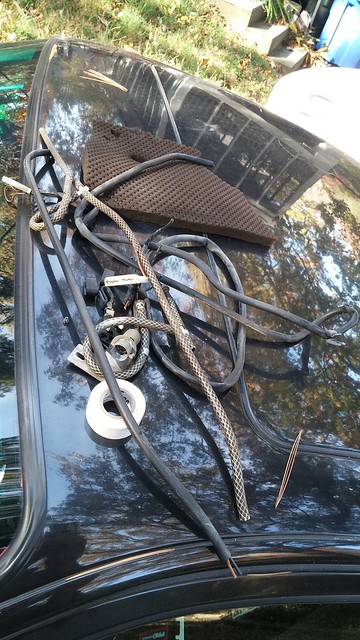
Then this weekend I kept at it... adding more lightness!
None of that stuff was necessary (or hooked up)...
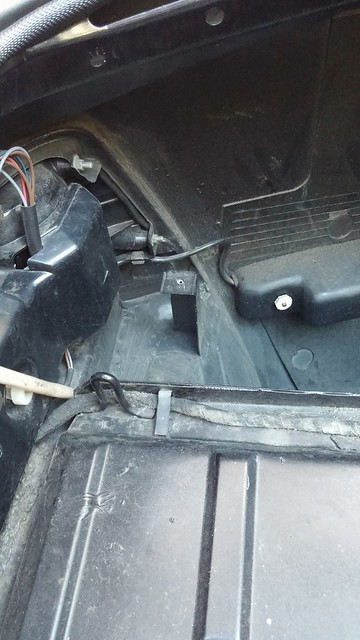
I took out more stuff in this area, plus there's a lot of painted-over fuzz to remove here.
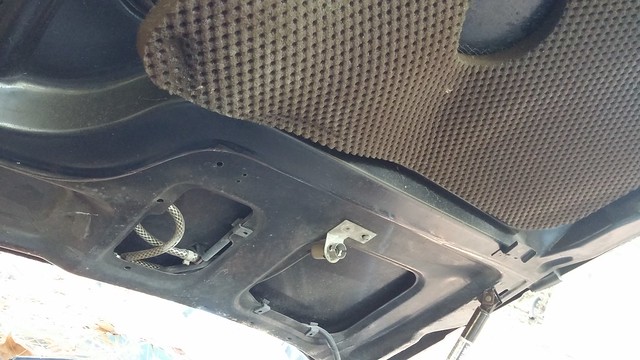
I really want to remove everything to do with the sunroof, especially the mechanism on the left of the following picture. But: A) I don't know how it disconnects from the actuation cable, and 2) I am afraid that if I do disconnect it, that I will be removing the only thing keeping the sunroof closed at 120 mph. So I think I'll wait until after this weekend's event to pull it. That way I'll have all winter to figure out how to keep the sunroof attached.
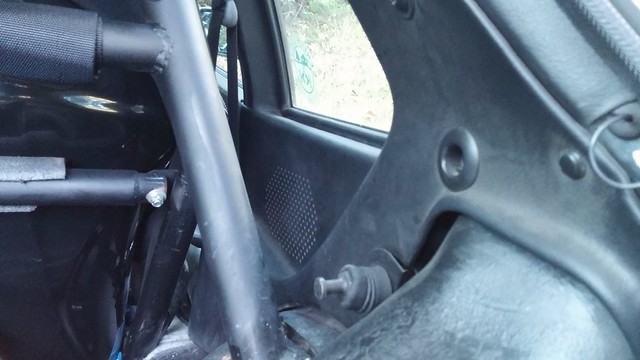
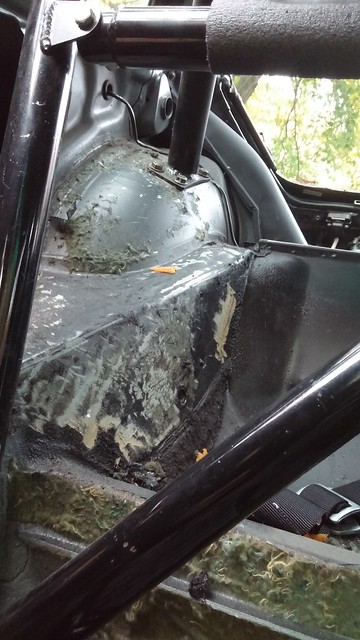
Here's the right quarter panel. There was a bracket there that I deleted... many of the race 944's I've seen on the interwebs have them removed... And I took a lot more of the painted-over fuzzy stuff off the wheel tub.

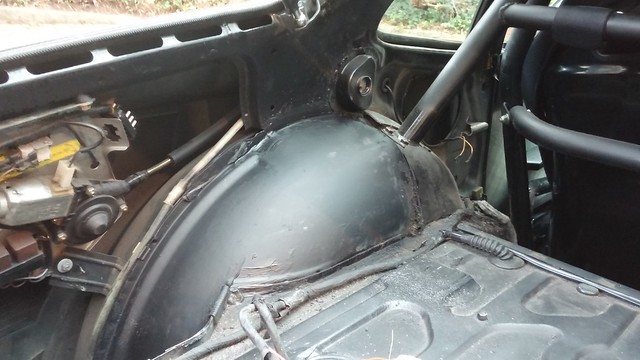
I took out the passenger seat and dove into the carpet removal and stuff underneath it.
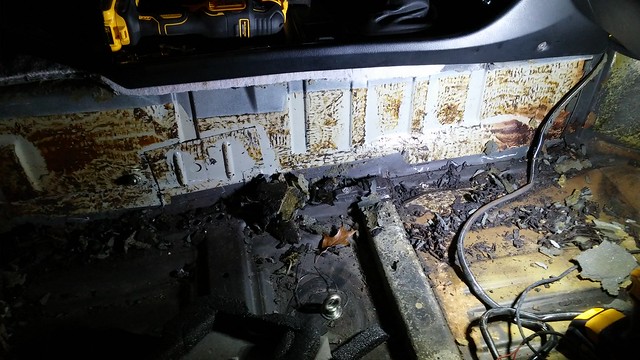
These last two are after I've taken to the harder material with the multi-tool. I'll follow up with the wire wheel and then acetone and/or Goof-Off.
When I took out the A/C condenser, I realized I needed something to protect the radiator now. So it was off to Home Depot to explore options.
I found some nice black gutter screens for $2 apiece. I bought two of them.
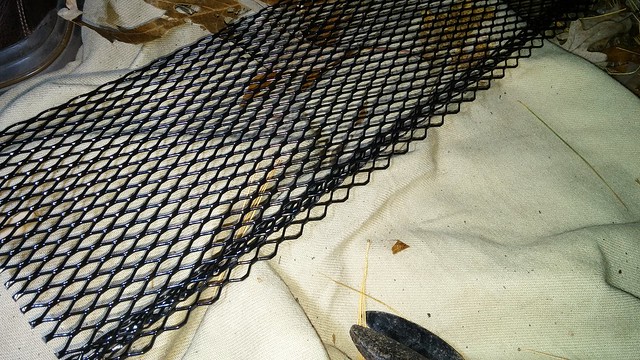
I used the bent edge for its strength, zip-tying it to holes I drilled in the interior side of the fascia between the lower and upper openings. It really worked out well because the bumper holds the top edge of the top panel in place nicely. The bottom panels (there was a support in the middle so I had to use two sections) were simply zip tied down to the bottom plenum.
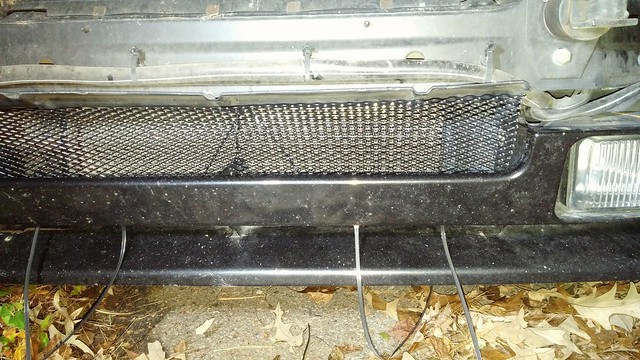
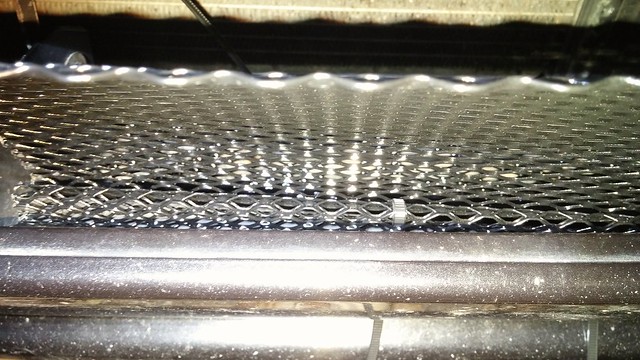
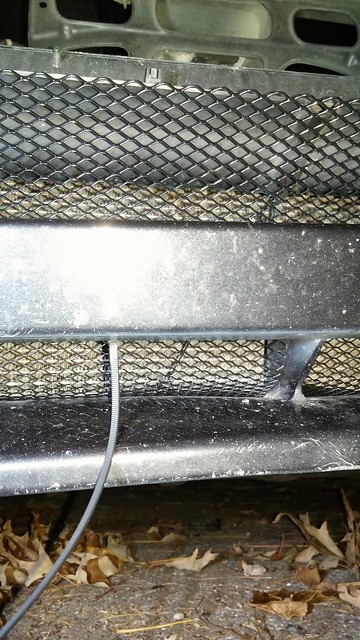

I was really happy with this little project. If I find the zipties fail too frequently, I'll just use safety wire. But it looks great (if you get way low to look at it hard enough) and it should stop most direct hits from rocks and parts.
It probably won't stop a deer.
Fortunately, I had no issues with deer at Summit Point in November (NASA Mid-Atlantic HPDE). I had no issues with the car either. The car ran great for its third and last weekend of 2015. It drove me from home to the track and back, twice. Oh, and eight full sessions of lapping, too. It was my first event in the Advanced (HDPE-3) group, and I am really happy with my car. Yeah, it's slow. But it's quick around the corners, and it is officially faster around the track than the Fiesta ST now, despite being 10mph slower than the Fiesta down the front straight. It really makes it up in the turns.
I have no pictures or video from this last event, but take it from me, I drove like a hero and I looked good doing it. Ha! ![]()
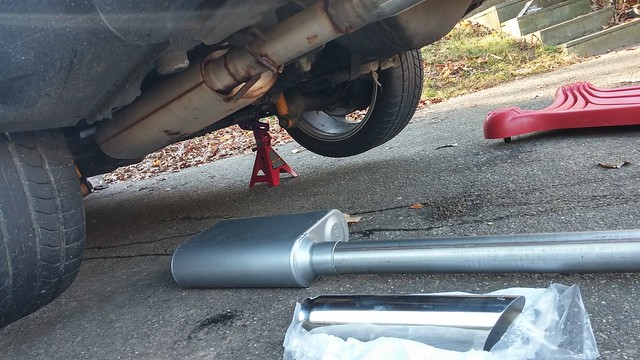
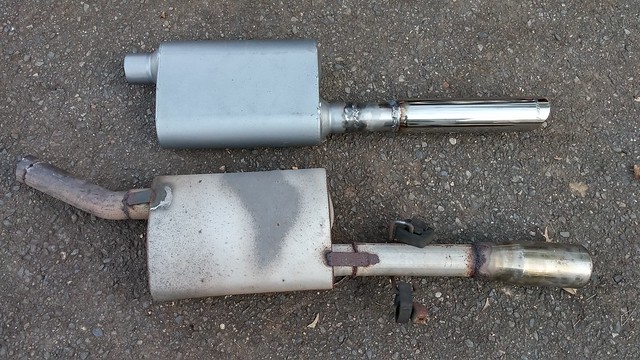
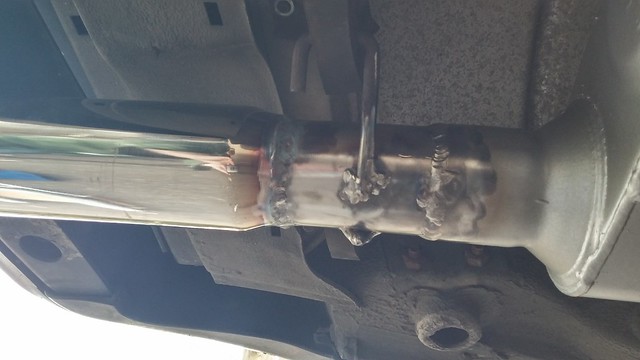
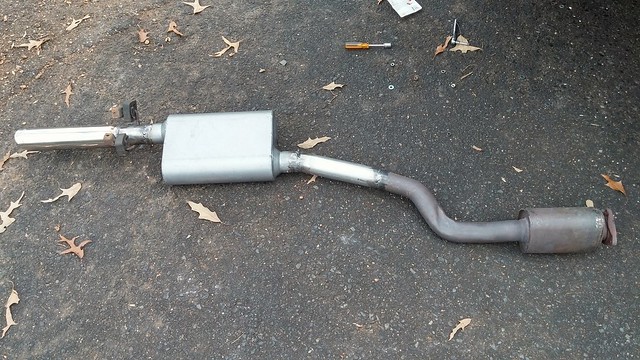
Next is to replace the old muffler that was doing its impression of swiss cheese. The new one is a FlowMaster Super 44 with a 2.5" inlet & outlet. I also got a weld-on Flowmaster exhaust tip and some stainless 2.5" tube from Summit Racing.
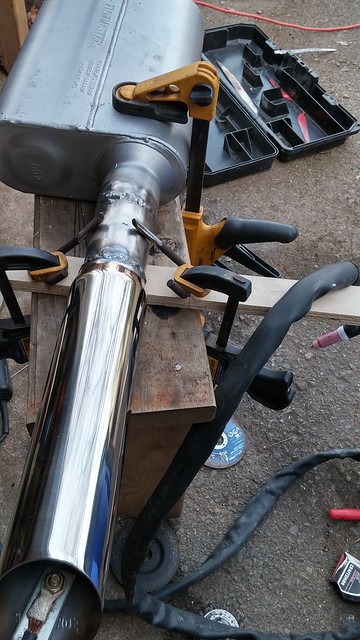
This is my first TIG project ever, with only YouTube instruction. So please be gentle. Yes, the welds are butt ugly. I know.

Seriously, if you take pride in welding or something like that, you might want to skip this whole post and save yourself some unnecessary anxiety. But I can say that I DIDN'T weld the old one together. That was pretty ugly too! (hello Pot, Kettle here!).
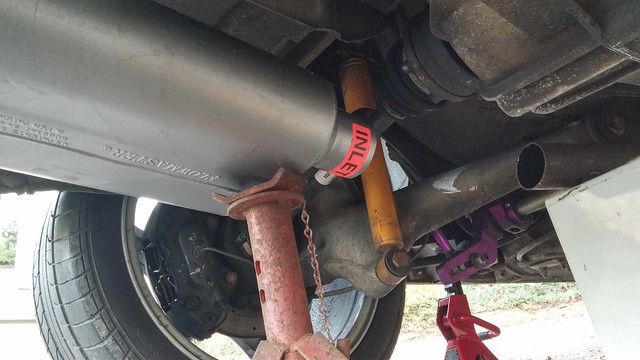
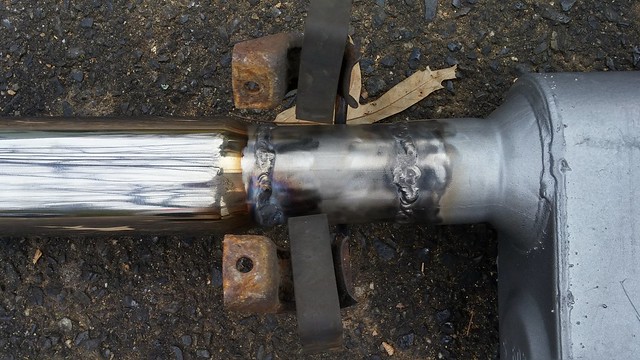
Here I've got the hangers from the old muffler clean up and clamped 6" apart to align with the hanger locations on the car:
And here they are in the car, on the first of about ten times I had to hang it and bring it back down.
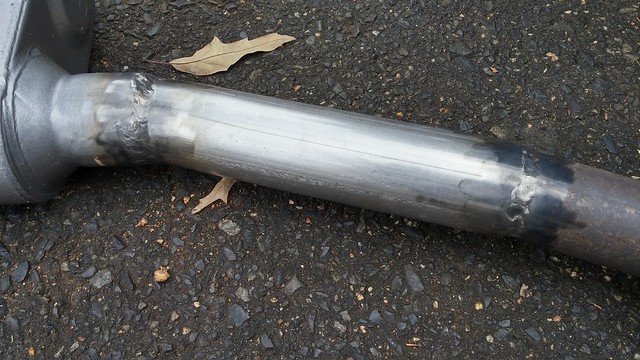
I used some Permatex Red RTV to seal the metal donut ring between the test pipe flare and the tail pipe flare, which worked out pretty well. The car sounds really angry. I mean it's impressive. I was hoping to smooth out some of where it gets really loud at certain RPM's. It still does that. But it doesn't sound quite so farty anymore. It's a really nice sound. I'll try to get some video up soon.
I still wonder if there aren't holes in the headers and/or the test pipe. One thing I'll do is try to seal the flange between those two sections. I like that it's still fairly loud, but it sounds a LOT better than before, so I guess this was a success. We'll see how it does on the track in the spring.

Nice! I need to do my exhaust soon. Quite rusty and very loud.

Those welds look damn good for a first time IMO! What welder are you using? I have been wanting to try TIG.....
In reply to java230:
Thanks! I guess I can only take that compliment once. From here on out, there just won't be any valid excuse for that kind of ugly.
Anyway, I hesitate to mention what machine it is, since it's a very capable one, and the welds above aren't the machine's fault. It's an Everlast PowerArc 160STH inverter stick and tig welder. It came with everything except the argon bottle, filler rod, and tungsten, all of which you can get at your local gas supply place.
Back in 2012 when I got this, it was $407 but these days it's selling for closer to $450 on various online outlets. Jody from WeldingTipsAndTricks.com had this to say about it:
General description
http://www.youtube.com/watch?v=CblpZF54_uM
Stick welding
http://www.youtube.com/watch?v=gJW2SDSxL2M
Tig welding
http://www.youtube.com/watch?v=MkjthiUUKRc
And if you haven't visited his website, it's a great resource. I watched most of the tig videos years ago but obviously I've forgotten all the tips and tricks about TIG.
Also, I should mention that I bought a pedal for the welder but it didn't come with the correct 7-pin connector for my welder. I now have the correct connector but I haven't swapped it for the one on the pedal yet. So the work above was done without the benefit of a foot pedal. It was all-on, or all-off. So I couldn't do the tapering technique that Jody speaks of, which resulted in little pits that I'd have to smooth over later after they cooled enough.
When I wire up the new pedal and successfully use it, I'll share that info including the pin-outs.
Thanks! I've been looking at the Chinese TIG machines, they are so cheap these days.
Those welds look even better for no pedal...

I continue to follow your build and your updates. Great car, glad to see it being used in anger.
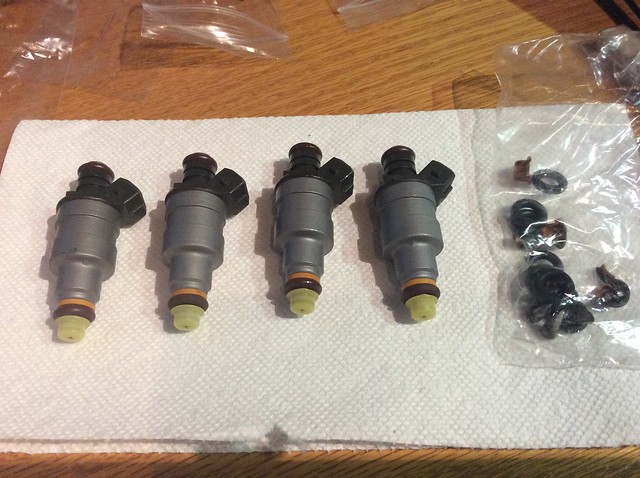
On a balmy New Year's Eve, I got home early and tore apart the fuel rail. I want to get down to the problem of the hesitation on acceleration, and so I decided to start with the injectors.
I removed the injectors and cleaned them up a bit. Before:
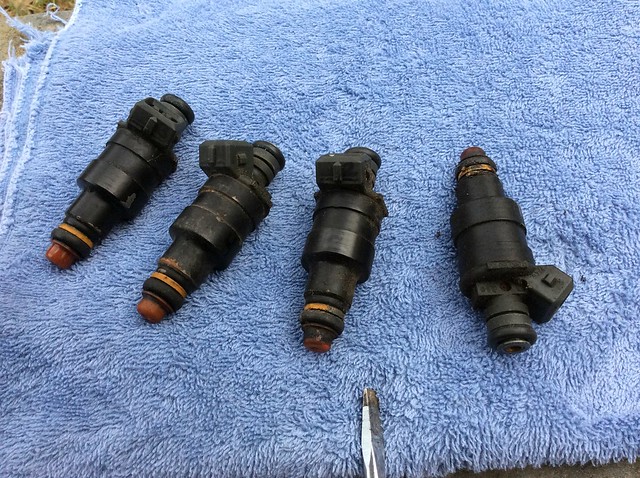
After:

I packaged them up according to instructions on Witchhunter Performance's website. They'll go out with Monday's mail.
By the time I get them back, the car will have a new fuel filter installed, and I may even get the intake off of the car to see about all the vacuum hoses underneath it. I don't really think the injectors are the main culprit, but I thought it might be nice to get them cleaned and tested as much for fun as for peace of mind.
My injectors are still at the cleaners. In the mean time, I replaced the fuel filter which was a really straightforward job. Easy access, and the fittings loosened and tightened easily.
Then I tackled the intake with the goal of finding something to blame for the stumbling on acceleration.
First I took off the hose between the air flow meter and the throttle body. The hardest part about that was removing the line with the blue arrow from that hose.
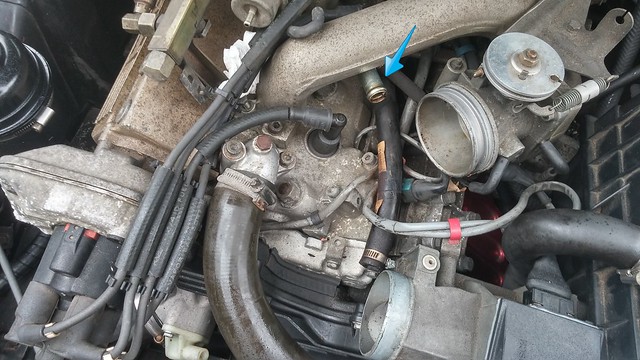
Here's the fitting that it plugs into. Pretty oily in there...
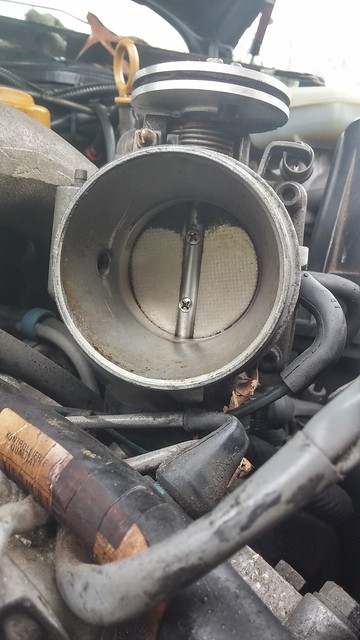
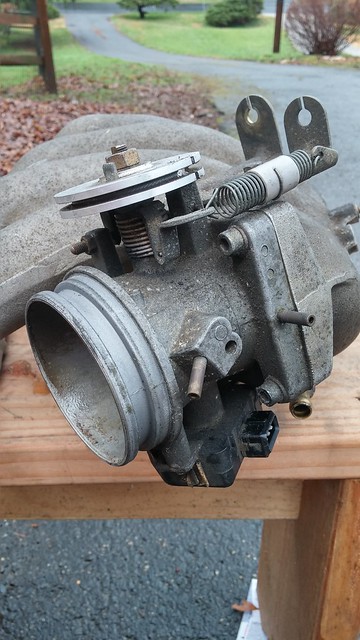
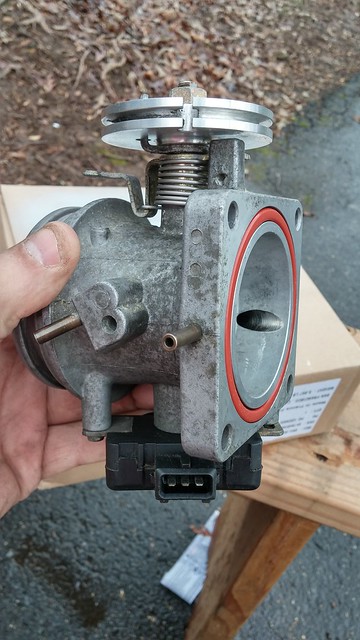
Here's what the throttle body looks like. I'll be cleaning that up, but it's not too bad. I will also be inspecting the throttle position sensor on the bottom side of the butterfly valve.
I'll spare you all the pictures I took in order to document the locations of everything, but here's something pretty cool. I used a piece of foam (the kind you wrap around 1/2" plumbing pipes) to keep my intake allen head bolts from getting lost. They all came out nicely, possibly because I followed procedure BOLT-01, which instructs you to "wake up" the bolts with a few blows of a hammer and socket extension. It must have done the trick, because I didn't need any easy-outs. Yay!
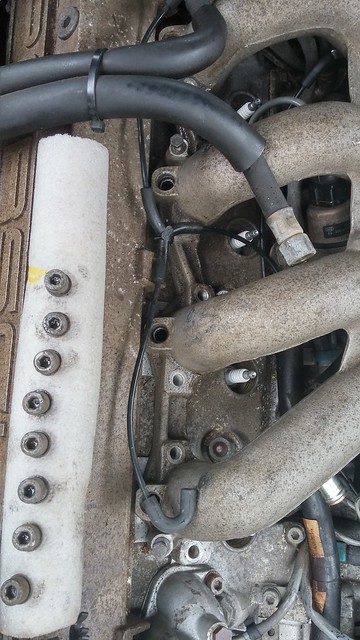
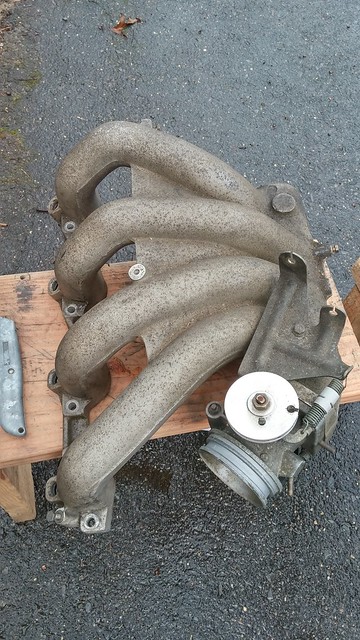
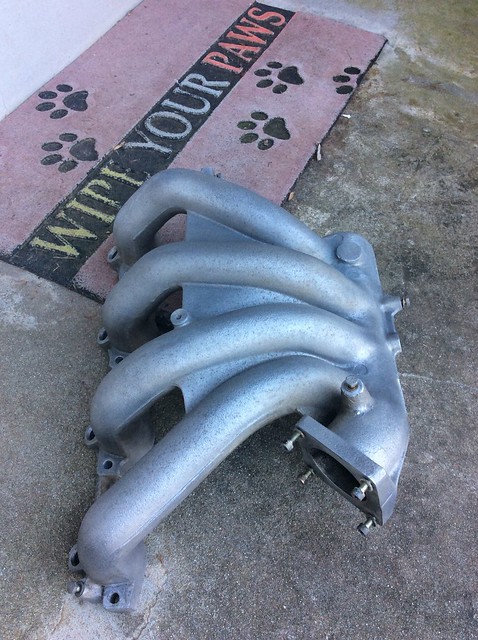
I finally got down to the removal of the intake manifold, and there was one last connection. It's the most inconvenient location!
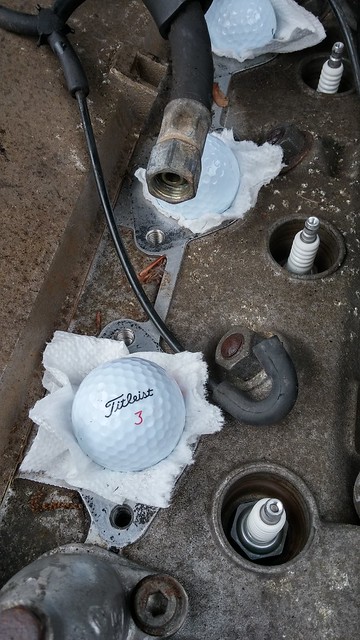
With the intake manifold removed, I plugged up the ports with whatever was handy. I like to run Titleist for plugging ports. I find it gives me the distance I'm looking for but with the control I need.
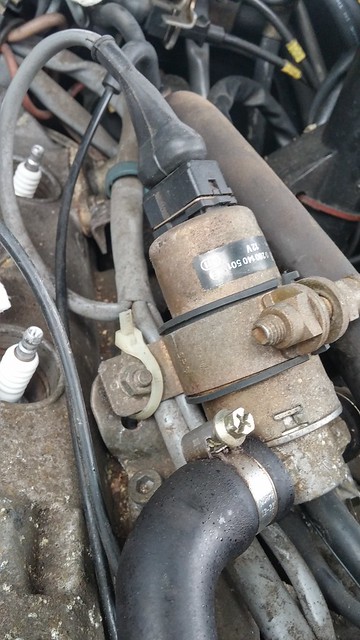
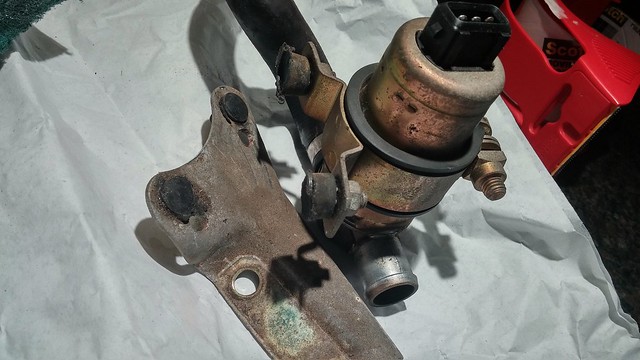
The idle control valve was held on with zipties. There are rubber bushings in between that seem to be broken like a motor mount might be broken.
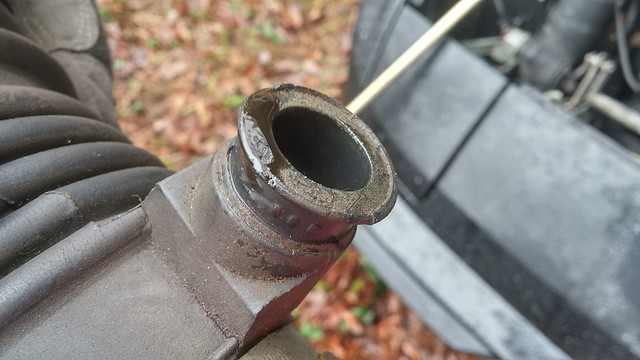
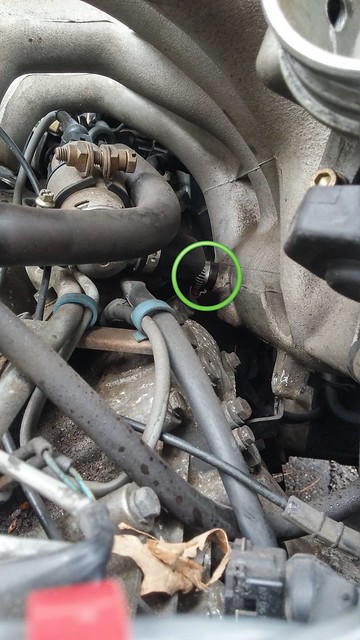
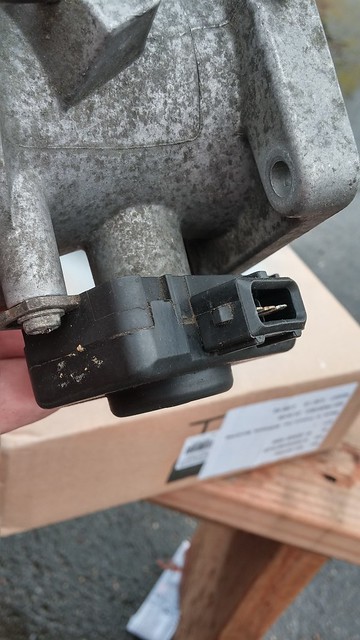
Like I said, I was hoping to find a loose connection somewhere. Here it is.
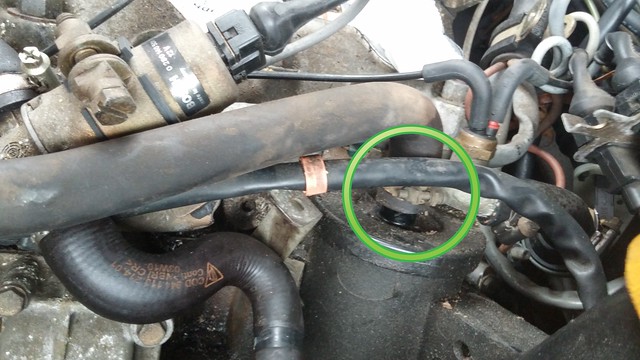
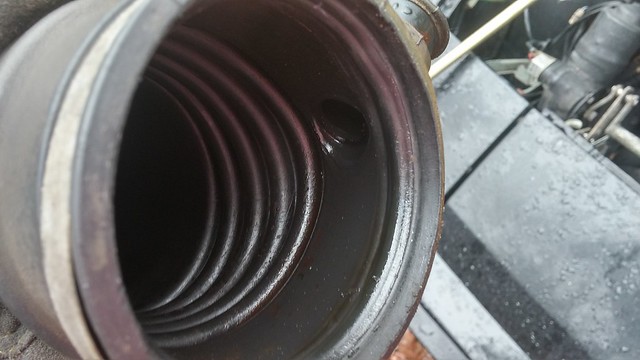
This connection easily lifted off and had lots of play and wiggle side to side. It was definitely not air-tight. And it goes directly to the air intake hose after the air flow meter. It looks like the hose is intact, so all it should take is a few turns on that hose clamp when all is put back together.
Here's hoping that was the culprit!
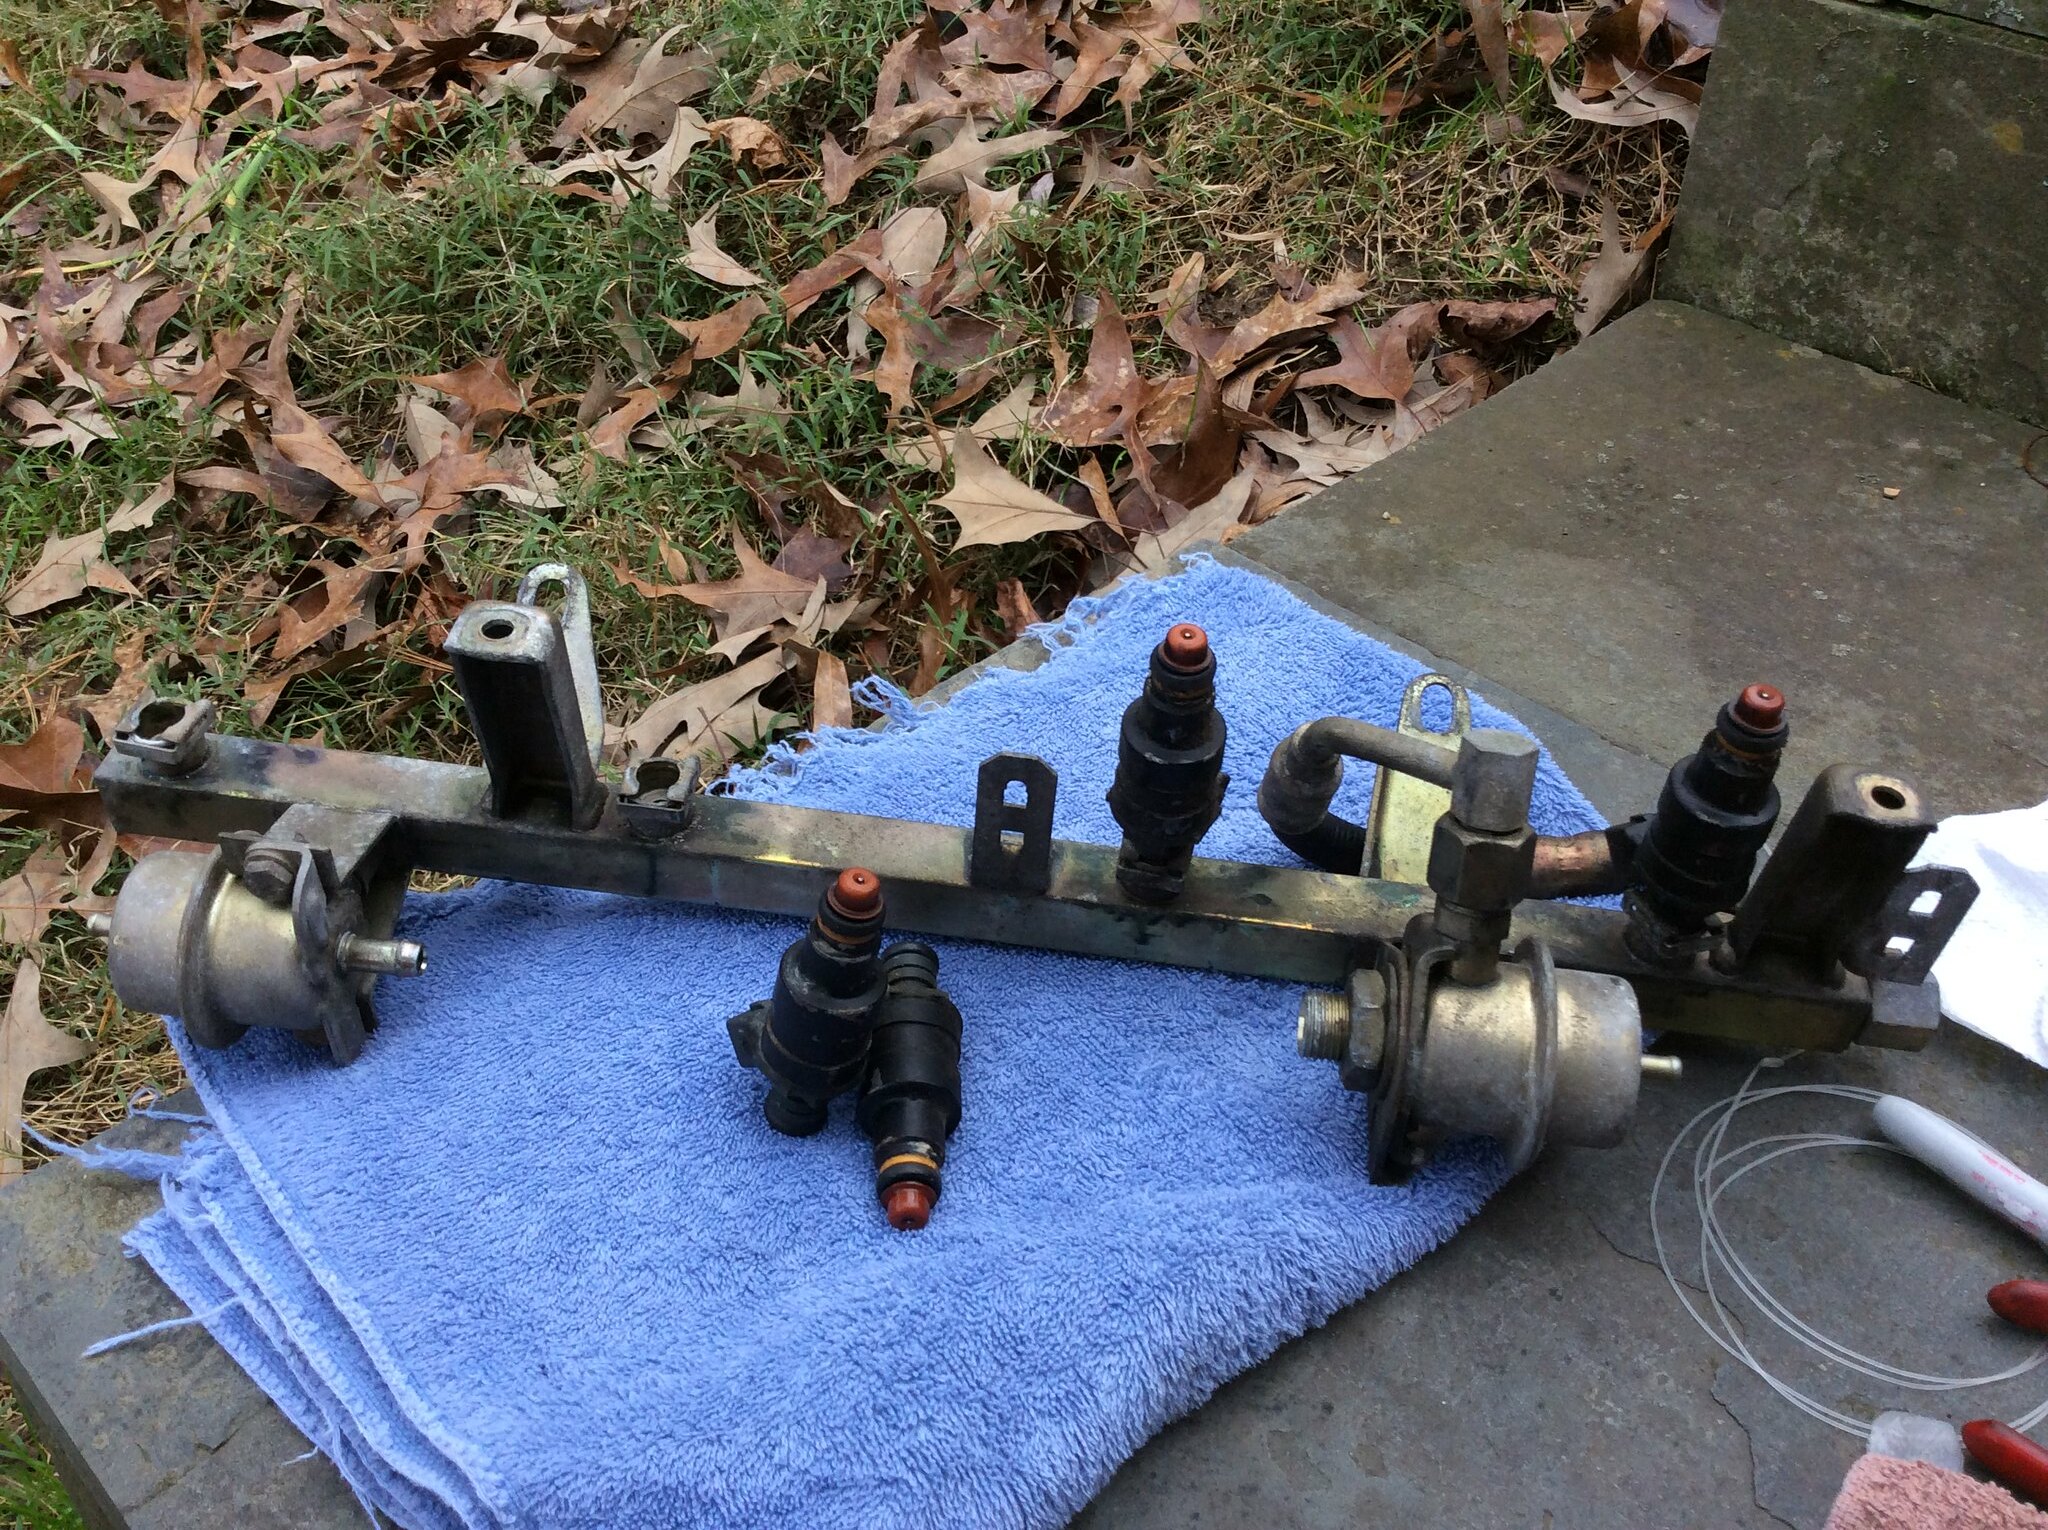
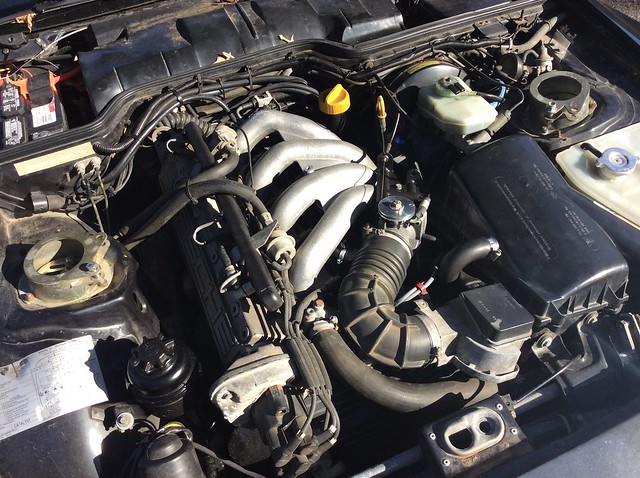
One last photo: The operating arena. The patient awaits its injectors for re-assembly.
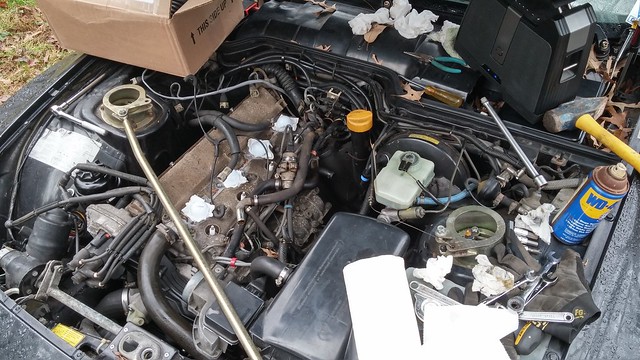
I'm so happy to have overcome my little crisis of confidence. Everything went well overall, except I dropped a small washer while replacing a bolt into the manifold. It looked like it might have fallen into a gaping hole at the top of the clutch bellhousing. Why is that there? Fortunately I found it elsewhere, and I was able to retrieve it safely. Whew!
The injectors might take another week to get back to me. In the mean time I'll be inspecting the throttle body, the throttle position sensor, and the idle control valve. And I'll be ordering a new bracket for the latter.

Nice job. If you're like me, leaving so much undone is very difficult but it looks like you've done a good job of keeping things organized. Here's to a well- running toy when you button her back up!

If you want to ditch the electric sunroof mechanism, you can grab a set of manual latches from a 924 and swap it into place once you remove the electric parts.
Another option is to do what the racers do, simple tabs bolted to the roof after removing all of the mechanical bits. Sunroof doesn't move unless you pull the tabs off.
Thanks guys. I've started cleaning things up starting with the throttle body. Here are a couple pics prior to disassembly.
After cleaning the throttle body with Simple Green, and thoroughly rinsing it, I'm not holding out much hope for the intake manifold. It doesn't look much better than before with the discoloration of the aluminum. I was hoping it would brighten up. I might go get some old-school mag wheel cleaner for the manifold.
But the insides look a lot better.

The throttle position switch operates properly, according to Procedure FUEL-06 and my ohmmeter.
Here's the look I'm interested in, of course. I think that wheel cleaner idea is looking pretty good.
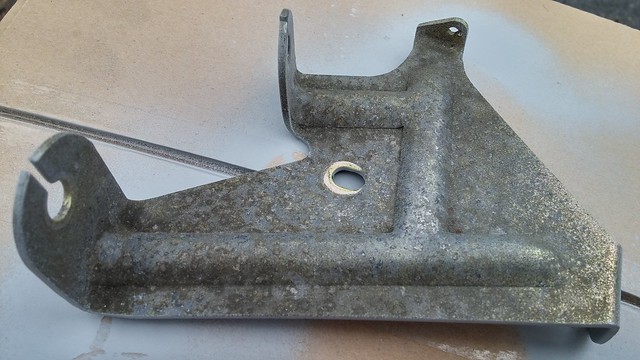
Just cleaning up the throttle cable / return spring bracket wasn't going to cut it. So I shot it with some paint.
Before (actually, it's after I scrubbed the crap out of it). This is actually "clean":
After:
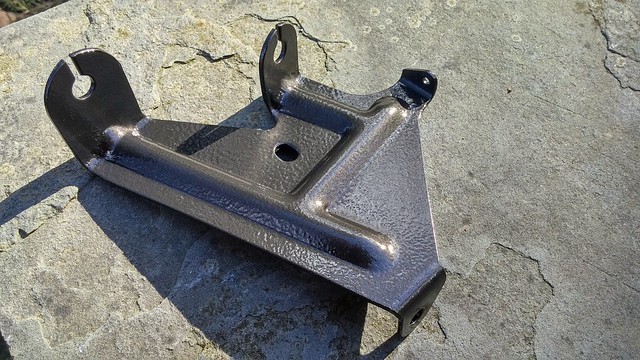
I love the "Hammered" paint look.
So I bought and tested a plethora of abrasive devices to clean this casting.
Copper dish scrubbers.
Heavy duty Scotch Brite pads
Brass brush
Small stainless steel brushes (fine)
Stainless steel wire wheel, used without a drill
Nylon brushes
I already had some decades old wheel cleaner, marked for all finishes, so it was pretty mild stuff. It helped, but you really have to be sure you are rinsing all of it off.
I was a bit afraid of the copper. Sure, it won't rust. But I had visions of a manifold with a nice green patina. Nope.
The stiff bristles of the wire wheel left visible scratches, even when using it lightly in your hand. Nope.
The Scotch Brite quickly began to Give the metal a shine by taking off just the peaks of the casting. It was going towards a really shiny look - which I don't want. The copper scrubbers seemed to be going in that direction too.
The brass seemed to work pretty well, but it would have taken forever. Gobs of elbow grease.
The best tool ended up being the fine-bristle stainless brushes that I found in the welding section at Home Depot. If you can call it a section. But it was nice that the first associate I asked was able to locate both these and the larger ones in the paint aisle. Score one for HD.
With a soft touch, with or without wheel cleaner, wet or dry, I could get rid of most of the black spots without perceptibly altering the look of the casting. I kept a circular motion with very small circles, and I tried to keep moving to avoid shiny spots.
The following photo is the result of about an hour with the piece, after tests in the least noticeable areas. I may go a little farther overall to further reduce the appearance of the spots, but I definitely don't want to go too far. I don't want to destroy the texture.
After I have it where I want it, I plan to clean it with water and a bit of Dawn, dry it thoroughly, then hit it with some Lemon Pledge to seal it. Then a bit of Old Spice after shave so it smells nice.
Really, what else am I going to do with that stuff?
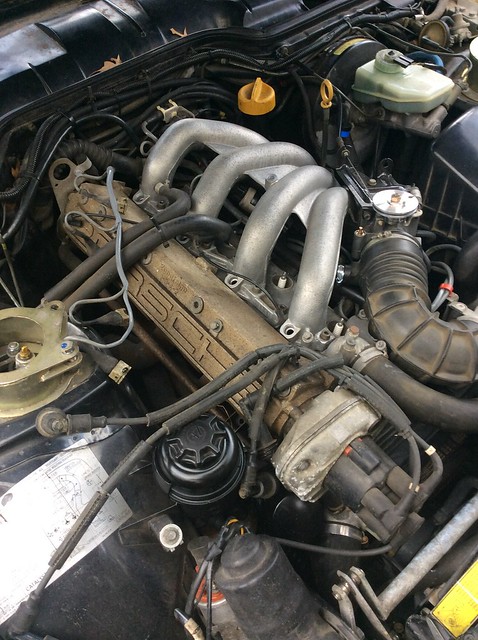
Saturday before last, I wrestled the intake manifold back into the car, having cleaned up a lot of items, including the aluminum head beneath.
Even though the previous zip-tie solution was a perfectly functional one, I coughed up $20 for the replacement pair of stupid little vibration isolators that hold the idle control valve in position. It felt good to install the OEM part, I guess.

I didn't bother with the Lemon Pledge idea. But the manifold did brighten up quite nicely. Here is the way it sits today:
Under more than a foot of snow, that is:
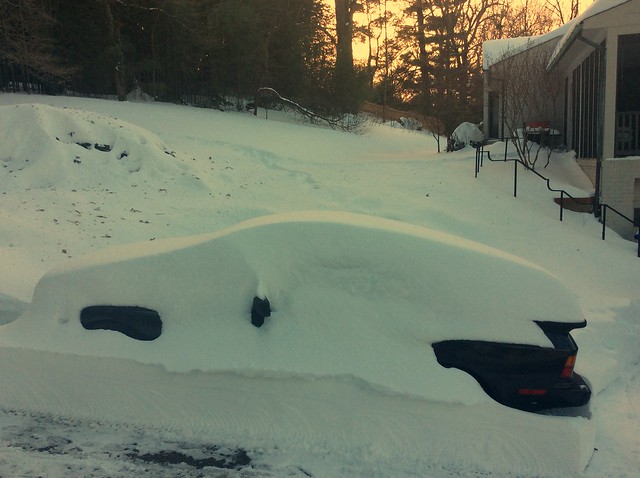
SnowZilla hit the DC area and made it a bit difficult to continue installing the fuel rail. I hope to get to this a little later this week.
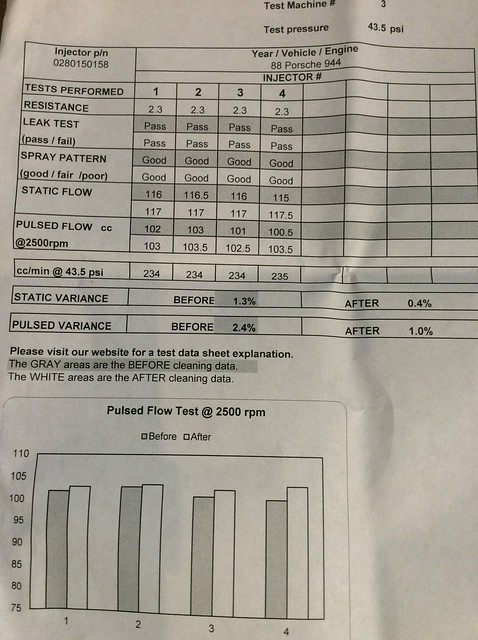
Meanwhile, the injectors came back and they look pretty good.
They weren't bad performers before the cleaning, however. So they're definitely not the cause of any of my issues. It's nice to have peace of mind, though.
Ok folks, the car is back together, and it's better, but not perfect.
We've had a lot of melting around here and I had the chance to put the fuel rail back together and install it over a valve cover that's been brightened up like the manifold. I do see it all turning to chalk over the next few weeks, though. It has already started, and before long, I predict it will look like poo again. I probably should have tried the Lemon Pledge thing before I put it back together.
Also this morning I installed the strut tower brace (not shown), and I tightened the alternator V-Belt. At my last track weekend, it would squeal for a minute or so every time I started the car. Very embarrassing.
So the car runs! It seems to be more responsive and it definitely doesn't hesitate like it did before. But it does still have some odd idle issues and it even seems to miss a cylinder for a while after it gets revved. I have video of pretty much all the use-cases that are annoying to me, right here:
https://www.youtube.com/embed/PK2_9lqnFrY
Then again, it sounds pretty bad-ass too.. I think it will actually sound really good at the track.
I did this video with my Canon Rebel T2i with an external mic from Audio Technica (AT8024). I kind of like the sound - you can hear some really loud birds at the beginning.
After the sound in the video, I took it out on the highway for a spin, just to be sure everything was functional. From the video, I noticed that the driver side taillight seems to be full of water. Boo!
Any help you guys can provide with improving the behavior of the car is much appreciated! Thanks!
You'll need to log in to post.


