1 2 3
dcteague
dcteague New Reader
6/29/14 7:11 p.m.

I started this build about a year and half ago and have been slowly tracking progress over time so I figured I’d post info now that its’ almost ready to go, and document the remaining work over time as I modify things and buy new presents for myself.

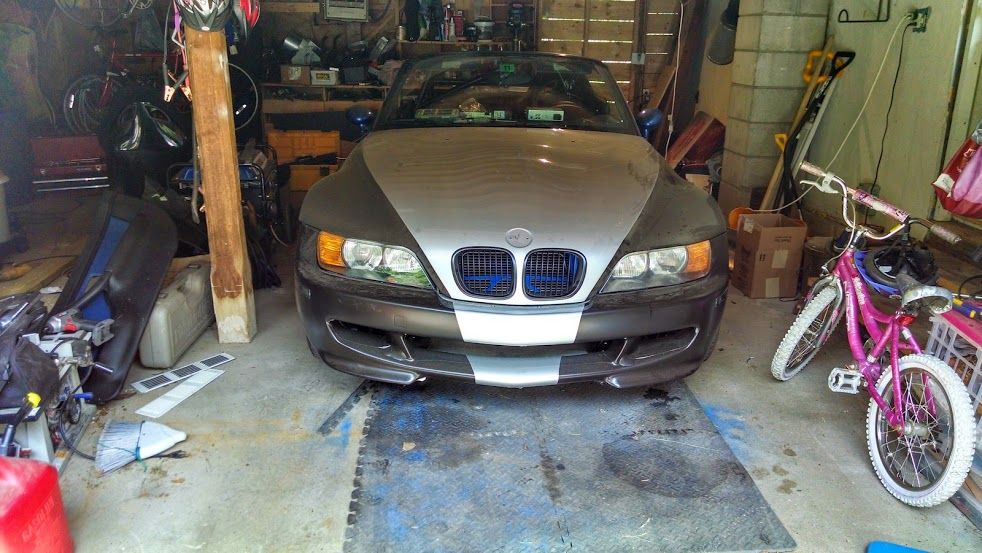
I bought this project car after having abandoned a lotus replica build that I just couldn’t get going. I had previously owned and tracked an E30, which I loved, and since I’ve always wanted a convertible track car, the M-Roadster seemed like a great option. It’s a similar chassis with a bigger engine. The only other option I had been looking for was the S2000. For financial reasons, I decided I would just get something that needed work and was cheap – auctions became a regular web search for me once I knew the 2 cars I would target. I finally found my car of choice – the car had a front end encounter with something but it was mainly cosmetic damage. Cost was minimal through an auction since my main competition was buyers looking for the S52 engine to resell – I was able to pick it up for under 3K, it was a bargain in my book given that I had sold my lotus project for 2k and had a car fund I had built up from parting my e30 out. Too much $$$ in this project to make it a challenge car, but that wasn’t really my goal anyway.

I drove the car off the lot and directly onto a flat bed and took it home – I promptly removed all of the damage – measured for square and was pleasantly surprised that the accident hadn’t caused any frame damage. The flange on the impacted frame rail was slightly bent but nothing a hammer wasn’t able to straighten – it was now time to rebuild.

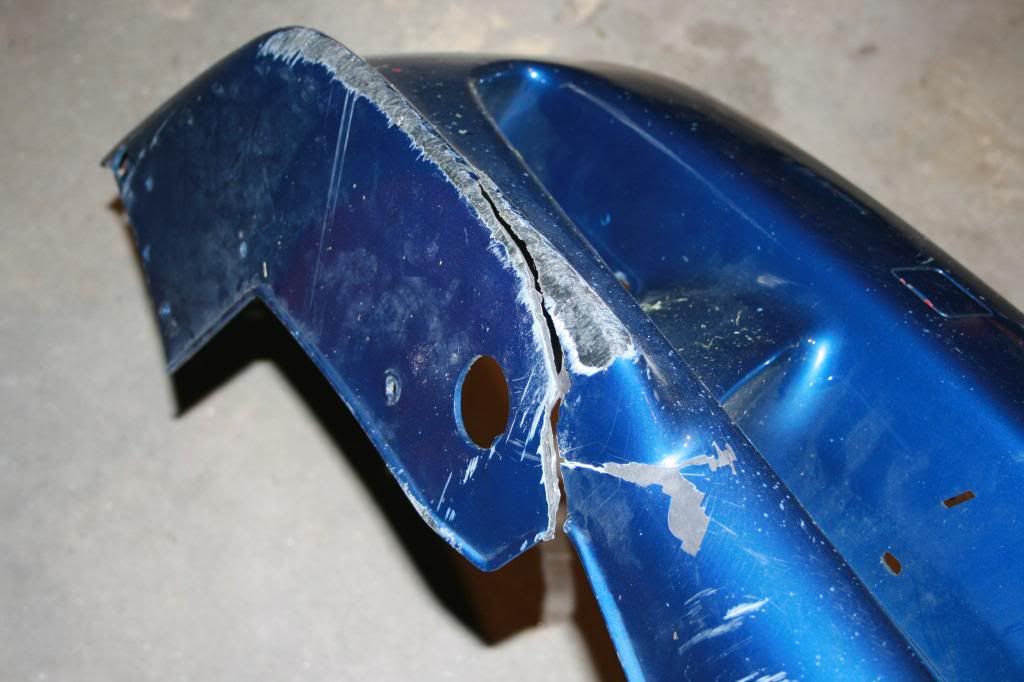
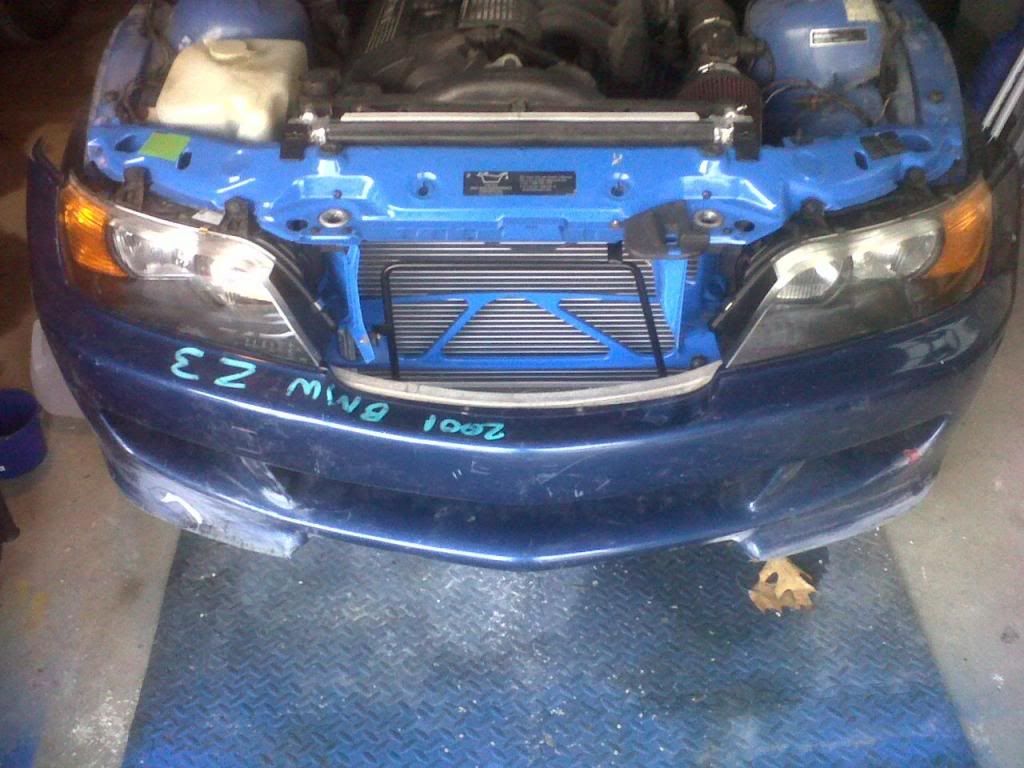
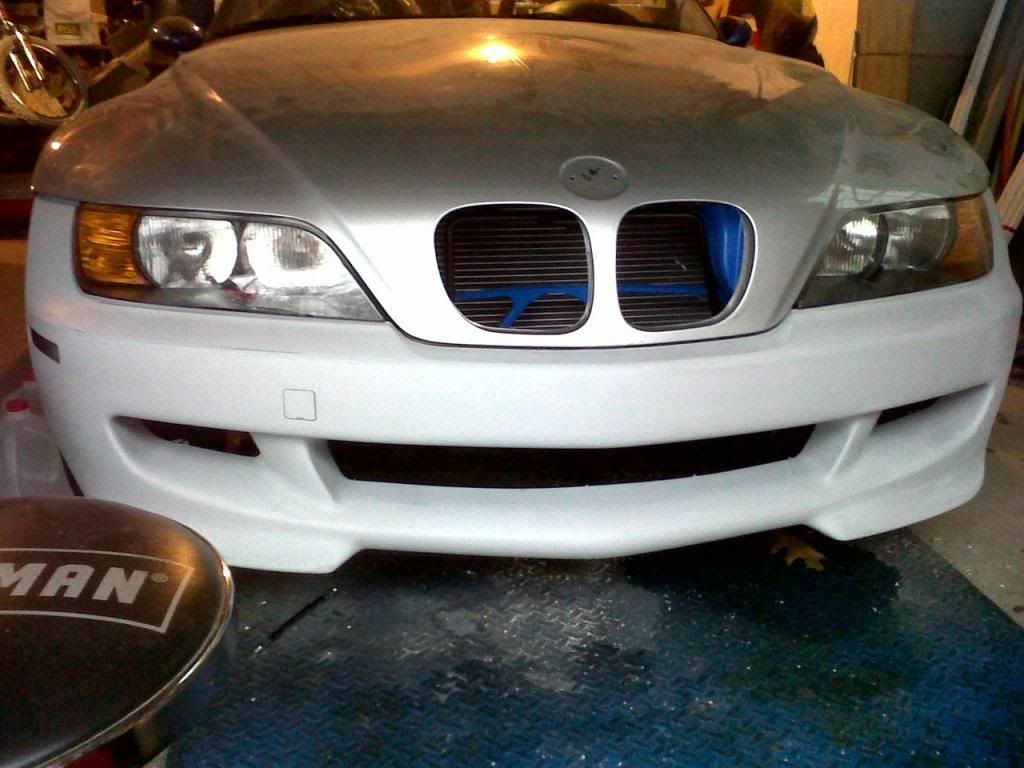
The accident had ruined everything forward of the fan (radiator, core support, both fans, bumper support, bumper and hood, a headlight, and the wheel well liner on one side. Junk yards provided all the parts I needed to replace everything – along with Ebay finds. Anything meaningful was upgraded – and while I had the front end pulled down to the frame rails, I took the opportunity to replace the water pump with a metal impeller and installed under-drive pulleys. At this point, I’ve installed silicon radiator hoses, aluminum radiator, aluminum skid plate, used bumper support, used bumper cover, used core support, and a used hood. I bought a headlight from ebay that was badly scratched and hazy, and polished it back to clear without much effort. Here are some shots pre and post buy/repair.

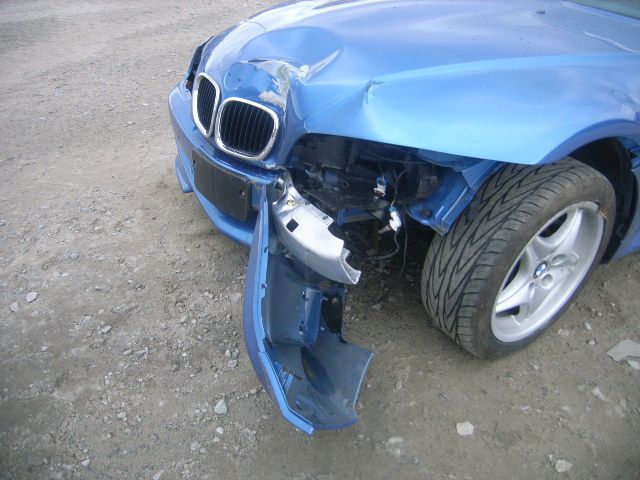
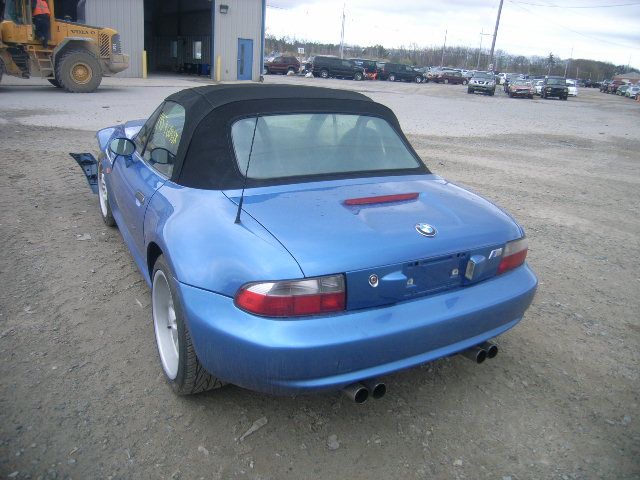
This was at the auction lot. Looks a lot worse than it was so I was lucky that probably scared some people away from the auction. The rear was perfect. Mileage is just over 100k, all rims were straight without any scratches, and the convertible top had no rips. Interior was in great condition aside from the coffee the driver spilled when he got into the accident. All the interior bits were great for reselling and making some money back.

This is the repair progress – should have taken a few more pics in between of the car once the frame rails had been removed but forgot. This is the newly painted core support and patched bumper post install – the bumper had a bad crack and road rash on the bottom lip I fixed with epoxy and rivets before sanding and repainting.

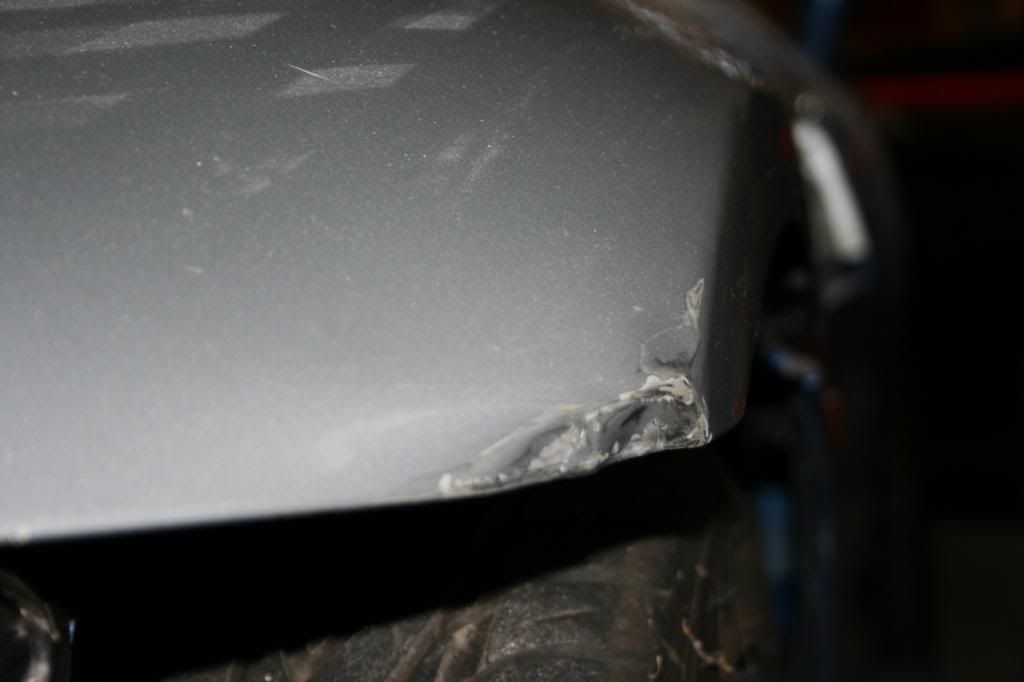
This was taken right after installing the hood – it had a slight ding on the driver’s side corner you can’t see that I repaired as well. This is the corner before repair.

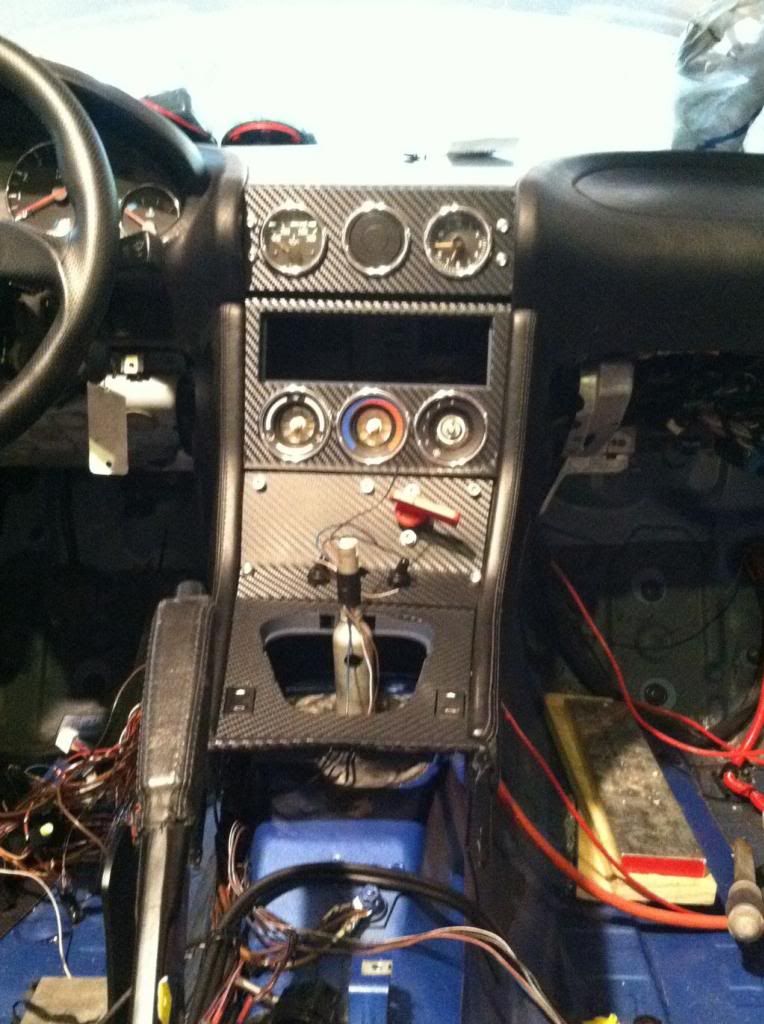
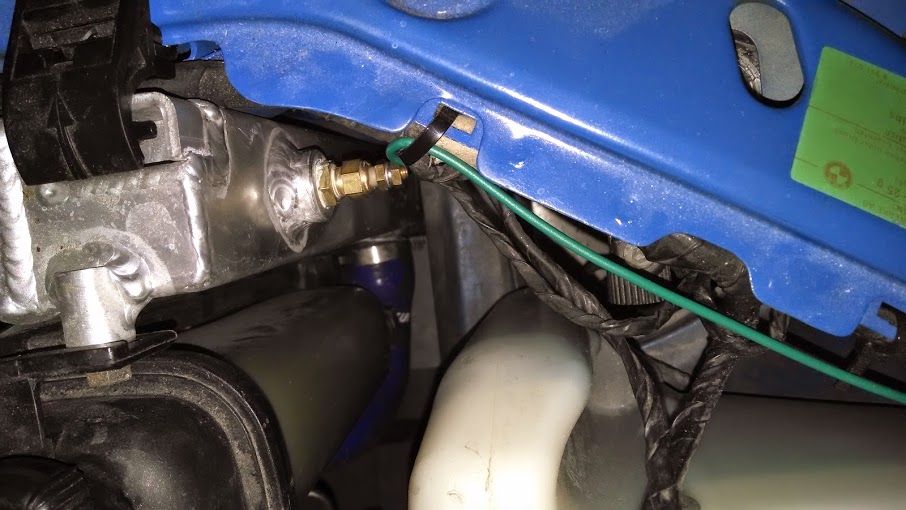
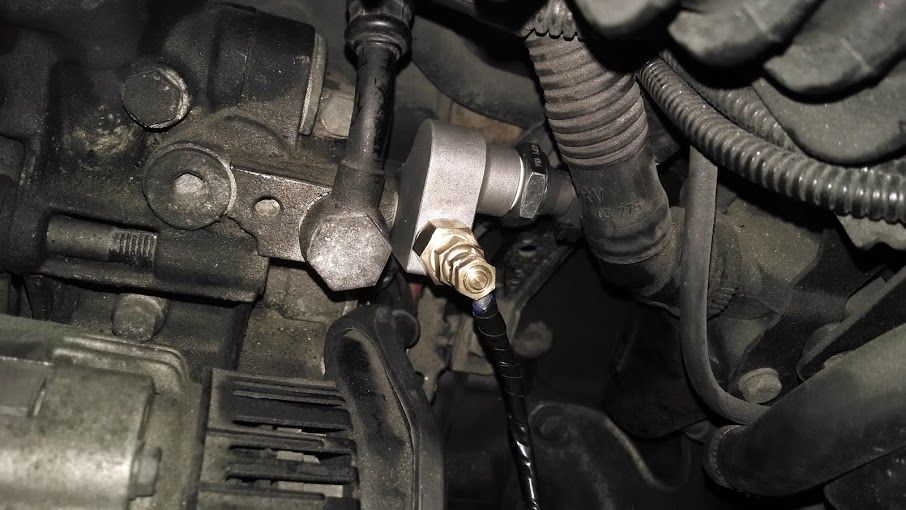
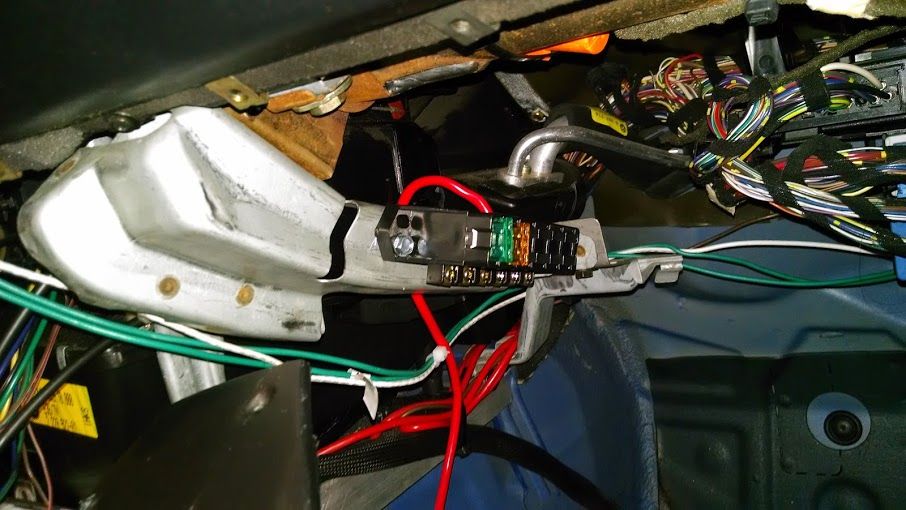
After doing some basic body work in prep for painting (which I later abandoned in lieu of vinyl as you’ll later see), I turned my attention to the interior and pulled all the carpet, roll hoops, seats, and the center section/tranny tunnel stuff. I decided to fabricate a panel to insert into the center console for an electrical kill switch and toggles for my gauges. I replaced the center vent with a panel for gauges and wired in a tri-alert system that is tied to a back-up warning alarm in case any of the 3 measurements go out of the norm. The toggles just turn the alarm on and the electric fan since I removed the old one and the associated auto-switching. I also had to put the hazard switch back since it was in the tranny covering, so it is also a toggle switch. The fan and gauge alarm are linked to 2 LED lights so I know their on/off. Here’s the center console before installation.

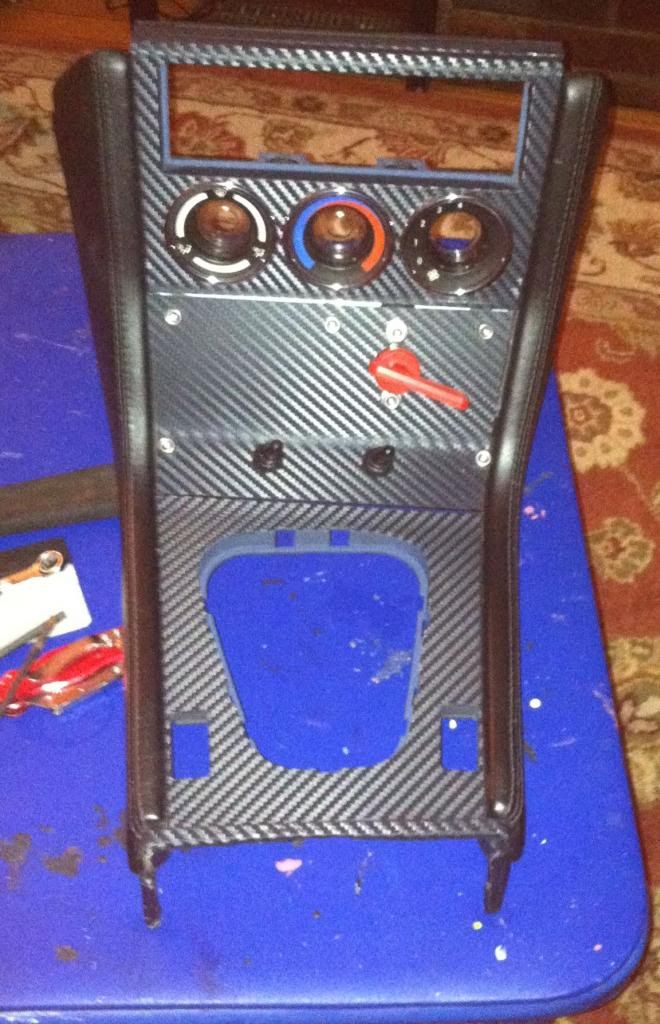
I hadn’t yet added the 3rd toggle to this yet but its next to the kill switch. I had to put an aluminum panel behind the kill-switch to give it some regidity, otherwise the plastic would bend, but its pretty solid now. I’ve left the other stock items simply because I will be driving this to/from track events, and who knows, maybe every once in a while I’ll take it into work.

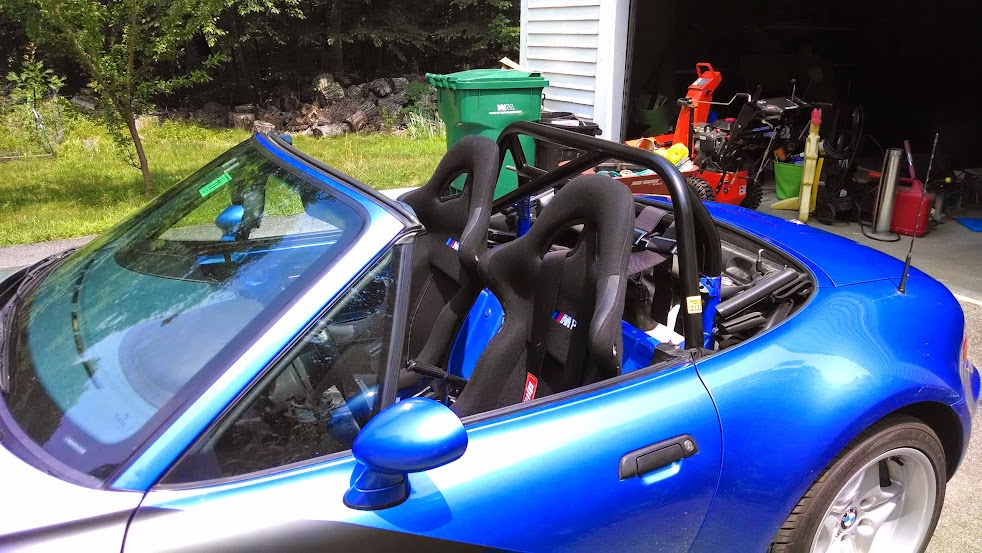
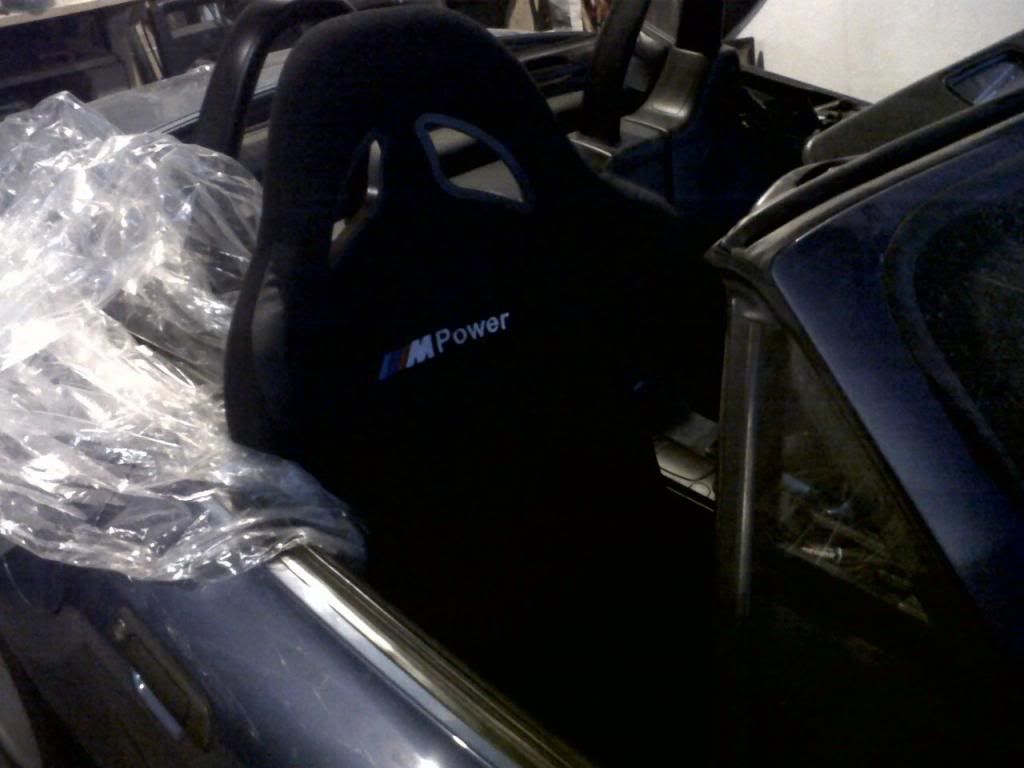
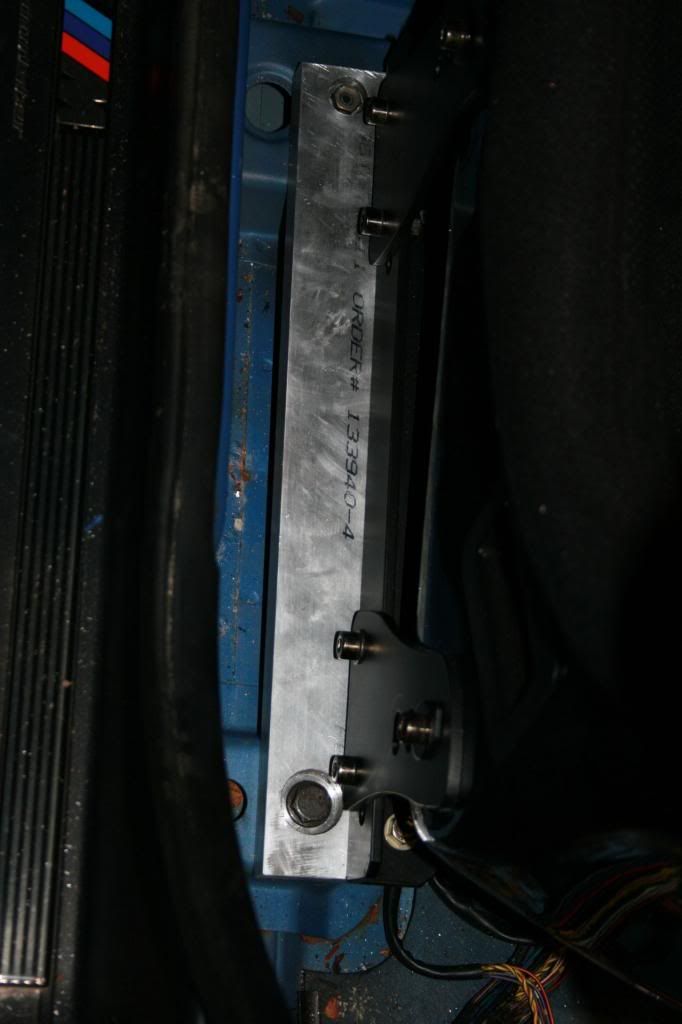
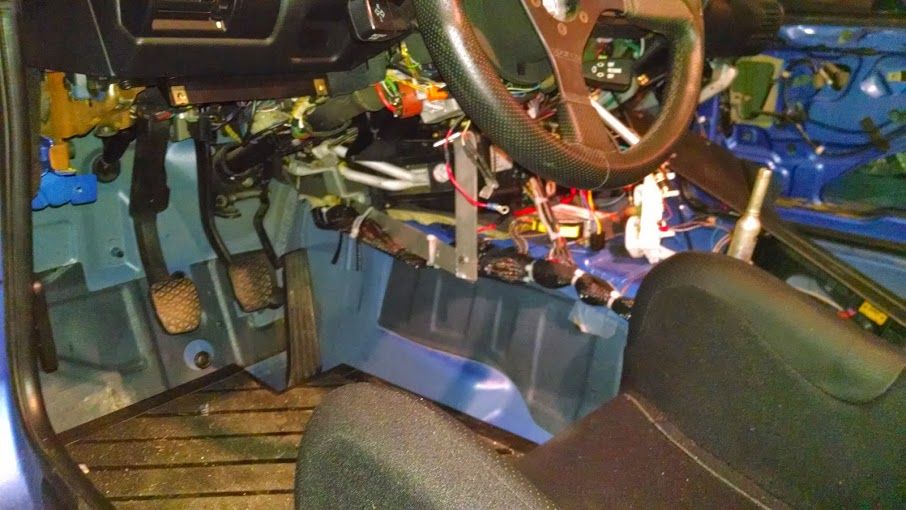
Next was the seat installation – I purchased 2 Bimarco seats and had the covering customized with the “M” logo – decent seats at a killer price - $900 shipped to my door customized embroidery, with brackets. They’re FIA certified and fit perfect (me), the car fit was not so easy, but I got them to work. I fabricated 2 seat brackets from T6061 Aluminum bars that allowed me more side-ways movement than anything I could find online. This was the only way to get the seat ears to fit over the doors. The window just clears them and I was able to get them pretty centered behind the wheel.

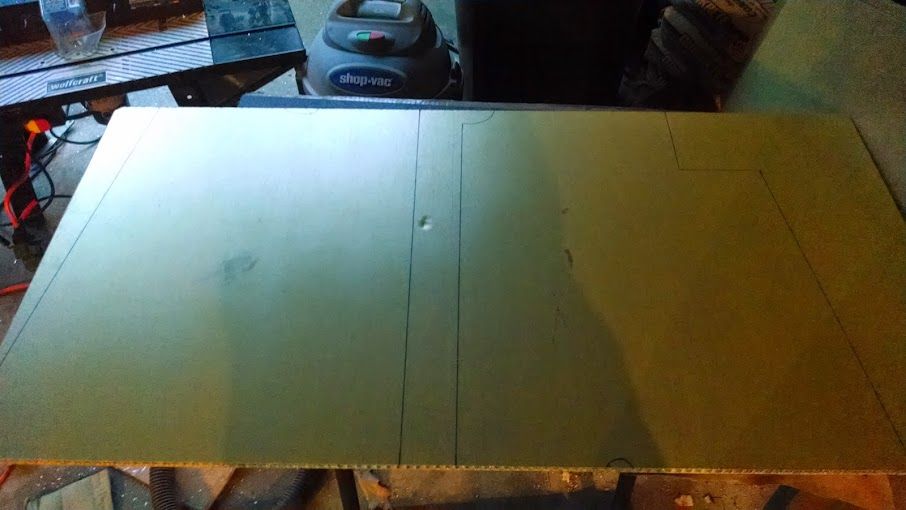
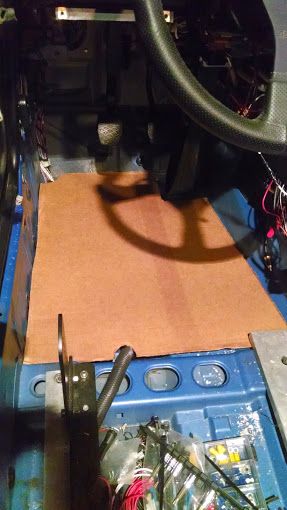
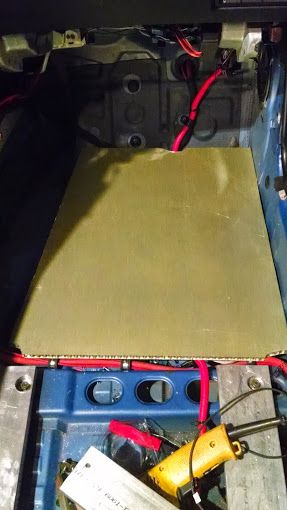
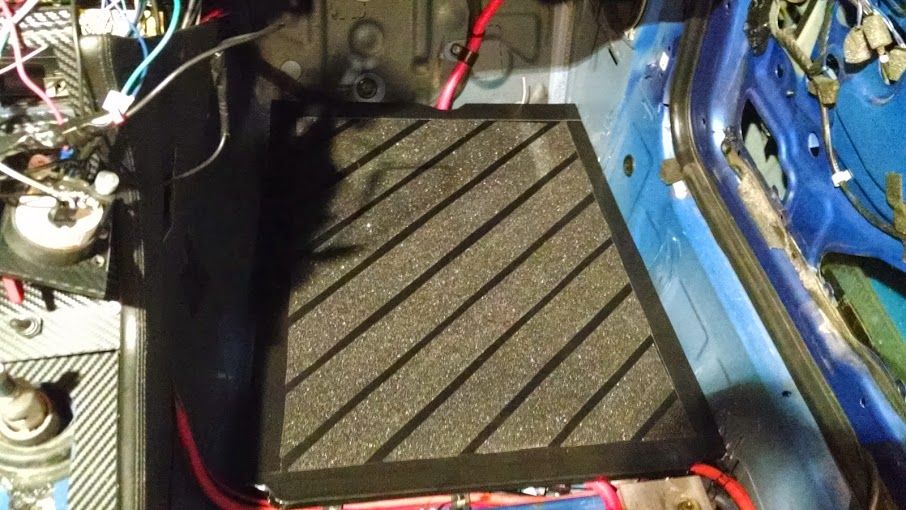
After the seats where installed I started work on the roll-bar installation – purchased the Hard Dog roll bar since it was pretty easy to install and had great feedback. It fit, but tight and the top just barely clears the upper bar. The most recent work involved the floor boards. With the carpet removed, the electrical wiring and plastic bits to protect them aren’t really ideal for feet. I purchased some aluminum diamond plates to use but after a while it just didn’t appeal to me. They were a bit flimsy and seemed difficult to work with in terms of cutting and shaping. Then I came across aluminum honeycomb boards – these things are awesome. Light-weight, very rigid, and you can use normal tools for them. This is 1 sheet of 3x4 that allowed me to cut out both sides. The shape was traced from cardboard templates I created – then just took my circular saw to them and shaped the rounded areas out with a router. Since the honeycomb and top/bottom layers are so thin, its like cutting plastic but the rigidity of these is much better than the diamond plate I had.

Once cut, they fit nicely. I rounded out some areas where the main electrical wiring looms run to ensure they don’t cut into any wiring.

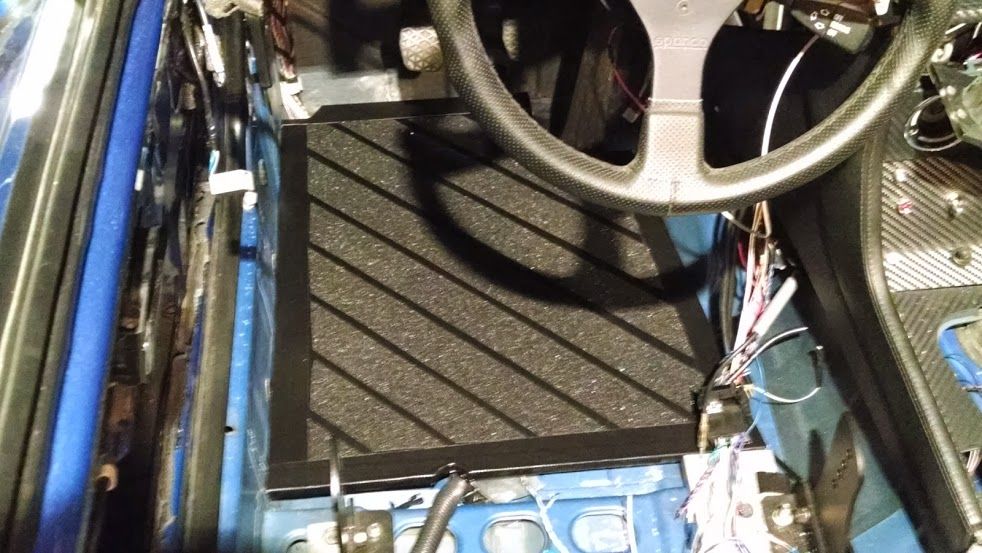
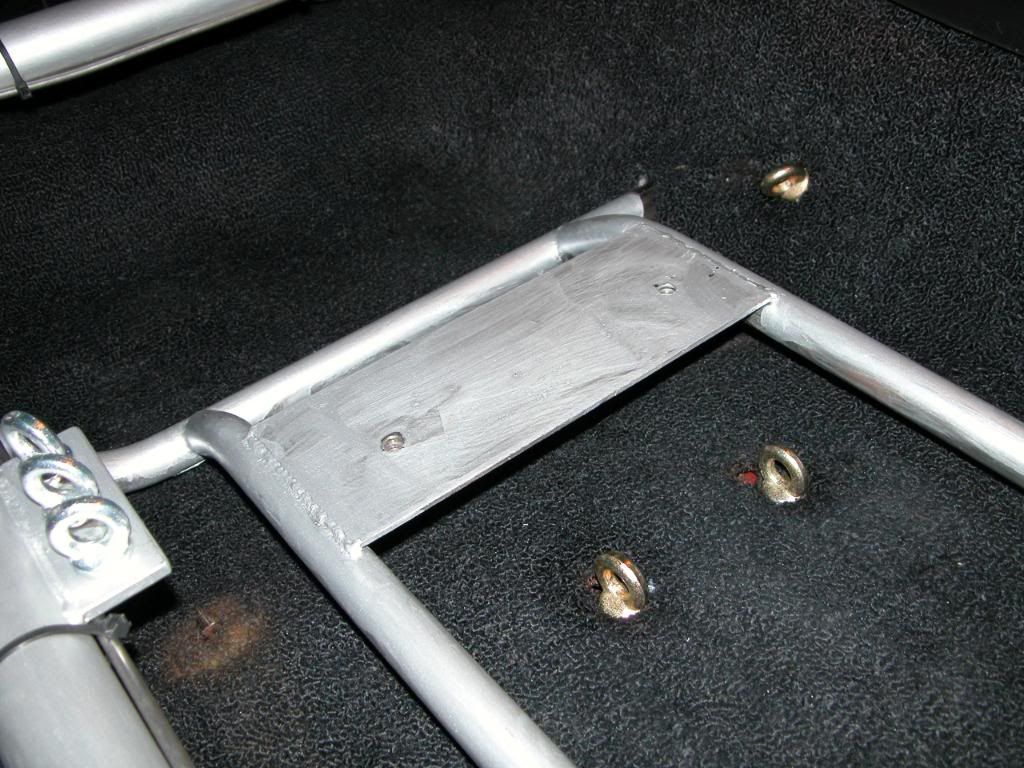
Once I knew they fit, I painted them black, covered them in grip-tape, and wrapped the edges with gorrilla tape. They’re bolted to small aluminum brackets I bent and screwed into the flooring.

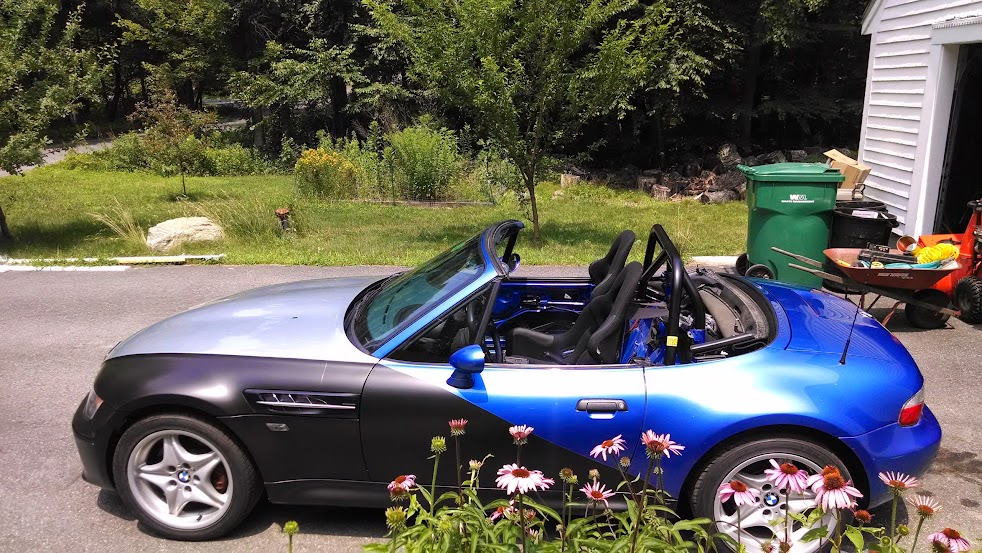
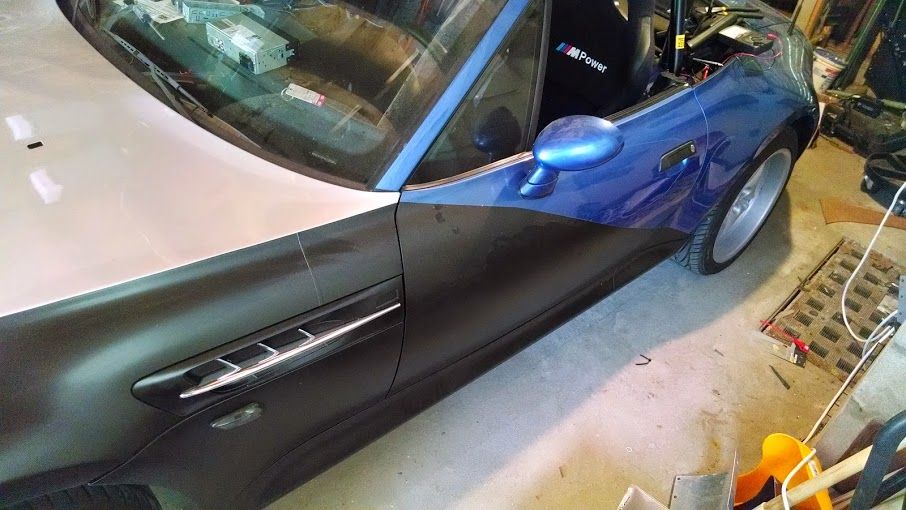
This is what it looked like part way through the vinyl work. This also shows the roll bar after installation.

The vinyl now cuts diagonally down the doors to finish off the line from the hood. I’m going to finish it off by putting another piece of matte black down the center of the hood so that the silver is more along the lines of 2 stripes, and I have silver vinyl I’ll put down the back down the trunk lid to carry the silver lines from front to back. I’ll then start to add race decals and numbering – more to come on that.

Excuse the messy garage – just getting to a point where I can drive it in and out of the garage so cleaning is next.

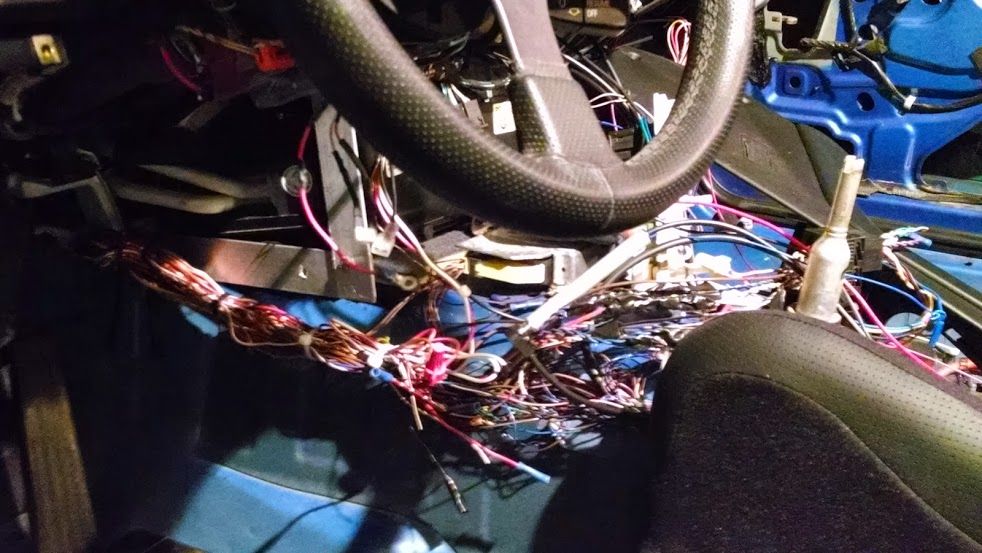
That’s it for now – have been working on cleaning up all the wiring behind the center console and will next begin to install new suspension and brakes before I finally get this out on the road.

Mr_Clutch42
Mr_Clutch42 HalfDork
6/29/14 7:56 p.m.

Looks good so far. How much more resistant to bursting are silicone hoses compared to rubber ones?

dcteague
dcteague New Reader
6/29/14 8:05 p.m.

I don't think its as much an issue of bursting as it is the ability to deal with heat. Actually, silicon tends to lose water over time in comparison to rubber - in most cases and probably even mine, rubber is fine. I just figured if I was replacing them and this was a dedicated track car, and with the S52 running hot typically, it'd be good to use silicon.

Woody
Woody MegaDork
6/29/14 8:11 p.m.

Wow, very good build thread so far!

dcteague
dcteague New Reader
6/30/14 8:36 p.m.

I spent some time tonight mounting the final gauge senders - I'm going to move the water temp sender - its on the wrong side of the radiator so it seems to send the wrong temps.

I mounted the oil pressure remotely - using a Lowes branded pipe clamp that I bolted to the shock tower using an existing fixed bolt. The Lowes bracket can be found in the electric section where you would find conduit and associated accessories. This is a 1.5" pipe clamp and it worked perfectly.

The oil temp and pressure are being monitored using a Bimmerworld distribution block that allows for 2 gauges and the stock pressure sender to keep the dummy light. Its a pain to fit, but once positioned correctly, it works great. I ran the pressure sender through a stainless line to the shock tower - this is supposed to eliminate wear on the sender due to engine vibration.

The water temp sender is mounted in the post-cooling side of the radiator - not ideal. I just received a water line adapter that will require I cut into the hot side of the water hoses - not sure I like this either but it'll give me more accurate readings. Here are a few new pics.

The oil pressure mounted to the shock tower:

Water temp in the least ideal location:

The Bimmerworld distribution block - great but a pain to install.

dyintorace
dyintorace UberDork
6/30/14 8:47 p.m.

Great build thread so far! I would love to know more about where you bought it (presumably an insurance auction?). Any details you care to share would be great.

dcteague
dcteague New Reader
7/1/14 7:28 a.m.

The auction site that I found this on was copart. They seem to have a multitude of locations and luckily for me this car was less than a 20 minute ride up the street.

Giant Purple Snorklewacker
Giant Purple Snorklewacker MegaDork
7/1/14 8:13 a.m.

Very cool.

A quick note on the water temp sender - when you are trimming the excess hoses and other weak points you don't need on a track car - you can relocate that sender. Remove the hose nipple from the head (center, under the intake behind IAC motor)for the coolant that flows to/thru the throttle body. It's 12x1.5 hose nipple. Get an adapter for that to 1/8NPT and screw the sender right in (or buy the correct sender).

Also, If you have a lathe, you can cut, drill & tap the old nipple pretty easily to make an "instant" adapter but the tolerances are tight. You won't be able to pull it off with a hand drill.

Also II: If you have an aluminum t-stat housing you can TIG a bung for the sender right onto it. It's easy to access and any welding shop can hook you up for $10. It's in exactly the right place to source engine temp too.

dcteague
dcteague New Reader
7/1/14 10:42 a.m.

I opted for the hose adapter as an easy option to start - I did put the aluminum t-stat housing in when I rebuilt the front end so I'll probably go with the hose adapter for now and move it once I have to rebuild or replace anything major up front. The first option you mention is probably where I'd go first though - seems the most straightforward.

Rad_Capz
Rad_Capz HalfDork
7/1/14 11:22 a.m.

Great build! Where'd you get the aluminum honeycomb board?

dcteague
dcteague New Reader
7/1/14 11:45 a.m.

Ebay - its actually pretty cheap stuff. Was cheaper than the aluminum diamond plate panels I bought from Lowes and its significantly more rigid - a bit thicker than the diamond plate, but its much thinner than carpet. You can buy it in different thicknesses - mine was 1/2" thick.

Rad_Capz wrote: Great build! Where'd you get the aluminum honeycomb board?
dcteague
dcteague New Reader
7/2/14 7:15 p.m.

Tonight's work effort is going to focus on electrical wiring - my favorite type of work .

I have the center console setup to allow for switching of my gauge alarm system, hazard lights, and aux fan. My plan is to wire in one of these from a non-ignition source.

I'll then run separate lines from this fuse switch to each toggle separately so they're all separately fused. The hazard lights are already wired via their stock configuration. I'm going to run a power wire to my aux fan toggle, and another to my gauge alarm system. Hopefully once done I can clean up the wiring mess I've created pulling everything apart. I'll take some pre and post pics and get them up.

The pictured fuse block is really nice for the cost - the main power line pictured is close to a foot in length once un-packaged, and its a very solid piece. It is an Amazon order for $12 - ATC/ATO Fuse Block with 8AWG wiring. You can get them from DellCity too.

dcteague
dcteague New Reader
7/4/14 3:59 p.m.

Here's some pics of the wiring mess I had to clean up, and what it looked like when done.

Installed the fuse block I purchased where the glove box is usually located. My tri-alert system for the gauge panel is located on the other side - I'll eventually cover the area with ABS plastic and a carbon fiber vinyl covering so it matches the center console. Figure if I am going to make it look somewhat streetable, I might as well do it right.

After getting everything wired up and getting rid of useless wires, organizing things, etc., I wrapped up the wiring in a braided covering, zip tied it all together, and hopefully I won't need to go back into it (I hate wiring work).

Put the center console back together, and all that's left is to install the radio mount and I think I'm close to done. I pre-wired the toggles for my fan and the gauge alarm and since they're wired into the new fuse block if I have lose wires around I'll just pull the fuse so they're not live - makes it much easier than having to pull everything back apart again.

Next up is cleaning everything and doing the final installation of harnesses. The 2 eye-bolts that are closest to the tranny tunnel are stumping me. In my prior cars, the 2 bolts fit easily on the floor beside the seat. The only room with my seat brackets in place are on the side of the tranny tunnel which would put them somewhat sideways, which isn't ideal. My only other option would be to mount them into the aluminum brackets I made, but they'd be too close to the seat. I'll try to figure things out and post a few pics once I get there.

Woody
Woody MegaDork
7/4/14 4:04 p.m.

Can you use something like these and mount them to the tunnel?

dcteague
dcteague New Reader
7/4/14 4:45 p.m.

The tranny tunnel is angled away from the seat so it wouldn't be able to sit vertically. I'm wondering if it would be okay to mount the eyebolt on the aluminum mount I fabricated but have the bolt go all the way through the floor with a backing plate. I'll see if I can get a pic of the issue.

dcteague
dcteague New Reader
7/4/14 4:51 p.m.

I am thinking I could probably get this to fit up underneath the aluminum bracket and up along the side of the tranny mount, but I'm not sure I'd have room to latch the harness on though.

I could probably do this too, but I didn't think that the bolt was designed to withstand the sheer force sideways when mounted this way.

nhmercracer
nhmercracer New Reader
7/5/14 6:42 p.m.

I wish we were neighbors. I love sorting out wiring, and deciding what can go, and what needs to be added.

I have some "special" issues!

dcteague
dcteague New Reader
7/5/14 7:07 p.m.

I'm sure there's a lot more that I could have taken out but I think I got a good bit out. If I ever decide to go full blown track car and dump all the street legal items, I'm sure I'd be able to dump a lot more. When that day comes maybe I'll take a road trip.

Rad_Capz
Rad_Capz HalfDork
7/5/14 10:28 p.m.

I have clip on 6 point Schroths and use those eye bolts mounted to the trans tunnel with backing plates. I talked to the tech guy at HMS motorsports (Importer of the Schroths)about the placement and angles of the eye bolts. I set the eyes for the short distance with the angle of the harness strap. The seats are in a fixed position but I had the cage builder provide 3 mount holes for eyes by the rockers so the seats could be moved to a different position on the seat supports if desired at some later date without having to fabricate a new mount on the cage to align the waist straps. After mocking up the seats I chose the tunnel mount location according to Schroths angle reccomendations, thats why there's only one eye on the tunnel. Harness clips into the eye.

[URL=http://s240.photobucket.com/user/NOTATA/media/The%2014%20Car%20Safety%20upgrades/The14Carinterior382.jpg.html][/URL]

dcteague
dcteague New Reader
7/13/14 12:37 p.m.

Some new pics from today after cleaning the car up a bit, fitting the seats, and starting to get the harness installed. Need to put the last eye bolts in the tranny tunnel before they're officially completed.

David S. Wallens
David S. Wallens Editorial Director
3/25/15 10:01 p.m.

I think you're going to enjoy the May '15 issue's cover story: finding gold at the local insurance auctions.

nderwater
nderwater PowerDork
3/26/15 1:22 p.m.
David S. Wallens wrote: I think you're going to enjoy the May '15 issue's cover story: finding gold at the local insurance auctions.

Lof8
Lof8 Reader
3/26/15 1:33 p.m.

I really like it! I'll be tuning in for more updates.

Edit: I just checked the dates. I think its time for more updates now!

BeardedJag
BeardedJag Reader
3/26/15 2:34 p.m.

I agree.

dcteague
dcteague New Reader
2/20/17 6:28 p.m.

Its coming - will start to post more soon. Have continued my work but been a bit too distracted to post.

1 2 3

You'll need to log in to post.

Our Preferred Partners
FwY2zeT2UIdgsYJJvRmKEelnhrGI04SzKn4MiWlVEoNmAyIjEm3pvUoDm9e6BxcJ