docwyte
docwyte PowerDork
12/18/20 7:13 p.m.

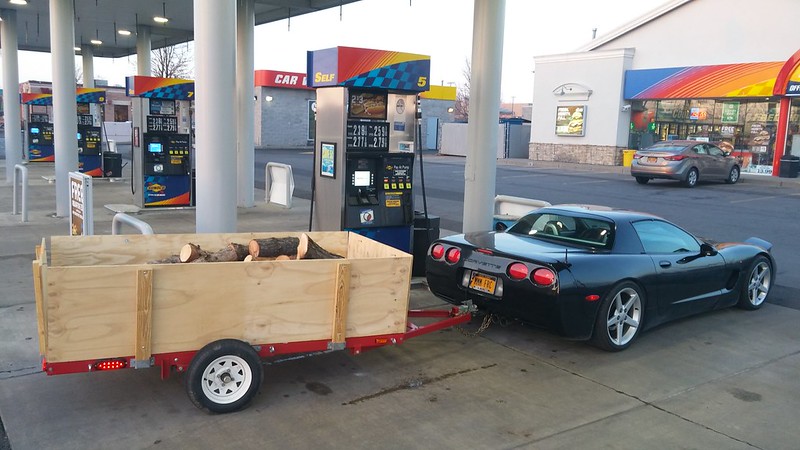
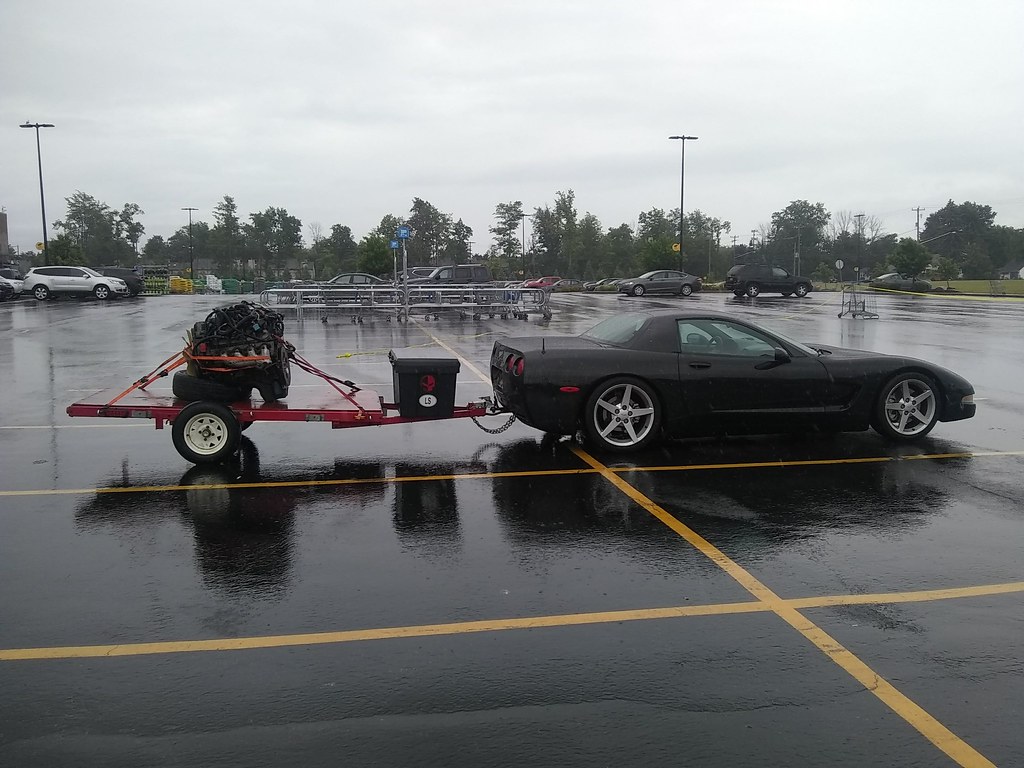
Ok, decided that I want to do more track events vs auto-x next season.  That means picking up a set of race tires, most likely Nitto NT01's.  I could drive to the track on them but that just accelerates wear and my most white knuckle experiences have been getting caught out in the rain on race tires driving to/from the track.

Since I already have a tire trailer and a hitch for the car, time to install the hitch.  First, take the bumper cover off.  Then take off the bumper beam, which is held in by a large 16mm bolt on either side

Now take off the bumper supports and swap them for the ones that come with the kit.  These are fixed in place vs the stock ones that are meant to collapse.

Time to get ready to install the hitch on the bumper beam.  Make a template...

Mark the heat shield and the hitch for midline.  You need to cut the heat shield to make room for the hitch.

I used some sticky thermo heat shield stuff to repair the heat shield, and drilled 4 holes in the bumper beam for the hitch, after you've marked their location using the template

Bolt the hitch on and then bolt the bumper beam back onto the car.

Receiver mocked up

OK, time to deal with the bumper cover.  You need to cut a hole in it to be able to access the receiver.  Luckily this gets hidden behind the license plate.

Measure twice, cut once

Mount the hinge onto the plate mount

Mount the plate.  Hidden!

Peek a boo!

Eagle eyed viewers will notice I also cut a hole in the license plate surround for the rear tow hook.  I'm going to cut a hole in my license plate as well, that way I can just thread the rear tow hook in place with everything else there.

Next up is to wire in the plug for the trailer lights and then put the bumper cover back on and make sure everything fits. 

Bumper cover isn't going on for a while tho as I'm working on another big project on the car.  Details this weekend on that!

docwyte
docwyte PowerDork
12/21/20 8:53 a.m.

Had a little free time yesterday and started to do the wiring for the hitch.  Mostly just run things where I want them to go...

Here's the convertor box, I need to put the airbox back in to finalize where I'm going to mount it.  This lets me use a single trailer light for both running lights and brake lights.  It's nothing special, buy it from amazon or Uhaul etc.

Run the wiring to the drivers side, brake/running light/turn signal.  you can also see the manual release cable for the engine lid.  With and without grommet!

Passenger side just has the turn signal wire

Power wire now.  I bought this kit used and for whatever reason the previous guy had used black wire for the power wire.  I don't like doing that so I substituted some nice red wire I had.  Fused link so I can pull the fuse and not have the convertor draw any power when I'm not using it.  Plan is to tap the positive jump post in the engine bay, that way this is easily removed.

Last thing is getting the 4 wire plug down to the hitch.  I decided to go over the bumper beam vs under it.  I should've run the wire before I bolted the bumper beam on.  Oh well...

And with the ball mount

Just need to tap the wires on the tail lights and attach power to the positive pole and wiring is done.  I got some vampire clips that have female spades on them.  That way I can put male spades on the trailer wiring and be able to easily remove the tail lights still.  Those should arrive today.  Once I reconnect the battery I can trace the tail light wires and that'll be it.


Box4VIR
Box4VIR Reader
12/21/20 9:18 a.m.

 Great install!  I was surprised to see the fixed bumper posts.  The bumper has tow attachments to pull the car up on a flat bed so I would assume it would easily handle a tire trailer.  Is there another reason you swapped these out?  Seems like a heavy price to pay for risking bending the frame in what would be a minor accident. 

docwyte
docwyte PowerDork
12/21/20 9:33 a.m.

In reply to Box4VIR :

There's some debate on whether my 2003 needs the stronger bumper beam supports or not.  The 2005+ cars definitely do, as their stock bumper beam supports are too weak.

Since I had them and it wasn't clear I just installed them.

docwyte
docwyte PowerDork
12/21/20 10:55 a.m.

Figured I'd post what I plan on towing.  I picked up this SouthSport tire trailer a few years ago.  It's very nice, with the wider wheel rack (they made two wheel racks, this is the bigger one) and the box has integral tail lights.  Sadly it looks like SouthSport is no longer in business.

I want to figure out a way to add two racks to hold two five gallon fuel jugs each.  That way I can carry twenty gallons of fuel to the track with me.  The obvious place is on the tongue, since it's so long.  However I'm not sure adding over 100lbs of weight there is a good idea...

docwyte
docwyte PowerDork
12/25/20 3:38 p.m.

Ok, wiring supplies came in.  Let's get everything hooked up!  Well, except the power wire, but I'll explain that in a bit...

Spade connectors for the wires I ran to the drivers side and passenger side tail lights. 

A friend gave me the wire codes for the body side of the harness but I'd rather tap the tail light side instead.  Tail lights are more easily replaceable compared to the body side of the harness.  Hence the space connectors, I need to be able to unplug the trailer wiring harness so I can remove the tail lights. 

Here's my notes, left side is the body harness, right side is the tail light harness.  Sorry about the arrows, just flip flop the brake and turn wiring...

Ok, let's tap those tail lights.  Brake, running lights and turn signal on the drivers side, just the turn signal on the passenger side.

And I found the proper bolt for the threaded hole I wanted to use for ground in my bucket of spare bolts.  There ya go...

Stick a fork in it, wiring is done except the power connection to the jump pole in the engine bay.

dj06482 (Forum Supporter)
dj06482 (Forum Supporter) UltraDork
12/25/20 7:12 p.m.

Love all the detail in your posts, you do great work!  Keep the updates coming!

docwyte
docwyte PowerDork
12/26/20 8:11 p.m.

In reply to dj06482 (Forum Supporter) :

Thanks!  The plan was to drop the motor/transmission this offseason with the help of a Porsche tech in my garage to get the coolant fittings welded and a bunch of other "while you're in there" type of jobs.  However that went sideways when his back just wasn't up to the task and my free time kinda vaporized.

So instead I'm going to finish this up, install 964 RS Cup motor mounts, flush the coolant system and replace the gearbox and diff oil since they're 17 years old.

docwyte
docwyte PowerDork
12/28/20 4:58 p.m.

So I was hoping that a Porsche tech was going to help me drop the motor/transmission so I could get the coolant pipes welded and do some other while the engine is out maintenance too.  Unforunately turns out he has a very bad back and really wasn't able to help.  So the project stalled and I'm ending up doing some work that I wasn't really planning on doing this offseason but probably should anyways.

So I'll be flushing the coolant (I already removed it, 5+ gallons), the transmission and front diff oil and doing an oil change.  Then I'll finish up the wiring for the tow hitch and put the rear bumper cover back on...

docwyte
docwyte PowerDork
1/4/21 8:34 a.m.

Ok, managed to button this up.  The motor mounts were supposed to arrive December 28th but I still don't have them.  Tracking number is no help, shows no movement since December 22nd.  Awesome.  Instead I finished everything else up.

I got the rear bumper cover back on and mocked up the receiver.  I needed to do some additional cuts.  One on the bottom of the license plate surround to clear the tow hitch...

And one on the top of the license plate surround so I could get the retaining pin for the hitch in

Then I noticed that the pin wasn't going all the way down.  It was hitting the bumper cover on the bottom and not seating.  Ok, lets trim that a little bit more...

That's better!  Time to install the tail lights.  Wiring worked out well...

Ok, this project is done!  Time to work on the next one...

docwyte
docwyte PowerDork
1/4/21 8:40 a.m.

I'd drained the engine oil at the tech's request.  I thought I had an OEM Mann/Mahle filter but turns out I didn't.  For now I grabbed a K&N one and I'll swap over to OEM this spring.  8.5 quarts of M1 0w40 and that's sorted.  Next up transmission and front diff. 

Here's the transmission fill plug, it's on the drivers side and is a 10mm allen.  Mine was on super tight!  I had to use a 1/2 rachet and a jack handle to break it free, which was scary since the torque spec is 20 ft lbs...

Transmission drain plug is on the bottom, another 10mm allen.  This came out easily.

Drain plug has a magnet on it, mine was pretty furry.  This is with about 35k miles on it...

And clean

Filled the transmission with Motul.  I used a hand pump and man, was that a chore!  It took 3.5 liters.  I have a Motive power filler but after it sprayed my garage with gear oil once I'm kinda leery to use it.  This method is clean but a PITA.

Let's do the front diff now.  Fill and drain plugs are 17mm hex.  Here's the fill, on the passenger side of the diff in front of the axle.

Drain plug is on the end of the diff, not the bottom.  It has a magnet too and was also pretty furry.

And clean

Diff took 1.5 liters of Motul.  On both fill until it starts to come out the fill hole...

Torque specs are the same as the transmission, 20 ft lbs.

Ok, done!  Next project!

docwyte
docwyte PowerDork
1/4/21 8:45 a.m.

Time to add the coolant.  I wasn't looking forward to this, the car holds 5.5 gallons of coolant and has three separate radiators all the way in the front of the car.  I was recommended to get an air lift vacuum tool, it was $130 off Amazon.  I have to say, this tool is AMAZING.  It made what can be a truly awful job totally simple, a walk in the park!  So worth the cash...

So, you stick this thing in the coolant reservior and pull a vacuum.  I was able to pull around 23 inches of vacuum

Close the ball valve, disconnect the air line and make sure the vacuum level is steady for 30 seconds.  If it is, connect the coolant feed line and open the valves.  Coolant gets pulled into the system super fast!  Make sure you have enough in the bucket. 

The bucket should also be about the height of the coolant reservoir...

When the vacuum gauge reads zero, the system is full.  I then raised the rear end of the car up...

And turned the heater on high and started the car

I let it come up to temp and heard the radiator fans come on.  Then I closed the bleeder valve on the coolant reservoir.  Level was perfect, right between min and max.  I'll check it today when I come home and top off if necessary.


docwyte
docwyte PowerDork
1/4/21 8:59 a.m.

Oh Saturday I went on a parts run.  My daughter is home and needs hours for her permit, so she drove us around.  3.5 hours total, with a few hair raising moments for me. 

I picked up a set of Rennline track mats, front Coco mats, Bendpak aluminum ramps for my lift and a super sweet trellice Brey Krause harness bar.

I'm not sure I'll run the harness bar, when my son no longer fits in the back seat I'd rather run a roll bar.  However most of the roll bars for this car use some combination of bolting into the stock seat belt mounts and/or the rear shock towers.  The shops are also very careful to not call them roll bars but harness bars.

At that point, if it's not going to give me any real protection I don't see why I'd install a really heavy, PITA bar to install vs a lightweight, simple harness bar.  I mean, if they're gonna do the same thing...

nsogiba
nsogiba New Reader
1/4/21 11:26 a.m.

Love the work on the trailer hitch. Nothing wrong with towing using a sports car as long as you're realistic about the load you're pulling. For track work you'll love the convenience of having a separate place to store everything. 

I can't suggest any good place to store your fuel containers on the existing trailer that won't throw off the weight balance unless you re-balance the load by putting the heaviest stuff (wheels) elsewhere. Maybe you can split the different by putting one jerry can up front and another towards the rear, might require some custom fabbed brackets. You might want to consider upsizing your trailer to something that is more versatile; I use a 4x8 Harbor Freight trailer with minor modifications and it works perfectly for hauling tires/fuel/spares to the track, and doubling as a utility trailer with some homemade sides. I typically store my helmet, tools, and straps in the waterproof box up front. 


docwyte
docwyte PowerDork
1/4/21 11:54 a.m.

In reply to nsogiba :

Unfortunately I have no place to store a 4x8 trailer.  I also really like the SouthSport trailer, it has a bunch of nice features like the tail lights integrated into the tool box and the wheel rack...

docwyte
docwyte PowerDork
1/11/21 8:30 a.m.

So my friend gave me the aluminum ramps from his Bendpak HD9 lift.  I stupidly thought they'd just plop right onto my HD7.  Yeah, not so much.  Turns out the way Bendpakl designed the tongue between the HD9 and HD7 is very different.  On the HD9 it's much wider and longer.  So out came the death wheel and I chopped 6" off the width and probably 3" off the length.

I do wish I'd left another 1/4" of length or so, but that's hard to eyeball with the death wheel.  They'll work...

While under the lift I also found a broken bolt.  This at at the end of the lift deck and locates it on the frame.  There are two bolts per side.  Replaced it with an 8.8.  Not sure why it sheared, it shouldn't be under load...

docwyte
docwyte PowerDork
1/15/21 5:21 p.m.

Installed my 964 RS motor mounts today with the help of a friend.  The stock mounts are fluid filled, the RS mounts are semi solid.  I got the kit from Rennpart, who includes the longer bolts needed to use these on a 996.

With the AWE exhaust installed I had to remove the passenger side post cat O2 sensor and the lower exhaust pipe/tip to gain access to the lower motor mount nut on the passenger side.

No pics because I was with my friend and we were just working away.  Remove the airbox, remove the two 13.. bolts on each motor mount.  Support the motor from underneath, then go remove the 18mm nut from each motor mount.  Remove the mount, drop in the 964 mount.  Make sure you have the large washers in the right direction.  Drop in the new 13mm bolts, then drop in the large through bolt. 

Go underneath the car and tighten up the lower nut, 63 ft lbs.  Tighten the upper 13mm bolts to 23ft lbs.  Airbox back in, reinstall the O2 sensor, reinstall the exhaust pipe/tip.

One thing I'm not sure about is I'd like to see more excess length on the motor mount bolts.  To gain access to things in the engine bay a lot of the time you lower the engine some by loosening that lower motor mount nut.  I don't really have much room on the bolt to do that...

Also, since these are a bolt/nut vs a stud on my stock mounts, tightening these is a two person job, as someone needs to hold the top of the bolt while it gets torqued by the other person

Box4VIR
Box4VIR Reader
1/15/21 6:03 p.m.

I installed these motor mounts on my 911 as well, I love the little extra engine vibration you get.  Gives the car more of an old school feel.  

docwyte
docwyte PowerDork
1/16/21 9:26 a.m.

In reply to Box4VIR :

I'm curious to see how the car feels.  My old mounts weren't bad, they weren't leaking fluid or anything but these are markedly stiffer in comparison.

AngryCorvair (Forum Supporter)
AngryCorvair (Forum Supporter) MegaDork
1/16/21 9:34 a.m.

In reply to docwyte :

That bolt didn't shear, it looks like it was cut through by a cable.

docwyte
docwyte PowerDork
1/16/21 10:15 a.m.

In reply to AngryCorvair (Forum Supporter) :

There are no cables there, that bolt goes through the rear frame of the lift and then the deck.  Holds the deck in place on the frame...

Mikelly
Mikelly New Reader
2/4/21 5:54 a.m.

In reply to docwyte :

Suggest you do the transaxle mount as well if you haven't already.  I believe Torquesolutions makes some nice inserts.  On my last 996TT I didn't notice a huge improvement until I did this, and that's when the drivetrain porpousing went away completely and shifting became 100% predicatable every time and weight transfer in every scenario was much much better.

docwyte
docwyte PowerDork
2/4/21 8:08 a.m.

In reply to Mikelly :

Hmm, I'll look into it.  Any additional NVH with them?

docwyte
docwyte PowerDork
4/2/21 4:39 p.m.

Still waiting for my wheels to get done.  Shop has been having issues with getting a permit for their new powdercoating oven.  At least they finally got power back to the shop so they should be able to strip the wheels and polish the barrels.  Hopefully by the time those are done their oven is up and going.  They said they'd be ready April 12th, I'm pushing them hard to get them April 9th.

Weather here has turned nice and I want to drive the car!

docwyte
docwyte PowerDork
4/17/21 3:39 p.m.

I've been waiting to get my BBS wheels back from the powder coater to finish up the season prep on the car.  I have to take the wheels off to address the rear fender liner brackets and flush the brake fluid, so figured I'd do it all at once.  Of course I didn't plan on the powder coater taking 5 months...

So, wheels...

They did turn out nice with polished lips/barrels and gold centers.

Next up, deal with the rear fender liner brackets. The 996 GT2 comes with 12" rear wheels and 315 rear tires.  To fit those Porsche put shorter rear fender liner brackets and slightly reworked fender liners.  If you try and run 315's on a 996 Turbo you're going to wear a hole in the fender liner and potentially contact the metal fender liner bracket causing it to cut the tire.  I'd bent my fender brackets out of the way but there's limited room to do that because of the boost hoses.  My fender liners already had holes worn in them from the previous owner.

Time to fix this for good.  Here's the offending bracket and you can see where it's been contacting the tire and had the paint rubbed off it

Cut off this much to copy the GT2 bracket.  Basically on the passenger side cut it off near the "5" on the last part of the part number and then drill the hole for the captive nut around the "6".  You'll have to eyeball the drivers side, I ended up cutting off more on that side but it worked out.

Let's reinstall our trimmed bracket...

And the fender liner.  Took me two tries to get the hole in the right spot.  I used a heat gun and massaged the bend out of the liner itself to get it to conform to the wheel well.  I'll toss some black gorilla tape over the hole worn by the tire and see how it works out...

Next up flush the brakes.  I was about done with the rear of the system when I heard my Motive power bleeder hissing.  WTF?  I've only used 1/2 a quart?! Turns out the hose on the Motive was leaking.  Argh!  Cleaned it all up, will run over to Wine Country soon and buy more Typ200.  Then I'll finish flushing the brakes (I replaced the two clamps on the Motive hose) and mount up the wheels.

Then it'll be all done with the exception of installing my Garmin Catalyst...

You'll need to log in to post.

Our Preferred Partners
U1uxoSA9sZ1wrVVXWr8sveMqpPt1ni9Hk6UmEtQ6Xb4gRYFnZLcFTIyhxQapcl36