1 2 3
Run_Away
Run_Away Reader
10/22/15 7:37 p.m.

Hey GRM!
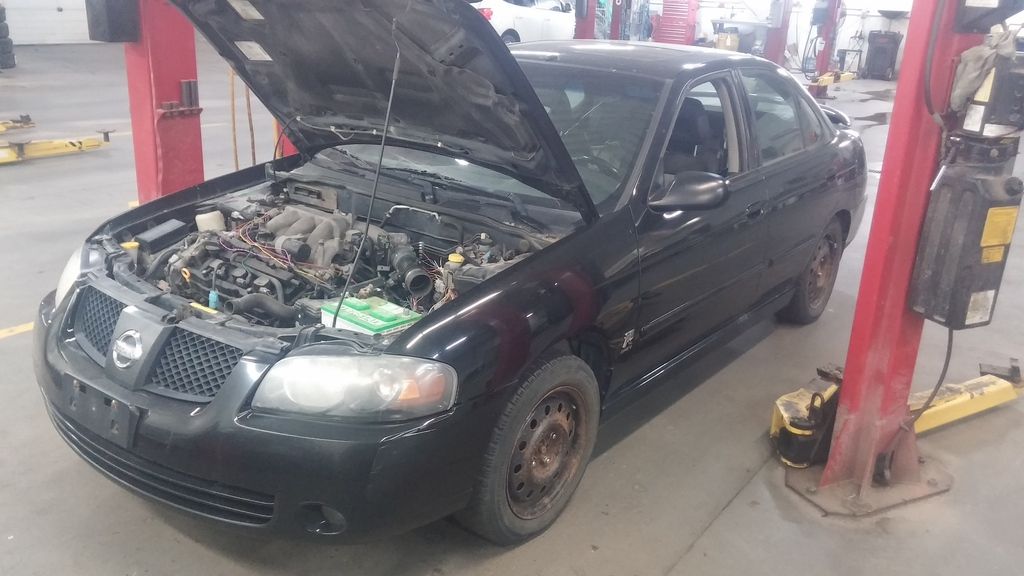
I figured I would start a build thread here of my on/off project for the past year and a bit. I never visit the Sentra forums where I originally posted it and I lurk on the forums here pretty much all day (GRM has the best mobile web format, EVER! Thank you guys...) so I figured I'd share it here. I originally bought the car in November 2013.

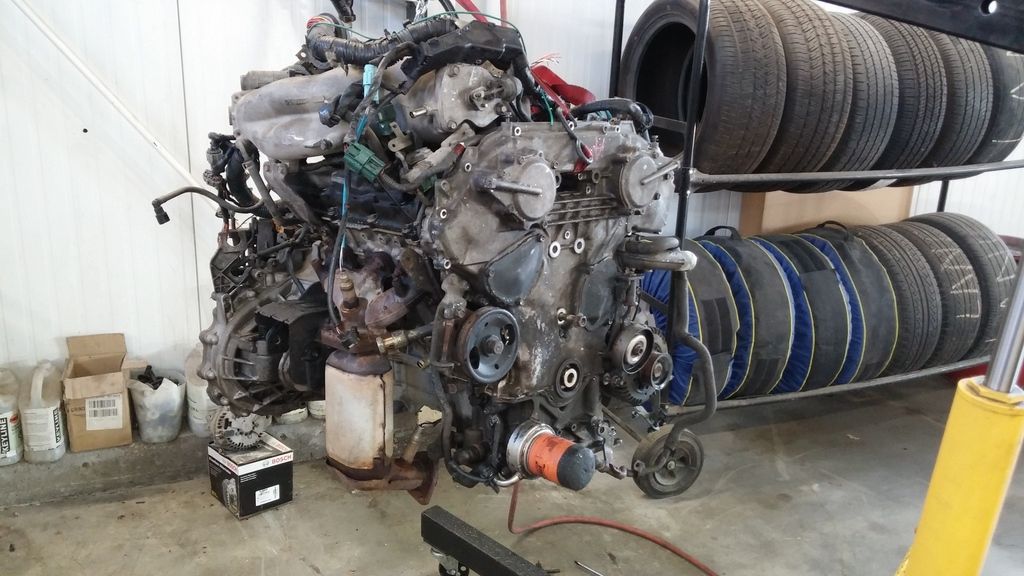
I work at a Nissan dealership and someone traded in an 04 Sentra Spec V with no compression. I was in need of a new winter beater/daily so I bought it for $600. Nissan makes an excellent 3.5L V6 called the VQ35. This engine is used in Altima, Maxima, Quest, and Murano cars, and a variation of the same engine was also used in 350Z and older Pathfinders. I had heard of VQ35 swaps into Sentras before buying mine and was really interested in them, but after figuring out costs I decided the only way it could be done economically was to buy a complete VQ powered manual trans parts car, which isn't a very common thing.
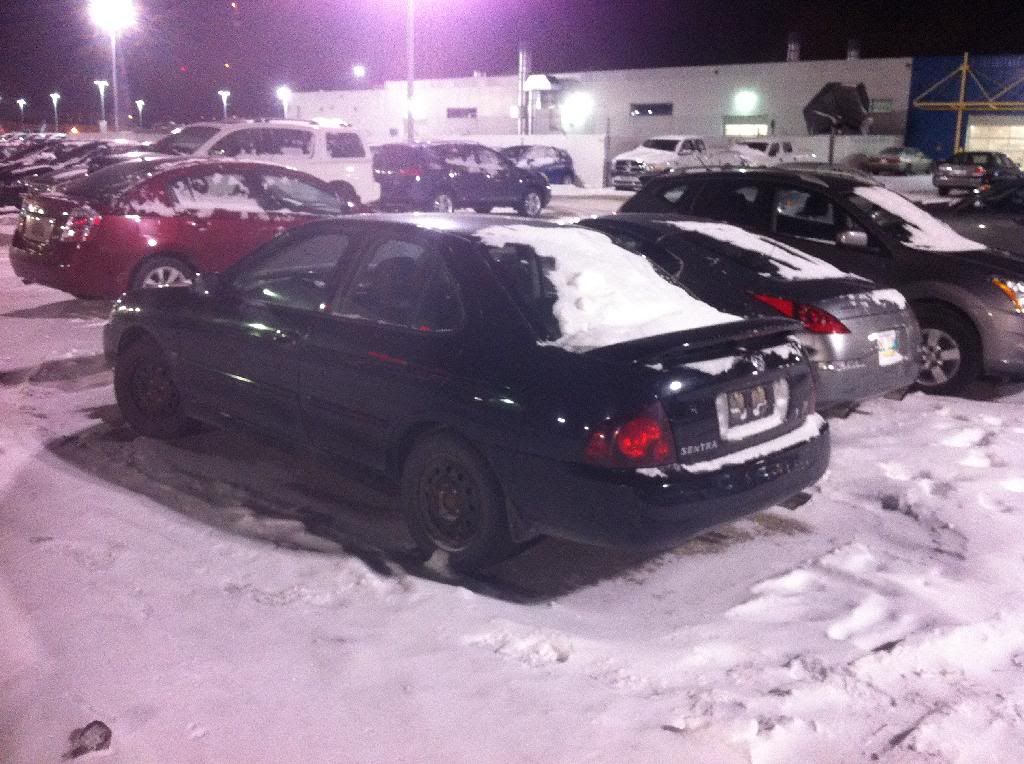
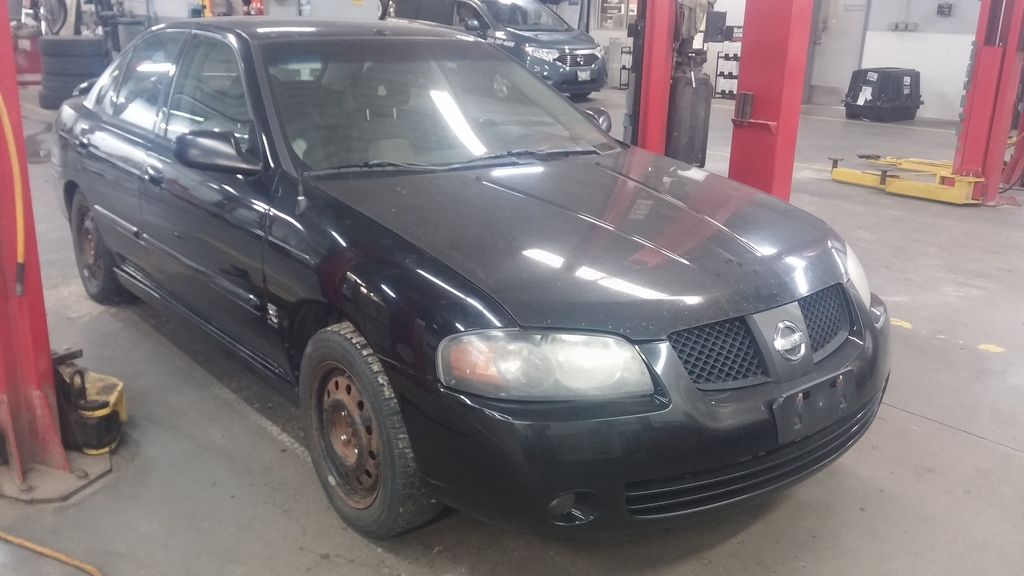
Here's the Sentra:

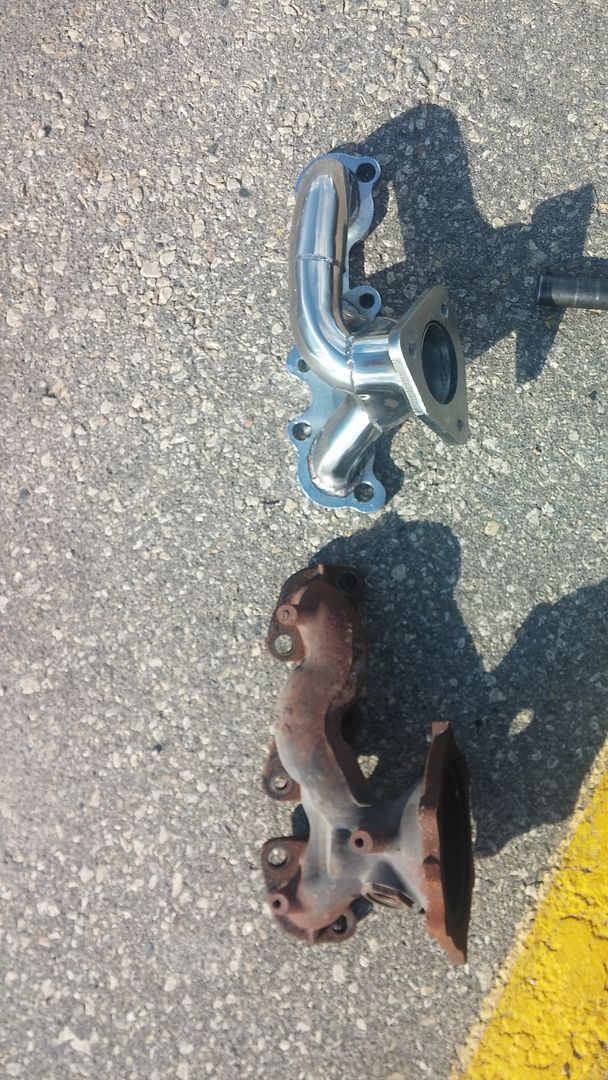
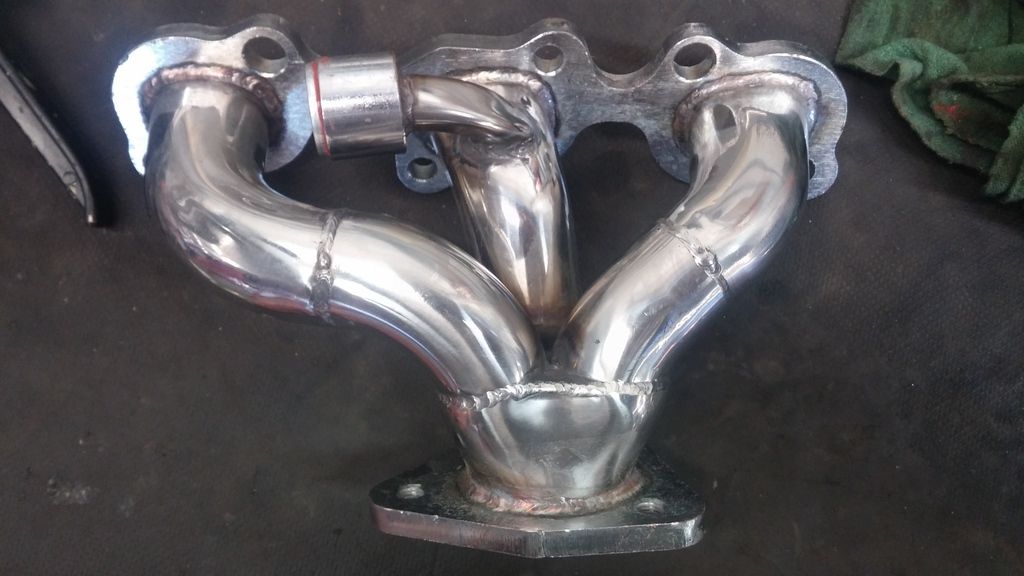
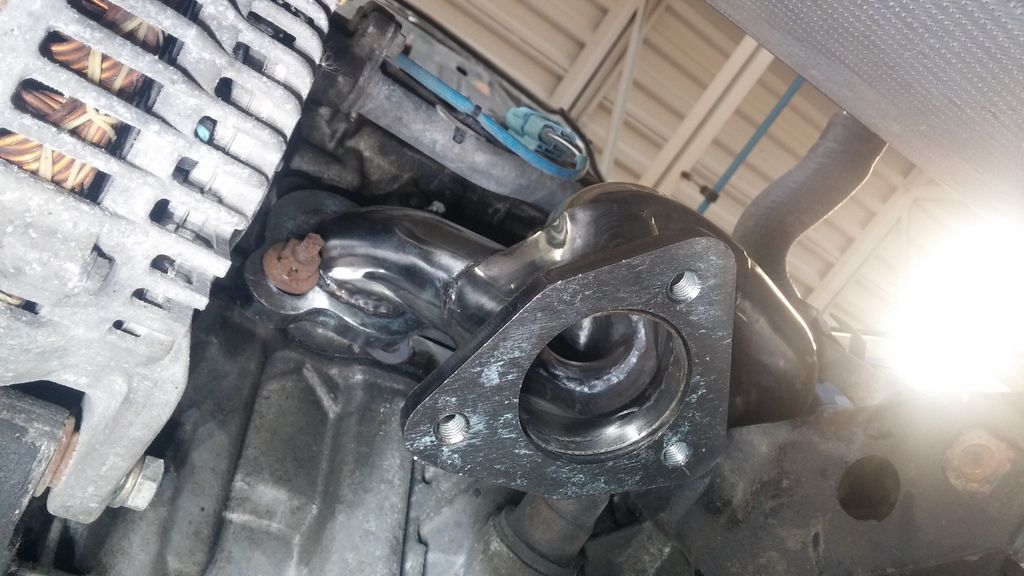
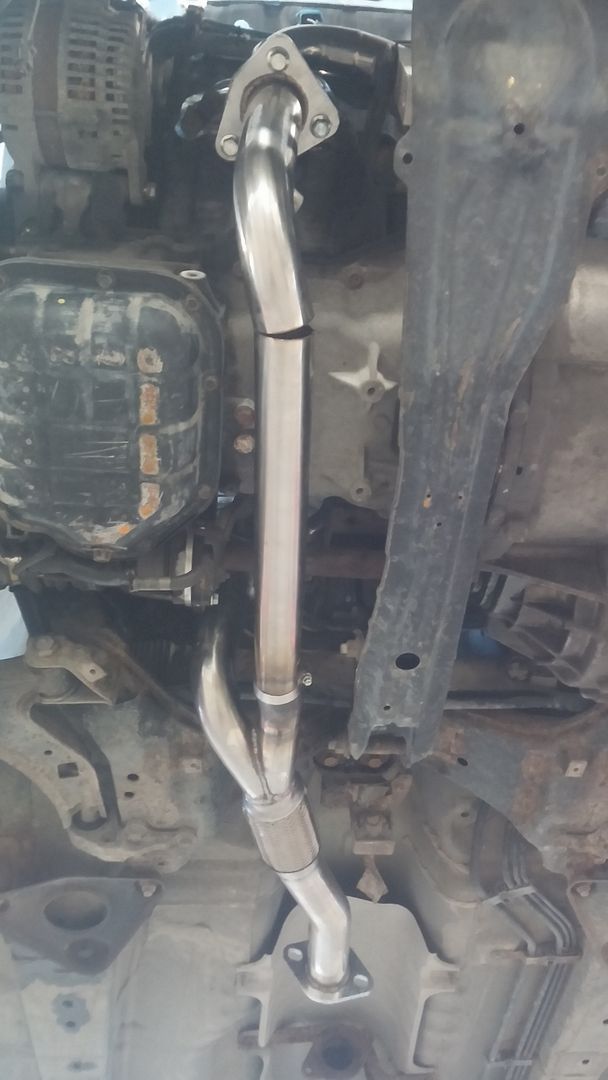
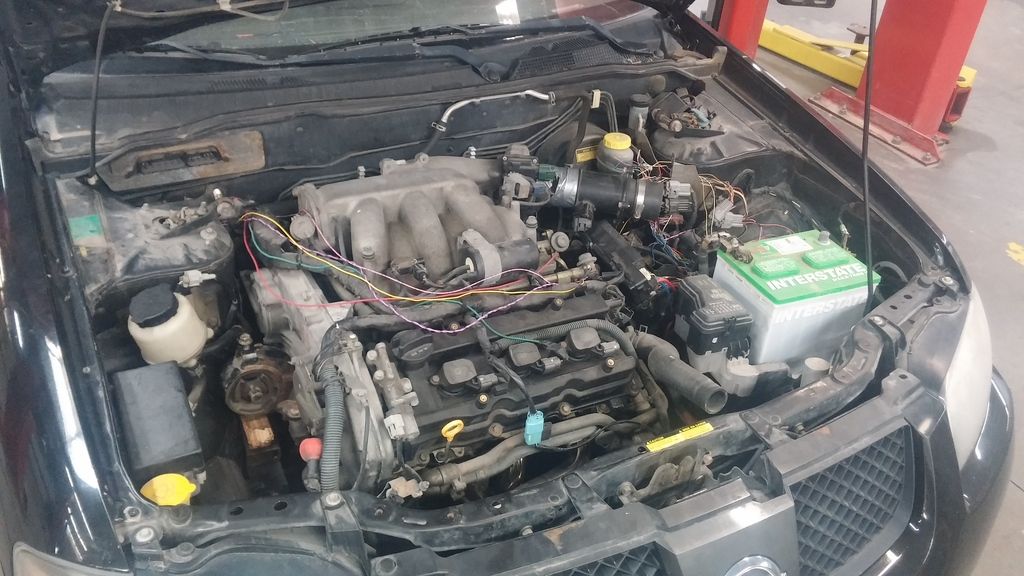
I initially planning on rebuilding the QR and as the first step ordered an OBX header from Amazon to eliminate the cat. As fate would have it, after a couple weeks Amazon never shipped the header and refunded me the money. At the same time, a 5 speed 2003 Altima showed up at the local public insurance auctions. I took a morning off work and won the auction for $475

My donor Altima:

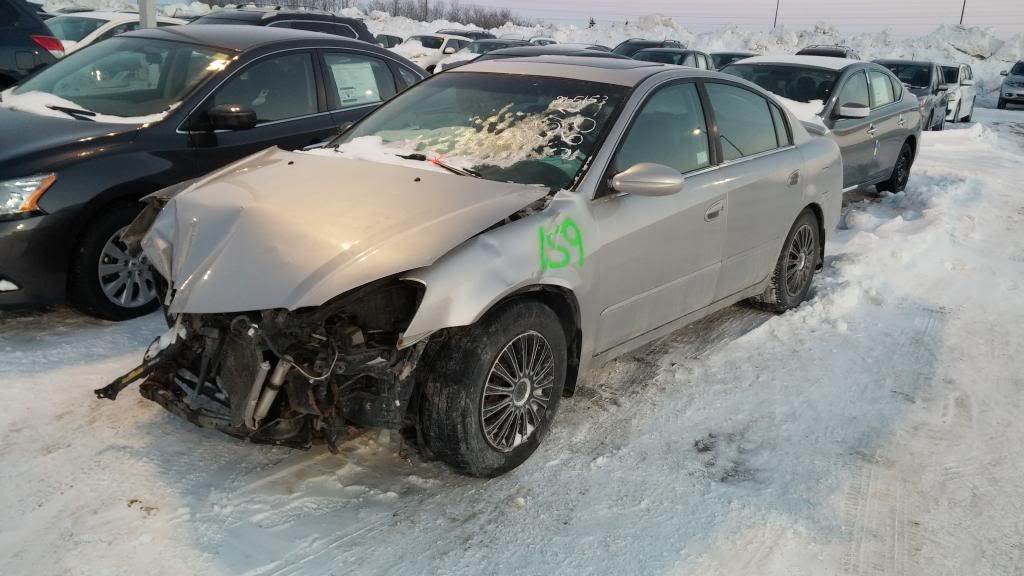
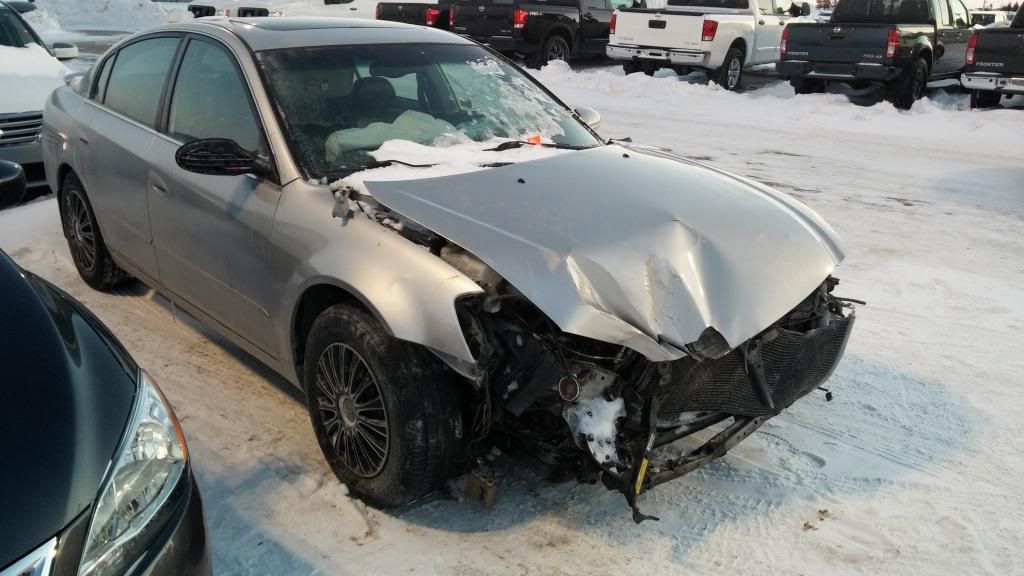
It had been hit pretty hard and there was some casualties. After cutting away the front end I was able to program my Sentra key to the car and start it up to make sure everything was good.

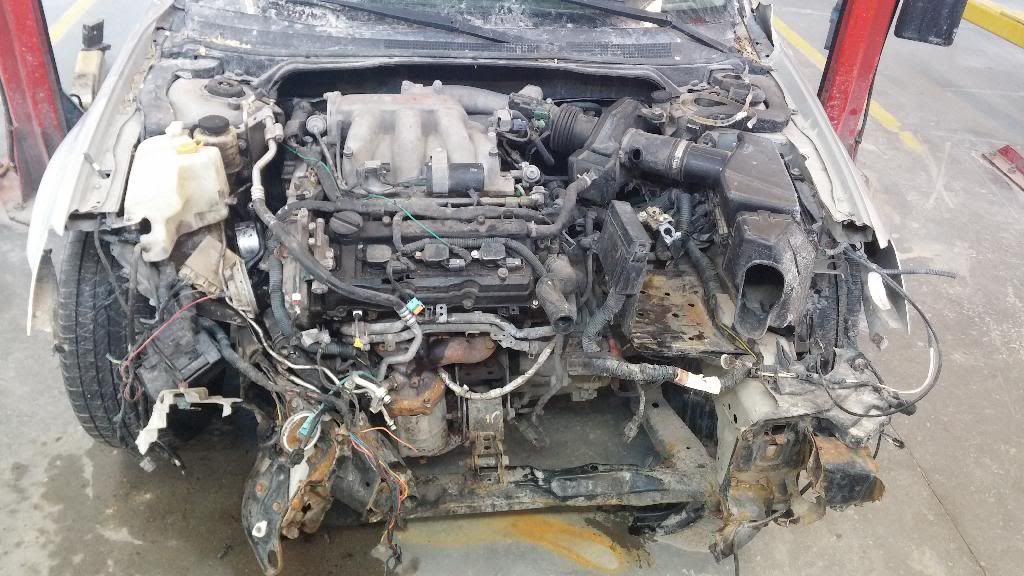
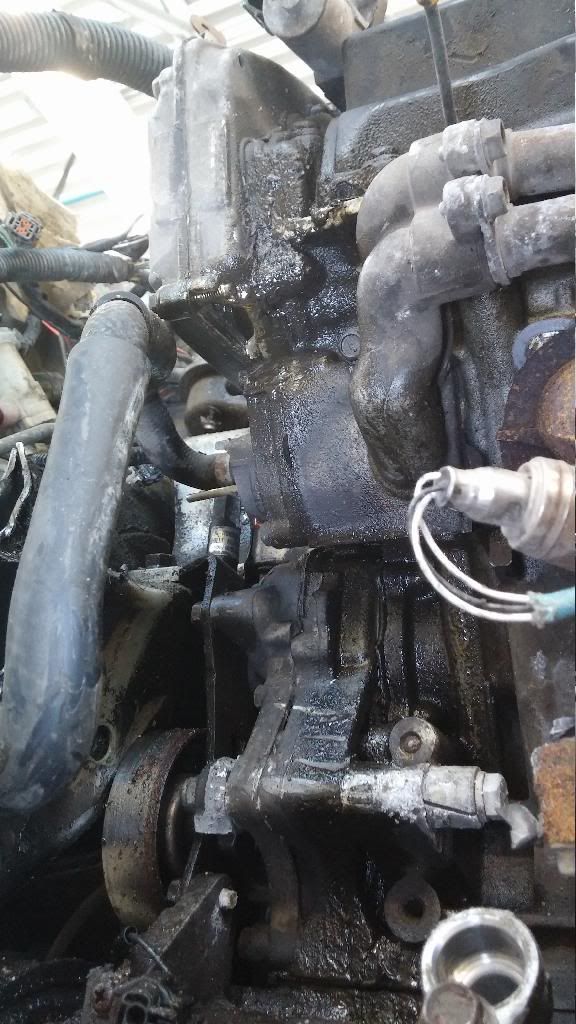
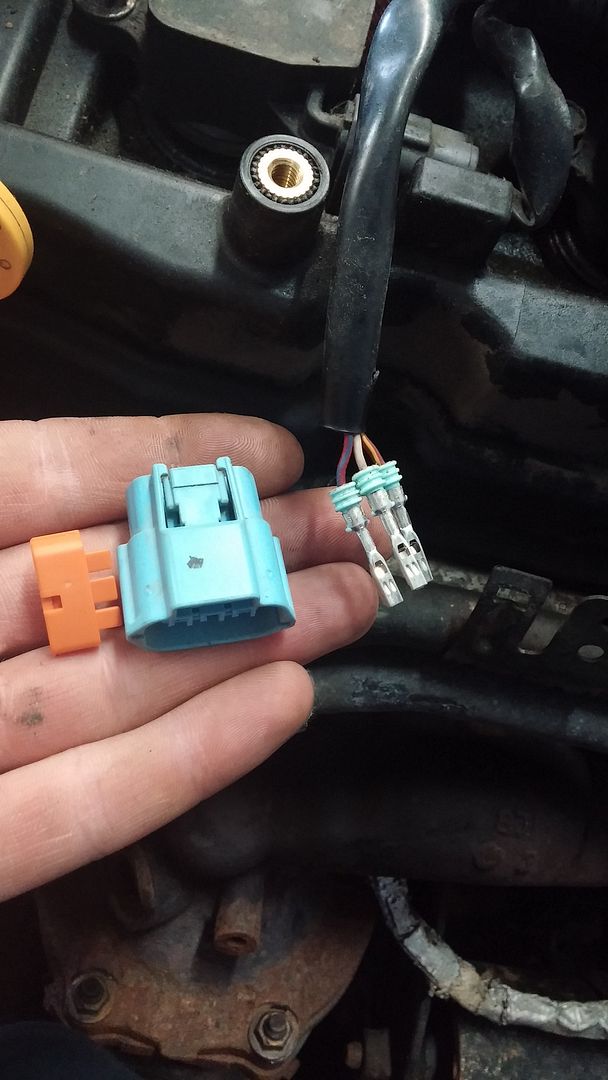
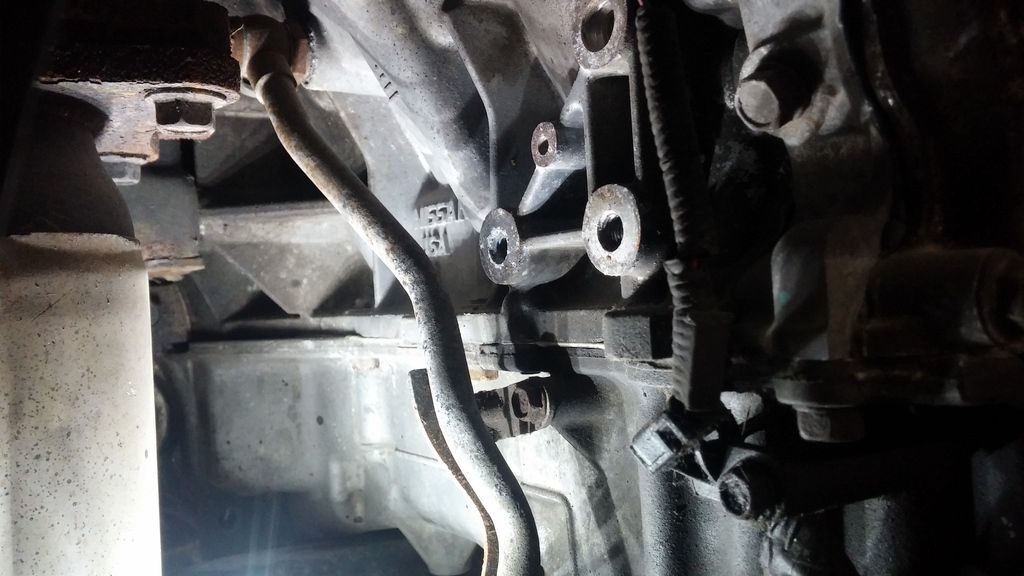
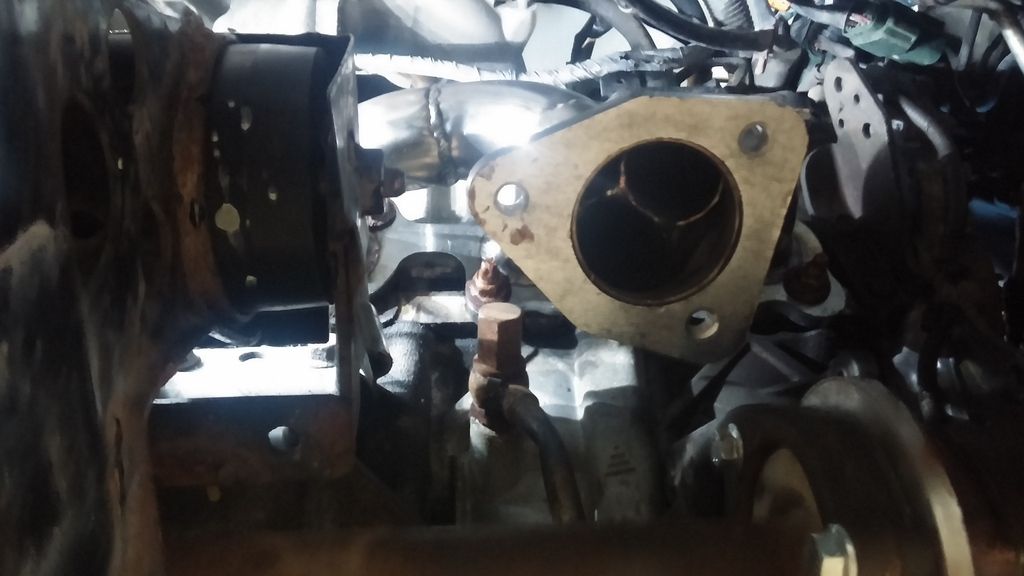
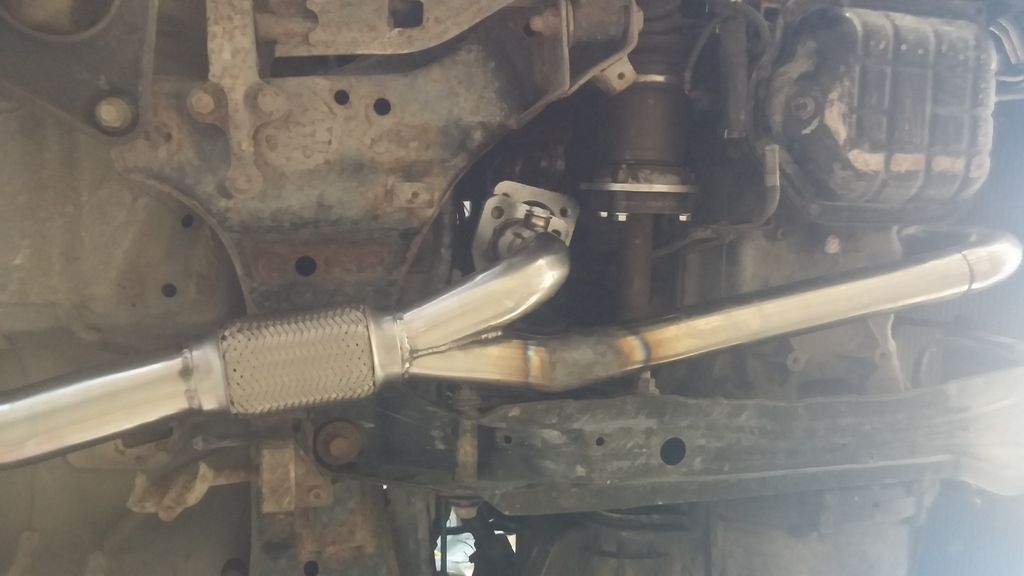
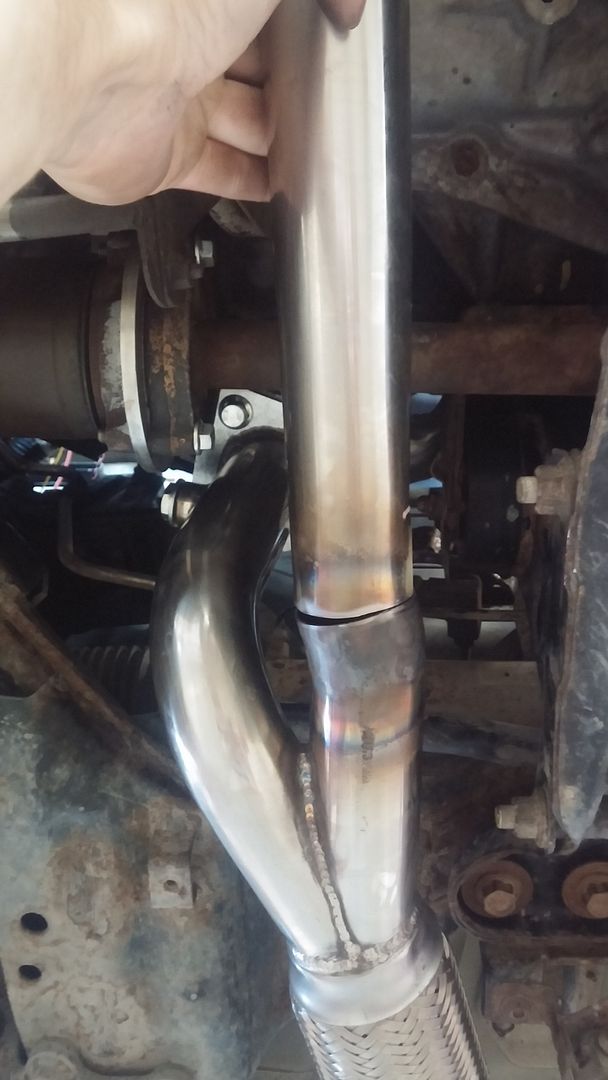
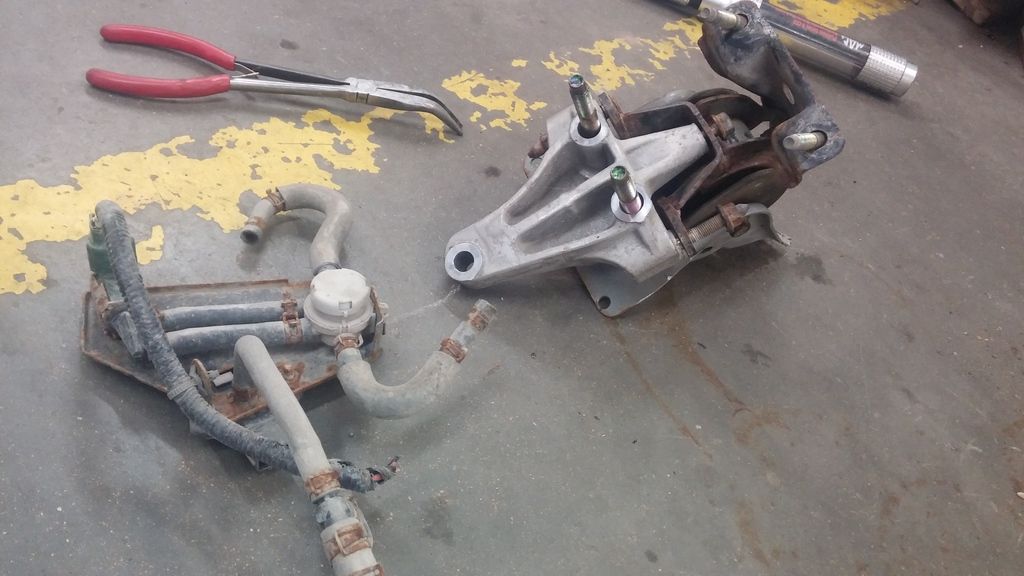
The accident had pushed the frame rail over into the alternator, smashing it to pieces and taking a small chunk of the inner timing cover with it. The A/C compressor escaped any damage, the front primary O2 was bent, and the IPDM (Intelligent power disctribution module - NIssan speak for a "smart" fuse and relay box) suffered some cosmetic damage.

Free!

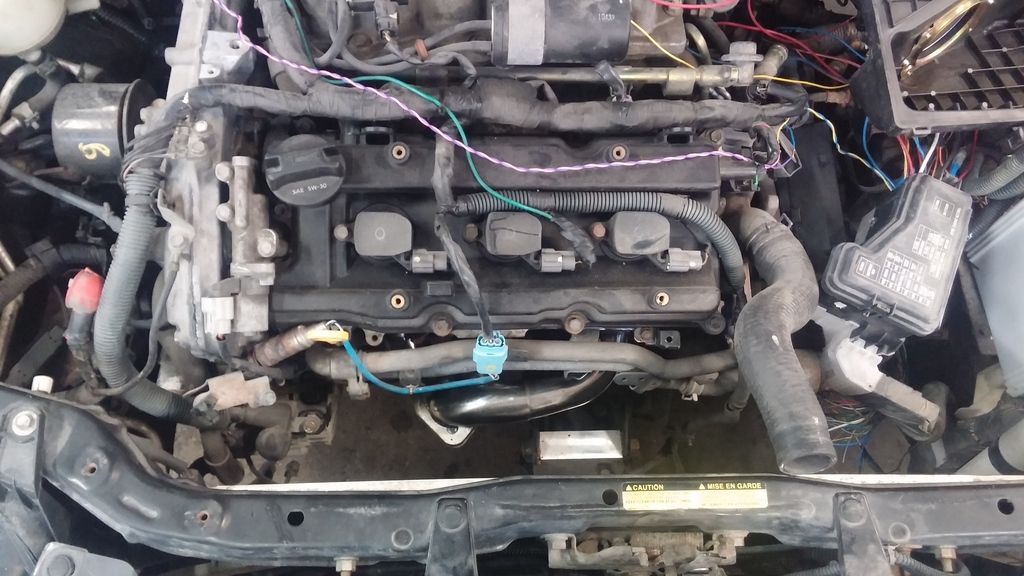
The car had 213,000kms (~132k MI) on it but the engine has clearly been out before (some missing bolts and stuff...) and had junkyard marker on the intake manifold so I don't know it's mileage.

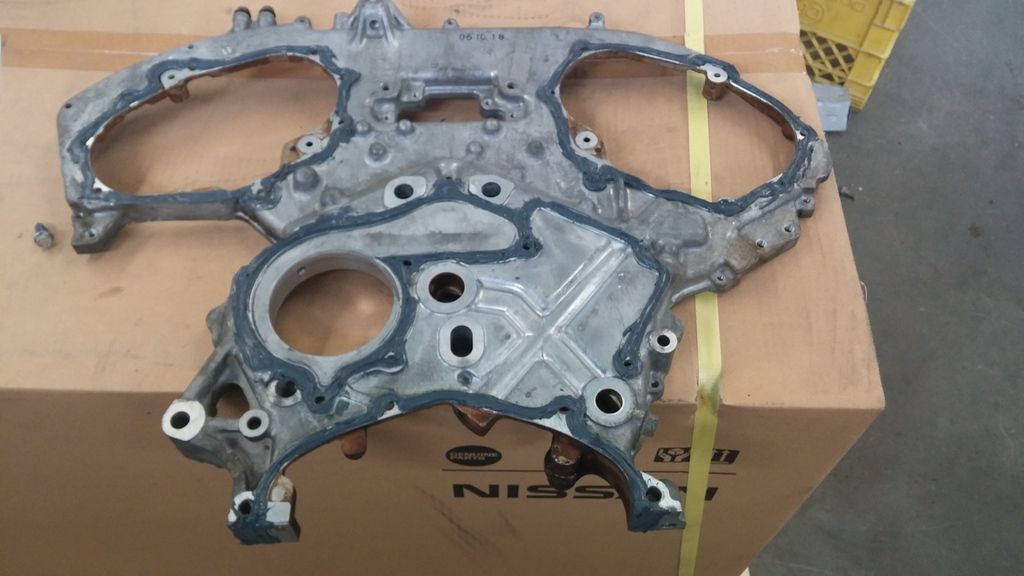
Fixing the timing cover:

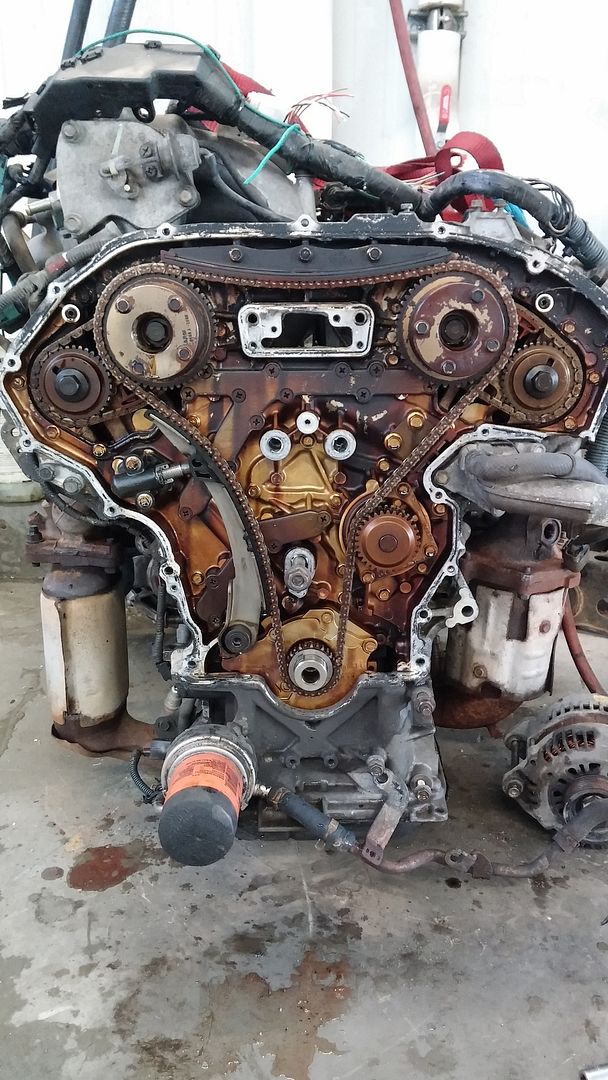
New inner cover from a junked VQ at work ready to go on:

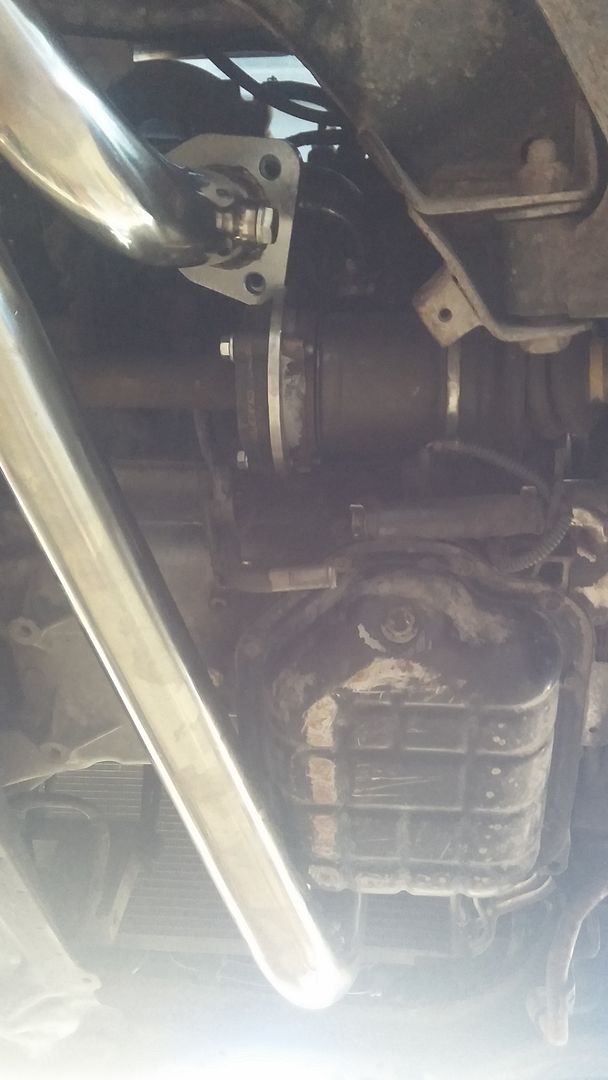
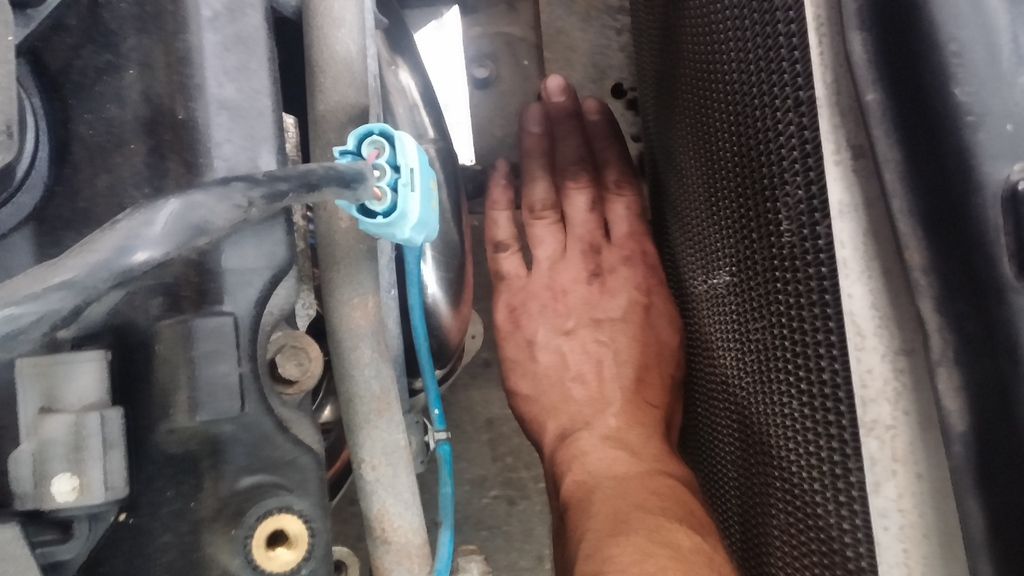
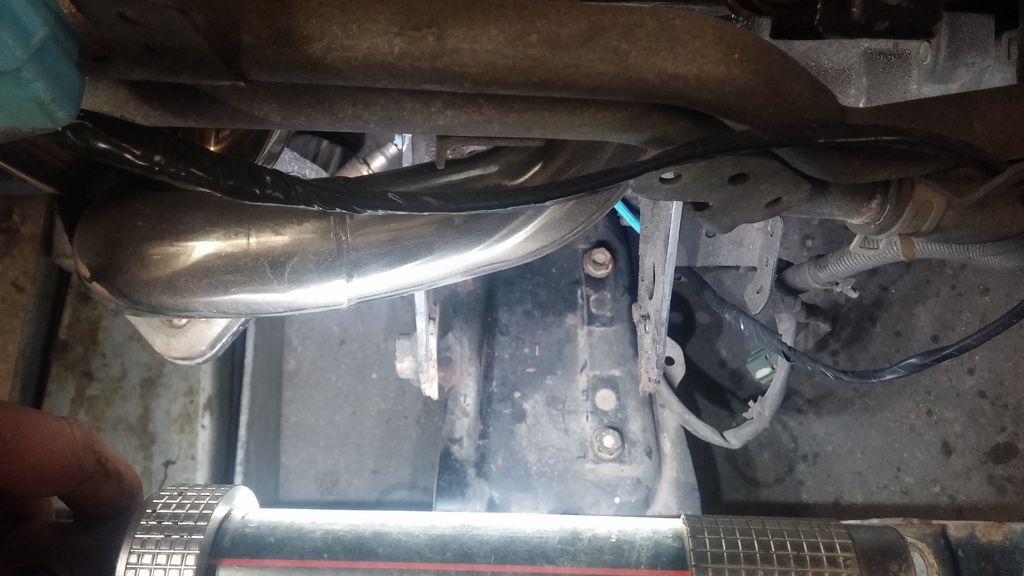
Also de-pinned and replaced the cracked connector for the front O2:

New inner cover on:

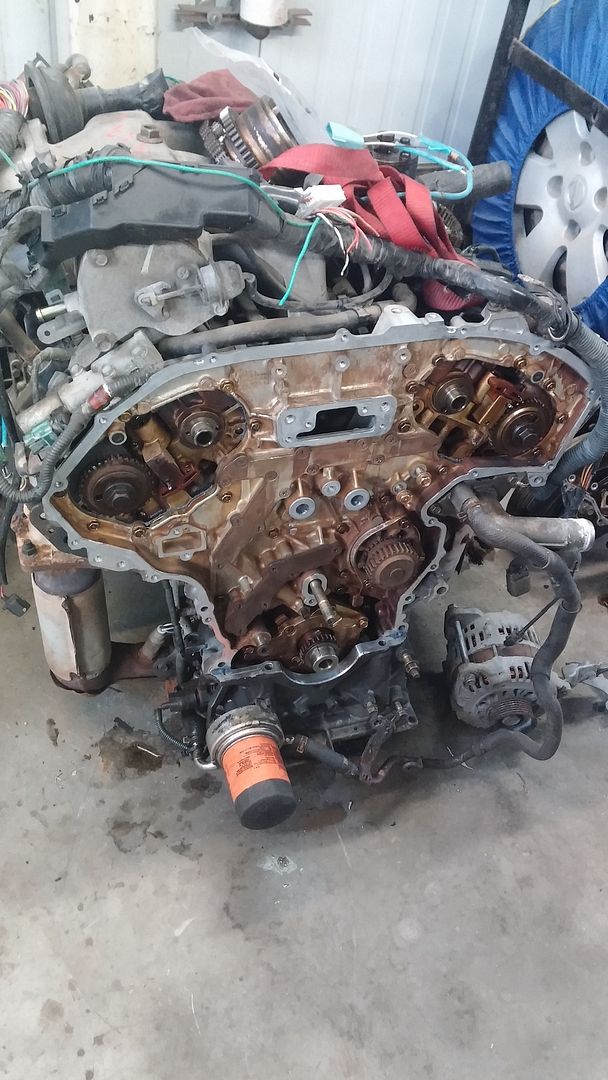
I seem to be missing some pictures, but I put a new OEM Nissan main timing chain, tensioner and guides in on re-assembly.

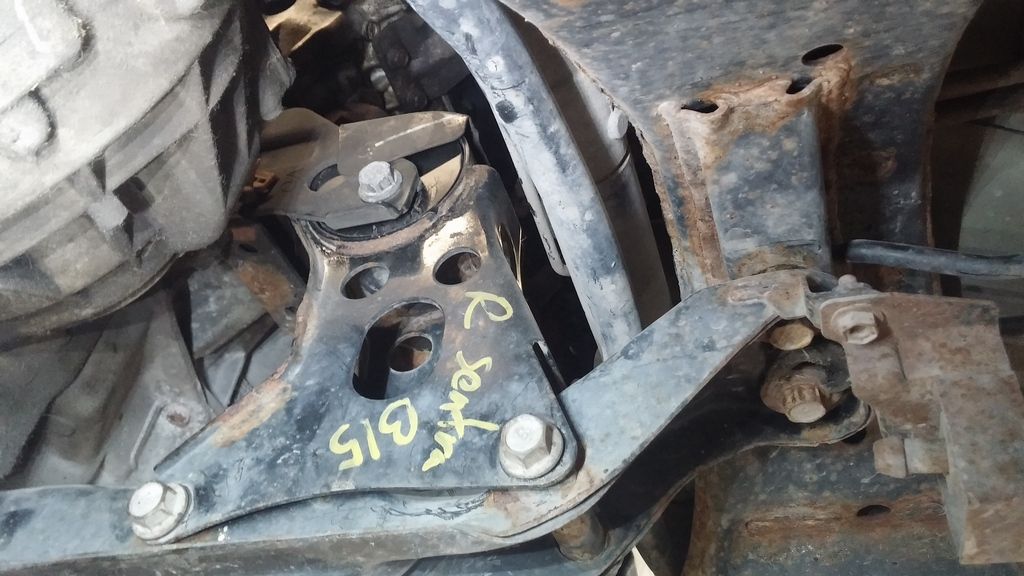
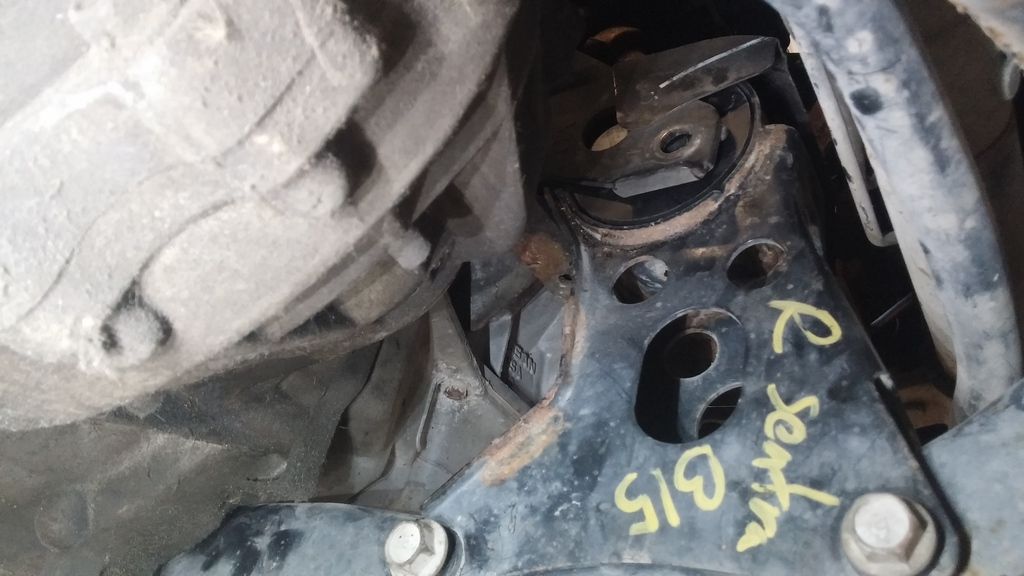
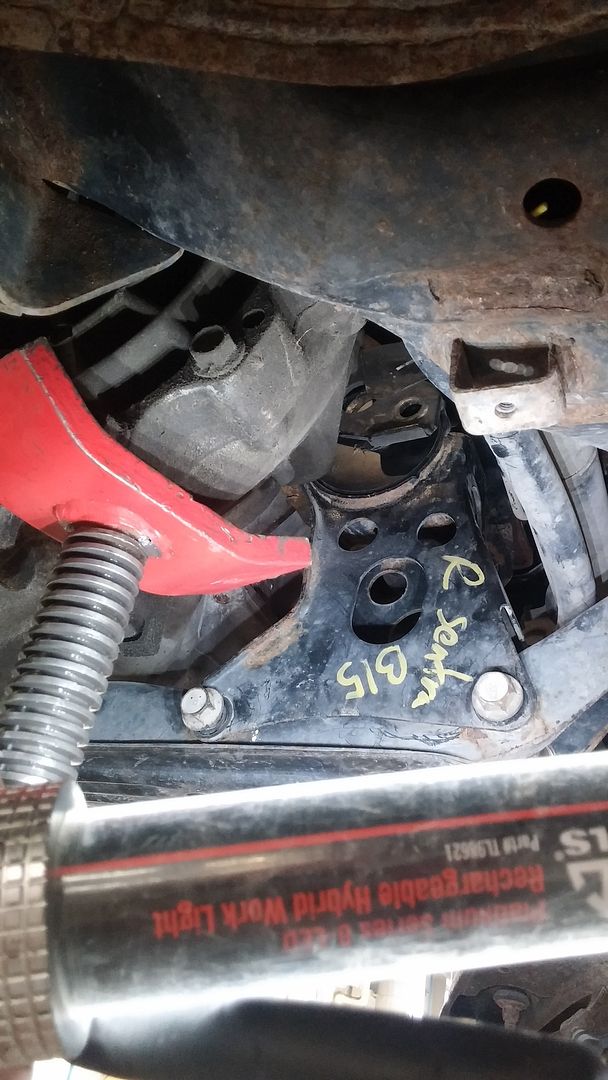
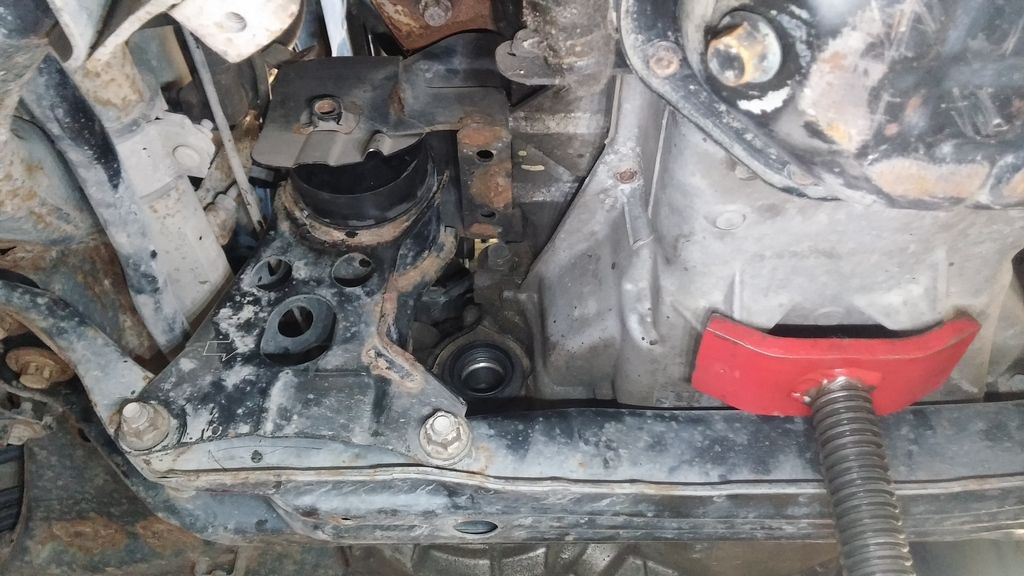
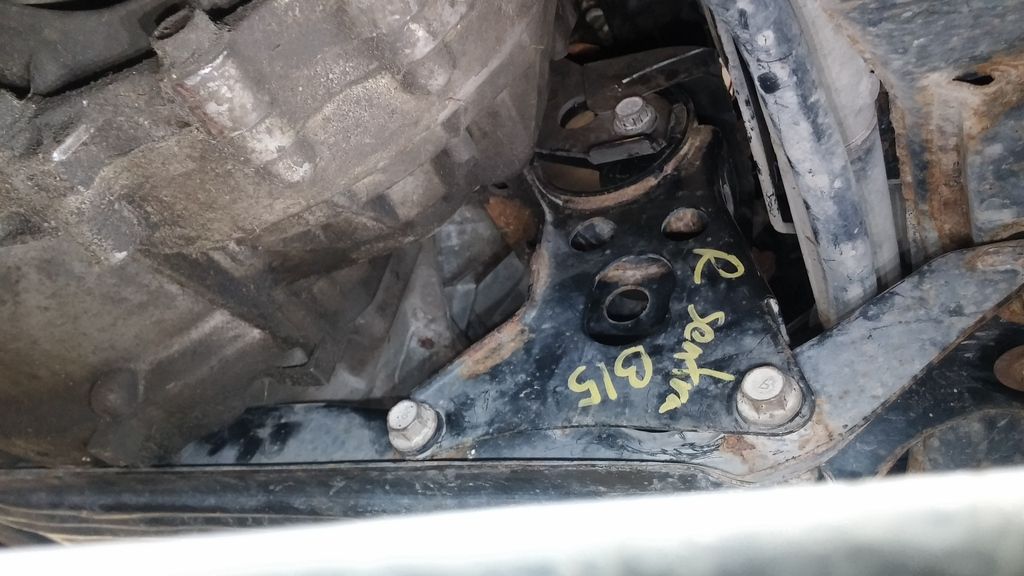
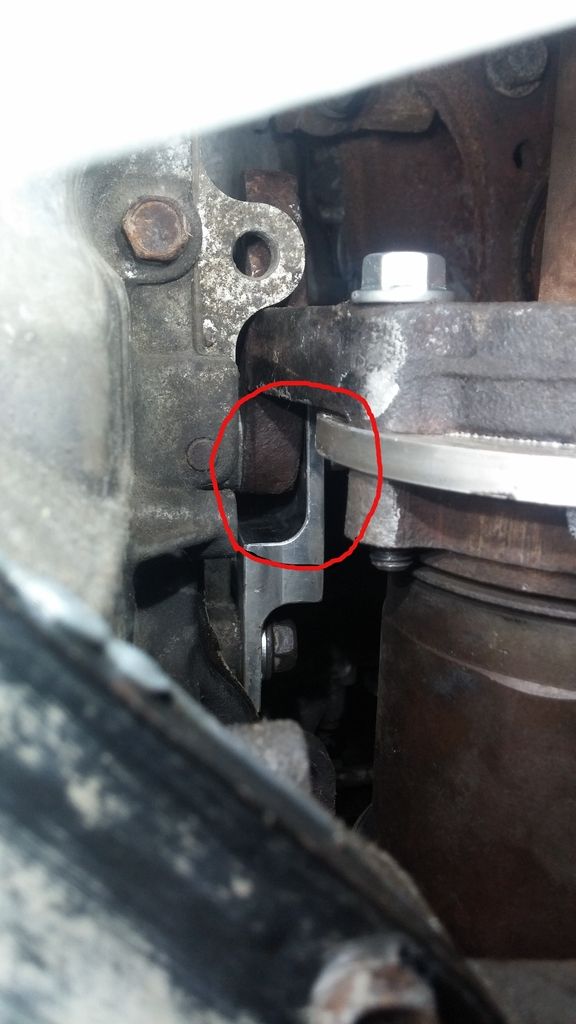
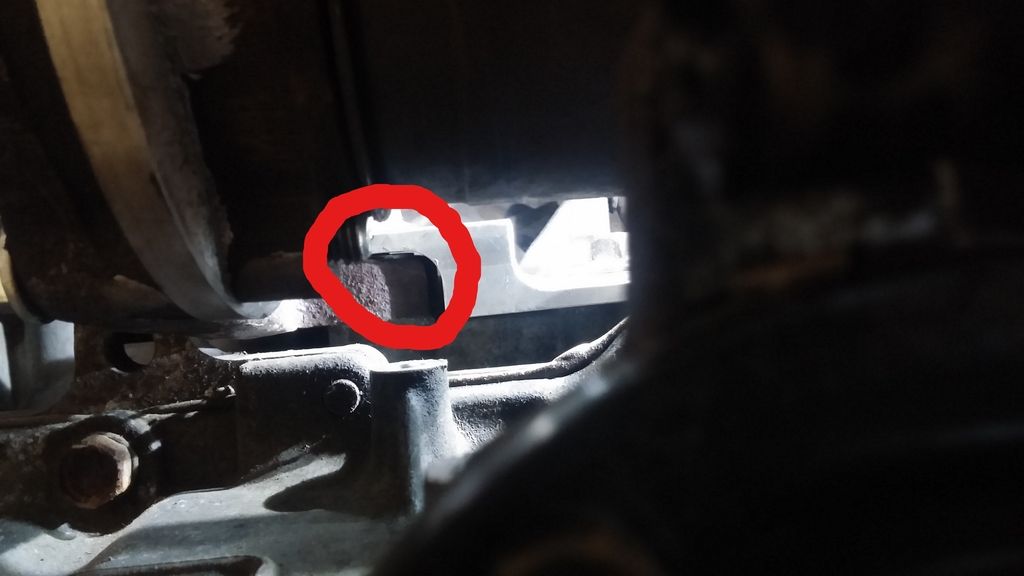
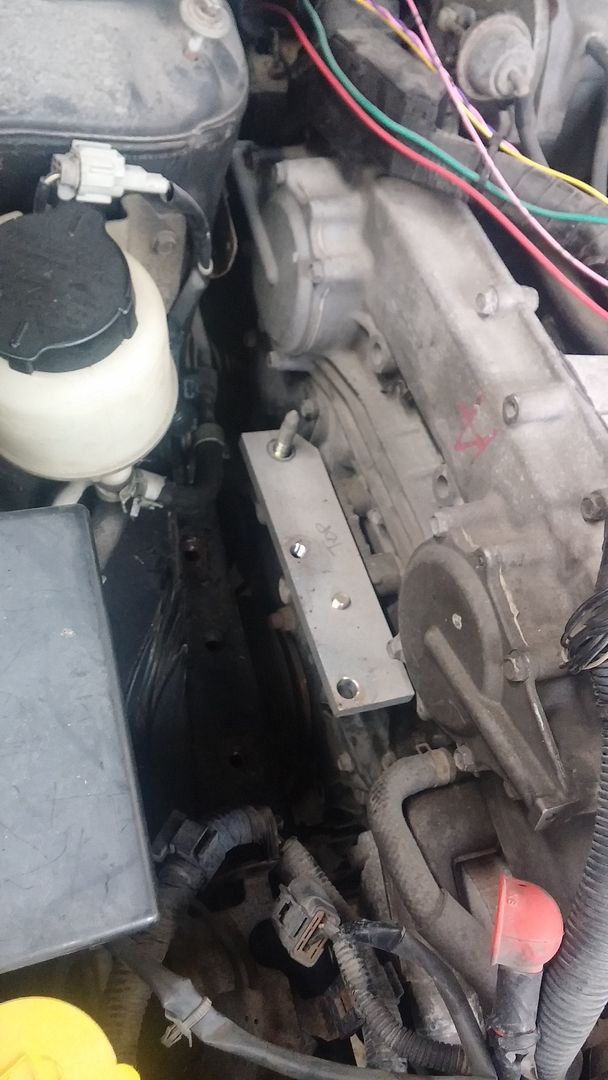
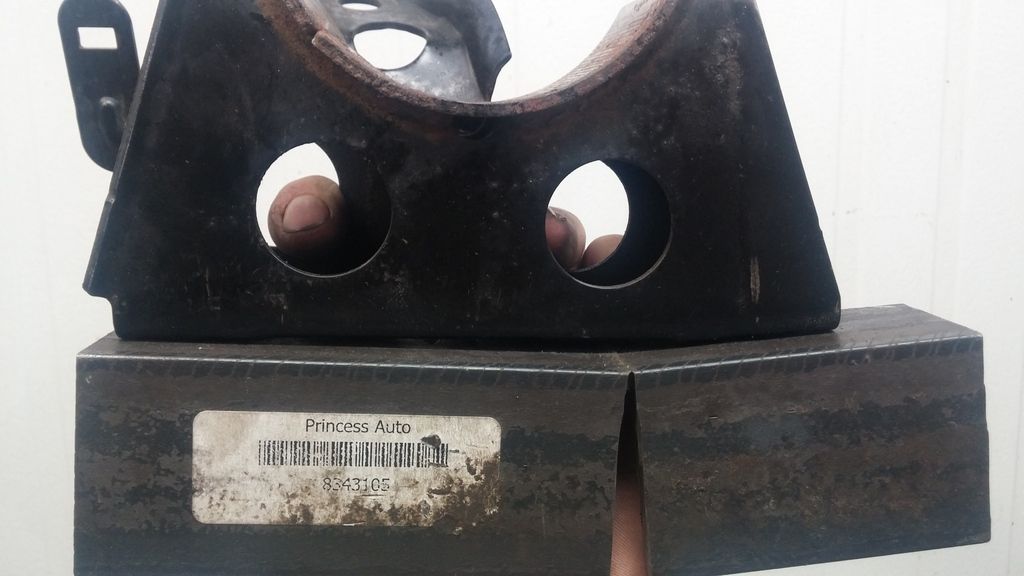
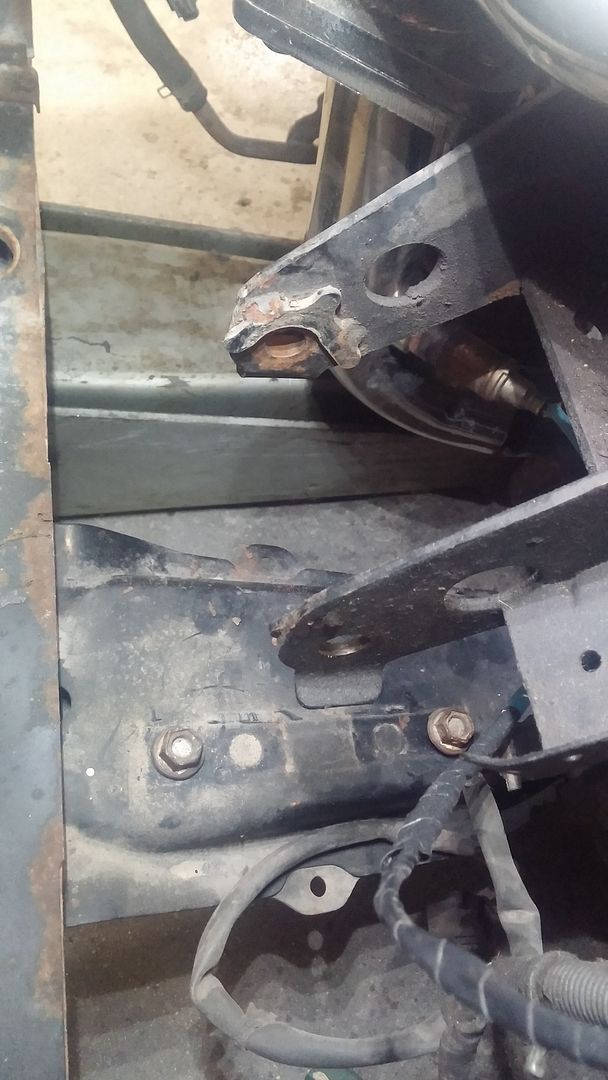
I placed the engine into the Sentra and got to work fabricating a passenger side engine mount.
I copied an idea from a user on the Sentras forums and cut the stock Sentra mount down to make a platform, and welded together a 4" spacer to raise the stock Altima mount up.

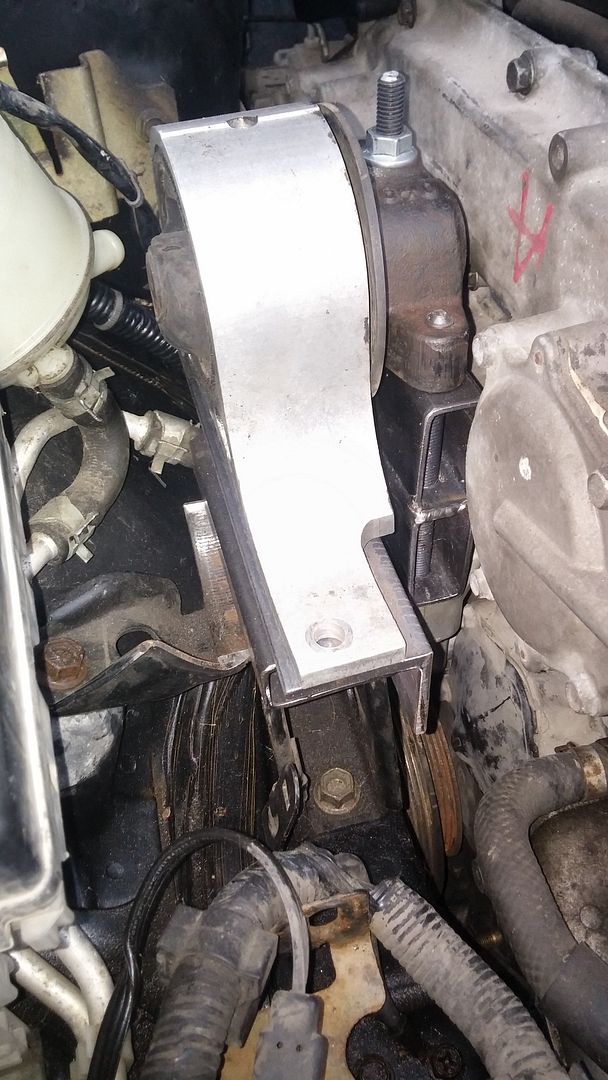
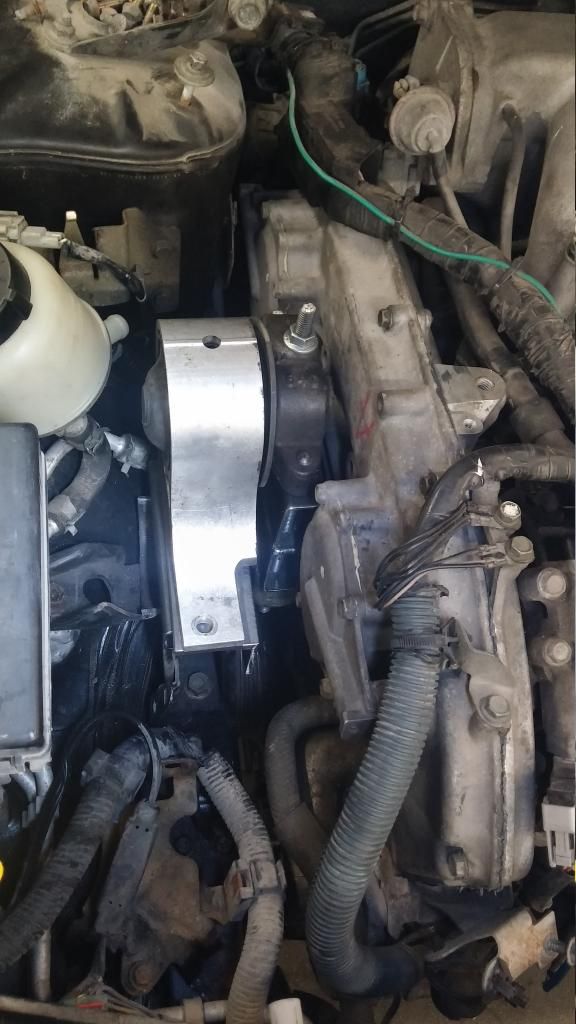
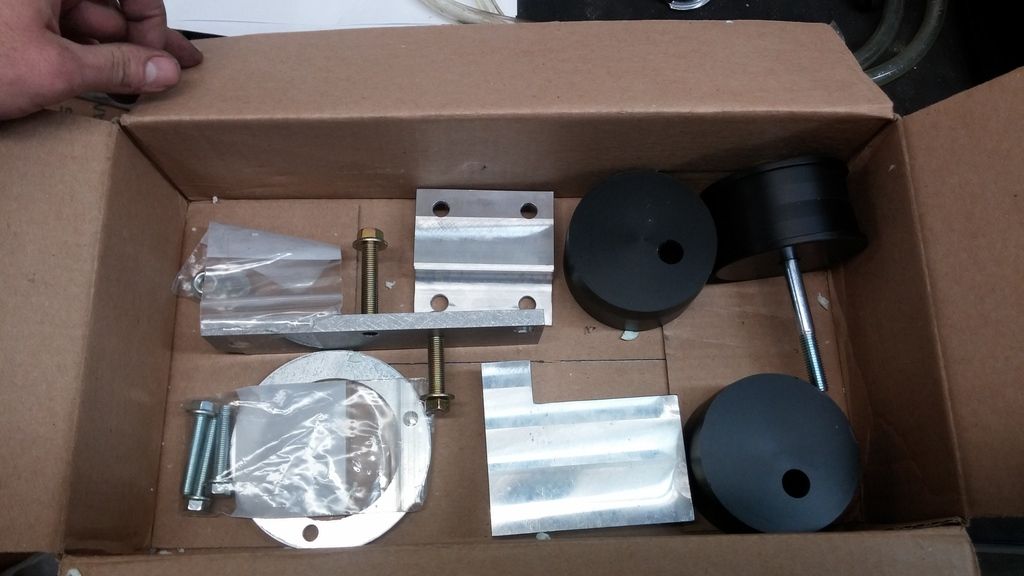
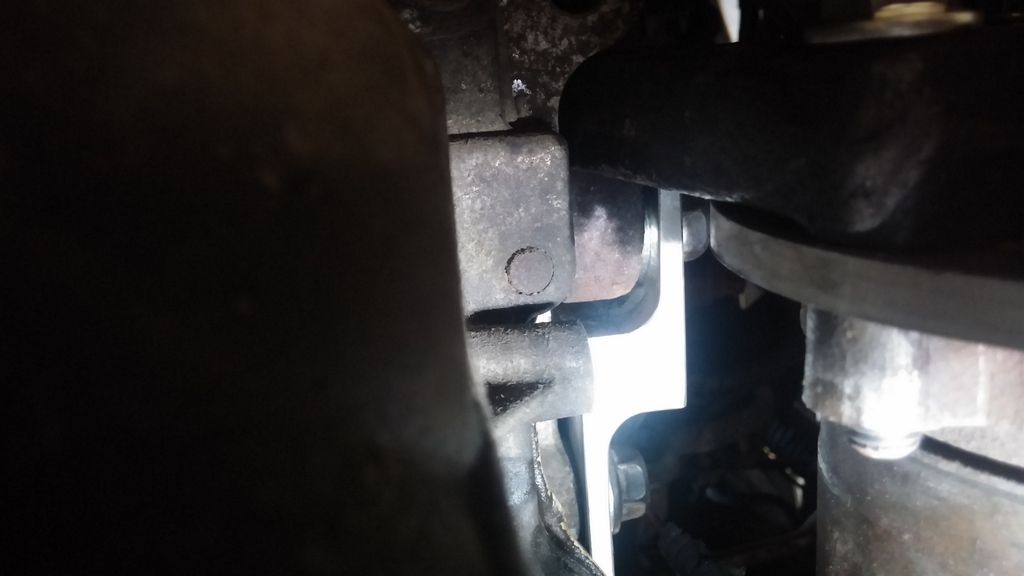
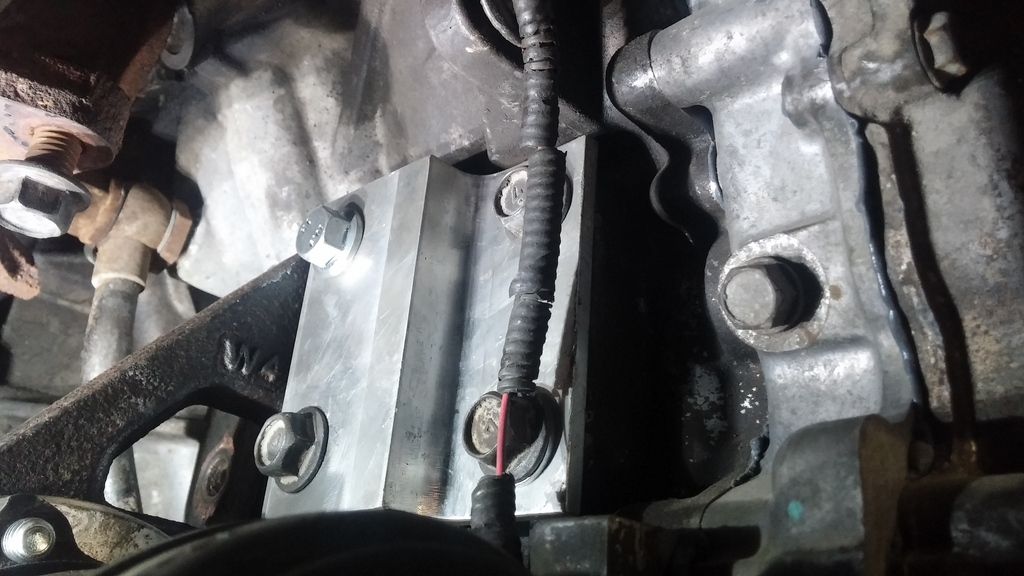
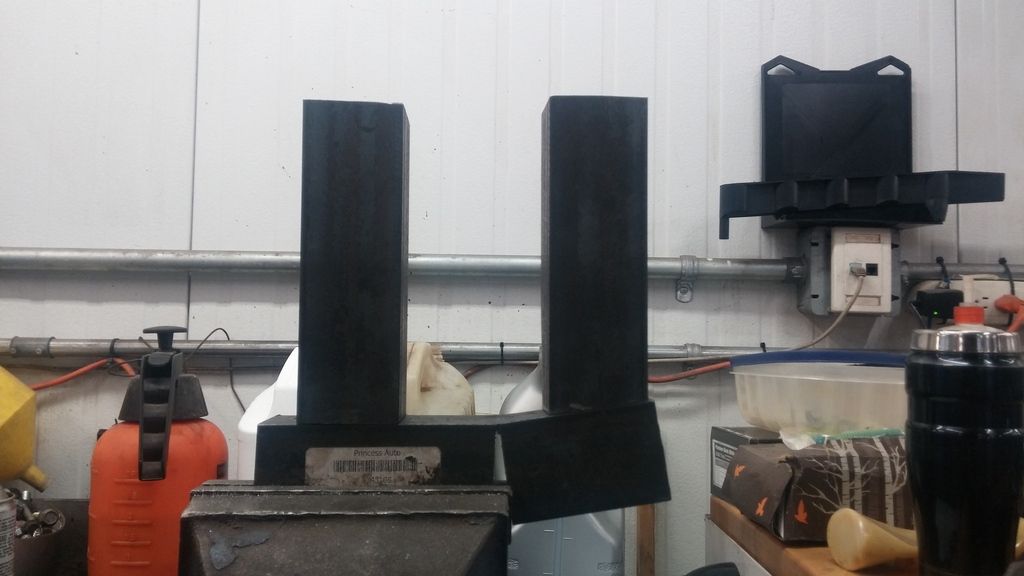
This was my first real attempt at fabrication, and I quickly got fed up with my slow progress. I then decided to order a mounting kit from a company called 2J Racing.

Trying to install the mounts which only resulted in frustration for me, so I decided to walk away from the mount issue and just focus on wiring it up. This is early 2015 now.

Run_Away
Run_Away Reader
10/22/15 9:02 p.m.

June 30th, 2015 was the first start:

I didn't get the first start on video, but here's the second:
https://youtu.be/ydzvS2EQPo0

Along with the conversion engine mounts I had also purchased a set of shifter bushings and crossmember bushings from 2J Racing. I ended up having a disagreement with 2J Racing when they sent me the wrong shifter bushings and refused to send me the correct ones unless I paid more. That coupled with the poor fitment issues I was having with the mounts made me decide to rid the car of all their product.

New shifter bushings were as necessity as the originals had disintegrated. I made up a shifter bushing out of an old hockey puck I found in a traded-in car.

It just just a tad on the loose side so a single layer of electrical tape made it fit nice and tight.

Installed. It's not nice, but it was free, it works, and it took 10 minutes to make....

Now that the car was running I wanted to see if I could get it moving under it's own power. I installed the drivers side axle (no pictures as it's all stock and boring) but ran into a snag on the passenger side. The 03 Altima axle bracket does not share the bolt pattern with the Sentra axle.

I'll also have to relocate the water hardline to the oil cooler.

Run_Away
Run_Away Reader
10/22/15 9:03 p.m.

Unable to make progress with the axles until I sourced a workable axle bracket, I moved on to trying to get the mounts to fit better. This is what I started with:

The offset bushing in the rear motor mount has the bolt hole down low, which doesn't work as the oil pan touches the crossmember and at the front jams the crank sensor up into the front mount:

So I took off the crossmember and clocked the offset bushing the way I was told to by 2J Racing:
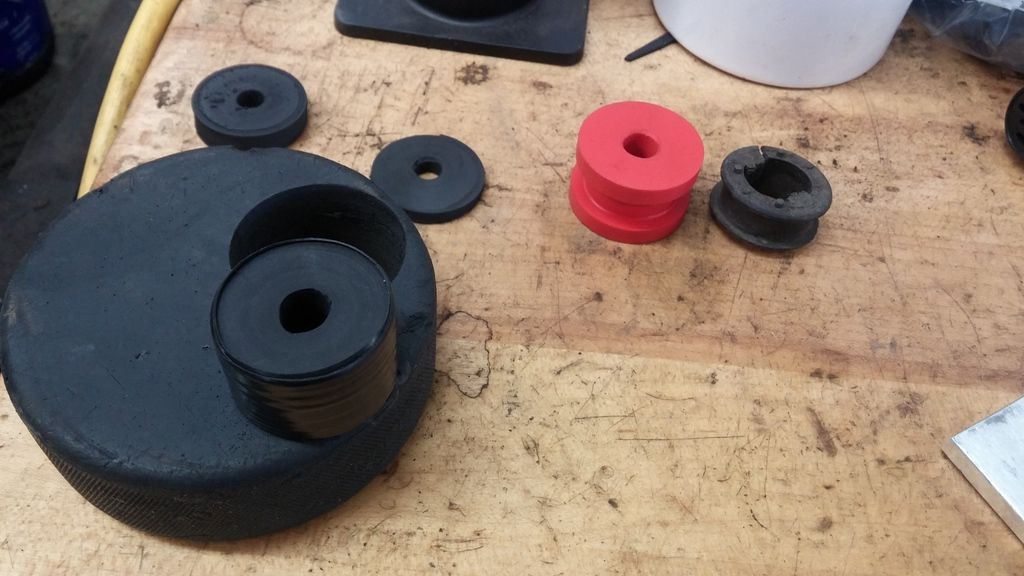
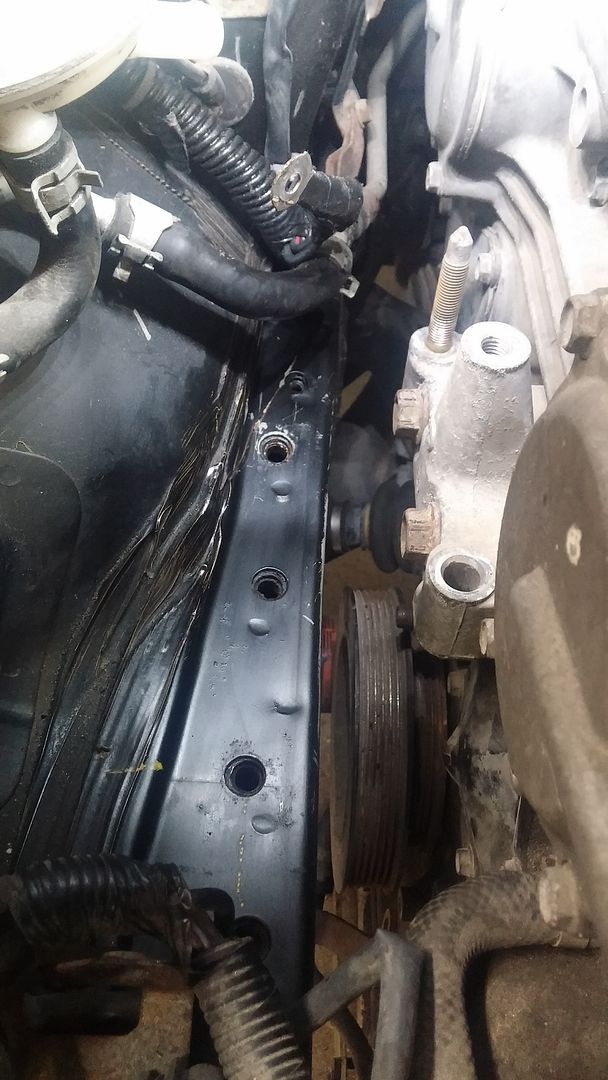
Also put in the Delrin crossmember bushings:

Put the crossmember back in, and here's how it lined up with the engine hanging naturally on the side mounts

Jacked up the back of the engine to try and line up the holes, but the arc in which the engine and transmission rotate in the two side mounts actually move it further back and nowhere close to the hole

So I tried jacking it straight up, and it's still too far back

In the end I rotated the bushing down a bit more and used the jack to push the engine up, but this is the best I could get

Which is still not acceptable as the oil pan still touches the cross-member.

Run_Away
Run_Away Reader
10/22/15 9:04 p.m.

Sourced an axle bracket and continued work on the axles July 18th:
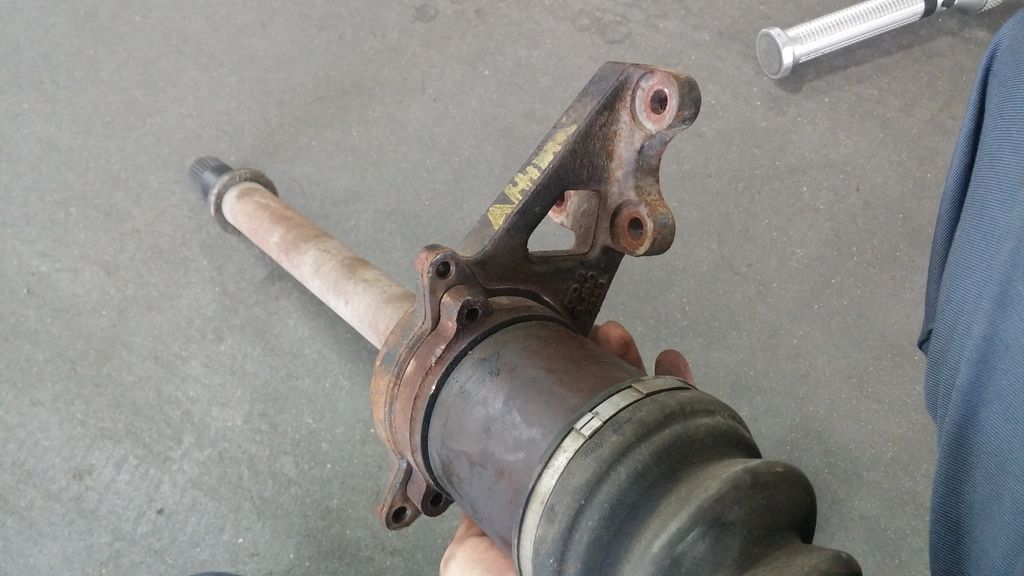
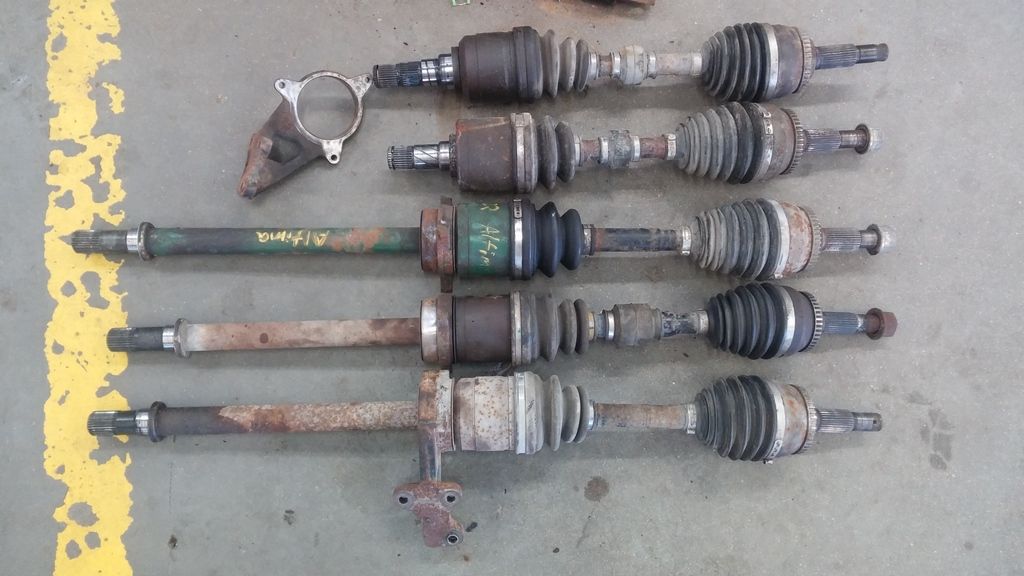
Top is 2001 Maxima with 5 speed VLSD drivers axle, followed by 2003 Altima 5 speed manual drivers axle, then 2003 Altima 5 speed manual passenger axle, then 2004 Spec V passenger axle, then 2001 Maxima with 5 speed VLSD passenger axle

2001 Maxima 5 speed manual bracket vs 2003 Altima 5 speed manual bracket

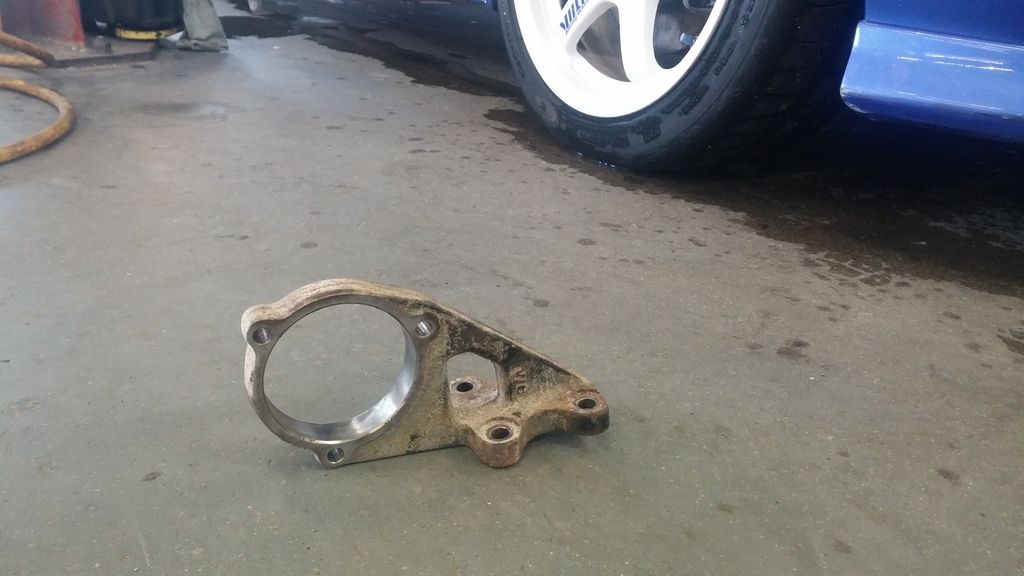
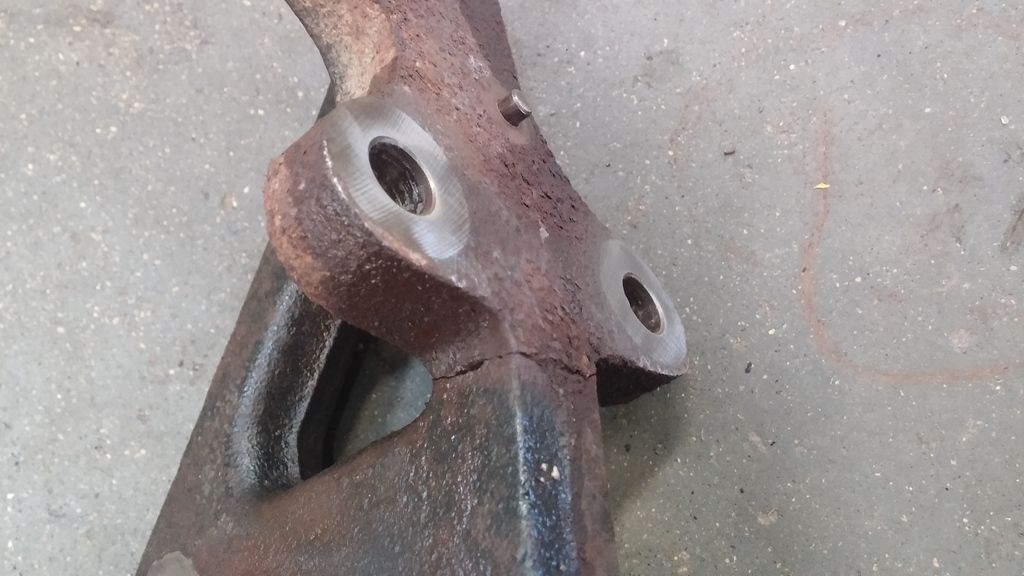
It wasn't until after I had torched and pressed out the 2001 Maxima axle bracket that I noticed that it was cracked...so I'll have to find another one and this is just for fitment purposes


2001 Maxima bracket on the Sentra axle with the 2J Racing spacer


Mocked up....the 2J Racing bracket doesn't fit properly here either. Note the gap between the aluminum bracket and the stock axle bracket.


So I added a washer. Still not enough. Bolt has that springy feeling of something giving as you tighten it...


Two washer did the trick. Everything tightens down nicely with no more springy bending feeling...


Top bolt put in place too.

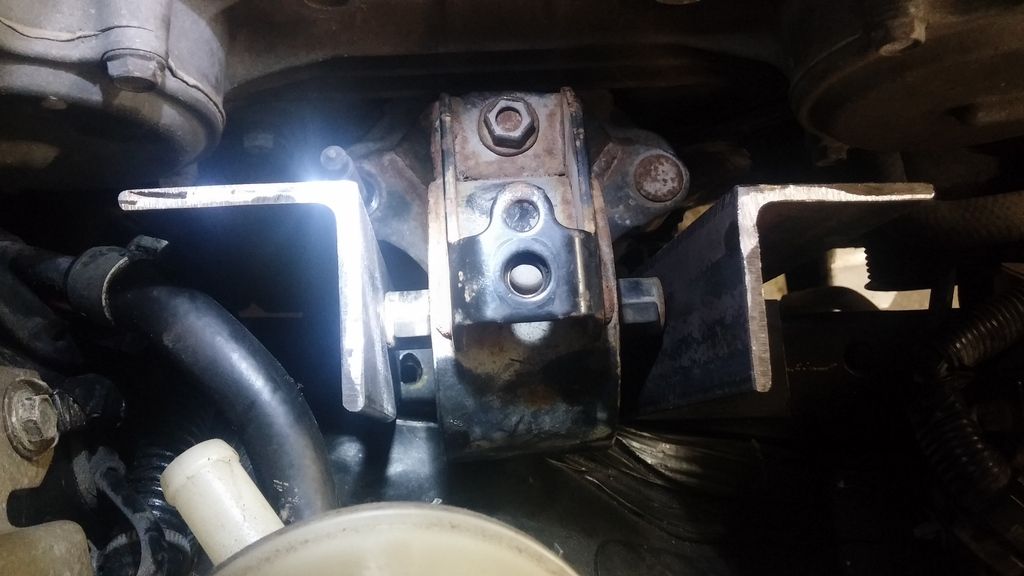
Two washers between the top bolt hole in the 2J Racing bracket and the axle bracket as well to keep things even. Put in a grade 10.9 bolt and a nut on the back side of the axle bracket for the top hole.

With the above done, I was able to drive the car for one lap of the parking lot! This was really good news as I no longer have to push the car in and out of the shop every time I want to work on it.

Run_Away
Run_Away Reader
10/22/15 9:05 p.m.

List of codes as of July 18th:

One of the things I had to buy was a new set of exhaust manifolds. The '03 Altima uses a perimeter subframe, while the Sentra just has a subframe at the base of the firewall with a crossmember down the middle of the engine bay tying the subframe and rad cradle together. The Altima manifolds and cats are cast metal and intefere with the crossmember on the Sentra. What I needed was the exhaust setup from a 1995-2003 Maxima. Instead of lying in the mud trying to retreive a crusty stock exhaust from a junkyard, I spent about $170 shipped and got the cheapest set of ebay headers I could find. Their intended application is a 95-01 Maxima. I fully expected fitment issues, E36 M3 hardware gaskets. :) Here's what $170 CAD got me:

Plugged the EGR port with a random diff plug I found

Quality seems okay for the money! Fitment on the otherhand...but that was to be expected.

Installed front

Installed rear

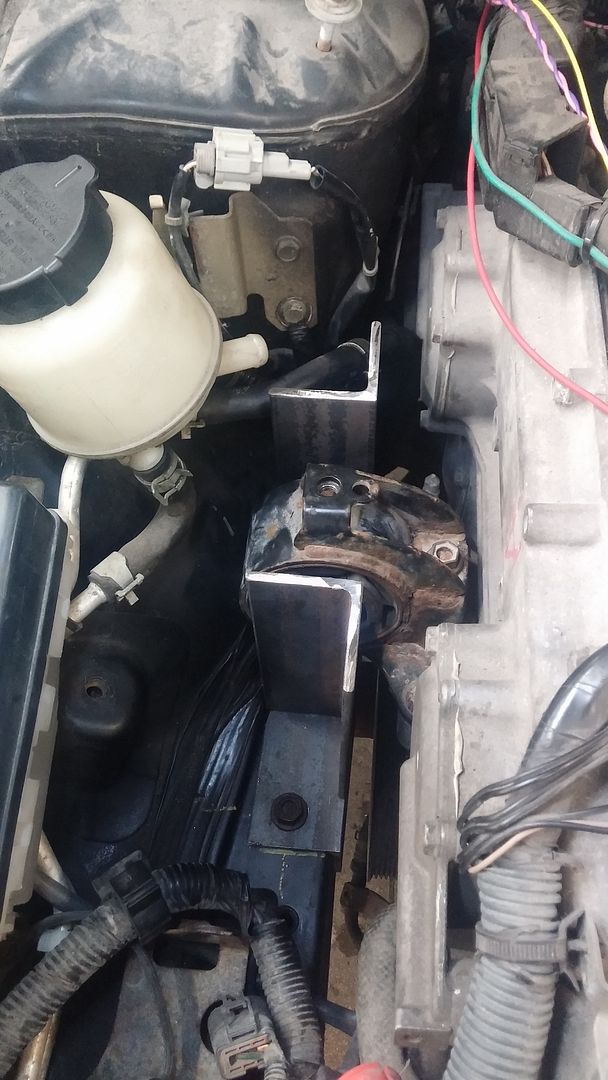
Tried to line it up by hand...nope

Tried to heat and bend it....no luck


So I made a relief cut about 3/4 of the way around the pipe. The front will now line up...

The back, not so much...

A couple of clearance pictures at the front. 
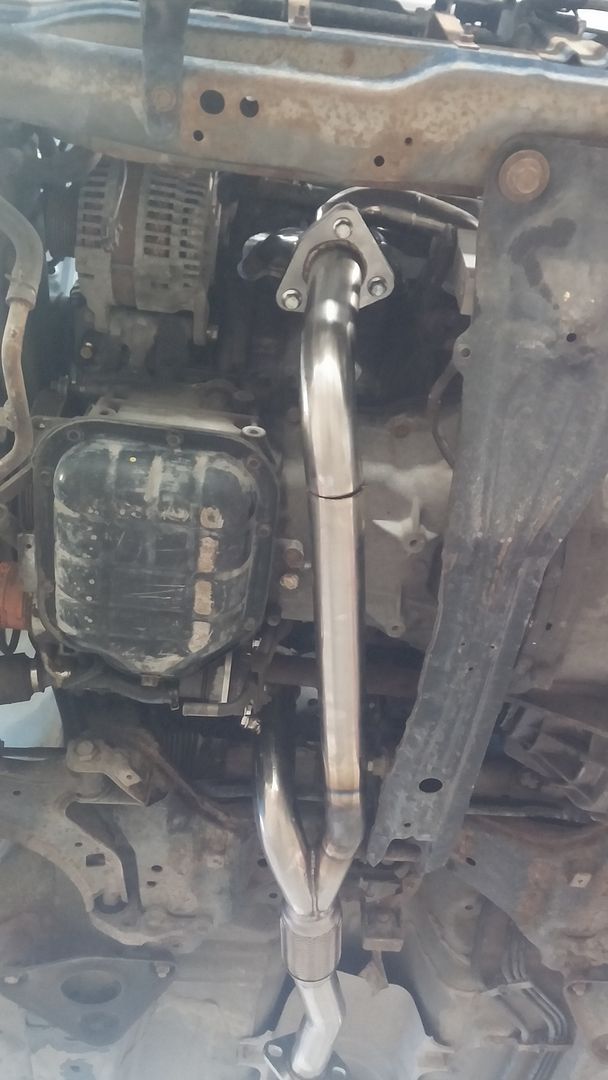
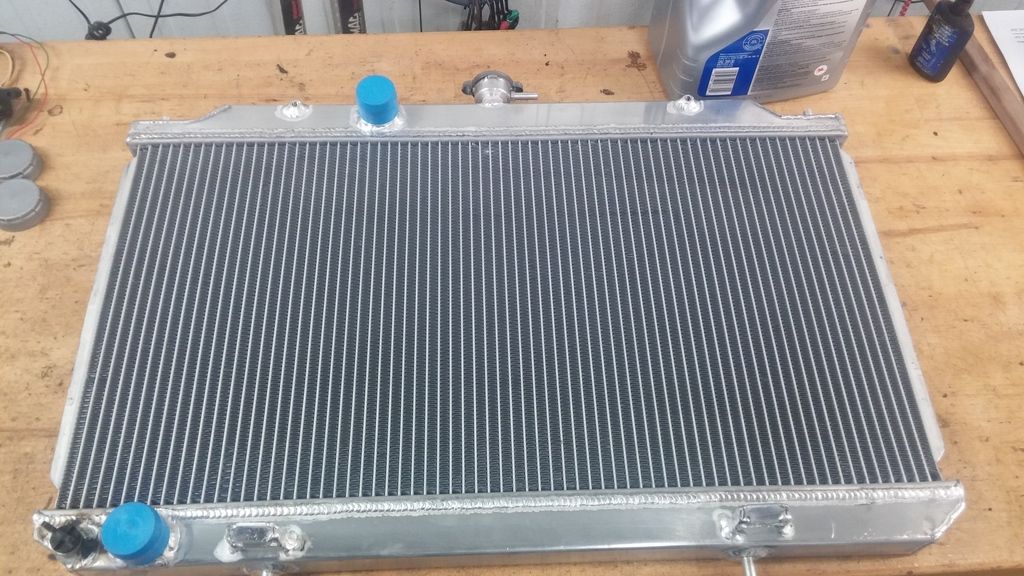
Still have to fit a rad and maybe fans there. Perhaps a pusher fan setup from the front? I'll figure it out when I've got a rad and fans

Datsun310Guy
Datsun310Guy PowerDork
10/22/15 9:52 p.m.

Nice work.

scardeal
scardeal Dork
10/23/15 8:05 a.m.

Whatever you do, please get the 02-03 SE-R front bumper cover. Way better looking.

sethmeister4
sethmeister4 SuperDork
10/23/15 11:08 p.m.

Awesome, I love it! I just finished putting an '03 Maxima VQ35 into my '95 Maxima. I'm down here at the $2015 Challenge right now! I was thinking about this exact swap that you're doing just the other day...nice work, can't wait to see it done!

Run_Away
Run_Away Reader
11/8/15 11:29 p.m.

Had to cut the Y pipe in half to fit. I'll have to get it welded up, but I already expected that...

On the Sentra the check engine light is turned on via CAN communication with the instrument cluster. The Altima uses an actual light, with it's own dedicated wire to turn on and off. The car was setting a code for the missing check engine light, so I had to wire something up. I saved from the trash bin at work a smashed up mirror from a Chrysler Town and Country with led turn signals. I freed the orange LEDs from the mirror, cut it down and stuck them on the back of the instrument cluster trim. I drilled a hole in the trim and lined up an LED behind the hole. 5 minute epoxy holds it in place. I soldered in a tweeter speaker connector so I can disconnect it should I ever have to take the dash apart.

In action...it's a bit brighter than I want...

Run_Away
Run_Away Reader
11/9/15 9:54 p.m.

Bought a used passenger side axle from the wreckers to replace my cracked axle bracket. These things are seized solid when the car is 2 years old, never mind from a 90s Maxima. So I had to use a lot of torch and air hammer to tickle it apart.

Apart and cleaned up! My autox car in the backround, a '99 Civic with way too much money dumped into it.

This Sentra is sort of the anti-thesis to my Civic, a very GRM spend-as-little-as-possible approach. Excluding the 2J racing parts on the car, I'm still well under challenge budget. While I won't be bringing this car to the Challenge (too far) I'd like to try and keep it within the budget rules. So I'm taking off the 2J Racing mounts and will be fabricating my own.

For the rear mount, I'm going to more or less copy what they did, but cheaper. I bought a rod of delrin on eBay. Here's the auction
Here's where that will go:

For the passenger side engine mount I'm going to try and replicate what a company called Z-Fever did. Their eBay page shows they wanted $1500 USD for them....it's a really nice setup, but I'm not paying that. Plus they don't make them anymore. I'll be using mild steel though...

I stole the body mount off a co-workers parts car, a 2001 Maxima.

Along with the rest of the passenger engine mount, and a "vacuum cut valve bypass valve"...it's an emissions thing that the Sentra lacks, and the Altima ECU is looking for.

Run_Away
Run_Away Reader
11/13/15 10:22 p.m.

Okay, so this update should bring me current with how the car sits now.

Here's 2J Racing's solution for the passenger side engine mount. Pretty simple, but leaves the engine mounted at an angle in the engine bay.

Here's the space I have on the frame rail to work with:

It's not flat, as picture here with the stock 4 cyl engine mount:

Made a bottom plate with angle iron to be the base of my mount. It matches the stock mount.

Cut some uprights, tried to make it all square

Here's an idea of what it'll look like finished.

I'll tie it in to the 3rd bolt hole on the inner fender/strut housing apron for stability. I do have an issue where the rearward upright wants to sit on top of the bolt hole for the mount.

I'm not sure if I want to try and sink another welded nut inside the frame rail further back, or possibly narrow the sleeve going through the stock maxima rubber mount. Possibly make a delrin mount to the replace the factory rubber?

I also have to figure out how to get the engine squared up in the engine bay before tacking it all together.
I'm thinking remove the upper intake manifold will give me a nice flat surface to put an electric level on (project binky anyone?) to hang it level. I'll zero the level to a flat bar across the top of the strut towers or something. To make the crankshaft parallel with an imaginary line drawn between the center of the front wheels is a bit more tricky.....so far my best thought is to tie a string tight from the same spot between the two shock towers, and measure the distance between the string and the two outer lower intake manifold stud holes.
This is all assuming both the car is relatively square (no accident tells that I can find) and nissan put the intake manifold bolt holes on level and straight.

Anyone have a better idea?

Run_Away
Run_Away Reader
11/13/15 10:25 p.m.

And just some overall shots of the car.

Sorry, no 02-03 front bumper here. It's going to be a sleeper!

Spoolpigeon
Spoolpigeon UberDork
11/13/15 11:00 p.m.

I like it. Keep the steelies and put some sticky tires on there.

wheelsmithy
wheelsmithy HalfDork
11/14/15 7:48 a.m.

Very cool build. The problems you are tackling involving integrating the computers and chassis are particularly impressive. Thanks for sharing.

JtspellS
JtspellS SuperDork
11/14/15 10:48 a.m.

Very impressive, its good to have someone on the "inside" who can shine a light on the ECM intricacies to the more grassroot folks.

erohslc
erohslc Dork
11/14/15 11:28 a.m.
Run_Away wrote: ... I also have to figure out how to get the engine squared up in the engine bay before tacking it all together. I'm thinking remove the upper intake manifold will give me a nice flat surface to put an electric level on (project binky anyone?) to hang it level. I'll zero the level to a flat bar across the top of the strut towers or something. To make the crankshaft parallel with an imaginary line drawn between the center of the front wheels is a bit more tricky.....so far my best thought is to tie a string tight from the same spot between the two shock towers, and measure the distance between the string and the two outer lower intake manifold stud holes. This is all assuming both the car is relatively square (no accident tells that I can find) and nissan put the intake manifold bolt holes on level and straight. Anyone have a better idea?

Most smartphones can host a free app that does 'level' functions.
Accurate to tenth of a degree, compact enough to be used in tight spaces, easy to read.
I also use mine for doing frame and suspension work.

Run_Away
Run_Away Reader
11/29/15 7:34 p.m.

I've actually got a nice little digital level, similar to what the guys on Project Binky use, thanks though!

Had a couple of hours to work on the car again this week. Fiddled with the front mount.
The space I'm working with:

The stock Altima front mount:

Rough draft of what I'd like

I forgot to take pictures, but note how the bushing in the mount is clocked. I'll be flipping the mount 180 deg, so the bushing (it's oil filled) is not properly oriented. I pressed out the shell of the inner bushing to flip it around.

I also welded together a mount for the IPDM (fusebox) on top of the drivers side axle mount. 
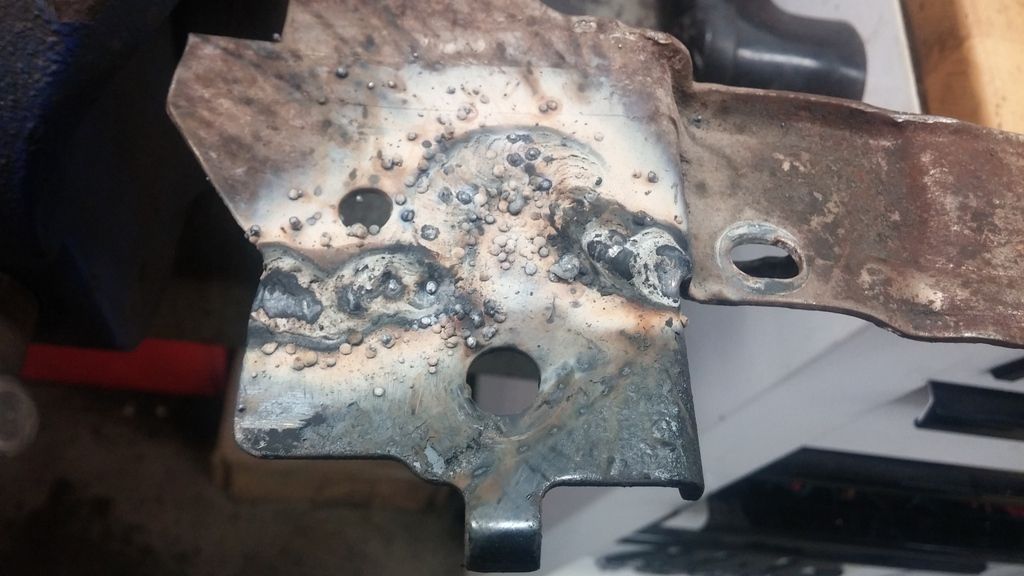
I'm a total noob at welding, here are the settings I used

And I made a trip across the border to pick up my cheapo $99 USD shipped radiator! I'm actually pretty impressed with the quality. Hopefully it does the job. Others who have done this swap report the stock 4cyl radiator is not up to the task.

And I'll leave you with a nice sunset behind the car.

RossD
RossD UltimaDork
12/1/15 12:12 p.m.

Cool project. Maybe I missed it, but what's the intended use? Just a sleeper/fun car?

Keep it coming.

Fitzauto
Fitzauto HalfDork
12/1/15 1:34 p.m.

Nice build. All that electronic work would make me freak out.

maschinenbau
maschinenbau New Reader
12/1/15 1:38 p.m.

Challenge contender?

Run_Away
Run_Away Reader
12/4/15 8:20 p.m.
RossD wrote: Cool project. Maybe I missed it, but what's the intended use? Just a sleeper/fun car? Keep it coming.

It's going to be a daily driver/winter vehicle. Silly, I know...

My fleet consists of a slammed '91 Prelude that I daily in the summer, a '99 Civic coupe I autocross in the summer, a '69 C10 truck parked and due for some rust repair, and a rusty '95 Civic coupe I drive in winter.

This car will replace the '95 Civic as the one car that is capable of driving though a snow drift....I think I'll enjoy 4 doors too.

Run_Away
Run_Away Reader
12/4/15 9:15 p.m.

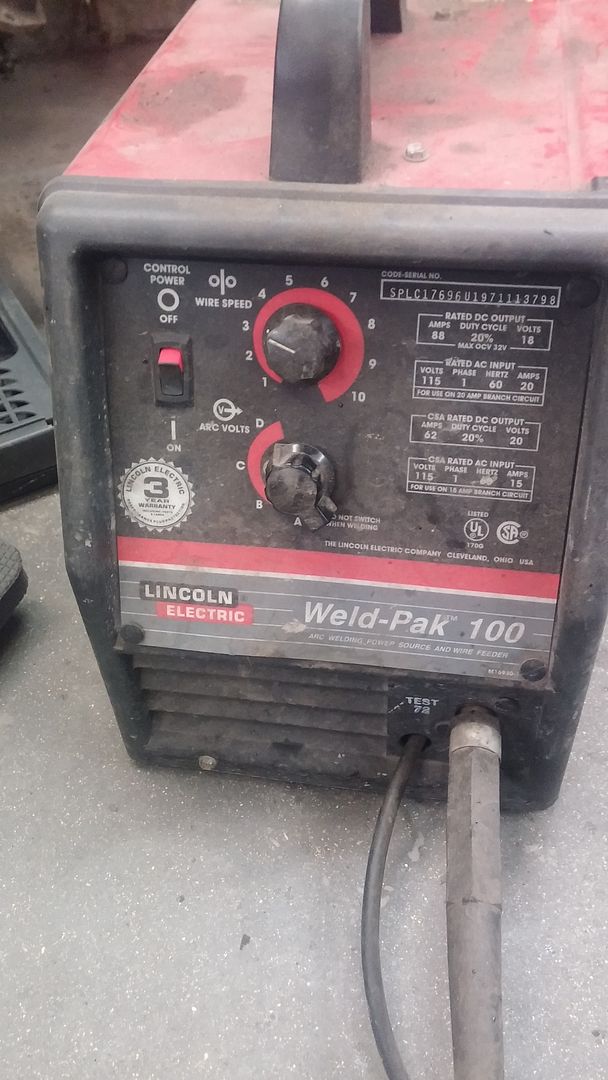
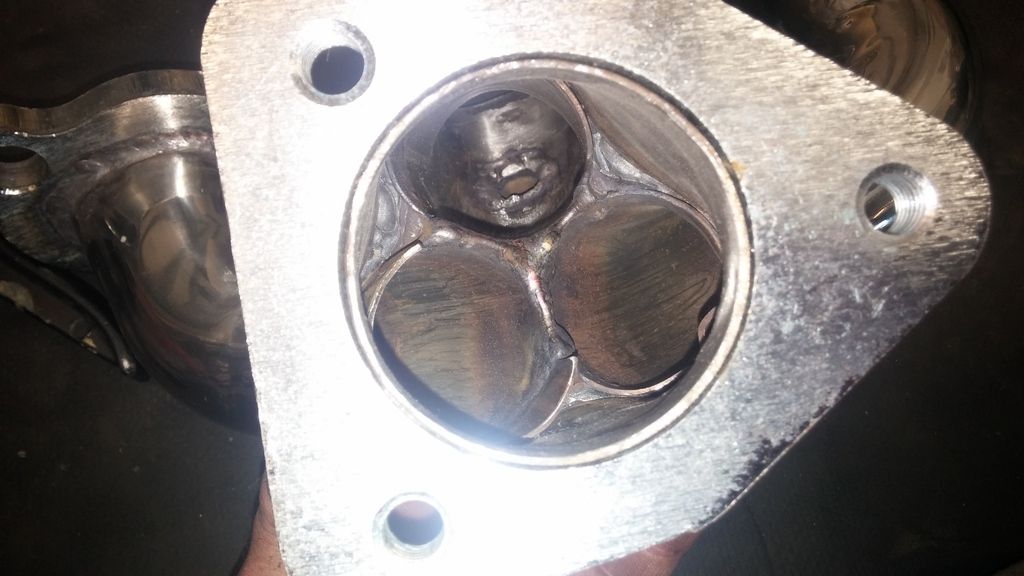
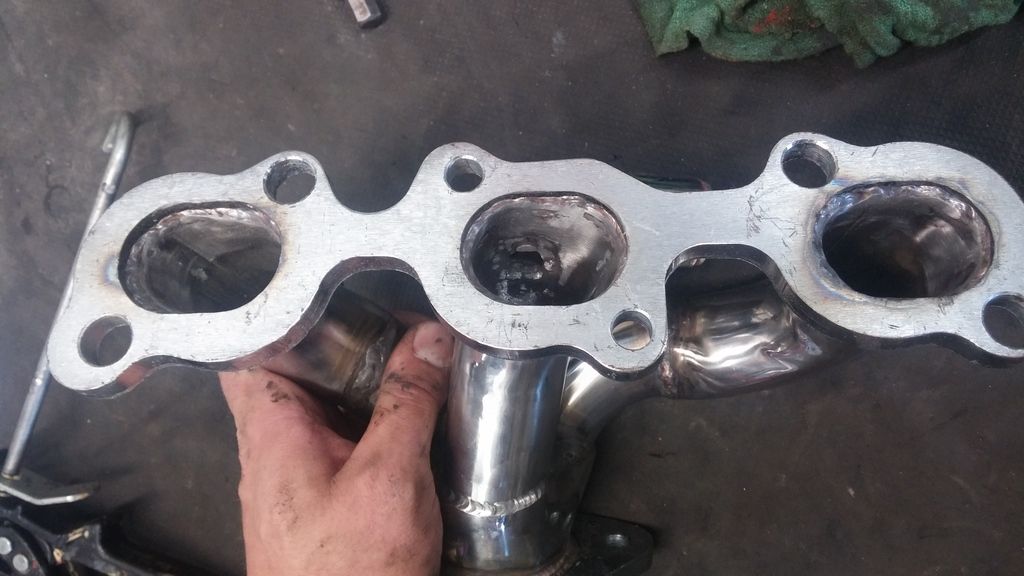
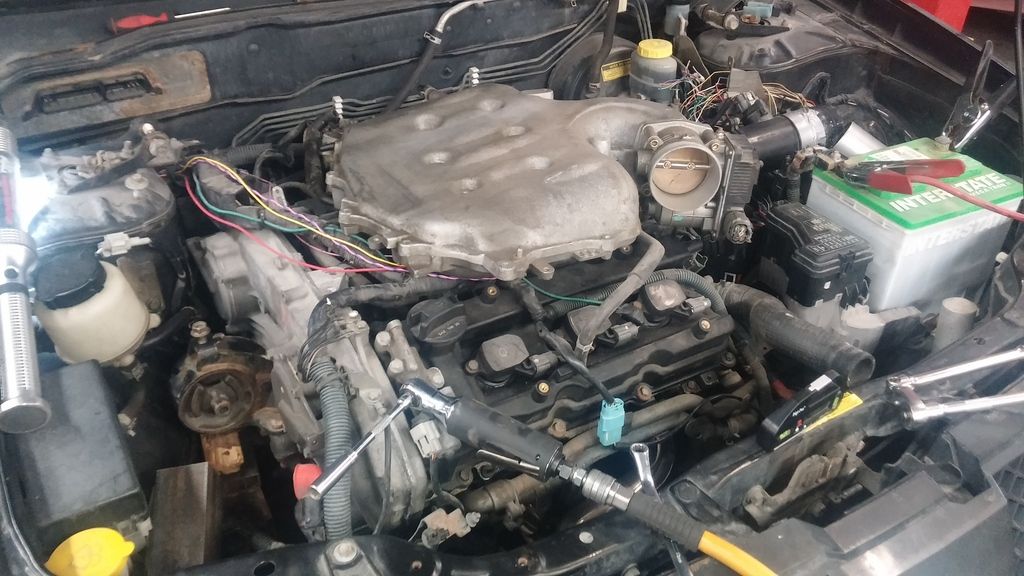
350Z intake manifold anyone?
It's far too tall to fit under the hood unfortunately.

Last Tuesday I spent my evening pulling off the intake manifold and taking the passenger axle out. The intake manifold off will give me a place to use as reference for setting up the engine level and square in the engine bay. The axle is out because I've dropped off a box of parts at a machine shop to have a better axle bracket system made, and to cut down a chunk of delrin to make a rear engine mount.
Pile of machine shop parts:

They said their machinist is gone for a couple weeks, but that it should be done by the 3rd week...

With the intake manifold off I also took a quick look at the rear bank plugs, and they are pretty worn... 
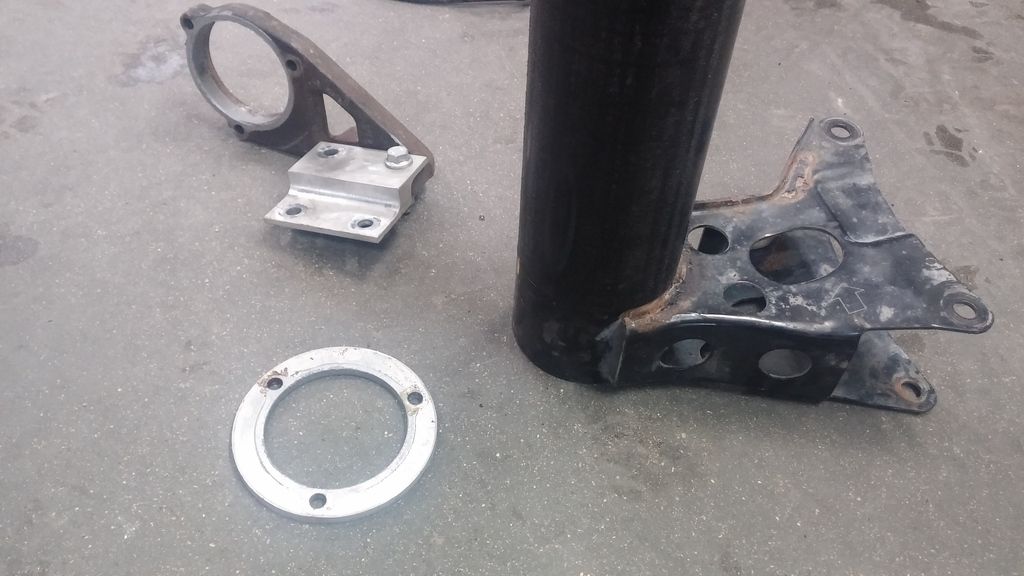
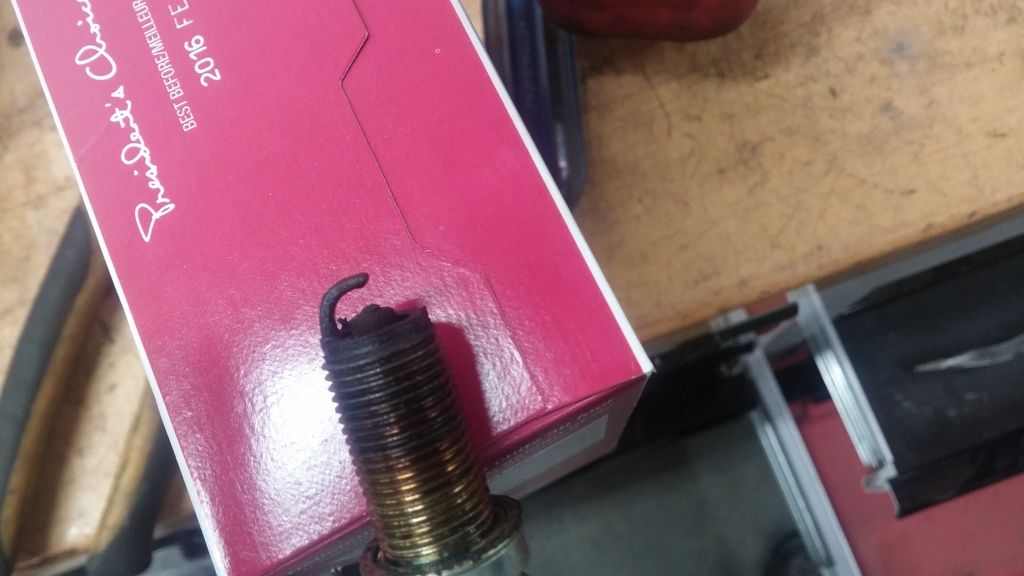
So I've got on order: -new spark plugs
-a 3.25" silicone couple for the 80mm throttle body and MAF connection that I hope won't be too loose
-factory heater core hose since I must have tossed the Altima ones and only one of Sentra ones could be made to work
-lower rad hose
-copper crush washer for the rear hard water line at the back of the block going to the oil cooler

ssswitch
ssswitch HalfDork
12/4/15 9:15 p.m.

This is a pretty cool swap. It's also nice to see Canadians putting out some of their budgets. I feel like Americans get off too easy sometimes.

Does MB have socialized insurance with tasty auctions like SK/BC do?

David S. Wallens
David S. Wallens Editorial Director
12/6/15 10:31 p.m.

Very cool. Thanks for sharing.

Run_Away
Run_Away Reader
2/7/16 6:17 p.m.

Well! It's been a while....

I've been working away at it. Trying to get the engine square and mounted in the bay. First I had to create some reference points. I used a steel rail from a big tire rack across the front fenders to get my left/right level reference. I also wrapped a string from strut tower to strut tower as reference.
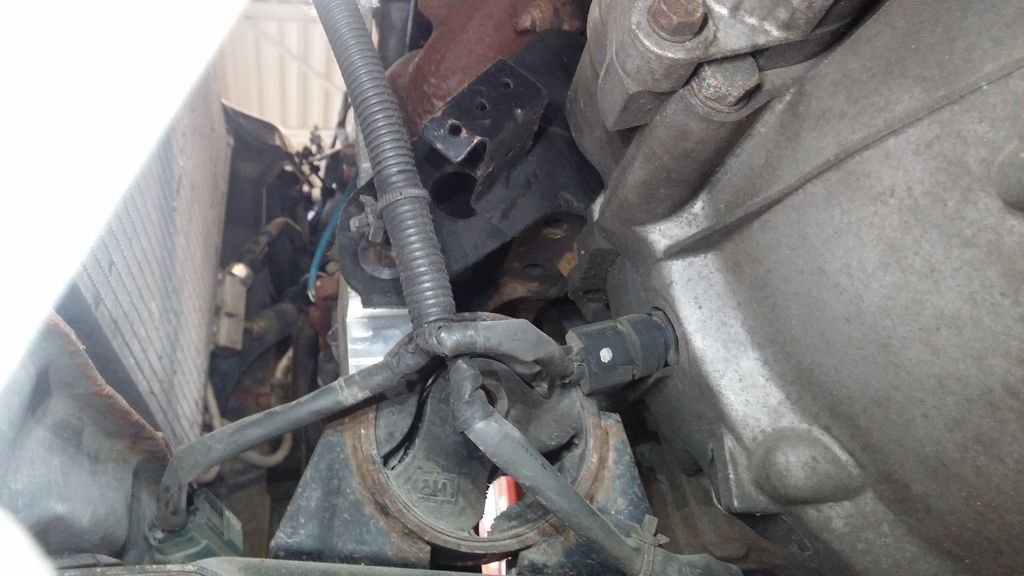
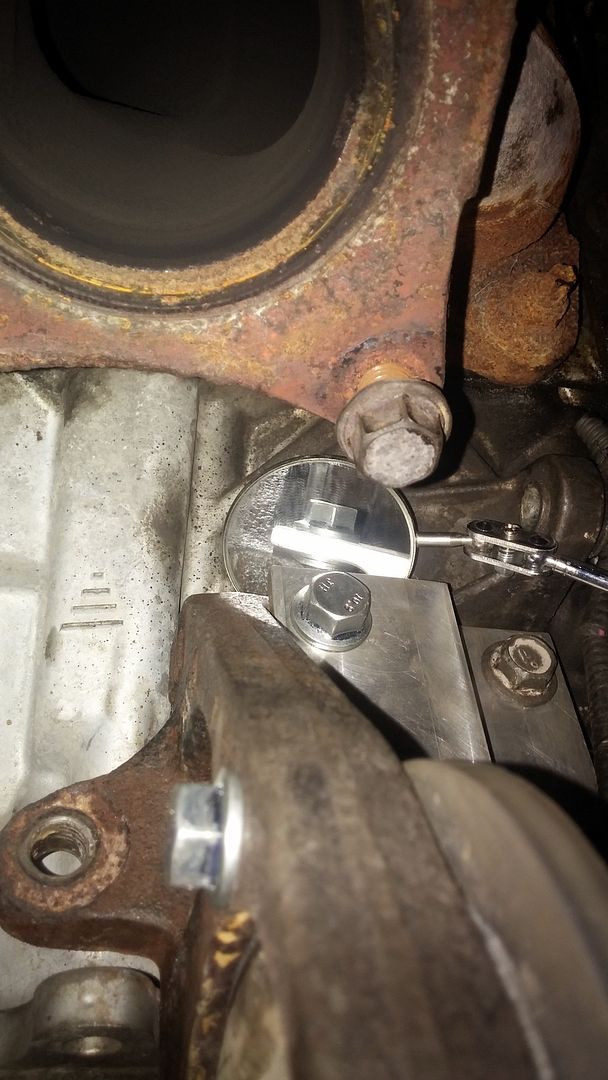
I use a jack on the oil pan and exhaust to move the engine around where I want.
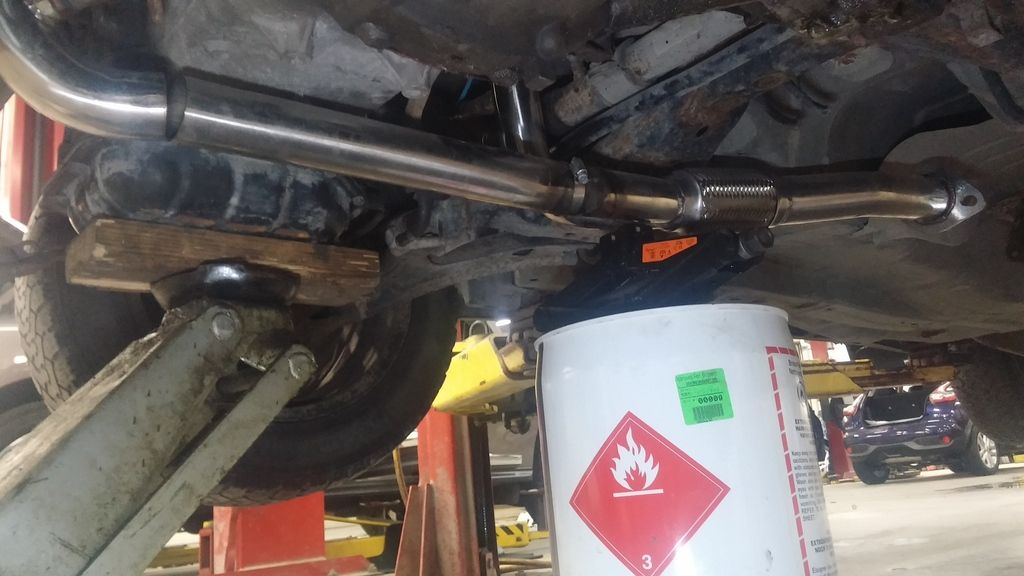
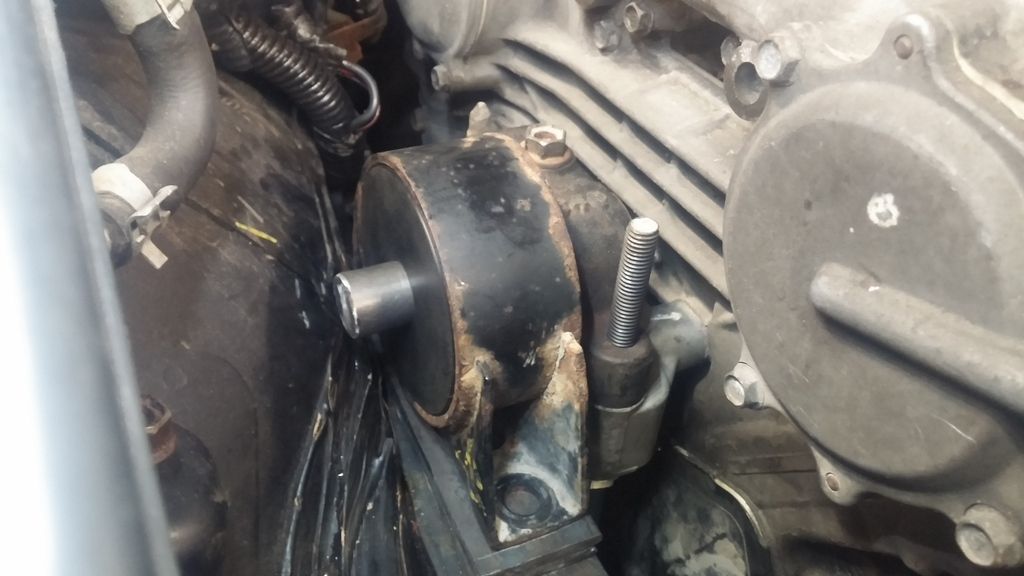
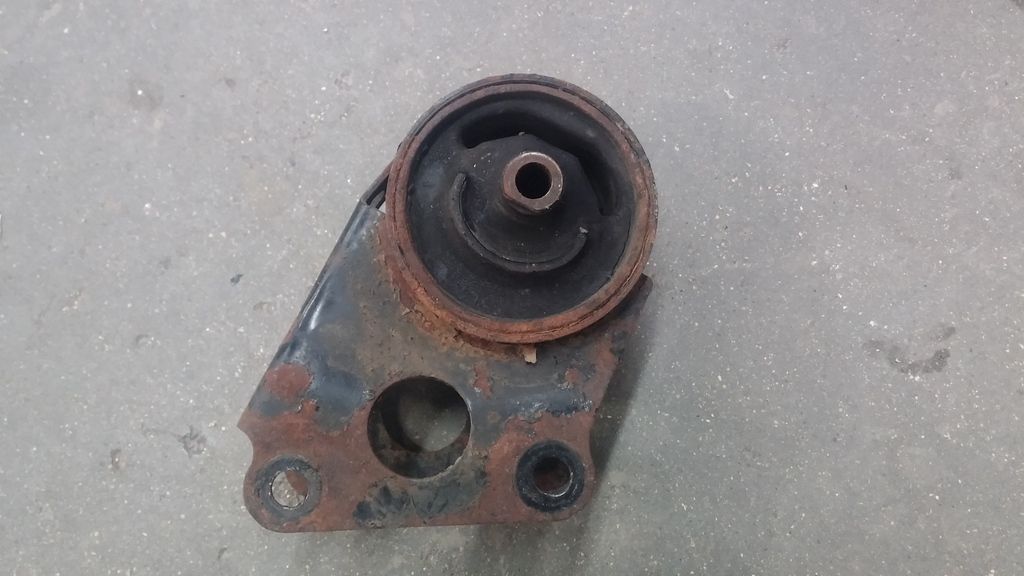
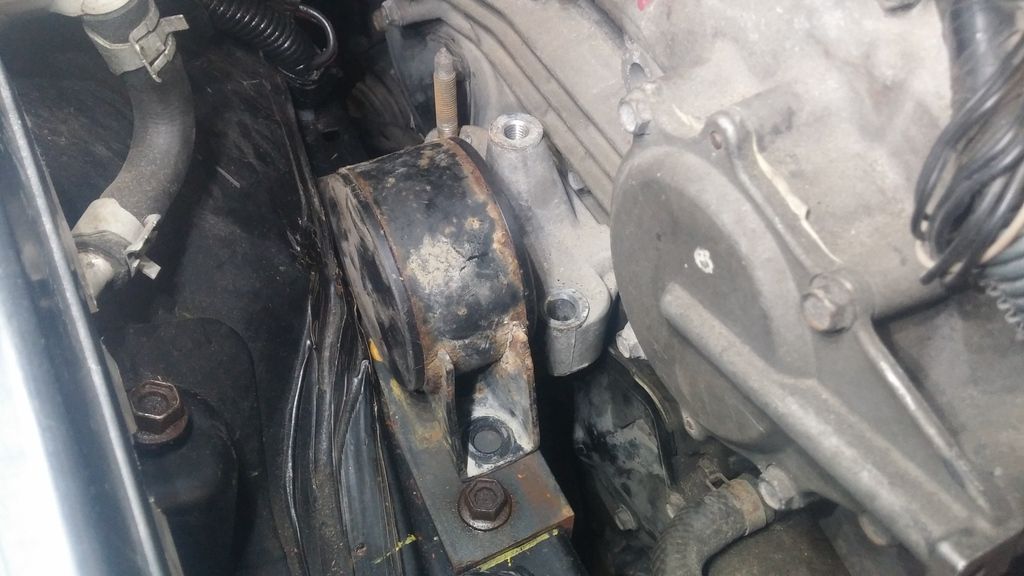
The bad news is my plan for the passenger side engine mount won't work due to space constraints. Once I had everything square, I found the engine sits further back and lower than I anticipated, and the factory Maxima mount was trying to occupy the same space as the inner fender. Hard to tell in this picture, but it's resting on the inner fender.

I'm not willing to dent or cut the inner fender as that will cost me tire clearance.

Here's my new plan. This configuration has just enough room: Stock Altima mount: 
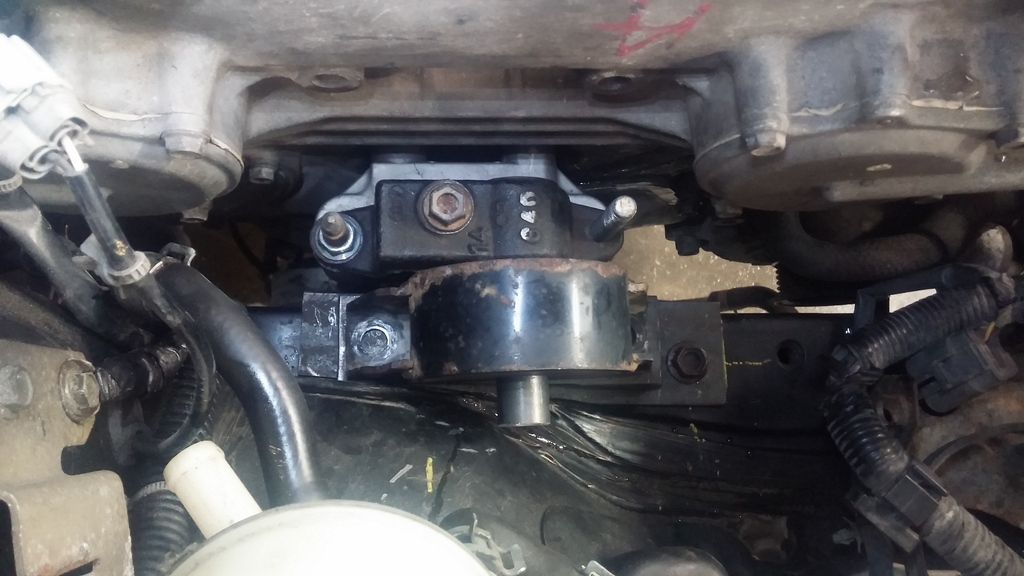
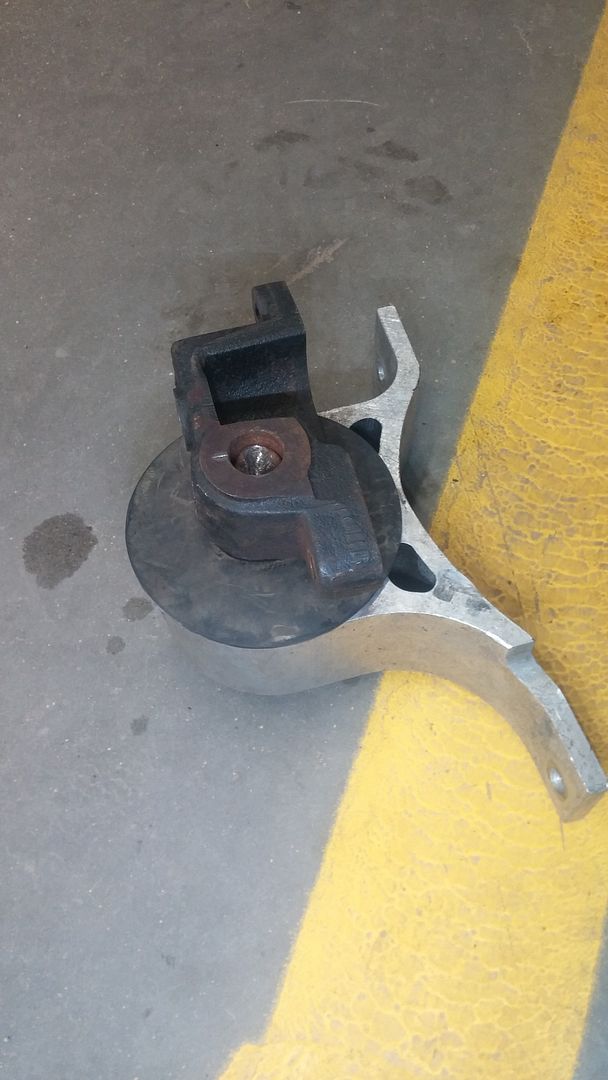
Tore out the rubber and kept the engine side of the stock Altima mount

Here's what it should look like: 
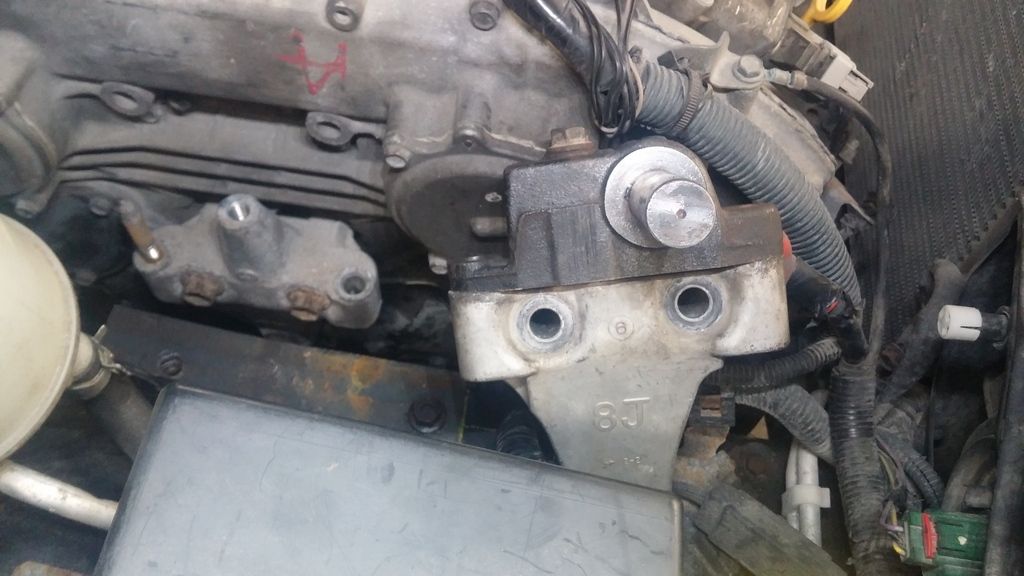
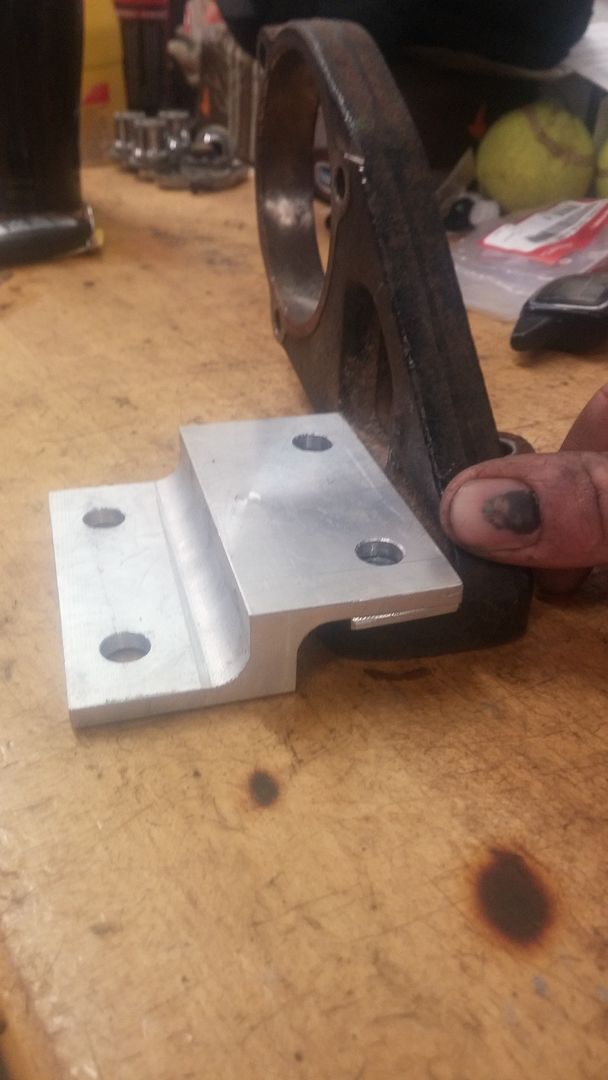
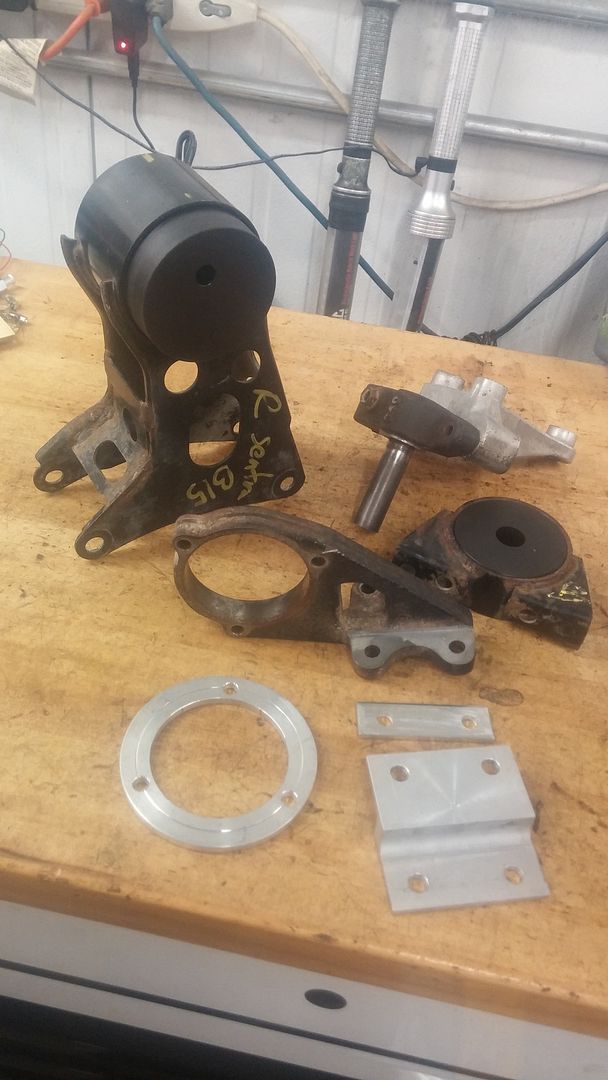
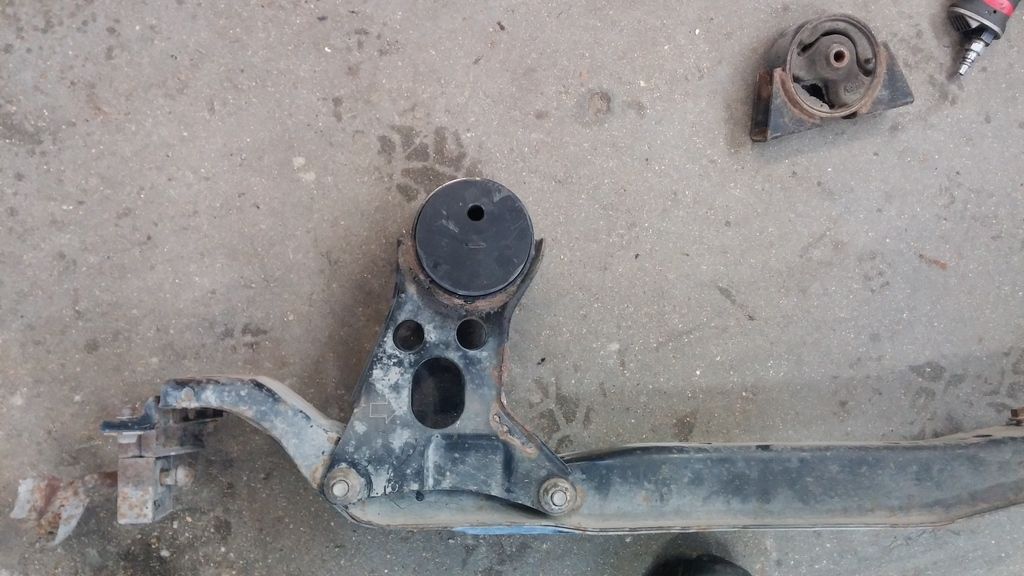
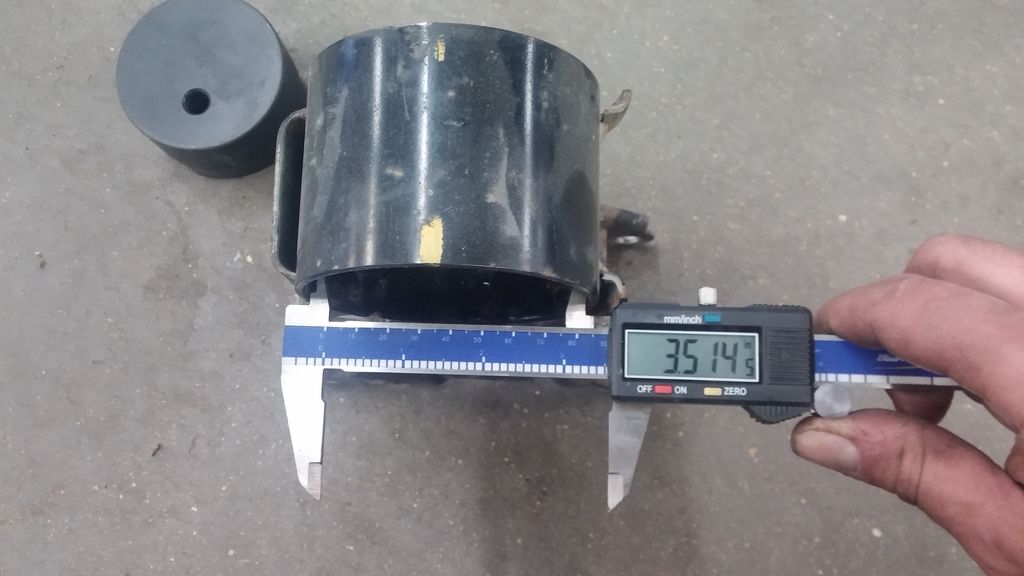
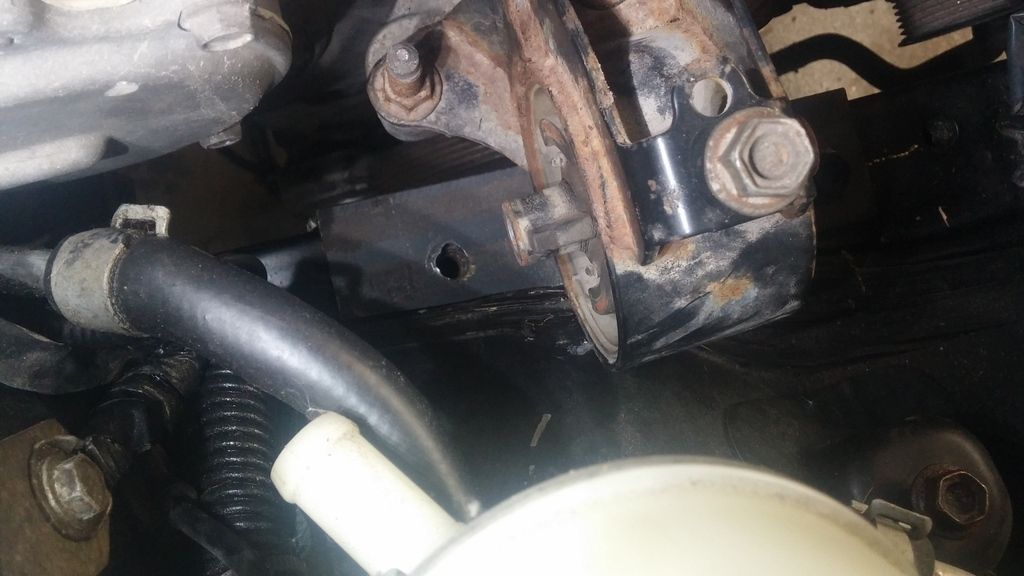
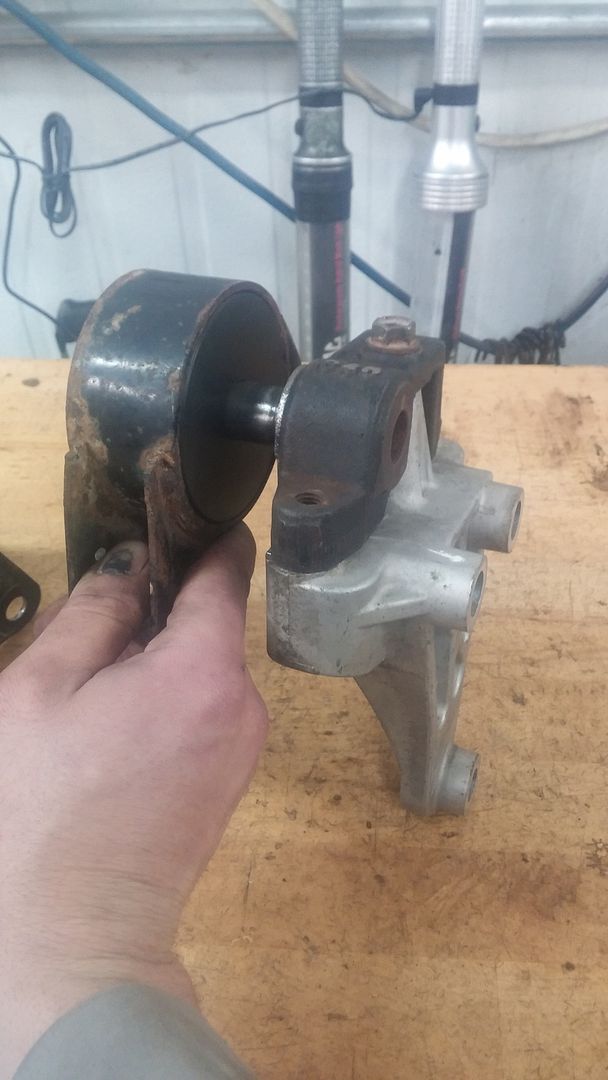
I'll have to swap the lower aluminum section of the mount, because Nissan made them all slightly different for some reason. The frame side mount is the old 2.5L Sentra front engine mount, with the rubber torn out and a bit of delrin machined down to fit. The factory rubber bit wasn't substantial enough to support the V6.

I also had the machine shop re-make my axle bracket. They shaved down the V6 axle bracket down to make a smooth surface and were supposed to re-create the stepped plate with the correct dimensions...there was a misunderstanding so they had to make a shim to fit. Here's what it'll look like. No more stacked washers!

All mocked up. I stacked bits of steel to get it level in the bay. Still close to the inner fender, I had to shorten center peg a bit.

Shot of everything I got done a the machine shop. Delrin rear engine mount insert, delrin side engine mount insert, shaved down axle bracket, axle bracket spacer, and axle bracket retainer plate plus shim.

1 2 3

You'll need to log in to post.

Our Preferred Partners
pT0aUAsVh0XiDCTeEoxYlQ7QIIOhPJXhUSUNW6vOapduVC5LF7rhlvItQSG4B4yQ