4 5 6 7 8
captainawesome
captainawesome Reader
12/26/18 8:42 p.m.

Today we closed up shop at 3, so I rolled the car out of the garage and spent a couple hours cleaning up my mess. I shoved some parts that I've been tripping over for a while now in the attic, and swept up all the grunge. After dinner with the kiddos I decided to test fit my 14" basketweaves and A7s to make sure the 15mm spacers are enough to clear the dreaded tie rod ends. My math worked out at least in static mode, so I adjusted front ride height where the control arms are pointing downward using a little bubble level. I then installed the rear Bilsteins and spent some time setting the ride height with a slight rake. Obviously there will be future adjustments since I don't have all of the weight back in the car, but I really wanted the visual motivation and to make sure there weren't any clearance issues. When I get a chance I would like to see what my camber front/rear is. If the rear is in a reasonable spec at the current ride height, I'm going to skip the subframe adjusters for the Challenge to help give me plenty of budget for whatever may come up between now and then.

I also snapped a pic of the parts installed the other day, I'm pretty happy with how it all turned out.

Untitled by hatchethairy, on Flickr

Untitled by hatchethairy, on Flickr

Untitled by hatchethairy, on Flickr

AxeHealey
AxeHealey Reader
12/27/18 8:19 a.m.

Looking good. I dig the 14s.

captainawesome
captainawesome Reader
12/27/18 9:37 a.m.
AxeHealey said:

Looking good. I dig the 14s.

I do too. I think if I run out of A7s the R888 would still work fine for me. As much as I want to get a 13" lightweight set, these will probably do just fine.

captainawesome
captainawesome Reader
1/2/19 10:00 a.m.

It's not a huge update, but it was cold yesterday. Cold enough that rolling the car into the driveway and doing some wet scrubbing wasn't in the cards. I'm tired of staring at the filthy engine bay, so I decided to do some spot cleaning with some purple power and brushes within the warm garage. I still need to hose down the bay when things warm up, but at least it's considerably less skanky. The plan is to get the motor and trans dropped back in before moving on to the rear. I need to test fit the radiator, wiring stuff, position the air intake box, and battery. Once these are checked off the list I'll drop the rear subframe and gas tanks. The local SCCA posted this years autocross schedule, so by March 24th I'll need this beast ready and sorted. There are two other clubs I run with that haven't posted up dates yet. I can only assume both will try to run events earlier in March so there could be some potential for two test and tune events prior to the SCCA.

Before:
Untitled by hatchethairy, on Flickr

After:
Untitled by hatchethairy, on Flickr

On another note, I recently discovered the Gambler 500 has been running locally for the past few years. I blame Mazduece. Instead of being angry I missed all these years, I decided to secure transportation for 2019. This one was already campaigned on the first two here in the Ozarks, so it's just getting back to it's roots. I plan to do the bare minimal amount of effort to get this back on the road and enjoy it for some back road exploring, possibly take it to the dunes. Saturday I'll pick it up, so hopefully I can manage to split time between the baja and the e21 without throwing my whole schedule off too much. It's a swingaxle which is not ideal, but I'm not looking for a full dessert slayer machine either.

Untitled by hatchethairy, on Flickr

Untitled by hatchethairy, on Flickr
 

AWSX1686
AWSX1686 SuperDork
1/2/19 10:35 a.m.

Engine bay looks way better already! Are you going to take a page out of duster's book and paint the engine bay white?

I started on my e28 project over the weekend so I'm excited. These old BMW's are good cars. 

captainawesome
captainawesome Reader
1/2/19 10:38 a.m.
AWSX1686 said:

Engine bay looks way better already! Are you going to take a page out of duster's book and paint the engine bay white?

I started on my e28 project over the weekend so I'm excited. These old BMW's are good cars. 

I'm going to probably do gray for the engine bay and interior with a white exterior. Still on the fence about it though.

Your e28 project looks like a blast. Makes me regret selling my e24, it would have been a fun car to strip down and just shred.

AWSX1686
AWSX1686 SuperDork
1/2/19 11:56 a.m.
captainawesome said:
AWSX1686 said:

Engine bay looks way better already! Are you going to take a page out of duster's book and paint the engine bay white?

I started on my e28 project over the weekend so I'm excited. These old BMW's are good cars. 

I'm going to probably do gray for the engine bay and interior with a white exterior. Still on the fence about it though.

Your e28 project looks like a blast. Makes me regret selling my e24, it would have been a fun car to strip down and just shred.

Oooh, like similar to Nardo Grey? I like that idea. 

Thanks man! I also regret getting rid of my e24. The parts from parting it out will help with the current build though. 

captainawesome
captainawesome Reader
1/2/19 12:04 p.m.
AWSX1686 said:
captainawesome said:
AWSX1686 said:

Engine bay looks way better already! Are you going to take a page out of duster's book and paint the engine bay white?

I started on my e28 project over the weekend so I'm excited. These old BMW's are good cars. 

I'm going to probably do gray for the engine bay and interior with a white exterior. Still on the fence about it though.

Your e28 project looks like a blast. Makes me regret selling my e24, it would have been a fun car to strip down and just shred.

Oooh, like similar to Nardo Grey? I like that idea. 

Thanks man! I also regret getting rid of my e24. The parts from parting it out will help with the current build though. 

Very similar to Nardo, it's Rustoleum Smoke Gray which was used on the block.

AWSX1686
AWSX1686 SuperDork
1/2/19 12:30 p.m.

In reply to captainawesome :

I might have to steal that idea for mine!

captainawesome
captainawesome Reader
1/4/19 8:55 a.m.

Still plugging along. I think the open center of the basketweaves are an eyesore. I've been buying these cheap plastic centercaps from ebay for my e30 euroweaves, and they just so happen to fit the baskets. Much better aesthetically pleasing, and they are priced slightly under the $10 mark for all 4.

Untitled by hatchethairy, on Flickr

Untitled by hatchethairy, on Flickr

Untitled by hatchethairy, on Flickr

Untitled by hatchethairy, on Flickr

I got motivated to get the motor and trans back together, but to get that accomplished there were a bunch of fiddly tasks I wanted to get done first. Driveshaft center support bearing, guibo, shifter bushings, shift selector seal, brass clutch pivot pin, cleaning trans crossmember and opening up holes to fit the HD e21 trans mounts. The manifold/header bolts were cut off long ago, so I welded in some stainless bolts and cleaned up all the mounting flange studs. All new gaskets/nuts and it's cinched down.

Untitled by hatchethairy, on Flickr

Untitled by hatchethairy, on Flickr

Untitled by hatchethairy, on Flickr

Untitled by hatchethairy, on Flickr

Untitled by hatchethairy, on Flickr

Untitled by hatchethairy, on Flickr

Untitled by hatchethairy, on Flickr

The motor was looking just about ready to pull off the stand, but realized it would be easier to make the coil on plug setup out of the car. I printed out my template to full scale, and taped it to the aluminum stock. Each hole was center punched and pilot drilled to get the best accuracy. Once the little holes were drilled to size, I used the world's worst hole saw to cut out the 4 larger holes. Trimmed to length the aluminum stock, cut an ear off the first cylinder coil mount, and bolted it all down with some stainless hardware. I cut down two short threaded rods and tightened a wide washer style nut to keep the rubber seal nice and snug for the valve cover. Slide the coil packs in place and two nylock nuts hold the whole enchilada in place with the studs.

Untitled by hatchethairy, on Flickr

Untitled by hatchethairy, on Flickr

Untitled by hatchethairy, on Flickr

Untitled by hatchethairy, on Flickr

Untitled by hatchethairy, on Flickr

Untitled by hatchethairy, on Flickr


AxeHealey
AxeHealey Reader
1/4/19 8:59 a.m.

Nice work!

captainawesome
captainawesome Reader
1/6/19 9:07 p.m.

So after dragging the Gambler 500 Baja home and doing some initial assessment of my purchase, it was time to get back to the e21. I drained the trans fluid and put in fresh ATF, installed new rear main seal, and also pilot bearing. The flywheel was bolted on, and on to the clutch/pressure assembly plus throwout bearing. It took a little effort to get the trans attached to the engine, but it's bolted together and everything seems to be fitting just right. At least until I bolt a starter to it. I've tried multiple configurations, and none of them seem to be engaging the flywheel properly. The m10 starter has the right tooth pattern, so I shimmed it out enough so the pinion gear isn't engaged with the flywheel until the solenoid pushes it forward. It will grind, and sometimes act like it's going to spin the flywheel, but never does. Then the m42 with the proper spacing has the same issue. At this point I'm probably going to have to pull the trans back off and see what's causing the issue. I may end up doing my best to swap ring gears so the m42 starter can be used and hopefully set things where they need to be.

I managed to take one pic, and since I've decided to walk away from things for the rest of the night, that's all I'm going to take for now.

Untitled by hatchethairy, on Flickr

captainawesome
captainawesome Reader
1/6/19 10:42 p.m.

I finally realized the m10 starter is so fat compared to the m42 that it's pushing up against the block in two spots. I think it's causing a binding issue, but can't be 100%. At this point I'm going to pull the trans and try to swap to the m42 ring gear. If I remember correctly it's about a mm or two to small on the inner diameter, so that may require some shaving to fit.
 

Untitled by hatchethairy, on Flickr

Untitled by hatchethairy, on Flickr

Untitled by hatchethairy, on Flickr

captainawesome
captainawesome Reader
1/8/19 9:12 p.m.

I took last night off of e21 duty to clean the Baja Gambler carb. Today I got an early day off of work, so my goal was to just get the ring gear swapped on the flywheel. I've never done it before, but a little heat and the old ones tapped off of each flywheel with a cold chisel and hammer. The m10 one had a spot weld on it, so had to grind it off before removal. The ID of the m42 ring is smaller than the m10, so it's been a fair bit of anxiety about how I will tackle that. I ended up taking a flap disc grinder to the ID slowly until it could be tapped in place. It wasn't a loose fit, very snug, and then a tack weld to keep it in place.

Untitled by hatchethairy, on Flickr

I then bolted the trans back in place and quickly fit the m42 starter to test it out. YEEEEEEHAAAAAAAAAAAAAA! It spins the flywheel, engages like it's supposed to, no grinding, just doing what it's supposed to. I can now breathe a sigh of relief.

Now that I know the motor can be slid back in place, it was time to go over my checklist of items left in the engine bay. The clutch master was acting funky on my last few drives, so I decided since it's a silly tight space now would be a good time to swap it out. The soft line was replaced as well. Both of these items took way more time than I expected, but I'm glad they were done without the engine in the way.

Untitled by hatchethairy, on Flickr

Untitled by hatchethairy, on Flickr

Going back over my list I am reminded that I recently purchased a cheap hanging scale. I've been curious what the final weight of the whole assembly would be, so now's a good time. Here's the list of what's on the scale: no oil, some residual radiator fluid in the block, no alternator belt, m42 starter, m10 flywheel/clutch/pressure plate, coils mounted to COP plate, alternator was placed on the trans, guibo mounted,slave cylinder, and I think that about sums up everything. All told, the scale says 383.94 lbs and I'm going to guess the accuracy is probably within a few pounds. I've seen Vorshlag post up a photo of the stock weight with AC and it was 427 lbs. I don't know what trans they used in the photo I've seen, but it's not the same as the one from the 318is. Either way, I'm really stoked it's under 390 lbs, which would be 43 lbs less than stock than the Vorshlag weight. After I get the m42 stabbed back in place I'll weigh the m10 and trans to see the difference.

Untitled by hatchethairy, on Flickr

Untitled by hatchethairy, on Flickr


captainawesome
captainawesome Reader
1/14/19 8:08 a.m.

So the plan for the weekend was simple. Get the motor/trans in the car so I can start figuring out where the airbox, battery, shifter arm, rad brackets, and center support bearing mounts need to be set. After opening up the holes for the 318is trans crossmember to fit the e21 mount spacing, it was all bolted in place. Looks like I probably could have pushed the motor about a 1/2" further against the firewall, but I think this will work just fine. The shifter arm will need to be shortened 1 1/4" and welded back together as it's too far back. This was expected though. I need to find someone local to do the aluminum welding for a small fee, otherwise I'm going to have to try some ghetto bolts and loctite method in hopes it will hold together. The driveshaft center support bearing bracket is further back about 4-5 inches than the stock e21. I'll probably just fab some new ones out of scrap angle and try to weld them underneath the car. Next up was the stock 318is airbox. I set it on the rubber mount from the e21 airbox, which put it almost exactly where it needs to be. It looks like I can cut the stock brackets and reweld them in position for the new box. The battery is a tight fit in the fender well, and I hope that there is enough hood clearance. I sorta test fit it with the hood and took some measurements, but I'm still not 100% there's enough room. Time flew by, and I was unable to sort the rad mounts. I have a plan, just waiting on a part to roll in to implement it.

Untitled by hatchethairy, on Flickr

Untitled by hatchethairy, on Flickr

Untitled by hatchethairy, on Flickr

Untitled by hatchethairy, on Flickr

Untitled by hatchethairy, on Flickr
 

captainawesome
captainawesome Reader
1/19/19 3:31 p.m.

For a little while now, I've been putting out the word to friends to find someone to TIG weld the aluminum shifter carrier. The carrier needs shortened 1 1/4" to put the shifter in just the right spot. Unfortunately all I have come up with is expensive solutions to a Challenge problem. I've considered cutting down the sheetmetal shifter console that came with the car, but have been hesitant to go there just yet. After my last quote of $80 to weld the aluminum, I decided it's time to commit. I cut the portion needed from the console, hammered the edges flat, and drilled a few holes to match up with the stock ones. I'll need to tack some nuts to the tunnel from the inside, but that's it. This does raise the shifter position, so I've got something in mind to cover that issue and shorten up my shifting throws.

Untitled by hatchethairy, on Flickr

Untitled by hatchethairy, on Flickr

Today I wanted to get some engine bay mounts done. The stock airbox lower mount was at the right height, but needed moved toward the alternator a little. I cut the stub off and welded it back on. Then the stock airbox upper mount was cut off, trimmed down to one mount and welded back. With all that in position, I realized my lawn battery is not going to fit. I kinda knew that already, so I'm hoping a 12v 22ah battery will be enough. It's going to end up really close to the starter and the fuse box, so I think it will be enough.

Untitled by hatchethairy, on Flickr

Untitled by hatchethairy, on Flickr

Untitled by hatchethairy, on Flickr

Untitled by hatchethairy, on Flickr

Untitled by hatchethairy, on Flickr

The lower rad mounts were an idea I borrowed from Tom D on Bimmerforums. There is a long and short mount used on the m42 e30. Two of the long mounts work with the e21 frame legs once you notch them to fit. The rubber nubs sit in the mounts and keep everything located nicely. It took some drilling and a small square file to get them just right on both sides, but they turned out well. On the passenger side there was a clearance issue at the bottom. Some chop choppy with a hacksaw and now the ~$40 ebay radiator has some breathing room. I still need to figure out some upper mounts that are isolated by rubber. I've got something in mind, just need to figure out all the logistics. So, all of the hoses fit but the lower passenger side. I compared the new one with the old stock one, and it's definitely a better fit with the old one. It kinks a little, and I'm worried it's going to be an issue. It may require a splice or I'll have to bite the bullet to and purchase the OEM one.

Untitled by hatchethairy, on Flickr

Untitled by hatchethairy, on Flickr

Untitled by hatchethairy, on Flickr

Untitled by hatchethairy, on Flickr

Untitled by hatchethairy, on Flickr

Untitled by hatchethairy, on Flickr

The expansion tank hose need some sort of support, but fits fine otherwise. Everything all together looks nice and factory like I hoped. Later I'll tackle the throttle cable bracket, weld on a stud near the passenger motor mount for a ground, electric fan brackets, and connect the soft fuel lines in the engine bay.

Untitled by hatchethairy, on Flickr

Untitled by hatchethairy, on Flickr
 

captainawesome
captainawesome Reader
1/20/19 4:13 p.m.

Throttle cable adaptation ended up being pretty straight forward. I cut a slit in the throttle bracket to slide the cable through, and after lubricating the cable I was able to get it adjusted in the proper range. The throttle stop at the gas pedal needed adjustment as well so it would open up the butterflies all the way.

Untitled by hatchethairy, on Flickr

Spent some time on a little arts and crafts for the electric fan. It's just a simple template that mirrors for both top and bottom with a few speed holes. I think they turned out pretty good, but now I'm struggling to figure out a top mount for the radiator. I wanted to use some rubber isolators bolted to the core support, but the height for both aren't quite in line to work out. I drilled out the the spot welds on the core support section to make pulling the motor in and out much simpler. I'll probably make a new one that will double as the upper rad bracket. I just need some more time staring at it before committing to anything.

Untitled by hatchethairy, on Flickr

Untitled by hatchethairy, on Flickr

Untitled by hatchethairy, on Flickr

Untitled by hatchethairy, on Flickr


captainawesome
captainawesome Reader
1/25/19 12:48 p.m.

Punch list in the engine bay is beginning to drop just a bit. The tiny details always take longer than expected, so I'm using whatever free minutes I have to just knock them out and leave the big stuff for when I have more time available.

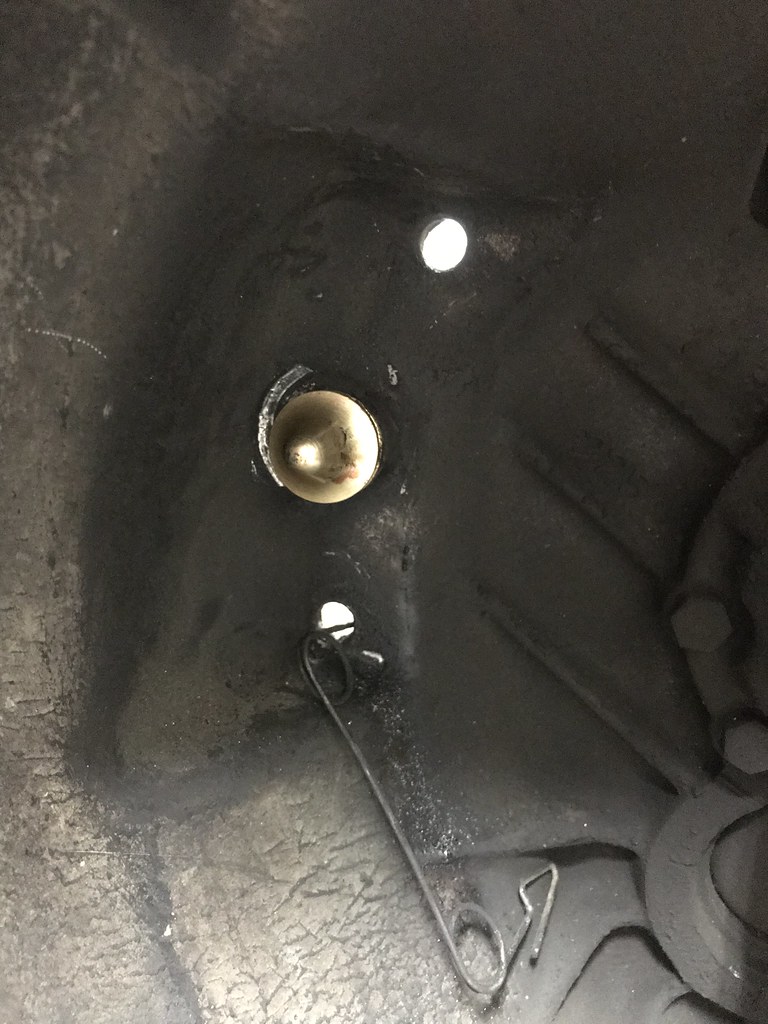
I added some engine oil, and immediately saw some drips at the oil pan. Fook. The brand new copper washer isn't sealing the drain plug, even after snugging it down just a bit more. I'll probably just drain the oil, teflon the bolt, and snug it all back up at this point. On to the next.

Clutch slave cylinder hard and soft lines were connected and tightened up. It's tight in the trans tunnel so that was a pain and I know it's going to be a struggle to bleed later.

At this point I'm not taking pics, just trying to get the little things. Tighten alternator belt and bolt check.

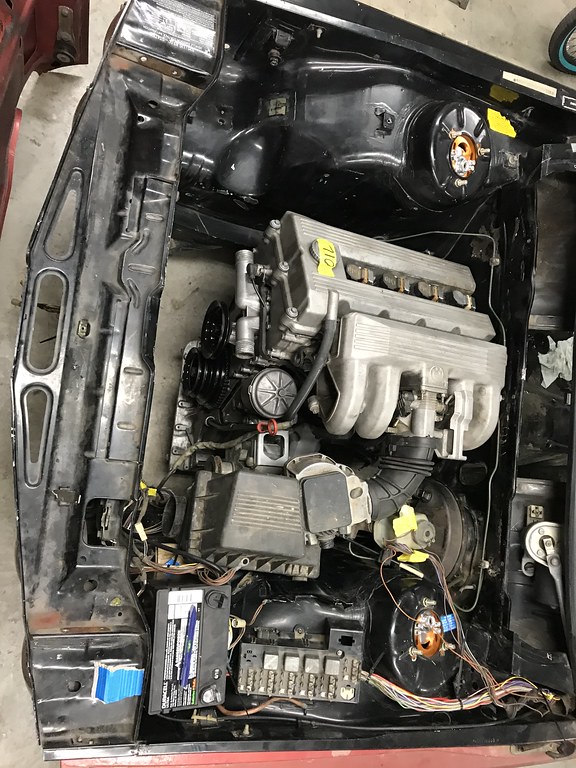
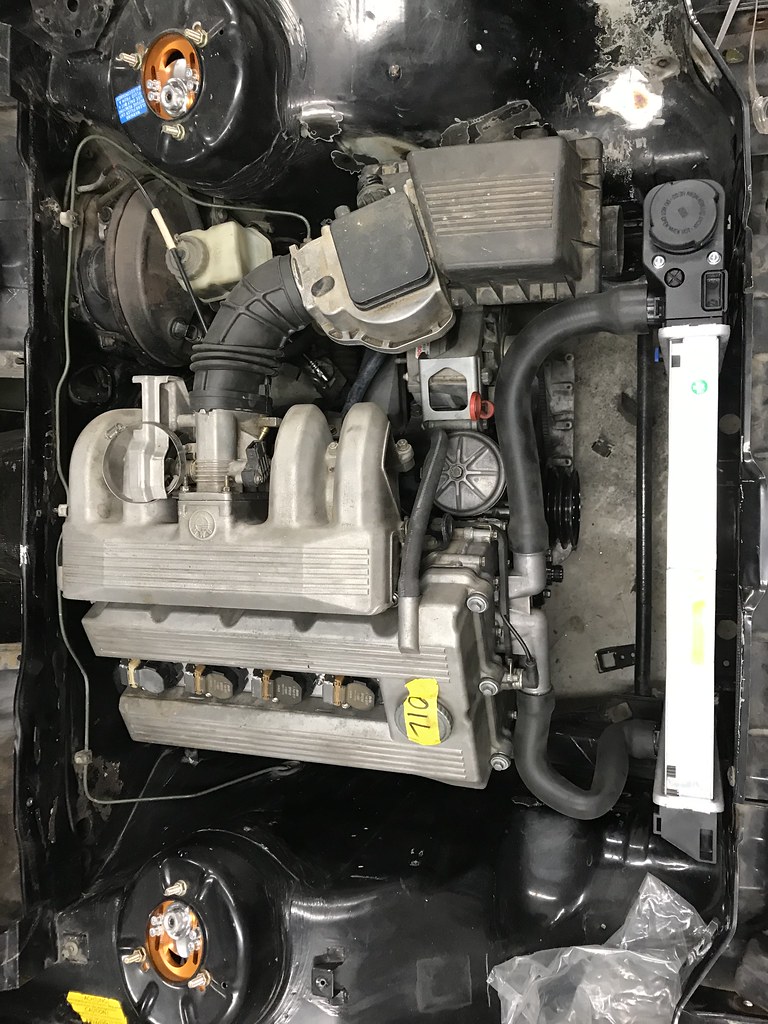
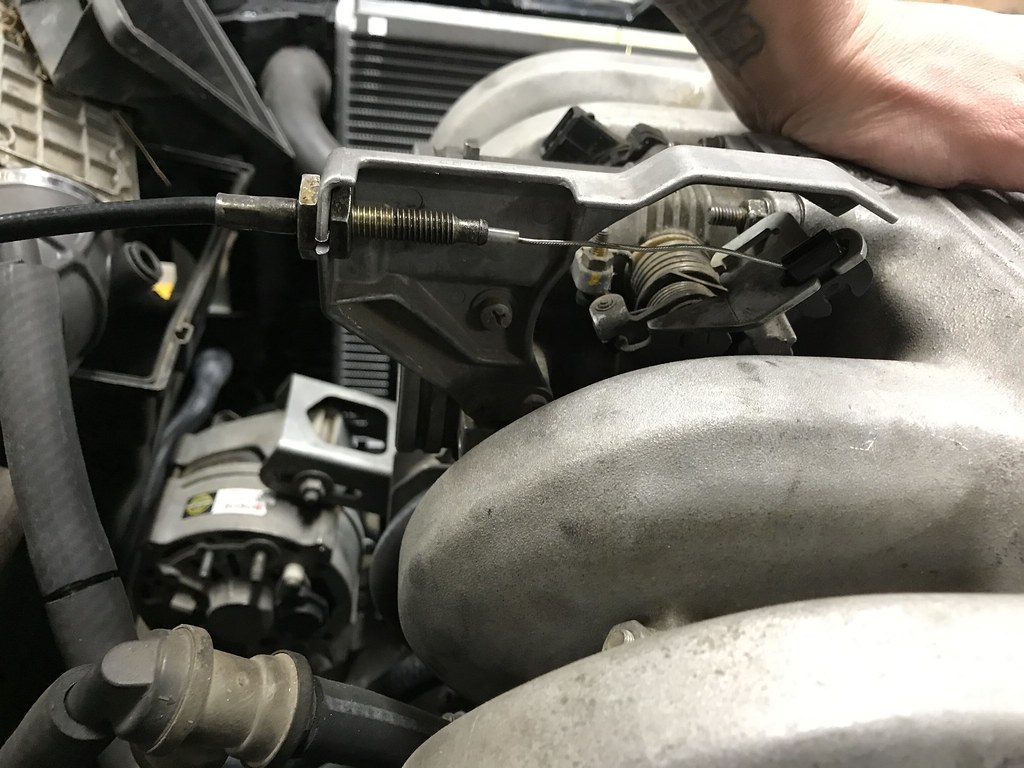
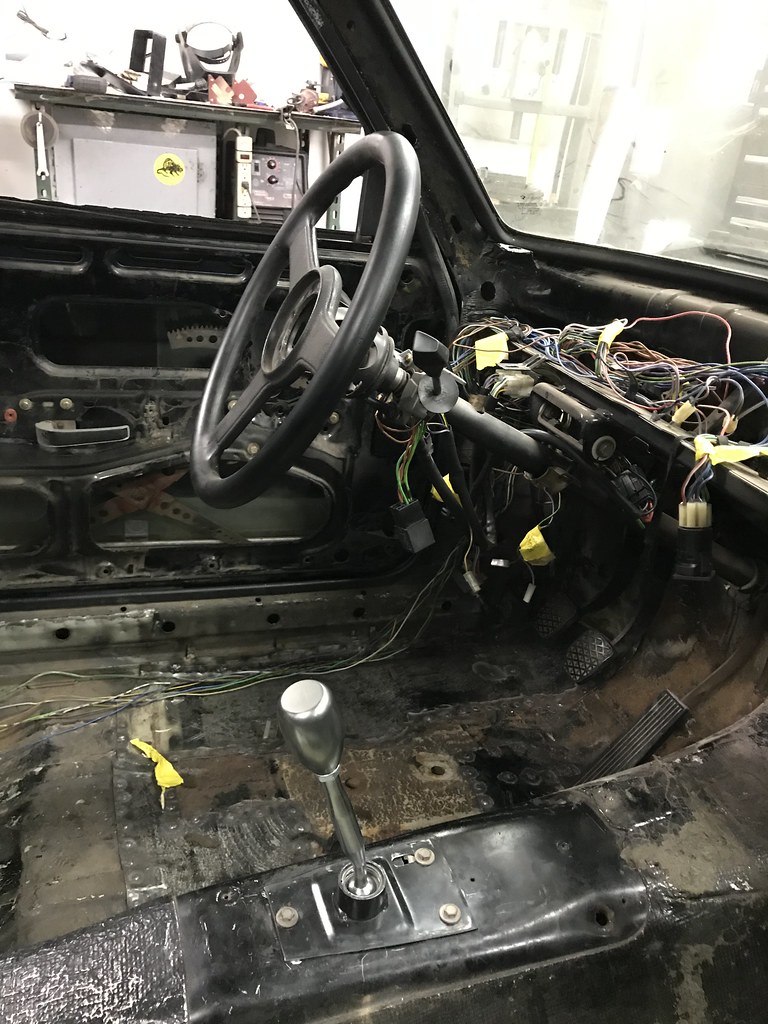
Engine harness installed so I can figure out what needs moved compared to an e30 engine bay. After a few hours of head scratching and internetting, I've figured out where to splice in the stock e21 engine connector, and that the fuel circuit needs one adjustment made to accommodate a proper fused circuit. I've got some Tesa tape to wrap all wires when it's all finished to give an OEM look.

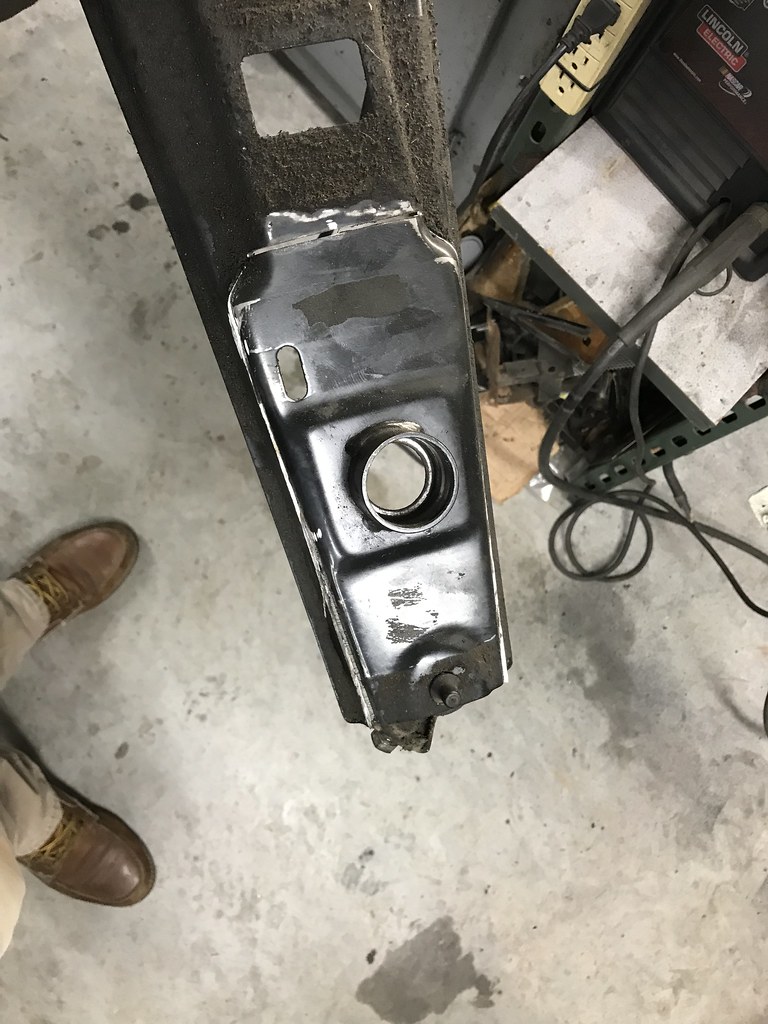
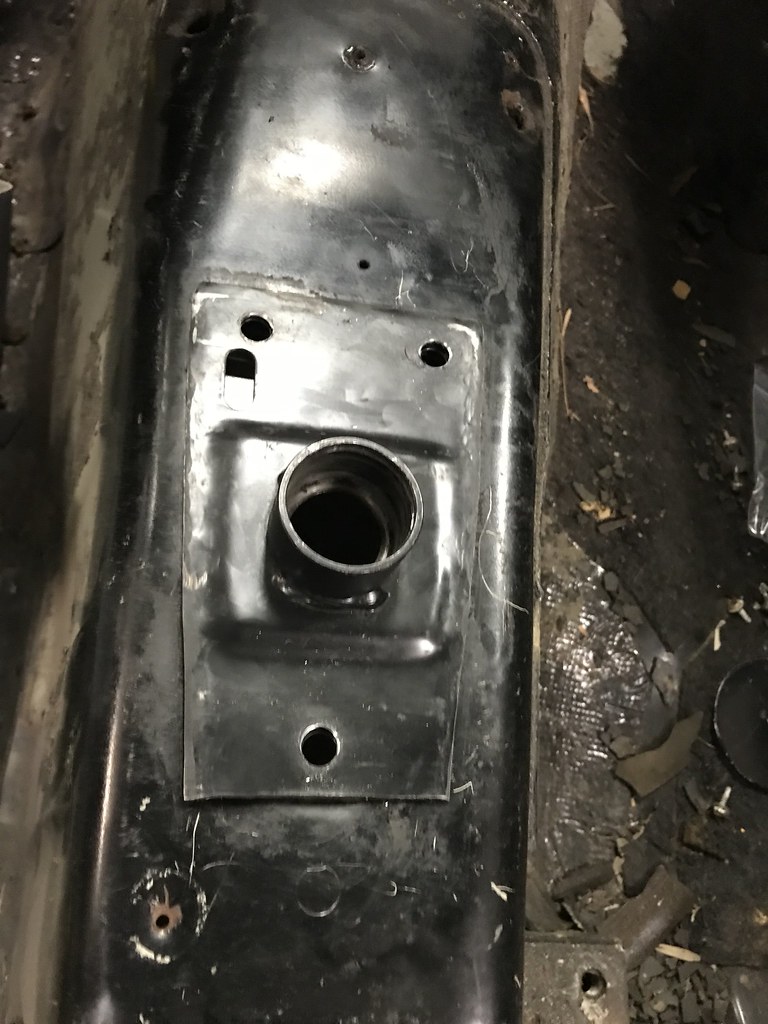
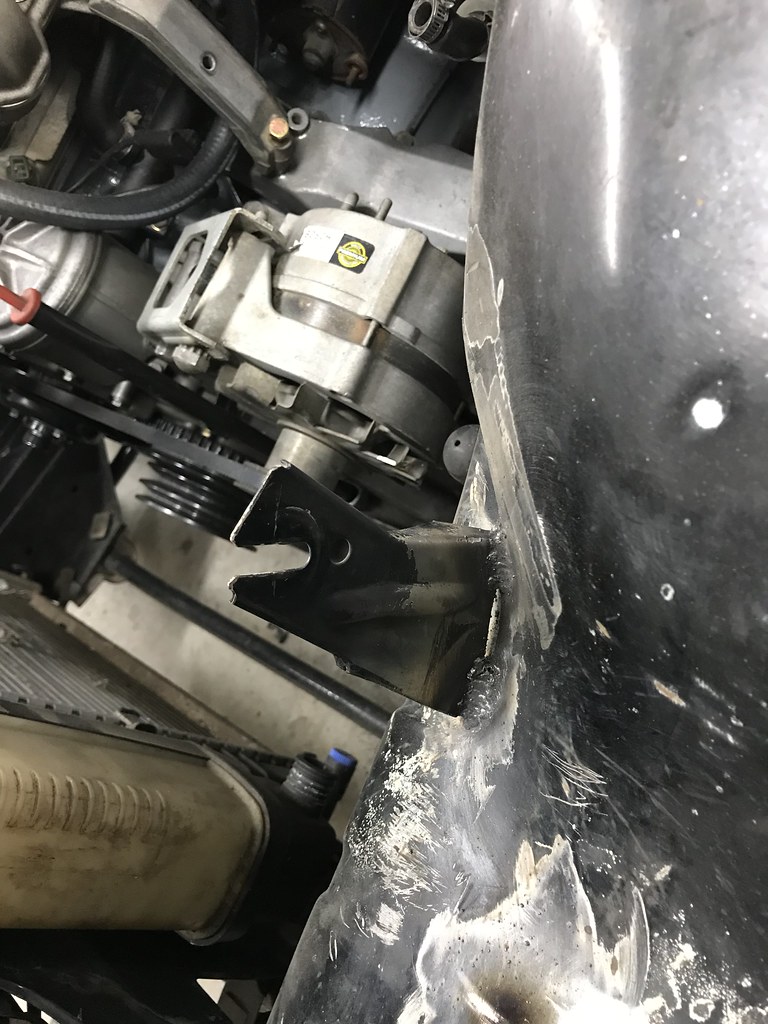
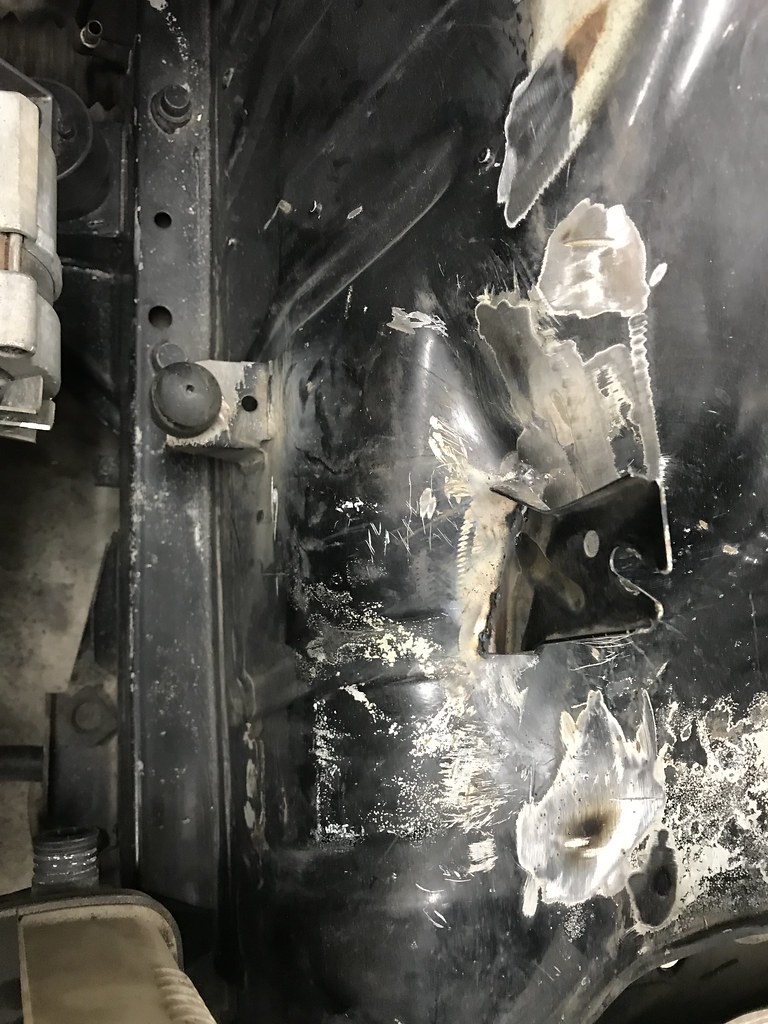
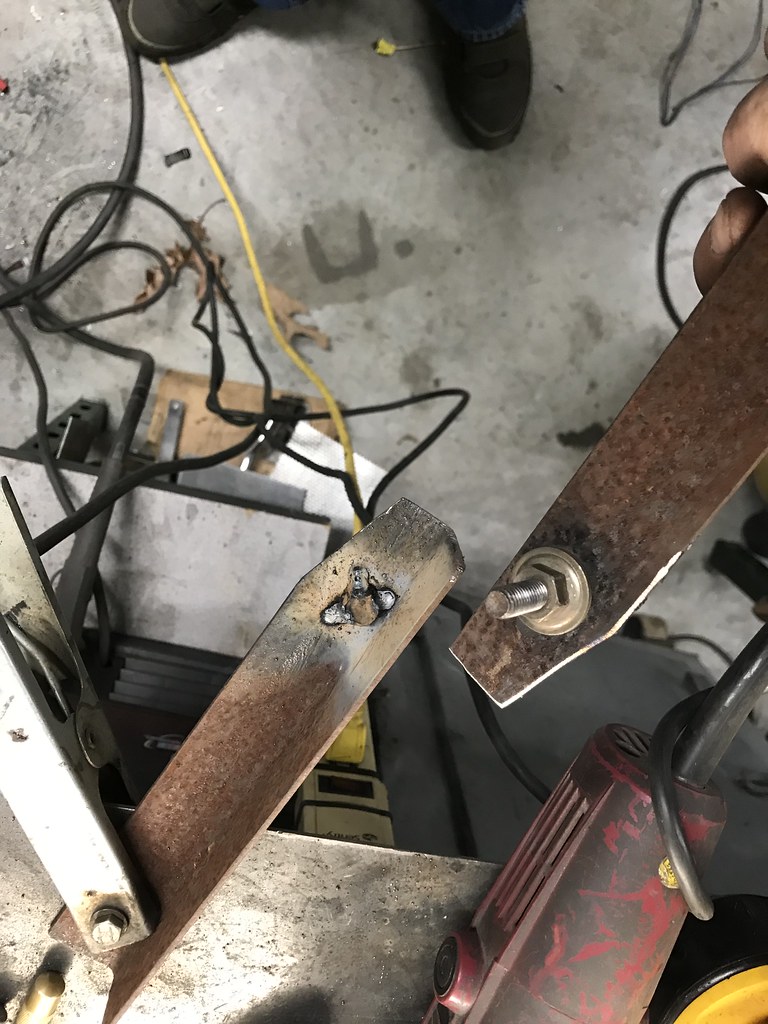
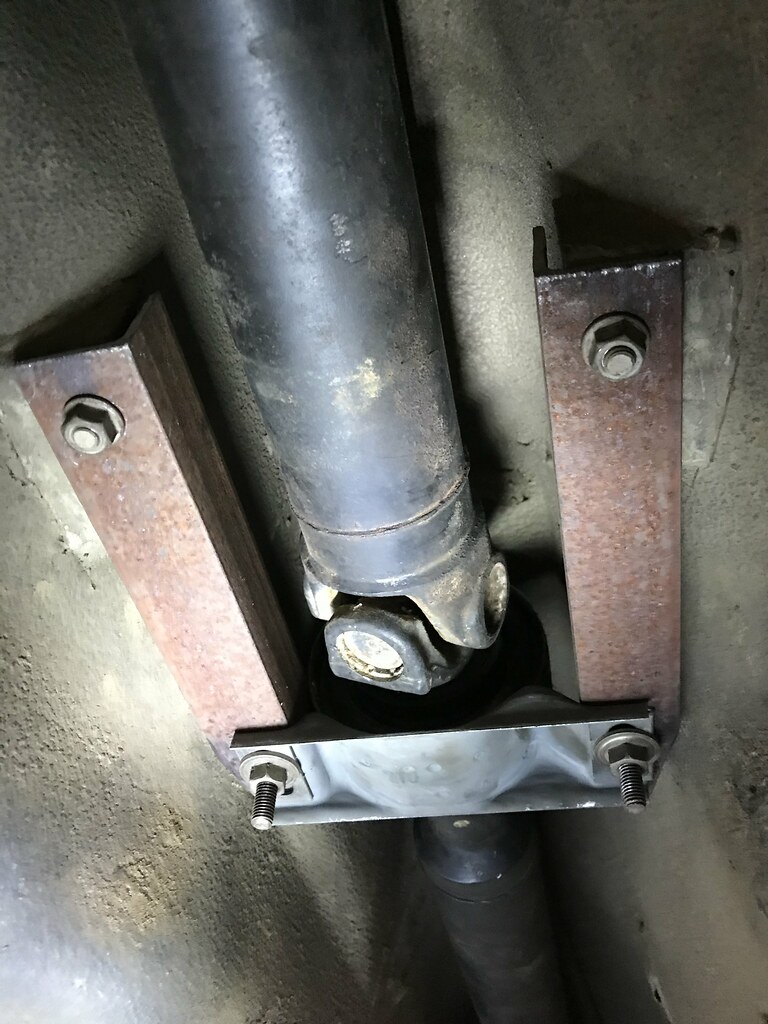
New alternator ground cable in to replace the shagged one. I got this 4 pack of them from ebay real cheap, but with them not being a larger gauge wire like the stock units I'm a bit worried. I have one for the engine ground off the passenger motor mount as well, just need to weld a stud on the frame rail to snug it down.

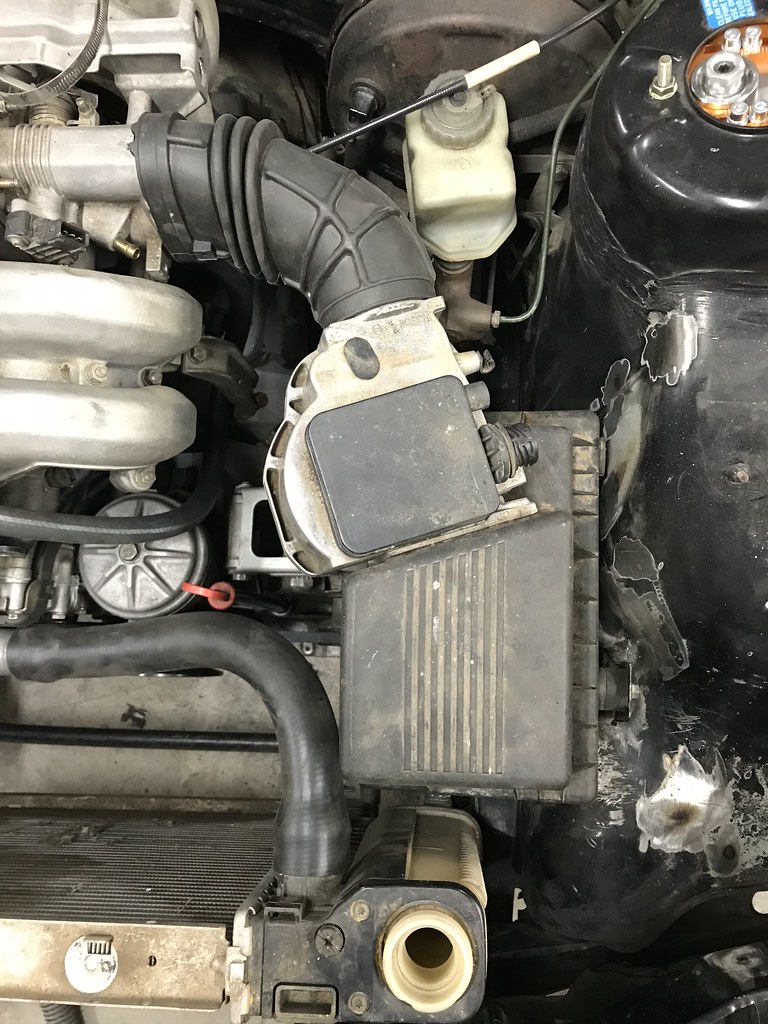
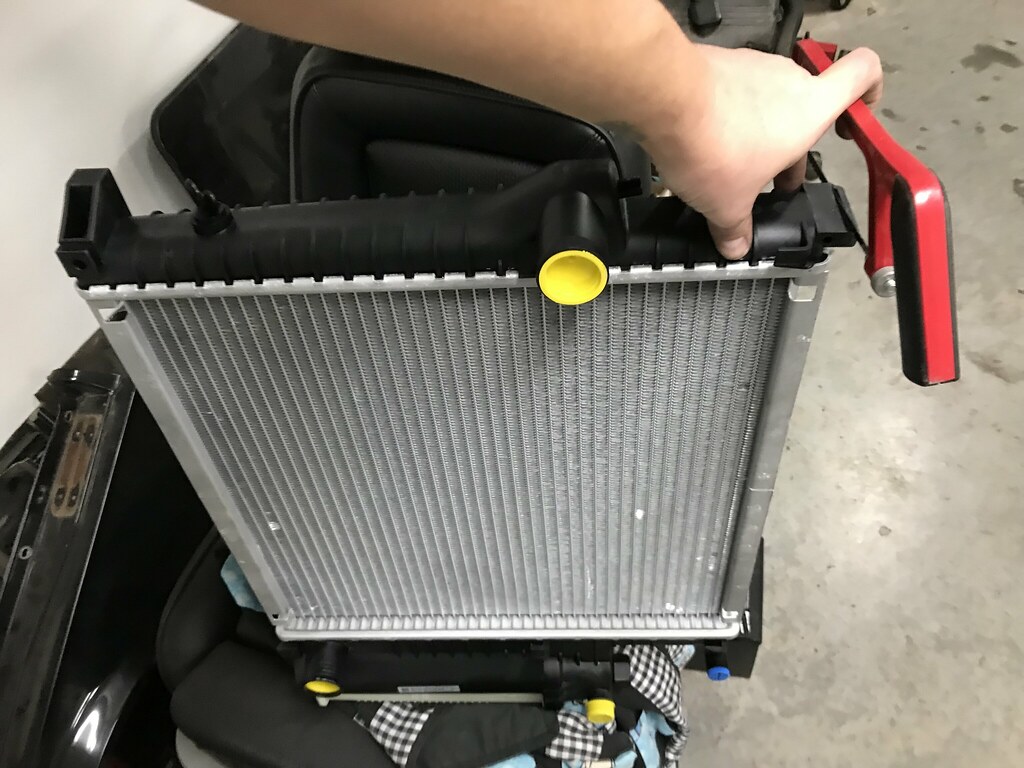
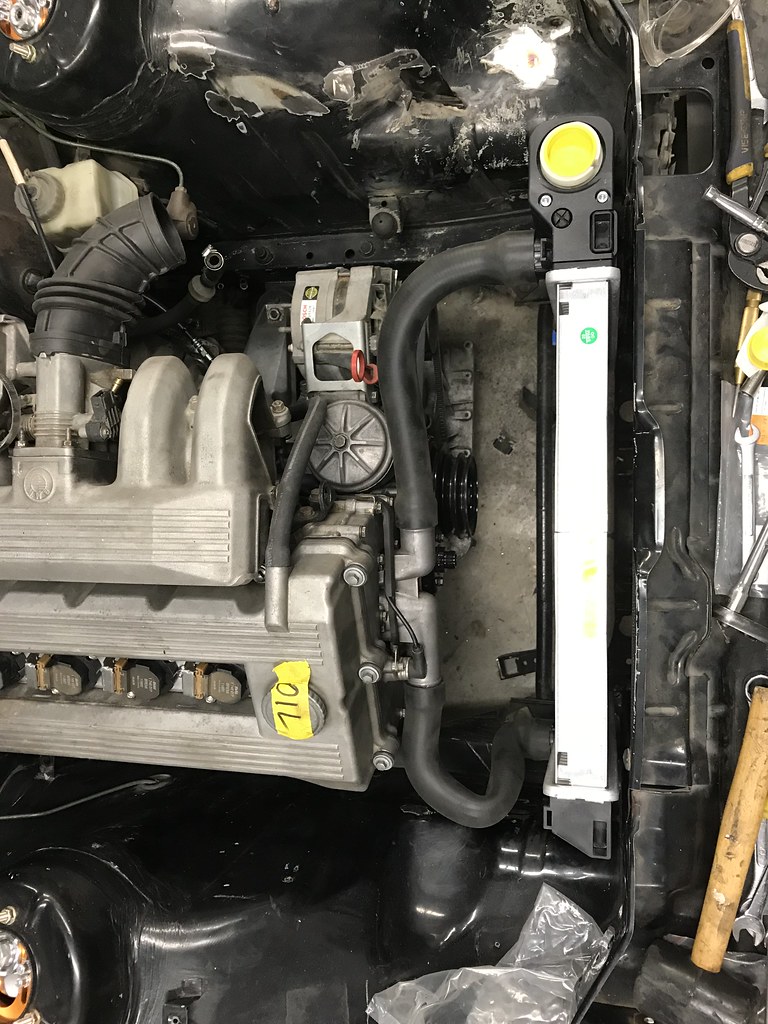
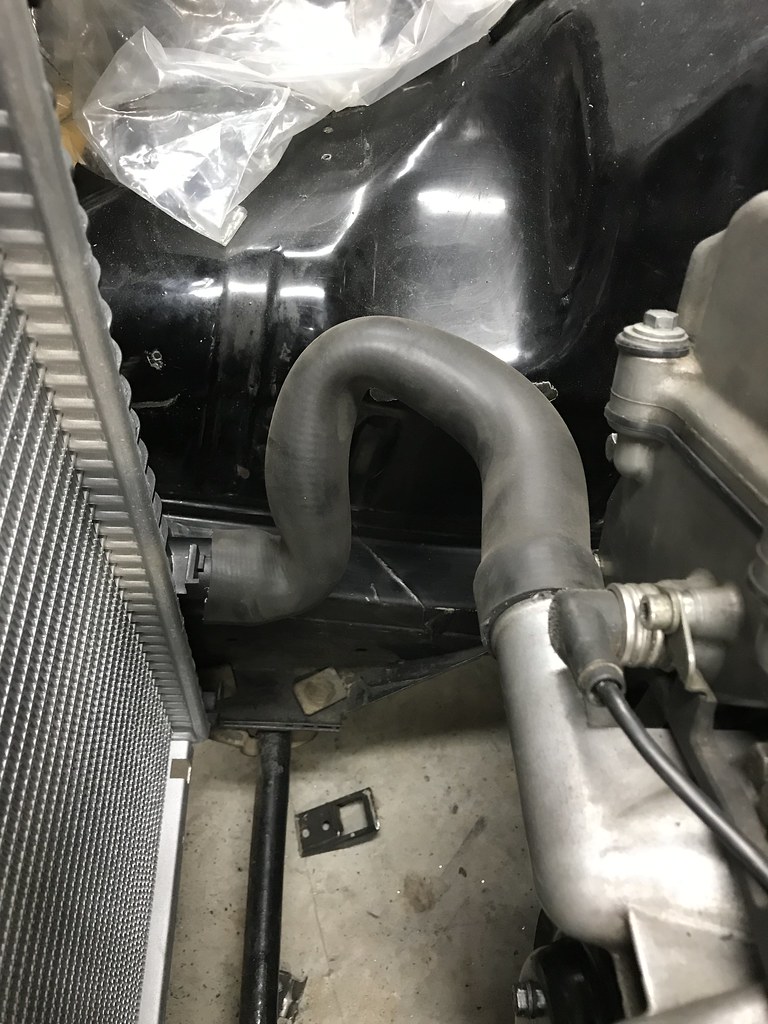
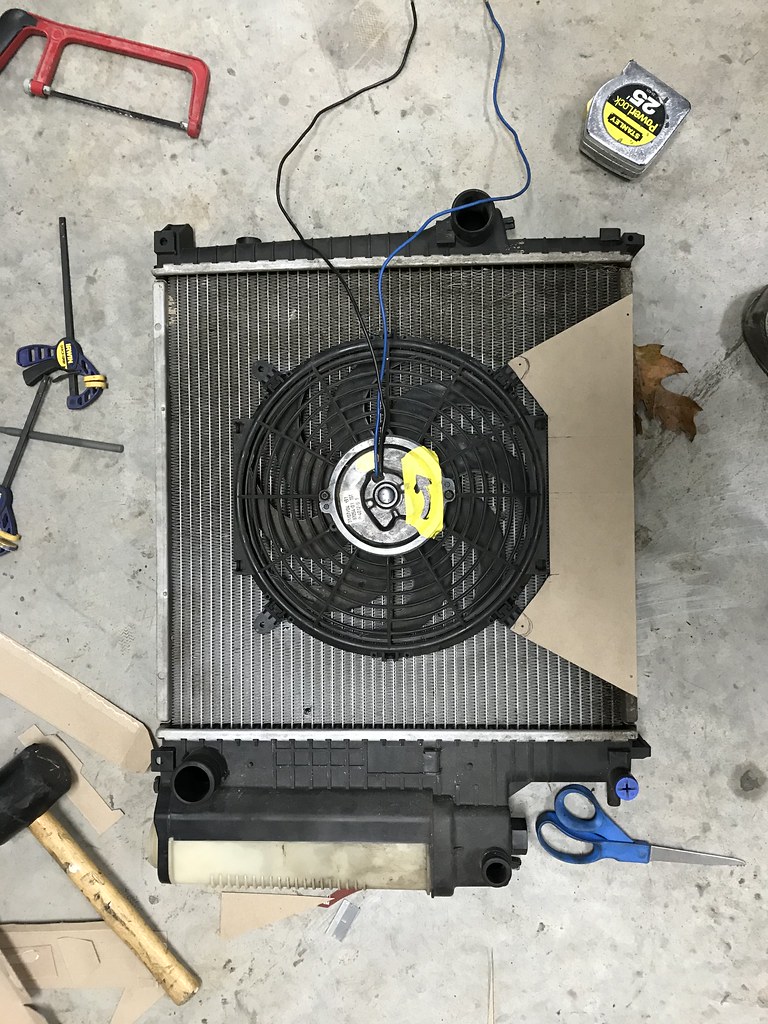
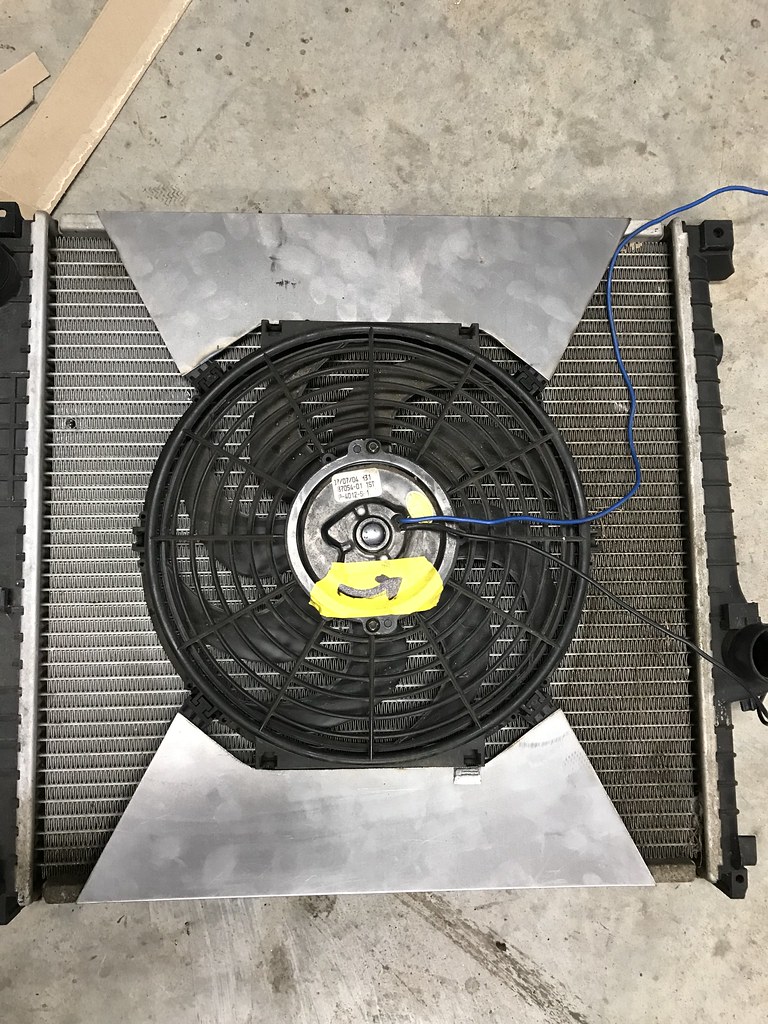
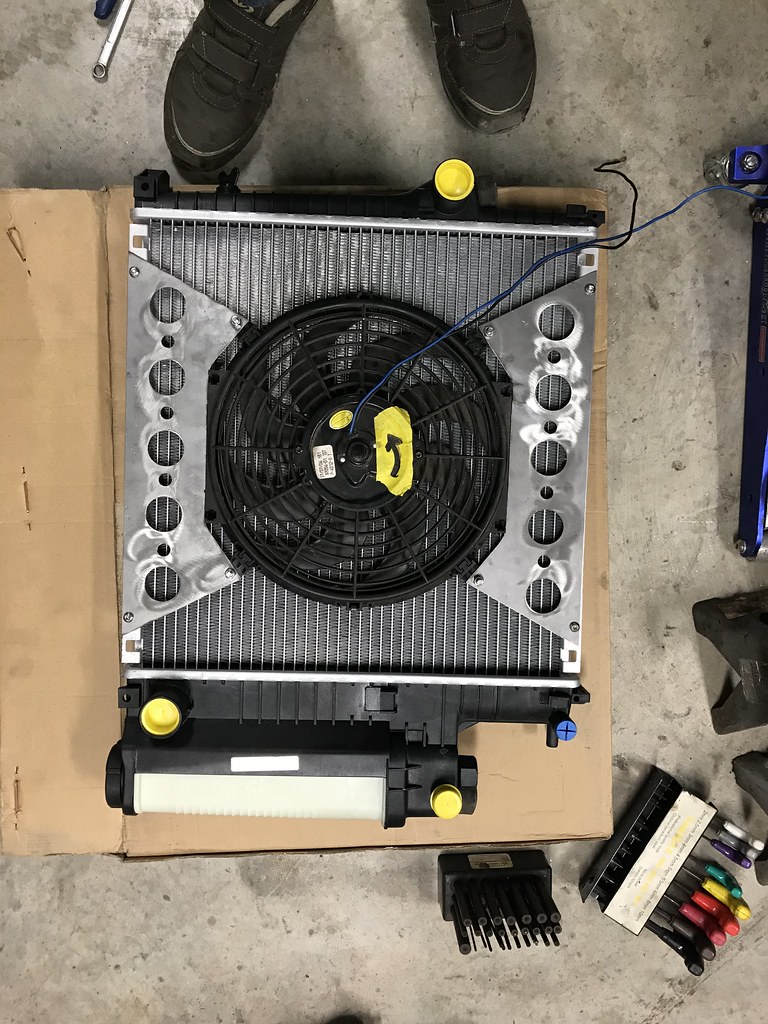
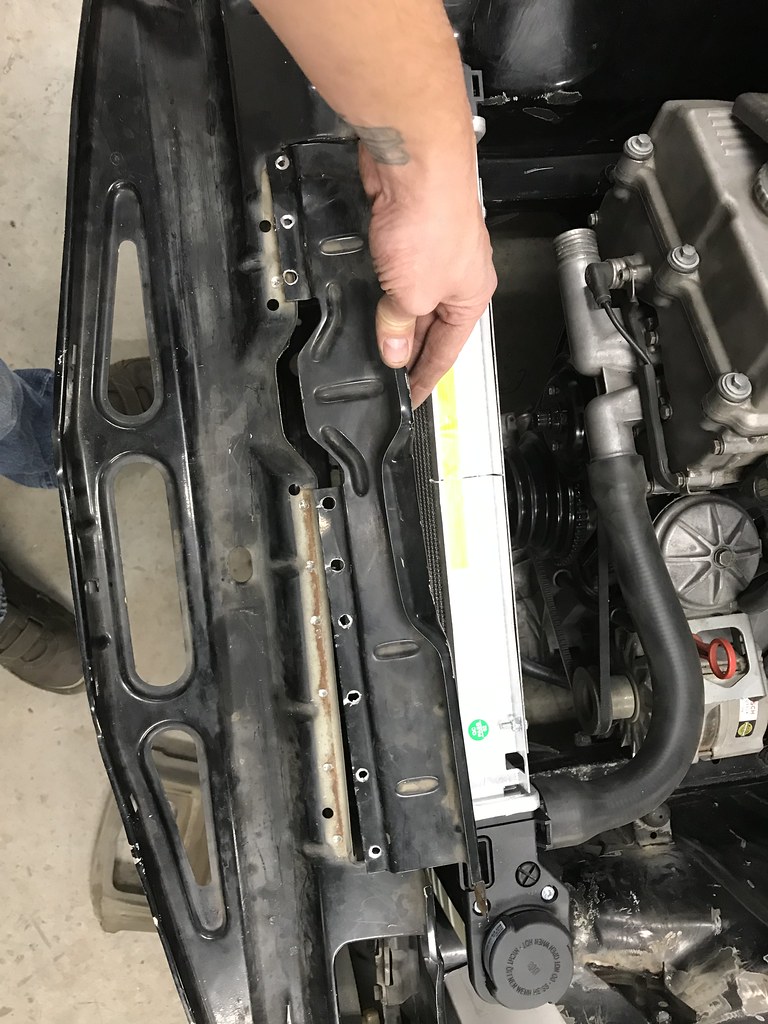
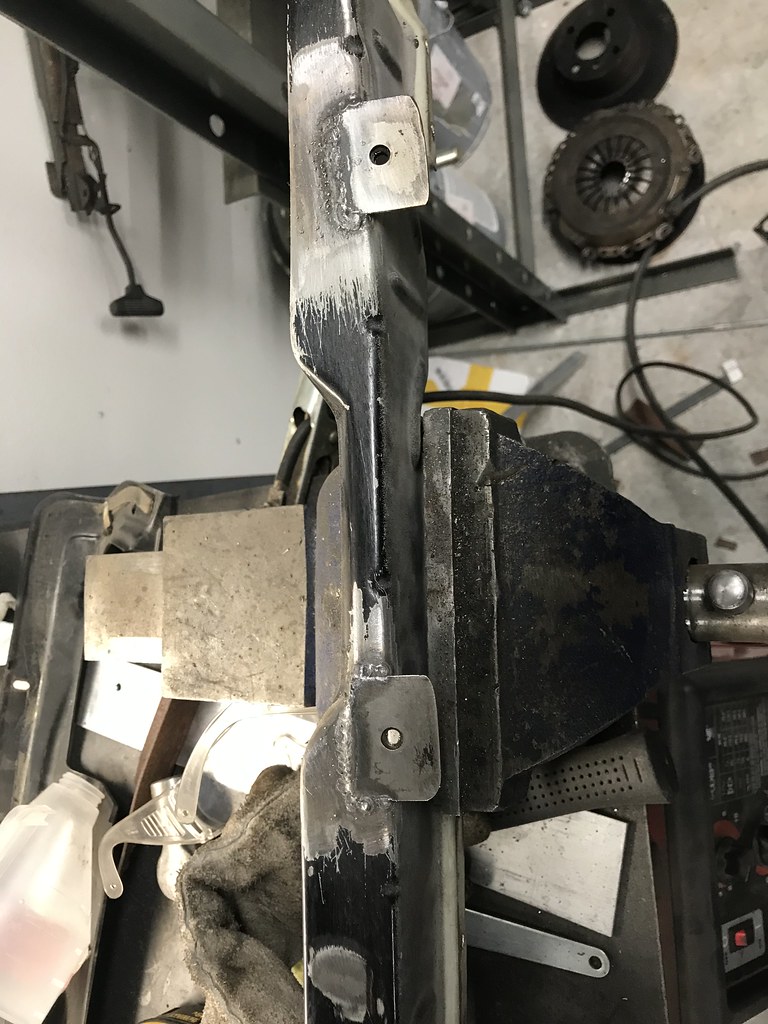
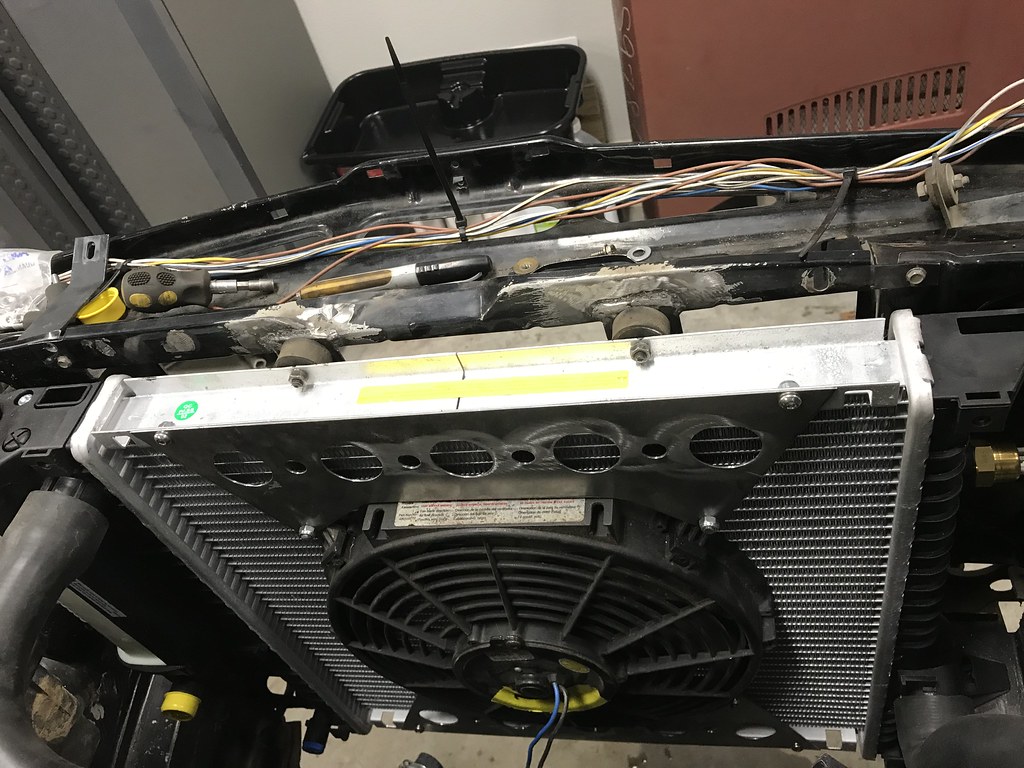
Radiator temp sensor has been installed so the e-fan will kick on when needed. Looks like I need to extend the stock wires a few inches to reach the new location. Waiting on some more uninsulated splicers to roll in before I can get that done. Also hoping to finalize some upper rad mounts Sunday.

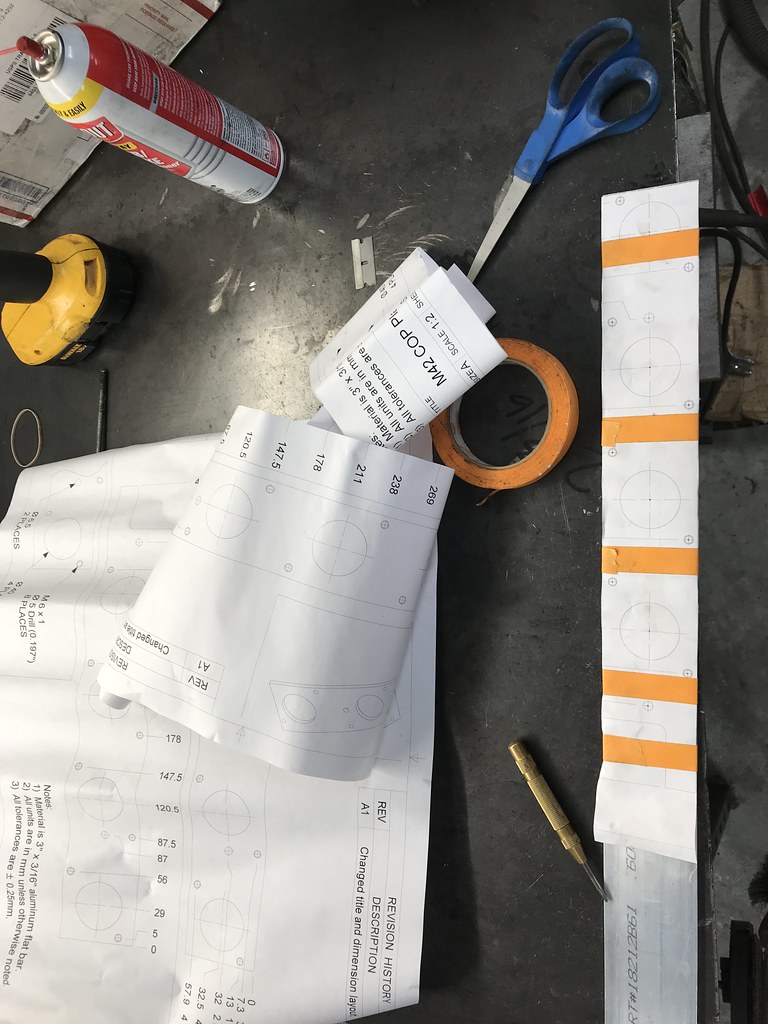
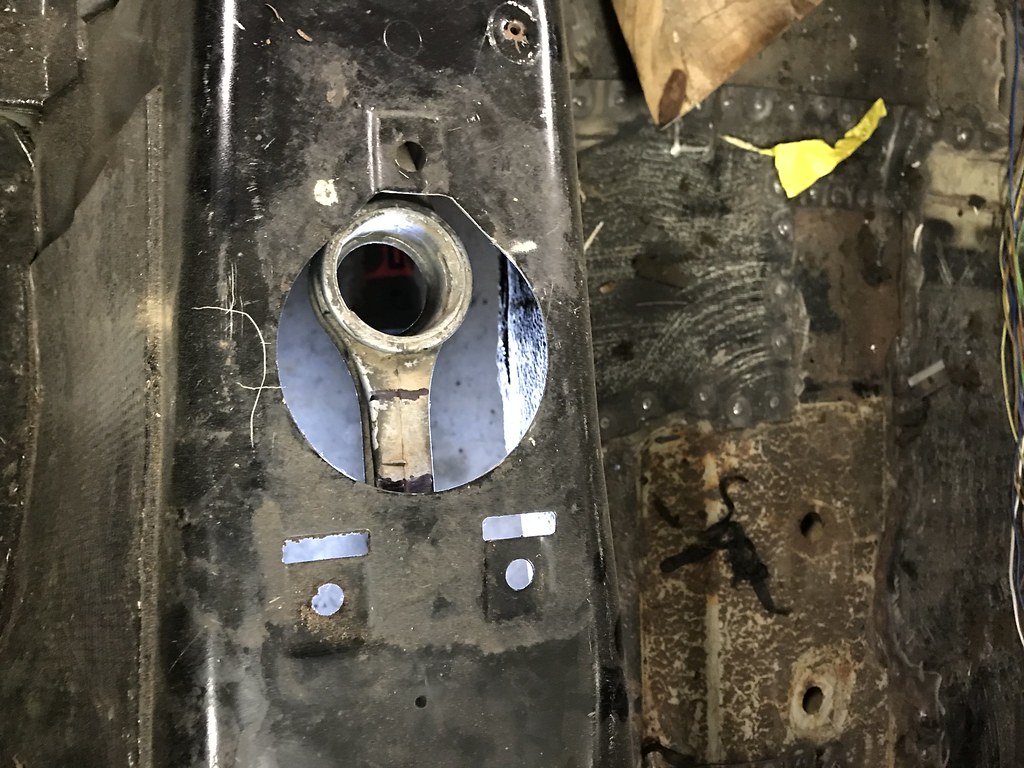
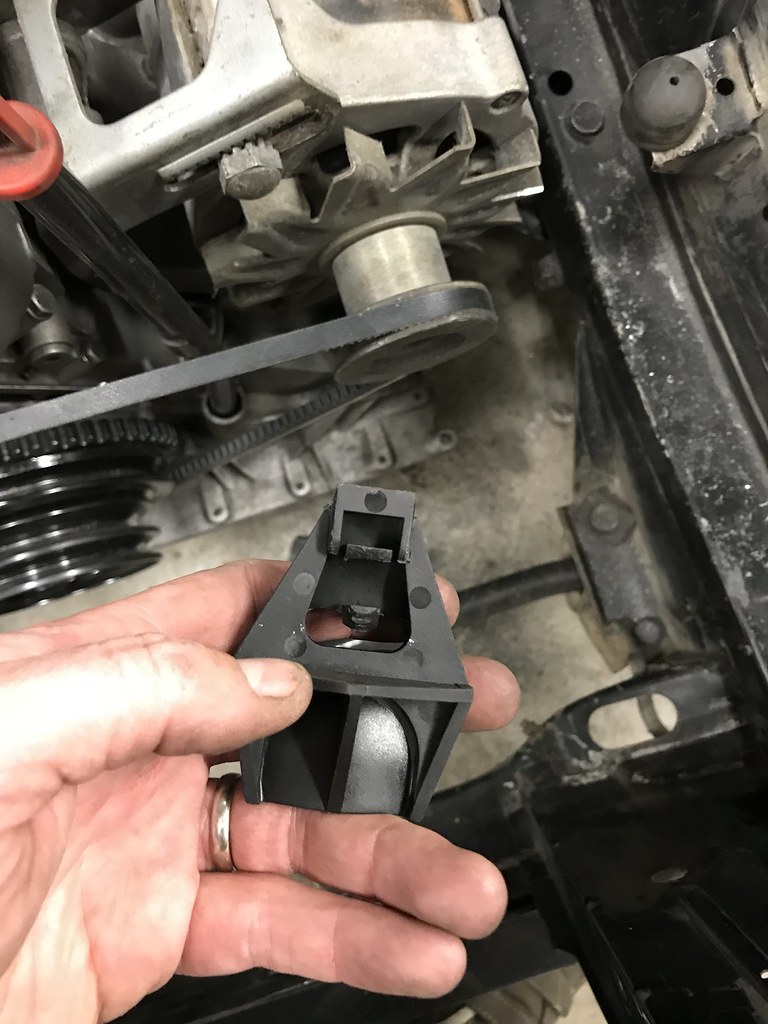
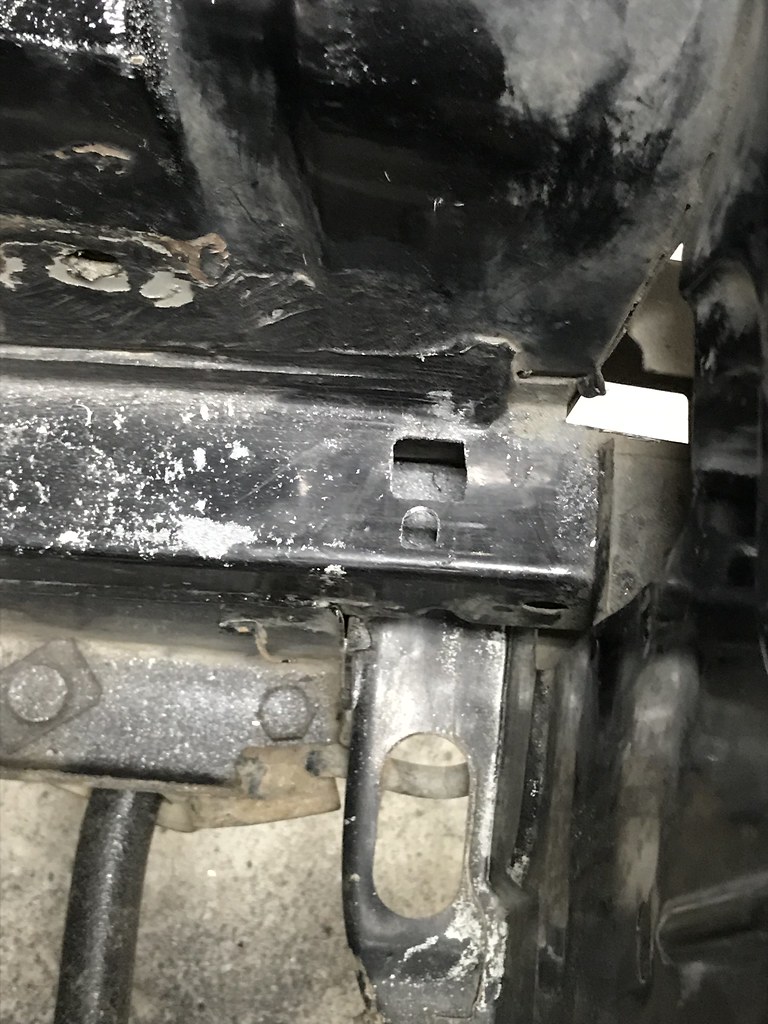
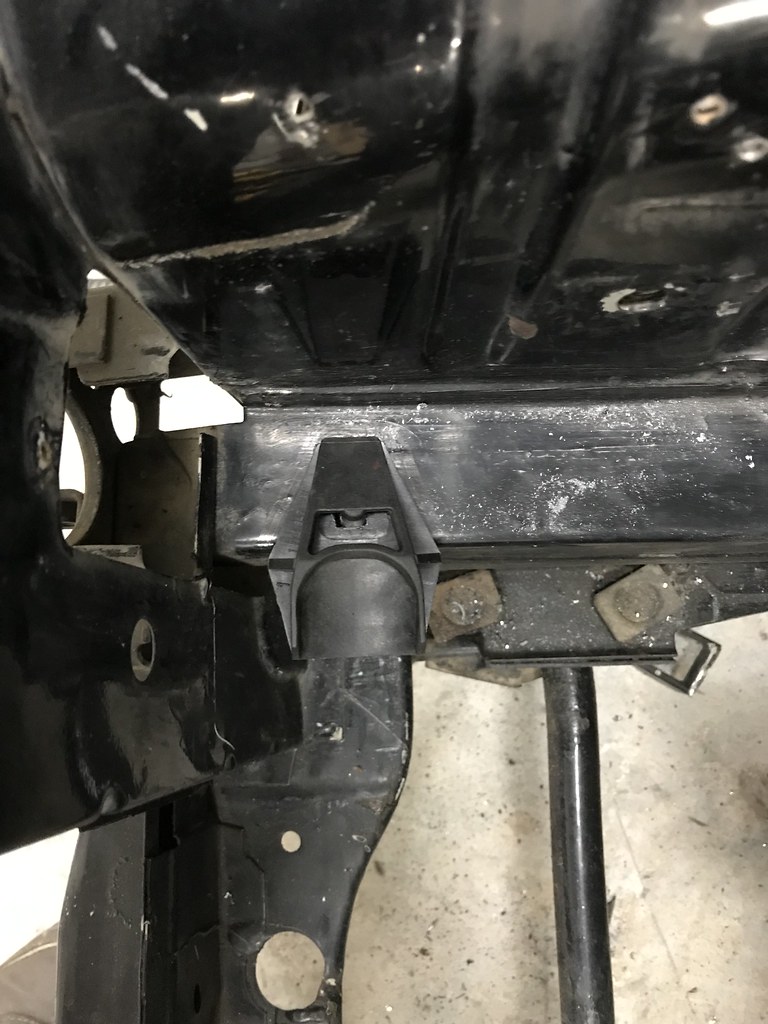
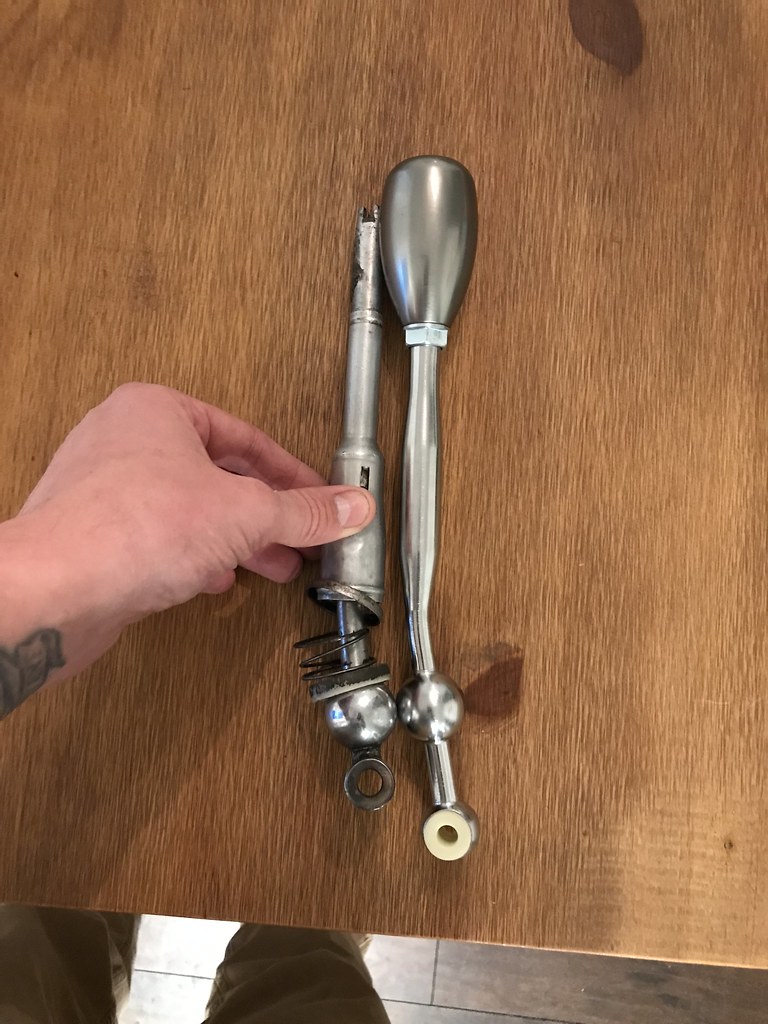
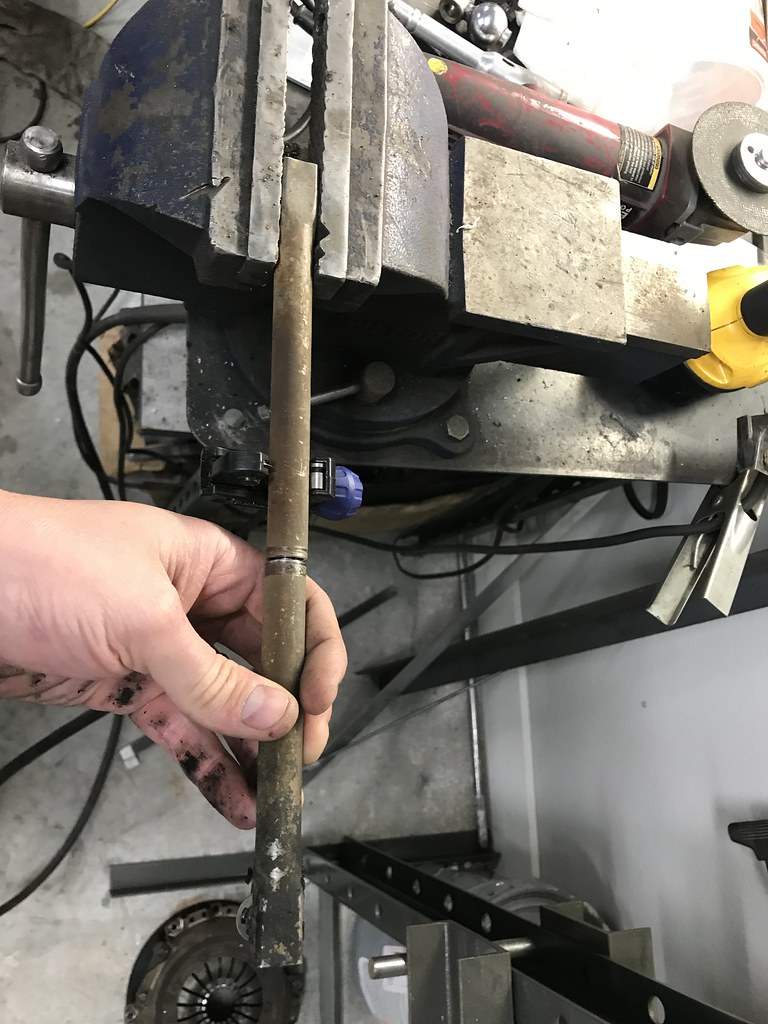
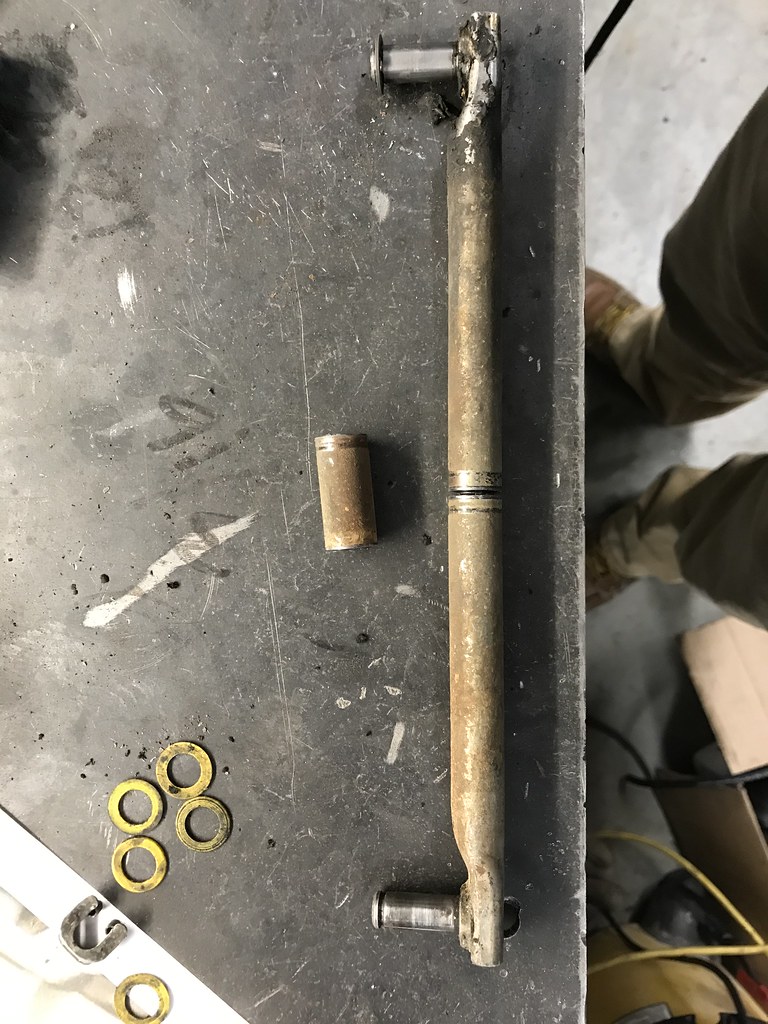
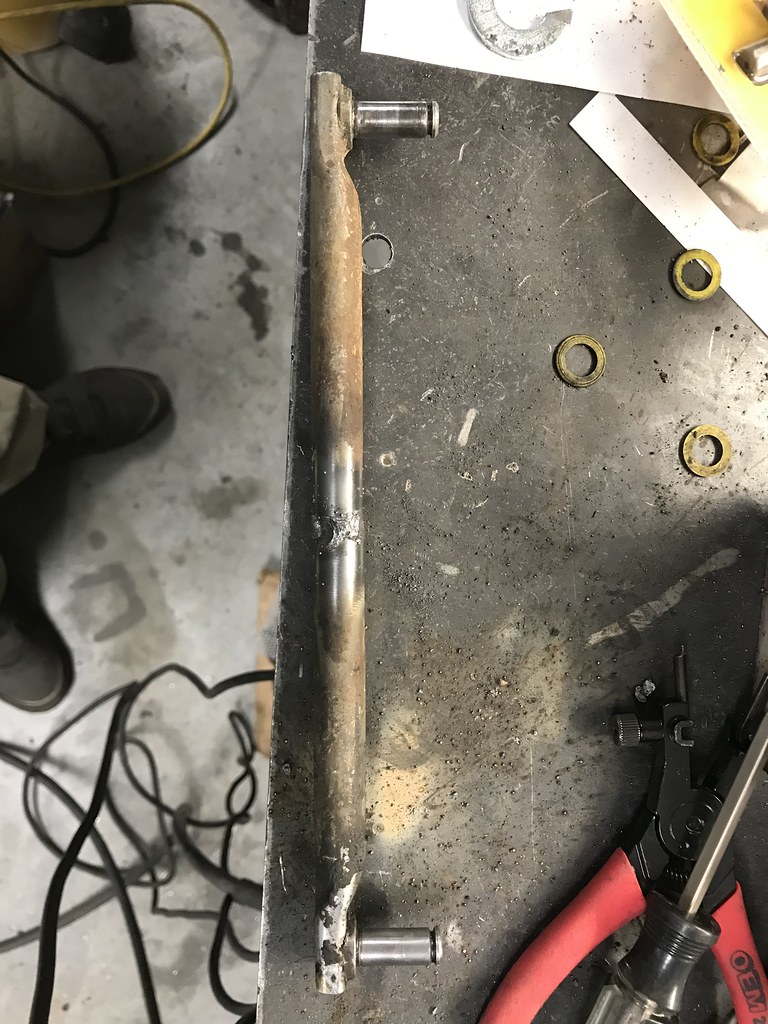
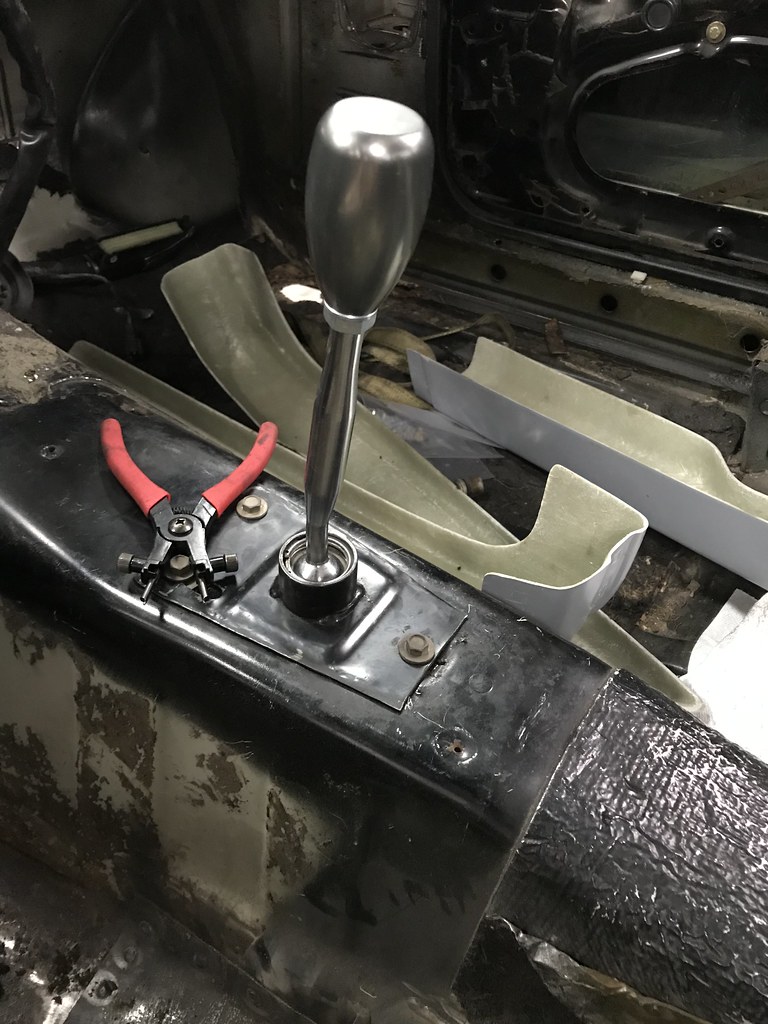
Installed 3 nut style clips in the shifter tunnel so the shifter setup I drilled will bolt in using stock hardware. New shifter should roll in this afternoon so I can get the linkage sorted.

Cleaned up and snatched some hose clamps from the m10 to make sure I don't need to order any or dig through the parts stash.

My new smaller battery will be here tomorrow, so hopefully Sunday I can get a bracket made and start committing to wire harness work. It's an ebay knock off of the pc860 for $34.99 called a Mighty Max Viper VP-600. Could be junk, but it's a smaller footprint than the lawn battery and an exact penny for penny cost.

So, speaking of budget, I am currently at $2809.09 before my $1000 recoup with only a few inexpensive items that haven't made the list yet. I have $190.91 left in the budget which I want to keep as open as possible until it's rolling and driving. There is a massive amount of parts that I ordered "just in case" to save on shipping, and some others that just didn't end up using. Luckily a large percentage of these can be sent back to FCP Euro for a refund/credit if needed.

Anyway, one huge budget hit was going to be a good performance chip. I didn't want to do the $30 ebay chip, but that's what was going to be the only thing I could afford to pick up. Miraculously I scored a SSSquid chip from a R3vlimited forum member along with another engine ground clable and airbox clip for the cost of shipping $3.75! Mike, you friggin rock! 

Untitled by hatchethairy, on Flickr

Untitled by hatchethairy, on Flickr

Untitled by hatchethairy, on Flickr


captainawesome
captainawesome Reader
1/25/19 9:16 p.m.

My shifter was in the mailbox this afternoon when I got home, so a quick comparison to the stock one reveals I made a good choice. The extra length should more than make up for the distance I raised the shifter platform. The knob is threaded, but it also has the provision to fit a stock style knob. After my initial assessment, I then proceeded to cut 1 1/4" out of the linkage with a little pipe cutter. After a tack or two, the test fit confirmed I'm good to melt the pieces back together. The shifter ball bushings are on the sloppy side, so I'll probably order up some new ones when I get another parts list together. Shifting pattern feels good and direct. The knob that comes with the shifter has a nice weight to it. All in all I may end up buying one of these for the e30. Driveshaft brackets will be up next for fab work I think.


Untitled by hatchethairy, on Flickr


Untitled by hatchethairy, on Flickr


Untitled by hatchethairy, on Flickr


Untitled by hatchethairy, on Flickr


Untitled by hatchethairy, on Flickr


Untitled by hatchethairy, on Flickr


Untitled by hatchethairy, on Flickr


AxeHealey
AxeHealey Reader
1/26/19 1:48 p.m.

I really like that shifter. Nice work man.

captainawesome
captainawesome Reader
1/28/19 7:54 a.m.
AxeHealey said:

I really like that shifter. Nice work man.

Thanks! Next mod for the shifter is to put a second lower cup at the top of the assembly to ditch the spring. Others before me have had to sand it down to a snug fit, but it will no longer have any give since the spring will be long gone. The clips and screws were from the aux fan brackets, and when tightened are nice and snug. I was concerned they would just move around, but so far that seems to be unfounded.

captainawesome
captainawesome Reader
1/29/19 8:36 a.m.

When it rains, it pours. Excited to see my smaller battery on the porch, I could tell the box had a rough life. Hoping for the best I opened the package finding a fairly significant dent in the lower corner. Fook. Waiting to hear back from the seller to see what they want to do about it. At least I can sort out a bracket to mount this thing.

In an effort to get some more momentum, I spent a few minutes cleaning up after myself before swapping the 13" stock wheels and tires back on. Don't want to flat spot the a7s, but this also gave me the opportunity to put the car on blocks to ease in driveshaft center support bearing bracketry and exhaust work. While the car is in the air, I now have room to slide my oil drain pan in place to try to stop this silly leak. You'd think after going through the trouble to pull the pans apart, I would have noticed the hairline crack at the top of the threaded hole, but NOPE. Luckily there are silly cheap pans for less than $23 on ebay new, but still not as convenient to replace in the car VS sitting on the stand. Plus, 23 buck is 23 bucks. So for the evening I managed to fasten down my fuel lines in the engine bay and stare at stuff.

Untitled by hatchethairy, on Flickr

Untitled by hatchethairy, on Flickr

Untitled by hatchethairy, on Flickr

Untitled by hatchethairy, on Flickr

Untitled by hatchethairy, on Flickr
 

captainawesome
captainawesome Reader
2/1/19 9:25 p.m.

I've been dreading the center support bearing brackets for a while now. I hate welding on my back under the car, and worse yet the undercoating is a pain in the ass to get removed. There have been a few m42 builds for the e21/2002 that used some angle iron to attach the csb mounts, and then anchor that to the stock mounts. I was afraid that wouldn't be sturdy enough, but luckily that was all unfounded. I happened to have some scrap angle from the poorly constructed roof rack of the new baja bug I got. After a bit of work with the grinder, drilling some holes, and tacking on a couple bolts it was all good to go. Way more sturdy than I expected. After a coat of cheap spray paint the brackets are done. Happy to have that finished, I moved on to the upper rad mounts. I've been putting this off because I just couldn't settle on a mount that I thought looked and functioned well enough. Digging through my scrap metal box, I noticed some pre-threaded tabs from an old motorcycle battery bracket assembly. They were the proper thread pitch of the old rubber isolators, and after a smidge of welding were nice and functional. The core support piece is still removable, I just need to settle on a more permanent fastening solution other than the sheet metal screws. Battery bracket is up next, hopefully Sunday I can get that finished up and then move on to exhaust mounting/fitting.

Untitled by hatchethairy, on Flickr

Untitled by hatchethairy, on Flickr

Untitled by hatchethairy, on Flickr

Untitled by hatchethairy, on Flickr

Untitled by hatchethairy, on Flickr

Untitled by hatchethairy, on Flickr

Untitled by hatchethairy, on Flickr


AWSX1686
AWSX1686 SuperDork
2/4/19 8:39 a.m.

As much as I like to do things "right" or how I know I want it to be in the end, the first time, sometimes you just have to keep moving and do something basic. I'm not talking cutting corners, but maybe not getting hung up on everything being perfect. 

That said, I think both of your solutions here worked out really well. 

captainawesome
captainawesome Reader
2/4/19 9:09 a.m.
AWSX1686 said:

As much as I like to do things "right" or how I know I want it to be in the end, the first time, sometimes you just have to keep moving and do something basic. I'm not talking cutting corners, but maybe not getting hung up on everything being perfect. 

That said, I think both of your solutions here worked out really well. 

Agreed. I think the problem ended up being the first couple of upper rad attempts were pure failure which just put me in a funk. This version isn't as beautiful as I had hoped, but with a little paint will look just fine.

Unfortunately I got a bit of a nasty sinus head cold thingy over the weekend, so no battery bracket or exhaust work was done. Hoping I'll have the energy tonight to get back to it and start knocking those off the list. March is coming up faster than I would like.

4 5 6 7 8

You'll need to log in to post.

Our Preferred Partners
OVUDRG2PQCQKJ0YljHWYE1JM5EiYEfeIm7J9BC6kG7u1mxuo4h23AD1PDrX41tI2