
Carpet Removal & Subfloor Prep
Physically laborious weekend. I made a dump run on Saturday and cleaned all the debris from the back deck.
One thing to factor if you like close budgeting: disposal. I've spent in the neighborhood of $350 on disposal alone - something I definitely underestimated in my original plans. My contingency covers it, but I've made four full truck-load trips to the dump already. Should be done with most of the removal at this point - only thing left to remove is a few old cabinets, and if I can get them out in one piece, I'll try to sell them. After finishing the dump run, I finished sticker-stacking the last five boxes of flooring. Our whole house is in disarray at this point in the project, but the family is putting up with it well.
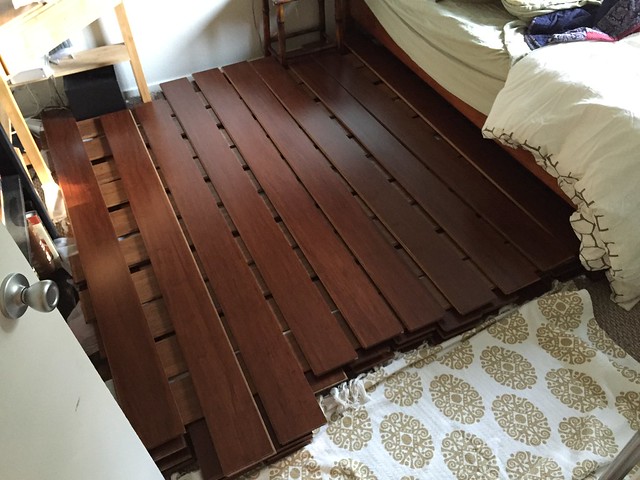
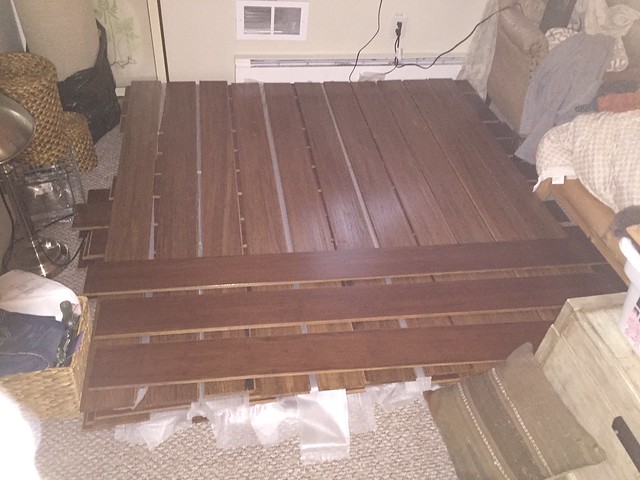
Got to stack it all out so it acclimates to the humidity in the house.
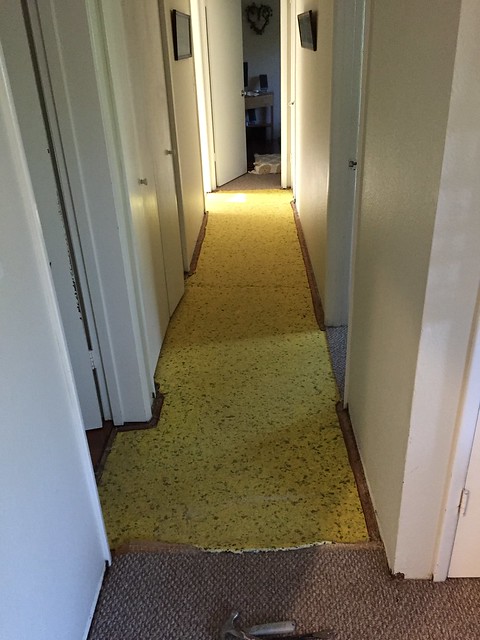
I started in on carpet removal Sunday morning as my wife and daughter left for the inlaws. Only took an hour or two to get it all out - would have been 15 minutes, but I had to shuffle furniture around.
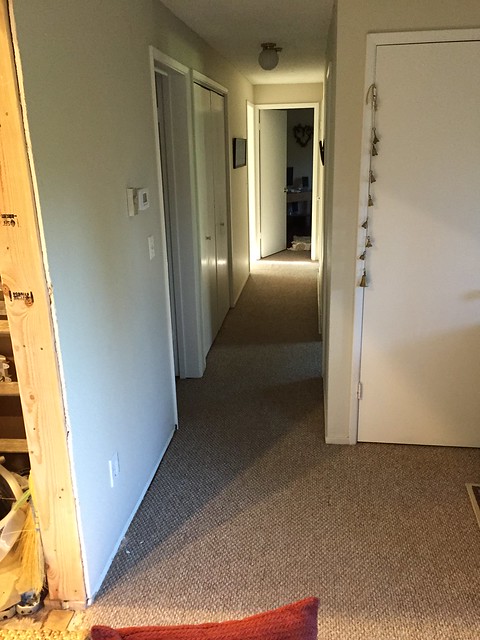
Before:
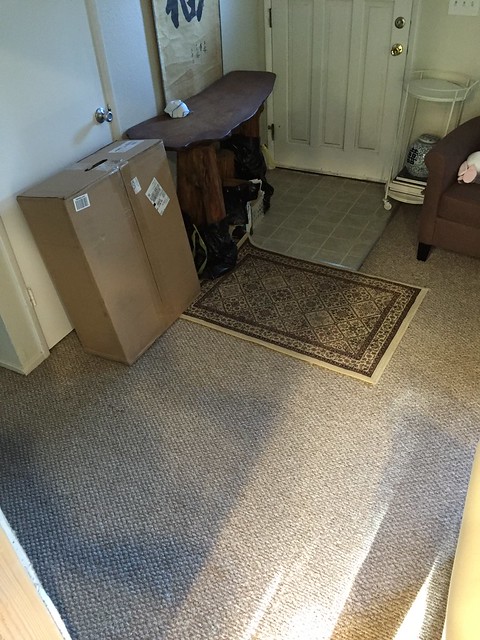
 Also had to remove the front door landing pad, seen here:
Carpet gone:
Pad too:
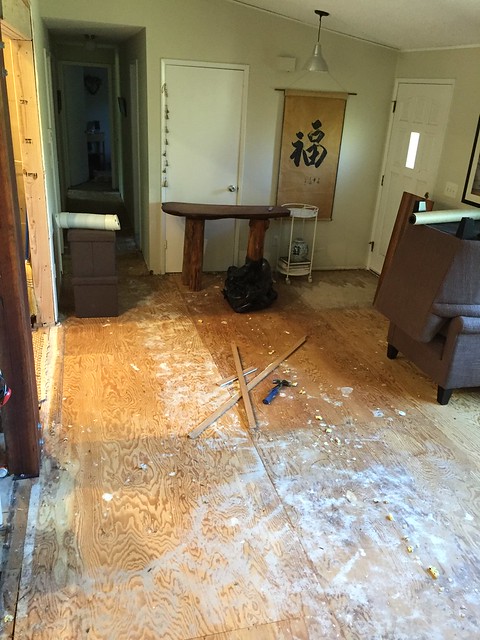
Loaded all that into the truck and also ripped out two more base-board heaters that haven't been used in decades. Dump run #2!
Picked up some more supplies at Home Depot and then spent the rest of the afternoon pulling staples from the subfloor. Also fired up the belt sander to smooth some transitions between sheets of the subfloor plywood. Pretty flat overall now, I'm hoping that extra effort pays off in a nice flat finished floor. I was really tired after this weekend - I've got a little bit of a bug that's going around, so that probably didn't help. Got some paper underlayment down, but need to finish prepping the rest of the floor in the evenings this week.
Of course, had to move furniture back into place and make the house functional again. We're knee deep in the "messy" phase of the project.


Enyar
Dork
5/2/16 8:29 p.m.
What kind of temperature fluctuations do you seen in your house? Here in Fl the AC is set at 76 when I'm home and 84 when gone for work. I've always wondered if that would mess with wood flooring.
No it won't in your case. We get the wonderful 30 to 40 degree temp swings weekly here. Yesterday it was 90 outside. Today is forecast to be 70-75 the next two days back down into the 60's for the daytime high. With some good 10 to 15 degree changes in the house depending on if the heat comes on or we open the windows.
Being that most of the would flooring is manufactured like plywood with the grains crossing it makes them less likely to cup and twist like a solid piece of wood would.
Brad said it. Engineered wood floors are a great choice to mitigate broad swings in humidity and temperature, but even solid wood can deal if it is installed right. It's important to remember that it is more sensitive to changes in humidity than temp. We have wood in the bathrooms of the house, and you can see a little difference in the gaps from winter to summer. When it dries out for a few weeks straight, you could slide a piece of paper into the gap between planks in some places, but not in winter.
Our house regularly sees 15 degree swings this time of year when it gets warm during the day, but cools off quite a bit at night. The PNW really only has two seasons though - spring and fall, with a warm or cool bit between the two. 
The biggie is humidity.
A/c units were initially designed for humidity control, not cool air. (hot moist air blown over condensors cools rapidly and the water condenses out, giving dry air that happens to be cooler.)
So what happens is if it's hot as heck, your a/c running more often will lower the humidity in the house, caushing your flooring to shrink. Same thing with winter. If your heat pump or (gas heat like we have.) comes on b/c it's 5* for the last month your humidity in the house drops to near zero and then you almost can hear the floor cracking and popping it'self loose. I have a lot more squeaks now.
Last winter it got bad enough that I resorted to boiling a pot of water every sunday. like just kept water boiling all day. To try pump more humidity in to the air.
Evenings this week have been spent tuning up the subfloor. In some sections I use the belt sander with the shop vac hooked up for dust control, but I've found most of the seams are puckered a little and the best tool for the job is an old block plane.
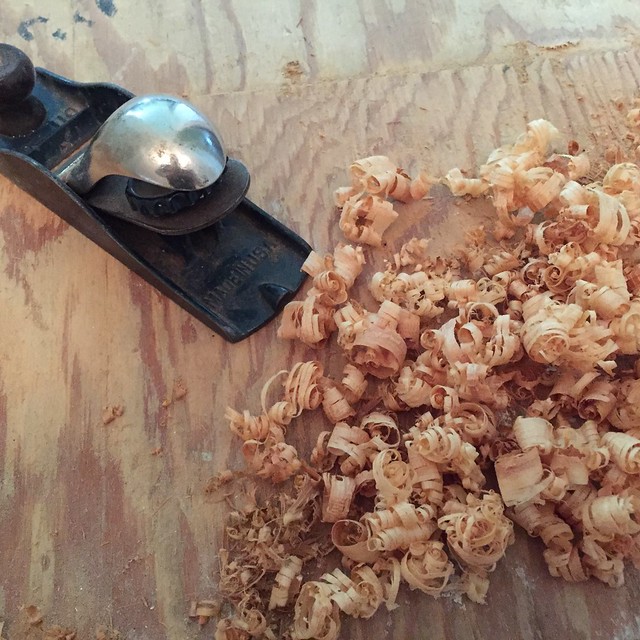
Like any proper tool hound, I've always lusted after wood planes, but I actually only have this one small old Stanley model 110. According to the Plane snobs online, it is a piece of junk compared to the other fine planes out there, but it did this job very well. Floor is nice and flat all over after a few passes here and there. Bonus: no dust and noise compared to the belt sander. 
While you can, find the joists and put some more nails and screws in... My fil went ahead and put new 1/4" ply on top of the existing with liquid nails when he did his flooring. Leveled it out nicely and helped a lot with teh squeaks he had. (that and the additional screws he did.)
In reply to Mad_Ratel:
I've got one spot in the floor that squeaks, and I will definitely hit it with some deck screws. Thanks for the reminder, because I was just about to head in and get some underlayment paper down.

Mezzanine wrote:
**Carpet Removal & Subfloor Prep**
Physically laborious weekend. I made a dump run on Saturday and cleaned all the debris from the back deck.
One thing to factor if you like close budgeting: disposal. I've spent in the neighborhood of $350 on disposal alone - something I definitely underestimated in my original plans. My contingency covers it, but I've made four full truck-load trips to the dump already. Should be done with most of the removal at this point - only thing left to remove is a few old cabinets, and if I can get them out in one piece, I'll try to sell them.
Damn dude. I guess I'm pretty lucky with my trash service here. I have unlimited curbside pickup. I'm probably not endearing myself to the trash guys, but I've thrown out about 2500sqft of carpet and padding, tons of drywall and tile from both bathrooms all for free. I did make a trip to the dump for the kitchen demo stuff, was just too much to put on the curb, so I loaded it up on the trailer, drywall, cabinets, countertops. To the tune of about 1500lbs, cost: 26 dollars.
If I was still out in BFE I would have just burned all the cabinets, but I can't really make a huge bonfire in suburbia without alerting the fire marshal.
Keep it up though, it's going to look great once it's done.
Mezzanine wrote:
In reply to Mad_Ratel:
I've got one spot in the floor that squeaks, and I will definitely hit it with some deck screws. Thanks for the reminder, because I was just about to head in and get some underlayment paper down.
If you do the 1/4" ply overlap joints so that they only cross 90*. I.e. sandwhich the joints. It'll greatly increase strength and sound deadening.
Flooring Prep
Since my project is currently in lockstep with t25torx, I too worked on flooring over the weekend.
Saturday I got the cabinets out of the way so I could get the subfloor sorted.
Lets get messy:

Are you guys as sad to see that awesome counter top go as I am?
Next up, get the cabinets out of the way:
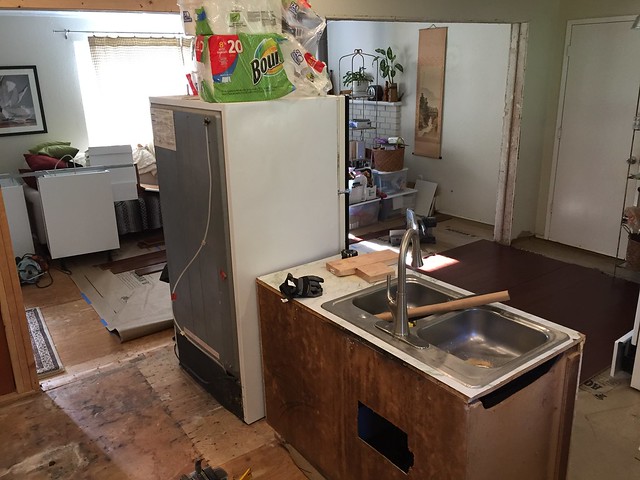
We had a leaking supply valve for quite some time and never knew it - it was leaking through the stem packing, so it leaked mostly if you had to do any work on the faucet and had valved off the supply. It leaked a bit only at these times, never continuously. The bottom of the particle board cabinet was in gross condition, so I knocked it on its back with the intention of tearing the bottom out since it was water damaged. As soon as I touched it, the bottom slumped right to the floor in a heap.
You know what particle board looks like after a prolonged water leak? Mulch. This cabinet was made of mulch.
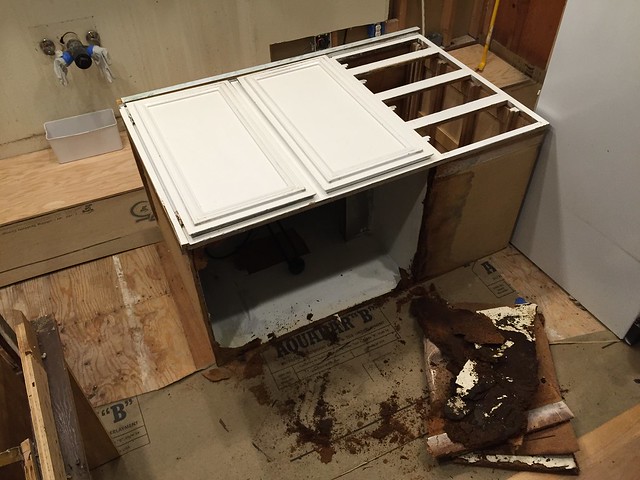
Here's the cool part about particle board cabinets: they soak up all the water, leaving the subfloor completely undamaged.

I got the whole area cleaned up and got the underlayment down by the end of the day Saturday.
Floor Layout and Install
I spent part of Saturday night and Sunday morning agonizing over layout... Where to start laying floor? Since no two walls in the house are perfectly square to each other, I spent hours measuring and calculating where to place the first boards to ensure that the new floor looked as straight as possible.
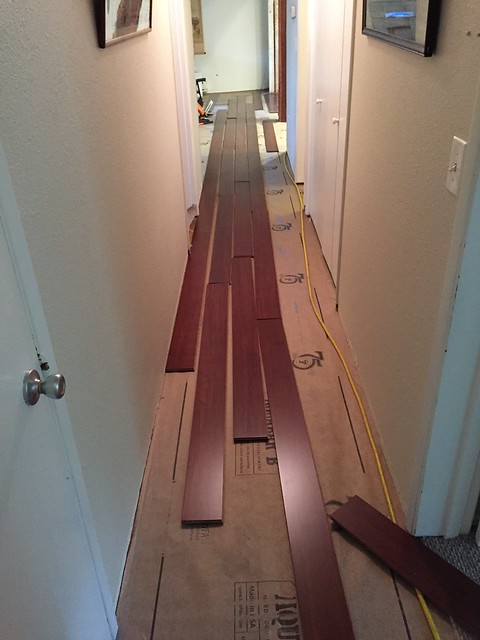
I knew I wanted to start along the hallway since that is a long straight run where you'll have the longest view of bare floor. I was reminded that pulling string lines, setting square, and snapping chalk lines by yourself sucks hard. Laying out some planks:
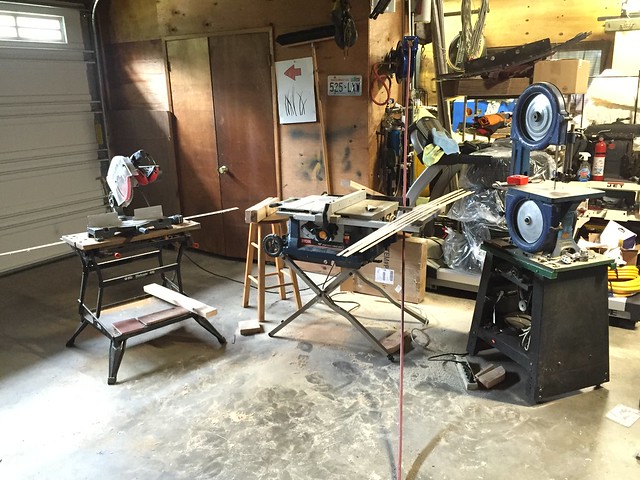
Once I had decided on a spot, I did everything possible to avoid actually driving nails, because scared. So I set up wood shop in the garage:
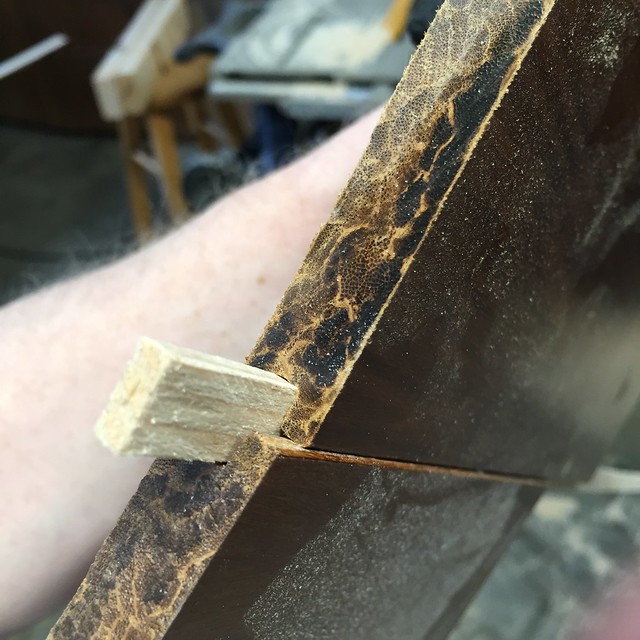
Since I was starting the floor in the center of the room, I needed some slip-tongues or splines to mate the groove side of two planks together. Starting in the center is common on wider runs because it helps control the flooring expansion. Nobody sells splines in the dimensions I needed, so I had to rip down my own, Fit is perfect:
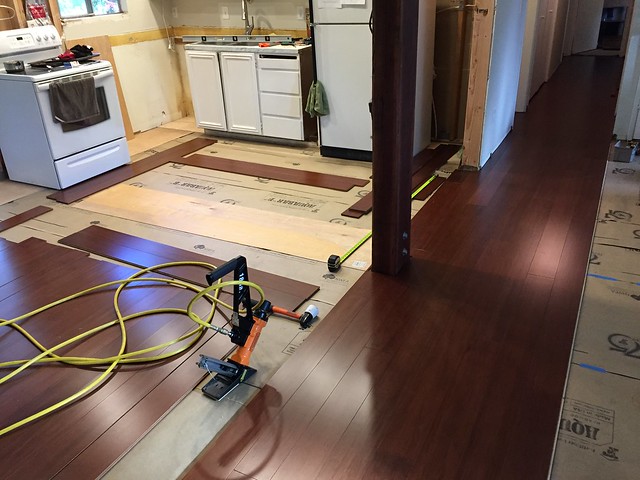
Once I'd made my commitment and had nothing else to stall with, I finally started nailing down boards:

Trimming out the hall was tedious since there are three doors and two closets, so lots of little cuts around door jambs. Made it into the Kitchen Monday night.
Cut in around the post:
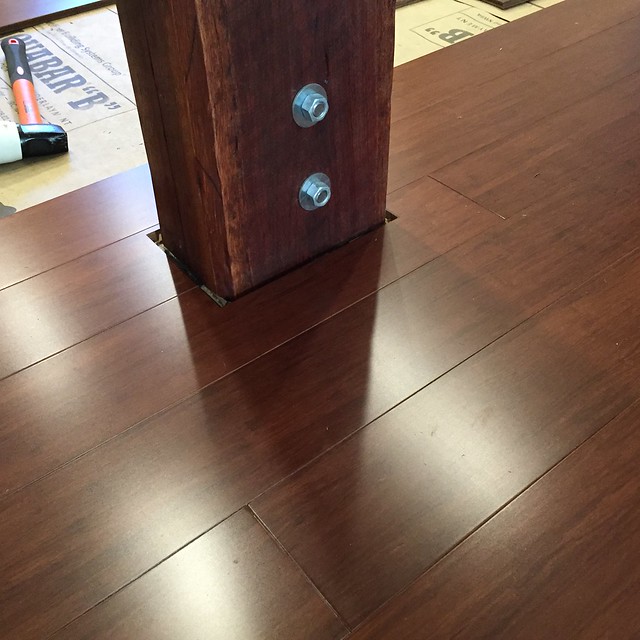
I have to leave a 1/2" expansion gap everywhere, which sucks around the post, but I'll trim it out with some steel so it doesn't look out of place.
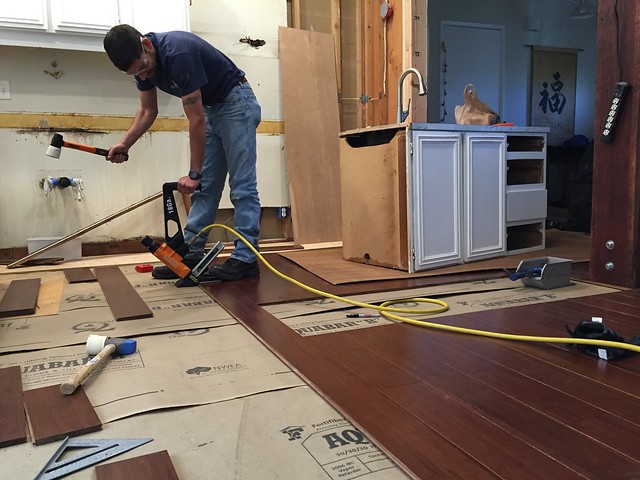
Tuesday I had my first project helper join me: Hungary Bill! This guy was huge help and was way faster than I was at this stuff. Thanks so much for your help!
Woo! After having laid hardwood in 3 houses and tile in this place I can say I miss laying hardwood. It's so much easier to cut and lay down. It's starting to look good dude, are you not laying flooring under the cabinets?
Enyar
Dork
5/14/16 8:55 a.m.
t25torx wrote:
Woo! After having laid hardwood in 3 houses and tile in this place I can say I miss laying hardwood. It's so much easier to cut and lay down. It's starting to look good dude, are you not laying flooring under the cabinets?
What are your thoughts about that? We weren't planning on laying floor under the cabinets either.
What was the plumbing contraption seen in the sink during cabinet demo above? It looks like it combines an amazing variety of tubing materials somewhat poorly.
Am I really that handsome!?! Why don't people tell me these things!?
On a more serious note. All that agonizing over measurements has already paid for itself. What the photos DON'T show is how well thought out that flooring is and how every plank we set "fits" perfectly with the room around it (ie: we didn't have to fudge anything to avoid trying to install a 1/2" strip in an effort to close the gap to the wall or the island, etc). IIRC when the two sides of the island met (pictured above) there was less than 1/32" difference from one far side to the other.
If you don't count the nails we stuck right on the top of the two (was it three) boards, and if I hadn't sawed off both mating ends of that one board (blonde moment) we were running at zero board waste. 
Pretty impressive, and I learned a lot by doing it.
Good times.
Enyar wrote:
t25torx wrote:
Woo! After having laid hardwood in 3 houses and tile in this place I can say I miss laying hardwood. It's so much easier to cut and lay down. It's starting to look good dude, are you not laying flooring under the cabinets?
What are your thoughts about that? We weren't planning on laying floor under the cabinets either.
There are pros and cons to both. I went with tiling under the cabinets since I had them out and in the future should someone want to do a different cabinet layout they won't have to worry about not having tile under them and being stuck with this layout.
The wood floors I did just went around the cabinets, I wasn't planning on replacing them or rearranging the cabinet layout so it was easier and used less material.

old_
Reader
5/14/16 10:06 p.m.
What color is the flooring? Looks very nice
old_ wrote:
What color is the flooring? Looks very nice
Floor is Cali Bamboo's Java Fossilized with an important caveat - we saw samples of this floor run a range between red and very brown. Our sales guy told us we could request a range of tones if we'd like, so we asked for the red end of the spectrum. They were happy to comply - sounds like most people go with the brown, so red was easy to come by.
t25torx wrote:
Enyar wrote:
What are your thoughts about that? We weren't planning on laying floor under the cabinets either.
There are pros and cons to both. I went with tiling under the cabinets since I had them out and in the future should someone want to do a different cabinet layout they won't have to worry about not having tile under them and being stuck with this layout.
Pros and cons for sure. I decided to NOT run the flooring under the cabinets in order to save a few bucks, but having done it now, I think I'd do it the other way if I were to start over. Cutting around everything took more time than the cost savings was worth.
GhiaMonster wrote:
What was the plumbing contraption seen in the sink during cabinet demo above? It looks like it combines an amazing variety of tubing materials somewhat poorly.
I presume you mean this contraption?
You might remember seeing that the dishwasher was three hundred yards from the sink. The thing in that photo is just one small part of the drain that they ran from the dishwasher to the sink. It had no less than 8 hose clamps, and four different hose or tubing types. It was part of the reason we never used the dishwasher. Probably part of the reason the bottom of the sink cabinet turned to mulch.
Sliding Glass Door and New Window
On Saturday all the ladies in the family came to town for a post-mother's day picnic down at the church, so my sister dropped my nephew off for free labor. You know what that means: free labor makes it heavy/awkward lifting day!
Our window and door was supposed to deliver to our house on Monday, but they were a no-call/no-show. Or at least I thought they were... After my wife called them, we discovered that they had indeed done a stealth delivery and left the new items on the end of the garage where nobody really goes. Weird because I was home all day working on flooring and never heard or saw anything, but glad to have the stuff here.
Let's get this trim removed:
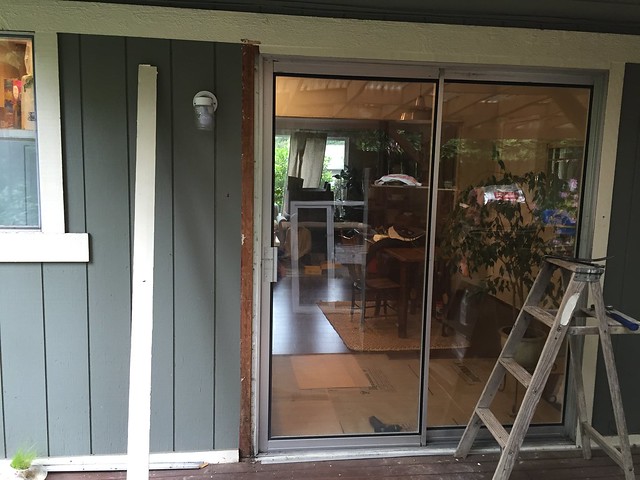
The old door came out pretty easily, and I was pleased to find solid wood all the way around. No rot to deal with. The panel is leaned up there to keep the cat in. Out with the old:
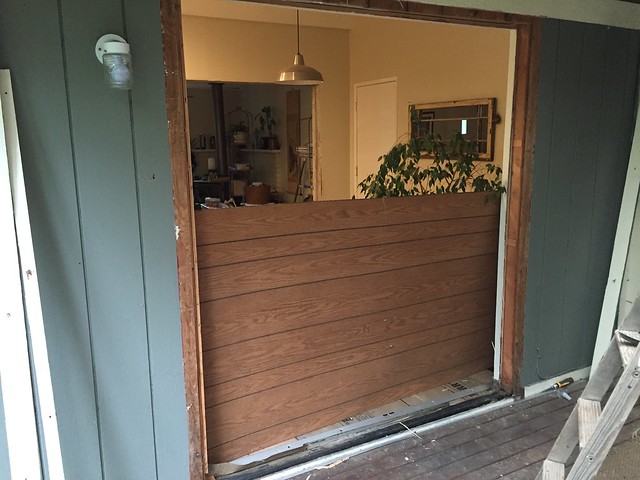
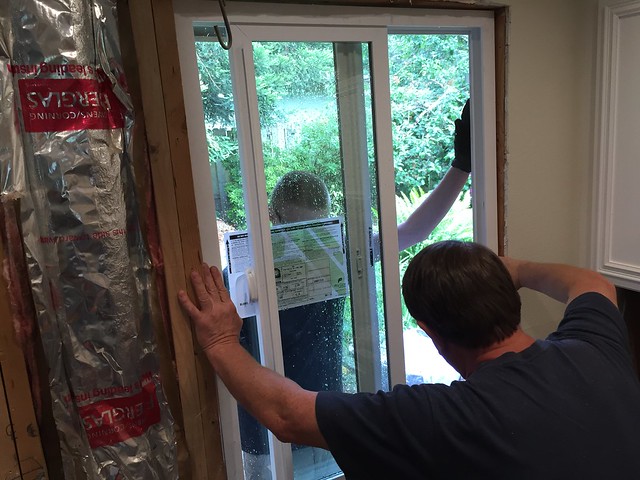
Dad sent a text to see if we needed help, so I sent a crazy-face of my nephew and I installing the door:

I guess he took that as a cry for help, because he came over too! Here's dad screwing around with something outside the new door; note that we went with a smaller door (to make room for more counter space), so we had to frame in one side a bit.

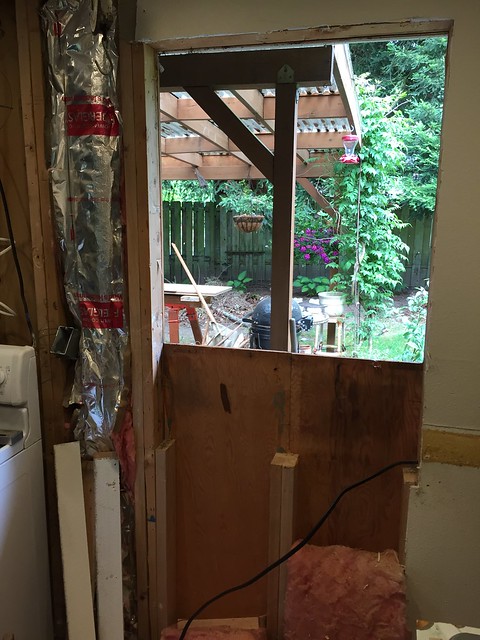
Window was next. Removing this one was harder than getting the door out, but we won eventually. Here we are with the cripples cut down to their new height:
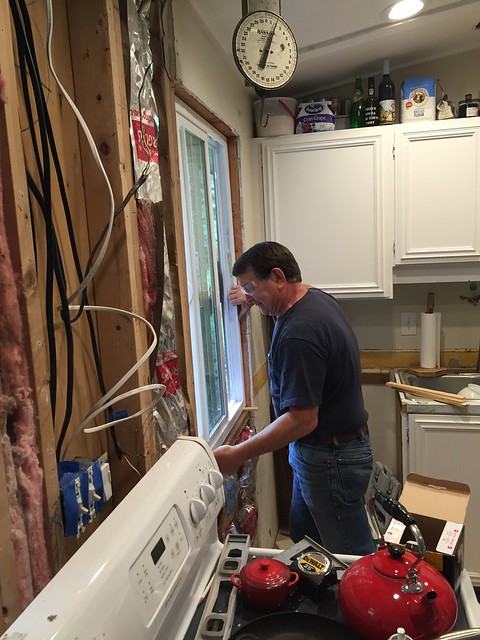
Dad setting shims:
Almost done:
Family photo after a productive day - my sister is taking the photo, so she isn't pictured.

Forgot some important details on the window/door day:
-
The new window is taller than the original, but I left the header at the original height. We set the bottom edge of the window so the counter top can run into and form the window sill. Should make for a great custom look.
-
Filling the hole in the wall created by going to a 60" door from a 72" door - I nailed a panel in there temporarily, but I need to pick up some siding and insulation to fill it properly.
-
Moving to a shorter door was critical to the layout of the kitchen because it makes for some usable counter top space, plus I needed a place to put the light switches that wasn't directly over the new stove location.
Flooring Done
Tuesday I made it this far with Bill's help:
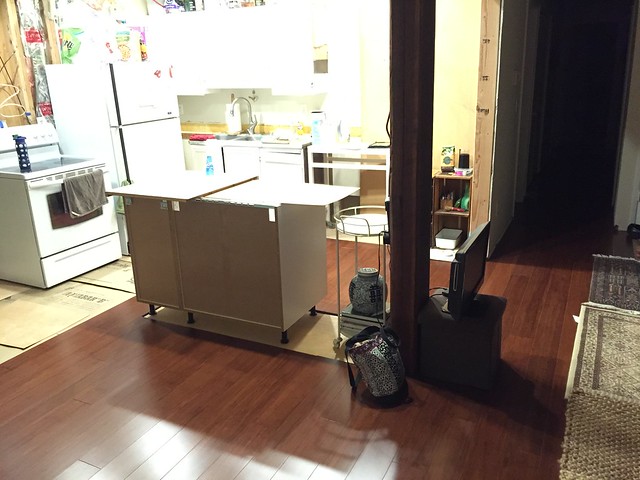
So Sunday morning I moved the fridge, sink, and oven AGAIN. Keeping the kitchen functional between these work sessions is getting old, but I can see the light at the end of the tunnel. A few more moves for drywall, then I can place the new cabinets. No in process shots, but you guys already know what that looks like. Here we are finished out to the wall.
In this photo, the oven is sitting in its final location - you can see that there is room for a 15" wide cabinet box to the left. I'll be moving the light switches over to sit right above that box. The fridge is also in its final location. Both appliances are being changed out for new, but these are in the right spot for now.
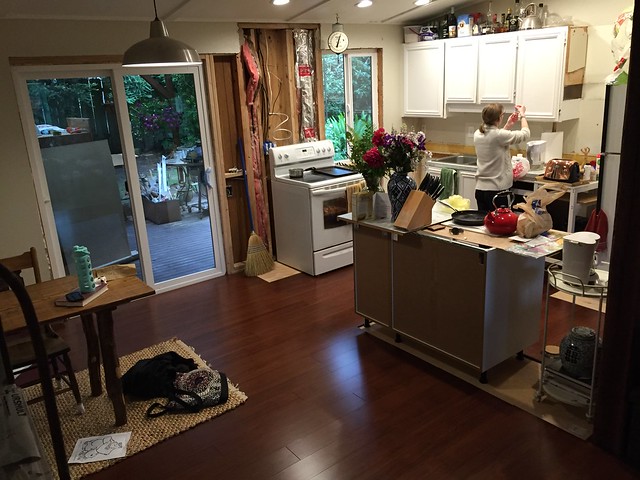
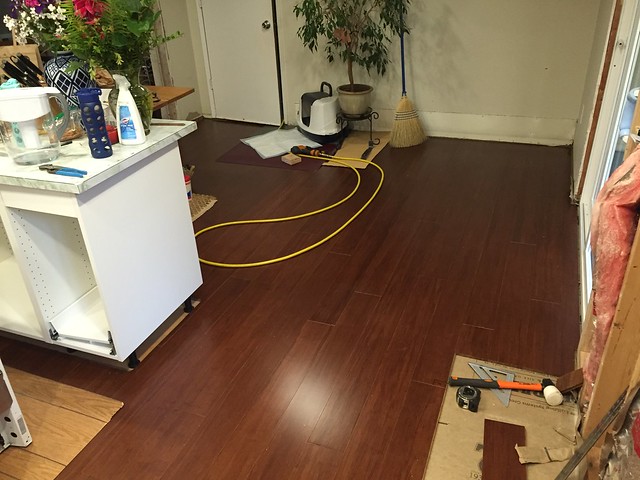
Another shot of the finished floor - you can see that I ran the flooring a bit under the edge of the cabinets against the back wall, which worked out really nicely because I got to nail through the toe same as any other board, but it was the last row that you could fit the flooring nailer anyway.

Doesn't that counter-height window look great? I'm excited about that.


