Well, in the general interest of keeping the wife happy. I need to help her with her latest project.
She has really gotten into cosplay, like really into it. and would like to make her most ambitious one yet, one to compete on the national level.
So, here's the basic plan. She needs wings, like really big ones and obviously, they need to be light. So, made out of aluminum...

Well, this guy should be able to help with that... you can see the torch cooler on the left there, which needs to be boxed in.
Here's a box!
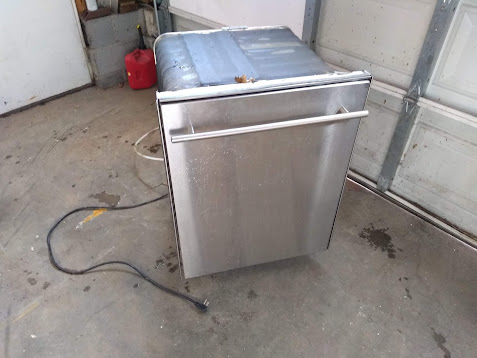
Good enough for now.

So, I don't actually know how to TIG weld... but how hard could it be?
On steel?
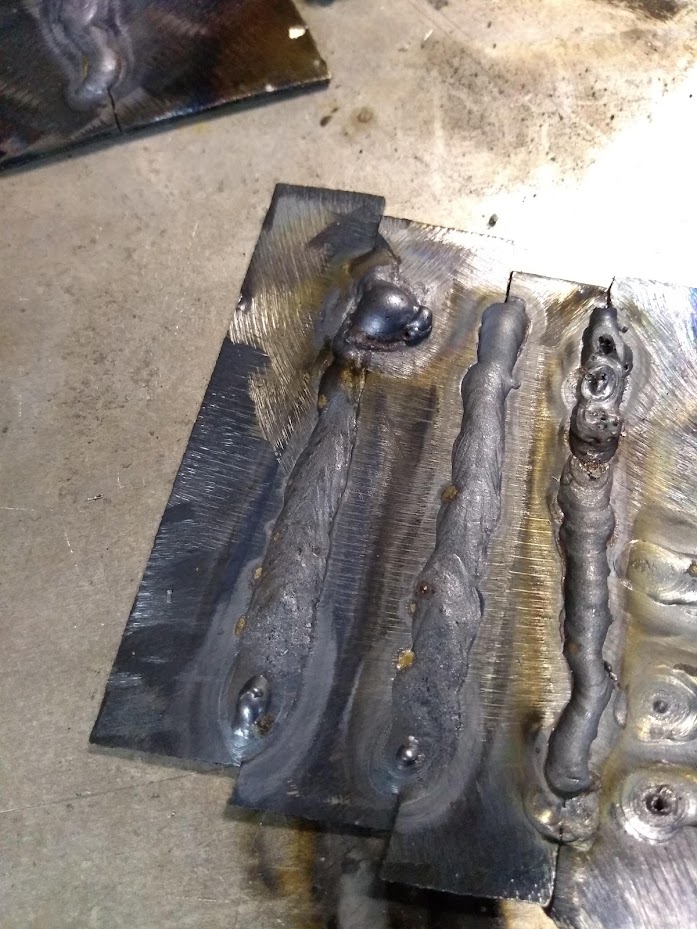
Not that hard!
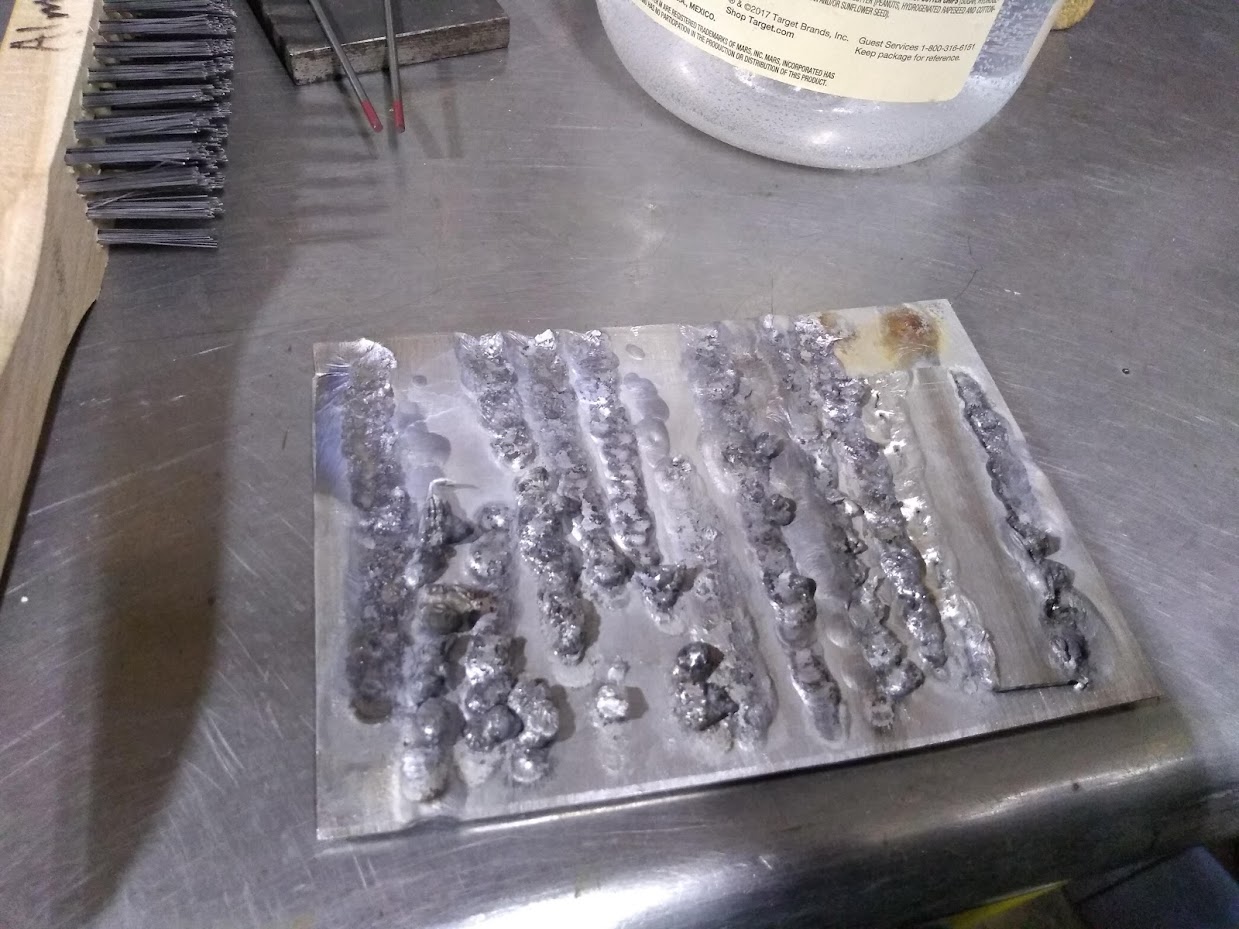
On aluminum...

Sweet berking mother of Ferrari.
It took me like an hour or more to get it to even function let alone work well...
some improvement... a long way to go. Welding on a flat, thick plate like this is also infinitely easier than welding corners or edges...
Was it still set to DC while welding the aluminum?
Any drawings of the wings?
There's an artist on YouTube with a giant set of (steel) wings hanging in his shop that look great for not being made from a billion individual pieces. Probably help for design part anyway.
I'll have to try to find his channel.

codrus
UberDork
4/25/19 4:59 p.m.
I'm just glad this thread didn't involve tape recorders and noses.
The character is rather obscure, it's one of the bosses from Darksiders 3, named Pride.
Here is how she looks in the game.

And here are a few of the other costumes she has made thus far.
Fury, from the same game.

Female Thor, from the comic books.

And World of Warcraft. This is the...Nightborne Heritage Armor, I'm 99% sure.

Rad. Did she make all the costumes? That Fury costume is really elaborate.
I have friends that cosplay and make all their own gear.
Here's the guy I was talking about earlier (skip to 1:10)
https://youtu.be/sExVwB-1bnE
I like the look, although it occurs to me that you are probably just making a frame, right?
Depending on costume detail, texturing a full set of metal wings would be a ton of work.
If you want to build wings you need to talk with @polinavish she had done some astonishing 40K saint Celestine wings that are just out of this world and light enough for her to wear at conventions. I get asked to print some of this stuff up by people but not my bag of cats. I like things that are practical not decorative but I dig the effort that goes in.
Also that headdress is going to weight like a LOT on your example photo. Like a lot. Some of the overwatch gals who do halos and things rig to a chest compression rig but those are nowhere near that weight to help with support.
https://i.imgur.com/pelf5Sx.mp4

Wow, this is ambitious! But it'll have to be to top what she's done already. +1 for starting work on headdress support early. The shoulder "horns" are going to need a lot of support and stabilization as well.
Id say her costumes are already at a national level!
She has made 95% of all of the shown costumes, by hand.
The Thor costume for example, has those disks on the belt, they were 3d printed. Every other part is hand 'sculpted' from foam or stitched.
She is naturally talented as a painter and sculptor so once she learned to sew and glue foam together she had all the skills. Most people at conventions don't believe her when she tells them she has only been doing this for a year.
Yes, there will be significant shoulder support, once I catch up on posting, you'll see what we have so far.
As for the design of the wings, she already has it mapped out, based on (I'm not sure who's) proven design.
BirgerBuilder said:
As for the design of the wings, she already has it mapped out, based on (I'm not sure who's) proven design.
If she is willing to share the design once shw has it down I would love to take a look. Friend wants to do a argel tal cosplay after the warp and building huge skeleton wings is part of that.
When I was digging I looked into these cheap led wings. They are attached ot the arm and they seem like something you could copy at least the attachment points.


On to the beginning of the build. First cuts on $10 worth of aluminum.

outside bends were easy in the sheet metal brake.

Insides had to be hammer-formed.

And a bit of footage missing here...

So I got out the sheet metal stretcher to form the shoulder hooks. This started out really successful but if you stretched them too far, the metal would snap apart.
Aluminum is not quite as mailable as mild steel, especially while cold. If I was going to do it again, I would use some thicker plate for the shoulders and just bend it by hand. Oh well, these should be lighter and stiffer, in theory.
Also, trap doors are cut to make mounting locations for the swivel brackets. The plan is for the wings to be able to 'flap' and this will be done with a small motor. These pivots, however, are so the wings can be folded back behind the wearer making it much easier to move through crowds and doors.
I've got a really poorly drawn diagram for all of this somewhere but to be honest, I've got the jist and I'm going full seat of the pants at this point.
More to come.
So, not exactly like this, I think we will likely skip the scissor action in the center section. But same basic overall size and scope.
What series aluminum are you using?
6061-t6 and 7025 do not bend easily and will crack without annealing. I'd suggest 3003 or 5052.
Knowing your alloy will also help you choose the correct filler rod when welding
In reply to Jumper K Balls (Trent) :
Good question! I never thought to ask them at the metal shop. I don't suppose there is a way to find out now?
Sometimes it is printed on the panel in red or black ink, but yeah, call the vendor.
You can anneal 6061 with an oxy acetylene torch..... if you happen to have one.
@$10 I'd be surprised if it's 6061. If you can fold a scrap piece in half and hammer the folded edge, then open it up and flatten it out without a lot of "granulation" where it was folded it's almost certainly not 6061.
I think .063 6061 would also have turned "white" on the outside radius of the bends.
I'd guess the tearing is most likely due to the stretcher jaws' design. That looks like a HF stretcher and the jaws have pretty sharp teeth on them and make stress risers. Even 3003 (what I'd guess you have based on price) has it's limits for cold work. That outer edge is probably stretched a couple inches.
Your difficulty bending is probably just due to the thickness. Aluminum in general is stiffer than the same thickness steel, and .063 is pretty close to 16 ga steel (.065?) which is what they make lawnmowers out of.
Next step is to strengthen up the mounting tabs so I cut and bent some scraps into brackets.

Crossed my fingers and brought out the torch.
First attempts were... less than great.

But, by the time I finished 4 of them I had a, still not great, but likely strong enough bead going.

At least the weld went all the way through.

This is... not easy. Seems like it goes from too cold (lumpy boogers) to too hot (loose mercury) nearly instantly.
Any TIG pros out there wanna critique my work?
What current settings are you running? High Frequency settings? Argon flow rate? An old machine like that will require green band tungsten electrodes.
I would be starting at about 65 amps with 15CFH argon flow and adjust from there
Seems like it goes from too cold (lumpy boogers) to too hot (loose mercury) nearly instantly.
This makes me think you still have some aluminum oxide on the surface. I always use a flap wheel or carbide followed by a wipe of acetone to clean aluminum before I weld. I've tried using just a wire brush but never had good results.
I'll second what Jumper K Balls said about the green band Pure Tungsten electrodes. Those old transformer machines seem to like the green electrodes with a balled up end the best, at least the old miller I learned on did.
Preheating with a Mapp or oxy-fuel torch helps a lot too on aluminum but I wouldn't think you'd need it on thin sheet.
Great tips!
I am running high frequency AC with 15CFH of argon. But I am also using Red tungsten so I'll switch to green and see if that helps.
I honesty don't know how many AMPS I'm using though, "High" and "7", LOL
For the cleaning process I've been using a SS brush and acetone so I'll try the flap-wheels instead.
Thanks!
Well, I've been off doing race car things a while but I'm back at it with limited success.
I tried all of the tips above, called a pro and got some tips from him as well, watched a bunch of videos and everything is still coming out like this...

Went back for more research and found that my welds look exactly like a picture labeled "Weld gas contamination".
A-ha! So I used soapy water on all of the lines and connections and found a few minor leaks. Ok, now we are getting somewhere!.
Unfortunately, this didn't fix all. I did see some minor improvement though and by this time had run out of Argon.
So, I went to the shop to get more. Talked about my woes and asked what he thought, Since this is a used tank, it may have once held CO2 and that can stay inside the metal of the tank. He 'flushed' the tank with nitrogen before refilling and I went home to try yet again.

Is that, marked improvement I see? The middle weld is the first one I laid down, You can still see a few black specks but it actually has a pattern to it. The bottom weld, I let the metal get too hot and it dropped out the bottom. But at least I am getting somewhere!
(very top is old weld that clearly wasn't working)
I tried a few more joints and am still having a hell of a time getting two pieces of metal to join. On a single piece I can get a good puddle going but in a corner I can only seem to weld on one side or the other.
Driving me proper nuts!

NOHOME
UltimaDork
5/30/19 3:43 p.m.
I feel your pain. Did a bit of aluminum TIG work on a Healey shroud and have avoided it ever since if I can.
Contamination is the big one. Both sides of the weld need to be cleaned using a SS wire brush that sees nothing but that duty. And the brush needs to be cleaned on occasion. And the seam wiped with acetone both sides. And don't forget that the rod needs the same treatment.
The other tip is to not let your filler rod stray outside of the gas shield. When it is hot it will just form an oxide layer, go back in and clump into a crusty gray mass that wont wet-out.
Late in the game, but did you consider making this out of composites?
Pete

BirgerBuilder said:
Well, I've been off doing race car things a while but I'm back at it with limited success.
I tried all of the tips above, called a pro and got some tips from him as well, watched a bunch of videos and everything is still coming out like this...
Went back for more research and found that my welds look exactly like a picture labeled "Weld gas contamination".
A-ha! So I used soapy water on all of the lines and connections and found a few minor leaks. Ok, now we are getting somewhere!.
Unfortunately, this didn't fix all. I did see some minor improvement though and by this time had run out of Argon.
So, I went to the shop to get more. Talked about my woes and asked what he thought, Since this is a used tank, it may have once held CO2 and that can stay inside the metal of the tank. He 'flushed' the tank with nitrogen before refilling and I went home to try yet again.
Is that, marked improvement I see? The middle weld is the first one I laid down, You can still see a few black specks but it actually has a pattern to it. The bottom weld, I let the metal get too hot and it dropped out the bottom. But at least I am getting somewhere!
(very top is old weld that clearly wasn't working)
I tried a few more joints and am still having a hell of a time getting two pieces of metal to join. On a single piece I can get a good puddle going but in a corner I can only seem to weld on one side or the other.
Driving me proper nuts!
I am no TIG expert, but a friend let me run some beads on hid machine to try it out. The two biggest things I found were making sure the metal was clean. Like clean, clean. TIG welding aluminum doesn't like any dirt or contamination. He had me use a fresh scotch-brite pad, and then wipe with acetone and a clean cloth. Looking at your first bead there (middle) I think you are getting there. Looking at the second bead brings me to the other thing I learned. Heat soaking. Aluminum gets hot fast, and once it's hot, your welds will go to crap. I'd guess that's what is happening with your bottom weld.
Again, not a TIG expert here, but hopefully that helps. I need to get a TIG machine of my own...
Back for more punishment... I mean practice.
So, things I have learned so far...
Do not let the filler rod touch the work piece except in a hot puddle. Most of the 'boogers' are coming from me letting the filler melt too soon.
Go ahead and slam that M-Effin pedal to start. Get it real hot, real fast, then modulate when it starts to get too hot.
Keep moving! This is the part I'm still really struggling with. I'll make a mistake and then try and stick around to fix it. With steel, you can just move the puddle around if it's in the wrong spot, re-melt any imperfections and generally putz around while welding. That ain't gonna fly here.
And, I likely still have contamination, in the Gas most likely.

I tracked down more small leaks in the lines and it is way better but there is still something getting in... Oh well.
The wife has a deadline and this will be hidden so I'm gonna swallow my pride for now and try to make some progress.

Uh, still ugly as hell, but it should hold.

Hopefully, by the time I'm done, I'll know what I'm doing.


