1 2 3 4 5
RallyCaddy
RallyCaddy New Reader
5/30/19 1:13 p.m.

Rear strut tower brace? Answer: Maybe.

I have some nice engineering style lab goodies and while I don't want additional weight, a simple bar is a simple install. I can do a strain test using a load cell and a dial indicator to determine the stiffness and load deflection. If it's small enough, it's not going to matter so we'll see later.

Knurled.
Knurled. MegaDork
5/30/19 3:04 p.m.

Talked with Evan last night, and he mentioned something about Leon coming to Ohio with his 914 if it comes together.


Pete:  "....what?"


This looks awesome and is everything I'd want in a mid engine MR car.

RallyCaddy
RallyCaddy New Reader
6/1/19 8:52 p.m.

Ready for some more? Well with the weekend here and only one more before race days, it's a mad push to the finish. Thursday night was a washout as I had a conference call (SCCA) that was right in the middle. Friday night however was time to get into what's left of the electrics. A lot of trips to the shop and A.Z. and precious little was accomplished. BUT, today was another story. A set of Moroso switches in a panel and a plastic enclosure from Mcmaster Carr made for a center console with switches for the system. Most are unused yet but I have plans for later. Right now, ignition power and starter are all I need. The feed goes to the I-wire relay box and that feeds the fuel pump, radiator fans, EFI and everything else on the engine.

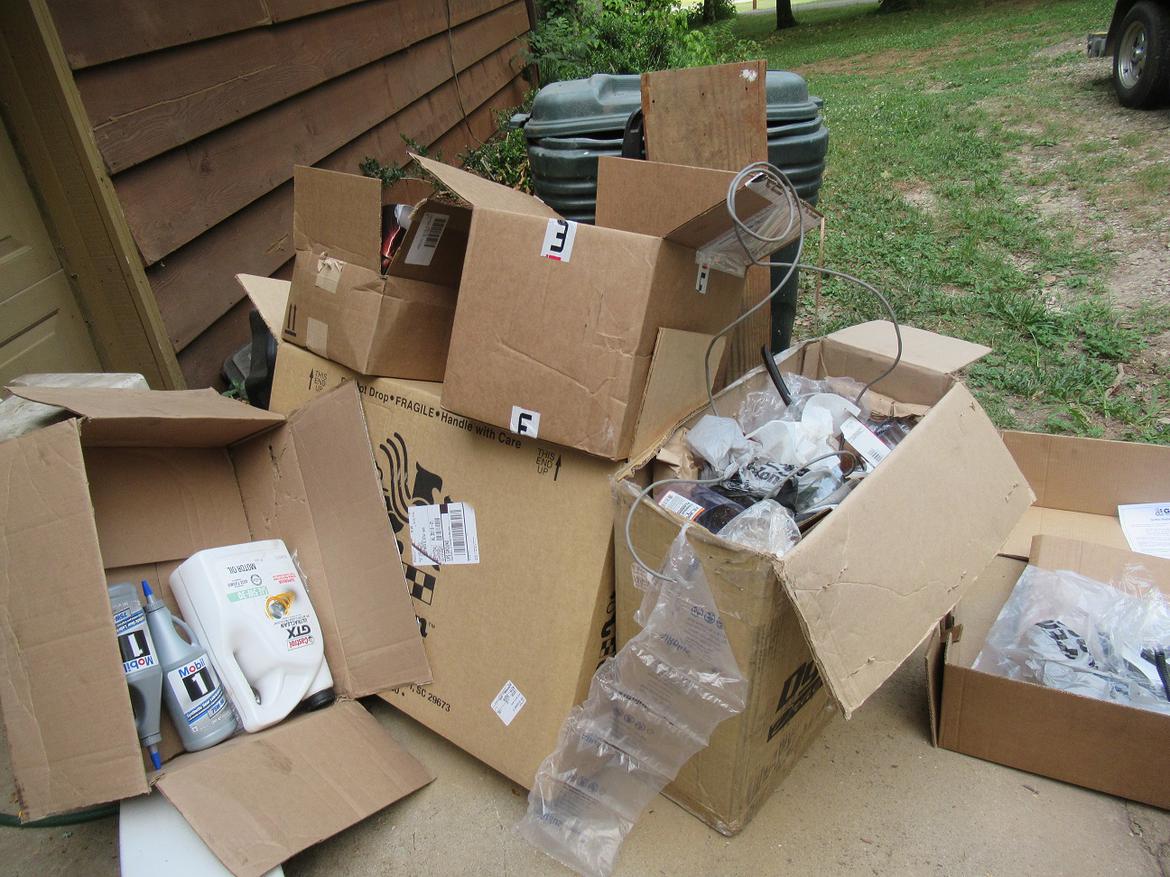
Stopping several times to clean up around the car so I can find tools. Once you waste 20 minutes looking for what you had in your hand 20 seconds ago, it's time to stop, clean and then start again. Looks like the trash pickup right after Christmas.

So A big Thanks goes out to Matt Brower for cutting the rust out of the right door, Re welding in new metal and getting it straight and primed. All in just a couple days. He may be doing more on this next week.

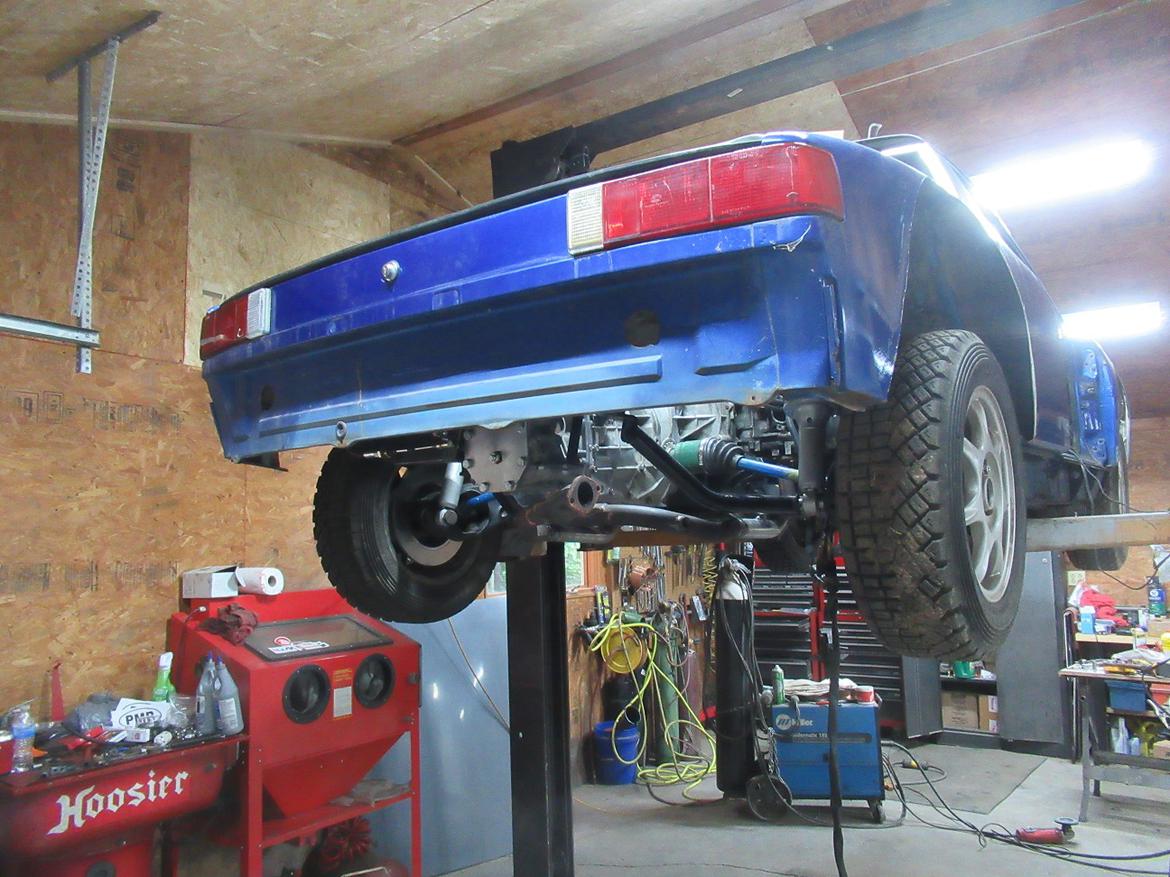
So add oil to the engine and trans, straighten up the wiring a bit, tie things down and connect the fuel pump wires and fuel lines. Check for pressure and leaks. All good. Crank it? Well, yes it turns over but timing seems off and it won't start. Remove and test the crank sensor that came with the motor. Well, TRY to. It was jammed in the engine and would twist but not come out for anything. Pry, pull, cuss. No way. Well it will get a new one anyway cause this ones coming out in pieces before it's done. Yup. Broke the tab, then the whole guts came out leaving the metal cap in the block. I had to crush iy in from the sides and twist the remnants out. It was corroded into the hole. A trip to Huntsville main A.Z. store and I had a new one. Some hole cleanup and anti seize for this puppy. Went in but it made no help. I called Saheed and he's going to go into it Monday. I'll deliver it Sunday evening.

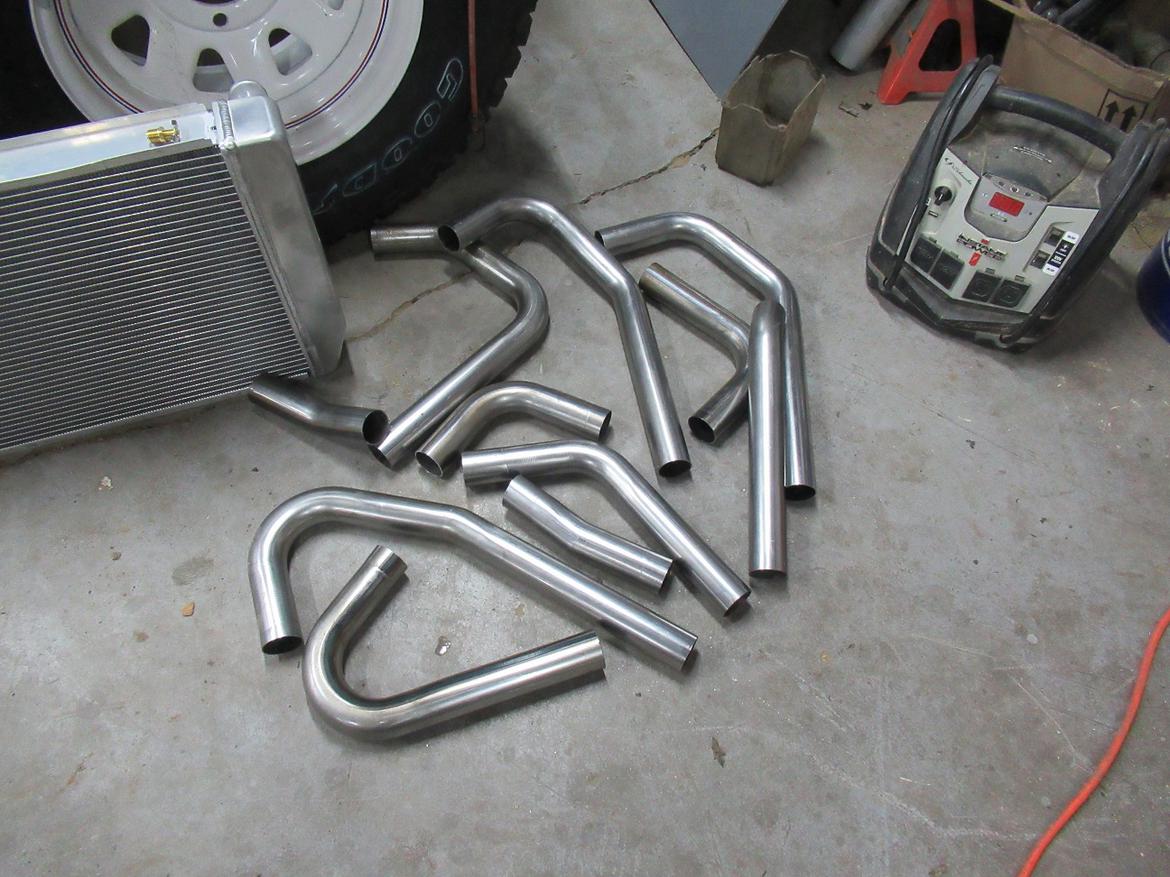
Meanwhile, back at the ranch, keep working. Exhaust right? Well I got a kit of many bends to use as a basis for whatever I'll need.

So some work with the trans jack to hold the back half of the Y pipe and then cut, fit and tack it together. Pull it off and weld it up.

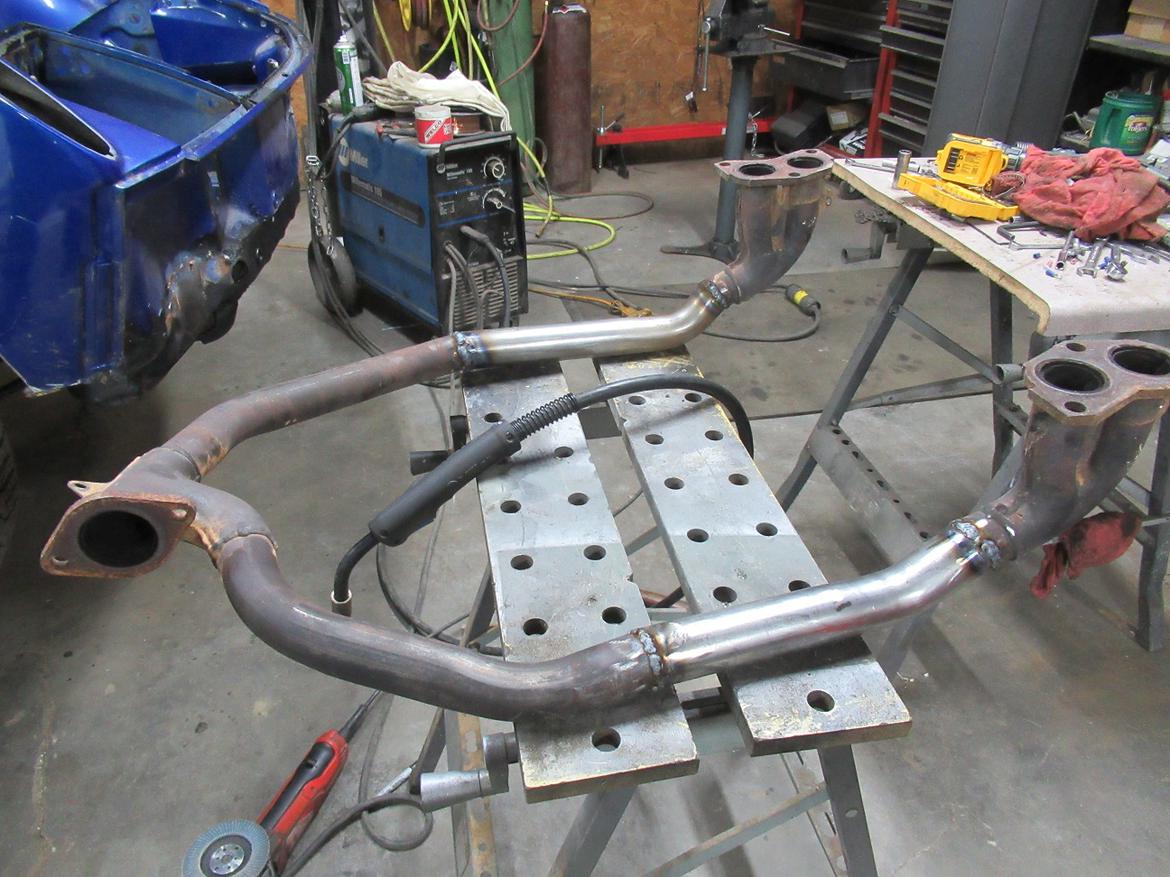
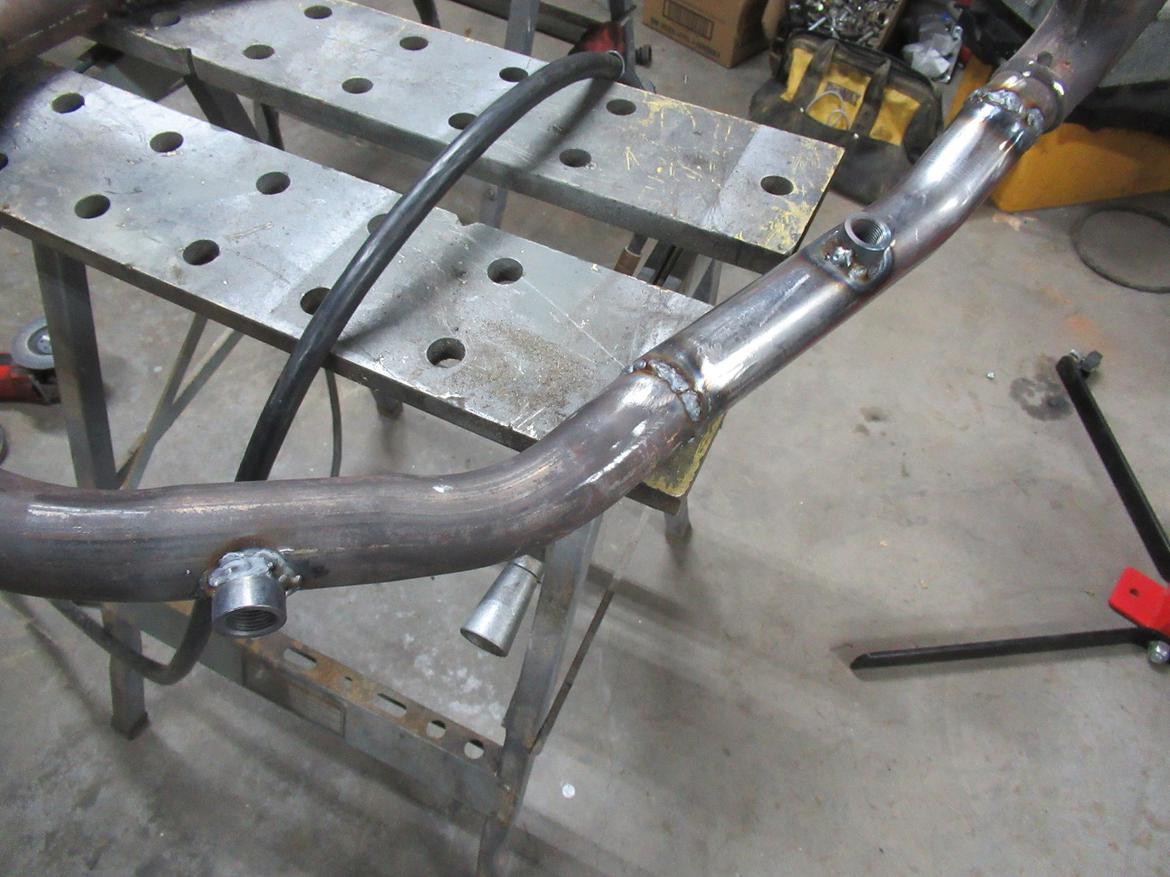
No harm doing the drop-it-on-the -floor test (clumsy) but it stays together so that's a thumbs up. Then add an O2 bung for the sensor. The harness has 2, I-wire said I only need the front one but since I got an extra bung, WTH, put it in there. I can always plug it later but it can't hurt.

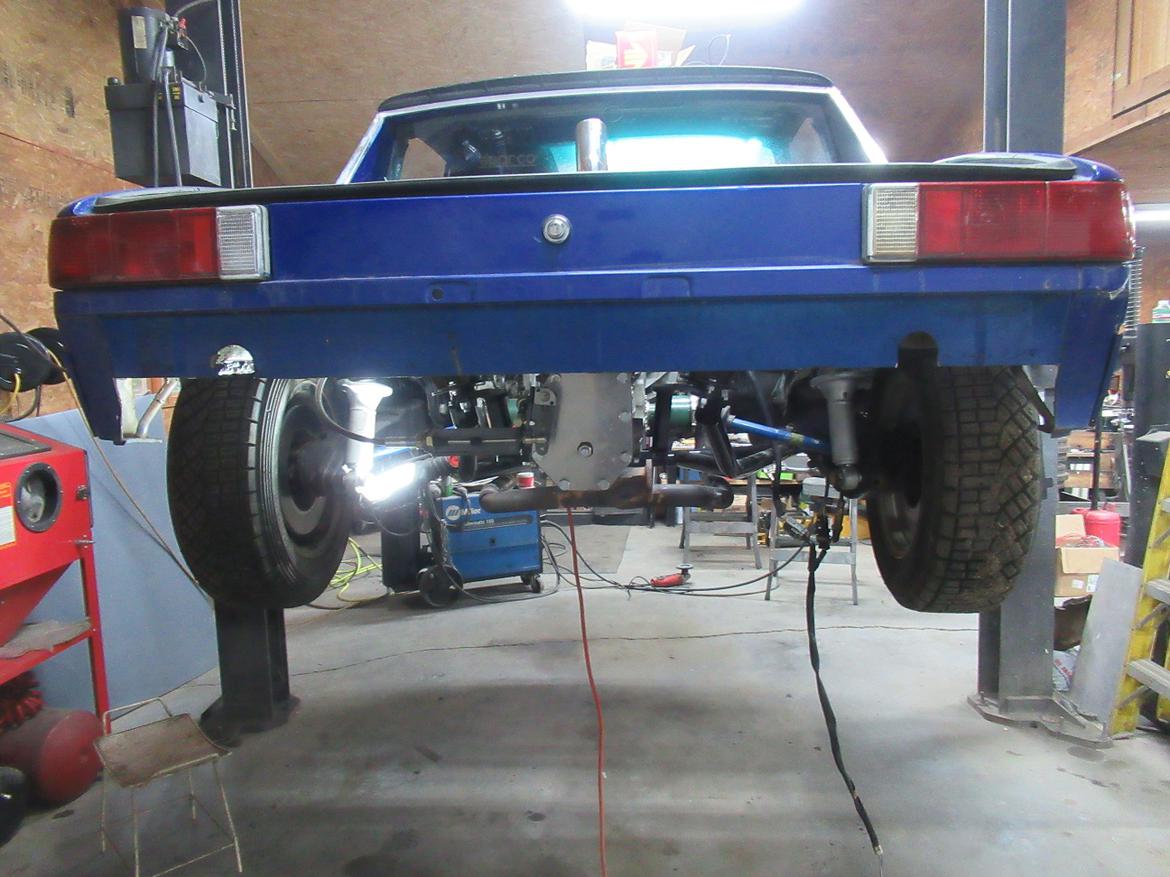
Put it in now for good. A rear hanger for that comes next but first.....

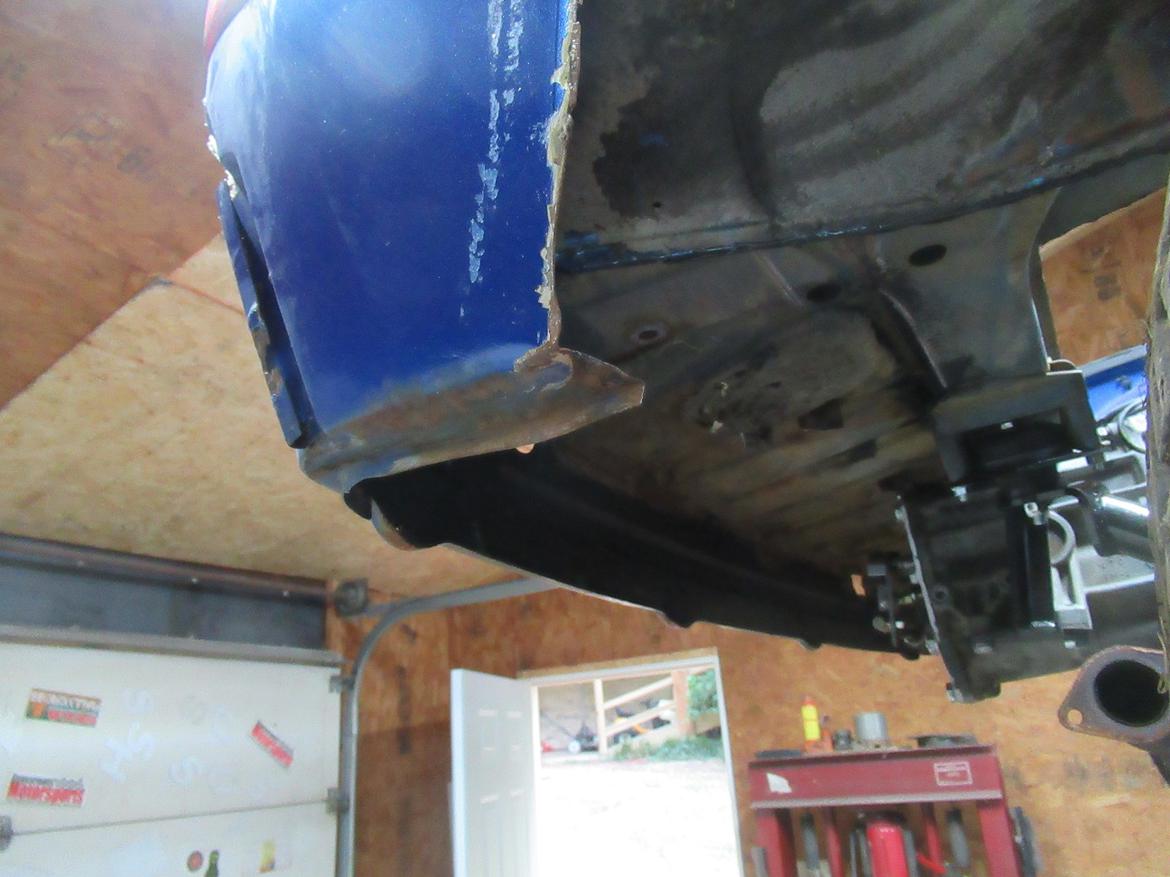
That rear valence in the back is kind of in the way for the right side exhaust planned and it always acts as just a huge mud catcher. It's also going to act as an air dam for the radiator air discharge. Plus it'll look beter gone.

From the back.

Start about 3/4 inch below the rear floor. Cut out the center and see what we have.

OOOOhhh. I LIKE that. Kind of Can-AM Chaparral look. I still may need to trim around the corners but it's best to cut less and add than to have to replace. Well, next is a run to work to cut out an exhaust flange to mate with the Y pipe. Perhaps first thing in the morning. Then the muffler, hangers and a tip. Oh, and finish installing the O2 sensors and wiring loom.

After that, cooling.

RallyCaddy
RallyCaddy New Reader
6/1/19 8:59 p.m.

One more item from today I forgot. The valve cover breathers had 1/2" hoses that went to the airbox. No airbox so instead I have a tube that will get a vertically mounted K&N cone filter inside the big scoop. I got some 1/2 inch aluminum billet bungs. Drill a hole for each side, bolt them in place for TIG welding and they should do the job.

Details details.

RallyCaddy
RallyCaddy New Reader
6/2/19 9:25 p.m.

Sunday. Another day to build and fab.

So a quick run to Dynatorch and in a few minutes with the CNC plasma I have a 3/8 thick matching flange for the exhaust. Then weld it to the muffler. Add an angle bracket for the hanger and weld it to the frame. Install a hanger and there we are. That will support the muffler and the back half of the Y pipe. The tailpipe and it's hanger will come soon. This is enough to run it.

Now for that custom radiator. Getting one made to fit would take weeks. Ever cut up a brand new Griffin radiator? Well with some encouragement from "project Binky", lets go. To start, it will install tilted forward a bit to help out, point the hoes connections down and here's about there it will fit. Measure twice.

Cut-n-pray time.  Add a new hole for the lower bung and a new bung.

Tomorrow the radiator will get welded along with the bungs in the intake, tube for the valve cover breathers.

Meanwhile, the new fiberglass hood is installed. Some rather big gaps but hey, it's race car.

Another item. The radiator will dump its air out the back behind where it site so I need a hole in the floor to allow the air out. There will be air guides to prevent recirculation in the engine bay. Start with corner holes like this.

Then use the cut-off tool and open it up. Avoid the cross member box that holds the cradle.

Refit the engine access lid.

And here it is sitting on it's own. Ready for a trailer trip...

Loaded up for a trip to Persad parts so they can fix the non-start issue tomorrow. It's been delivered tonight.

Upon return this week asap, it's cooling, clutch cable, brake bleeding and cosmetics. That includes the rear deck and scoop. Ya'll come back now.

Knurled.
Knurled. MegaDork
6/2/19 10:00 p.m.
RallyCaddy said:So a quick run to Dynatorch and in a few minutes with the CNC plasma I have a 3/8 thick matching flange for the exhaust. Then weld it to the muffler. Add an angle bracket for the hanger and weld it to the frame. Install a hanger and there we are. That will support the muffler and the back half of the Y pipe. The tailpipe and it's hanger will come soon. This is enough to run it.


I am soooo jealous of the resources available to you.   Have you ever heard of Bad Obsession Motorsport?

Now for that custom radiator. Getting one made to fit would take weeks. Ever cut up a brand new Griffin radiator?

Yes, but I have learned to use drill stops since then.


Well with some encouragement from "project Binky",


Oh good, you (A) have heard of Bad Obsession Motorsport, and (B) won't get this car done for another two or three years...

OjaiM5
OjaiM5 New Reader
6/2/19 10:16 p.m.

Impress with how fast this is being built!

RallyCaddy
RallyCaddy New Reader
6/4/19 9:20 a.m.

Warning! Fun part ahead.

Time to attache the scoop to the rear deck lid. So to start, I placed the scoop near the front of the deck lid and centered and then outlined it with blue tape. Back about 1/4 inch from the front edge.

Next step is to contour the side edges to fit the curve of the deck lid. It looks like I need about 3/16 of a rise in the middle so I put a piece of tape along that side that far up as a guide line. Then using a drum sander on a drill, I take smooth even strokes along the edge increasing pressure in the middle and less near the ends. Never go all the way to the ends. I stop about 2 inches short.

Then check fit by placing a trouble light inside and looking at the light along the edge for high and low spots and adjust as I go. Slowly remove only a small amount and recheck it a lot.

Once it fits, repeat for the other side and do a very slight repeat on the ends as the lid also has a crown. Next step is to cut some mounting angles from aluminum. I have no intent to attach this by fiberglass bonding. It's a race car. It's going to flex. Not a show car with pretty smooth seams. The rails run along both sides. Allow for the width of the angle and the scoop wall thickness and place a tape cutting guide inside that.

Now for the ends. Leave some material at the back. About 1/2". At the front there is a reinforcement on the underside that was cast and bonded to the lid. I want to cut behind that leaving all of the in place for strength. A view of the underside...

The step back is 2-1/2 inches. Tape that on top as a cutting guide and mark which side to cut on as it's real easy to make a terrible blunder here.

Small X in the corners is for locating the hole saw. As with all other access cuts, always cut holes in teh corners first. Never cut sharp corners as that causes stress risers that will eventually start a crack. This is even more important in fiberglass.

Then it's cutoff wheel time. Finish the corners with the drill and drum sander. As a reminder, when cutting fiberglass NEVER go straight to bed. A shower first is mandatory. Also, NEVER be tempted to mix that white power into the laundry detergent of someone you don't like. The law has no sufficient punishment.

Next, the aluminum angle has to be formed like the side of the scoop to match the curve of the deck lid. To do this, there is of course a tool. A set of shrinker/stretchers on a stand. Used by fabricators all over and available at harbor freight. One set grabs and pulls the metal apart and the other set pushes it together. This allows for curved edges and such. Go to far one way? Switch back and go the other way. Many small steps.

It leaves bite marks in the surface that you can grind back if required. This will be well hidden so no big deal. Anyway, after some check and re-check they fit pretty well. Sorry for the shadow.

Now, some bolts. The correct ones will arrive tomorrow, but for now 2 per side. I'll add more once the other fasteners arrive. This will use flanged button head stainless screws to spread out the contact area and also never rust. Then on the inside will be rubber lined washers as cushions and nylock nuts.

And from below.

Before tossing in the towel and getting that shower, here's the next item. The clutch bellcrank. I'm using a bushed pivot block from one of our machines along with an arm that I cut on the CNC plasma (of course). Handy huh? I actually got into the CNC biz because of the car hobby and all the things I want to make all the time. It turns out there are others that feel the same way. Who knew?

AxeHealey
AxeHealey Reader
6/4/19 10:08 a.m.

Awesome, awesome, awesome!

java230
java230 UltraDork
6/4/19 11:14 a.m.

So much awesome!!

RallyCaddy
RallyCaddy New Reader
6/4/19 12:22 p.m.

One modified radiator.

Add 2 fans. Hmmm. The ears sit just outside the frame. I really wanted MAX fan so I guess it's time to fab up some mounting tabs to grip the radiator flanges.

Dusterbd13-michael
Dusterbd13-michael MegaDork
6/4/19 12:24 p.m.

Giant zipties going the whole way around the radiator and through the mounting ears.

Or, you know, tig some aluminium angle scraps on with a nutsert.

RallyCaddy
RallyCaddy New Reader
6/4/19 3:21 p.m.

OR, cut a 1" wide aluminum flat bar. Drill and tap holes for all 4 and put one on top and bottom. That sandwiches the flange and holds them very securely. Individual tabs just seemed kind of a hassle.

Dusterbd13-michael
Dusterbd13-michael MegaDork
6/4/19 3:25 p.m.

Thats really sound problem solving! Didn't see the lips on the radiator before that.

RallyCaddy
RallyCaddy New Reader
6/5/19 8:14 a.m.

IT LIVES!!!! Finally got it running last night. There was a problem caused by somebody I won't name. It took 2 days to find it. Coming home today to finish the fab work and get it to paint.

preach
preach New Reader
6/5/19 10:38 p.m.

Very nice, it's coming along fast!

Masonrk
Masonrk New Reader
6/6/19 12:11 a.m.

This is a great project. If can't wait to hear her rumble! 

Knurled.
Knurled. MegaDork
6/6/19 6:55 p.m.

We want you in Ohio to design one of the courses.


BTW - Brianne Corn is registered in MR in a Miata...  This National Tour concept is awesome.

RallyCaddy
RallyCaddy New Reader
6/6/19 7:39 p.m.

OK, A quick note. I will post a lot tomorrow but have spent the last 2 days solid working.

It runs good now. Cooling system done. Clutch almost done. Just one more bracket. Rear deck pins on the way tonight.

I'll post all about these things and how they were done. It needs to get to paint tomorrow so I can get it back Monday and finish details. IF all that works as planned, I'll register for the event on Tuesday. With NO pre drive, I don't expect to beat Brianne unless it gets sloppy. I can do good in that.

Knurled.
Knurled. MegaDork
6/6/19 7:54 p.m.

In reply to RallyCaddy :

Good news!  It's supposed to rain like a bastard leadung up to the event.


Bad news!  I also tend to excel when it is sloppy.  My National times have always excelled when it was either really sloppy or really rough... once it smoothed out/dried out and became more autocross-like, I slid back down into mediocrity.


(but for a few shining moments, I was dominating SA that one year, or PF that other year...)

RallyCaddy
RallyCaddy New Reader
6/7/19 10:14 a.m.

Finally update time. So the next project was the cooling system. The radiator was modified and fans added. Now to test fit it in place and measure for brackets.

Some cardboard mock up and then cut from 0.090" aluminum. I was going to make single parts and bend the flanges but with vibration and the stress from bending I was afraid it will eventually start cracking. So instead, I used some more of the aluminum angle I had left over from the scoop install. The side plates act both as supports and also as air guides to prevent the discharge (hot) air from recirculating around the sides. It all dumps out the rear hole. Fresh air is supplied by the scoop.

One more thing. To prevent racking (side to side) motion, I could X brace the supports but I decided to simply add a lateral brace to the fender well. After adding the one, it is rock solid so no need for 2.

When adding a heater by-pass, it's almost impossible to find a nice molded 180 degree hose so usually a bent piece of heater hose is used, The problem is it always kinks. To avoid that, simply insert a spring like so...

It will compress slightly but now it won't kink.

Radiator IN. Now for the hoses. Next post.

RallyCaddy
RallyCaddy New Reader
6/7/19 10:24 a.m.

Cooling hoses. Well I picked up some 1-1/2" 90 degree elbows to use for hard lines. I got 4 so I can cut and weld as required.

For hoses, I found I could use universal style hoses rather than cutting up molded hoses. This makes field repairs a lot easier if I break and need another right away. I also lucked out in that I was able to run all the lines without having to cut or weld tubes. These were the right length and fit as is. WOW, that NEVER happens. Then to support these tubes and hard install them, I need some brackets. Starting with some of teh exhaust 1-3/4 tube. I cut some short lengths and sliced then in half.

Then plasma cut some bracket bases to match at lengths that measured up. (more CNC to go).

And weld them together. Offset so I have a lip for hose clamps.

Use hose clamps to attache these to the tubes and locate on the frame. Then tack weld them in place. Remove the tubes, weld, paint and reinstall.

Repeat for the lower hose. Make sure it's all solidly mounted.

Add a overflow bottle and warm the motor for the first time. Check for leaks and ECU numbers. All GOOD after putting in a new set of plugs.

Next up? That darned clutch cable.

RallyCaddy
RallyCaddy New Reader
6/7/19 10:39 a.m.

And so the part I was most dreading. The clutch cable. The original cable is too short. I got a heavy duty universal push pull control cable 5 ft long. So I have to connect them. Engineering time. Not knowing if the Porsche pedal travel has enough cable travel to activate the clutch means I need options. A bellcrank allows me to re-drill if I must to change the leverage and travel lengths. More pedal force may be required if that becomes the case but I'll start with 1:1 ratio. So here's that CNC cut bellcrank after drilling and countersinks for the flat head screws I will need on the bottom.

Add the pivot block with bushings and shoulder bolt (1/2 inch x 2) and place it in the car where I want it checking cable fit up preliminary.

Add clevis ends and hardware.

CNC cut a 4x4 mounting plate and weld the pivot nut to the top side.

While the paint dries, I started on the transmission end bracket. Another CNC cut plate. You know, I saw a post on another build here mentioning "death by 1000 brackets" So true. Perhaps this is starting to make clear why I find the CNC plasma so usefull.

An ear for the cable, measure and tack it in.

Add a gusset, weld and paint it.

Now back to the other 2 cable ends. I'll need 2 more brackets, of course. CNC cut some blanks and bend them. For small items, I like to use the simple tool shown here in the hydraulic press. I think I got it from Harbor Freight long ago but has seen a lot of use.

So then, gusset them, paint them and then install bulling teh slack from the cables for position. Drill and bolt. And here we are...

With a bit of adjustment for tension, it seems to work as planned. HUGE win. Still no test drive as the brakes need bleeding but it moved a bit on it's own power!!!

RallyCaddy
RallyCaddy New Reader
6/7/19 10:45 a.m.

Details details details. Bolt down the battery and install a cable entry to protect the harness pass through the fire wall. This one from "seals It" is a 2 piece so it goes in easy.

Then add the hood pins for the rear deck. No hinges as the hood scoop will interfere with the roof. It's light anyway. The front pins had a nice mounting surface but required some spacers to raise them up an inch. Some tubing and welding later and...

For the rear 2 MORE BRACKETS. Seriously, bracket hell. Anyway, CNC cut, bend drill paint is starting to become a routine.

So all that is left is to drill holes in the decklid. I put paint on top of the pins and carefully set it down to mark locations.


java230
java230 UltraDork
6/7/19 10:47 a.m.

Soo much progress os fast!

1 2 3 4 5

You'll need to log in to post.

Our Preferred Partners
D8iCGSqz8n1y4pXNt2wJufm1t6vEpV9xY5YupZZnm2BGYjOXoU5L0RACqPSe0jvI