
SHutson
New Reader
4/30/16 2:39 p.m.
Over the last few years I have been more and more intrigued by Vintage Racing. I had attended the International Challenge/Hawk/Brian Redman evented at Road America several times over the years. However, it was the 2012 Road & Track Concours for racing cars, however, which really lit the flame. There were two XKEs in that event that really stood out, Larry Ligas’s gorgeous flamed roadster and a competition-styled “resto-mod” by Velke Design.
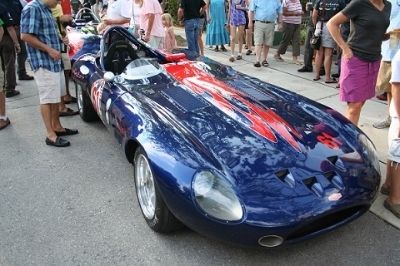
Both took my breath away and blew my mind. I knew that someday I would build a competition-styled vintage sports car and hopefully race it.
As I approached retirement, I started looking for a suitable candidate. It needed to be simple, elemental and iconic. It need racing heritage. I also wanted something that hadn’t increased in value dramatically (sorry 911) and had the fan base that might make it a candidate for appreciation in the future – we all aspire to make a buck on our projects, right?
Last summer I made my decision and started looking for a local BMW 2002. I wanted one that was not pristine, or even a candidate for a pure restoration. I did not need the guilt of bastardizing something that could be properly restored. I found one with some of the trim removed and filled, incorrect seats, ugly late-model bumpers, sloppy rust repair, incorrect wheels and missing engine components. No one would miss this. Perfect! Below is my journey:
SHutson
New Reader
4/30/16 2:39 p.m.
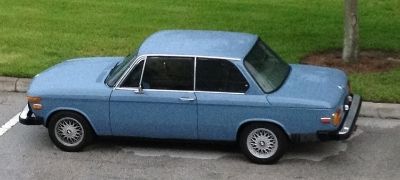
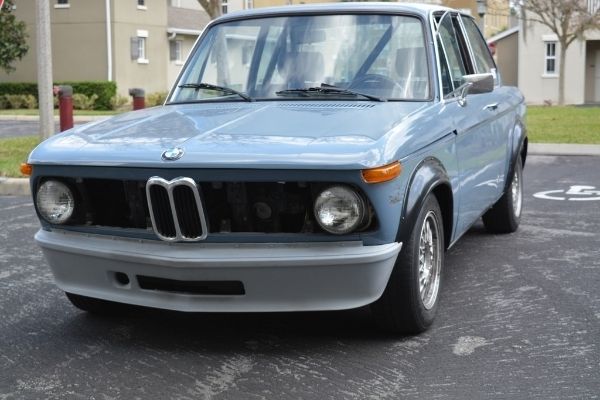
Here is my starting point. A 1976 2002 in light blue. From this distance the flaws are not readily evident.
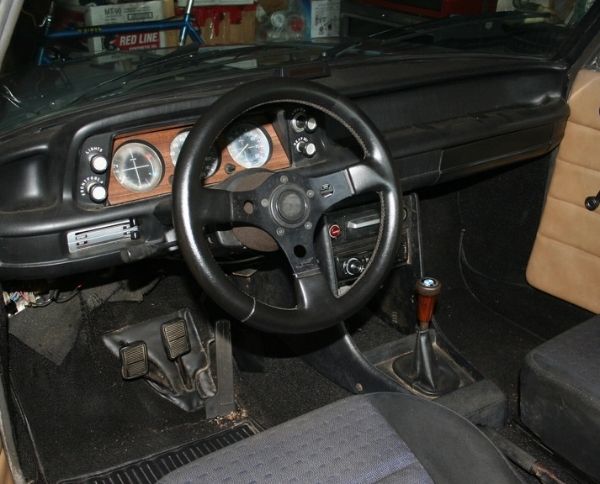
The interior needed help.
The engine compartment did too.
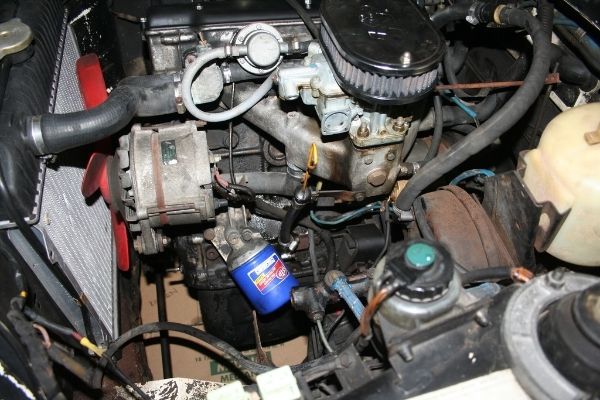
I rolled up my sleeves and started pulling parts. My intent was to leave the engine internals alone and focus initially on bolt-ons. That was about to change.......
SHutson
New Reader
4/30/16 2:39 p.m.
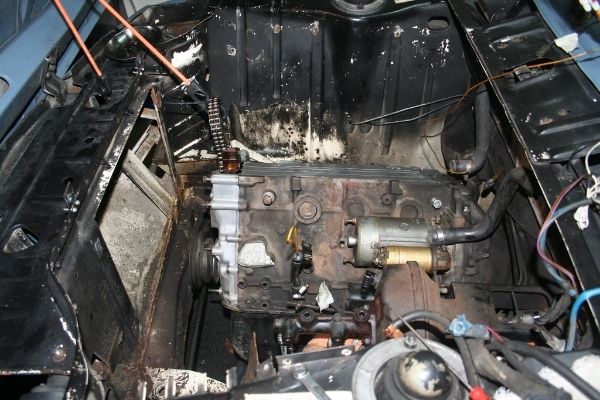
Given the amount of other work scheduled for the car, I initially decided to wait on any internal engine work. That plan evaporated during removal of the exhaust manifold. Things were going smoothly - as smoothly as removing a 40-year-old cast iron exhaust manifold can go - until the last stud...THE LAST STUD... broke off. I tried to get it out with an extractor, but that broke off too. Looks like the head is going to the machine shop. While it's there I might as well get a valve job, replace the leaking valve seals and, what the heck, upgrade the cam. I went with an Ireland Engineering 292 which should give me some nice added power up top. So, here it stood:
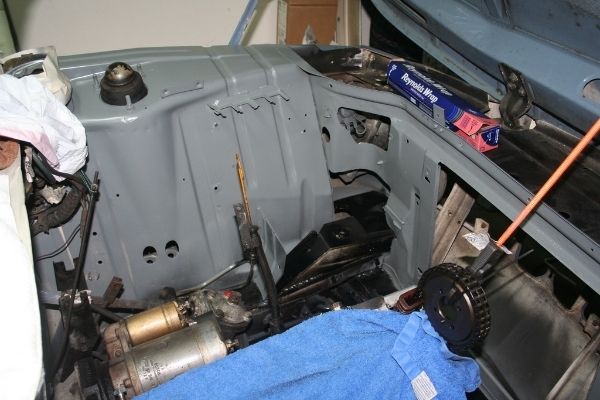
The first order of business will be to clean up the engine compartment and deal with some rust-prone areas. I used POR-15 Metal Prep and Top Coat on the frame rails, the radiator support and the bottom of the nose. Next job was to get rid of the horrible flat black paint. At this point in the build I was unsure what my final color would be. The car was originally Chamonix White and it had been resprayed Pastelblau. I decided to use and old racer's trick and go with grey in the engine compartment. That compliments just about any exterior color. I pulled all the electrical and had at it. Here is the result:
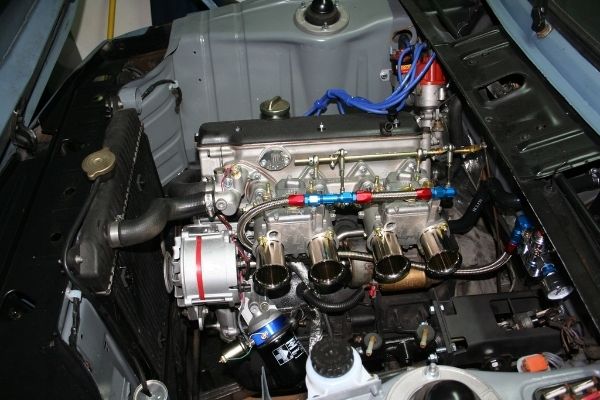
With the rebuilt head back it was time to start boltin' stuff on! Tubular headers, Weber side-drafts, upgraded ignition components went on next. After re-routing the wiring and a little heat shield, the engine compartment was looking MUCH better.
SHutson
New Reader
4/30/16 2:40 p.m.
Interior
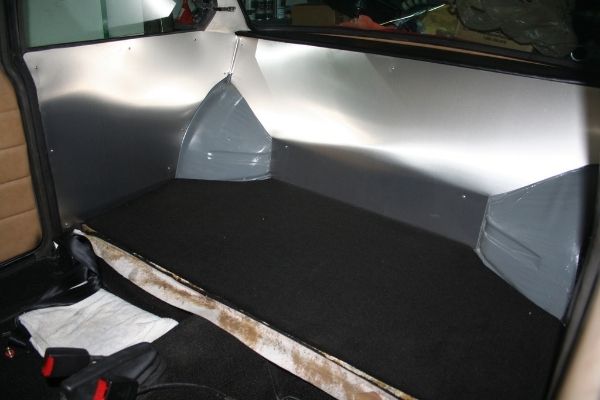
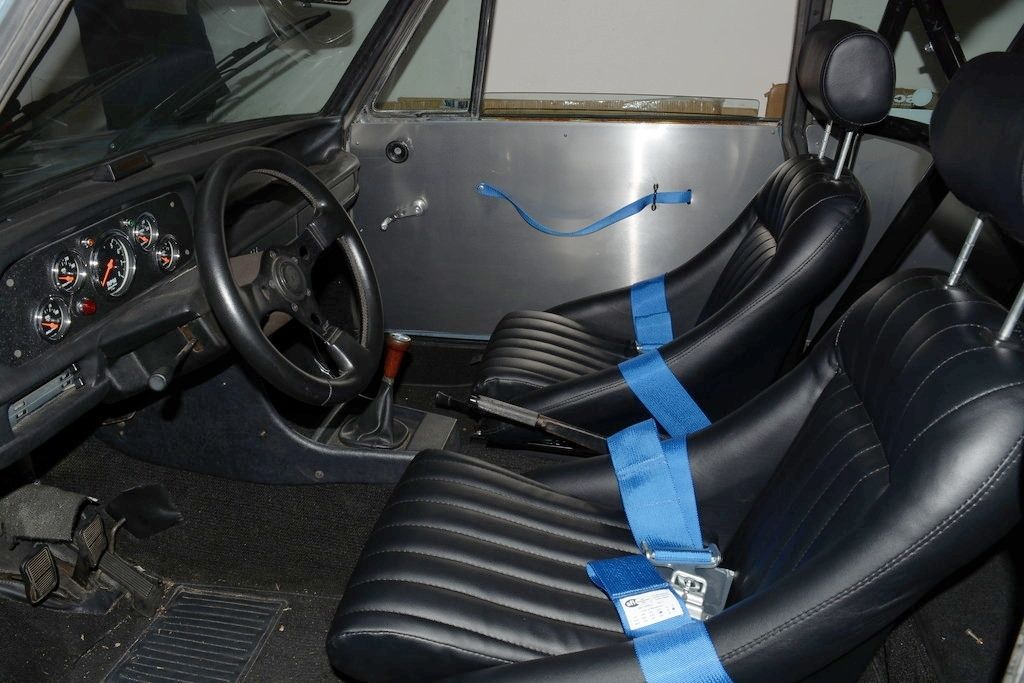
On to the interior. Clearly, this is the area of the build where I was most able to bring out the "vintage racer" look. I opted for retro-styled low back buckets from Corbeau, a competition styled gauge cluster, roll bar and aluminum interior panels.
First came the interior panels. After replacing the rear seat with some lightweight plywood covered in synthetic carpet, I bought some 5052 aluminum sheet in .040 for the rear panels and .063 for the doors (which should see more abuse). I made templates out of cardboard and cut the pieces to shape with a jigsaw. I needed a couple of bends in the rear panel which I made using my bi-fold closet door in my office < I know, facepalm>. I should mention at this time that this entire build was done in a one-car garage with only a B&D Workmate for a workbench and some electric hand tools. No lift, no vice, no drill press, etc.
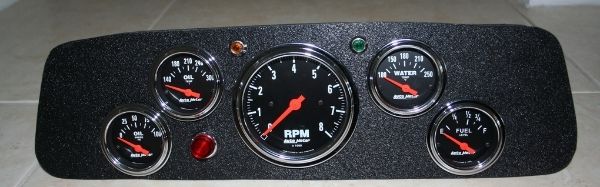
The roll bar is a bolt-in piece from Autopower. The dash is built with classic, chrome-beveled gauges from Auto Meter. I removed the OEM gauge cluster and built a cover panel out of wrinkle ABS cut to size into which I set the gauges. The light switch needed to be relocated so I moved it to the center console.
The buckets looked just right, but had a couple of odd characteristics. First, the seat bottom cushions were disproportionately think and the seat was quite narrow. I'm not a wide-glide, but still, the side bolsters pressed uncomfortably against my hip bones. The bottom cushions disassembled easily and after a few minutes with a serrated knife I was able to take about an inch off the thickness. This restored proper scale. The side bolsters are defined by the steel frame of the seat which yielded to my bottle jack (horizontally between the bolsters) to add the extra inch or two I needed to feel comfortable in the seats.
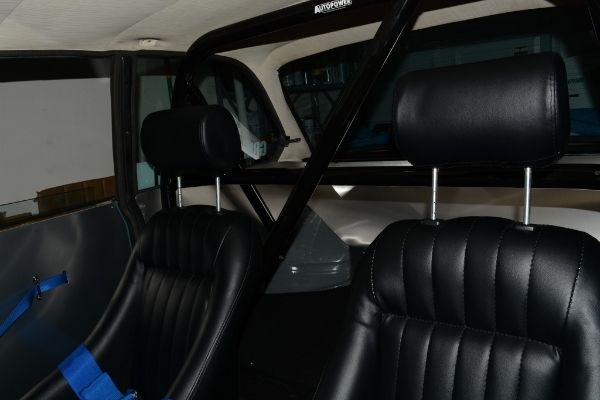
I finished off the interior with blue harnesses and matching webbing door latch/pulls. I am pleased with the finished product and feel it met my vintage racer design goal.
Someone brought one to the $200X Challenge, there was an article after on converting the square tail lights to round rockets, looks easy.
I love 02s. Great balance, good aftermarket and very easy on the eyes.
Dan

84FSP
Dork
4/30/16 7:22 p.m.
Great eyeball here. Would love one but struggle to support two specimens of bavarian garage art....

Woody
MegaDork
4/30/16 7:33 p.m.
914Driver wrote:
Someone brought one to the $200X Challenge, there was an article after on converting the square tail lights to round rockets, looks easy.
I love 02s. Great balance, good aftermarket and very easy on the eyes.
Dan
I am proud to be the only one on the planet who prefers the square tail lights and plastic grills.
So sue me...
SHutson
New Reader
5/2/16 11:31 a.m.
Suspension and Brakes
The PO had recently put on new Bilstein Sport struts and shocks and Ireland Engineering Sport 2 springs. The car had OEM sway bars, but it felt tight and the springs were doing enough that it did not need a sway bar upgrade at this time. Bushings looked good. Consequently, the suspension was plenty good enough for now.
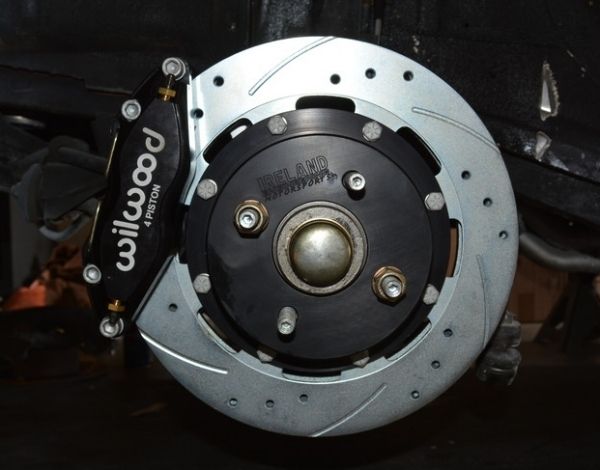
The 2002 came with a pretty good brake system for the day - 4 piston front calipers paired with rear drums. This is all good until you realize the car came with 13" wheels which limited the front rotor size. I opted for a Wilwood-based upgrade engineered by Ireland. 11.8" vented, drilled and slotted 2-piece rotors grabbed by 4-piston Wilwood Dynopro calipers. The kit went on easily and without issues.
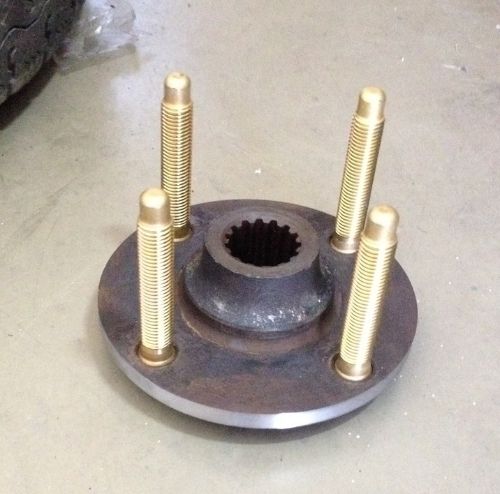
At the rear I upgraded the drum arrangement to discs. One of the great things about modifying a car the the 2002 is the depth of knowledge of the enthusiast base. There are a number of options for rear disc upgrades. I chose one that utilizes a fabricated adapter and VW/Audi components (front rotor and rear caliper). The only major work required is having the rear hub machined down in diameter to accept the VW rotors. I added longer studs at the same time.
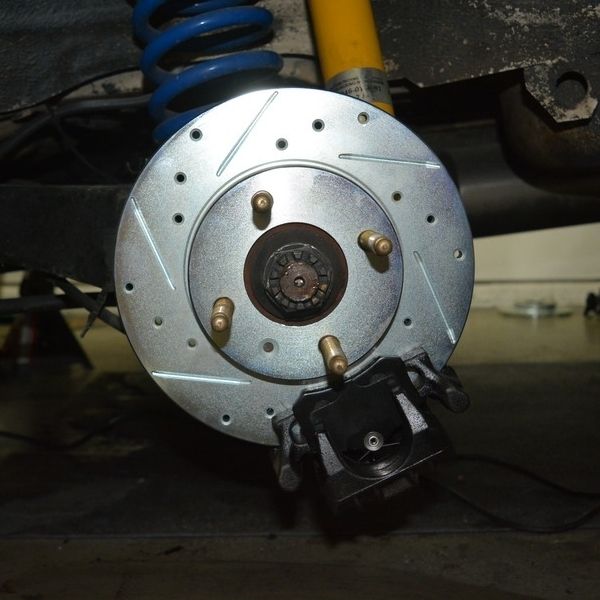
A little alignment help comes in the way of washers between the caliper bracket and the adapter plate. Bleeding is somewhat compromised as the bleed valve is not at the 12 o'clock position when installed, so the caliper has to be unbolted at one side and pivoted down to bleed using some sort of push or pull bleeder. Other than that, it's a clean and effective upgrade. I chose drilled and slotted aftermarket rotors to match the fronts.
84FSP
Dork
5/2/16 1:26 p.m.
Looking good! Should really stop such a lightweight beast with those. What diameter rotor did you go with?
Great work! a '74 2002 was my first car and I've owned 2 others since then. I like the idea of the rear disc conversion.
SHutson
New Reader
5/2/16 3:43 p.m.
84FSP wrote:
Looking good! Should really stop such a lightweight beast with those. What diameter rotor did you go with?
Fronts are 11.8" and rears 9.4"
SHutson
New Reader
5/4/16 9:25 a.m.
Brakes, part 2
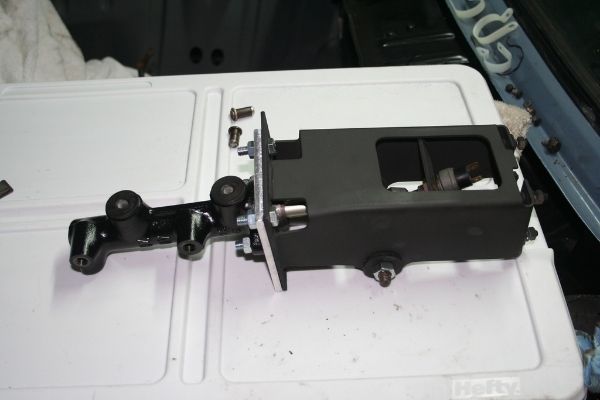
I added the Ireland Engineering recommended E21 master cylinder, which has single front line outputs, to match the brake kit I purchased. It is the same diameter as the 2002 MC. However, my Brake booster is large and has clearance issues with the Weber velocity stacks. Many use the tii booster, but they are expensive. Plus, the short-runner intake manifold and 4 carb throats make for a bad vacuum source. Consequently, I decided to try an unboosted system. The enthusiast community offers up numerous options for pedal and master cylinder combinations. In an attempt to KISS, I decided to keep the OEM pedal/linkage/bracket arrangement. I fabricated a new mounting plate for the master cylinder to serve as a booster delete.
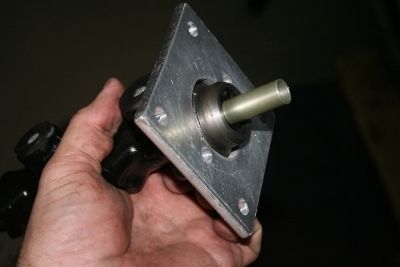
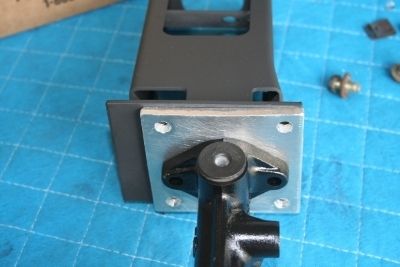
Here is the completed assembly, which bolts to the firewall and including the brake light switch.
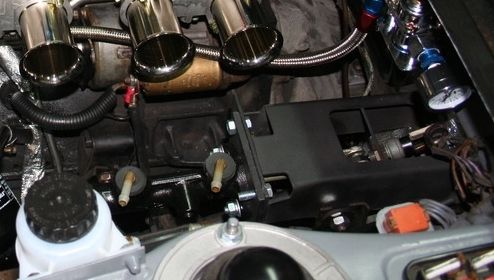
And the finished product installed. There is plenty of clearance for the velocity stacks and it really opens up access to the area.
So far, the pedal effort is fine, with the much greater brake torque offsetting the lack of vacuum assist. While bedding the pads, I got a little lockup once (RR I think) but it needs a little more bleeding before I can really render a final verdict. It may need a pad compound adjustment.
84FSP
Dork
5/4/16 2:25 p.m.
Really creative solution there on the brakes. Nicely done sir.
SHutson
New Reader
5/12/16 9:27 a.m.
Exterior part 1
The exterior of the car will be the most obvious area to express my concept - a street legal vintage racer. Clearly I was going to need flares and an air dam, but there are many options out there - turbo flares, box flares, pig cheeks, even bat ears. If I had an early model with the small chrome bumpers I might have gone a different route, but I had the huge "diving boards" which had to go. My choice was the turbo kit which includes bolt-on flares adding a couple of inches of width each and allows for larger tires after enlarging the original wheel wells openings. The turbo kit also includes a large air dam/bumper front piece. Another plus is that the air dam, if mounted a little high, will cover the large mounting holes for my OEM bumpers saving me some bodywork charges. here is the car mocked up and ready for the body shop.
The next decision was color. My car was originally Chamonix White and was, at some point, repainted pastel blue (which I do not care for). Given white as a long-standing BMW motorsport color a respray back to white was decided upon. Not Chamonix, though as I find that too cream-colored. I opted for a full color change (door jams, trunk, etc) to Alpine white which really pops. My plan is to add some M-sport colors to vaguely (and hopefully tastefully) emulate the iconic 3.0 CSL "Batmobile" which had such an impact in the mid 70s.
I opted for a lightweight fiberglass rear bumper painted to look aluminum and had the side marker lights "shaved". A new chrome kidney grill, new roundels and new front turn signals will dress up it up as well. While there it will have some rust repaired - outside rockers and some rust bubbles on the doors and fenders. I am new to the area so I had to guess a bit on a body shop. After talking to several shops I found a guy that does mostly street rods but seemed undaunted by the job and offered to do the work at a good price. I crossed my fingers and dropped it off.
SHutson
New Reader
5/16/16 12:52 p.m.
So, here is the result. The paint and body guy did a nice job on the car. There are some small imperfections in the paint, but all-in-all, I am very pleased with the result for the amount I paid. I sill need to do a little tweeking. One of my flares doesn't sit flush and a couple of rivnuts holding on the flares have loosened. The stripes are done with vinyl tape so they can be removed if I decide I don't care for the look anymore. Right now, however, it's just what I was after.

SHutson-
What sanctioning ody do you plan to run with- I'm looking at those brakes thinking there's no vintage racing sanctioning place they're gonna be legal.
For instance, many sanctioning bodies require stock diameter rotors and calipers made from the same material as the factory.
If you're time trialing or tracking the car,ignore me
SHutson
New Reader
5/16/16 5:03 p.m.
twentyover wrote:
SHutson-
What sanctioning ody do you plan to run with- I'm looking at those brakes thinking there's no vintage racing sanctioning place they're gonna be legal.
For instance, many sanctioning bodies require stock diameter rotors and calipers made from the same material as the factory.
If you're time trialing or tracking the car,ignore me
You are correct, although I have seen rule bending in vintage. If I go vintage (down the road) I still have the old brakes.


