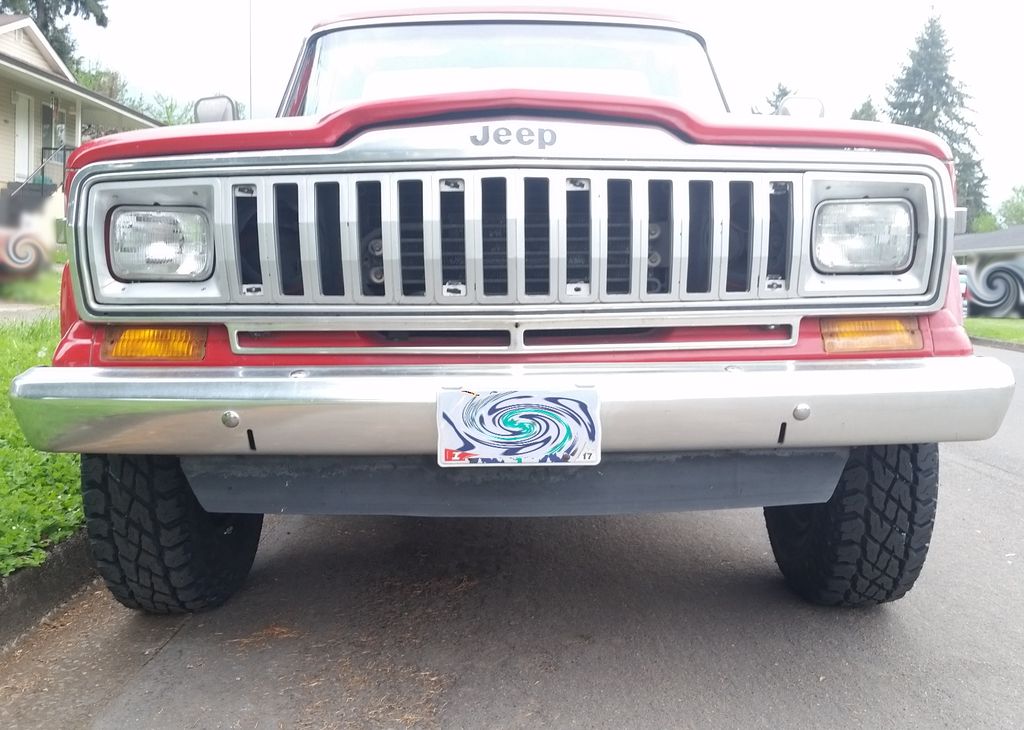
1 2 3
11GTCS
11GTCS HalfDork
12/19/20 9:55 a.m.

More please.  smiley One of our scoutmasters had one of these when I was in high school and I drove it a ton loaded up with gear for hiking /camping trips up in the White Mountains in NH.  His was a 6 with a four speed, it was a cool truck.  Very unusual to see one up here now. 

Dusterbd13-michael (Forum Supporter)
Dusterbd13-michael (Forum Supporter) MegaDork
12/19/20 10:41 a.m.

Hell yes! Looking forward to lift....

DarkMonohue
DarkMonohue New Reader
12/19/20 2:10 p.m.
jimbob_racing said:

I love this so far.

Thanks.  I do too, although it's a weird, probably unhealthy, mutually abusive relationship.


clunk said:

This thing is niiiice.  There's a guy using an old J20 as a plow truck a ways away from me, kills me to see it parked for most of the year with a pile of twigs and leaves on the hood until it starts to snow and he gives it some salt in its diet :/

What part of oregon are you in if you don't mind me asking?

Thanks, clunk.  As I understand it, Jeep pickups were typically cheaper than competitive Big Three products, and pretty good for plow duty with their lower ride height and the optional Quadra-Trac four wheel drive (center diff, not unlike your NV249).  It seems a lot of them were destined to be abused and unloved on the farm and behind a plow, and consequently just quietly faded away when their shift was over.

I'm close (too close, sometimes) to Eugene, about a hundred miles south of Portland.


11GTCS said:

More please.  smiley One of our scoutmasters had one of these when I was in high school and I drove it a ton loaded up with gear for hiking /camping trips up in the White Mountains in NH.  His was a 6 with a four speed, it was a cool truck.  Very unusual to see one up here now. 

More is coming as time permits.  Thanks for the interest.  The shamelessly tarted-up Grand Wagoneer big sister seemed to be a big seller among the moneyed (and/or horsey) Northeast types, but the pickups mostly seemed to appeal to the other end of the economic spectrum.  They're both susceptible to rust and the pickups typically don't have high enough value to warrant a big-money resto like the much more fashionable Grand Wags currently do.


Dusterbd13-michael (Forum Supporter) said:

Hell yes! Looking forward to lift....

It's coming.  Steel yourself for quiet disappointment.  We're only going from "wait, that's actually four wheel drive?" to "wow, I bet that would look great with a lift under it."


Gearheadotaku (Forum Supporter)
Gearheadotaku (Forum Supporter) UltimaDork
12/19/20 3:29 p.m.

That tachometer build is awesome! The Jeep trucks have such a cool style.

Dusterbd13-michael (Forum Supporter)
Dusterbd13-michael (Forum Supporter) MegaDork
12/19/20 5:52 p.m.

In reply to DarkMonohue :

One of my dreams, that i will probably never realize,  is the yellow j10 from the movie twister. That truck makes me tingly. 

Im sure this thing will look just right on 33s. 

russ_mill
russ_mill Reader
12/20/20 2:49 a.m.

The change from just running boards is great. I don't know much about these, but I was thinking (no offense) "this is rather frumpy"


to "HOT DAMN THAT IS GORGEOUS!"

DarkMonohue
DarkMonohue New Reader
12/20/20 11:49 p.m.

Thanks for the comments.  Getting rid of the running boards made a world of difference in appearance.  Darned if they weren't handy, though.  I kind of miss having them on there.

Alright, on to the next installment in this cut-rate soap opera.

20 Jun 2015:

This is a very slow-moving project on a very low budget.  The goals are to make the truck more usable and reliable while keeping it fairly close to stock in spirit and appearance.

Over the last couple of years I've been collecting parts and making mental lists of things to work on.  From here forward they'll be listed as they are addressed.  Other issues that have been dealt with but not yet documented may sneak in here and there as well. 


Project #1: auxiliary fuel tanks

These trucks only have about an 18 gallon gas tank, which typically gives you less than 200 miles of range between gas stations.  One of the POs had some auxiliary tanks installed in the bed of this truck.  Together they should hold about 28 gallons of fuel.  That would more than double the range of the vehicle.  

Try to ignore the leaves and clutter.  It has since been removed.  Here are the tanks.


However, there are some issues to sort out before the tanks can be used:

1) The forward corners of the truck bed have some surface rust and paint damage.  They need to be cleaned up and protected before the tanks go back in.
2) The tanks are rusty on the inside and must be cleaned out.
3) The tanks have to be notched to clear the tool box that is now in the truck.
4) These tanks were filled separately, one at a time.  I want to fill them both at the same time from one filler on the left side.

The big obstacle is #4.  I'm not sure whether to build a crossover pipe that runs underneath the bed floor or one that connects the tanks near the top.  Right now I'm leaning toward connecting them at the top with a length of 1.5" or 2.0" tubing, using a vertical section of tube to pick fuel up near the floor of the driver's side tank and transfer it to the tank on the passenger side, as such:


Hopefully, if the tanks are connected that way, there will be less tendency for fuel to slosh from one side to the other, and the crossover will be well protected in the bed of the truck, forward of the tool box.

Thoughts?

Thinking more about this, it seems that a high crossover would not begin filling the right side tank until the left tank was nearly full.  A low crossover under the bed floor may be the better way to go.

The auxiliary tanks will vent into the factory tank vent system.  A check valve will be installed if necessary to prevent fuel spillage.


24 Jun 2015:

Someone was cranky this morning. Or, more accurately, not cranky. The starter would engage and turn the engine for just a second, and then the drive would disengage, leaving the starter motor whirring away.

A local parts house had a Delco Remy reman starter in it (part number 25203) so I chucked that in. Problem solved. No pics because, really, it's just an ugly old starter.

Since this is an old truck, it sometimes gets used as such.  Today it assumed the role of yard waste hauler.  The back yard is steep here and there.  4WD is handy.


Here's a better shot showing off the very nice muscle grille another IFSJA member was kind enough to sell me a while back.  I like this a lot better than the Final Edition GW setup I initially put in.


Seems I have the Midas touch today.  The ignition coil on my string trimmer pooped the bed shortly after these photos were taken - in other words, as soon as the work area was in the shade and I could get some work done.  Ain't that the way.

preach
preach Reader
12/21/20 8:18 a.m.

Sweet. I almost bought one a month or so ago.

My dream truck after I put 1t axles and a 12v Cummins in it.

Tony Sestito
Tony Sestito PowerDork
12/21/20 9:31 a.m.

Nice to see a FSJ truck in nice shape on here! Always wanted one of these, but there are almost zero left here in the Northeast. Nice work saving this one.

And yeah, I had similar running boards on my Power Wagon. Pretty sure every truck around in the 1980's had these at one point. I actually had to remove them before I could get the truck on a lift.


Not sure if you added anything later, but I snagged some small Bully steps for the shorter person in the household (aka my 5ft tall wife) to be able to get in the truck.


buzzboy
buzzboy Dork
12/21/20 10:50 p.m.

I love the stance with those tires and the current ride height. Looks meaty! The new grill is perfection!

DarkMonohue
DarkMonohue New Reader
12/22/20 12:44 a.m.
preach said:

Sweet. I almost bought one a month or so ago.

My dream truck after I put 1t axles and a 12v Cummins in it.

 Thanks!  I have considered a 6BT or similar but from what I've read it's a hell of a squeeze.  A few people have done the GM 6.2/6.5, and a 7.3 IDI might be a viable option as well, but this particular example is not likely to get that far above its raising.


Tony Sestito said:

Nice to see a FSJ truck in nice shape on here! Always wanted one of these, but there are almost zero left here in the Northeast. Nice work saving this one.

And yeah, I had similar running boards on my Power Wagon. Pretty sure every truck around in the 1980's had these at one point. I actually had to remove them before I could get the truck on a lift.

Not sure if you added anything later, but I snagged some small Bully steps for the shorter person in the household (aka my 5ft tall wife) to be able to get in the truck.

Thanks, Tony!  I'm watching your thread with interest.  I walked past a cheap set of Carr steps at a local Goodwill store and almost immediately regretted not buying them, so I have one eye open for a similar set.  Should add some kind of grab handle to the A-pillar or roof rail at some point, too.


buzzboy said:

I love the stance with those tires and the current ride height. Looks meaty! The new grill is perfection!

Thank you.  Those tires are gone but the new ones are nominally the same size.  But that stance is no more.


12 Jul 2015:

Time to remove the rust from the auxiliary tanks.  I have had success with electrolysis before and decided to give it a try again.  The basic procedure is to run a 12V DC electric current through an electrolytic solution (washing soda in water), with the rusty part connected to ground and a sacrificial anode connected to positive.  This effectively floats the rust off the part and basically transfers it to the anode.

First attempt:  Power was supplied by a car battery and battery charger working together.  Used old rebar (wire brushed clean) for the anode and filled the tank with solution to let it work on the interior.  Got a steady flow of bubbles (hydrogen), but had the reset the battery charger frequently to keep the solution working.


Second attempt: filled a wading pool with solution and laid the tank in it.  Used two rebar anodes.  This exposed the exterior of the tank to the solution, theoretically removing rust from the outer surfaces as well as the interior.  Got bubbles off the anodes, but they refused to get rusty.  Still had to reset the charger often.

Third attempt: converted an old computer power supply to a 5V/12V bench power supply.  Hooked that up in place of the car battery and charger.  Tons of bubbles off the anodes, but they still did not attract rust.

Fourth attempt: replaced the rebar anodes with scrap pieces of plain sheet steel.  These bubbled furiously and started collecting rust almost immediately.

The setup:


I will have to flip the tank after a while to clean the whole thing, but I think this will be the most successful method.  This is a fairly slow process and it may take a week or so to get the tanks down to clean metal again.

Result:

Unfortunately, the electrolysis showed that these tanks have already rusted through. They're junk. Rather than try to patch, hack, mod and chop, I'm (eventually) going to build some new ones.

DarkMonohue
DarkMonohue New Reader
12/22/20 10:12 p.m.

17 Apr 2016:

Time for an update.

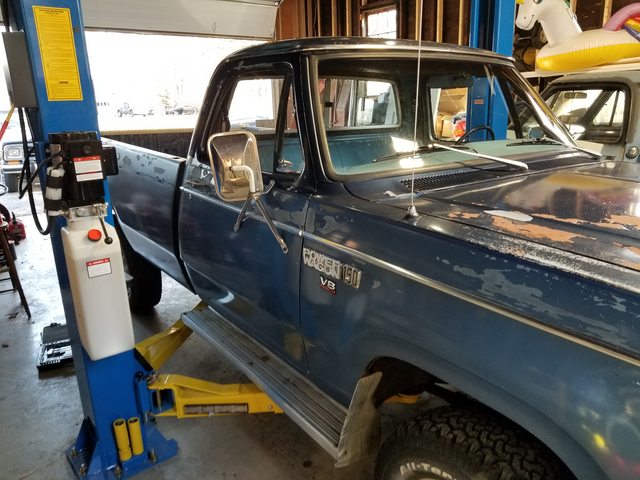
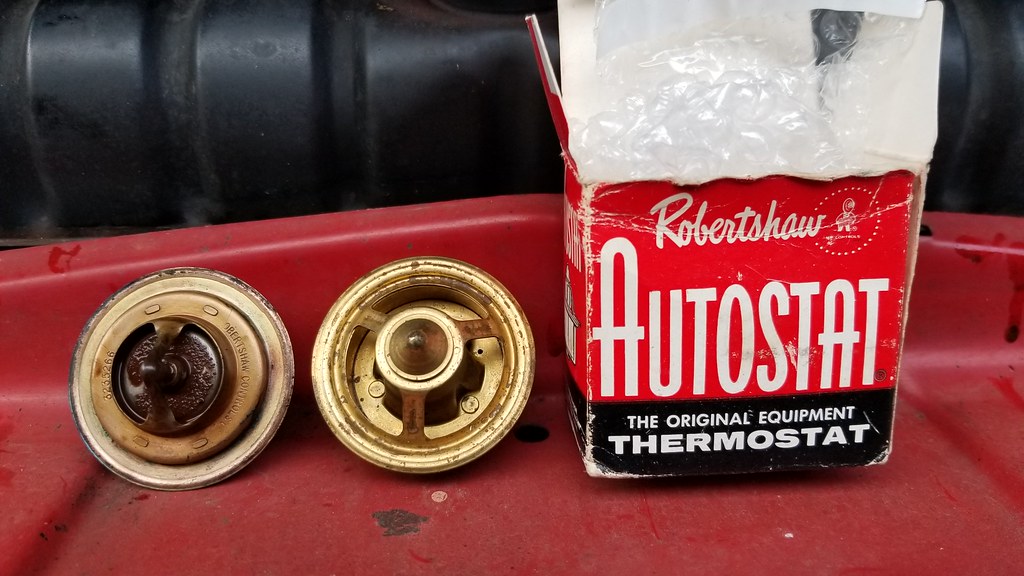
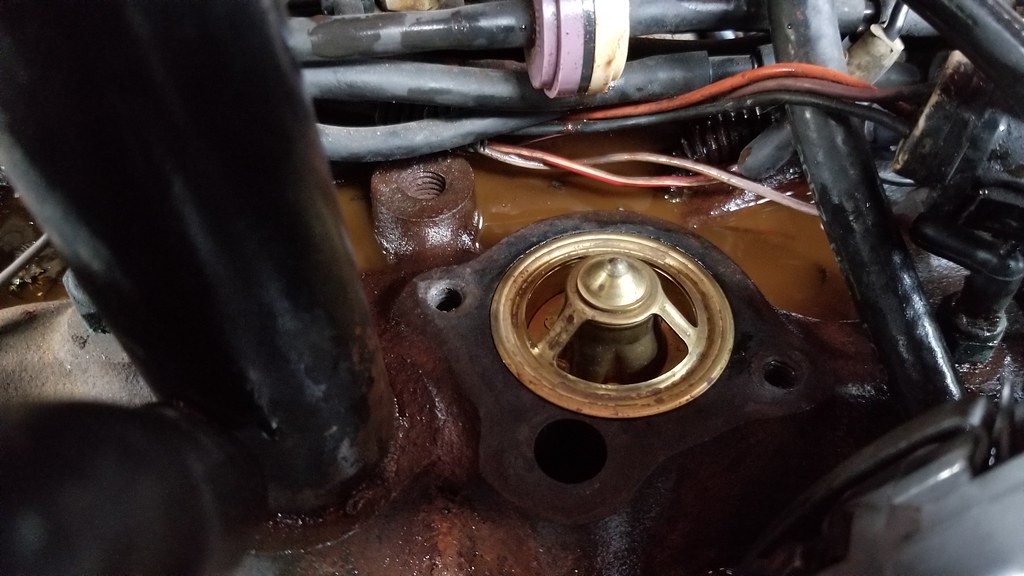
Project #2: heater core repair and water pump replacement

My water pump had been leaking badly, and rather than pour antifreeze through it, I'd been refilling it with water.  Well, that bit me.  Winters here are normally pretty mild, but last December was chilly, and one night the heater core split open in the below-freezing temps.  It produced a spectacular gusher from the heater box when I tried to leave home in the morning.

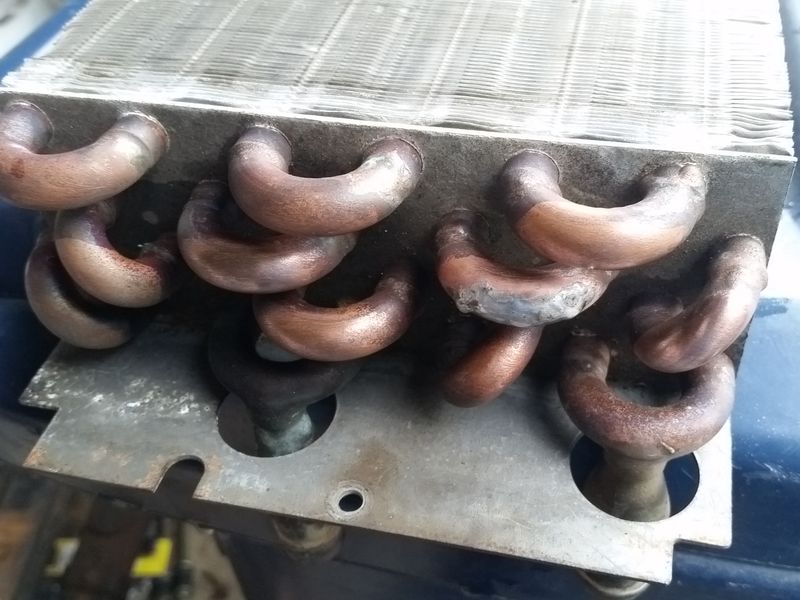
Here's the offending hole.  That dog, as they say, won't hunt.


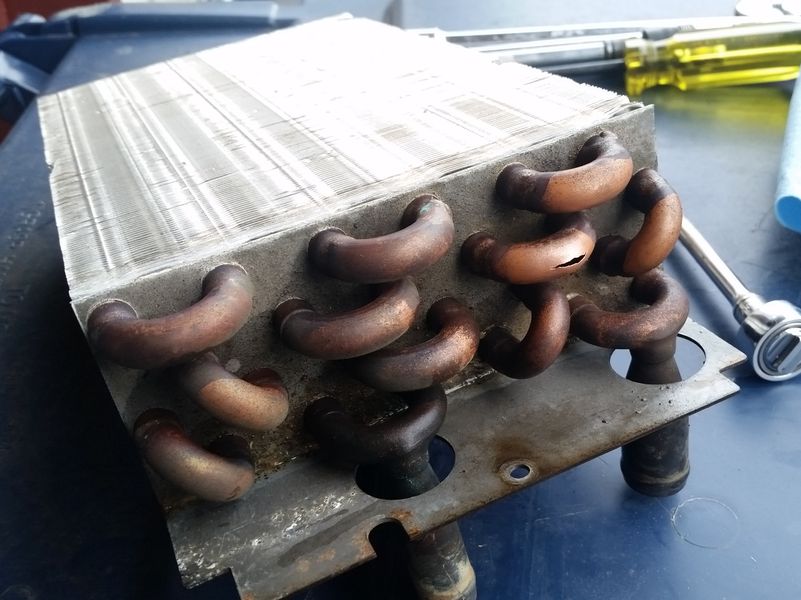
Other than the hole, the heater core was in good shape, so I decided to try to fix it.  First I brushed the metal clean, then hammered (gently) both sides of the split as close together as I could get them.


Then came a little acid core solder.


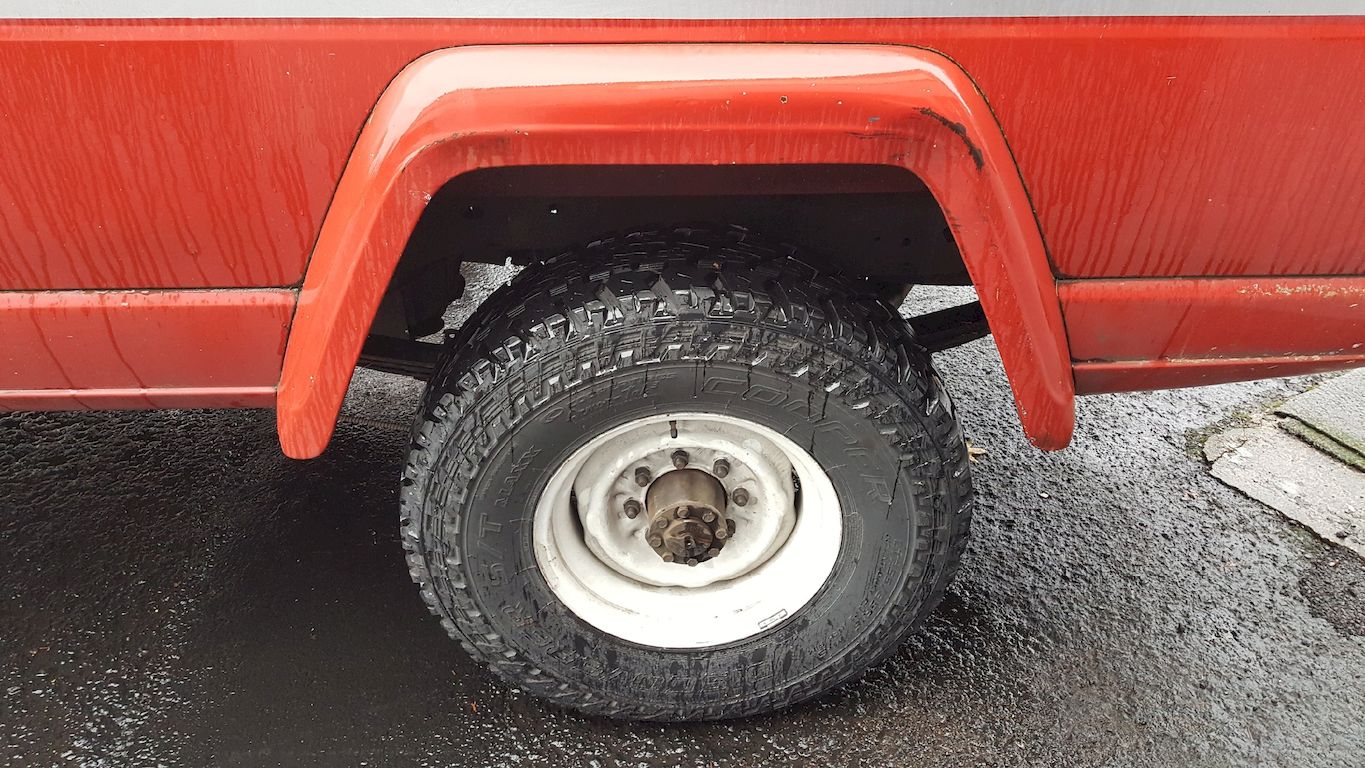
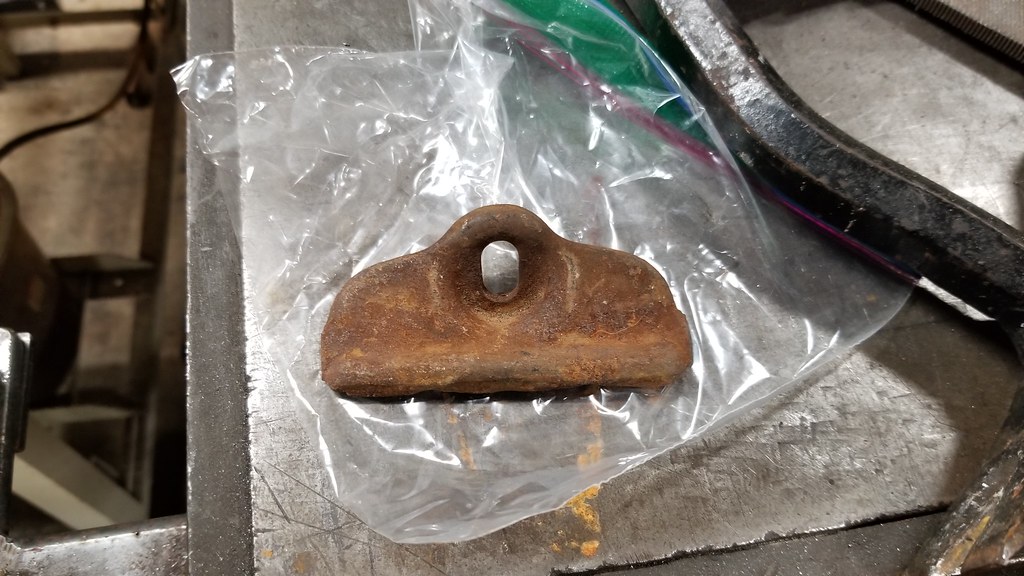
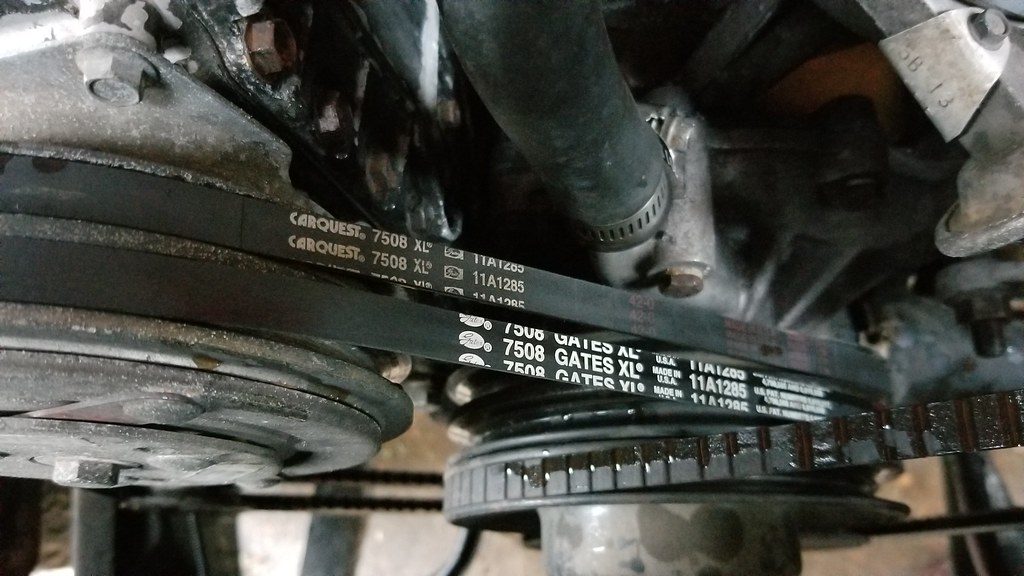
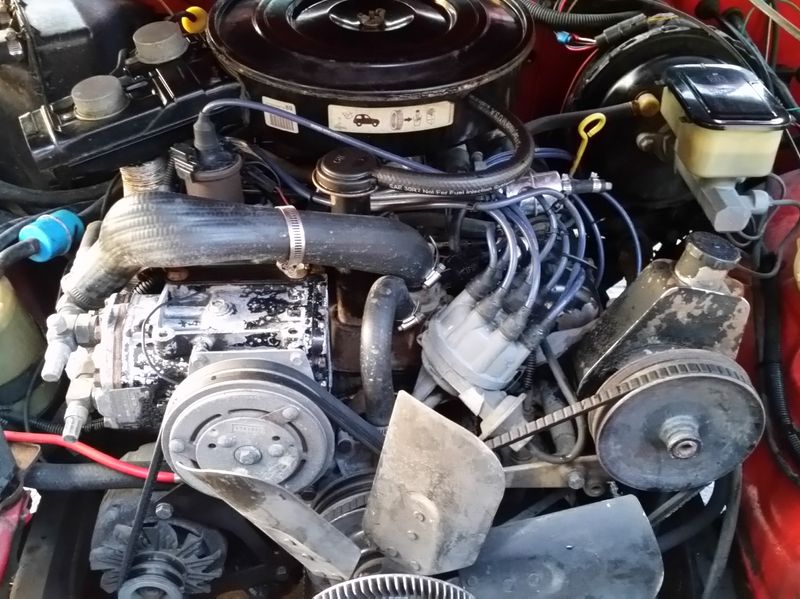
Once that was back together, I got rid of the gnarly old water pump.  For some reason I apparently didn't have the presence of mind to take photos of the job after this glamor shot of the old pump.  Or maybe this was just meant to act as a reference for reassembly.  Anyway, this is the old pump.  It's gone now, and a loomnum pump lives here now.  Also, new belts, because the old ones had part numbers written in Roman numerals and had lost some (all) of their youthful glow.


Project #3: cleaned the cowl vent pockets

I found my round tuit and finally, after years of denial and procrastination, de-trashed the kick panel vent pockets.  Like in every other FSJ, these were packed tight with pine needles, seed cones, leaves, and various other components, all rotting together and forming several pounds of really neat organic compost.  The junk makes its way through the cowl louver into the plenum, which feeds fresh air to the vents in the kick panels, and then it all just collects at the lowest point.  Here are the what the left and right vent pockets looked like with the grilles and dampers removed.


I also got started on a real end-all, be-all cowl vent screen to keep this from happening again, but got sidetracked.  Probably better remember to finish that thing...


Project #4: fuel leak repair

This was an easy one.  Started with a slight aroma of fuel now and then, and rapidly developed into liquid gasoline puddling on the intake manifold in front of the carburetor.  Well, when you can see daylight through the accelerator pump diaphragm, that kind of thing will happen.


Chucked a new diaphragm on.  No more leaks.  I do love an eight dollar fix.


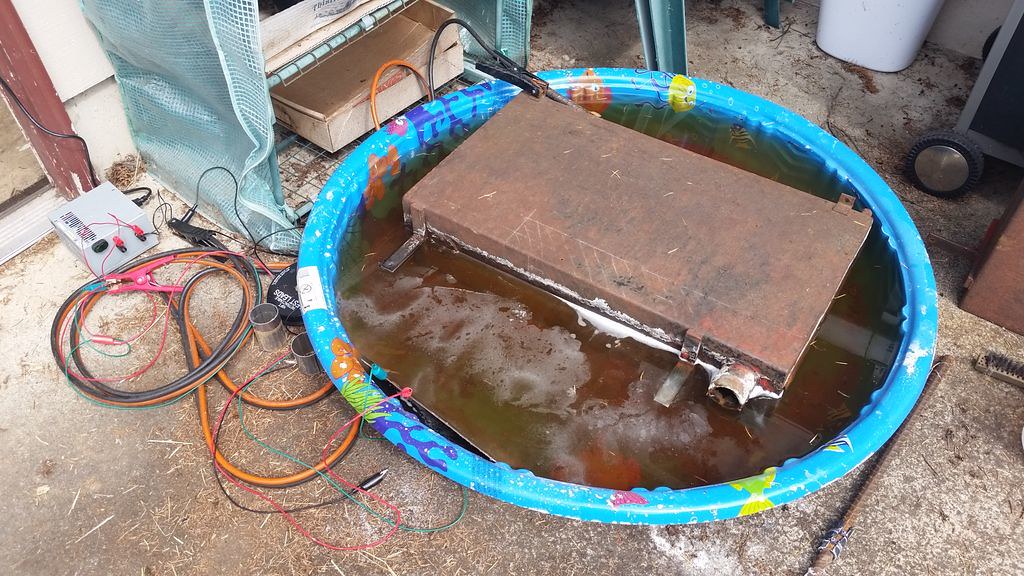
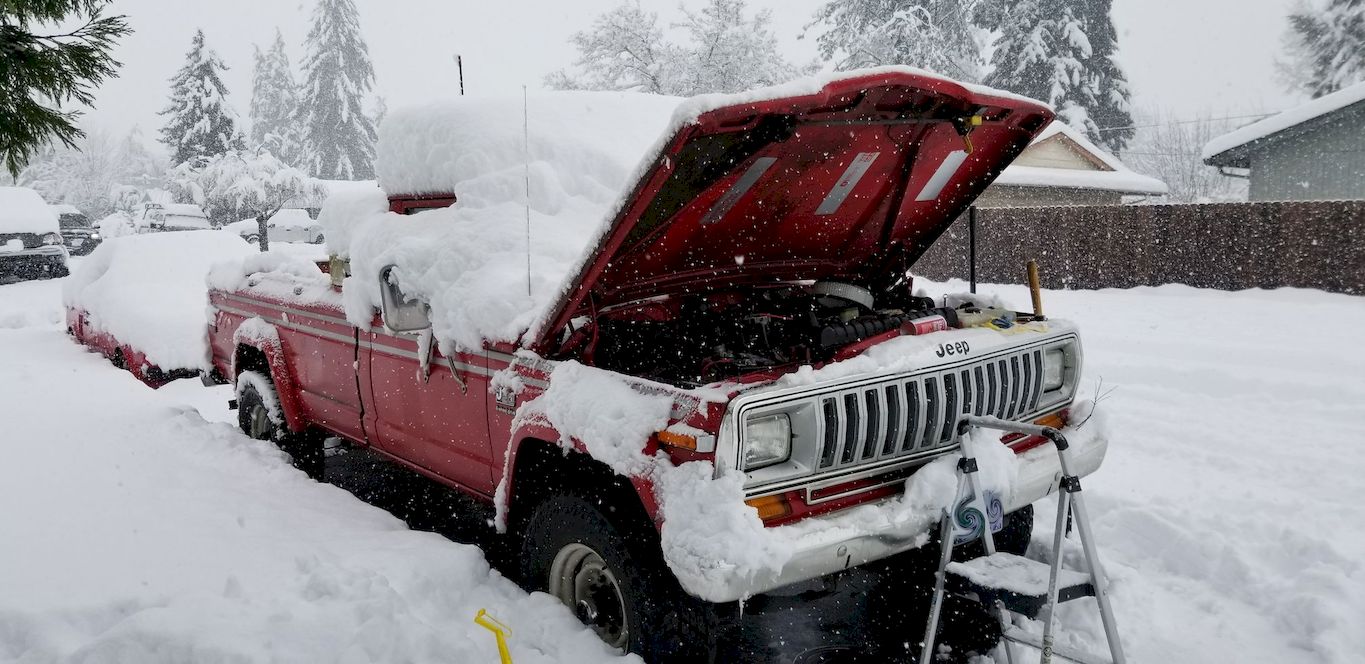
Project #5: new radiator

This was tonight's project.  I knew the radiator on this truck was not in great shape, but didn't realize quite how nasty it was.  Say "ahhhh"...


And that was one of its better angles.  Here's an unflattering shot of its less-than-attractive backside:


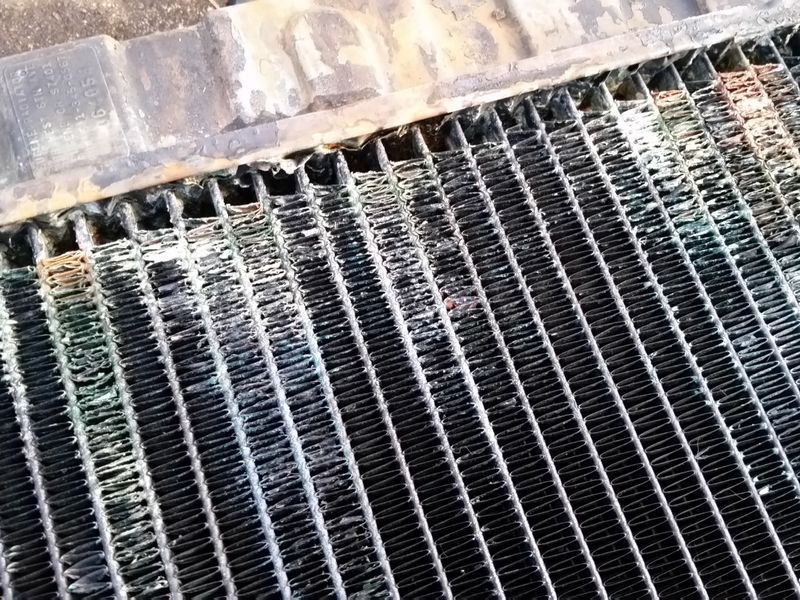
So that obviously ain't gonna work.  Step one: run some radiator flush through it, then drain, fill with water, run, repeat until clear water comes out.  Follow with step two: remove everything that doesn't look like a new radiator.


Step three: installation is the reverse of removal.  Brand new all-metal rad from BJ's Offroad:


So far, I like it.  It fits perfectly and seems well-made.  And at least I know it can be repaired if an issue should arise.

Step four: fill with the finest (and only) antifreeze available at this end of town on a Sunday evening.  Unfortunately, I'm still seeing a whole lot of dirt and/or cooling system cleaner in the coolant.  Well, at least the finest antifreeze is also very cheap.  I'll throw a flush tee in it and blast the whole system clean later in the week, and then replace the coolant one last time.  Hopefully, I will then be able to leave the cooling system alone for a couple of years.

I think I missed a couple other ... yeah, I know I missed a couple other little jobs.  But we'll get it caught up sooner or later.  This is enough for now.

Recon1342
Recon1342 Dork
12/22/20 10:43 p.m.

I too, have an old orphan of a vehicle that is uncommon and unloved by the aftermarket (which is to say most parts stores). Mine is also a product of Mother Mopar and is similarly motivated by an anemic 5.9L lump. 
 

Mine's a Ramcharger. I think we'll be good friends...

DarkMonohue
DarkMonohue New Reader
12/22/20 11:13 p.m.
Recon1342 said:

I too, have an old orphan of a vehicle that is uncommon and unloved by the aftermarket (which is to say most parts stores). Mine is also a product of Mother Mopar and is similarly motivated by an anemic 5.9L lump. 
 

Mine's a Ramcharger. I think we'll be good friends...

We can certainly be friends, but we can't be Mopar friends.  Chrysler didn't actually start to kill...uh, I mean, absorb AMC until a couple of years after this one had been built.  This is an American Motors product all the way.

Ramchargers are cool.  Not as common as they used to be, but they still make appearances here and there.

Recon1342
Recon1342 Dork
12/23/20 10:41 p.m.

In reply to DarkMonohue :

Eh, we'll just adopt you, howzat sound?


Looking forward to whatever it is you come up with next.

DarkMonohue
DarkMonohue New Reader
12/24/20 3:56 p.m.
Recon1342 said:

In reply to DarkMonohue :

Eh, we'll just adopt you, howzat sound?


Looking forward to whatever it is you come up with next.

The Jeep brand affilliation thing is a funny deal one.  I had no problem with the fact that our '95 ZJ was a Mopar product, although by all accounts it was an AMC design.  But SJs are really...well, if you get down to it, it's a Willys design that flourished and matured under Kaiser ownership, spent many long and storied retirement years with AMC, and finally moved in with Chrysler a few years before they pulled the plug.  The fact that this one is late AMC era is almost coincidental.  People seem to like 'em no matter who was paying the light bill at the time.

Anyway, where was we?

22 Apr 2016:

Yesterday I finally got/had to bite the bullet and get some new rubber under this old tractor.

Project #6: new tires

Well, not much of a project so much as handing someone some money and letting them do their job.  But it needed to be done, so...here it is.

Gave the old pig a quick warsh and got over to the tire store in the morning.  Basking in the sun, waiting for the doctor to see her:


After waiting way too long (they were deep in the weeds), they finally made some room in the shop.


And shortly thereafter, the deed was done.


Went with Cooper Discoverer S/T MAXX in the same LT255/85R16 size.  I would have liked them to have a narrower tread, more like the old-style Discoverer ST, but I wanted the three-ply sidewalls.  I almost chose the old STs anyway for their more retro-looking tread pattern, but these should be just fine.  All I can say for now is that they are pretty quiet at speed, and a whole lot rounder than the old ones.  Which is a good start, really.

Forgot to mention that somewhere between the tires and the last round of updates, I changed the mirrors for some cheap stainless jobbies from one of the Chevy resto suppliers.  They're OK.  They look pretty good, anyway.

Couple more.  Still no really good shots to show the true size and width of the tires, but...well, they're just tires.


Also, with the help of the lovely Mrs. Monohue, I just found the cause of the wandering steering.  The right side tie rod end (from pitman arm to main tie rod) has some play in it I wasn't seeing last time I looked.  Hooray...


Dusterbd13-michael (Forum Supporter) said:

In reply to DarkMonohue :

One of my dreams, that i will probably never realize,  is the yellow j10 from the movie twister. That truck makes me tingly. 

Im sure this thing will look just right on 33s. 

Nominally speaking, these tires are 33s. In the real world, they measure out right at 32" diameter (not height; I measure a 16" radius from hub center to top of tread surface).  They are both shorter and fatter than I was hoping for.  Unfortunately this seems to be as close to tall and skinny as we can get without going to a bias belted old-style STA Super Traxion.  No denying those look great but I'm not sure I'd enjoy the drive.  Could have also gone with a BFG KM3 or a few similar "mud terrain" types but they're less suited for my usage (wet weather is a reality around here) and cost more money to boot.  So it kind of is what it is.

You might get a charge out of this Twister tribute build.  No updates for a while but it looks like the builder is taking it pretty seriously.

http://www.ifsja.org/forums/vb/showthread.php?t=185018

DarkMonohue
DarkMonohue New Reader
12/26/20 11:55 p.m.

02 Jun 2017:

Project #7.1: 4" spring lift - front

You know how things tend to drag out if you let them?  That's the problem.  I let them.

When I bought this poor old truck four and a half years ago, I thought it might need shocks soon.  Well, it did.  But I also wanted to lift it a little, which meant longer shocks, so I waited.  I found a suitable (read: cheap) set of used springs, did the math, bought the shocks, and promptly did nothing but drive the truck and complain about the miserable ride quality.

A couple of weeks ago I decided enough was enough and dug out the parts.  It was time to get the thing put together.  So I ripped into the front.  And that's what I got done.  The front.

So we got this for now:


It's a couple inches low in the back because there's a ton (well, 2400 pounds, actually) of Daddy Weekender landscaping materials in the bed.  But even without the load, it's still dopey looking, and still rides like poo with 8400# rear springs and nearly no damping on the rear axle.

Just looking through my old PMs, apparently I bought the springs in late 2013.  There's nothing like procrastination, is there?

I'll get the rear lifted pretty soon.  Probably.

DarkMonohue
DarkMonohue New Reader
12/26/20 11:57 p.m.

16 Feb 2019:

It's time for an annual check-in - just like going to the doctor, really, only without the awkward eye contact.

I have been really bad about updating this, but the truth is that nothing all that exciting has happened.  The old truck is... well, it's still an old truck.  That's what I wanted when I bought it, and since then, it has not lost any of its oldness or truckness.  I've been using it occasionally to do truckly, homeownerly things, like hauling bulk amounts of rotting plant matter and tree parts off to the local forest products emporium, and for the most part, it does it without complaint.  As such:


There have actually been a handful of little projects.  Such as the grandiosely titled Project #7.2: 4" spring lift - rear:

I had a buddy throw the rear lift springs in at his shop as I just didn't feel like fighting them in the driveway.  All went well except that the springs positioned the axle 3/4" to the rear.  It's a little hard to see in this pic, but here it is:


Apparently this is typical of FSJ lift springs (at least of this era); they're usually configured for wagons, not pickups.  The lift springs I've seen are usually listed as "fits all '76-'91 FSJ", and while you can technically bolt all the parts together, the rear springs will put the axle 3/4" rearward of the correct location.  Even though the springs are the same length and width, the axle location on the rear springs is different between pickups and wagons.  With all four lift springs installed, the rear also seemed to sit a little lower than the front, which I don't like.  That combination of annoyances brought about the unnecessarily boldfaced Project #7.3: Rear axle relocation plates:

To move the axle forward 3/4" and raise the rear end a little, I made some combination lift-and-relocation plates out of 2-1/2" x 3/4" bar stock and a bolt the same diameter as the spring pin.  The pin in the relocation plate is 3/4" rearward of the hole.  The pin locates the plate on the axle, and the hole locates the pin in the spring pack.  This moves the axle forward by 3/4" to correct the axle location:


A ratchet strap helped position the axle for reassembly.  Notice the spring pin is now in a new hole in the spring clamp plate and the axle has been moved forward to its correct location:


With those in place the axle was once again centered in the wheelwell and the rear ride height and attitude was more appropriate.  Witness the imposing stance and astonishing flex encountered in the, uh, backyard:


... who am I kidding?  This thing is stiff as a buckboard.  That said, it's not worse than it was on the stock (8400 lb GVWR) springs.  The ride would be better with a flatter overload leaf in the rear to allow more flex before the overload comes into play.  Removing a leaf from the front might make it a little softer as well.  And the Gabriel Max Control shocks are way overkill for the light use this thing normally sees.  But it's OK for what it is and what it does.

Project #8: Replacing fuel hoses and fuel tank strainer due to no-start condition:

There was one other issue that had to be dealt with lately.  The blessed truck refused to start after sitting for a few weeks.  Long story short, a couple of pieces of fuel hose (between the hard line and the fuel pump inlet and a few inches at the fuel tank) were original to the truck, and after 34 years, looking pretty sad.  They were probably permeable enough to allow the pump to suck air rather than fuel.  Replacing the section at the pump inlet was easy enough.  Replacing the little piece at the tank required dropping the tank and pulling the sending unit to gain access to the hose clamps at the sending unit.  Since that had to come out I also replaced the strainer on the pickup tube.  Unfortunately, the replacement was either incorrect or poorly made.  This is the style the truck came with - note the provision for a clamp:


And this is the style I got as a replacement part:


It looked like it was meant to be a light press fit on the pickup tube, but it was far too loose to hold on.  The solution was to flare the end of the pickup tube by simultaneously hammering and turning a tapered bolt into the end if it, then running a 3/8" die around the outside of it to start a couple of crude threads.  That gave the new strainer something to thread onto.  It's not elegant, but it worked, and likely nobody will ever see it again.

Since the tank was down, I also replaced the fuel filler and vent hoses with the new ones I've had sitting on the shelf for a couple of years now.  It was definitely past time.  The originals were hard and starting to crack.  At this point, all the soft parts on the fuel system have been replaced, and the truck seems to start nice and easy.

One more thing - the truck had some auxiliary tanks in the bed when I bought it, with fuel switched by a six-port solenoid.  Apparently this is a GM #467513 (or clone), designed to simultaneously switch fuel supply and return:


Those auxiliary tanks were shot when I got the truck, so I never used tried to use the solenoid, but it seems to work just fine on the bench.  If the truck ever gets new auxiliary tanks that solenoid can go right back in.

That's all the news I have for now.  See you next year! :drivin:

DarkMonohue
DarkMonohue New Reader
12/26/20 11:58 p.m.

25 Feb 2019:

Well, this was my morning.

Remember the last post where I said that the truck was starting like a champ?  Right.  Well, I intentionally let the thing sit for a couple of weeks to test that theory, and last night it wouldn't start.  Same deal this morning.  Normally, I'd deal with it later, but last night and this morning saw a foot and change of snow fall, and I didn't want to take my wife's AWD car and leave her without transportation, so this was my morning.

Project #9: Replacing the fuel pump due to ongoing no-start condition:


Working in the snow wouldn't be my first choice, but it sure beats working in the rain.  And the ugly old beast now has a new fuel pump.  Let's hope this is the last time this topic comes up.

We lost a branch off a big cedar tree in the front yard, but there was no real damage.  Lost power for a few hours, so we went out in the truck for coffee and firewood and watched people flounder.  Best laughs were the dummies who refused to clean snow off the roof of their vehicle before driving.  It was fun watching them learn their lesson at every stop sign.

Two updates in the same month.  I can't keep up this frantic pace!

rattfink81
rattfink81 Reader
12/27/20 1:04 a.m.

I love this build. I've been wanting a old jeep pick up but here in the northeast its either cheap and rust or way out of my budget. Hope you keep the thread going.

DarkMonohue
DarkMonohue New Reader
12/27/20 11:13 p.m.
rattfink81 said:

I love this build. I've been wanting a old jeep pick up but here in the northeast its either cheap and rust or way out of my budget. Hope you keep the thread going.

Thanks for the encouragement.  It is a blessing living in an area where road salt isn't an issue and rust is not a foregone conclusion. 

Anything posted up to this point has been a rewarmed post from another forum I'm on, so they all got dumped within a few days.  I will keep this thread moving but from here forward it's going to be pretty slow going.  I drive the truck more than I work on it.


DarkMonohue
DarkMonohue New Reader
1/2/21 11:19 p.m.

Little tiny update here.  Hardly worth mentioning.

Somehow, somewhere, the battery clamp went missing.  Not sure where it went, considering the bolt was still in its hole.  I probably left it parked on the inner fender one day and it decided that wasn't a good place to spend the rest of its life.  An FSJ buddy was kind enough to send a replacement, but it was a little rusty:


...so it got wire wheel treatment (too aggressive, as shown by the stripes in the surface) and a hasty coat of Krylon semi-flat black.  At some point I will refinish it as well as the battery tray.  This will serve for the time being.


The truck has been running great, but not putting out a whole lot of BTU at the heater and defroster.  The temperature gauge has also been reading low, the coolant level has been dropping slowly but steadily, and the coolant itself has taken on a distinctly brown color.  A better man than me would have performed a little diagnosis, but that better man is not the one who gets to work on this thing.  It seemed simpler just to replace the nearly 36-year-old original thermostat on principle and flush the cooling system.

The original thermostat, AMC part number and all, next to the new-old-stock Robertshaw replacement (scored two of them on the auction site), both in the factory 195° rating:


And the NOS stat in its new home:


While I was at it, I removed and superficially cleaned the overflow bottle and repositioned the hose clamps at the flushing tee to try to eliminate a persistent little leak there.  I was starting to lose daylight and didn't stop to take any pics of either.

I also replaced one of the two alternator/AC compressor drive belts.  Although I bought them both from the same store at the same time, one was considerably older than the other:


The two really aren't the same length, so it developed an occasional squeal. I replaced the older one with a new one that matched the part number of the newer of the two belts already on the truck.

After it all went back together I filled the rad with plain water, ran it for a moment, drained it again, filled with water, stuck the garden hose on the flushing tee, fired it up, and let 'er puke.  It took a solid five or six minutes for the water coming out of the radiator neck to get almost clear.  Almost clear is good enough for now.  It's a whole lot better than the disgusting red-brown mess that came out of it on the first drain cycle.  So it got another drain, a gallon and a half of green concentrate, and a roughly equal amount of water to top it off. 

Took it for a little test drive and picked up some burgers and fries.  The temp gauge now registers something, which is better than the near-zero it was reading, and there's enough heat available to actually warm the cab up.  And it still squeals with a heavy load on the alternator.  I'll revisit belt tension tomorrow.  

Also, I finally took an hour or two this morning and washed the truck.  It's been a while, and the moss was getting aggressive.  It's still ugly, but slightly less so now.  Might try to snap some glamor shots if I get anywhere scenic tomorrow.

DarkMonohue
DarkMonohue Reader
1/27/21 12:45 a.m.

Nobody will be surprised to hear that we haven't been anywhere even remotely glamorous for beauty shots. But here's a picture taken in a soggy parking lot anyway.

Driving to and from work it's dark and cold, so the lights and heater are always on, and the belt squeal has become unbearable. Just found a matched pair listed by a private party on an evil auction site for less than one belt would cost locally. I'm hopeful that, since they are being sold together, they'll be close enough to the same length that we can get back to relative silence.

That's probably it for now. Something more interesting may happen eventually. 


artur1808
artur1808 HalfDork
1/27/21 7:37 a.m.

I love full size jeeps, so I'll be following along with this build - slow as it may be. Keep up the good work, I love the attention to detail and agree that it looks SOO much better without those running boards. 

DarkMonohue
DarkMonohue Reader
1/31/21 5:16 p.m.

Steering has been less than precise since the lift springs went in.  It just doesn't self-center the way it should, or the way it did with the stock springs, even after fiddling with steering box preload.  So this morning I backed the truck into the driveway and got under it to check caster angle by sticking a magnetic angle finder on the flat bottom surface of the lower ball joint.  According to the angle finder, the ball joint surface was pointing uphill at about 1-1/2 degrees, and the driveway is sloped at about 1-1/2 degrees downhill.  So the truck only has about three degrees caster.  That's not much.  Spec is four to five degrees.  So caster is at least one degree short of minimum spec, and it seems like a lot of people in the FSJ community run more than spec.  Looks like some tapered shims between the leaf spring and axle mounting pad are in order.

1 2 3

You'll need to log in to post.

Our Preferred Partners
1RxIWkYOMa6c5XogOYqsDsouMGePgTMzPG5jgwdBXjAeEF57tMGYx93DZ3pkACBV