 I missed the autocross event last week due to a sick kid. Bummer.
I adjusted the exhaust brackets again and it's been a lot better. The NVH from the rear has gotten worse. I suspected the CV is failing, but it could be a number of things.
With the emergency brake on if I spin the front of the driveshaft i can see the inner axle hub turning, but the axlenshaft not turning...so that's part of the issue. There is a little play between the front and rear of the axle, so the center support axle may have some wear.
The bigger issue is that the rear subframe bushings are shot. I realized the whole subframe moves an inch as I jack it up. This has become a major project.
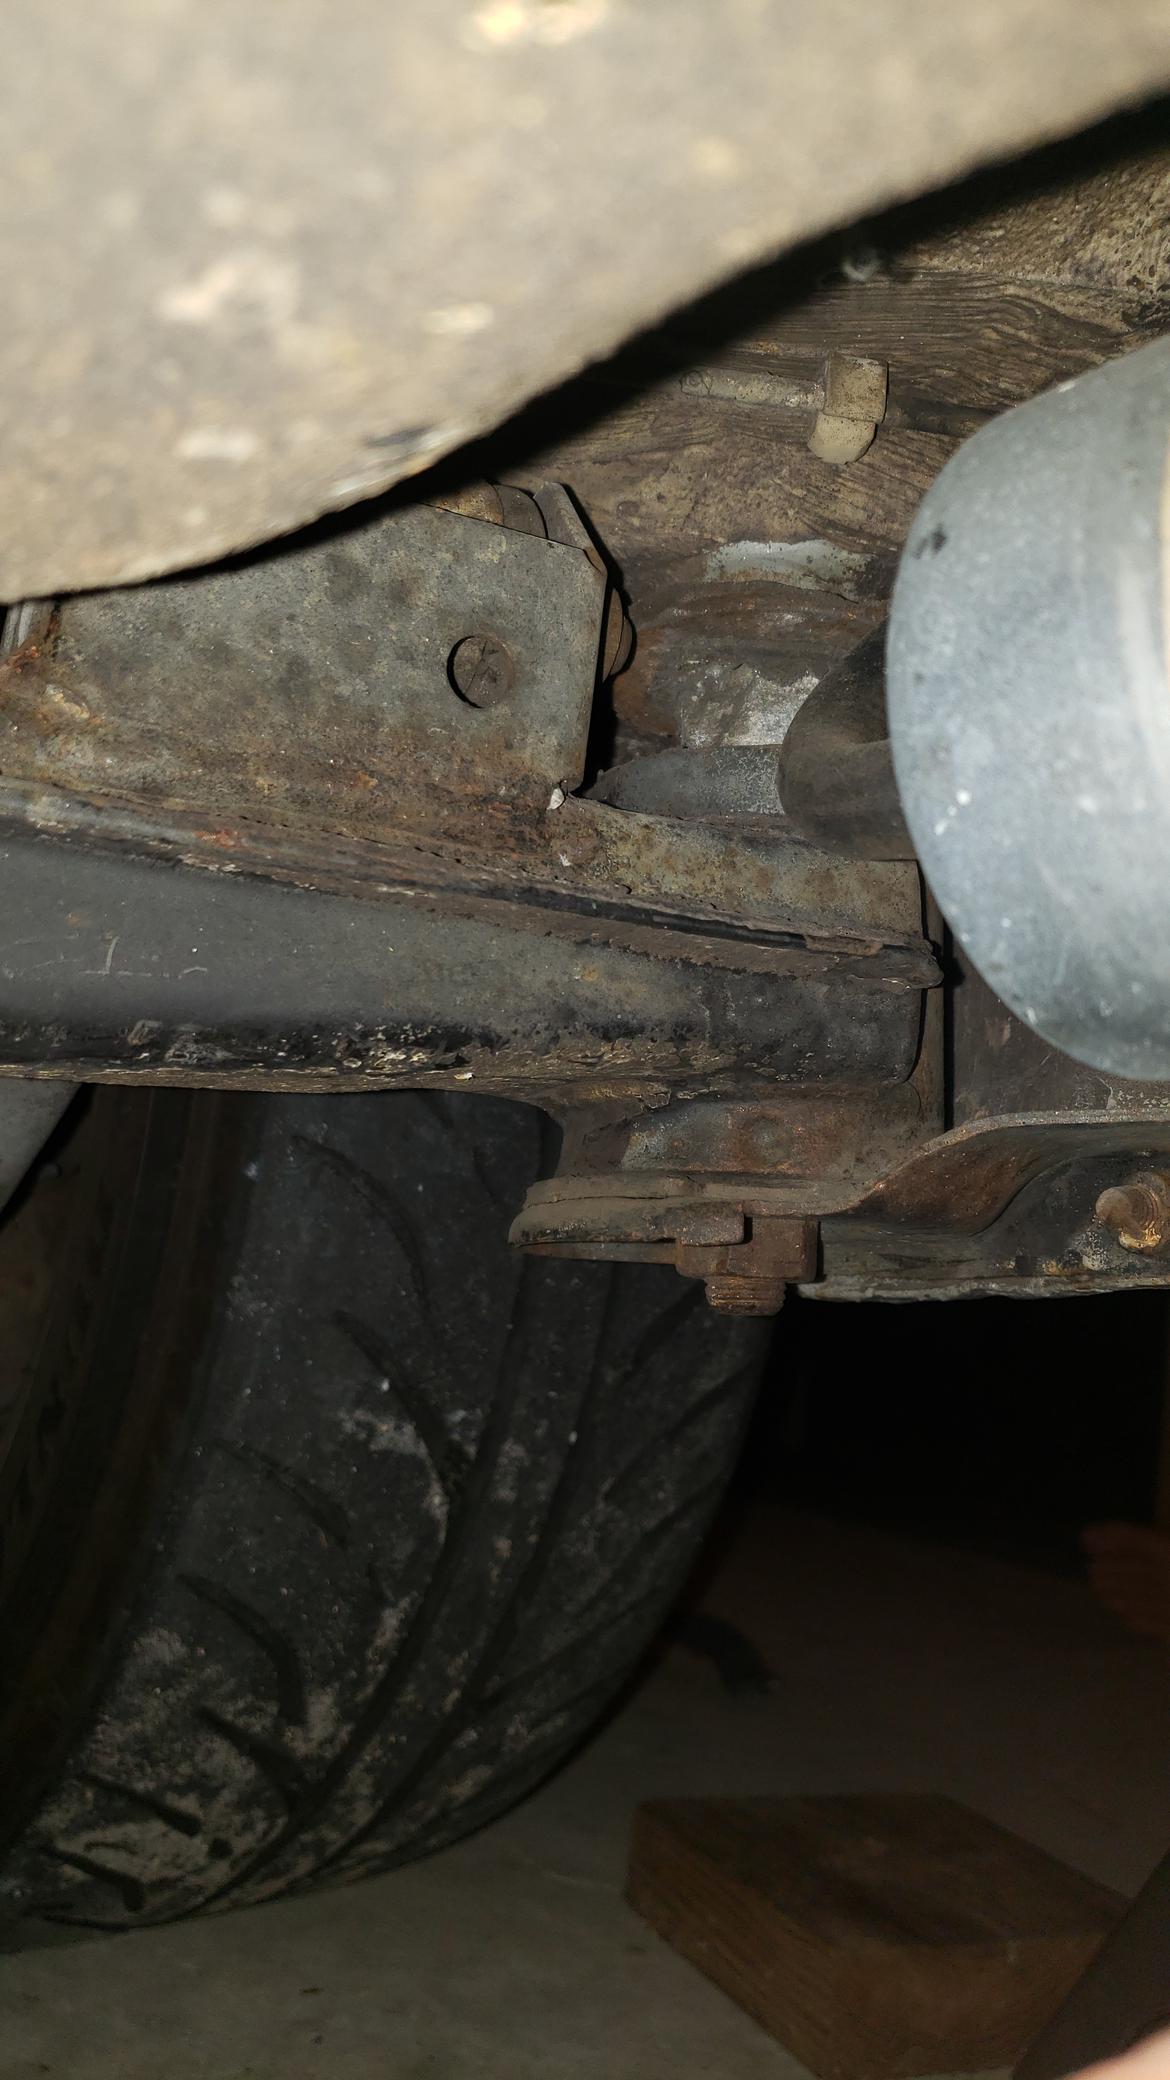
well yeah, if the rear subframe bushings are done, the lower plate is metal-on-metal with the subframe flanges (first pic), which would definitely cause some substantial NVH! Getting torn stock ones out isn't fun at all, so make sure you watch some youtube vids with tips/tricks.
CSB on the driveshaft shouldn't have any effect on things "moving" - it's just a support bearing. The front and rear driveshaft sections are joined in a splined slip-joint, so there shouldn't be any "play" rotationally between them (and I don't see how there could be, frankly). Probably some slop in your diff input flange or CV axles output shafts. Mine certainly has some.
I rented a tool from someone on r3v that was amazing. You can remove the bushings in no time and dont even need to remove the subframe.
The guy’s name is Alex (monty23psk). This is not the tool, but a thread by him in case you want to PM him:
Rental tool
If you are not on r3v, PM me and I can forward you his email address.
Slippery said:
I rented a tool from someone on r3v that was amazing. You can remove the bushings in no time and dont even need to remove the subframe.
The guy’s name is Alex (monty23psk). This is not the tool, but a thread by him in case you want to PM him:
Rental tool
If you are not on r3v, PM me and I can forward you his email address.
yep, it's actually easier to do with the subframe on with the tool, than it is to take the subframe off (oddly).
side note: the new r3v format sucks, and annoys me.
In reply to irish44j :
I just noticed the format today, haven’t been on it in over a month. Didnt pay much attention, but noticed it was different and wasnt sure I was on the right website.

In reply to Slippery :
Thanks for the tip on tool rental. I watched a youtube clip this morning on someone who pulled the subframe bushings with the subframe on the car. He probably spent $50-$75 in tools. Lots of prep getting all the tools, a bit of a struggle...but definitely looked like it could be done in a day. I don't like how/where he used the jackstands on the rear of the car. I always use the subframe for my rear jacking point & jackstand placement...and never the pinch-welds. I wonder if there is anywhere better to use as a jacking point?
I'm kind of on the fence about what/how to do this. A buddy of mine just did subframe bushings and trailing arm bushings on his 318ti racecar project and offered to help me. If I remove the whole subframe and bring it to his place he has all the tools to remove the bushings and press the new ones in. He recommended going with poly bushings, and also replacing the trailing arm bushings. He also mentioned if I'm ever interested in trailing arm reinforcement, now is the time to do it.
I'll have to take a closer look at trailing arm bushings. I'm guessing they look bad as well and I should just plan to renew everything. I also still need to pull one of the axles to either replace it or at least replace the boot. It is tempting to just replace the bushing on the car and call it "good enough."
The other choice is which bushings to use: the 80A poly bushings are described as an OEM+ equivalent, the softest poly available . If I go this route I'll also order the offset control arm bushing as well. My diff bushing is new (rubber/OEM), so I won't plan to replace that.
Of course a set of Poly subframe and trailing arm bushings are ~$190 and the OEM rubber ones are $50...so there's that.
I also place the jackstands under the subframe, but in this case you need to use the pinchwelds.
I removed mine when I replaced the trailing arm bushings, those were a pain in the ass to remove.
If you are going to be reinforcing, do the swaybar tabs as well. And buy new ebrake wires.
I have a 318ti as well and have done that subframe as well, same as the e30 so your friend will be good to have around.


By the way, I did all stock rubber bushings as I wanted a factory like ride. I often question whether I should have used poly on the subframe.
Next time I might as I feel there is some slop there with the rubber. I did not use BMW parts, but some that I bought from Turner, maybe that is the reason.

Hoondavan said:
In reply to Slippery :
Thanks for the tip on tool rental. I watched a youtube clip this morning on someone who pulled the subframe bushings with the subframe on the car. He probably spent $50-$75 in tools. Lots of prep getting all the tools, a bit of a struggle...but definitely looked like it could be done in a day. I don't like how/where he used the jackstands on the rear of the car. I always use the subframe for my rear jacking point & jackstand placement...and never the pinch-welds. I wonder if there is anywhere better to use as a jacking point?
I'm kind of on the fence about what/how to do this. A buddy of mine just did subframe bushings and trailing arm bushings on his 318ti racecar project and offered to help me. If I remove the whole subframe and bring it to his place he has all the tools to remove the bushings and press the new ones in. He recommended going with poly bushings, and also replacing the trailing arm bushings. He also mentioned if I'm ever interested in trailing arm reinforcement, now is the time to do it.
I'll have to take a closer look at trailing arm bushings. I'm guessing they look bad as well and I should just plan to renew everything. I also still need to pull one of the axles to either replace it or at least replace the boot. It is tempting to just replace the bushing on the car and call it "good enough."
The other choice is which bushings to use: the 80A poly bushings are described as an OEM+ equivalent, the softest poly available . If I go this route I'll also order the offset control arm bushing as well. My diff bushing is new (rubber/OEM), so I won't plan to replace that.
Of course a set of Poly subframe and trailing arm bushings are ~$190 and the OEM rubber ones are $50...so there's that.
I've used poly subframe trailing arm bushings and have now switched back to OEM (and this is in a stage rally car). The poly ones tend to loosen up unless you check them periodically, and when they get loose, they round out the mount holes on the subframe. Plus they get squeaky and annoying. OEM ones last a long time on a street car, I would just go that direction.
For the subframe itself, I use Condor solid ones (along with the Condor diff bushing). Minimal additional NVH but gets rid of all the "wind-up" flex in the subframe. I like that combo best. ]
If the subframe bushigns have separated (which they certainly have), droppign the subframe is the easy part. Getting the bushings out fo the car is the tough part. I hammered mine back UP into the car (they're huge bolts). But MAKE SURE if you do that put a towel or somethign over them up in the backseat area. Else you can shoot them up and smash the back glass (I've seen it done!).
All this stuff is covered in my huge build thread someplace. GRM search isn't very good, but if you search the version on r3V you may be able ot find where I did it all. And I didn't use any special tools, btw.
In reply to irish44j :
Thanks for finding the links, I appreciate the advice. Were the OEM trailing arm bushings more difficult to put in than the poly bushings? Considering there's 4 of them...if the poly ones are considerably easier to install it may be worth it to go that route and continually check torque.
Hoondavan said:
In reply to irish44j :
Thanks for finding the links, I appreciate the advice. Were the OEM trailing arm bushings more difficult to put in than the poly bushings? Considering there's 4 of them...if the poly ones are considerably easier to install it may be worth it to go that route and continually check torque.
I don't recall them being distinctly difficult. Just lube them with a bit of Dawn or something and pressed them in using a bench vise and some large sockets for spacing (or can use a small press), as I recall. I mean, any thing is more work than poly since those just slip right in usually. I certainly wouldn't call the rubber ones "difficult" though.
The E30 guys have given you lots of advice on how to do it, I'll just encourage you to get it done soon. The improvement in handling is well worth the trouble you'll go through to get them done.
Adam
Order placed! I went with the Revshift 80A poly bushings. Lifetime warranty and includes the washer and lubricant.

Zero progress in the last 10 days. Ordered bushings directly from Revshift, thinking it'd be good to order direct (also a little cheaper). In hindsight, I should have just ordered from FCP Euro.
I called on wednesday this week and they said they had shipped out the day before. I received an email Friday from REVSHIFT saying my order had shipped. Of course, on Saturday USPS is showing the package as having a label, but not yet received. Since it's a holiday weekend, they probably won't ship till tuesday(?).
Prep for this Cat5 hurricane that may land on my doorstep has consumed the time I was hoping to rebuild my subframe. I'm just shocked small botique companies like revshift are so e36m3 at actually shipping product. If I had known, i would have known it'd take so long i'd have just ordered elsewhere. [End rant]
Zero progress in the last month or so. Work and family commitments have kept me from spinning a wrench. I did finally move the car under my carpark in preparation for actually fixing it. I also replaced the broken glove-box latch last night. The latches are prone to breaking (especially if you load the glove box w/a heave book of CDs). I destroyed the old latch to remove it, but I suppose there is at least a small sense of accomplishment.
In other good news, @CaptainAwesome sent me a box last week with a bigger swaybar and a bunch of other spare parts. I haven't opened it yet, but that should help a lot with body roll and car control. I had been hesitant to buy the cheap swaybars on ebay/amazon due to counterfeit issues, so I'm pretty happy to find a (very) budget-friendly used one.
If anyone in the hive is looking for spare M42 parts, be sure to send me a PM. I still have most of what I stripped off my bad engine.
My weekend is already booked w/family commitments this weekend, but I'm hoping to take a 1/2 day on Monday to get my subframe out.
Subframe is out. This is the kind of day i had.

For the record, tin snips are not good for cutting e-brake cables.
I spent the morning taking apart the exhaust and driveshaft. Removed the brakes and emegency brake cables/pads.
The e-brake sheath wouldn't come out of the dust plate. After talking with a friend, he suggested pulling it out from the front handle. Unfortunately, the outer cable was seized and cane apart when i tried to pull it. I'll be buying new cables now. Eventually i just cut them.
The other trouble spot was the brake lines. They just wouldn't budge. I'm replacing them with stainless lines, so eventually i just cut the ruber line.
One of the bushings remained mostly intact, only leavint then top in the chasis. The other bushing core is still in the chasis. I guess i could try to drill it out or buy a cutting wheel for my dremel.
I dropped the subframe and diff all in one piece. Top-tip, if you leave the swaybar attached, it'll keep it from falling as the subframe breaks free.

Trailing arm bolts came loose pretty easily, but the brake lines won't budge. I have brake line wrenches, but the small nut keeps slipping. I've soaked them in PB blaster a few times now, but it looks like i'll be learning to flare new lines if they don't come loose tonight.
I still hope to stop by the challenge, but i won't be competing. The concept of the challenge got me off the couch and wrenching, so i'll chalk it up as a "win" even if I missed the event (again).
Either the brake hard lines were buggered up by a PO, or my (cheap Amazon) brake line wrenches are garbage. Every 11mm nut won't grip. I've soaked in PB Blaster, tried compressed air (ice) on one of them. I'm going to buy a Craftsman set of brake line wrenches and try one more time.
I did see pre-flared hard-lines are available in different lengths...maybe it's easier to just buy the lines and bend them?
Wow, this is embarrassing. This project has really stalled and I miss driving my e30. Bushings were greased and installed a few weeks ago. The craftsman brake line wrenches I bought didn't work any better.
I spent ~2 hours working on the car over the weekend. I wound up ordering an OEM hard line to replace the section that runs from the driver-side caliper (soft line) down the trailing arm. New OEM lines (straight) are only $20 or so shipped on Amazon, so I figured that's easier than buying tools to flare the lines, etc. I used a cheap HF pipe bender to replicate the old hard line and put it back together.
I also (finally) hammered out the remnants of the parking brake cable where it had seized to the brake housing.
For a minute I was actually thinking I may be able to get the subframe back into position soon...until I went to remove the final two soft lines that are tucked up by the gas tank/subframe. I had ordered my new stainless brake lines to replace all the old cracked rubber ones months ago...and I'm soooo glad I didn't try to install them earlier. I don't see how I could have done anything other than swear with subframe in the way. Even with the subframe out, this has been a PITA. One of the soft lines is totally seized, so i'll have to dremel the nut off of the hard line and replace that hard line section. I ordered another OEM replacement line, which should arrive later this week and I can finally get the subframe back in place. I did spend a little time to wire-wheel off surface rust from the subframe & sprayed rust converter than some matte black on those sections.
The only thing that has me a little nervous is the fact I still need to remove the soft lines on the front brakes. I wish I could have done that now, in case I needed to order more hard lines...but I left the front wheels on and don't want to lower the front end while the rear is supported by the pinch welds. It'll have to wait until I have the subframe back in.
Finally, the subframe is back in the car. Now to reconnect everything. Just under two weeks until the next SOLO event, so hopefully work is managable so I spend some time in the evening putting everything back together.
I eventually used a dremel to grind off the hard-line fitting that just wouldn't come loose. I bent the new line and installed it.
 The car is 90% back together. All the rubber lines have been replaced. Brakes lines flushed and bled. It's been a long time since i bled my own brakes and this one-man brake bleeder helped a lot. It has a check valve so the fluid and air can't back-up into the line. I had my son pump the brake pedal while i worked the bleeder valve. The pedal feels firm.

I finally opened up the box i got from @CaptainAwesomene and swapped out the rear shift cup and bushing. I had added a poly bushing, but the actual part felt pretty flimsy. This new one feels much better. The box also had new belts and a bigger front sway bar, which i'll get to later this week.

Before i change the oil and hang the exhaust I still need to torque the trailing arm bushings. Poly bushings are supposed to be tightened under load (and checked periodically). I should have marked and measured the position under load before i dropped the subframe so i could torque it outside of the car.
[Edit/Update]
In order to torque the RTAB bushings I measures the position on the ground (6 inches from spring perch top to bottom. Once the car was jacked up i removed the wheels and jacked up the trailing arm until it was in the loaded position and torqued it down. No torque wrench...but the internet guidance was 60 fl/lbs...so i guessed.
No big updates as of late. I did take a shakedown drive to the grocery store yesterday and everything seems good. I plan to re-torque the RTAB bolts again now that I've driven it a little.
The exhaust seems to be hitting the bumper valence again, so I'll need to reposition that while I'm torquing the subframe bushings.
I'm also hearing a slight rubbing/ticking sound that moves at the same rate as the car is traveling. It could be something clicking in the driveshaft, the e-brake assembly or even something as simple as a backing plate on the front brakes. I'll have to get it up in the air to see where it's coming from.
The driveline feels much better, less lash/noise, etc. There is still some occasional noise/clunk on deceleration, and a little clunking when the weight shifts. I did buy a set of used GKN Loebro axles (OEM quality) on ebay. They sell for around $350 new and I bought a pair used for less than 1/2 that...so I'll tackle that at some point soon. I may also have wheel bearing issues.
Retorqued the RTABs and double-checked the e brake assembly and brakes.
I did manage to complete an easy upgrade. The Z3 1.9 shift lever is essentially an OEM short shift for the e30. I saw it for sale at FCPEuro for $85 and pulled the trigger. Install was easy. The difference was measurable...this is what it should be.
After a short test drive i'm still hearing a light ticking...it seems more faint...but tough to figure out. It almost sounds like it's near the gearbox.

I feel much better. The ticking sound (that increased w/speed) was the slack in the parking brake cable hitting the driveline. A slight lift of the e-brake cable and it's gone. I was starting to get concerned it was something more complicated. I still need to shift the exhaust (it's hitting the valence again), but I'm happy.


