irish44j (Forum Supporter)
irish44j (Forum Supporter) MegaDork
11/11/20 8:42 p.m.
95maxrider said:
irish44j (Forum Supporter) said:


lol, I've been running this car for 10 years. Trust me when I say I know when something changes significantly in the way it drives haha.....

The diff felt fine at Panthera at the previous weekend, even though there's probably less traction there (and my 1-2 results that weekend reflect that).  FWIW, that diff had right around 60lb breakaway earlier in the summer (I checked it because I was considering swapping in my 3.73, but since it was surprisingly good I decided to leave it in).  Either way, now I'll have a good excuse to go to a triple-clutch setup ;)

In any case, nice running. Good or bad diff, it would have been tough to catch you last weekend - you mentioned you aren't usually good at Summit, and I usually haven't won there either (muddy events excepted) so you upped your game and I clearly did not!

Next time at Summit i'll have to arrange a bribe to get some water truck action :D

Thanks, I'm not sure if I actually drove better, or if the courses were just extra friendly to my car.  Now I want to measure the breakaway of my diff.  What's a 3 plate supposed to be around?  Since you don't have an M44 anymore, I'm not sure the water truck would be to your advantage!

The stock e30 2-plate is 25% lock. 3-plate I think is 40% or 50% as I recall. IDK what the breakaway torque for a 3-disc setup is offhand. 


95maxrider
95maxrider Reader
11/16/20 7:38 p.m.

More rust stuff, super exciting, I know.  Basically the same routine on the driver's side, except the rust on the sill moved a bit.  It looks like the car was improperly jacked at some point which bent the metal and the paint started to peel.


Chemical bath, and then POR15 seam sealer stuff for the hole.


With the fender pulled off....not looking so hot.


Chemical bath....


Everything got 3 coats of POR15.


Sanded the POR15 with 320 grit and cleaned prior to 3M Rubberized Undercoating (3 coats of this too)

irish44j (Forum Supporter)
irish44j (Forum Supporter) MegaDork
11/16/20 8:15 p.m.

Good God. I had no idea that car was so rusty! It disguises it well :)

95maxrider
95maxrider Reader
11/16/20 9:31 p.m.
irish44j (Forum Supporter) said:

Good God. I had no idea that car was so rusty! It disguises it well :)

Yeah, tell me about it.  I just thought there was a little on the front/bottom of the fenders, but these damn side skirts are good at hiding things.

95maxrider
95maxrider Reader
11/17/20 12:56 p.m.

I have used some 3M Rubberized Undercoating sparingly on my car after doing rust repairs or welding, and after hearing more about rubberized undercoating in general, I'm now wondering if I should remove it all.

For a little background, here's how I have used it so far.  I physically and chemically remove all rust from the surface, then follow the application directions for POR15 and apply 3 coats.  Once it's fully cured, I scuff the surface with 320 grit and clean it with a solvent to prepare for the undercoating.  I then apply 3 light coats of the undercoating.

I did this when I re-did my shock towers:


And then again for my front fenders:


And for the inside of my rear fender:


My thinking in doing this was that the undercoating would protect the POR15 from rocks and things, since I rallycross the car and also DD it all year where it's exposed to road salt, but it sounds like it may just be trapping moisture and debris against the surface (POR15) if/when the coating is compromised.

I've had good luck with 3M Cavity Wax Plus inside enclosed spaces, like side sills and frame rails, but I don't think it would last very long in an area getting sprayed with rocks and dirt.  I've heard very good things about CRC Marine Heavy Duty Corrosion Inhibitor (thanks, Project Farm!) but it's not clear to me if it would just absorb and hold whatever road debris is thrown at it, if it would just get knocked loose, or if it would be just fine.  Or would it just require annual applications?

Now that I think about it, I guess my concerns are pretty much localized to my wheel wells, as I haven't used the undercoating in any other areas of my car, nor do I plan to.  For all other exposed areas, I plan on POR15 plus the CRC stuff, and 3M CWP on enclosed areas.

Does POR15 need anything on top of it?  Should I remove all of the undercoating?  What are your thoughts on the subject?  All suggestions are welcome!

bluej (Forum Supporter)
bluej (Forum Supporter) UberDork
11/17/20 2:23 p.m.

I'm taking notes for cleaning up the underside of dirthammer. Thanks for the detail.

95maxrider
95maxrider Reader
11/19/20 7:49 p.m.

While I was doing all of that work already shown, I was also working on the front fenders with pretty much the same routine.  The PS fender wasn't nearly as bad as the DS fender.  At least these could fit in my bucket of Evaporust!


After chemical bath....


Some Bondo wire mesh and POR15 seam sealer....


Regular POR15


And 3M Rubberized Undercoating


The DS was much worse....


Chemicals....


This one required a LOT of Bondo mesh and POR15 seam sealer.  With these things being covered up by the side sills, I wasn't in any way concerned about appearances (obviously).  I just wanted them to not be filled with holes, and to prevent them from rusting any further.  I hope I succeeded.


It's ugly as all hell, but I think the mission has been accomplished.  And that ends my rust repair project.  I really hope I did things properly, because that was a lot of work and I really don't want to have to do it again.

95maxrider
95maxrider Reader
2/24/21 4:18 p.m.

Long time no post!  Well the season is starting up soon so I've done all my preseason checks and fluid changes, and all seems to be well.  Yesterday I decided to do an oil change so I drove the car around for 15 minutes to get the oil hot before draining it.  It was warmer than it has been in a while, so the oil got up to about 200*.  I then saw my red low oil pressure light was coming on and staying on at idle.  I've seen it come on before, but that was in the middle of summer with the AC blasting, and even then it was more of an intermittent flash rather than steady on.  I run Motul 5w-40.  I have a BimmerWorld oil distribution block and VDO gauges, and my oil pressure gauge appeared to be reading about 15 at idle.  It's hard to tell exactly since the gauge goes to 150 PSI for some reason.  I was under the impression that the light would only come on if pressure dropped below 7 PSI.  My cold startup oil pressure is about 70, and cruising on the highway it's about 30-40 according to the VDO gauge.

I decided to try some slightly heavier oil I had lying around, some LiquiMoly 10w-40, in the hopes that would make the light go away.  Well I took the car for a drive today, and sure enough when the oil got to around 200* the light came back on and stayed on at idle.  If I raised the revs by 100 it would go out.  As far as I can tell the engine is running normally and isn't making any strange noises.  I do not overfill my oil, I put in the recommended 6.3 quarts.

I have done lots of searching on this and the threads never seem to get solved.  I should mention that my oil pump nut was tack welded by the previous owner, and the engine has about 180k on it.  Possible culprits of this seem to include:
-Bad oil pressure sender
-Bearing clearances are getting larger
-Oil pump is wearing out
-Clogged valves in the oil filter housing

Possible solutions include:
-New oil pressure sender (although this never seems to solve the problem)
-15w-50 oil
-Raising the idle

As far as I can tell the only thing I can do to get a better picture of what's actually going on is to buy a handheld oil pressure gauge kit, and hook it up to where the oil sending unit goes, and see what my PSI is at idle.  How is this actually done in practice?  Do I hook up the gauge when the car is cool, drive around with it installed for 15 minutes to get the oil hot and then check out the reading at idle?  I can't imagine that installing the gauge when the car is piping hot would be a pleasant experience.

I've seen lots of people say that this can be ignored if the light goes away if you rev it above idle, but that's not very reassuring.  Does anyone have any guidance on this issue?
 

irish44j (Forum Supporter)
irish44j (Forum Supporter) MegaDork
2/24/21 7:56 p.m.

I mean, I get the low pressure light on really, really hot days right after a run or stage, but never other than that, and even then it's only for a second coming off throttle before the idle recovers. Granted, I run 15w/40 Rotella T6 since I'm not really concerned about cold starts since a car like this gets plenty of time to idle/warm up. 

I really don't have any real advice for you, other than bump the idle up and see if it stays "off." But at stock idle, even on a worn engine, I don't really think the light should ever come on outside of super-hot race conditions perhaps. I guess I'd lean toward the oil pump going out, but IDK, I'm not aware of that being a common issue on these engines - how many miles does yours have on it? Mine has like 250k....

95maxrider
95maxrider Reader
2/24/21 8:00 p.m.
irish44j (Forum Supporter) said:

I mean, I get the low pressure light on really, really hot days right after a run or stage, but never other than that, and even then it's only for a second coming off throttle before the idle recovers. Granted, I run 15w/40 Rotella T6 since I'm not really concerned about cold starts since a car like this gets plenty of time to idle/warm up. 

I really don't have any real advice for you, other than bump the idle up and see if it stays "off." But at stock idle, even on a worn engine, I don't really think the light should ever come on outside of super-hot race conditions perhaps. I guess I'd lean toward the oil pump going out, but IDK, I'm not aware of that being a common issue on these engines - how many miles does yours have on it? Mine has like 250k....

Yeah, that's what's got me concerned, it's not hot enough out yet for this to be happening, and this is now a consistent problem.  The engine has 180k.

irish44j (Forum Supporter)
irish44j (Forum Supporter) MegaDork
2/24/21 9:12 p.m.

I suppose the easy thing is to change the sender first, since that's probably not that expensive or difficult.

IDK if it's a problem with these cars, but is it possible the oil pickup tube could have a crack in it and isn't getting full suction at idle? I can't recall if it's the e36 engines that had this issue or some other car I own (maybe the Porsche? or maybe my old WRX?), but considering the beating the car takes, maybe that's possible?

I wouldn't *think* 180k would put that much wear on the oil pump. Did you ever do bearings on this engine? I can't recall. 

Turbine
Turbine Reader
2/25/21 8:17 a.m.

In reply to irish44j (Forum Supporter) :

The pickup tube does seem to be an issue for the s50/s52 engines. Lots of guys run z3 pickup tubes which are reinforced, I guess. I've also heard that the oil squirters are a common culprit. 

I started getting the same issue on my 95 m3 near the end of last year, and it seems to be somewhat common. Mine goes away with a blip of the throttle. I already run 15w50, and the car has the dual sump s54 pan and oil pump and Bimmerworld distribution block. I figured I'd hook the mechanical gauge up to an open port in the block, zip tie it out of the way, go for a drive until the car gets up to temp, then check. 

95maxrider
95maxrider Reader
2/25/21 11:54 a.m.
Turbine said:

In reply to irish44j (Forum Supporter) :

The pickup tube does seem to be an issue for the s50/s52 engines. Lots of guys run z3 pickup tubes which are reinforced, I guess. I've also heard that the oil squirters are a common culprit. 

I started getting the same issue on my 95 m3 near the end of last year, and it seems to be somewhat common. Mine goes away with a blip of the throttle. I already run 15w50, and the car has the dual sump s54 pan and oil pump and Bimmerworld distribution block. I figured I'd hook the mechanical gauge up to an open port in the block, zip tie it out of the way, go for a drive until the car gets up to temp, then check. 

I installed a new reinforced Z3 oil pickup tube about three years ago when I was preparing to install this engine in my car, so I sincerely hope that hasn't failed on me.  What does your VDO/aftermarket gauge read at hot idle?

Stock:


Z3:


Josh- Yes, the stock pickup tubes are known to crack and fail.

I ordered a new OEM oil sender unit, it's certainly the easiest and cheapest place to start.

Turbine
Turbine Reader
2/25/21 12:40 p.m.

In reply to 95maxrider :

Roughly 5 psi or so. My gauge doesn't have any divisions below 10, so that's kind of a rough estimate. 
Based on the results of the mechanical gauge and oil analysis, I might just have my tune revised to raise my idle to 750 RPM or so. 

95maxrider
95maxrider Reader
3/7/21 8:16 p.m.
Turbine said:

In reply to 95maxrider :

Roughly 5 psi or so. My gauge doesn't have any divisions below 10, so that's kind of a rough estimate. 
Based on the results of the mechanical gauge and oil analysis, I might just have my tune revised to raise my idle to 750 RPM or so. 

That's a good idea.  What did you oil analysis show?  I'm about to send a sample in myself.  Unfortunately for me, me idle is already set to 900.  I think that had something to do with the single mass flywheel, but I can't remember at this point.  Maybe I'll go back to running the 15w-50 that the previous owner of this engine said he used.  The only brand of 15w-50 I could easily find was Mobil 1, what do you use?  I wonder if the 10w-60 stuff for E46 M3s would be of any use.....

Josh- I missed your question earlier- no, no bearings have been replaced on this engine that I'm aware of.  I considered doing it before installing the engine, but decided against it since I have absolutely no idea what I'm doing.

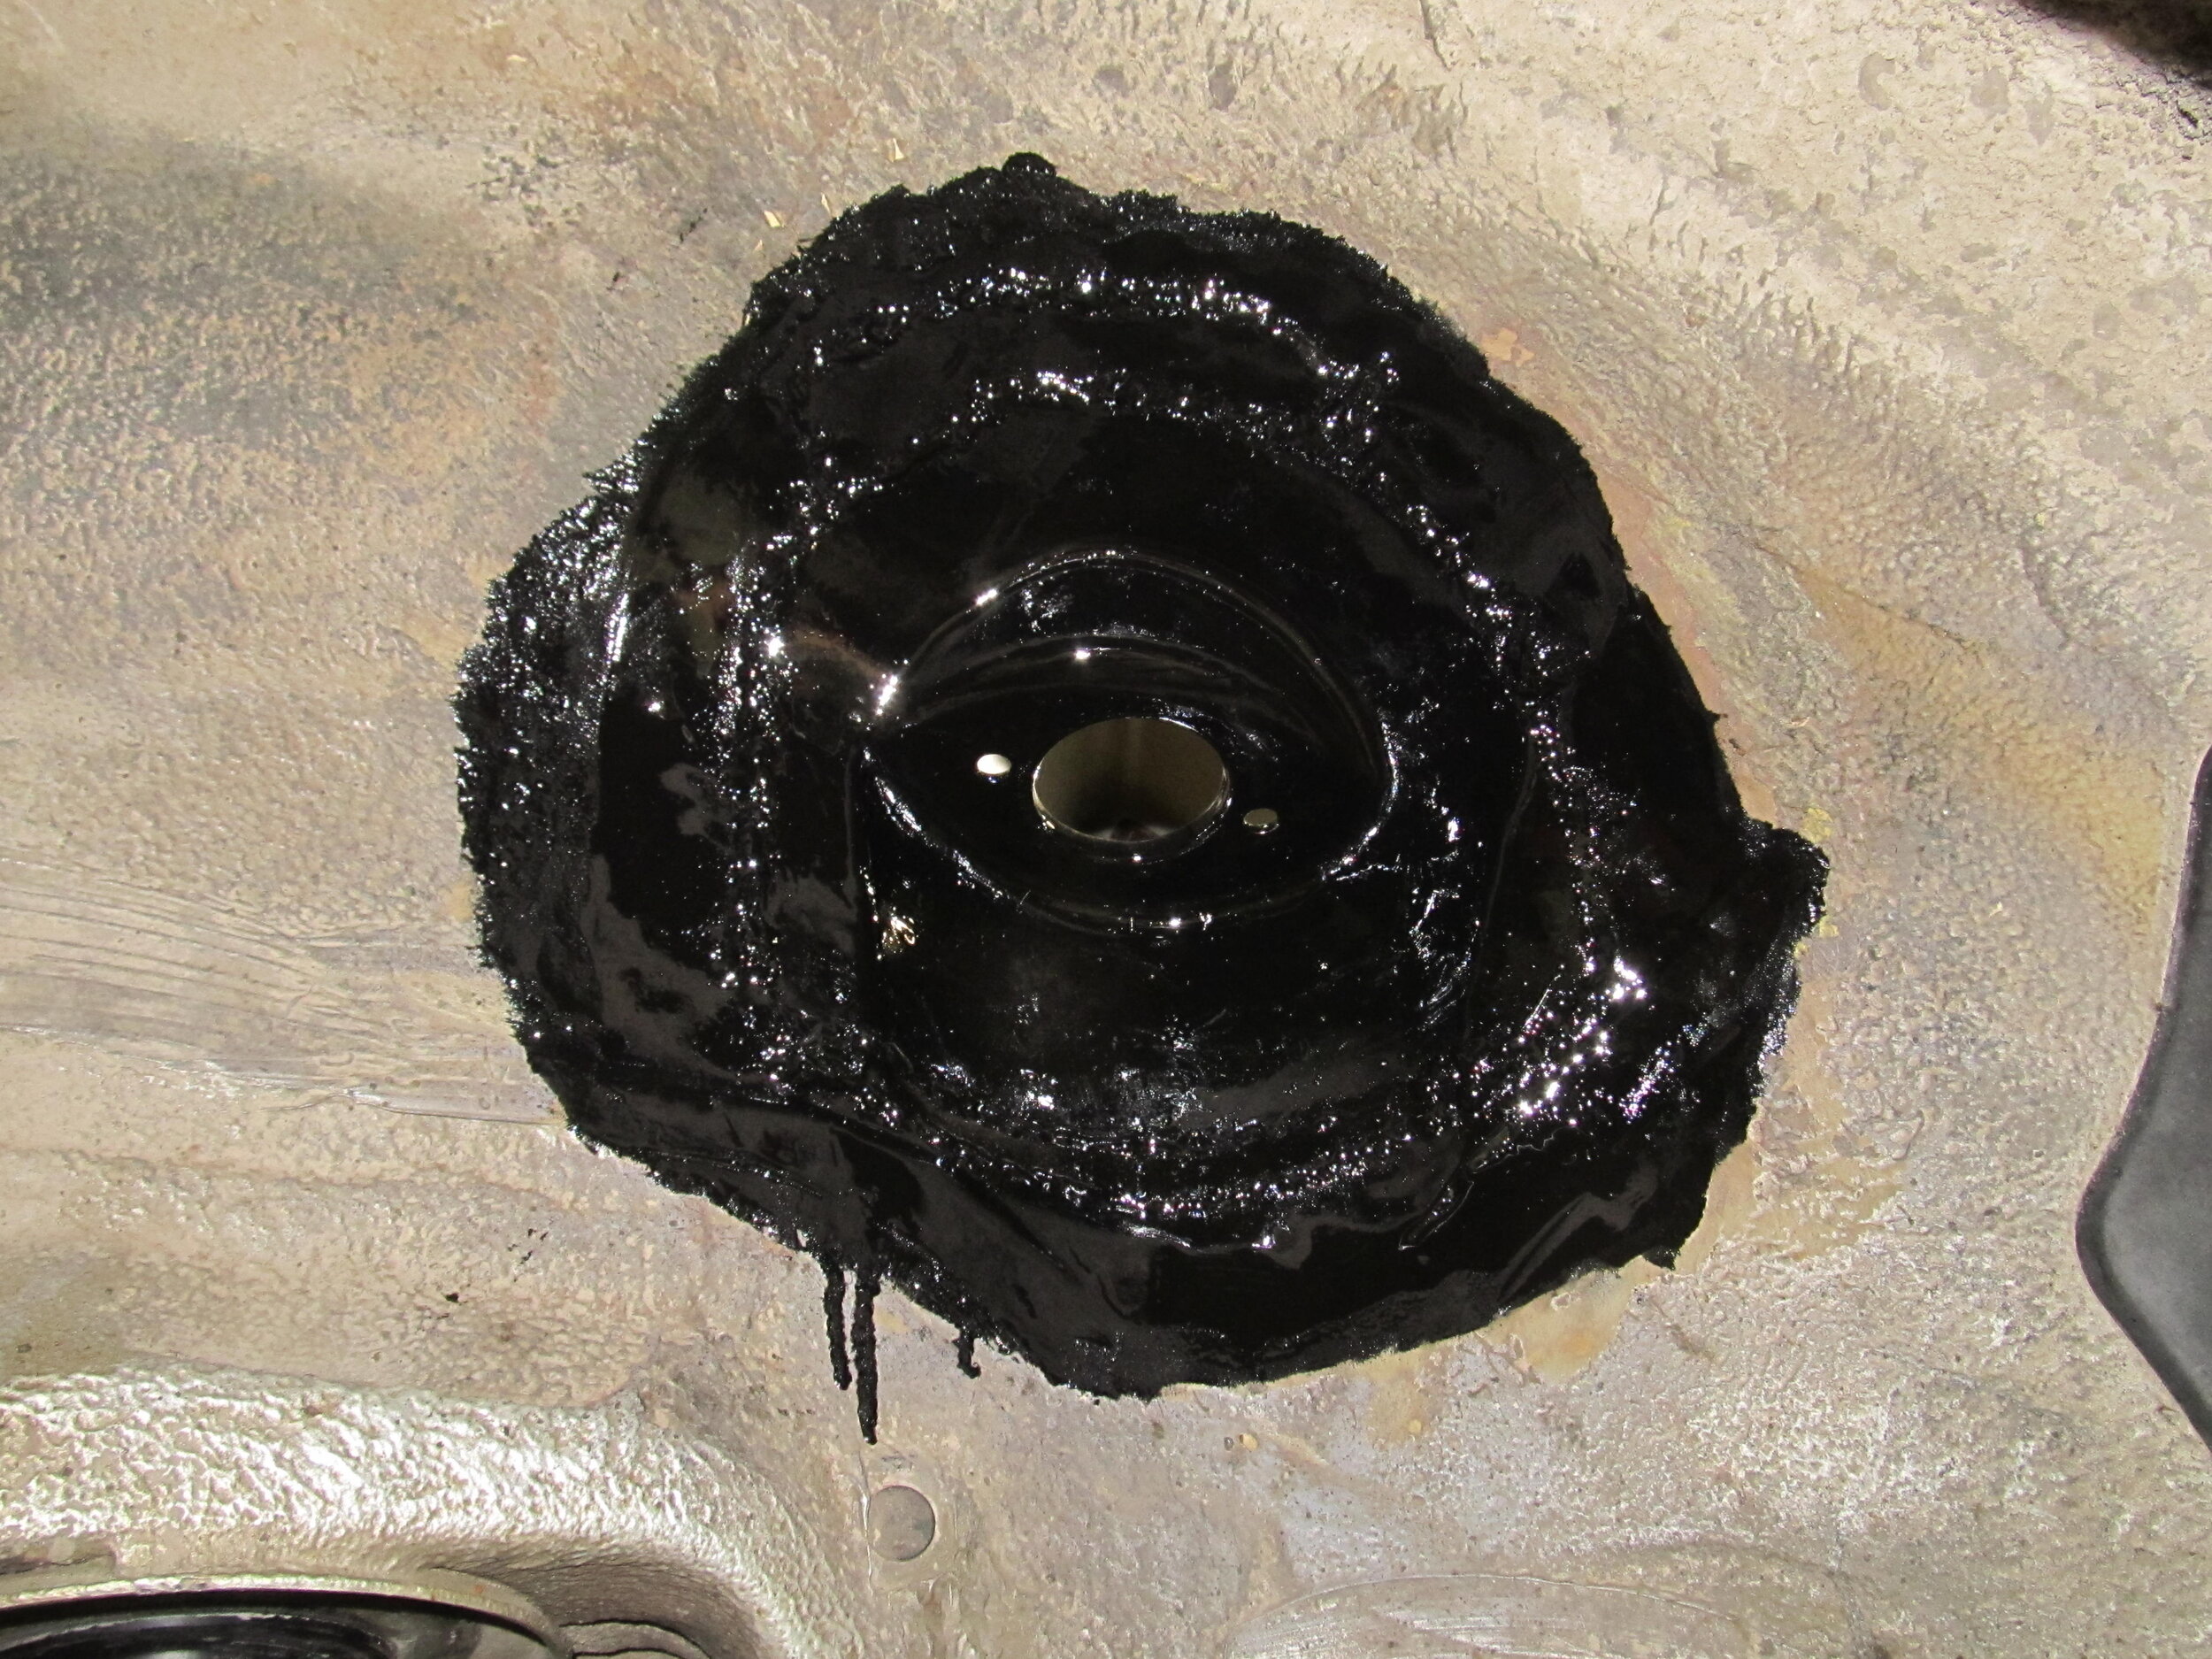
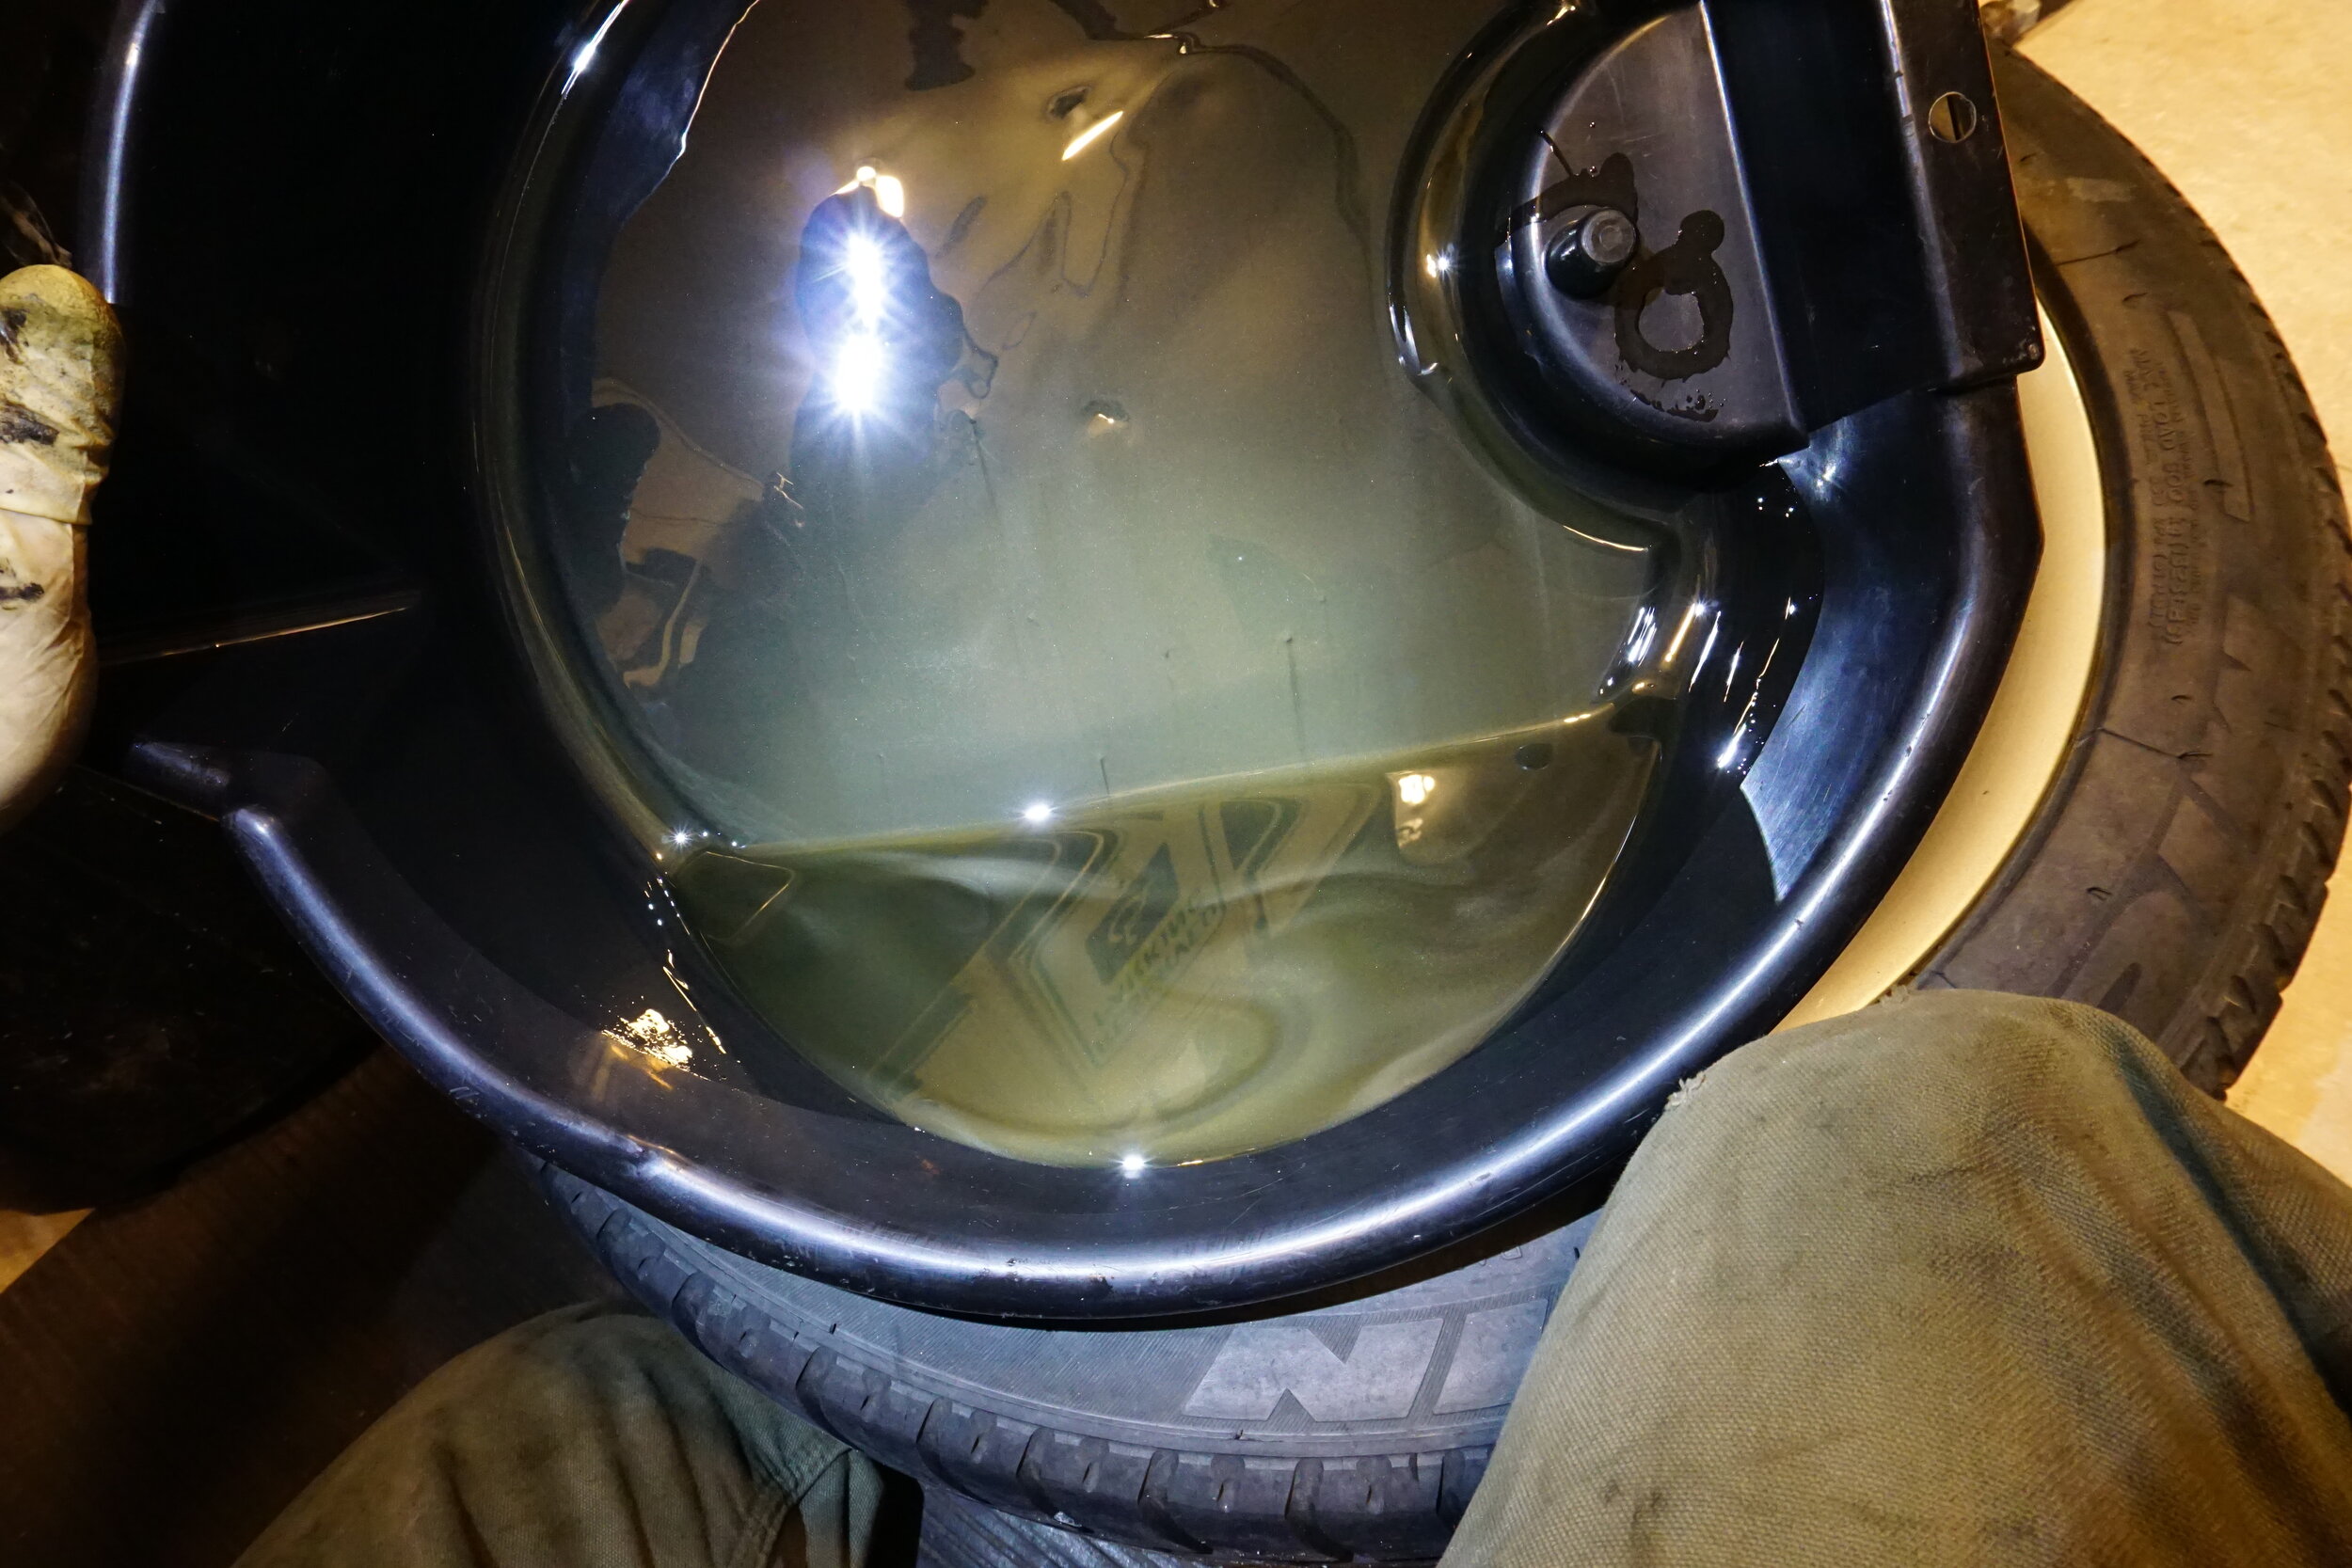
Catching up on things a bit, I put in some fresh fluids.  Is it normal that my diff fluid always comes out looking like this even after only like 3,000 miles?  I've got an upgraded triple clutch plate LSD.


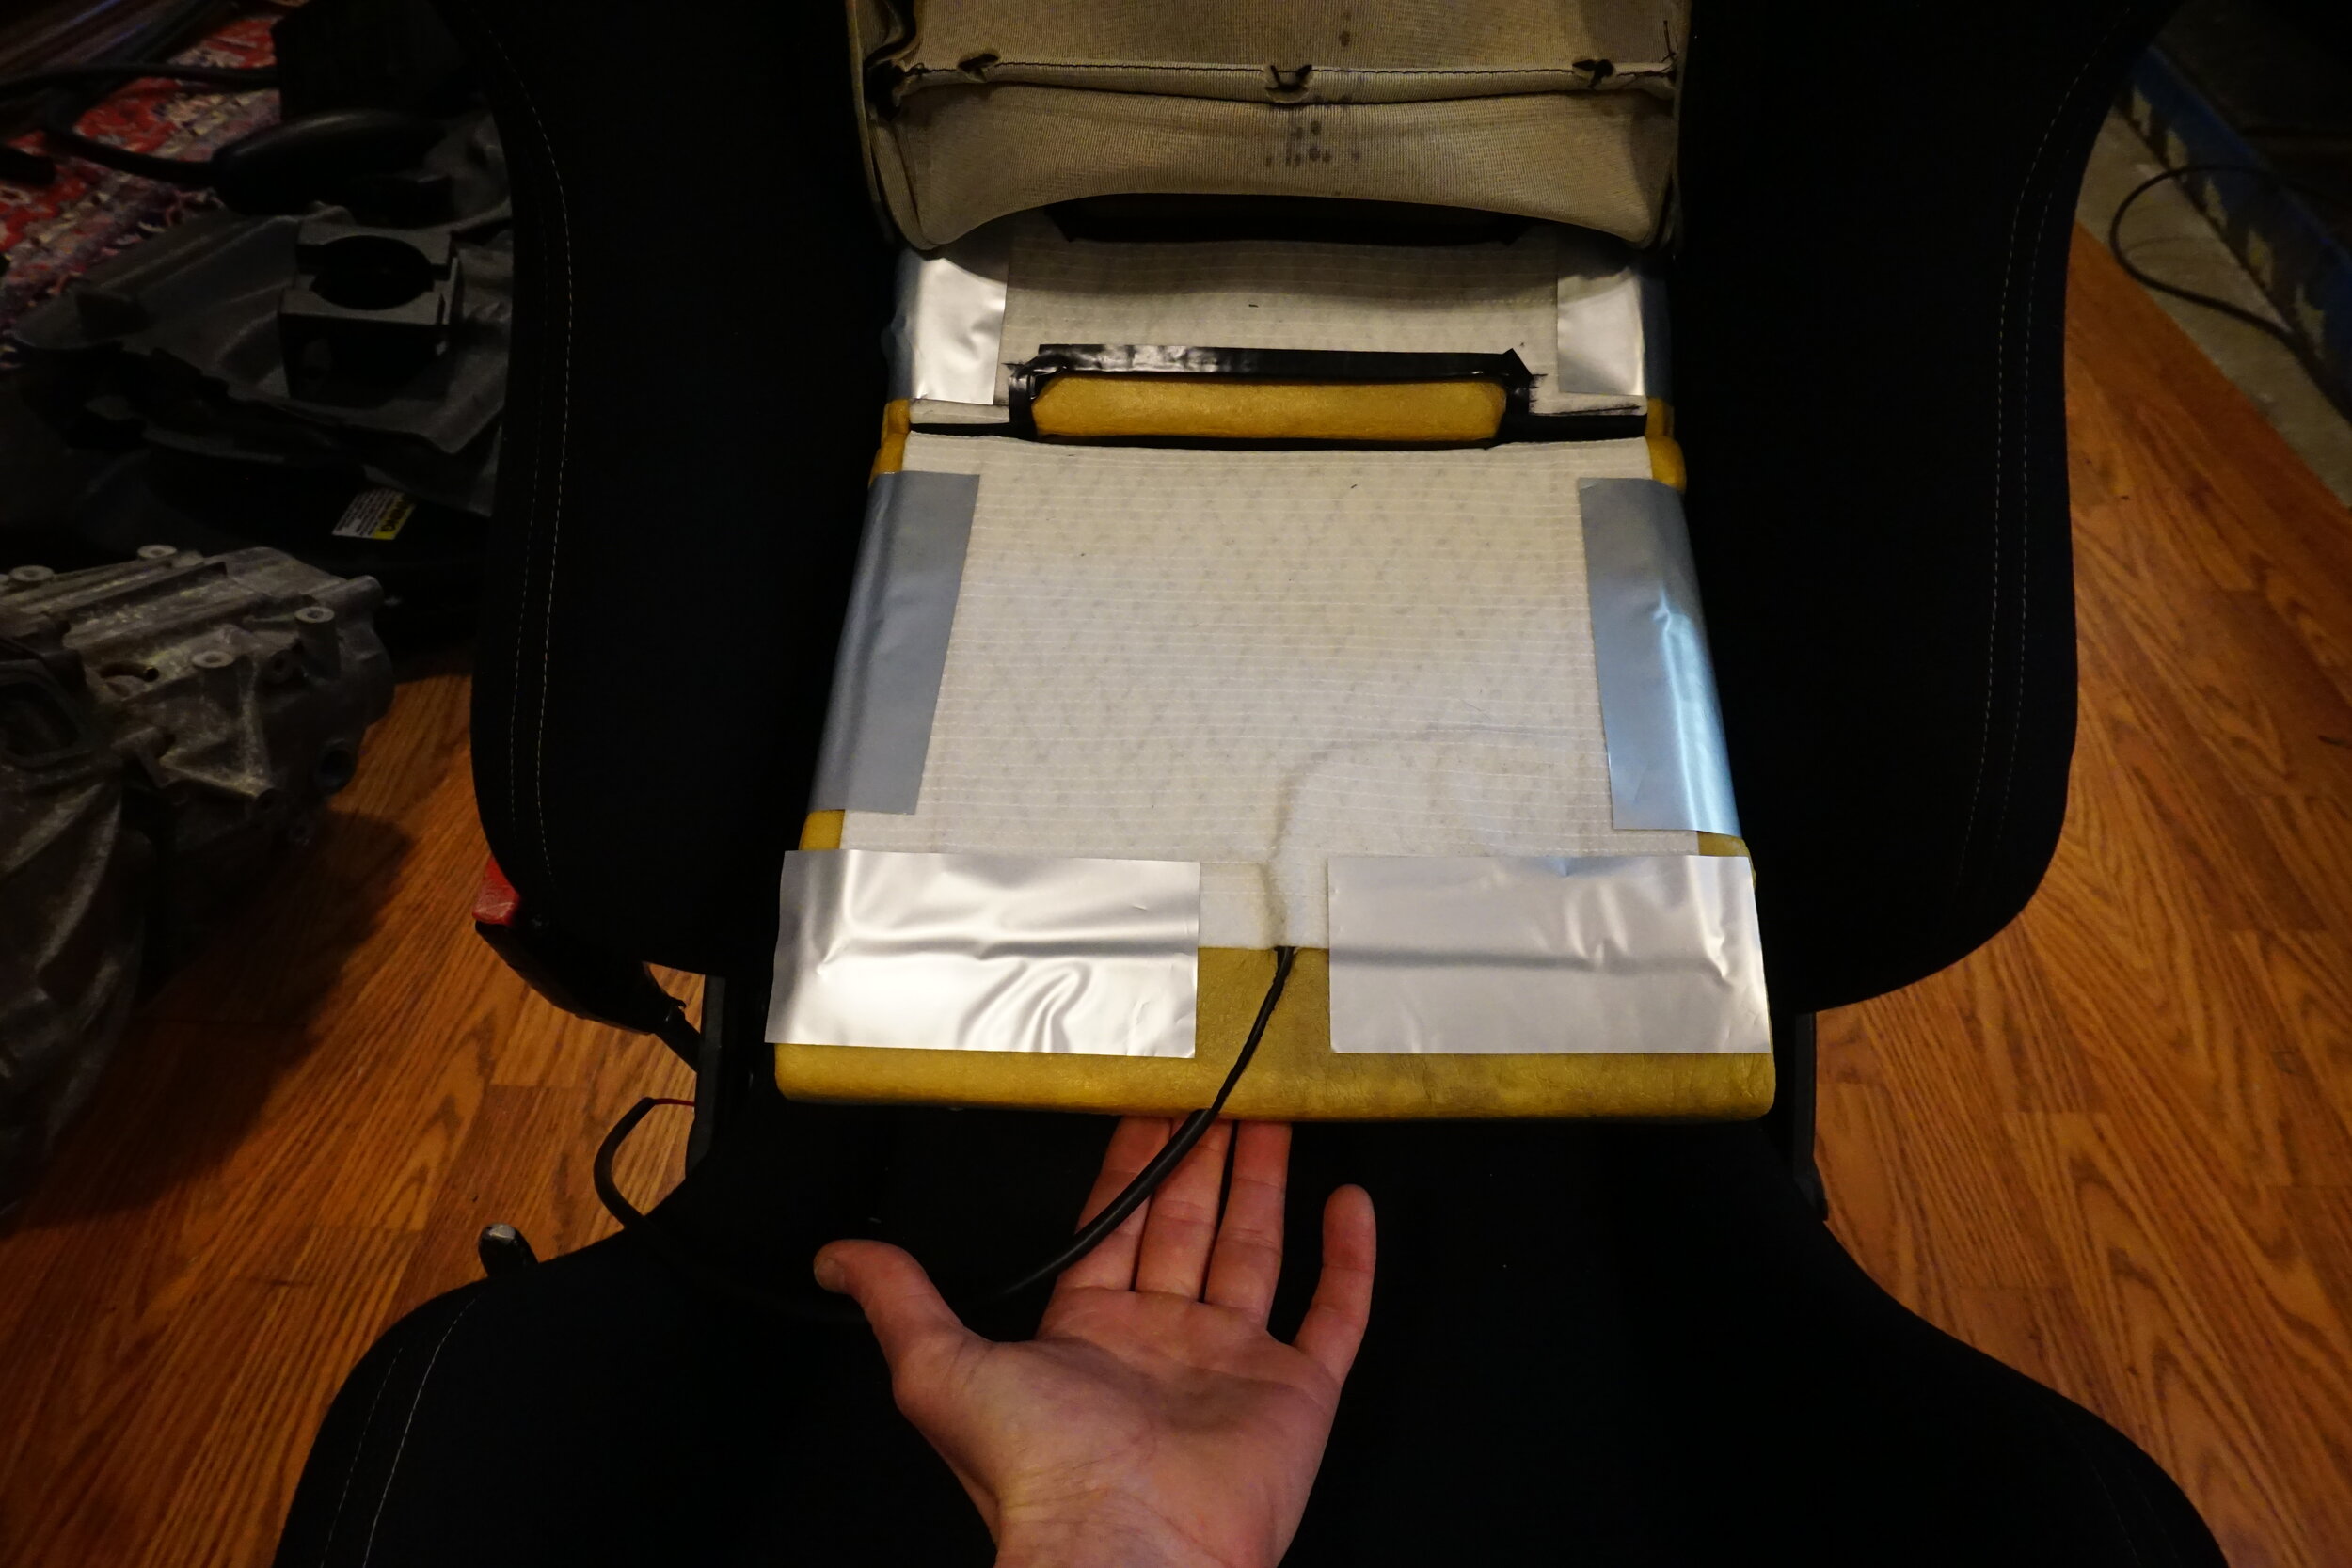
I also finally got around to installing my aftermarket seat heaters that have been sitting in my closet for the last four years.  Well, at least the one for the driver's seat.  I think I've had someone in the passenger seat like 10 times in the last 5 years, so that one might get ignored for another four years.  I really wanted to be able to use the factory heated seats button, but it was cutting out at max heat, running for a few seconds then turning off for a while, then turning back on.  On low power they worked fine.  Oh well, guess I'll have to use the switches that came with the heaters.  I got 12V power from the power seat wiring, and the switched 12V from the factory button.  I wanted to make sure that if I left the heated seat on when I turned off the car that it also turned off.

Getting the element on the seat base was easy, but the back was tricky.  I had to cut out some holes for the rod that holds the seat cover down to go through.


I wanted a clean but removable install for the switch, so I got a new blank plate for the dash and got to trimming.  I was left with about 1 mm of material left on the sides of the blank plate, but it seems to be enough to hold it all together.  I had to grind off quite a bit of material from the switch to get it to fit into the hole in the blank plate.


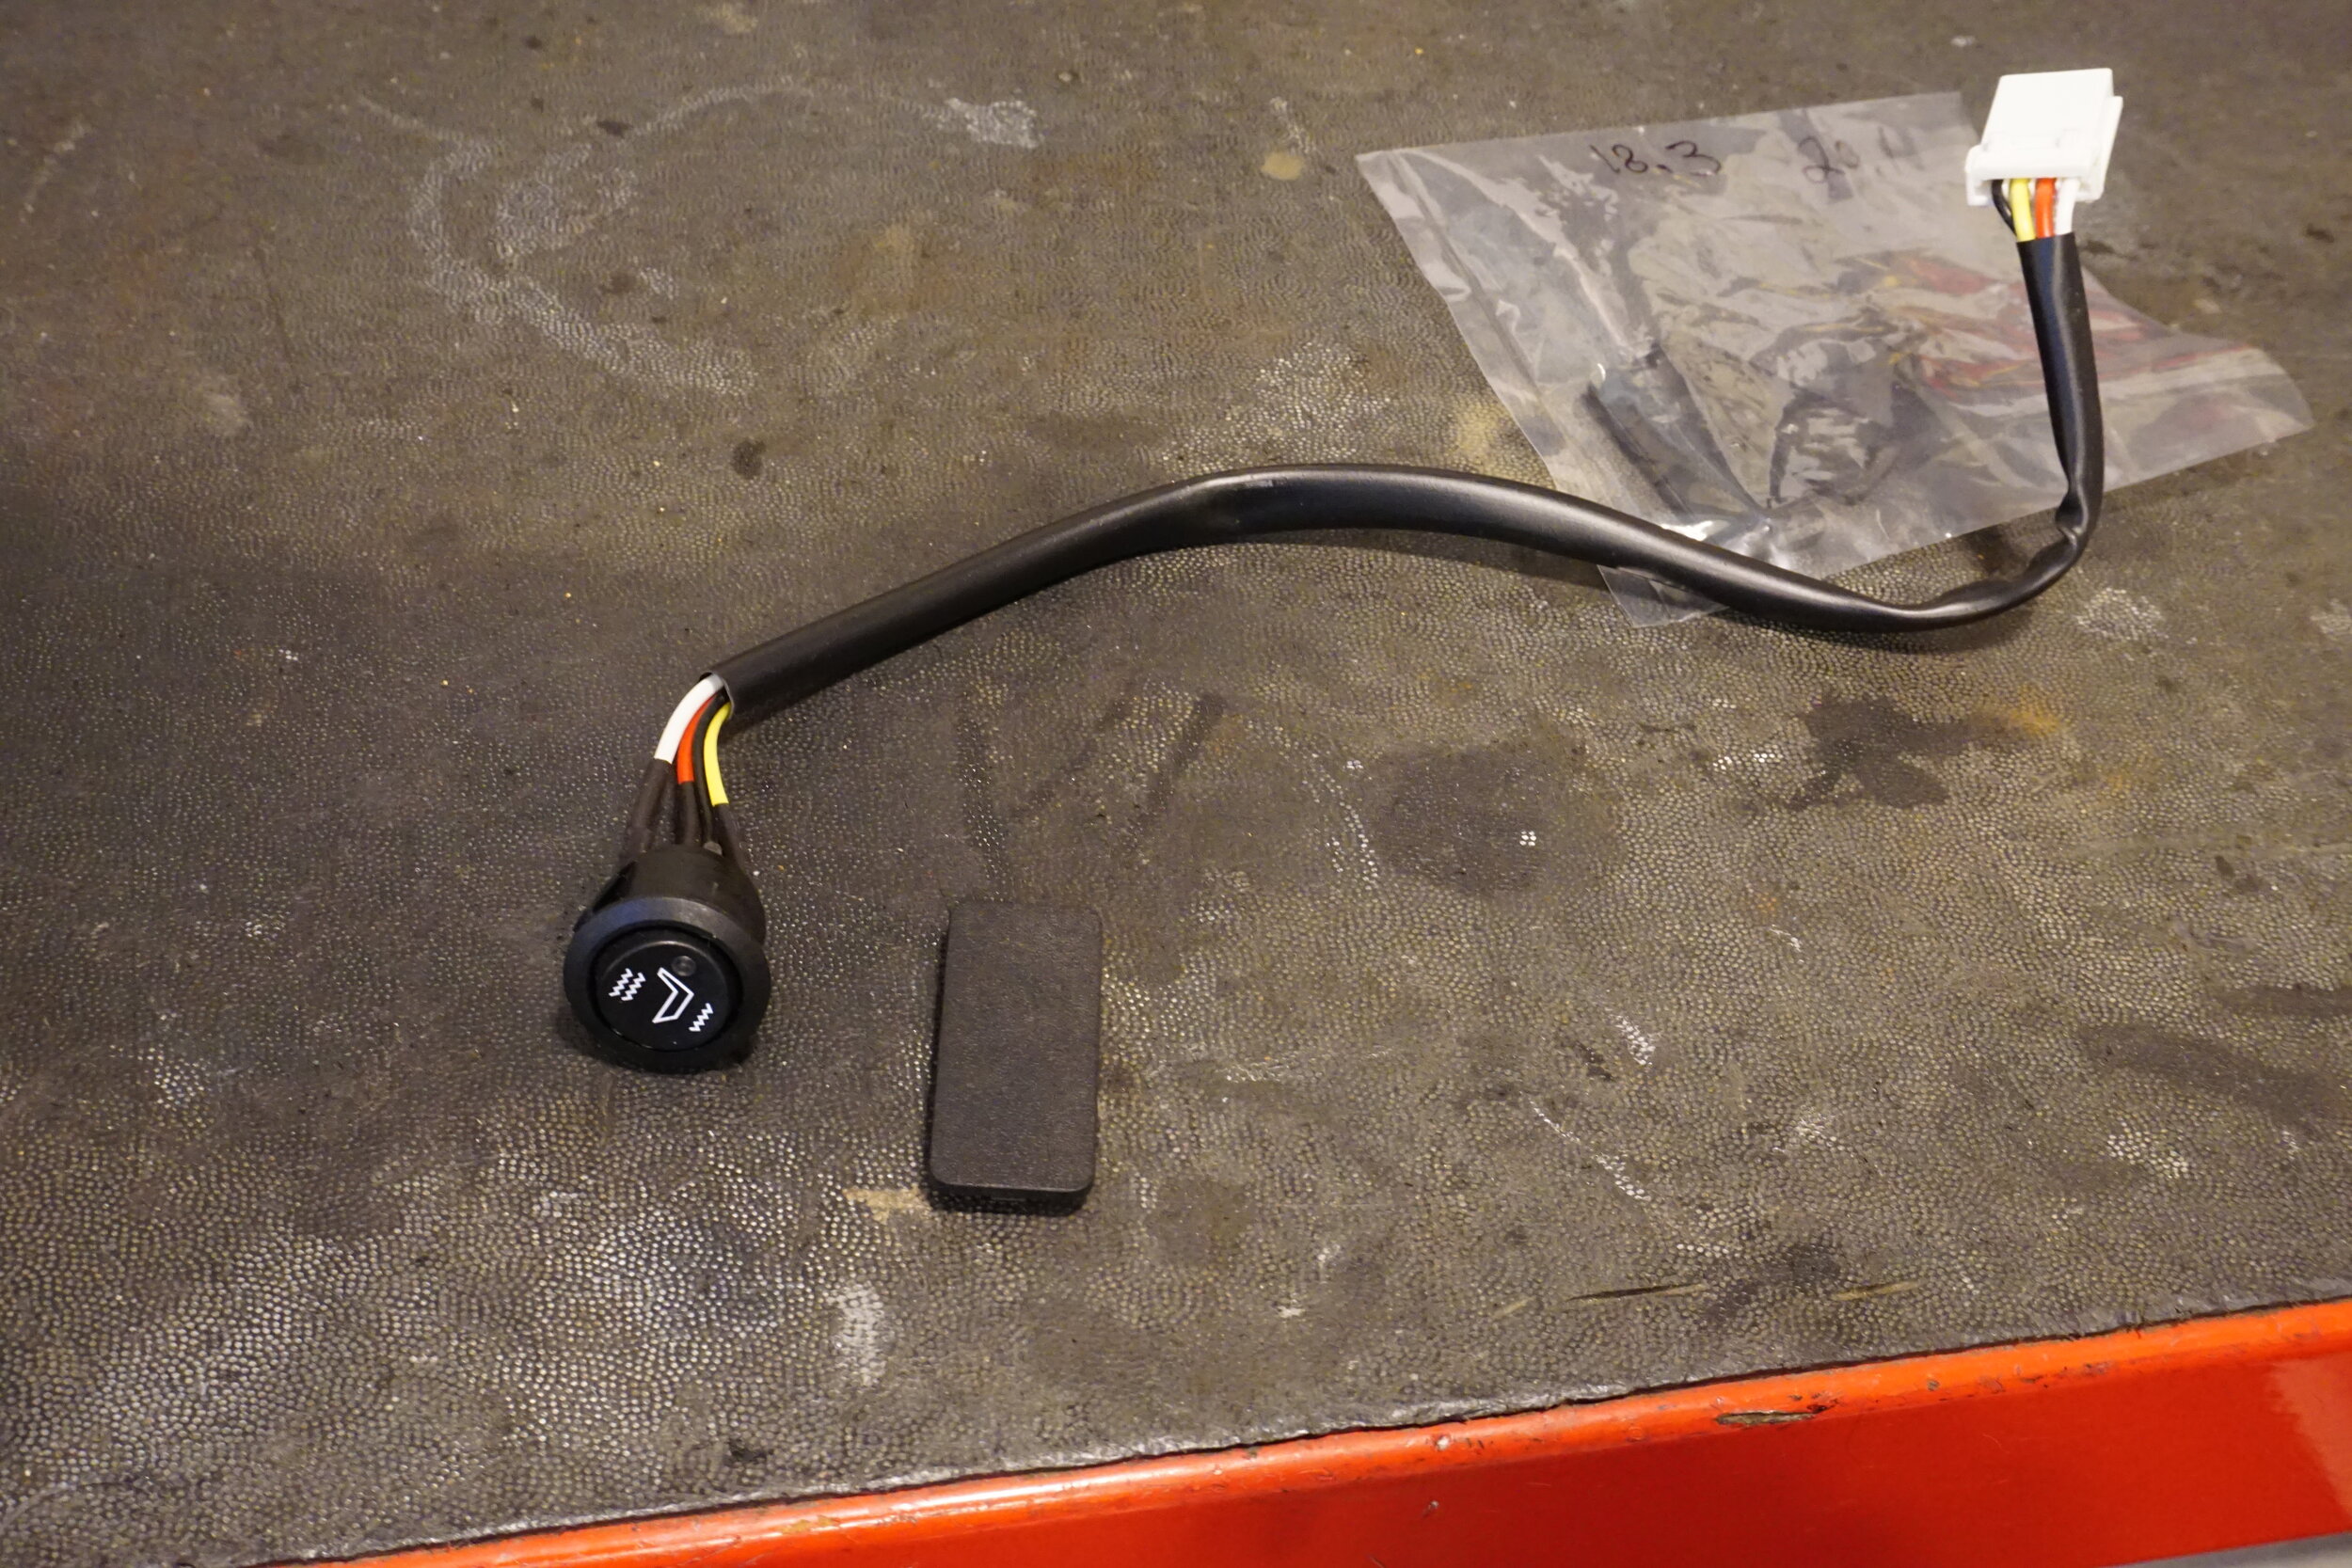
But I think it was worth the effort.


I'm kicking myself for not installing these things earlier, they are so awesome!  They heat up fast and get really hot.  Ahh, heated Recaros!

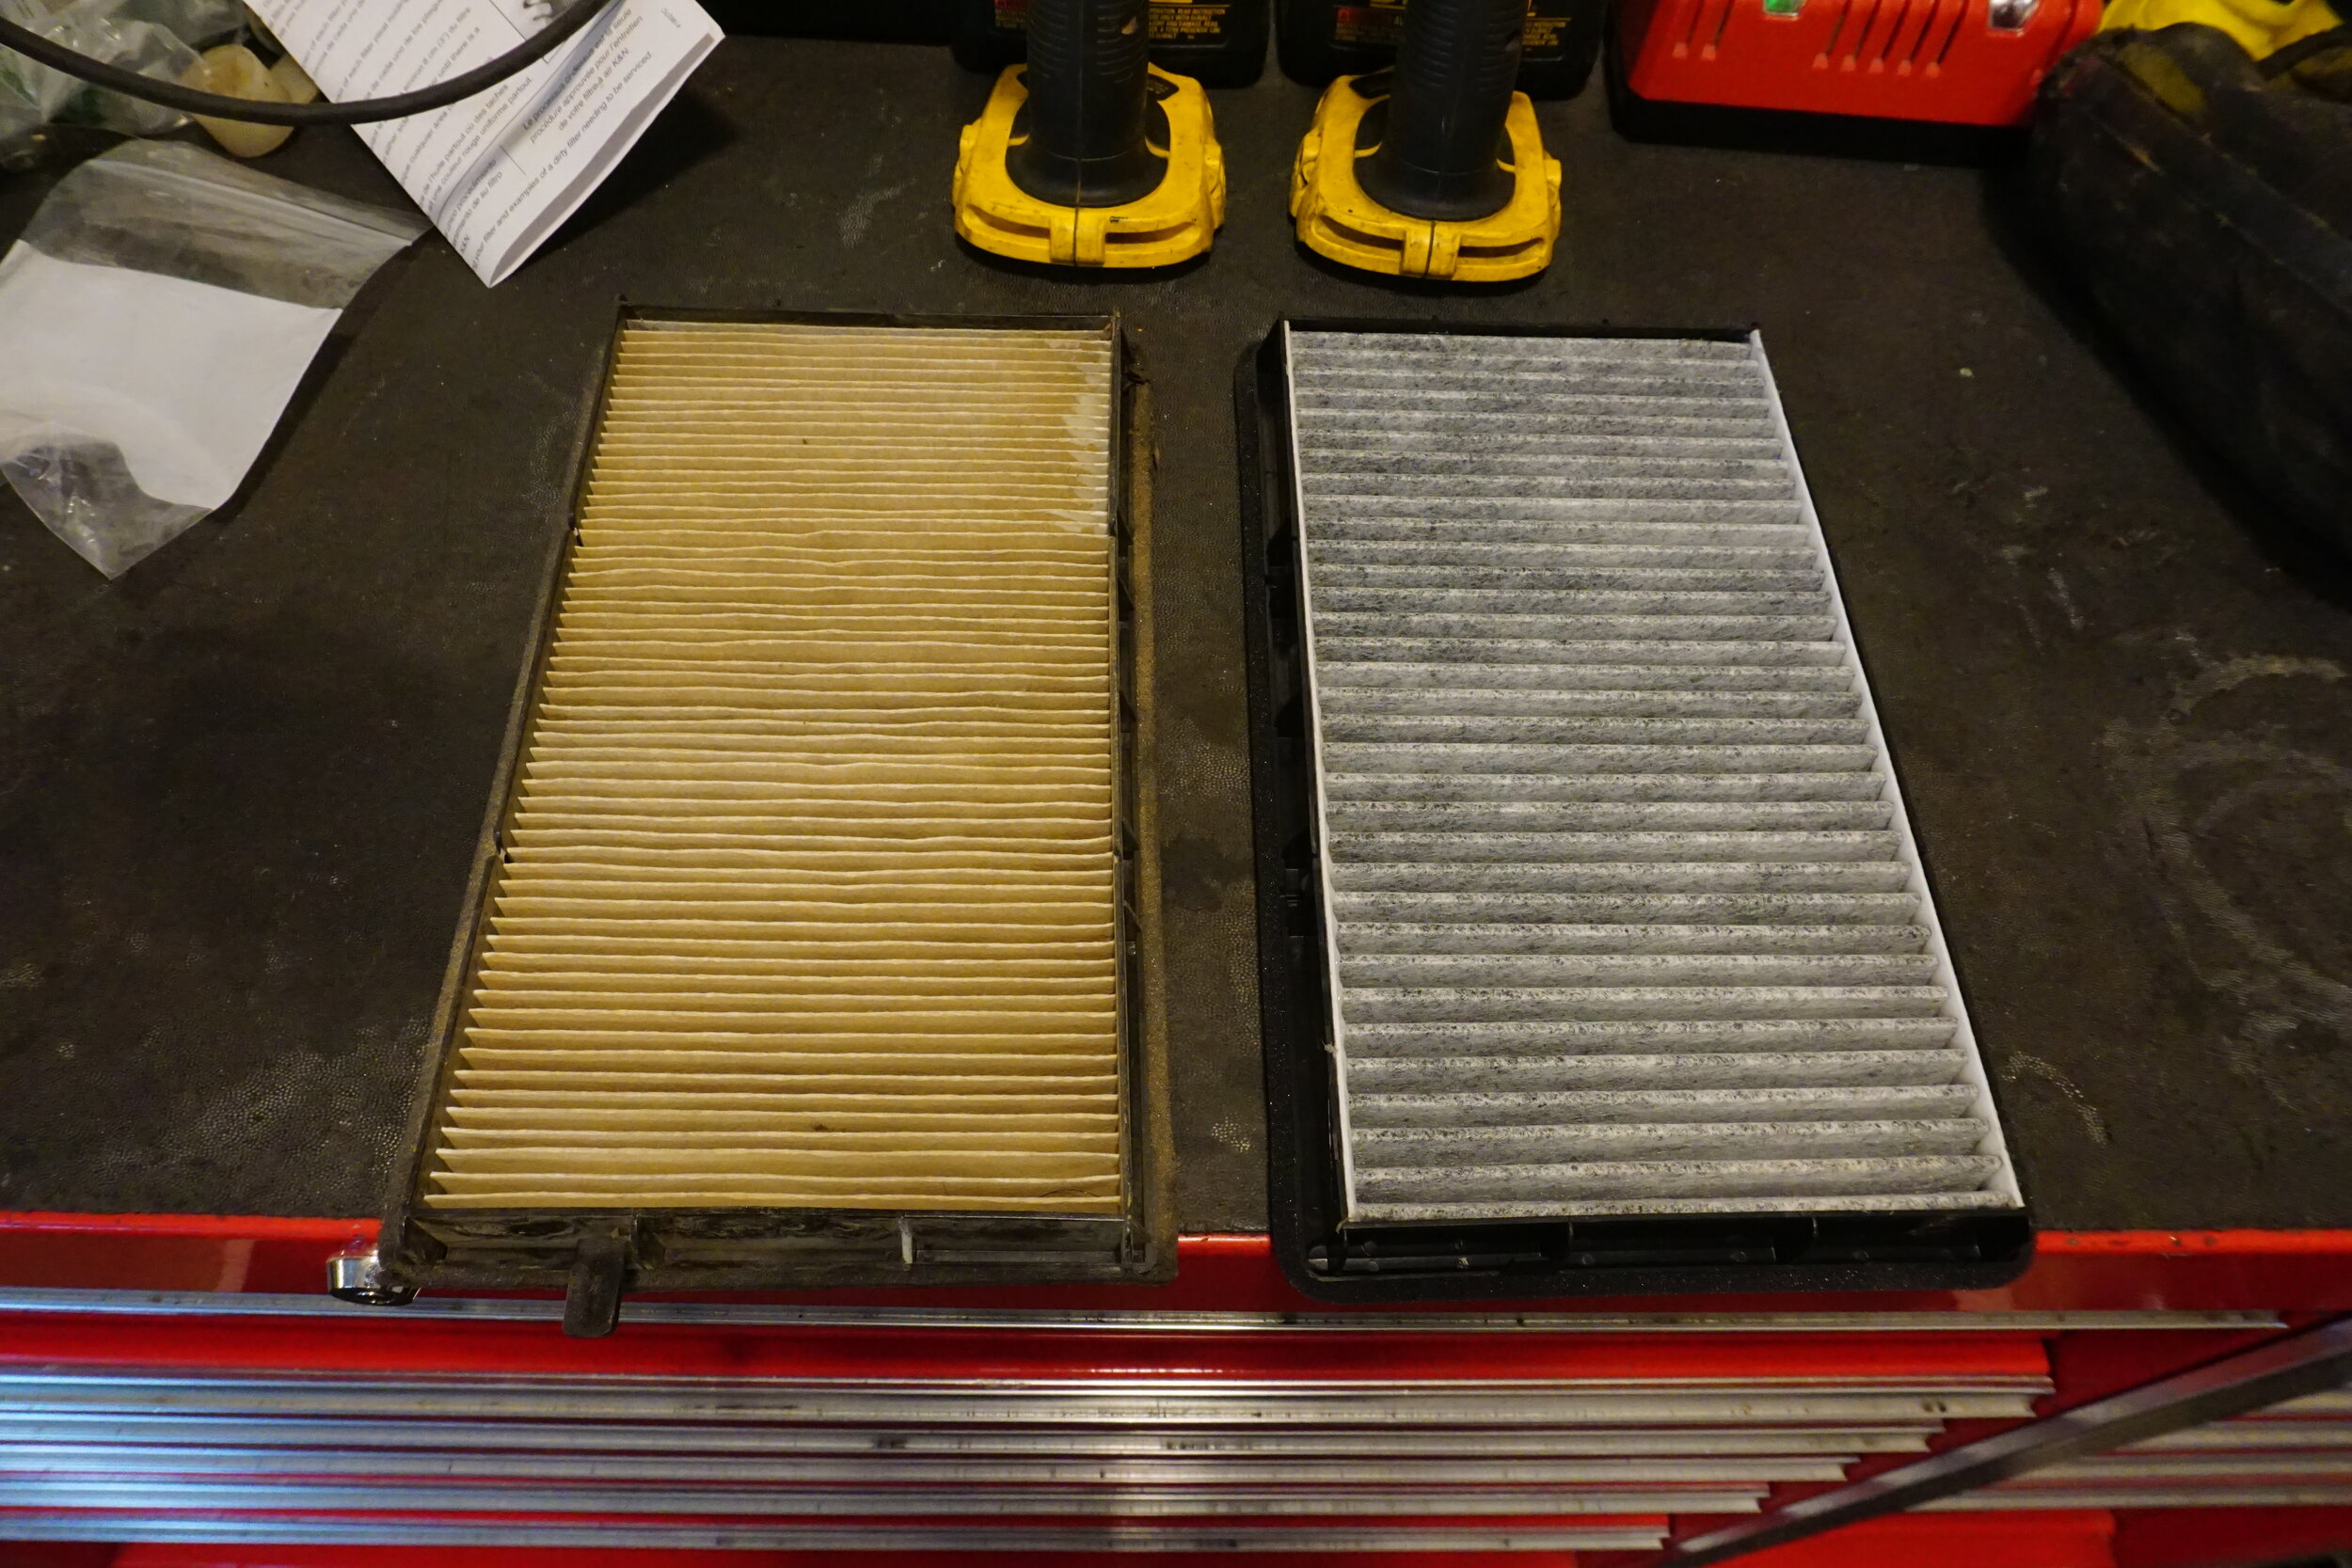
It had been a few years since I replaced the cabin air filter, and I was reminded how much I hate doing that job.  The filter never wants to come out, and getting it back in isn't easy either.  But at least it's done, and this time I got me a fancy "carbon activated" filter.


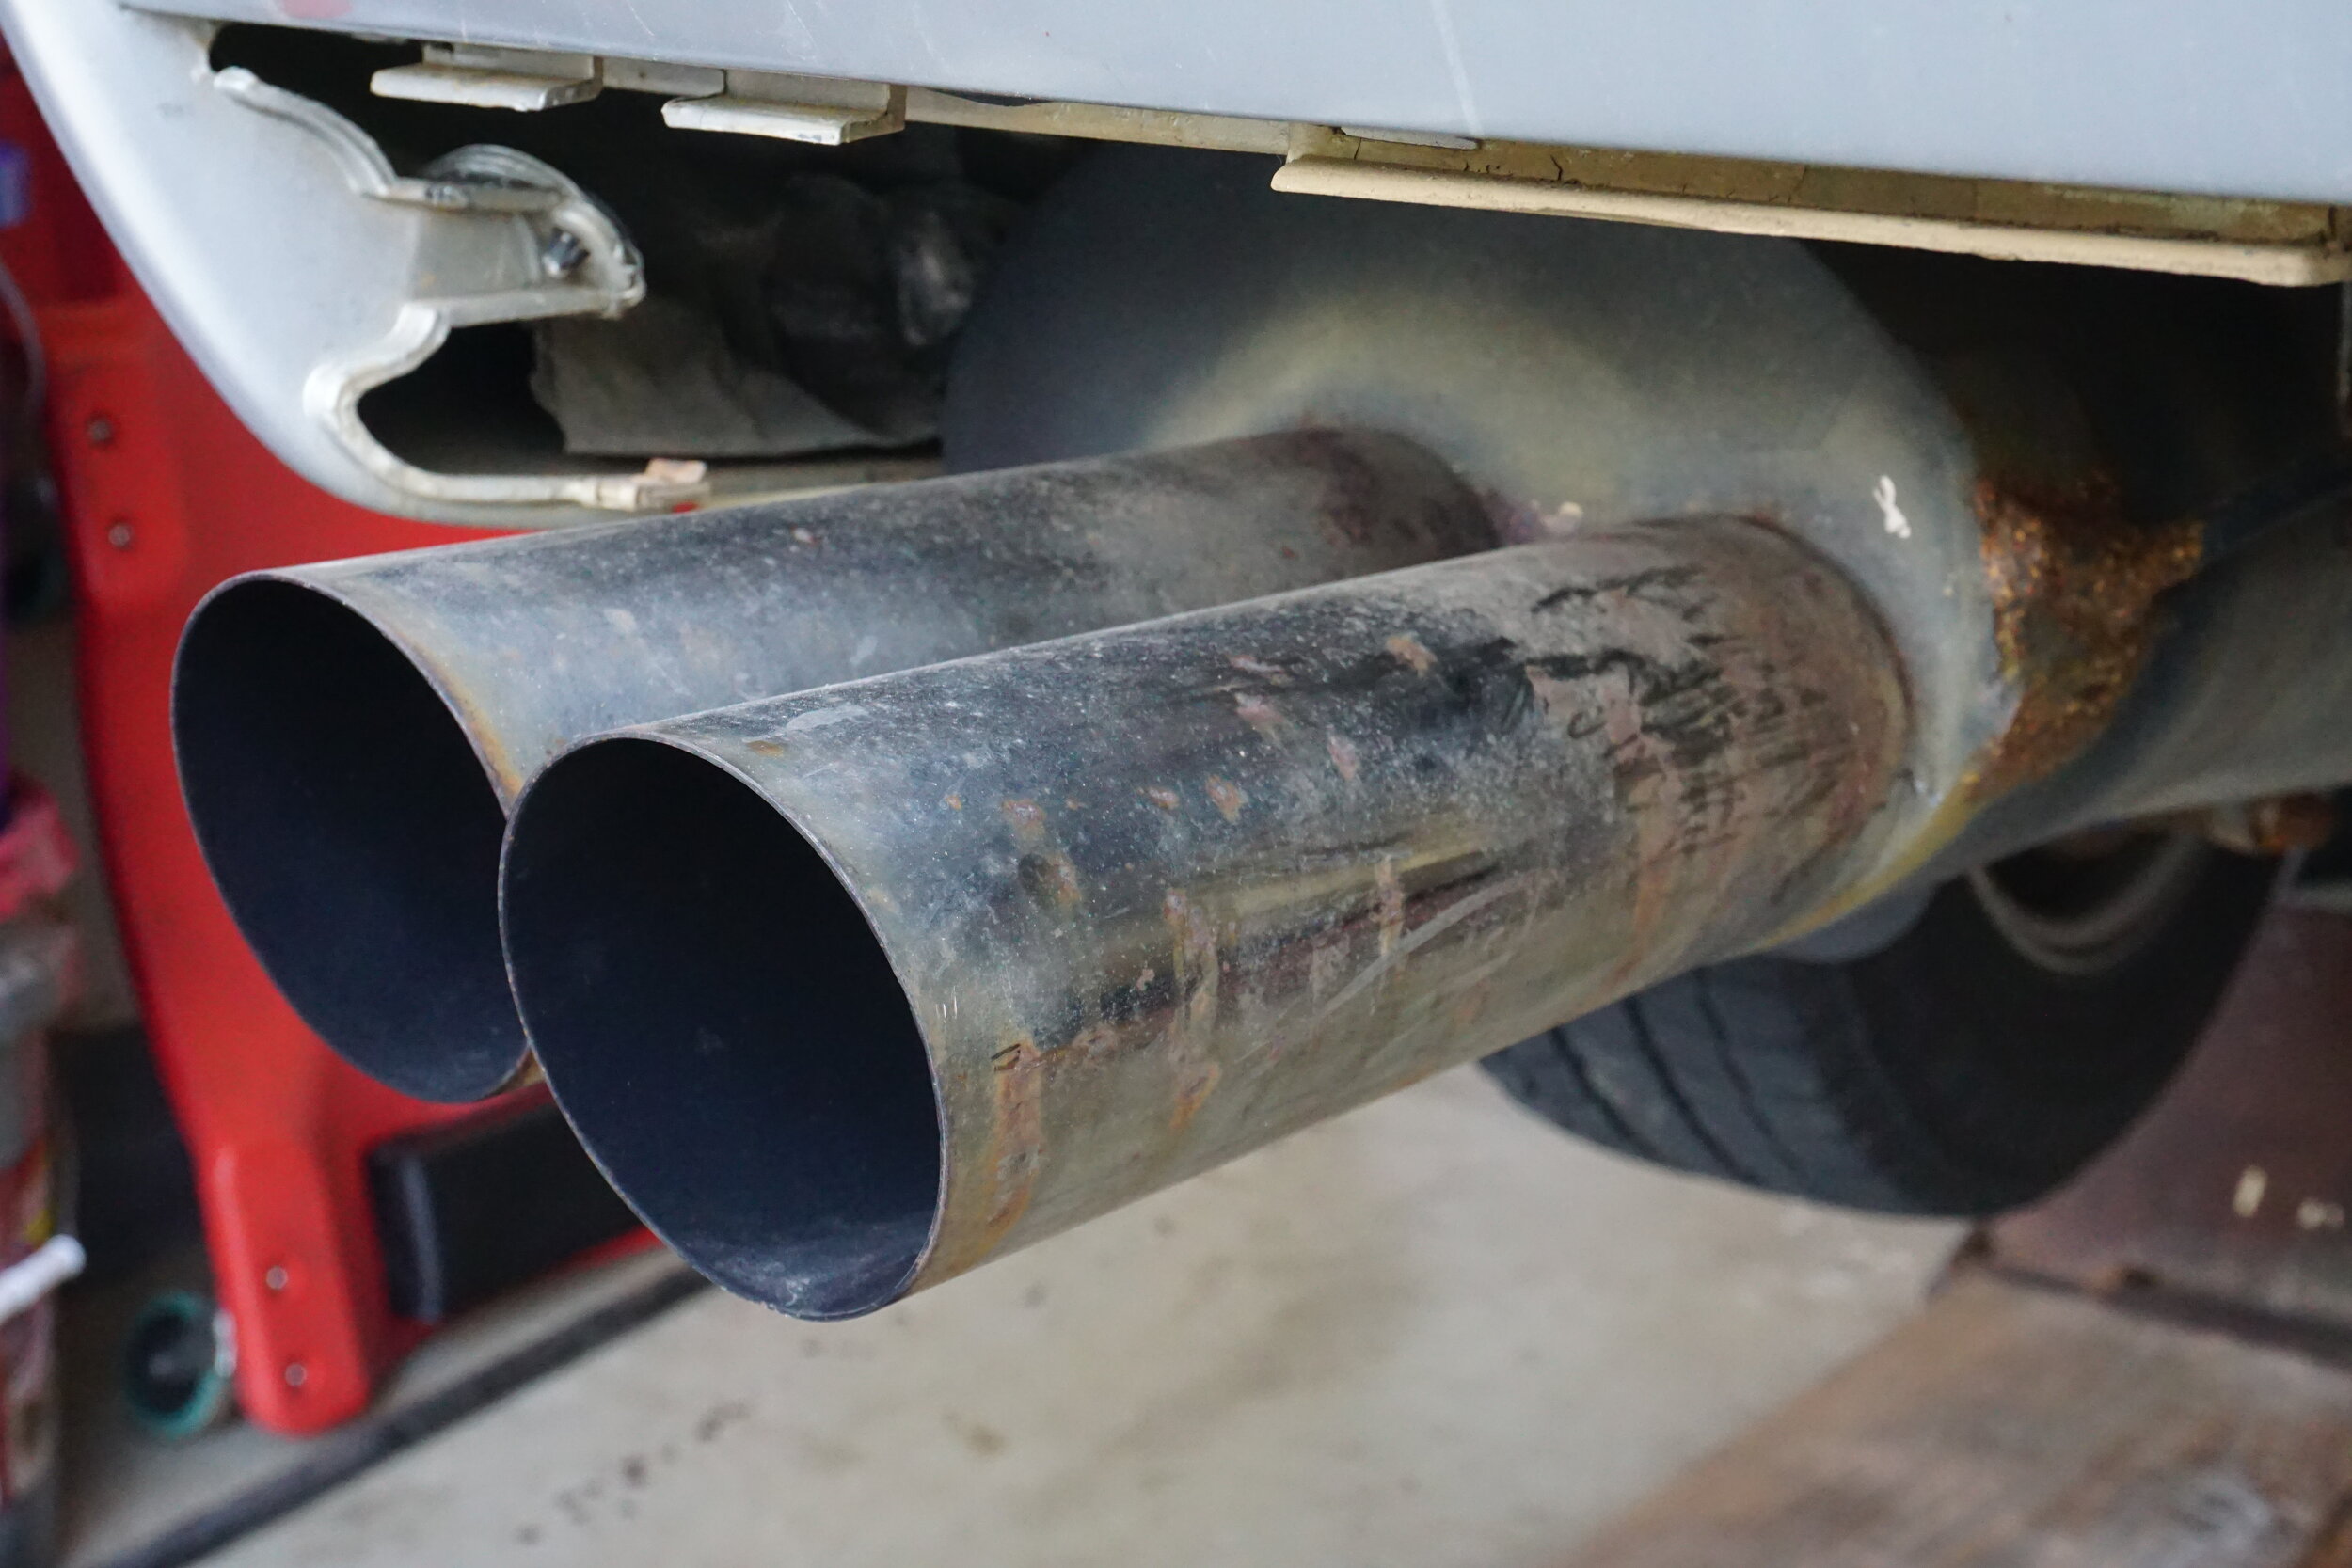
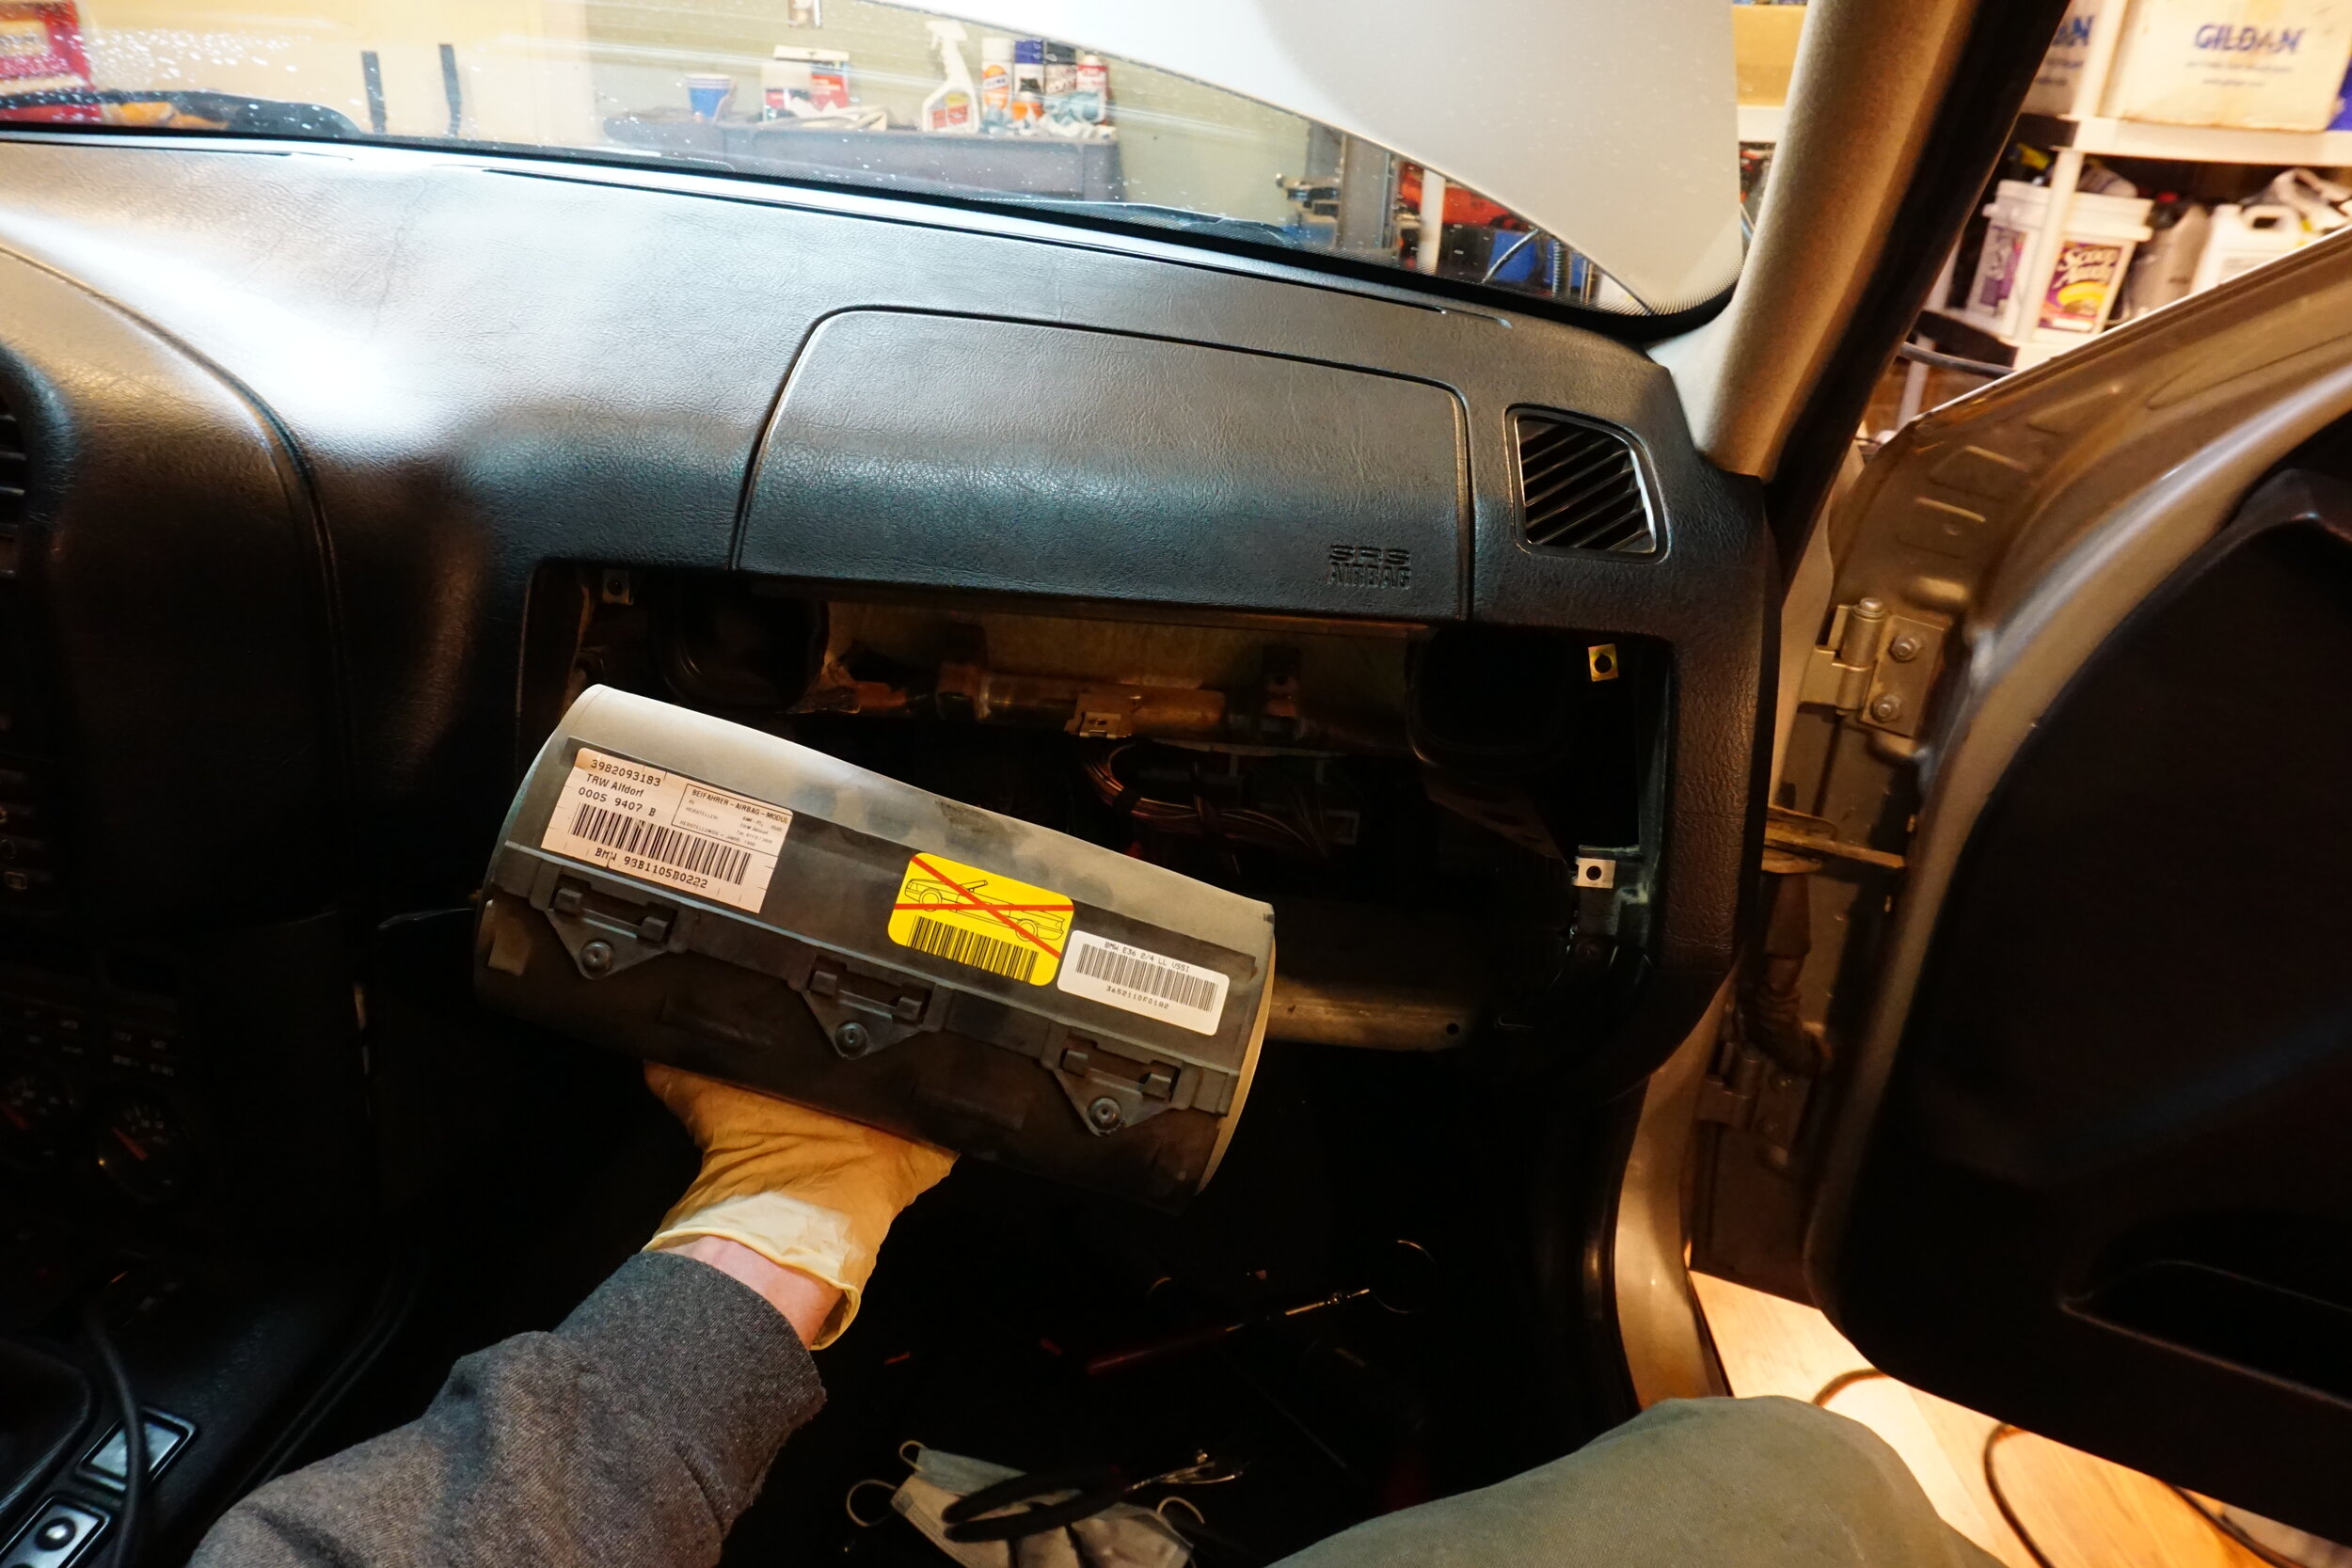
And while I was in there I got rid of this 10 pound paper weight.  It's not like it was active anyways.  Woo hoo, weight reduction!


Oh, and since nobody ever sits in the passenger seat, I decided to block off the air vent for their feet, so now it should all come to me!


Or maybe it will all get pushed to the vent under the passenger seat, who knows....

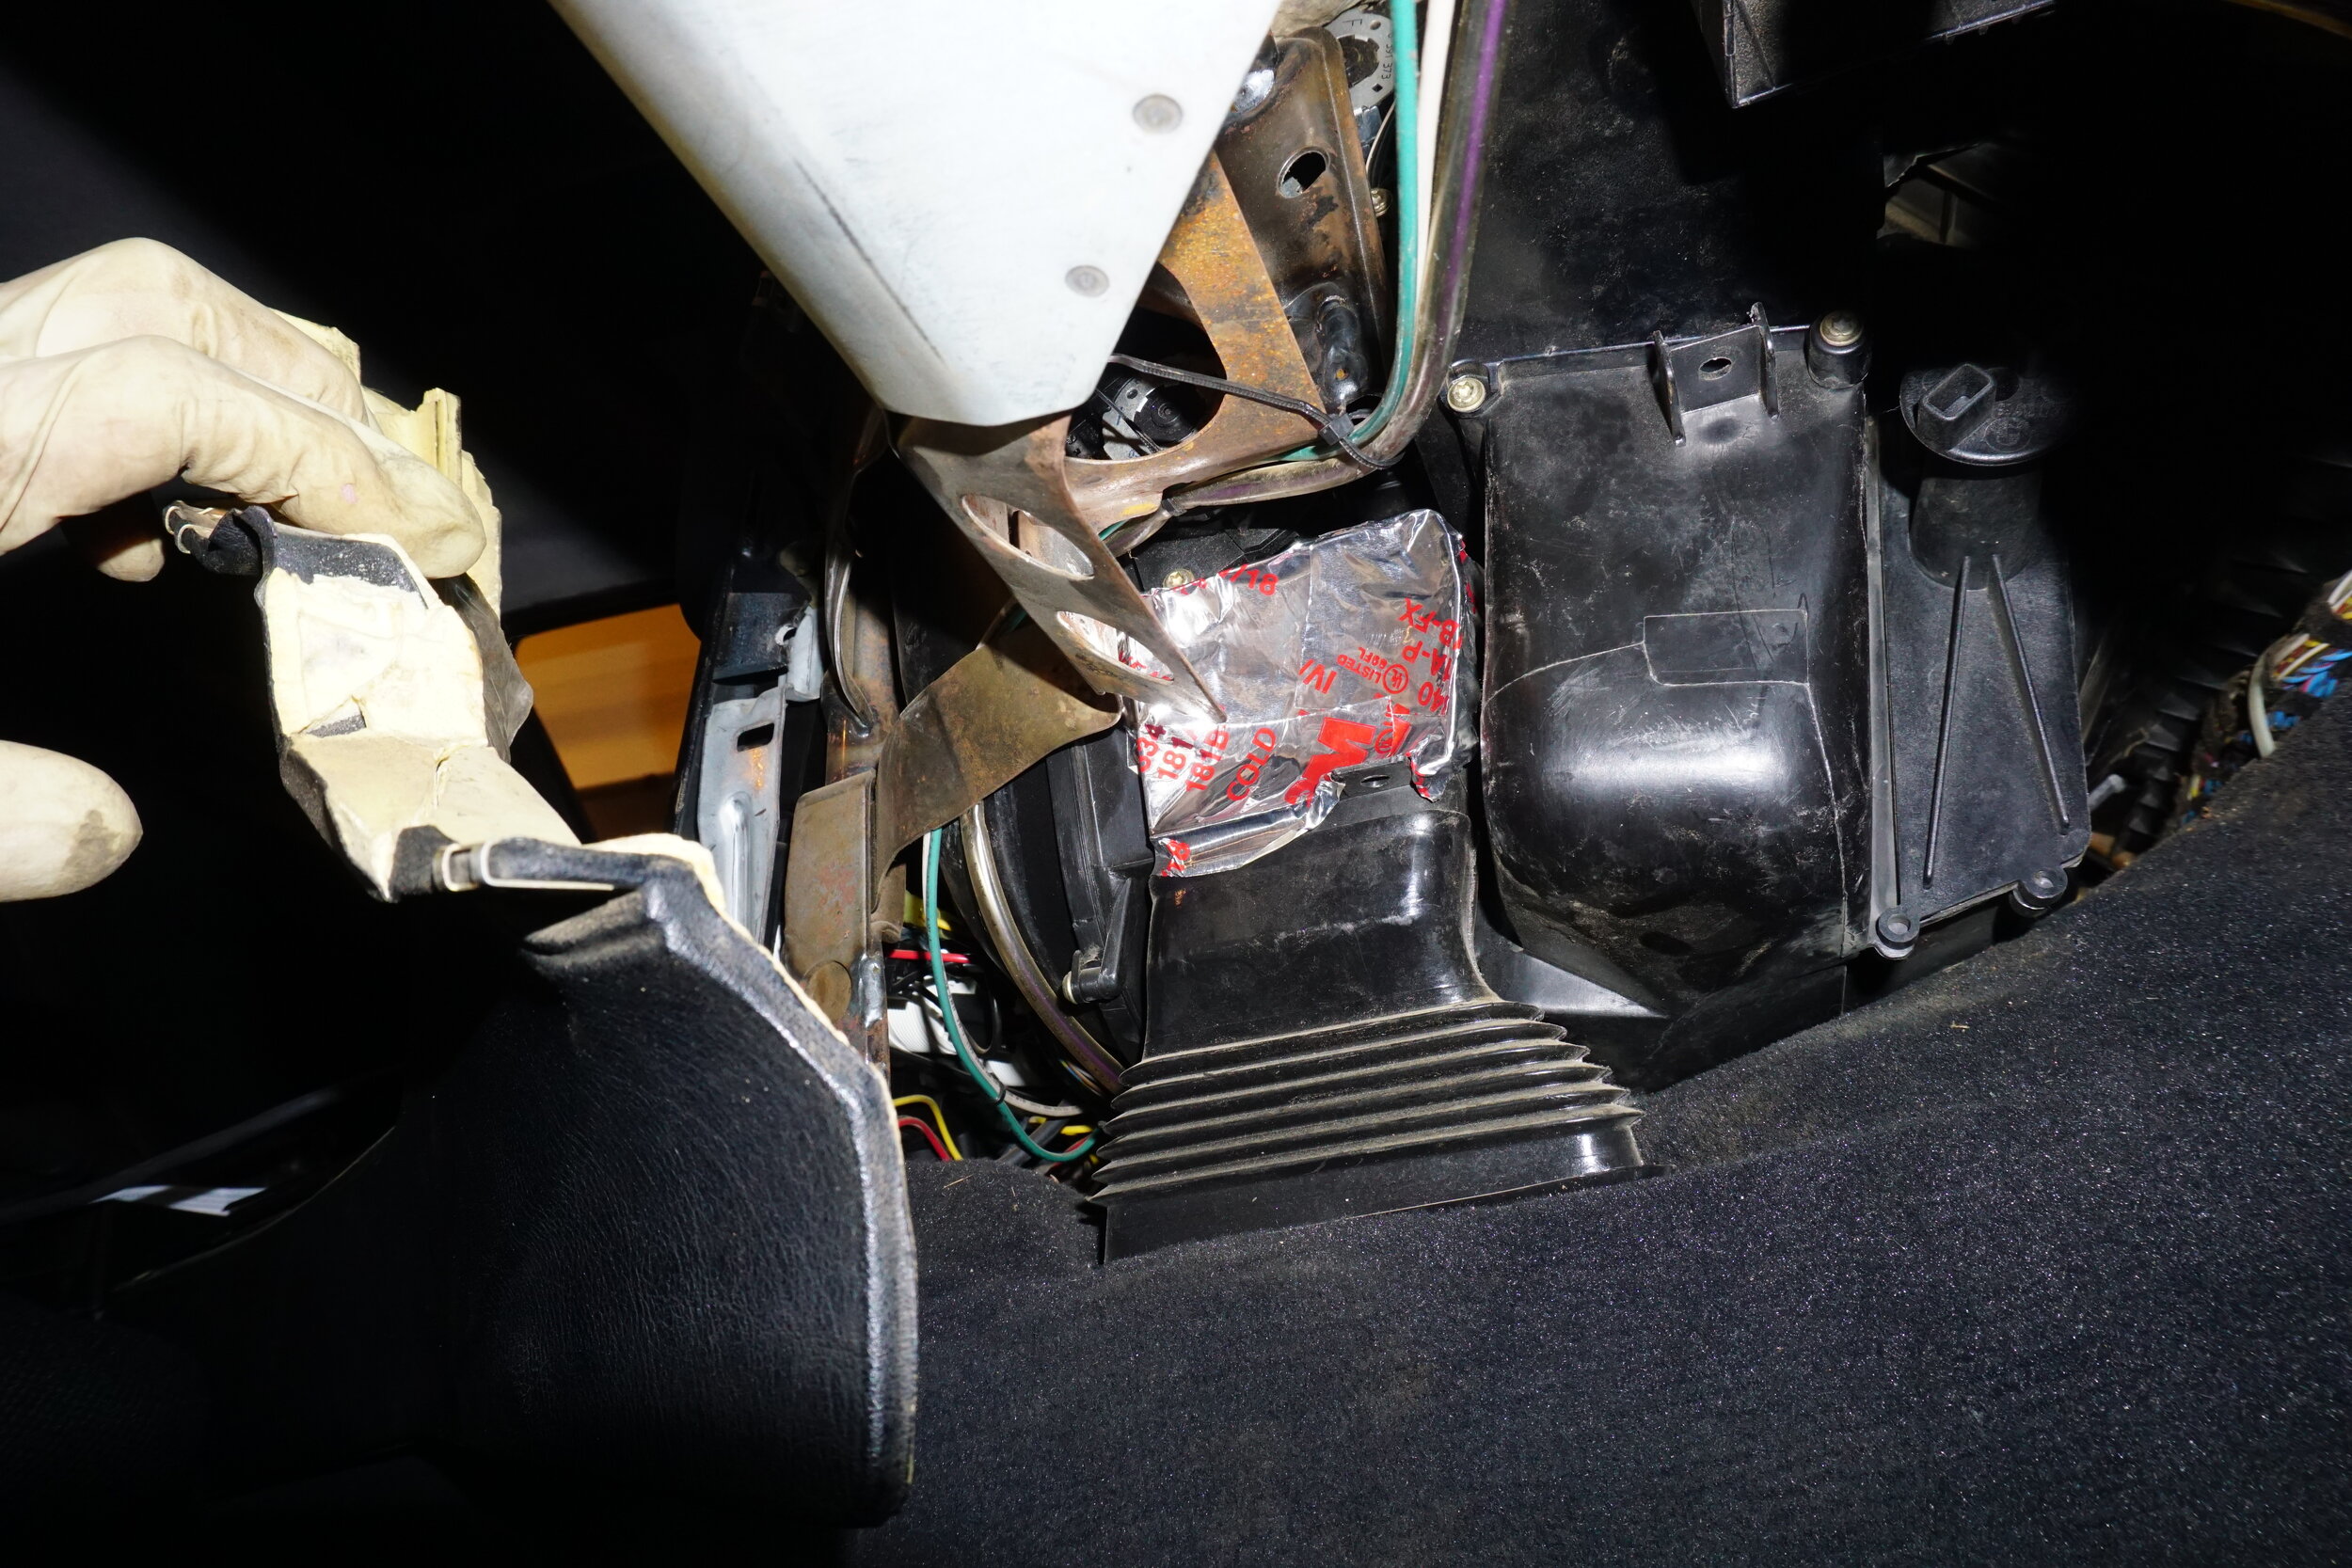
Anyways, back to my oil pressure.  I bought a new OEM sender, and decided to replace my VDO stuff as well.  My current VDO oil pressure gauge goes from 0-150 PSI, and considering I've never seen pressure go above 80, I wanted to see if I could get a gauge to better match my pressure range.  Lo and behold, VDO makes a 0-80 PSI gauge, so I got one and the matching sender unit (0-5 bar instead of 0-10 bar).  This should make it easier to see which side of 10 PSI my pressure is when I'm idling.

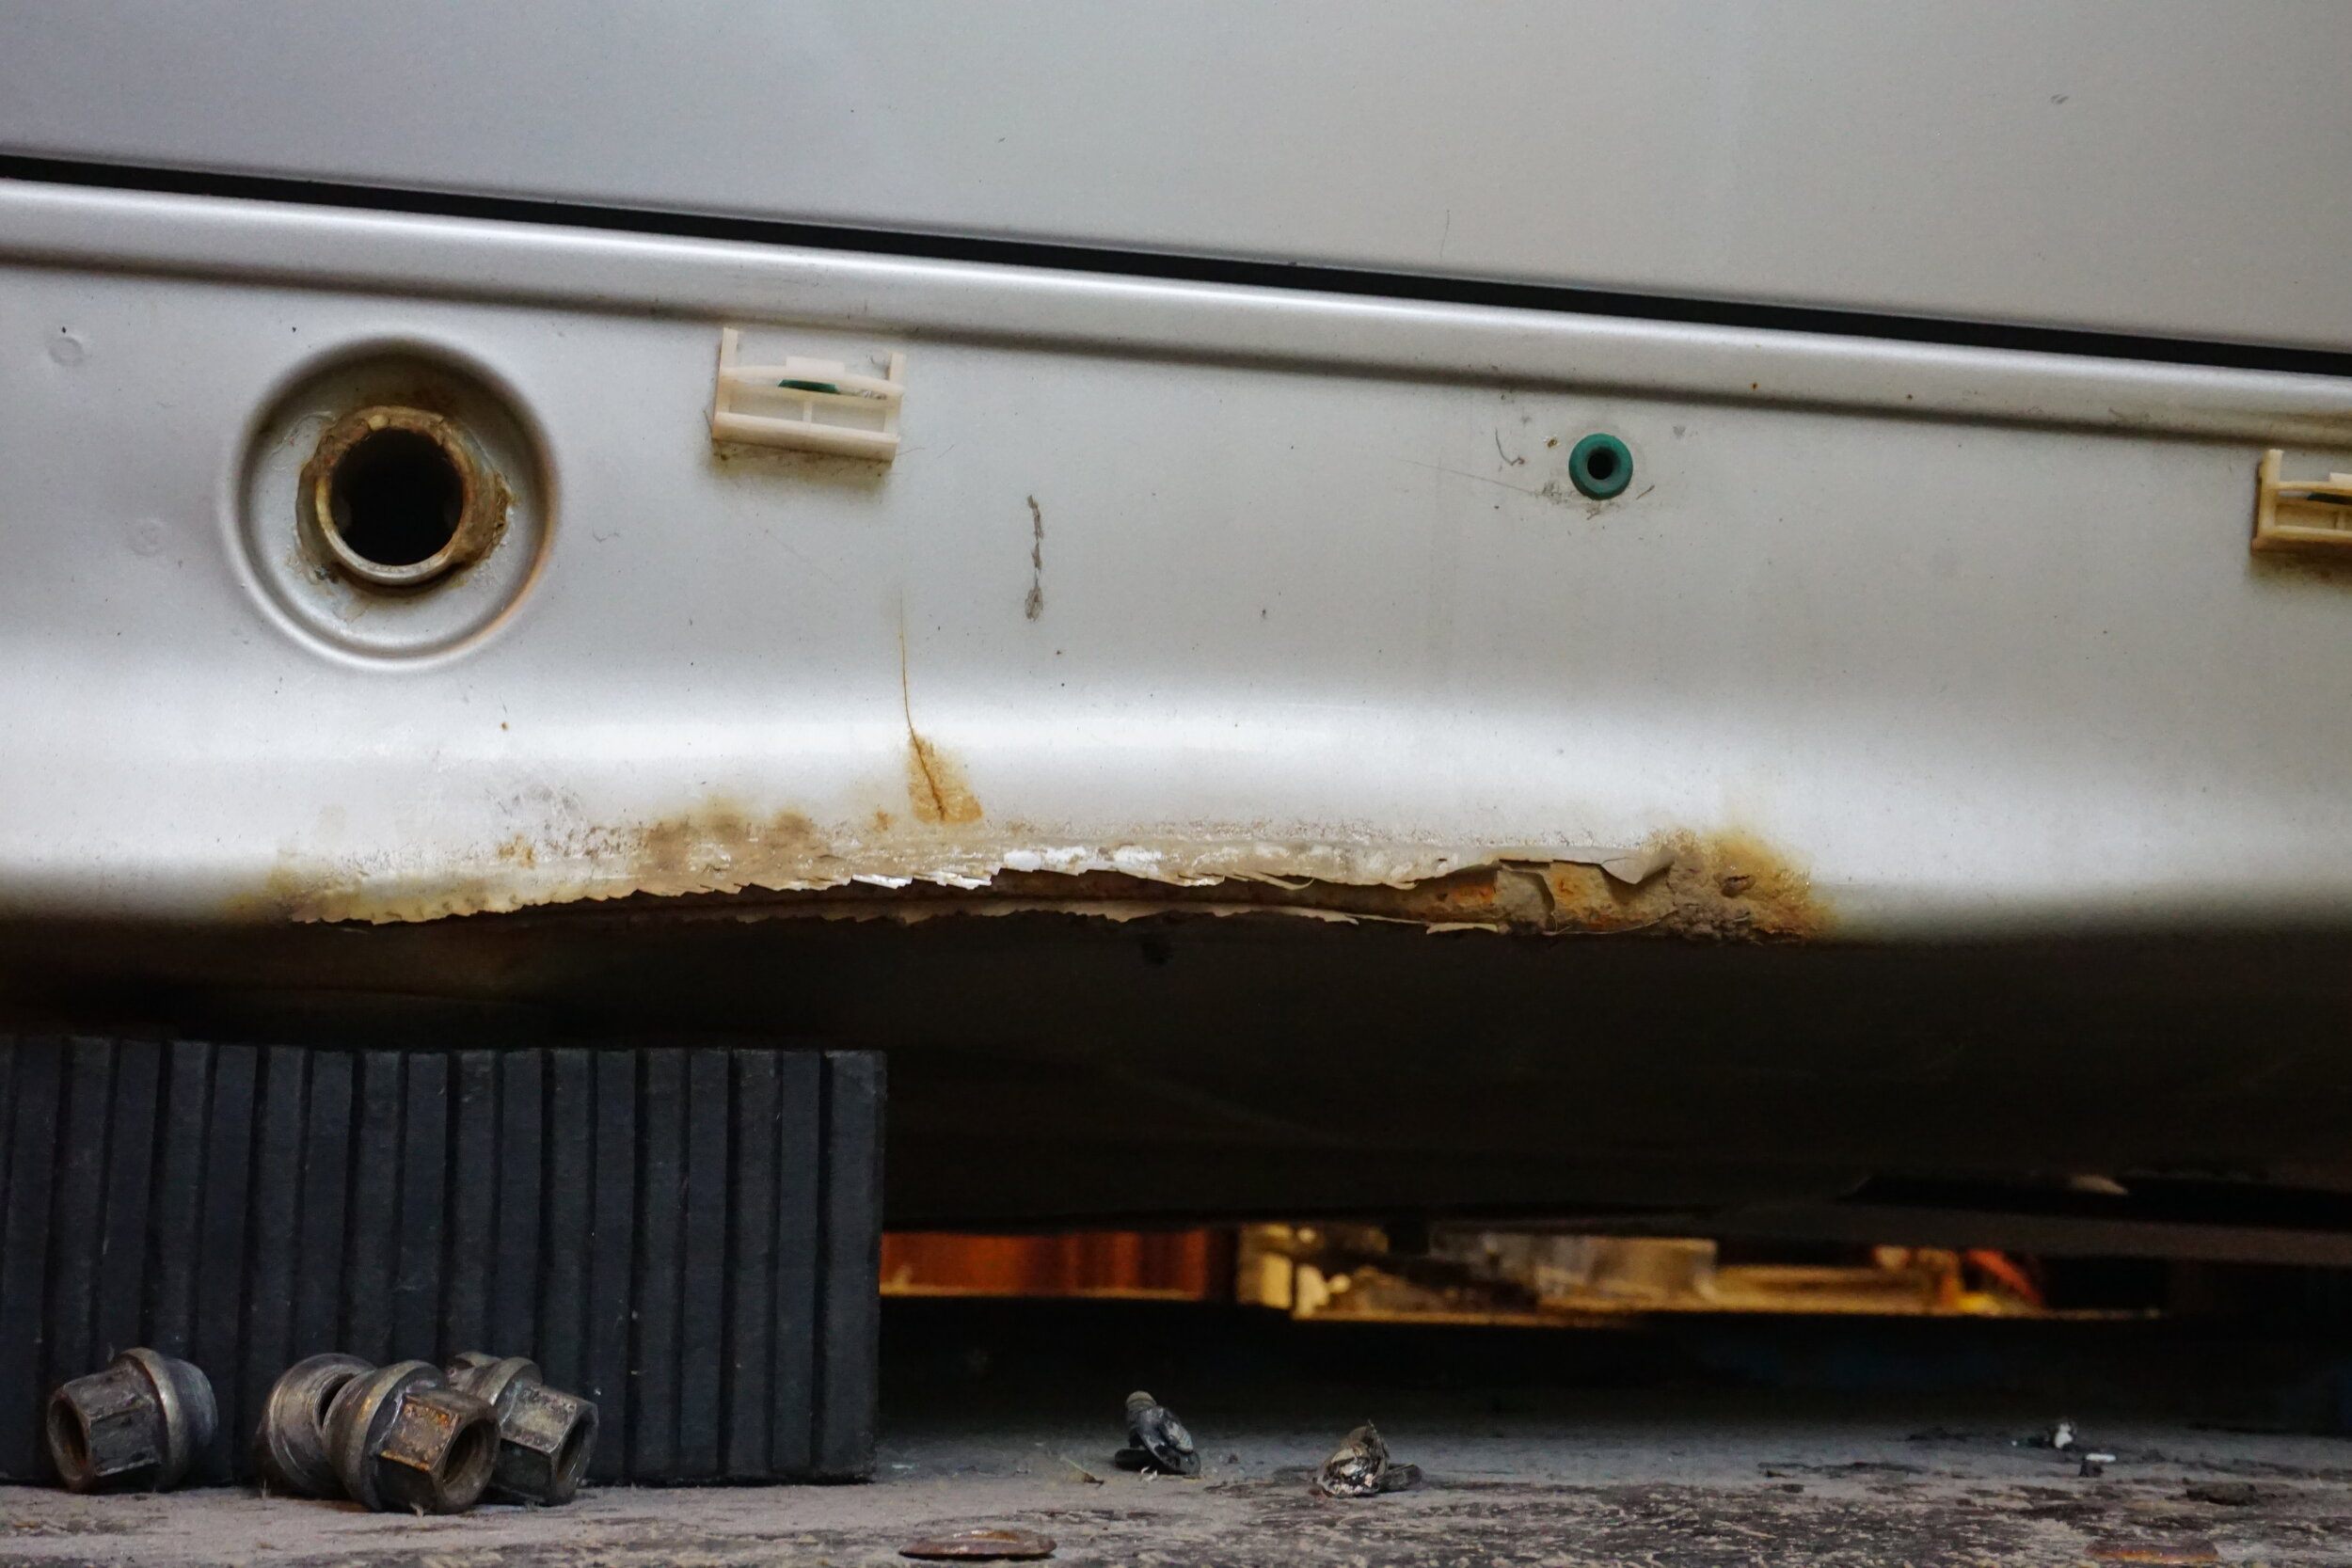
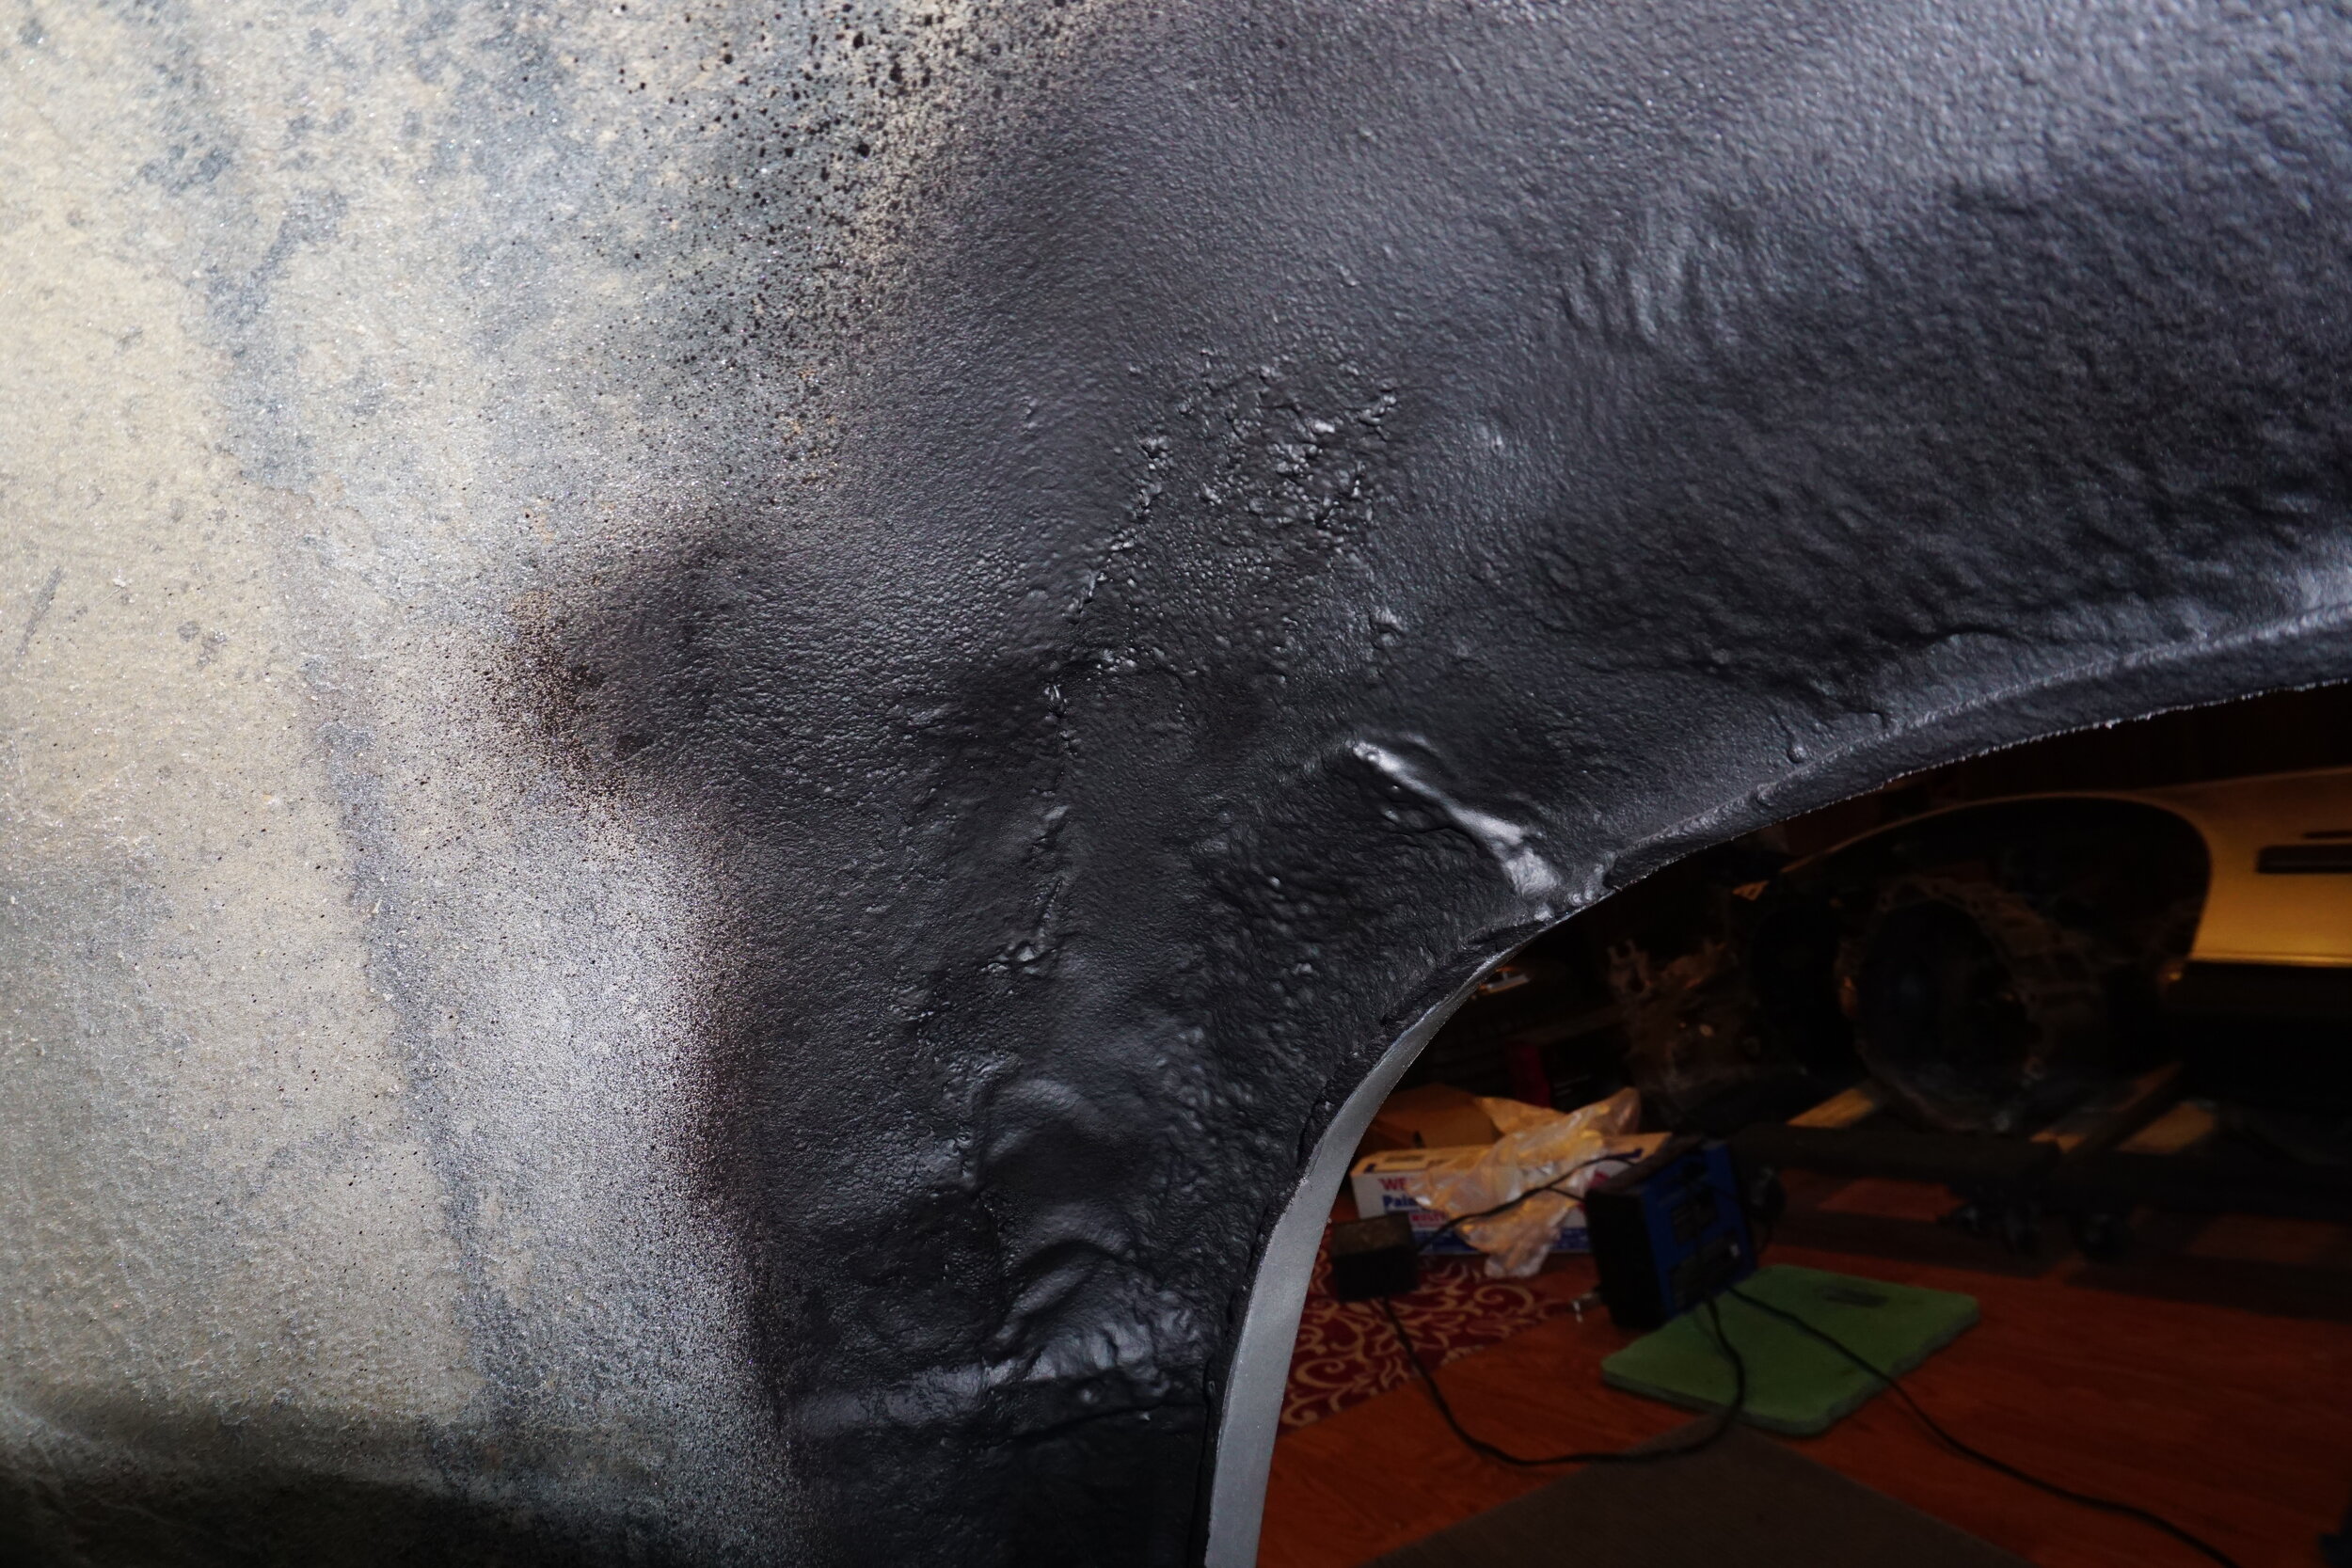
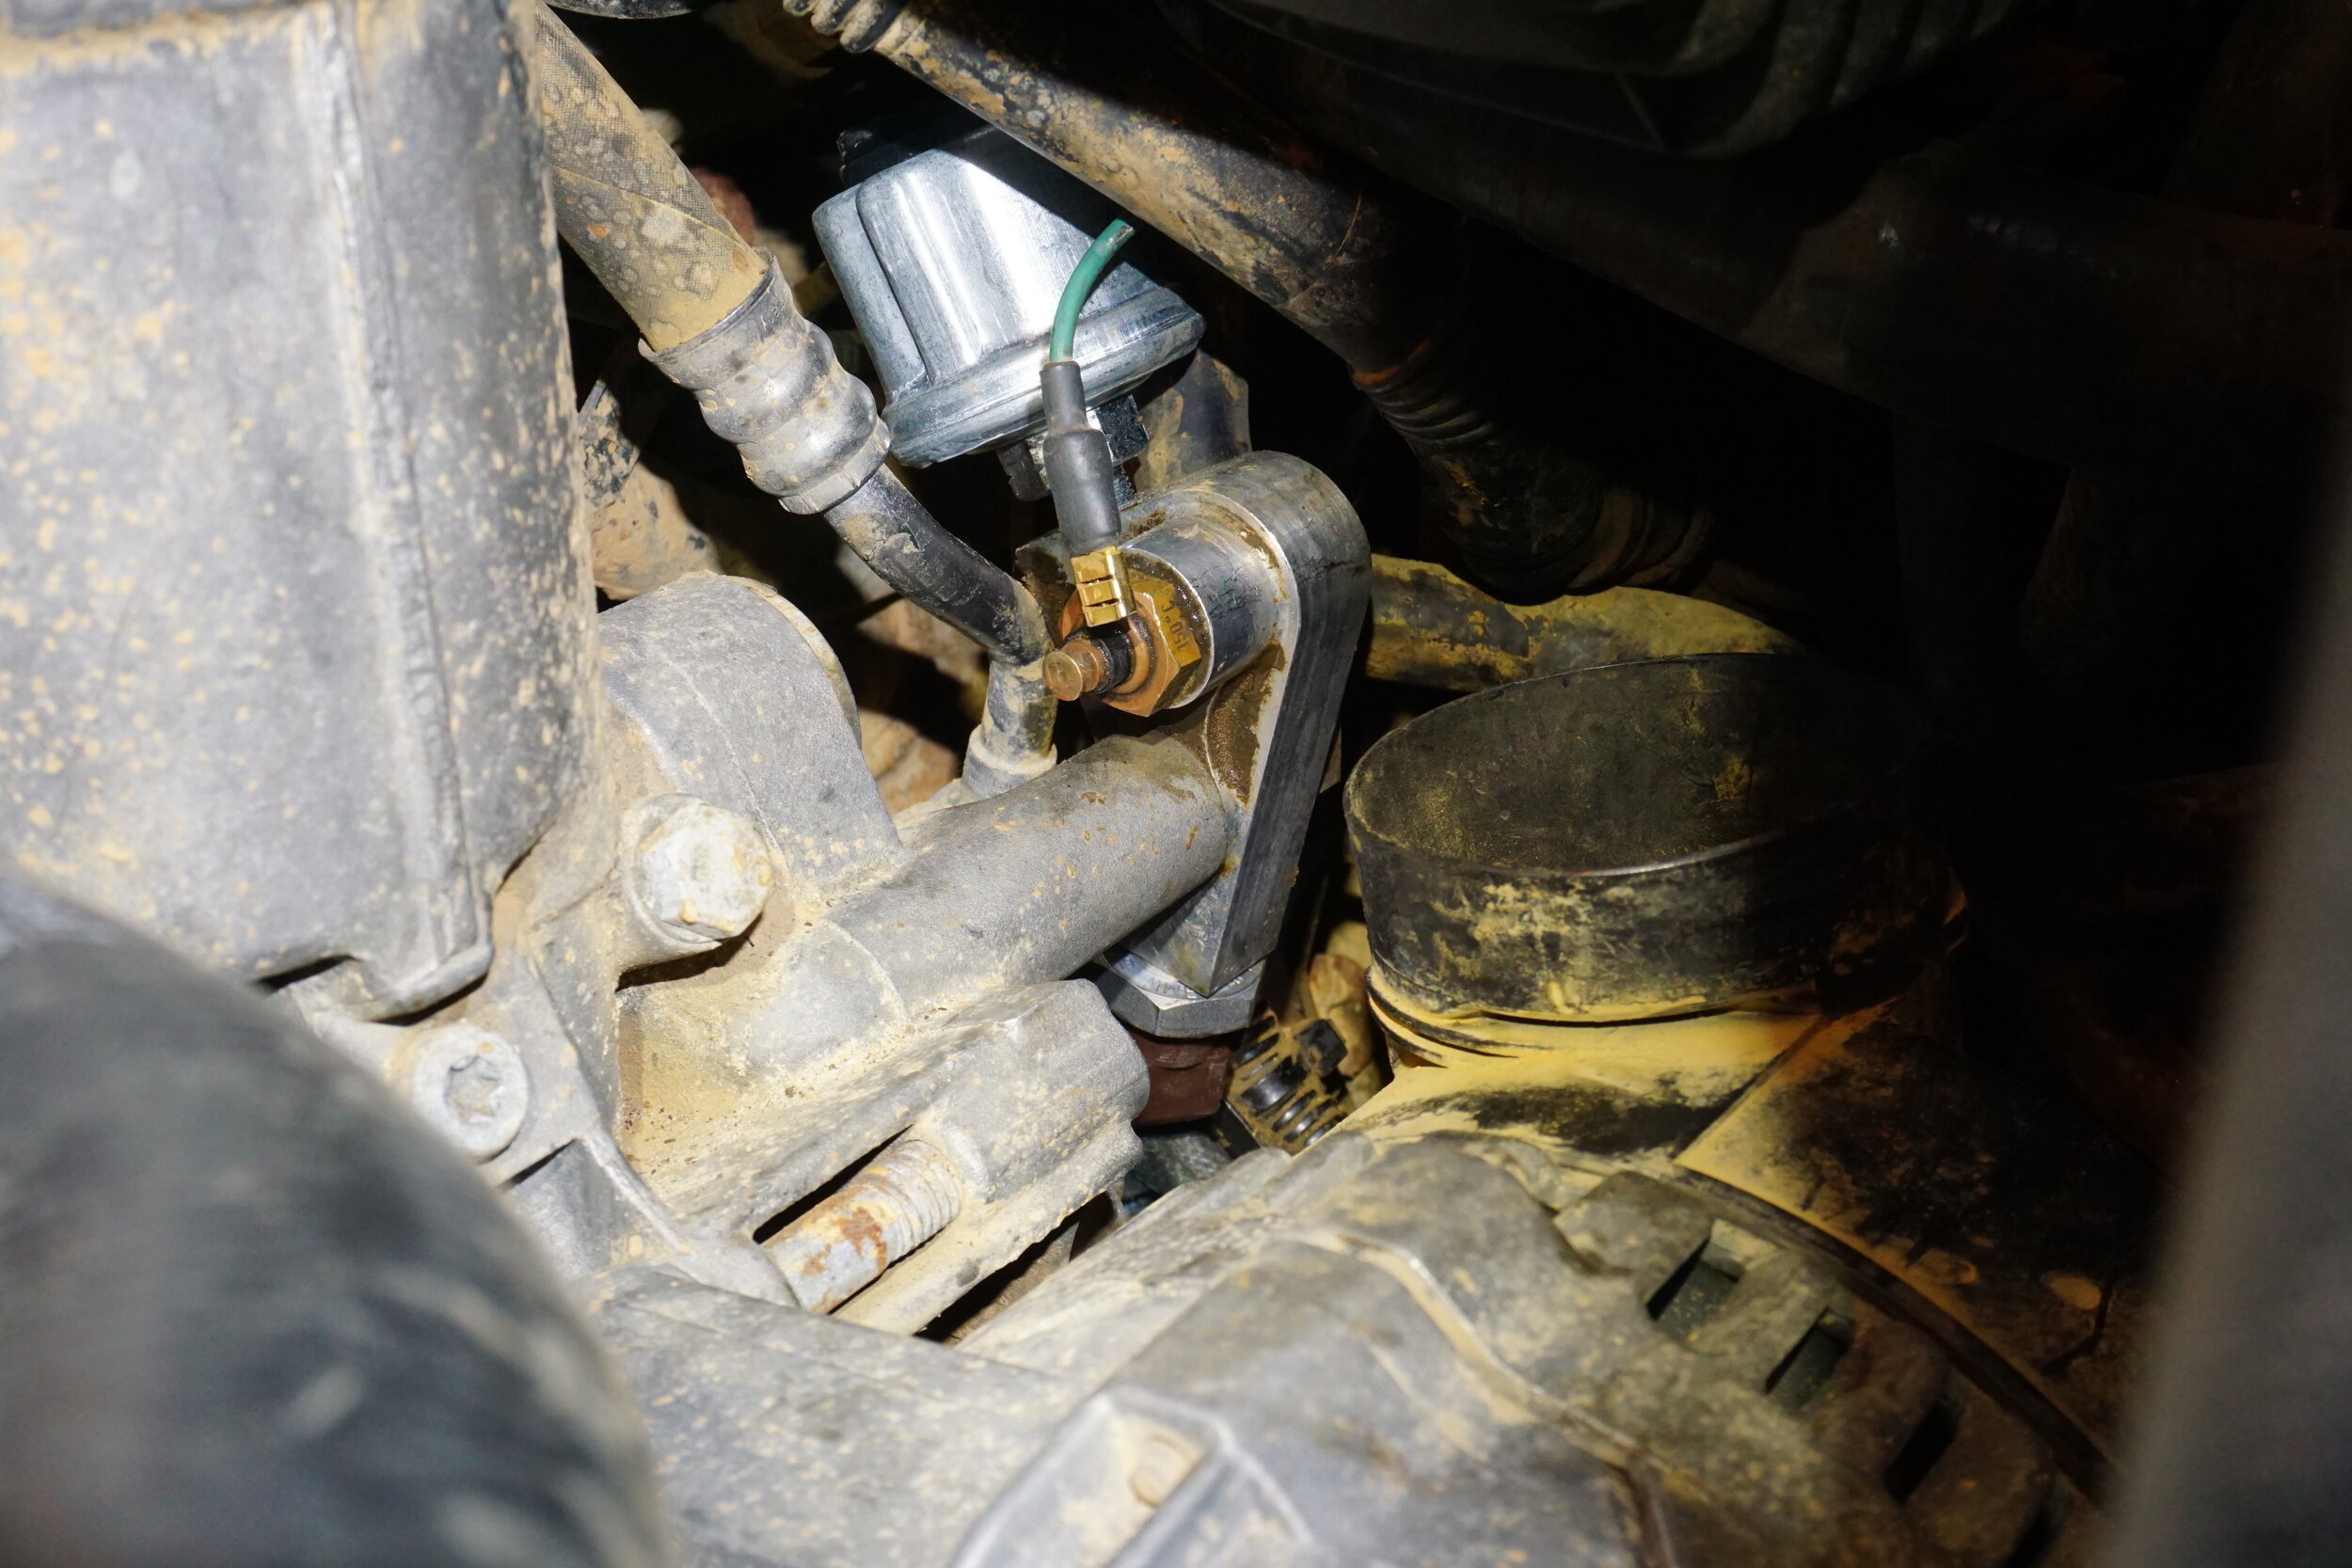
Taking a look into the area where this all lived, I realized access was going to be a bit of an issue.  It also looks like a number of these things had been leaking some oil.


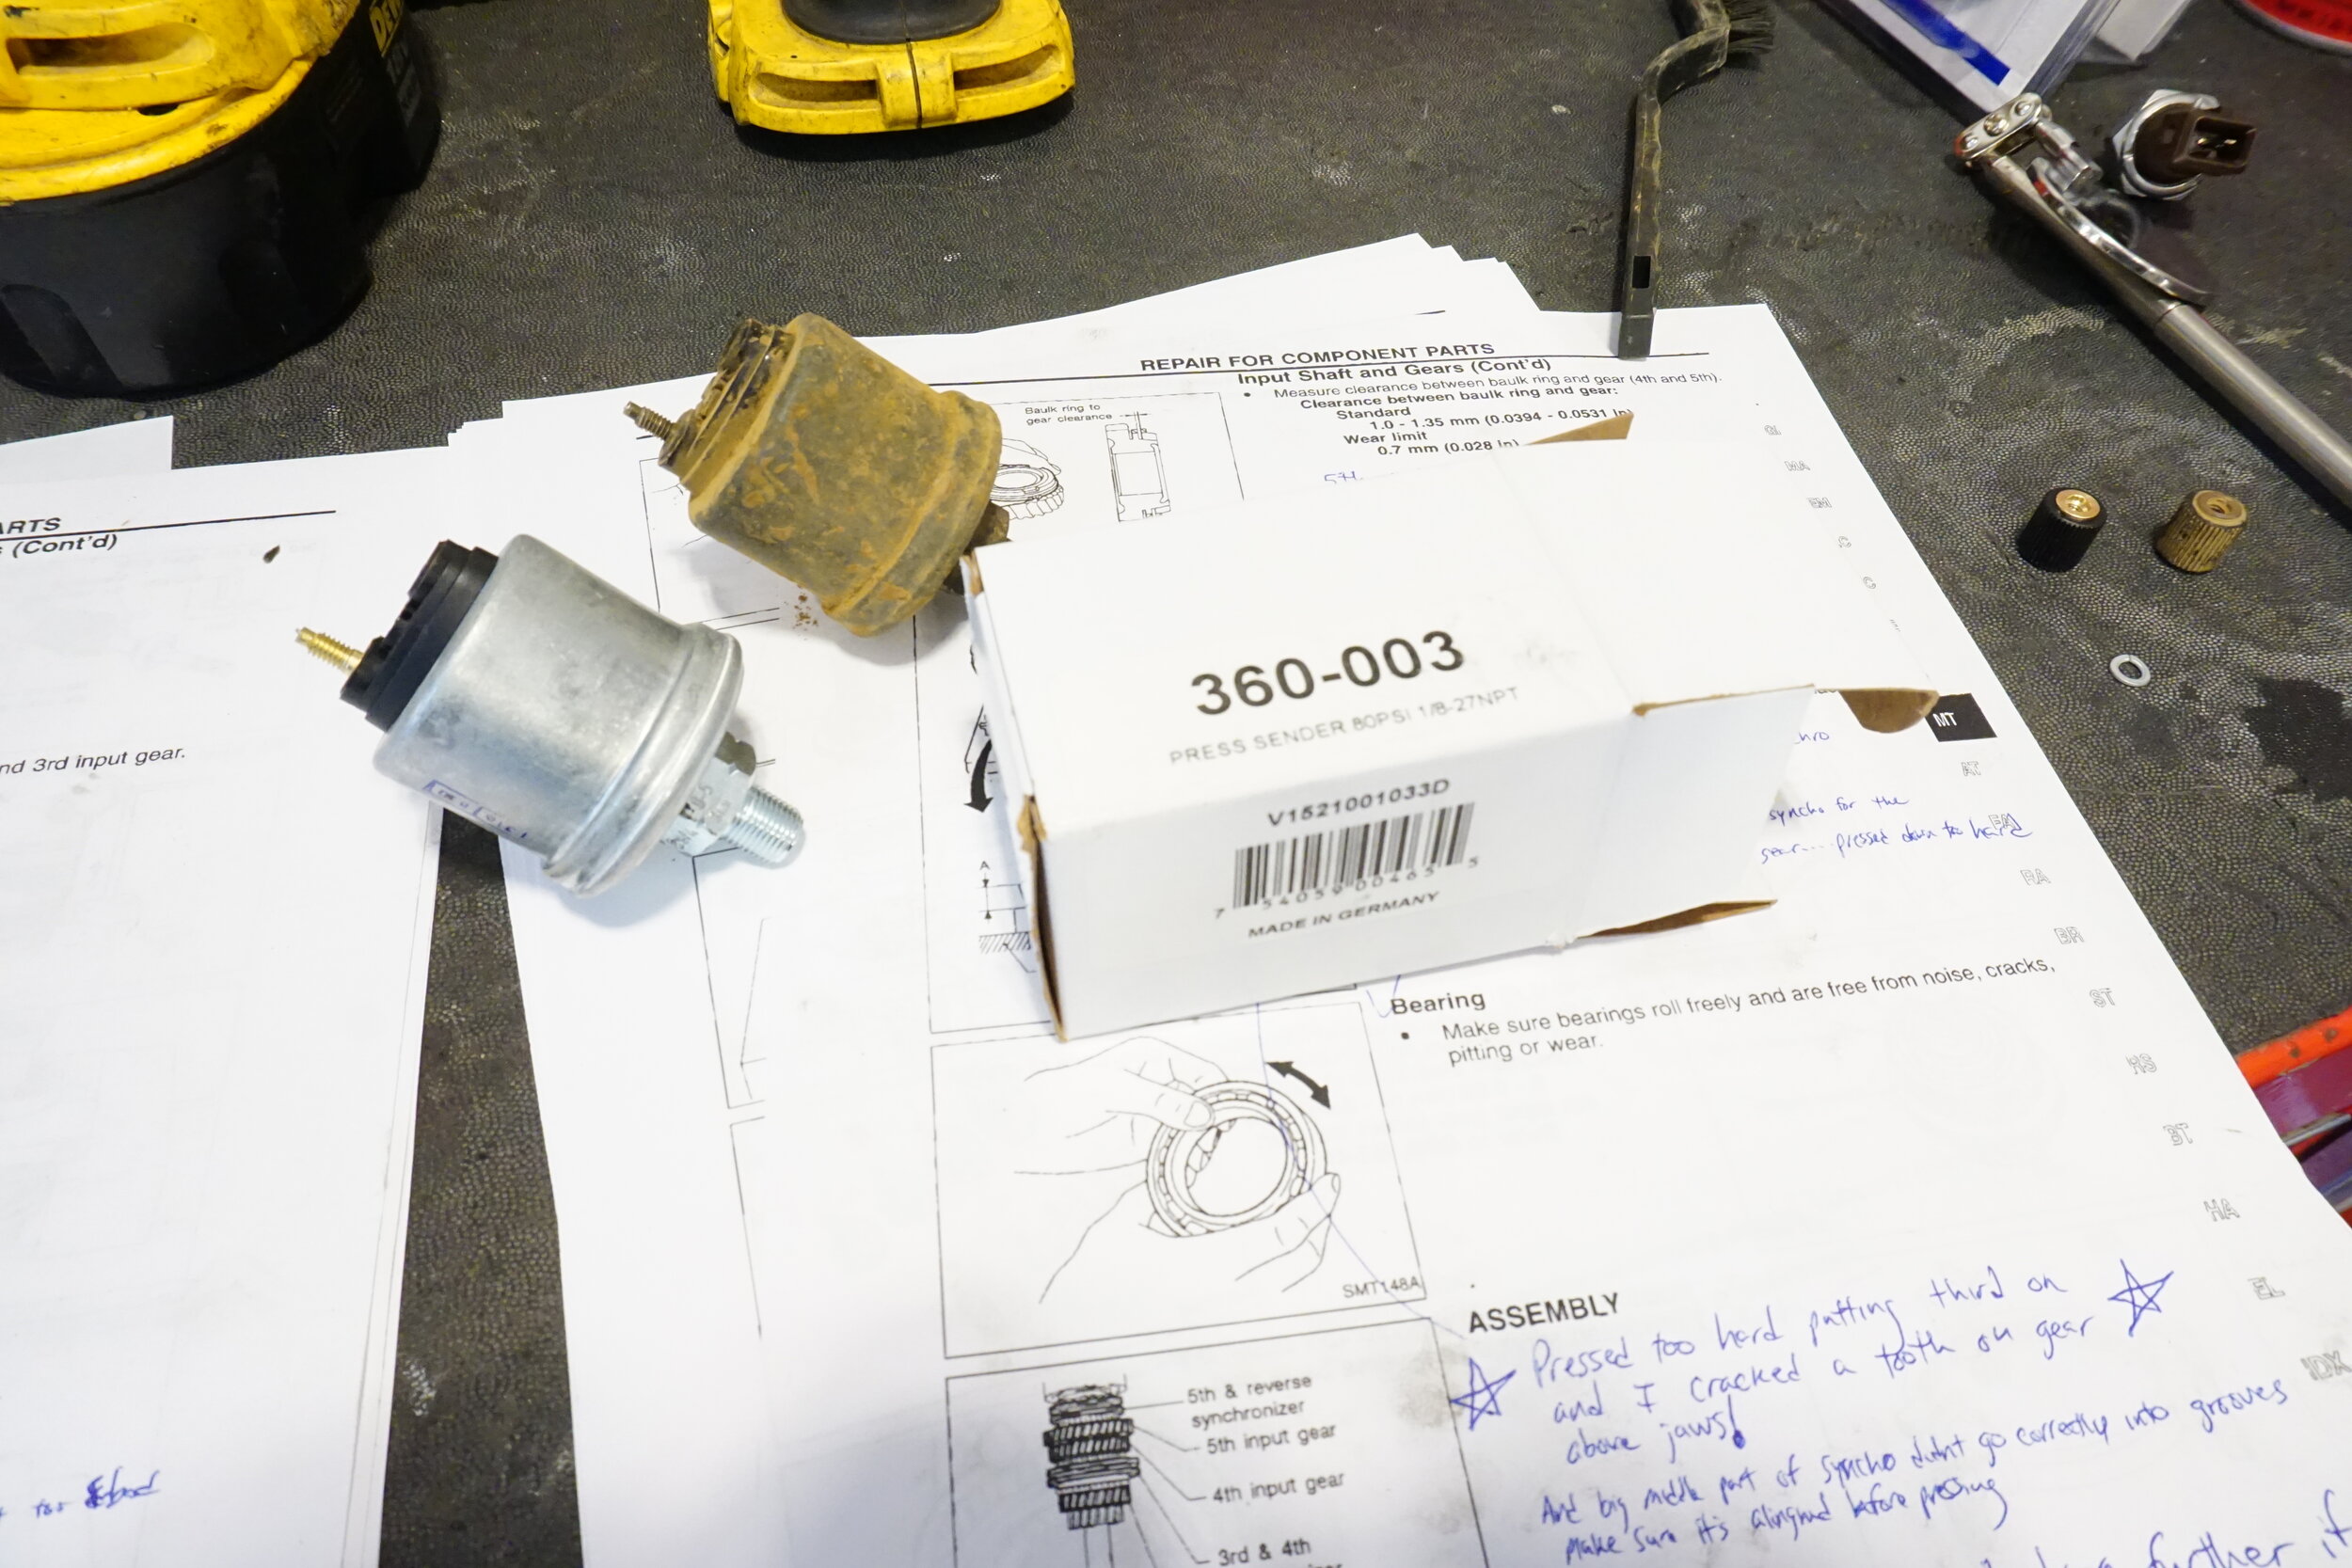
New VDO sender (360-003, 1/8-27NPT for BW distribution block).  A stubby 17mm saved the day here.


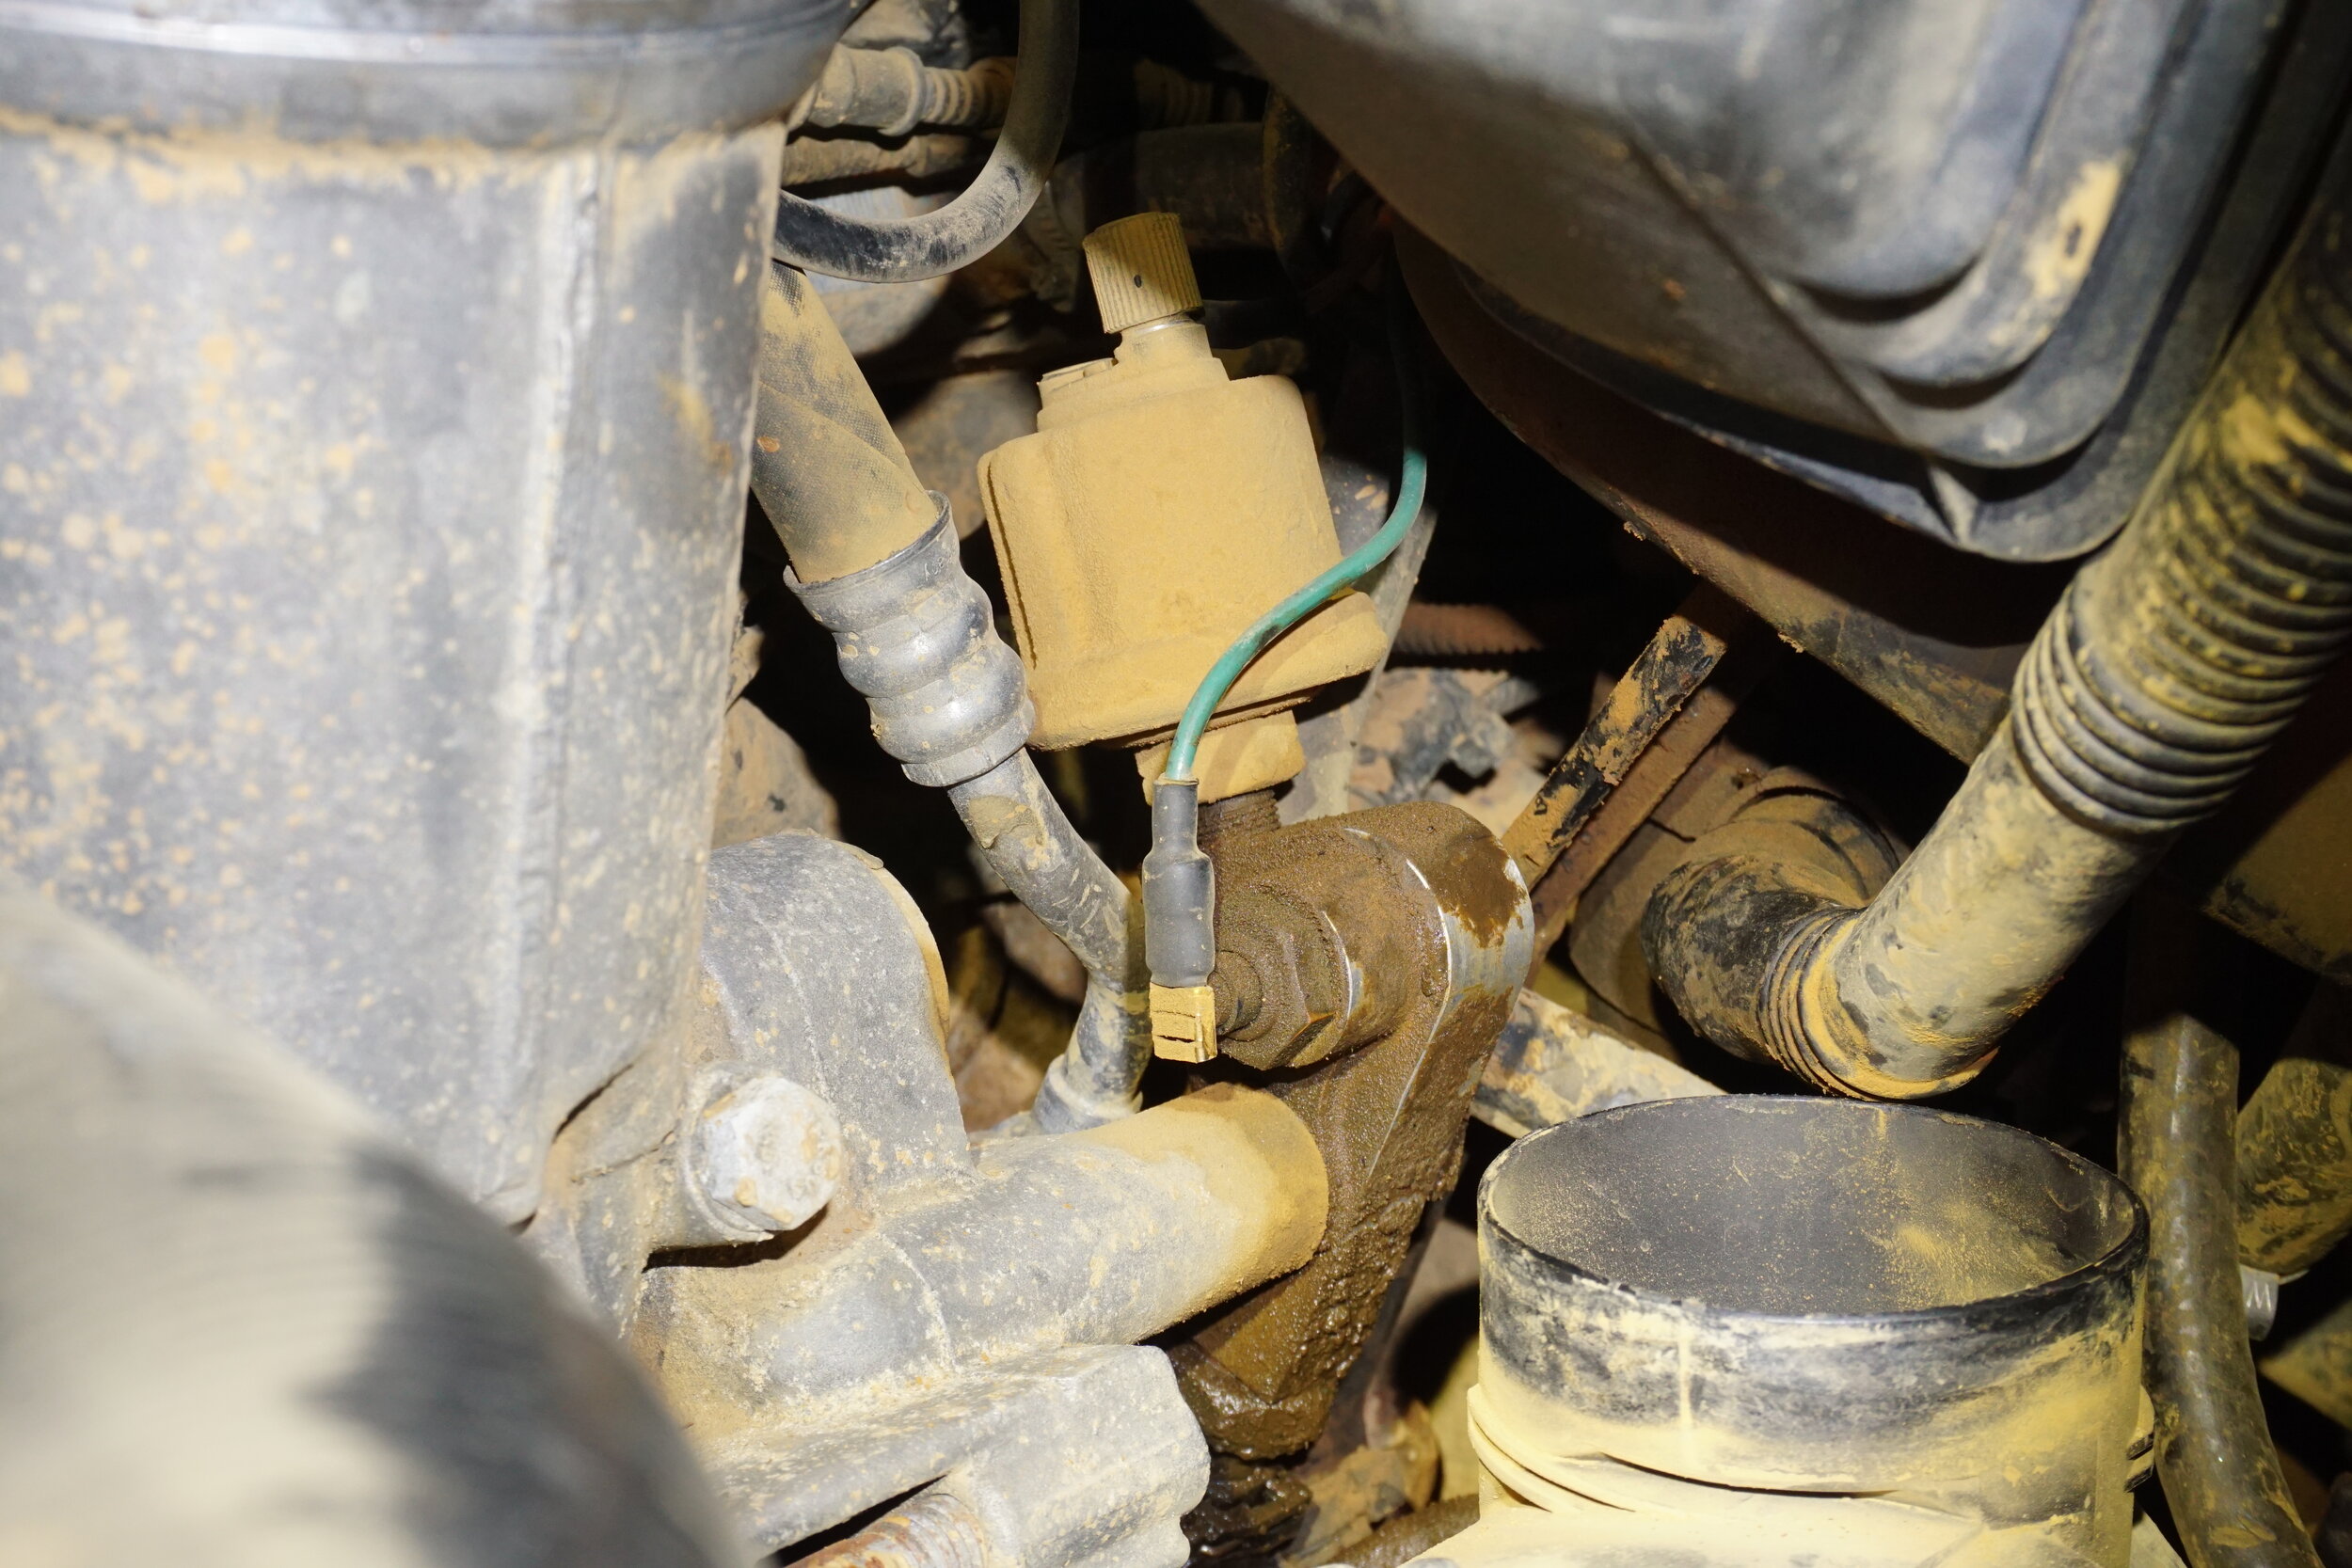
As for the factory sender, well, that was far trickier.  It's on the bottom of the distro block, and there no real access from the bottom.  My larger 140a alternator wasn't helping matters either, my old 80a was much smaller.  I considered taking the alternator off to make things easier, but eventually found I was able to unscrew the old one with a crowfoot wrench.


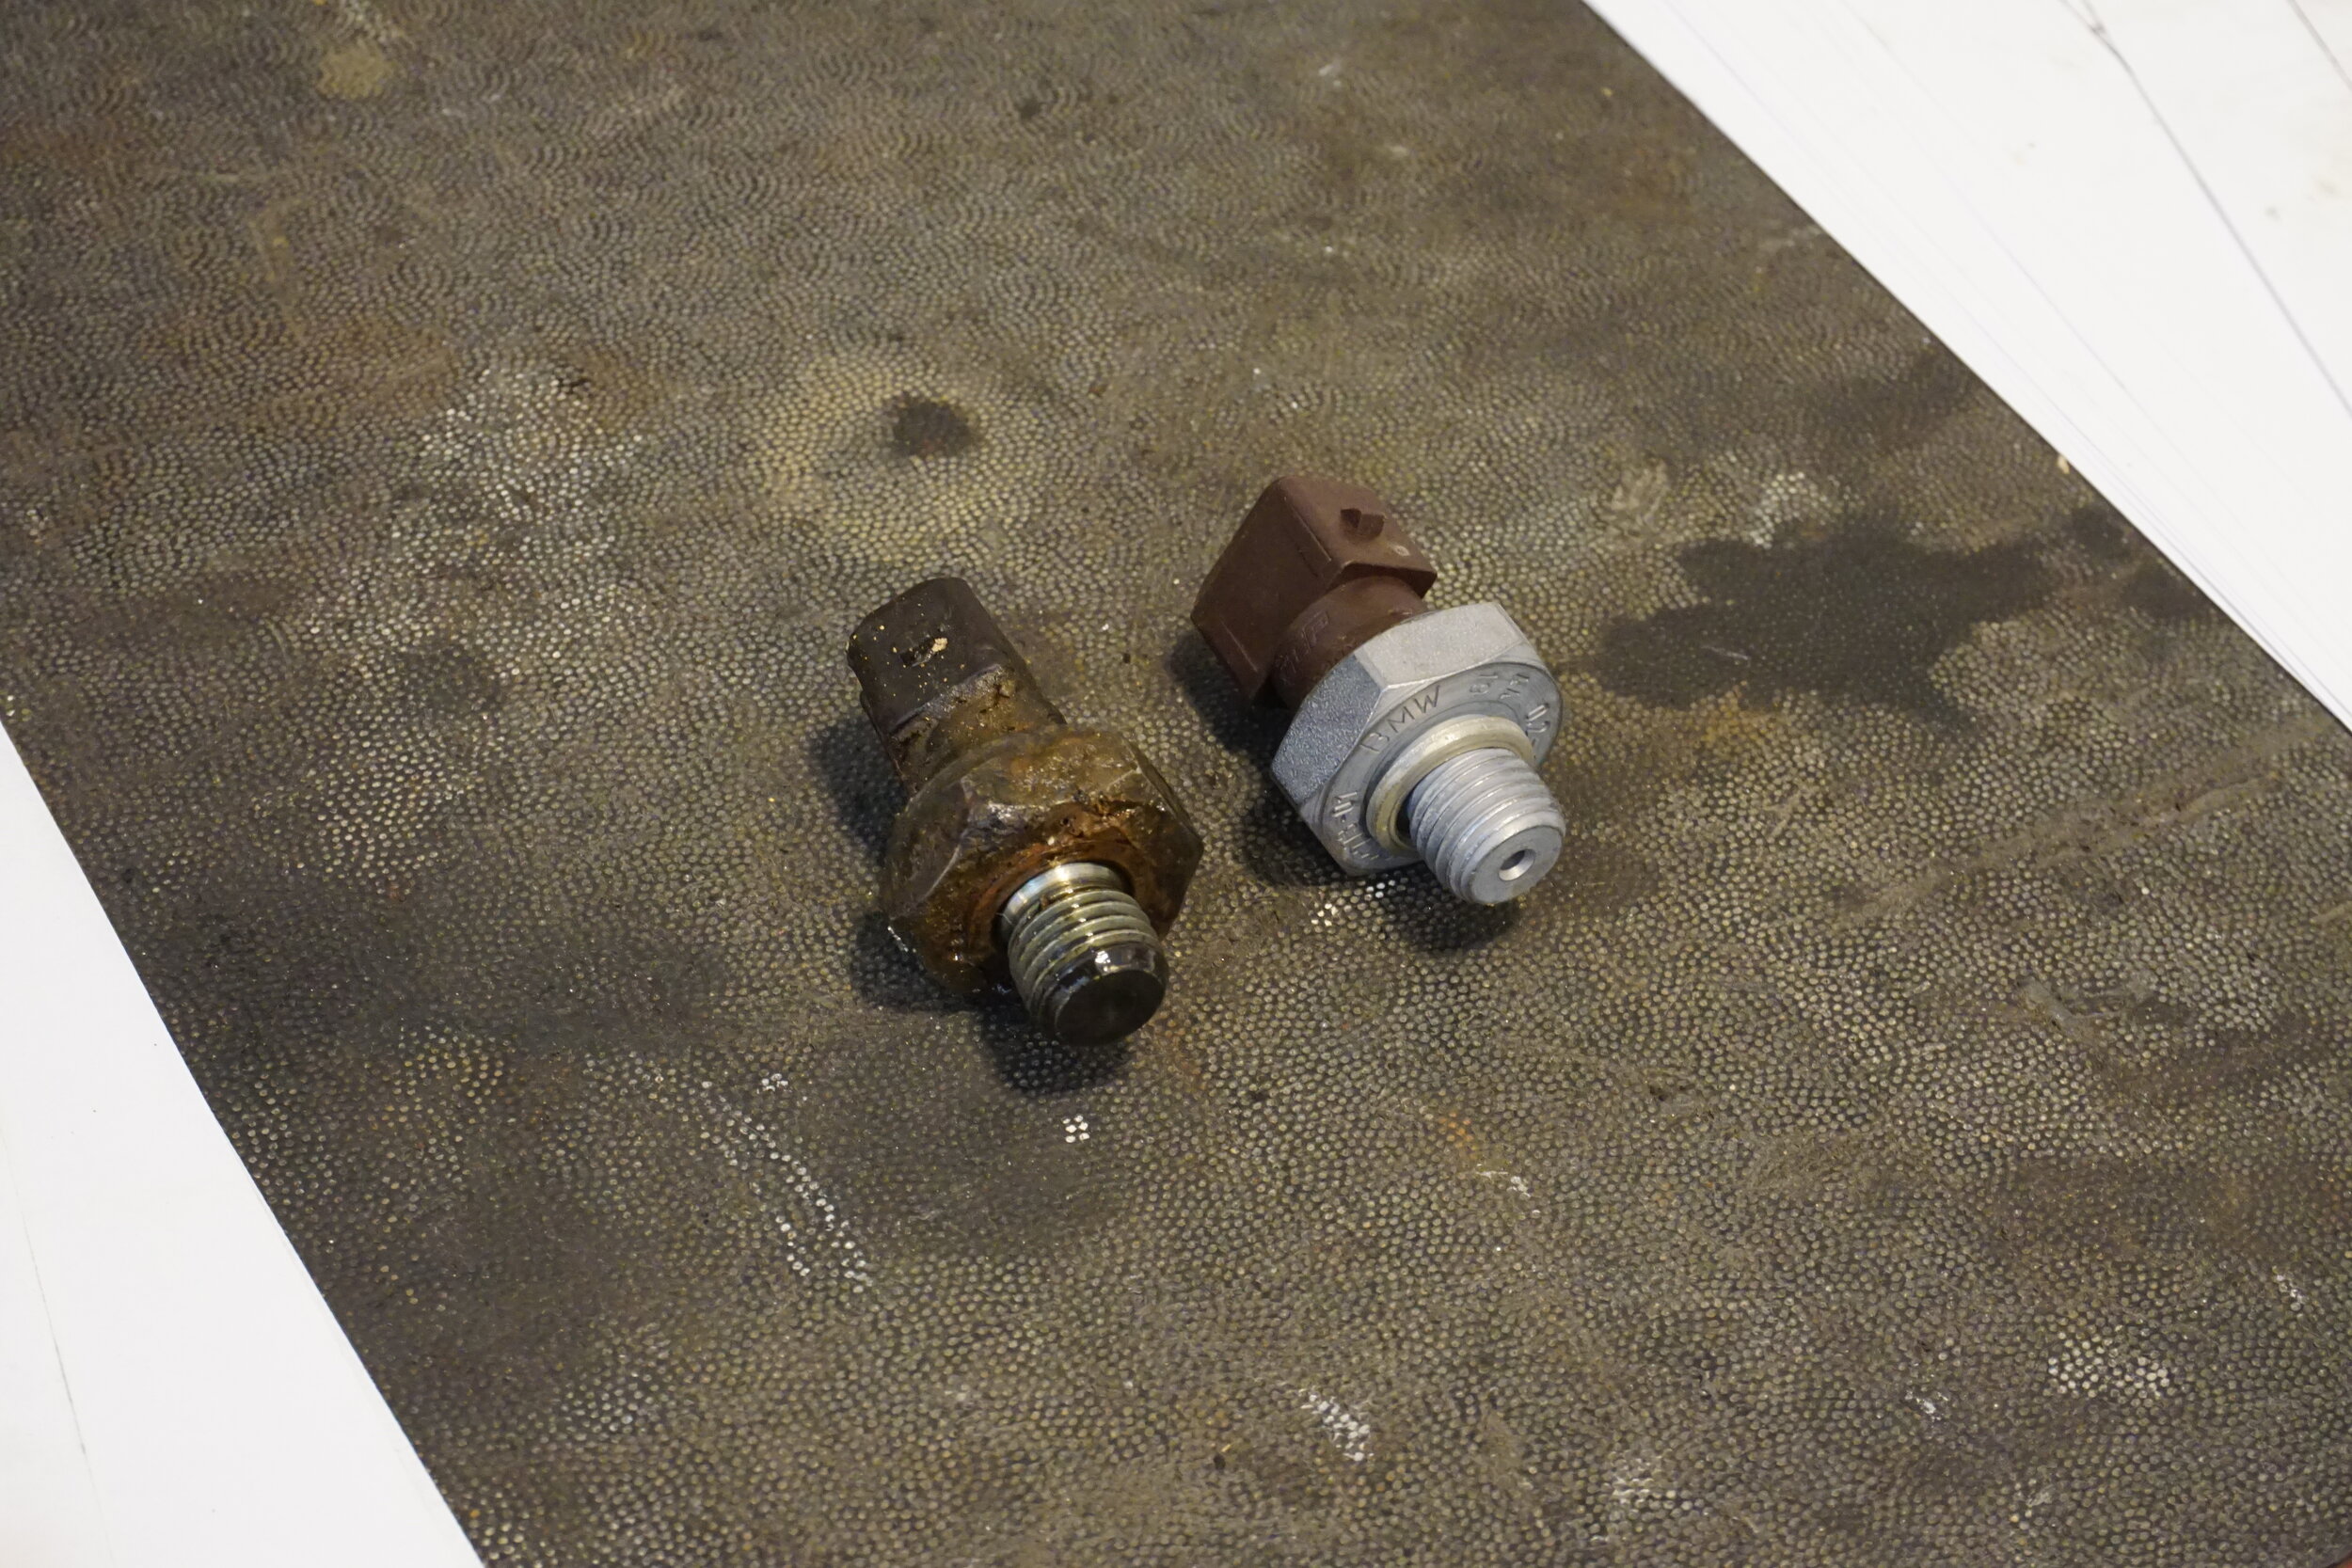
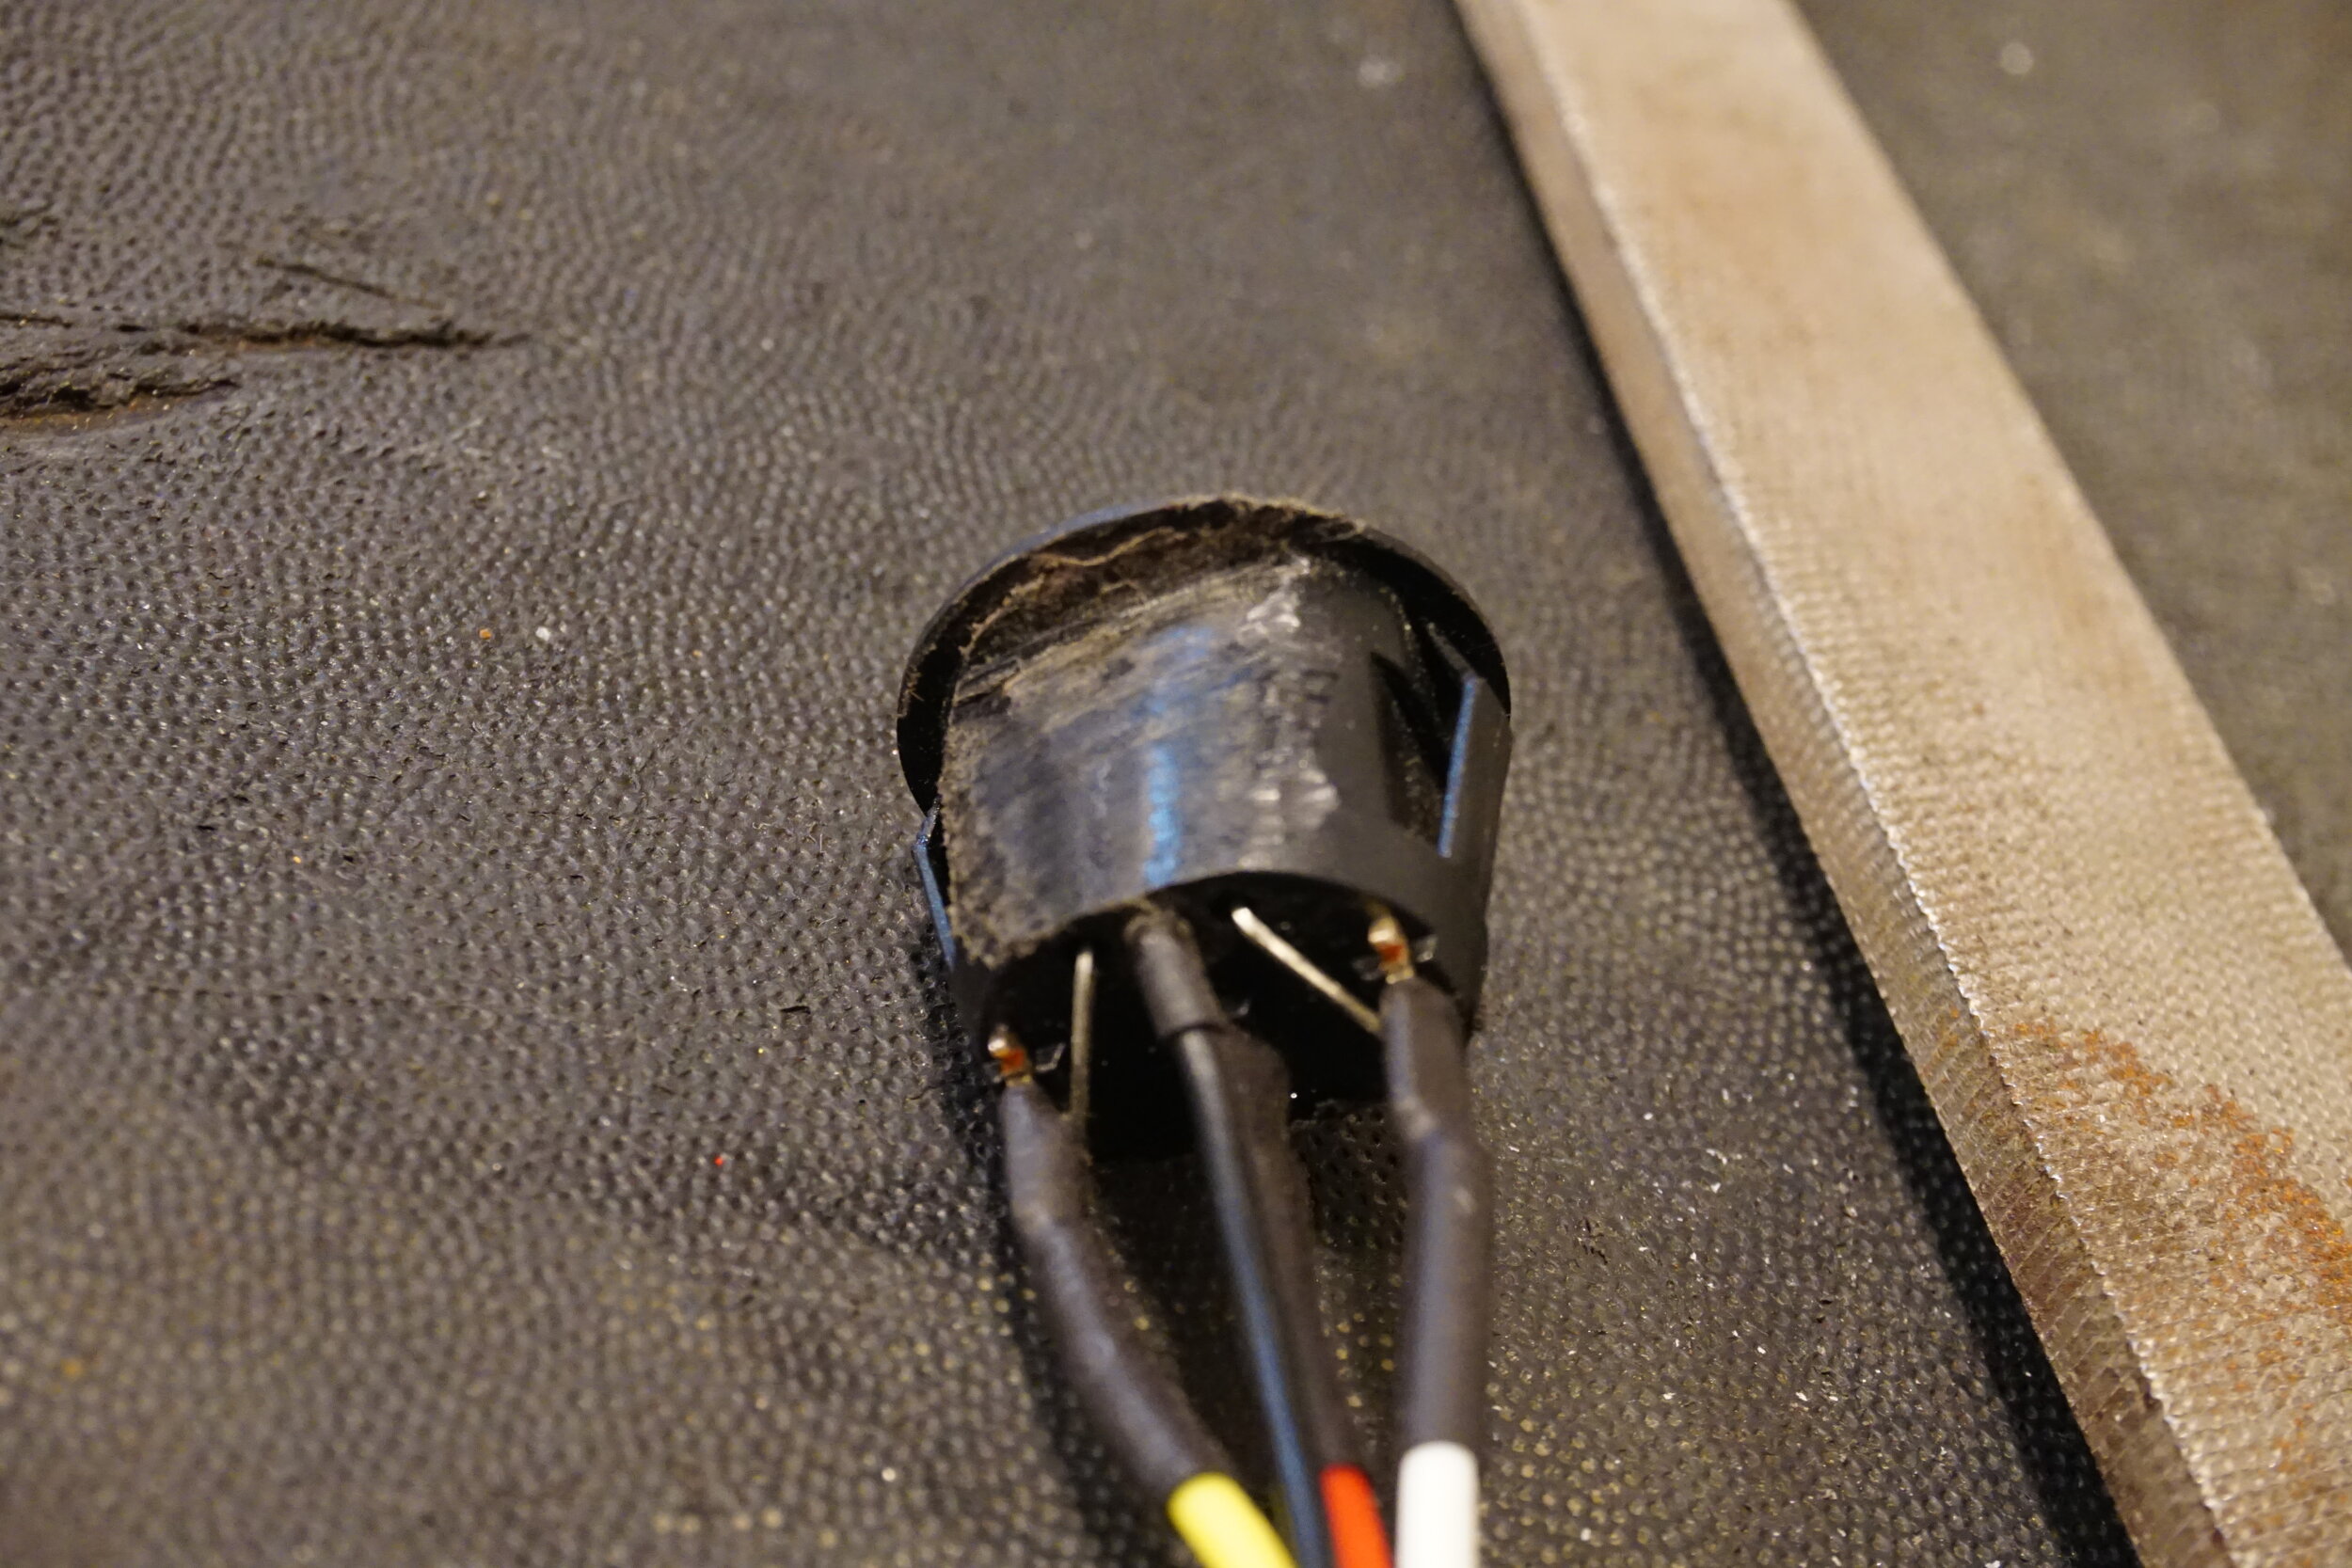
It had seen better days and had been leaking a bit.  In fact, when I got the crowfoot wrench on it, it came off with almost no force.  If it had loosened up a bit more it could have been very bad.  I could read the date code on the sensor, and it was the original one from 1998.  But then I was faced with another problem, how do I screw it back in?  Access was so tight that I couldn't get it back in there.  I tried everything, but no dice.  Maybe the alternator was going to have to come off after all.  In a last ditch effort I got my wife to come out and help.  She held the sensor roughly in place from above, while I got under the car and squirmed my hand up there and was somehow able to get it screwed in.  Awesome!  The same problem reappeared when I went to reconnect the electrical connector, and again, and second pair of hands saved the day.  I made sure to tighten this one in pretty tight, so hopefully it won't leak anymore. 

When it was all said and done, I was left with this:


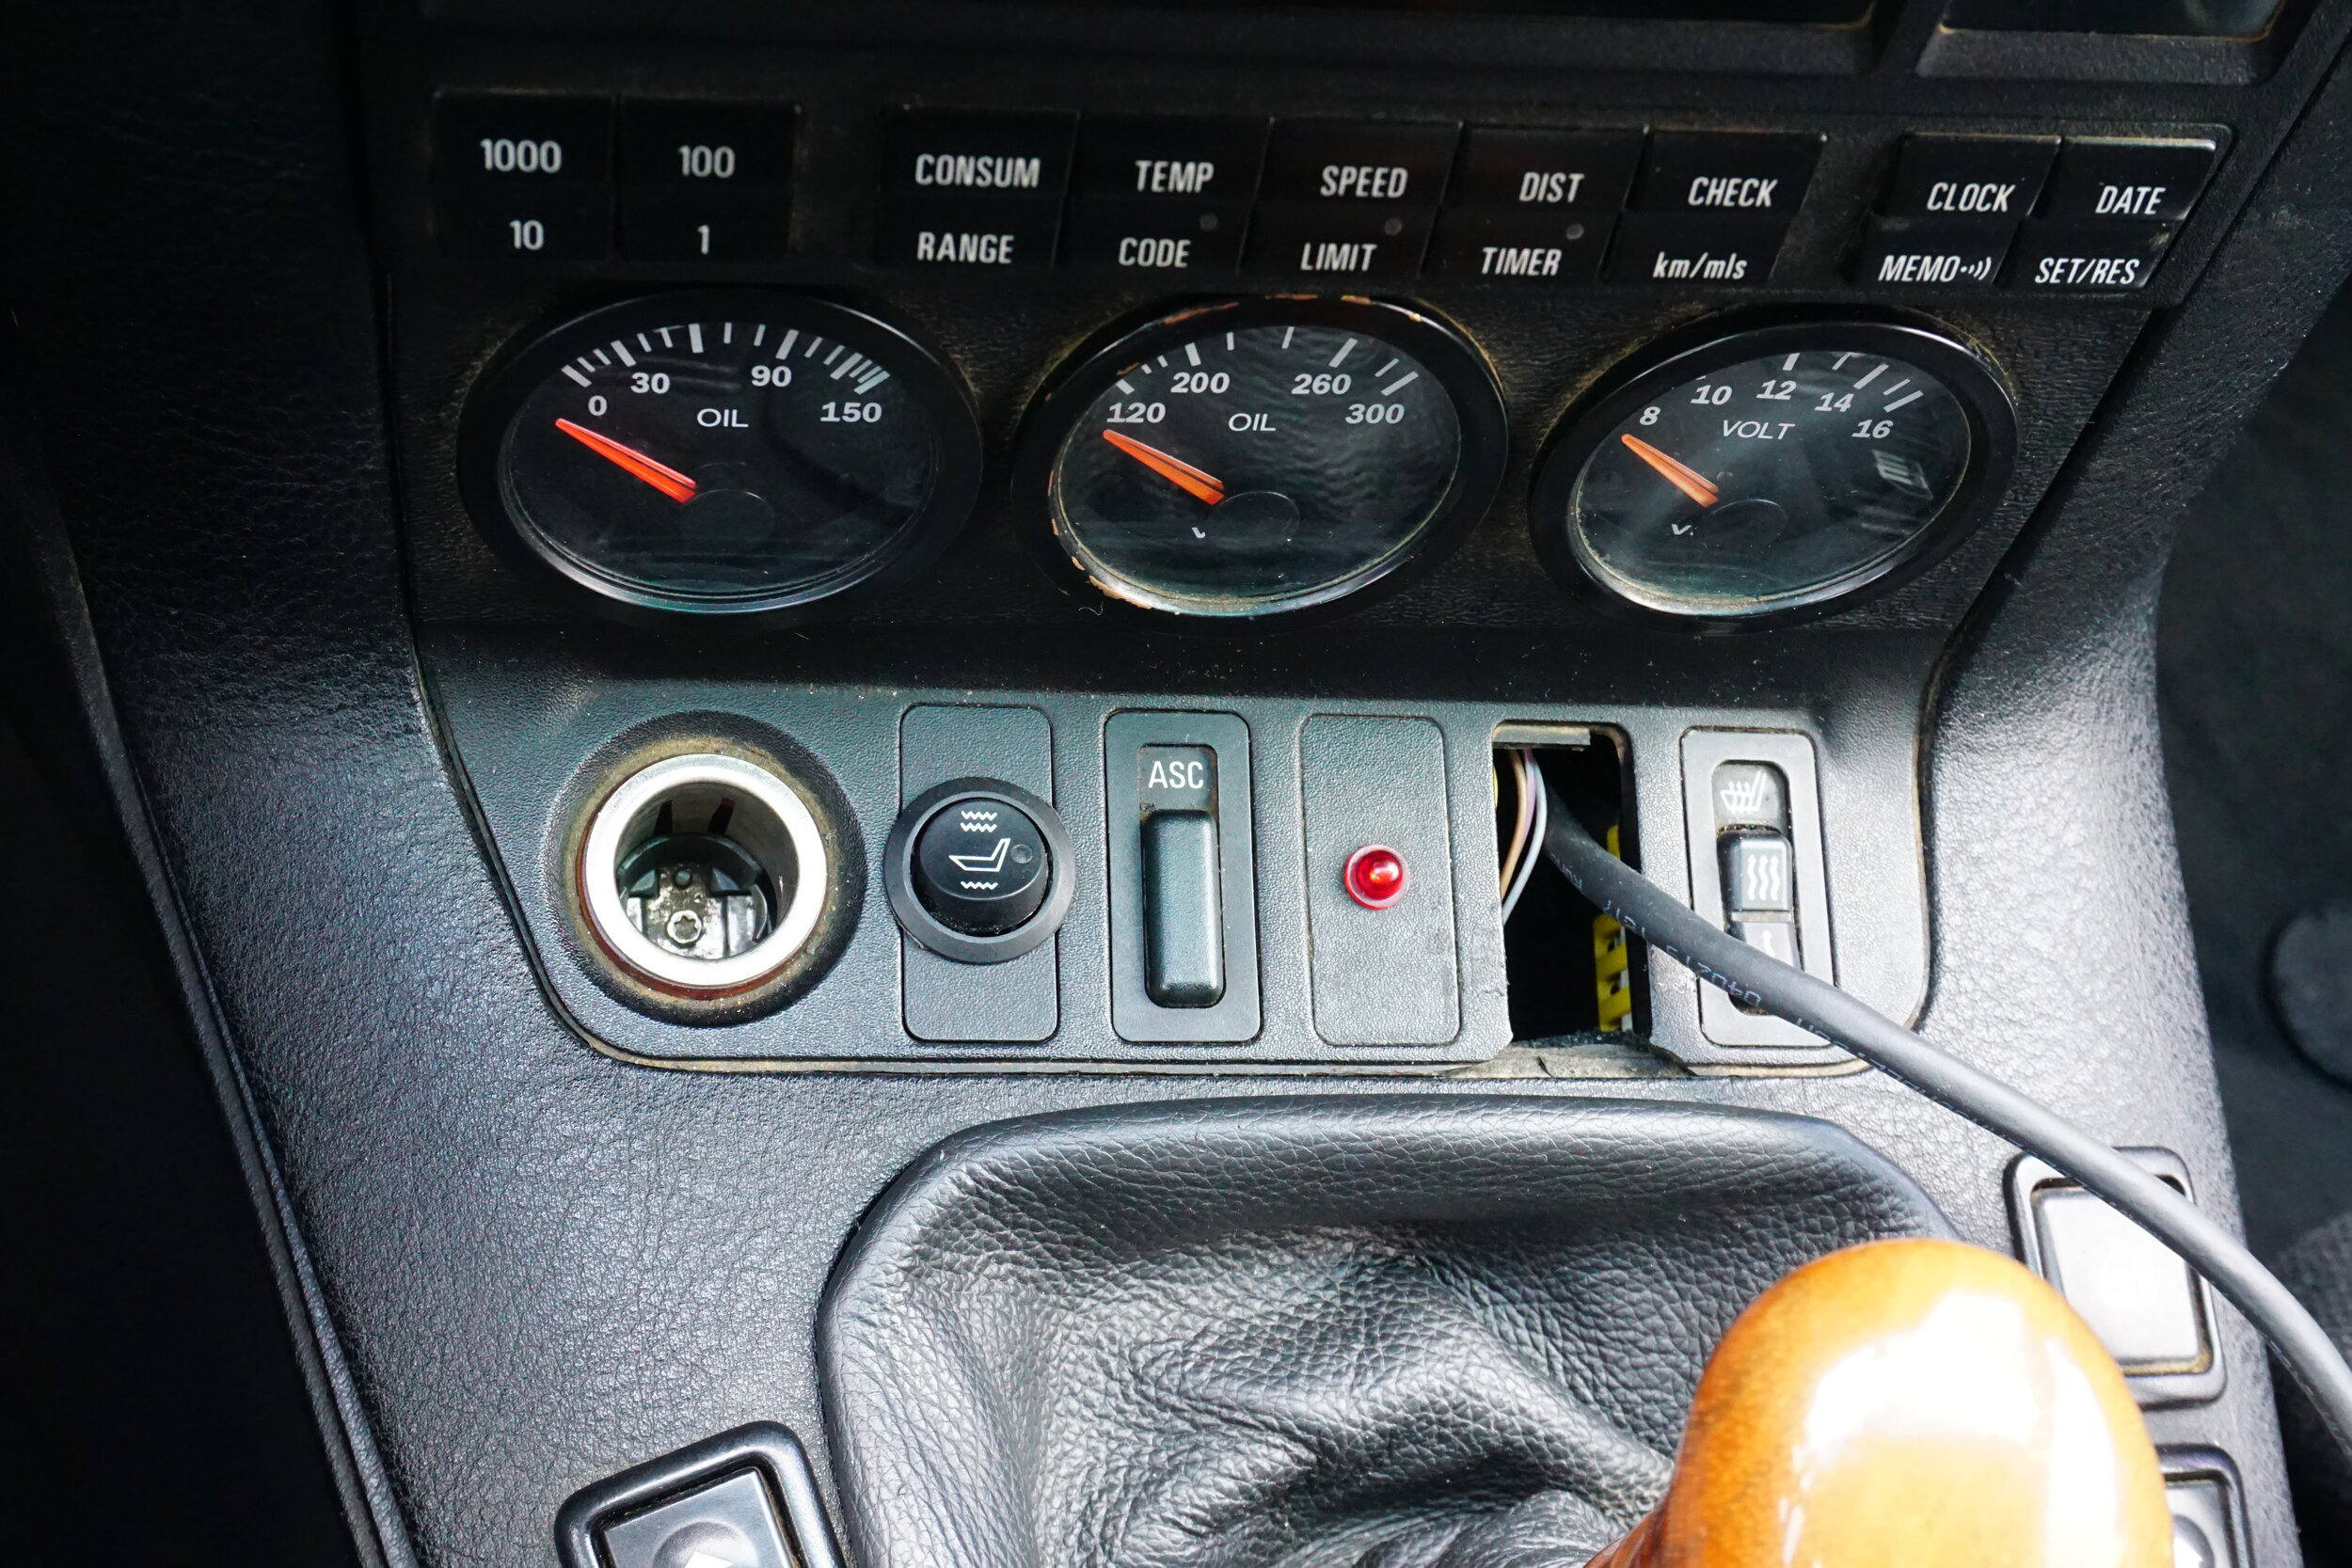
So I installed the new gauge.  It's not perfect, but it should be a lot easier to tell if I'm at 8 or 12 PSI.


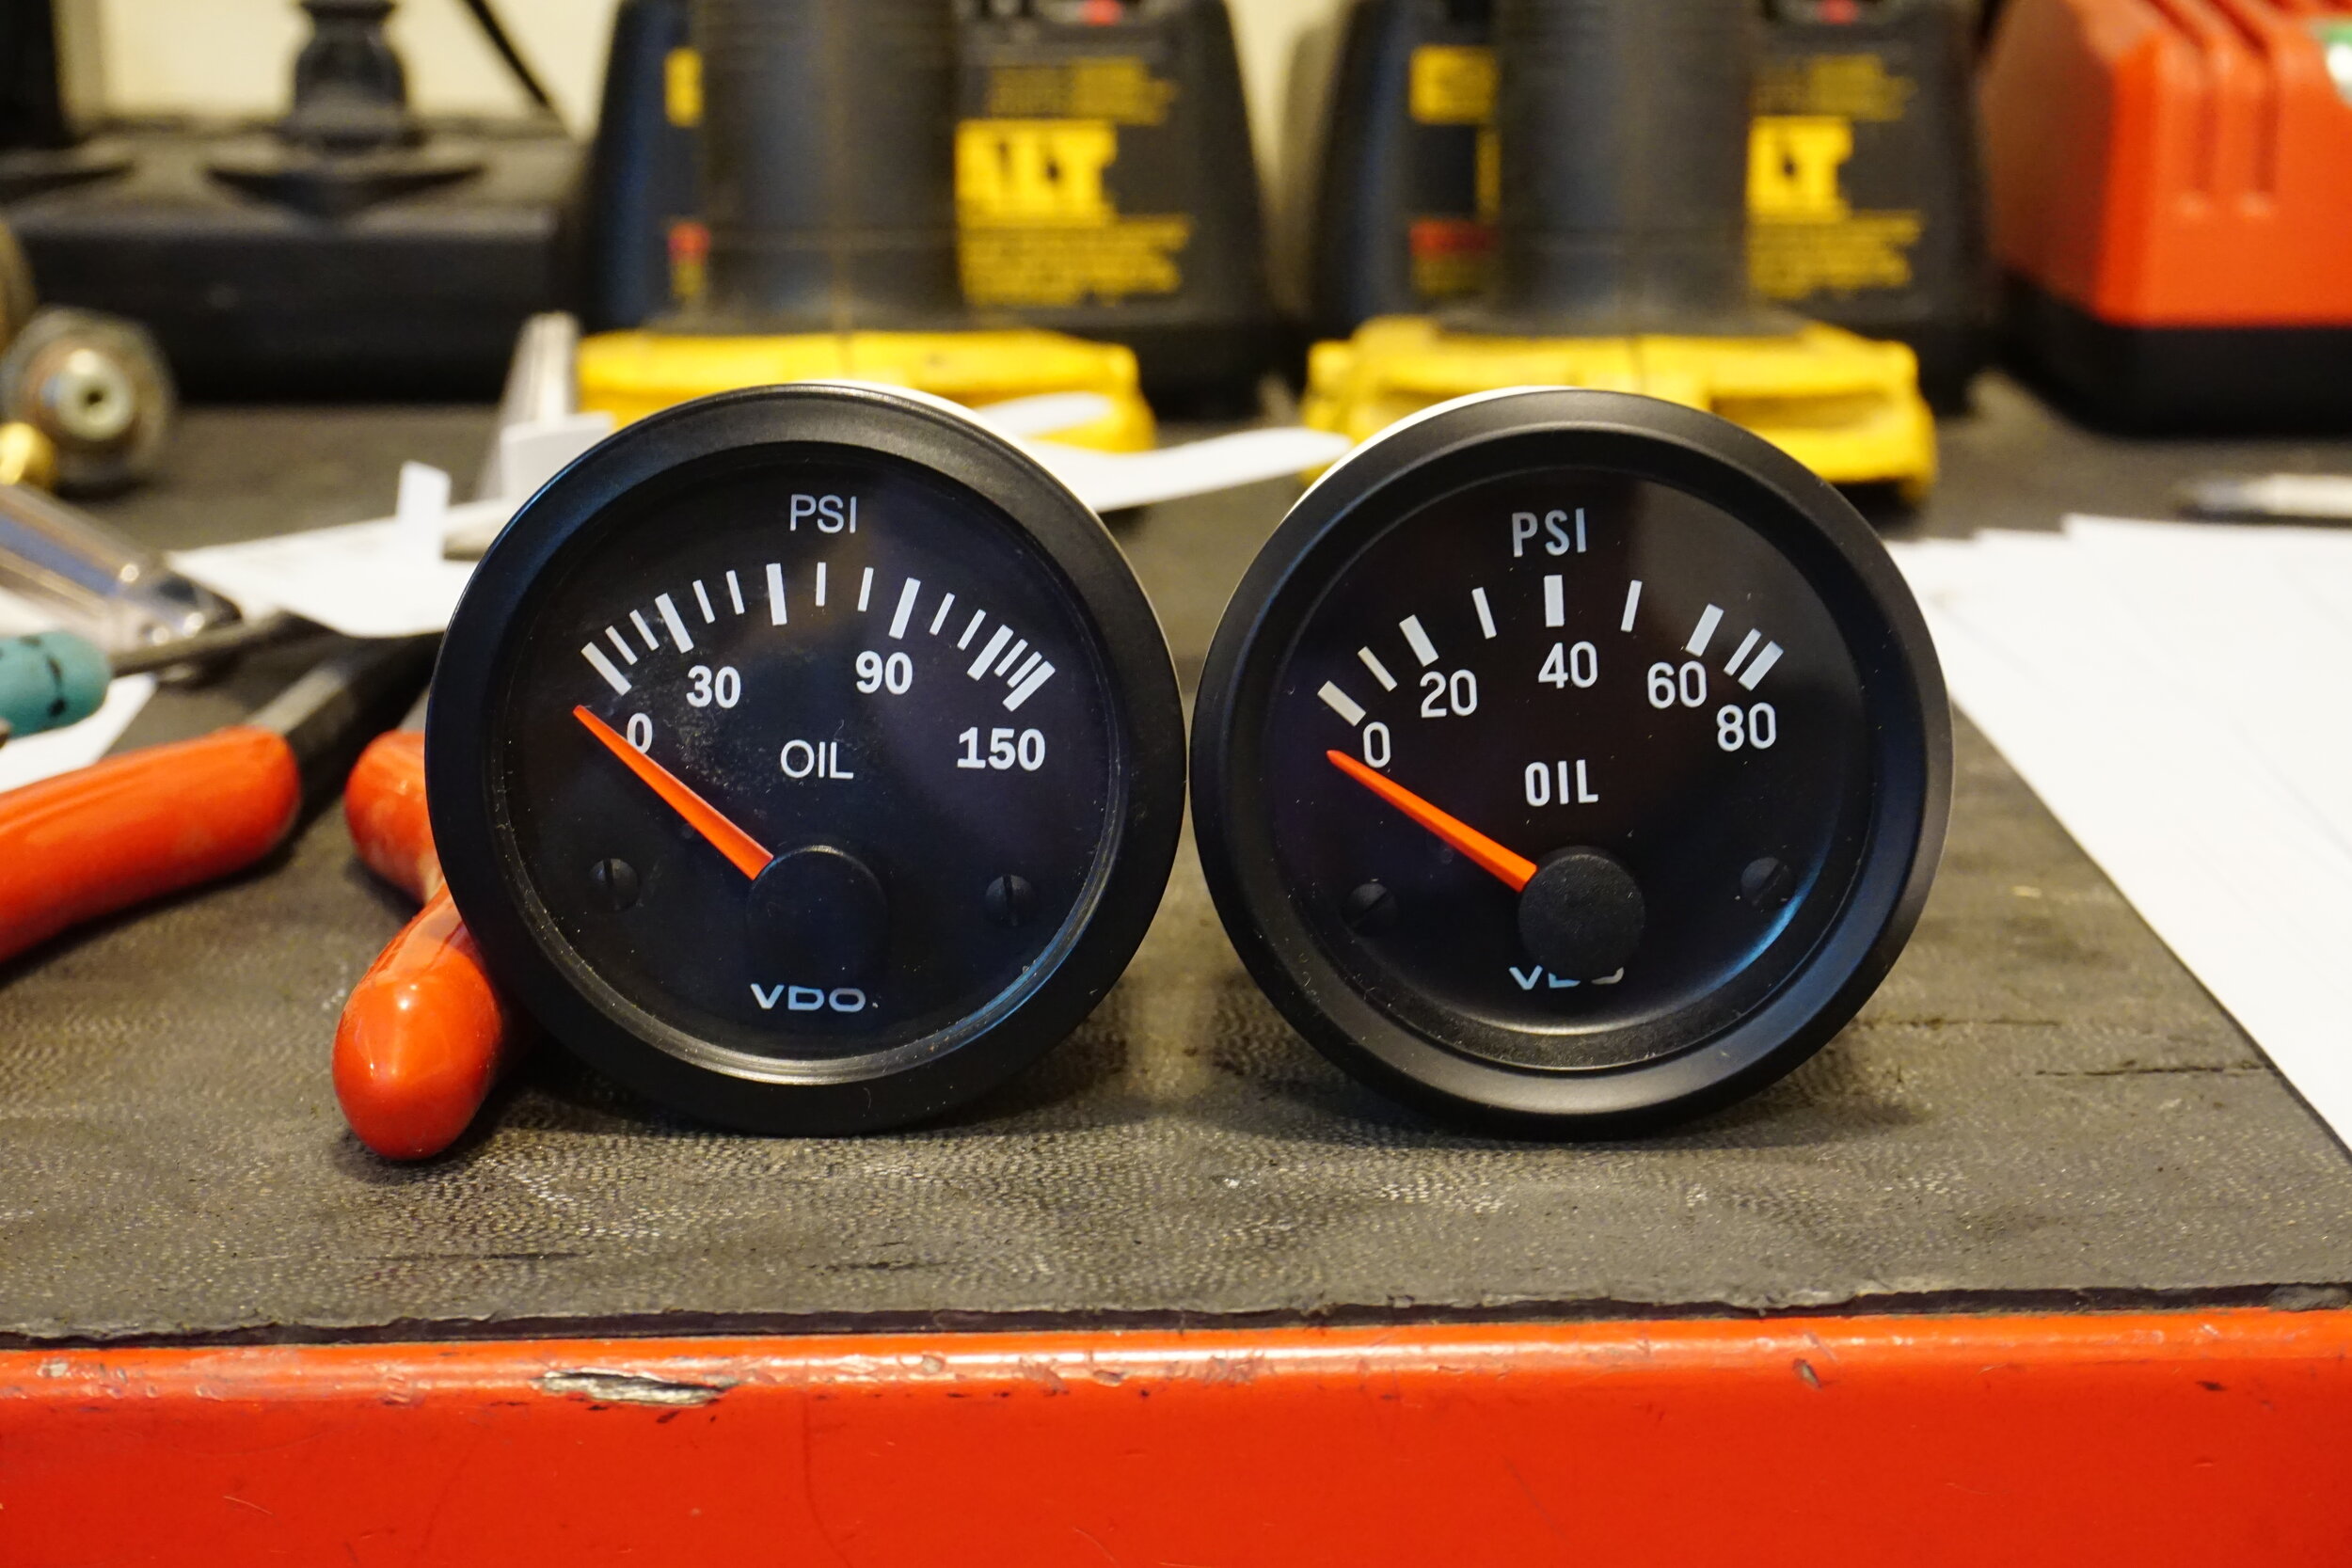
As a refresher, at cold start I would usually see around 65-70 PSI.  I read that in these engines pressure is regulated to 58 PSI, but I haven't been able to verify that, so I don't know if my old gauge was accurate or not.  So I turned on the car, and my pressure was only 50, quite low compared to what I'm used to.  So now I don't know if the new gauge is accurate, or if the old one was.  Or neither?  I haven't had a chance to drive it yet, so I don't know if the new OEM sensor fixed my warning light or not.
 

95maxrider
95maxrider Reader
4/15/21 9:38 a.m.

So I've been driving around with the new oil pressure senders and gauge, and the warning light hasn't come back on since, so I'm considering this a success.  With oil at 200*+ I'm seeing pressure just under 10 psi.  Looks like the issue was just a worn out OEM sender.  At full cold start I'm seeing pressure just under 60, which jives with the 58 psi max I read about in another thread, which leads me to believe this new gauge is spot on.  When warmed up, cruising pressure is 30-40+ psi.

I was at a junkyard a while back and they had an earlier sedan without side air bags, so I grabbed the front door panels.  At some point I might recover a section with leather and add some padding for my elbow, but for now I just wanted to get them installed.  It's always bugged me how much the panels with side air bags stick out where your elbow rests, so these panels give me an extra inch or two of elbow space.  It might not sound like much, but it makes a difference on longer drives.  These panels were also in better shape than mine, and the backing material wasn't all torn up and flimsy.  To top it off, they even came with a fancy little coin holder (not that I'm ever going to use it).


The little trim piece on the rear bumper was all faded and looking crappy so I wanted to repaint it.  While it was off, I noticed how crummy my muffler tips were looking, so I knocked off some welding slag, scrubbed them with some steel wool, and polished them up.


And the worn out trim, especially on the right side.


My rear shock bearings had been making some noise so I figured it was time to clean them up and lube them.  Unfortunately, in the two years since I installed them, they had welded themselves to the aluminum spacers on either side:


And no amount of penetrating oil, heat, and chiseling would get them apart.  Here's a reminder of what the spacers look like:


The only thing I can think to do is to use a dremel to cut the bearing apart and hope I can separate everything when it all falls apart.  Anyone else have any good ideas?

¯\_(ツ)_/¯
¯\_(ツ)_/¯ PowerDork
4/15/21 9:42 a.m.

In reply to 95maxrider :

Buy new spacers and put them in the with new bearings?  I know JVL is very proud of his spacers but you should be able to find replacements pretty cheaply.

irish44j (Forum Supporter)
irish44j (Forum Supporter) MegaDork
4/15/21 12:28 p.m.

I still find it amusing that you have bearings on your shocks... And also amusing that you didn't realize that that is exactly what was going to happen with that kind of setup on a rally cross car ;) rubber ftw!

95maxrider
95maxrider Reader
4/15/21 12:32 p.m.
¯\_(ツ)_/¯ said:

In reply to 95maxrider :

Buy new spacers and put them in the with new bearings?  I know JVL is very proud of his spacers but you should be able to find replacements pretty cheaply.

Wouldn't I need to get them out and take measurements before I can get new ones?  Do these things have a specific name that I can start searching for?

¯\_(ツ)_/¯
¯\_(ツ)_/¯ PowerDork
4/15/21 12:36 p.m.

In reply to 95maxrider :

What size is the bolt?  I'd bet you almost anything those bearings are a standard size, and it doesn't really matter anyway since the replacements you put in sure will be.  Get me some basic measurements of the bearing OD and width, and the spacer ID and width and I'll make an educated guess for you.

They are generally called rod end spacers or misalignment spacers.  Here's my no-measurements guess.

95maxrider
95maxrider Reader
4/15/21 12:46 p.m.
irish44j (Forum Supporter) said:

I still find it amusing that you have bearings on your shocks... And also amusing that you didn't realize that that is exactly what was going to happen with that kind of setup on a rally cross car ;) rubber ftw!

When the original bearings were in there I never had a problem getting the spacers out, the finish on these replacement bearings was quite different and I think is the culprit.  If I had a drop in solution that would get rid of these, I would do it.  I'm just too lazy to figure out something "custom".

95maxrider
95maxrider Reader
4/15/21 12:49 p.m.
¯\_(ツ)_/¯ said:

In reply to 95maxrider :

What size is the bolt?  I'd bet you almost anything those bearings are a standard size, and it doesn't really matter anyway since the replacements you put in sure will be.  Get me some basic measurements of the bearing OD and width, and the spacer ID and width and I'll make an educated guess for you.

They are generally called rod end spacers or misalignment spacers.  Here's my no-measurements guess.


The measurements in red were incorrect.  The others were close enough.

¯\_(ツ)_/¯
¯\_(ツ)_/¯ PowerDork
4/15/21 1:04 p.m.

OK so you need a 26mm bearing with a 15mm ID if you want the same size spacers.  You may also be able to pick a different ID (looks like the standard Bilstein was 1/2", that's certainly easy from a hardware standpoint) and use different spacers if that simplifies things.

Personally, since this seems to be a recurring problem, I'd stick the standard Bilstein one in there, bore any holes you need to out for high grade 1/2" hardware, get generic spacers that work, and have an easy part to order next time.

Based on your measurements this seems to be the JVAB spec: ebay linky.

¯\_(ツ)_/¯
¯\_(ツ)_/¯ PowerDork
4/15/21 1:26 p.m.

Went back in the thread- are the sphericals actually pressed in, or is it a shoulder and a circlip?  If they're press-in I bet we can find a bushing instead and be done with the whole clunky spherical problem.

95maxrider
95maxrider Reader
4/15/21 3:56 p.m.
¯\_(ツ)_/¯ said:

Went back in the thread- are the sphericals actually pressed in, or is it a shoulder and a circlip?  If they're press-in I bet we can find a bushing instead and be done with the whole clunky spherical problem.

They had to be pressed in, and are held in place with a circlip.

You'll need to log in to post.

Our Preferred Partners
NCW80qOC3U7l0fjoVh2luu7gsD4iZDOLcf0AvnalgcYT0oCLYzSE6bH8A2Gd2xcE