1 2 3 4 5
Rufledt
Rufledt Dork
2/12/13 12:39 p.m.

Tuna: I suspect if you have the land and friendly neighbors to shoot rockets, archery will be just fine. There may be local laws against it, but I've never run into problems. You also don't need an earthen bank. We use a box stuffed with phonebooks horizontally. Behind that, a 4' square 3/4" plywood sheet. It stops everything. Stand close enough to not miss the sheet and you wont lose your arrows I the grass. Also, hitting the plywood is hard on arrows. Try not to do that.

bgkast
bgkast Reader
2/12/13 1:29 p.m.

I'm also reading with interest...and trying feebly to avoid taking on yet another awesome hobby.

Rufledt
Rufledt Dork
2/12/13 2:48 p.m.

I'm glad there's interest! Feel free to ask questions/leave comments, it'll keep me motivated.

I promised some arrow making stuff, so i'm taking my late lunch break to do some of that (and to eat some tasty sesame chicken).

There are many factors when it comes to arrows, the most important (in my opinion) is spine weight (stiffness). An arrow doesn't shoot straight, it flexes. This is more important in longbows than it is compounds, because those tend to shoot straight through the handle (and you shouldn't use wood arrows on compounds!!). Store bought bows tend to have a heavy handle, and an arrow rest cut in fairly far, so they aren't as sensitive to spine weight, but it is important. For hand shelf bows (often called self-bows) the arrow is often far off of center, and thus very sensitive to spine weight. If the spine weight is wrong, it'll fishtail in mid air. It may even fly fairly straight but always hit off to the left or right. There are many factors that influence which spine weight works best, and it can change based on arrow tip weight, draw length, etc... 2 people can shoot the same bow and need different spine weights. Even the power curve matters- 2 bows with the same weight and length, shot by the same person, but with different power curves may need different spined arrows. There are kits out there that come with 2 arrows in each range. You take the kits, put on the tips that weight what you plan on shooting (usually 125 grain field points for me) and shoot them. watch how they fly. The ones that go straight are the correct stiffness. buy that stiffness (and length) and put that weight point on it, and theres a good bet it'll be perfect. For longbows, I find that, for me, the weight of the bow is slightly higher than the spine weight of arrows that work for me with 125 grain points. My arrows tend to be long, because I have long chimp like arms (in disproportionate length and hair only, not the muscle part) which can effectively lower the dynamic spine weight. The arrows usually come in ranges of 5. My 45# @ 29" longbow works with 32" arrows tipped with 125 grain points spined 30-35#.

After that, consistency is important. All of the arrows would best be in a small range of weights (like within 20 grains. FYI I think there are 7,500 grains to a pound? someone help me out with that one) and have a similar center of gravity. I've read it's important for the center of gravity to be decently forward of center, but with 125 grain points I've never had a tail heavy arrow.

Don't think this means you need a different set of arrows for every bow. If you have 10 bows of light to mid weight, you may only need 3 different sets of spine weights for perfect arrow flight. Even if they are a little off, they'll still fly mostly right if you're just shooting for giggles.

The feathers are a variable where you can have some fun. There are a number of different designs and colors. Generally, the ones with more surface area have more ability to straighten arrow flight, but they also drag more. If the spine weight is perfect (as well as your form, and you are nocking the arrow on the string in the right position) you won't need much fletching area to correct the flight. I err on the side of more, just in case. You can also buy uncut feathers and cut them yourself, which is what I do. It's cheaper, and you can attach them in the way I will show below, without having to buy a fletching jig.

A word on arrow making tools- they aren't cheap. Fletching jigs can get up in price if you don't want to do 1 feather on 1 arrow at a time, and spine checkers are crazy expensive. They can be replicated with a board, a couple nails, a bottle of water, and a micrometer. Maybe i'll get to that after all of the other stuff. I had to disassemble my board and nails because the wood was actually destined for a planter that I still haven't finished yet (don't remind my wife, she lurks around here).

Actually, I ran out of time with the background info, i'll post how to pics later (sorry!)

ultraclyde
ultraclyde Dork
2/12/13 3:29 p.m.

Okay, I'm jumping ahead to post, and then I'll go back and catch up. I used to target shoot around the yard back when I was in my teens. I had a little jr compound bow and really enjoyed it. When high school and cars came along, I stopped shooting.

A couple weeks back I was at a yard sale and happened on a late 70's Bear BlacKtail Hunter compound bow. I wasn't really in the market, but I when the guy looked at the tools I had in hand and said he'd sell me everything AND the bow for $8, I figured why the hell not? I had the local pro shop check it out and throw on a new string, it's good to go. I picked up some vane-fletched Easton 2117s and a target and have really been enjoying myself. Shooting off a flipper rest the vanes collide with the riser something awful, but I can usually keep them on the bag target up to about 25 yards shooting full instinct, no sights.

So...the future....My wife has watched and decided she really wants to try it, so I'll be getting her a bow. She's left handed, and balanced for eye dominance, so we'll probably get her one of the nicer adjustable compounds. Looking at the Diamond Infinite Edge right now.

I shot a Bear Grizzly recurve for the first time at the local BassPro, and I fell in love with the idea of a traditional bow. I've been looking at the Samick Sage and Red Stag. I'm right handed but left eye dominant. I shoot right handed right now, but I'd like to try out shooting left before I buy a recurve. Since you are obviously shooting instinctual, how much difference do you think eye dominance makes when not using sights and such?

Right now I have almost no money in the bow I have, but you can't find cheap feather-fletched arrows to avoid the riser issue. I'm going to be buying the stuff to start fletching my own shortly, so arrow instruction would be great. My plan is to use cheap aluminum shaft like Gamegetters to start since backyard target shooting is hard on arrows.

I'm really enjoying the build thread, and I think I'll add this to the long list of Things I Must Do. Building a usable target/hunting bow would be awesome. Thanks for all the work you're putting in!

Rufledt
Rufledt Dork
2/12/13 3:59 p.m.

greetings! $8 for a bow and stuff? Thats a fine deal. extremely fine. Those old Bear recurves will sell for nearly new recurve money if they are in usable shape. I don't fletch with a fletching jig because I don't have one (yet) but using a jig is a great way to do a much more consistent job. Again, I don't shoot compounds (I don't have one, and I can't make one) but i'm sure your wife will have fun. If she really gets into it, you can make a matched his and hers longbow set for you two!

A word on shooting instinctive: it's not the only way to shoot traditional bows. Of course sights fit on longbows just fine, but there is also something called gap shooting. basically, you anchor in the same place, and pull the same distance every time (if your form is good) so you aim by putting the tip of the arrow somewhere in your line of sight with a target of known distance. When I used to shoot in the scottish games, I found if I put the arrow point right where I saw the bulls eye, that's where it would hit (if i didn't screw anything else up, which I usually did). I would put the tip lower for closer targets, higher for farther ones. No sights, but I was aiming by sight. Instinctual shooting is often preferred in traditional shooting because your brain because you can't be sure the deer will be x-yards away. It could be 9, it could be 23. you use your depth perception to take the shot. I'm don't always shoot like that.

I've shot a Bear Grizzly a number of times, and they are awesome recurves, but they aren't strictly traditional. If you measure traditional based on compound or recurve, then yes they are, but they are fiberglass, heavy handled bows. Fiberglass aside, the super heavy handled recurve didn't come about until the 20th century. As recent as a hundred years ago people were still using long yew, bend in the handle longbows for target shooting in america. The weight in the handle of newer bows made them more stable while aiming, and the fiberglass meant they could be mass produced safely and quickly without having to select perfect wood and craft them by hand. That doesn't mean you can't make them: people do, but I don't want to mess with fiberglass and resin. You could also make heavy handled all wood bows. I have an uncle with a whole arsenal of recurves and longbows, among them a Grizzly, and it certainly gave me a warm fuzzy feeling just holding the thing. It's soooo pretty and shot sooo nice....

ultraclyde
ultraclyde Dork
2/12/13 4:06 p.m.

Yeah, I only meant non-compound. I guess as an archaeologist who makes his own bows, traditional has a WHOLE different meaning!

Rufledt
Rufledt Dork
2/12/13 4:30 p.m.

Haha yeah I guess that's true, but I don't want to confuse "traditional" with "paleo." There are certainly people who try to make a bow with only flintknapped tools, but bows were made for centuries with metal tools, and in highly complex civilizations. I guess I figure if it existed (or could have been made) before the bow went from 'tool' to 'entertainment', it counts. In that sense, a bow made from a board isn't traditional, as most were made from split wood, but lumberyards existed and so did wood planes, so it could have been made this way .

I guess it doesn't pay to get bogged down in terminology (archaeologists waste a lot of time with that- I study colonialism, and arguements can break out over "contact," "pre-columbian," "entaglement," "historic period," and so on...). If it's a bow and it shoots an arrow, great. If you like to use it, buy it. And if you are loaded with cash, I'll take a Bear Grizzly, 50#....

Rufledt
Rufledt Dork
2/12/13 6:44 p.m.

Arrow time!

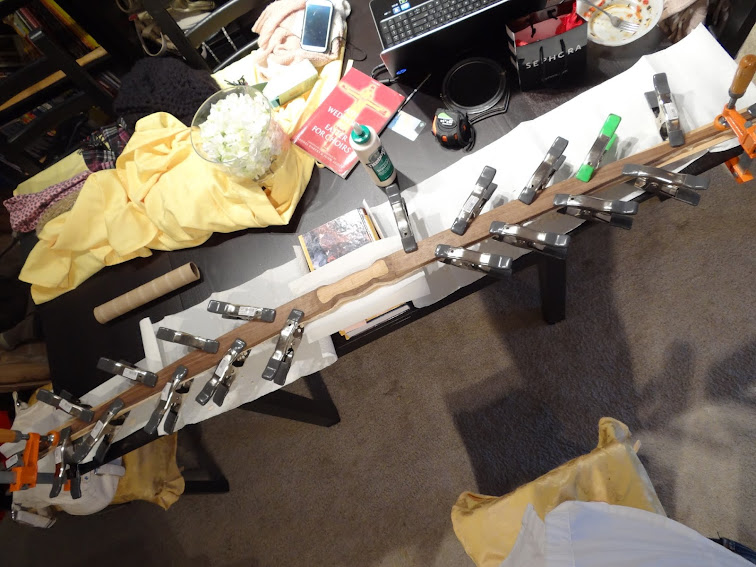
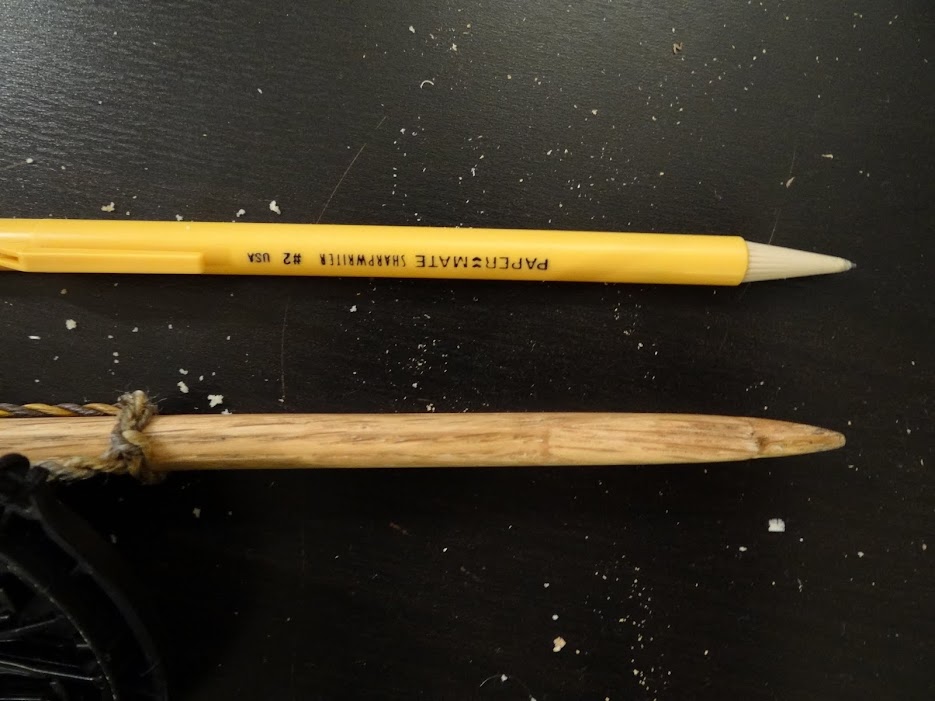
Here are some arrow making tools:

The blue thing is used to shave the arrow to accept glue on points and nocks (the back, what clips onto the string). thing that looks like a large stick of hot glue is exactly that, (called arrow point glue, but it's just hot glue), and the other stuff is self explanatory. I also use super glue (for nocks) and artificial sinew, which is just nylon string colored to look like sinew. For arrows, get the finest string you can. I think mine is called 15#

After figuring out which spine weight you want, get some arrow shafts. They come by the dozen in ranges of 5#. Sometimes they are weight matched, sometimes not. Many people prefer port oxford cedar, and there's nothing wrong with that. I went with sitka spruce, because it is claimed to be a bit tougher. It doesn't smell as good, but I don't often smell my arrows. I do, however, break them, and I don't want to. Sitka spruce is also farmed because it grows so fast, and port oxford cedar is not. Therefor, POC is disappearing, and sitka spruce isn't. I guess that makes it more 'green'? I realize the irony of owning a rotary powered car and claiming something I do is green. I really just got it because of the strength.

First, make sure they are all the correct length. finished arrow length is usually measured between the nock and the point, not from the point to the nock. Remember the taper tool will take some of the length away from the raw shaft. make sure you know how much, and cut the shafts accordingly. For me, I left the test arrows full length, and i'm making these the same length (remember, differing lengths change dynamic spine weight) Here's what the end looks like:

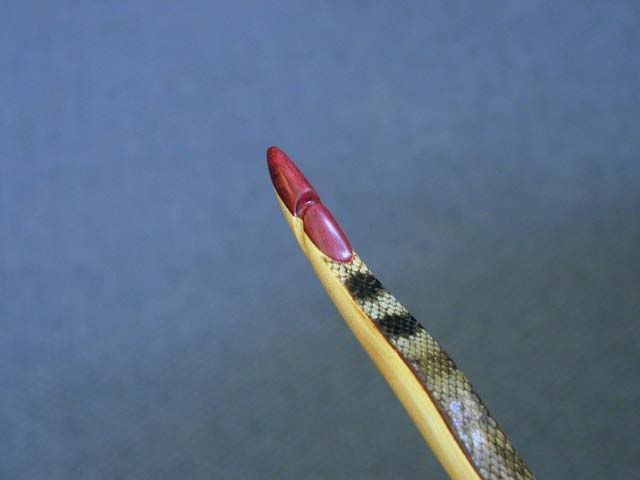
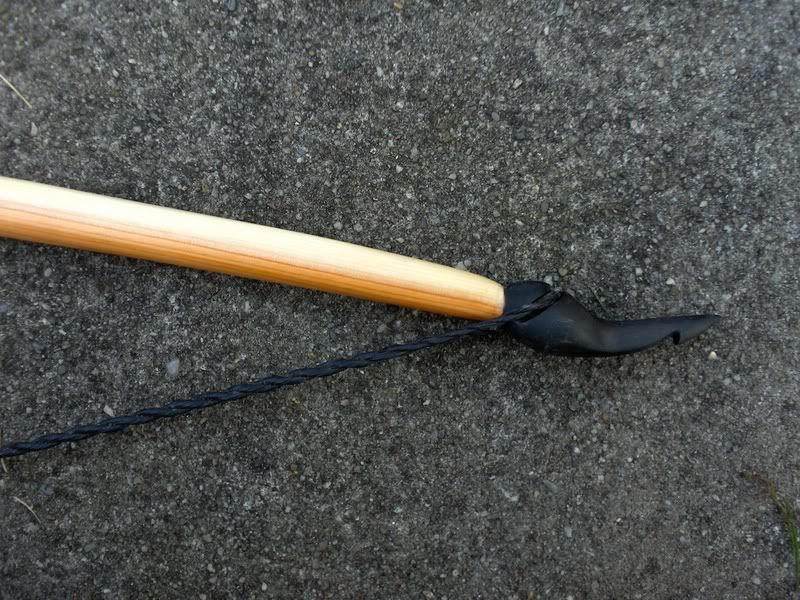
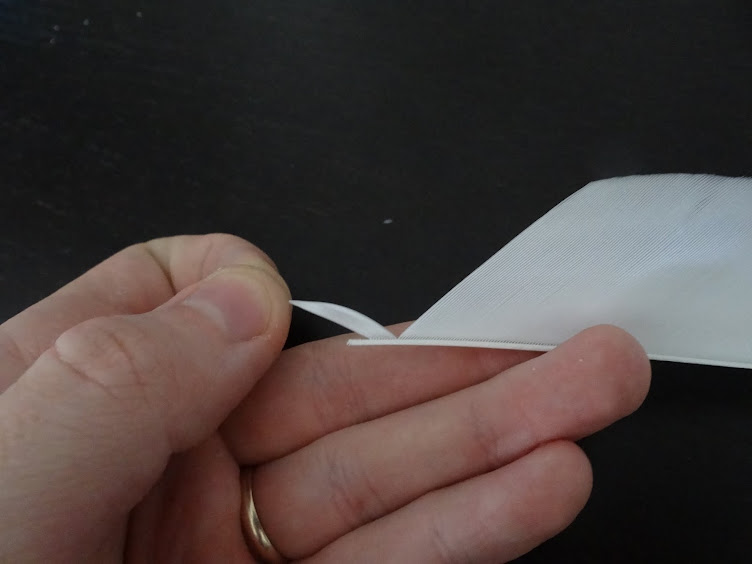
I put the nock on first. Take the blue tool, and use it like a pencil sharpener. The steeper angle is the nock, the other is for points. you'll notice the nock has a bump on it:

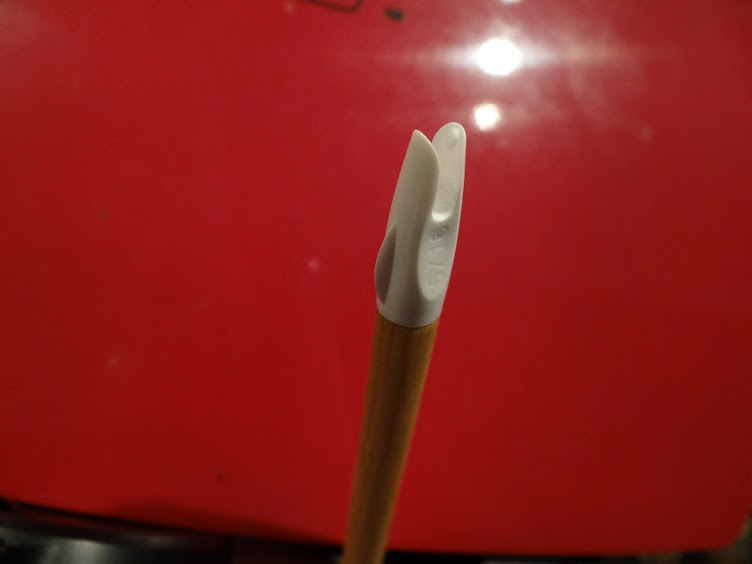
When the arrow is clipped on the string, that should point toward your body. What I mean by that is if you hold the bow with your left hand and the string with your right, it should go left of the string. You should put it on the shaft such that the growth ring lines go horizontal when shooting (perpendicular to the string). One more 'traditional' way of doing it is to cut the nock right into the shaft. This is called a 'self nock.' I've done this, and it takes too much time. I want to shoot, not file nocks.

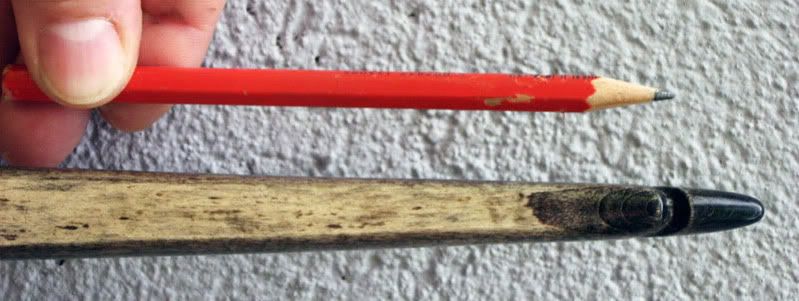
Now the tips! I actually did this last, but it's more related to doing nocks, so whatevs. Here's a shot of the shaft shaved down before gluing:

It's a bit rough, but that's because I need a new point taper tool. I once made some arrows out of oak and the blade wasn't really up to it... So! Get the glue hot and melt-y with the candle. More is not more here, don't burn the glue, just melt it.

Then, smear some on the shaft

That ended up being way more than needed, but the last time I was at the range I lost an arrow inside a target, so call me paranoid if you want. Now, keeping the tip not far from the candle (to keep it from cooling off), heat the tip over the candle using the pliers

After this, push the tip on and spin it. This will distribute the glue evenly, and thanks to the exacting nature of the arrow taper tool, it will center and straighten the point. If the glue isn't hot enough and you can't do this, put it back over the candle and then redo this. Some glue will squeeze out, that's ok. Quench it in water, and then shave off the excess glue.

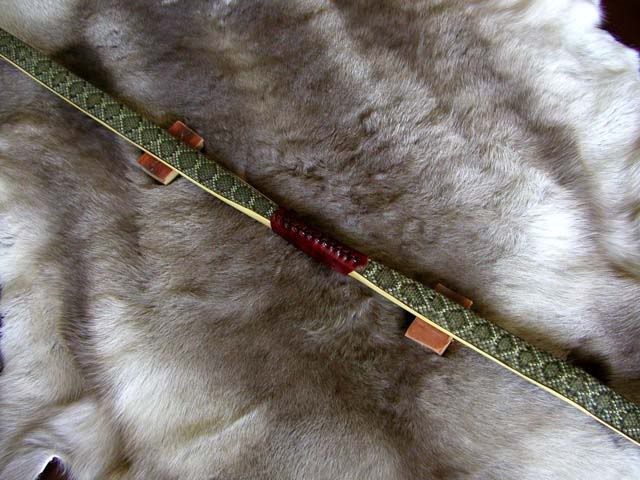
Now, the feathers! When you buy feathers, they look like this:

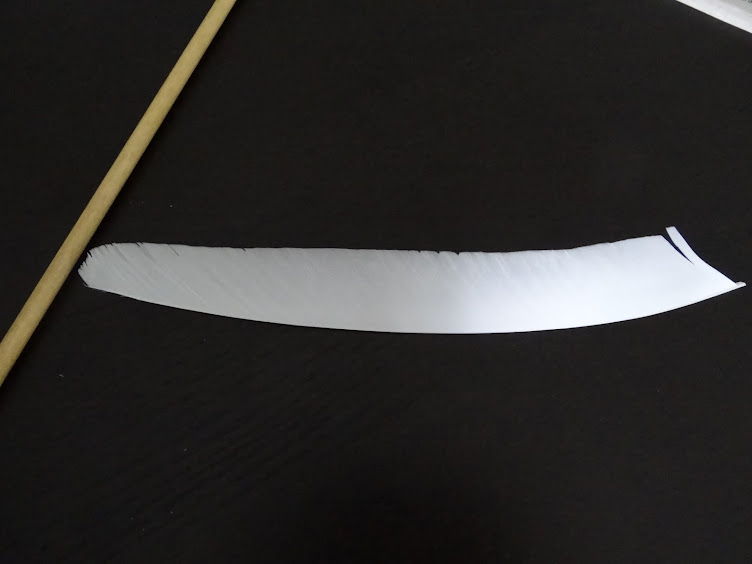
In the past, you could get 2 fletches per feather, but not anymore. They use flight feathers from turkeys that are raised for food. People buy smaller turkeys now, so they kill them younger. Shorter feathers, only 1 fletch per. Sadly. Feathers are sold by left or right "wing." There's some more old tyme lore about which one you need, but in reality, just make sure all of them are the same. I think mine are left wing? It doesn't matter because they are ALL left wing. Now, mine aren't glued down all the way, they are wrapped old school style. Also, it's cheaper style, because fletching jigs aren't free. To facilitate this, I start by peeling off the first half inch or so of the feathers. Start by grabbing a little, and pulling it forward like so:

It'll peel right off nice and easy. Now, a certain distance back (in my case 4.5") bend the feather a little and separate the thingies:

Do what you did in the front of the feather the the ones after the bend. Be careful not to rip up the feathers in front of the bend.

Peel the rest off. You'll have a really long stick out the back. The feather you have is much higher than it should be unless you want flu-flu arrows, which are used for birds/small game. The tall feathers slow the arrow down, so it won't go right past the squirrel and into the woods 100 yards away, never to be seen again.

Cut the shape you want. then, do it exactly the same on the other feathers. Here's what I do:

This isn't the result of personal preference, though I like the looks, it came about through trial and error. A common feather type is the shield cut:

With this design, the tines or whatever they're called are really short on the leading edge. Many self bows are braced lower than mass produced recurves, so the feathers may touch your hand. when you then pull the string back, they get bent backward. This damages the feathers, makes noise, and doesn't feel good. The long leading edge on mine instead lays flat against the hand. The back end it cut in like that because i shoot 1 above, 2 below. Basically, with my middle and right fingers below the arrow, and my index finger above. Some shoot all 3 fingers below. Feathers that stick way back will mess with your fingers (and face) at full draw.

They are different colors, white and blue in this case. 2 of them are blue, one white. Having one odd one is normal. it's called the 'cock' feather (heh). Remember the bump on the nock that sticks out? that's where the white one goes. The blue ones are evenly spaced, such that when the arrow is on the string, they face kinda up right, and kinda down right. The white one sticks out left (assuming you shoot right handed, like most people).

I attach just the front of the feathers with a drop of super glue:

Notice the natural twist? Yeah, i'm gonna use that. It's called "helical" fletching. You can also do it straight if you want, but that's not as easy without a fletching jig. Think of it like rifling on a gun barrel, this makes them spin.

Now, pull the feather back so there isnt' a gap between it and the wood, and apply a drop of super glue where it touches the back of the wood part. At this point i trim off the long spine sticking out the back, and the feathers are each barely secured with a drop of glue on both ends. It's important to get the twist even on all 3 feathers, and then on all the rest of the arrows.

Now, take a knife or something and try to taper the leading edge of the feather down to wood. This is especially important if shooting off your hand. Then take the atrificial sinew (or whatever you use) and glue a the start to a feather like so:

Wrap tightly forward on the shaft, and then start wrapping tightly back

When you get to the feathers, you can spread out the way it's wrapped, separating the feathers to slide the string through, then reattaching them. Then, at the back, return to tightly wrapping until you get it nice and secure, and then secure it with another drop of super glue.

Sorry I don't have more pics of that process, but it takes both hands until it's done. Notice the spiral nature of the feathers:

It doesn't take much to make the thing spin very quickly.

Simple enough, right? Ok now do it again a dozen times, exactly the same way.

Rufledt
Rufledt Dork
2/12/13 7:33 p.m.

Oh yeah, I should also mention, the overly elaborate wrapping of the feathers is so they can be removed. That's why they are held on with a minimum of glue, and the shaved parts of the feather are so long. If the arrow breaks, we can remove good feathers to be used again on another arrow. The wrapping will be sacrificed, as will a little bit of the feather length, but I won't have to make a whole new set of fletchings. The points are always removable with heat, and the nocks are stuck for good. If a nock breaks, they can be chiseled off, and a new one glued on, but a good nock can't be removed from a busted shaft.

Rufledt
Rufledt Dork
2/13/13 10:20 a.m.

More actual bow stuff to come after today- I promise. I glued the backing, and screwed something up. Stay tuned to see how big the problem is, what caused it, how you can avoid it, and what happens when I ignore it and keep going anyway...

Edit: also hear what kind of total b.s. excuse I have to claim is wasn't my fault.

Jerry From LA
Jerry From LA Dork
2/13/13 3:02 p.m.

Really enjoying this a lot. Keep it coming.

Karl La Follette
Karl La Follette SuperDork
2/13/13 3:34 p.m.

My Ben Pearson Cougar 7050 with Fishing gear <img src=" photo DSCF1462.jpg" />

<img src=" photo DSCF1463.jpg" />

Rufledt
Rufledt Dork
2/13/13 9:07 p.m.

More will keep coming! but not tonight. I want to get a little farther on the current step to get a more complete post, plus I have a whole bunch of theory i'm gonna sprinkle in there, so it'll potentially be a long one (or multiple, depending on how often I hit the add post button on accident). Finding time is tricky, good thing this bow making stuff can be done in 5 minute spurts here and there.

That looks pretty sweet, have you ever tried bow fishing? I haven't, but I've always wondered what people would think if I strapped that stuff to a wooden longbow and tried to do it. i'd probably just miss all day and walk home empty handed. Then again, i've never lived anywhere that had a reasonably clean river, so i'd most likely die if I tried eating anything i caught.

Keith Tanner
Keith Tanner MegaDork
2/14/13 12:14 a.m.

Wow, I'm going to take care of Janel's arrows so I don't have to fletch them Of course, given that they once belonged to a teenage girl, they're aluminum. Why? Because you can get it in pink anodizing...

The bows we have are a Bear Tigercat and a Hoyt/Easton Polaris. Easton is a name I know from hockey! The only markings on the latter are "AMO - H24" and "66" - 25 lbs". Looks like the Polaris can also be disassembled, that's cool. I can't find a year on the Bear anywhere other than the "1953".

Given that these probably haven't been strung in 15 years at least, should I pick up new strings? Or do the strings not really age.

Rufledt
Rufledt Dork
2/14/13 7:44 a.m.

Fletching arrows with a jig is WAY less intensive! And don't think you need aluminum to be pink: http://www.3riversarchery.com/Cap+Wraps+Arrow+Enhancers_i7979X_baseitem.html

AMO is generally a measurement of distance between the 'nocks.' Half of the stuff on a bow is call a nock, but this is referring to where the string attaches. If you order a string for a recurve bow "AMO 66" it will give you a string for that bow. The string will be shorter than 66". Production dates on bear bows are found in a code written on the side of the bow around where the draw weight/length is. Usually it's a few letters and numbers, and I think the last 2 indicate production year if I remember right? On my old bow i think the last 2 numbers are 68, indicating it was made in 1968. I found a nearly identical bow at a local archery shop in whittman, MA that was made in 1982. Other things are found in the code, but I don't know them.

New strings might not be necessary, as most of them are synthetic. You may want to pick up a bow stringer if you don't have one, though. There's a method of stringing bows called the "step through" that can damage fiberglass laminate bows, especially older ones (I'll show you later). It can twist recurved limbs slightly and this causes all kinds of problems pulling the laminations apart. With wooden longbows, this is less of a problem, but you can still use a stringer to be safe. I don't, but that's just me. the straight limbs aren't as easy to twist, and with no fiberglass (or laminations on most bows I make) there really isn't a risk of that, but one limb can be unevenly stressed. An archery shop may have more experience with fiberglass laminate bows (or potentially only have experience with compounds). There are a few kinds of strings and string materials. I make a Flemish twist bow string with an adjustable knot on one side, out of dacron. these work, but are a bit stretchy (easier on wooden limbs). If you got a continuous loop string out of something called 'fast flight' the bow would shoot faster, but it would be slightly harder on the bow.

Keith Tanner
Keith Tanner MegaDork
2/14/13 10:27 a.m.

Thanks, I'll look for that production date on the Bear. I've seen a serial number of some sort, that would probably be it. We also do apparently have a bow stringer. Janel pointed it out to me and maybe this weekend I'll get her to show me how to use it.

Do you think the H24 on the Polaris refers to the draw? It's the only number I can find on the bow. It's printed, while the 66" and the 25 lbs are hand-written.

I'll stick with the pink aluminum until I can hit the broad side of a barn, then maybe we'll get into wood shafts

Rufledt
Rufledt Dork
2/14/13 7:14 p.m.

I figured she might have a stringer, That's good news.

Bow stuff as promised! First, a little theory, then some bow stuff, then some of both sprinkled together. Think of it like a story where they start at the end, then the beginning, then jump back and forth for a while, except with no plot, characters, locations, or twists, and at the end I have a longbow. Ok, so, nothing like a story at all.

Moving along, then...

A bow stores energy when you bend the limb, but it does so by stretching back fibers and compressing belly ones. Over stress the back fibers and they break, this makes it go bank, and your potential bow becomes firewood. Over stress the belly fibers, and they collapse. This forms compression fractures, also known as chrysals. They look like this: Horizontal lines, such as the one right in the middle of that picture.

You must also think of resistance to stretch/compress. Assuming homogenous material, the belly compresses the same amount as the back stretches. The wood dead center of the limb is doing absolutely nothing. This is called the neutral plane, where the wood neither compresses or stretches, and the farther away from the neutral plane the wood is, the more it has to stretch and compress when the limb is bent the same amount.

Let's say you have a piece of wood 3' long, with one end clamped to a bench. Pretend you want it to bend in a perfect arch, with the tip bending down 10" from where it started when you sit on it. At 10" of bend, the wood pushes back with the force of your weight x. Lets say the wood is .500 thick, and is made with tapering width such that all of the belly wood (here on the bottom) and all of the back wood (here on top of the wood log) is stressed exactly as much as it can before problems arise. If you want it to be twice as strong, you double the width. This way, at 10" of deflection, it would push back up with the force of 2x, but all of the belly and back wood would be stressed exactly as much as before. the reason it pushes back twice as hard is because there is twice as much of it.

If you were to take the original piece of wood and double the thickness, the resistance at 10" would go up by 8 times, this is because all of the same wood is expected to stretch and compress much farther than before. If the original was just right at .500", than this limb at 1.000" would most likely break before it reached 10" of deflection. it would, however, push back with the force x while bending much less, and with no additional width. Part of the trick is to make a bow designed such that the limbs are no thinner/wider than they need to be to store the amount of energy you want at the amount of bend you want. Want more bend? Make the limb thinner. You could also make it longer so any given part of the limb doesn't have to bend as far, spreading the same load over a larger area.

Now, remember the thing about the neutral plane between the belly and the back that isn't doing anything? Turns out it's even less efficient than that. In fact, pretty much all of the tension/compression work is being done by only the top 30% of material. This means a whole third of the wood isn't doing much of anything. The surface 10% of the material does half of the work, and the very surface 1% of material does 6% of the total load. The farther from the neutral plane, the more stressed it is, and you can't over stress the surface wood, or the bow will die. Most of the wood, therefor, does less work than it's maximum potential.

One improvement discovered recently in flight shooting (shooting for maximum length) is called "Perry reflexing," named after it's discoverer and flight shooting champion Dan Perry. This must be done with at least 2 pieces of wood. The wood is bent into reflex and the 2 pieces glued in place. This means the wood will be forced into compression/tension at the surface where the pieces meet, in the inside of the limb. This wood is forced to do work, instead of just lounging about adding worthless mass.

There's more at work, since these are 2 different woods with different properties, making this a non-homogeneous material. Thus, the neutral plane isn't in the middle. Hickory is denser, which usually means it has more bending resistance, but hickory also has near herculean tension strength. This means the neutral plane would go closer to the back, causing the walnut belly fibers to compress farther (since they are farther from the plane), crushing them. A good way of fixing this is called 'trapping.' Basically, narrow the back without narrowing the belly. If you were to cut the limb, you would see a trapezoid. Less back wood means less wood working to resist stretching. This moves the neutral plane closer to the belly. This also means the back fibers must stretch farther, taking advantage of hickory's strength in tension, while easing the load on the less dense Walnut. Ok, now to the actual making of this bow and the application of all of that mumbo jumbo....

Rufledt
Rufledt Dork
2/14/13 7:36 p.m.

Prior to gluing, make sure all gluing surfaces are clean and smooth. Then, you'll need something like this:

A table space, something to make it bent, and a crapload of clamps.

The books raise the center up 3 and a half inches, while the tips will be clamped down to the table to bend the limbs. Up to this point, I made sure the limbs bend backwards evenly to avoid messing it all up.

put down some paper towels to keep the excess from dripping onto stuff (and to keep SWMBO from smacking you for ruining the livingroom furniture) and glue up.

Spread the glue evenly over both surfaces, and clamp as so:

Spring clamps up the wazoo, and big clamps to force them both into a bend. I should've mentioned before this how you should floor tiller the limbs, but don't perry reflex your first bow and you won't have a problem.

Leave it to sit for a day or so. The bottle says you can unclamp in 30 minutes but don't stress the joints for 24 hours. Simply unclamping the ends would stress the joint, as the woods will try to stretch/compress back to their original shapes, creating huge shear forces on the glue joint, so I left it clamped for 24 hours. Upon removal, I found this:

a slight gap! nooooo!!!!

The hickory absorbed moisture where the glue touched it, expanding that part of the wood. The other side of the hickory didn't expand, so this forced it into a curl, lifting the edges off the walnut. I should've anticipated this, but in the past the backings were sold much thicker, and therefor wouldn't curl as readily. That's my excuse. You should use more clamps, and focus on not allowing the edges to lift. If you clamp the edges, the middle with be tight down, because the arching nature of the wood will force the middle down into the walnut. you may also just clamp the whole shebang onto a flat surface like I do when backing non-perry reflexed bows. Doh.

The books I used deflected the tips 3 1/2", but the unclamped reflex rests at 1.5". This is normal, always go beyond your goal, because you won't keep it all.

This means when I do the 'trapping' mentioned earlier, I may actually cut off the parts of the hickory that arent touching the walnut, ending my problem. I haven't done this yet on the bow (I will start tonight) but more on the potential success or failure soon!

Any questions on exactly what I did there? There is like 100+ pages of this theory stuff in those books I keep mentioning, and I know I missed a lot of stuff.

Rufledt
Rufledt Dork
2/14/13 9:00 p.m.

More backing info- you don't have to do it. It is not needed with good grained wood, and the backing doesn't need to be wood. There are MANY options, including sinew, which is of particular note. It can be used to mess with the whole neutral plane, thing, too. It takes a lot of work, though. if you think this wood backing was extra work, you should check out processing sinew...

Also, through the process of trapping the back of the bow, the gap is vanishing. I think I dodged a bullet (arrow?) this time.

Rufledt
Rufledt Dork
2/15/13 12:13 p.m.

Mini update! I have acquired 2 1x2 redoak boards to teach my wife and sister-in-law who really want to make bows for obvious reasons of awesomeness. The lumber situation at the 2 HD's and 1 lowes i went to was pretty grim, so good luck to any of you looking for wood. I found no maple with decent grain at all. One board was pretty good, but had a half inch section in the mid-limb area where the grain was all screwy, which would've been insta-death had it been unbacked.

Alternative backings- some people glue down thick brown paper. This doesn't have any strength, but it prevents a splinter from lifting on the back, which can save the bow. In the same way people glue down snake skin or something of the like. Rawhide backings keep splinters down, but offer a little bit of strength, too. Perhaps the cheapest, easiest, and ugliest backing is fiberglass reinforced tape. It sticks to the bow instantly, and works in much the same way as paper, keeping splinters down. It is, however, hideous.

Pic for snake skin bow:

Soon to come, glued on tips:

Neither pic is a bow of mine. I probobly won't even cut tips like that, but there will be a glued on piece of wood over the tips.

Rufledt
Rufledt Dork
2/15/13 6:13 p.m.

OK, while dinner is cooking and the glue is drying, here's some info about tips. It is necessary to have a place for the string to attach before the bending process (tillering) is started.

Tips are best left as light as possible. Think of it like rotating mass on a tire. If you add 10 pounds to the center of the wheel, that would suck, but not near as bad as adding 10 pounds to the tire. Adding dead weight to the handle of a bow doesn't really suck as much, since it's not a perfect metaphor, but dead weight to the tips is almost the worst place to add weight. (the very worst place being where the arrow nocks to the string, since that is what accelerates fastest)

The tips of the bow may not seem like low stress areas, since this is where the string pulls on the limb. Remember earlier about the parabolic nature of a normal, straight board? The tips don't bend at all, because they are under the least stress. This means you can remove TONS of weight there with little risk of breakage. You don't really want it bending, so it has to be somewhat thick, but narrowness is recommended.

There's an example I pulled from paleoplanet.net. They have a whole gallery of bow tips and handles, but the forum doesn't hum as smoothly as GRM. That bow tip isn't even CLOSE to the limit of narrowness. Do you see how the string groove on the snake skin backed bow above cuts into the glued on nock and around the sides? When I make string grooves, they are only cut into the back. The ends of the tips are as narrow and the inner part of the string groove. Here's a pic of one of mine:

Not only is it narrower than a mechanical pencil, it is that narrow for the last 5 or 6 inches of lenght. It is also not all that thick, and there is probably 20% more dead weight than it needs. This section does not bend. Also, if you see the little extra bump on the bottom in the first picture, don't think it's for a second string. That double bow looking thing above has tips that look like this:

again, tons of dead weight, but I thought it looked cool. I hadn't broken the thing in by the time it started to show signs of imminent death, so I didn't get to modifying it for more speed. That extra little burr is because one end of my strings has a knot. That knot tightens when the bow is strung, and stays locked in place when the other side (which is a loop, not a knot) is taken out of the string groove. This way the string wont fall off during transport (which annoys the berk out of me). Yes, this adds weight and slows it down. This can't account for more than one fps i would assume, and it saves me some headaches. Would you guys take A/C, heat, and carpet out of your daily driver just to make the occasional drag race a little faster? Ok, bad example... Would you do that to your spouse's car? Ok, maybe also a bad example...

Why even bother gluing something on for the strings? Wouldn't the dead weight be problematic? It isn't necessary, and no, it doesn't add dead weight. Here's the bow from one of my early posts:

I cut the groove straight into the hickory backing. This can leave a weak spot on the back, meaning it has to be bulked up a little to put up with the extra strain. These nocks often weight considerably more. A glued on extra bit of wood won't cut the wood fibers on the structural backing, and can thus be only big enough to hold the string.

One guy used to make tips so narrow a groove couldn't be cut. He would soak some flax in hide glue and wrap a little ring around the tip, so the string knots (on both ends this time) would tighten and not slip off. He made some crazy fast single piece wooden longbows. I can't find a picture. Sorry.

Historically, nocks had an additional purpose. Here's a traditional english long bow:

Those are horn nocks carved out and glued on the end. Yew wood (pictured and preffered by english bowyers) is actually very soft, and strings can dig in, especially at such high draw weights found in old english long bows. The extra length is for the stringer (mentioned before). Some people struggle to do the 'step through' method for 60+# bows, imagine double that weight. Yeah, use a stringer.

This adds a bit of weight, and here's a modern retake on it:

No stringer attachment, but it's a lot lighter. It's also probably not 120# draw.

There really are unlimited options. Go nuts, but remember, lighter is better.

Rufledt
Rufledt Dork
2/15/13 10:52 p.m.

So, on to actually making the tips on this bow. remember the thin cherry board I used to glue the handle up a little bit thicker? Well, I have a decent amount of that stuff, and I like visual consistency, so i'm gonna glue some of that on.

Remember in the beginning when I told you to save the cut offs from the sides of the bow while roughing it out? You can use that, too, and the color would match PERFECTLY. Unfortunately, that was cut off of my friend's bow, and he called dibs on it. yeah, we're making more than one simultaneously, but they are slightly different.

Anyhoo, I took a piece of this cherry and marked out the pieces to cut:

These are 1.5" x .75". Why 4? because the wood is only 1/8" thick, and i'm used to doing this with 1/4" thick wood. I like consistency like that. It's really not necessary to go more than 1/8" thick, since that's the loop thickness of the massively overbuilt store bought strings, and more than enough depth to hold my thinner strings. I just can't stomach change, because, in a sense, i'm screwed up in the head. I have also once glued tips up higher, hoping to mimic a bit of reflex. The string is pulling on the tips, and if the tips are forward an extra half inch, it's almost like the limbs are reflexed (or less deflexed) by half an inch. Moar power would result, but barely.

i cut them out, and glued with Titebond 3 and clamps:

I then proceeded with some of the 'trapping' of the back. I marked where I want to narrow the back:

I'm narrowing it a decent amount (maybe 30% average?) which would greatly increase the tension load on the wood. Fortunately, like I mentioned before, hickory is almost unbreakable in tension. Random fact: even the bark in crazy strong in tension. The Iroquois would use hickory bark as structural ties in their awesome longhouses. It's good stuff. It's not all narrowed like that. Here's a shot of the tip:

Here, the bow is only 1/2" wide. There isn't really much width to remove. Before we start the bending process, i'm going to round the back edges (to about the radius of a pea) to prevent breakage. When the wood is bend, the hard edges are a place that tension energy can lift up a splinter. When this happens, it becomes a weak spot, further lifting the splinter, making it weaker, etc... until it breaks half a second later. If I round the edges of a 1/2" wide back, it will barely have any flat surface at all, so I left it full width.

Does it look too narrow? only time will tell, but remember old fasioned bows are from split staves. On these bows, the backs are arched to follow one grown ring, meaning the very top of the arch is under a great amount of stress. At least here there is a 1"+ flat back width for most of the limb, to spread that force out.

I also made a line down the sides of the limb 3/8" below the back. This creates a line between this and the pencil marks on the back where I will be removing wood. I haven't finished this yet, but just FYI hickory takes quite a sharp edge:

That's from the wood, not my tools. I was shaving the extra width off of the hickory backing, slipped, and hit my fingers on the side of the wood. It wasn't splintery, it was sharp. The kind of sharp where you don't feel the cut even though it's pretty deep and bleeds a good amount, forcing you to super glue it back together so it doesn't make the bow all bloody. That kind of sharp.

Another fun fact: some old school arrows were tipped with metal, bone, stone, glass, and wood. Until I got sliced by some razor sharp hickory, I was skeptical about the wooden broad heads. Not anymore.

Edit: Beware of how the grain works. With many hand tools, there is a direction they work best. Go the opposite way, and the wood tears. I discovered going one way was good for the hickory backing, but not for the walnut. Go the other way and the opposite happened. Do'h.

Rufledt
Rufledt Dork
2/16/13 10:58 p.m.

News! my friend wants to do something different with the tips on his bow. Would you guys be interested in a build along there or are you all fed up with tips? Do you want me to get to the bending part already? Making the string? What do you want to see next?

I will need to make a string eventually, but I could make one now if you want, or I could use my tillering string to get the thing bending and make the string later. Your call!

Keith Tanner
Keith Tanner MegaDork
2/16/13 11:30 p.m.

The almost stream-of-bowmaker-consciousness method you have going on here is working just fine! It's a little surprise, what will we learn today?

Jerry From LA
Jerry From LA Dork
2/17/13 12:09 a.m.

Yeah, we're all along for the ride wherever it goes.

1 2 3 4 5

You'll need to log in to post.

Our Preferred Partners
rel2LDw74XrC6PK77II9nmxhWPrHonAtHONk6DzlqyOb0PcQfHz0n3YA7C58nwmp