6 7 8 9 10
fromeast2west
fromeast2west Reader
3/13/13 12:19 a.m.

I'm going ahead with trying to save the bow, so tonight I tried backing. I was able to find a variety of methods online and took a few hints from each.

The ladies at the fabric store weren't sure what the canvas they had was made of, so I used a good solid linen that was labeled as 100% lined (flax fibers).

To prep the bow for backing I rounded over the back, which will hopefully help with the edges lifting and also got rid of all signs of the existing splinter. I had to eyeball how much I was taking off when rounding over the edges because I didn't want to put the bow under any stress until it was backed.

Once the back was rounded off and sanded down with 80 grit I cut the linen to the approximate width and length. At the nocks I split the fabric and shaped the portion of the linen that ran further to each side.

One of the tips I found online was to wet the cloth, so I put it in water and then squeezed out any excess.

For the actual glue up I used Titebond 3. I applied a primary coat and spent a while wiping it on and working it into the grain of the wood. I coated the entire back and sides, but not the belly. With the more rounded edges of the back it wasn't clear where to stop, and I figure having the backing wrap around the edges will help keep any splinters from lifting there and give the threads running perpendicular to the limb better anchorage.

I let the primary coat tack up, then spread a second thick coat on the bow. Once that was basically spread out a laid on the damp linen. Working from the center of the bow outward I worked the linen to get it seated in the glue. I tried to make sure the threads ran as parallel as possible.

After the linen was smooth and had good contact I applied more glue and worked it in until every portion of the cloth seemed saturated.

Before leaving it to dry I propped the tips up on some 2x4 cut offs and clamped the center/handle to the work surface. This won't add much reflex really, only about an inch at most .. which might only be the amount of set the bow had already taken. With luck that will help restore some of the power that the bow lost when I removed wood to round over the edges of the back, but even if that's minimal my real hope is that it adds some sort of pre-tension to the fabric that will help hold down the wood fibers.

I didn't take any pictures of the process because most of it took both hands, and I didn't want to glue up my camera. I'll grab some shots of the results tomorrow.

Oh, and if you ever need fabric for any projects, JoAnn's (I think it's a national chain), has a phone app that pretty much guarantees you'll be able to use at least one 50% off a single item coupon. You can install it, get the discount, and then delete it if you want.

Rufledt
Rufledt Dork
3/13/13 10:47 a.m.

I can't wait to see it! It's good that you read a bunch of stuff before trying it, you should get those books I keep pimping on this thread. They'll keep you busy for YEARS of bow making. Just keep in mind that the online buildalongs are specific to the materials/region. For example, if you are in a fairly dry part of California, you may not want to follow my methods of trapping and heat treating oak board bows. I have to do that to prevent moisture induced set. If your climate is dry, it might be too much for the back. I may have mentioned this before, but I once new a guy who broke like 6 red oak bows in a row. The tiller shots were perfect, the design looked great, he wasn't trying to get too much draw weight, they weren't trapped or heat treated, and many were backed with canvas. His problem? He was in Arizona, in the desert. Many Native American bows from this region looked like this:

That's not strung, and that's not reflex. They deflexed the tips many inches! That way, the bow doesn't have to bend much for brace, and it doesn't have to bend as far for draw. Less bend means less stress, and means it doesn't break. You may be thinking that deflexed tips would be like an opposite recurve, giving it even less energy storage than a longbow and SLOW cast. You'd be right, but it wouldn't break.

It sounds like you did a thorough job with prep and gluing up, and titebond 3 is always a good choice. I have a feeling you'll be shooting it soon. You were pretty far along in tillering, right? You may only have some minor tillering and adjustments after applying to backing before it's ready to go again.

I ran into the same problem with unmarked materials at fabric stores. One I went to had an area with "100% Silk linens" which points to a problem. Linen can be used interchangably with woven fabric, but linen as a material is made of spun flax. We also noticed 90% of the fabrics were cotton or artificial materials like polyester. Cotton takes a set in tension, and then tightens back up when it's not under stress. You know how a pair of jeans feels GREAT after wearing them a while, and then they tighten back up, making you feel like you gained 10lbs since wearing them last?

Thanks for the JoAnn's tip! I likely won't be deleting it, since my wife loves that place. If you want leather hides, you may have luck with other local places. There was a fabric store I went to (not a chain store) that had a whole bunch of hides, too. Oddly, they had no leather working needles...

Rufledt
Rufledt Dork
3/13/13 4:41 p.m.

Just bent the other tip today. I let it boil for longer (I got stuck on the phone for an extra half hour or so) and bent it a little slower. This time, no splinters at all.

Edit: after unclamping, it does have a bit of twist in one of the tips. Thankfully, I left the tips extra wide. I'll just cut them straight. I hope.

fromeast2west
fromeast2west Reader
3/13/13 10:35 p.m.

I have good news to share: the linen backing seems to have saved the bow.

Here's a quick shot of one of the tips (which still needs lots of shaping) showing how I tried to split the fabric and wrap it to the sides. A lot of that will probably get removed when I shape the tips.

I used my shurform to clean up the portion of the linen that extended beyond the sides of the bow. I may go back over the ends of the fibers with some extra glue once the bow is complete to help keep the edge locked down.

It's hard to tell from the picture, but the shurform really left a pretty clean line.

I'm not very good at waiting, so even though one site suggested waiting several days after gluing on a backing to allow any water from the glue to leave wood, I went ahead and put the tillering string on to see how far it was drawing at 30lbs. Given the amount of wood I took off rounding over the back I was sure it would be pulling further, but it ended up pulling a full inch less than before. It may be all in my mind, but the linen seems to have add a springiness that wasn't there before too.

Here it is on the tillering stick.

I also had a couple of packages waiting when I got home, one of which had the bow string. So I strung it up just to see how it would look. It was such a momentous occasion that our semi-feral cat Earl came by to check it out.

I'll have to spend some time looking at the bow on the tillering stick to see where and how it still needs to be shaped, but I'm somewhat tempted to leave it as is for now and finish the tips and handle so that I can take some shots when the arrows and the rest of the gear get here.

Rufledt
Rufledt Dork
3/13/13 11:59 p.m.

That's awesome! I'm glad you were able to save it. I generally do the final tillering with the string I intend to use on the bow, and i'd recommend you do the same. The string will get a chance to stretch out before you get to full draw and before you do some shooting so you won't be left with a sudden problem. That last shot looks like the bow is strung a bit high, but it may end up coming down when the string does some stretching. how high is it braced off the handle? I usually shoot for 5-6". When I made the string for the walnut bow, I tied the knot a bit too short (intentionally hoping to brace the bow 6 or more inches and let it stretch a bit) but it ended up 1". I then shortened it so the brace was 5 inches, and when I set it down I watched the string slowly lower until it touched the handle. Dacron can stretch a good amount, but I suspect you won't have the same experience. Usually purchased strings are very overbuilt, with twice the strand count as my string, so it won't be so easy for your bow to stretch it out. Also, the ones i've purchased from 3rivers came much less twisted than what I make. Less twist means less stretch. Lastly, my walnut bow is a much higher draw weight, and has a good deal of reflex, so it's brace height tension is extremely high, pulling on the string more.

The tiller looks pretty good, but it could still use a little work. The limb on the left looks good, well done there, but the one on the right seems to have a weird twist/hinge a few inches away from the handle. Then, it seems a little stiff for a few inches, then has more bend, then is a little stiff until you get to where it fades into the stiff tips. The shot looks like you were standing a little left of center when you took the shot, so that might be messing with the way the photo looks. You should also put the bow on the stick the other way around and check how it looks from both sides, since a minor, non-problematic twist can make it look out of balance from one side and not the other.

That being said, you can still shape the tips and handle before you're done tillering and shoot some half draw shots for motivation. You could even use that as a way to exercise the limbs after you remove wood. Just make sure to not draw it all the way back until you have tillered it to full draw. It's tempting to full draw it when you're only a few inches away, I know, I've done it, but it can cause undue set or a break outright. You may also find a problem that doesn't manifest itself until you shoot if a few dozen times, and, if you aren't being cautious, cause a hinge or chrysal (compression fracture). Be VERY careful and you'll end up with a successful first bow, just like my friend here that I taught to make a bow. His first still works. Technically, my first one works too, it just came in way too light (about 25#).

If you aren't hooked on this yet, you will be once your stuff gets there and you start shooting. Just remember that in-person help is far better than internet help. That goes doubly for the people here: http://paleoplanet69529.yuku.com/topic/54463/This-Months-Pasadena-Bowyers-Meet-March-17th I'm envious of anybody within (relative) driving distance of there. They're WAY more experienced than me, and very friendly online.

Rufledt
Rufledt Dork
3/16/13 9:58 p.m.

Sorry for the few days of silence, I was away on a school visit in New York and didn't work on anything. The good news is that there is TONS of bow wood there and a couple archery places, so that's cool.

Good news! I got a special delivery last week:

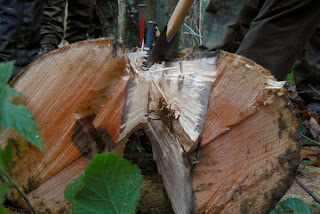
That's right! It's wood! That, fine sirs (and ma'am's), is a split-from-a-tree stave or Oregon Ash, harvested the traditional way. With a chainsaw. You may be saying "I can't keep up with what bow is being worked on when plz stop!" and I understand. The thing is, the recurve is more or less my wife's project, which means progressing on that will be spotty. The oak longbow (the one I heat treated and will back with canvas) is mine, and I'll be working on that, but It's already a bow and after backing, there isn't really any bow making to post about. This stave gives me an opportunity to make a more traditional bow, and post all about it. I've talked a bit about split staves, but I'll go into some more detail now. Again, sorry, no actual bow making right now, just info.

Basically, you find a tree that's straight, cut it down, and split it into staves. It's a bit more complicated than that, though. First off, tree selection is key. You want one that isn't twisted like this:

You don't want one full of knots and kinks like this:

http://www.lastgreatroadtrip.com/wp-content/uploads/2011/02/knotty-tree-202x300.jpg

Perfection is not as important, though. You don't want pin knots and branches, and you want the tree to be fairly straight, it's not like the lumberyard. Going to the lumberyard is a difficult process of careful selection. The grain MUST be perfectly straight, because the board was cut perfectly straight. When it comes to trees, You don't have to cut them straight, so you can be less picky. Look at this bunch of trees:

ALL of them can be made into bows. Each tree has at least 6' of straight, branch free trunk, and They are all a decent diameter. See how much easier it is?

Step One would be to cut down the tree (Duh). Cut it close to the ground, and IMMEDIATELY coat the cut surface with something to seal it. Many people bring a can of shellac and paint it on the cut. When you cut the tree, moisture will rapidly escape through the cut surface, drying the last few inches faster than the wood inward a bit. This will cause drying checks (cracks) which you don't want. The shellac stops the moisture from escaping out the ends. Some say certain woods like osage will audibly crack within seconds of cutting. This is bad. You also want to cut the section of wood a little too long as a protective measure against these cracks. If you get some minor checking, you can cut the ends off.

You don't want the top part of the tree, just a 6-7' section of the trunk. IF the tree has a long straight truck, you can get more than one section per tree. If you end up with a 4' section at the end, take that, too. You can splice them together or make take down bows.

When you get everything home, split it into quarters. Somewhere on this thread is the mention of a youtube channel that I can't seem to find. On there somewhere is a video of them splitting osage. Watch that if you're interested. I've never done that, so I don't have personal pics, but I did find this:

Split in half, split those in half. If the tree is big enough, each quarter will have 2 or 3 bows worth of width on the outer surface. You can also bandsaw out another one from under that, but I don't have pics. The bowyers bible 1 has some great info and pictures about that, but I don't feel comfortable posting a copy of their stuff online. If you want those books and buy from "bois d' arc press" you're actually buying from one of the main authors directly. Bois D'arc is a name for the osage orange tree, btw.

Now take your staves and let them dry for a long time. I hear a year per inch of thickness. I've also read you can rough out the shape of the bow and let it sit for a couple months. Thinner means it dries faster.

The staves I bought were cut 10 years ago, according to the guy (look up vinemaplebows and you'll get his website. He's a good guy who just does this on the side because he loves bow making) so they should be plenty dry.

Tip: I hear cutting wood in the spring/summer is better than winter, since the bark will come off easier. Again, I've never cut the wood down, so I can't confirm that.

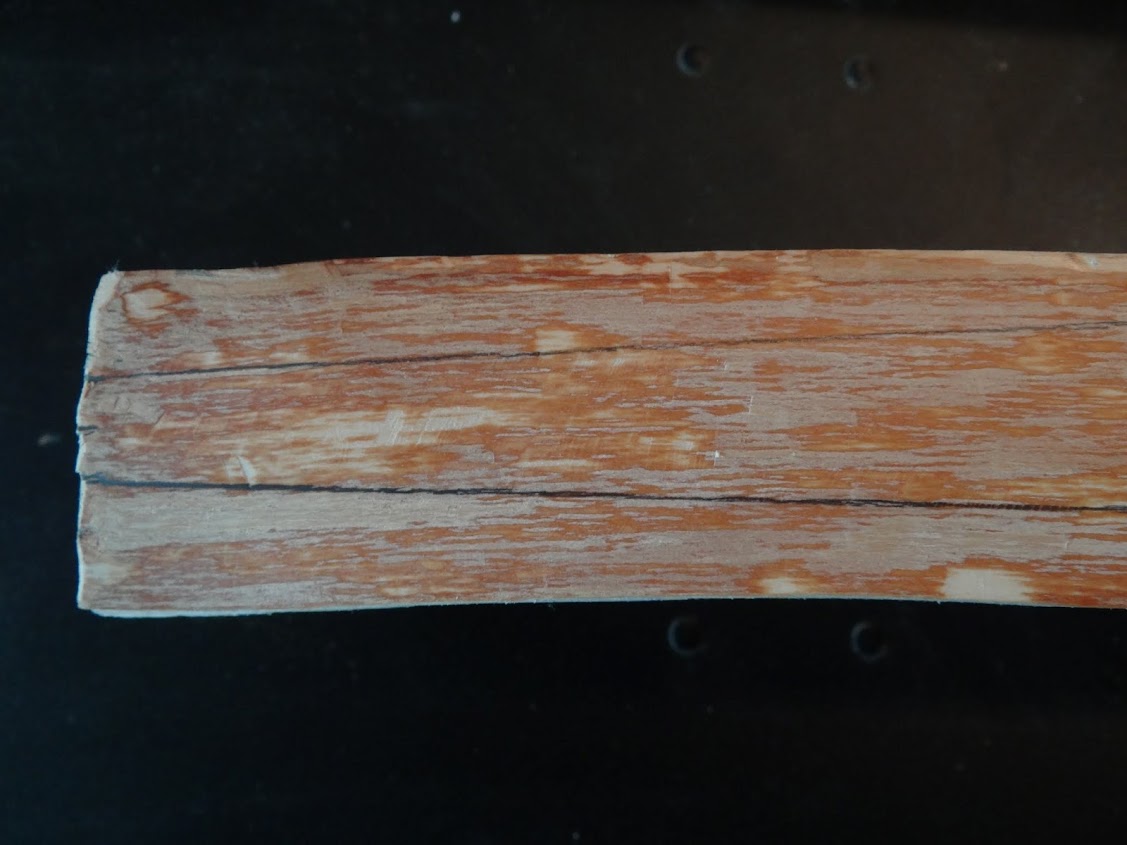
My stave is about 2" wide, 70" long, and an inch or so thick, except at the middle where extra wood was left for a handle. Yes, the guy did the beginning stages of bow roughing already, and these staves were dried and affordable. I'm totally buying from him again.

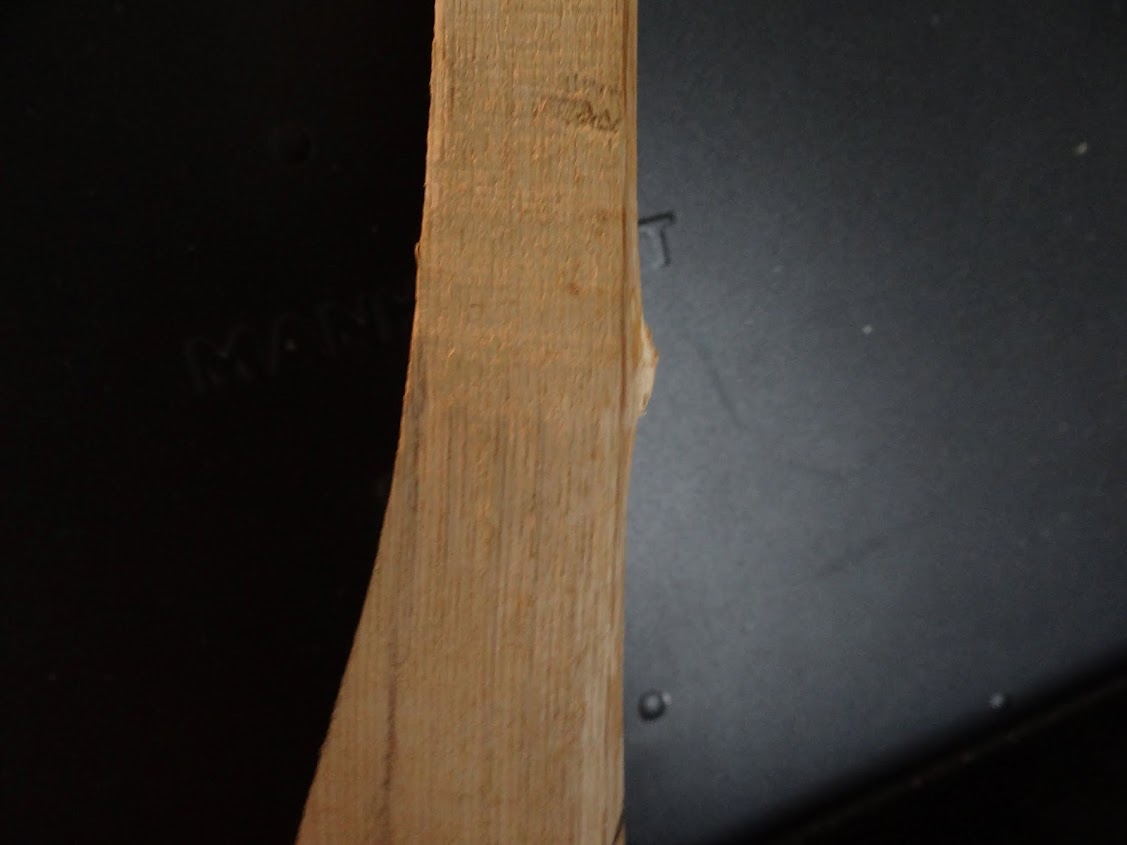
In most species of tree, you remove the bark and the surface left is the bow's back. Since the bow was split, following the grain lines of the wood, you will have uninterrupted wood fibers (what you want) from tip to tip with no run off. It will usually not be perfectly flat:

This is fine, because you don't want perfectly flat, you want unviolated wood fibers. With a board, the back is cut perfectly flat, so you need perfect grain to have unviolated fibers. This little bend will result in a hump in the limb. I'll have to carve the belly to follow the shape of the back. Some people, who love a challange, take this to the extreme.

Fibers are not violated, so the bow stays together. If that were cut into a straight board, it would break. If I sound like a broken record here, it's because fiber violation is THAT BAD of a thing. This preservation of fibers in a bow can even lead to knotty bows that don't break:

Notice something here, the knots are weak spots, but the tree compensated by making the wood thicker and wider around the knots. The bowyer simply followed what the tree did. The back is one growth ring of the tree and the sides are straight fibers. If you don't like the look, then don't buy knotty wood. Leave that for people who like that kind of thing. Personally, lots of character doesn't 'do it' for me, but I do find them to be impressive displays of bowyer skill. The main challenge is trying to figure out if the bow is bending evenly when it wasn't straight to begin with!

Some woods are different, though. Osage, for one, is known to have crappy sapwood (the stuff just under the bark). Yew is the opposite, it's sapwood is awesome, but it can be too thick. You don't want a yew sapwood belly, and you don'w want an osage sapwood back (although some have gotten away with it). In that case, you have to cut down the back. It is important here that you 'chase a ring'. Basically this means you have to cut off a few growth rings and leave another one intact. This is a lot of work, and it generally takes lots of painstaking work with a scraper.

I may get to do this with my ash bow. The surface just under the bark on oregon ash makes a great bow back, but the rings are crazy thin. If I make just one error, I could cut through a ring. Then, i'd have to chase the whole ring from tip to tip. I don't want to do that. Some people cut the wood in the late spring, and peel the bark right off before drying, leaving a clean surface from the get go. The guy who cut this wood didn't do that, and on some woods that isn't advisable. Surely the bark offered some back-surface protection during shipping, too.

This bow will not have any glued on handle, and I may not even glue on tip overlays. Oregon ash isn't super hard, though, so I still might do that. I'll figure that out later. I may also scour some books and imitate tips found on some old bow. That bois d arc press has a good variety of other bow books, too, and i'll likely copy something from one of those. More decisions have to be made, and i'll keep you guys updated.

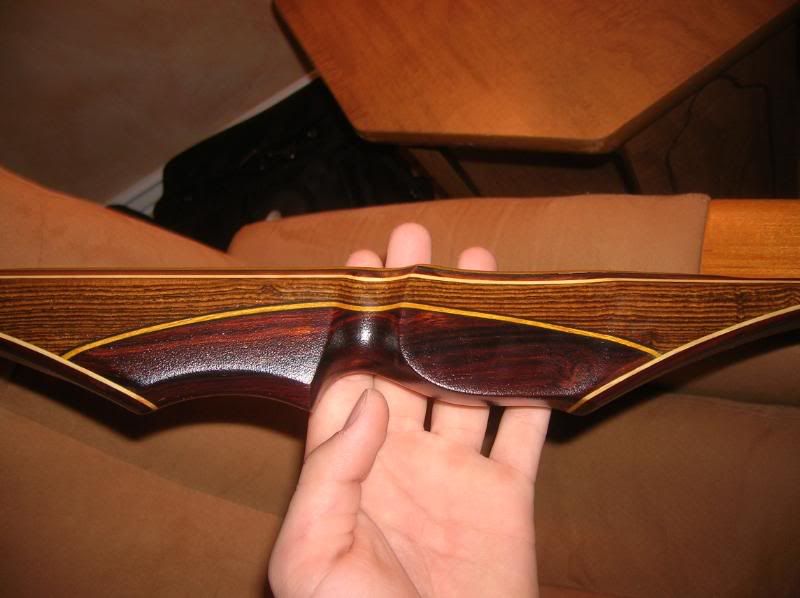
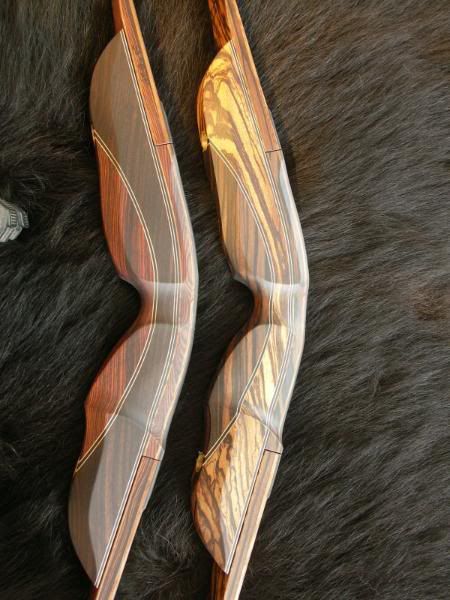
East2west: Did you get it tillered to full draw yet? any pics? Can Earl work the camera while you shoot your first shots? I'm fairly sure after you take a few shots you'll immediately start working on the second one. These bows are like crack. You can't have enough. Ever. Unfortunately, arrows are even worse, since you need lots of them for every bow.

Anyone else making a bow yet?

tuna55
tuna55 UberDork
3/16/13 10:42 p.m.

OK this last bit got me even more interested. Not building one yet - have enough projects (disrespectful build thread plug) for now.

fromeast2west
fromeast2west Reader
3/18/13 5:56 p.m.

This weekend was devoted mostly to resurfacing the driveway, and the arrows I ordered were back ordered, so they won't get here until the 21st. .. which is all a long way of saying I don't have any updates right now.

I should have some time to spend in the shop over the next few days, so I'll have an update on the tillering, tip shaping, and the next couple of steps on shaping the handle.

Rufledt
Rufledt Dork
3/19/13 12:51 p.m.

Ok guys, decisions have been made, and then unmade, and then made again as to the design of this bow. My mind still isn't fully made up on some details, maybe I'll design this by democracy? I don't know.

I've always kinda like the famed Sudbury bow:

This bow was 'collected' in Sudbury, MA in 1660 by a colonist who shot the guy who had the bow. I think it's in a private collection currently, but I could be wrong. It's not unique, other bows of this kind of design also exist from other New England area tribes. It has some cool features. First, it has a stiff, narrow handle section. This may not seem too unique, but paging through a few books on the subject shows bend-through-the-handle bows greatly outnumber stiff handled ones. This isn't surprising, since bend in the handle bows are a bit easier to make, can be made shorter, tend to store more energy, etc... The sudbury and similar bows have a fairly long stiff handle section as well. This means the mid-outer limbs do all the bending, which appears a bit whip-tillered, where all the bend is near the tips. This reduces energy storage, but also reduces moving tip mass. The long stiff handle section puts those whip ended tips farther from each other, which increases energy storage without adding moving mass. Not a bad idea, eh? 67 1/8" isn't particularly long, but it's on the upper end for native american bows.

Notice the flat belly and trapped back design as well. This bow (and many bows in the area) were hickory, a common wood around these parts and well suited to a flat bellied/trapped back design. This bow maker knew what he was doing. Hickory has a bad reputation for taking set. More scientific tests have shown that hickory isn't actually weak in compression compared to other woods as some have thought. It's actually quite good in compression, it's just insanely good in tension, which crushes the belly. Hence the trapped back. It's also likely this bow would've been stored in a dry place. Current bowyers say hickory bows stored in a place with, say, a fire or something to stay dry don't take unusual set, but bows left strung in humid conditions take set like the sudbury artifact. The artifact has more than desirable set. The later books in the bowmaking series suggest that this set was taken after the colonist got a hold of it.

This kind of design would be over stressed by the standard European pull-to-the-mouth type shooting. Many native american groups shot with a shorter draw. bend through the handle bow of the same length would handle a 28" draw without concern, in fact it would be highly efficient. The sudbury bow, however, has a stiff, long center handle section. Assuming a shorter draw and dry conditions, this bow would be efficiently stressed, and wouldn't take excessive set. If you want a longer draw, as some do, the design should be lengthened a few inches. An example of something similar is shown in book 4. A bow was made 76" and another 80" long. These weren't exactly sudbury like, more holmegaard type. Instead of 2 short whip tillered limbs with a stiff center section, they had 2 short bending sections with long stiff tips on a long center section. Same idea, low moving mass and higher energy storage. These LONGbows proved to be unusually fast, outperforming sinew/osage recurves and modern fiberglass bows, though the latter happened under less controlled circumstances.

Here's where I run into a problem. A sudbury looking design would be great if I had a few more inches of length on my stave. It's only 70" long. That might work for a 28" draw sudbury design, but my draw is 29.5". I don't really like that. Many well made selfbows are designed for 28" draw, and drawing them an inch and a half further can cause damage or breakage. This would make shooting other people's bows tricky. I'll have an issue with trading bows with people or buying from others. Dangit. Since I can't extend the design a little longer, I'll need to get more bending surface by going inward, into the long, stiff center handle. This kinda eliminates some of the design features of this bow, making it no longer a sudbury. Oh well, maybe next time. If I make the tiller elliptical, with more bend farther out, the inner limb will barely bend, again reducing moving limb mass while still allowing for the design not to be overly stressed. Now, it's just a normal flatbow.

Lastly most of those bows were hickory, not ash. Ash is not as dense or strong as hickory, but that just means I need to compensate with wider limbs or lower draw weight. I'm going for 45-50# ish, which isn't too much for my 2" wide ash stave. I'm keeping the stiff handle section normal sized, but at 8" long, it's longer than I usually make. Then, the bending limbs are full stave width for half of the limb length, tapering to 1/2" at the tips. I'll narrow tips later, but this is the design I'm using for now. Keeping the limbs wider farther out means I can make the tiller a little more elliptical, with more bending a little farther out than I usually do. This is sortof like the 'meare heath' bow.

This bow VASTLY predates the sudbury design by thousands of years, but the design is not as old as the holmegaard design. Long, wide, flat limbs. The extra wide tips are a bit of a mystery, as this would result in a lot of hand shock, unless shooting very heavy arrows. My design will have much narrower tips, as many modern recreations have. The wrapping is likely to protect against flying splinters if a break happens. After all of this overly complicated debating, I settled on a design that is exactly like one suggested by a guy named Paul Comstock for 'white woods,' basically woods that aren't Osage or Yew (or junipers including eastern red cedar, or pine, etc...). Wide limb, flat belly designs are unlike english longbow designs (traditionally narrow, deep limbs with rounded bellies), and allow woods like maple, hickory, etc... to perform as well as osage or yew. Pretty much no ideas are new in archery. The most recent (last couple decades) in bow making saw an increase in longbow speed because of long, stiff, light tips with more bend near the handle. That's right, a holmegaard design, which is the oldest design currently represented archaeologically. It was designed by hunter-gatherers who were hungry. Not warring nations, not sport hunters, not target shooters, but survival hunters. They needed to shoot animals to survive, you think of a better motivation than that to come up with a good design.

So, the limbs and tiller of this new ash bow will be nothing special. In fact, it's fairly common, and for good reason. It works well. Now what about the tips? You'll notice the sudbury and meare heath photos show side or pin nocks. basically, the grooves are cut into the sides of the bow. Nothing glued on. Here's a modern shot of these:

http://3.bp.blogspot.com/_kerdDztYpts/SYzpG1jhoKI/AAAAAAAAAEc/tVLXbcm9kCU/s1600/18+nock.JPG

Many of them are also wrapped to prevent the center section from splitting away from the extra side wood:

The bottom limb is the actual meare heath artifact. pin nocks can split, since the tips are unevenly stressed. I've used these a couple times, but don't tend to anymore. Another type of nock represented archaeologically are tie on nocks:

No wood glued overlays, no side nocks cut into the limb. Basically, you can shave the whole tip down so thin that cut in nocks won't work, so you wrap on a hump of rawhide, wood, or just a lot of cordage soaked in hide glue, and it holds the bowstring in place. Those photos show something tied down with the wrapping, but I've seen a photo of a VERY skinny tip (like 3/16" wide at the tips and only 3/8" 8 inches away from the tips)with only flax cordage wrapped around the tip. Only enough to hold the string during shooting. It's supposedly very, very light, though I've never dared to try it. Maybe I will. This type of tip is even represented archaeologically. The oldest bows (like the holmegaard) have no visibly cut in nocks for strings. There are 2 possibilities- the tips are fairly pointed, so likely a knot would hold tight enough to avoid slipping farther down the widening tips, and/or, they were warpped. Some old bows show evidence of cordage wrapping around the tips, so that's possible. If I go that route, i'll probobly use titebond instead of hideglue, but the idea is the same. Any thoughts/questions?

Rufledt
Rufledt Dork
3/19/13 1:35 p.m.

So now to the actual build part of the ash bow.

When I last posted, the back looked a lot like this:

Before roughing out the bow, you have to shave that bark off. I started by using a draw knife. When you shave some bark off, you'll see this:

See the ring lines? You'll also see a distinctive separation between white and brown. Don't be fooled, you aren't deep enough yet.

This looks more like wood, but it still isn't. Check this out:

Educational diagram! what could be better? Below the bark is the 'bast', which will become bark. Below that is the cambium layer, the actual living part of the tree. Below that is sapwood, which will become heartwood over time. Both are wood. The cambium lays down xylem (to become wood) and phloem (to become bark). When more phloem is laid down, it's under the old stuff. This pushes the old layers outward. Eventually they crack from the expansion, which is why tree bark is all gnarly looking. The wood part is layed down on top of old wood. We want to shave off all of the 'bast' and the cambium layer as well. Here's a shot of the side of this stave showing the difference in bark, bast, and wood:

The cambium is a thin later between sapwood and bast. Take a look at this shot:

That's approaching the cambium layer. The dark spots in particular are cambium. Near the top you can see a couple white patches where the cambium came off revealing the wood underneath. The bast and cambium are very soft. It's not like shaving wood. The clamp even left an impression:

There was some sticky gunk building up on the blade of the draw knife, too. Anyways, after shaving it down to the cambium, I laid out some roughing marks:

Notice all of the cambium still on there. I was trying not to get through it as to not go through a ring. I don't want to have to chase another ring. I've seen a couple bows where the cambium was left on for a little camouflage, but i'll probably remove it. To prevent going through a thin ring, I'm gonna use a card scraper not a bladed tool like the draw knife.

Here's me trying to be careful around a knot:

and a side shot:

I left it raised so I wouldn't remove the wood the tree put there to compensate for the hole. These are tiny TINY pin knots, but the tree added that much extra wood. Who am I to argue with the tree?

I also did some handle layout:

Notice the plethora of lines. The line off center with the x in the middle is actually the middle of the stave. That's right, the handle is slightly off center. This is a debate among bow makers. Some people say symmetrical tiller is best, while some think you should put the arrow in the center and thus hold it slightly lower. I usually do things symmetrically, but this stave had a thicker handle section cut in slightly off center, so I'm going for it. I've never tried it, but I want to see what it's like.

Rufledt
Rufledt Dork
3/19/13 1:39 p.m.

I forgot to mention the differences in layout between board and split staves. It doesn't really differ with this, since it's so straight, but wavy ones shouldn't be layed out with straight limb tapers. What you should do is mark a line down the center of the bow, following the wood fibers. This line wouldn't be straight, it would follow the bow. Then, measure width's from this line and cut it like that. The sides will be wavy, but they will follow the fibers in the wood. Like I said, this stave is pretty straight, so it doesn't matter as much.

fromeast2west
fromeast2west Reader
3/21/13 10:57 a.m.

I did a little tillering on the limb that was off last night, and took a first pass at shaping the tips and handles. The bow currently pulls 30# at 30"; so I'm calling it done for now. I did some sanding and cleaned up the linen backing a bit, then put a coat of wax on it.

My arrows should be arriving today, so as long as UPS cooperates I should be shooting tonight!

I was lazy and didn't take any pictures last night, but I'll try to get some today. I can't promise any video of the bow shooting though. Every time I try to get the cats to help out all I get are shots of the food dishes, and once one of the litter box which I think was a not too subtle hint that it needed cleaning.

I'm already thinking about future bow builds too. I have to work on some other projects around the house, but while gathering supplies for those builds I'll probably swing by the lumber/decking supply yard and check out their stock of ipe boards.

tuna55
tuna55 UberDork
3/21/13 11:10 a.m.
fromeast2west wrote: I should be shooting tonight! ... Every time I try to get the cats to help out

Don't shoot the cats!

Ruf, how much did that stave cost?

Rufledt
Rufledt Dork
3/21/13 3:28 p.m.

Excellent! take photos of everything. Bow unbraced, braced, full draw, you shooting (but not shooting the cats). No need to post cat litter pictures, I've had cats and I know what those look like! Our cats wouldn't photograph them, they'd just follow us around and whine CONSTANTLY until they were fed/litter cleaned.

Staves really vary in price a LOT. Prime perfect yew staves can go up to $300, osage I've seen up to $150. Part of that is because of the rarity of good staves (the trees grow all gnarly and knotty) and because they are in such demand. I've seen most wood staves between $50 and $75 for retail, but this guy (again, vinemaplebows . com I think was his site) sells oregon ash (different from lumberyard ash) for $25 or so, Cascara (buckthorn) in the 30's, some yew for $50 or so, but it's likely pacific yew, not european yew. It works, it just isn't the same species. Shipping is kinda killer, though, since it's basically part of a 6' log. I'd suggest getting a board bow or 10 under your belt before doing staves. Staves tend to have unique 'issues' that you have to cope with, and it's best to get tillering down on something that starts straight like a board. You can also cut your own if you have some trees, but the drying takes a while.

Also ipe is good stuff, it matches well to a tough backing like hickory or bamboo. You can make the bow considerably narrower than red oak for the same draw weight or the same width for higher draw. One tip is that heavier woods need even narrower tips to prevent hand shock, since the wood is denser. It's stronger, too, so it can take the strain.

fromeast2west
fromeast2west Reader
3/21/13 11:30 p.m.

The UPS guy didn't show up until about 7:30 tonight, so it was dark out by the time I got the arrows.

I did set up a shop light and take a few short distance shots. I learned a few things.

1st. Shooting a bow you made yourself is awesome, no matter how imperfect it is.

2nd. The plastic buckets left over from resurfacing a driveway may make convenient, disposable targets, but it can be tough to pull the arrows out.

3rd. It's important to have a backstop, and even more important to make sure that backstop isn't also the area that the PVC pipe for the sprinklers runs. Even a light bow can easily punch a hole in PVC.

4th. If you do use your sprinkler system for a backstop, it's a good idea to be near the shut off valve.

5th. PVC is pretty easy to fix, and making your own bow is completely worth it if that is all you wreck your first time out.

Pictures of the bow, shooting, and resulting wreckage will be up later, but not until next week. This weekend is a birthday road trip up to the Sierra Nevada brewery.

Rufledt
Rufledt Dork
3/22/13 11:17 a.m.

You're dang right it's awesome! And yes, backstops are vital, especially in the early stages. I'm not talking about early stages of shooting in general, although they are vital then, but each bow can act differently, leading to misses at first. Even bows you are used to with unmatched arrows won't be consistant, and you don't want your arrows flying into something vital/disappearing under the grass. They are surprizingly good at doing that. If they land fairly flat, they can slip under the grass roots, never to be found again. A good technique for finding them that my mom came up with is to walk barefoot on the grass where you think the arrow might be. You'll feel something stiff under the grass and BINGO you found the arrow. She did that in a field where we shot for the scottish games looking for a couple arrows that people lost and ended up finding a dozen extra that nobody claimed! Those were handed over to the people who have a kids teaching thing set up.

Remember, boxes full of phonebooks/magazines work great, too, and the arrows come right out. Just don't use GRM. I use people style watch that my wife gets. The best part is that they are basically full of ads of new clothes, so they are thick, and they go out of style, leading to a tall stack of junk. Perfect for stuffing boxes. Lay them flat.

Oh no! there goes my most frequent responder! Enjoy your road trip! I'm also taking a while to post progress, in part because of schooling, in part because of hanging out with a friend who will be thousands of miles away from his wife for the next few months, and in part because I already told you guys about roughing out bows. Figure out where to remove wood, mark lines, remove wood. This stave has 1" thick or so limbs, so I have LOTS of wood to remove before it even starts bending. I'll fill the space with some more info:

Oregon ash in general has a lower SG than red oak. SG (standard gravity) is a ratio of density compared to water. Water has an SG of 1.0, most wood less. I think red oak tends to be .60 or so (or 60% the density (mass per volume) of water) with some variation since 'red' is not a species but a grouping of species. Even individual species will have lots of variation. Think of it like people, some people are taller, some are skinny, some have weaker bones, etc... and humans have WAY less genetic variation than many other species of living things. Trust me on that, I'm an anthropologist . Imagine the variation in tree's when many species are lumped! Oregon ash is reported as about .56 in the bowyers bible book 4 (along with a long list of other species) which is within the range of variation of red oak, but not quite as dense on average. Knowing roughly what SG the wood is will help you with design. In general, denser woods are stronger, and can be made narrower. In the end, you may find that a bow design has an optimum weight, where different woods should be made narrower or wider in response to SG to end up with the same draw weight and physical weight of the bow, regardless of material. Indeed there is a chapter on just that topic in book 4 as well.

This isn't a hard rule. Some woods, like purpleheart, have properties that are not shown in the SG. Purpleheart is DENSE at .82, but it doens't have the compression elasticity that it should have. These bows must have wider bellies and trapped backs, since the wood is strong in tension. Hickory has the compression strength you would think it would have with it's SG between .65 and .72 depending on the species (on average), but it has tension strength FAR above expectations. Again, this means it responds well to trapped backs. Most woods are stronger in tension than compression, which is why the slightly crowned back of a split stave bow works so well, but it isn't always the case. Black cherry (usually just called cherry at lumberyards) is weak in tension. These bows don't tend to take set, but instead will break if overstressed. If they don't break, they are quite fast.

You can use this SG info to help pair a wood with a backing in the case that you need that. Ipe is extremely dense at 1.00 sg on average. Yes, that means with variation, some will be denser than water. This wood is so dense it doesn't like to burn, soak up water, rot, or anything. It's tough stuff for making a deck. As a dense bow wood, it has to be made especially narrow, with extremely narrow tips or it will have lots of hand shock. They are usualy in board form with difficult to read grain, so a backing is mostly needed. Being super dense, you wouldn't want a backing of something like maple (around .63 for rock maple, less for other species) because it would be overpowered. Ipe won't tend to be overpowered by a bamboo backing. Bamboo has insane tensile strength, as long as you don't shave the nodes down (which cuts fibers). Hickory also works as a great backing, since it has very high tensile strength. You won't need to trap the back either.

Look at my walnut bow I made again. Walnut averages around .55sg, wayyy below hickory. It is, however, reported as being somewhat like cherry in its resistance of set, only a little more tension safe. Still, it can't stand up to a full width hickory back. Not many lower SG woods can. I once was tillering a red oak bow backed with hickory that failed. The bow was trapped, but probobly not enough. It was one of my early bows, and it wasn't designed well. I also hadn't prepped the glue surface very well, etc... It was bound to go. The glue joint ended up failing in the middle (the back was in 2 peices, joined with glue I found in my parents garage, another stupid thing I did) tearing one limb literally apart. The hickory didn't just survive, it was unaffected as it shredded the red oak like paper. It's not an exaggeration, it's just that strong. This means the back should be narrowed (which I did) compared to the belly, otherwise it would just crush the belly fibers, resulting in lots of set. Narrower back means less fibers being forced to do the same work, raising the strain, but hickory would otherwise be understrained.

Most split staves won't need a backing if treated properly (a continuous ring left uncut for the back) and I won't be backing this bow. There is a test for SG, but i'm just going by the reported number and adding in a little extra width for safety. There is a formula for how to design a bow using SG, but I can't find it. Those books total like 1,300 pages, so it would be a while. I'm just going by what people report as good for this wood. If it shows set during tillering, i'll lower the target weight. If it shows not enough set, i'll be happy it is under stressed and shoot it a lot, knowing it won't break. Maybe I'll heat treat it, too. Ash supposedly takes heat treating well, kinda like oak.

That's another can of worms. Some woods take heat treating well, some don't. There's a whole chapter on that in book 4 as well, but I'll just say oak seems to take it well, and everybody says ash does, too. That chapter said white ash wouldn't hold a decent reflex with heat treating, but that it doens't tend to break, so that's good. Oregon ash is likely similar, maybe i'll try it on a later bow. I haven't decided.

Rufledt
Rufledt Dork
3/22/13 11:43 a.m.

I should also mention there is a difference between bending resistance and elasticity. Bending resistance is what it sounds like. Some woods will 'push back' more than others. Elasticity is how far it will bend and still bend back. Yew wood, for example, is similar to hickory in sg. However, it can be made much narrower and thicker, since it has lower bend resistance and more elasticitiy. Lower bend resistance means it has to be made wider or thicker for the same draw weight, and higher elasticity means it can take being thicker. This is why yew bows tend to be so narrow and thick, while my walnut bow was 2" wide and under .5" thick.

Narrower bows are easier to make, and you get more staves out of a given diameter tree. The English needed LOTS of bows made quickly out of a given number of trees, so there's no doubt why they went for yew.

Going back to purpleheart, it has lots of bending resistance, but not much elasticity in compression. It will make a high draw weight bow without much width, but the belly is likely to get crushed to death. This brings up a good point, not only are resistance and elasticity different, but woods have different properties in tension and in compression.

This also changes based on moisture content. Higher moisture content usually makes a wood less resistant to compressing. This makes the belly compress farther (to match the amount of resistance of the back stretching) which can cause set, since elasticity doesn't go up with moisture content. Drier wood (lower moisture content) is more resistant to compressing, which is similar to having a wider belly. This makes the back do more stretching to match the force, which can lead to breakage. There is more to it than this, since drier wood is likely less elastic in tension, but it just goes to show that moisture content can effect the bows properties. Since hickory, for example, is so unbalanced (way stronger in tension) it works exceedingly well in dry conditions. As a bow dries out, it'll shoot faster, since it has more draw weight with less limb mass (water weighs a lot) until the back breaks. Hickory doens't like to break, so it reaps the rewards.

If you are thinking back, I once said that cultures with longstanding bow traditions (meaning they use it all the time as a primary means of acquiring food) almost invariably come up with a very efficient design for their environment/conditions. You may remember I said Native Americans in desert like areas tended to have deflexed tip bows, which help them make bows with not so great wood that won't break in the dry heat. You'll remember that deflexed tips make for low energy storage, and slow bows. You may ask why these people didn't just use hickory, which seems like such an obviously great material for their area. Unfortunately, hickory didn't grow anywhere near them. All they had were relatively crap woods. If osage orange or lemonwood grew in England I'm sure the medieval archers would have some bows made of that, too, but it wasn't available to them. Thank you globalization. I've really only lived in areas LUSH with bow quality wood (though I can't legally cut most of it), but I would never have found an osage tree or moso bamboo. Or purpleheart, or oregon ash... Now I can get them delivered.

Rufledt
Rufledt Dork
3/24/13 8:33 p.m.

Time for a bow accessory post featuring bow socks!

No, your bow does not have feet, but it is prone to damage. A bow sock is simply a really long tube of fabric to protect the bow during storage and transit. To make these, I bought 2 types of fabric. the first was 2.5 yards of fleece. There are tons of colors/patterns. This is one I got:

I also got a small amount of artificial leather from the cut offs rack for a couple bucks. You'll want something like this for reasons that will become clear.

First, I cut the fleece into a strip 8" wide and the full 2.5 yards long. Then, cut a piece of the other fabric 8" by around 5". It will lay on the bottom of the fleece like this:

That is OVER the fleece. You want there to be extra thickness on the bottom to prevent the bow tip from poking through. Sew it kinda backwards like so:

This way, when you fold it down along the bottom, it hides the nasty edge of the fabric. How do you like my pretty wedding ring? Just kidding, my wife did that.

Pin it in place. I sewed along the bottom to hold it, but it isn't necessary. Make not of which side the leather is on, that will be the outside. On the other end of the fleece, fold over a quarter inch or so to the inside edge and sew it in place. Now, fold in half lengthwise so the leather is on the inside, sew it around the bottom and up the side, leaving the top open. BAM you have a bow sock. There are some things you can add to make it more convenient. I sewed a reverse twisted length of yarn around the top so I can tie it shut:

I ended up making 3 of them, and one of them had a shoulder strap:

Make sure the top of the handle is sewn into the side above the center of gravity of the bows, so it will stand upright, but not too high as to make the bottom hit the ground.

On the last one (before I ran out of fabric) I figured out a way to make it hold 4 bows without them rubbing. This uses 4 8" wide strips of fleece, so it doesn't save any material, but it does make it easier to carry 4 bows at once.

see what you guys can come up with. It was surprisingly hard to do this. My actual step 1 was to figure out how a sewing machine works, figure out why my wife's wasn't working, and then make it work. It's really worn out, since we got it used "as is" for $10 from our university's theater department. It didn't work and didn't have some parts. It took another $5 and about an hour of work to get it running again, and that was 5 years ago. This whole thing basically ended with us buying a new sewing machine. The lady said our old one was from a great company, but I think decades of college kids using it full speed wore it out. I know for some of you guys working on a car constantly is acceptable, but I don't like sewing machines that much, and there's only so many times I can bend stuff and file stuff to make it work before the irreplaceable, old, metal parts fatigue..

Also I didn't realize sewing machines were that expensive, or that "Singer," the brand I used in that hateful middle school class so many years ago, has recently crapped out in quality.

Rufledt
Rufledt Dork
3/28/13 7:09 p.m.

Sorry for all of the nothingness, I actually haven't been working on my stave. School is getting a bit more hectic lately, and I've been making a couple extra bow socks in my spare time. Next weekend I might be able to trade some (and some labor in splitting) for a bunch of staves. Then I'll have bow wood a plenty for a little while. It's supposedly black locust, which is a fairly strong species, but prone to compression fractures. It's a good way to tune tillering skills because if you screw up, you can visibly see what is being over worked. It also means it's less forgiving, but if I get enough of it I'm sure at least ONE of them will become a working bow. Hows everybody else's bows coming?

maj75
maj75
3/29/13 9:45 a.m.

In reply to Rufledt:

Thanks for the terrific read! Just found this thread yesterday. Really enjoying watching the craftsmanship.

No bow project yet, but this is really fascinating.

Thanks Again!

maj75
maj75 New Reader
3/29/13 9:47 a.m.

Quick question,

I'm in South Florida. What type of bow material and construction techniques would Native Americans used around here?

fromeast2west
fromeast2west Reader
3/29/13 1:18 p.m.

I've been doing some shooting and the bow seems to be doing well. The draw weight is so low that I doubt I'm putting much stress on the wood.

I have to clean up my shop a bit and then I'll be ready to start on the next board. I picked up some scrapers and some additions for my tillering stick that I think will make it more accurate.

Now I just have to find what we did with the camera after last weekend's roadtrip and I'll be able to update some of the pictures.

I think I've found a source for ipe not too far away, so my next bow will probably be either bamboo or hickory backed ipe tri-lam. I've also been looking at some of the osage and pacific yew staves available for self bows.

So far I've picked up the first two parts of the Bowyer's Bible. I've just started reading the first book and the author sure does seem to like osage.

Rufledt
Rufledt Dork
3/29/13 3:10 p.m.

In reply to maj75:

I'm glad you like it! The book I have with Native American bows shows a couple made of cyprus in south florida, but there are plenty of other local woods that work well. Keep in mind, the Native people there likely had different ways of shooting than the 'mediterranean' 3 finger approach that many archery shops teach, and they would have used stone tools, which limits the woods they can reasonably work. I see online that Elm grows in florida, and that makes a great bow. I see red maple and live oak on the same list of native species, and those should work as well. I would still suggest starting with a maple or red oak board from a store like home depot, or if you have a lumberyard something like hard maple or hickory would work as well.

As for construction techniques, I'm not very knowledgable with stone tools, but if you're making one from modern metal tools, it should be the same as what i've done. I assume it's humid there? You will likely have to fight set like me on certain woods (like oak or hickory).

Also sweet FRS and 944. My wife and I both really want an FRS but i'm not willing to part with my RX8.

In reply to fromeast2west:

awesome! I told you it's addicting and that you'd start on the other right away. hickory or bamboo backed ipe is a pretty awesome combination, but why tri-lam? Osage and pacific yew make great woods too, but generally osage is double price of, say, a hickory stave or whatever, while yew is double that. You may want to try a 'white wood' stave first before shelling out the cash, but if you find a source for either nearby (or you're made of money) then go for it. The first couple chapters of the first book do indeed talk extensively about osage, but remember there are different authors for every chapter, with a couple authors doing multiple chapters (like Tim Baker or Jim Hamm (the guy who runs bois d'arc press)) and certainly different opinions. Also a couple thigns in the first book are wrong and have been disproven by book 4 (published MANY years after the first 3). Namely, the design chapter talks about internal friction, but his test is flawed.

The 4th book has a new test with updated numbers. Never have I used friction information in bow making, though. Also the chapter on "other bow woods" seems to refer to woods other than osage and yew (and lemonwood and acouple others) as "second string" bow woods, but by the 4th book it has been conclusively proven that no woods are superior, just certain designs for certain woods. The book had a massive test (also that was revised later, but there is no book to talk about that) of bows in which the 7 of the top 11 bows (shooting speed per pound of draw weight) were Hickory/pecan (very similar, in fact often sold together at lumberyards). The top 2 were longbows made from pecan boards. 3 of the top 11 were osage, but one of them broke. Using that data we would assume hickory is the best, but the guy who made most of them (Tim Baker) insists that it's because of design, not the wood.

Of course if your motivation for singling out Osage and Yew is because the woods look amazing, then you'll find no argument here. Personally I like the looks of Yew better because of it's white sapwood. Osage has white sapwood, too, but it sucks really bad. Some people online occasionally leave one sapwood ring if they don't have enough heartwood, but it often cracks eventually. Yew sapwood is pretty great in tension, so you get the awesome color difference. If you read the primitive archer mag forum there is always friendly banter between yew and osage which is the king of bow woods. Some osage guys will call yew "pine" or whatever, but really both work quite well, they just make differnet kinds of bows.

If you go to that monthly pasadena meet there should be guys selling staves there. Just let them know you're coming in the primitive bows section of paleoplanet . net.

fromeast2west
fromeast2west Reader
4/4/13 2:23 p.m.

I haven't abandoned the build, but now that I've had time to take pictures I can't find the non-standardized USB cable that Sony forces on it's customers to upload them... I hate non-standard USB cables...

To answer your question about going with a tri-lam bow at some point, I guess it's because I'm also coming at the process with a traditional woodworking background and the process seems interesting. I also have some ideas for 'pretty' handles ... for no other purpose than making pretty wooden stuff (that can also shoot things).

For example:

Rufledt
Rufledt Dork
4/5/13 9:50 p.m.

Those are pretty cool looking. I have a bow stave glued up with various different colors like that. it's on my to-do list but kinda far down there. There is a chapter in book 4 about laminated bows that it worth a read. I think some of the difference there is that you can't remove much thickness from the belly before going through the belly lam so you tiller a bit by width. Also the lams are tapered in thickness to begin with to make it naturally a bit closer to tiller.

Again sorry about all of the dead time, haven't had much time to work. Tomorrow i'm going to cut a bunch of wood so I'll get some pics of that unless I forget the camera.

6 7 8 9 10

You'll need to log in to post.

Our Preferred Partners
WbIRYA6bDbMLAassGvODXcxuT9gcWsdLimKbdcRljHmak0mzOk06Xn8cuiNFRogv