6 7 8 9 10
klodkrawler05
klodkrawler05 Reader
8/22/18 1:26 a.m.

excellent progress! I've been watching as I love the caddys.


From what I recall about older vw's that rear brake bias/proportining thing actively adjusts based on the amount of brake you are requesting to prevent locking up the rears before the fronts, I suspect you could dial this in just fine with a manual valve if it becomes an issue but the active bias adjustment is pretty trick if you wind up finding the part to re-install it.

BirgerBuilder
BirgerBuilder Reader
8/28/18 2:24 p.m.

I'll look into it after I find out that I am locking up both rear wheels every time I hit the brakes. 

Anyway, some progress is being made. Not as much as I had hoped. 

Rear quarter panel is patched up for now. 

Oh yeah, and there is an engine in there. 

The brakes look so good in this picture, but looks are deceiving. I tried to bleed the brakes and ran into 2 problems. 

1, the master cylinder was leaking under the reservoir. 

So I pulled it all apart and in the effort to save money, cleaned it out and put it back together. 

Above, you can see where the rubber grommets were not sealing because of rust. They cleaned up pretty well and I added some 'gas proof' seal-all that is supposed to stand up to brake fluid. Mostly in the hopes of holding off the next layer of rust. We shall see. 

Problem number 2, I didn't bench bleed the master, it would have been smart to do that while it was, you know, on a bench. 

Oh well. 

Worked great this time, the pedal got harder than a ****** at a ******. (Fill in your own dirty joke, this is a family show) 

Next up, dealing with all dem hose. 

It's an 83, with a 88 radiator and a 98 motor. So I've been mixing and matching as best as I could. 

Step one though, is this little cover. 

It sits on the side of the heater core and holds everything in place. The problem is that with the drive by wire pot sitting there now, they rub together. So I could just take it off, but I'd be worried about rattles and it sliding out and running into the pedals anyway. 

So I need a low profile clip. Drill and a dremel. 

cut with the angle grinder, bend with pliers. 

Add another simpler tab and, voila. 

I didn't take a picture of it bent into place, but you get the idea. I also added a little piece of foam behind it to prevent rattle issues. 

Next up is my continuing hunt for a lower radiator hose. The two I bought from local auto parts stores were a bust. I ordered one online that looks promising but... we. shall. see.

BirgerBuilder
BirgerBuilder Reader
8/30/18 1:14 p.m.

Got a radiator hose in the mail, 

Not quite. Looks like I'll be cutting and modifying which I was trying to avoid. 

But, that's not what I did today. Today, I worked on this. 

You can see the intake hose is made of two couplers, I have a 4" one arriving tomorrow, so that's sorted. 

As for the turbo to intercooler pipe, you can see it misses by, a bit...

Chop chop. 

Now what, you ask? 

An experiment. involving a vice, a soldering iron and some zip ties. 

Here is the first little test piece. I melted some zip tie into a scrap piece of the tubing. You can just see it in this picture. 

After that, I let it cool and did my damnedest to chip it out of there with a screwdriver. And to my surprise, even that little bubble of garbage stayed stuck really well. I practiced a bit more, found the process really easy and dug in.

Essentially, you just stab the hot iron in between the two pieces to melt them and make a gap. Then, you stick some filler nylon in there. Then, you kind of just, stir the melted plastic until it's all one color. It's slightly more time consuming than welding metal but on thick plastic like this, there is tons of room for error. A super cheap walmart soldering iron seemed to be the perfect temperature for PA6/ nylon. I think HDPE and PP need cooler temps. 

Here is the article I found most helpful about how to do it. 

With everything done it looks pretty good to me. I can't do a pressure test until I have that last piece of coupling so, fingers crossed for tomorrow morning!


Sparkydog
Sparkydog Reader
8/30/18 1:47 p.m.

McGuyver award! You may stroke your mullet.

Mezzanine
Mezzanine Dork
8/30/18 1:49 p.m.

Damn, plastic welding just got added to my list of things to try! Nice solution, and the finish doesn't look too bad either.


BirgerBuilder
BirgerBuilder Reader
8/30/18 2:37 p.m.

Thanks guys,

I will hold off on any mullet stroking until the thing doesn't leak profusely or blow apart at 20psi. 

java230
java230 UltraDork
8/30/18 4:47 p.m.

Such an awesome little build! Please crank the pump up sooner rather than later :D

BirgerBuilder
BirgerBuilder Reader
8/31/18 1:36 p.m.

Had a few hours this morning to wrench. I didn't get to tank test the intercooler plumbing since the coupler didn't arrive first thing in the AM. So instead, I started sorting out the radiator hose. Since I was unable to find one that fit, I had to cut out a center section of the hose I had.

I have some aluminum tube the right size to join them but how do I keep them from blowing apart? 

Build a bead roller! To the lathe! 

After the basic shape, I needed to round the corners, so I ground down a corner cutting tool.

One side worked way better than the other for some reason. But a little filing fixed all. 

The other half was cut out on the vertical mill.

I tried to use it like this first, just lining things up by eye and going around the tube with the press.

results were predictably bad.

The beads didn't line up with each other and much worse than that, the roller wasn't always centered in the channel so it pinched the aluminum and caused it to crack. 

Some simple modifications took place. 

A simple backing plate keeps the bead centered in the channel. I also added two simple stops for the tube I'm working with to sit against and keep it at a set depth but I forgot to take a picture of it. 

second attempt; 

Way better. It's not the best bead roller, but I think I did alright for 3 hours of labor. 

BirgerBuilder
BirgerBuilder Reader
9/4/18 3:08 p.m.

Had a fairly productive holiday weekend. 

Started out finishing up the coolant lines. 

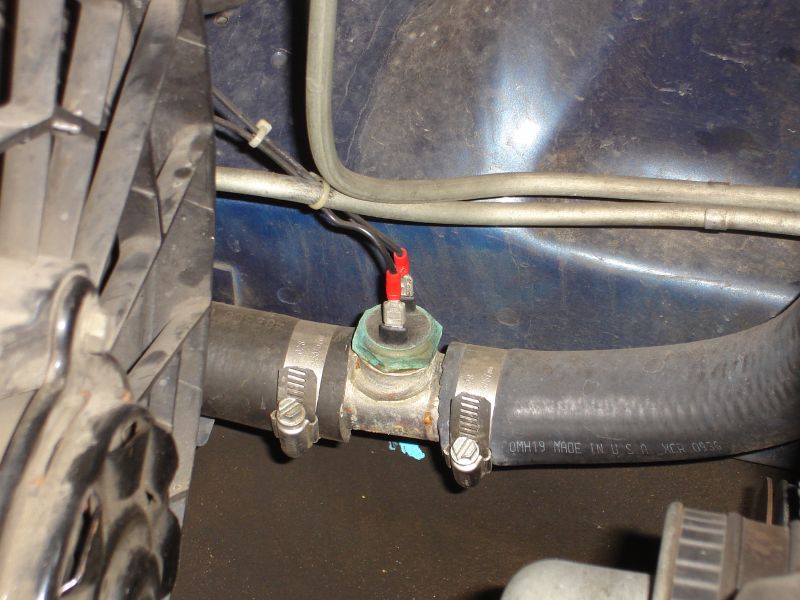
I had to make 2 of these, since I wanted to keep the stock temp sensor in the upper hose. 

Both finished up. I may cover them up with the fancy Gates shrink tube clamps before I add coolant. They will certainly look much nicer.

Then I pressure tested the charge pipe. I did find one air bubble so I remelted and repaired it. Holds 20 psi with no leaks now!

here is the testing set-up. Took a bit to puzzle them together.

Next up is this bit. 

Took me 2 straight days of looking at wiring diagrams to even understand what I was doing.

But I got most of the wires plugged in and identified. For some reason, the dash lights don't come on. Something isn't getting from the ecu to the gauge cluster. Because the gauges move and have power. Odometer came on too. 

Oh. I remember the guy I bought the engine from told me it had over 200K on it... didn't realize it was that many over. Oh well, it's a diesel, right? 

Well after another several hours trying to figure out why the fuel cut off switch wasn't getting power I figured this out... the main plug that runs to the engine had a broken slip connector and wasn't connected... yeah that'll do it.  

We are getting places!

https://www.facebook.com/plugins/video.php?href=https%3A%2F%2Fwww.facebook.com%2Ffacebook%2Fvideos%2F10216763661342273%2F&width=500&show_text=false&height=281


Mezzanine
Mezzanine Dork
9/4/18 4:33 p.m.

Success! Troubleshooting wiring is fun, right? That temp sensor arrangement sure is ugly. Classic SAAB 900s had a steel tube in the upper radiator hose with the radiator fan switch sensor in it...it's often adapted to other cars. In any event, those Gates clamps would make it look prettier for sure. I haven't gotten to try those yet.

e13h
e13h New Reader
9/6/18 9:40 a.m.

Following this, I've got a mk1 cabby and it hates me. Hopefully I'll be able to find inspiration here.

maschinenbau
maschinenbau Dork
9/6/18 12:13 p.m.

Plastic welding awesome. It really helps to use the same material for filler. Most plastics will have the triangular recycling symbol with a number in it. That number corresponds to the type of plastic. Automotive parts often don't have that symbol, but will have markings that say something like "SAE PP" (for PolyPropylene). 

For example, a Lowes bucket has a recycle symbol with a "2" indicating high density polyethylene (HDPE). My free, cracked kayak also happens to be HDPE, and blue. So I cut the rim off a bucket and burned it into the crack using a propane torch blowing on a butter knife to smear the plastic around.

Also, don't breath :) 

BirgerBuilder
BirgerBuilder Reader
9/6/18 2:02 p.m.

More wiring progress has been made!

I didn't have an OBD plug so I did this,

One semi-hardwired OBD reader, ready to install. 

And it works,

I fixed several, cleared the rest, re-ran the scanner and it's down to 2 codes. One for the throttle position sensor, (it's not hooked up) and one for the EGR, (it's gone forever) I'll call that a win. 

Next I test fit the dash, and welded in some mounting tabs for the MK3 fuse box. 

The wide aluminum tab on top holds the box in place and allows it to flip down to access the plugs on the back like you could on a stock one. 

After that, I started thinning out the herd. Pulling, separating, and organizing the wiring is surprisingly relaxing. too bad I don't have a spare 8 hours per day to work on it. 

Oh well, the first sacrifice to the electrical gods has been made.

BirgerBuilder
BirgerBuilder Reader
9/11/18 2:33 p.m.

Despite the fact that I have worked on the truck for probably 16 hours since I last posted, it sure doesn't look like a lot of difference. 

I did add a quick cheap air filter, which I have photographic evidence of. 

It didn't fit out of the box. 

so a quick slice...

And some bolts...

Fits great, no ugly hose clamp either. 

Other than that I've been studying, labeling, disassembling, crimping, cleaning, splicing and testing wires non-stop. 

Here's the old MK1 harness getting ripped apart.

And then spliced back in to the MK3 harness. 

Still a big mess, clearly. But I do have working headlights, heater fan, indicators, full engine electronics, alternator, fuel system, shifter, clutch, and wipers!

I still need to finish:

the washer bottle,

fix/ replace the turn signal stalk(only have R turn signal),

fix oil leak behind oil cooler

fix a coolant leak

wrap, locate, organize wiring harness

move intercooler down (doesn't clear the hood)

Make a better mount for fuel filter

Add dynomat

add a heat shield under shifter

install the interior

weld up exhaust

mount doors, hood and fenders

Get A License Plate! 

After that it will be DONE! Well... not done, but driving. I'm shooting for the roadkill philosophy that a running-driving project is always superior to one that sits around. 

Wish me luck


mazdeuce - Seth
mazdeuce - Seth Mod Squad
9/11/18 2:39 p.m.

I'm pretty comfortable with wiring and that wiring terrifies me. Way to stick to it. 

AngryCorvair
AngryCorvair MegaDork
9/11/18 3:15 p.m.

In reply to BirgerBuilder :

the skills you've demonstrated here suggest that you don't need luck.  i love this build.

BirgerBuilder
BirgerBuilder Reader
9/13/18 1:29 p.m.

Thanks for the kind words guys, the wiring is going way better than I'd hoped really. 

Having the two wiring harnesses both made by Volkswagen is a huge help. Despite being 15 years apart in manufacture, most of the systems are essentially the same. Most of the wires I'm splicing together are even the same Color!

About 3 hours of progress this morning, mixed in with fleet maintenance on the wife's car.

Still looks like the same picture doesn't it? LOL

Well, the wires are at least clumped together now, and I've puzzled out where they all go in the fuse box, ends are labeled. Hopefully we will have fully functional lights tomorrow morning.

Also got some parts to fix my engine leaks. 

idparts.com is a great company if anyone else out there is running oil-burners. 

I need to shoot another video with some diesel pedal action, this one doesn't have nearly enough turbo whistle. 

https://www.facebook.com/plugins/video.php?href=https%3A%2F%2Fwww.facebook.com%2Ffacebook%2Fvideos%2F10216835478297652%2F&width=500&show_text=false&height=281


BirgerBuilder
BirgerBuilder Reader
9/15/18 9:48 a.m.

Wires are coming together, Everything is in the fuse box!

Albeit, The lowers are somewhat temporary. I need to hit the pick-n-pull and get those missing VW plugs. 

But check this out. 

Oh yeah. Hope to have it all wrapped up and tucked away this weekend. 


Mezzanine
Mezzanine Dork
9/16/18 4:45 p.m.

Love the big red jumper clamped to three or four small wires. laugh Do work son.

BirgerBuilder
BirgerBuilder Reader
9/17/18 1:47 p.m.

Some progress.

I got the wires wrapped up. I ordered 200 ft of dry tape and one roll of "F4". 

The F4 tape is really cool because it doesn't have any adhesive and only sticks to itself. It's supposed to be super waterproof as well so I used it to cover the gaps at all of the forks. Everything probably would have gone much smoother if I had pulled the harness out to wrap it but I did not want to shove all 57 connectors through the firewall all over again, twice. 

I also didn't have a 2" grommet and could find a replacement anywhere... what to do. Well, what would Red Green do? 

I think it looks pretty good. You can hardly tell that it's two pieces of radiator hose, split open, wrapped around the harness in double layers, taped, jammed into the hole and taped again. Well, if it keeps the water out.

Also, I fixed my oil and water leaks. (hopefully) 

I had taken the oil cooler off when painting the block and never read the directions about using gasket sealer. Well, now it's got a fresh gasket and RTV Black. The water leak was from behind the coolant flange on the block. Got a new one for 6$ off IDparts. 

Here's the old one. 

Other than that, I spent my time moving parts around to get the wires in to place and making little brackets to hold things like the radiator fan controller. 

I'm not bored of doing the wiring... but I'm sure y'all are, and I want to drive it!

Hopefully I can grab the missing plugs from the junkyard on Wednesday, and I called the insurance company already today, plates are soon!


BirgerBuilder
BirgerBuilder Reader
9/18/18 2:51 p.m.

Next little hurdle, The VW grommets for the wiring harnesses are shaped like cartoon mouse doors. 

So I made a test piece first. mostly successfully. 

I actually cut the test piece just a little too big, which worked out well because when traced onto the firewall, it's exactly the right size. 

I did the rain-tray pass through first, for the wiper motor plug; figuring if this leaks it's not a big deal. 

Other than the fact that there was no room to run a jig saw or barely even a dremel, it turned out ok. 

After that, the firewall was a piece of cake since I had the entire passenger compartment to comfortably work in. 

And done.

BirgerBuilder
BirgerBuilder Reader
9/20/18 1:42 p.m.

Wednesday I got to go to my favorite pick-n-pull

Can't go wrong with a name like that. 

I picked up all the stock plugs I needed for the fusebox, and some extra relays and a temp sensor for 20 bucks. 

This morning I got the wires plugged in which only took a few minutes now that they are organized. Then wrapped up the bundles with dry tape. 

After that I hooked it back up and gave myself a heart attack because Nothing Worked! Then, realized I didn't have a Chassis ground to the battery. 

But the real success of the day... 

Looking forward to some fenderless, no hood, doors-off test drives! 


Mezzanine
Mezzanine Dork
9/20/18 2:04 p.m.

Sweet! Congrats on the plates and the impending shake-down cruises!

BirgerBuilder
BirgerBuilder Reader
9/21/18 1:43 p.m.

I had few free hours this morning so I knocked this together.

Local welding shop had a 16ft piece of 1/0 welding wire sitting around so they let me have it at 3$ a foot.

Made a positive cable with some to spare. 

 I cut down the negative and bolted it to the seatbelt mount. 


And under the hood, The extra chunk of ground cable went from the frame to the transmission, and the old positive cable went to all of the accessories. That's somewhat temporary... it needs a plastic box around it at least. 

I'm getting excited, hopefully next post will have a video with tires spinning!


BirgerBuilder
BirgerBuilder Reader
9/23/18 7:07 p.m.

Well, other than my new starter wire attempting to plasma cut a hole in the starter...

I wrapped it in some of that fancy F4 tape that is supposed to be good up to 6000V, and bent the wire away from the body, after that, things went back together really well. 

And... she's out of the garage!

And now that it's 'drivable' the kids insisted we had to wash the windows. 

And.. as promised, tires spinning! 

https://www.facebook.com/plugins/video.php?href=https%3A%2F%2Fwww.facebook.com%2Ffacebook%2Fvideos%2F10216915857427080%2F&width=500&show_text=false&height=281

This burnout has been cut short by, oil pressure sensor...

fortunately, we pulled the sensor and blew some compressed air into it and found that while it made a nice little clicking sound under pressure, the ohm meter showed no change under pressure so I ordered a new sensor and fingers crossed everything is fine. 

Also, if the video looks like it was filmed by a 4 year old, it's cuz it was. 

Next step, an exhaust!

I fully intend to run things like a catalytic converter and... a muffler but right now time and money are both tight and the old exhaust and some scraps of 2" pipe are readily available. 


I put Patches up on the lift and tacked it all up before welding it back together... poorly. 

But again, it's temporary... right? 

As you can see, it consists of; 1. a flex pipe and 2; a resonator. It's about one step better than a hater pipe i guess.  

How does it sound? I have no idea. I don't know how loud it is for sure but I'm willing to bet it's too loud to fire up a 2am when I finished it. 

And today... I'm on vacation. wife wanted to go away for a few days, so here I am. 


6 7 8 9 10

You'll need to log in to post.

Our Preferred Partners
SJdTJfQZZThQrCiIrm10NFZMjQdb4ZVOnRHVbFKCHN8td7l13IgthzeP2ETgFpTj