Previous budget was 3035 with 315 recoup
new money:
73 duster 340 body with 71 front clip and crap inside: $660
lug nuts: 20
front wheel studs: 20
inner axle seals: 30
outer axle seals: 20
rear hub hardware: 12
rear u bolt: 5
3/4-16 locknuts: 21.13
white rustoleum: 14
springs: 100
shock lot: 20
Kirkey and cover: 80
9 inch hogshead and 31 spline carrier 20
new total: 4057.13 with 315 recoup
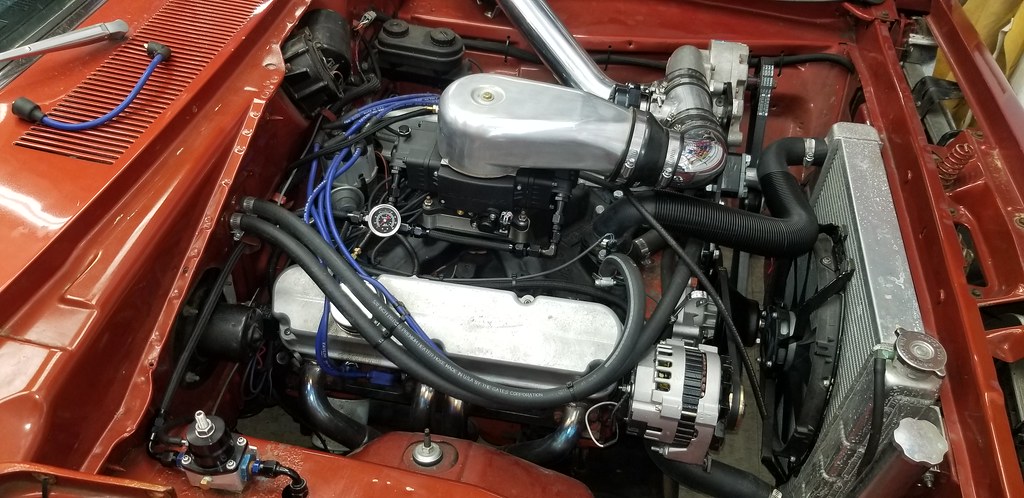
I have to say the cuda took a minute and a few odd scope changes. However, its done and the owner is super happy. Im also REALLY impressed with the sniper stealth 4150 and holley's homework on this. So much better than all the other systems ive done. Way, way better than them. Way better than the fast and megasquirt ive used as well. Just a quality product.
 20220605_162356 by Michael Crawford, on Flickr
with that done, I pulled the nascar back in the shop. I decided that the next step was to rebuild the rear end and suspension. I did this for multiple reasons. Biggest was that I needed to go through it all before I was willing to tow dolly it to dads shop where I have the good welder and can complete the cage repairs. The cage repairs are the next real step to do before test fitting the drivetrain and getting all the ergonomics sorted.
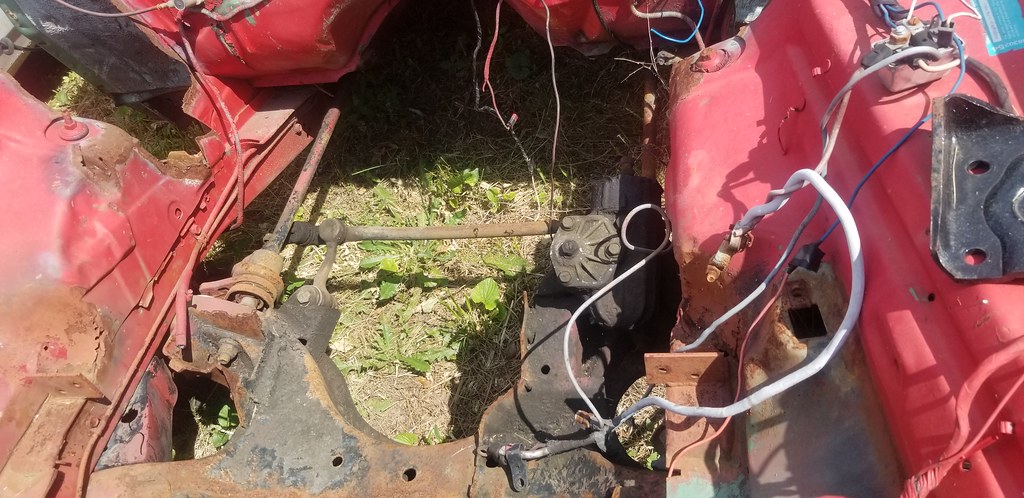
I pulled the rear axle, truck arms, etc to get started. It all came apart pretty easy. I had to cut one of the u bolts that just refused to come apart to release the truck arm from housing.
 20220610_164239 by Michael Crawford, on Flickr
 20220611_080835 by Michael Crawford, on Flickr
 20220611_180458 by Michael Crawford, on Flickr
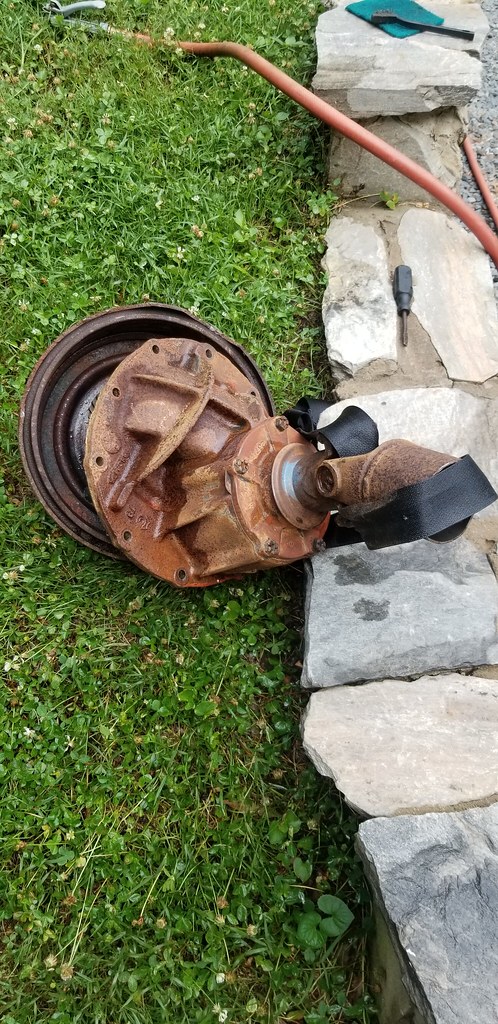
upon disassembly, I found the rear shocks were bent and leaking. Additionally, there were no inner seals on the axle tubes, most of the hardware on the rear hubs was either mangled or missing, and the grease seals were a mere suggestion.
 20220610_174316 by Michael Crawford, on Flickr
 20220611_180507 by Michael Crawford, on Flickr
So I started clean up. Ordered replacement hardware from amazon as it was all fine thread socket head screws. Disassembled the rear hubs and bearings, cleaned up in the parts washer. We were able to identify them as speedway engineering hubs, with the right rear bearing being a super low friction piece. Chased all the threads and had to drill out some broken hardware. I went ahead and repainted everything while it was apart, cleaned up the studs, etc.
 20220617_102546 by Michael Crawford, on Flickr
 20220617_102557 by Michael Crawford, on Flickr
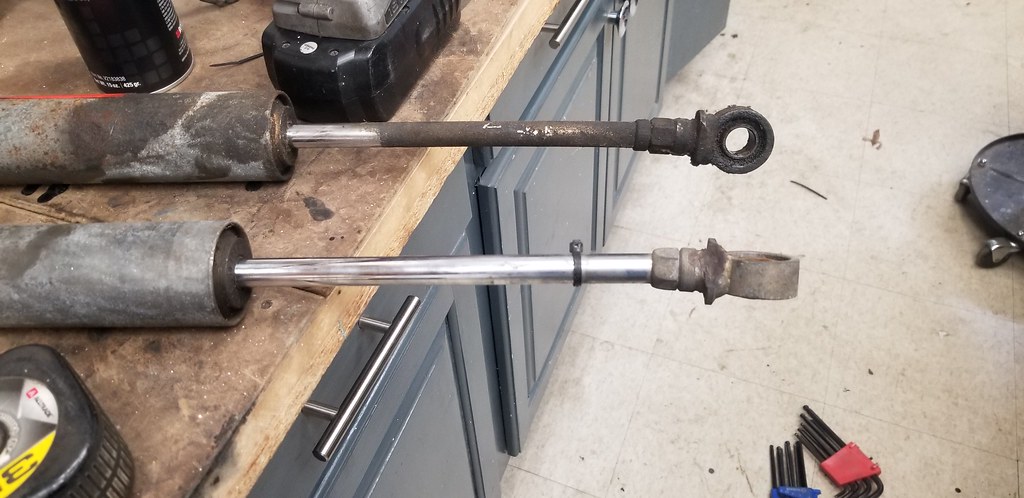
to replace the bent shocks, I found an add on facebook for 6 30 series koni shocks and 4 bilstien. The lengths listed seemed workable, so I contacted the seller. Turned out he only wanted $20 for all 10 shocks. So I bought them. I love konis on the autocross and corvette applications ive tried them in, but it seems they're not common in the circle track world, but for the price I took a gamble.
 Screenshot_20220610-184525_Facebook by Michael Crawford, on Flickr
bought a kirkey seat and cover from the seller too. Its a wide seat, and the cover is perfect. So for $80 I brought it home. Apparently no pictures on my phone, and I don't feel up to going out to the shop for one (have food poisoning). Regardless, I started cleaning and painting the konis. Turns out duplicolor Chevrolet red-orange is a perfect match
 20220614_162312 by Michael Crawford, on Flickr
 20220614_163044 by Michael Crawford, on Flickr
 20220615_084736 by Michael Crawford, on Flickr
somewhere in here I started to get the gearing and hogshead sorted out for the rear axle, and the axle itself sorted. I pulled apart the cheapo 9 inch u bought from runion. Cleaned up the hogshead, verified the 2.76 open diff, and later discovered that its a 28 spline, not 31. which probably wont work. Unfortunately.
Regardless, its filling the hole in the housing for now.
 20220614_175555 by Michael Crawford, on Flickr
 20220615_152906 by Michael Crawford, on Flickr
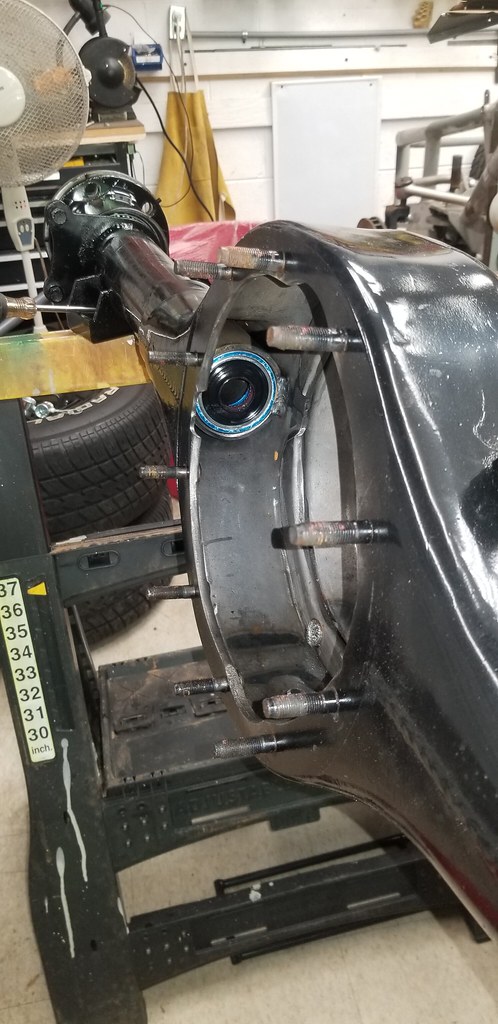
the housing cleaned up beautifully, and was shot in gloss black rustoleum. I installed the rebuilt hubs with new seals and fresh grease, obtained the inner axle tube seals, and put it together. I did get used floater axles win 27.75 and 32 inch lengths, 31 spline. However, apparently this housing is significantly narrower than the current (last 20 years) cup axle. So I will have to have custom shafts made. I could get the shafts in 28 or 31 spline, and am debating with myself which way to go as both my hogsheads are 28 spline open, but I have a 31 carrier. And 31 track lock seem to be easier to find.
 20220617_091035 by Michael Crawford, on Flickr
since I alluded to it, I scored a hatch load of parts from a mopar buddy. He had a “pile of 9 inch crap” that needed to leave. Most of it was exactly that, but in the pile was a whole 3.5x 28 spline hogshead and a 31 spline open carrier. Right gear ratio at least! And I gave him $20 bucks for steak, which made him happy. Ill buy his dinner too one night.
 20220617_141008 by Michael Crawford, on Flickr
I also took the opportunity to do the underside of the car. This is not fun. The quickjacks made it better, but it still sucks. I scrubbed everything down with brown scotchbrite pads and superclean to get the grease, oil, and grime off, wiped down with windex and a paper towel, and shot with rattle can white rustoleum.
 20220612_082611 by Michael Crawford, on Flickr
 20220612_082618 by Michael Crawford, on Flickr
 20220613_174003 by Michael Crawford, on Flickr
 20220614_073658 by Michael Crawford, on Flickr
 20220617_090636 by Michael Crawford, on Flickr
I went ahead and began reassembly with new locknuts, cleaned and greased adjusters, new to me 550lb eibach springs out back, the konis, etc. starting to come together back there, and after a good nut and bolt check ill get the brakes on, and towed down to dads. Only one picture at the moment, as that's all that's on my phone to upload to flickr at the moment.
 20220620_191302 by Michael Crawford, on Flickr
other stuff that ive been working on, such as brakes, aren't quite ready yet and I have no pictures. I was able to figure out the rotors are still available (at $112 each. Holy crap), the rear JFZ calipers are an exact match to the wiliwood superlites Patrick gave me, the fronts use a common wilwood backing plate, steve made me a delrin bushing so I can use a spare brake pedal as clutch in mt pedal box with a custom clevis, etc. lots of little things and baby steps.
Another baby step was getting the body out of my driveway. Stampie picked it up, strapped it to a lotus europa on his trailer, and took it with him to the buyer in Florida who is hanging it on his wall. He was unable to get the passengers side, but its ok, it worked out in the end.
 20220615_202229 by Michael Crawford, on Flickr
I also bought a body. Its not as bad as I was looking for, but it was the right price and has some recoup parts on it. The car is a 73 340 car that was hacked up for a big block drag car, and then parted out and left for dead. There's no windshield, which is a problem. I want to keep a glass windshield in here for maintenance and longevity reasons. I know lexan is more impact resistant, but ot becomes a wear item pretty quickly. The seller did throw in a 70-72 front clip for me, as that's the car I want to clone. There's the manual steering box and big bolt discs still present, a gas tank, a grant steering wheel, etc. ill need to go pick it up when I free up some space, and my mopar buddy that gave me the 9 inch stuff thinks he wants to buy everything im not using on my car to fix the rust in his daughters. So I may be able to use his rotisserie and help, and get it done quicker and easier than I thought! Hopefully be able to sell off enough to mostly zero the car out.
 IMG_4598 by Michael Crawford, on Flickr
 20220611_110754 by Michael Crawford, on Flickr
 20220611_110801 by Michael Crawford, on Flickr
 20220611_110807 by Michael Crawford, on Flickr
 20220611_110817 by Michael Crawford, on Flickr
until next time!


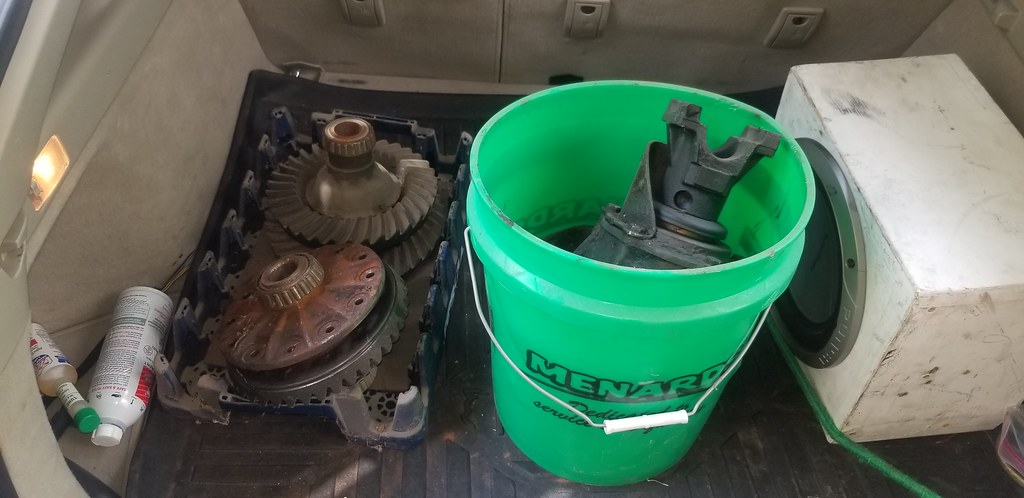
 so, my mopar buddy ryan told me he had a small pile of "9 inch ford crap" that i needed to come get. He has no history on it, no knowledge of it, but wants his bucket back.
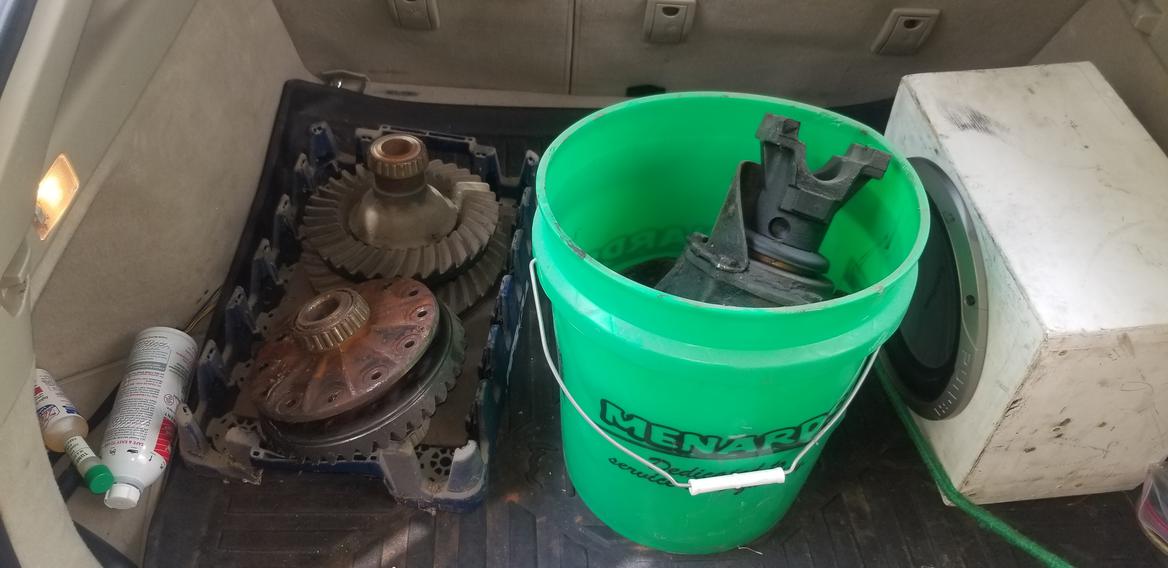


 Thanks!


 so, just about ready to haul down to dads place this weekend, assuming I can get the brakes on the tow dolly fixed. I know i don't need them for the car at this point, but its already torn down.


 i knew it would be tight. Didn't expect this tight though. But, its down at dads. First tow with my new dolly, first tow of this car. Uneventful. Just the way we like it.


