1 2 3 4
bigdaddylee82
bigdaddylee82 UltraDork
8/18/14 12:32 p.m.

I'll get side tracked here for a minute, it's my thread I can talk about whatever I want.

While in the garage, not only did Muffin become a giant storage container, she also became a work bench for other projects. This has been the wettest Summer I can recall, and mowing our yard once a week isn't really adequate, should be more frequent, but at least it's not waist deep like some others in our neighborhood.

Typically, by the 3rd week in June it's hot and dry enough that if you aren't irrigating, you won't have to mow but once a month if at all. Of course the summer we need a mower the most, our mower E36 M3s the bed. We've got a 15 year old hand-me-down Huskee self propelled walk behind. It has been rode hard and put up wet most of it's life, and never missed a beat until this summer.

Now any normal person would probably just go out and buy a new/used mower. However, while discussing said mower purchase with SWMBO, she commented, "you know, if I didn't have to pull that rope to start it, I'd mow the yard."

Our yard isn't big enough to really justify a riding mower, and most electric start push mowers I found were silly expensive so they were out of the question. However, I found a new surplus 190 cc Briggs and Stratton 875 with alternator and electric start, originally used on a little Weed Eater One riding mower.

The price was right so that seemed like the best solution at the time. Of course while making sure the new engine's shaft diameter, shaft thread, key way, and engine mounting pattern, were all the same as the old one, I somehow neglected to make sure the output shafts were the same length.

So what shouldn't have taken more than a weekend after the parts arrived to build took about 2 weeks of measuring, ordering, modifying, failure, and then doing it all again. Of course I had to strip the deck down and paint it too. While I was at it I welded on some strategically placed 1x1x1/8 angle to the deck for added rigidity and a battery mount.

SWMBO even held up her end of the bargain. In fact since the "new" mower has been electric start she has mowed the yard more times than I have.

That was one big distraction out of the way. I had several others, between work, family, etc. but one big one that hit me right in the stomach, literally the abdomen, was a kidney stone. I had never had a kidney stone before, never want one again. Even after it passed I couldn't find much motivation to be in the garage. Easily at/near the top of the list of "Most Pain Ever Felt by Lee." So I feel like I had some legitimate excuses to set Muffin to the side for a bit.

bigdaddylee82
bigdaddylee82 UltraDork
8/18/14 5:37 p.m.

Alright, I was recovered from my ailments, could mow the yard again, and had enough other stuff done that I could justify turning my attention to Muffin again.

Between Muffin sitting collecting dust, and the various projects stored in her she had gotten pretty dirty again. The residual oil still in the old mower engine that was laying in the bed of the Jeep leaked out and put a nice film of nasty on everything.

I basically had to scrub the tub again. Since I had the oil slick, this time I mixed up some ZEP degreaser and scrubbed, and scrubbed and scrubbed.

Once I was satisfied that the tub was clean, I needed to do something about the surface so that product would better adhere to it.

A knotted wire cup brush on my angle grinder did the bulk of the work, and then anything that still hand any hint of a shine to it got hit with some 120 grit sand paper.

After some serious surface prep, a lot of time vacuuming, and wiping down with denatured alcohol, and vacuuming, and wiping down with denatured alcohol, and vacuuming, and wiping down with denatured alcohol, I got started masking stuff off.

I created some extra challenges for myself since I had decided to do this "whole ass." I wanted the bed liner to come up over the Jeep tub "bed rails" just like most do on a truck's bed rails, and I wanted to cover the door thresholds as well. There's a factory clear vinyl/plastic layer that covers the inner lip of the door thresholds to protect them from getting beat up while getting in and out, but mine were long ago worn out. There's a lot of aftermarket covers of varying materials and designs for this purpose too, but since I was putting in bed liner why not go ahead and coat them too? This caused for a little more work in masking, but in the end I feel that it's worth it.

I tried my best to mask around the lower door hinge, but try as I might it just wasn't going to work. Just when I thought I had everything removed that needed removed. The door hinges are attached just like 90%+ of other things on TJs, Torx bolts. The driver side was cake, no issues at all, then I head over to the passenger side... I HATE Torx bolts.

I removed the center console, and meticulously taped and masked the shifters.

Then I basically had her ready to rock and roll, only thing left was to plug all the holes that needed plugged, and pretend I knew how to operate a spray gun.

For this entire masking operation I used 3M 18mm automotive masking tape, Trimaco 15" masking paper, and 3 9x12' IIT plastic drop cloths, all from Amazon. I used some 1/4" vinyl pinstripe tape around the radii of the door thresholds, there was no way that 18mm tape was going to make the radius I needed. The 1/4" tape was leftover from painting flames on my old air compressor, everyone needs flames on their air compressor right? I think I got it from O'Reily's.

bigdaddylee82
bigdaddylee82 UltraDork
8/19/14 1:53 p.m.

Before applying any coating to the bed of Muffin, I needed to protect the eleventy billion holes and the threads in most of those holes. There are holes for wiring, access holes that little rubber plugs go in, and countless mounting points for the roll cage, seat belts, seats, door strikers, hinges, etc. I ordered a 50 count package of soft ear plugs, and a 100 count package of golf tees. The golf tees are neon green, the ear plugs are kind of light blue. Fifty ear plugs was not enough, by the time it was all said and done, I had to order a second package. A lot of the golf tees had to be cut shorter for some holes. For the really small holes I used ~14 Ga. galvanized nails with a bit of masking tape wrapped around the head. If a hole was big enough to need more than 3 ear plugs I simply used masking tape.

The brown in the bed isn't rust, it's some rattle can Rust-Oleum primer I sprayed on to protect the welded patches from rusting.

Almost ready to start spraying. I needed to do something about ventilation in my "spray booth" garage. I really classed up the neighborhood with my filtration system. Four 20x20x1 blue HVAC filters for intake, a 20" box fan blowing out for ventilation, HVAC filter on the back of it too. The frame is cheap pine 2x2, and the rest is the packing paper from the box the new lawn mower engine was shipped in. All held together with staples and duct tape.

SyntheticBlinkerFluid
SyntheticBlinkerFluid PowerDork
8/19/14 2:36 p.m.

Haha that's awesome.

e46potenza
e46potenza New Reader
8/19/14 3:02 p.m.

your garage filtration system pretty much just made my day. That's awesome

bigdaddylee82
bigdaddylee82 UltraDork
8/19/14 5:24 p.m.

I'm glad someone appreciates my filtration system, when SWMBO saw it, she sighed, rolled her eyes, said, "Really?" and walked back into the house shaking her head.


The first step of the multiple step process of applying liner to the bed of my Jeep was a base coat.

Now the products I used doesn't "require" a base primer other than what comes in the kit for "spot" treatment. The directions suggest simply scuffing an already painted surface and applying it directly to it. However when discussing with the bed liner's manufacturer my particular application; how I had the painted areas, the bare galvanized areas, the rust repaired areas, the bare steel areas, the welded/primed areas, etc. they believed a base primer prior to application would get me the best results.

When discussing the merits of etching vs. epoxy, and surface prep they steered me toward epoxy primer for my application. A lot of the paint stuff is still Voodoo to me, but I took their advice and began researching, "affordable" epoxy primers. I learned anything claiming to be ready to spray would likely be crap and/or not truly an epoxy primer, I was looking for 2K (2 part) epoxy primer. A lot of further Google sleuthing and price comparing lead me toward Summit Racing's line of 2K epoxy primer. The Summit primer had predominately good reviews, was reasonably priced, and is allegedly made for Summit by Kirker, a brand I was familiar with from my previous research. So I ordered 1 quart of Summit flat gray epoxy primer, and 1 quart of Summit epoxy primer catalyst.

The primer and catalyst mix at a 1:1 ratio so when one is used up the other is too.

Before I mixed the primer, I had already made sure the Jeep's surface was clean again, with denatured alcohol and lint free cloth wipes.

I've got a cheap Campbell Hausfeld HVLP gun, I have slightly better than novice experience with it. I painted my folk's '98 3500 4 door Chevy that came stock with the GM "peel off in sheets" white paint. I used single stage Nason paint on it. That truck was my first foray into "real" automotive paint. SWMBO has brought home countless furniture projects that I've used the HVLP gun on, and when my POS HF airless gun died 1/4 way through painting a bathroom remodel, I stretched air hose through the house and tackled it with the HVLP too. So I've got some experience mixing paints, and have a "technique" with the spray gun, but I've certainly never had any formal training, nor do I claim to be doing it correctly, just what works for me.

Shorts and a tee shirt count as proper PPE right? It was HOT in that garage, July heat, plus a 500 watt work light made being in a closed up garage very uncomfortable, even with filter fan going. I did put on socks, shoes, and gloves before I actually started spraying.

mazdeuce
mazdeuce UberDork
8/19/14 5:32 p.m.

I can't be the only one reading along and wondering whether your hootus made it through unscathed.

Datsun310Guy
Datsun310Guy PowerDork
8/19/14 7:02 p.m.

In reply to mazdeuce:

I'm not wondering. I don't think about Hootusses - just the lawn mowing ladies in MY neighborhood.

No muff (muffin?) too tough....

bigdaddylee82
bigdaddylee82 UltraDork
8/20/14 2:22 p.m.

No Hootuses (Hooti?) were harmed in the making of this thread.


Pretending I know what I'm doing. SWMBO didn't get many in process pictures, something about fumes?

And primed.

There was however, a fatal flaw in my ventilation system. The top of the garage door wasn't sealed, and I had basically every light I own set up in the garage. So the bugs came to the light, and the fumes killed them. Thankfully most of the bugs were easily removed with the shop vac, only a few wings and/or legs were left behind. Were I going for a concourse paint job I might have been more concerned, but bed liner is textured, and more bugs just means more texture right?

Dusterbd13
Dusterbd13 Dork
8/20/14 3:41 p.m.

Looking forward to seeing what bedliner, techniques, air pressure, etc and results you got. Going to spray the bed of my el Camino soon...

Autolex
Autolex Dork
8/20/14 3:59 p.m.

Looking fantastic! love the picture updates, keep them coming!

dculberson
dculberson UberDork
8/21/14 10:19 a.m.
bigdaddylee82 wrote: There was however, a fatal flaw in my ventilation system. The top of the garage door wasn't sealed,

I thought about that .. but didn't think of the bugs + lights add-on.

ssswitch
ssswitch Reader
8/21/14 12:32 p.m.

I have an unusual fixation on these Jeeps even though it seems like the Jeep crowd consensus is that they kind of suck.

I'm really impressed with the paint, even with the dead bugs (I'd have to work for a really long time to seal out my garage and its poorly-measured door from bugs unfortunately). Looking forward to the rest of the story.

bigdaddylee82
bigdaddylee82 Dork
8/21/14 1:28 p.m.
ssswitch wrote: I have an unusual fixation on these Jeeps even though it seems like the Jeep crowd consensus is that they kind of suck.

Jeep TJs in general don't suck, I have several friends that have/had most versions of civilian and military Jeeps over the years. I believe Jeep "got it right" with the TJ. I don't hate on JK as much as a lot of the TJ faithful do, but the worst thing they did to it was killing the 4.0l in favor of the minivan 3.8l, it took them long enough, but they remedied that with the Pentastar. I'd drive a '12+ 2 door Rubicon in a heart beat.

Now my particular trim/optioned TJ, well yeah, as far as highway performance, and power go, I agree it SUCKS. I've told countless people if you think you MUST get a 4 cylinder TJ, at least get the later model with the Neon/PT Loser OHC 2.4l and stay far, far, far, far away from AMC's 2.5l. What hurts mine even more is it being automatic, since it's an automatic it got 3.73 axle ratios instead of the 4.10 that the manuals got. Calculating drive train loss, I'm putting about 65-70 horse power to the wheels, slow is an understatement.

When I left home for college, moved from central Arkansas to Fayetteville, in Northwest Arkansas, Woo Pig Sooie! Muffin was my only means of transportation. I dreaded that stretch of I-49 (was still called I-540 back then) between I-40 & Fayetteville. All of the trucks, vans, busses, and old blue hairs I passed on I-40 eventually passed me once I was driving up the hills of I-49.

I got stopped by a state trooper once on I-49, said I was doing ~80, I had a leaky valve cover gasket at the time, officer walks up to the window, "smells like your burning a little oil there," I said, "yes sir." "Son, do you know how fast you were going?" I responded, "No sir, I just knew I had to get as much speed as I could going down this hill so I could be doing better than 50 by the time I got to the top of the next one." The officer chuckled a little, took my info back to his car, came back laughing a little still, told me to have a nice day and watch my speed.

So yeah, if you're in the market for a Jeep, don't get a 4 cylinder, 1/2 the power of the 4.0l and the same to worse fuel economy.

  • Lee
bigdaddylee82
bigdaddylee82 UltraDork
8/21/14 3:33 p.m.

The Summit Primer I used claimed to have a 4 day top coat window, i.e. ≥4 days after application the primered surface would have to be sanded to ensure the next layer "stuck" to it. So, I had a window to work with, no time to dally, since I was doing most of this during the evening when I got home from work.

The next layer of the Layer Cake that is Muffin, was Al's HNR (Heat and Noise Reducer). Al's HNR is like a budget Lizard Skin. Al's uses some technical jargon, and "marketing speak" to basically state that it's a Latex blend with some ceramic micro spheres mixed in. The ceramic micro spheres allegedly provide insulation against noise and heat. Further foreshadowing here: the jury is still out on this one, preliminary findings would have me leaning toward, don't bother with this step.

Al's HNR

I made sure all of the magic beads were evenly distributed throughout the solution.

For the HNR application I could have used a texture gun to apply it, however I didn't want the HNR everywhere, not on the bed rails or door sills, and I wasn't up to masking off more areas, so instead I used a roller to apply it. In some of the hard to reach areas I used a cheap siphon gun from Harbor Freight, the gun had a slightly larger than 2 mm tip, HNR directions suggest at least a 3 mm tip, and they're right. While I was able to apply the HNR with the 2 mm tip it was not consistent, thankfully I wasn't trying to spray the whole tub with it, just the areas I couldn't get my roller or foam brush into.

Getting my roll on.

Al's directions state that for best results to apply HNR at a 31 mil (0.031" a little less than 1/32") thickness. Over the course of 2 nights I applied a minimum of 2 coats of HNR over the entire inside of the tub. The rear wheel wells got 3 coats, and the front floor boards, fire wall (as far as I could reach), and transmission tunnel all got 5 to 6 coats. I believe that I sufficiently met, possibly surpassed, the 31 mil recommendation in the front of the Jeep for sure, the rear of the Jeep with only 2 or 3 coats is probably thinner than recommended.

Opti
Opti Reader
8/21/14 10:16 p.m.

Did the bedliner on my blazer. Never again. Didnt get it on my hootus, but I feel for the guy. Got it on my arms and drew blood trying to scrub it off, so I just left the rest of it, had it all over me for days.

 photo DSCN0225.jpg

Love the jeep, looking good. The restore/slightly mod threads are my favorite.

bigdaddylee82
bigdaddylee82 Dork
8/22/14 1:05 p.m.

In reply to Opti:

I was able to get most of it off while it was still tacky with paper towels and denatured alcohol, not a pleasant experience. I missed a spot on my lower right calf, by the time SWMBO had pointed it out to me it was hardened, and basically part of me. I lost some leg hairs but was able to pick at and rub it until it eventually came off.

Talk about low hanging fruit, there's a "that's what she said" joke in that last sentence if I've ever seen one.

  • Lee
bigdaddylee82
bigdaddylee82 UltraDork
8/22/14 2:15 p.m.

If you hadn't already gathered as much, since I used Al's HNR, I also used Al's Liner. I've not had it long enough to give a real world "Lee's seal of approval," but so far I'm quite pleased with the product.

Full disclosure, I was not new to Al's product line. Once upon a time, in a galaxy far, far away, I worked for a "boutique" trailer manufacturer and general metal fab shop. Our niche market was display/delivery trailers for the spa/hot tub industry, and mobile staging, i.e. big trailers you drive to wherever you want to have a concert, flip some switches/hydraulic levers and it turns into a stage. I referenced earlier, working with welders that were artists at laying a bead, this was the place. I was the "college boy," did most of the design and drafting, programed and ran all of the CNC equipment, as well as the bulk of inventory and purchasing. For our mobile stages, and a lot of other random things, we applied Scorpion Liner to the floors for a non-skid, durable surface. The Scorpion Liner held up great, even when applied to poorly prepped surfaces by meth heads, it really did a stellar job, I was impressed.

So if I was so impressed with Scorpion Liner, why the heck did I buy Al's Liner instead you ask? Great question! Al's Liner is the do-it-at-home DIY version of Scorpion Liner.

Al's Liner said: Al's Liner is the first and only urethane/acrylic DIY bed liner kit that delivers quality protection that meets or exceeds the so-called "Professional Bed Liners." Designed by Scorpion Protective Coatings in 1995, Al's Liner is built on the three part batch system that Scorpion has been deploying through the commercial and industrial sectors for over 15 years. In April of 2008, Scorpion launched its first retail item, Al's Liner 1 Gallon Kit. Since that time, Al's has developed a reputation as one of the best protective coatings on the retail market. With a genuine high solids mixture for maximum durability that has been tested by Scorpion on fleets worldwide for over a decade, Al's Liner brings a professional grade protective liner to your truck bed that will last for years to come. With the simple and inexpensive batch system that allows customers to easily mix their liner at home, Al's Liner can be customized to cover a wide array of substrates with any texture, color or thickness you desire. Don't be fooled by solvent-based, watered down versions of the real thing. Get lasting protection for your truck bed the way you want it. Get Al's Liner DIY Truck Bed Liner Kit.

Some time spent researching Al's Liner, and my previous experience seeing Scorpion Liner in use, it was a relatively easy decision for me to make.

I'm a bargain hunter, and have an Amazon Prime membership, so I buy a lot of stuff from Amazon. Best price I found for the liner kit was surprise, surprise, at Amazon, and it was Prime Eligible too.

I've seen a lot of Jeep's tubs done with black bed liner, and I've just never been a fan. Al's Liner, is tintable to basically any color you want using automotive paint tint. The thought of matching Muffin's Flame Red exterior crossed my mind, but I thought better of it and decided I'd rather match the interior. All those years ago when Muffin still had carpet, it was gray, the rest of the interior is varying shades of gray/black so gray seemed like the logical, and most esthetically pleasing choice. To make it even easier Al's Liner is available as a gray (grey) straight from Al, no need to source paint tint from elsewhere.

Al's Liner can be applied with a roller, but I had never planned to do so, plus, after applying the HNR with a roller, I didn't want anything else to do with roll on products for a while.

Al suggests using a texture gun to apply their product. I inquired about using an undercoating gun, but they recommended against it. I had a Harbor Freight texture gun at one point in time, I couldn't find it, probably one of many things I forgot that I gave away before one of our many moves. I just almost bought another HF texture gun despite Al's strong recommendation to use their own Al's brand "Professional Series Air Texture Spray Gun," there was roughly $20 difference between HF and Al's texture gun, and they looked the same in the pictures.

I contacted Al's again; I must say their customer service really has been top notch, Dana has been very helpful and usually quick to respond to emails. I asked, "what gives?" "What makes the Al's gun $20 better than the HF gun?" Apparently the tip of Al's gun has 5 air holes in it, and everyone else's only has 3 or 4 holes. According to Dana, having more air holes in the tip "allows you to spray at much lower air pressures," and due to the multi-pinhole blow tip it can "atomize the material better for lower pressures and better control of texture." There may or may not be something to that, but it was only $20 more than the next cheapest option, and the Al's gun was Prime Eligible on Amazon too, so I bought the Al's gun.

Unfortunately, just like every other hopper fed texture gun I've used, if an air hose is hooked up to it, air is going to be blowing through it. Pulling the trigger/lever only opens the valve to allow gravity fed material out of the hopper and into the constantly flowing stream of air. My air source is an ancient, pawn shop find, 20 gallon, oil lubed, twin cylinder, 2 HP, 120v, horizontal, Speedaire that I've rebuilt twice. While it's generally sufficient for most of my shop needs, and adequate-ish enough for occasional painting with a HVLP gun, it's not up to the constant demands of a texture gun.

Al's recommends putting a valve in line with the gun so that you can turn the air flow off when it's not needed, I wanted a little more control than a ball valve allows. What I really wanted to do was have a valve that opened when squeezing the lever for the hopper, but I couldn't come up with a reasonable or cost effective solution for 1 handed operation, especially for putting liner on 1 vehicle, if I was doing this more often I'd probably put more effort into it.

What I eventually came up with allowed me nearly instant on/off air control using 2 hands. I simply added a 2 way lever valve (Interstate Pneumatics VL700) to the base of the Al's Texture gun.

bigdaddylee82
bigdaddylee82 UltraDork
8/22/14 3:06 p.m.

Al's Liner is a 3 part mix plus tint, so 4 bottles of stuff to mix up. All together it makes 1 gallon of product.

The kit comes with everything you see pictured here, if you want to make the full gallon of product at once you simply dump container B, C, and the tint into the largest container A and use the provided stirrer in a drill to mix everything together. You are supposed to thoroughly shake container B before adding it to the mix. If you don't need a full gallon, there are directions included with measurements needed to make as little as 1 quart of bed liner at a time. When all components are added together, it takes longer than you might think to get them fully incorporated, mix until everything is a uniform color and there is absolutely no white left visible, and then mix some more.

Once mixed, you "ALLEGEDLY" have a 20 minute pot life, more on that later.

I've seen varying directions on how/when to apply the Adhesion Promoter, I've seen it misted over the entire area you're applying liner too, I saw a how to youtube video where the Adhesion Promoter was only applied to bare metal. Since I had applied HNR to my tub Al's suggested I apply Adhesion Promoter to the entire surface, so that's what I did. If you're doing this, and have questions, ask Al's they'll steer you in the right direction. You're supposed to apply the Adhesion Promoter, and wait 15-20 minutes for it to get tacky, before applying the bed liner.

Another Al's accessory I bought to go along with my bed liner kit, and texture gun was Al's LMR (Lecithin Mold Release). You spray this inside of the texture gun, on all of the metal parts and let it dry before putting any liner material into the hopper. This makes cleaning up the texture gun super easy, you just leave any liner residue in the texture gun and allow it to harden. Once it's hardened you can just peel it out of the gun. That might have been the most entertaining part of the whole experience.

tuna55
tuna55 UltimaDork
8/22/14 3:26 p.m.

Very much looking forward to hearing about this bedliner/microbubble treatment..

bigdaddylee82
bigdaddylee82 UltraDork
8/23/14 9:29 a.m.

In reply to tuna55:

I'm surprised and pleased that folks show interest in Muffin's well being. I've got a lot more in store for her than just the bed liner. Though I'm already struggling with "scope creep." You know, while I've got the interior completely apart I might as well do this, it'll be a lot easier to go ahead and do that now than when the roll cage is back in, etc.

SWMBO and I went on a short road trip a couple weeks ago, brought this home for Muffin, and was a great deal too.

It's so dang hot out in the garage now, it's hard to get much done.

tjbell
tjbell Reader
8/23/14 9:57 a.m.

I thoroughly enjoy this thread and all the work you have done to this jeep. most people would consider a 4cyl/auto a throw away jeep. I admire what your doing keep it up!

ssswitch
ssswitch Reader
8/23/14 10:29 a.m.

I would've probably just used some of that anti-rattle and heat mat that the stereo guys use, but it seems like the suspended-spheres liner is a much cheaper solution that's easier to get into ugly crevices (and is aesthetically much nicer). Way cool, surprised I haven't heard of it before.

Grey bedliner looks way nicer than black bedliner any day, too.

bigdaddylee82
bigdaddylee82 UltraDork
8/25/14 3:36 p.m.

This got kind of long, apologies in advance.

Late on the third day after priming, I finally sprayed bed liner. Remember that I only had 4 days to work with the epoxy primer before it had to be sanded. Since there wasn't a lot of epoxy primer still exposed, most was covered with HNR, I went ahead and did a quick rubbing with some 120 grit and roughed up it's surface just in case. I also wiped down the still primed areas with some denatured alcohol since they were all areas I had been leaning up against, and dripping sweat on.

I thoroughly vacuumed the entire tub again with the Shop Vac, and then I was basically ready to go.

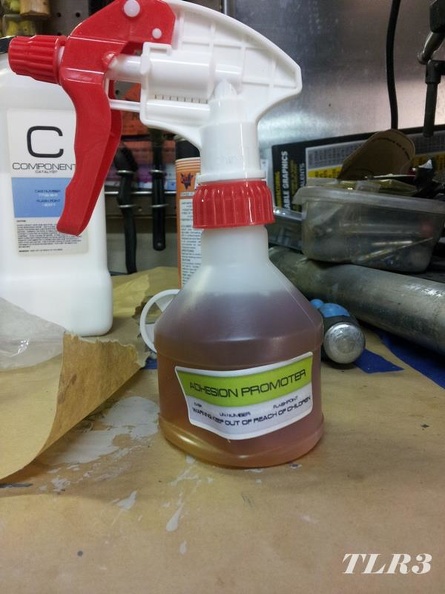
Before I mixed up any of the liner, I applied the Adhesion Promoter to the entire tub of the Jeep. The Adhesion Promoter's spray bottle basically sucks. You can adjust the nozzle to go from a large spray to a stream, there's no real mist option. Needless to say I went through the Adhesion Promoter relatively quickly, I managed to spray some on the entire tub, but had absolutely zero Adhesion Promoter left by the time the entire tub was covered, some places were coated thicker than others while attempting to adjust the nozzle.

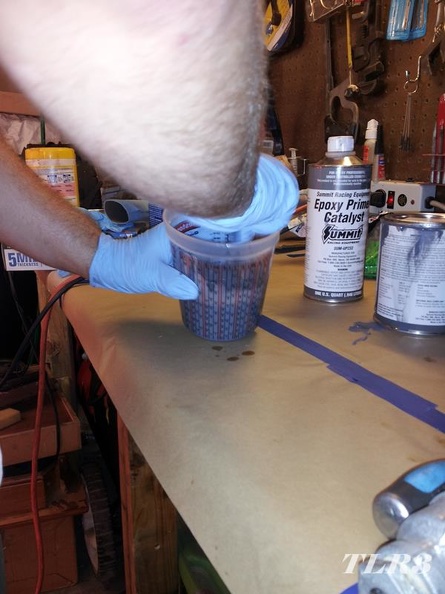
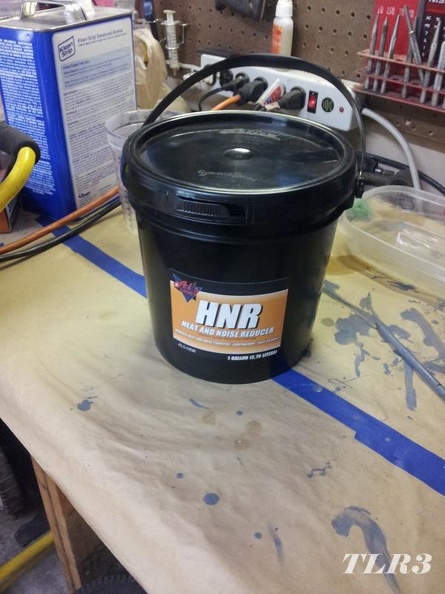
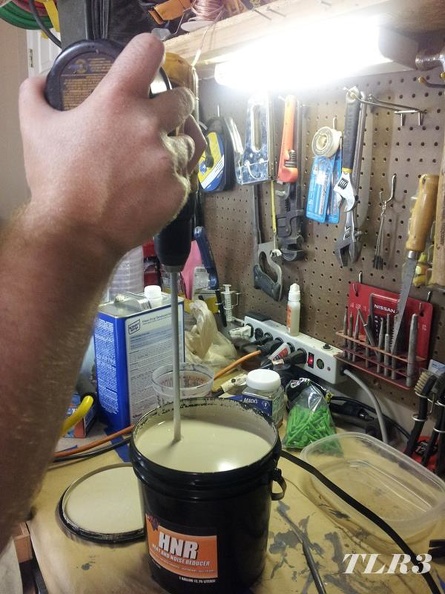
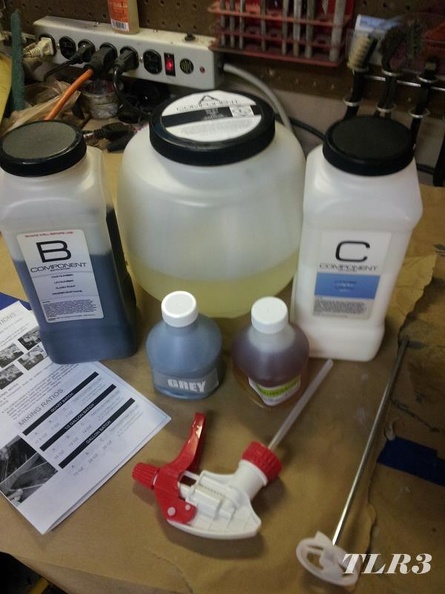
During my correspondence with Dana at Al's, he suggested mixing and applying half of the product at a time. This is excellent advice that I neglected to take. With out really thinking about what I was doing, after I got Component B shaken up to my satisfaction, I opened the lid and proceeded to dump its entire contents into the Component A container. What did I just do?!?!? At that point I was committed, so I went ahead and made the entire gallon.

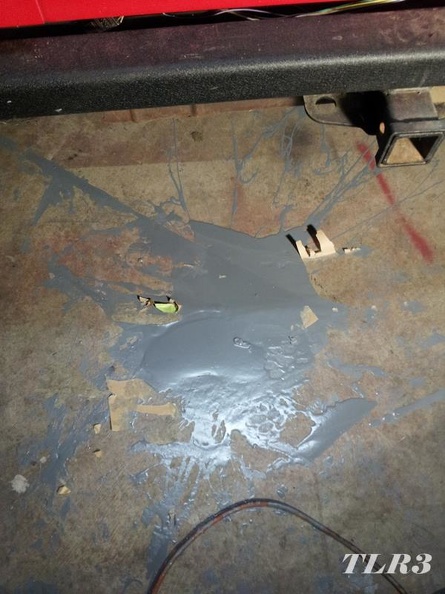
I soon figured out why Dana recommended to only mix half of the batch at a time. If you mix the entire contents you wind up with roughly a gallon of product, and you have a gun that holds roughly a gallon of material in its hopper. The top of the hopper is open, not sealed. So, open top hopper, filled to the brim, 1 gallon of heavy bed liner, plus the weight of the gun, regulator, and hose, doesn't take a rocket surgeon to figure out what's going to happen.

At least it's easy to peel off a dirty concrete floor once it has hardened.

Sadly that wasn't the only spill, however the silver lining was that the other spill was in the tub where I was going to spray liner anyway. Spread with a roller, and topped with more product out of the texture gun you can't tell where it was spilled.

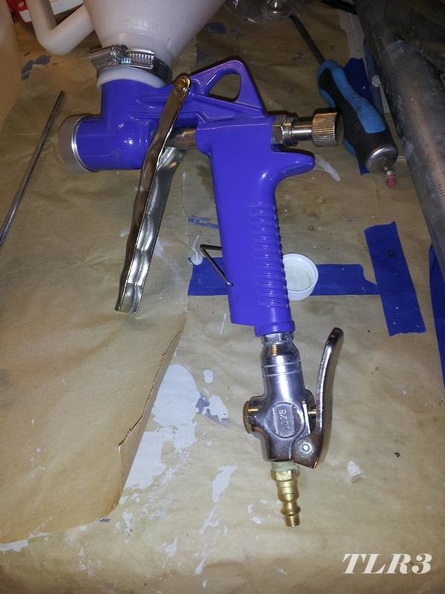
No point crying over spilled milk... I mean bed liner, so then I proceeded to spray the liner onto a big card board box, adjust the air pressure, and gun settings, get a feel for the gun, and achieve a texture I was happy with. I had already selected the smallest tip that came with the texture gun, three different sizes are provided with the gun.

Al's directions say to set the air pressure at 35 psi (I think I'll have to double check that), I saw a youtube video recommending 50 psi, so I started at 50 and worked my way down. I settled on 30 psi to achieve the results and texture I wanted. I couldn't tell you where the knob on the gun was turned to, you'll just have to practice on your own. I have a double filter, and regulator, and a manual hose reel mounted on my garage wall, I typically leave the wall regulator set at 90 psi, and I used a HF mini regulator attached to the texture gun to adjust the air pressure for at the gun.

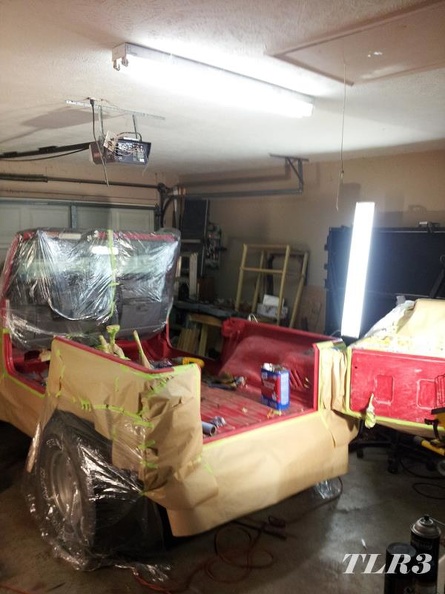
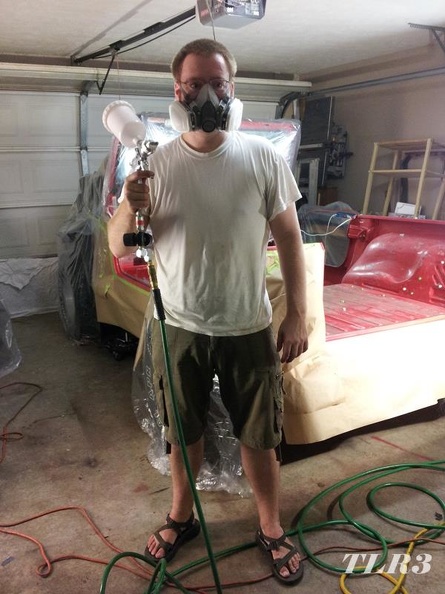
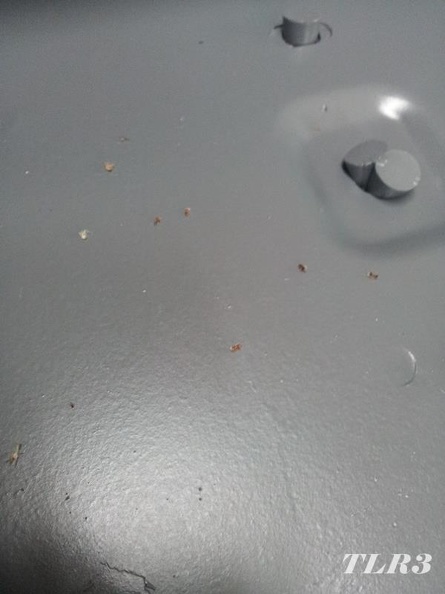
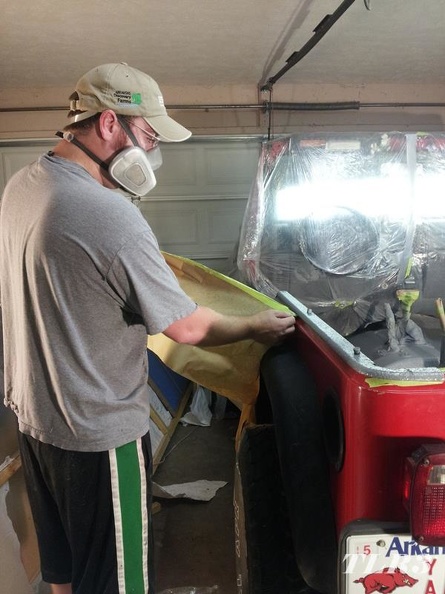
My first time ever spraying bed liner was eventful, I've already covered spilling the stuff. I had a real bug issue when spraying the primer, and I didn't want that problem again, so I kept the garage door closed to spray the liner. No air flow and it was HOT, I was soaking wet with sweat, and could hardly see for the stinging sweat in my eyes. You kind of need to be able to see when spraying bed liner.

I mentioned earlier how my air compressor wouldn't be up to the task of continuous texture gun use, so I had a "brilliant" idea: Hey, I've got a little Porter Cable pancake compressor, why don't I just hook it into the manifold on my Speedaire, that ought to help some, right?

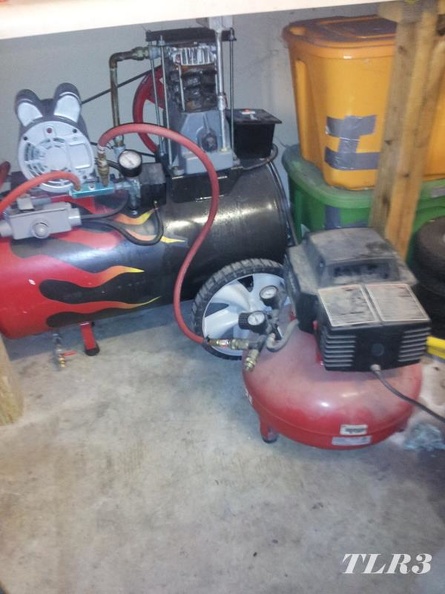
As it turns out the Porter Cable has a higher shut off pressure than I have my Speedaire set for, so basically the Porter Cable keeps on running. Any guesses what happens in you garage when you're not only running two air compressors basically continuous, but also a 500 watt shop light, and its 96° outside? This doesn't take a rocket surgeon either, threw a breaker. Great! Where's the breaker box in this house, in the garage like a normal person would have? Nope, it's outside, other end of the house. I've got bed liner all over me, I can't go through the house, I must open the garage door, and run outside around the house and flip the breaker back on.

I must say the look on the faces of the neighbor kids when they saw me running out of the garage, mask on, covered in gray stuff, and soaking wet was kind of priceless. I'm sure they thought, "we better get the hell out of here, that meth lab is about to blow."

So I turned the Porter Cable off, got the power back on, and got back to the garage to finish up. It wasn't long before I started getting real inconsistent texture from my gun. Pressure was fine, compressor was going, what could be the problem? I look in the hopper, there's still quite a bit of material in the hopper, I noticed it was much more viscous than it was when I started spraying, it had started to harden already.

I was not a happy camper. Al's advertise this stuff as having a 20 minute pot life, I might have gotten 12 minutes of actual sprayable material before it became too thick. I could still spray it out of the gun, but it was very inconsistent and was making a much coarser texture than what I wanted, so I quit. I had a little over a pint of product left in the hopper.

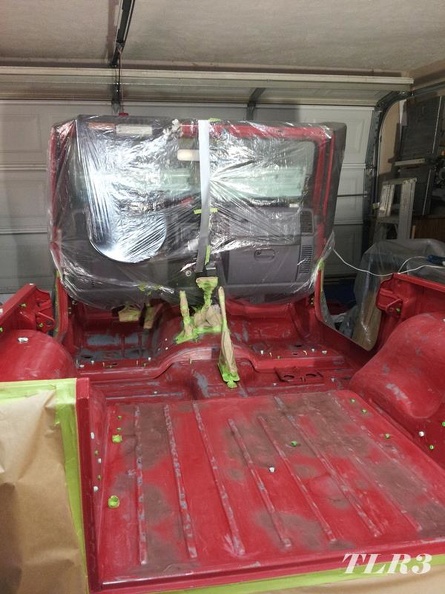
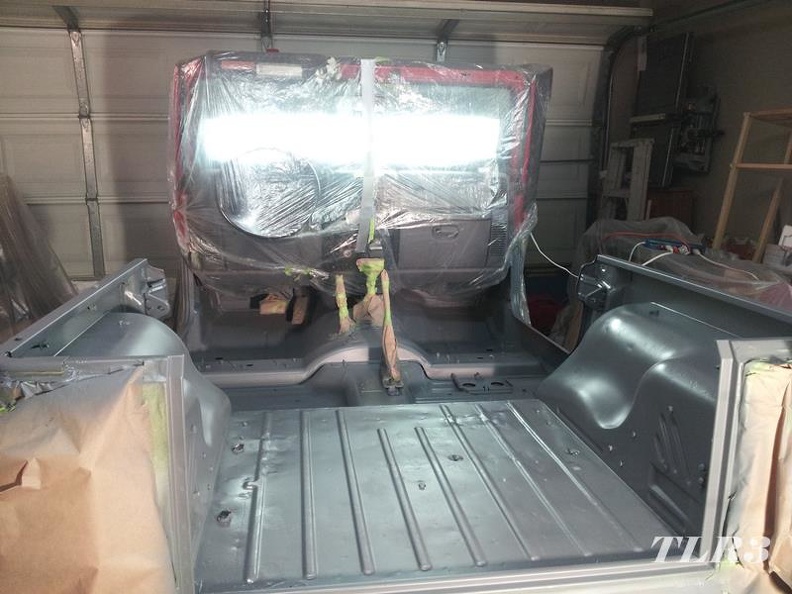
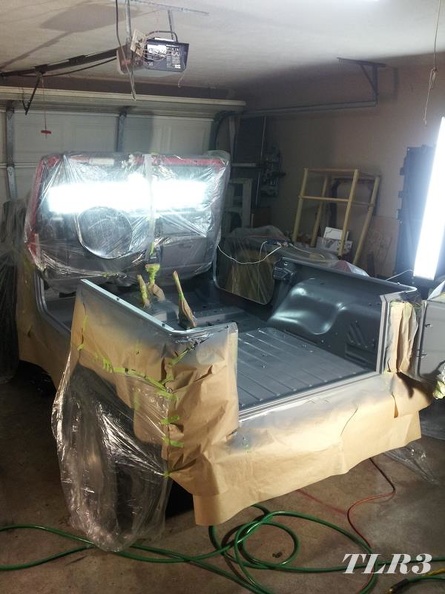
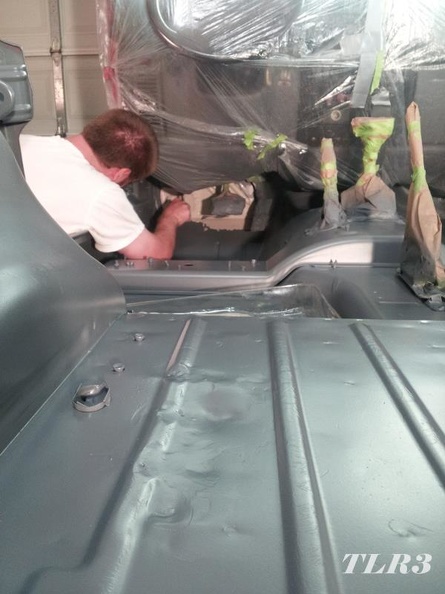
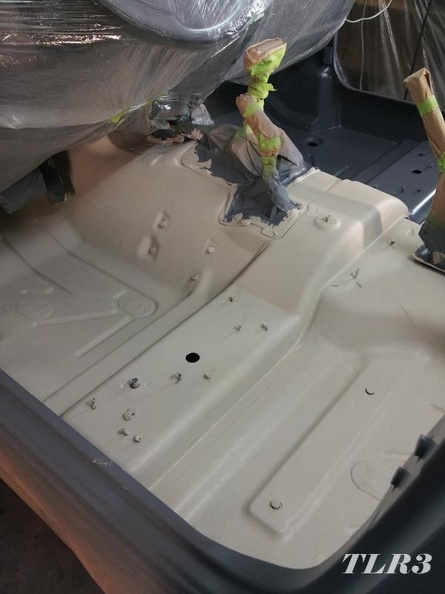
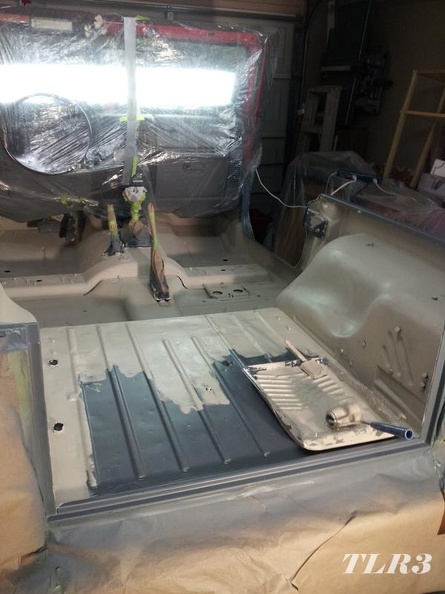
Between what I spilled, test spraying, and what hardened in the hopper, I lost at least a quart (1/4) of my liner. I didn't have near the coverage that I wanted on Muffin either. There were thin spots and off angles that you could still see HNR through a light coating of bed liner. I was not a happy but I didn't have time to sulk.

I knew how hot it was going to be so I thought shorts and a tee shirt were a good idea. I was wrong. I had bed liner all over my arms and legs. As I mentioned earlier, SWMBO had to give me a sponge bath with denatured alcohol, not fun. I then quickly hopped in the shower, and scrubbed. Thankfully I didn't get any on or near my hootus.

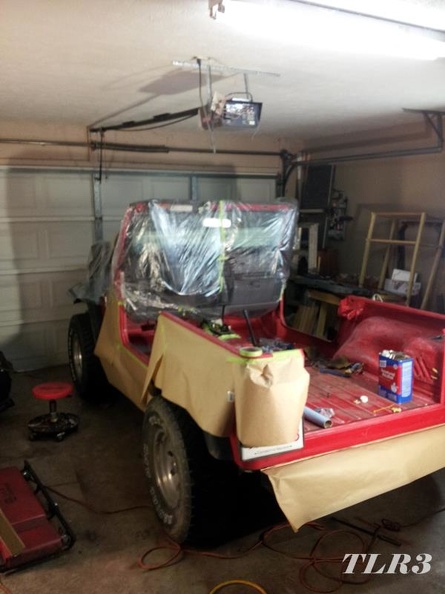
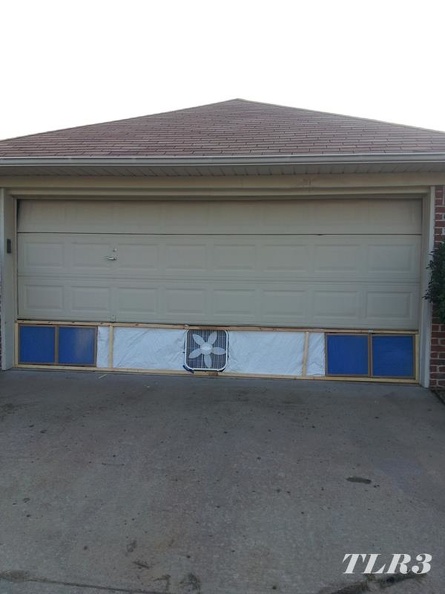
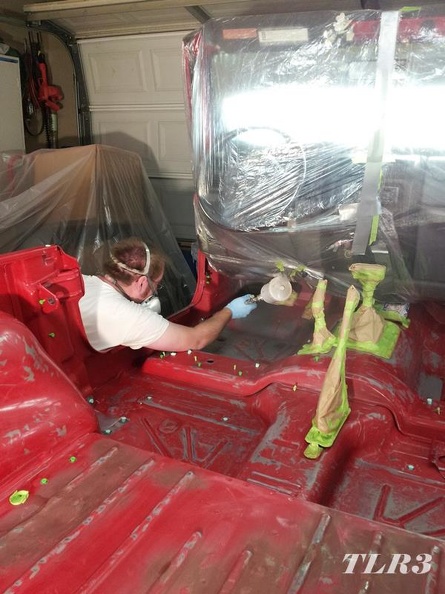
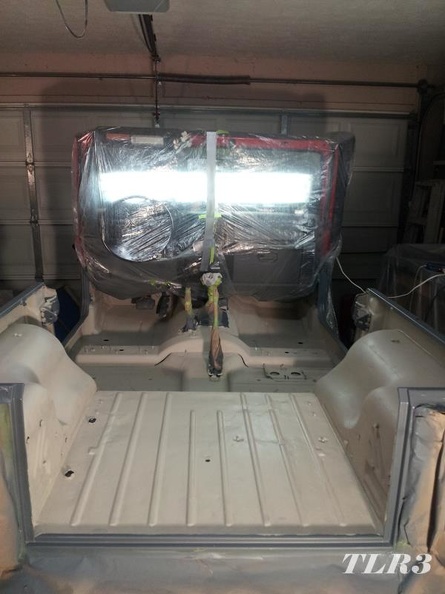
You're supposed to remove any masking about as soon as you finish spraying the bed liner so that you can have a defined line between bed liner and paint, and so the bed liner doesn't permanently glue your masking tape in place. So as soon as I got out of the shower I rushed back out to the garage and began unmasking Muffin.

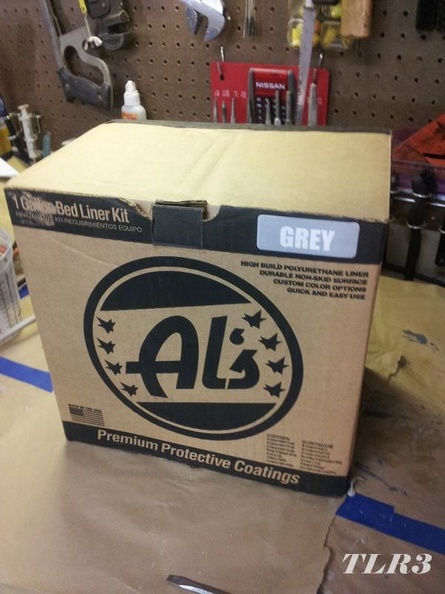
This was not a good night, I was not happy with my initial results, nor how much product I wasted, but at this point there wasn't much else I could do. I had thankfully covered all of the areas that were still just primer sufficiently, so I was no longer worrying about the 4 day top coat window, or having to sand around/through any bed liner. Before I went to bed that night I got on Amazon and ordered another 1 gallon gray Al's Liner kit, Prime 2 day delivery.

Additionally, keeping the garage door closed made the entire house stink, so SWMBO wasn't happy either, if she ain't happy, no ones happy.

mazdeuce
mazdeuce UberDork
8/25/14 5:10 p.m.

I love this story.

1 2 3 4

You'll need to log in to post.

Our Preferred Partners
ooeqD2tTUa2udzbI8WjVUVSPAbohPYrHCMlJez8nPyz9Kl2CKhB9nKGweNIvh70O