1 2 3
turboswede
turboswede PowerDork
10/20/12 11:11 a.m.

Here's my recount of how I got it home the weekend of January 26th, 2006:

Picked it up on Friday afternoon in Everett, Washington. Girlfriend, Joy, and I went up together, she wasn't too crazy about driving back to Portland by herself, but we decided to stay over night in Renton so that we could rest and spend some time hanging out in Seattle, etc.

So Friday afternoon, while we were on our way, I called the Volunteers of America office to ensure the car was ready for pickup. They stated that it was, but then asked if I had a way of towing it. I was confused as this was supposed to be a runner. I said, that if I needed to I would get one, but that I had planned on driving it. That was fine, I would just need to get a trip permit for it in order to drive it back as Washington requires them to take the plates or at least the tabs. Sigh, fine, whatever.

Arrived at their "office" around 2:30. I put "office" in quotes because it is a really just a dingy little hovel with a bunch of cars parked all over the yard on the main street of Everett. So we squeezed into the "office" and waited for the guy ahead of us to finish his transaction and leave.

James, the apparent manager of the place, seemed like a decent, straight forward guy, so that put us at ease, though his teenage assistant gave us the creeps thanks to a rather awkward conversation we had with him about Astoria. James explained to us that we needed to get an out of state residency form notarized and to get a trip permit and while we were doing that he was going to get the rest of the paperwork in order.

He pointed us to a place called Lucy's Licensing further down Broadway. Lucy's was again a little hole carved into a mini-mall, it looked to be also a check-cashing place if you know what those places are like, you've got Lucy's pinned down. $24 for the trip permit, $5 for the notarizing and we managed to avoid the crack whores that were lining up in there.

Back to VoA and James. We get back and the girlfriend tells me that she's going to stay in the car, I don't blame her. So I go in and the first James hits me with after I sit down is an extra $10 administrative charge that somehow didn't get communicated to me. Sigh, fine I don't really care as I just want to go to the hotel and get out of this little one horse town, preferably with my Porsche. So after I give him $10 we finish up the paper work and he sends us down Broadway again to actually pick up the car from their storage lot.

We arrive at the storage lot and the guy working there points out the car, hands me the keys and takes off. Now, the lot is down below the road and to get back onto the road you need to drive up a rather steep hill while avoiding the latte stand traffic. So, I'm hoping the car runs somewhat decently in order to make it up the hill.

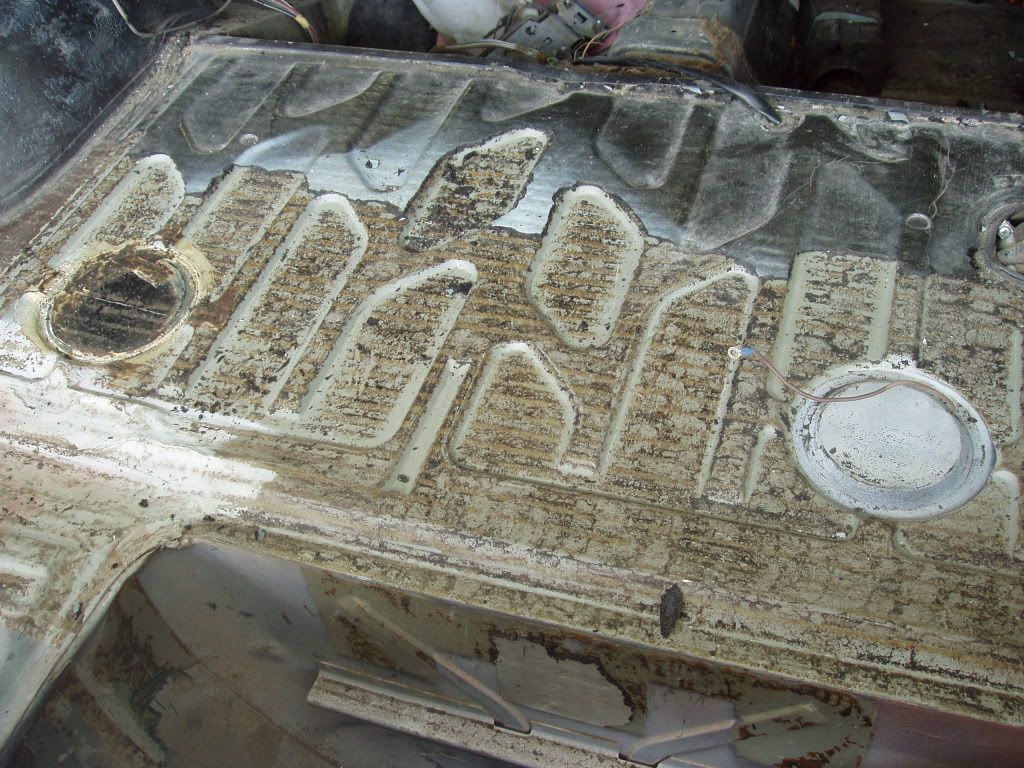
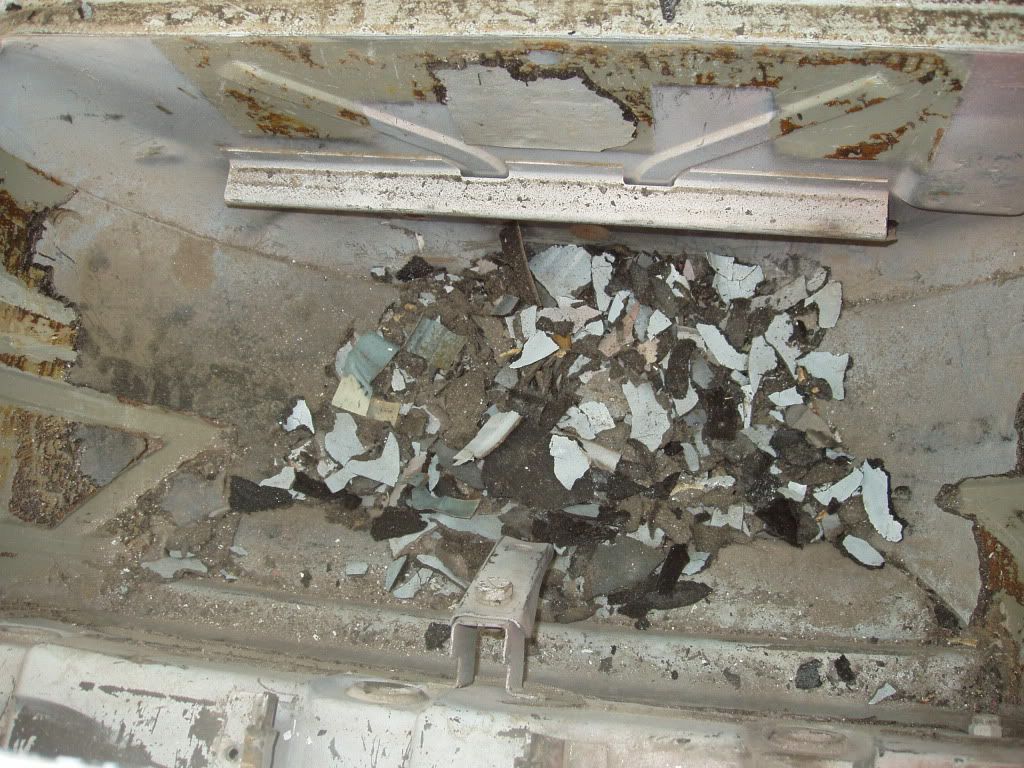
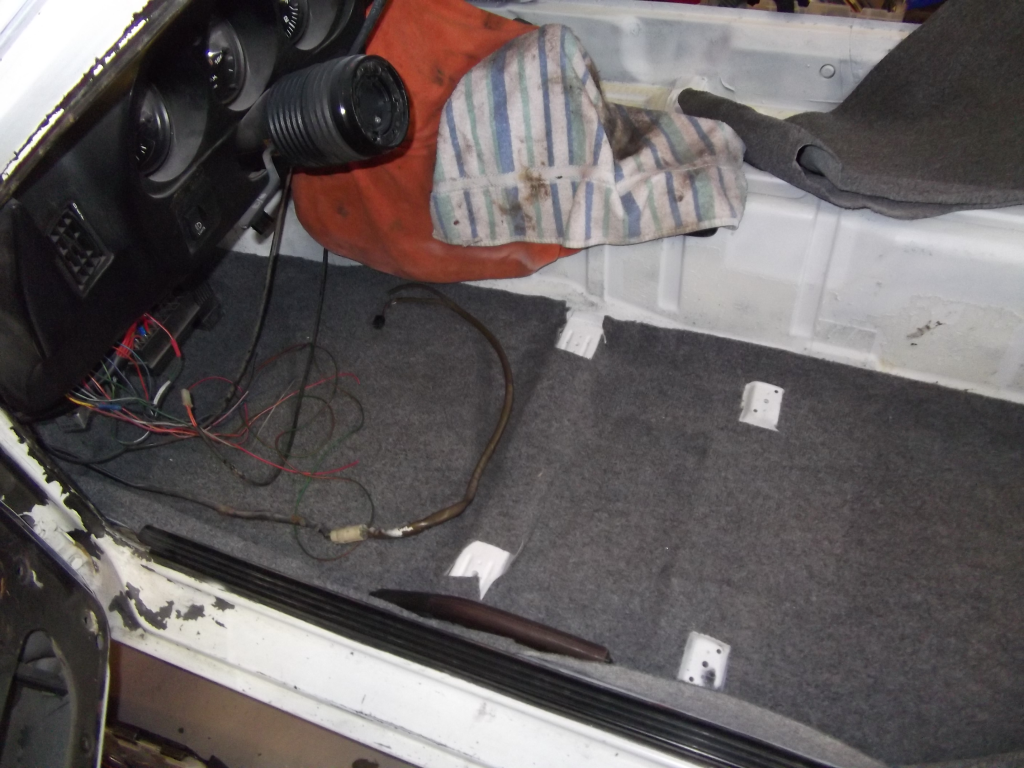
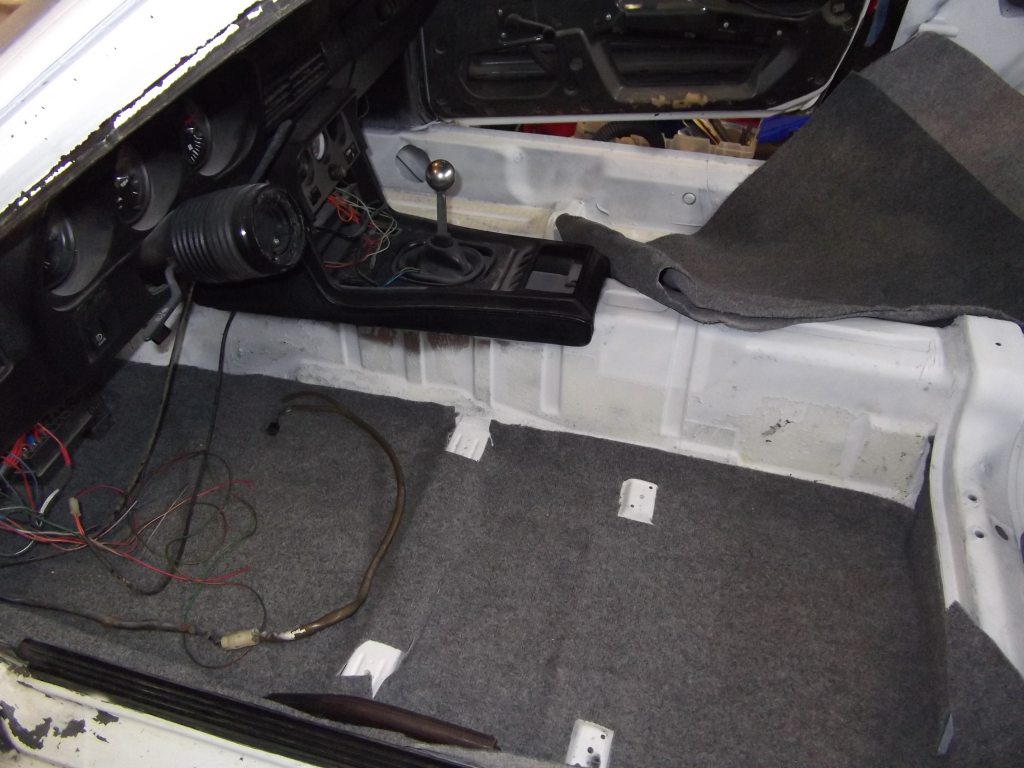
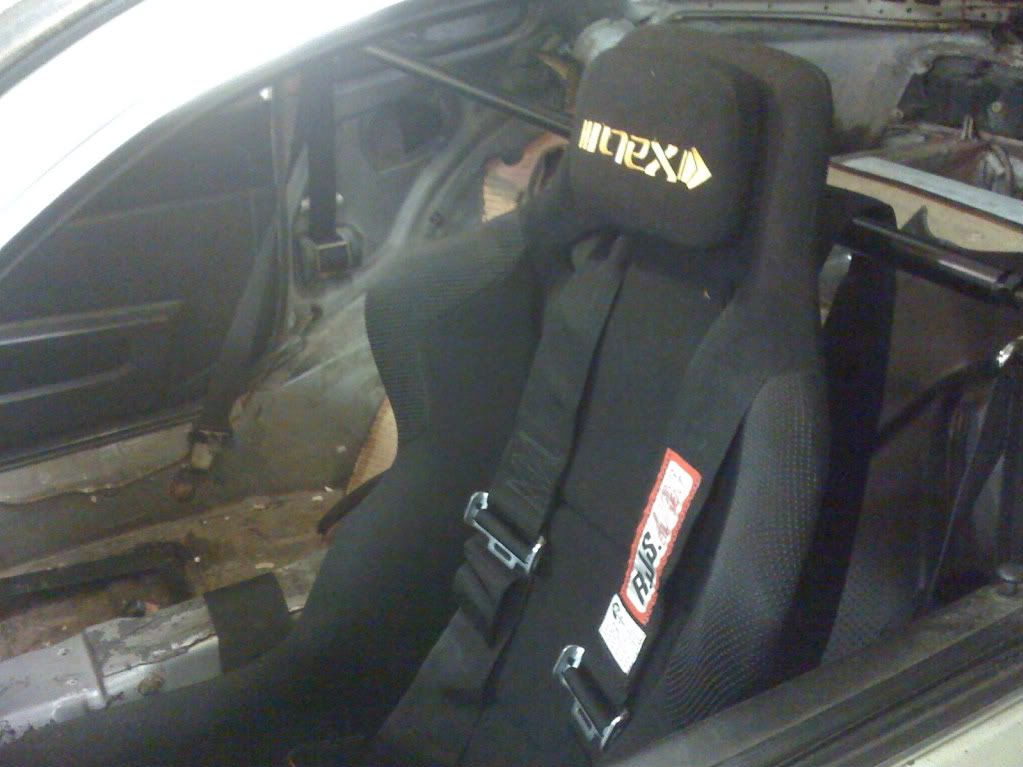
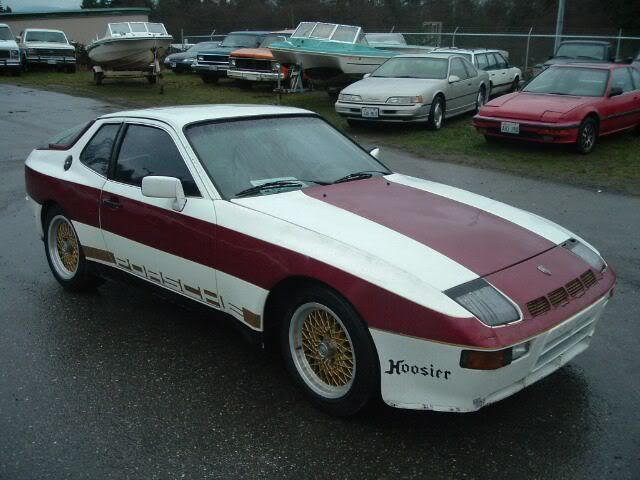
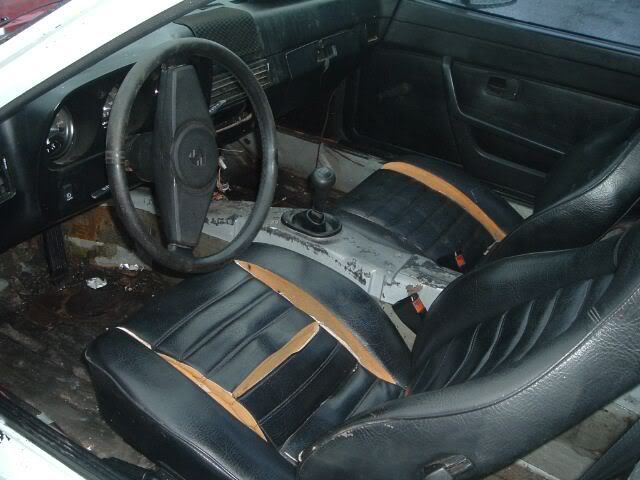
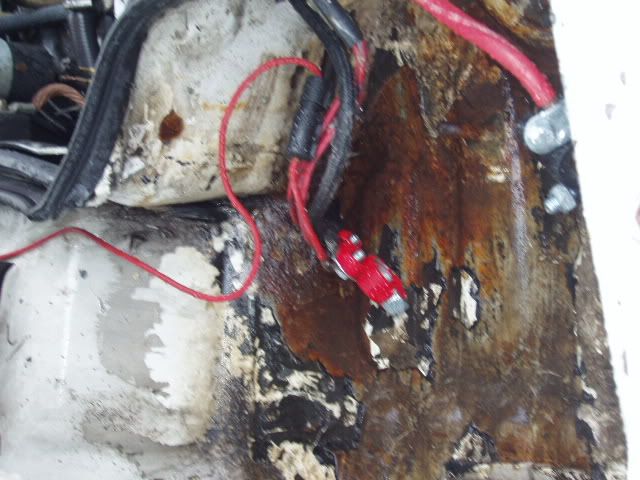
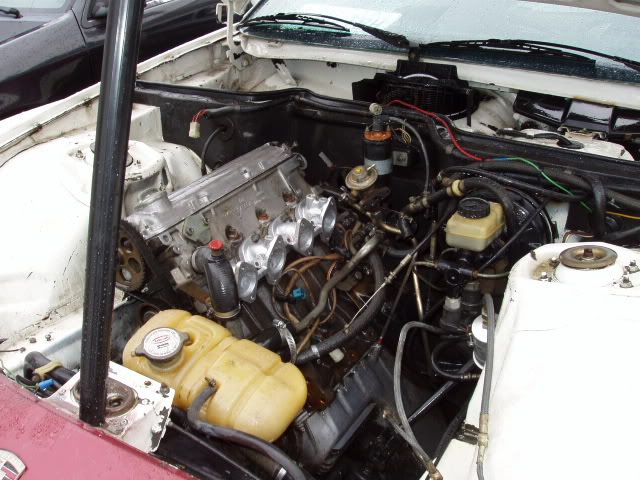
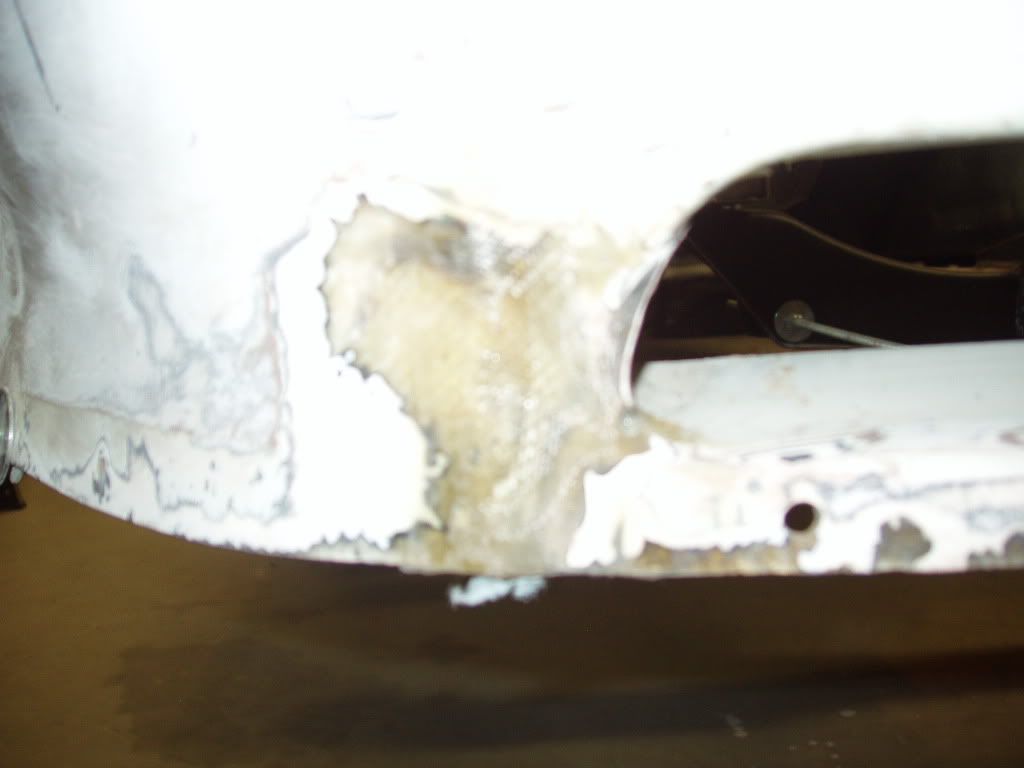
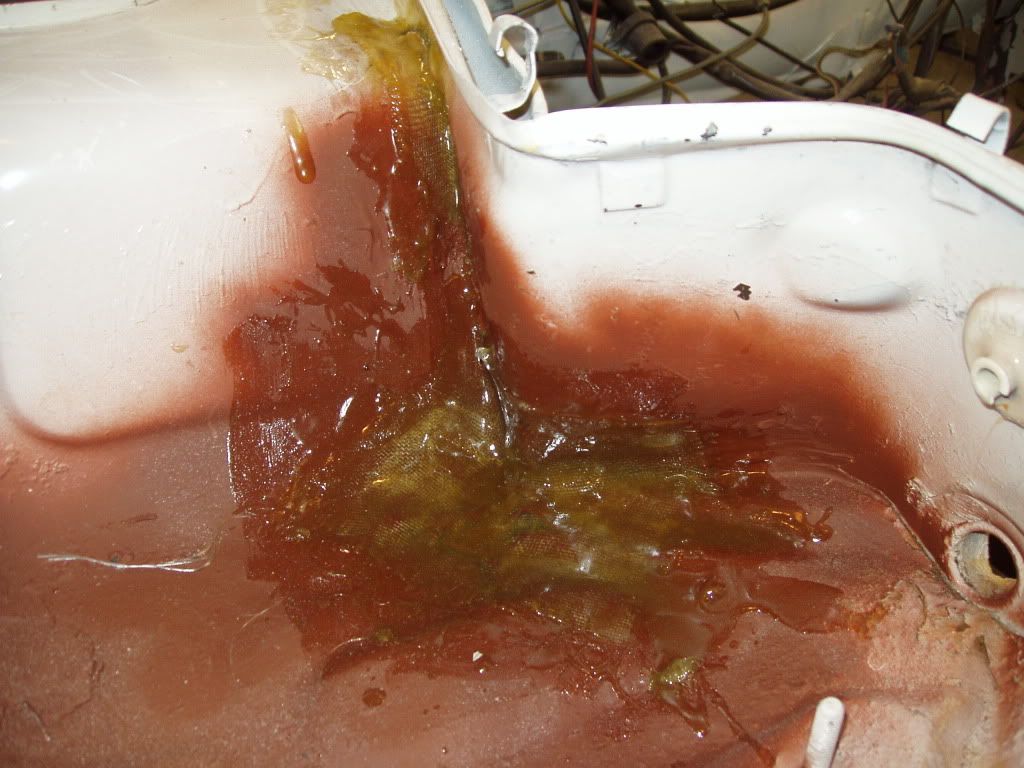
Now before I go much further, I feel I should talk about the condition of the car as I found it. The outside looked a little worse than the pictures made it out to be, but I was expecting that from previous experiences. The side windows were tinted, poorly. I opened the driver's door and found a lake of water in the passenger foot well and the driver's wasn't all that dry either. It was literally up to the door frame. Apparently it has a leaking sunroof and rear hatch and it has been stored in an uncovered storage lot near Seattle, Washington I guess I shouldn't be that surprised (Cue: ominous foreshadowing).

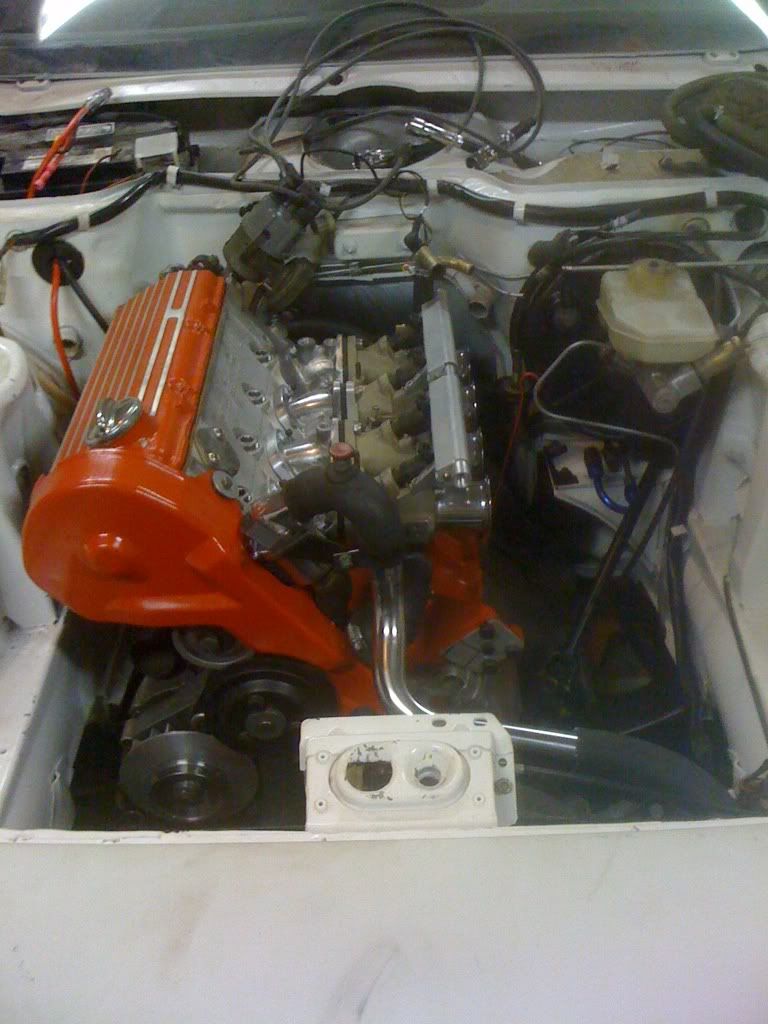
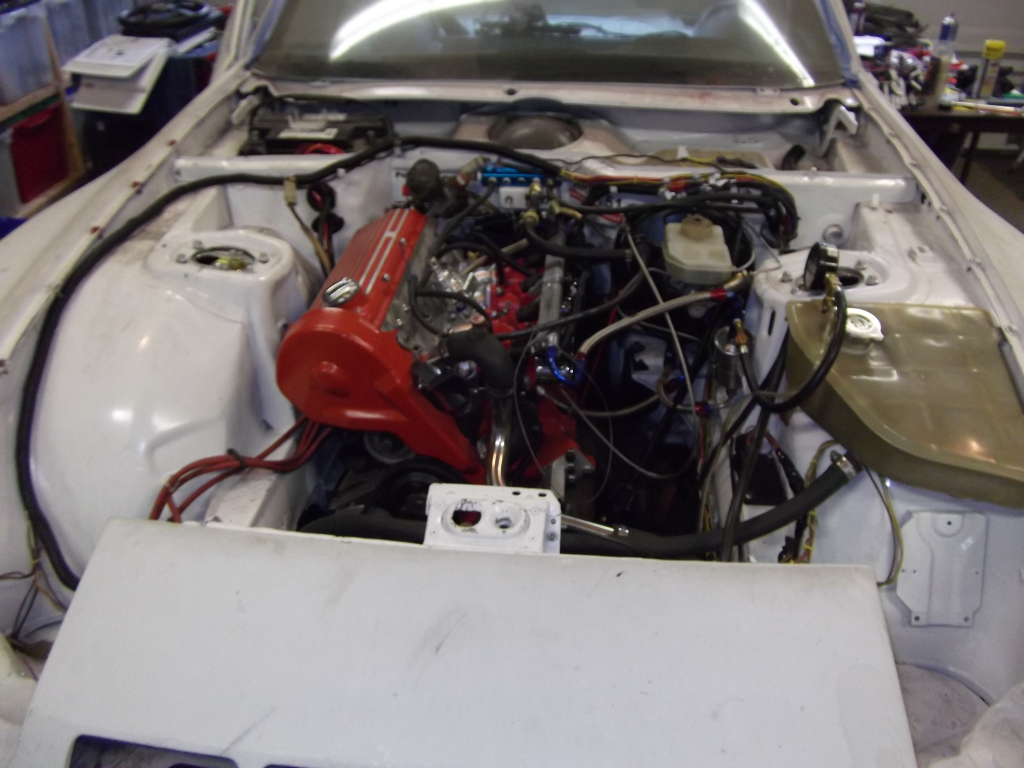
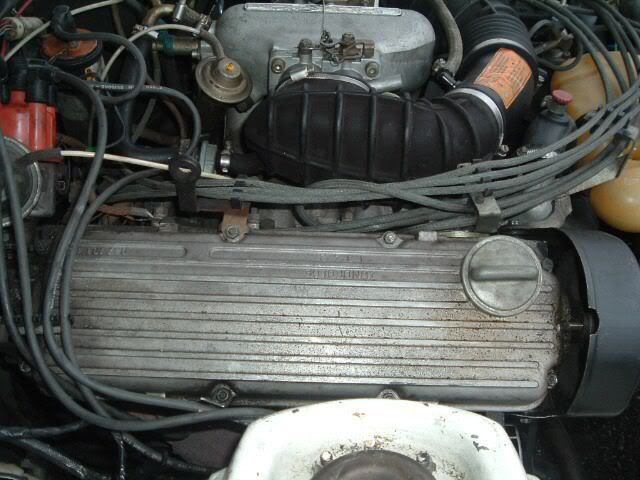
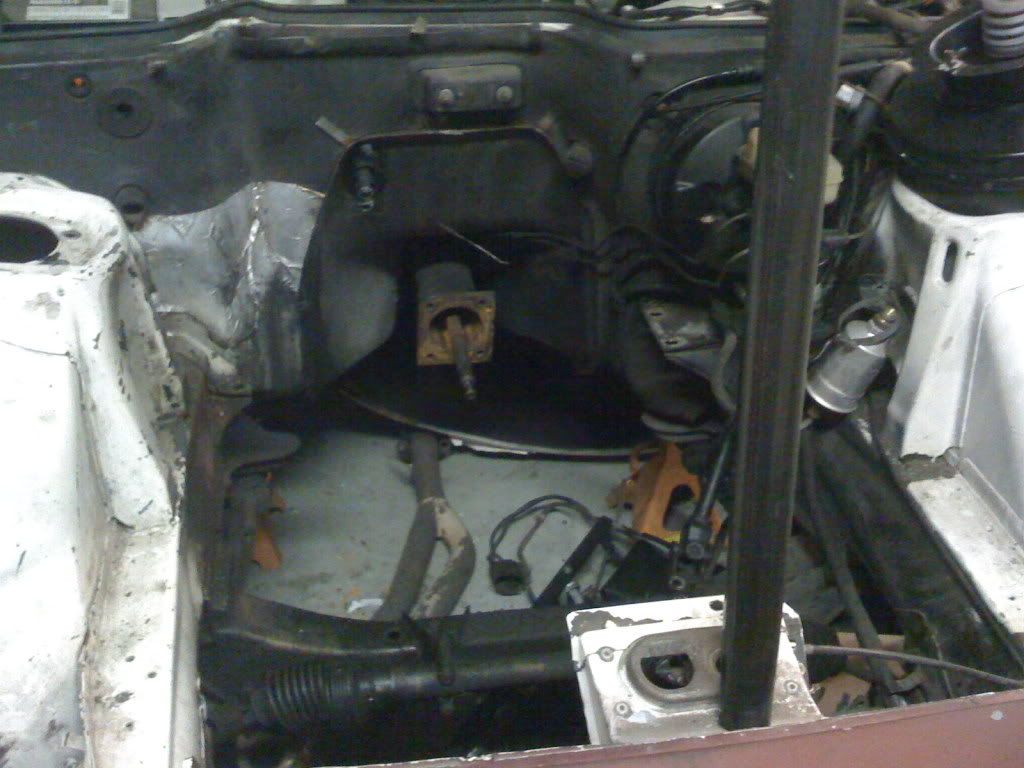
I pop the hood and check the vital fluids and the general condition of the engine bay. Other than needing a lot of cleanup and some proper wiring it doesn't look too bad. Though the valve cover leak on the passenger side is something that will definitely need to be sorted out after I get it home.

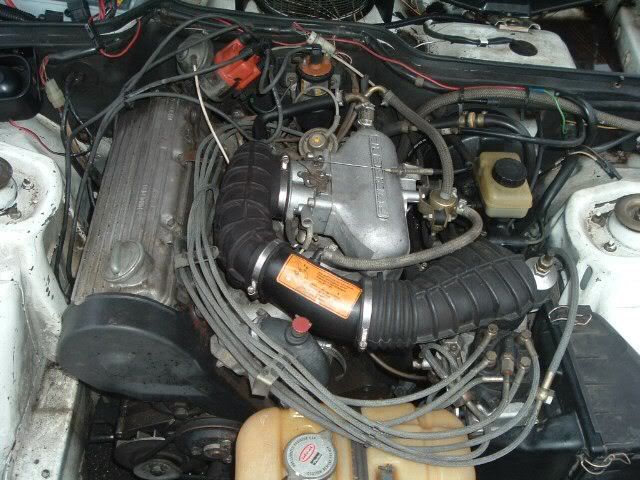
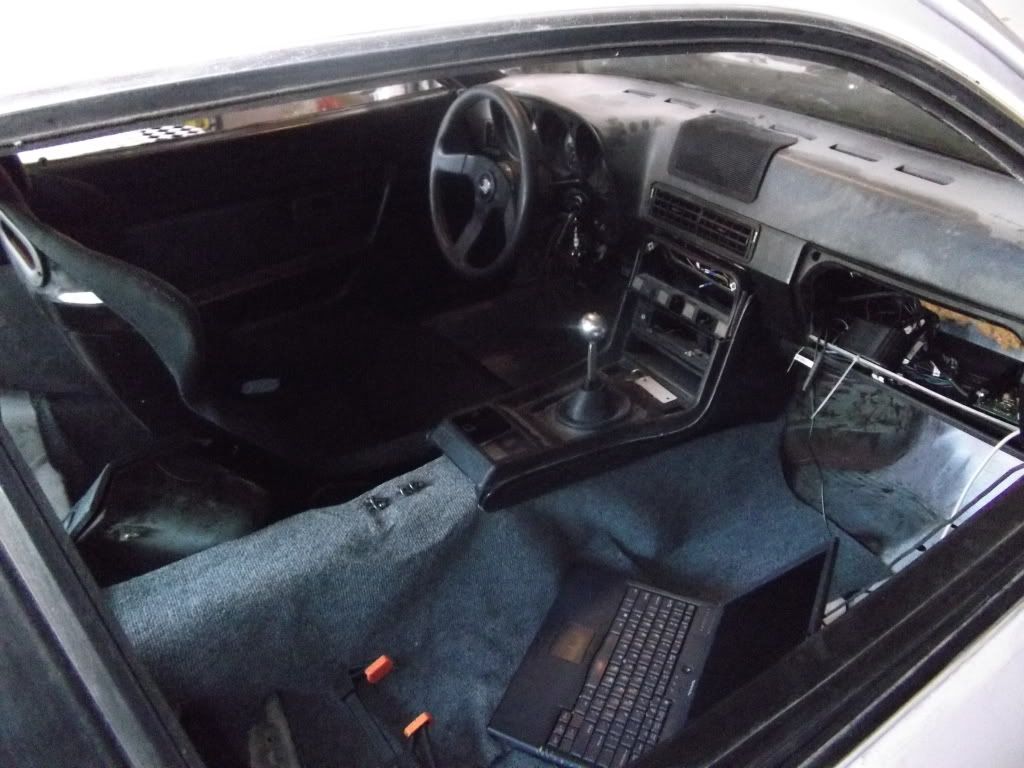
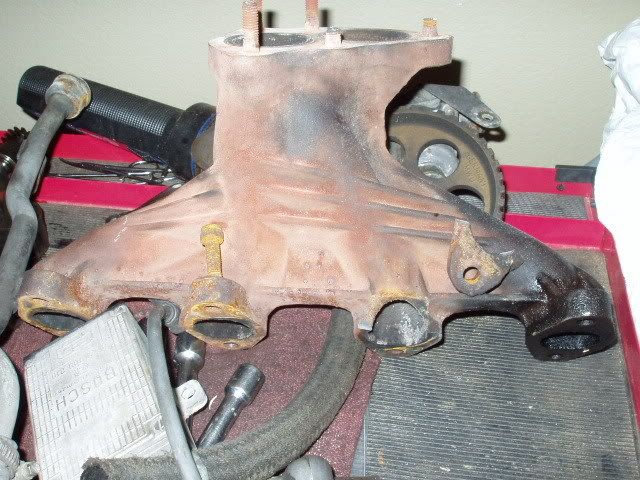
I jump in and put my foot on the clutch and the brake and go to put the car in neutral. The gear shift knob pops off and falls in the stagnant water. I wish it bon voyage as I struggle to sort out this horrid shifter that feels like its missing half of its bolts. I start the car up and the exhaust leak they mentioned in their ad is definitely there and coming from under the hood. I try the e-brake, but the catch is broken, so no working e-brake. The brakes feel pretty spongy, but they are there. So I turn the car off and pop the hood and look closer at the exhaust manifold and find that one of the studs is missing for the number one cylinder and the other one is on its way out. I grab a 12mm socket and tighten it down a little just to keep it from going away more than anything else.

I figure I should drive it around the lot to see if it works well enough to make it up the hill. Of course I stall it going around the latte stand and I can't get it to go anywhere, like its in the wrong gear or something. I slowly realize that this car has the "wonderful" transaxle with the reversed gear shift pattern. I realize this as I stall the car again and back it into a chain link fence trying to get it around the latte stand. So I find that all the way to the left and down is first. That gets the car moving again and while its coughing and sputtering, it seems like it will drive okay enough to at least get it back to the hotel. Of course all the while the water in the foot well is sloshing back and forth as I accelerate and decelerate. Sort of my own cup of water only instead of merely spilling a little water, if I get too jerky with the controls, I'll get splashed in the face by the column of stagnant water moving back and forth, mmmmm.

Now that I feel like I've had enough fun in the lot, I decide that I should share this fun with the rest of the world and with the girlfriend following me, I head up the hill to get on to the main road headed to the freeway. Once underway the car has no problem keeping up with traffic. The brakes are definitely spongy so I have to think ahead on my stops in order to not get caught off guard.

A 180 degree downhill off camber on ramp (why are so many in the northwest built this way?) was the first test of the cars handling. It is definitely stiff. One of the latches for the hatch popped loose, but that may have been due to my efforts in getting it open to put the trip permit in place as the assembly is very sticky from a lack of use. Between the exhaust leak, the rattling hatch, the sloshing water and banging suspension the car is definitely not a symphony orchestra, more like a grade school band recital.

The trip to Renton was relatively uneventful, though the shifter is definitely a mess, the wacky gear shift pattern doesn't help. The hatch completely popped open about halfway through the trip to Renton. Luckily the trip permit hung on as I pulled over to stop the car and close the hatch. After this I watch the hatch in the rear view to make sure its not opening up as that same latch as before popped loose. I'm watching the gauges and notice the battery light is on. Since I don' t have a gauge on the dash I don't know if this is valid or not. Either way there isn't much I can do about it now.

Finally pull into the Holiday Inn Select in Renton. Check in and crash in the room for a bit. Head downstairs to grab a bite to eat, then back upstairs to rest a bit. While we're resting I jump on the net (free high speed, very cool) and browse some of the 924 boards and stuff. The girlfriend is apparently mad at me now for doing so, but using the logic of your were reading your book didn't seem to help.

So we go work out and eventually in the middle of the night she finally opens up so we can talk about what's bugging her. Why do some women choose the middle of the night to ask these kinds of questions? Obviously we discuss it for a bit. Of course this means that we don't get up until 11am, instead of the 9am I was hoping for. Sigh. We head out in her car to get some brunch and to try and find a stud or bolt to put in that exhaust manifold.

Since we knew that the Westfield Shopping Center was nearby, we decided that hitting the RainForest Cafe would be nice and of course we wandered the mall a bit, window shopping before and after. I didn't mind as we didn't get to much of this yesterday like I'd hoped. Brunch was nice, had plenty to eat and watching the fish in the aquarium was very relaxing. Watching the huge kids birthday party next to us was inversely relaxing so I guess it balanced out in the end.

It took a while, but we found a Schuck's (FLAP) and picked up some duct tape, brake cleaner, loctite, an 8mm stud, nut and washer we head back to the car. Other than dropping the stud on the cross member once, they went in just fine. Put some duct tape on the hatch to hold it down (can't believe I didn't bring any, doh)

While I'm under the hood, I check the voltage on the battery and its reading a little over 12 volts. Start the car and it drops to 11.8. Well that would mean that the dash-light is correct and the alternator isn't working. So that means that I need to head back to the parts store to pick up another battery just in case (that's okay I need one for another project anyway) While we were out the first time, I scoped out a gas station that had a vacuum cleaner that I could use to suck out the excess water. so we take both cars out to get the battery, gas a little vacuum action and then head south.

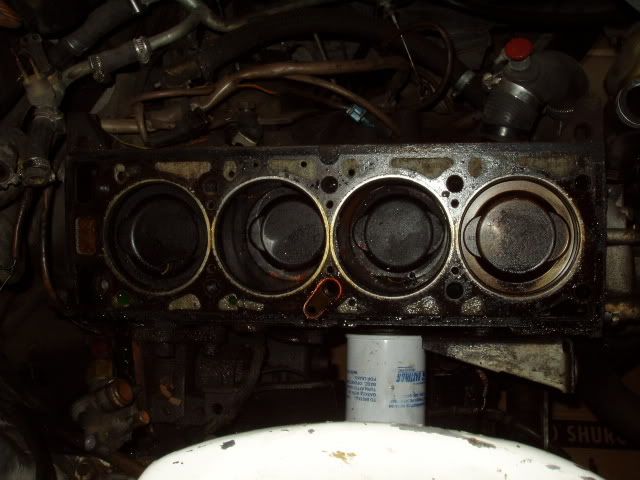
Unfortunately the battery doesn't make it and the car dies as we're trying to get to the parts store. Luckily the car died as I was turning around on a side street so at least it is out of the way. After finding the parts store again (its hard when you don't know the way around town) and buying a $90 battery, we get the car running again and after getting gas and removing a bunch of water we head south at about 5pm with 148 miles to go to get home. At least the car is running much better on a full battery. Though its now blowing oil out the tailpipe, its not enough to worry about right now and I suspect that a valve was damaged due to the exhaust manifold leak.

The sun is setting now and I decide to leave the lights off as much as possible to save the battery. Luckily only a few people remind me that my lights are off and with Joy tucked in behind me I'm not worried about someone running into my rear end. I've got the car in top gear, cruising at 60 with the engine spinning at about 3 grand, I'm counting the miles as the car's alignment and stiff springs causes it to bang and bounce while it follows the ruts in the road. As it gets darker I turn on the parking lights to provide some illumination ot those around me. Around 60 miles into the trip, we stop in Centralia to use the restroom and get some coffee. I jump start the car to try and save the battery. Its really dark now, especially as we head away from town. I tuck in behind a semi-truck and follow its taillights through the dark for quite a few miles. Eventually the freeway speeds increase to 70 and I pass the truck. After that I pick up an SUV that's got his fog lights on. Man those are just what I needed as they work great for lighting up the road ahead of me.

48 miles to go now. The car is starting to stumble some on the hills, so I'm very gentle with the gas. The few rain squalls we hit caused me to use the wipers a lot. As we pass Ridgefield I start to relax as its now within the comfort zone of my home town area. I contemplate pulling over and having Joy call AAA to tow the car. I decide to press on until it dies or I make it home. We jump on I-205 and head southeast towards home. As I near the lights of Vancouver, I turn my headlights on to ward off any potential police presence. I cross the I-205 bridge with only a few miles left to go until we're home. Before I know it we're at the Stark street exit. I feel so good I double clutch the down shift into 3rd and gas it through the off ramp, enjoying some lateral g-forces through the off-ramp.

I pull up to the stop light at Glisan and the car is stumbling a little, so I turn the headlights off again and gingerly drive it through the next few lights onto and up Stark. As I reach the last light before the house the car is really struggling. Luckily I can see my house from the light and I just have to make it half a block up the street. As the light turned green I goose the gas and gently let out the clutch to nudge the car forward. It bucks and stumbles while I work the pedals to keep the momentum building. As I near the entrance to the house I put the car in neutral and pull it to a stop on the street. As I reach for the keys the engine stops and I realize that I'm damned lucky to have made it home without further assistance.

MOAR Pictures

chandlerGTi
chandlerGTi HalfDork
10/20/12 11:55 a.m.

This will be fun!

grafmiata
grafmiata Dork
10/20/12 8:49 p.m.
chandlerGTi wrote: This will be fun!

For us, yes it will...

For Turboswede, probably not so much!!! ;-)

chandlerGTi
chandlerGTi HalfDork
10/20/12 10:33 p.m.
grafmiata wrote:
chandlerGTi wrote: This will be fun!
For us, yes it will... For Turboswede, probably not so much!!! ;-)

I think that since it has already been six years since the purchase that part is over(I hope)!

turboswede
turboswede PowerDork
10/21/12 1:00 a.m.

Well, I'm finishing the paint now, does that give you an idea of the "fun" involved?

Yeah, lots more posts and pictures to come :)

Double_Wishbone
Double_Wishbone New Reader
10/21/12 10:59 a.m.

This is awesome...great story! I'm really getting into the 924 and 924S, as well as the 944, so I'm really excited to see where this goes and take notes.

turboswede
turboswede PowerDork
10/21/12 2:09 p.m.

So after the dust settled and I was able to charge the battery and get the car into the driveway to take stock of what I actually bought for about $600.

Pros:

Fiberglass Carrera GTS front end, hood, 944 rear quarter panels and fixed headlight conversion from A.I.R.

924 turbo vented nose panel

16" basket weave 5-lug wheels (indicating a possible 944 brake conversion)

Huge adjustable aftermarket front and rear sway bars.

Front Lowering springs, possibly stiffer rear torsion bars?

Performance struts/shocks?

Gutted interior

Cons:

It is running on 3-cylinders.

The fiberglass body work is cracked in a few spots.

Paint sucks.

Interior leaks badly

Shifter bushings are badly worn.

So lets dig in to what we've actually got:

5-lug wheels made by Ceres, with okay tires (probably a bit old now)

Looking around the car I find that I'm missing a few lug nuts (scary) and at least one stud is gone as well. Time to jack the car up and pull the wheels to see what's going on there.

FML... Wheel adapters? Really? Lazy berks!

Missing stud in one of the aluminum adapters (they are thread in studs, idiots!)

Okay, well I'll start sourcing a proper 5-lug conversion setup to fix that. Need to confirm the proper pieces to keep the wheel offset.

Lets pop the hood and do a compression check and overall look see at what is going on under the hood. All Cylinder 1? 0psi. Berk. Cylinder 2-4?, around 90psi (its a low compression motor, perfect for turbocharging, heh.) Okay the head has to come off so I can see if this can be saved.

I should also check the valve clearances as well (and see if the cam or the valve train has been damaged, etc)

Lets see if I can determine the health of the alternator, need to clean it first, spray some degreaser on it (it is located on the passenger side under the motor.) Apparently doing this with the engine running is a bad idea since I catch the oil and wiring on fire briefly. Goody, one moron award for me.

The alternator is just to the right of and between the strut tower and the engine in this picture. See it? Yeah me either. Oh and the spark plugs? they are also on the passenger side of the motor just below the valve cover. Yep, they are fun to change!

I put the fire out and decide that I should just dive into pulling the head since it might mean that the car gets parted instead of fixed.

Look very closely around the engine bay and it doesn't look too bad, other than the piss poor mounting solution for the headlights, a cracked headlight cover and some poorly done wiring repairs. CIS system looks to be in decent shape overall (obviously since it didn't complain once the entire trip down once it was warmed up and filled with fresh gas)

Next up: Cylinder head frivolities....

turboswede
turboswede PowerDork
10/21/12 2:41 p.m.

Okay, so when we last left our hero he discovered that aside from some questionable parts selection, he had a dead cylinder on his hands requiring the removal of the cylinder head:

First time to remove the battery, which gives me a chance to check the battery tray, which is known to leak on the 924/944 series due to battery acid leaking and dissolving the galvanized coating on the metal which then rusts through as the battery tray is exposed to the rain (and the drain ports are easily plugged with debris) You'd think they'd have learned after the 914's battery tray fiasco.

Yep, that isn't good. Looks like someone used the wrong size battery at some point then slammed the hood since the bottom was pushed down and the hood cracked slightly in that area. Something to watch for when buying a 924/944 is that the wrong size battery can cause the posts to hit the hood and cause all sorts of havoc (especially with a steel hood)

Okay, pulling the head:

Drain fluids, note the lovely rust color of the coolant and dirty oil. Oh well.

Start pulling the CIS parts, break two of the injector lines. Berk. Well I was going to go to MegaSquirt anyway, I guess this might push that timeline forward.

Pop the valve cover and inspect the valvetrain, which looks good (so no broken valve springs, damaged followers and the like) Remove the timing belt, intake and try to take the exhaust manifold loose. Fail on the exhaust manifold (not enough room) remove the downpipe, snap the studs off.

Start breaking the head bolts loose and break three 3/8" extensions as I don't have a 1/2" drive allen head bit. Head to Sears and get a proper 1/2" drive bit and get the rest loose with a breaker bar.

Hmm, isn't that interesting.... Cylinder 1 has a shattered exhaust valve. That was the cylinder missing exhaust studs, I think it might have shattered due to sudden shock. Hopefully there's no damage to the piston/bore.

BTW, the exhaust manifold broke completely:

The cylinders look okay:

Luckily I had just completed a deal with a guy in California that was getting out 924's and had a bunch of parts to sell:

a full set of NOS exhaust valves

Brand new stage 2 camshaft

MSDS 4-into 2 into 1 header

2.25" cat-less exhaust

$300 and I had a buddy pick it up while on his way back from visiting his brother in California. He only charged me a few bucks in gas.

Send the head to the machine shop to be repaired and it comes back looking pretty:

The exhaust valve doesn't look quite so pretty though:

Spinout007
Spinout007 SuperDork
10/21/12 3:40 p.m.

Nice, keep it coming!

Double_Wishbone
Double_Wishbone New Reader
10/21/12 6:35 p.m.

Awesome update. Sounds like a good deal on parts too. Keep the updates comin'!

turboswede
turboswede PowerDork
10/21/12 7:56 p.m.

So at this point, I should state that we've moved from our rental house into a newly built house of our own. Then shortly thereafter I was laid off so car projects that required money took a back burner for the 6 months I was laid or so. Luckily I received unemployment so we were staying afloat while I looked for work.

Once I returned to gainful employment, I decided that I should really strive to make it to a Challenge with the car. So that meant a change in direction from repair to essentially restomod.

So the engine comes out for cleaning, paintng and to check the clutch, etc.

First I have a cunning plan to increase the power output:

DCOE intake off of eBay from Pierce Manifolds for $135.

A quick paint job after cleaning with a pressure washer and lots of scrubbing. Test fitted the EDIS trigger wheel (924board group buy). Head is mounted with a set of ARP studs.

Hand polished the Oil fill cap and water neck.

Fitted the header, etc.

Of course with the engine out, I can clean up the engine bay, paint it and start the wiring for the MegaSquirt, plus fix the battery tray.

turboswede
turboswede PowerDork
10/22/12 3:23 p.m.

So now onto the bodywork:

Fiberglass joints to the body from the quarter panels were cracking and failing and the passenger side taillight housing and hatch pin area have seen better days.

Filling the seams between the front quarters/nose panel and bumper cover.

Front bumper cover repairs

Battery tray, its a mess.

Used lots of this stuff.

Empty engine bay

turboswede
turboswede PowerDork
10/22/12 4:06 p.m.

So while I was mostly done working on that, I changed gears to updating the suspension, shift linkage, etc.

Luckily this is essentially similar to the setup used as the later Porsche 914. When I pulled the linkage out, I found the bushings in the rear were missing completely. Ordered a new set of bushings and pressed them in. Replaced the bushings in the front as well while I was at it.

Updated the shift knob while I was at it. Ground the stock shaft and threaded it to fit the knob I bought from eBay. It was marketed for a Ferrari 308/328, but was pretty cheap and nicely weighted.

Filled the transaxle with fresh Redline MTL to try and keep it alive (they are prone to lunching syncro's and they are hard to find.)

turboswede
turboswede PowerDork
10/22/12 4:39 p.m.

Now the (not so) fun part; Rebuilding the Torque Tube.

Mine was waterlogged and practically rusted solid. The trick with the 924 N/A is that it used a smaller diameter inner shaft, meaning the bearings are different than the 944 or 924 Turbo. The bearings were about $90 at the local bearing shop. I rebuilt it following the directions from Clarks-Garage and it is as fun as it seems like it would be:

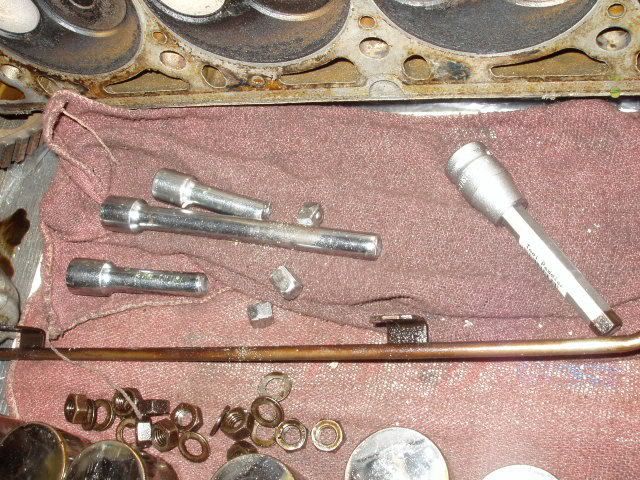
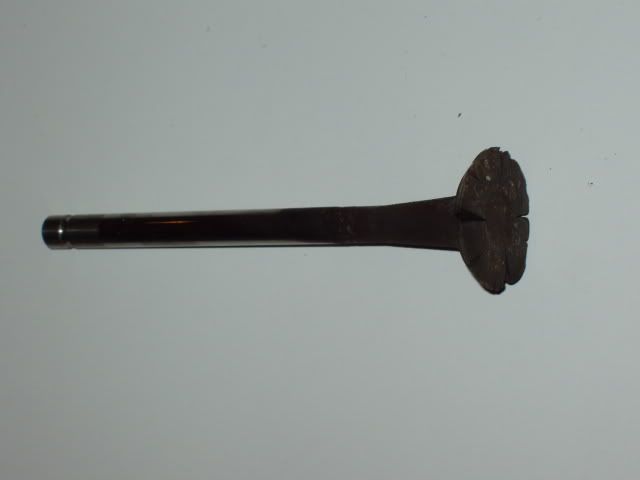
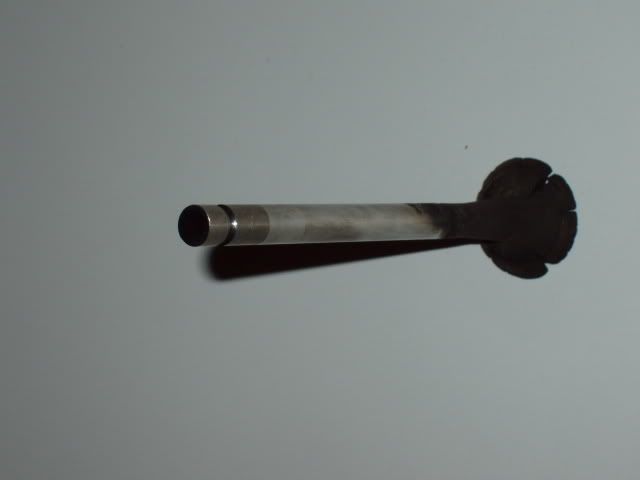
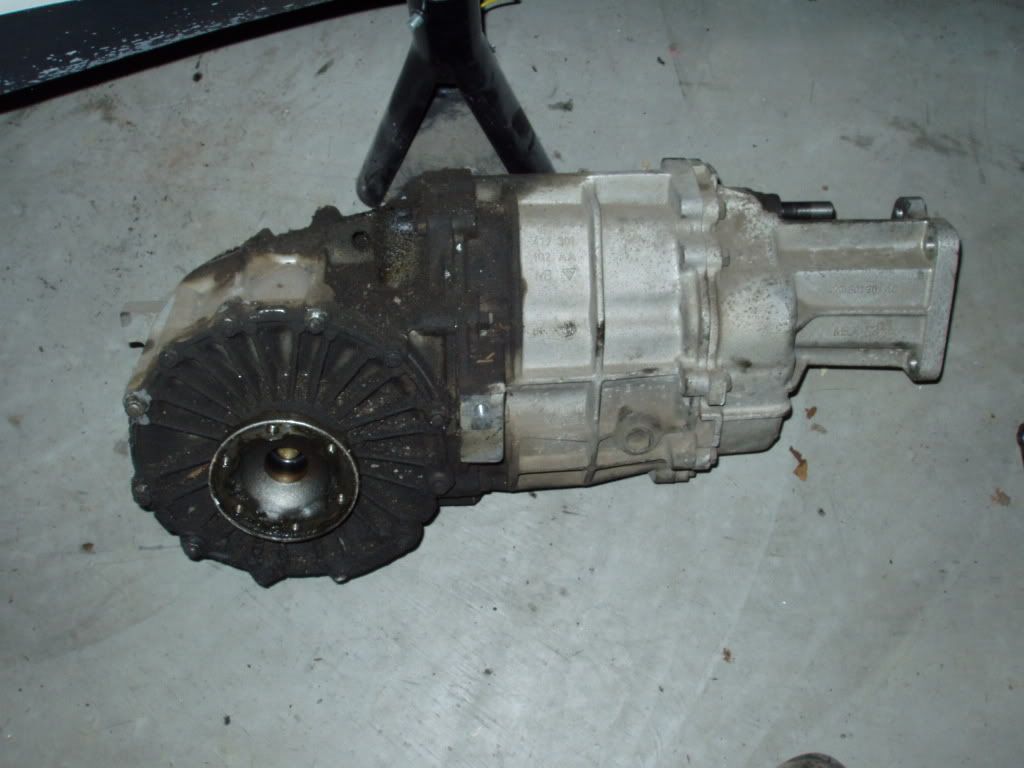
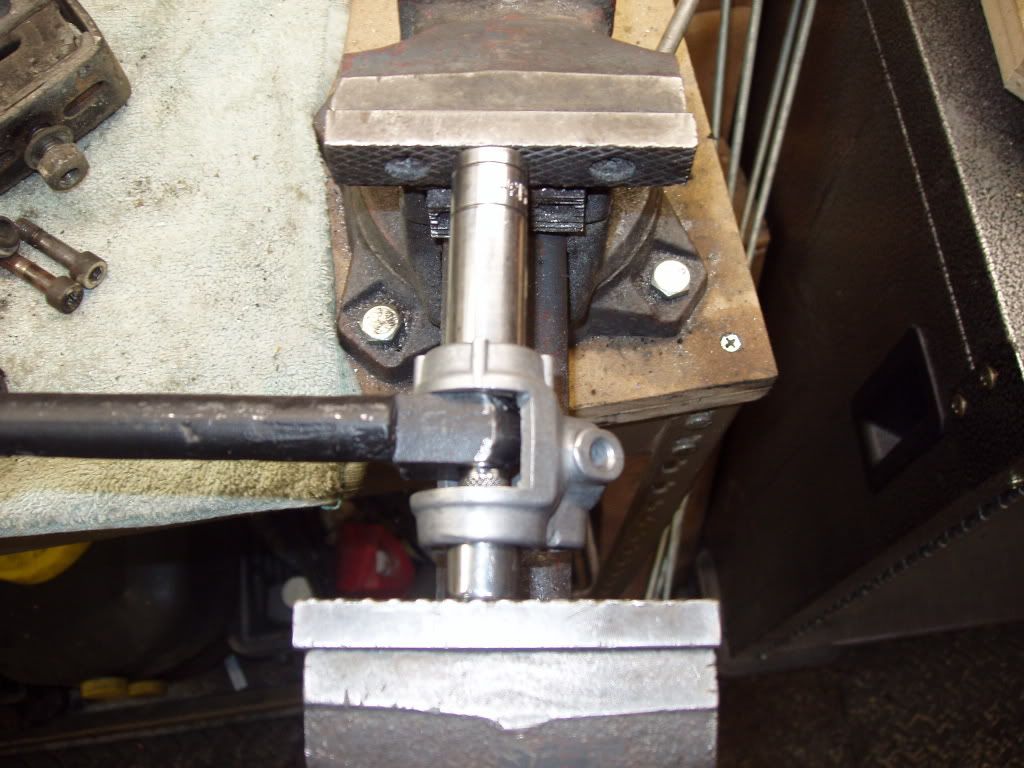
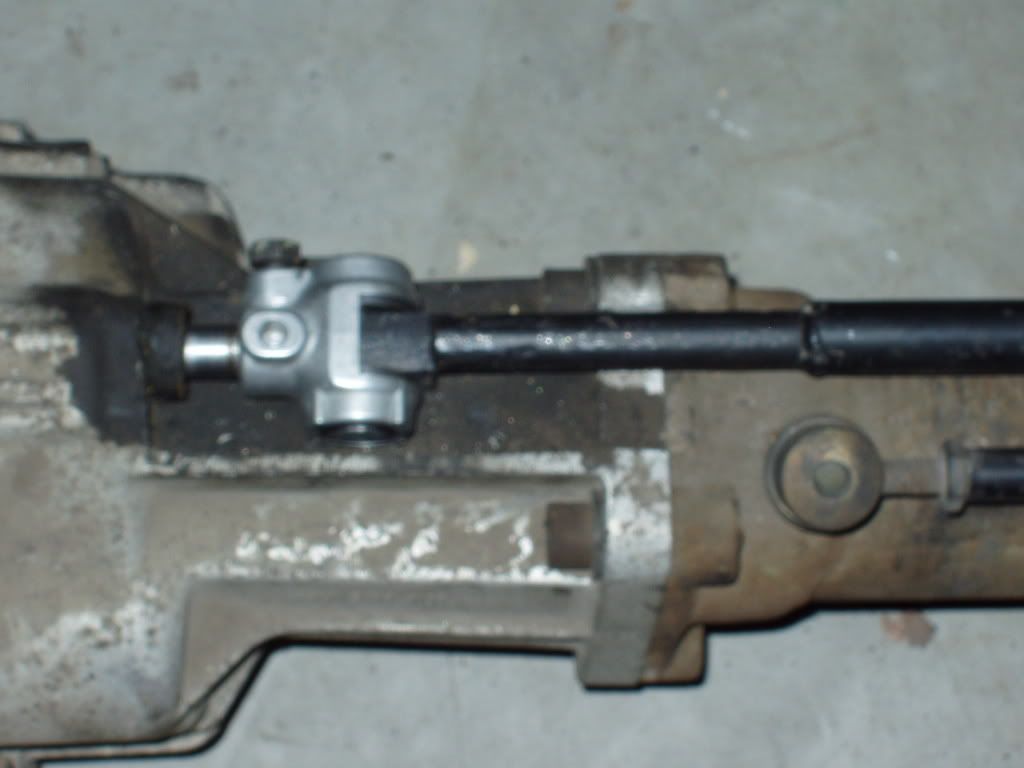
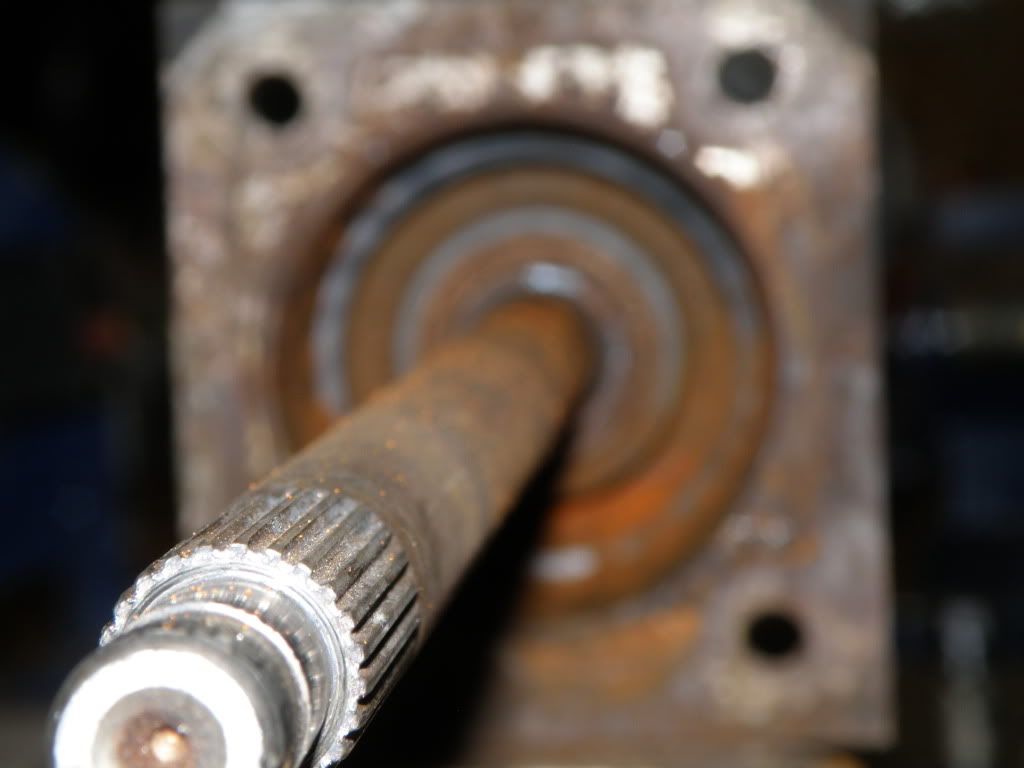
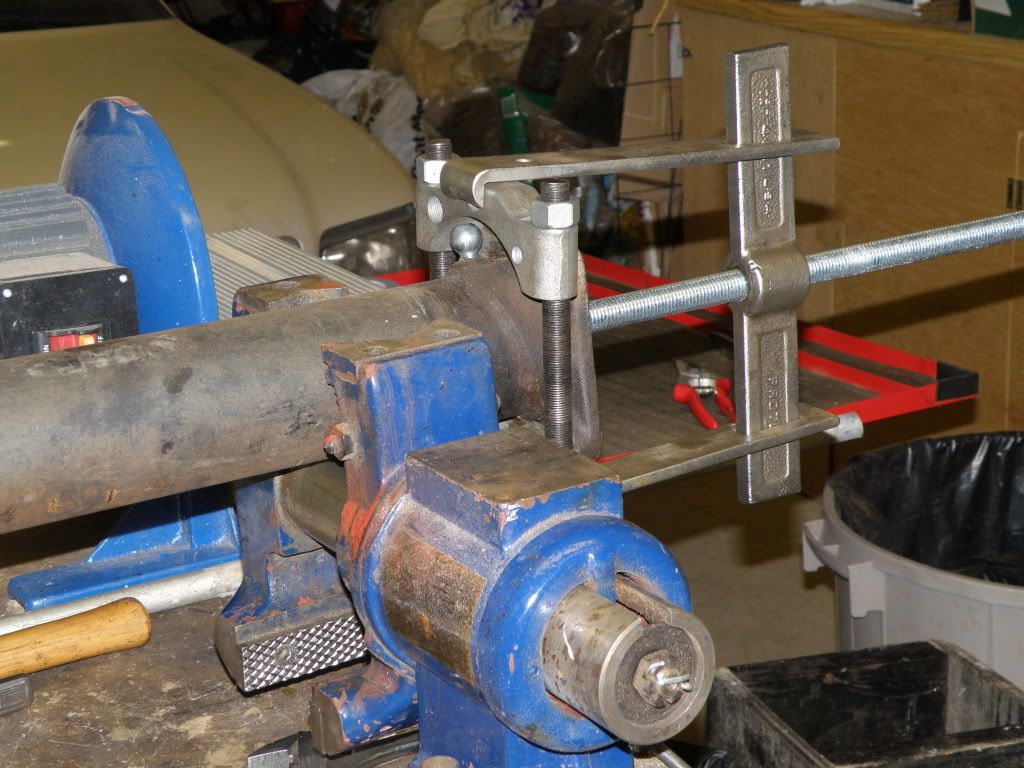
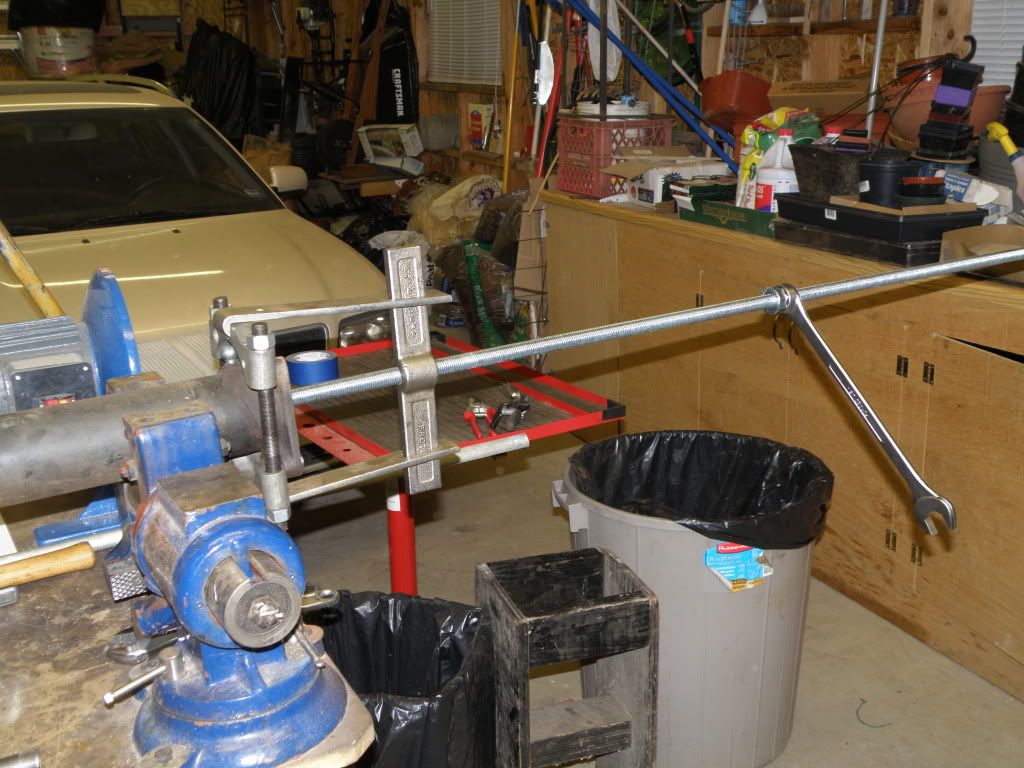
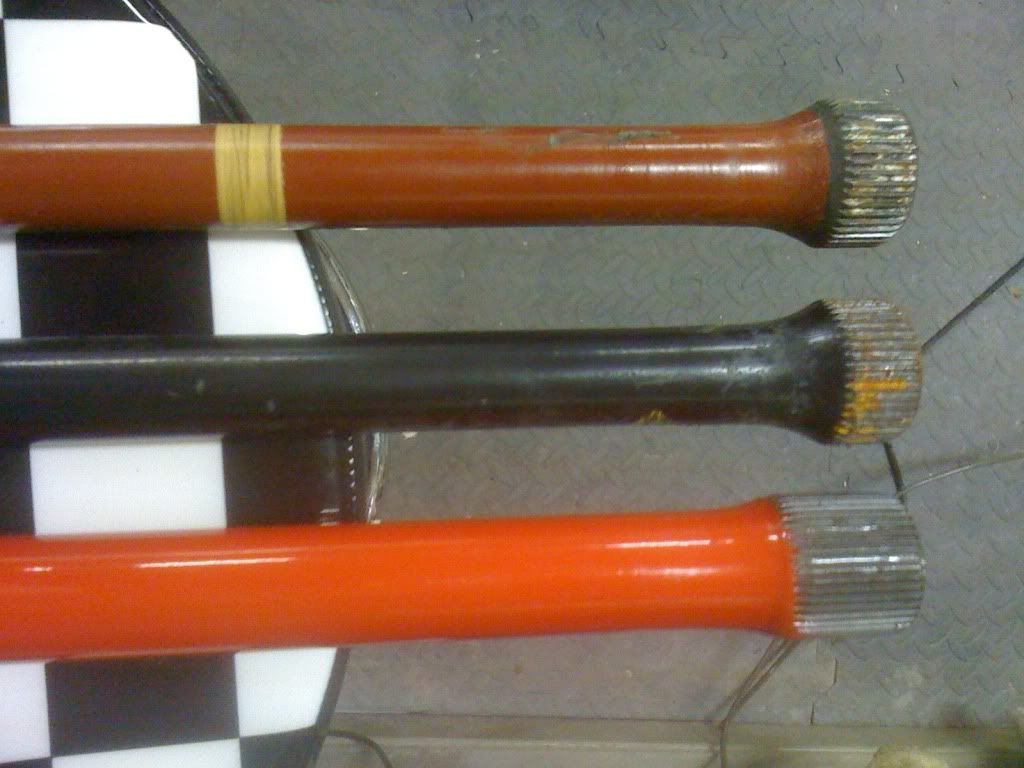
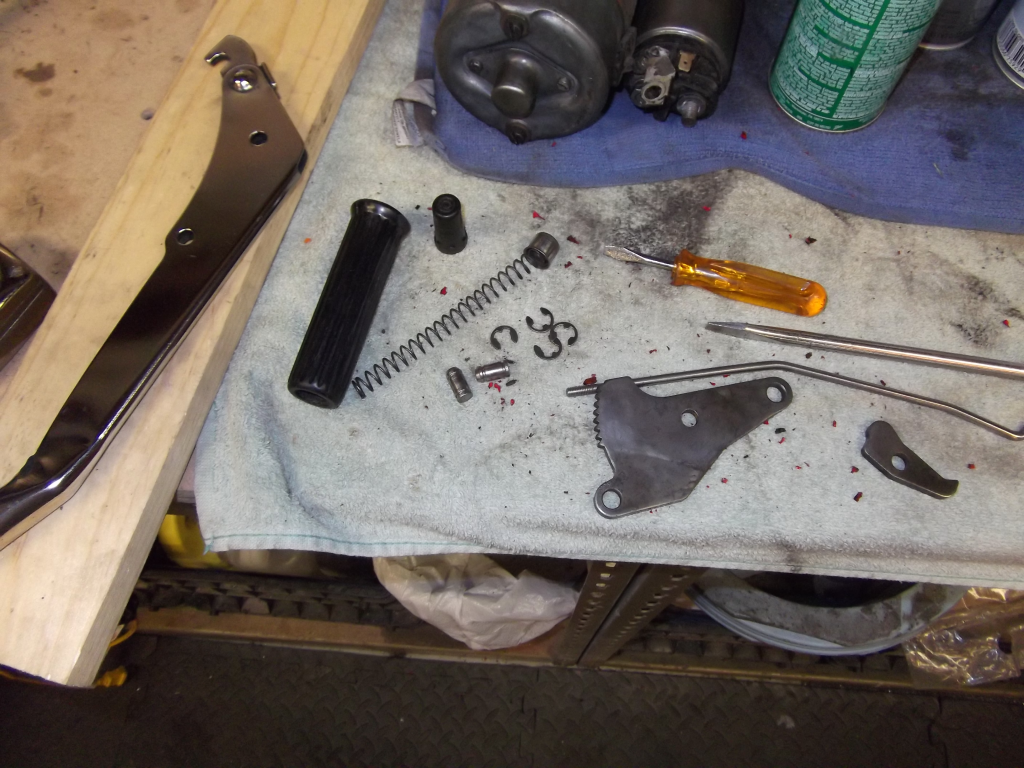
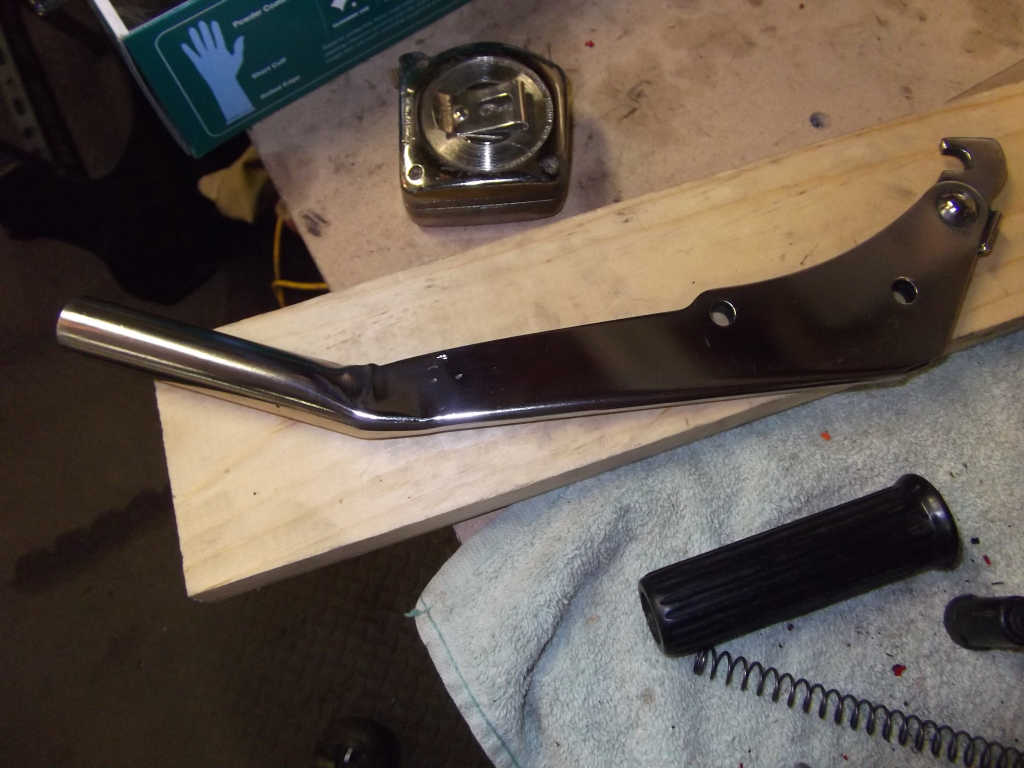
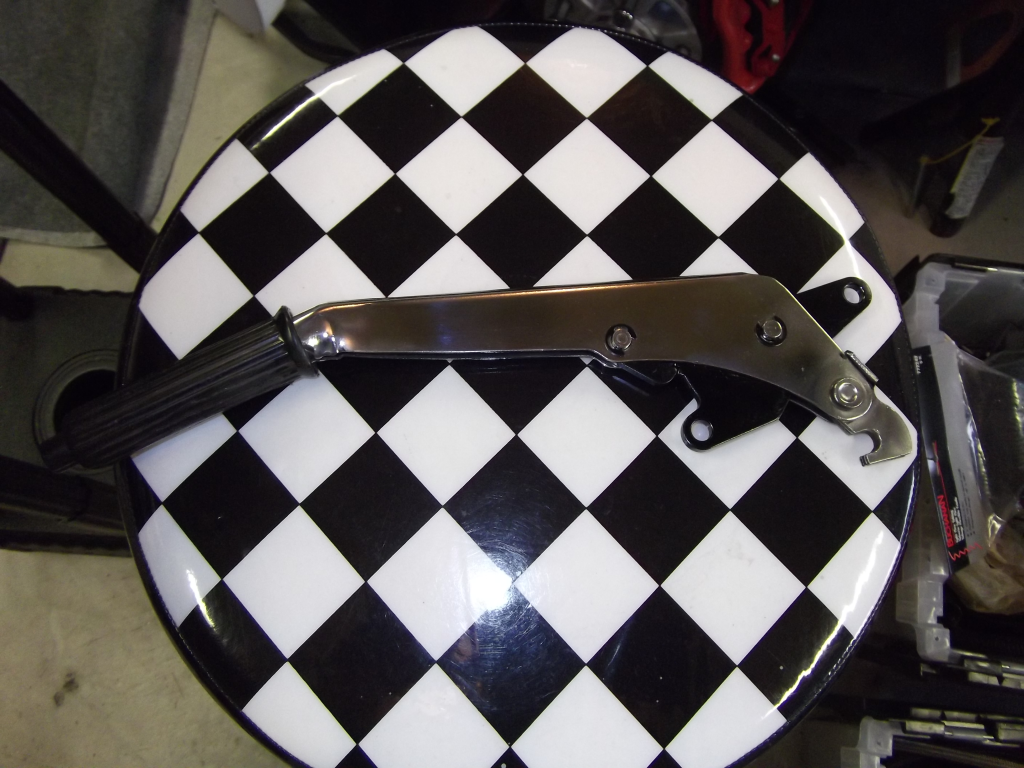
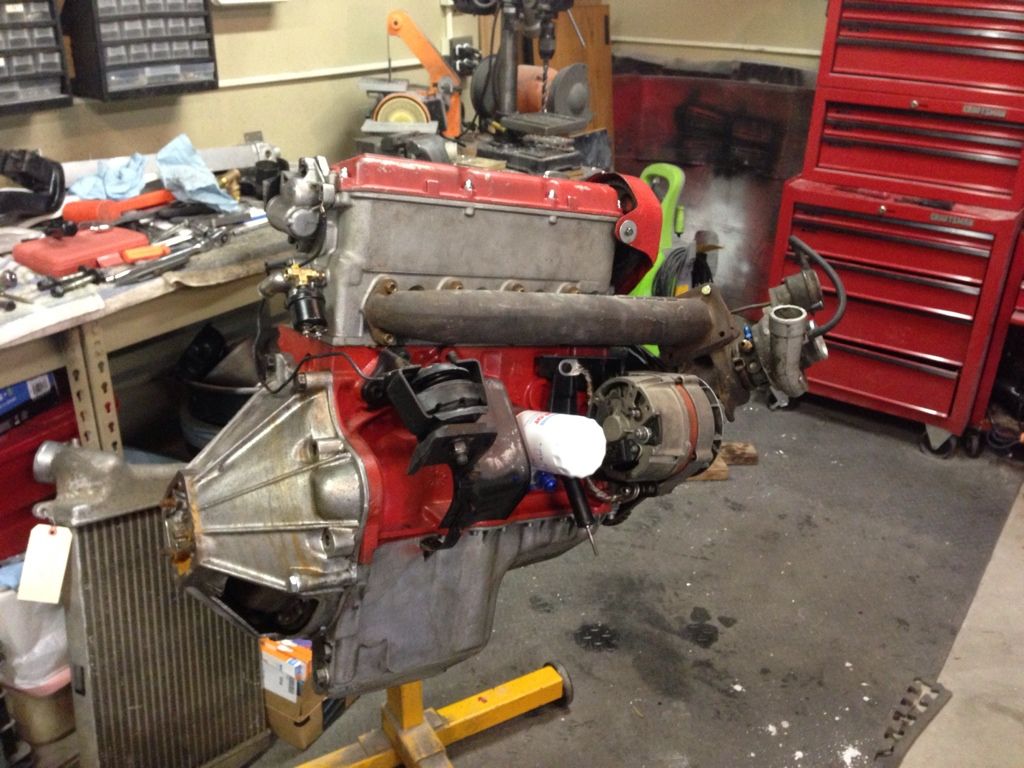
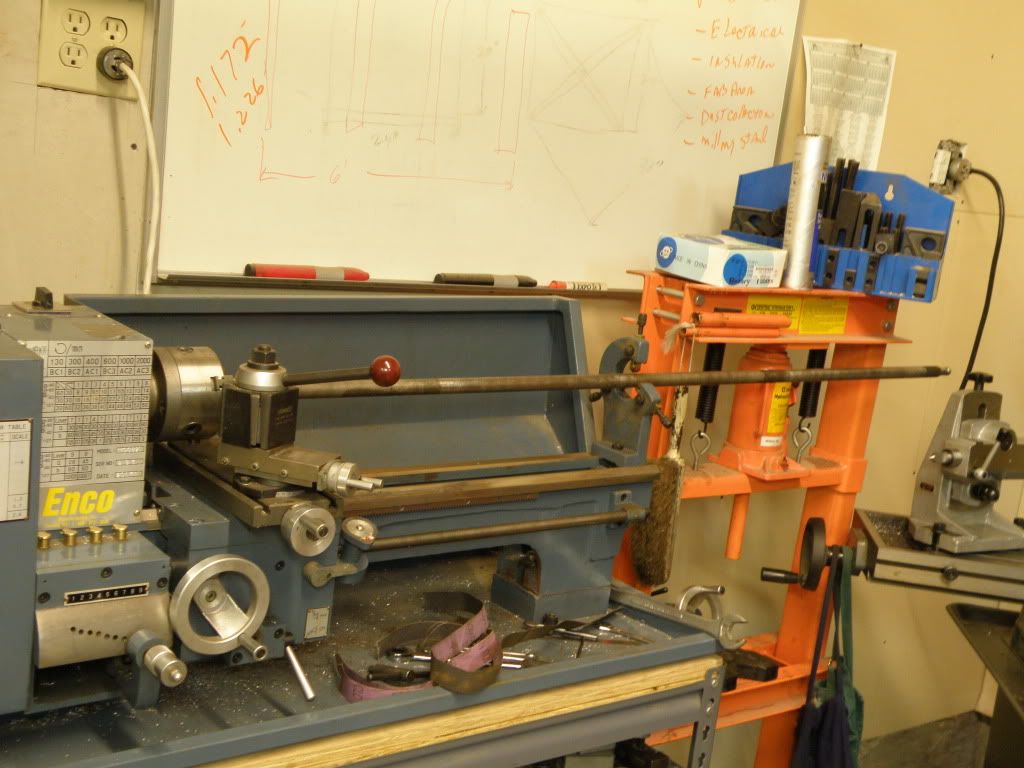
Cleaned up the shaft with some light sand paper in the lathe.

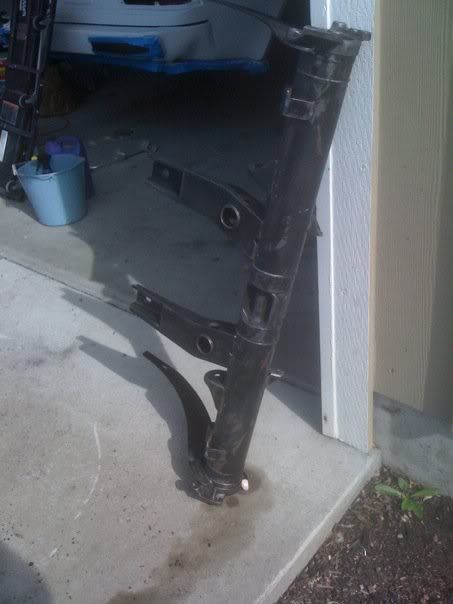
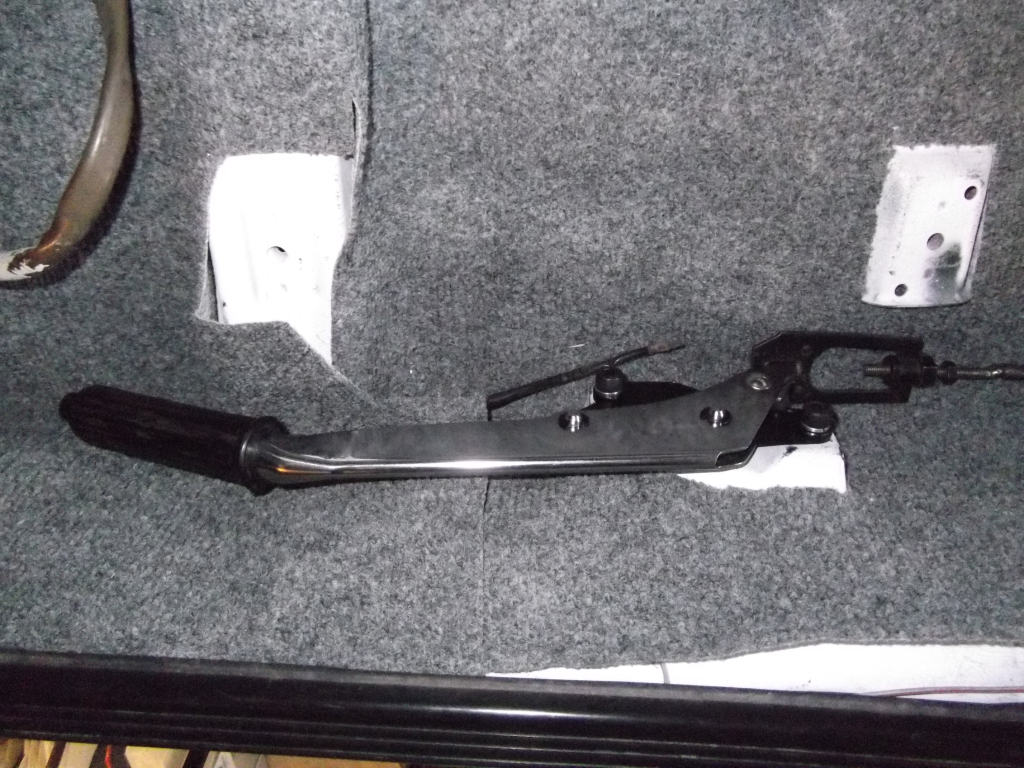
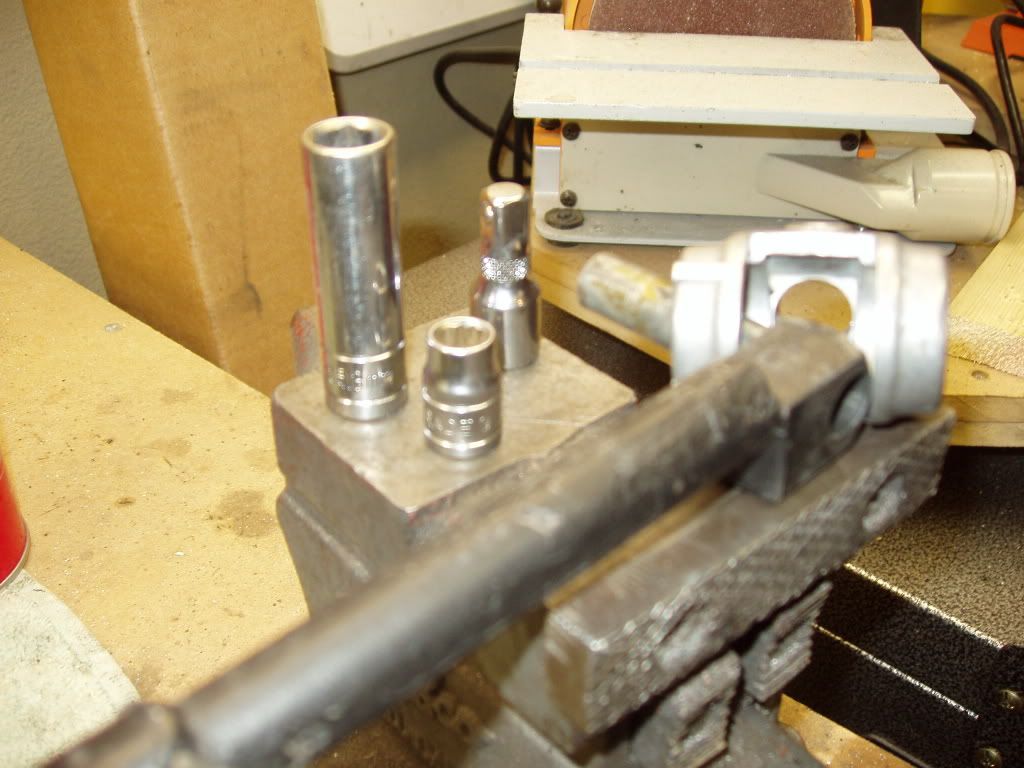
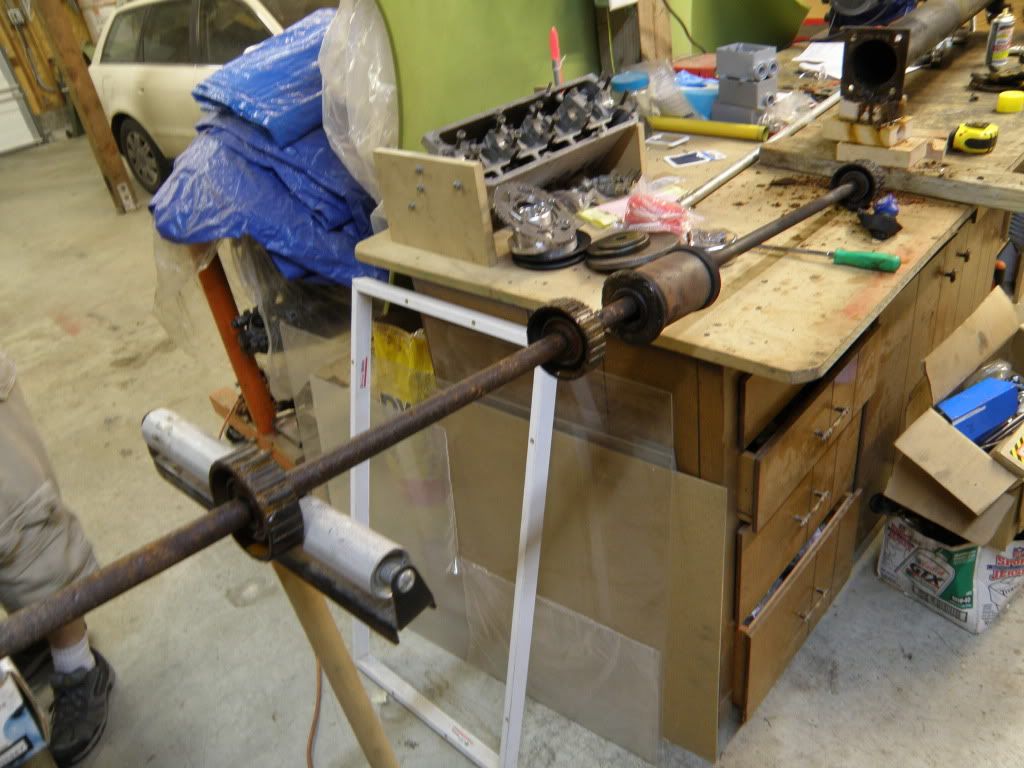
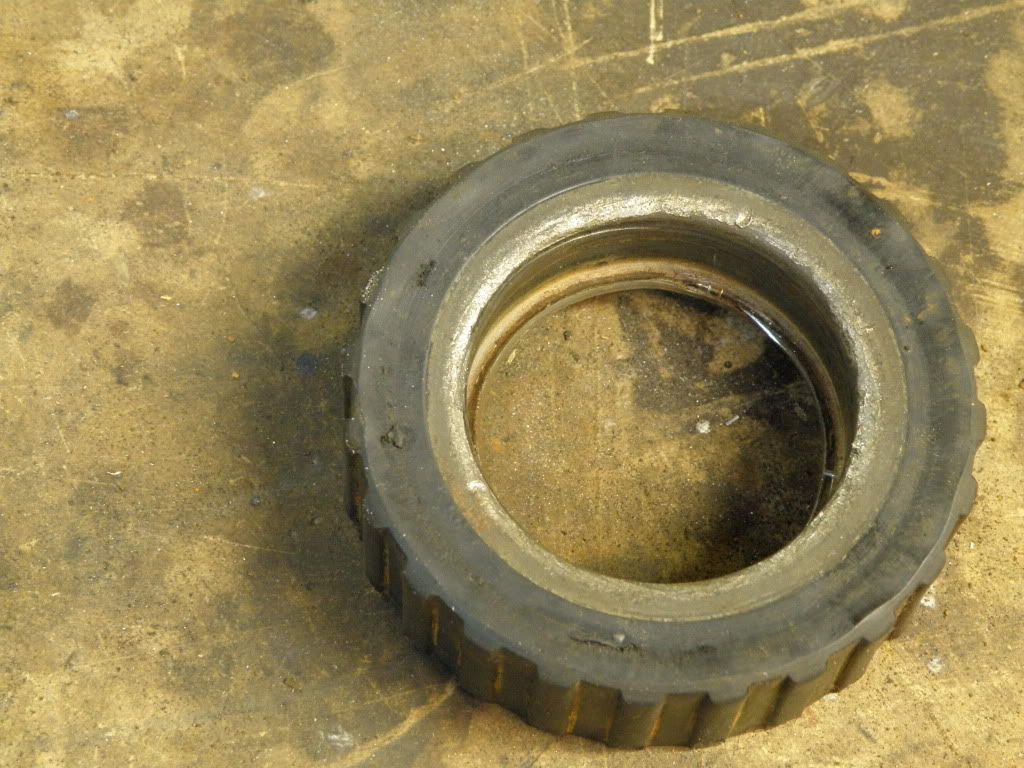
Used a ball-hone to clean up the inside of the torque tube.

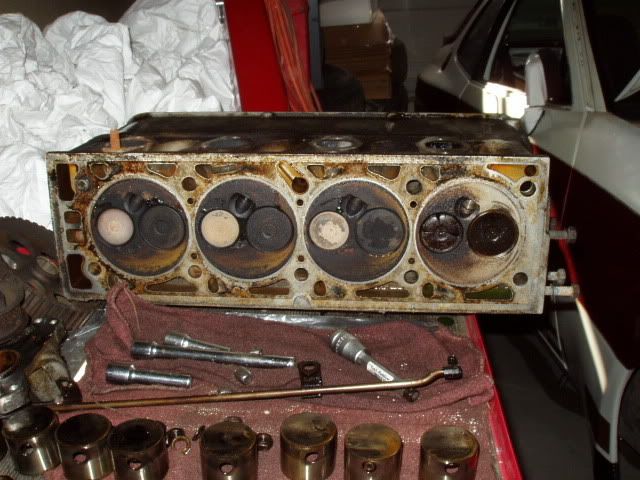
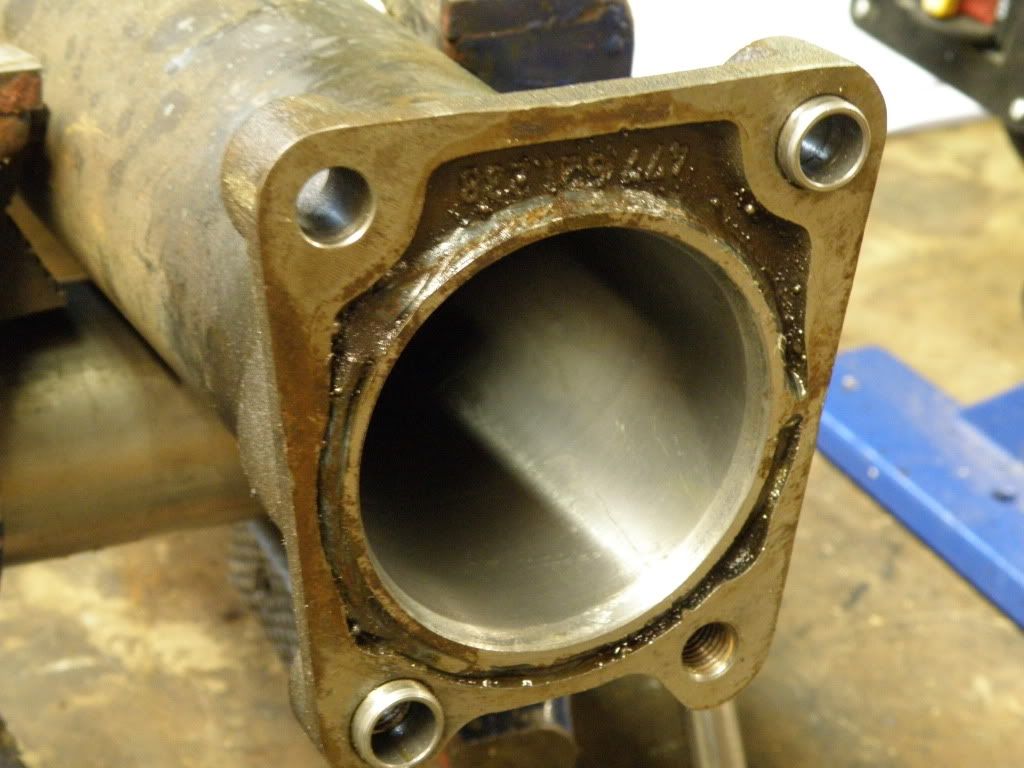
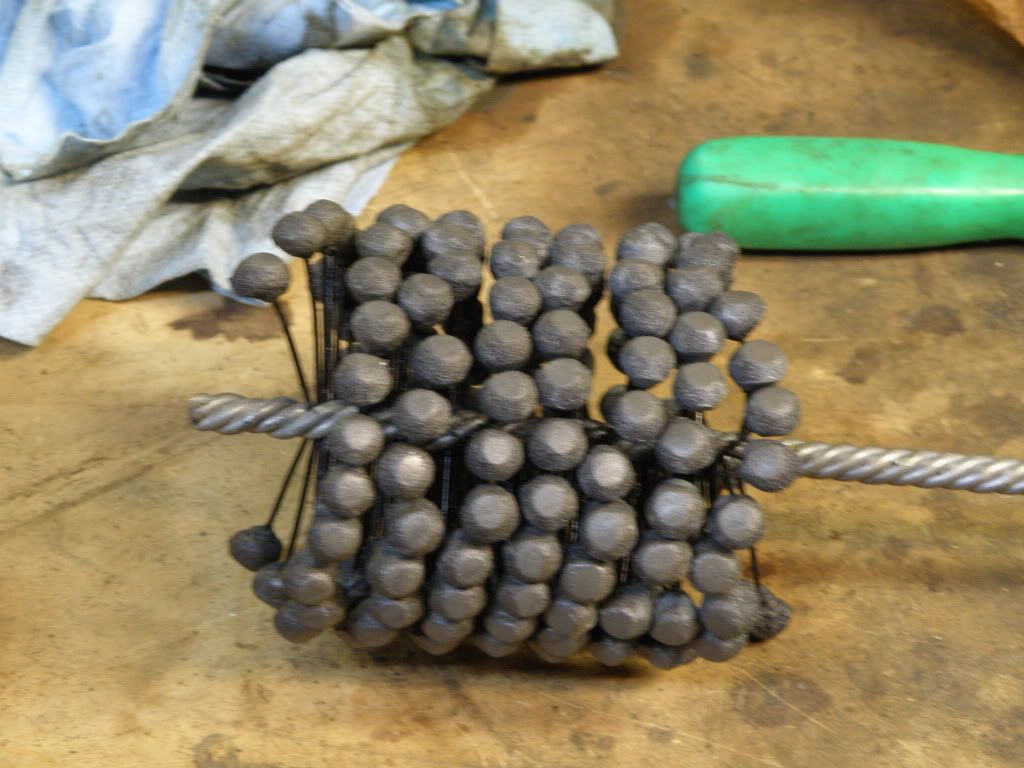
Nice and clean inside.

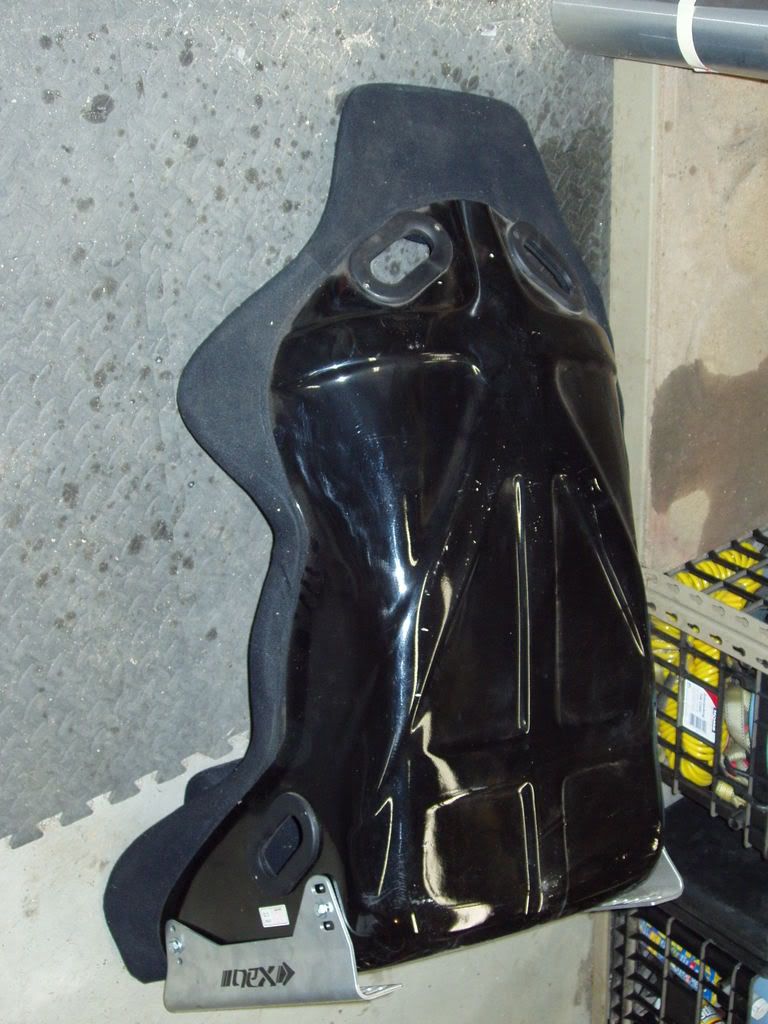
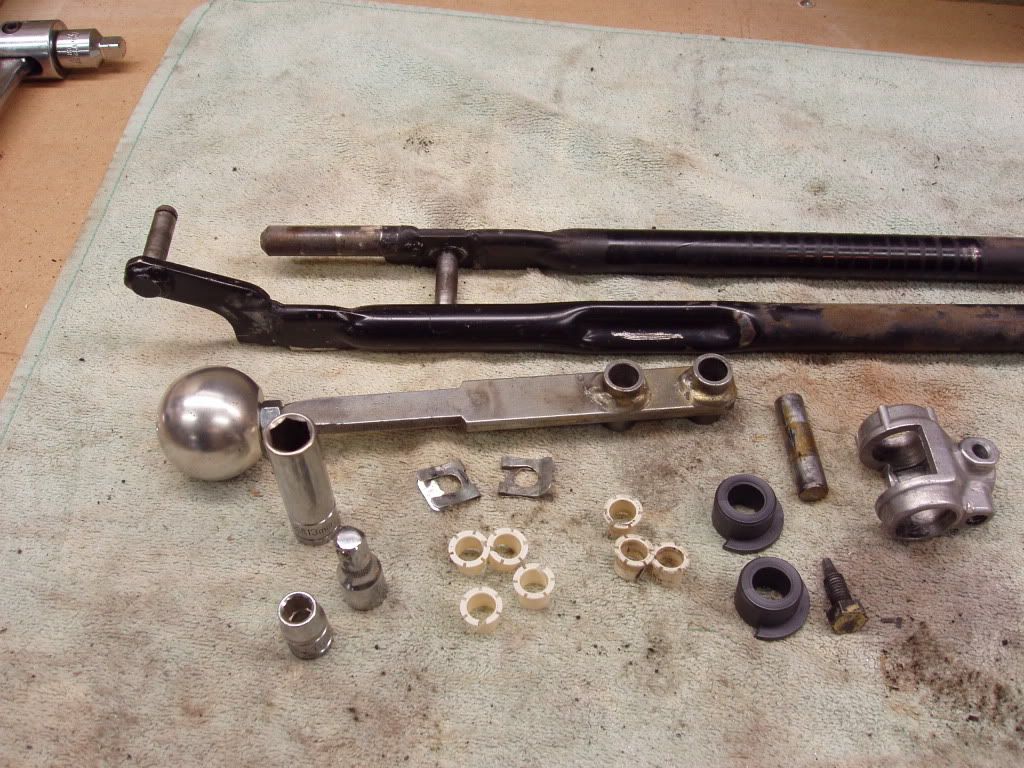
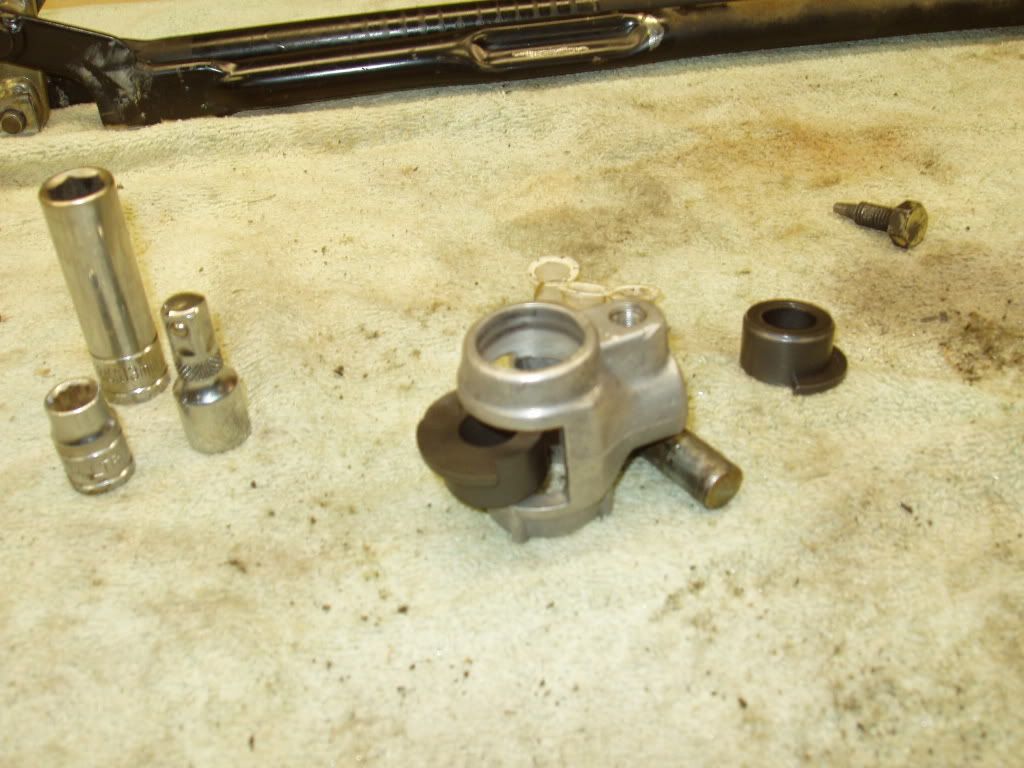
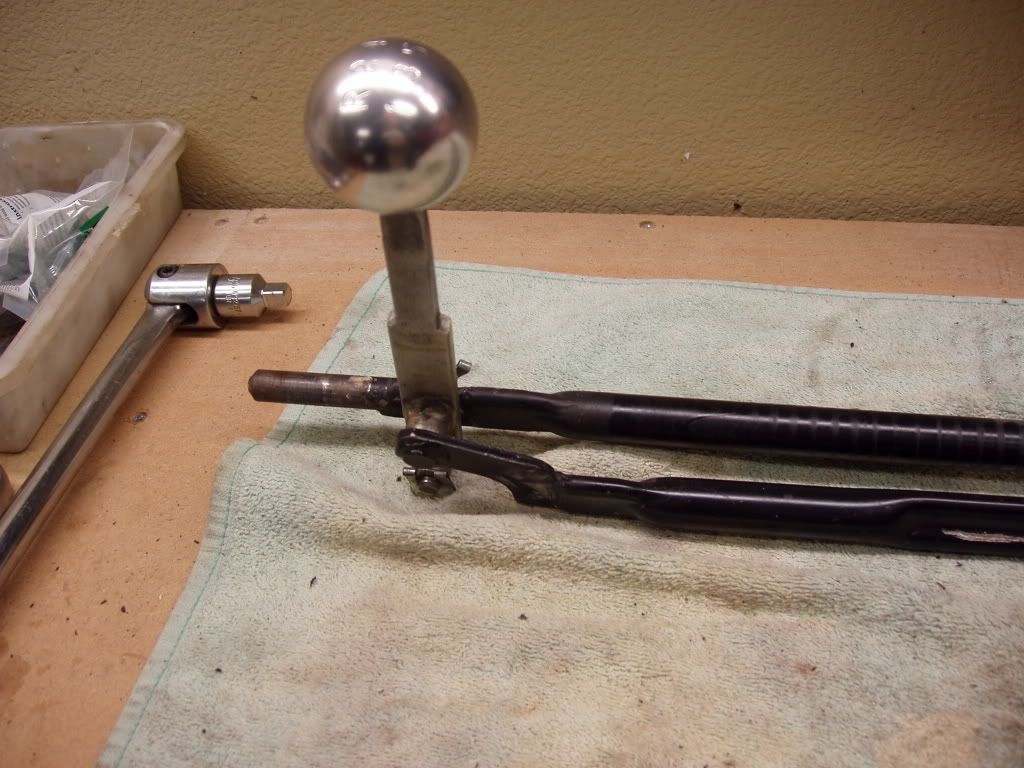
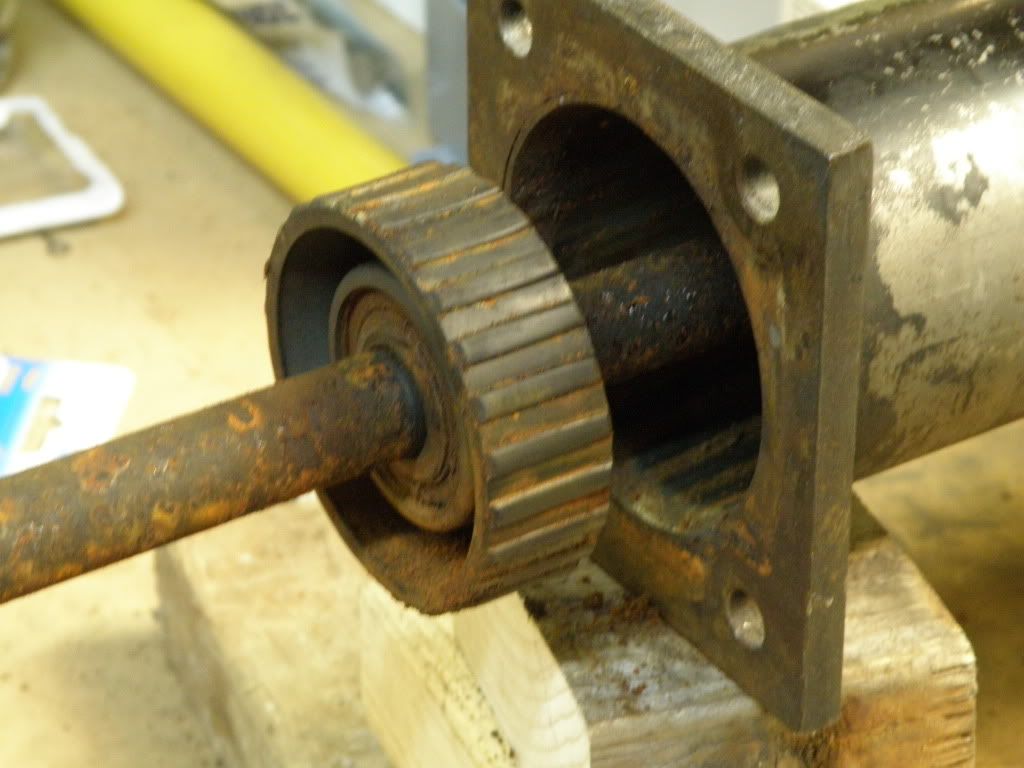
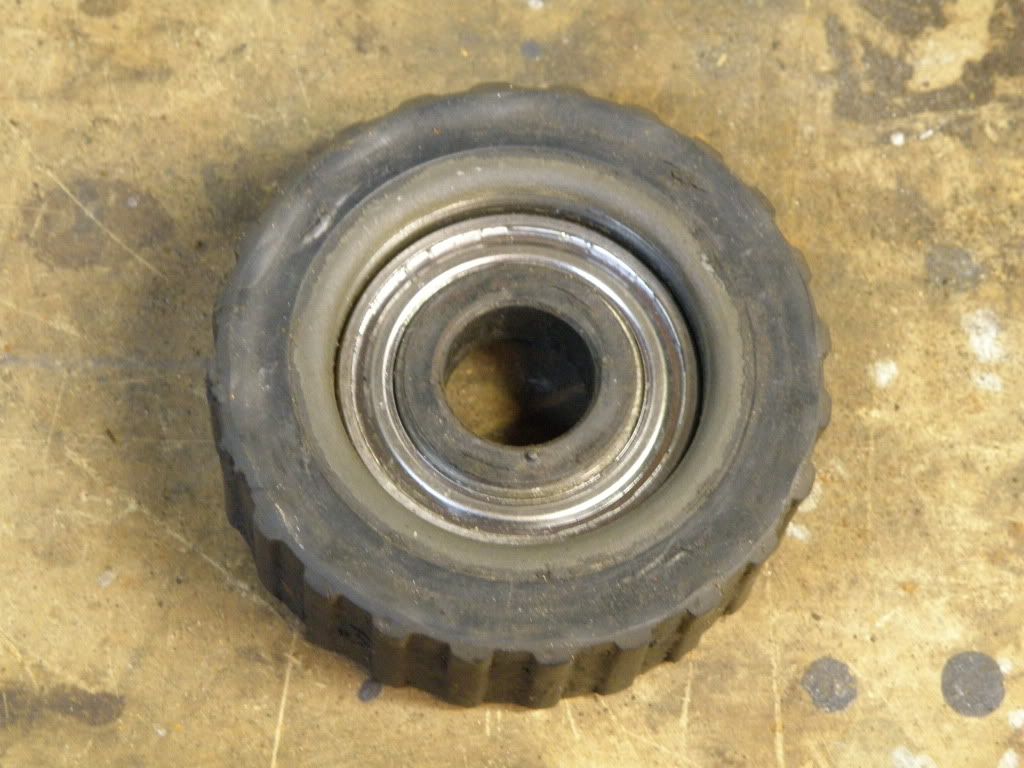
One of the bearing cups sans bearing

After it was all reassembled, the shaft spun nicely without any excess noise. It also dropped right back into the car like normal. Success!

turboswede
turboswede PowerDork
10/24/12 12:59 p.m.

Since the torque tube, transaxle and shift linkage was out, I pulled the front and rear suspension for refresh at the same time.

Because of the discovery of the worlds E36 M3tiest wheel adapters, I had to either find 4x108mm/4x4.25" wheels with the proper width and offset or move to 5x130mm bolt pattern and better brakes from a 924 Turbo, 924S or 944.

Guess which direction I went with?

Pulled torsion bar carrier started cleaning it up.

Dirty, dirty hardware.

Upgraded the torsion bars while I had it apart. CIP1.com has the best deal on 28mm torsion bars (under the off-road section for Super Beetles) Top to bottom is the stock 944, 924 and CIP1.com, big difference, eh?

Old and busted

New hotness

Replaced the rear arms with aluminum units, which provided the upgrade to rear discs. Replaced the axles as well with longer units.

New rear stance:

Little problem though, the rear width was too much. To fix this I had to pull the rear hubs and replace them with 924S units. I don't have any pictures of this, but needless to say it was straight forward, except for setting my coat on fire and burning my arm with a torch.

To remove the nuts, I braced the hubs with a pry bar on the studs and used a large piece of pipe on a 3/4" breaker bar. It took all 200lbs of my weight on the end of a 6 foot piece of fence post.

I used the torch to heat the rear arms with a piece of heavy duty all-thread to push out the old bearings and pull in the new ones. Seems to work great so far.

Now onto the front suspension....

turboswede
turboswede PowerDork
10/26/12 12:26 p.m.

With the rear suspension sorted (somewhat) along with the torque tube and shift linkage, it was back on to the front suspension:

Completed rear suspension

Scored a set of early 944 brakes from the local Pick-N-Pull. Time to break out the elbow grease....

New front uprights, cleaned and painted.

New front calipers (cleaned, rebuilt and painted)

Dad picked up a Soda blaster from Harbor Freight, so we tried it on the front hubs. Definitely worth the price of admission! Put new wheel bearings (RockAuto has been awesome for cheap parts)

Cleaned and painted the rest of the parts. Installed a set of eBay sleeves on the front struts. Not sure if the springs are the correct rate, so those will be replaced with slightly longer 325lb/in springs.

Picked up a set of cheap adjustable camber plates off of eBay. The only drawback with these is that they reduce the amount of strut travel available. I may just save up my pennies and buy the Ground-Control units that retain that travel and add adjust-ability.

One problem I had was that the 944 I bought the uprights off of didn't have the speedometer drive cup for the front wheel. So I added the square drive to the dust cap myself. Used a small drill bit and a hand file.

One of the other issues with converting a 77-79 924 to 4-wheel discs is that the brake line routing changed. So you can either use an early 924 turbo w/4-wheel disc master cylinder (kinda rare and expensive) or convert the brake lines to the later routing. Since I'm a masochist apparently, I converted the lines by bending all new steel lines. Yes, it sucked.

Completed front suspension :)

turboswede
turboswede PowerDork
10/26/12 12:56 p.m.

Before I go back to working on the bodywork, I thought I'd turn my attention to the interior (plus it was a good project to tackle during the fall/winter time frame)

Start by washing the dirt and funk out of the interior (and it was nasty) Then started with a torch and a scraper to remove the tar sound deadening material.

Probably not much weight loss all things considered, but every little bit helps.

Hatchback love. Surprised there isn't an echo in there....

Since I'm still going to drive it on the street, I figured a little carpeting wouldn't be a bad idea. The local Home Depot Racing Supply has gray indoor/outdoor carpet remnants for $25, used a couple of those to make my own carpet for the car.

Since the carpet came out so nicely, I figured that I should clean up the rest of it as well.

Hand polished the e-brake handle. It is one of the first things you see when you open the driver's door (mounted between the driver's seat and the door)

I expect the car will be capable of some decent lateral loads on my IT-inspired body (flabby would be another description) So to that end, I acquired a set of racing seats from my brother after his Wife stated she didn't like them (she didn't fit in them too well)

Corbeau seat brackets, they fit the 911/944 and 924. Still need to ditch the 1st-gen Neon brackets that I got with the seats.

Javelin
Javelin MegaDork
10/26/12 1:18 p.m.

Hmm, those brackets look familiar...

turboswede
turboswede PowerDork
10/26/12 6:18 p.m.

Heh, yeah :)

SyntheticBlinkerFluid
SyntheticBlinkerFluid UltraDork
10/27/12 12:38 a.m.

Damn, I'm digging this build. Will definitely keep up with this one.

turboswede
turboswede PowerDork
10/31/12 4:59 p.m.

So as it turns out, I didn't actually need the seat adapter brackets as I was able to bolt the side mounts directly to the sliders and then to the frame rails. So Javelin took them off my hands for his (now) former 944 project.

With the interior in semi-decent shape aside from picking up a few missing bits here and there (ashtray, glovebox, etc.) it was time to head back to the engine and drivetrain to see if I could get the thing running again!

Since I've got the DCOE intake manifold and I won a set of TWM 45mm DCOE-style throttle bodies on eBay a long time ago (they were cheap, I think they were about $300 because they were miscategorized, heh) I think you can see the direction this is going....

So with some MegaSquirt driving those, I should be a happy monkey. However, I'm not one to do things the easy way sometimes, so the stock ignition was junked in favor of EDIS-4 crank trigger controlled by the MegaSquirt system. Part of the reason to head that way was the group buy on the 924board on EDIS trigger wheels.

The annoying thing was that the snout was a bit long (meant for the turbo cars with A/C, etc) Luckily Dad just picked up a rotary table for his milling machine and wanted to try it out on something. So we made a pulley with a shorter snout.

Good, good...

I'll work on the bracket to hold the trigger sensor once I get the engine in the car, since without all of the brackets, belts, covers, etc in place I may have to redo it anyway.

Time to put the lump of Audi schteel back in the engine bay.

Not too many pictures of this, but its in. Finally. Now to play with wiring, accessories, etc.

Sexy isn't it? I just wish it ran ;)

Fuel lines. Removed the stock fittings from the old hose and polished them up a little. Decided against EFI-rated rubber line and used Earl's braided line and fittings in the engine bay where possible. The stock fitting were re-used in the rear for the fuel pump and fuel tank fittings.

turboswede
turboswede PowerDork
10/31/12 5:05 p.m.

Now that the engine is in, I can build the VR mount.

Built it from aluminum pieces picked up at Home Depot Racing Supply. Stuck the together using alumarod and a decent torch. Used bolts through the center for backup (in case the alumarod joints fail)

Turned out pretty good for someone with not much more than bear skins and bone knives!

turboswede
turboswede PowerDork
10/31/12 5:33 p.m.

Getting close!

Mounted the EDIS coil pack by the passenger headlight bucket using the stock Escort bracket.

Bought a generic adjustable FPR from eBay for about $30. Hopefully there won't be any issues with the Chinese knockoff.

Of course before I find out, I get to finish the wiring! What a mess that was.

Time to load the code!

turboswede
turboswede PowerDork
10/31/12 5:38 p.m.

Some signs of life:

http://youtu.be/LqV10kLobwM

http://youtu.be/3FZHohhuxuU

Then, after much fiddling with various settings and etc. (reversing the fuel lines so that the regulator could actually regulate the fuel pressure, heh) Adjusting the timing to reasonable settings and charging the battery. Several times.

http://youtu.be/6baQCdfxOf0

Success!

Still a long way to go from here though....

turboswede
turboswede PowerDork
4/26/13 10:43 p.m.

So, time to drag this back to life, kicking and screaming as it were.

As you can see, I've been driving it! Legally even! I've been working on the tuning and solving problems along the way.

Burned myself pretty badly when the back half of the exhaust fell down on the way to work and I stupidly tried to put it back up.

Throttle position sensor died, turns out it shouldn't have worked anyway, so swapped it out for a Ford sensor with the proper rotation.

Got tired of using a shopvac handle to hold the hood up when I needed to adjust the idle, so I installed some hood props:

Snazzy!

Added some restrictors to the vacuum lines to steady the MAP signal so that my timing doesn't jump around so much (use Alpha-N for fuel with MAP controlling timing). Really helped clean things up, I suspect moving the restrictors to the individual feed lines would help steady the fuel pressure which might be the final piece of the puzzle that I'm missing.

Finally here's a little video of the car as I'm leaving work one day :)

https://www.youtube.com/watch?v=4XgLYJVX3gQ

The next day this happens on the way TO work:

Stupid clutch arm slipped on the shaft. Didn't find out until I pulled the engine. Oh well it gives me a chance to get the header ceramic coated so that may it will stop melting control arm bushings.

Oh and while I had it out, this happened:

BAE Turbo manifold and Mitsubishi TE04H turbo. Should provide enough boost when combined with the big 'cooler leaning against the bench in the background. Now to build a plenum for the ITB's and collect a few pieces and I'll be ready for MOAR BOOSTS! hehehe...

1 2 3

You'll need to log in to post.

Our Preferred Partners
vxAcqy6DnJZQxuiBGqqVtjsuvLEsaO8kxReJMFAUb3A2b6WfXneiCXK0kn1M5ktE