


I'm still back at the top of the page (EDIT: first page...), thinking about the M37...

I'm still back at the top of the page (EDIT: first page...), thinking about the M37...

Ransom wrote: I'm still back at the top of the page (EDIT: *first* page...), thinking about the M37...
It would have been fun but totally impractical. It either paint it and run it, top speed of 45mph, or drop a crapton of money into axle and engine swaps. And still have no use for it.

Your a glutton for punishment and I like it! ![]()
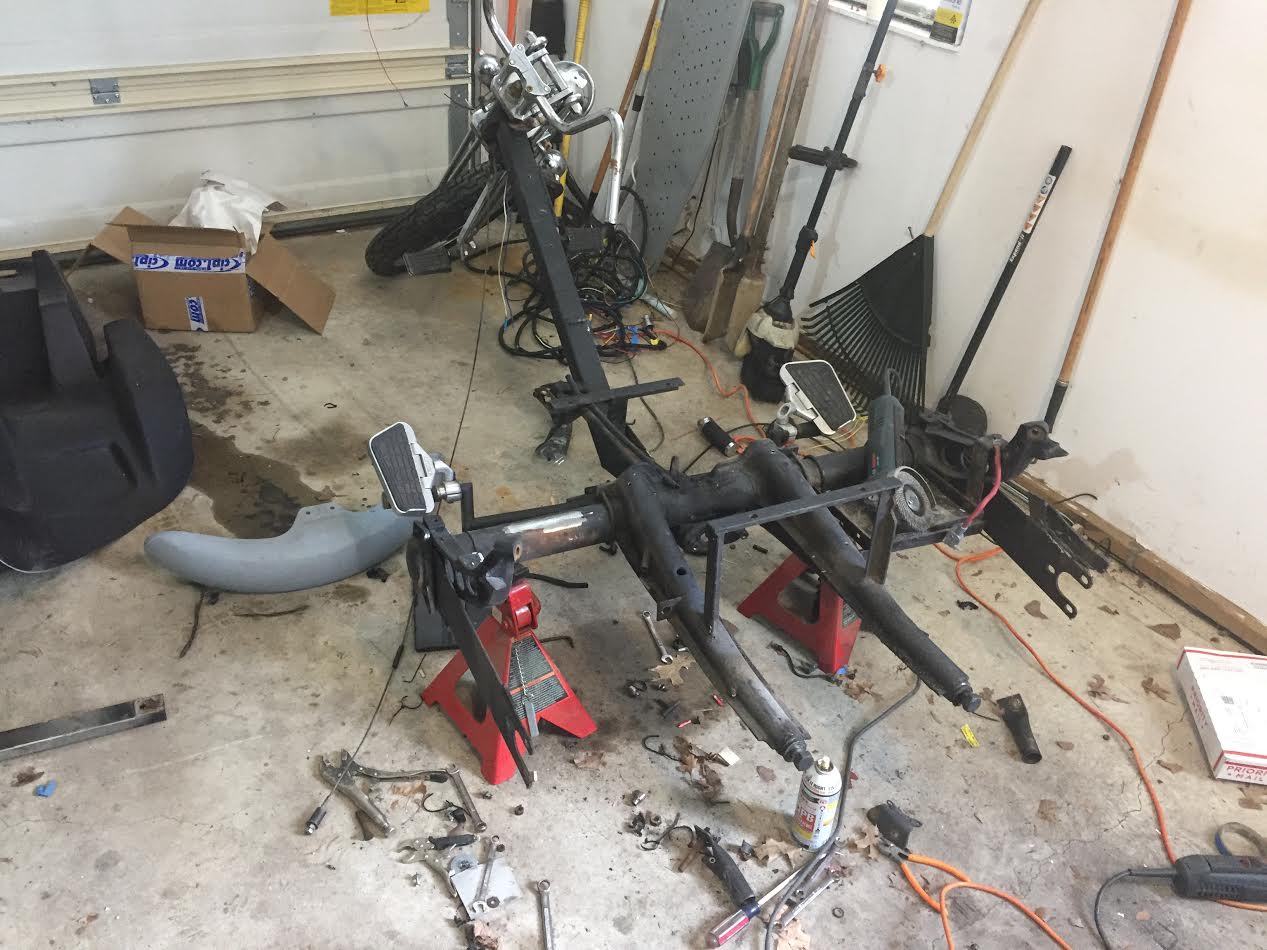
Ok, disassembly finished. Seems when they bolted on the wheelie bars they decided to go the extra yard and weld them. Effectively welding the spring plates to the axles FML. Took a bit of careful cutting but its all apart now. Next up, cleaning my mess, then I will clean the frame and transaxle and prep them for some paint. Unfortunately its snowing here today because I'd like to take them outside and pressure wash them. Might still do that tomorrow, snow or no snow. As long as I had the cutting tools out I cut and ground all extra brackets and things that didnt need to be there.
![]()

Yay! Jim is back! I am probably not alone in missing your build threads. ![]()
Ian F wrote: Yay! Jim is back! I am probably not alone in missing your build threads.
Much thanks for the kind words from you and others. I love sharing this stuff with you guys, keeps me motivated. Felt really weird to not be building anything last year. And after these two are done I might have some long downtime again. These are both "keepers" so I'll be running out of space for projects rapidly.
But one of these days the $500 CVPI is gonna need a paint job. If these turn out well I may do something fun with it.

aaaaand....switch. Jeep morning.
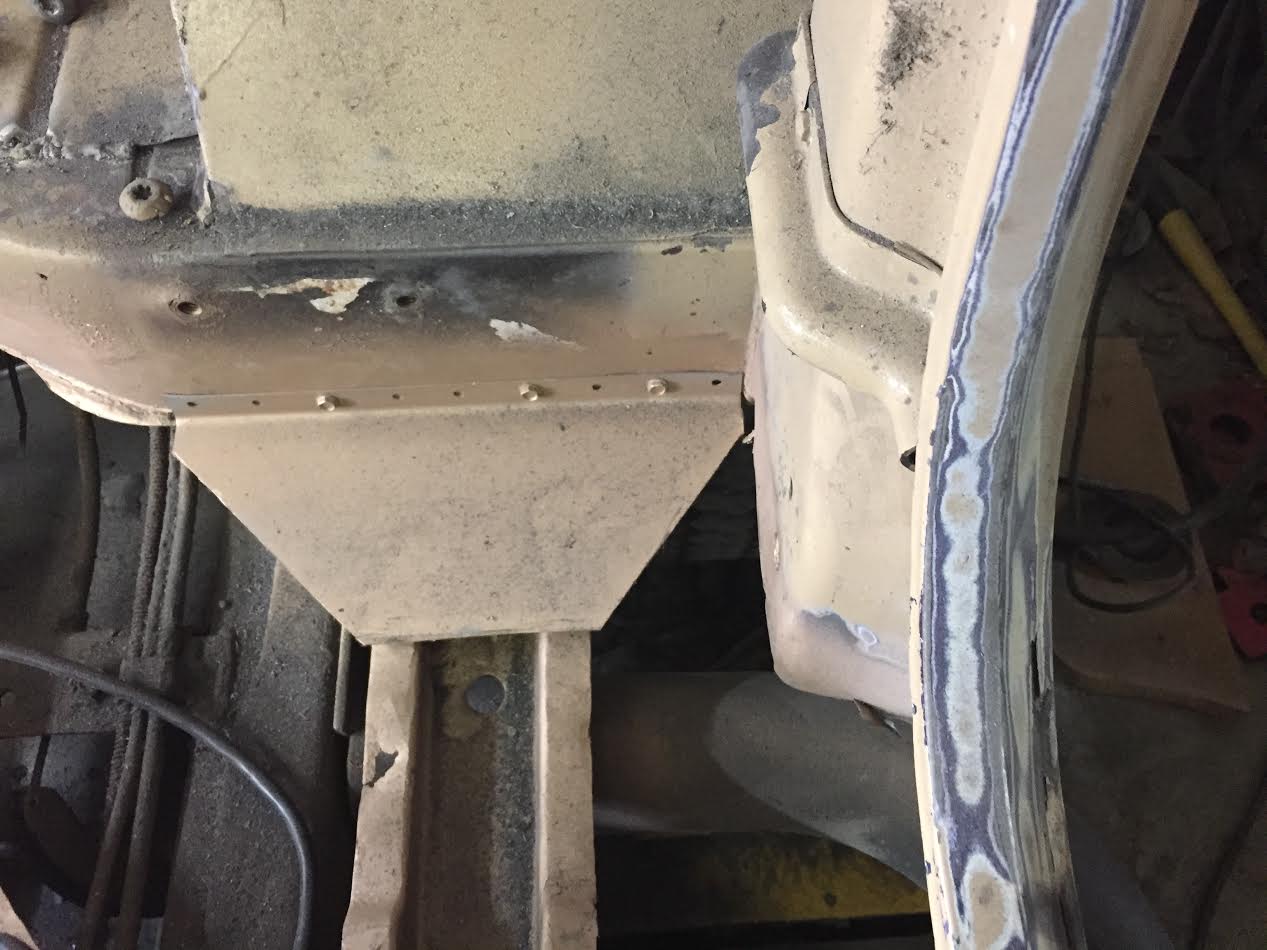
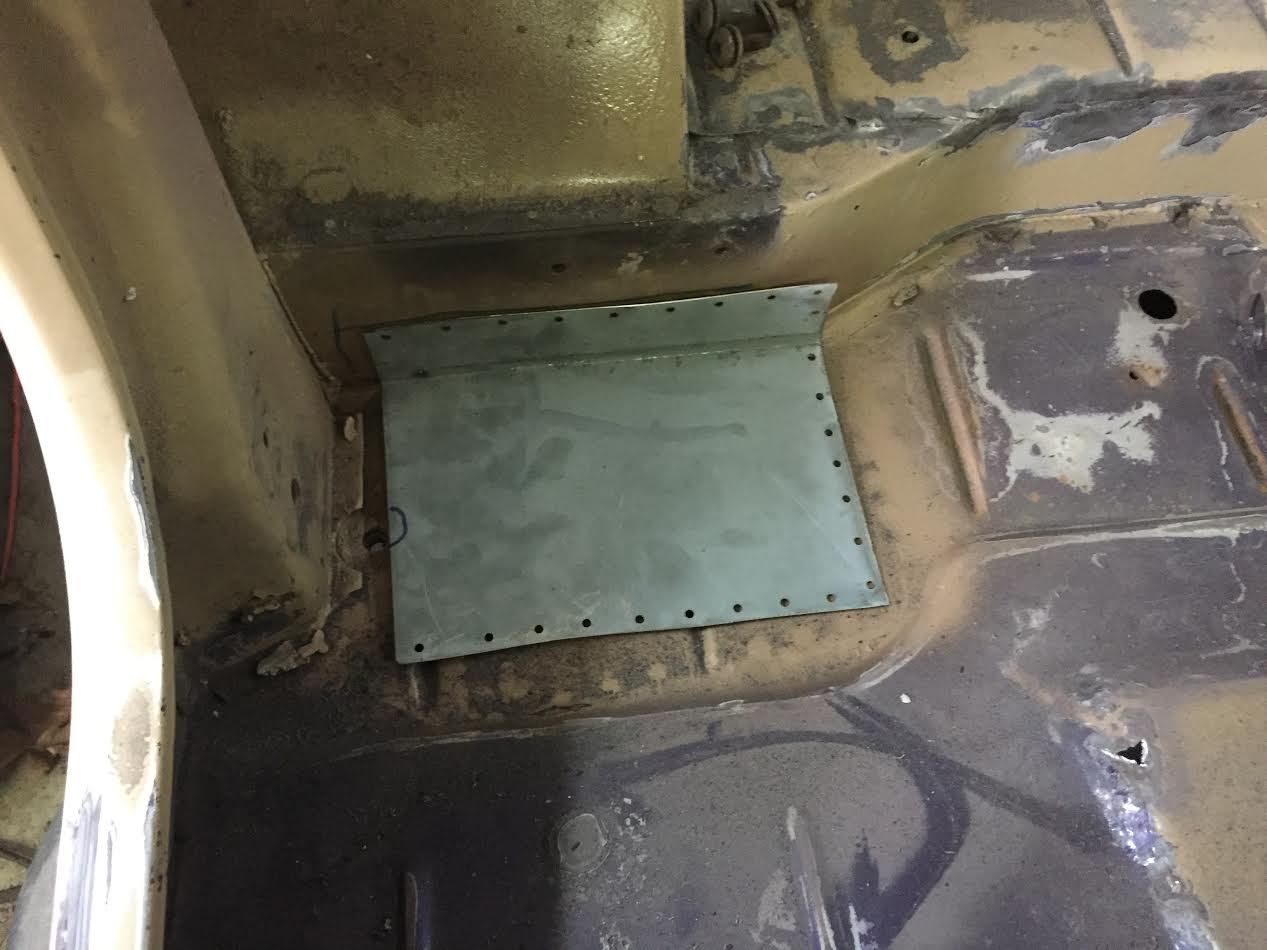
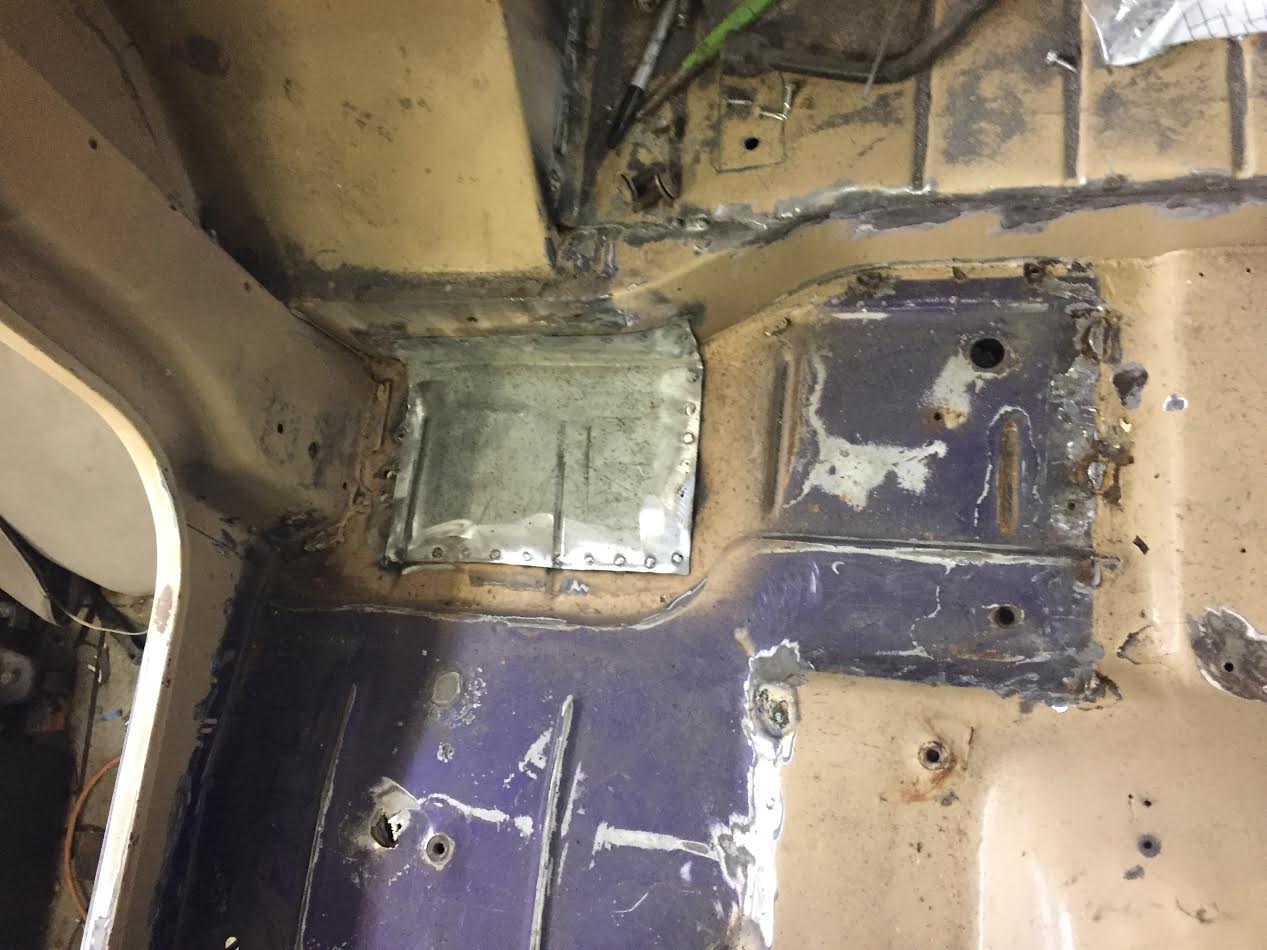
Started by making a reinforcing patch for the rear drivers floor. The "roll bar" (factory bar is a show bar not a true roll bar but its the easier term to use) mounts here so I wanted a little extra reinforcement.
Yes the sheetmetal screws are temporary ;)
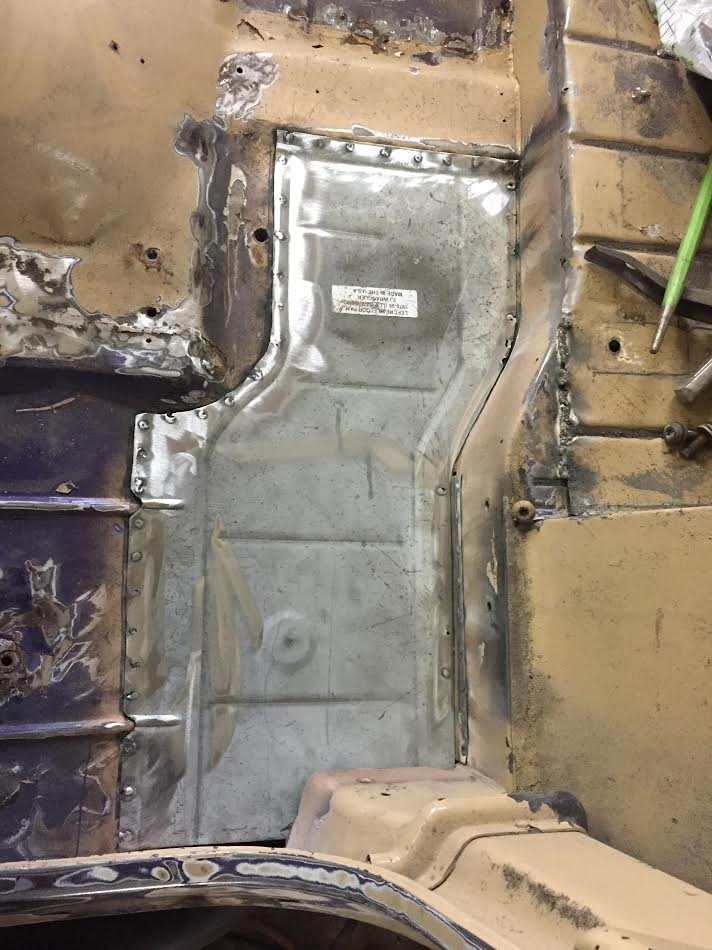
Then I cut out the bad spot on the passenger side and prepped it for welding
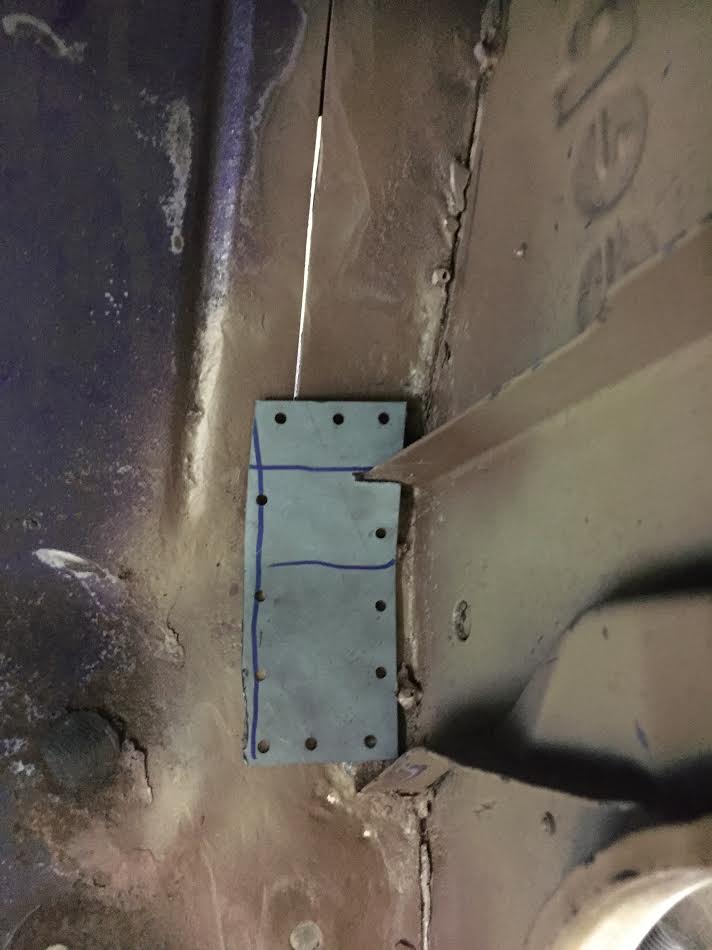
And made a patch out of the scraps left over from the drivers floor. Ooops, I see now I forgot to roll the beads in it, I'll do that next trip out to the garage.
And made a quick patch for a small hole in the front of the PS floor.
Someone asked else where so I'll note it here, yes I am doing lap joints on the floor. For regular body work I tend to use a butt joint but on floors or if Im being lazy I like lap joints. It feels a bit stronger to me. Lap joints are definitely easier than butt joints too. You just need to be sure to use a weld through primer and seal well where they overlap or you are begging for more rust in the future. Thats why the new panels have holes in em, they will be "spot" welded through the holes

In reply to JThw8:
Hey Jim, that Jeep is already completely rust free by CJ standards, no need for all that repair.![]()
HappyAndy wrote: In reply to JThw8: Hey Jim, that Jeep is already completely rust free by CJ standards, no need for all that repair.
Yeah, I've been getting the impression Im not the typical Jeep owner :)
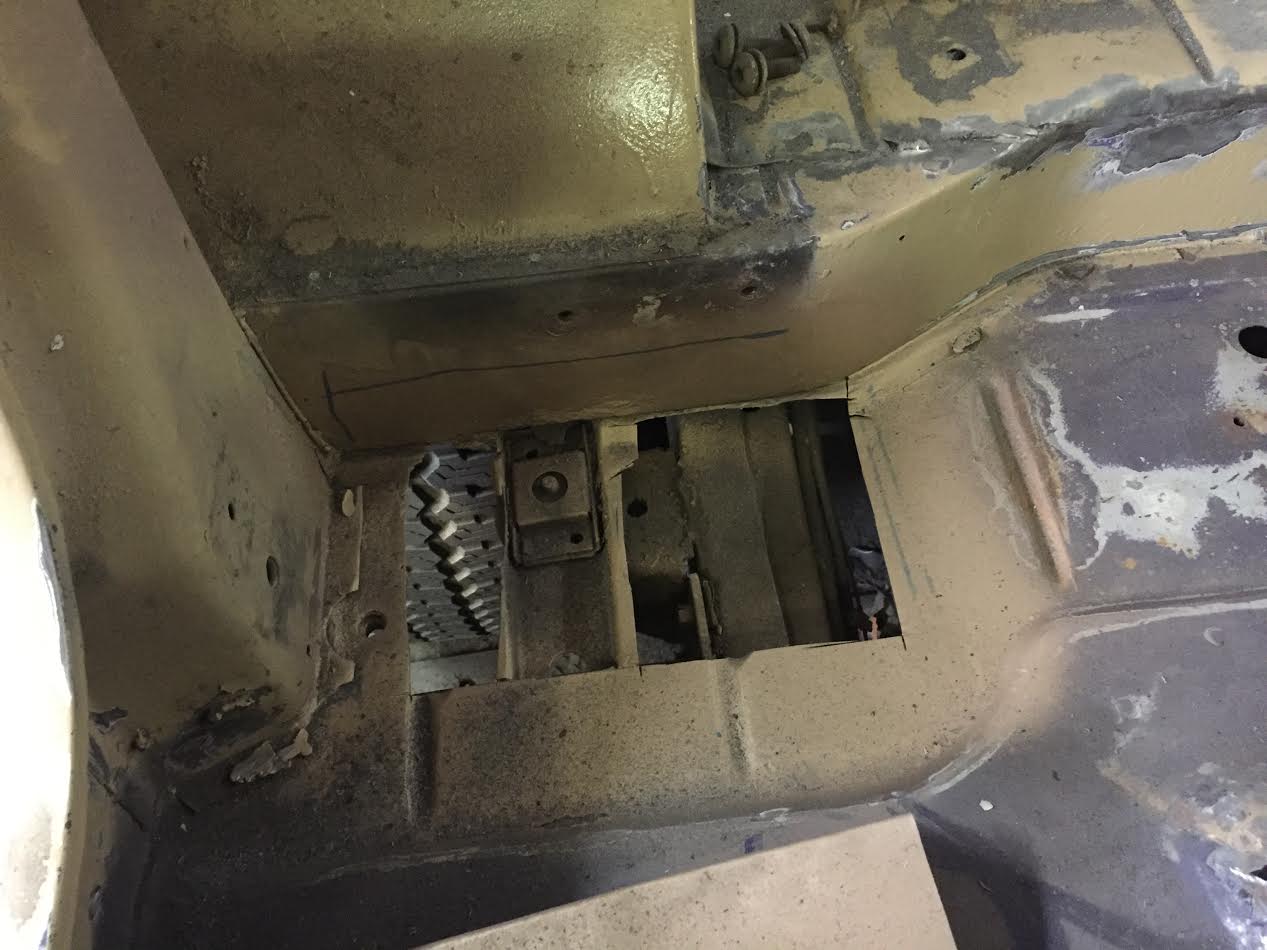
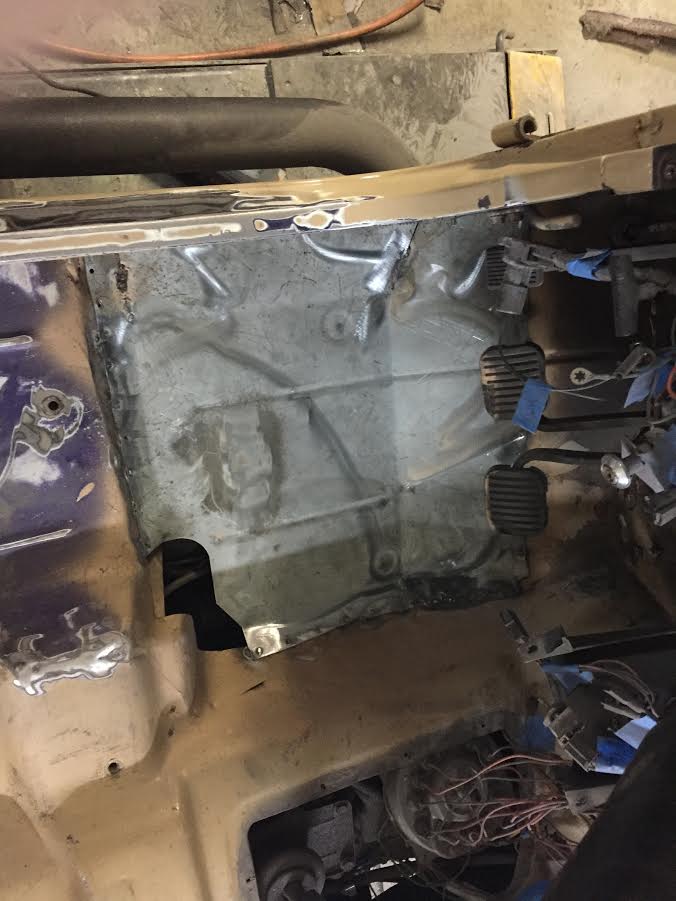
The Jeep has floors again. Now that the main bits are solid I can sort out the small filler pieces still needed. This will all get a coating of seam sealer top and bottom and the tub is going to get truck bed liner sprayed in as a last step. Should be good for many years to come.
while all that Jeep stuff was going on the transaxle and torsion housing from the trike was soaking in some foamy engine brite to loosen up all the oil and crud buildup. So I went at them with a wire brush and a quick coat of paint.
I love rustoleum hammered for stuff like this transaxle, the finish on these is never smooth so the hammered paint helps hide that and looks good to boot. Those who are familiar with my other VW based projects know that I'll strip and polish the ribs after its all dried. It's just kinda become a thing I do now I guess.
![]()
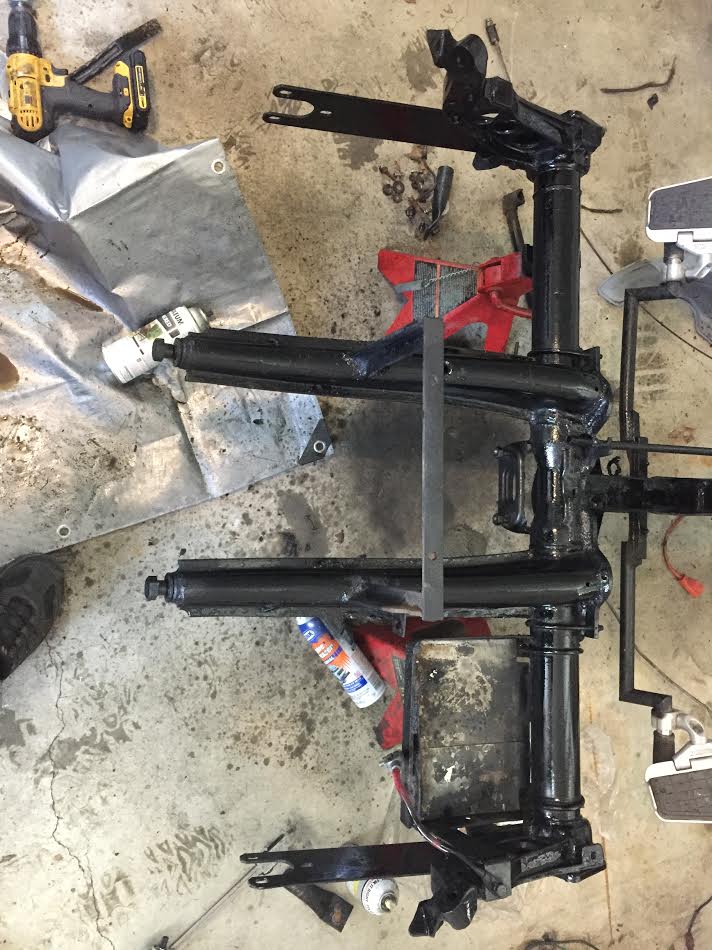
Just some semi gloss black for the frame and torsion. I will have some modifications to do later so I need something easy to touch up after I do some welding.
More trike stuff this morning. Family obligations for the afternoon so a short day.
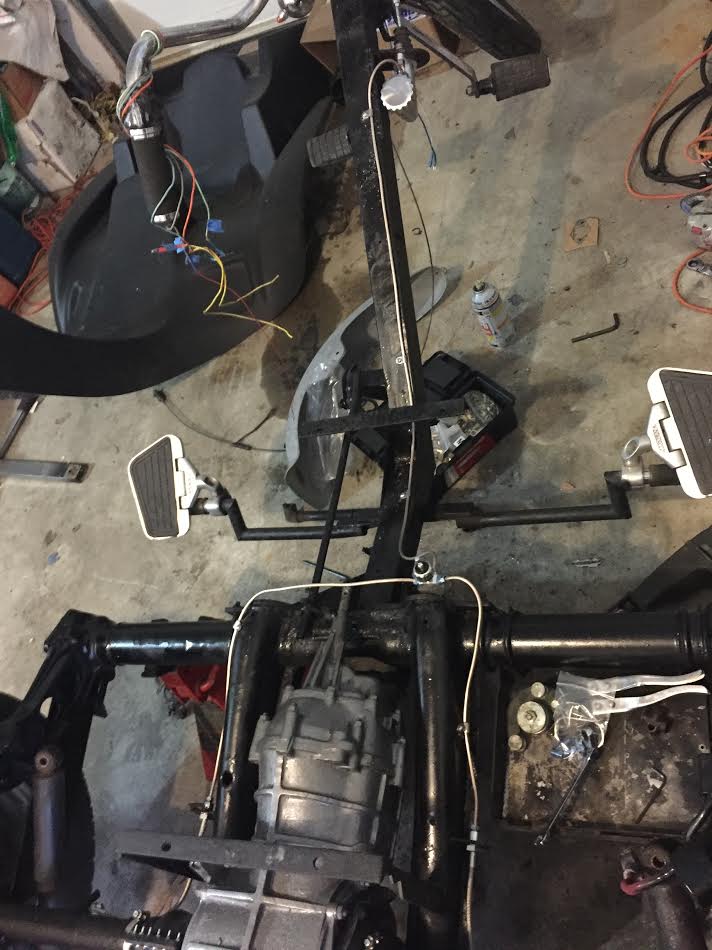
Transaxle is reinstalled. Need to get new hardware for the tube to spring plate connections.
![]()
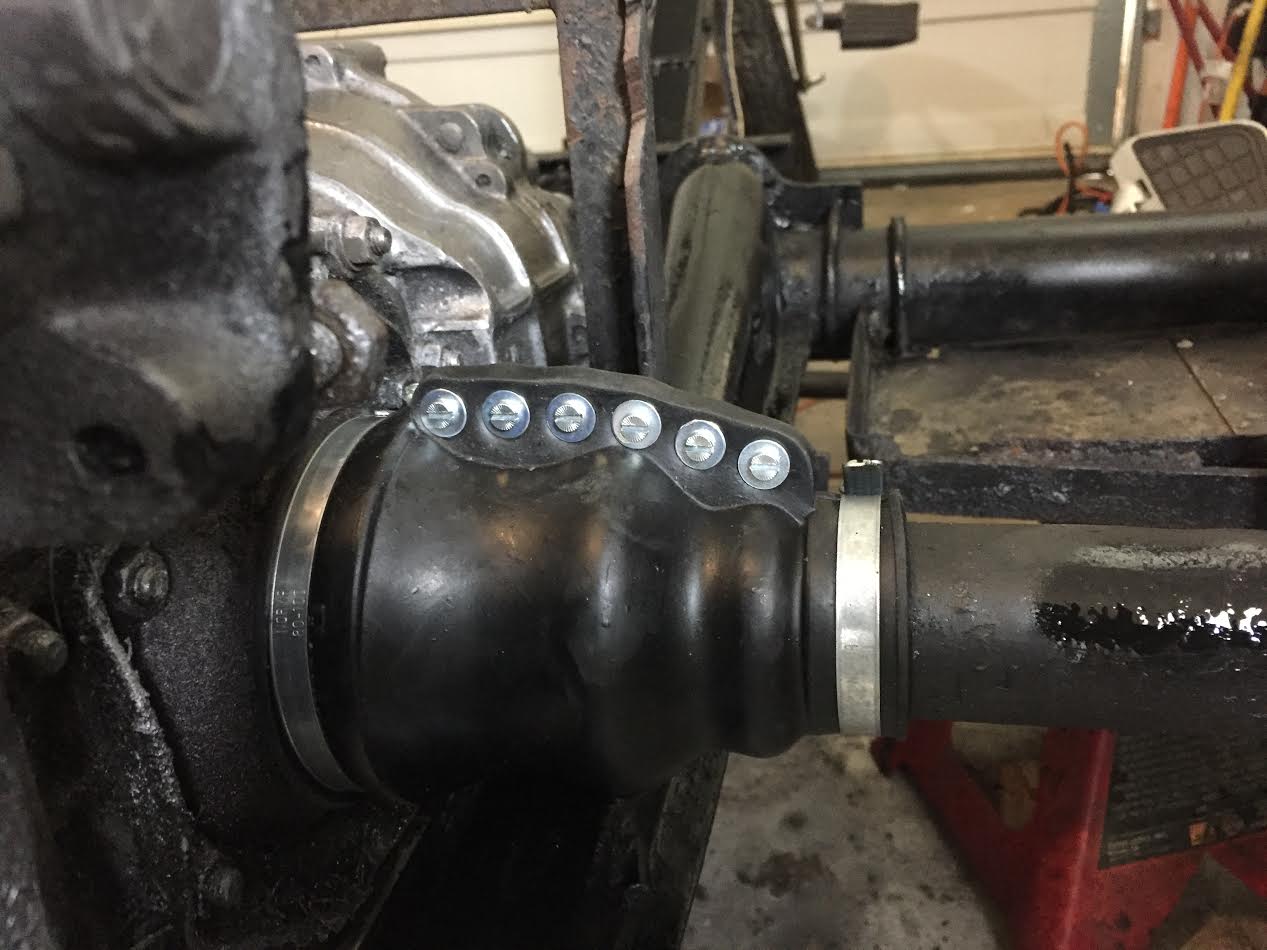
Had some nice quality german boots sitting on the shelf so I put them on. Yes I indexed the screws, it makes me happy.
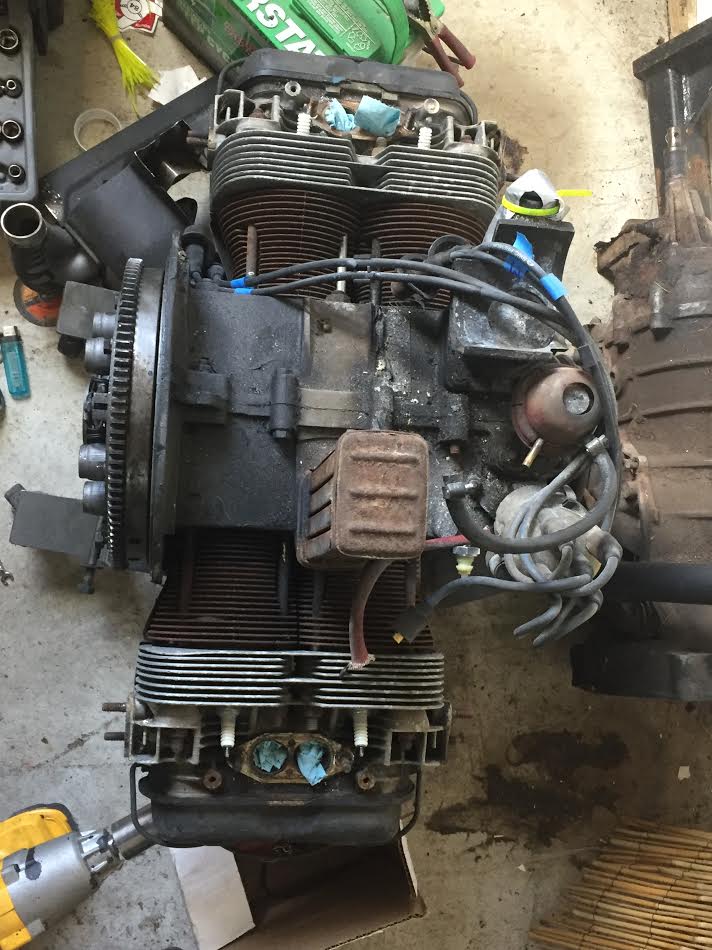
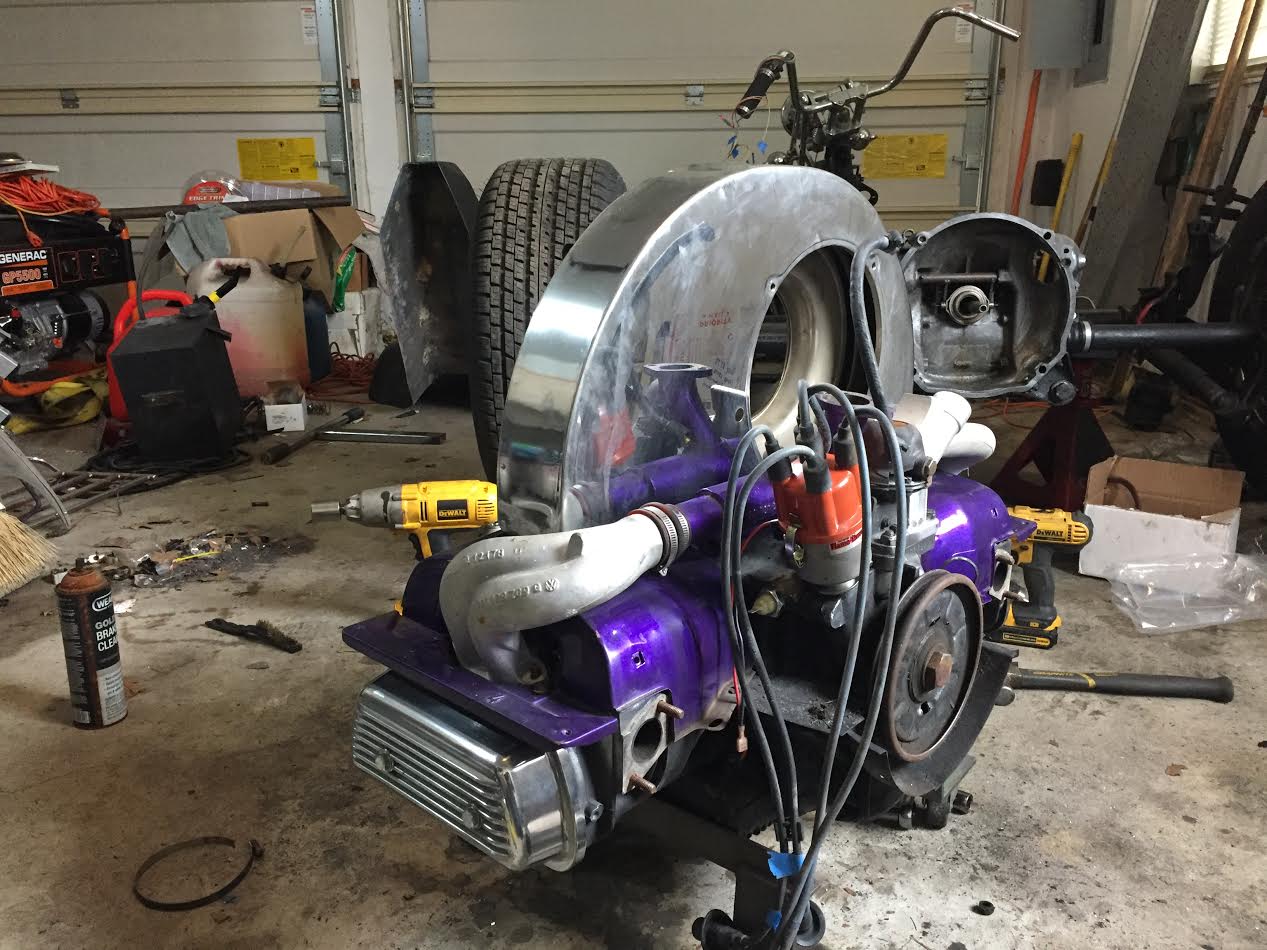
Engine assembly started. Doghouse adapter and cooler installed, tin work just in mock up. Installed alternator stand and pertronix flamethrower distributor.
This tinwork is actually what inspired the idea of the purple flake paint job. I've had it sitting on a shelf for well over 10 years. It came with a car I bought and I never used it. Part of me wishes I had a matching fan shroud, part thinks that might have been too much. Not a big fan of chrome though, might have to do somethign with the shroud. Valve covers will get the inserts painted purple as well eventually.

Dat flake tho. I knew there was a reason I liked you.

Where'd you get that stuff, Marsellus Wallace's briefcase?![]()
JThw8 wrote: Lots of parts but also FLAKE! Gunmetal grey for the wheels, purple for the body.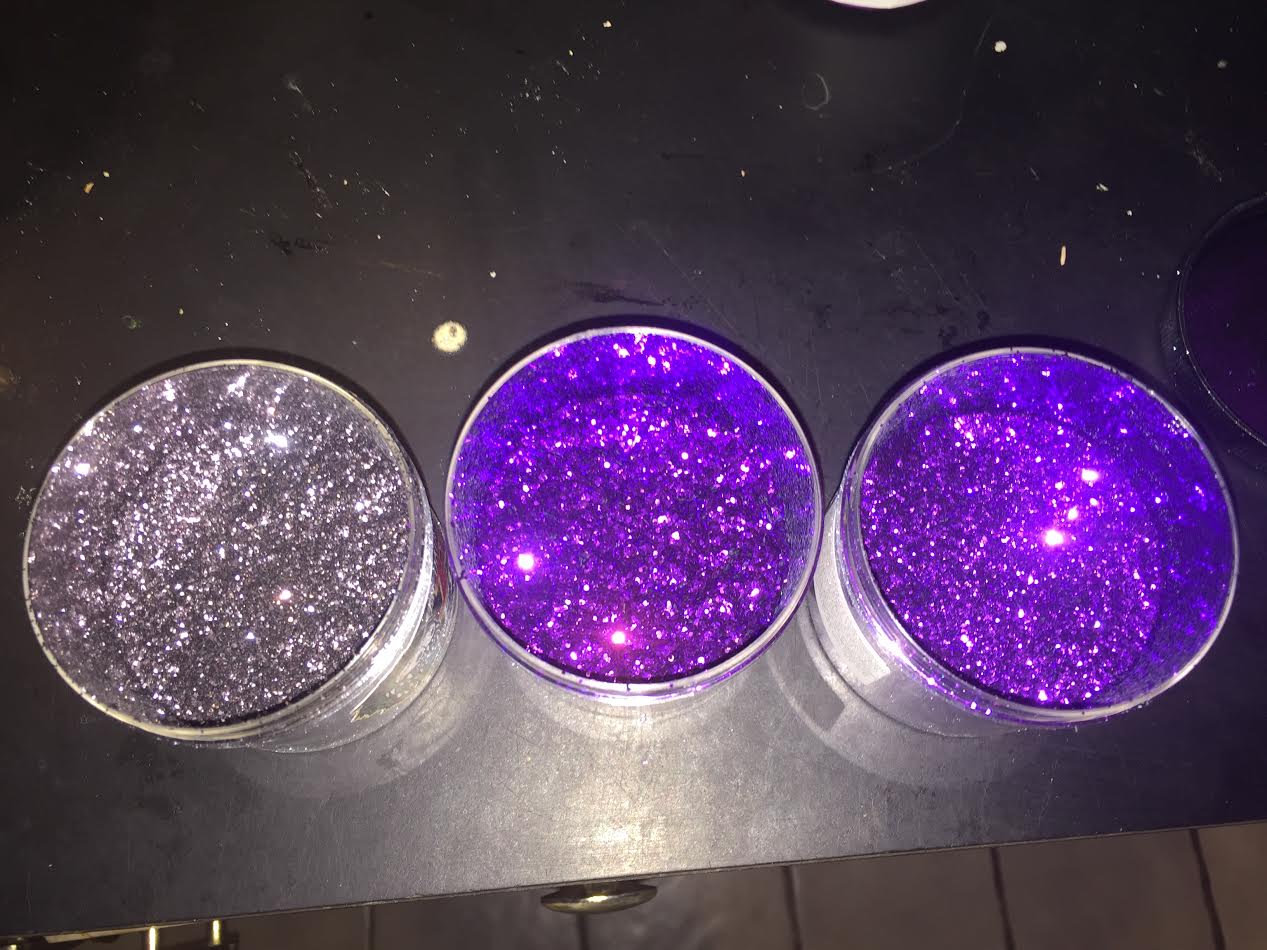
It's become rare that I don't have a tool I need/want for a project. Years of doing this junk and gradually buying stuff does that to you. But I added a new tool to the kit today as it will be useful on both projects. A rivnut tool.
Rather than my usual MO of self tapping screws for everything I can do some proper inserts. I also hope to use these for the body mounts on the trike so Im not struggling to reach the bottom nut with one hand and the top with another during removal. Now that its here Im coming up with all kinds of ideas for it. :)
One more work day tomorrow then Im off for 5 days....plan on overload of project updates. I'm beggin you all to help keep me motivated and hopefully I'll have the trike mostly done by Sunday minus paint. Parts dependent of course, still waiting on a few things and I know the new fuel tank is still 2 weeks out, but if I can get the rest done that will be good.

Short of threatening to come down and drink your beer, how do we keep you motivated?
NOHOME wrote: Short of threatening to come down and drink your beer, how do we keep you motivated?
I've got 5 gallons of homebrew on tap and the beer cooler is in the garage with the trike! But seriously I dunno, feel free to ask questions about the build, throw out ideas, helpful tips etc. Just feeling like Im not working in a vacuum helps a lot some days. I have this huge pile of parts here (I have totally abused Amazon prime 2 day shipping) and I just need to put it all together.
I think next steps are to run the brake lines...but Im waiting on my rear disk kit so I can't fully run them....I like to do things end to end. Finish the motor assembly. And start wiring. I have been over the loom a dozen times and looked at a few sample diagrams and I have an idea but somehow when I start working with wires my head goes fuzzy. I need to unloom everything and run every circuit again, not because it was done poorly but because I need to understand it and I can only do that if I run it all myself.
I really want to get to the paint stage but that's quite a bit off. Its the fun part. I think I actually have everything planned out right now and all the parts on hand or arriving soon. Need to make a hardware run but the snowstorm coming it may put that off a day or two.
Generally Im just thinking out loud here on what I need to do. Nice to feel like Im not talking to myself. I'm going pretty quick through some of this so there's not a terrible amount of detail to some of it. If there are things you all would like to see better documented please let me know and I'll focus more.
Im following along, at the rate your going you will get a lot done in 5 days!

I will bug you for updates as much as I can if that will help.
java230 wrote: Im following along, at the rate your going you will get a lot done in 5 days!
I really hope to have the trike finished except for paint and fuel (tank is still 2 weeks out) by Sunday. Supposed to be working this morning but I might have ducked out to the shop for a bit to do a little work to mount the new master cylinder. With that done I can start fabbing up brake lines tonight. Still waiting on a few parts to finish the brake system but they are at the back so I can run everything up to the wheels.
Annoying part is my flare tool is vice mounted and my vice is mounted in my other garage so I will have to be running back and forth between them all night to flare up the lines.
And the heater in the trike garage won't stay running but I'm used to working in the cold. Got spoiled having heat in the shops.
First things first, I fixed the heat in the garage so my motivation level is higher now :)
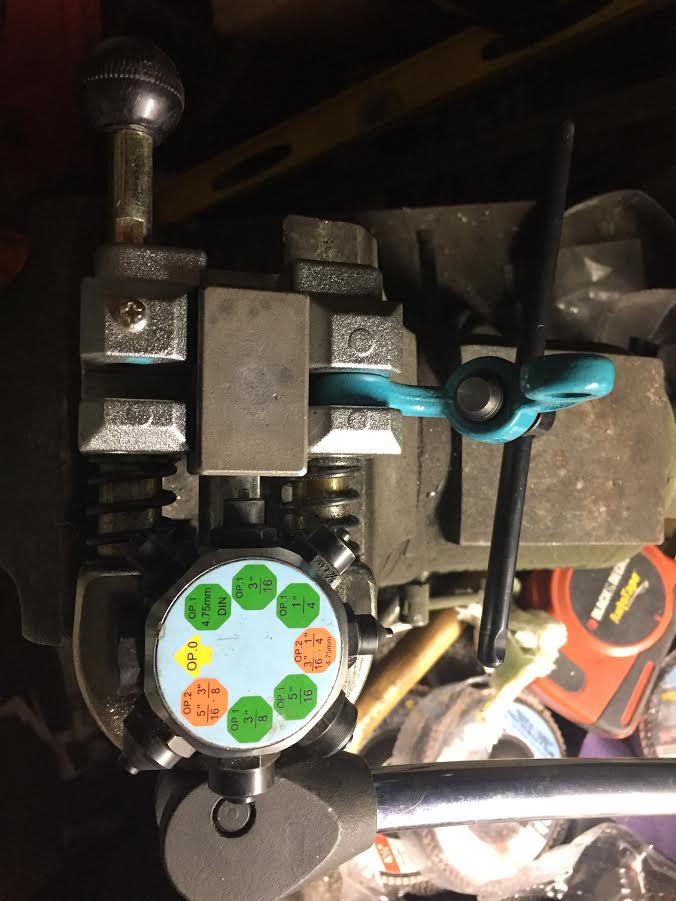
Said it before and I'll say it again, having the right (and quality) tools for the job make it so much better. Bought this brake flare tool back on the Wartburg project and have never regretted it. Got tired of messing with cheap flare tools that never work. This thing just works and works well. That being said new master cylinder is installed and the brake lines are run up to the soft lines. I'll need to make 2 more lines from the soft line to the caliper but Im waiting on my caliper mounts to determine locations.
And I put that new riv nut tool to use so all my little brake clamps are set in with real screws into nuts instead of self tapping screws like I usually use.
Very nice!
That does look like a nice flare tool, thats one I dont have yet....
java230 wrote: Very nice! That does look like a nice flare tool, thats one I dont have yet....
came from eastwood. On the upside it makes excellent flares every time. Downside, its a vice mount so you cant use it on car. Wait till they have a sale on it, I think I got it for about half of what they usually charge for it.

+1 on the Eastwood flaring tool, it's really nice.
You'll need to log in to post.


