
JThw8
UltimaDork
3/19/17 9:46 a.m.
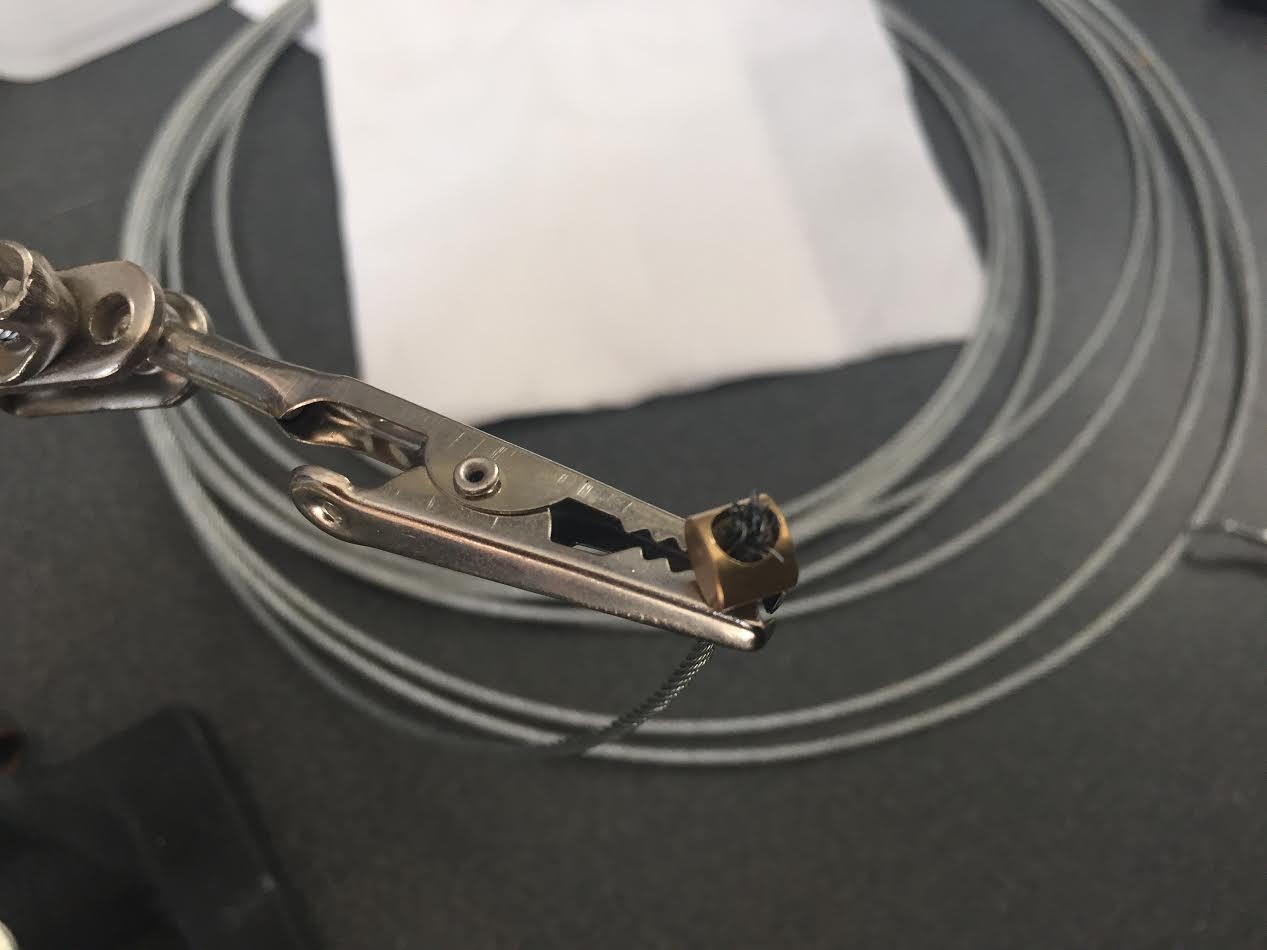
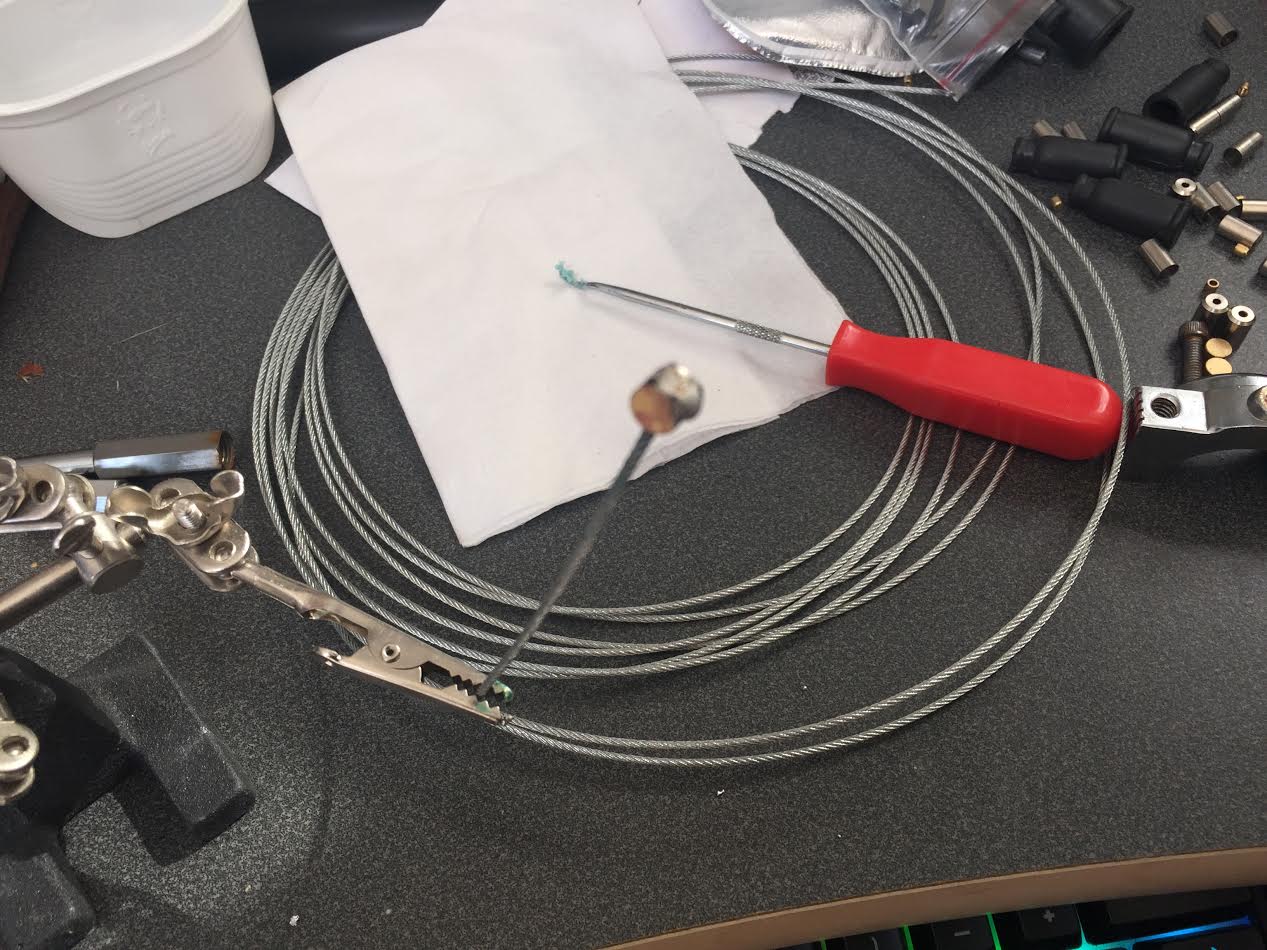
Making a throttle cable this morning, fairly simple affair. Started with a Venhill universal kit. It's meant to basically be a bag of parts for motorcycle shops to work from on multiple projects but because of that it comes with over 15ft of cable so it is great for making dune buggy and trike cables.
Really just needed one end on it as the other goes through the screw terminal in the carb. So per the instructions, clean well, stuff cable through end, fray out the ends (supposed to make a lovely "birdcage" but whatever. Heat it up and solder it. It is recommended to use silver solder or plumbing solder not electrical. Most of the how-tos I watched used either a solder pot or a torch. But the torch is discouraged by Venhill as it can make the cable brittle.
Luckily I have a good soldering iron that can hit 900f so it wasn't too much trouble.
JThw8
UltimaDork
3/19/17 3:29 p.m.
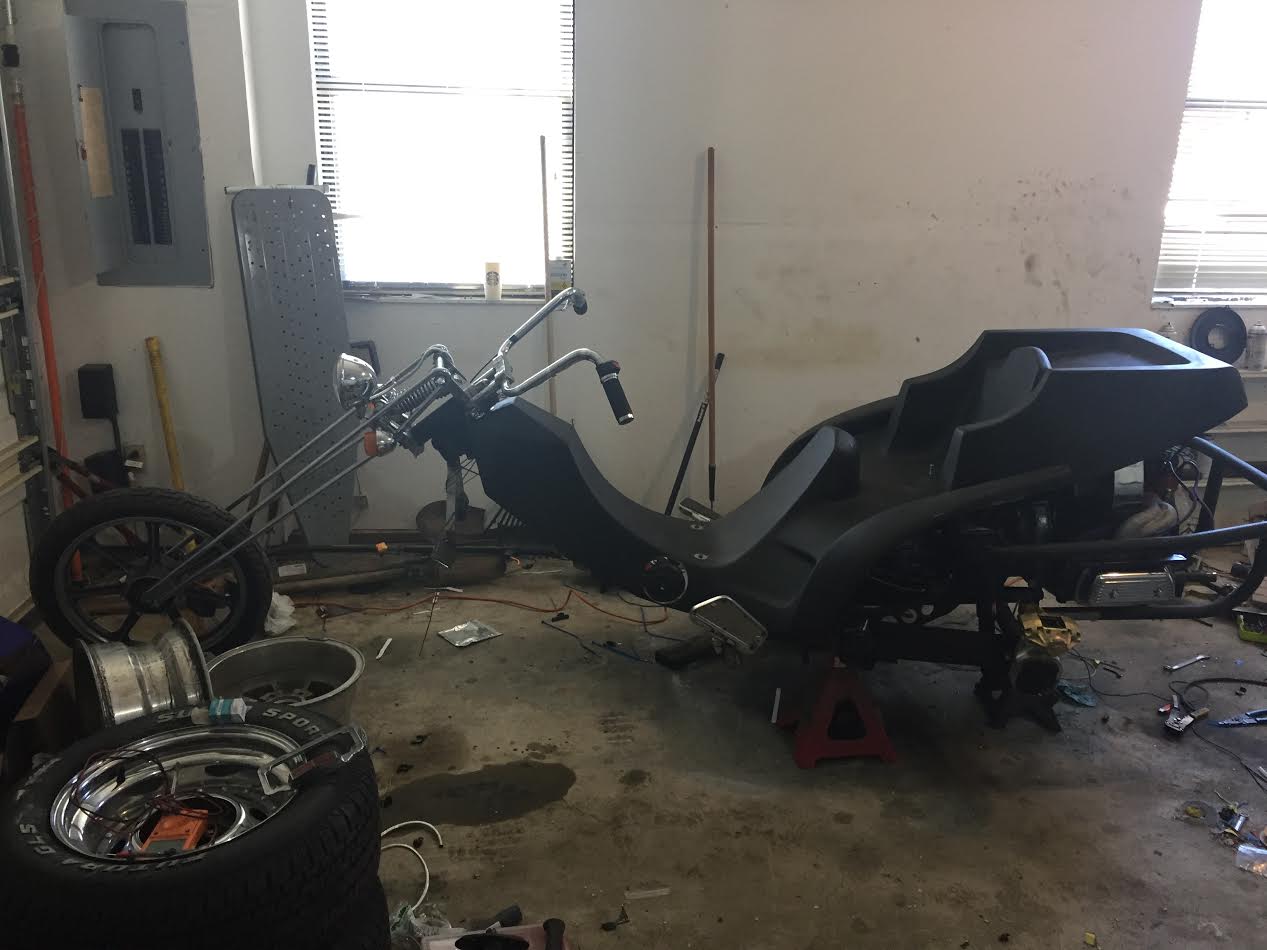
For what is essentially 5 bolts this took way to long. But the body is mounted now. Of course it will have to come back off to finalize some wiring and other things but its one step closer.
Cut the shifter hole and mounted the boot while I was at it. Still need to cut a hole for the fuel gauge and idiot lights but my lights aren't working under testing so I need to see whats up with them before I make a hole in their size. Honestly they were a bit smaller than I wanted so I might look for something else.
JThw8
UltimaDork
3/19/17 8:46 p.m.
Sigh...so I just added stupid amounts of effort for nothing. When I was setting up the shifter mount I was installing the shift linkage and tried to move the shaft by hand and...nuttin, froze solid. Please note I've been able to do this with other VW transaxles. So I thought the shift selector aka hockey stick got out of synch with the shift rods. It was driving me nuts so I just removed the nosecone of the transaxle which yes, necessitated removing all the transaxle mounts (if you dont know VW that means motor too cause it just hangs on the transaxle) Luckily I didnt have to fully remove the drivetrain, I could slide it back enough to get the nosecone off.
Well, nothing was wrong, discussed it with a VW trans expert I know and showed him pics and it was agreed it was just a good tight transaxle and requires the leverage of the shifter to actually move stuff around unlike the sloppy old ones Im used to.
Sigh, I wouldn't have slept if I didn't pull it apart but now I gotta put it all back together again as soon as I get a seal for the nosecone.

java230
SuperDork
3/19/17 8:52 p.m.
Ugh still good nothing is broken!
JThw8
UltimaDork
3/19/17 9:01 p.m.
java230 wrote:
Ugh still good nothing is broken!
Indeed, happy about that bit. If I had a seal I'd put it all back together before bed but I don't. The closer I get to done the more the little jobs take time. Wish I had another week off :) This beats the hell out of my day job, but makes me hurt a lot more at the end of the day too. Still haven't fully regained use of my right hand...no particular reason I can think of but I just can't move it fully right now...gettin old.
JThw8
UltimaDork
3/22/17 7:00 p.m.
Sorry for the lack of updates, things have obviously slowed down due to my return to work but also due to the fact that sometime last week I did something to my hand. I chalked the pain to up to gettin old and being stupid but by yesterday it was bad enough and my hand swollen enough that I actually gave in and went for xrays.
On the upside nothing broken, just a lot of aggravation of the soft tissue. Downside is I need to rest it a few days so progress has slowed. I did fiddle a bit to sort out some things I was still figuring out and I extended some wires to relocate some electrical bits that just didnt sit where I wanted them.
A lot of the "waiting on" parts arrived today so I'll be back on it soon.
java230
SuperDork
3/22/17 8:24 p.m.
Take your time to heal up. Pissing it off half healed doesnt end well...
JThw8
UltimaDork
3/22/17 9:24 p.m.
java230 wrote:
Take your time to heal up. Pissing it off half healed doesnt end well...
yeah, that's how I got to where I am now. I just kept workin with the bum paw. I injured it on wednesday but didnt think much of it. Doing light jobs and more of the "thinkin" bits to come up with better solutions to some problem areas.
For instance my new rear mount is made of thicker stock than what was there. Didnt really give it much thought till I reinstalled the clutch cable and it rubs on it. First try for a fix was to get a stock bowden tube so the cable would be routed lower, but the cable is thicker than stock so it doesnt fit in stock tube. Next I ordered a small pulley to mount on the bottom of the body mount so the cable has something to ride on, and I might still use that. But the more I think I might be able to just notch and fill the bottom of that mount as well. I'll have to see how much clearance it really needs.
Figured out how to mount my speedo, again after getting a bunch of different parts for alternate solutions. And still sorting wiring, mostly how to keep it neat and accessible more than anything else right now.
JThw8
UltimaDork
3/29/17 7:05 a.m.
Been busy with the day job and family but knocked out a few things. Finally got my seal to put the nosecone back on the trans and put the drivetrain back in again.
From the "nothing is easy" department: Got my new trimill muffler. I ordered from trimill because the header/stinger combo look just like a trimill. Nope...the mounting flange on the header is reversed from the trimill. So I carefully cut it off and spun it 180 degrees then welded it back up. Coated the header system with some high temp header paint since it was all just in "shipping black" The new muffler itself is ceramicoated.
Figured out my speedo mount and some other things that needed figuring. Body had to come back off to get the drivetrain lined up so while it's off I'll drill the rest of the holes for the gauges/idiot lights. I have to sit down and work on that section of the paint design before I finalize mounting as the graphics are all being designed to work with/around the lights and other cut ins.
So things are still moving along just slower now that Im back at work. I should have the weekend free to get things done though.
JThw8
UltimaDork
3/29/17 3:50 p.m.
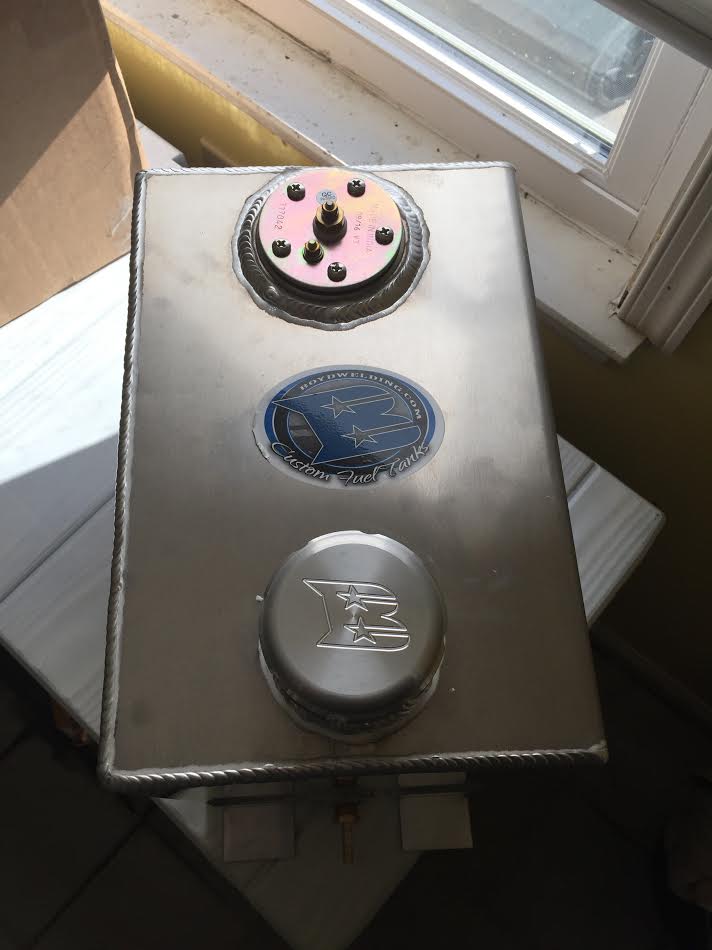
oooh, shiny things. Fuel tank arrived today, between that and a pile of other stuff that arrived this week I should have a very busy weekend.
JThw8
UltimaDork
3/29/17 6:04 p.m.
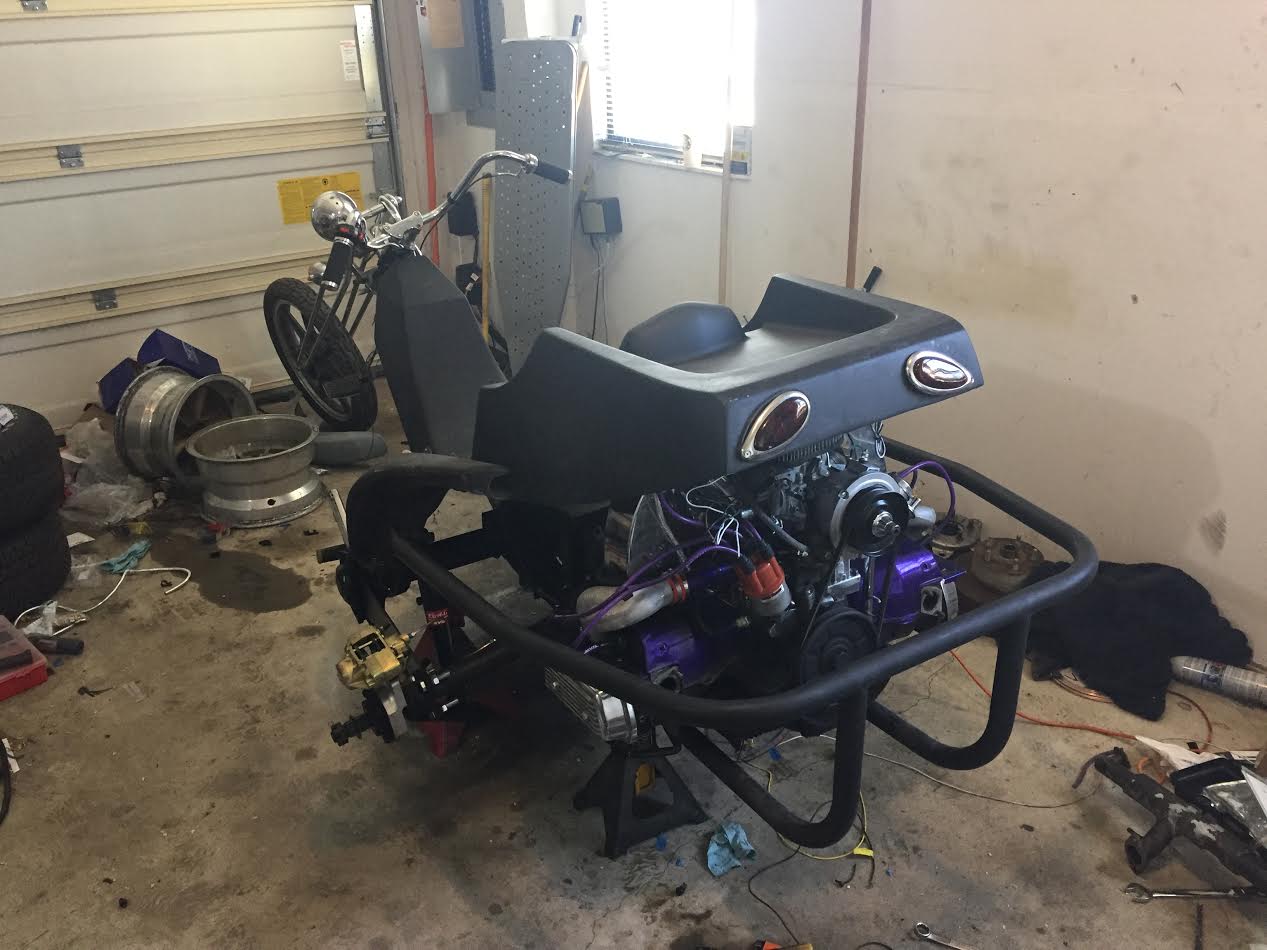
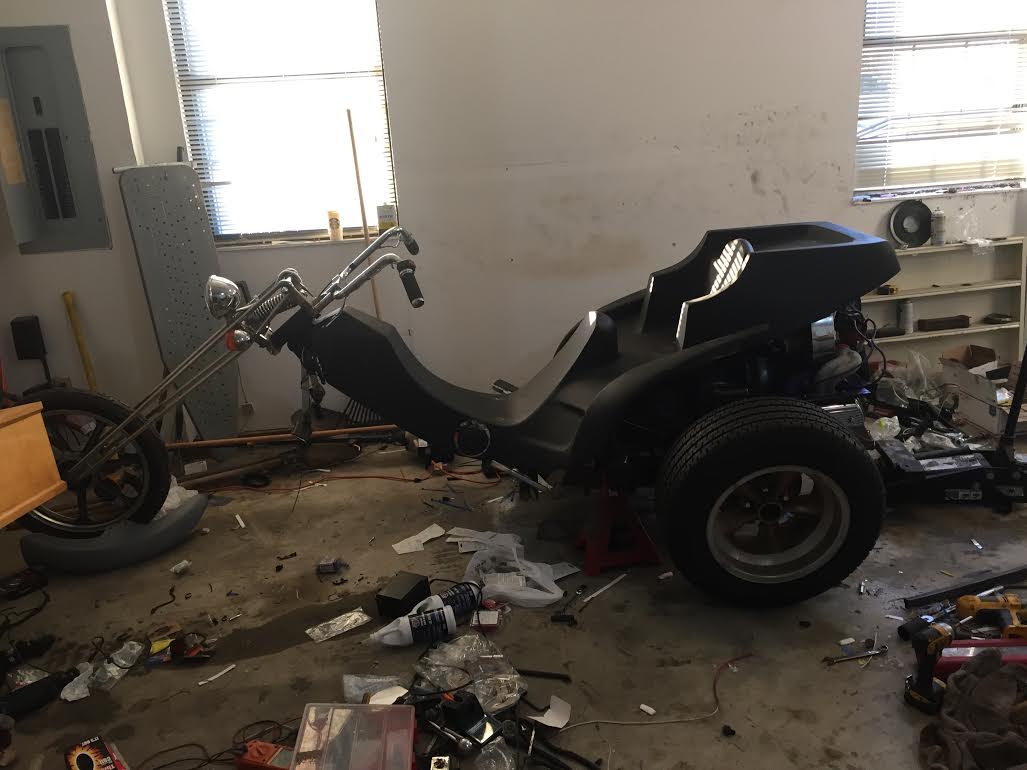
Ok so back to doing a little Trike work.
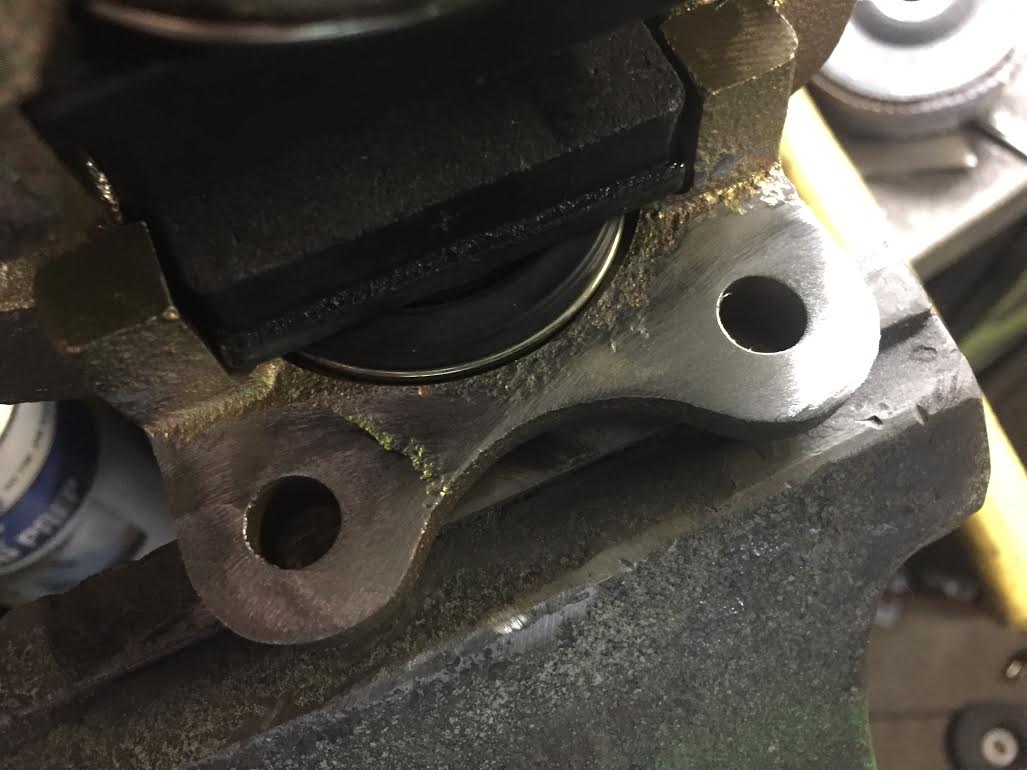
I was concerned (turns out correctly) that the thicker aluminum caliper mounts would be an issue. It used to be the calipers came with washers to shim them out against the thinner stamped steel mounts. But since those are all you can get these days it seems they are casting the calipers thicker so the washers aren't needed.....so..
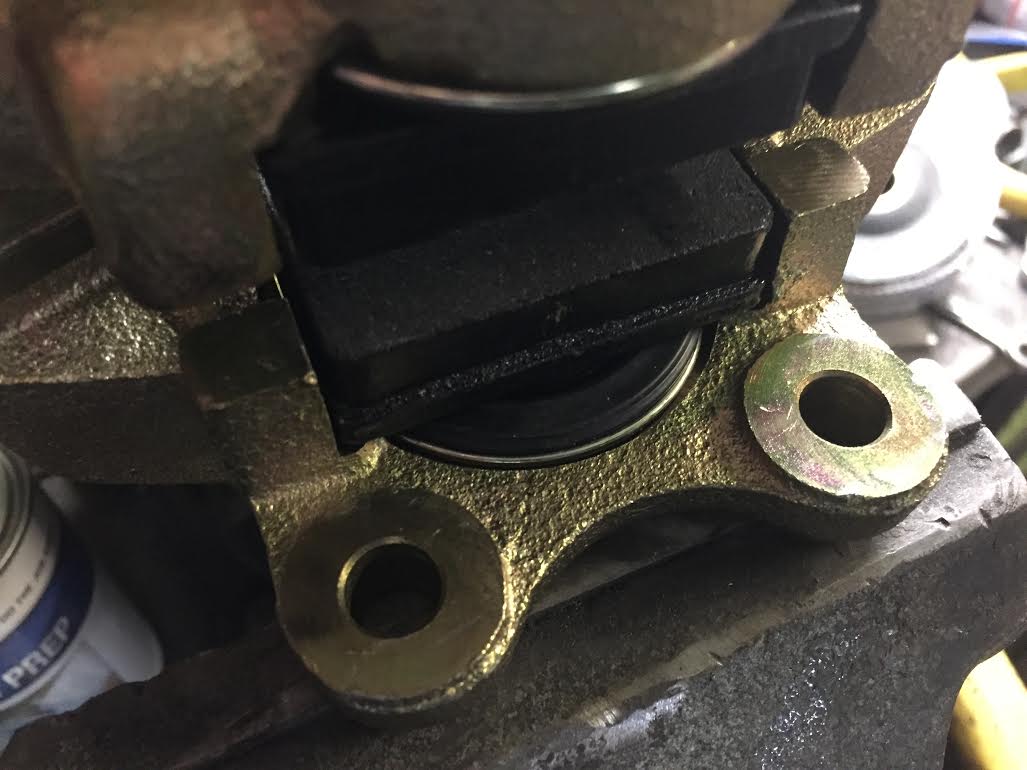
A little grinder lovin, driver side was pretty straight forward but the passenger was way off requiring some light clearancing of the mount as well. All is good now though
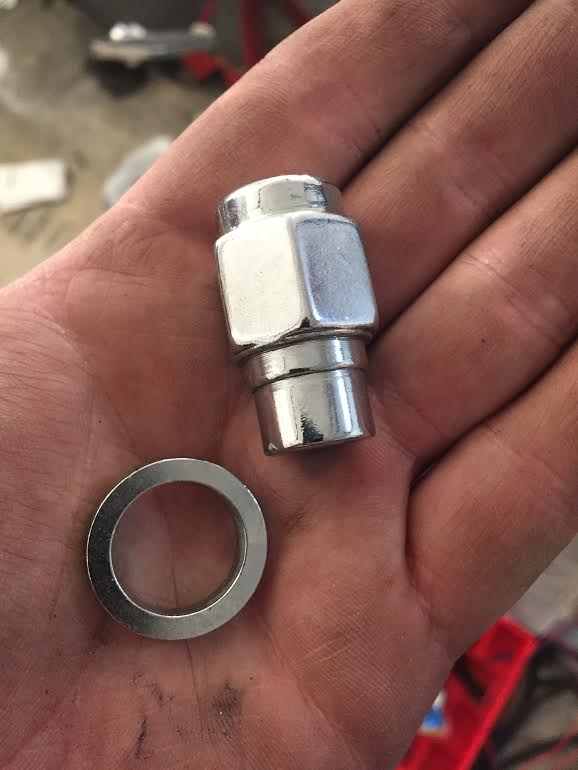
Another conundrum. These wheels are original American Racing Torque Thrust T70s (not torque thrust D's) which used a special lug nut and washer. You can find ones that look right at the local flaps since the same style was common on Cragars as well. But the ARE's have a smaller hole diameter and the lugs have typically been hard to come by. Internet has simplified that though and there's a guy on ebay that is now selling the correct ones.
So the wheels are on. So much better than what was there. Same tires as before but they just look bigger on these wheels. Yes I have the correct center caps but I've set them aside until the wheels get painted.

'scuse my mess, a little picture of where it's heading.
JThw8
UltimaDork
3/30/17 7:15 p.m.
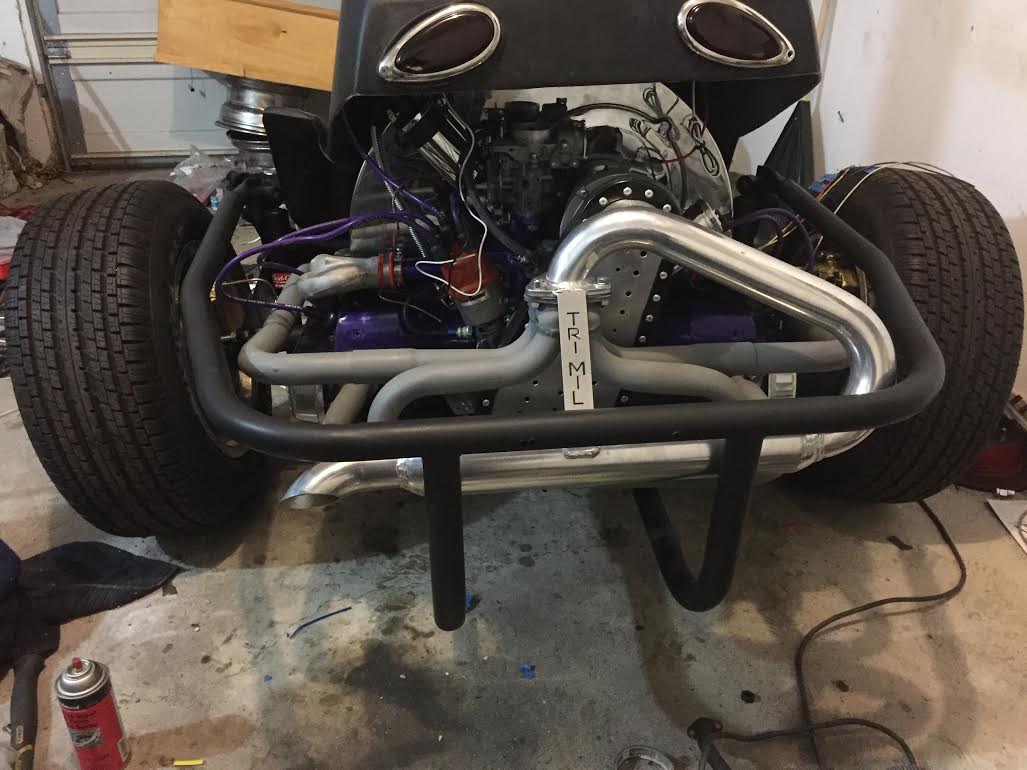
Exhaust is finally finished. With apologies to the PO I liked the stinger he had put on it but I also like my neighbors and not being hassled by the local authorities so I converted it to a glasspack. The headers looked like they would work with a tri-mill exhaust but it ended up requiring a bit of modification to actually get it all to work together. The cage barely makes it back on now, lower mounts are fine but top mounts are just barely engaged. I'll be making some tabs to bolt the tops together so it should all be fine in the end.
java230
SuperDork
3/31/17 9:46 a.m.
Looking good, its still gonna be loud 
I really like that the riding position and wheelie-prone nature of this thing combine to create a possible scenario where, if you get the front end up enough, it could accelerate while the rider is upside down and moving through the air ass-first.
¯\_(ツ)_/¯ wrote:
I really like that the riding position and wheelie-prone nature of this thing combine to create a possible scenario where, if you get the front end up enough, it could accelerate while the rider is upside down and moving through the air ass-first.
Otherwise known as "design intent"
JThw8
UltimaDork
3/31/17 5:34 p.m.
In theory I have wheelie bars for it....but what's the fun in that. Actually rider sits well forward of the center of gravity and Im a fat ass so it should be ok unless I'm trying to do wheelies 
JThw8
UltimaDork
3/31/17 5:35 p.m.
java230 wrote:
Looking good, its still gonna be loud
Yes, I debated going with the full quiet exhaust but what's the fun in that, but I've also heard a fully unbaffled singer at full rev and its not very pleasant to those around you. Plus these motors kinda need a little backpressure or they burn valves.
JThw8
UltimaDork
4/1/17 11:26 a.m.
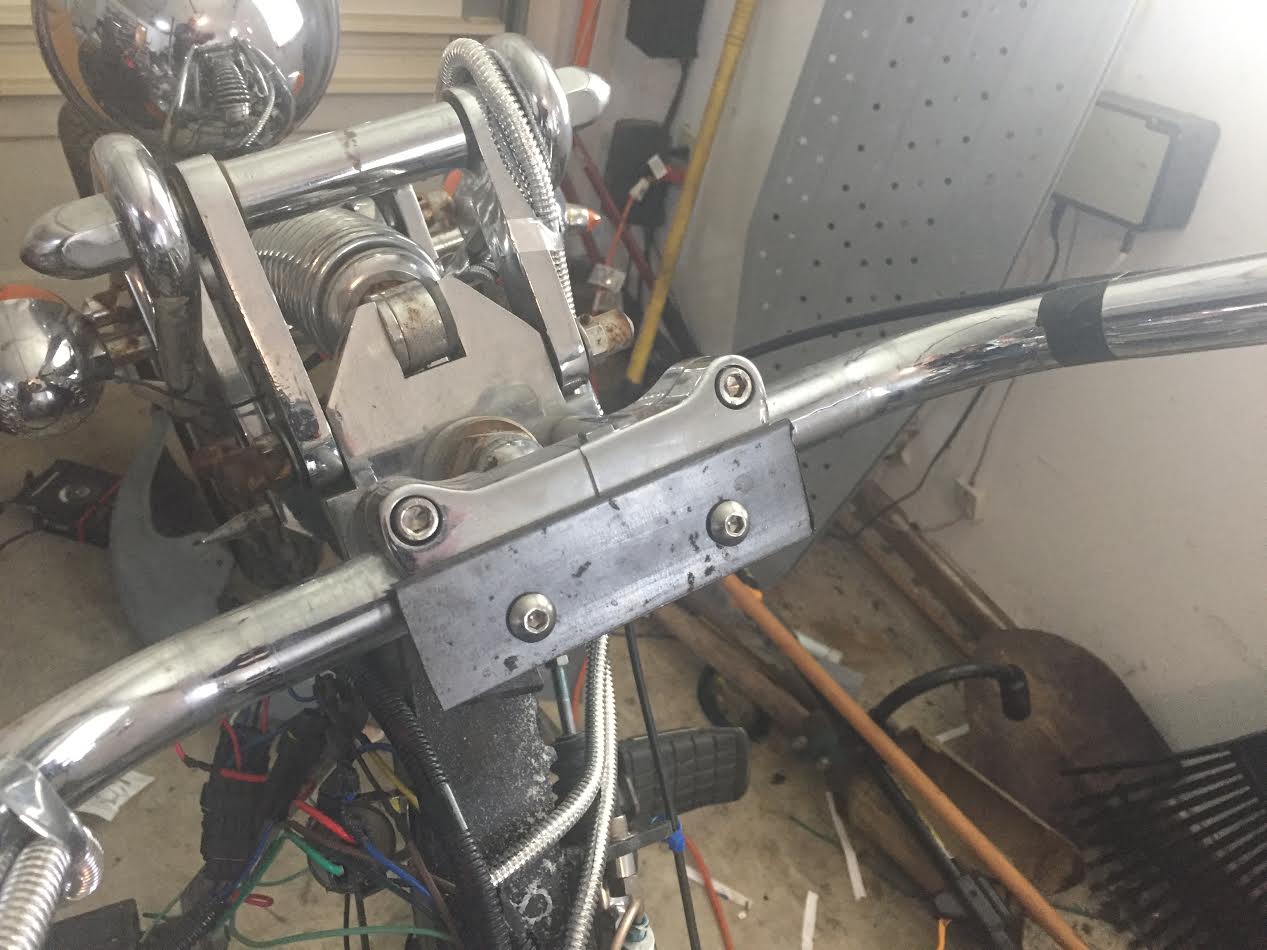
Fabrication day. I get to make things. On the agenda, fuel tank mount, battery mount, tail light mounts (for additional lights) and a speedometer mount. Lets start with the speedo. I must have come up with a dozen ways to mount this thing, but in the end none of those required enough effort so I made it hard on myself
Started by drilling a piece of flat stock and mounting it to the handlebar clamp.
Marked it out to match the shape.
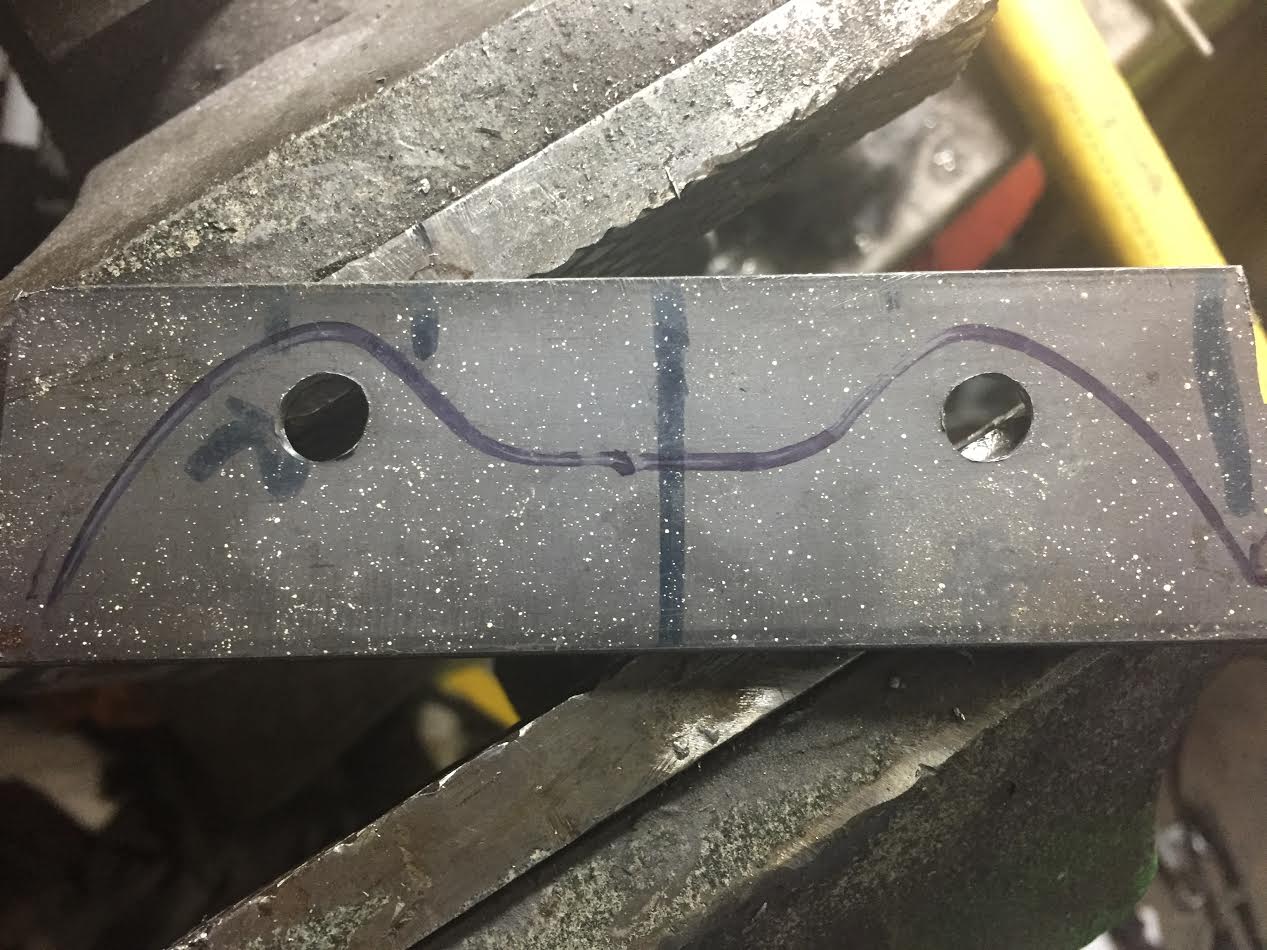
rough cut with sawzall
finish with grinder
Weld the mount for the mounting cup to this piece and there a bolt on speedometer mount.
java230
SuperDork
4/1/17 12:46 p.m.
Good to see your back at it! How's the hand doing?
JThw8
UltimaDork
4/1/17 2:31 p.m.
java230 wrote:
Good to see your back at it! How's the hand doing?
Still sore from time to time, trying to go easy on it.
JThw8
UltimaDork
4/1/17 2:40 p.m.
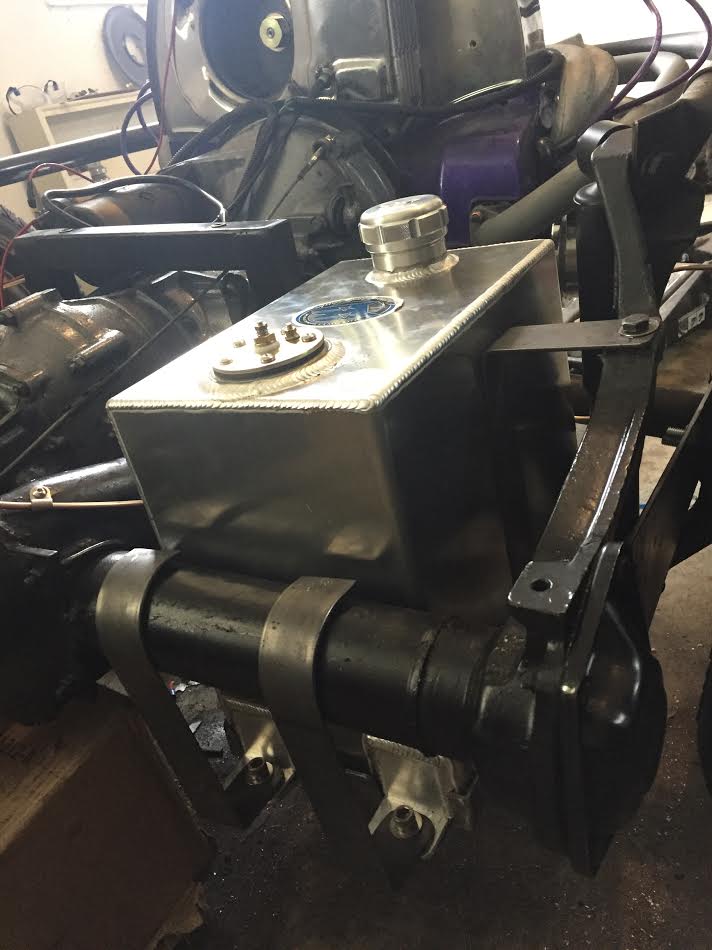
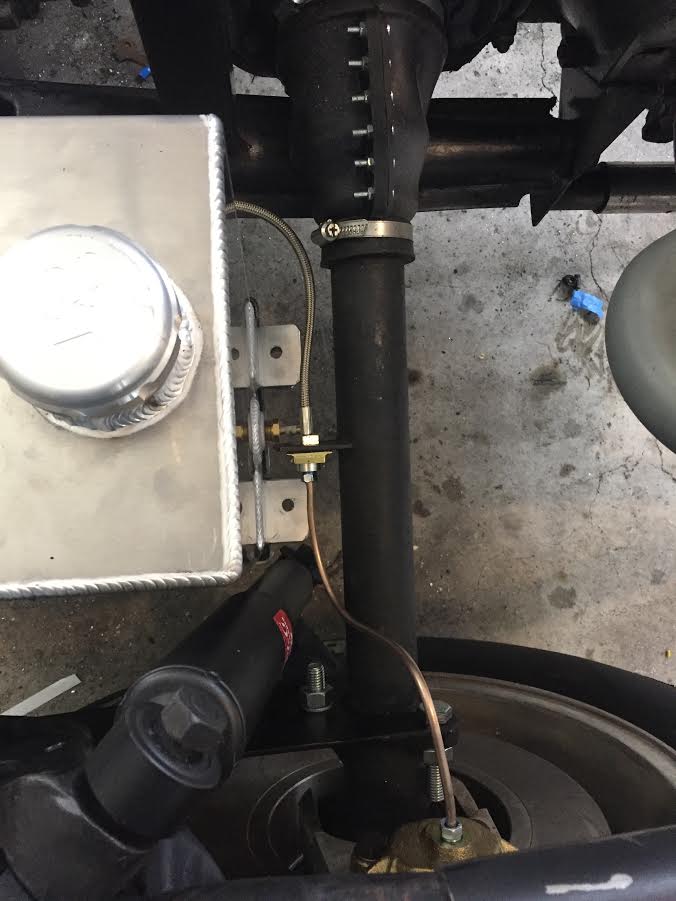
Well the fuel tank mounting has taken longer than expected but I'm quite happy with the result. Now I get to do it all over again for the battery. Battery is smaller so the clearances aren't as bad but I'm tempted to make an identical mount so if I decide to add a 2nd tank I know it will fit. A lot more work though than what I need to do for the battery mount. Might hold off for awhile.
Started with some angle stock, cut notches to make corners.
bent it all around then weld it up.
cut for the tabs and folded the sides down to make corresponding tabs.
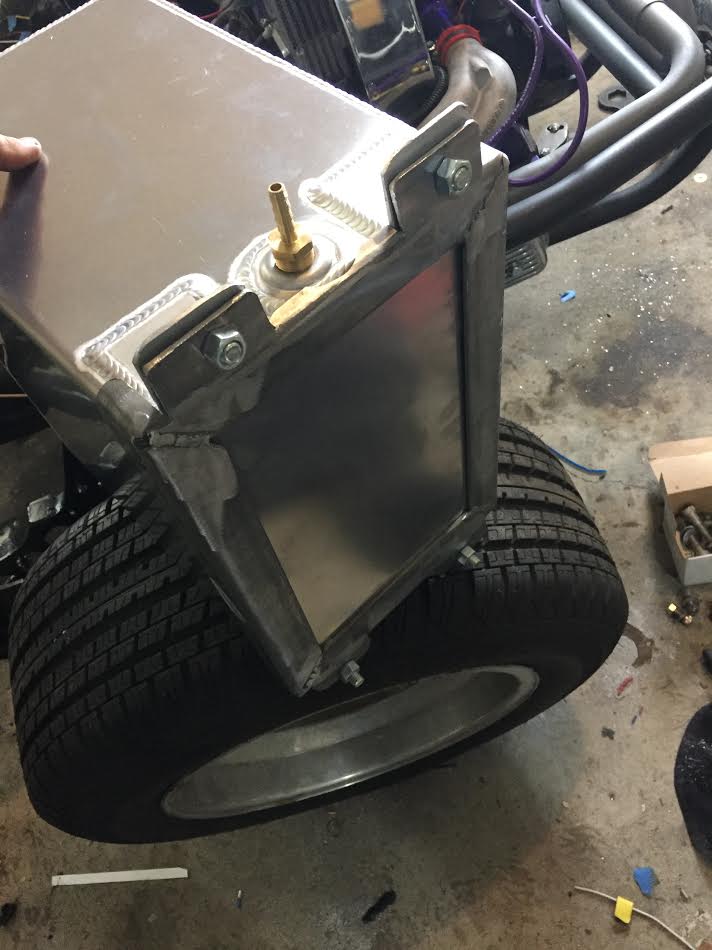
made mounting straps, the front ones will get welded to the torsion housing but are bolted on at the bottom so everything is still removable. But clearances are so tight I can't remove the mount and the tank together, they have to be separated.
How tight you ask? That tight. When I pull it back out Im going to trim that tab back by about a half inch to make a little more breathing room.
JThw8
UltimaDork
4/1/17 3:54 p.m.
Finished up the battery mount, no photos, I just replicated the old one but made it a bit larger to accommodate the battery I had which was too big (sure I could have just gotten a new battery I guess) and the original had a fair bit of corrosion so something new and solid is good.
JThw8
UltimaDork
4/5/17 7:29 p.m.
Sorry for the lack of updates, been busy and just knocking out little things at night when I can.
Finished the speedometer mount and got that installed with the speedo.
Finally dragged the MIG over to the other shop so I could do the welding that had to happen on the trike.
Welded in the fuel tank mounts and got that painted up.
Welded tabs on the rear cage so it can be bolted on.
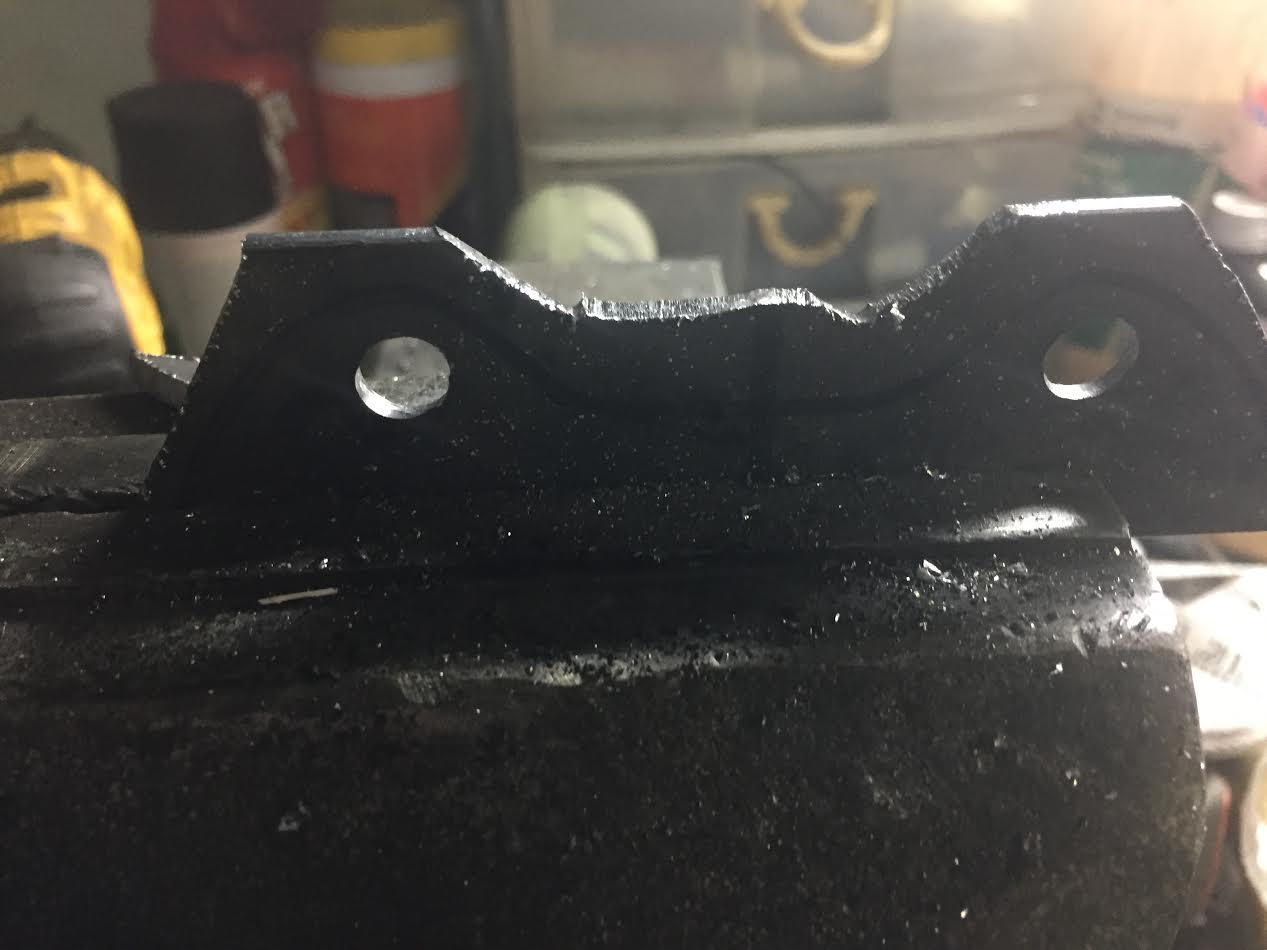
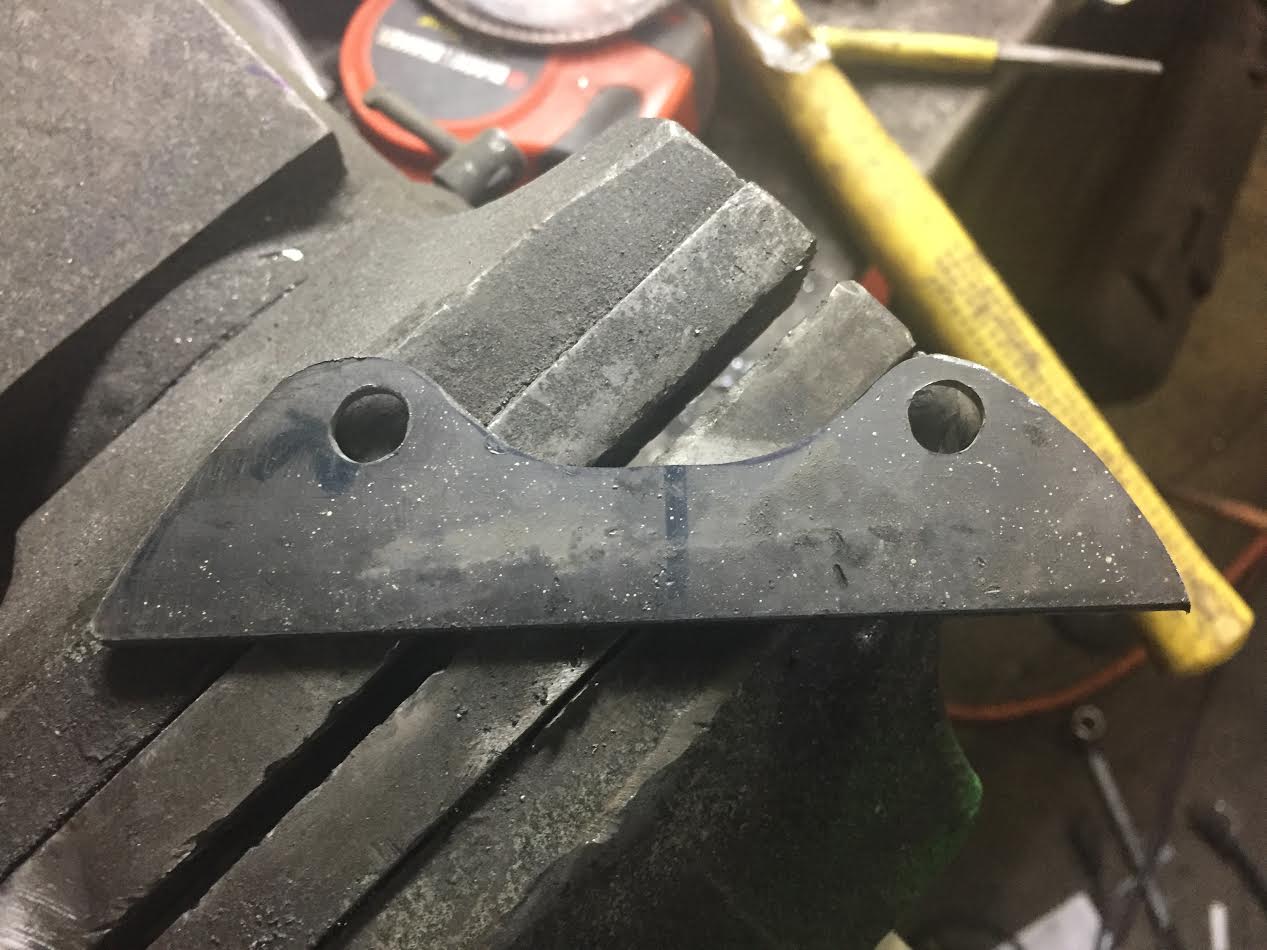
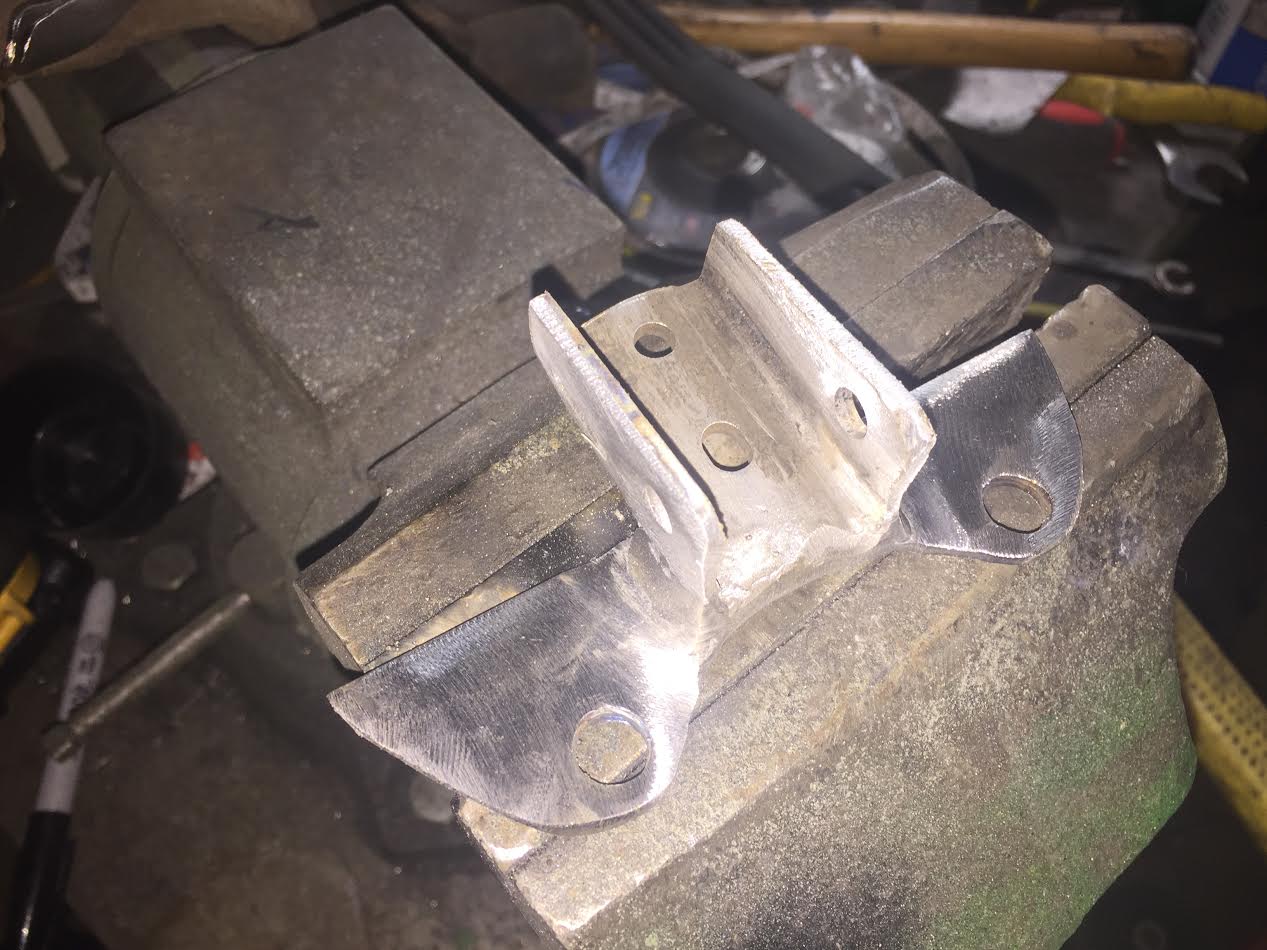
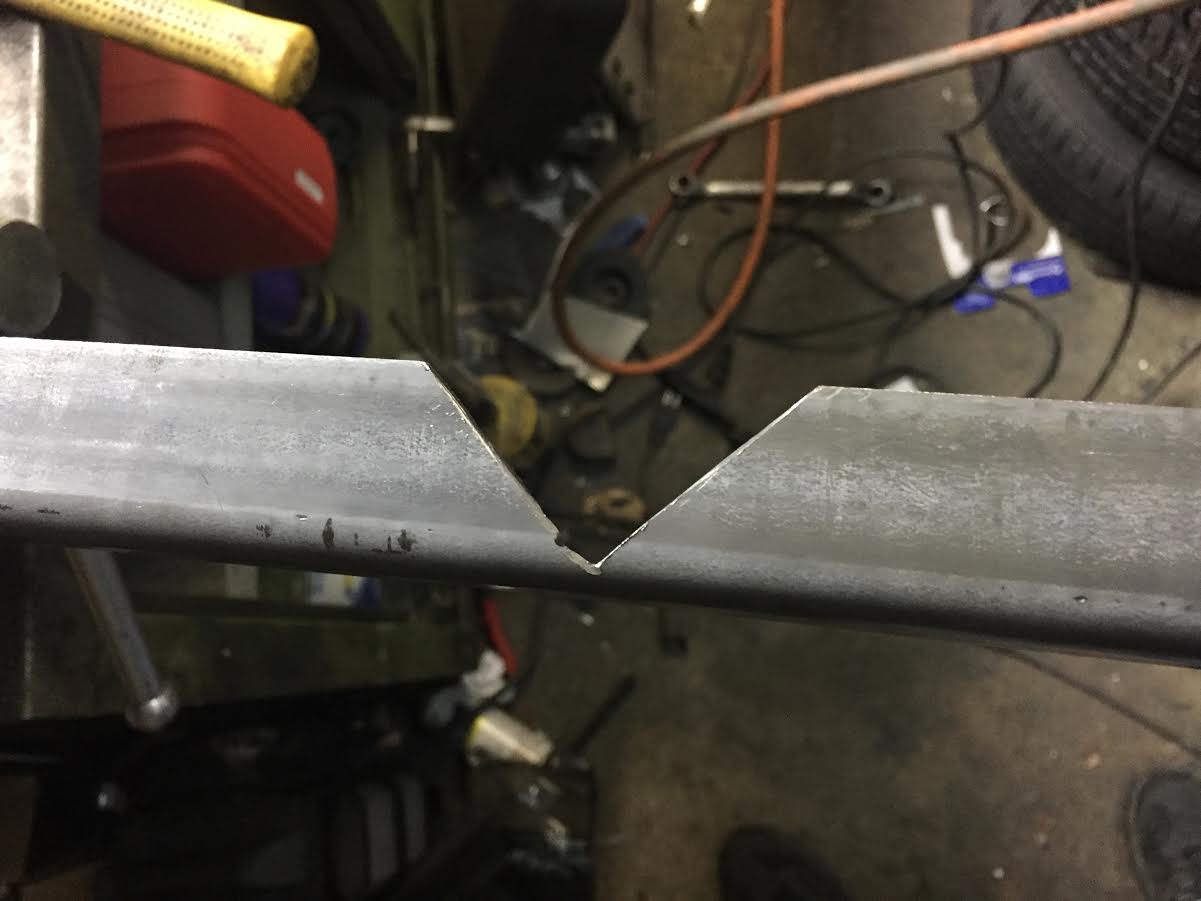
Welded up a crack in the shifter mount.
And removed the whole exhaust again because on of the studs broke so I had to drill and tap it for a new stud.
Not very exciting stuff but very necessary stuff.
So really its just drill a few holes for the fuel gauge and idiot lights then mount the body and wire in the tail lights and it should be ride able.
I'd tell y'all it was gonna happen this weekend but the kid broke the smart and is limping it up here Saturday for a repair session so it might not be quite that soon.
I could never build that battery mount like you did - my OCD would make me cut & bend all-4 corners, then weld it together in the middle of a side. 


