1 2 3
Southrnfresh_Joe
Southrnfresh_Joe
6/13/21 9:26 p.m.

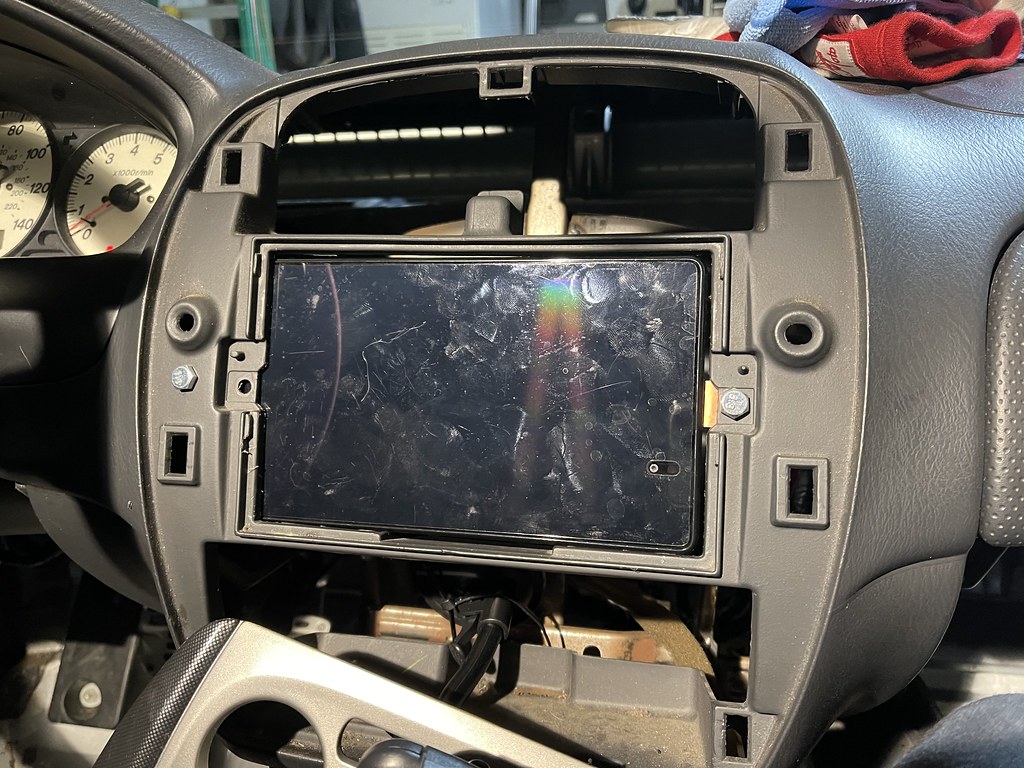
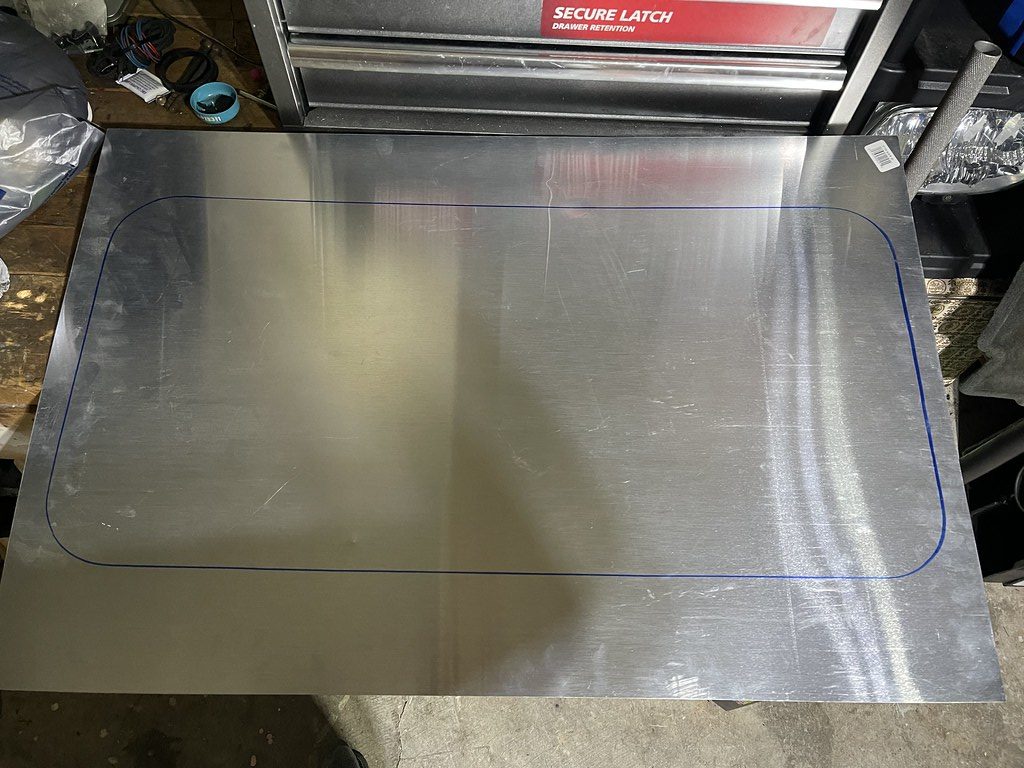
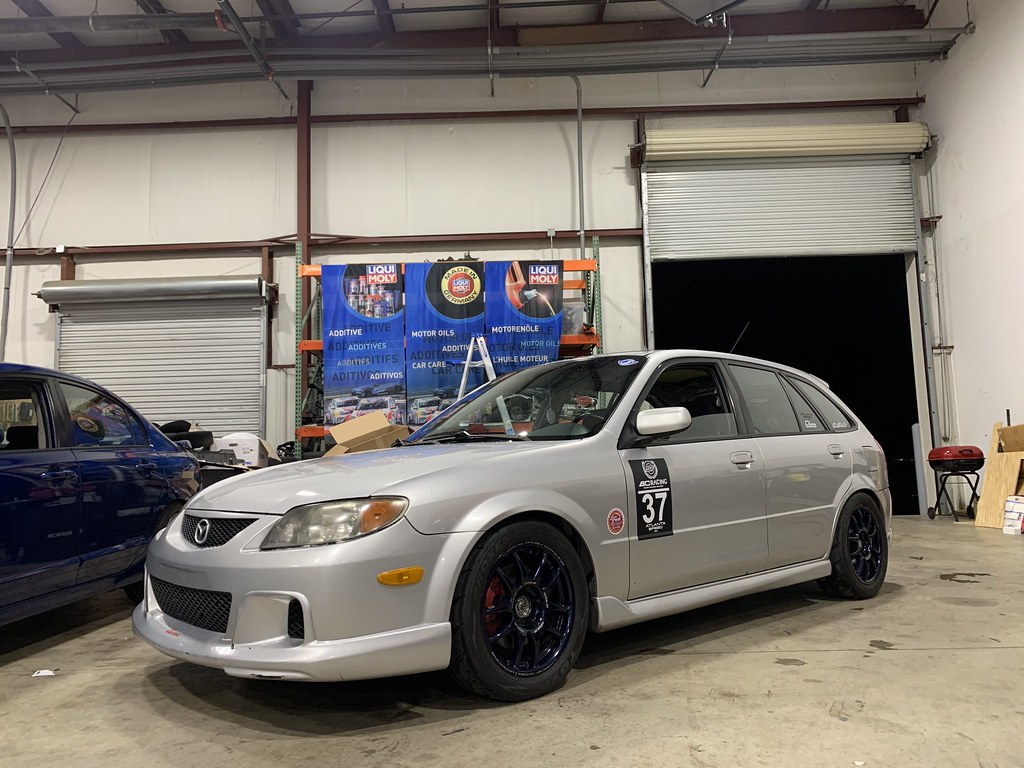
Well over the last month I have been working on something to get more involved into motor sports, and  being able to go on a track and mimic what I have been doing in video games for many years.


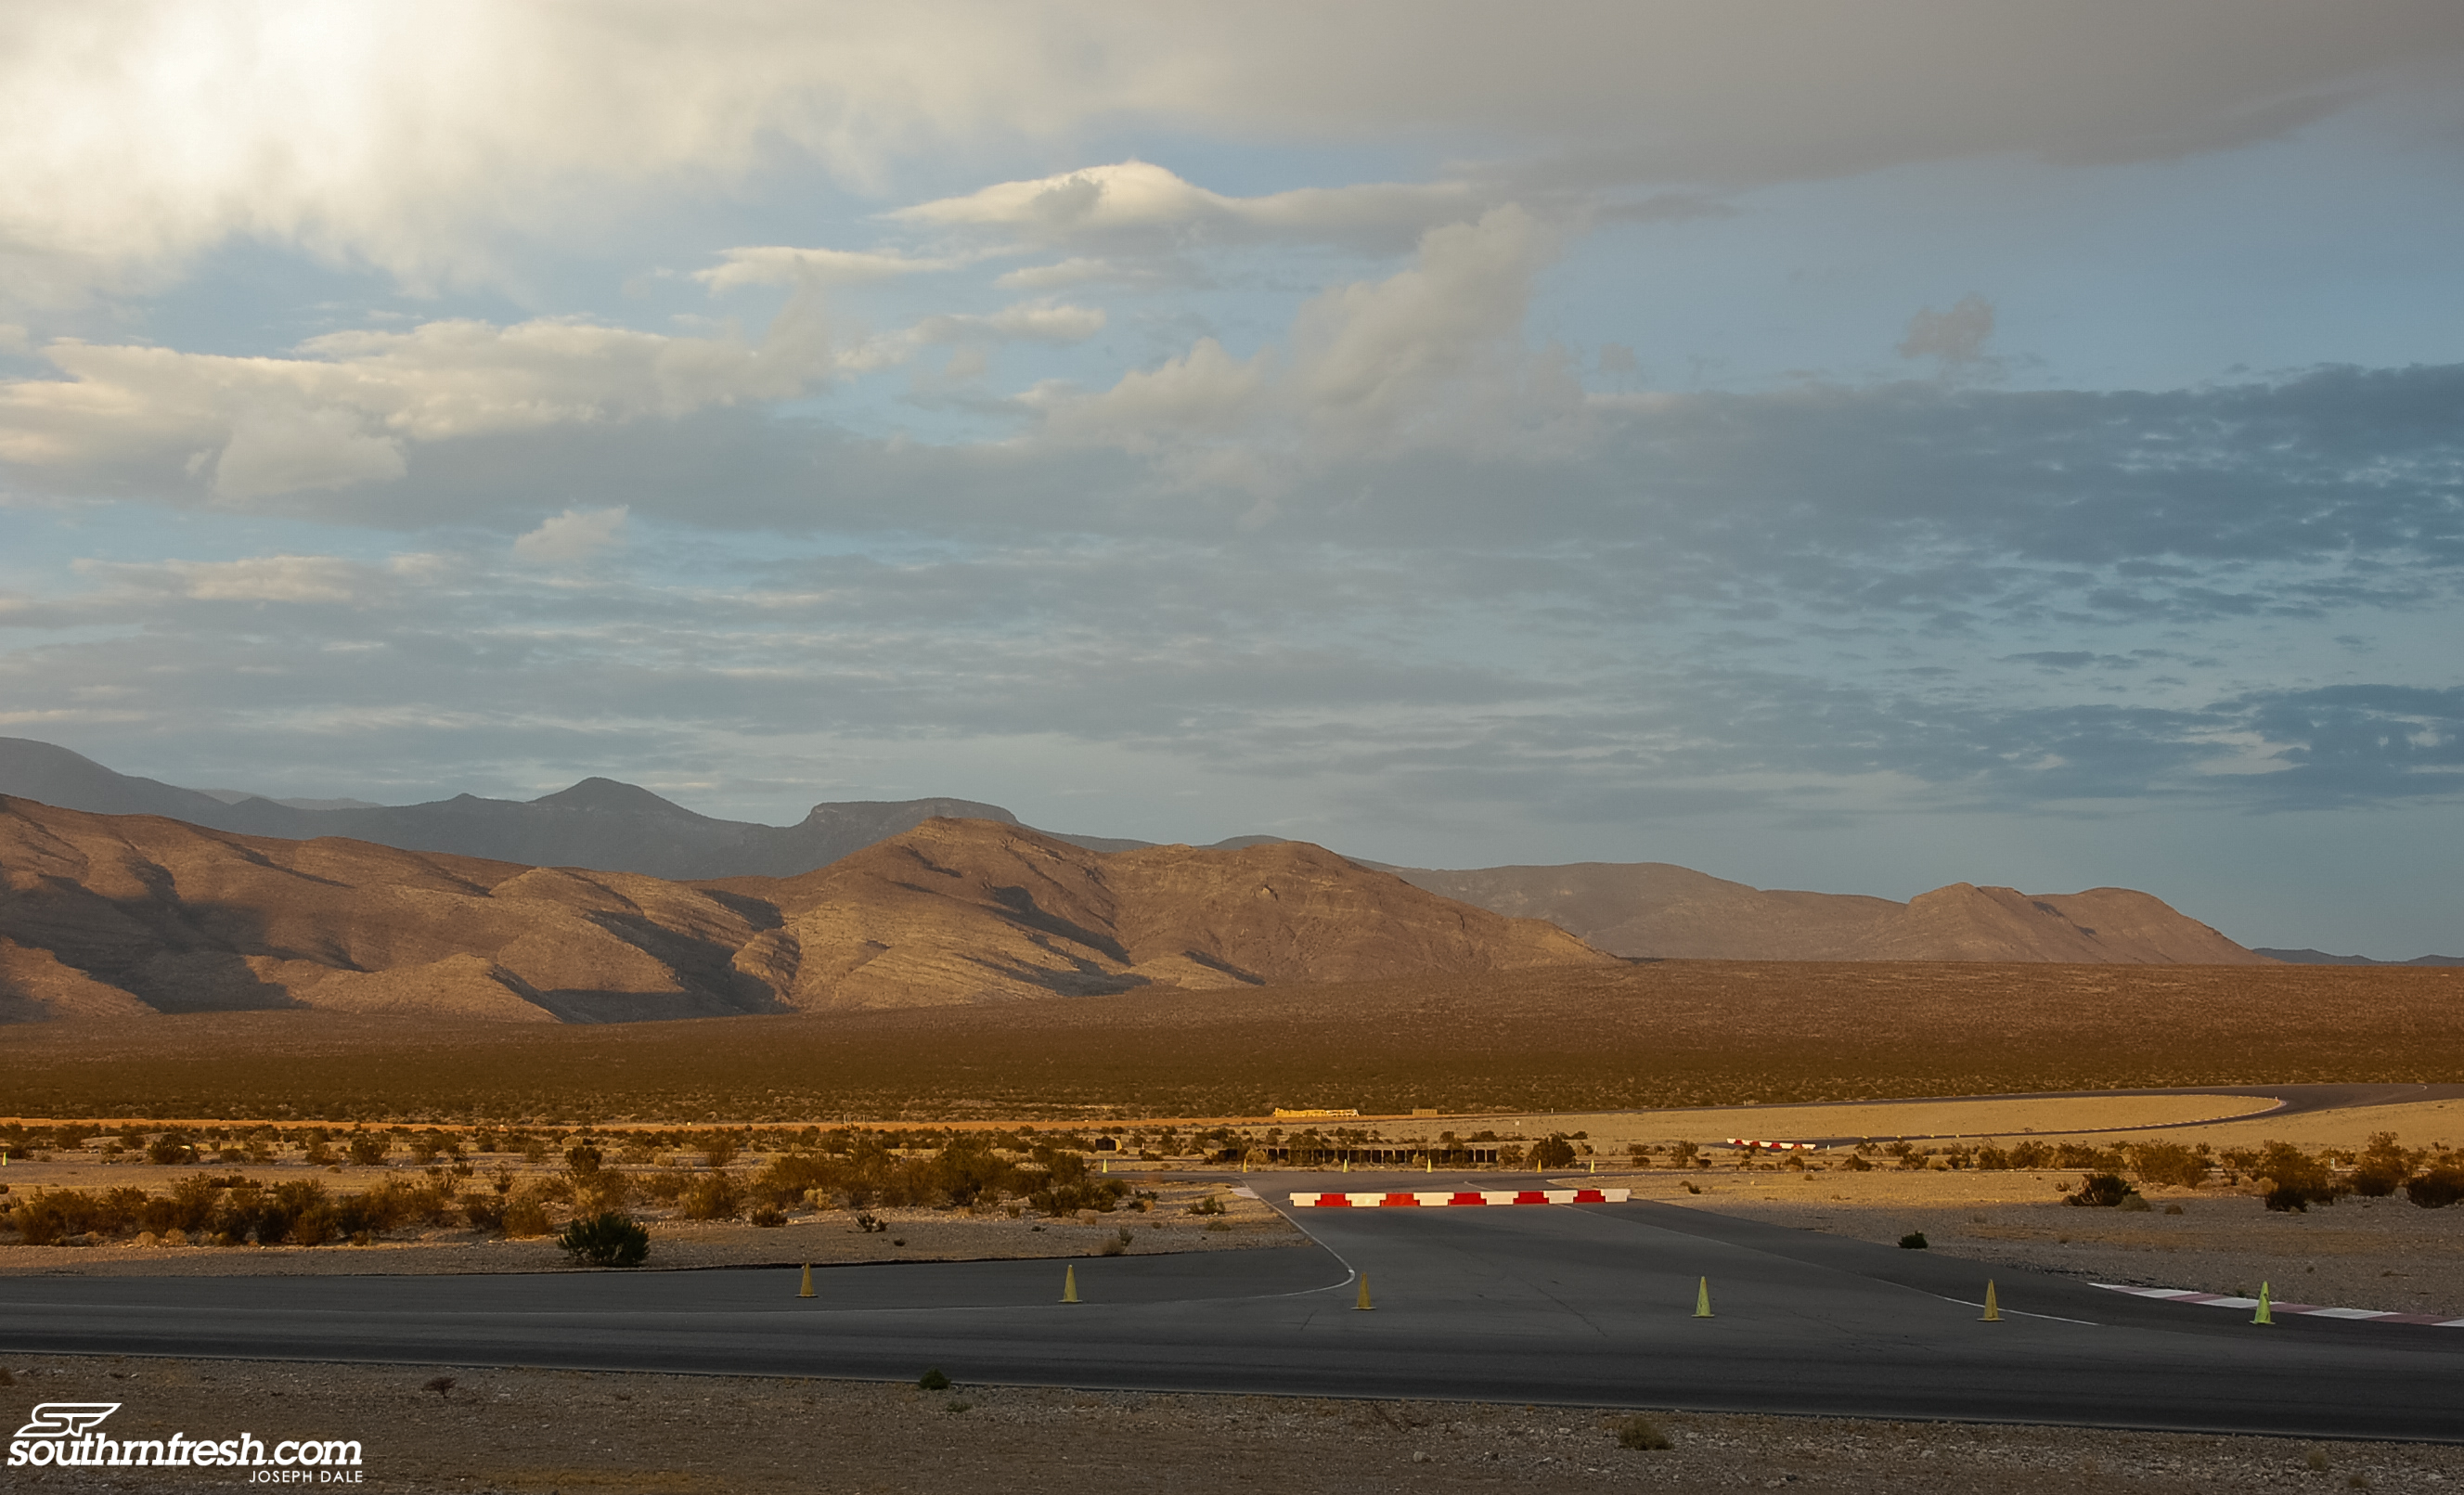
Earlier this year, I won a contest at work and was able to attended the Ron Fellows Performance Driving School in Nevada.  It was held at Spring Mountain Raceway, a track that Michelin and GM use for testing and they also host club races throughout the year.  The backdrop was stunning, and being my first time in Nevada I was overwhelmed by it all, and did not get nearly as many photos as I should have gotten.


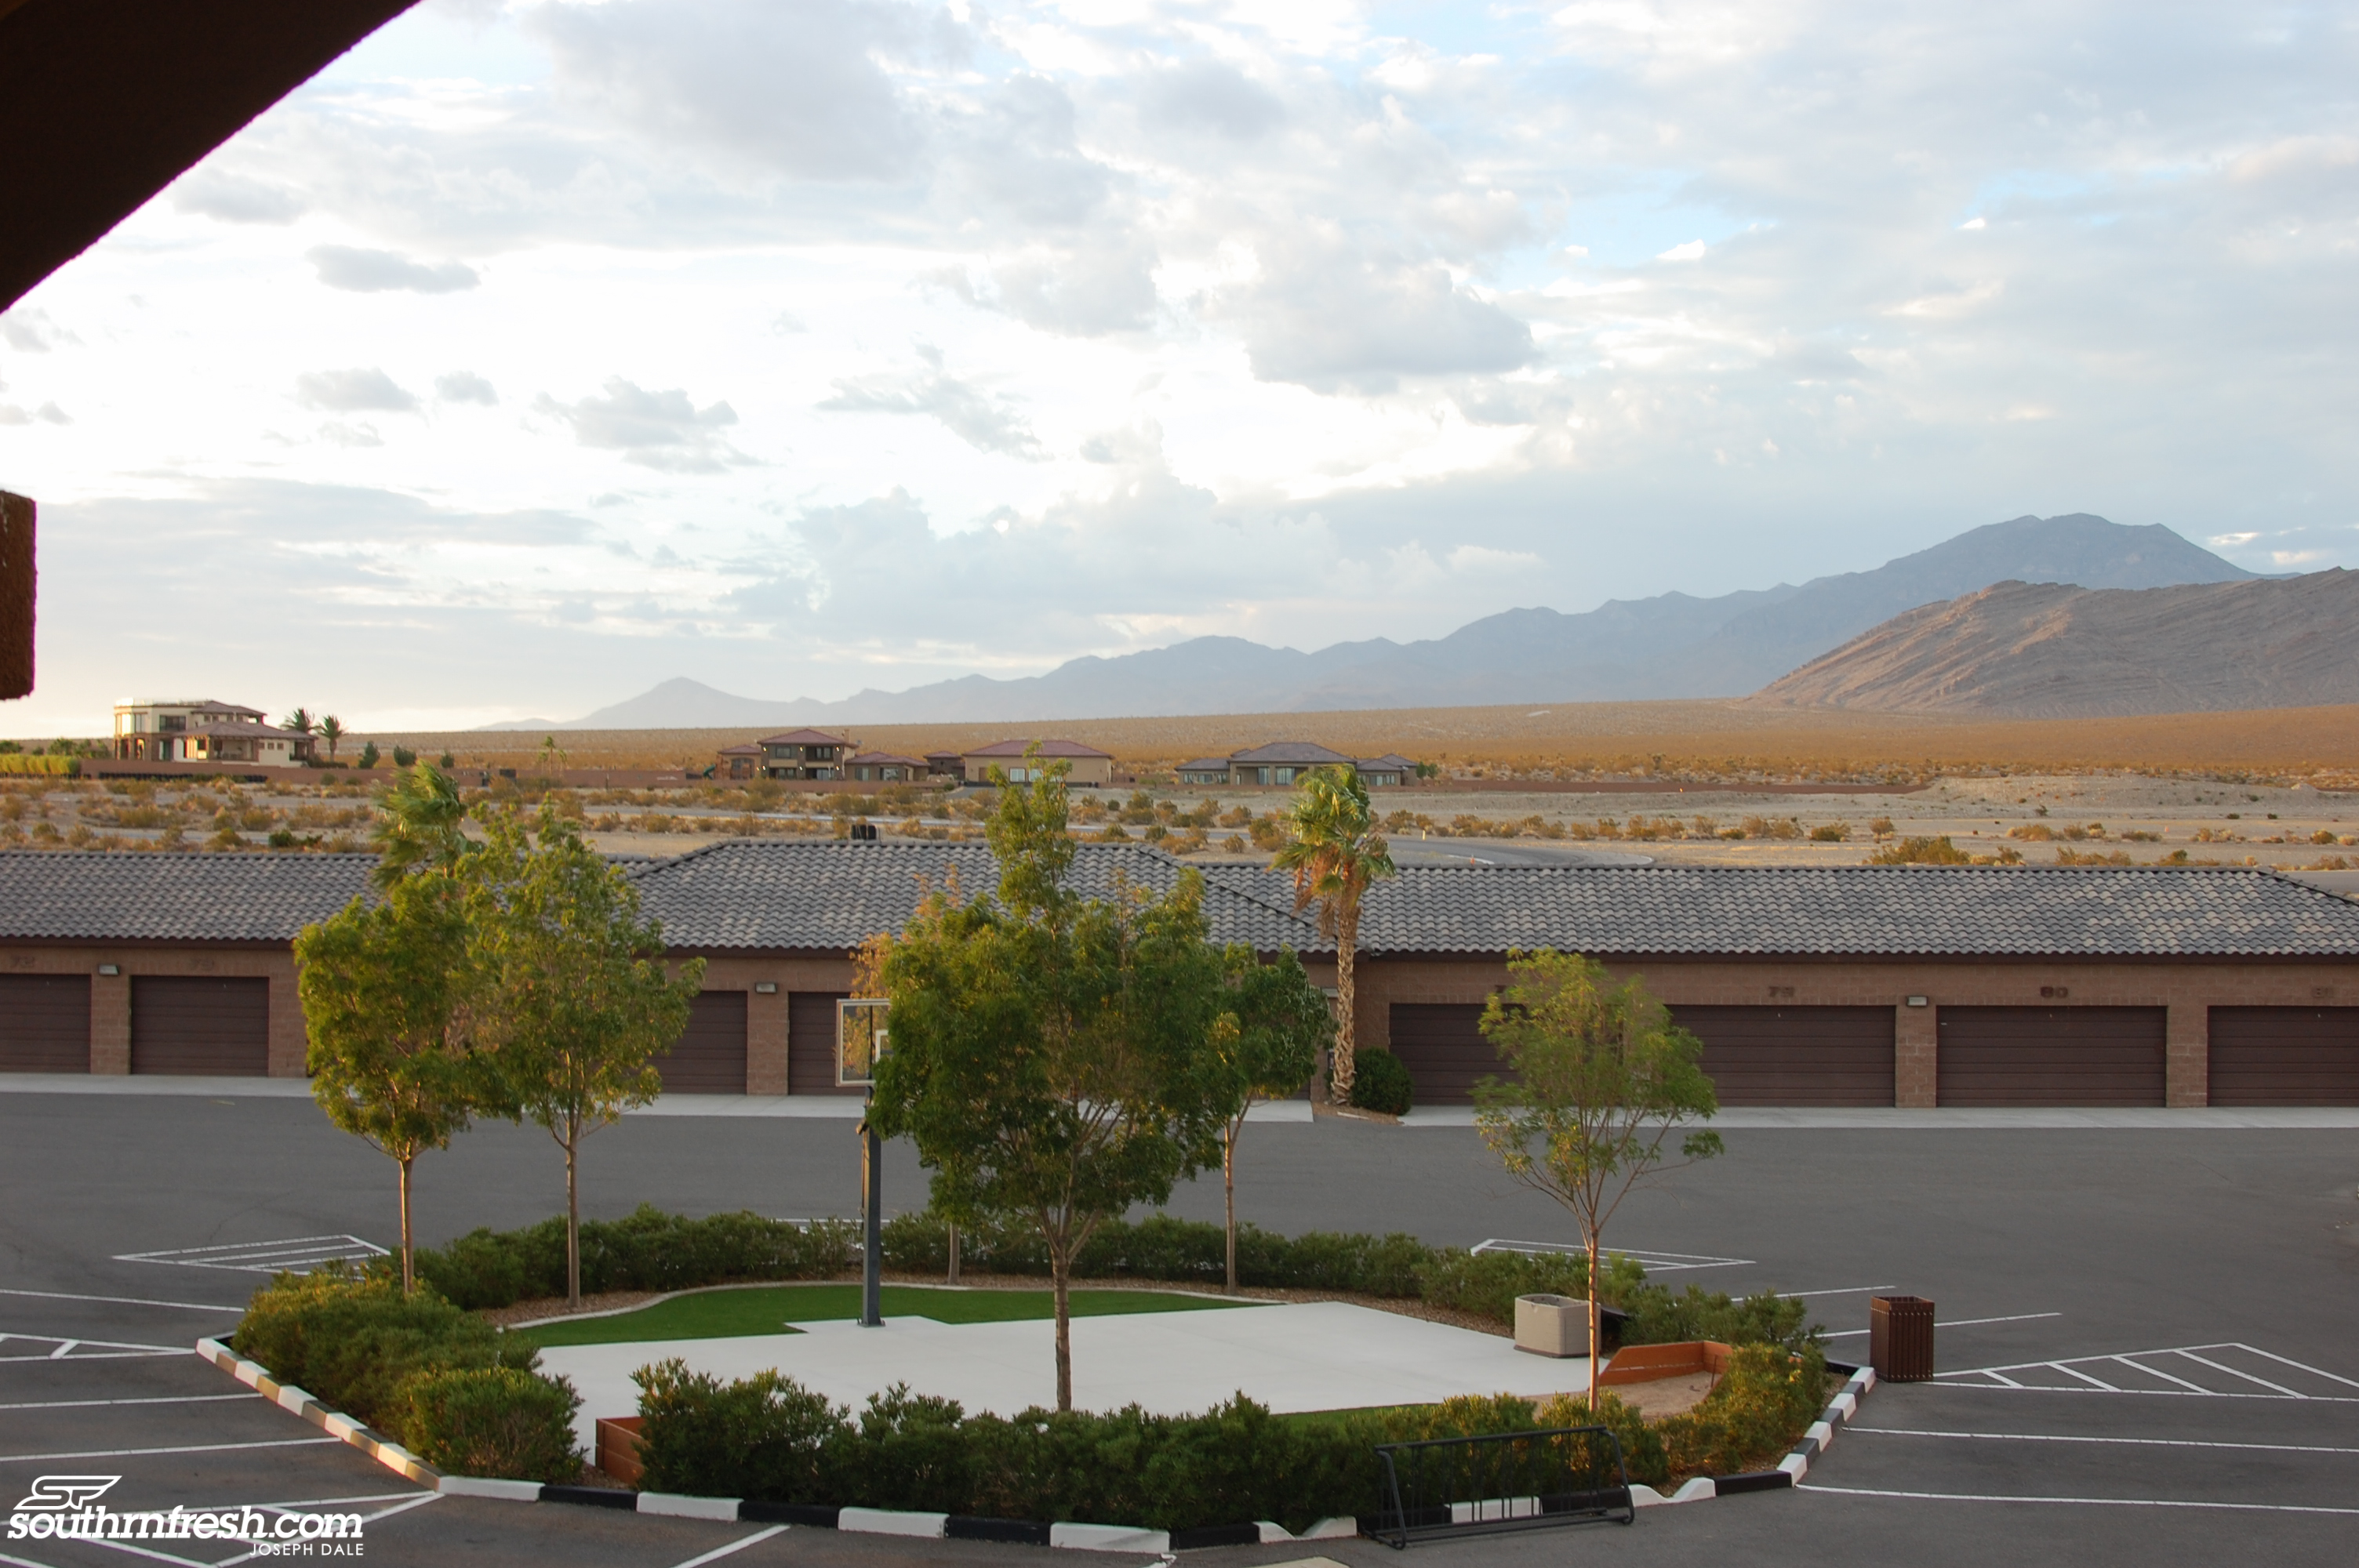
The venue was set up like a resort, they had garages for club members, and a huge hotel on site for guests.  If you look in the back ground you can see the owners house's.  
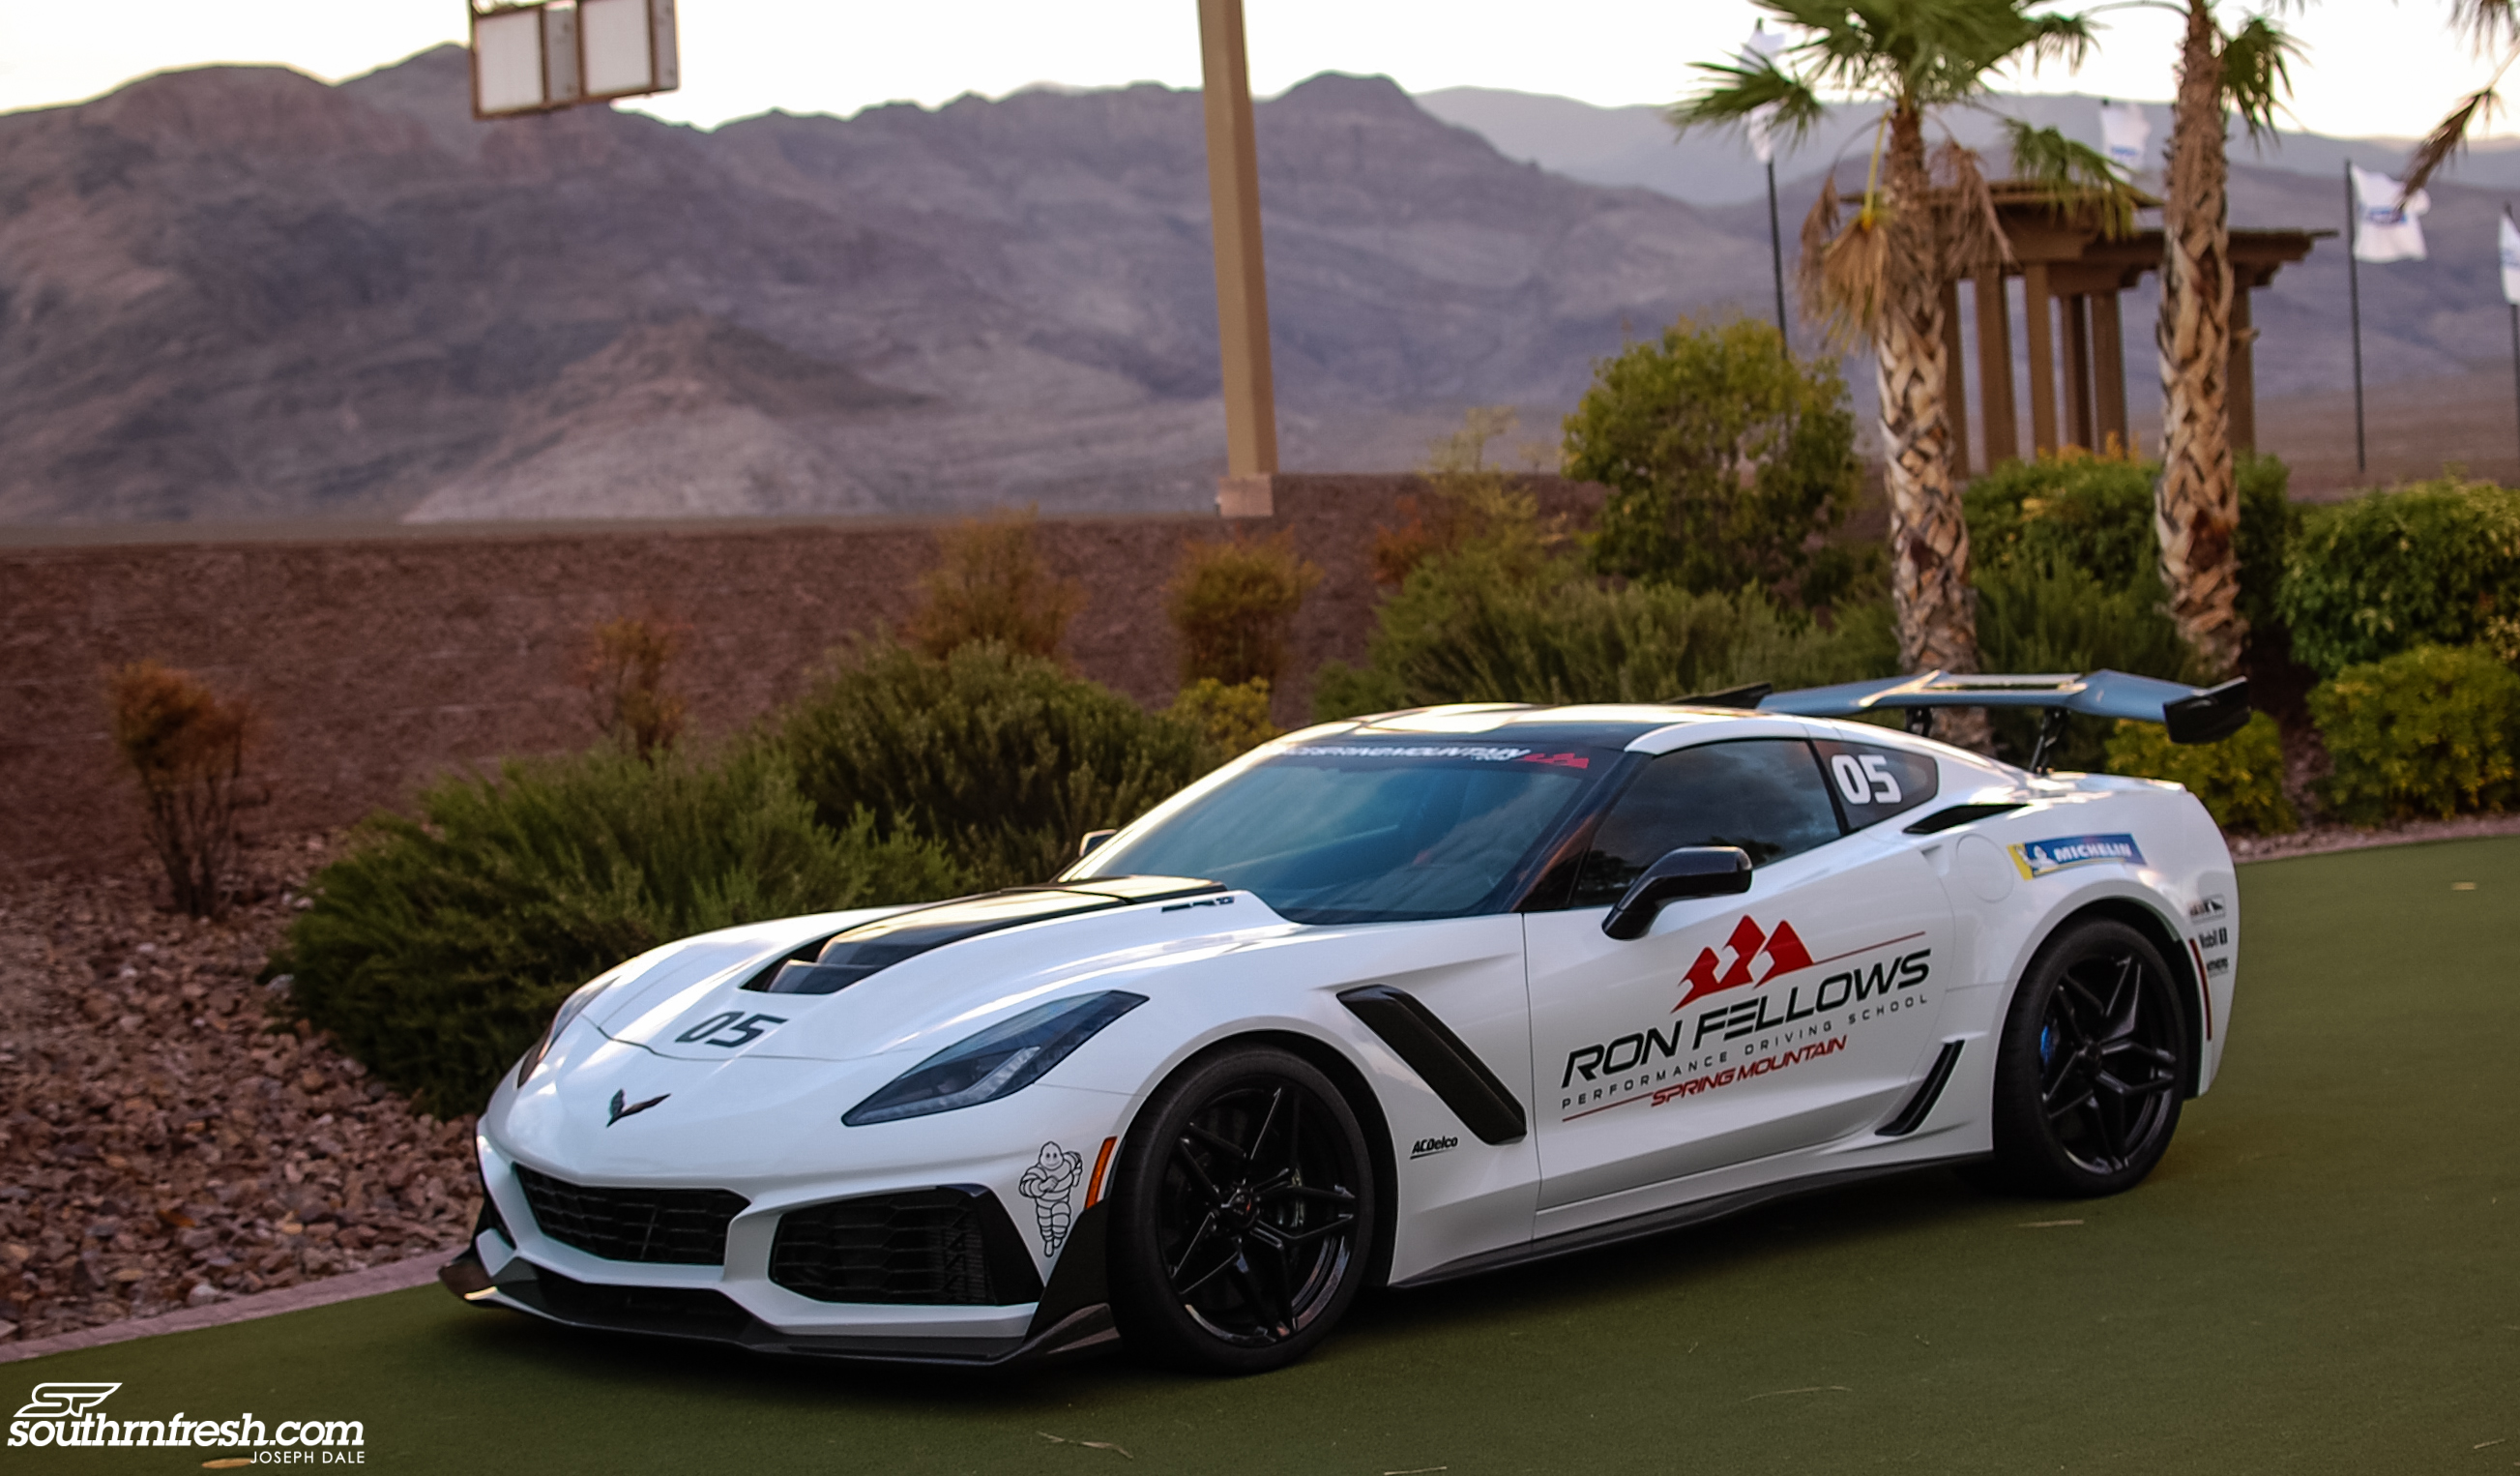
I learned so much at the event it was unreal.  Simple things like looking where your going and not in front of you, and holding the steering was key.  And once we were able to put the skills to the test it all made sense.   We drove stock C7 stingrays on track for one full day and  I ended up winning 3rd place overall in the Auto X contest between all the attendees.  Going back home and driving was so different after being able to thrash around a corvette all weekend.  Back in September I attended a track day for the first time in my own vehicle at Little Talladega in my Jetta.  It was a last minute thing, and the track day was hosted by my good friend George (@nemesis5.0).  It was a Mustang track day, but he had a few spots open for me to bring my Jetta out for the day.  
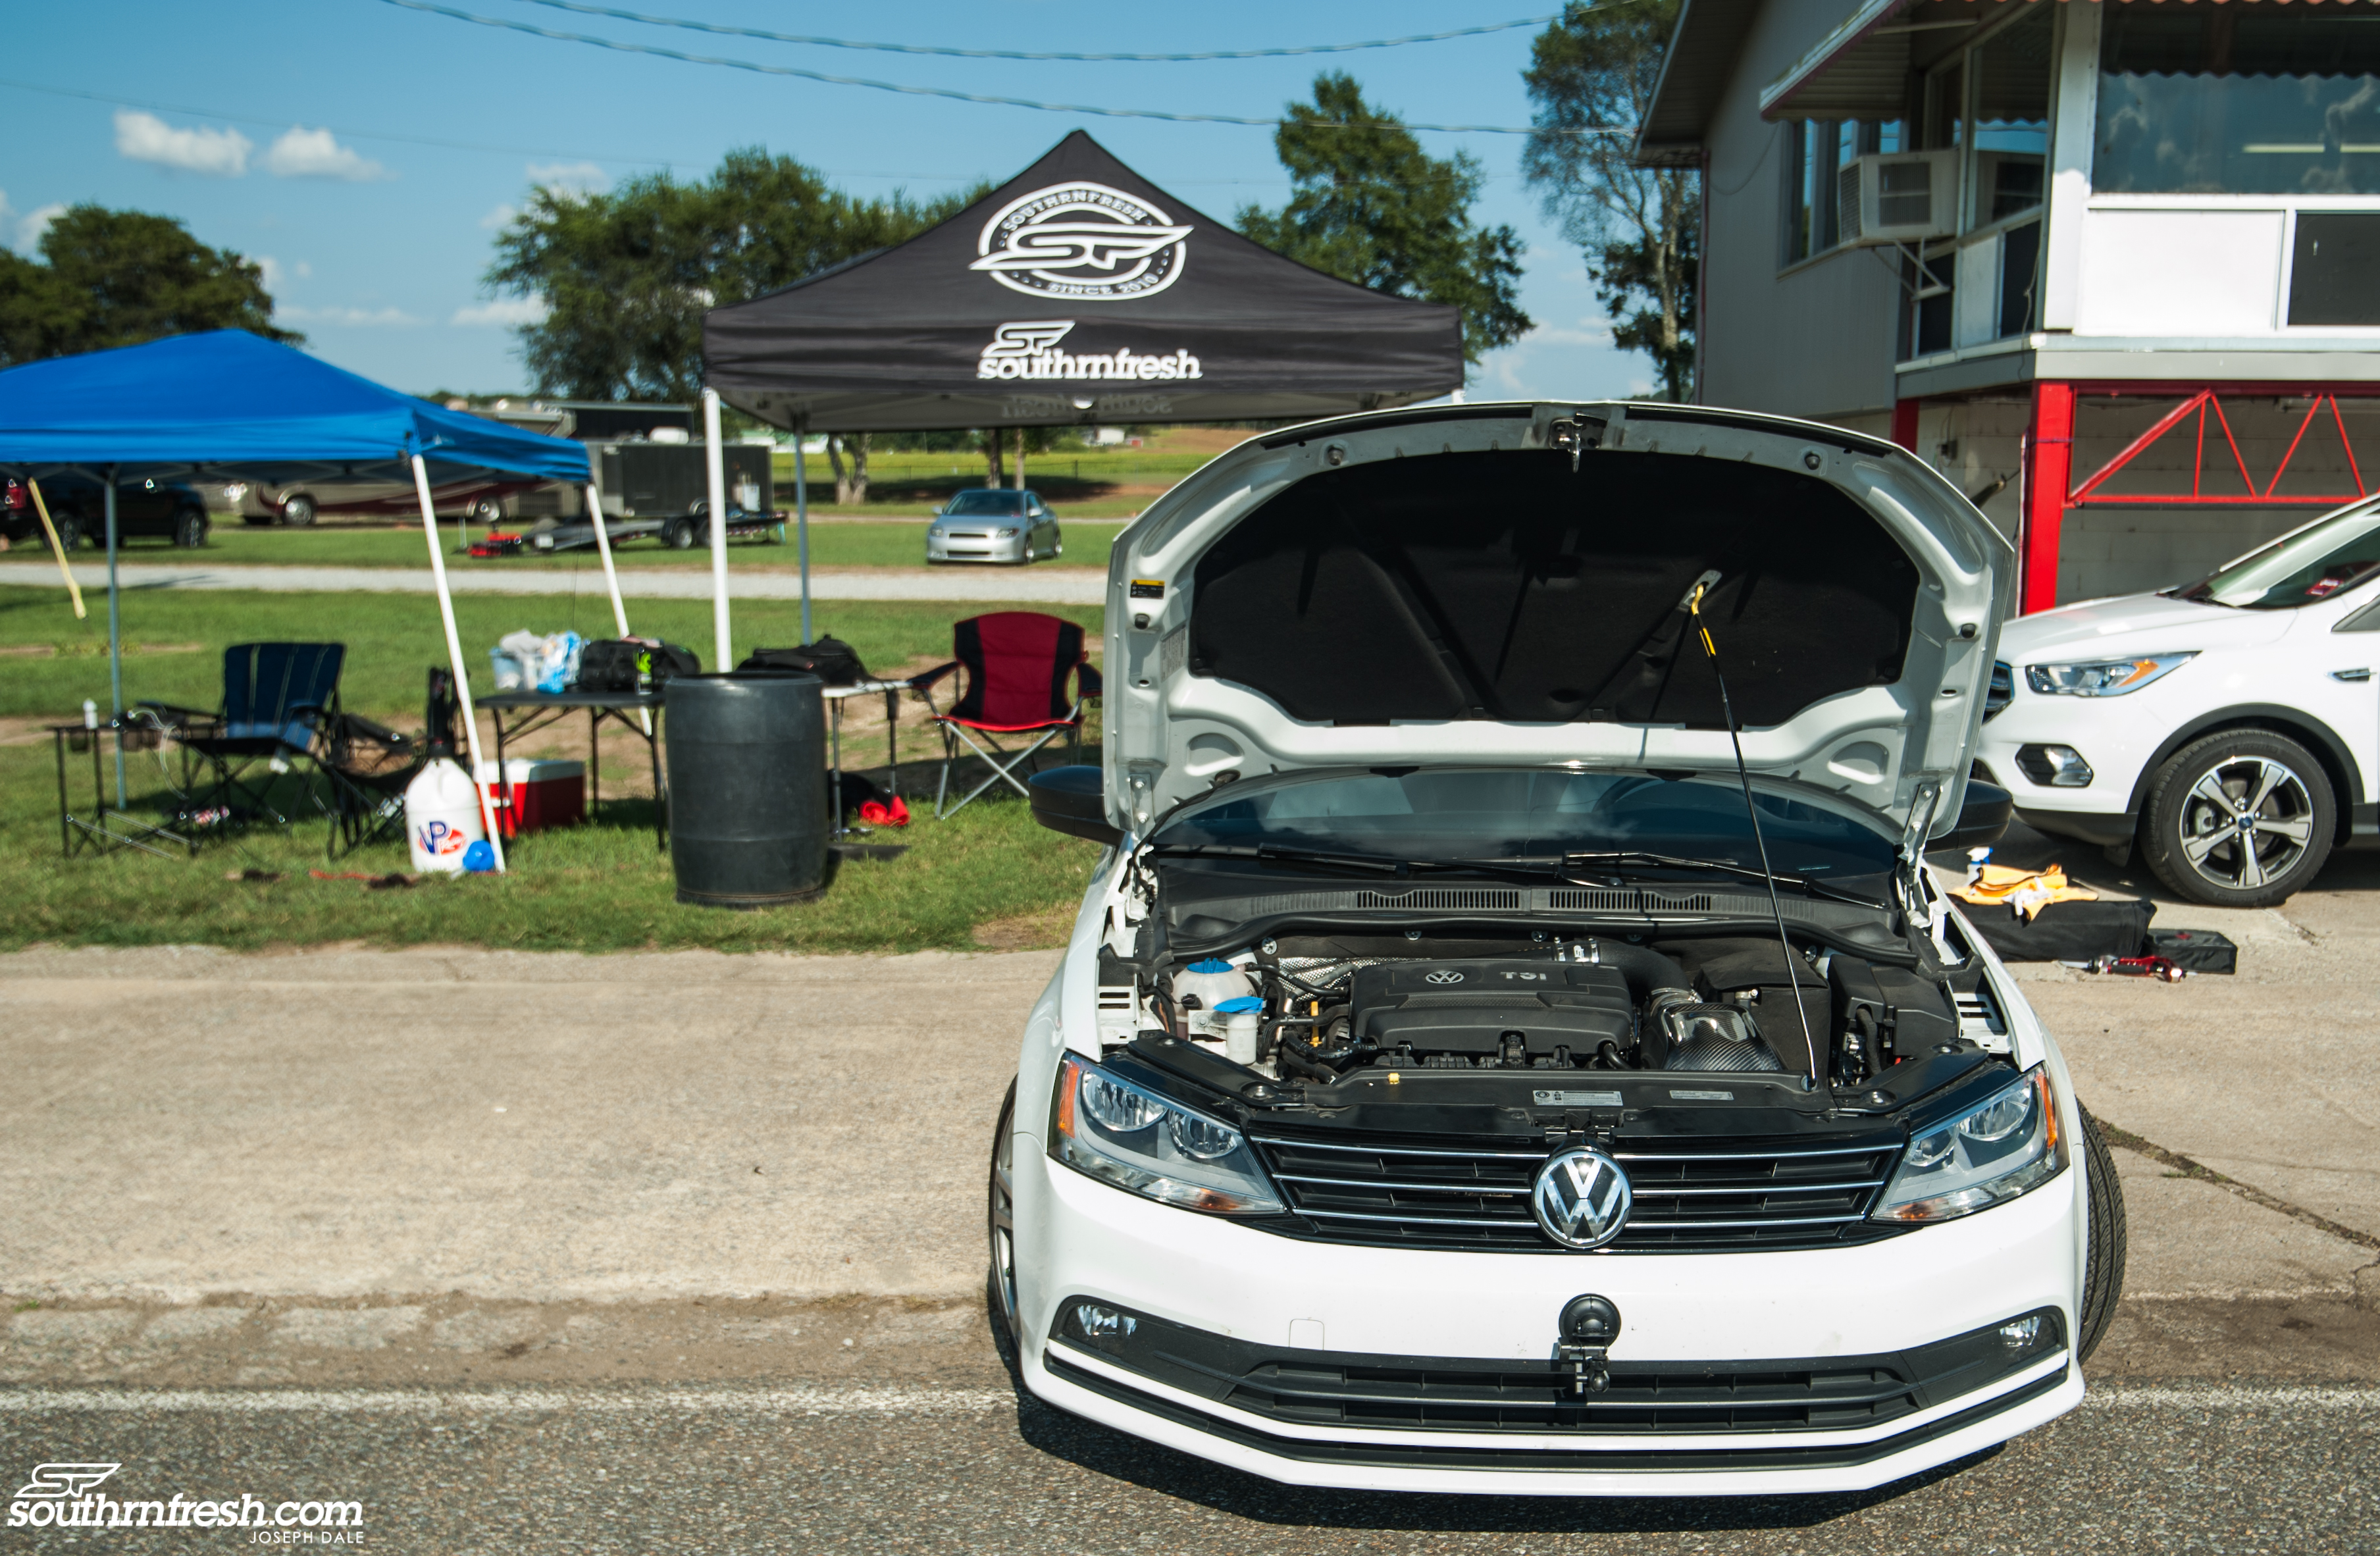
My Jetta is no track car by any means.  It has a stage 2 APR tune, and has most of the supporting mods for the engine but other then that it has stock brakes, regular street tires and H&R springs.  To me the car handled great, and did what i needed it to do.  My biggest fear was my brakes at the event, with the tune and mods, the car has good power.  But I knew if i pushed it to hard on the straights I would over due the stock brakes and put myself in the dirt.  Before that day the Jetta was a daily driver, but driving it on a track and with no regard was the most fun I had ever had in a vehicle.  I was eager to get back out and do another track day in the Jetta, with some upgrades to the brakes and a second set of tires strictly for the track.  But on my way home, I noticed the brakes felt a little mushy, the tires didnt feel as smooth, and I realized... damn I have to drive this car to work on Monday.  NO part of this ends good for me and the Jetta. 


I still wanted to take the Jetta back out again on a track, so I had planned to get it ready for the next event in March 2019.  After being realistic with myself, it just did not make sense to put that much wear and tear on the Jetta, and then expect it to be a proper daily during the week.  I started to search and look for something cheap, and with a decent aftermarket that I could have to take out and enjoy at track days and not have to worry about it as much.


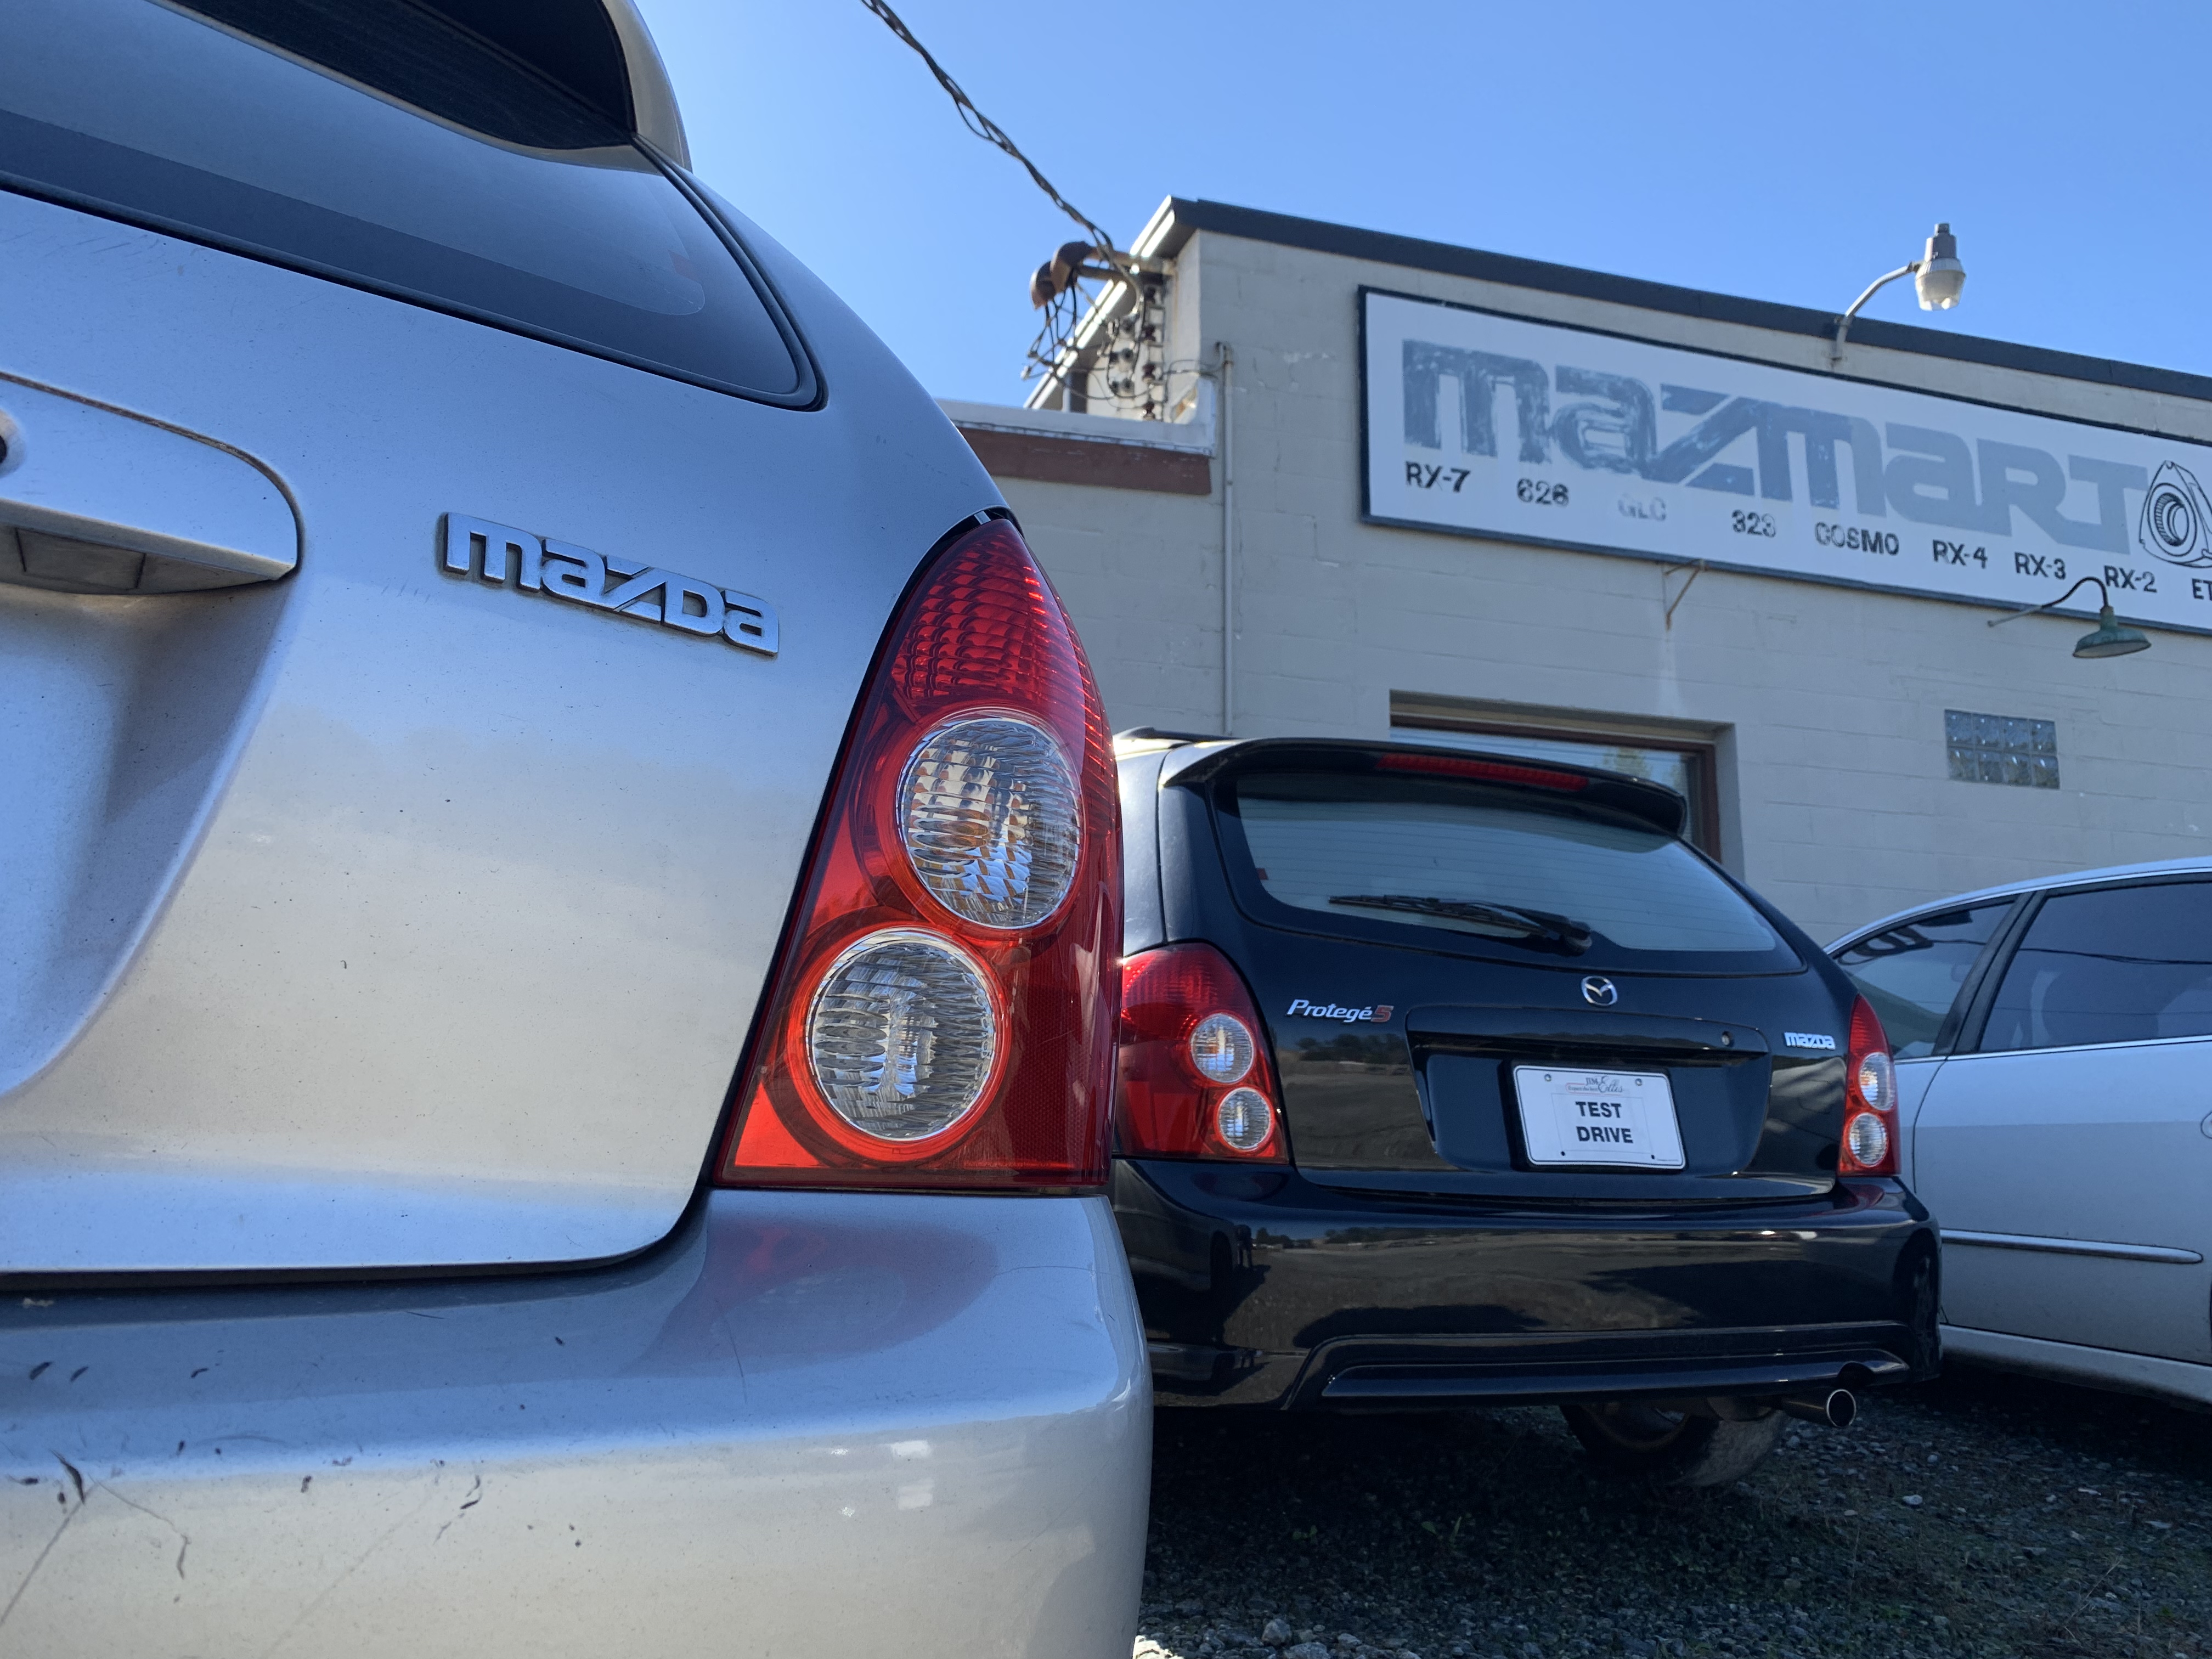
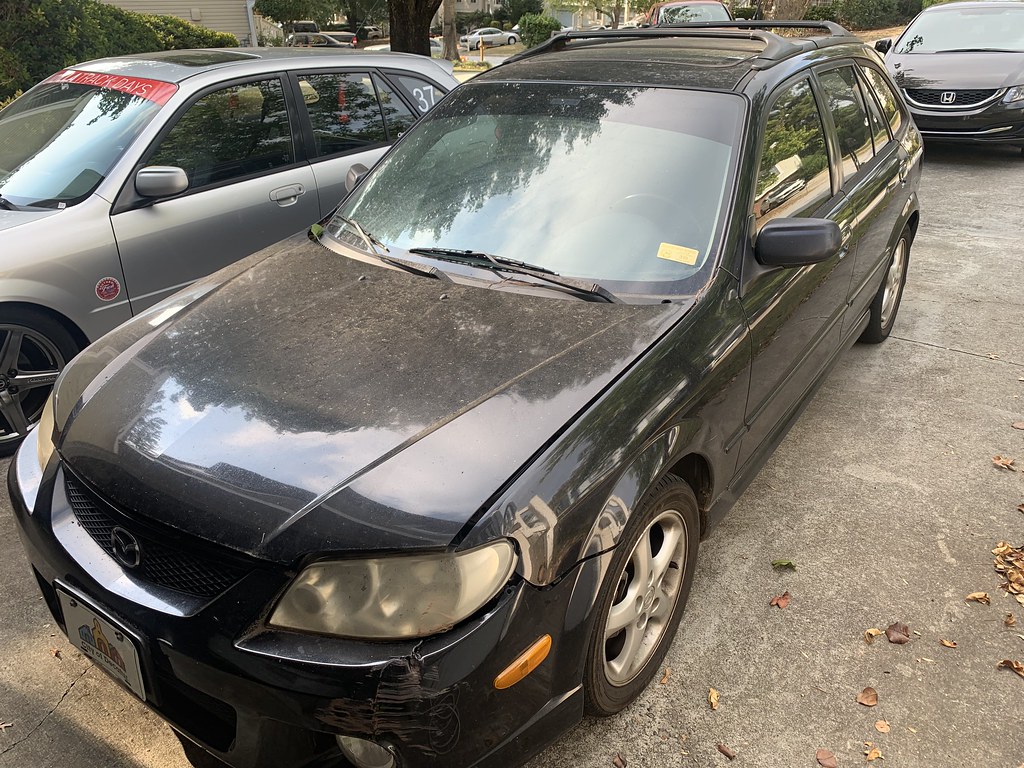
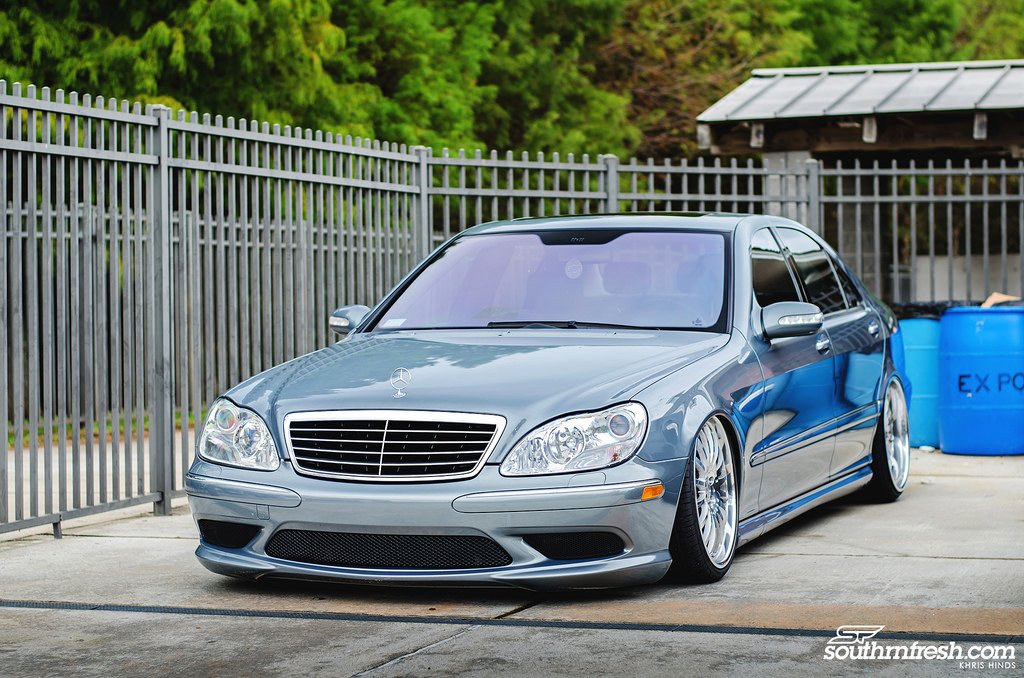
But did not have space or the funds to purchase  another vehicle, so something had to go.  So i decided to part ways with my Mercedes and help fund this journey.  I had not owned it for very long, and it was as nice as it was gonna get in my hands, I had a few sets of wheels for it, and lowered it.  The car was damn near perfect for its age, but it wasnt the right tool for the job.  After selling the Benz, I had a bigger budget, and went looking for something Japanese, reliable, cheap, fun , and some sort of aftermarket support.  I narrowed it down to a RSX, EP3 Si, Integra, Prelude, Mazda Protege, SRT4.  I noticed that all the cars were from a certain era.  To me the 99 to the 2000s was the golden era for the import automotive scene.  The cars were what they were meant to be and nothing more, but they can be transformed into whatever you want it to be.  They were not trying to be luxury sedans, they were efficient , nimble, economical and sporty .


Finding these cars in decent shape for a good price is really tough these days.  My biggest thing was having a decent body, and be in good running condition, if it needed repairs it was fine, I just wanted to be able to drive it home under its own power.  I did not wanna have to pull a motor, transmission or do major body work from the start.  Most RSXs were beaten to death, or to expensive.  Majority of the EP3s suffered from the same problem.  Integras and Preludes were all over the place, but either it was swapped and just needed a "tune" or it to expensive.  I only really saw one SRT4 for sale but it was a little too cheap and jsut did not seem right.


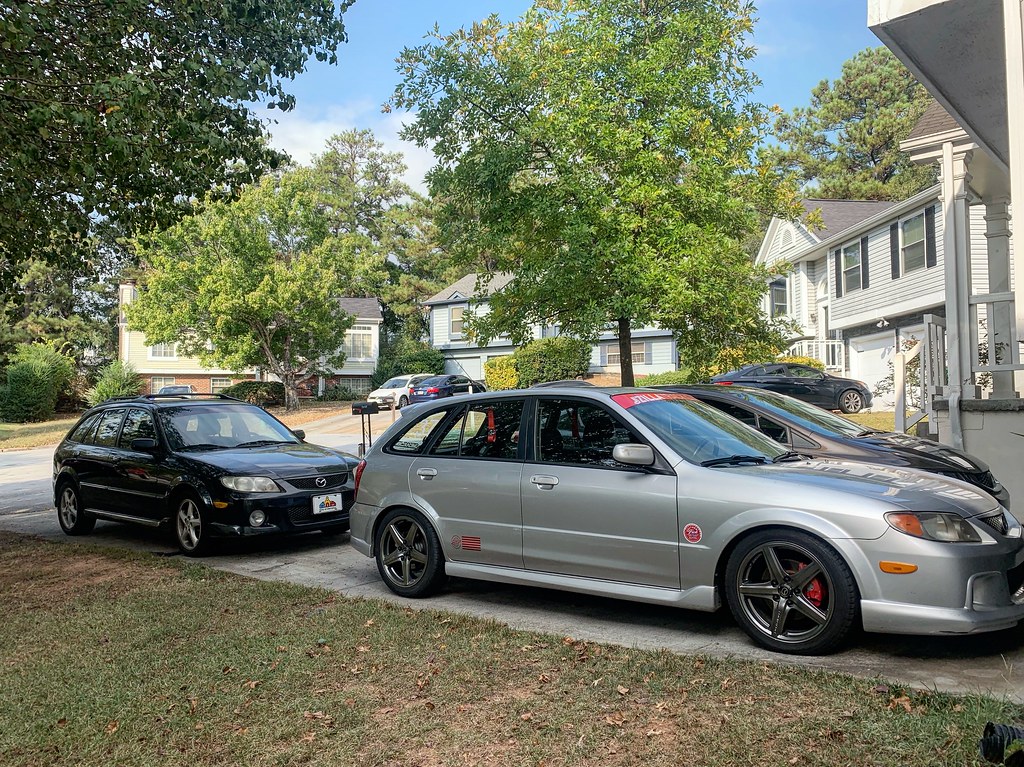
I have owned 13 Mazdas and deep down I  wanted another Mazda.  I owned a Mazdaspeed Protege back in 2013 and it was a great car.  One of the best handling FWD cars at the time, but the cars are plagued with drive train issues and were under powered.  Like the SRT4, the MSP was not as easy to find in good running condition for a reasonable price.  I had thought of maybe finding a MP3 or a Protege 5, which  shared the same handling dynamics minus the turbocharged engine.


I had my eye on a really clean EP3, the car was a little more then I wanted to spend.  But I wanted to at least throw him a lowball offer and see if he would bite.  Before I could offer him , he told me the car had been in a fender bender and he was selling it for cheaper then what I was going to offer.  I was mentally prepared to be driving home a EP3 Si that afternoon, the only thing I needed to see was photos of the damage.  And that is where the communication stopped.....  I never heard from the guy again after that.


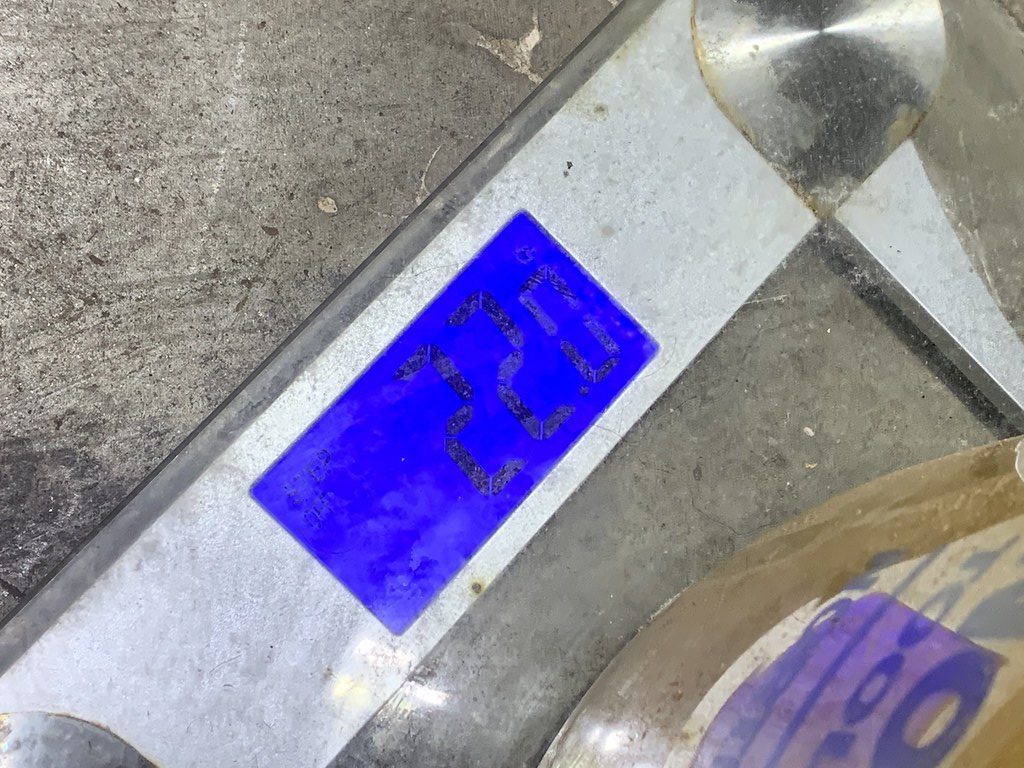
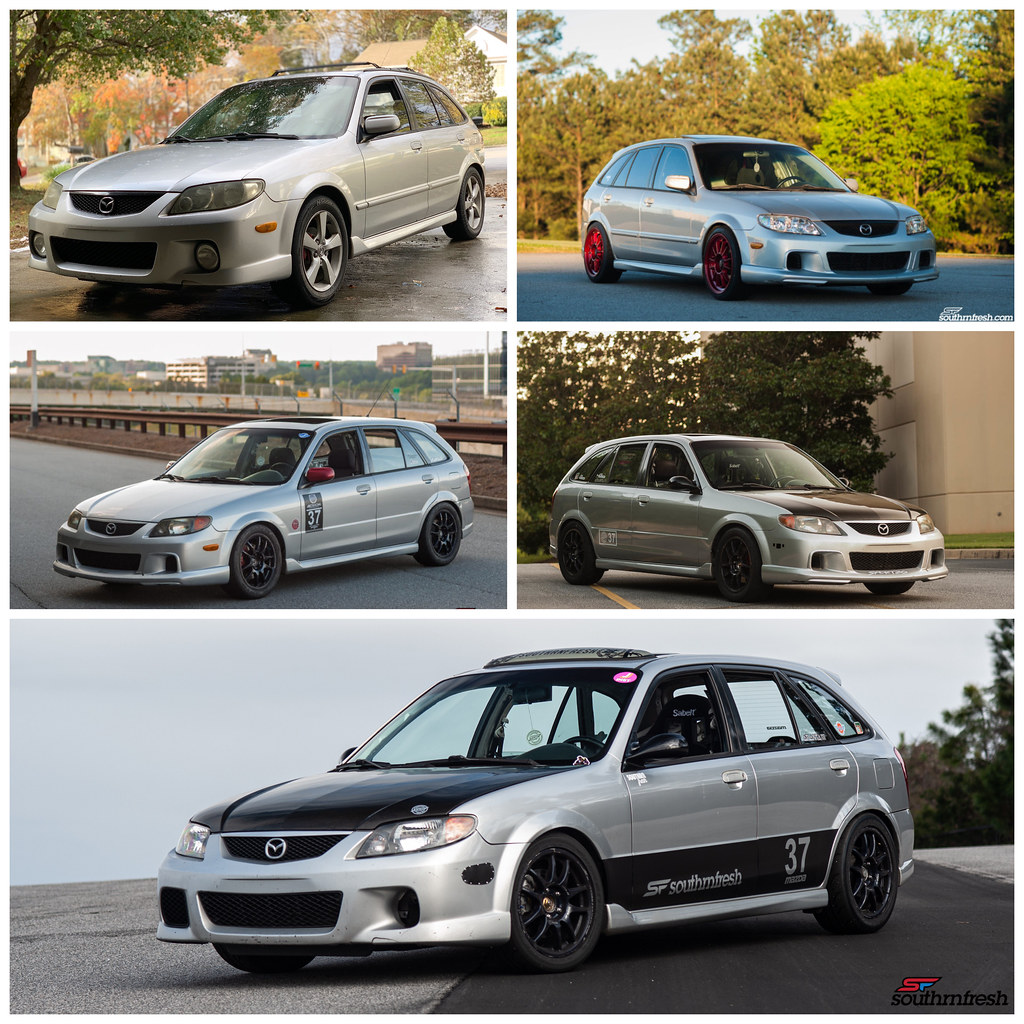
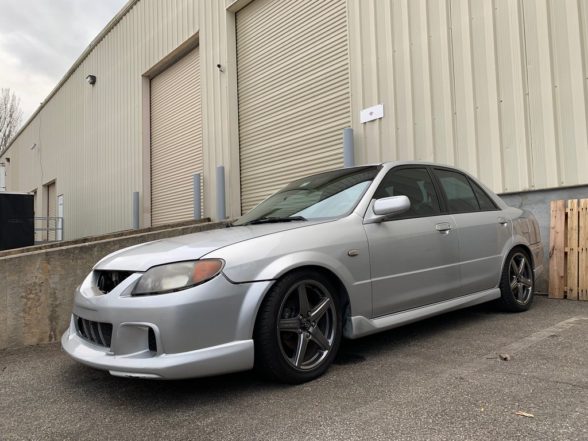
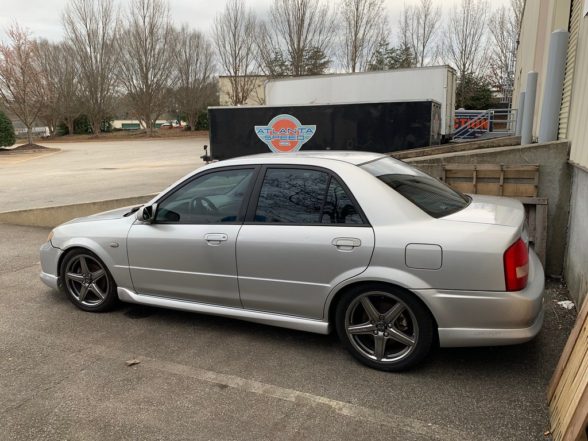
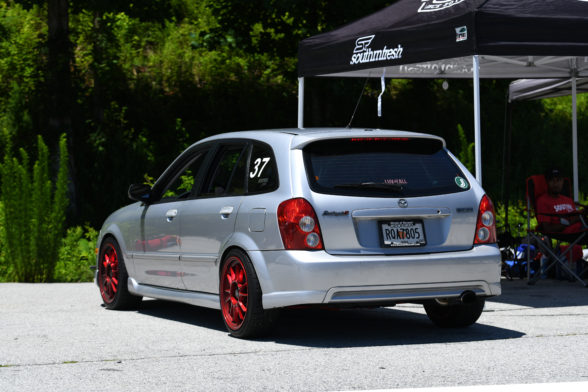
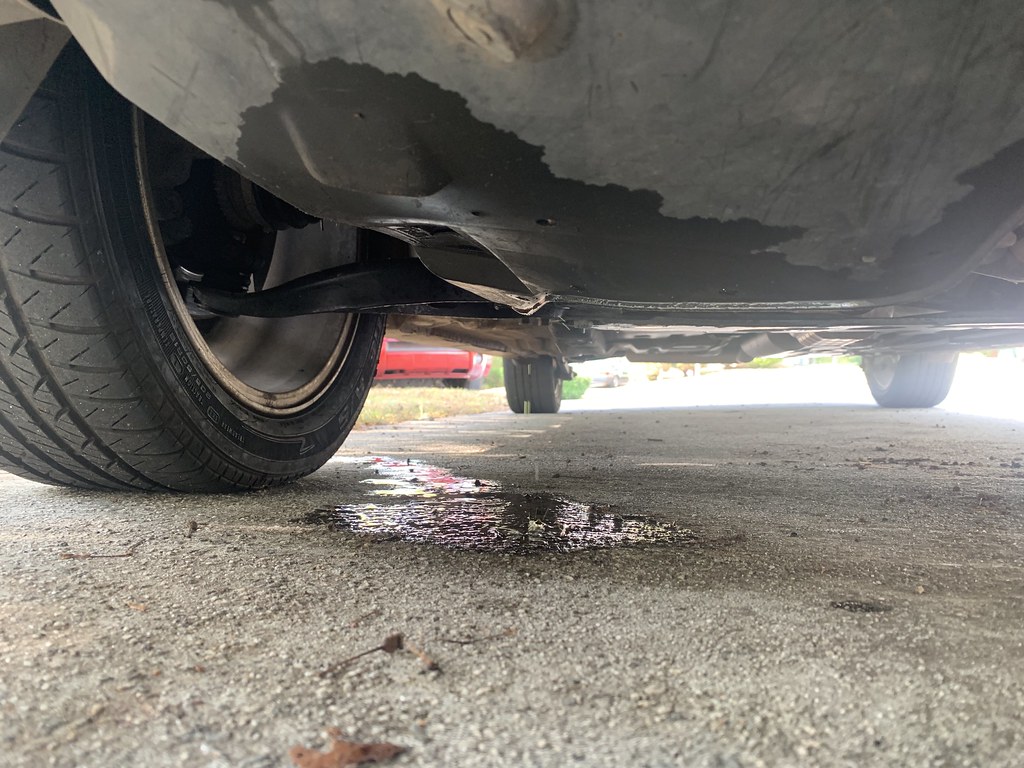
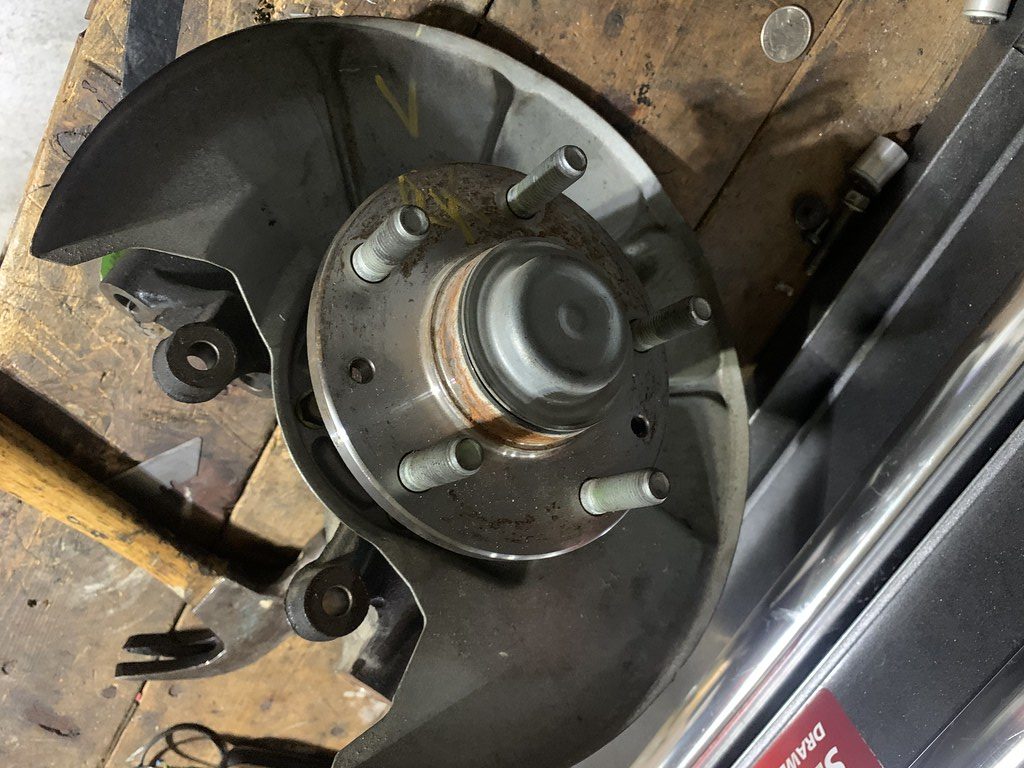
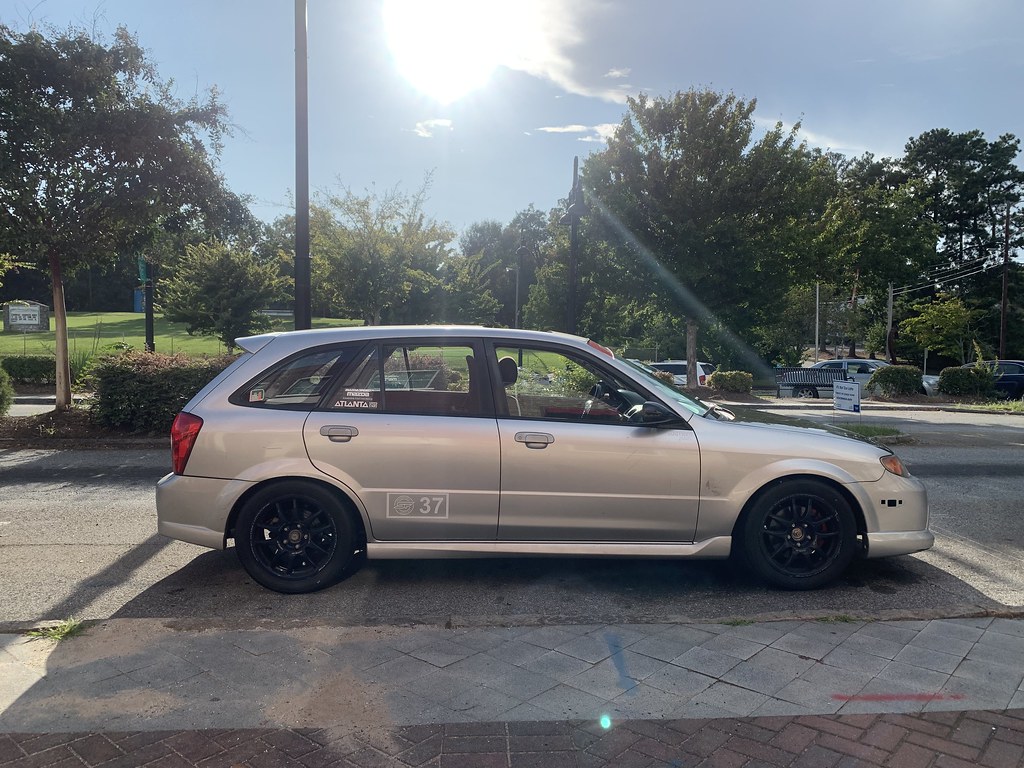
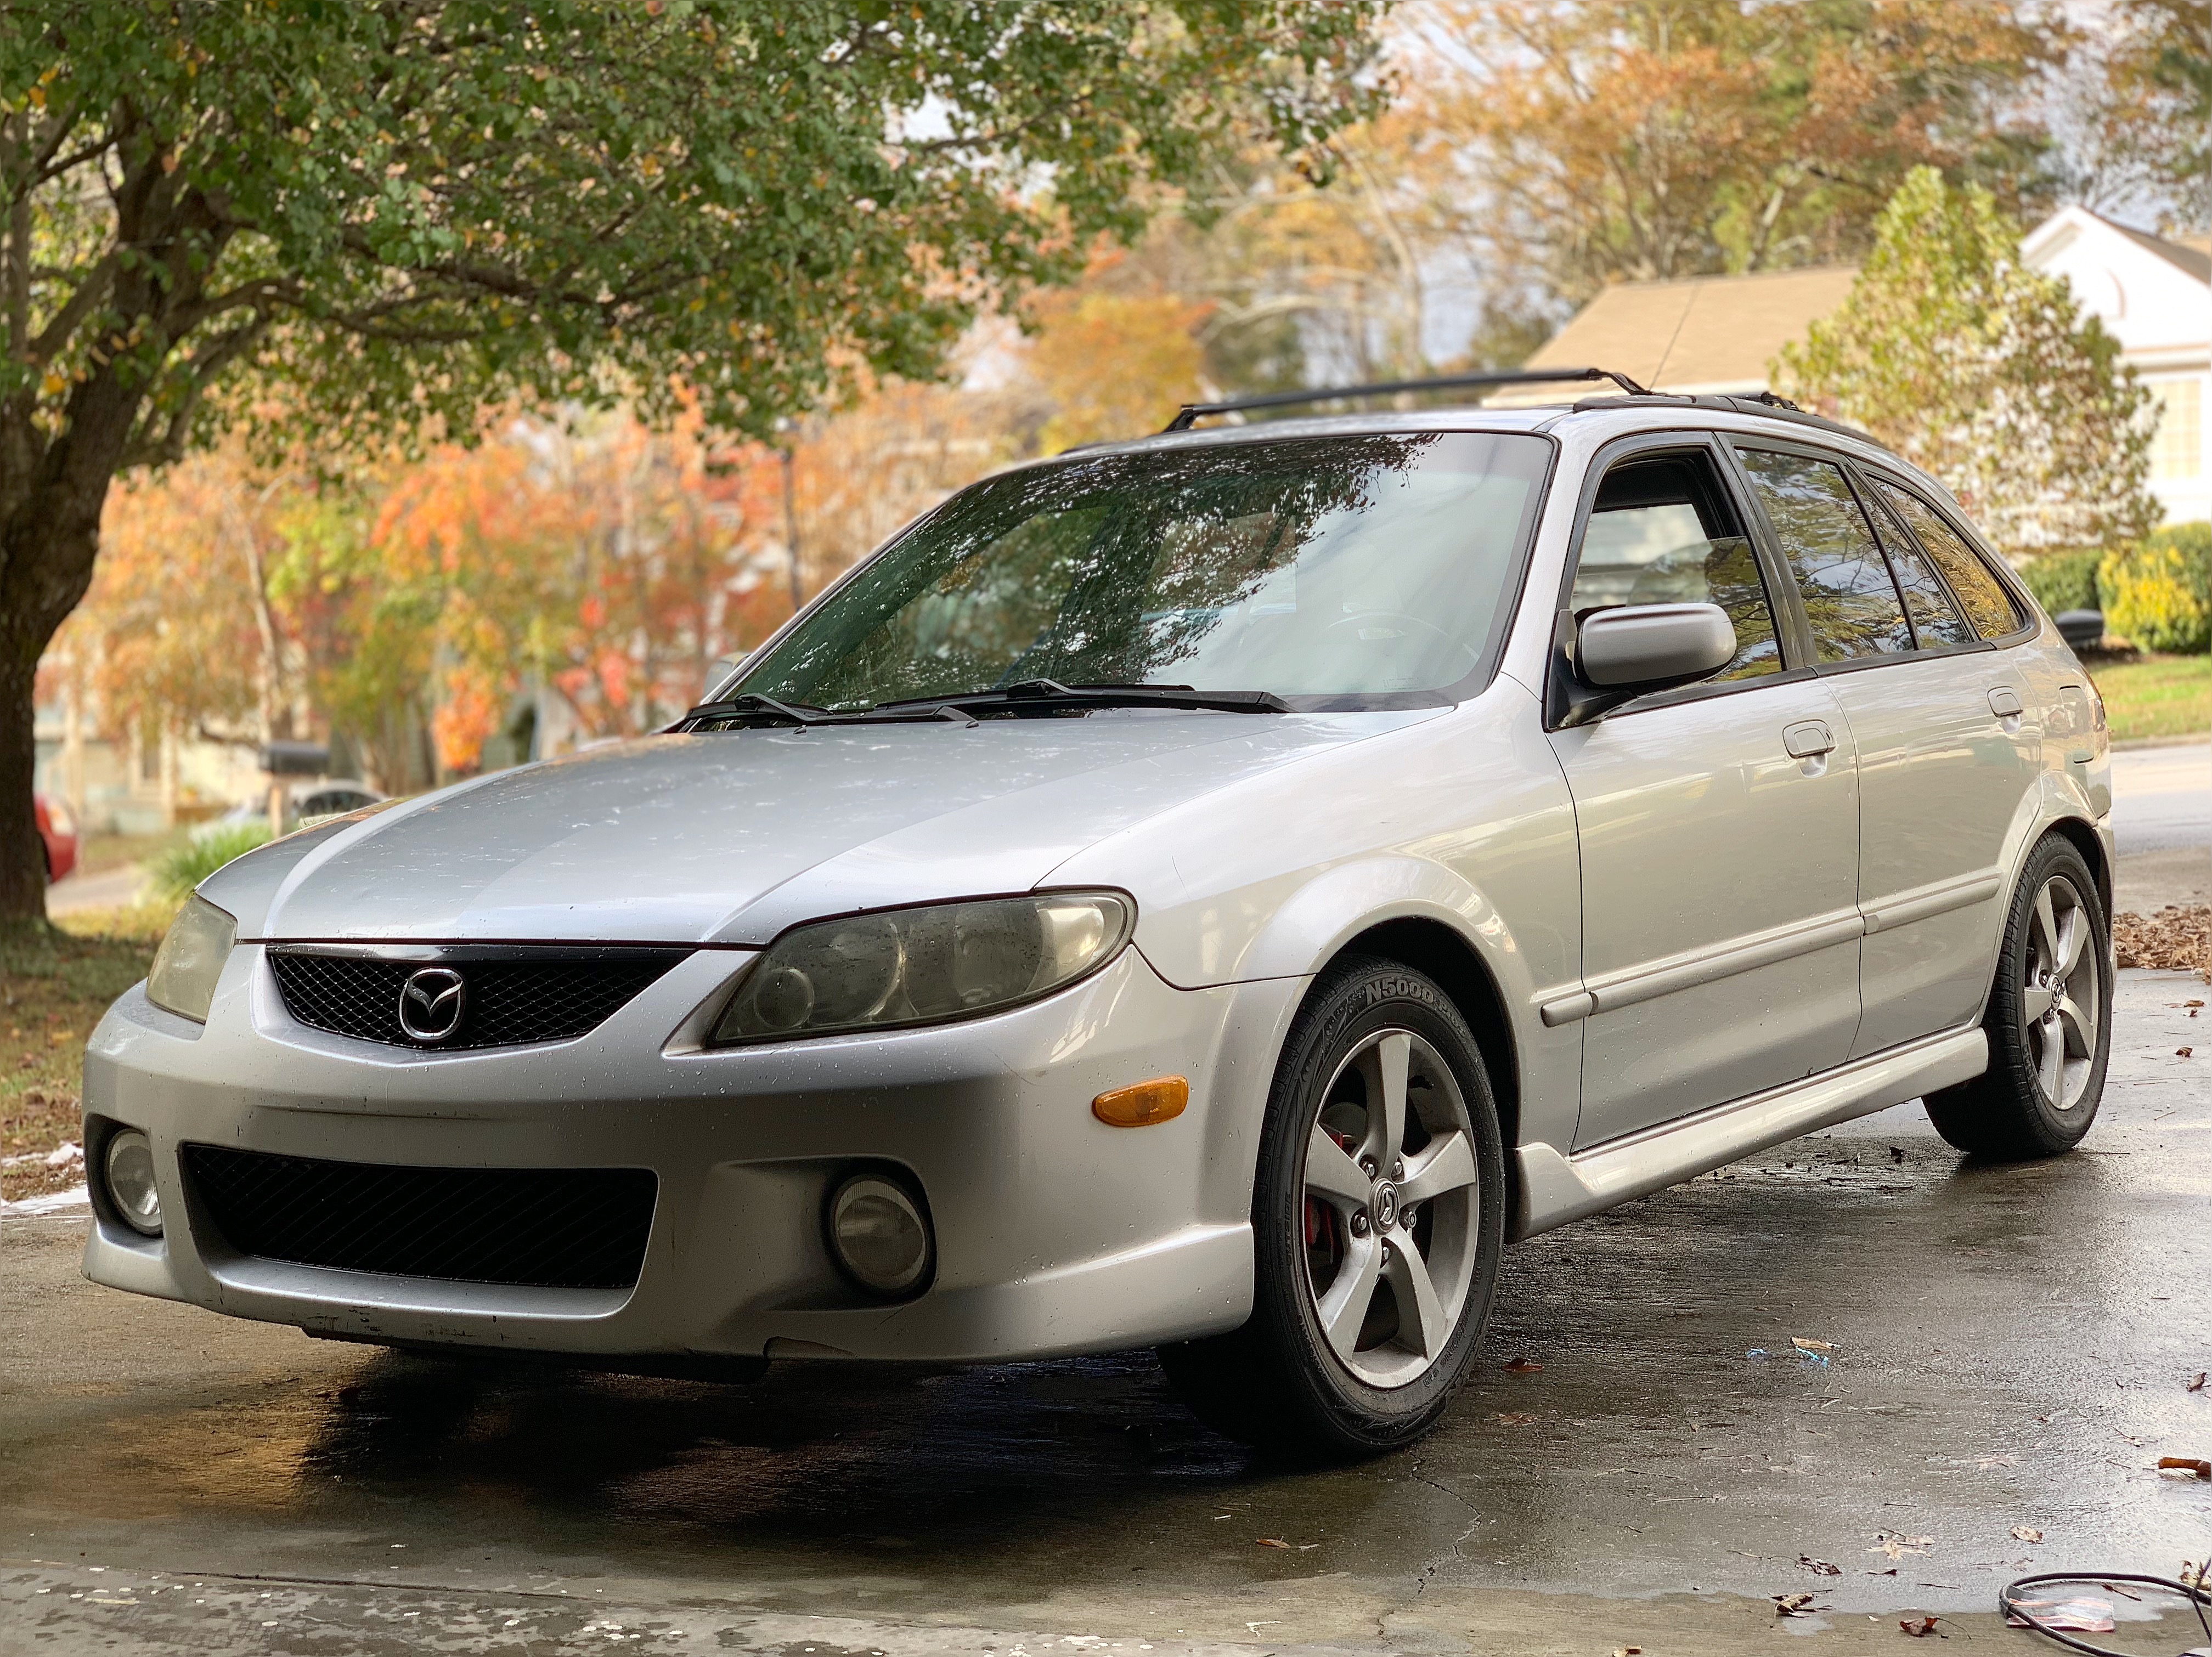
I had been seeing this Protege 5 popup on CL for almost a month.  The car was a little too cheap, so I was suspicious of it.  Thinking that it had to have major issues that they did not mention in the ad.   But never took the time to read the ad, and see how honest it was.  You can almost visualize what type of person you are dealing with when you read their Craiglist ads.  The car was owned by a couple that had been driving it to work for the last few years.  It seemed perfect, the last thing I wanted was a modified car.  I got a response from the owner at around 5pm as I got ready to leave work.  She had mentioned that someone else was coming to buy it later that night, but I had called here first so she would hold it for me if I could come by that night.  At that time it was around 6pm, and I was sitting in traffic on 285.  I did not get to their house until around 7:30, drove it around the neighborhood and was sold on it instantly.  The car was clean and well taken care of by regular people, ready to be ruined by me.  I drove home, got a ride back that night, and bought the car for $1200! The most notable issue was the left front hub bearing, which is a common issue.  The only thing that troubled me was the 288,000 miles.  But the motor and transmission felt solid on the ride home.  But I could not get a true idea what I am dealing with until the wheel bearing is replaced.


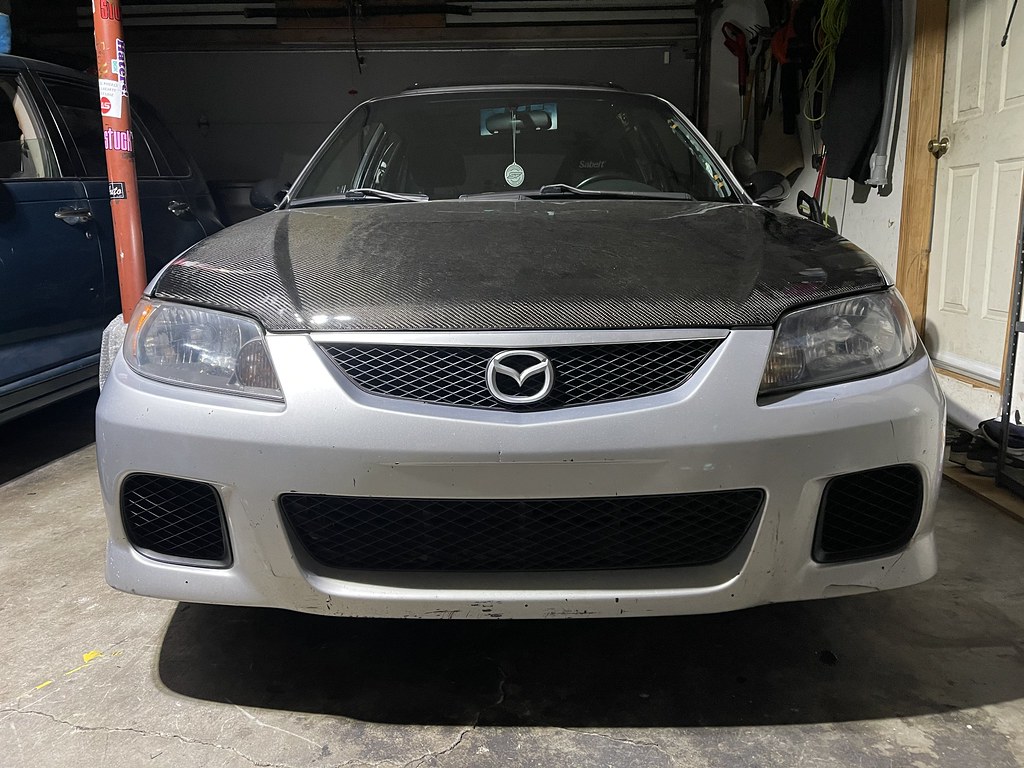
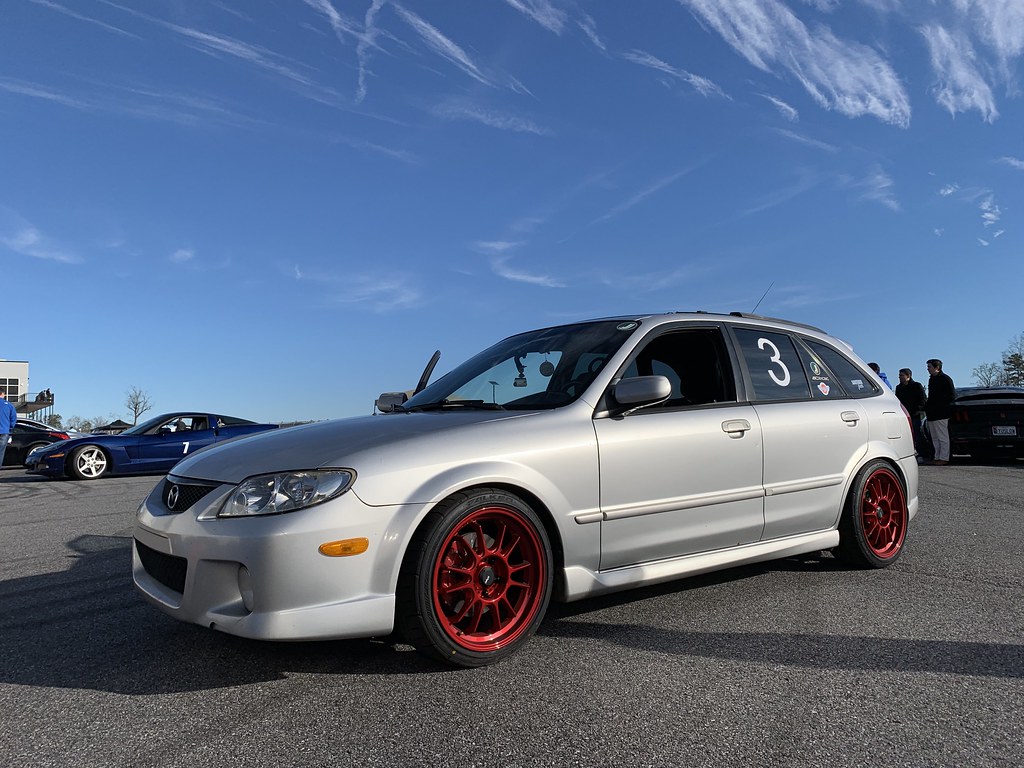
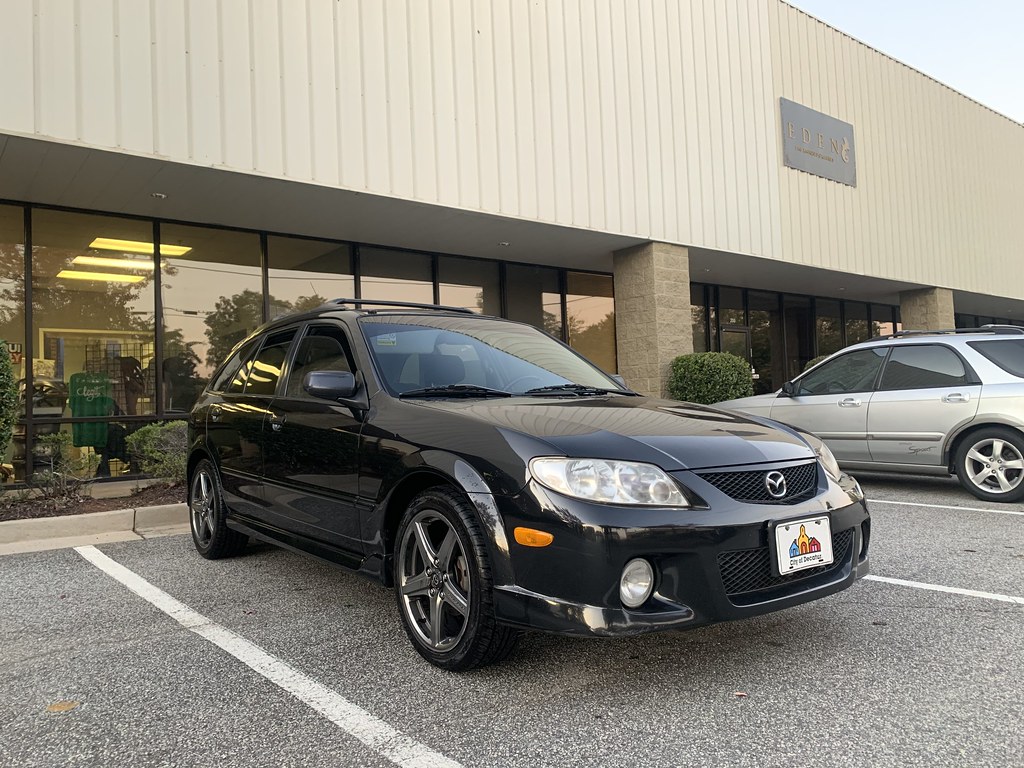
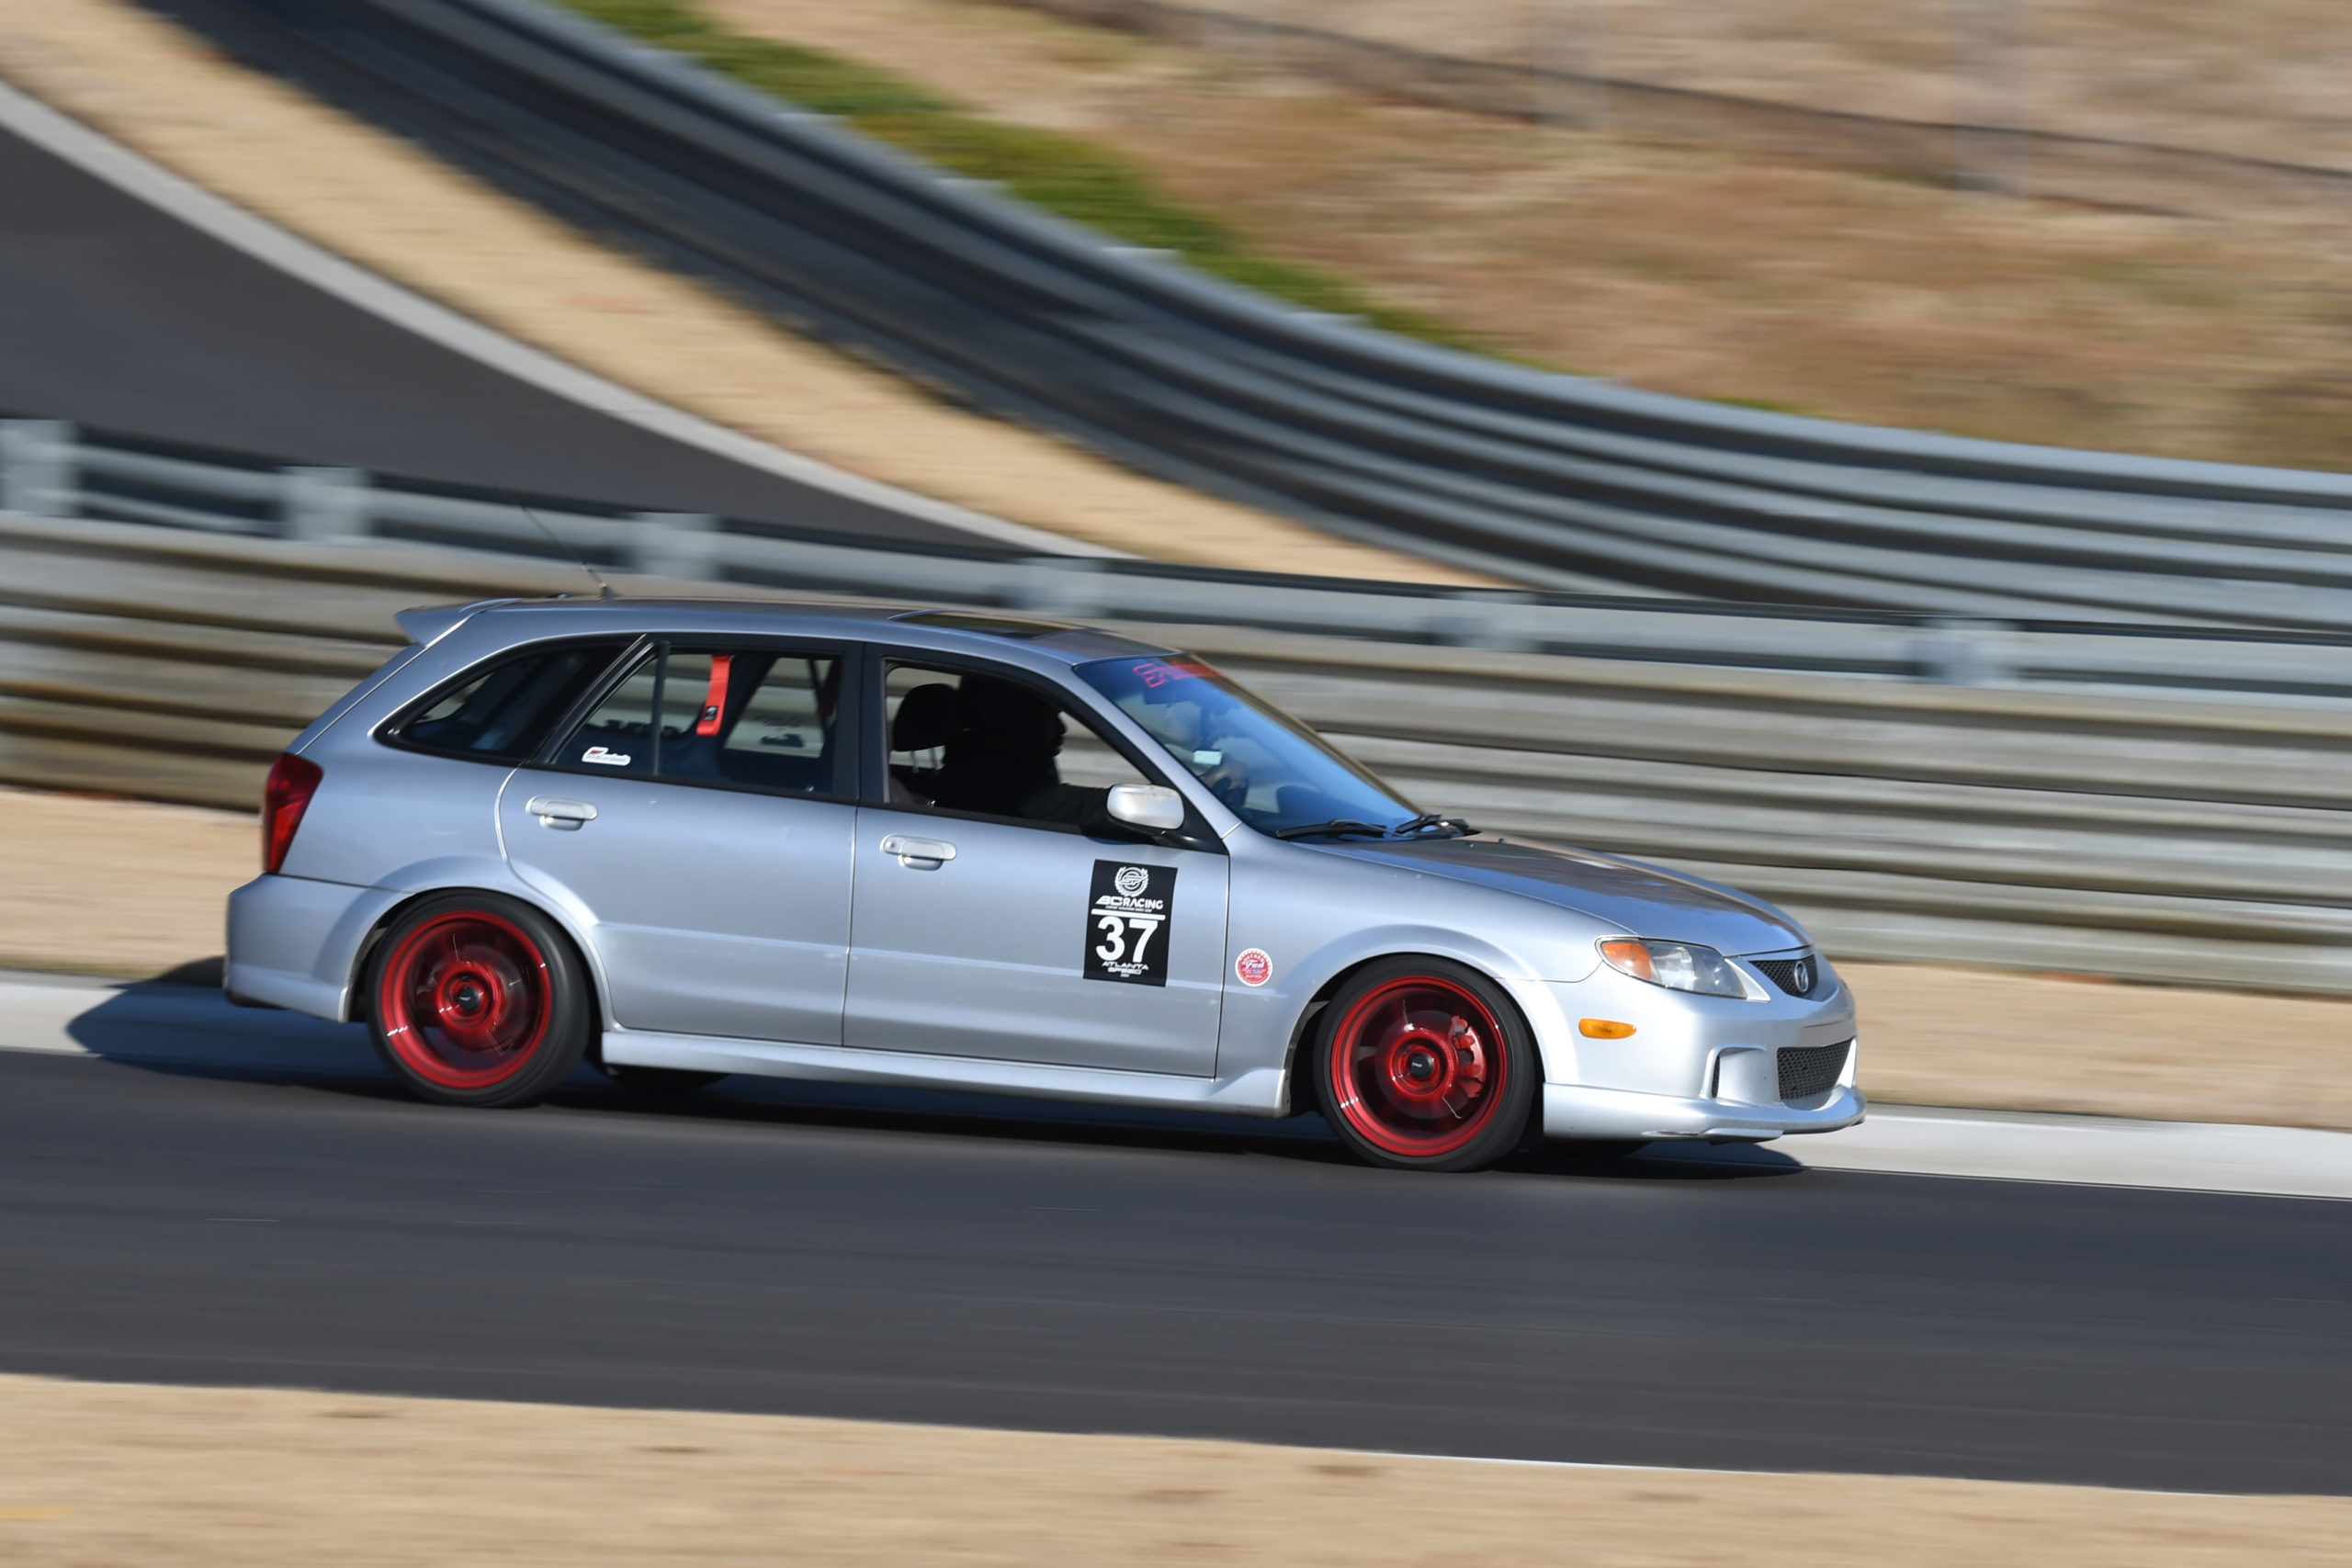
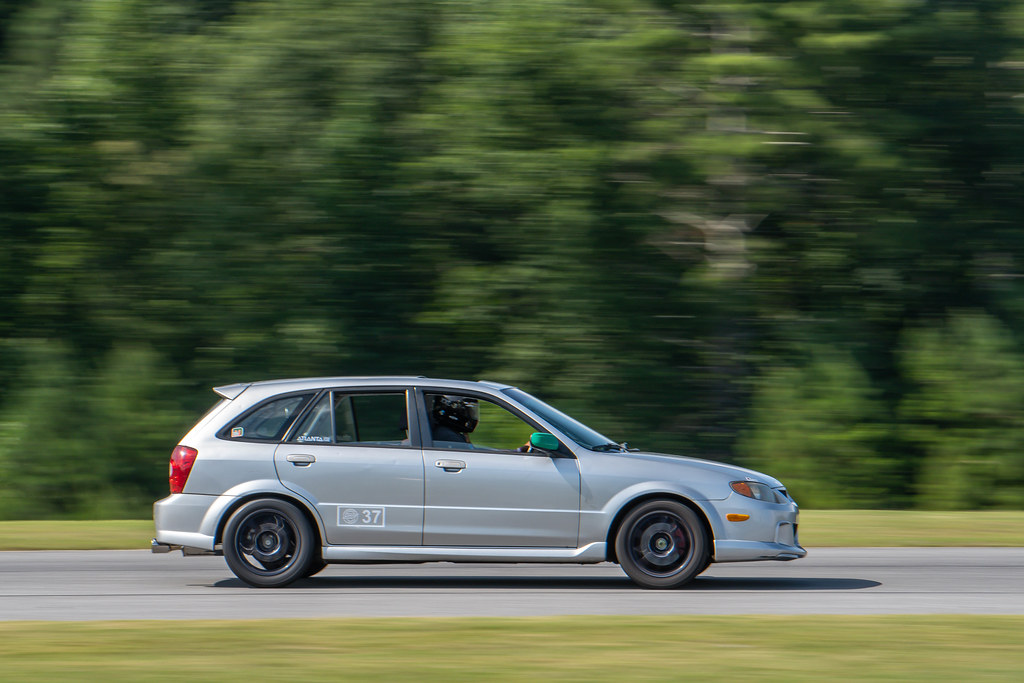
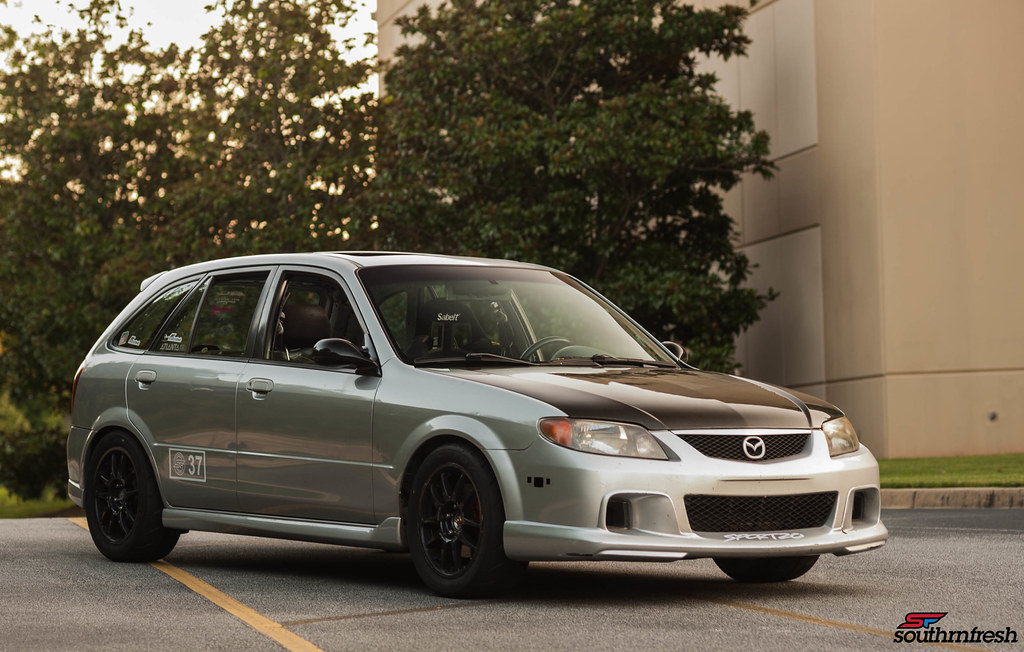
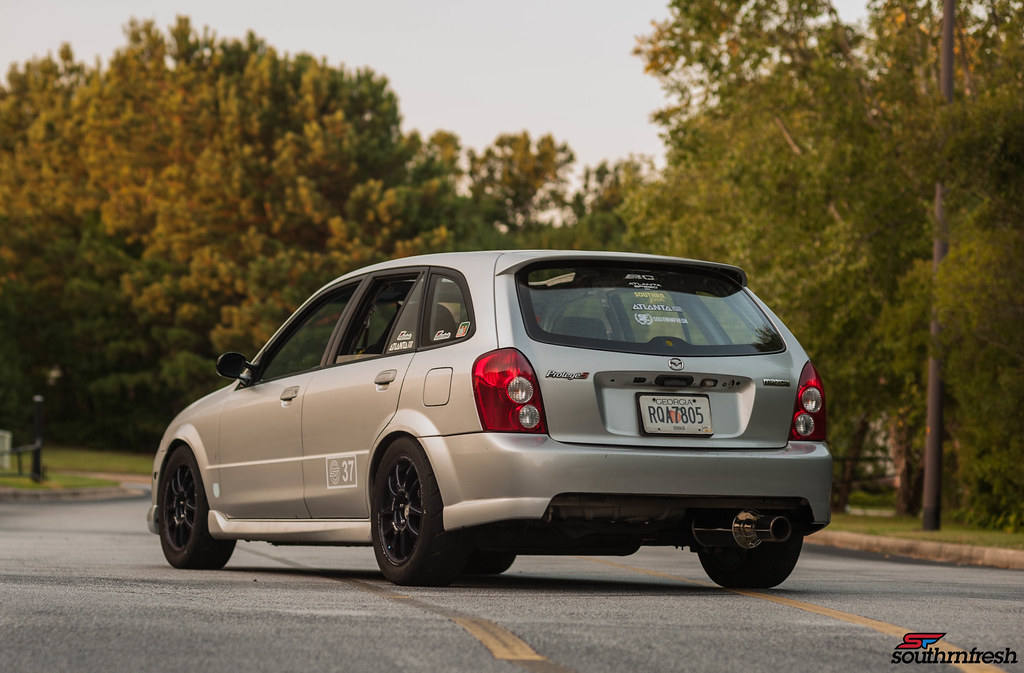
My goal with the P5 is to get involved in doing track days, auto x, time attack and just being behind the wheel on a track.  I wanted to be able to drive the car at its full potential with basic upgrades and learn.  I also wanted to stick to a tight budget, and try my hardest to save any way I can on some things, but spend the extra dollar when necessary.  The P5 at one point had a huge aftermarket and was a very popular car when ti was released.  The car was pushed to the side once the Mazdaspeed 3 was released.  A lot of the big names do not really support the car as much anymore.  The weakest part of the P5 is the drive train, but nothing that can not be prevented.  Without turbocharging the 2.0 liter FSDE motor will last as long as it needs to.  But if not careful it will easily spin a bearing, mainly due to the oem oil pan baffle.  If you ever heard the phrase "zoom zoom boom" it literally came from the 2.0 FS motor.  Its sounds bad, but its not as bad as it seems, especially if you know what to do to prevent it from happening.


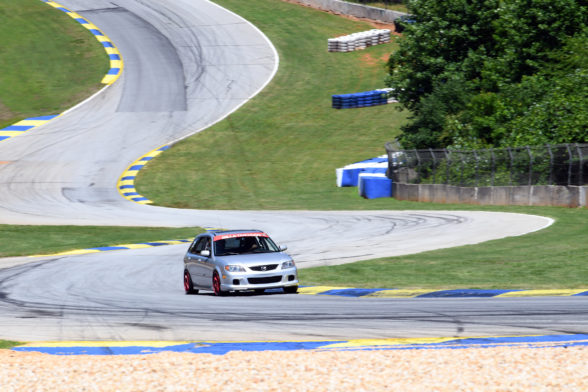
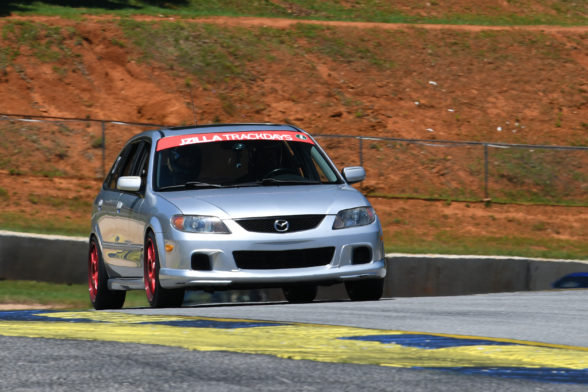
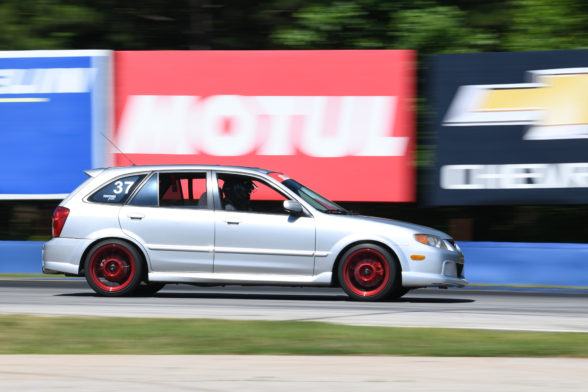
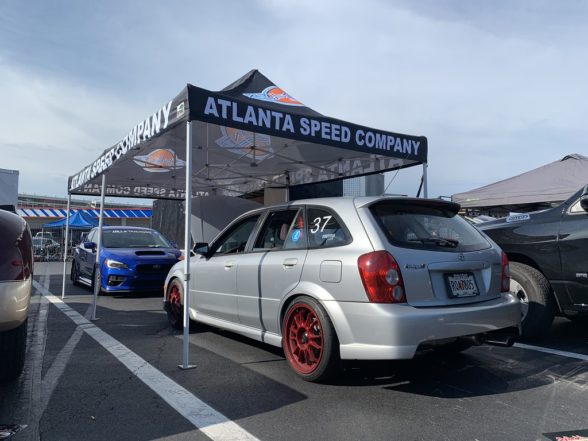
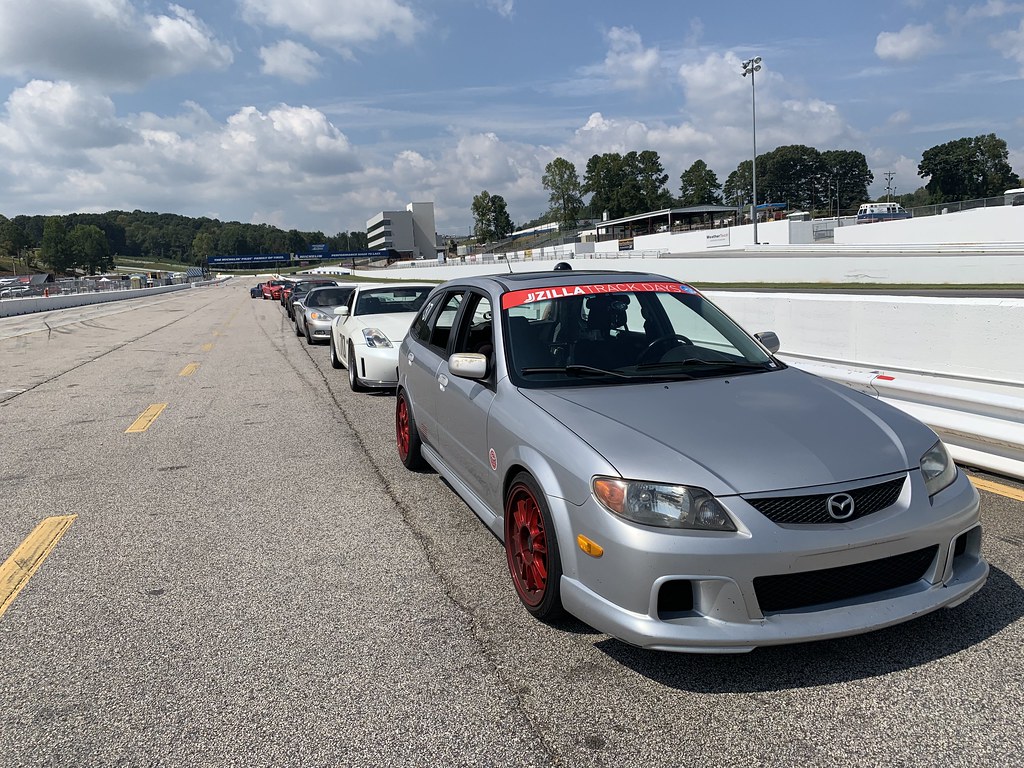
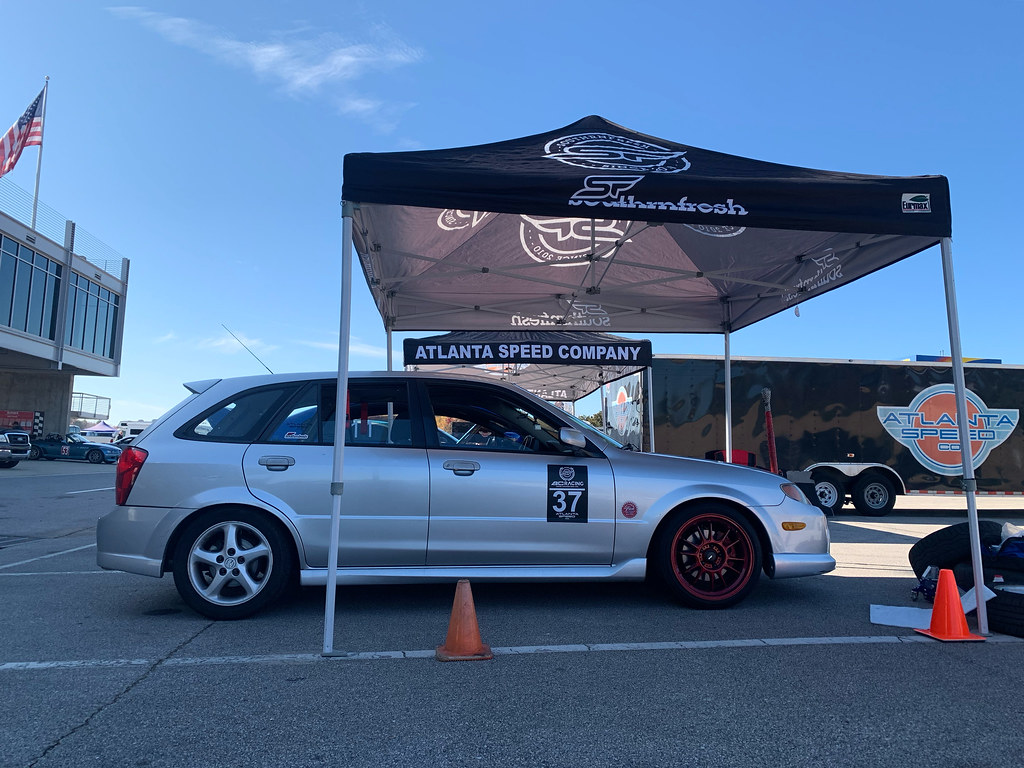
The first goal of this build is to make it to the March Track day being held by JZilla Track days  with my friends at Atlanta Speed Company, who will be helping me on and off the track with the build.  So I will be sharing the process with everyone here, and soon move on to adding videos alongside these posts in the near future.


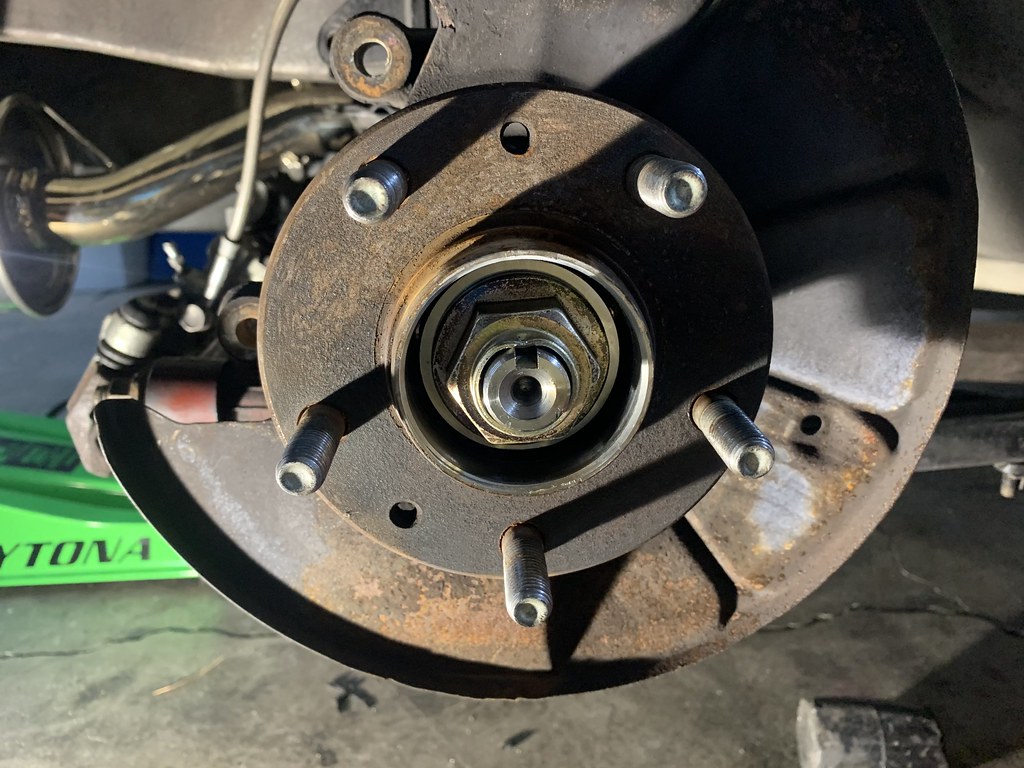
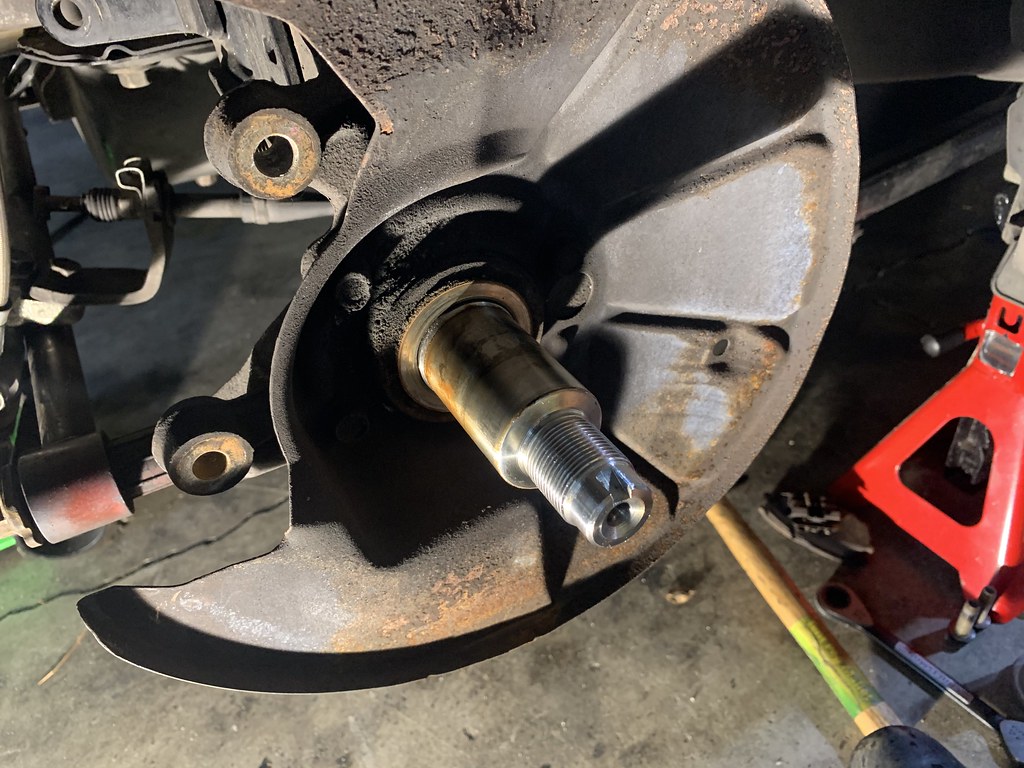
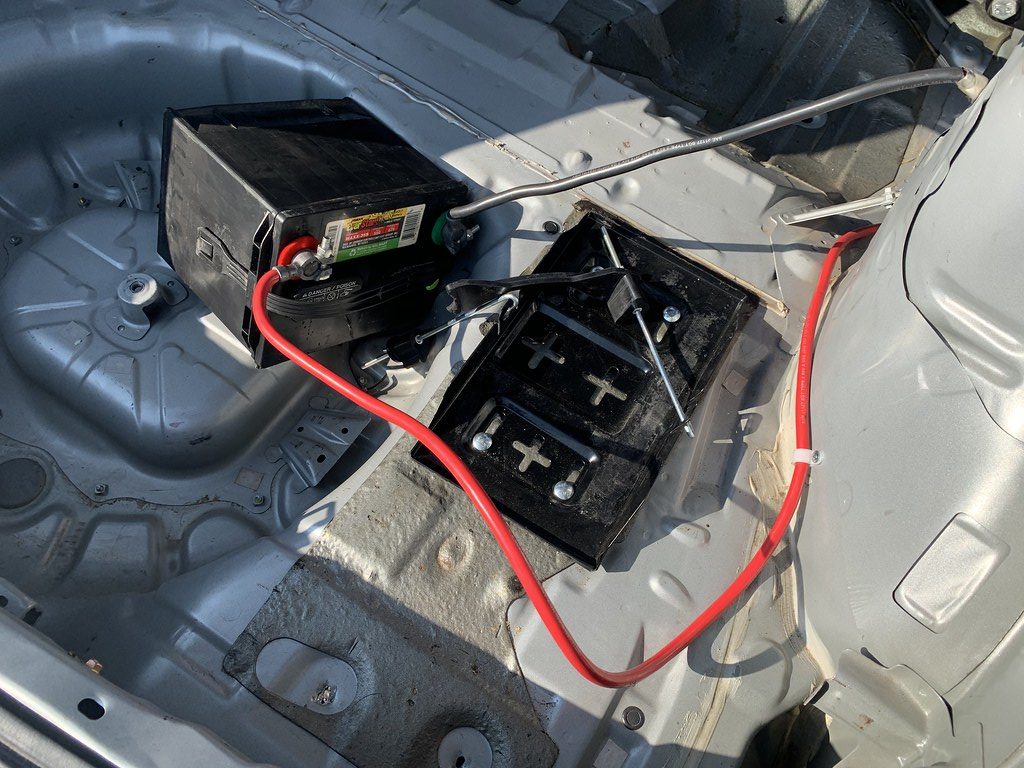
  A week after purchasing the car I got the Wheel bearing replaced on the front driver side.  And upon further inspection the passenger side was brand new, so I lucked out with that.  The cost of the part was only $25 on Rock Auto .


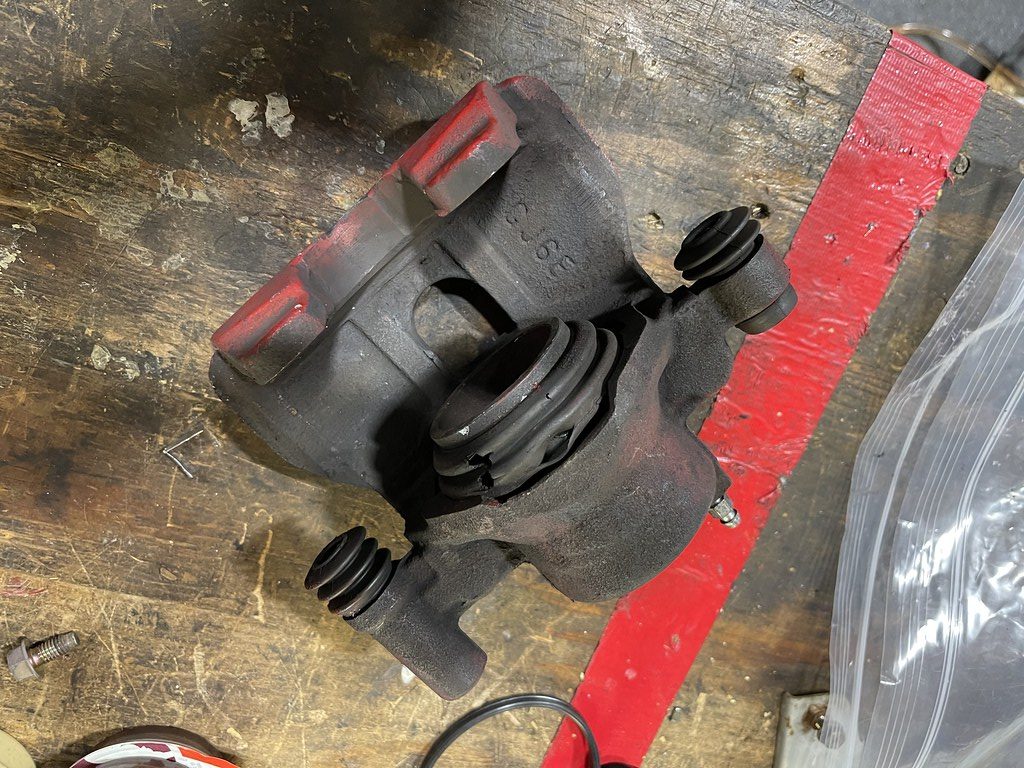
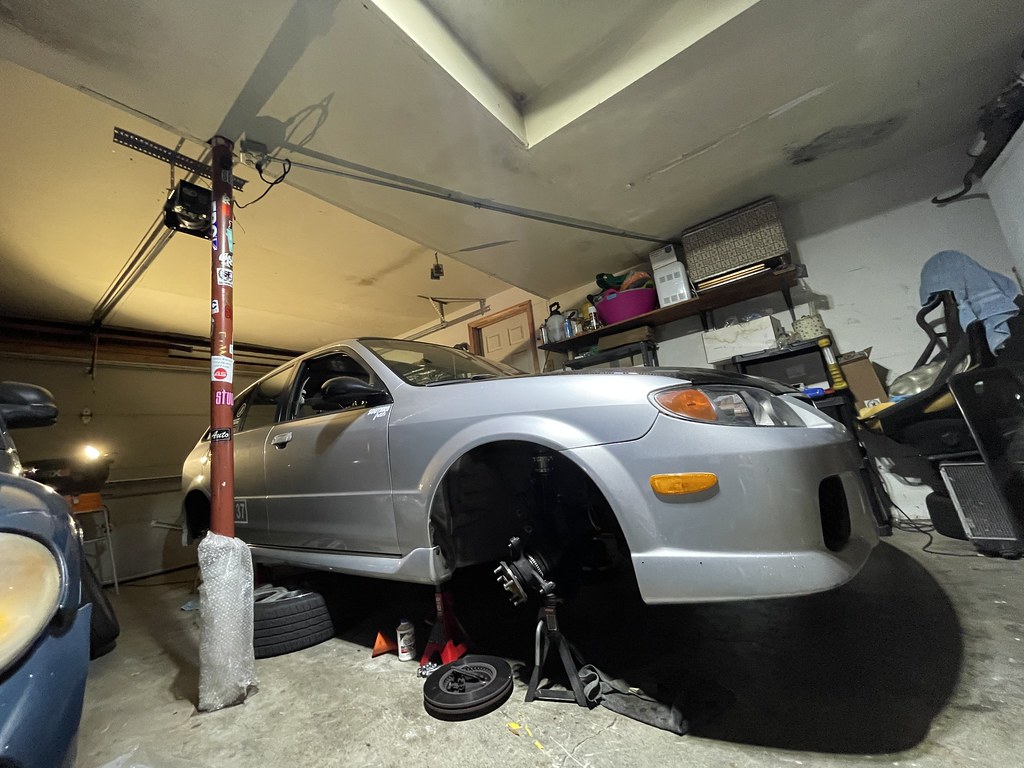
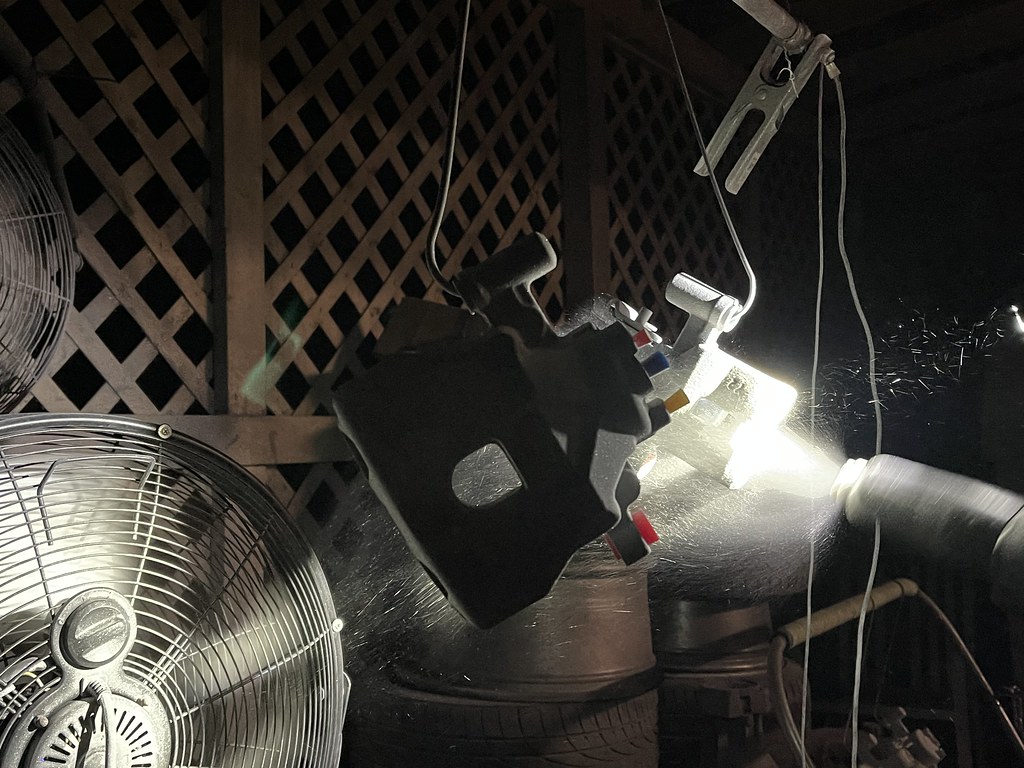
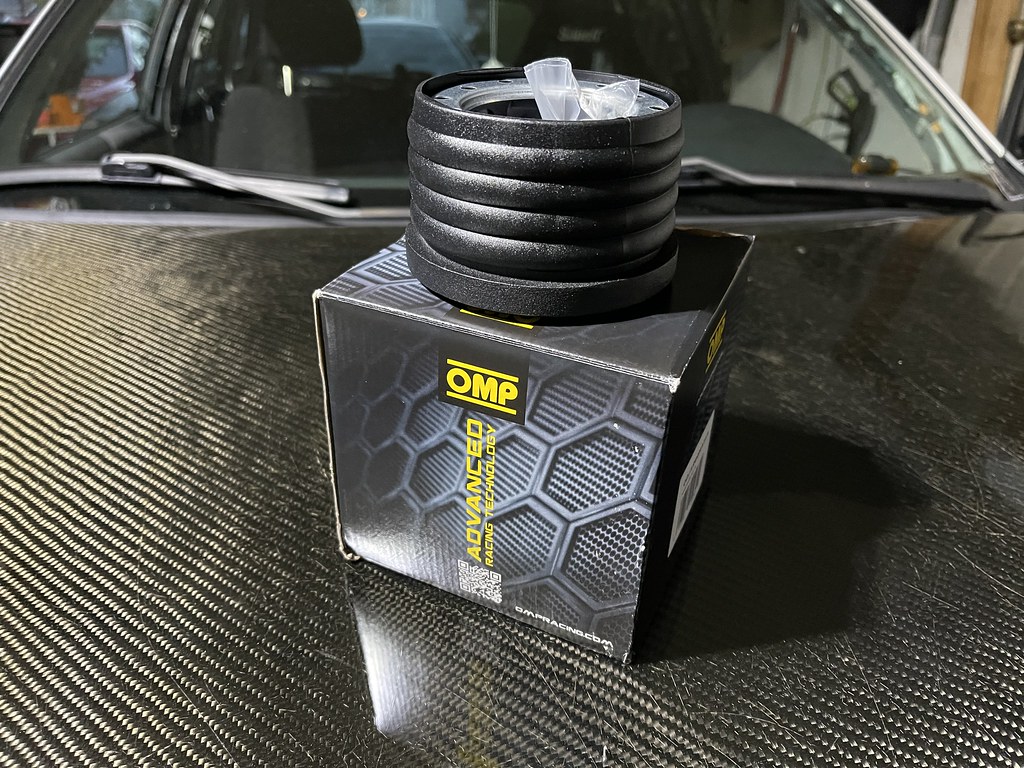
While getting the bearing done, I figured it was a good time to try and get some better brakes on the car.  So we went with a easy and cheap oem upgrade.


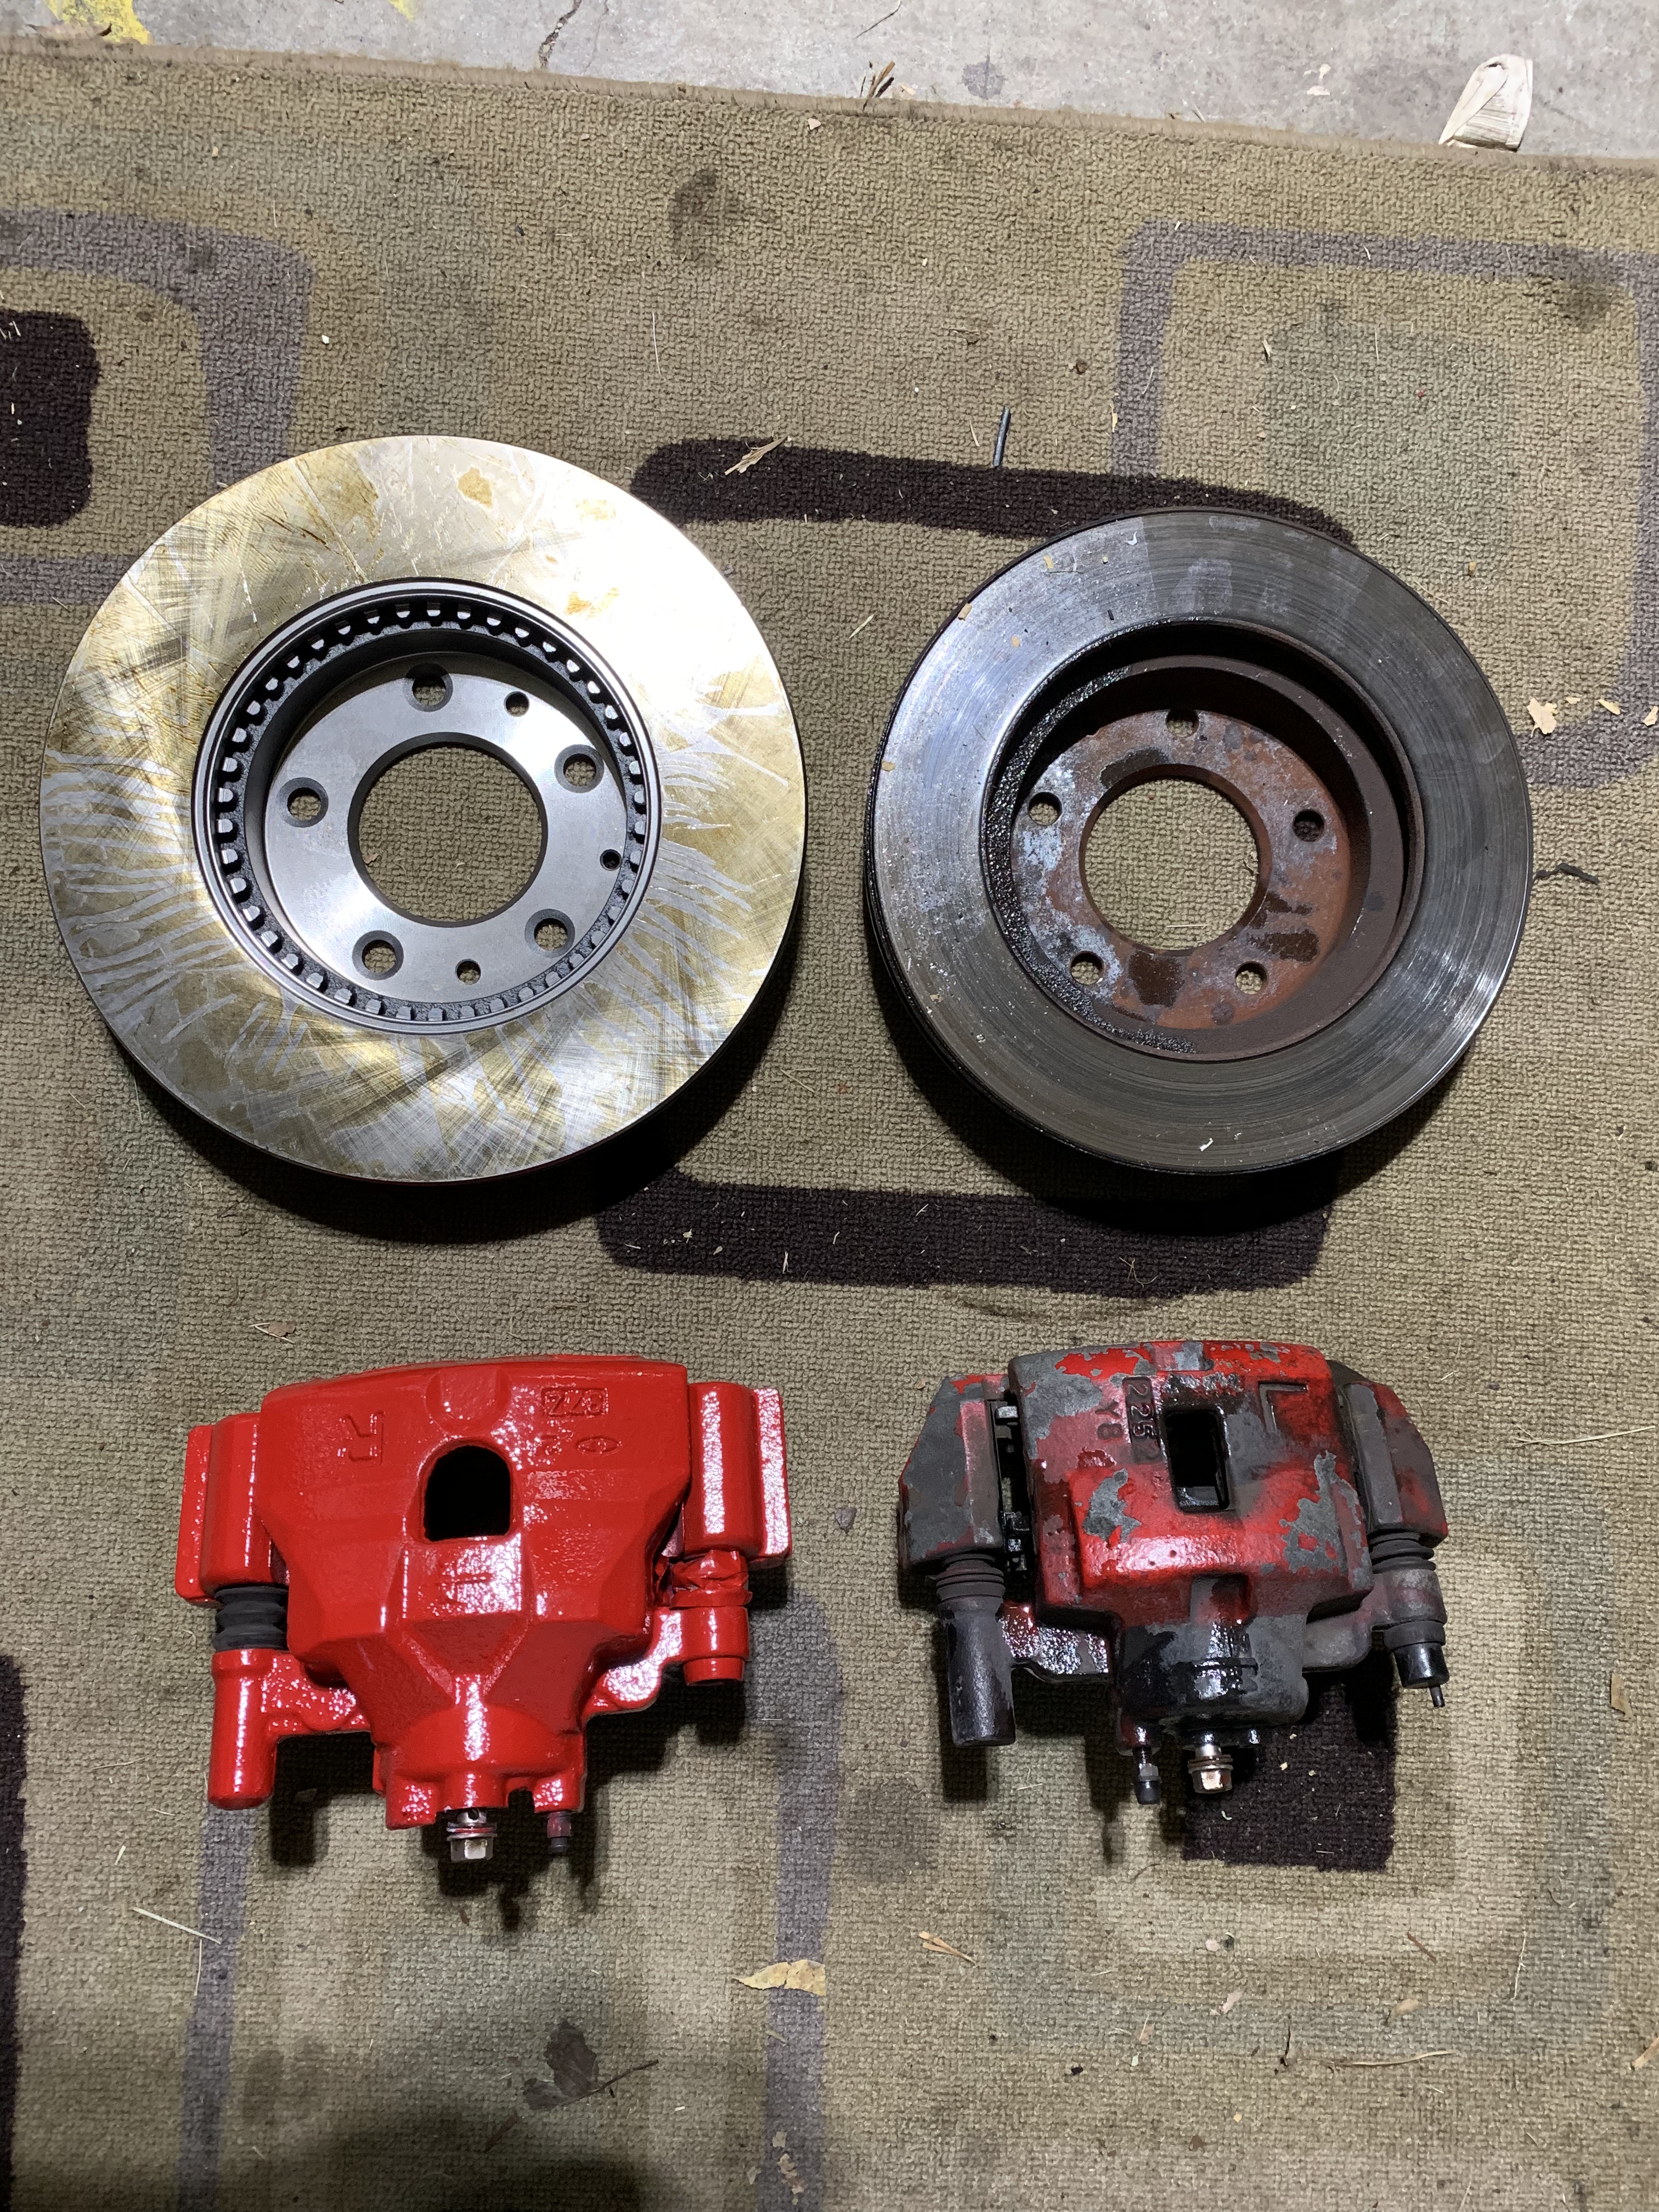
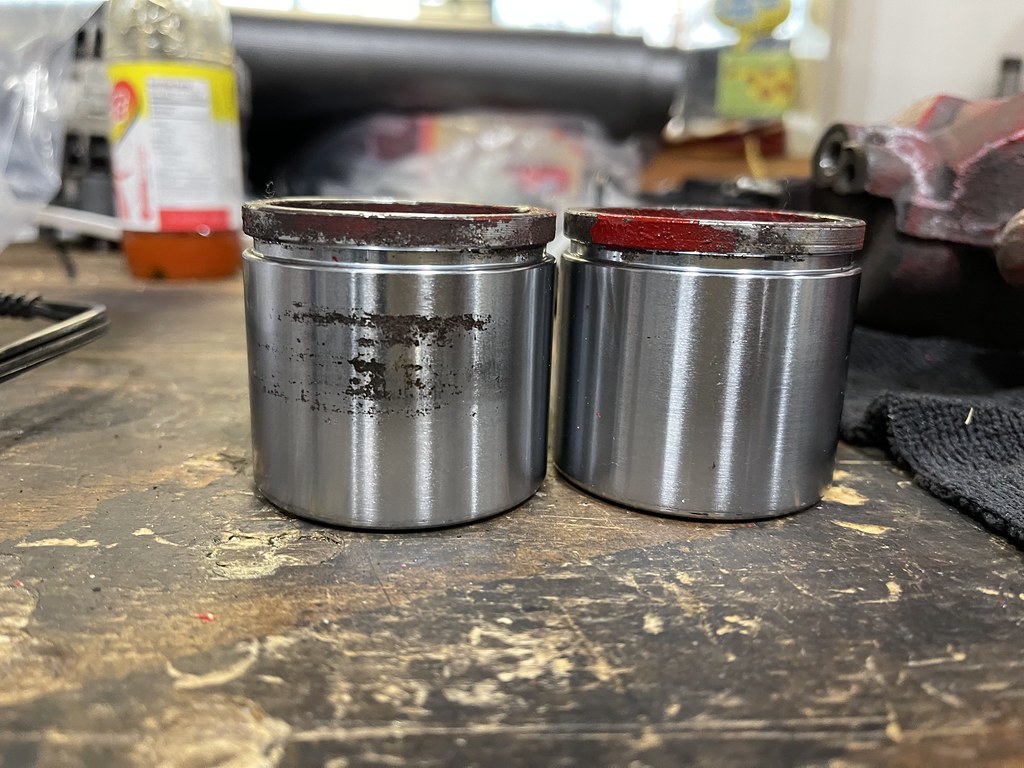
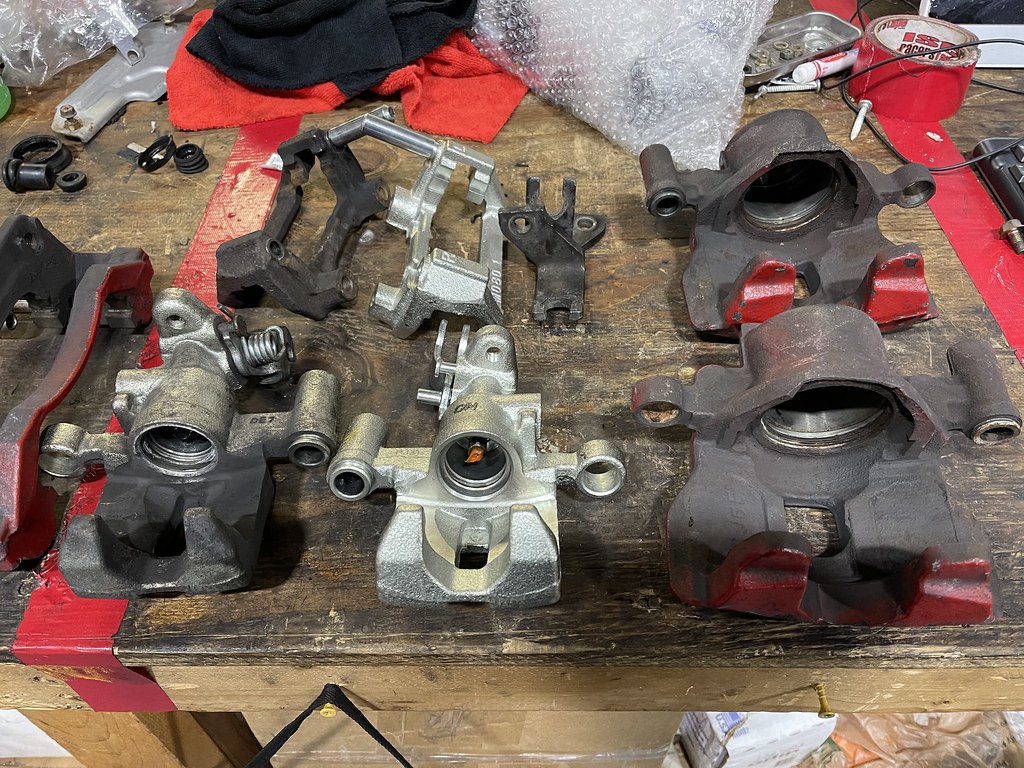
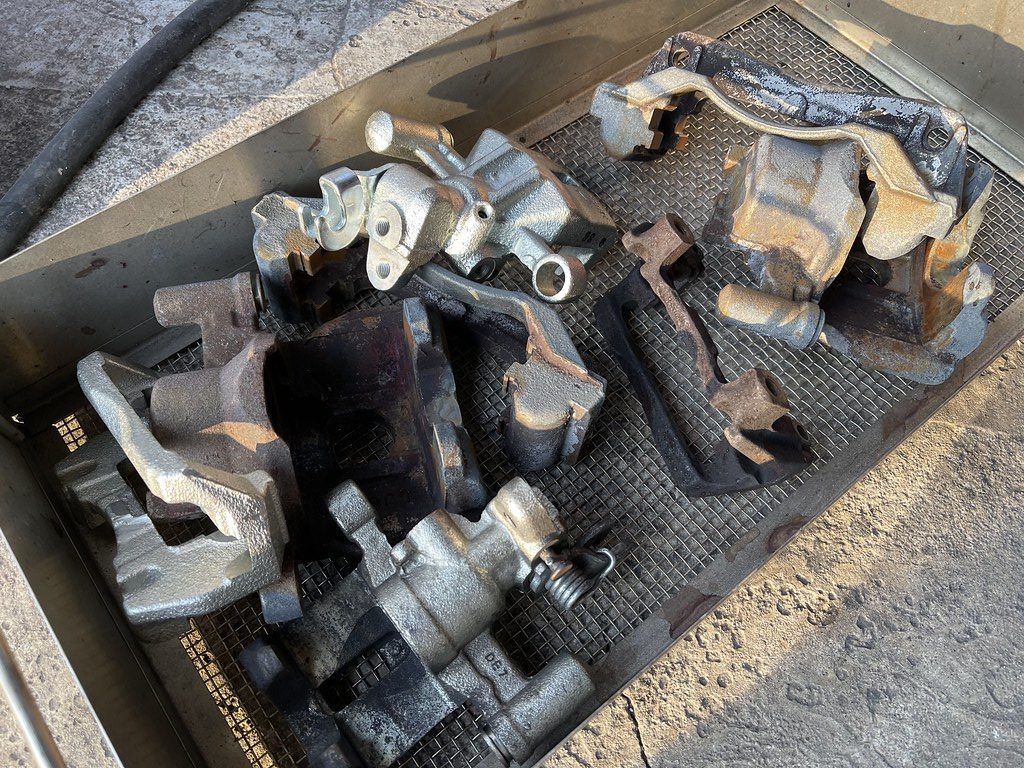
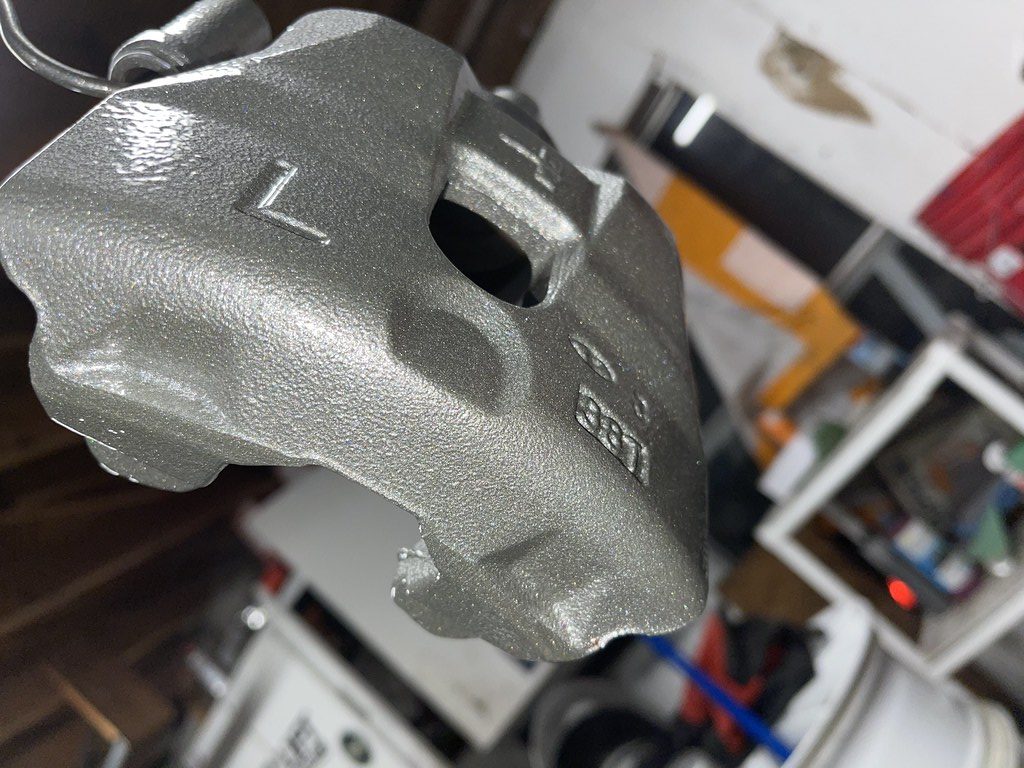
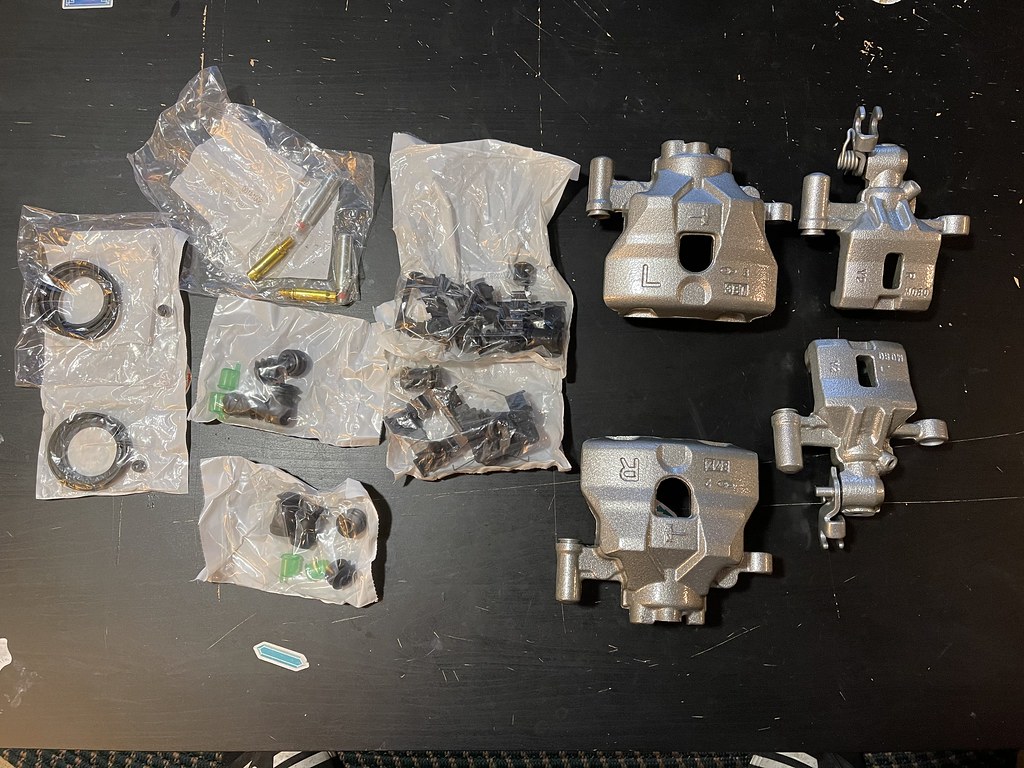
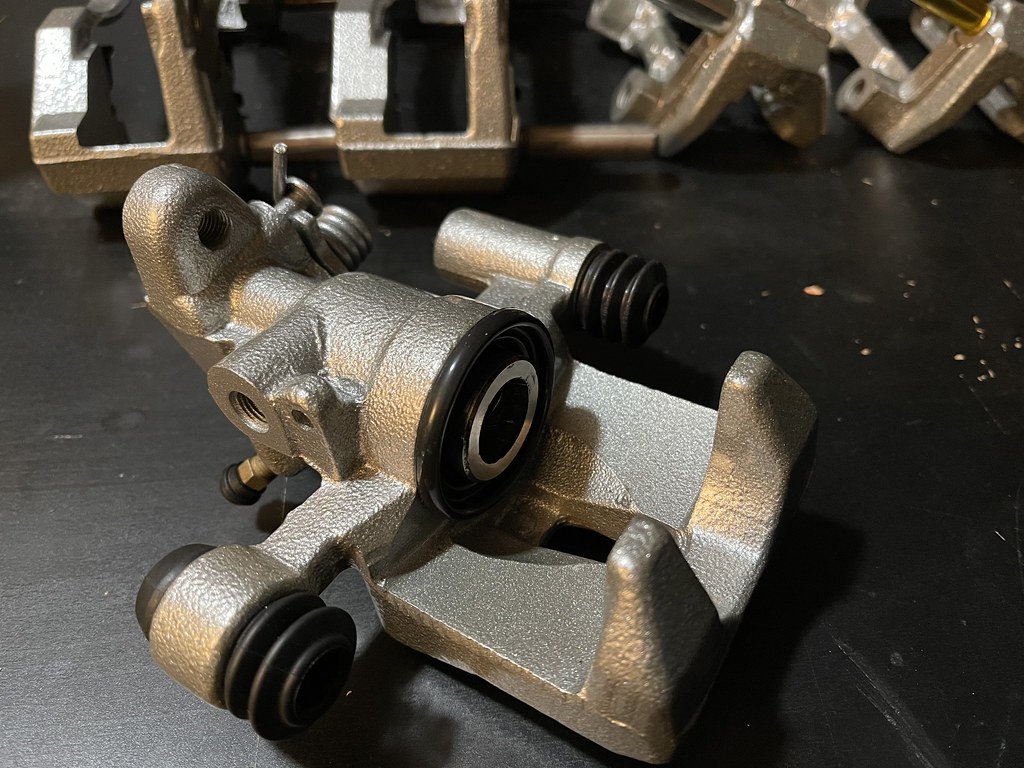
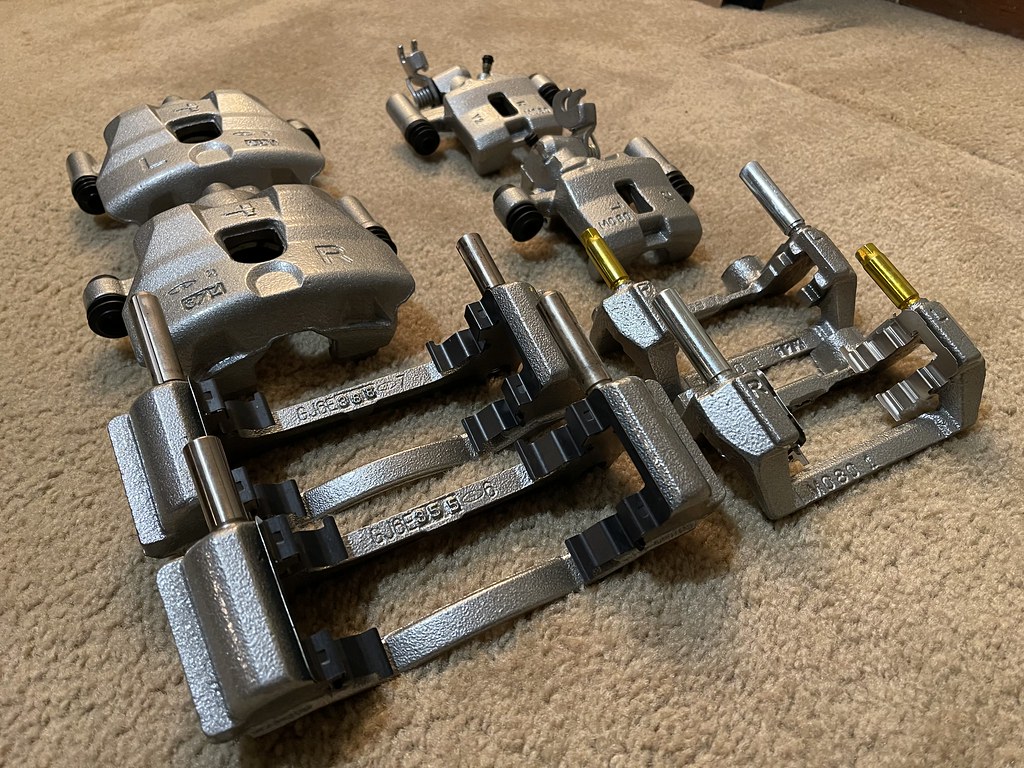
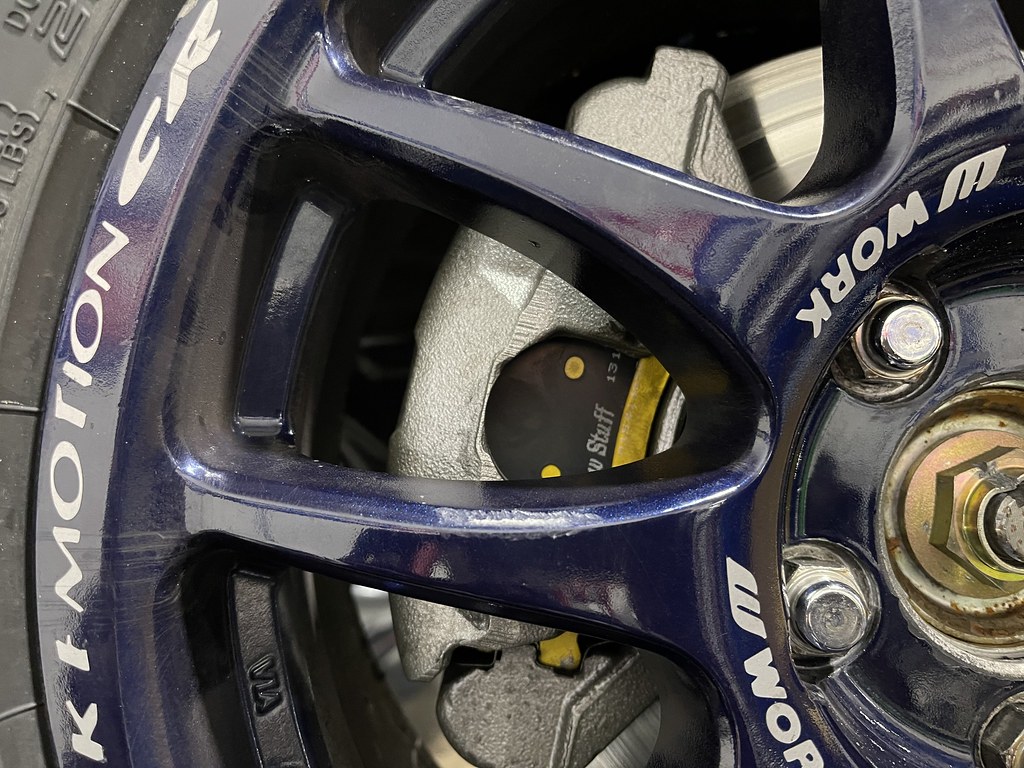
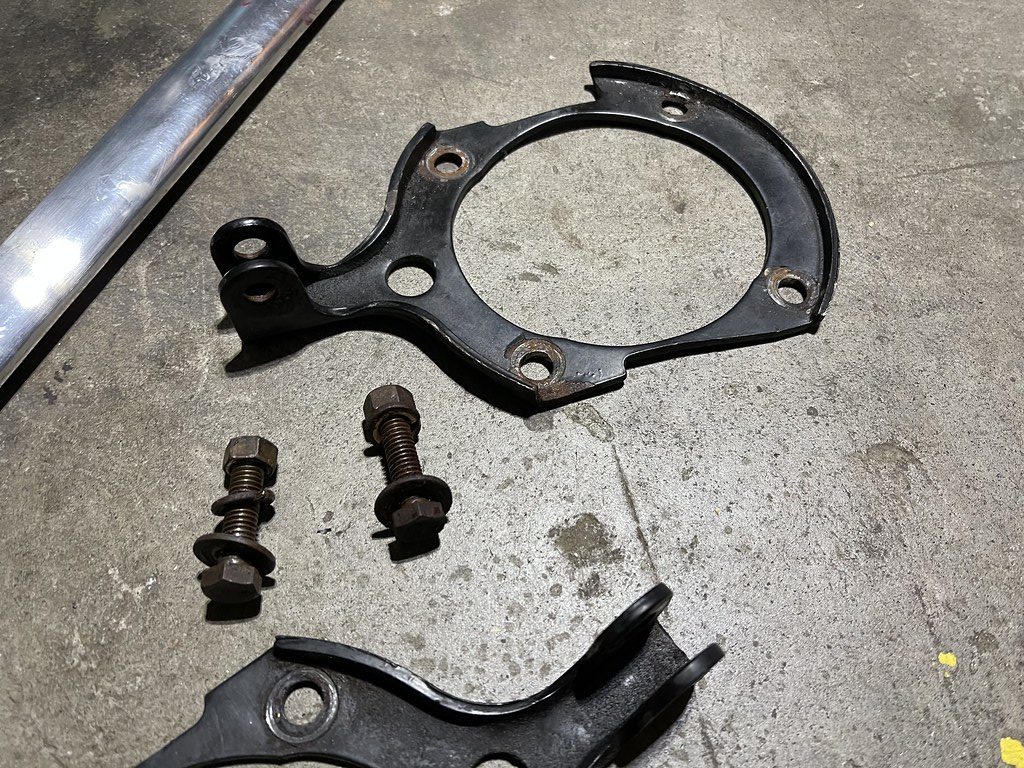
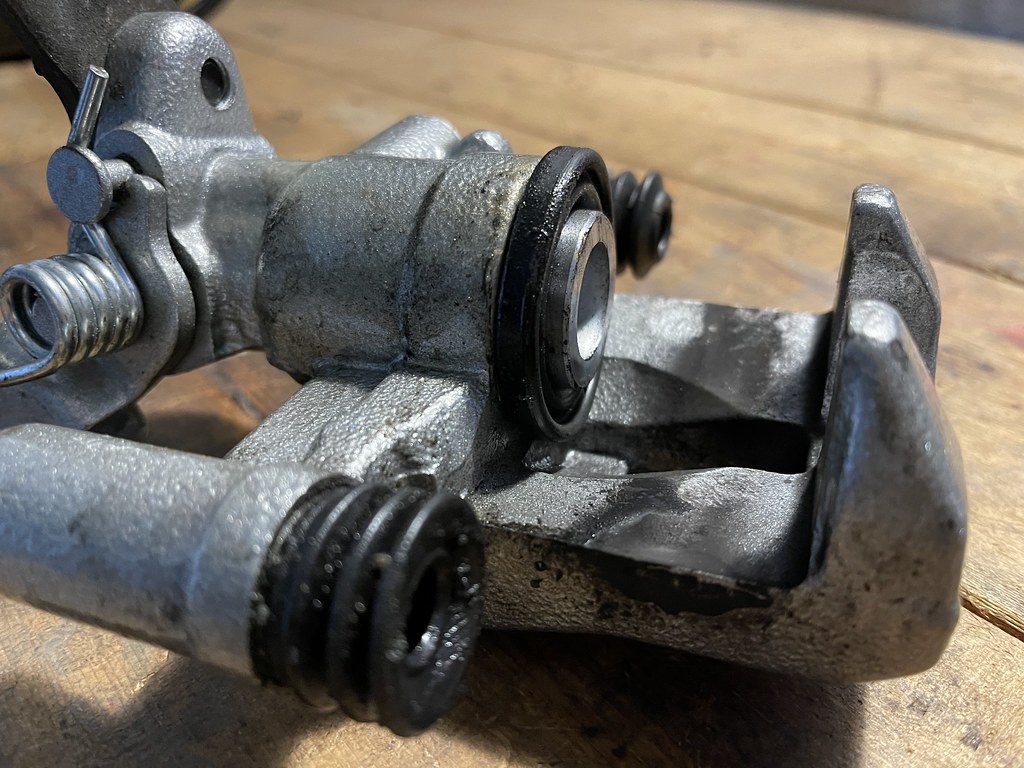
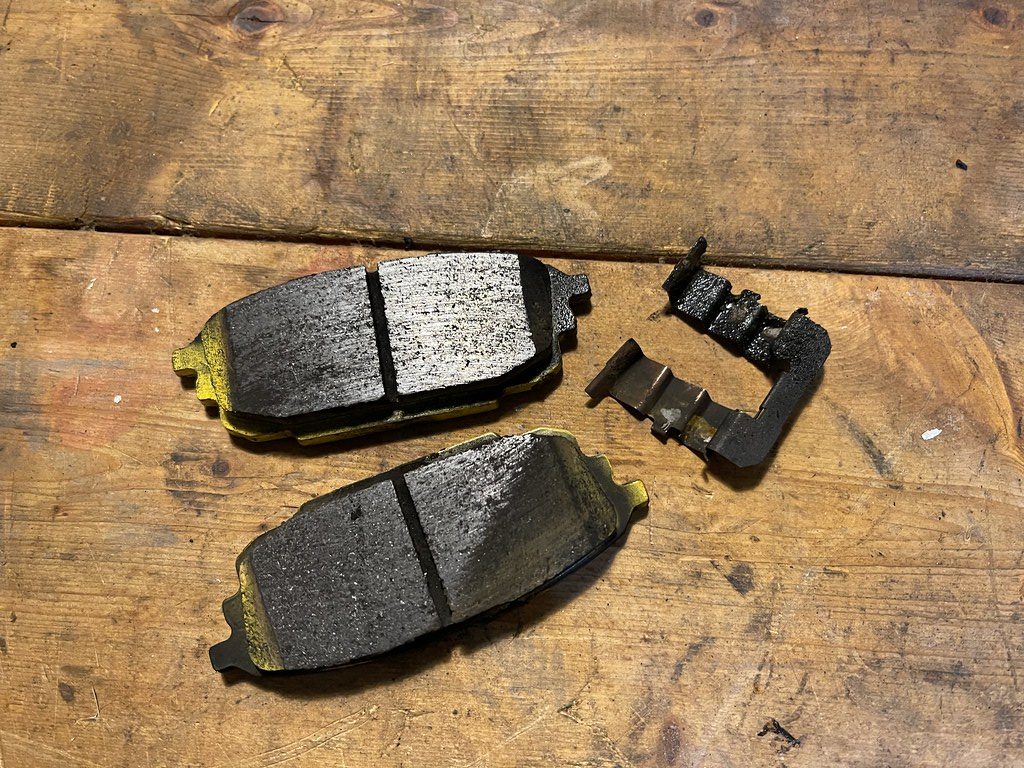
The left Caliper is from a 2004 Mazda 6, and the Right is the OEM Protege 5 caliper.  The swap is a direct swap and requires no additional modifications.  The Mazda 6 rear also works on the P5, I am just gonna go with a better pad and rotor for the rear.


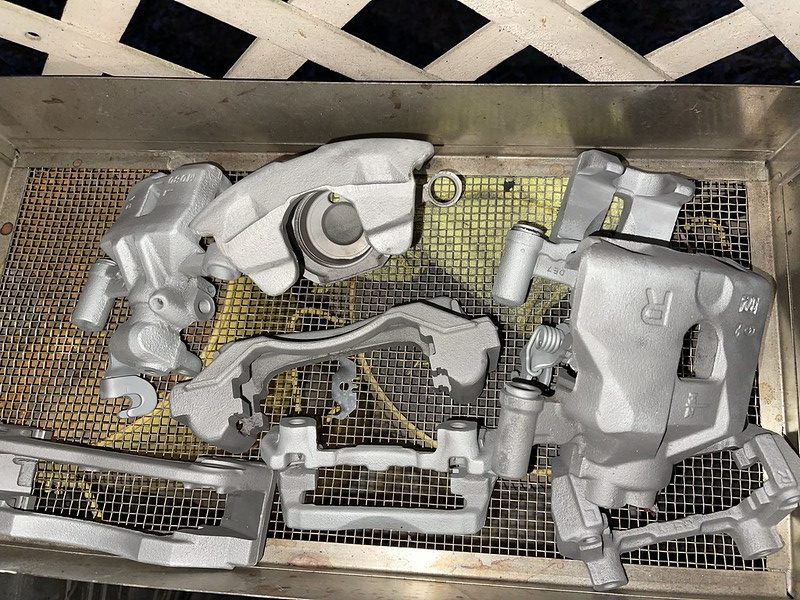
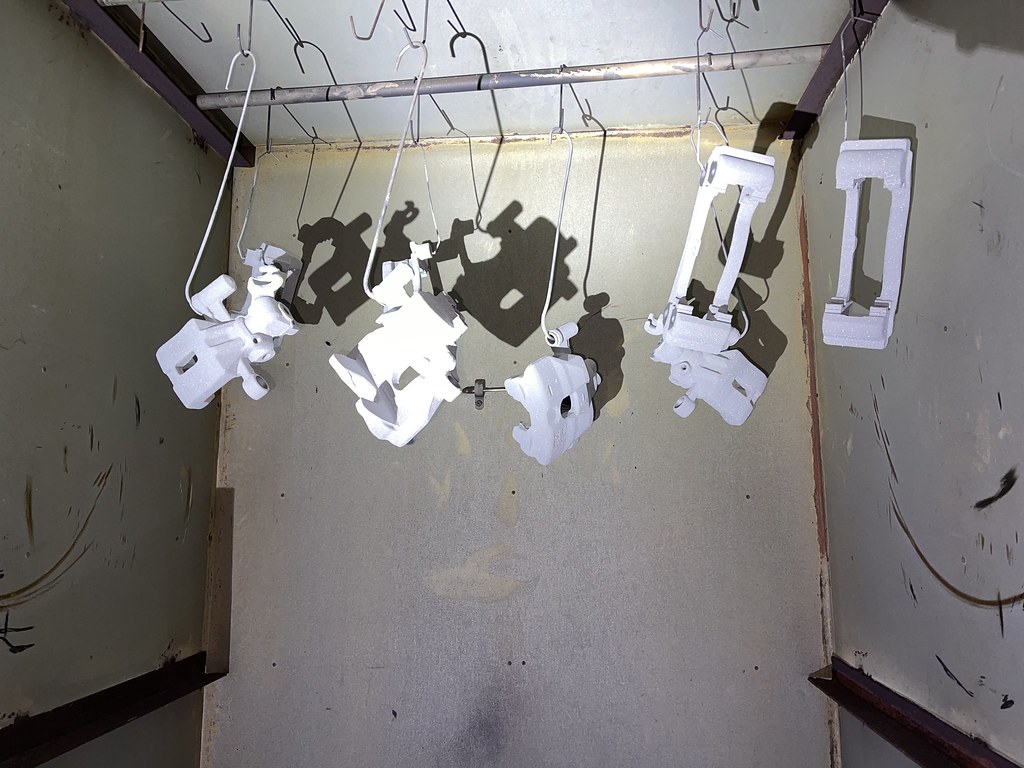
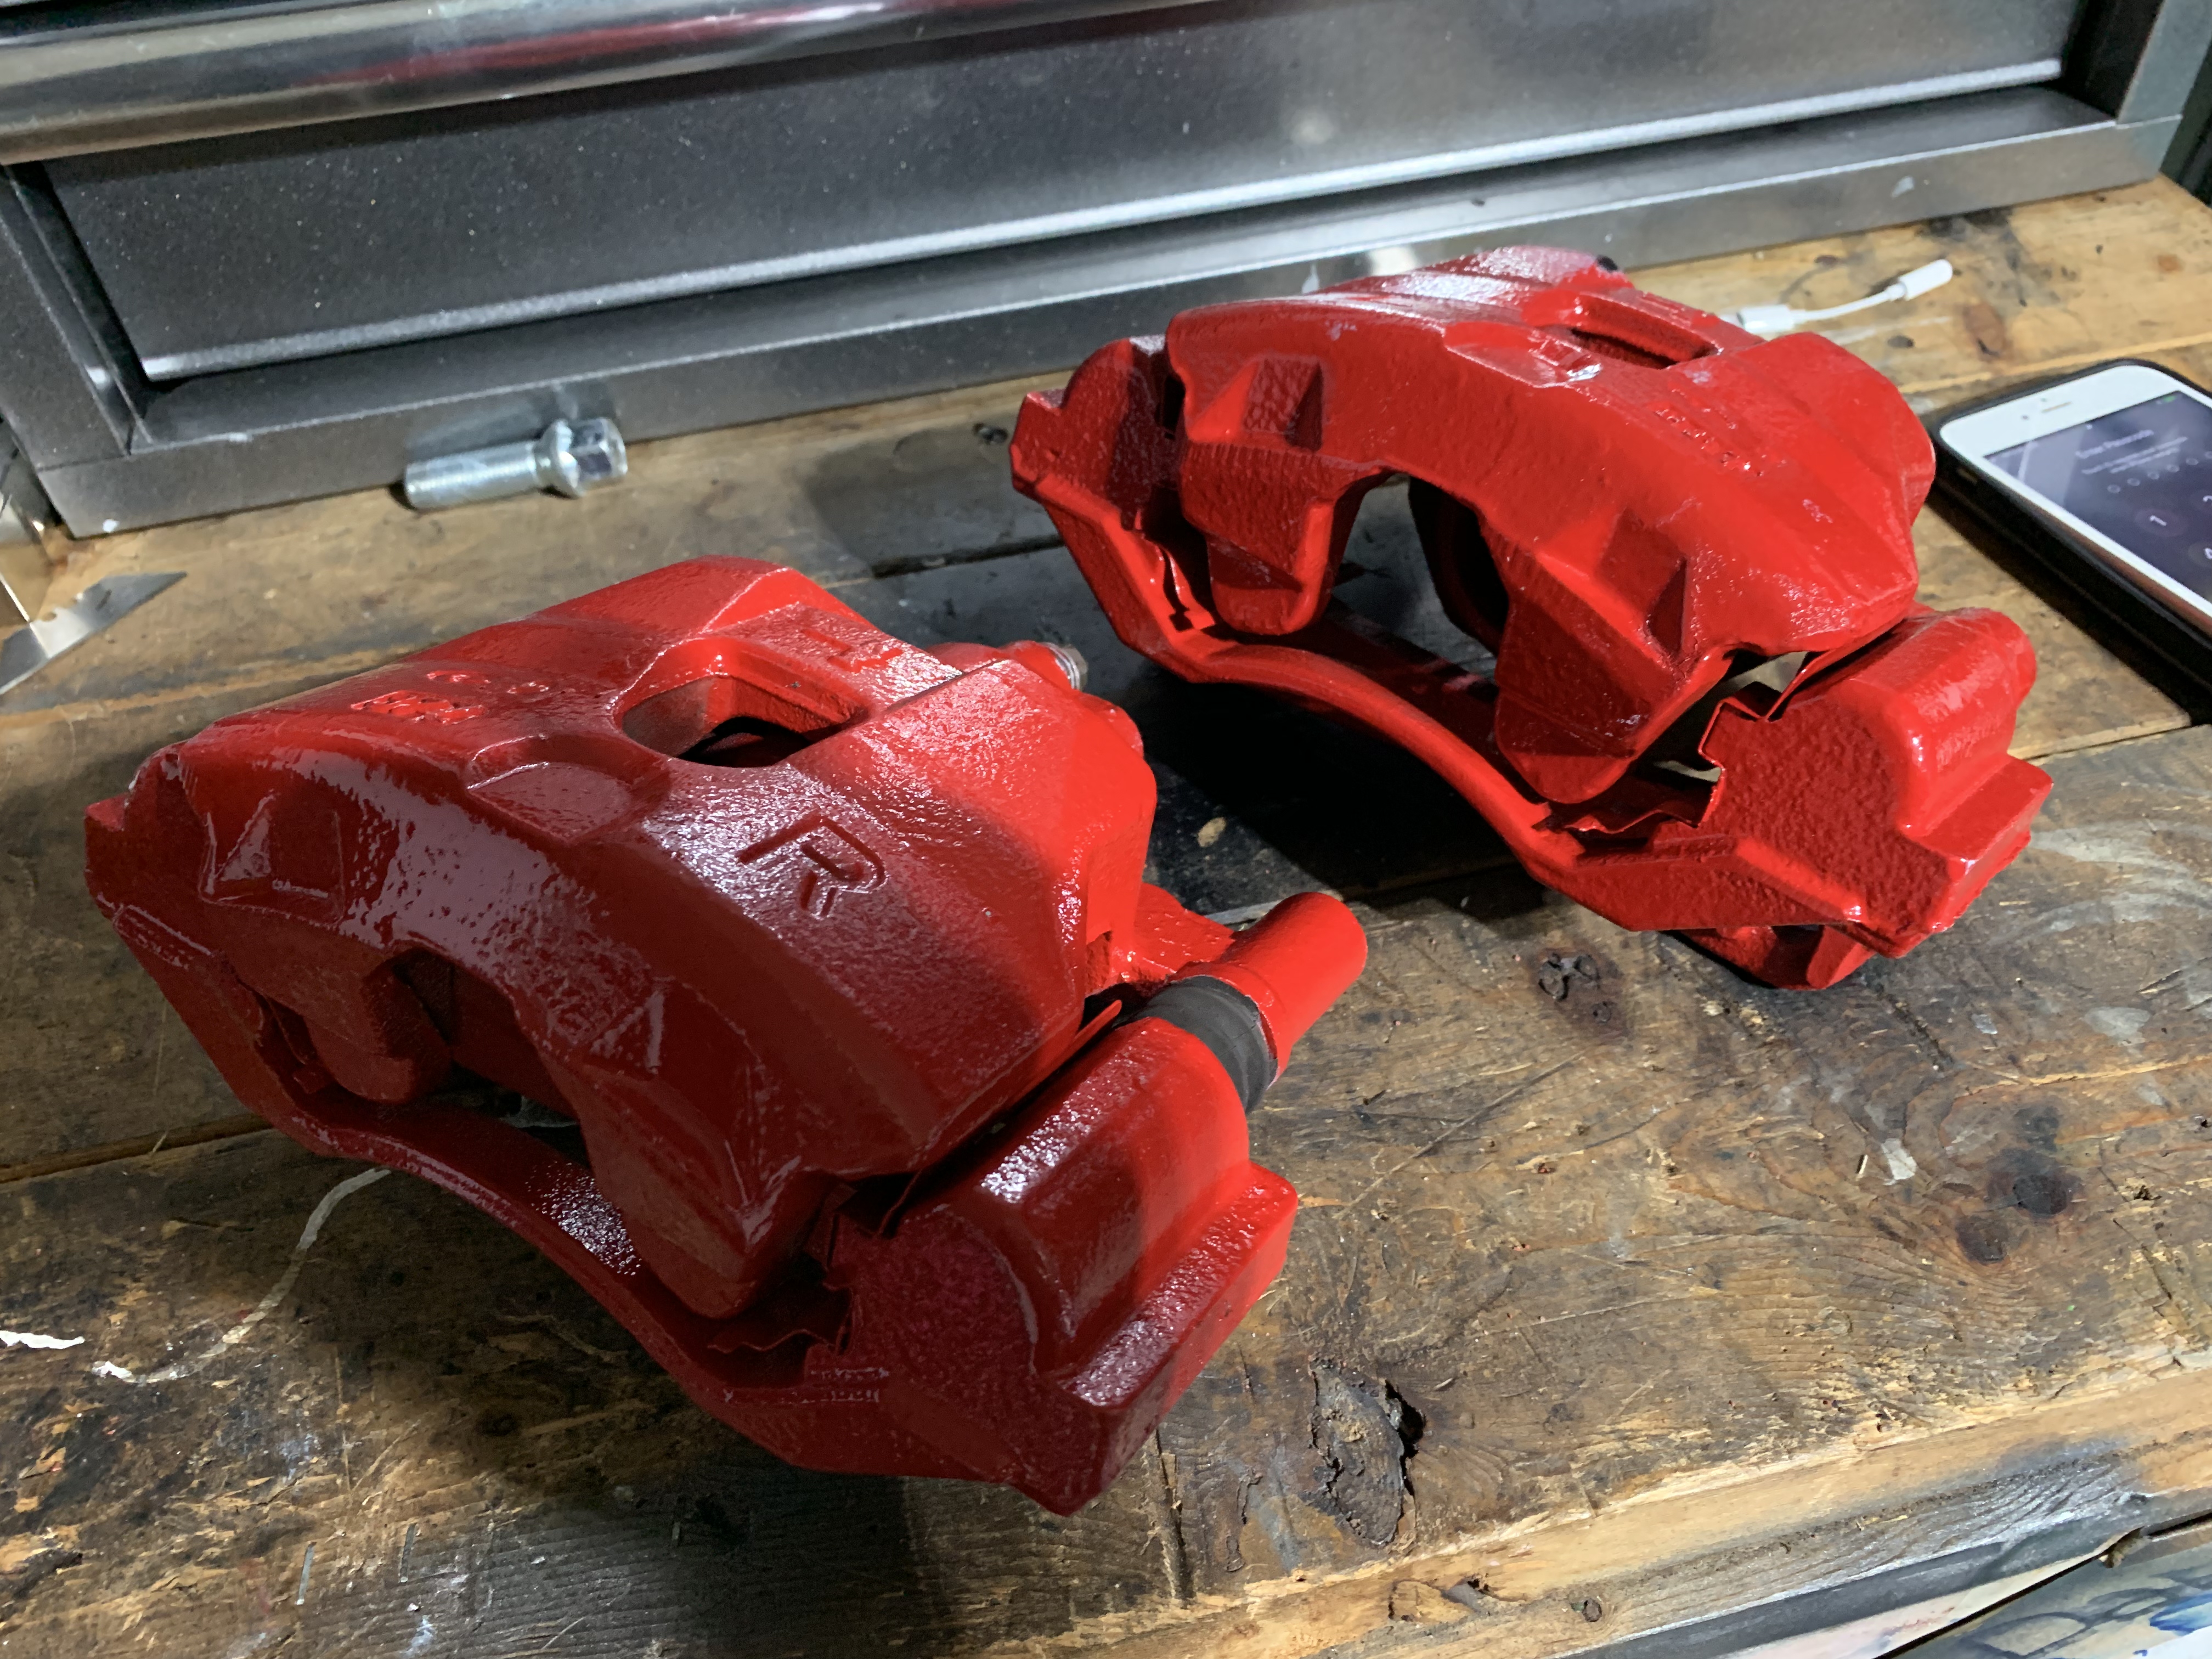
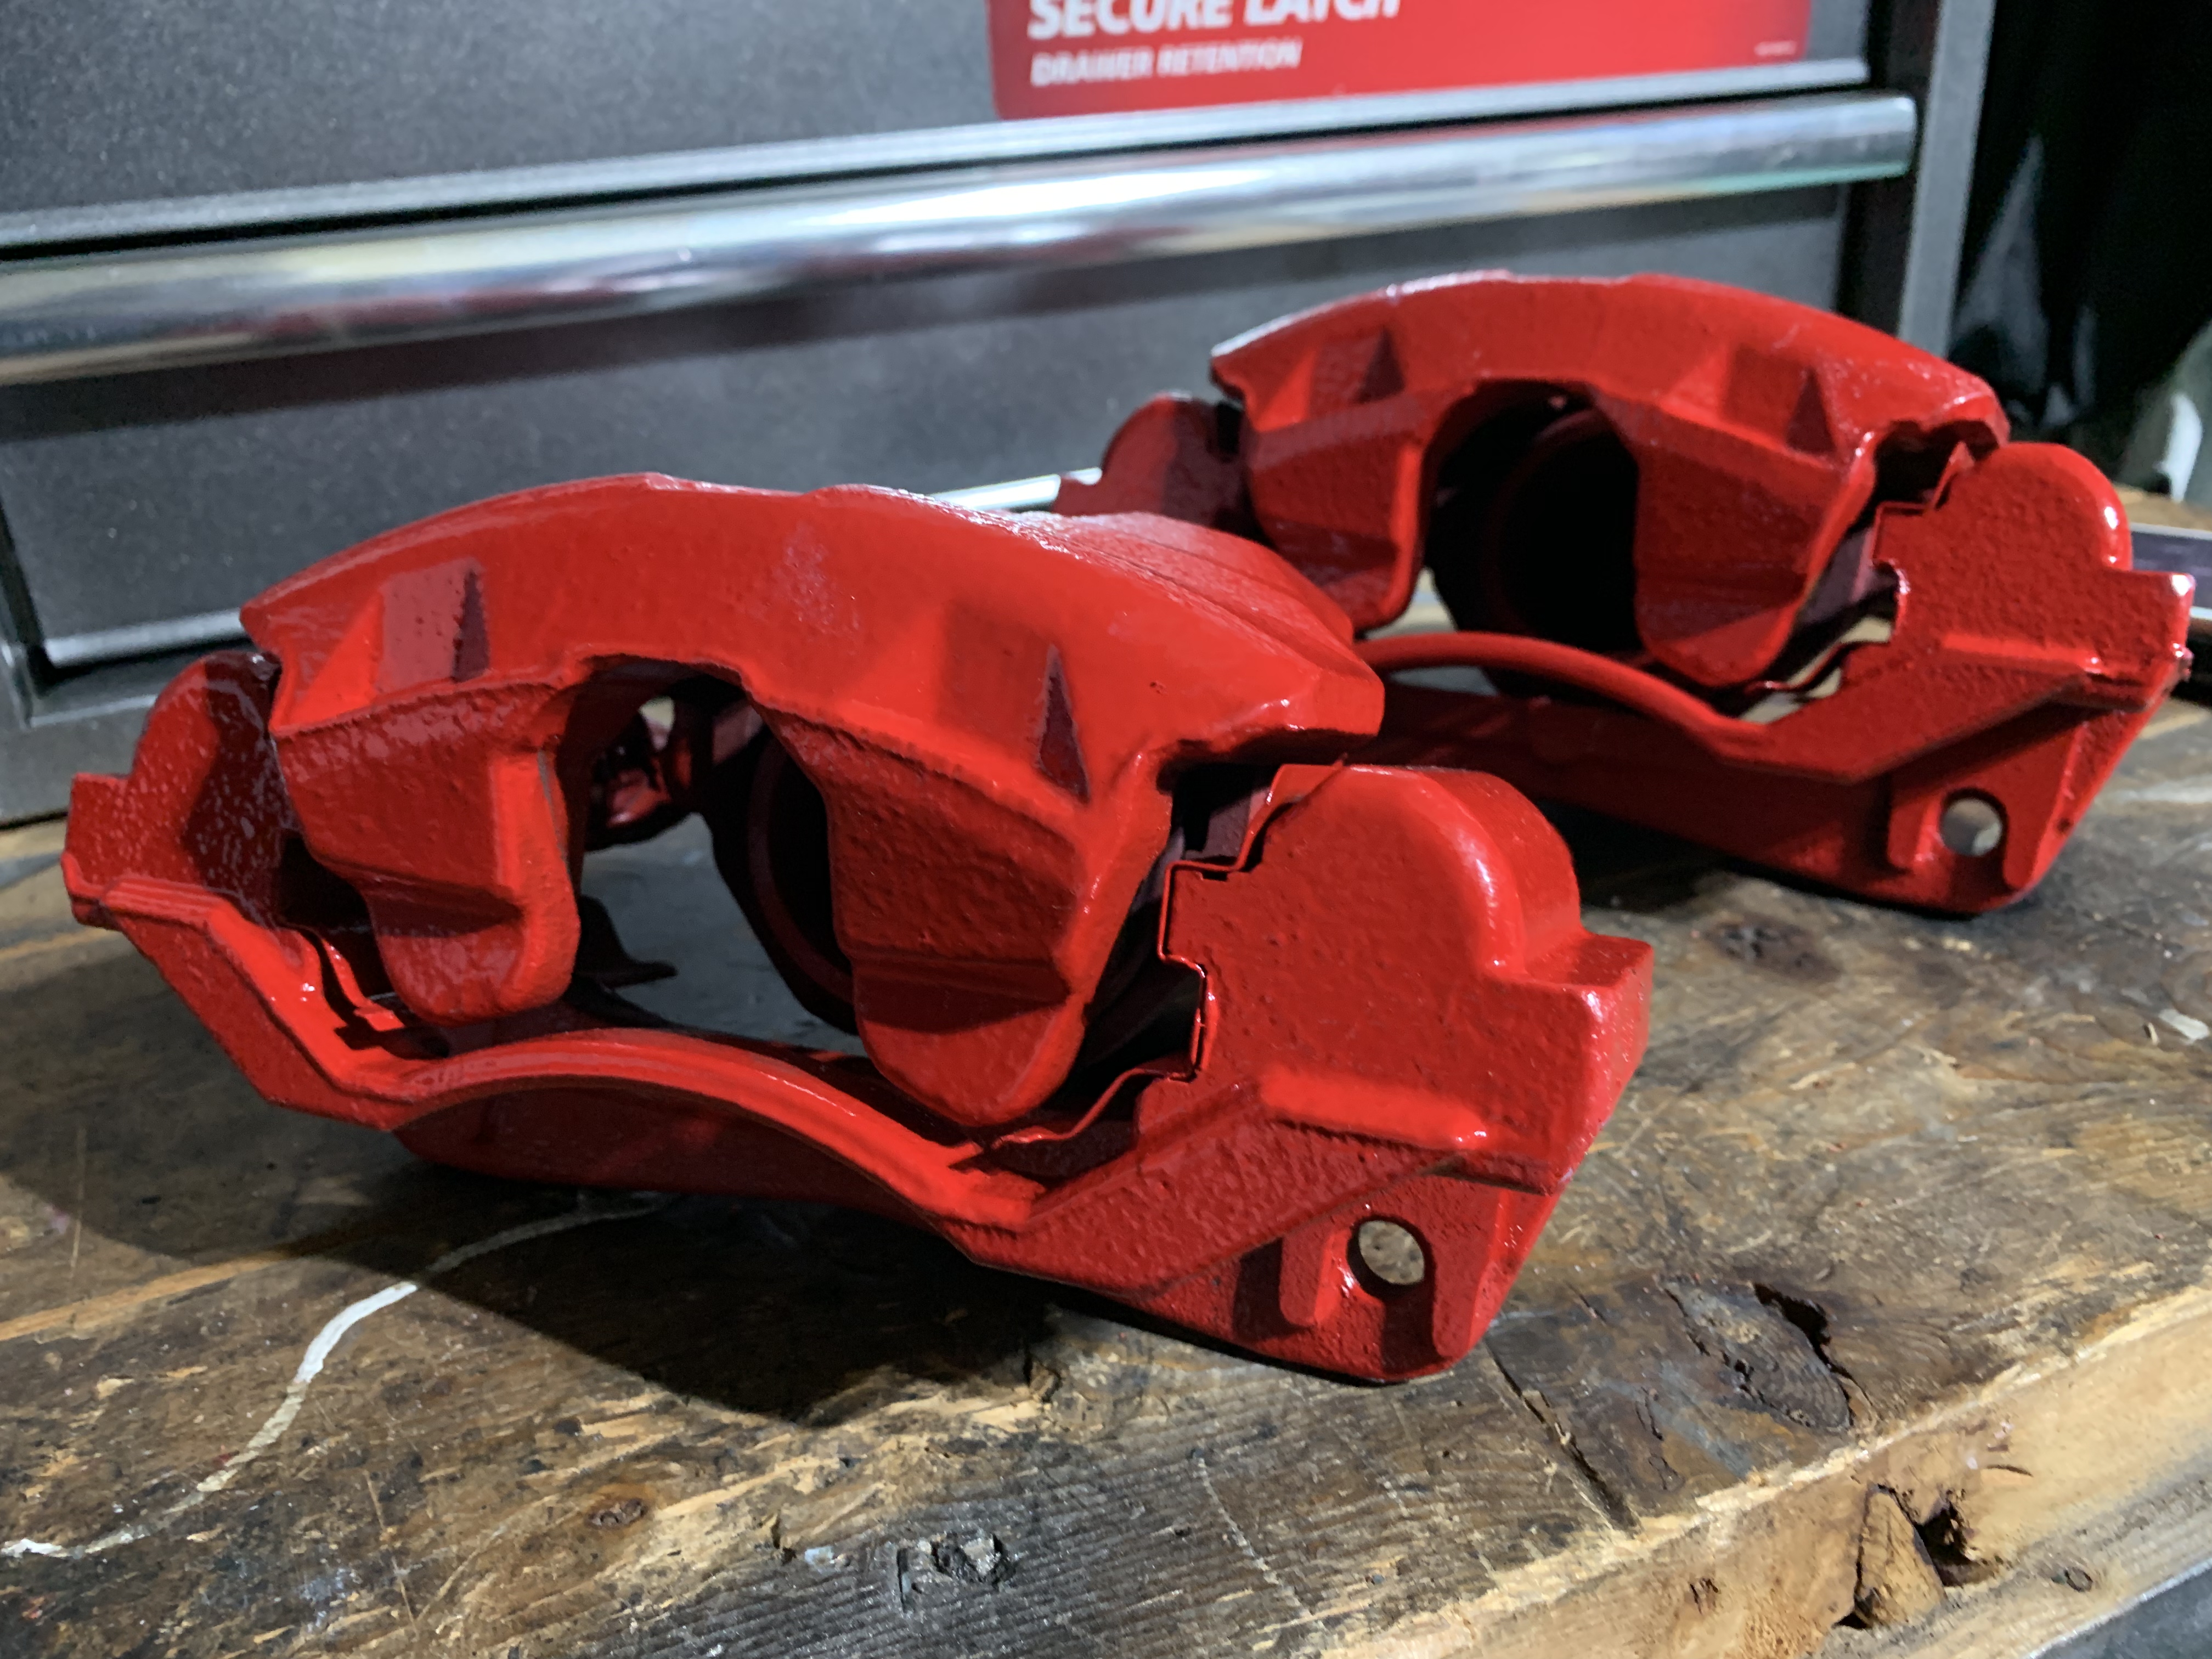
A race car red paint for the calipers...


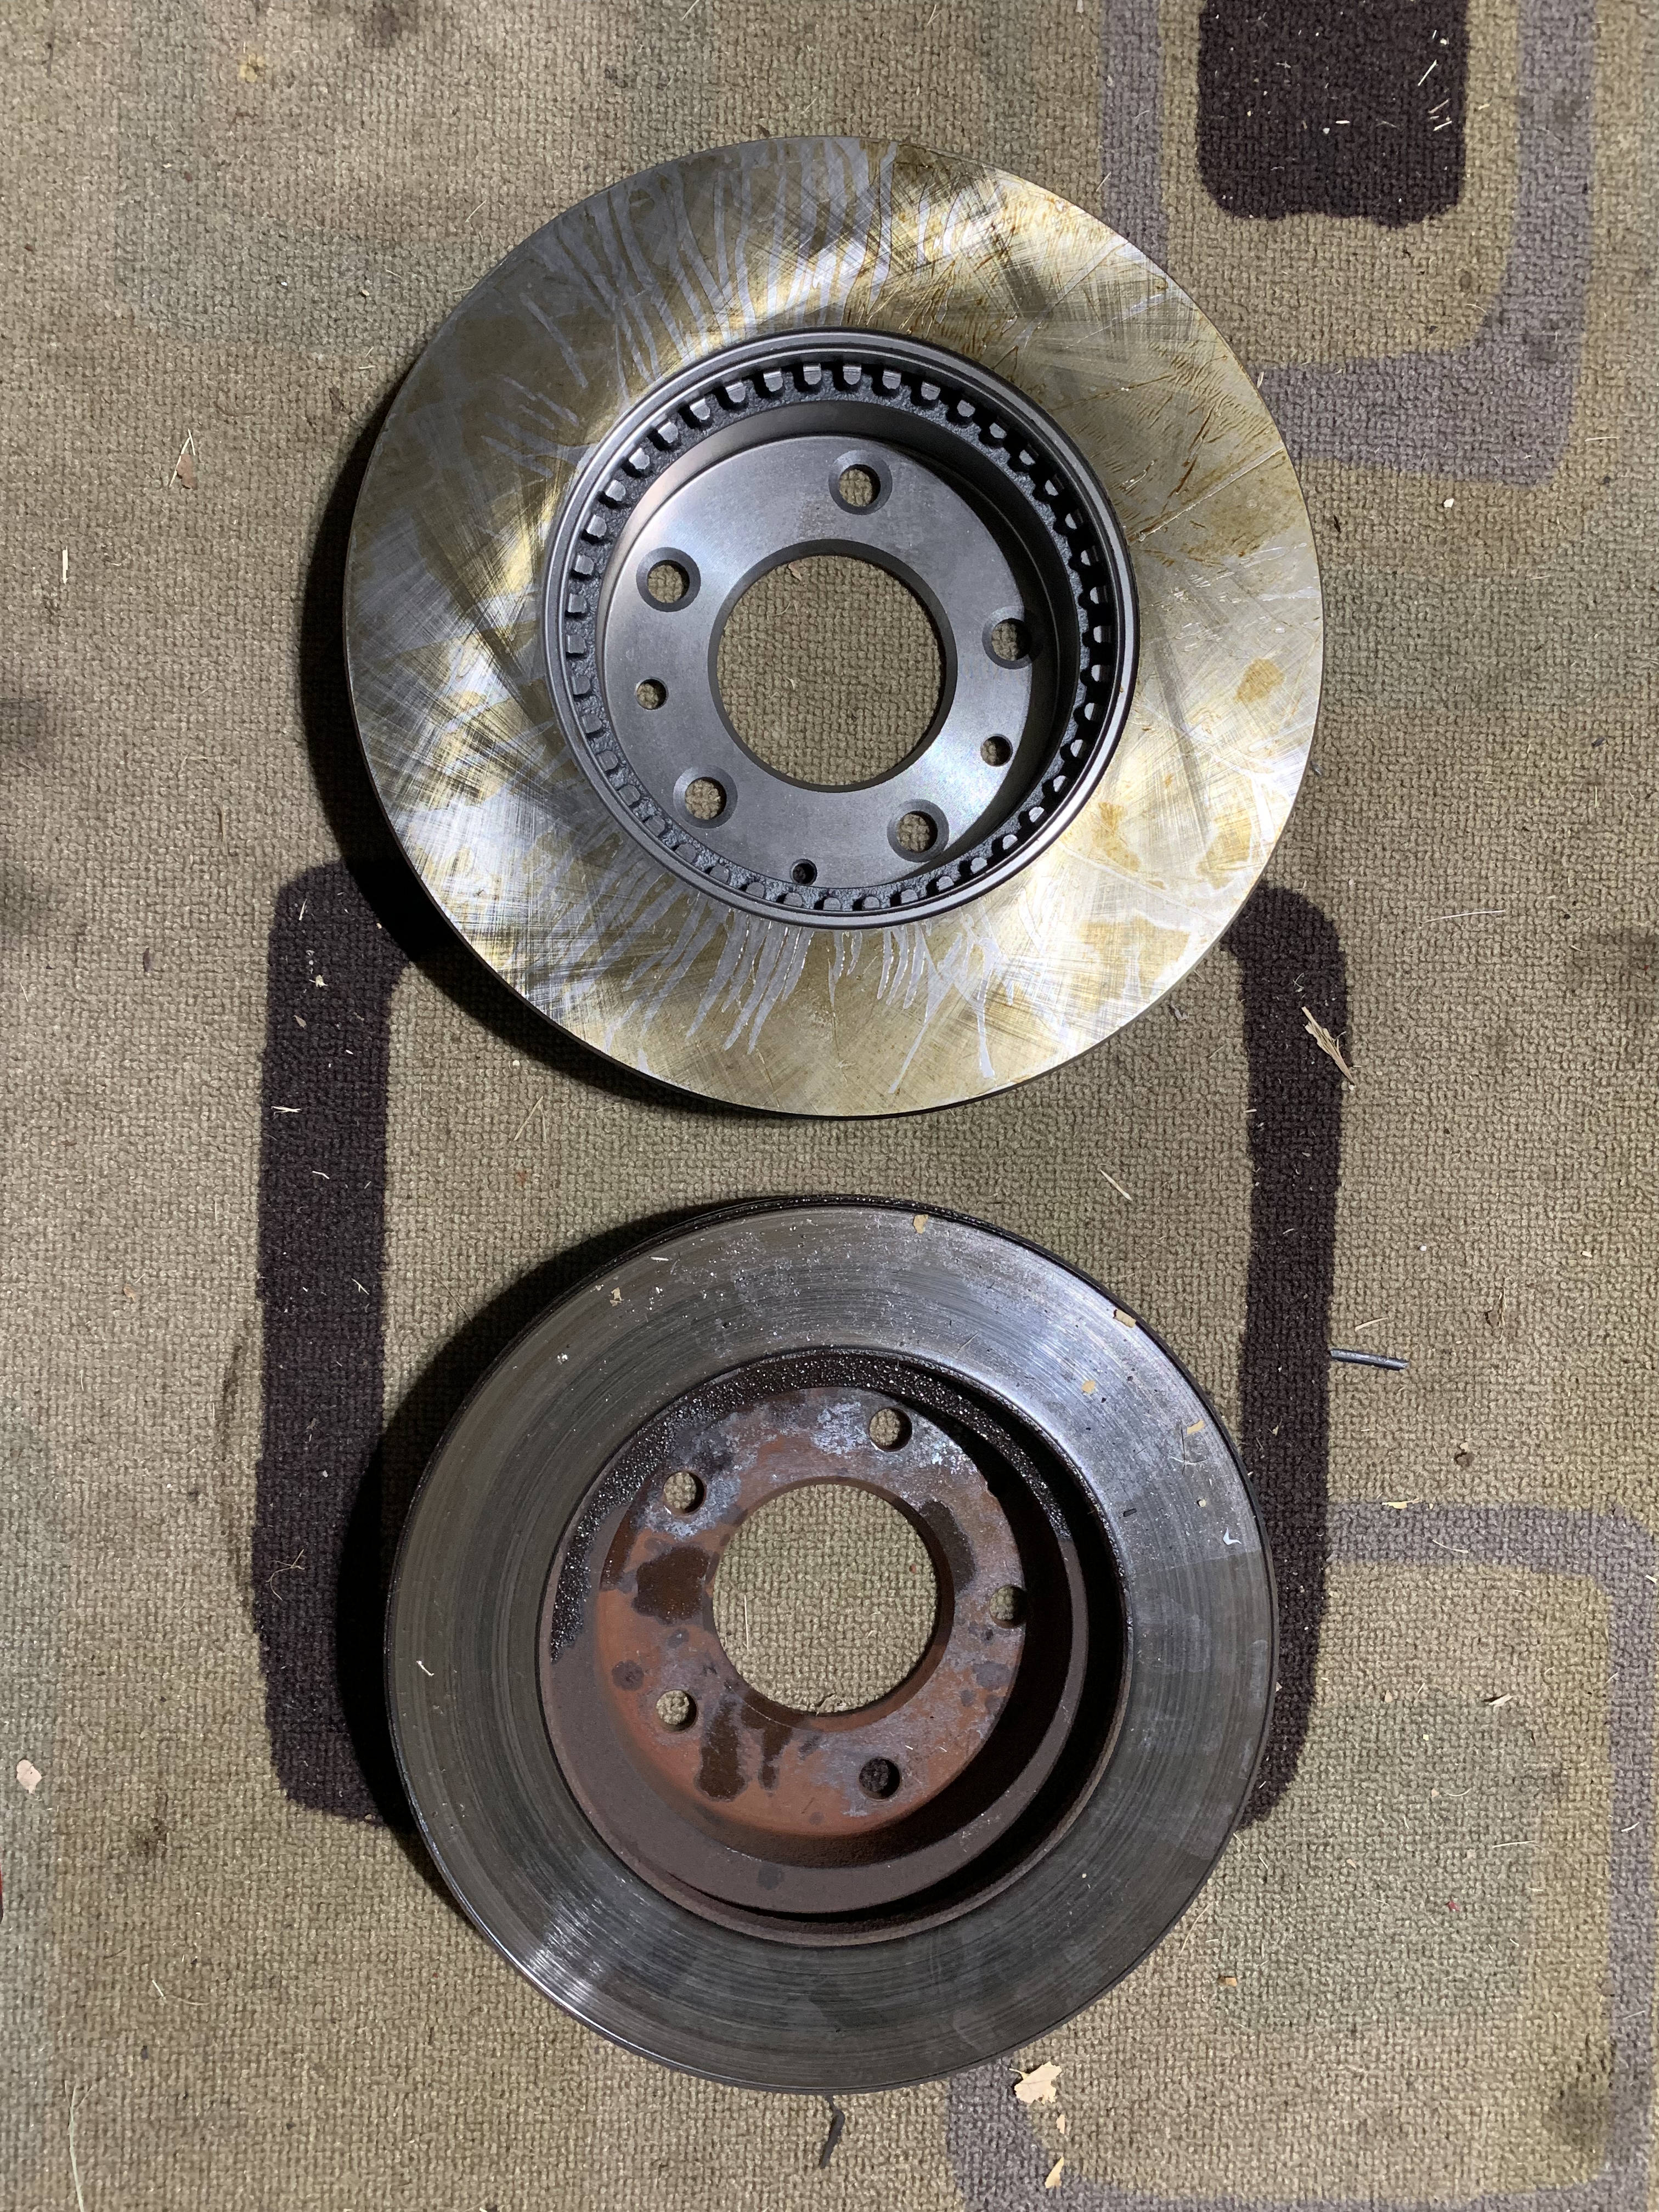
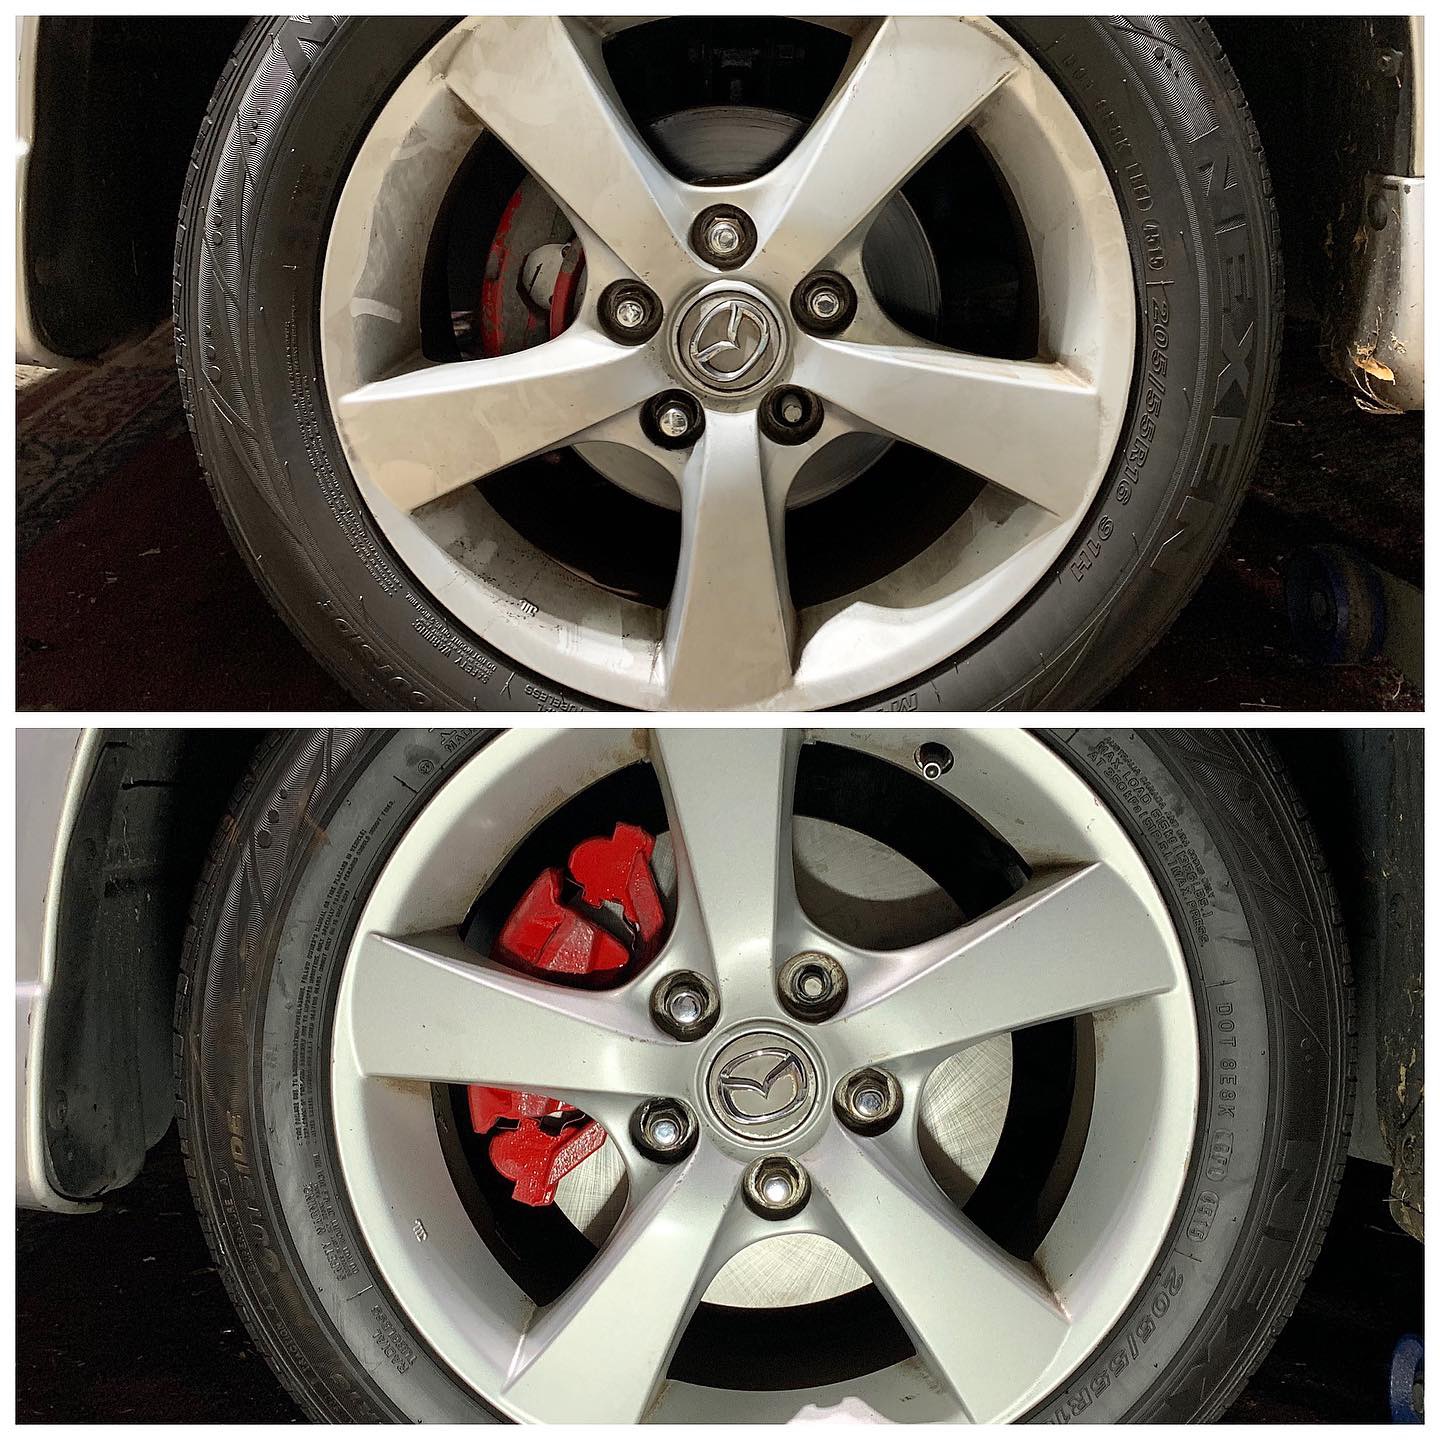
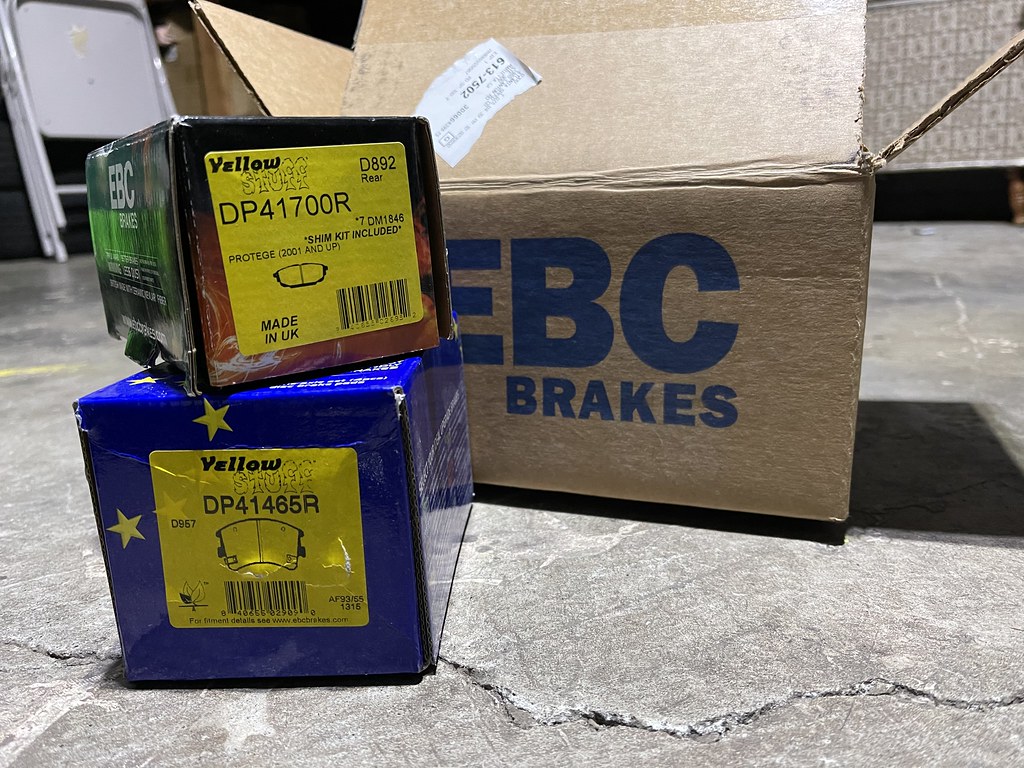
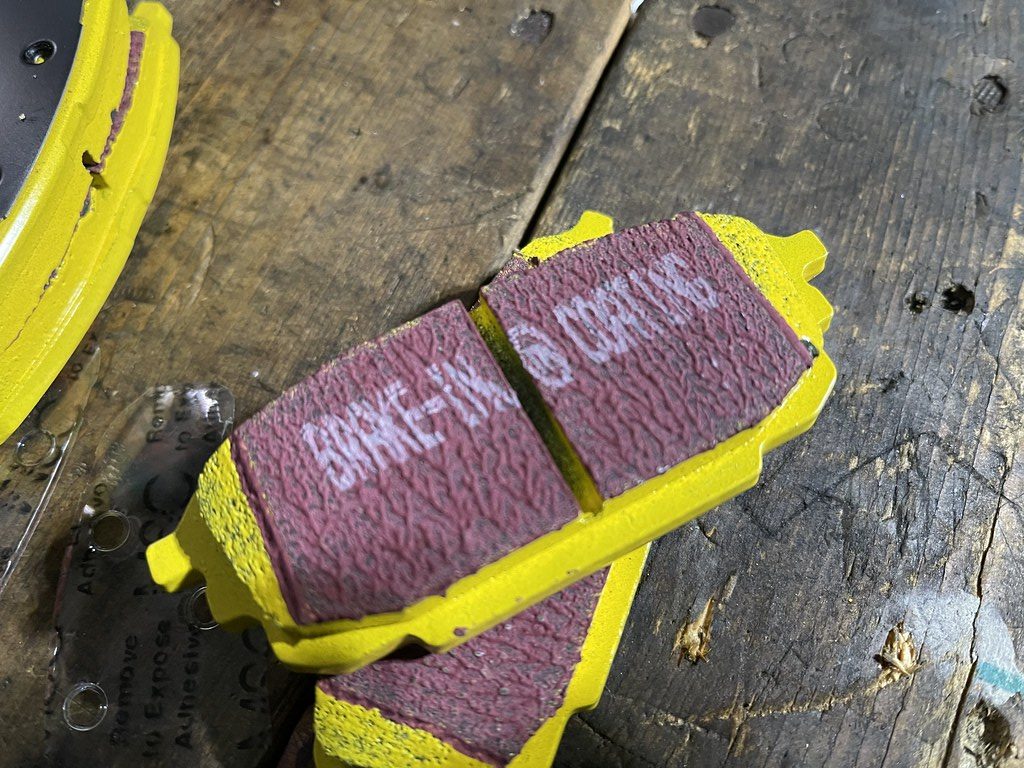
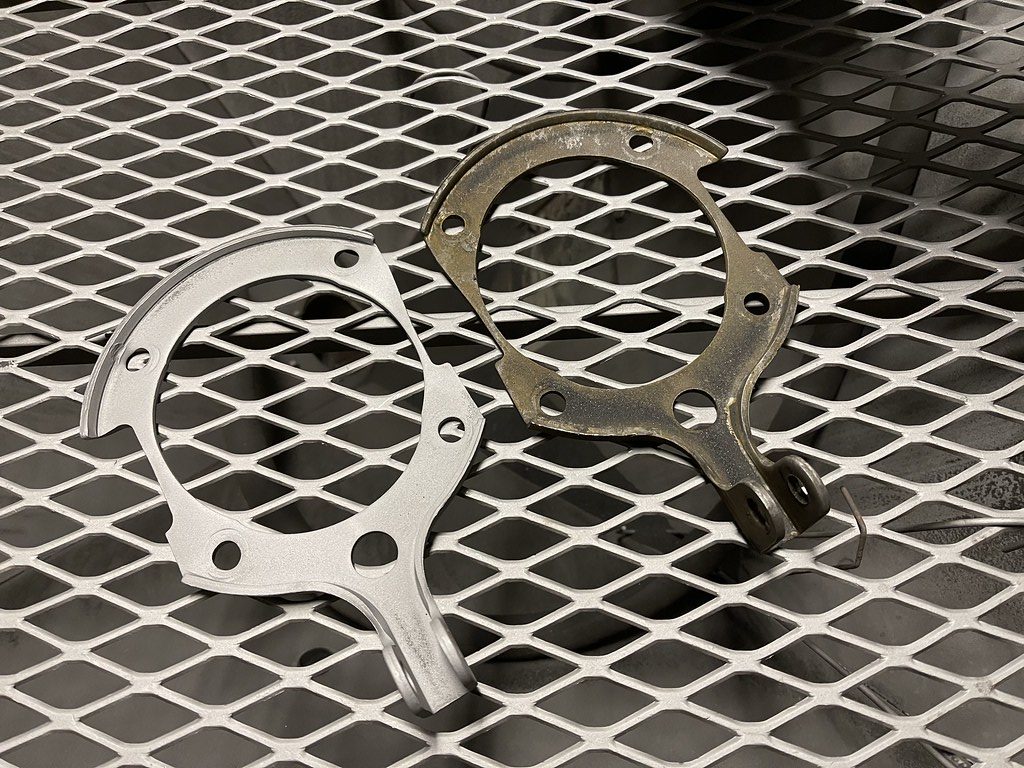
You can really see the difference in the two above.  The difference was night and day with this upgrade, being so much lighter then the 6 the P5 stops on a dime.  You can also use the Mazdaspeed 6 brakes, but it requires the use of a 17" wheel, and it would make finding replacement pad/rotors a little more difficult if I had to go with specific MS6 pad and rotors.  And the regular 6 brakes get the job done.  This cost me a total of $90 including new blank pads and rotors.


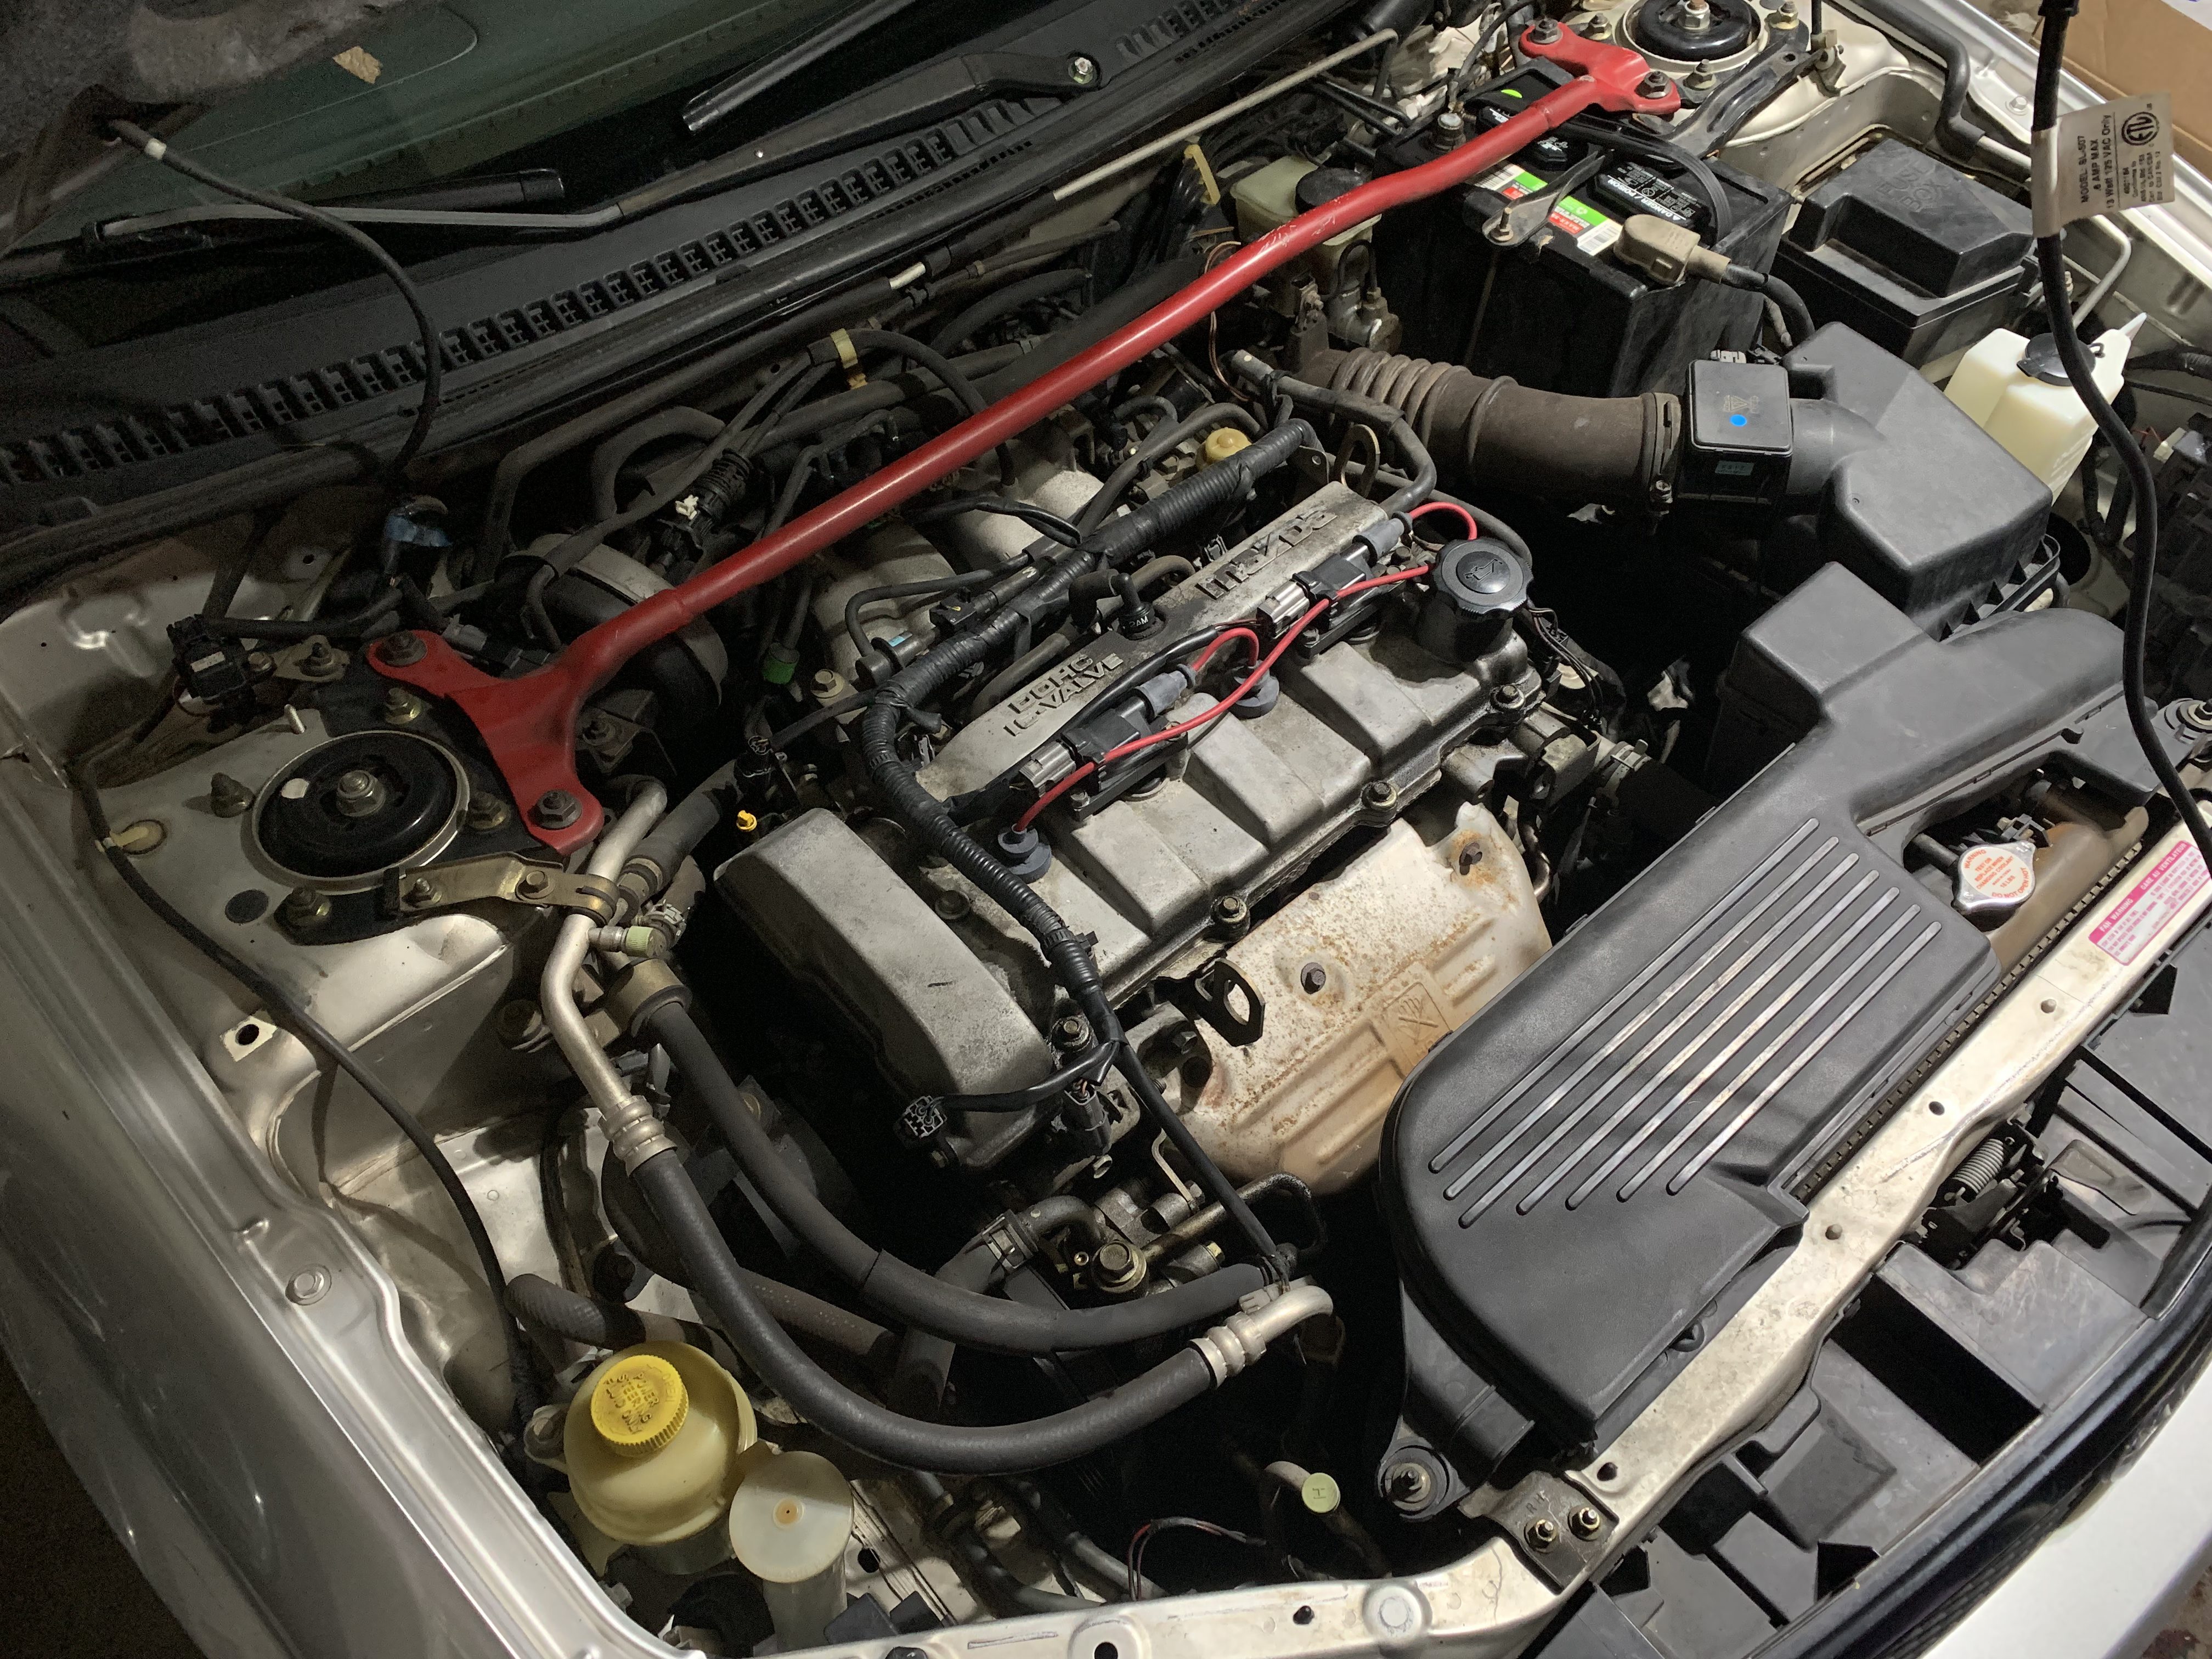
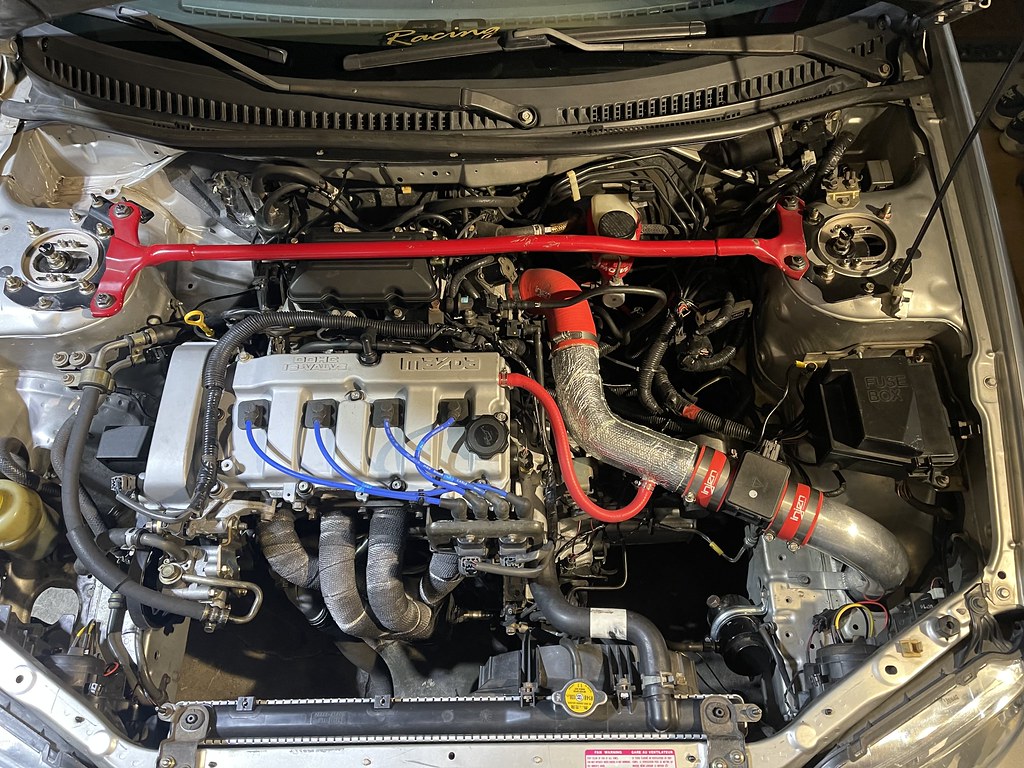
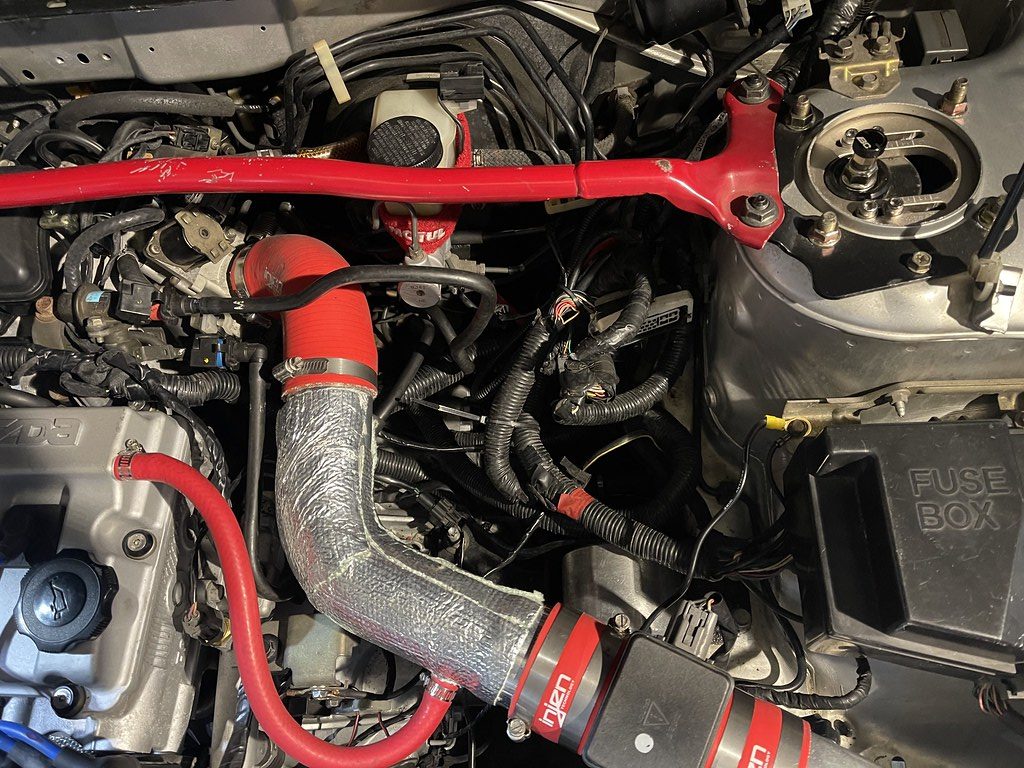
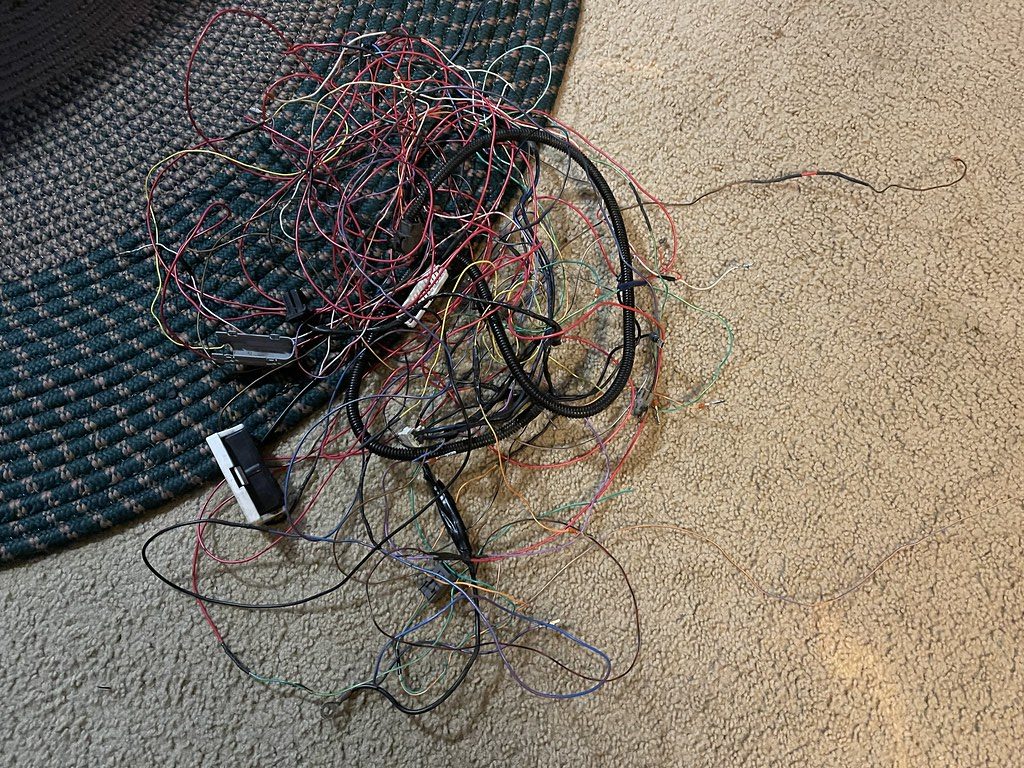
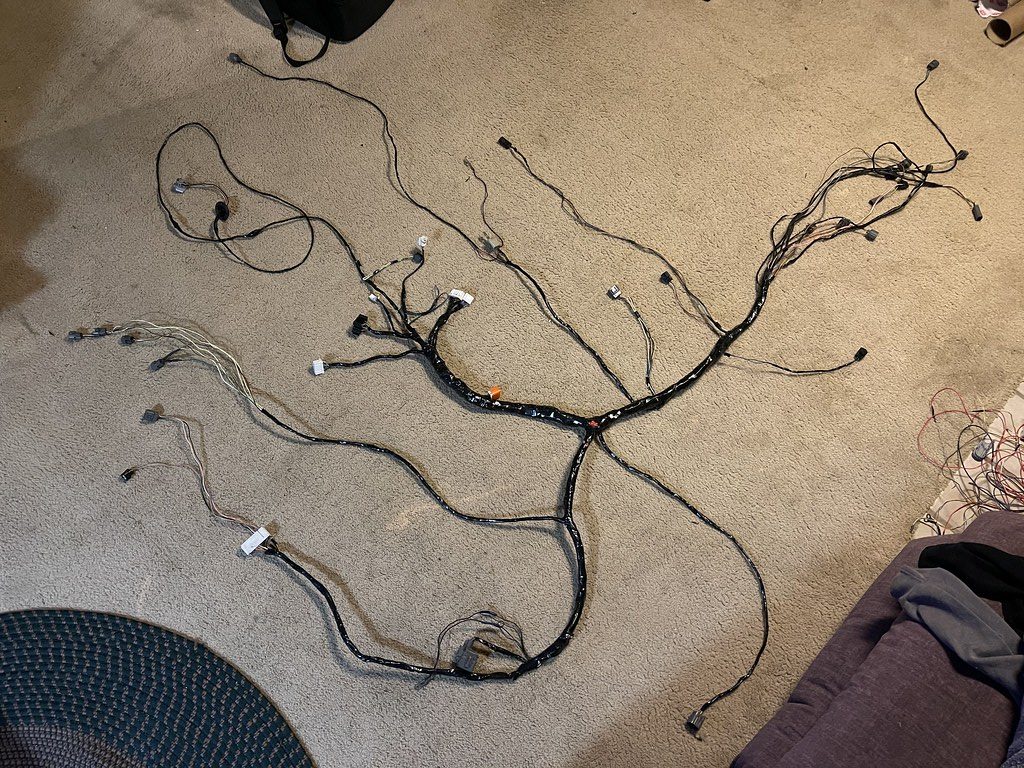
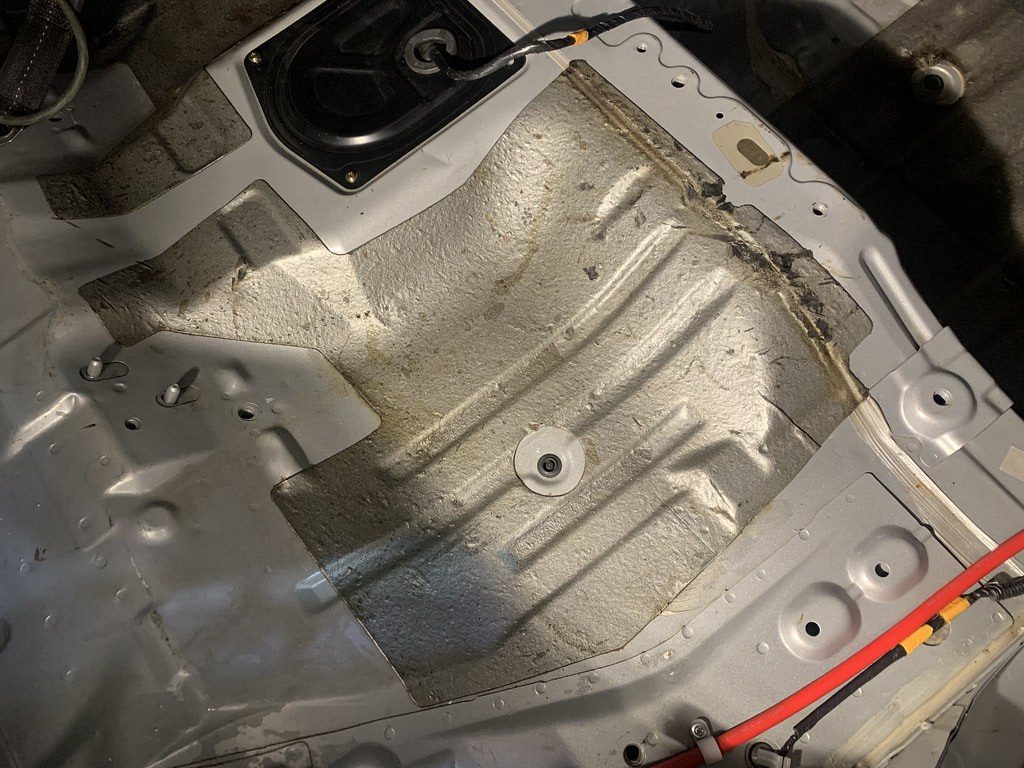
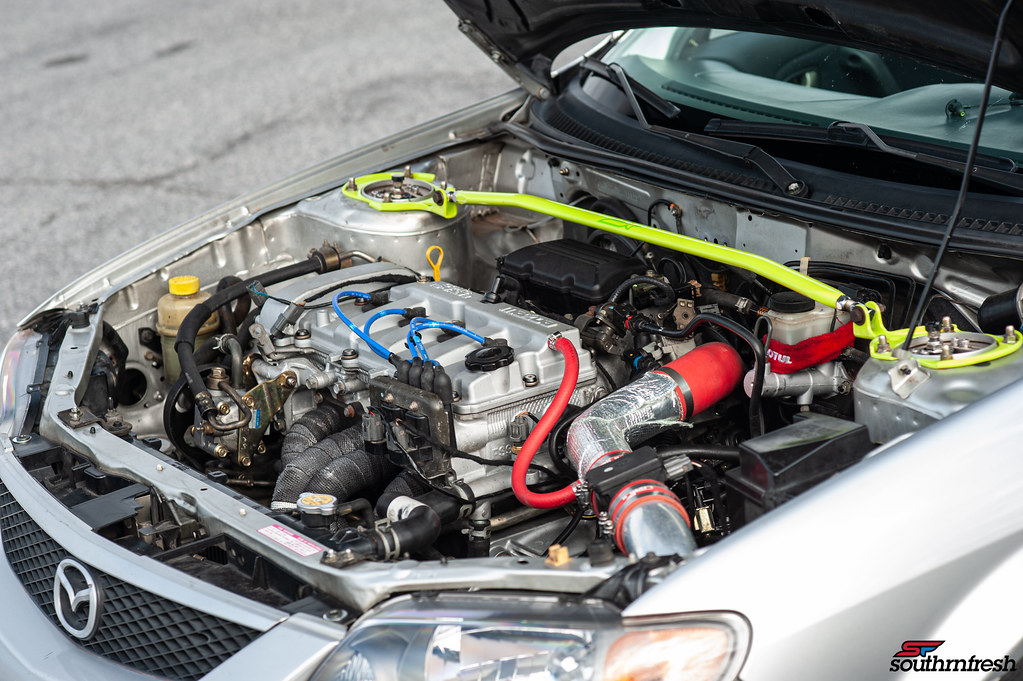
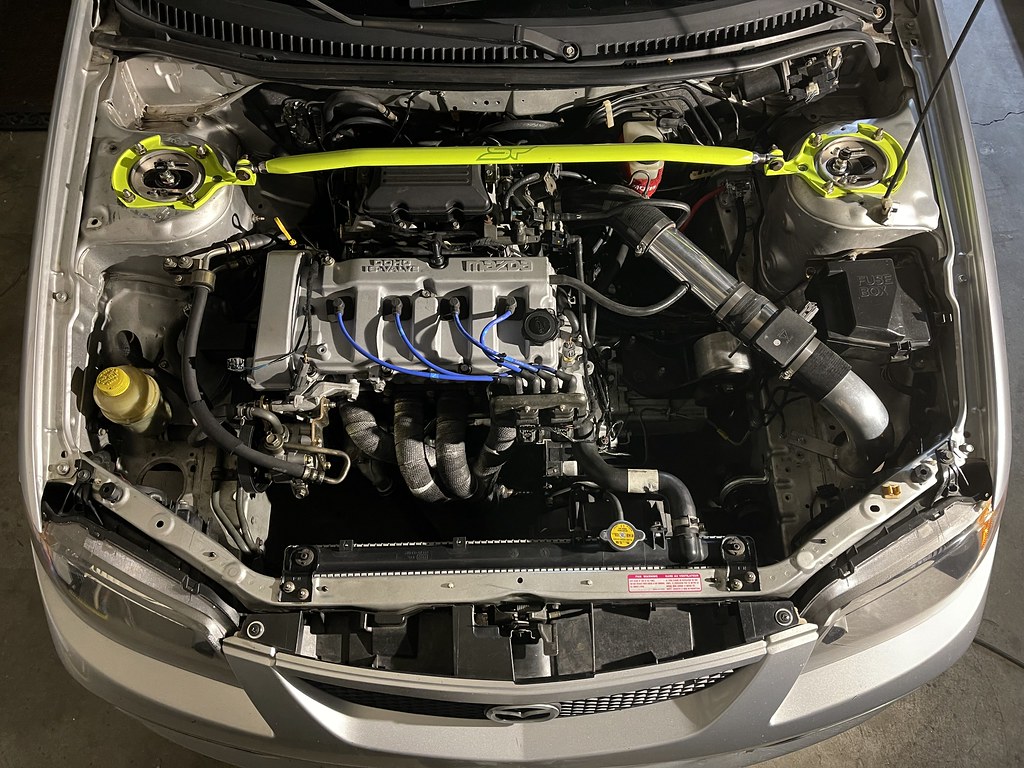
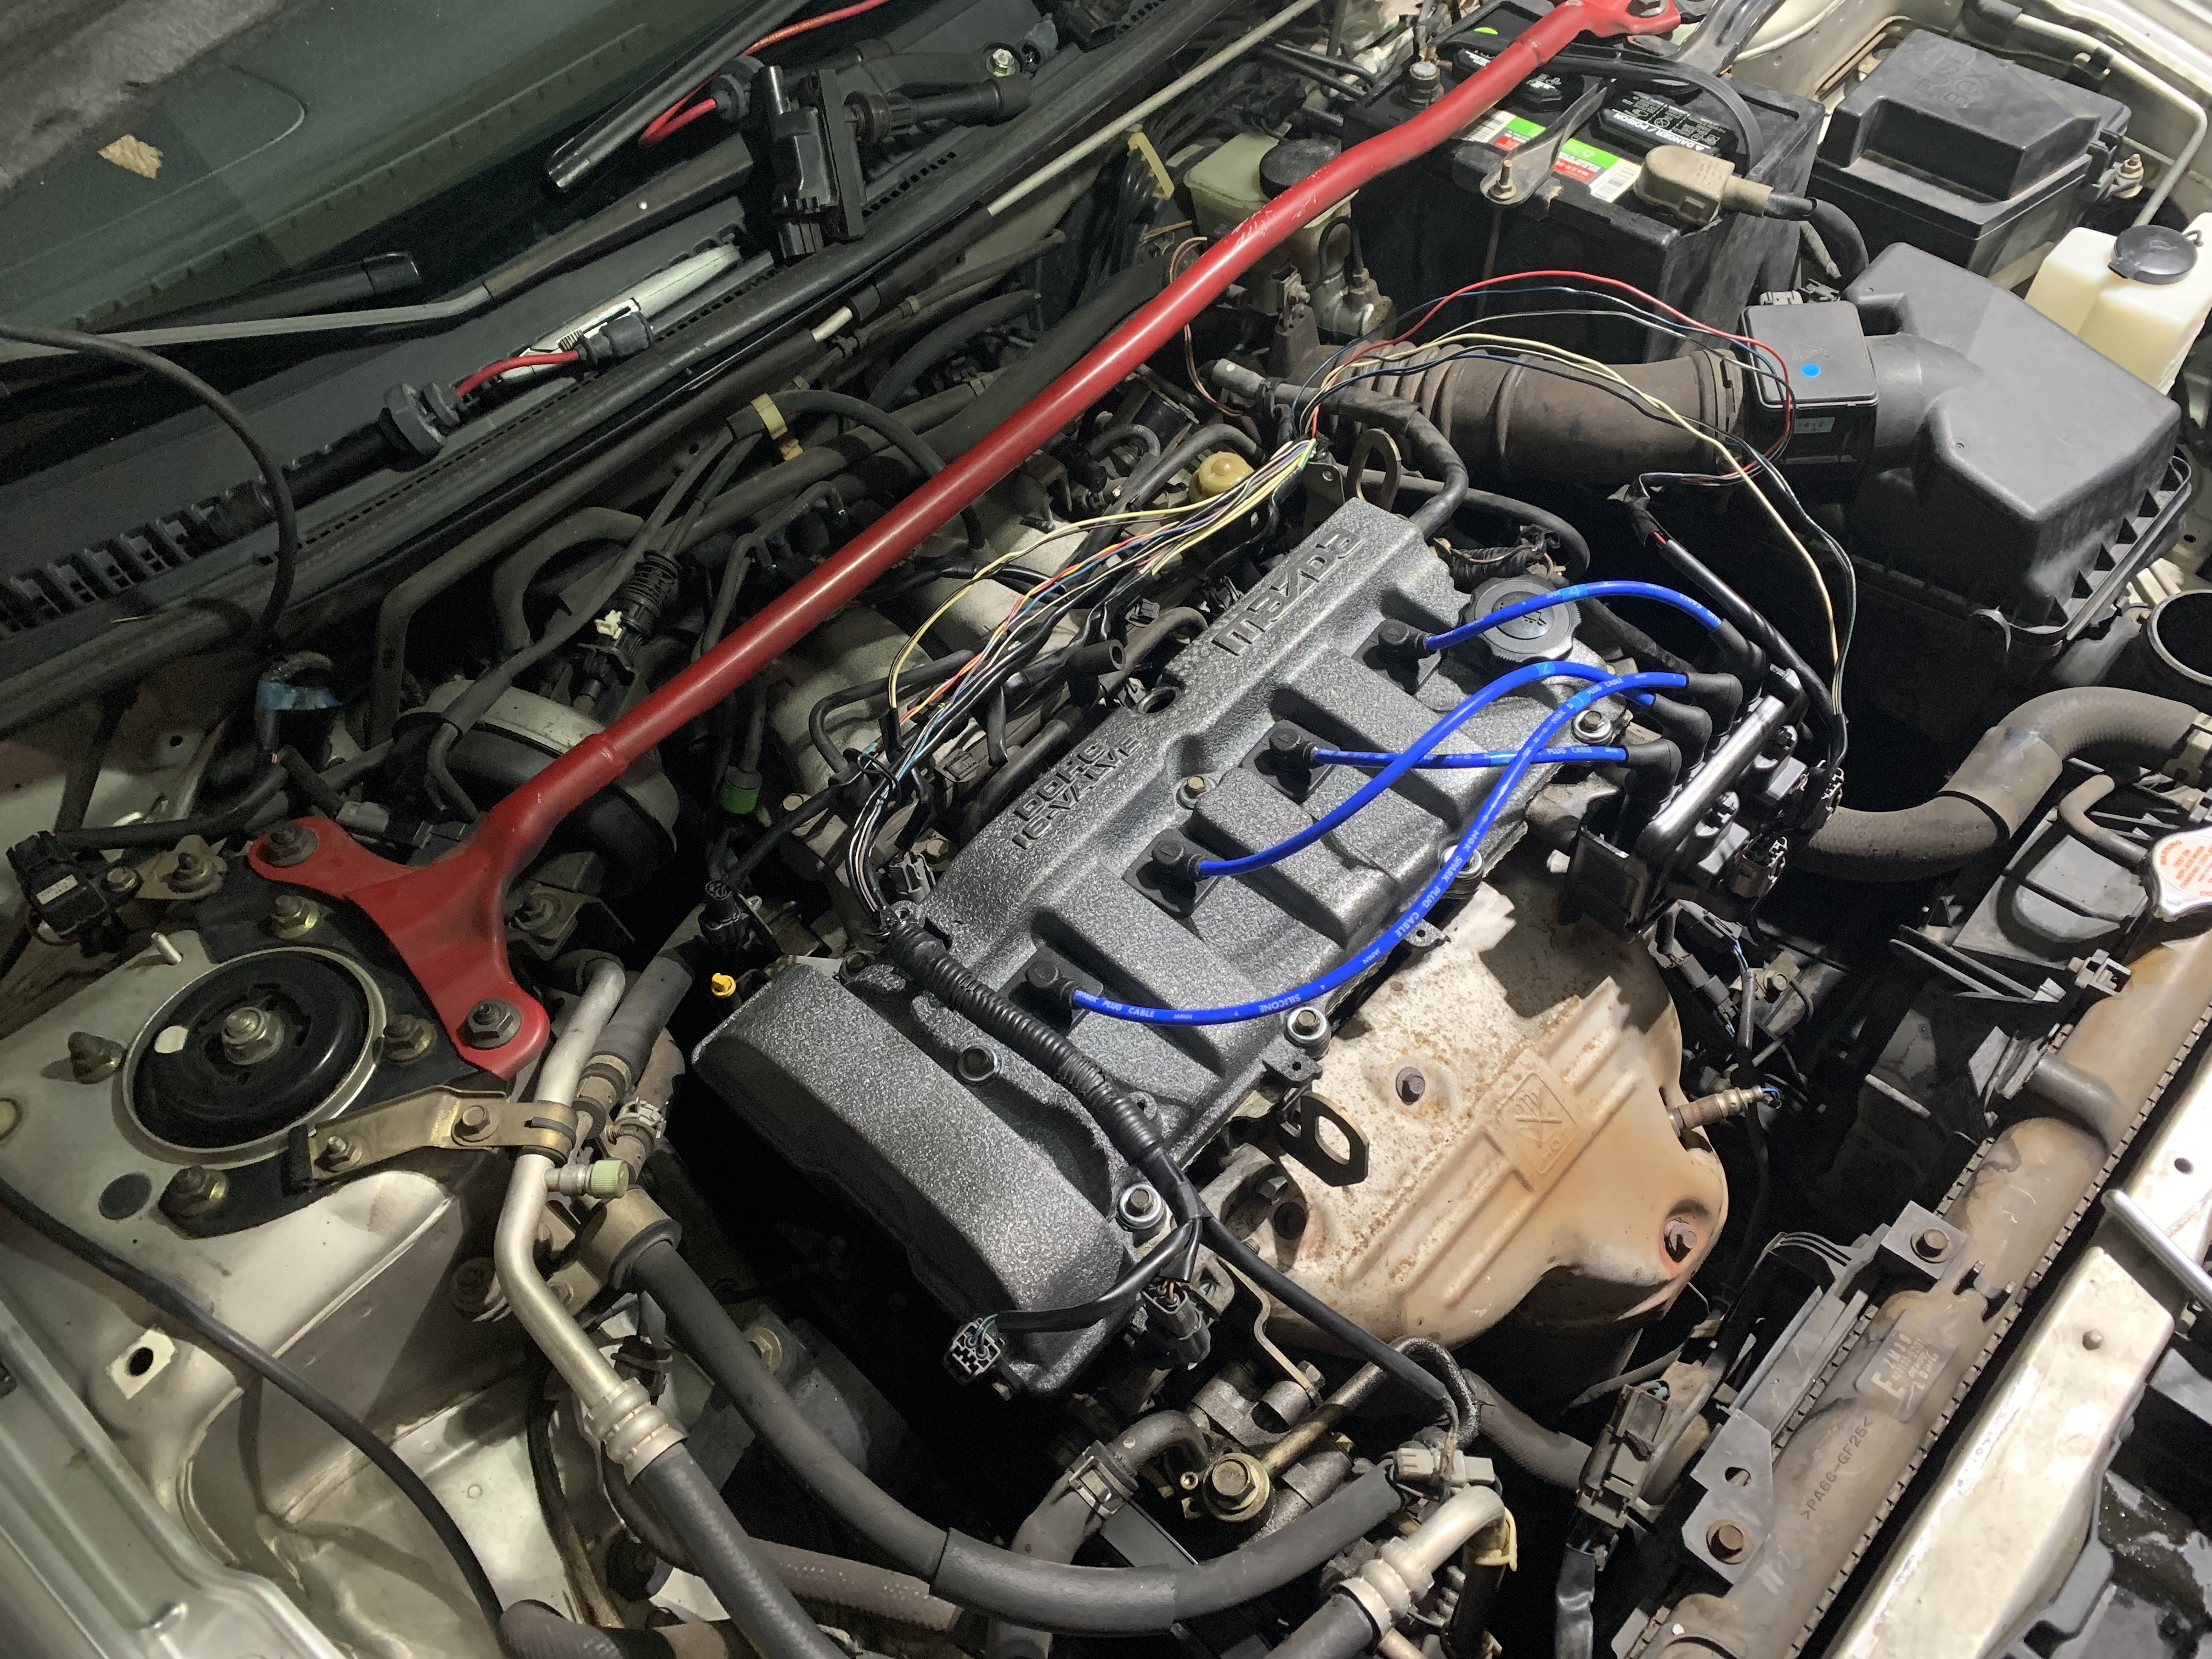
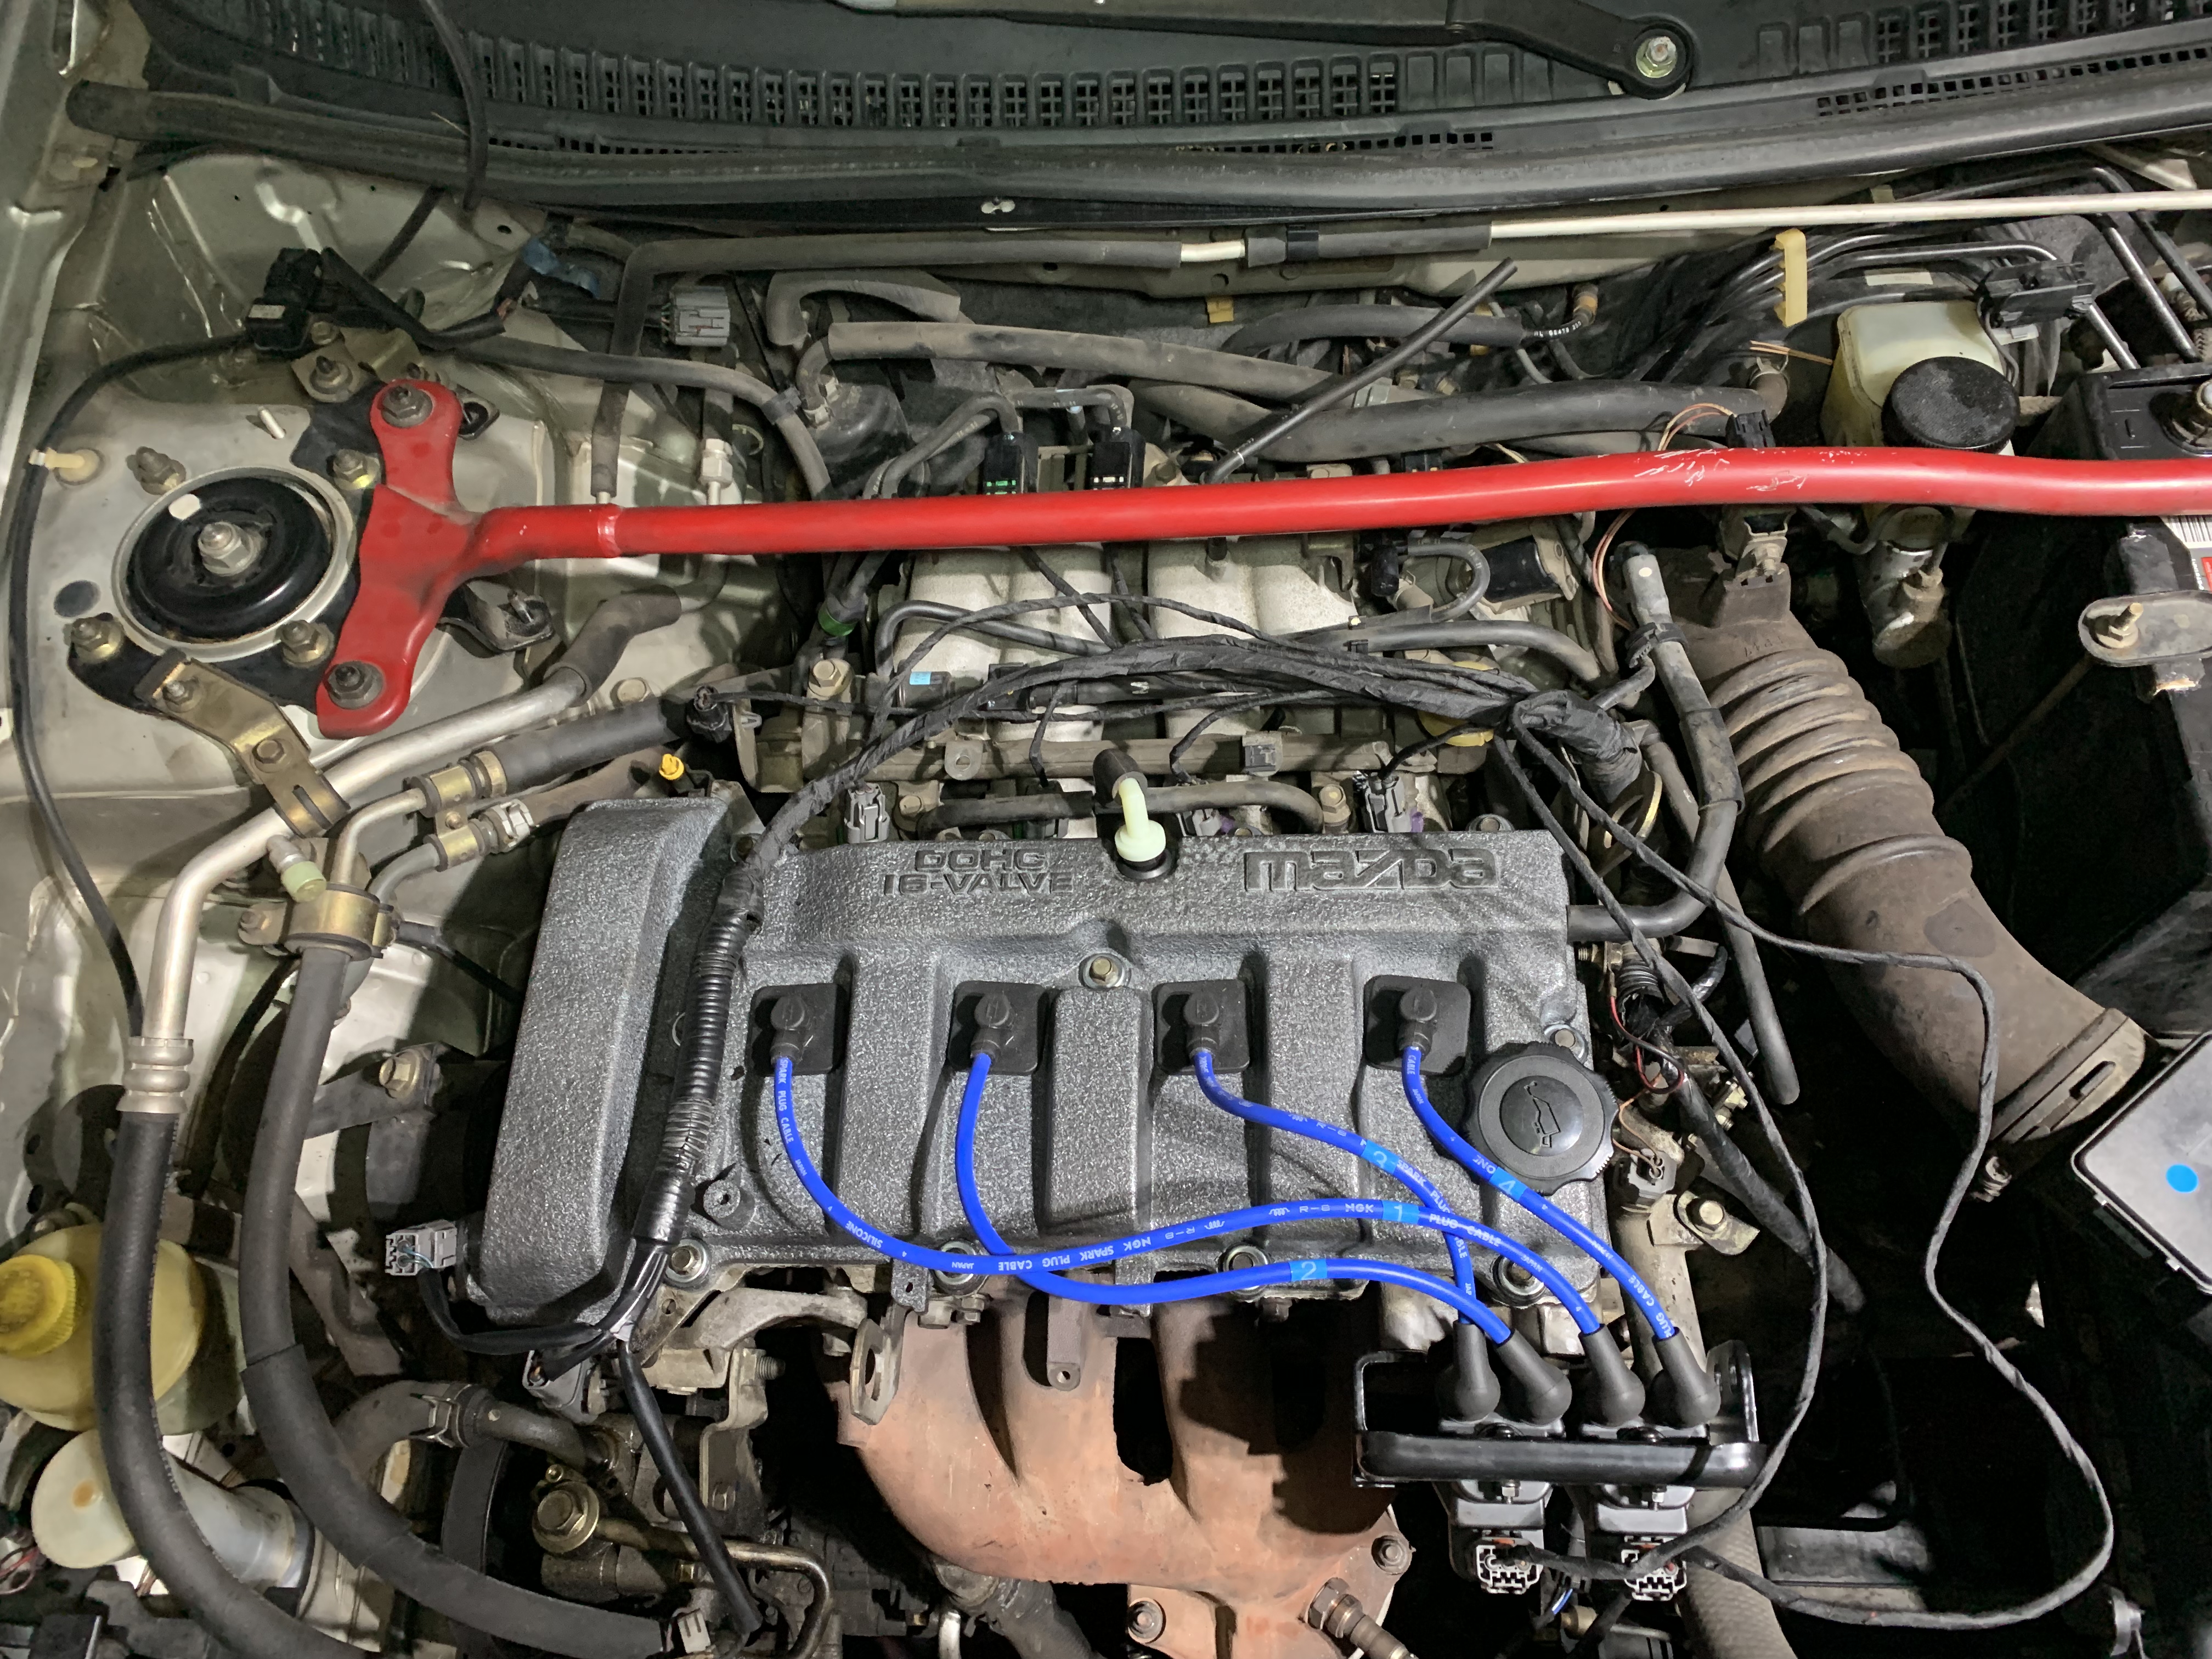
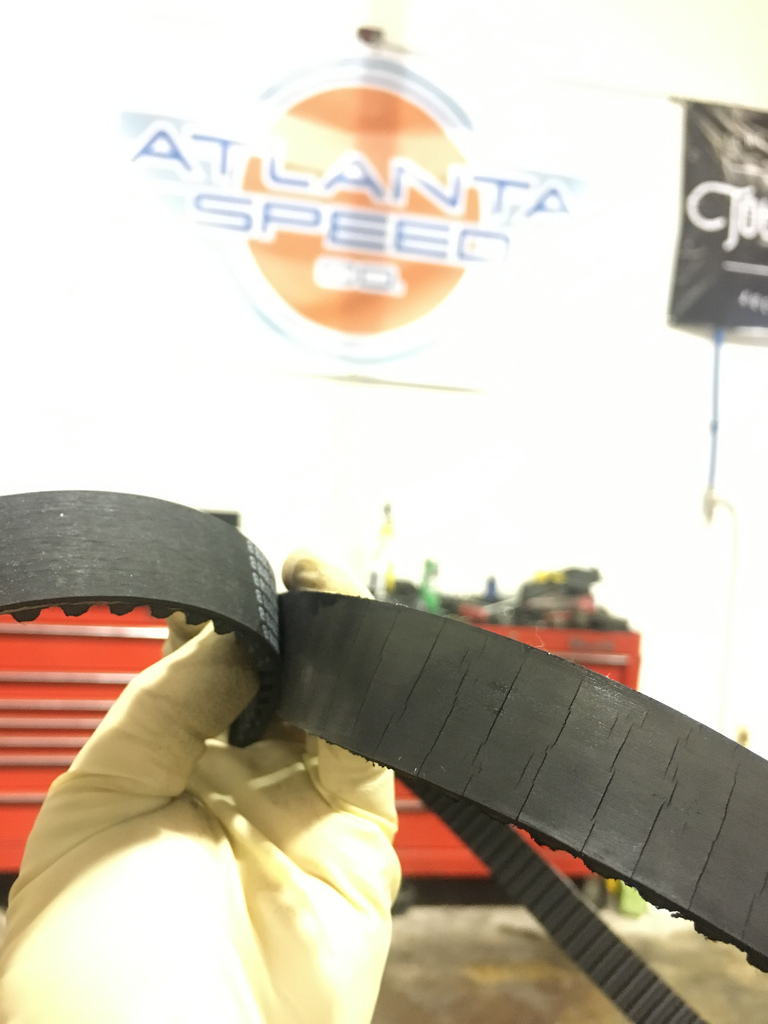
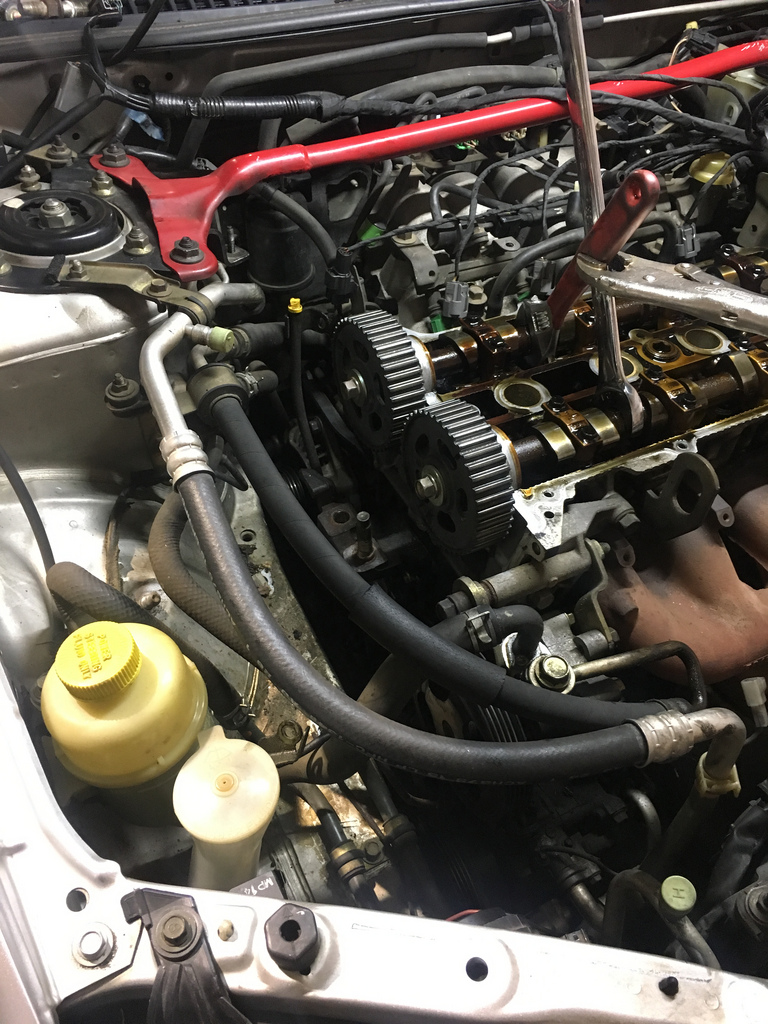
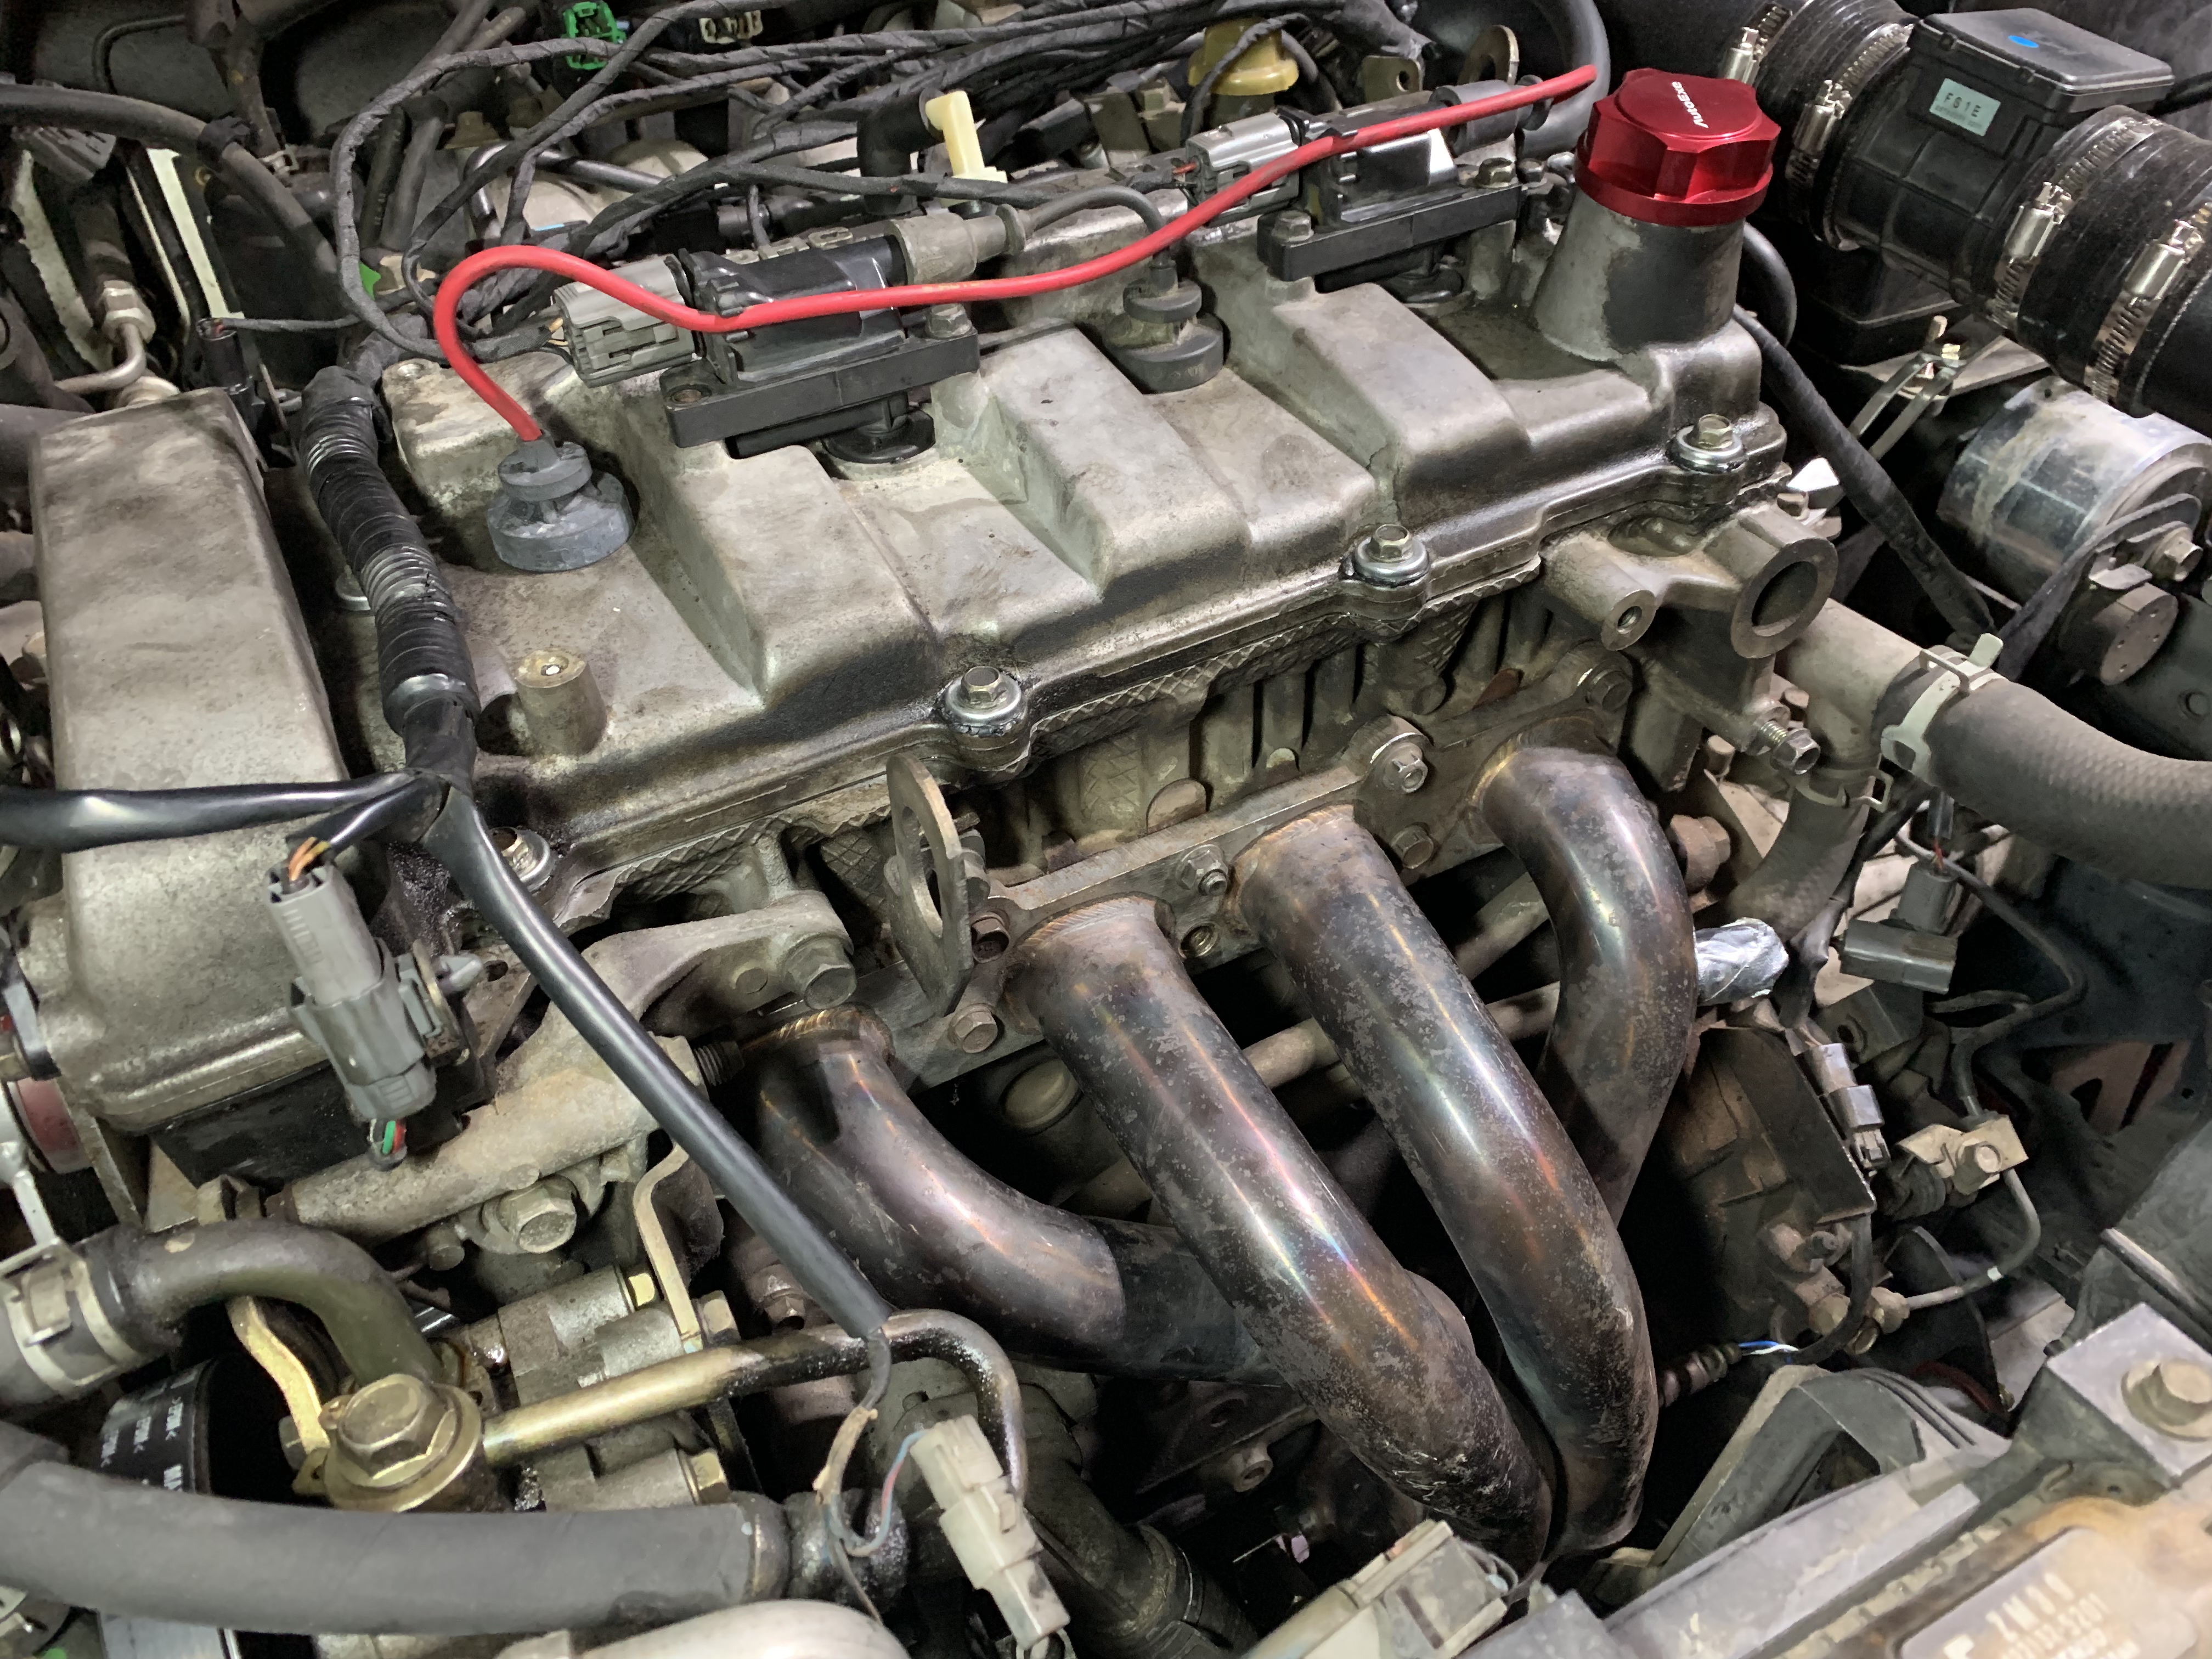
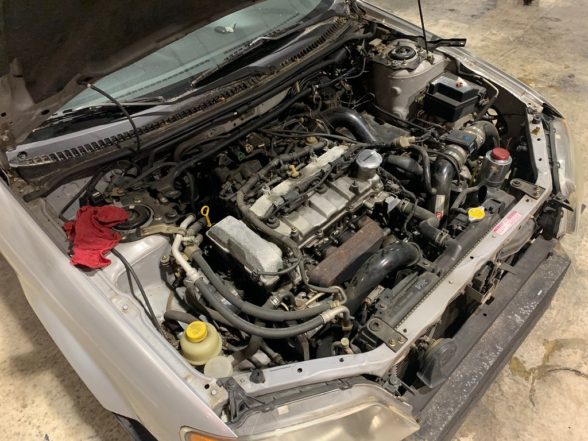
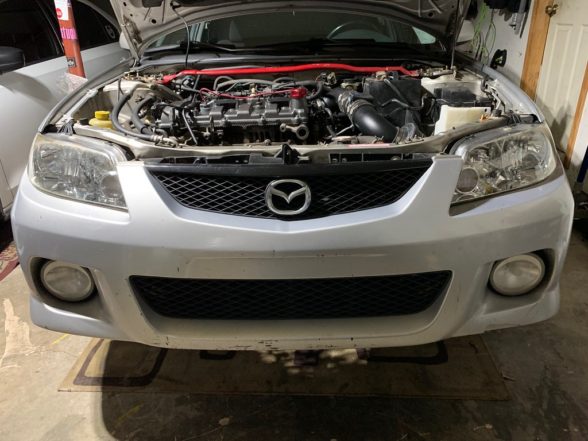
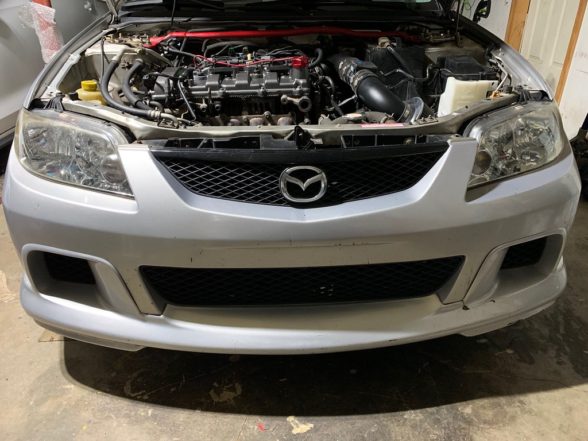
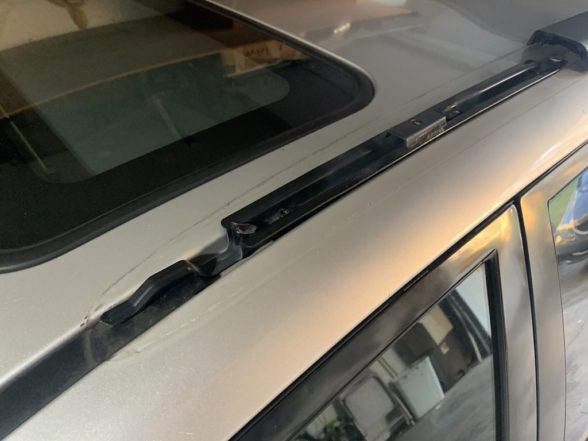
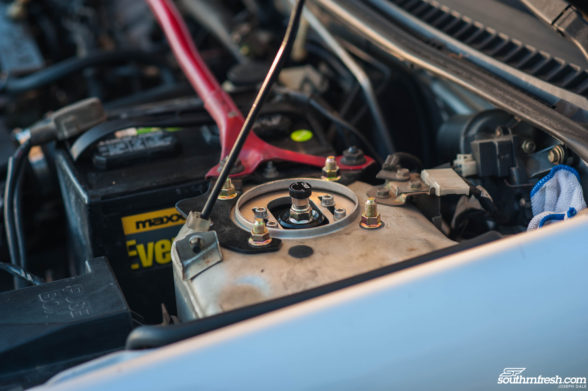
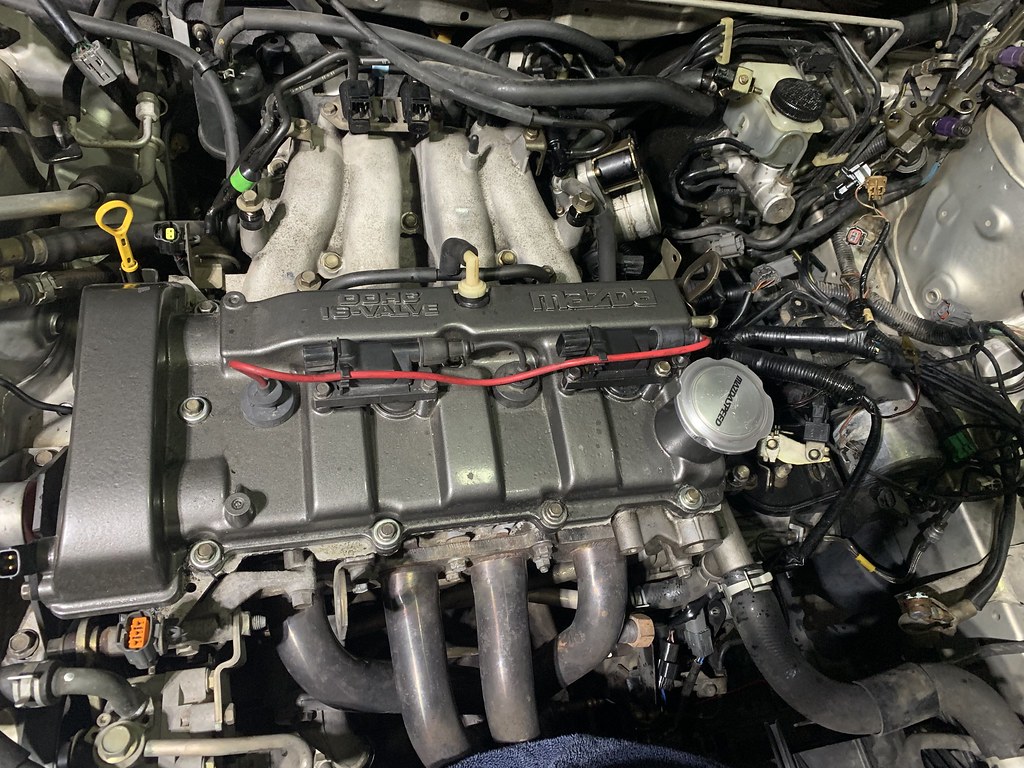
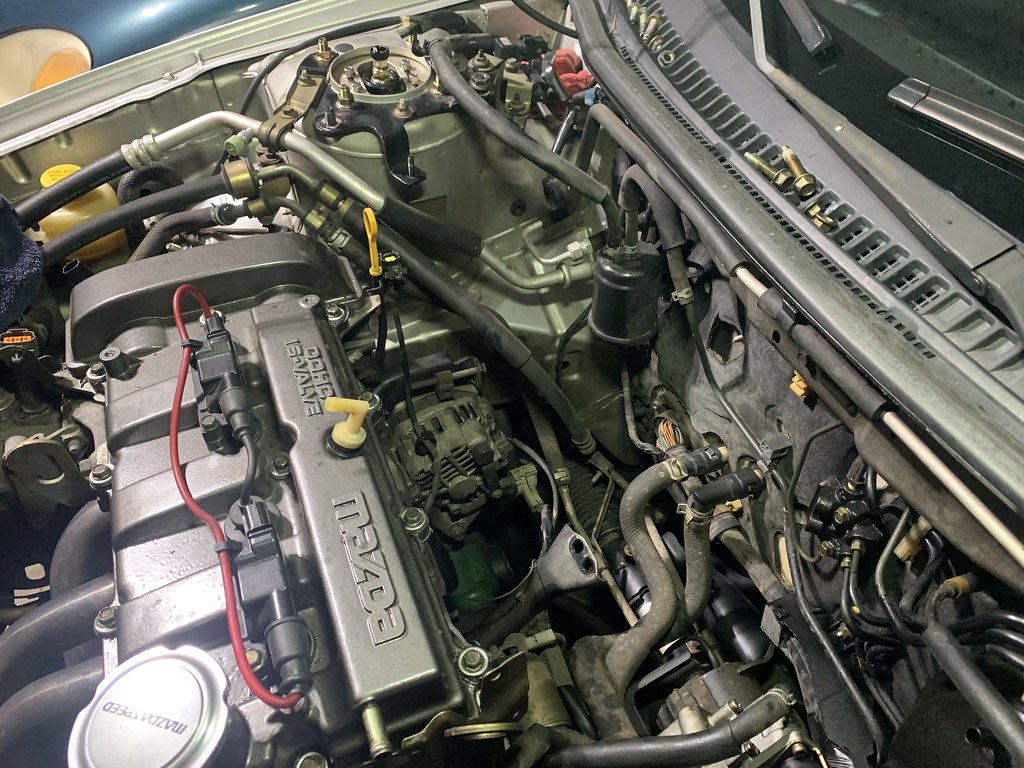
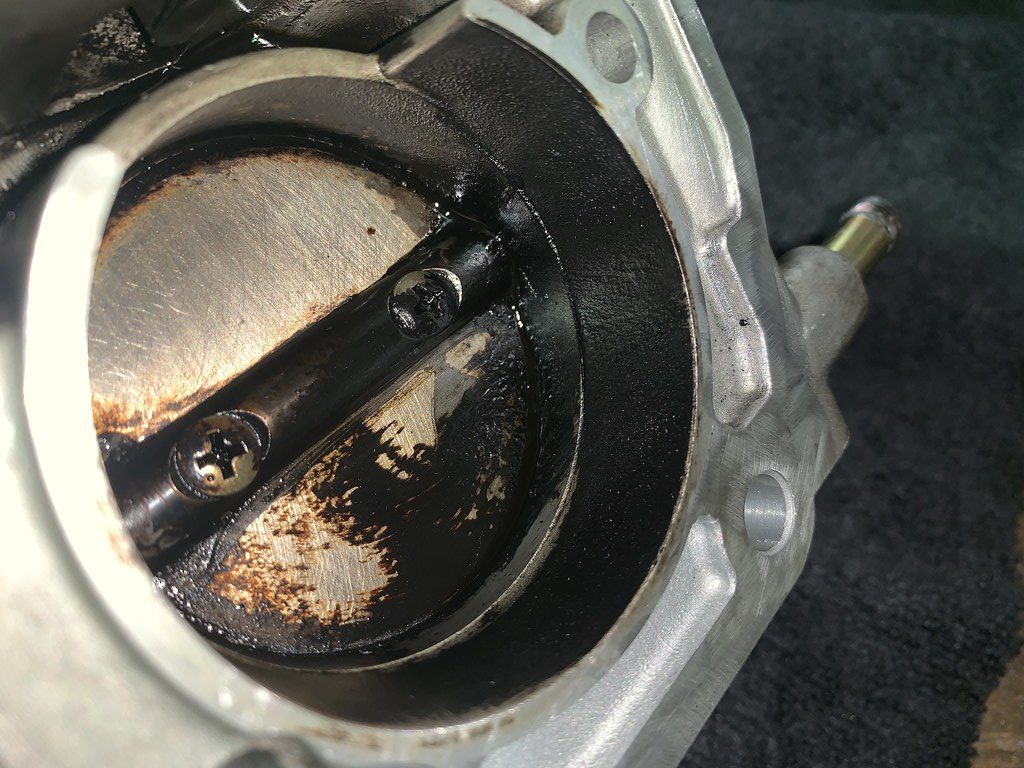
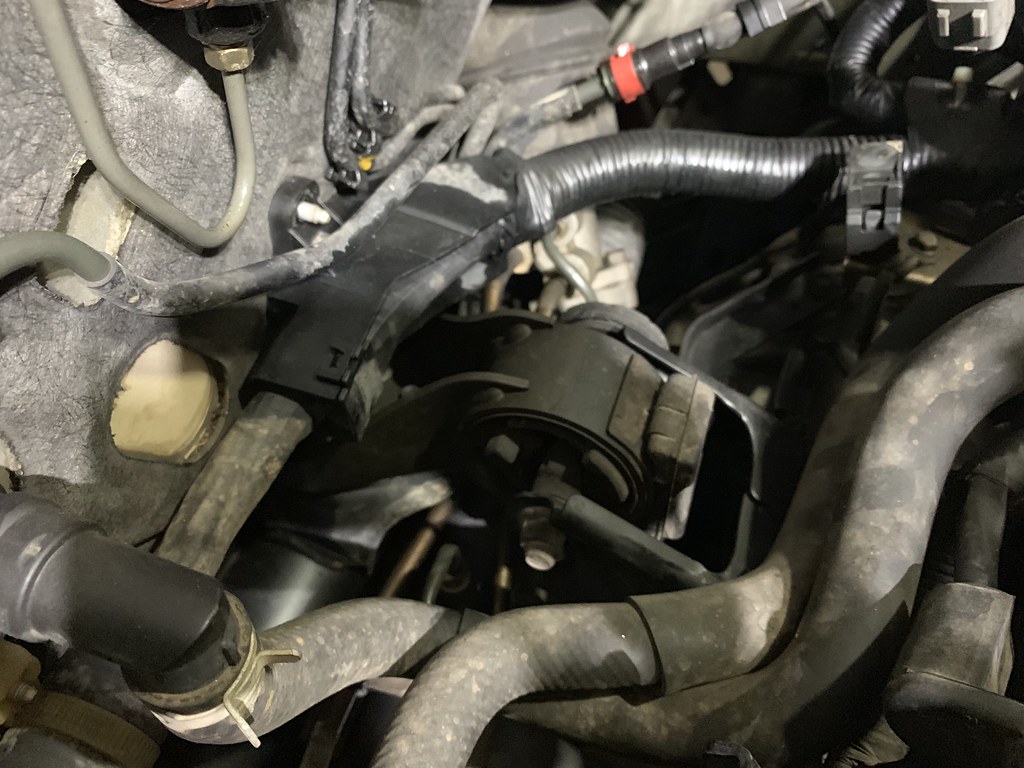
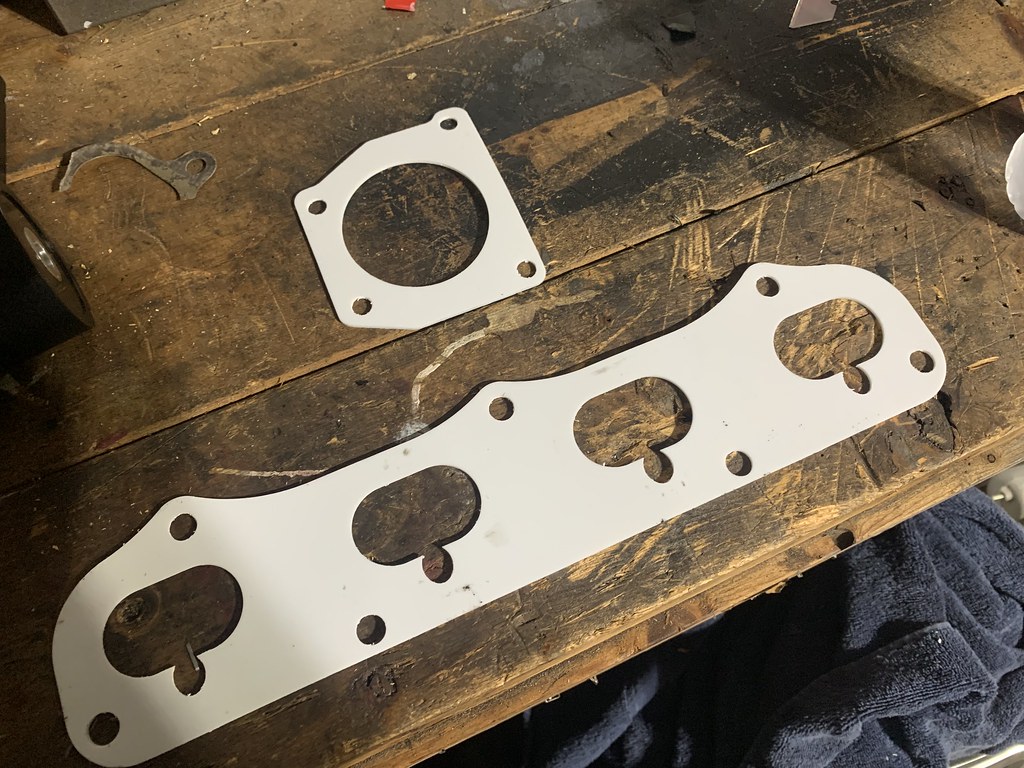
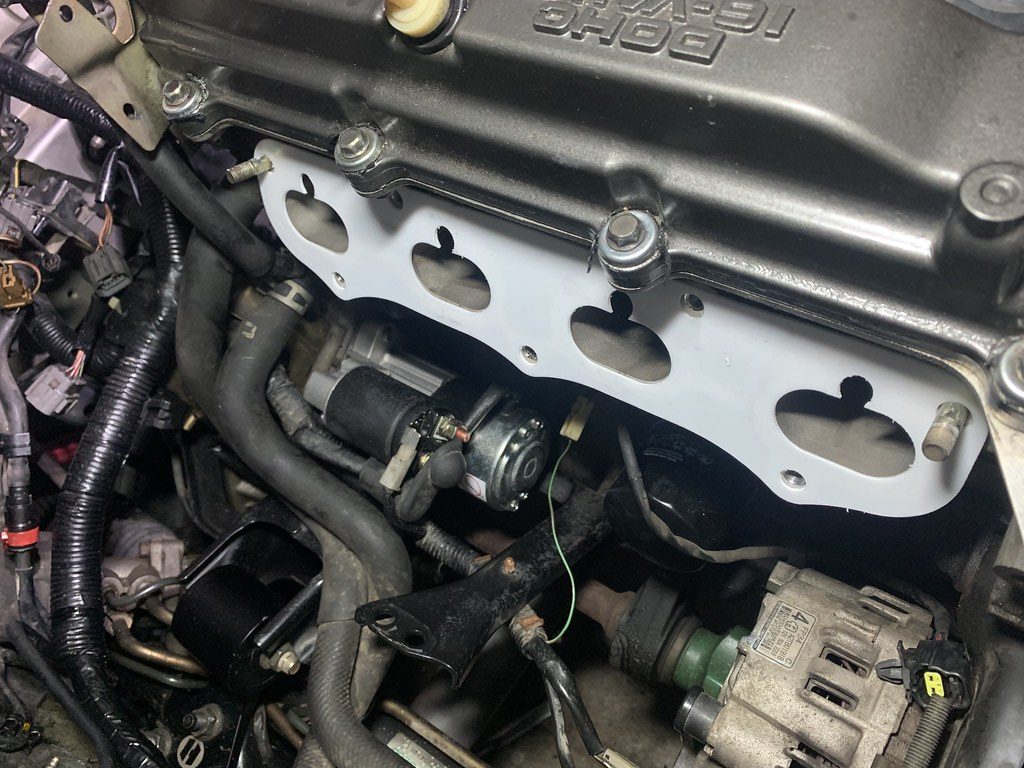
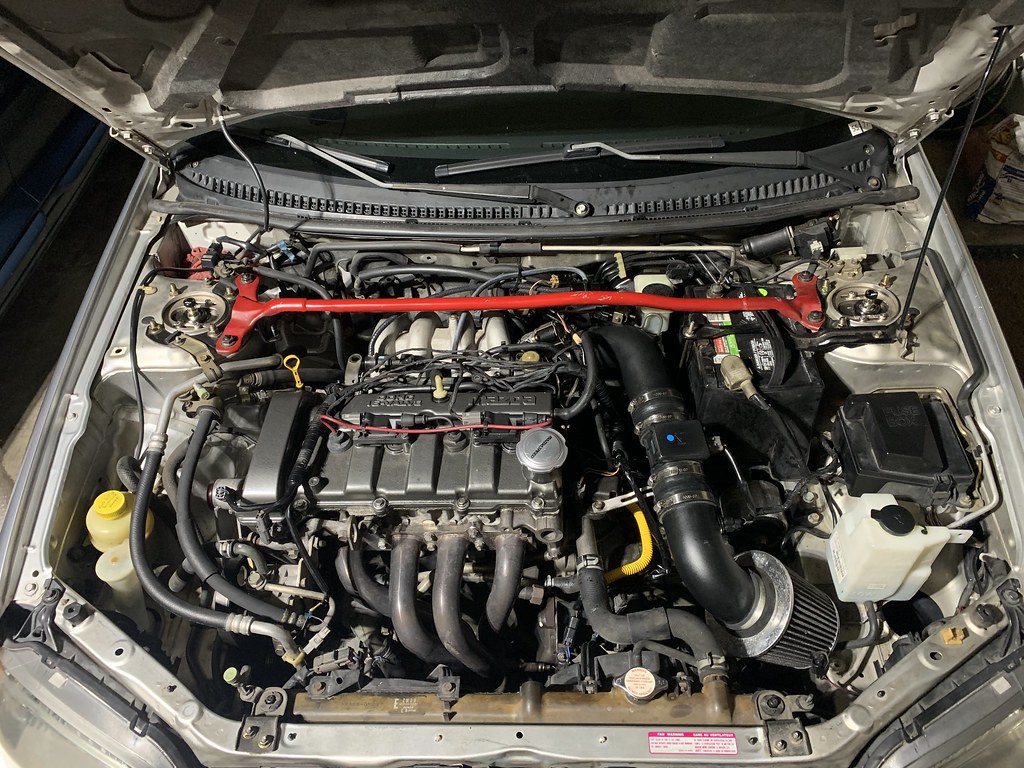
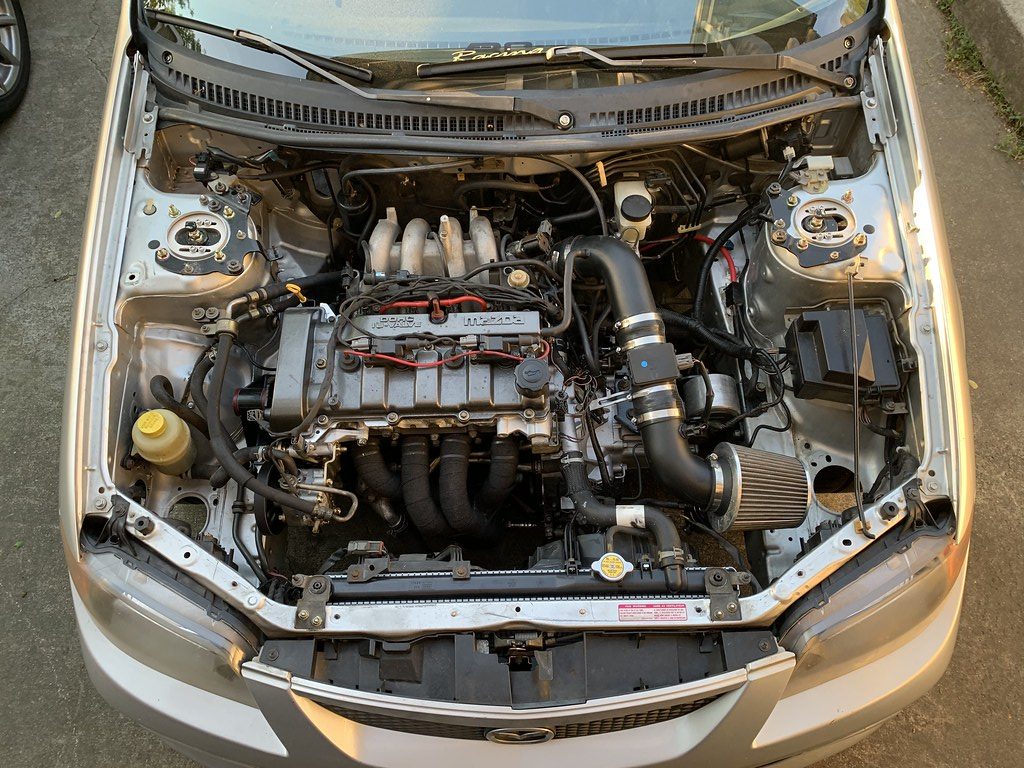
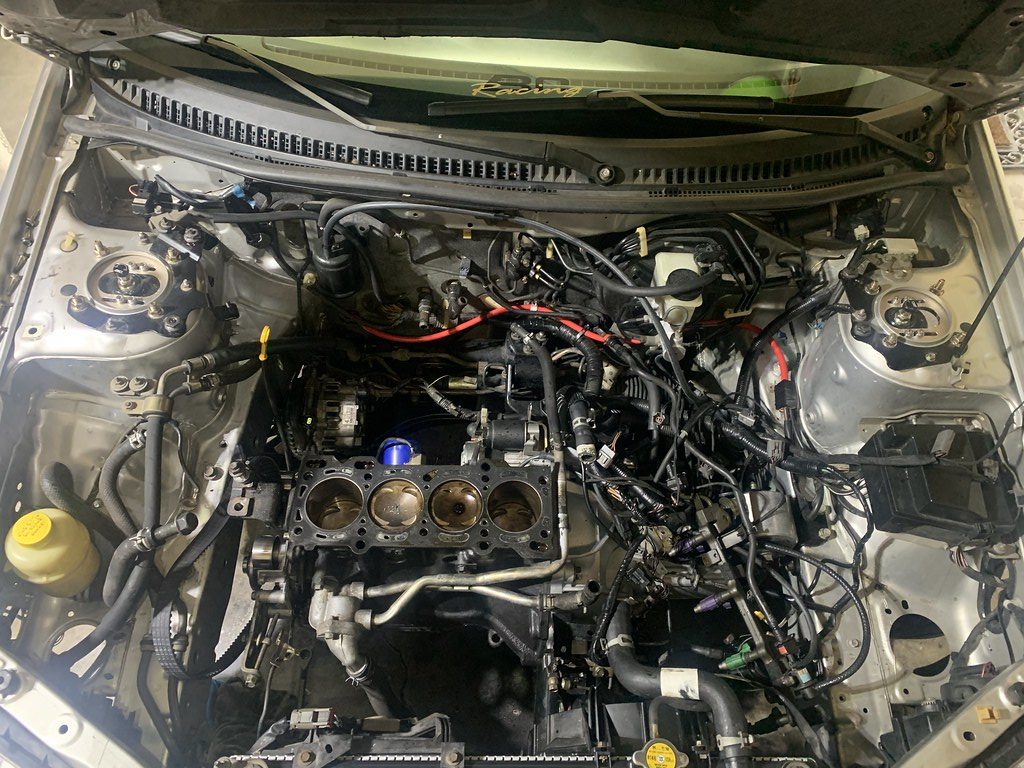
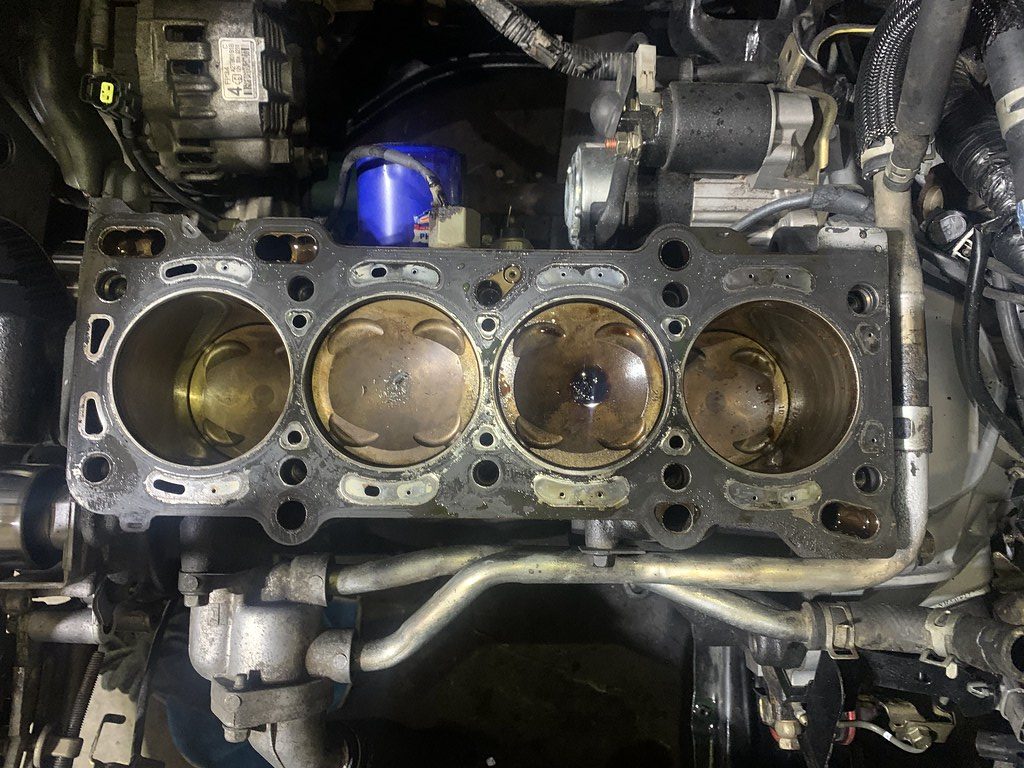
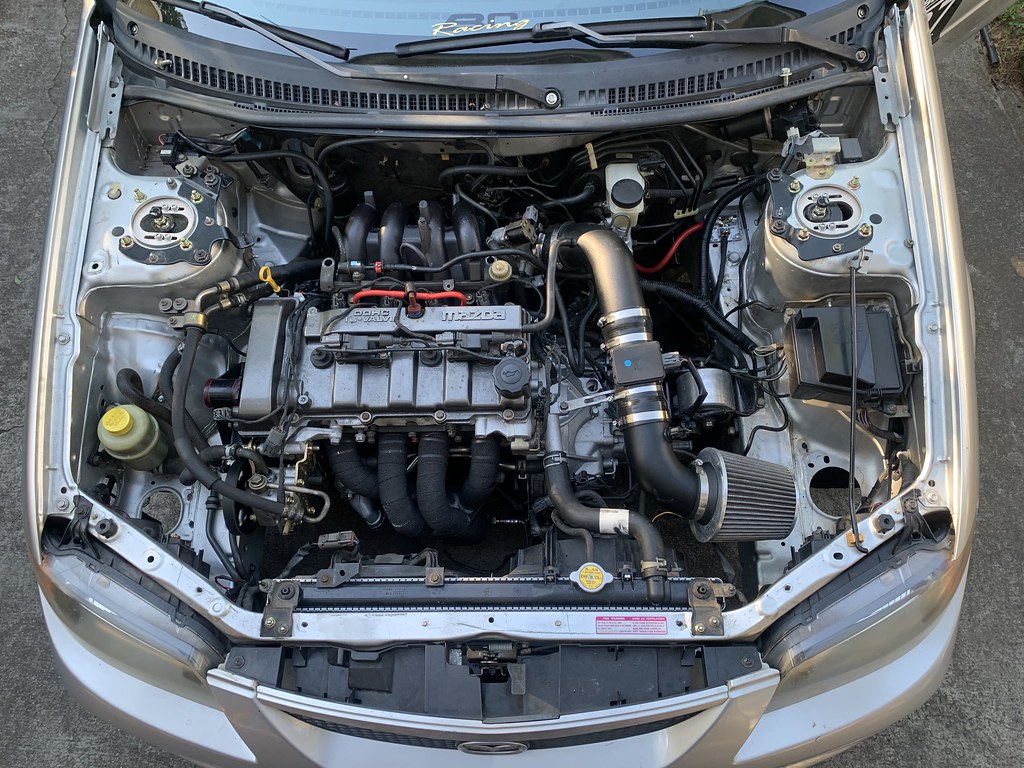
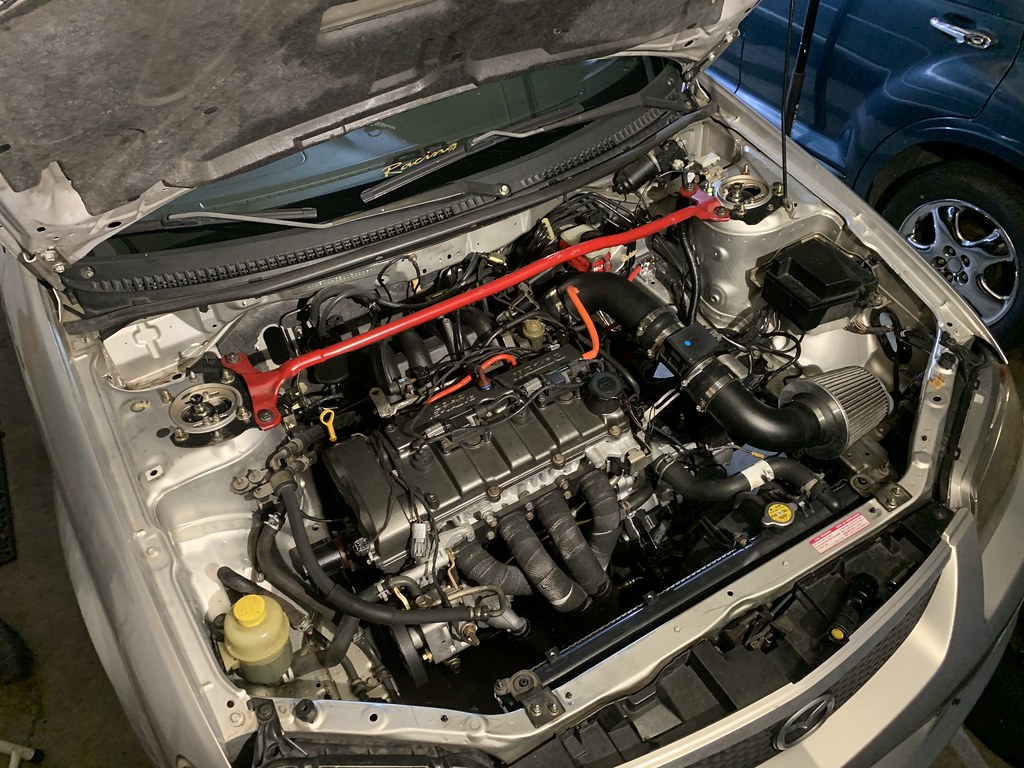
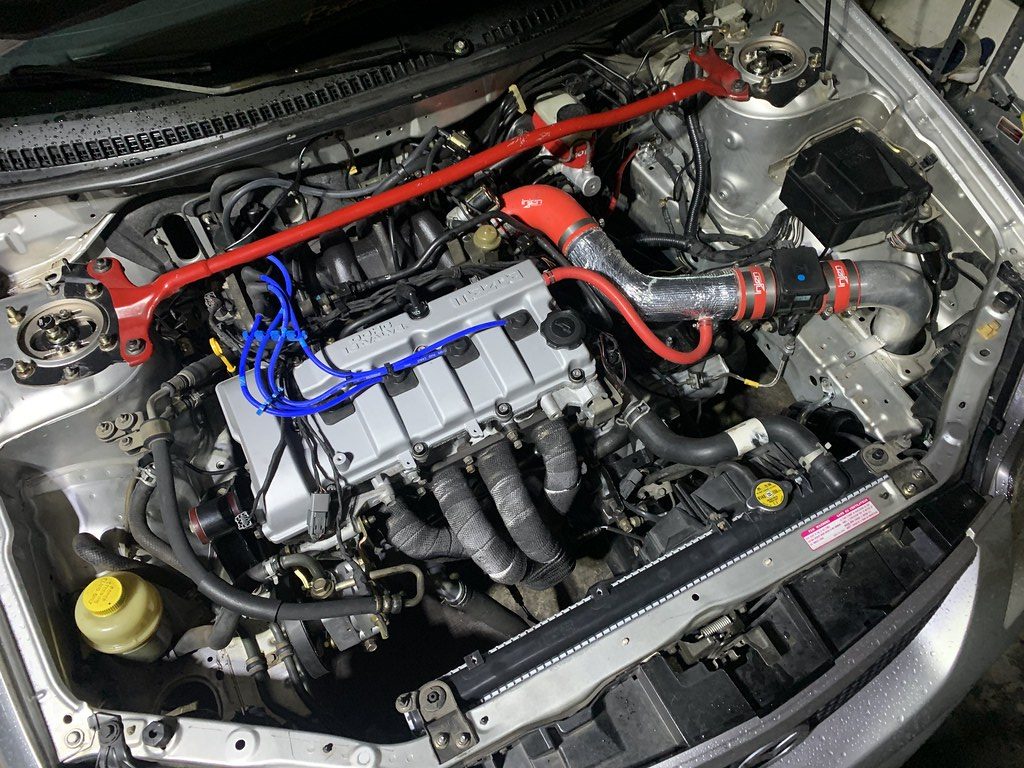
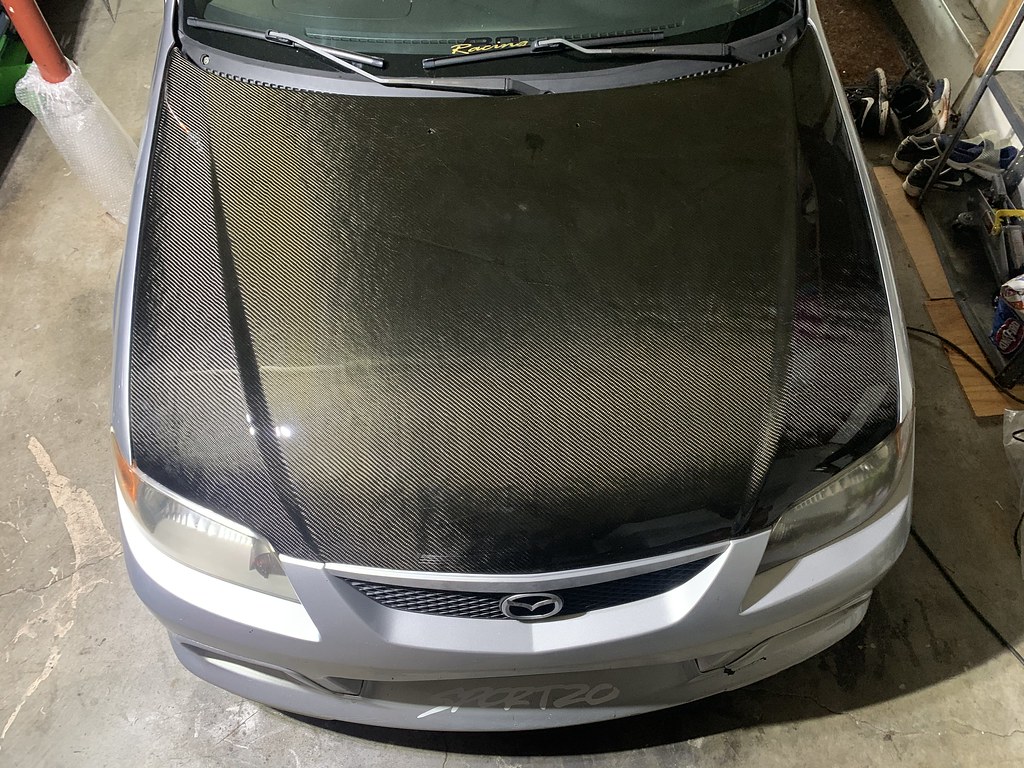
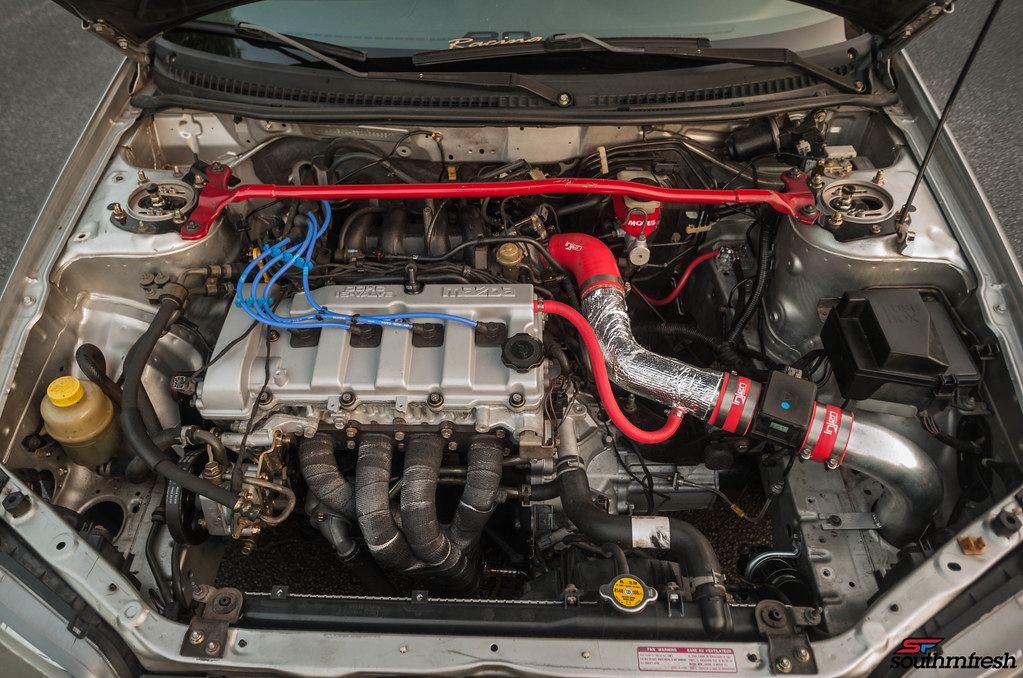
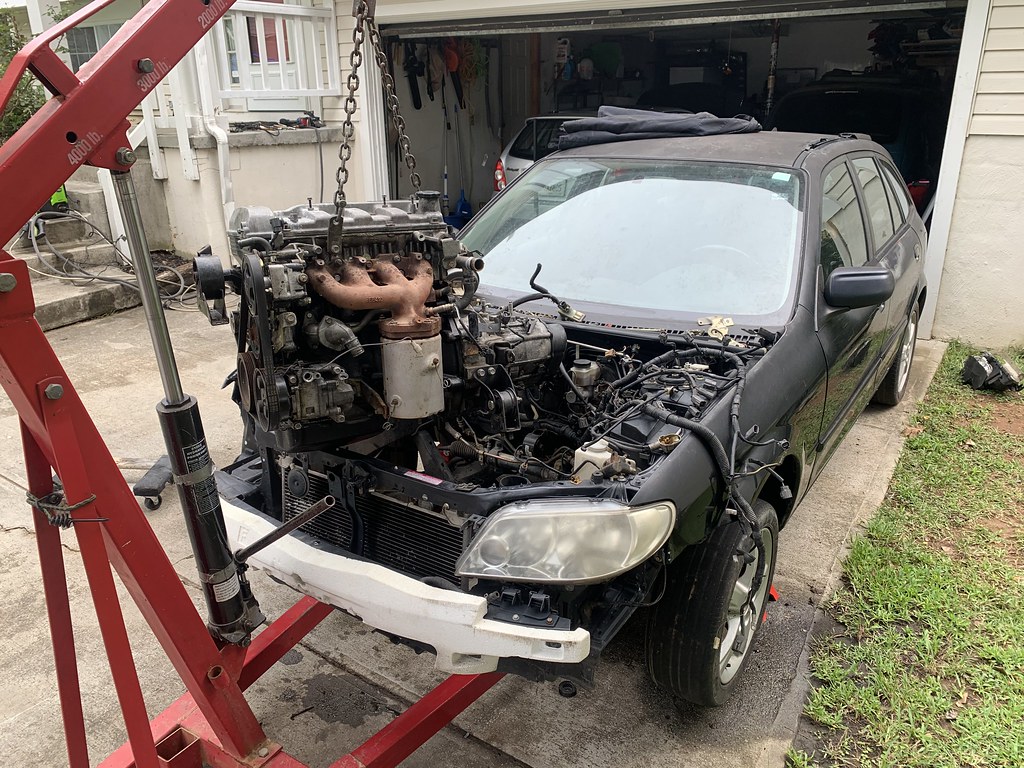
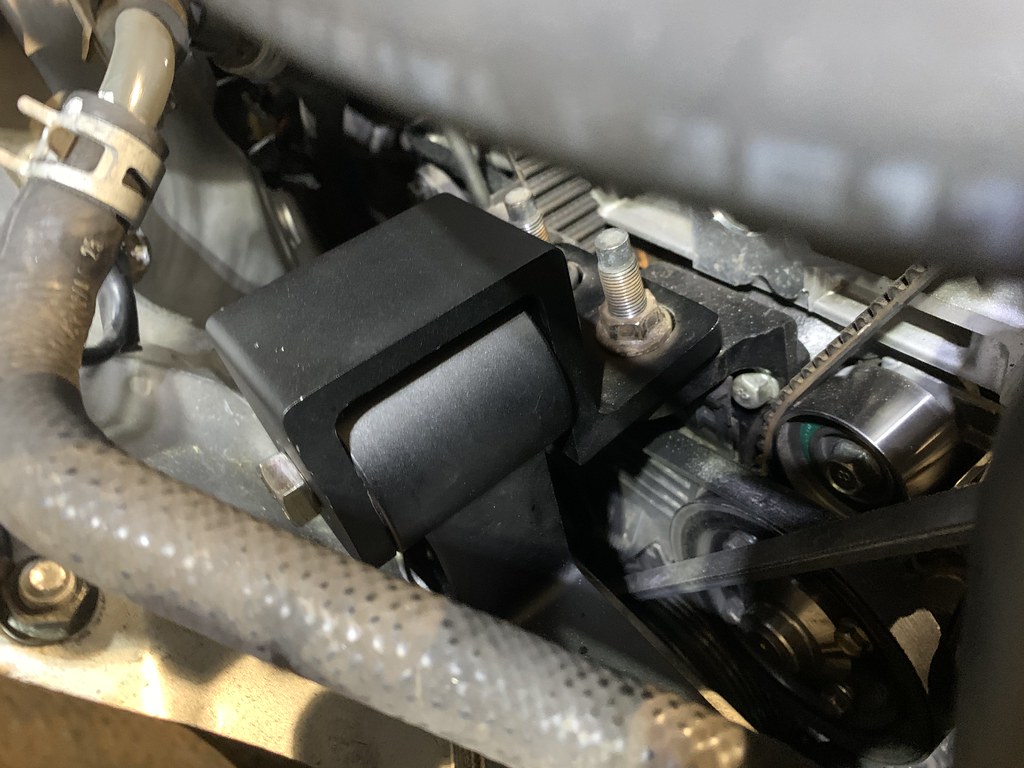
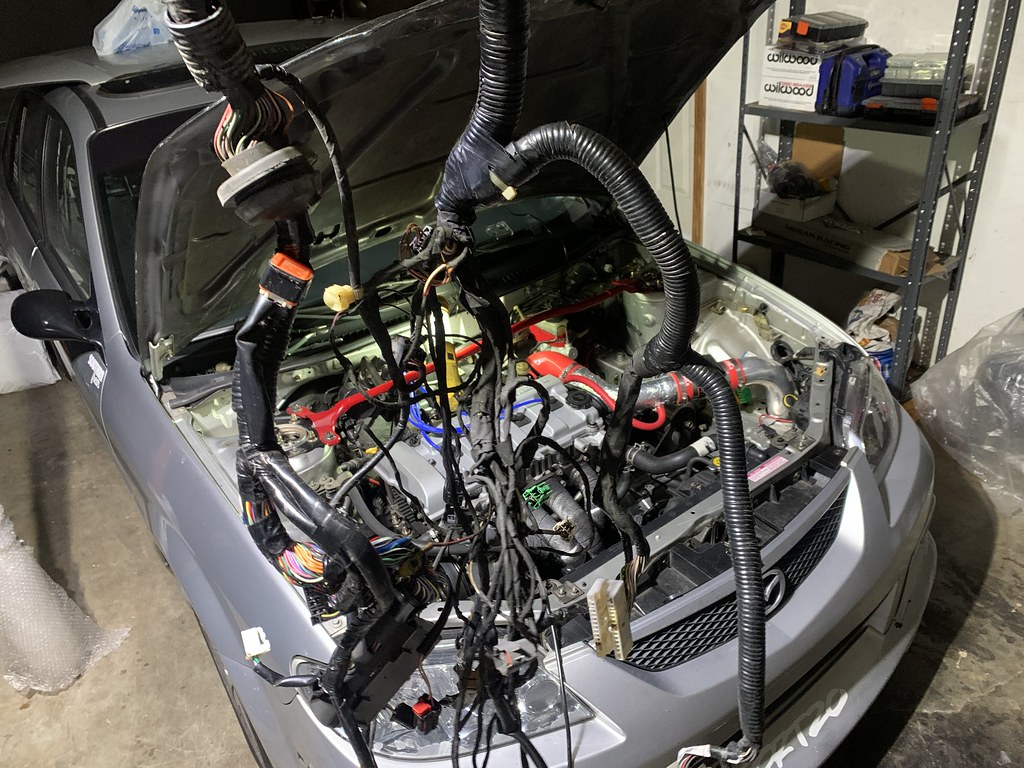
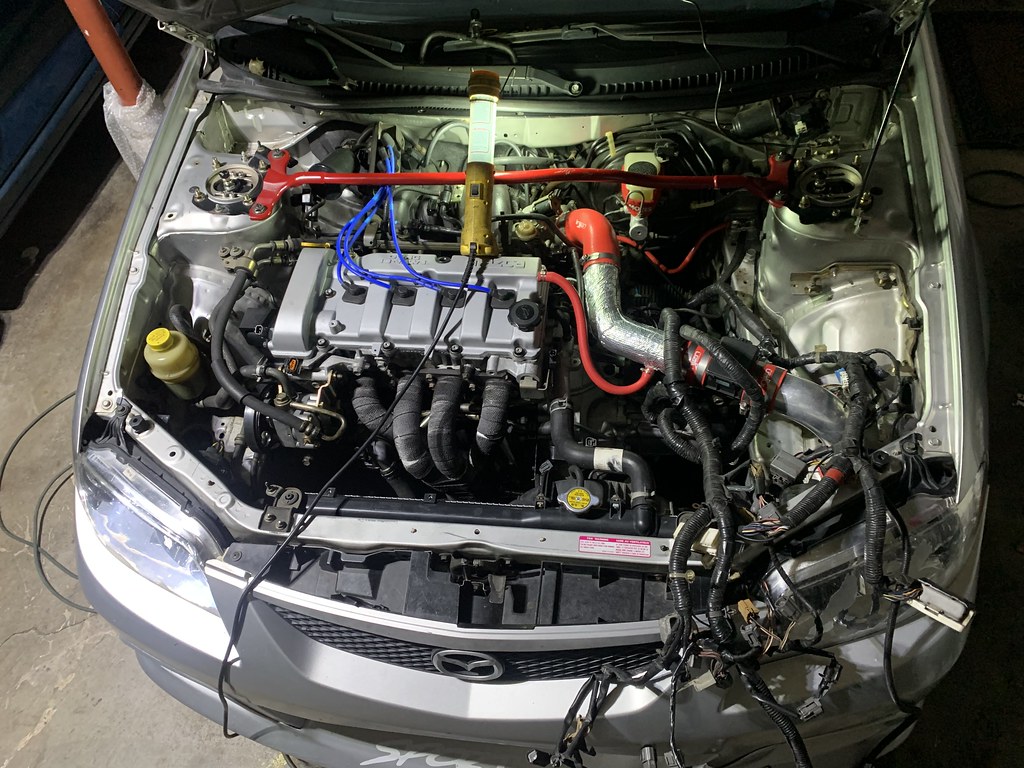
Mazda has always had some of the most cluttered engine bays.  So I wanted to clean it up some and make things more accessible.  And the car had a real bad valve cover gasket leak that needed to be fixed.


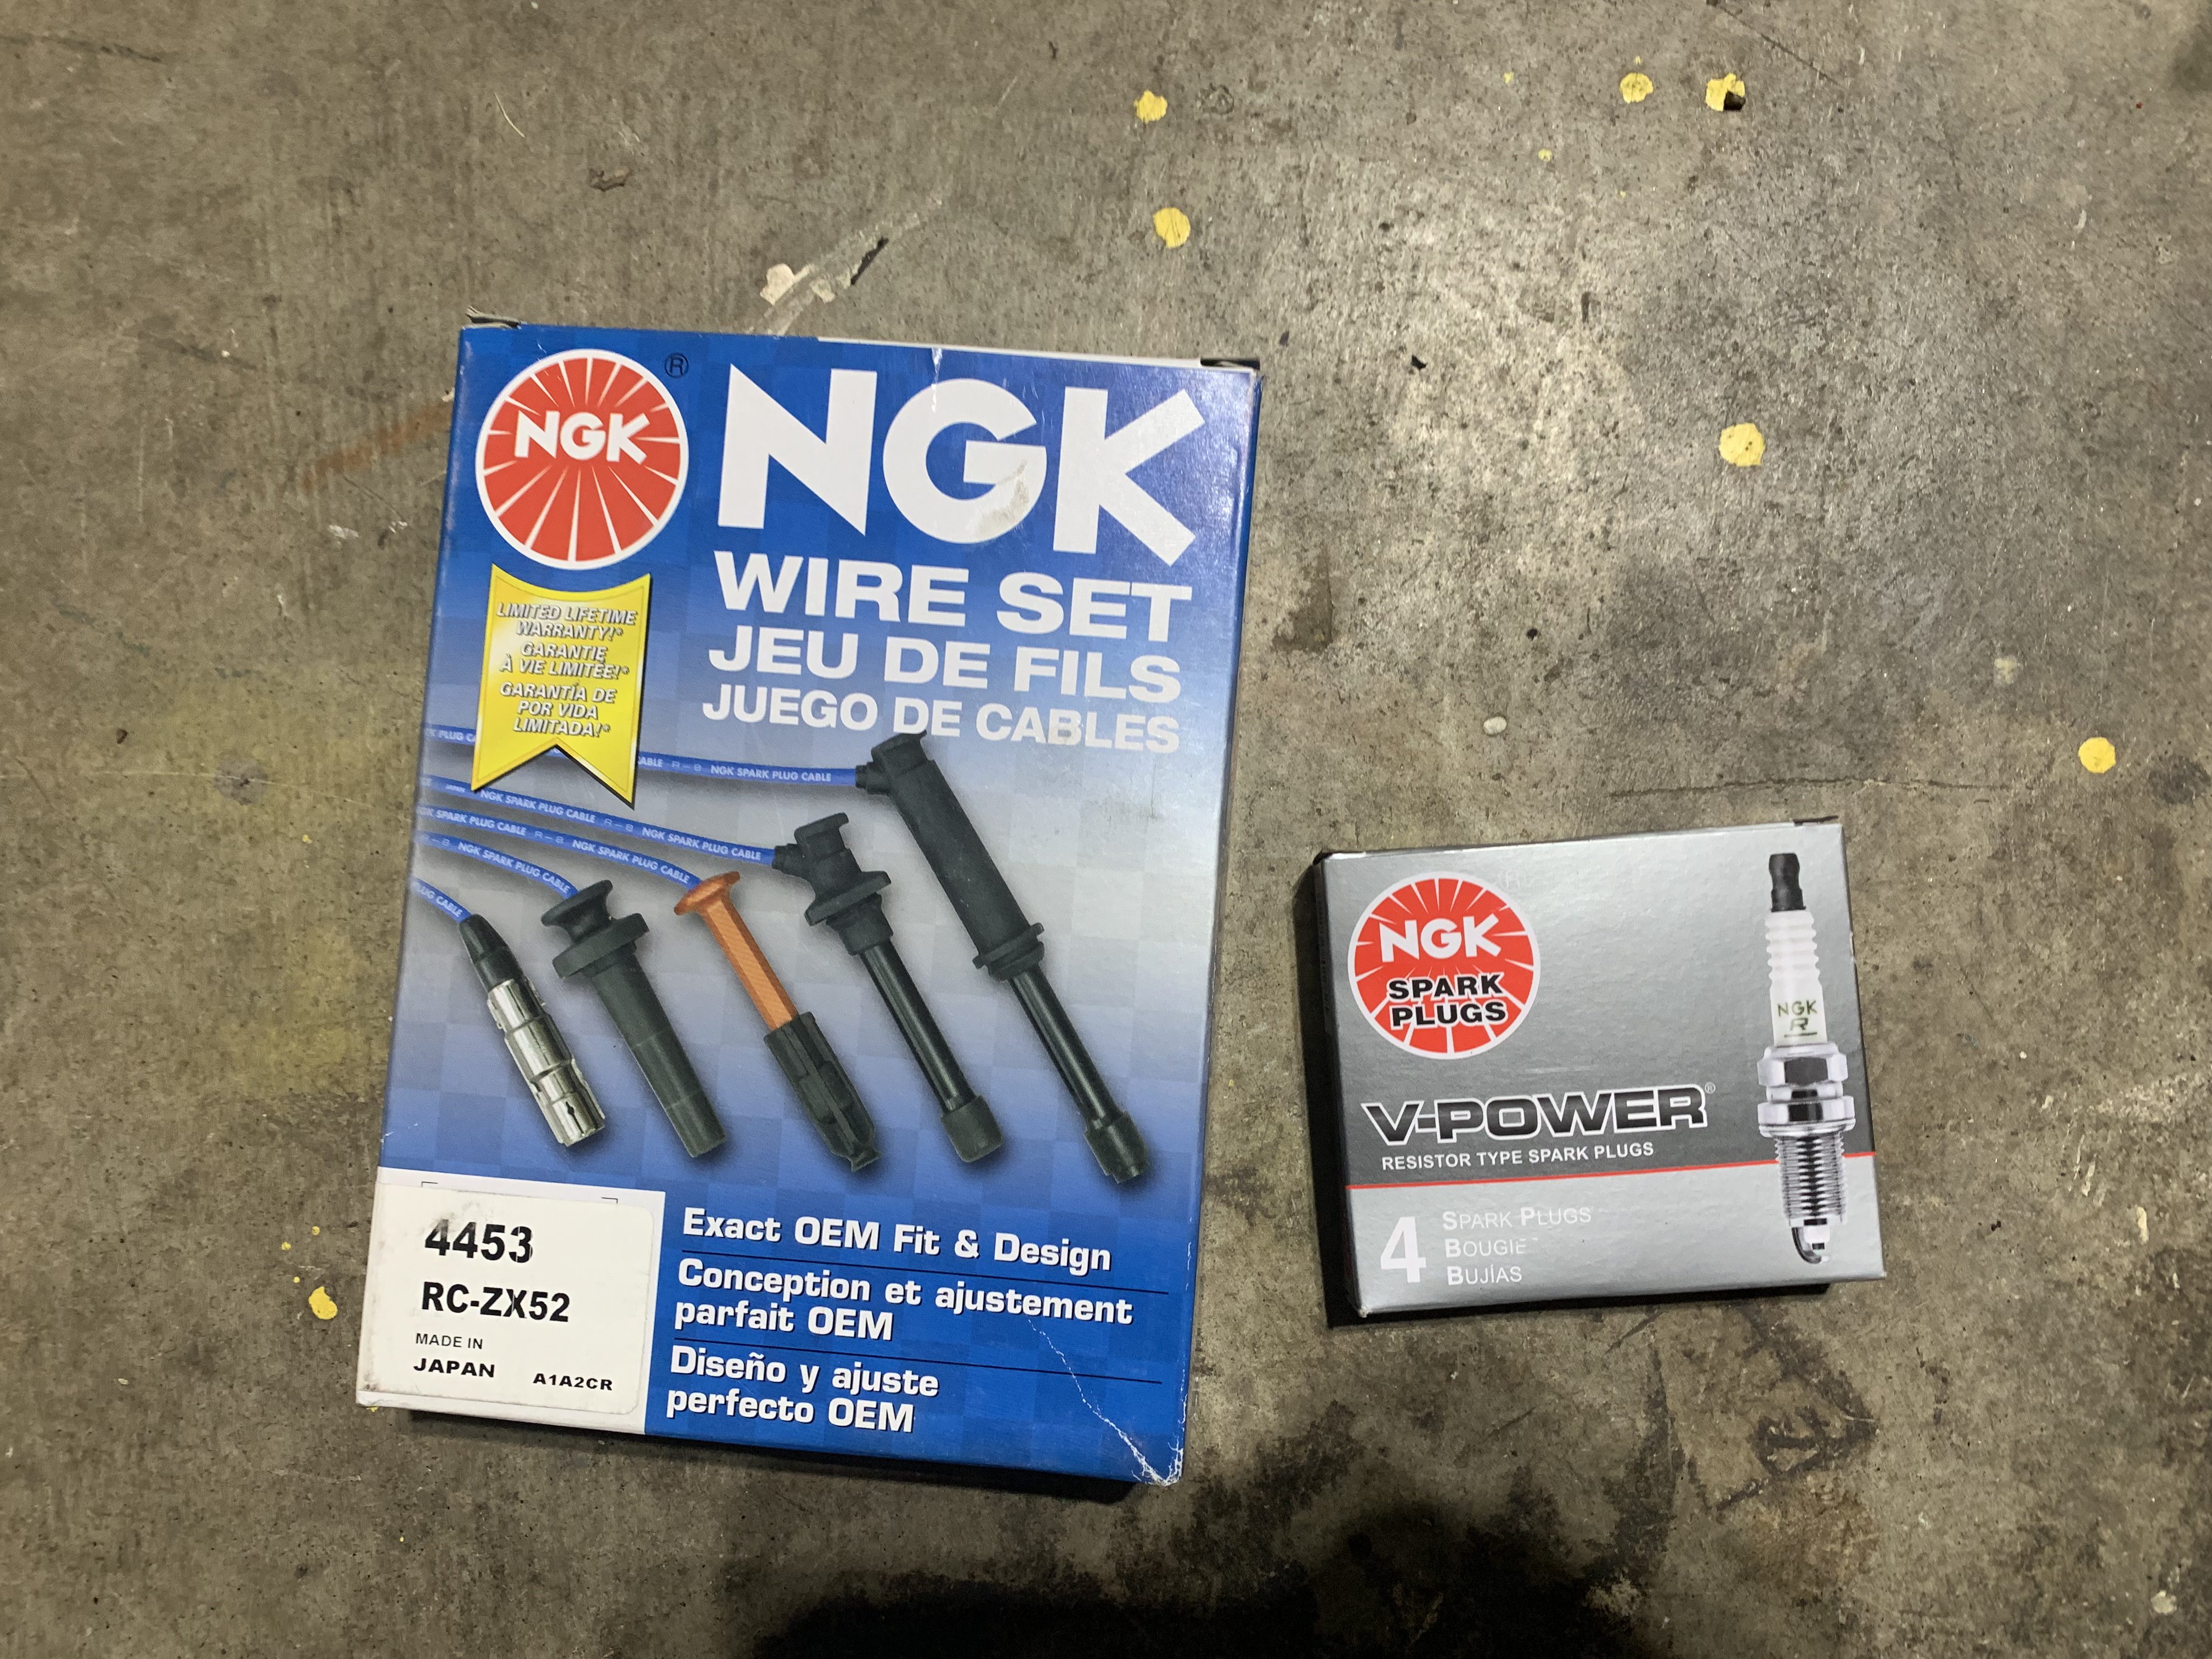
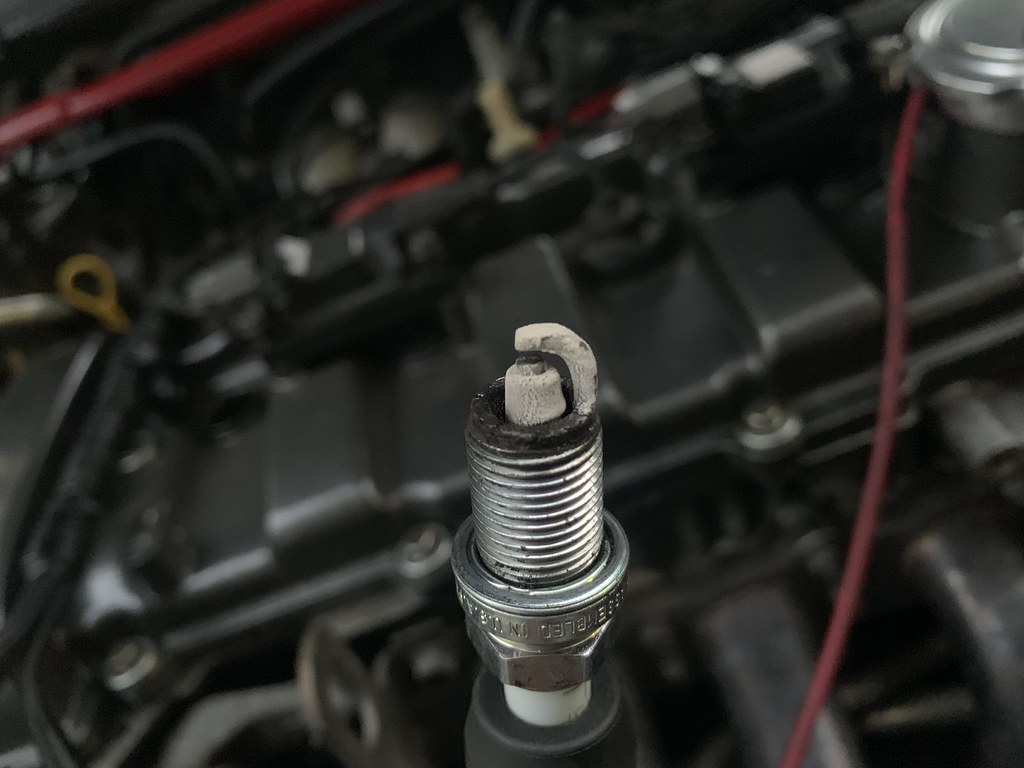
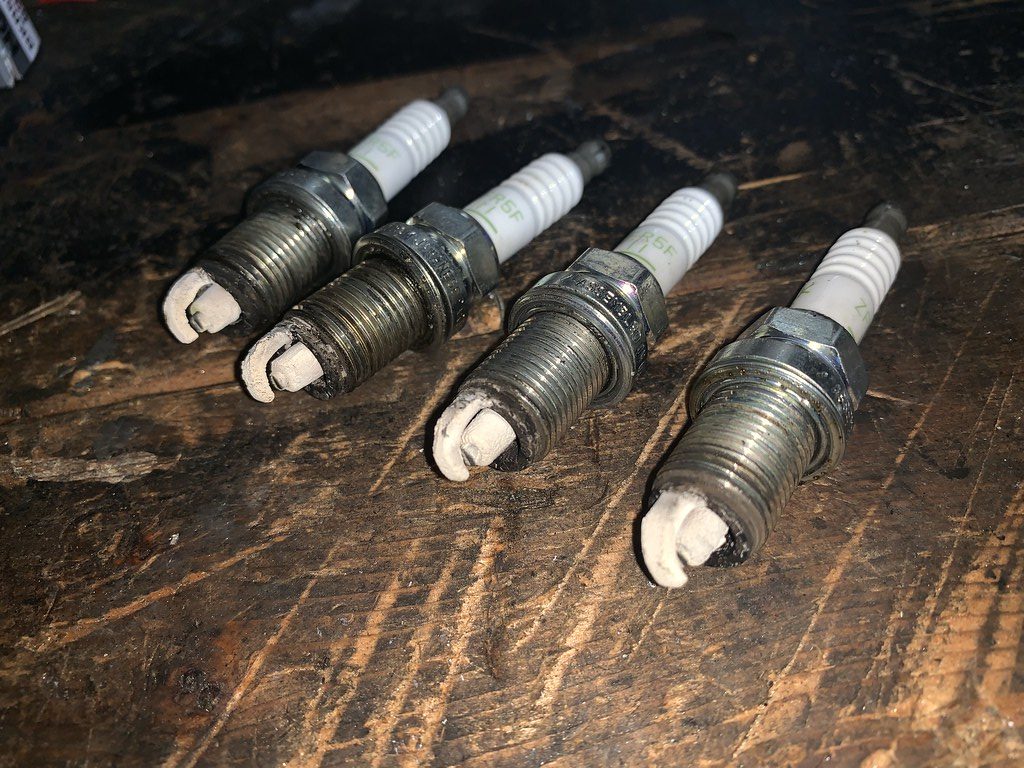
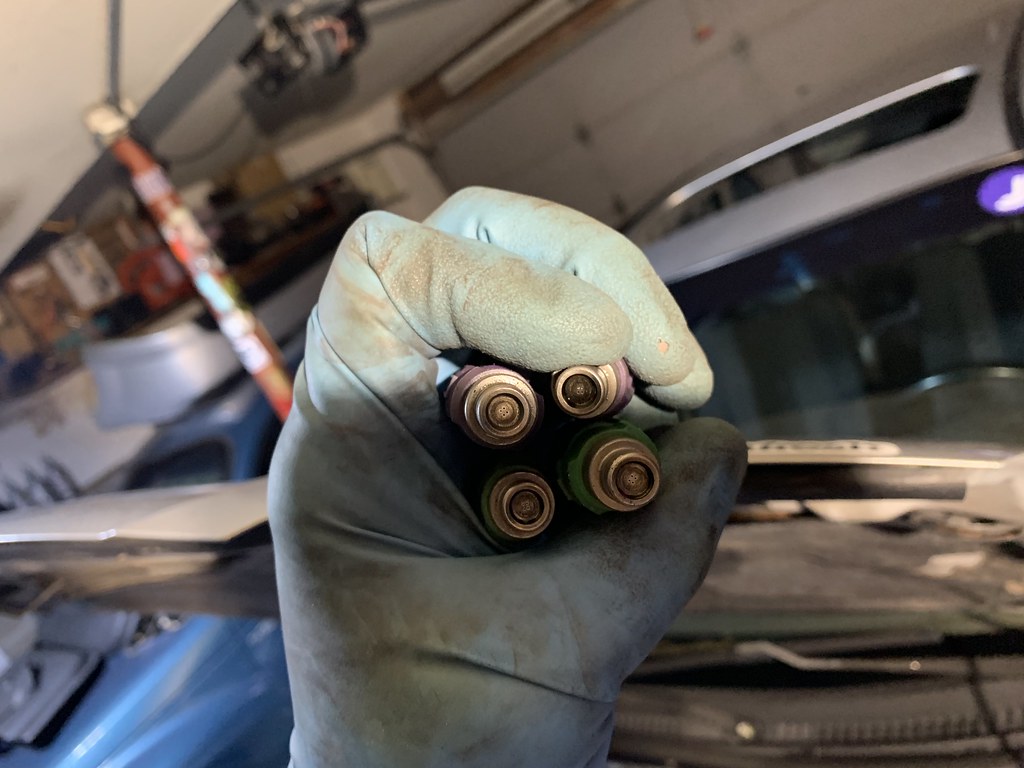
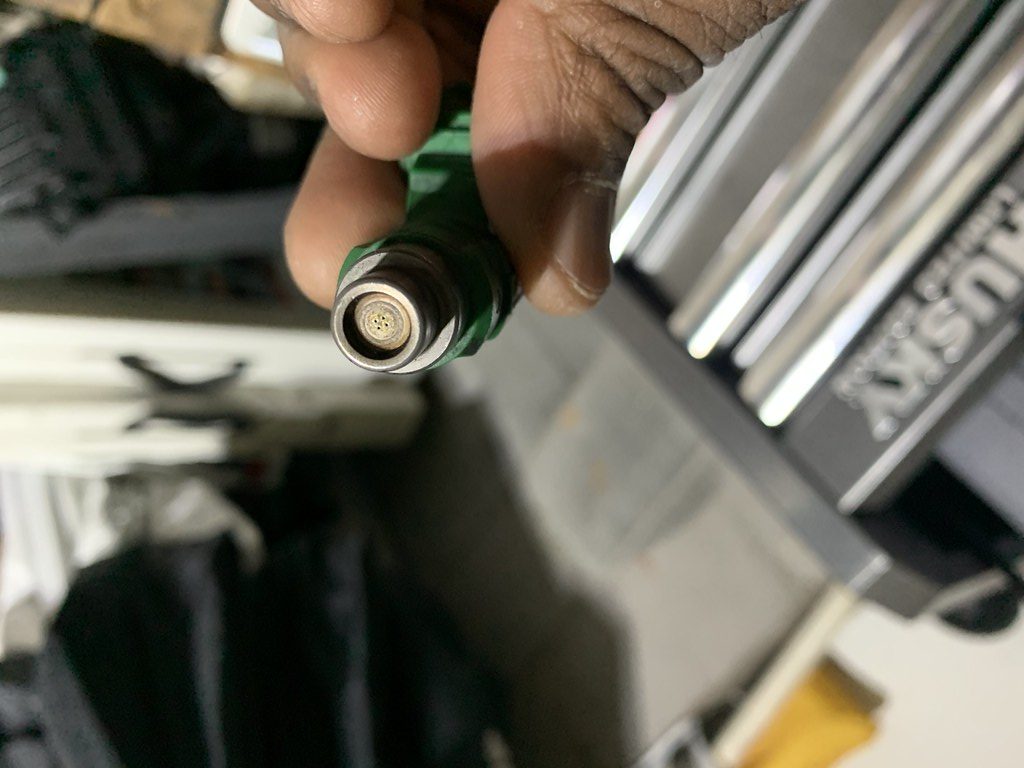
The previous owner said he just replaced the plugs and wires, but I always feel the need to replace them on any new car just because.


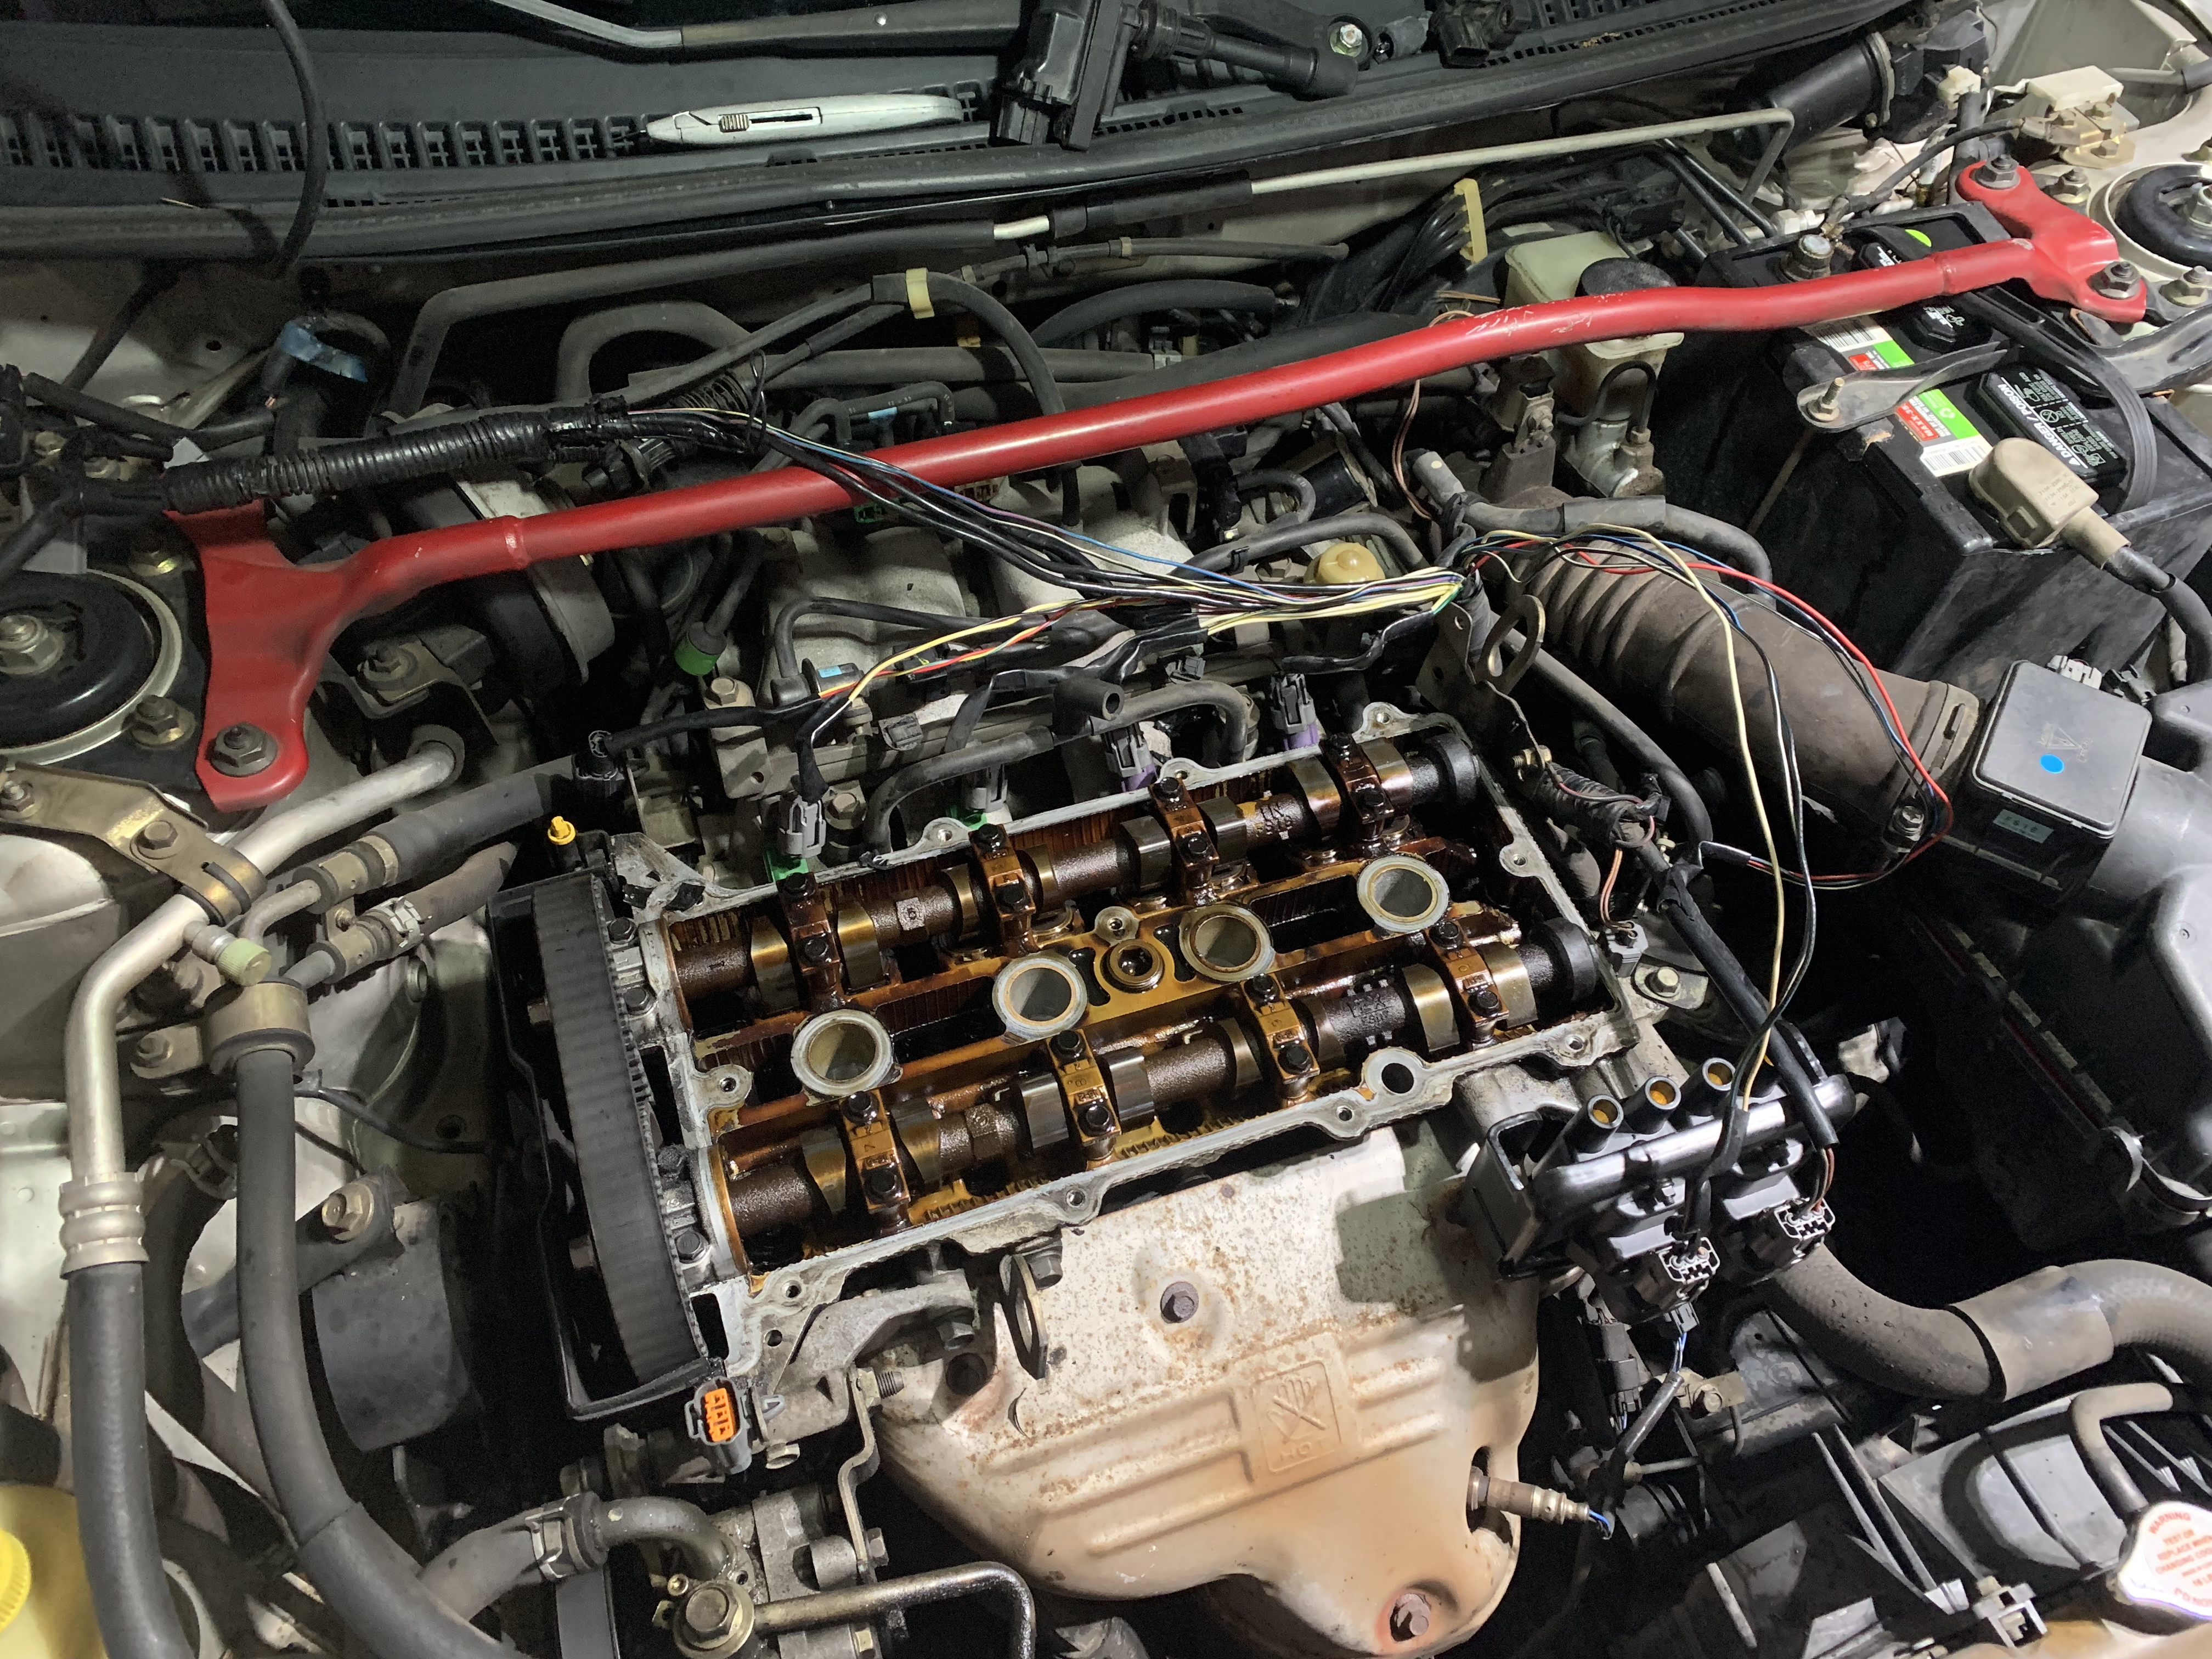
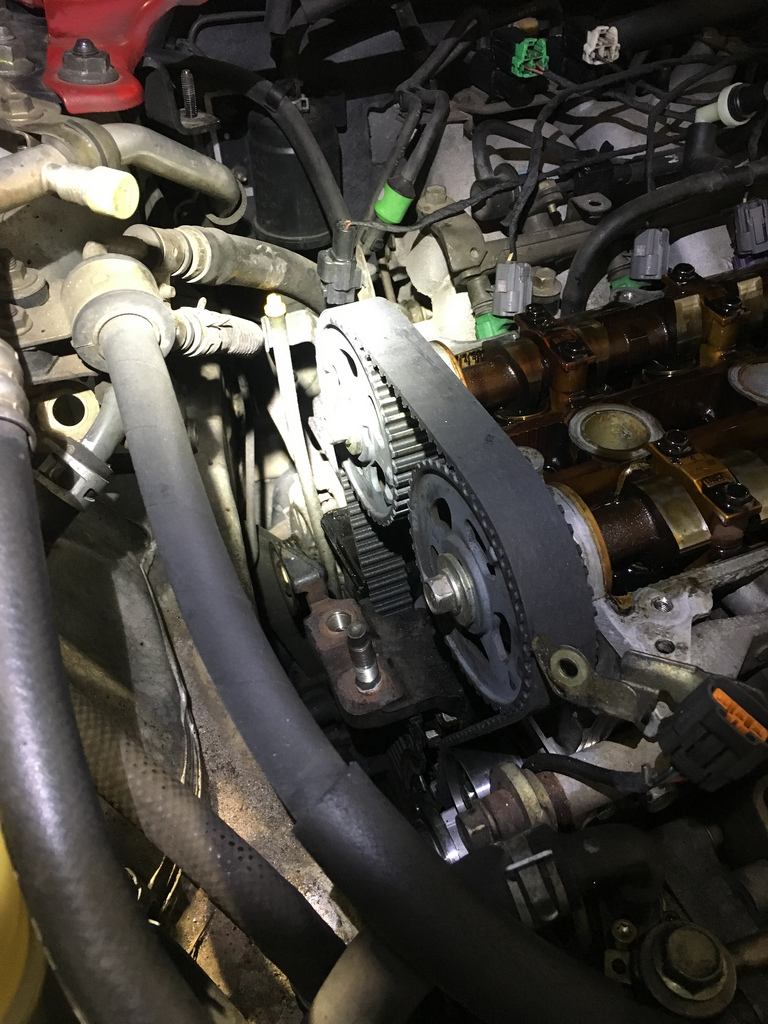
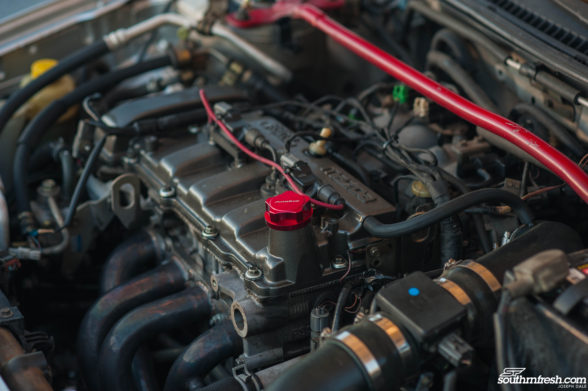
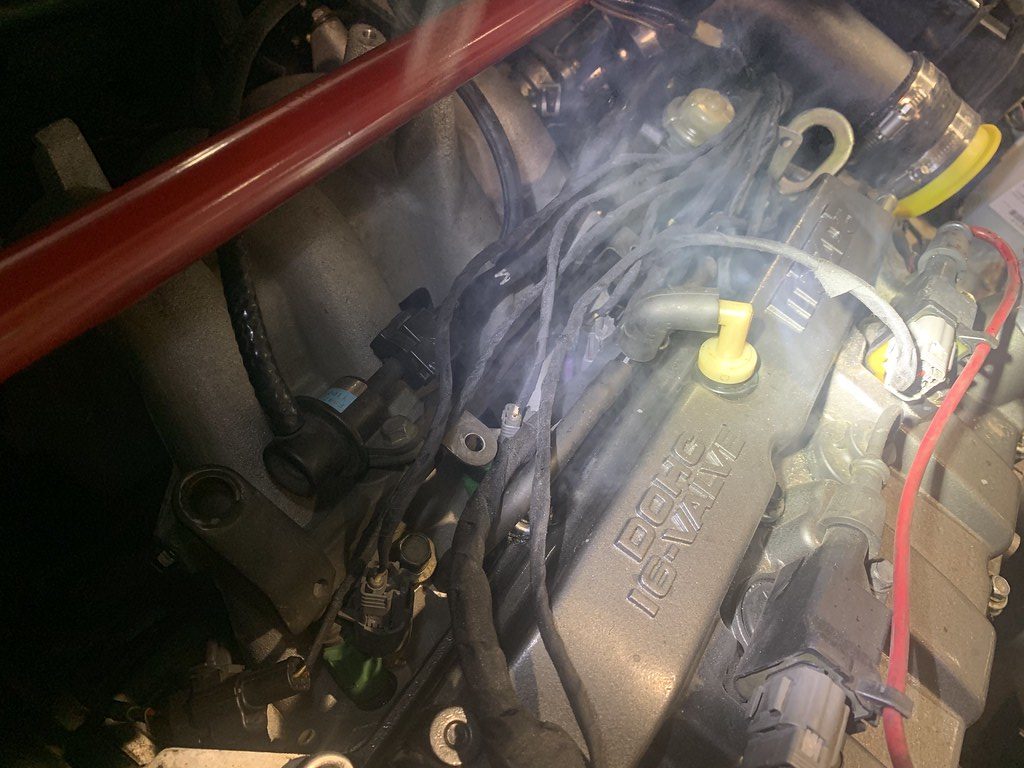
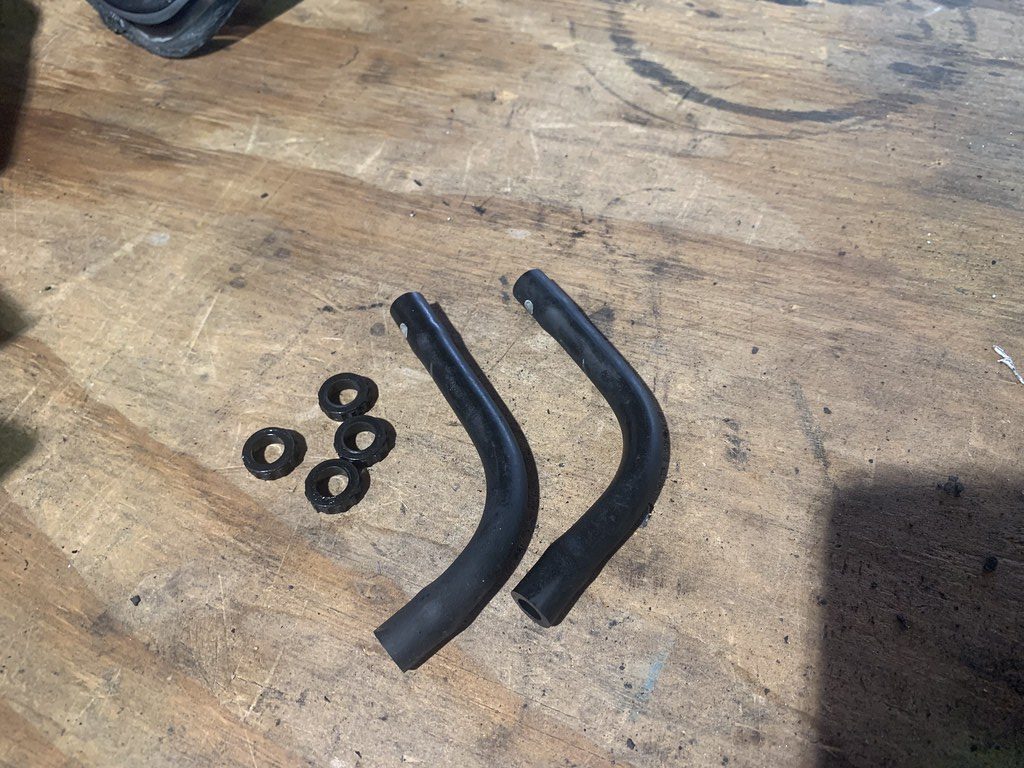
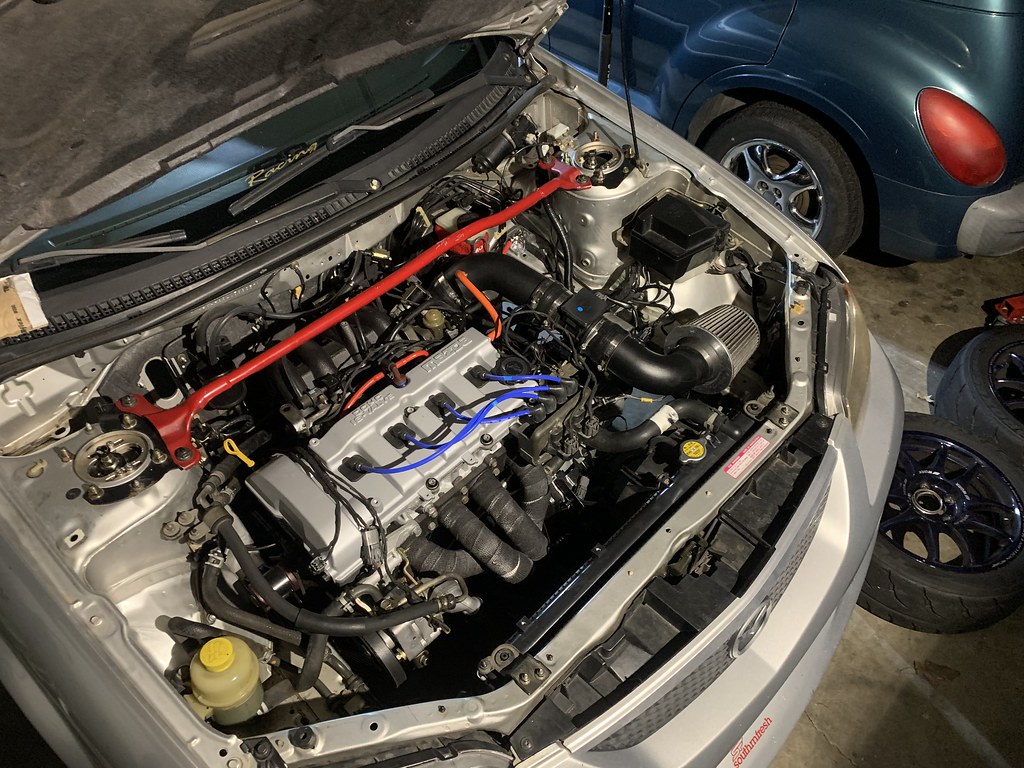
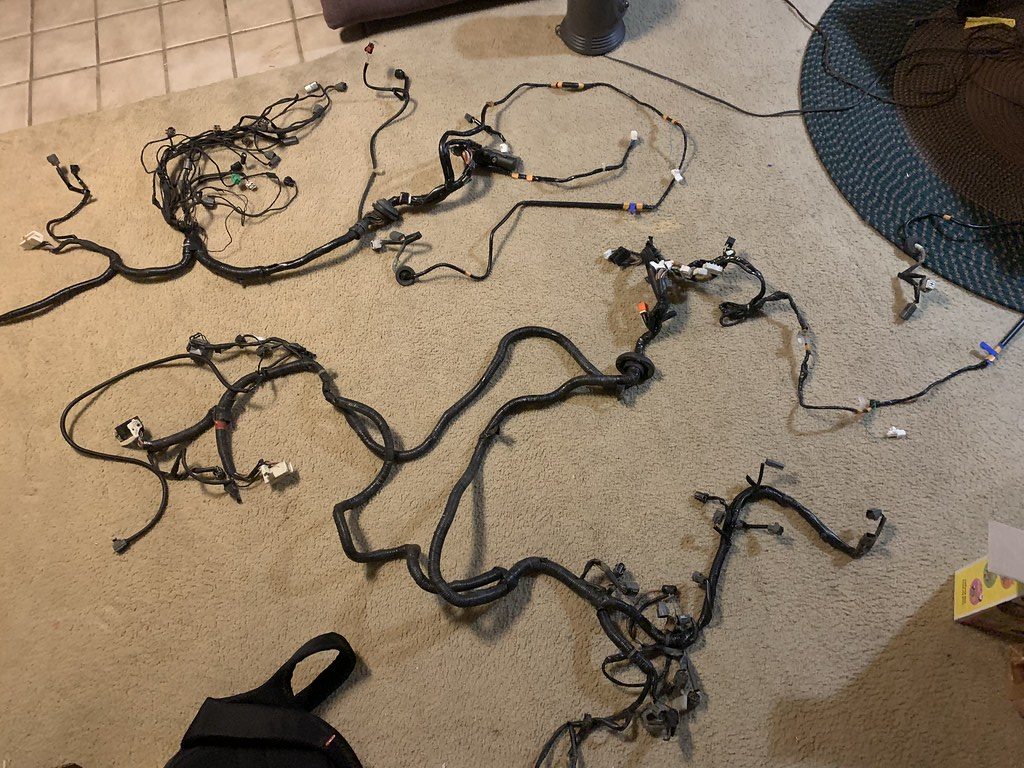
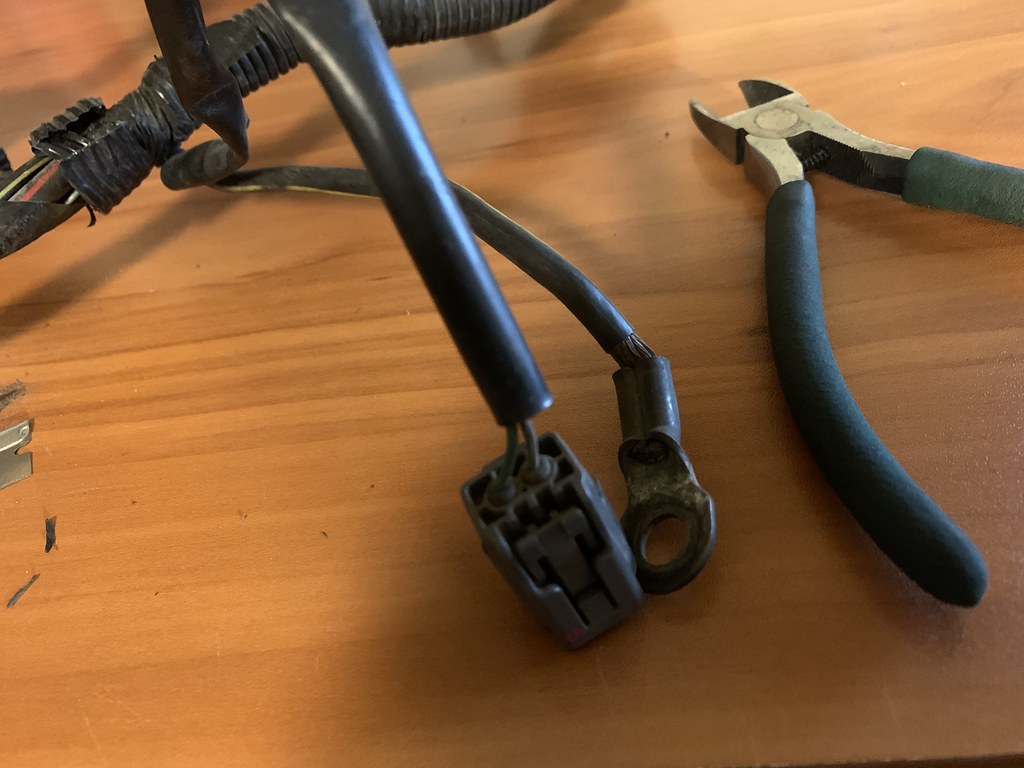
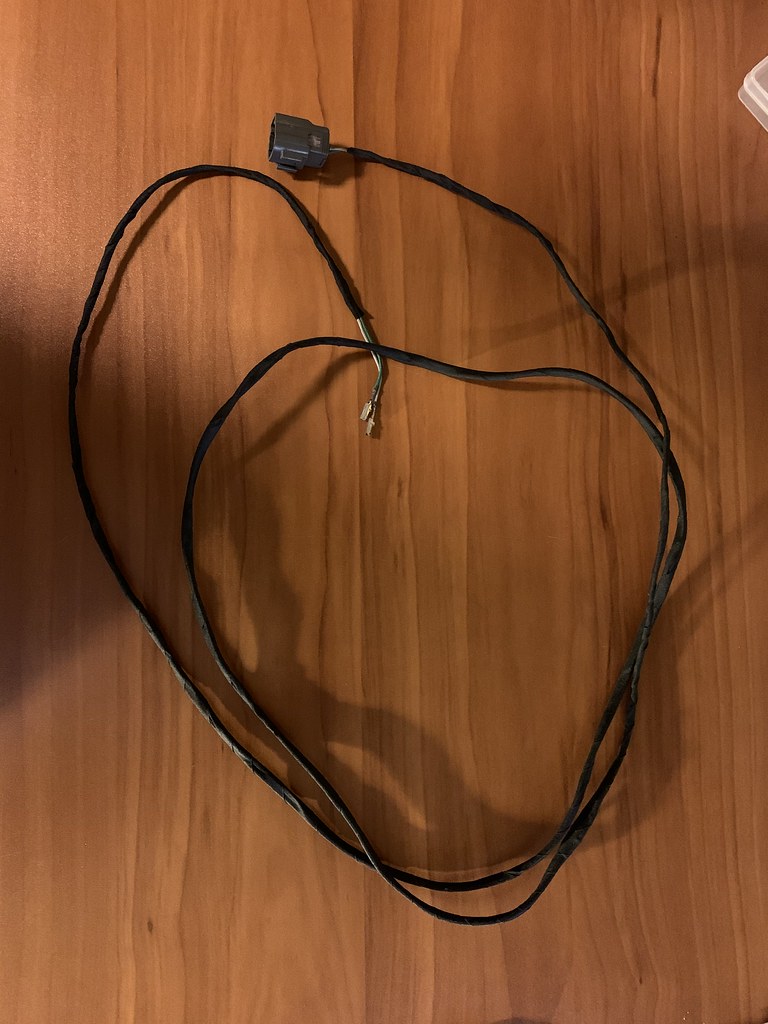
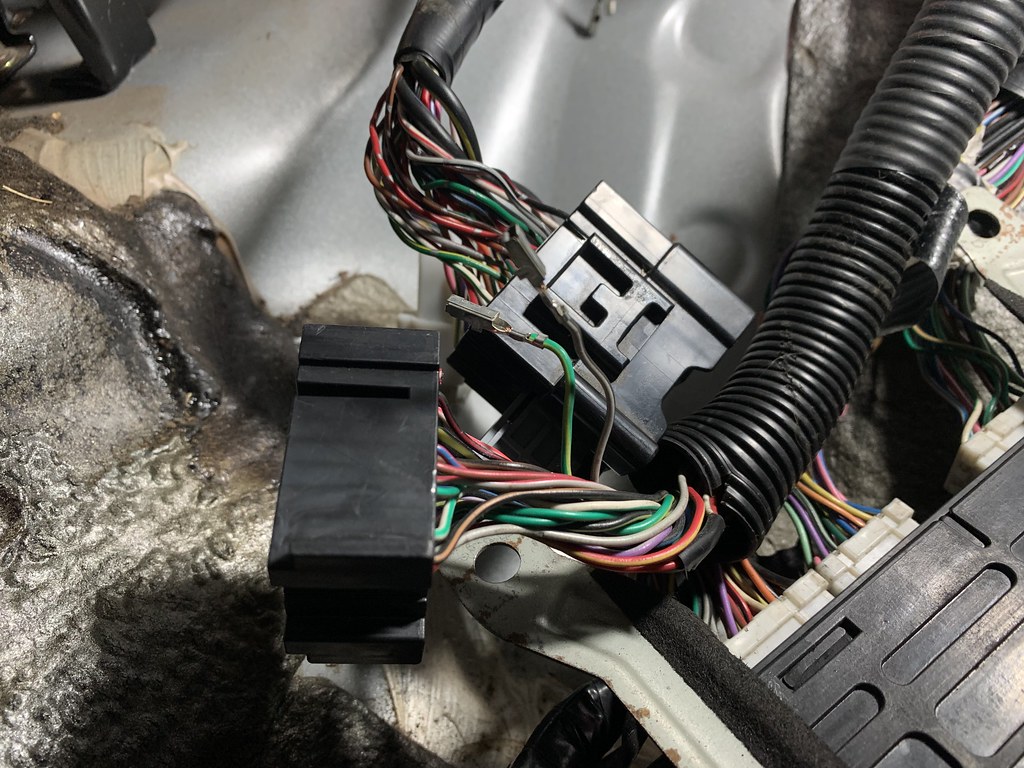
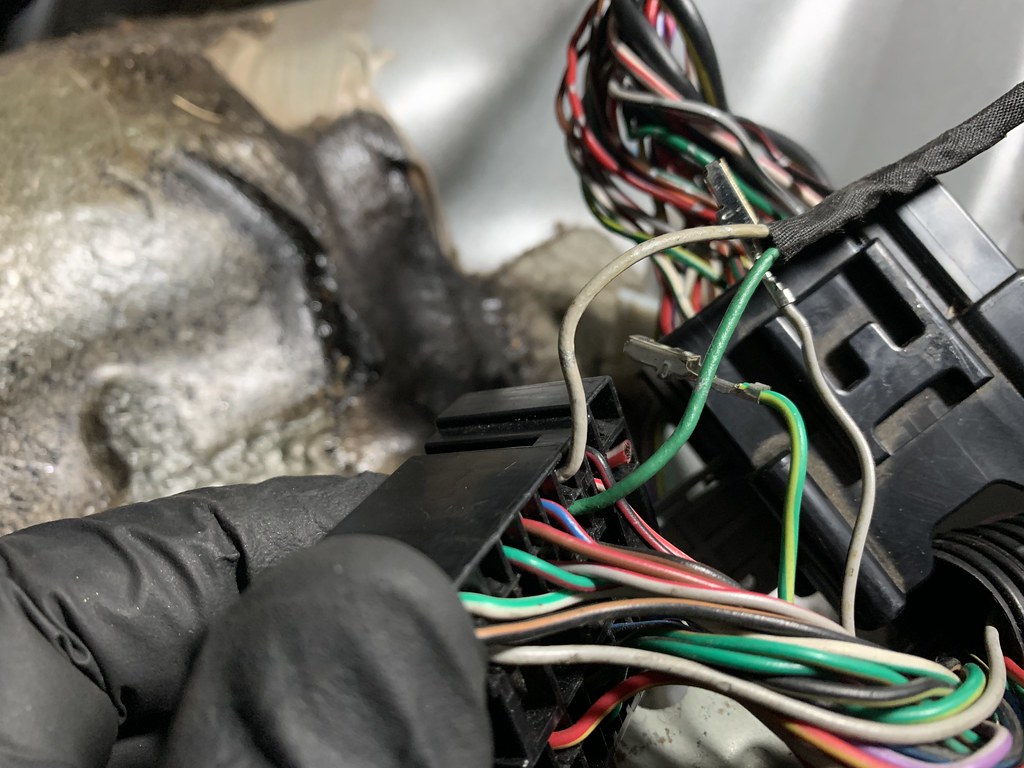
To get rid of some of the clutter, you can convert the ignition system from a shared 2 coil setup to a individual coil setup.  But it requires a 626 valve cover, and a coil and wire from a earlier model 1.8 Protege.  You simply unwrap the coil pack harness, and it gives you more space for you to use the setup.


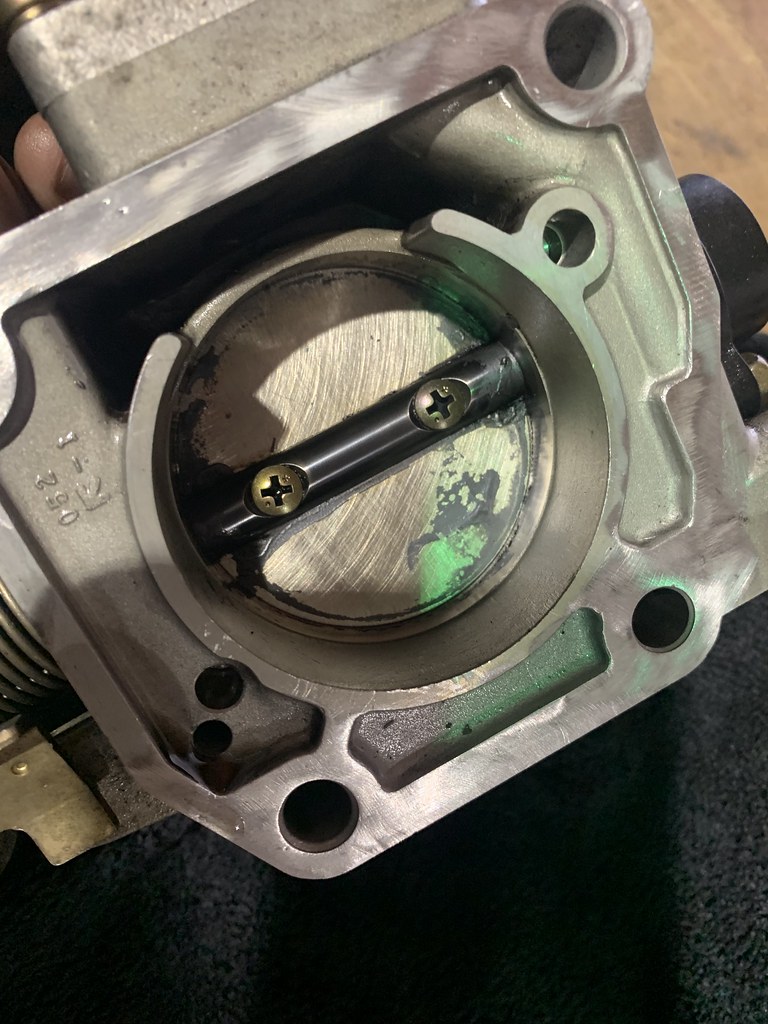
Pretty simple modification, which has no proven performance gain, but it simplifies things and removes all the clutter on the valve cover.  
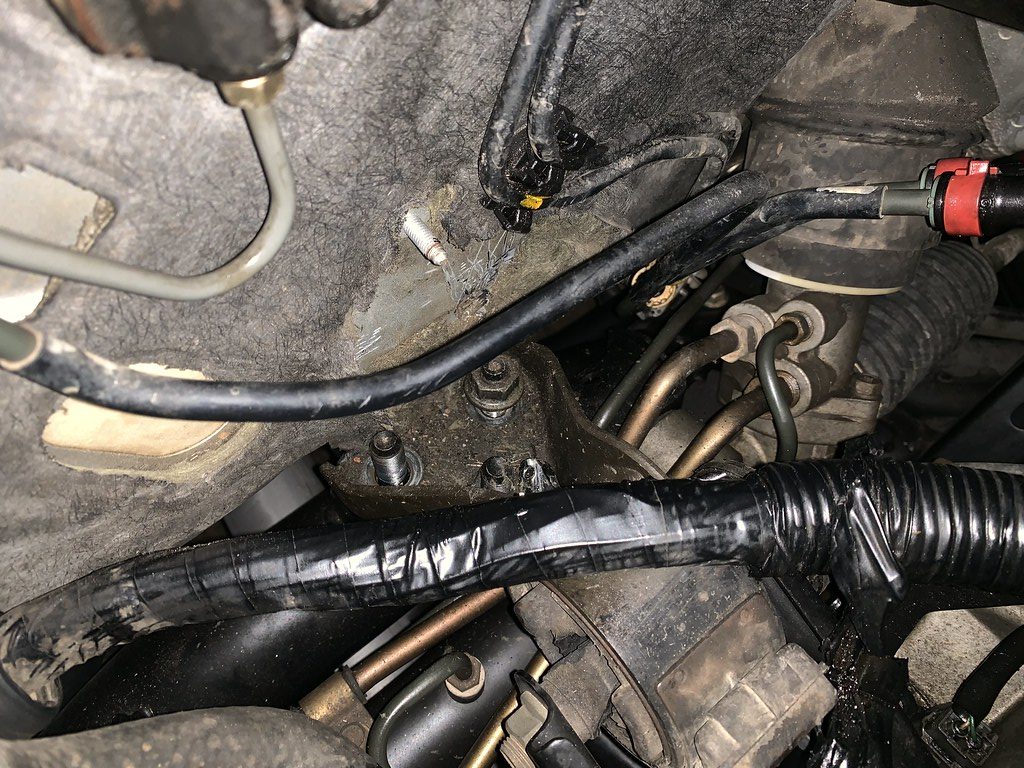
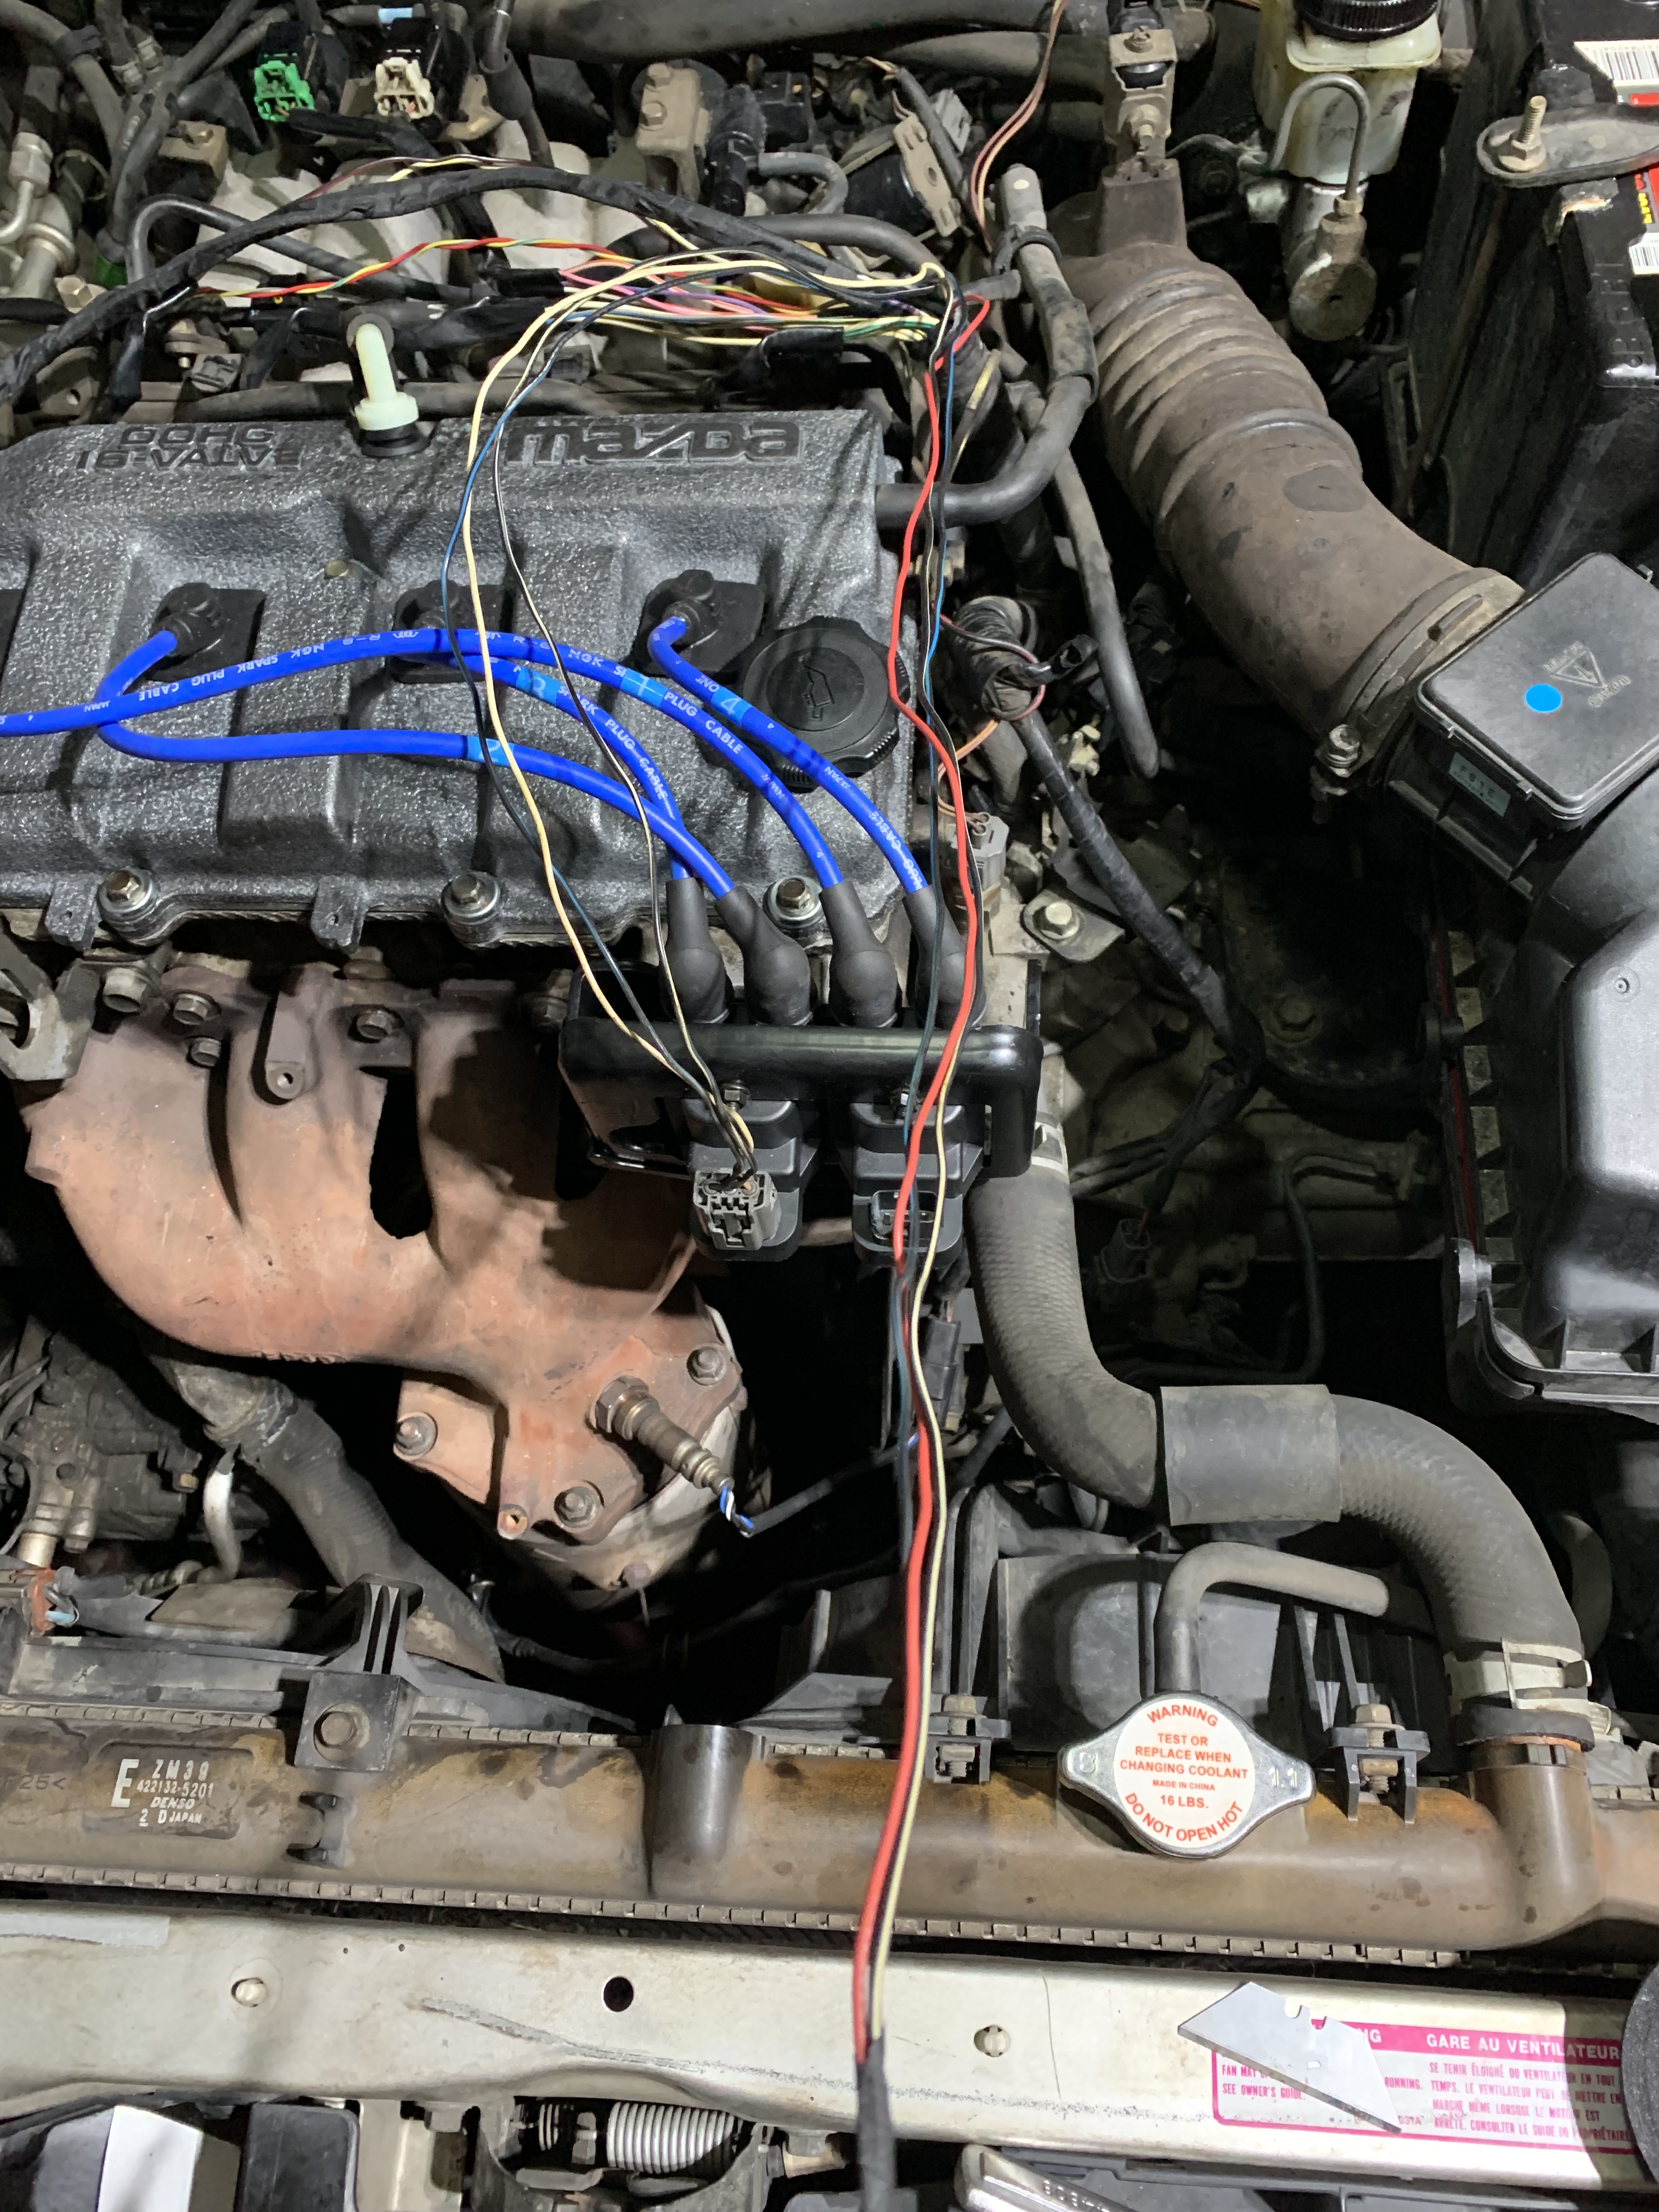
Once its all done, I wrapped up the wire in harness fabric tape.  
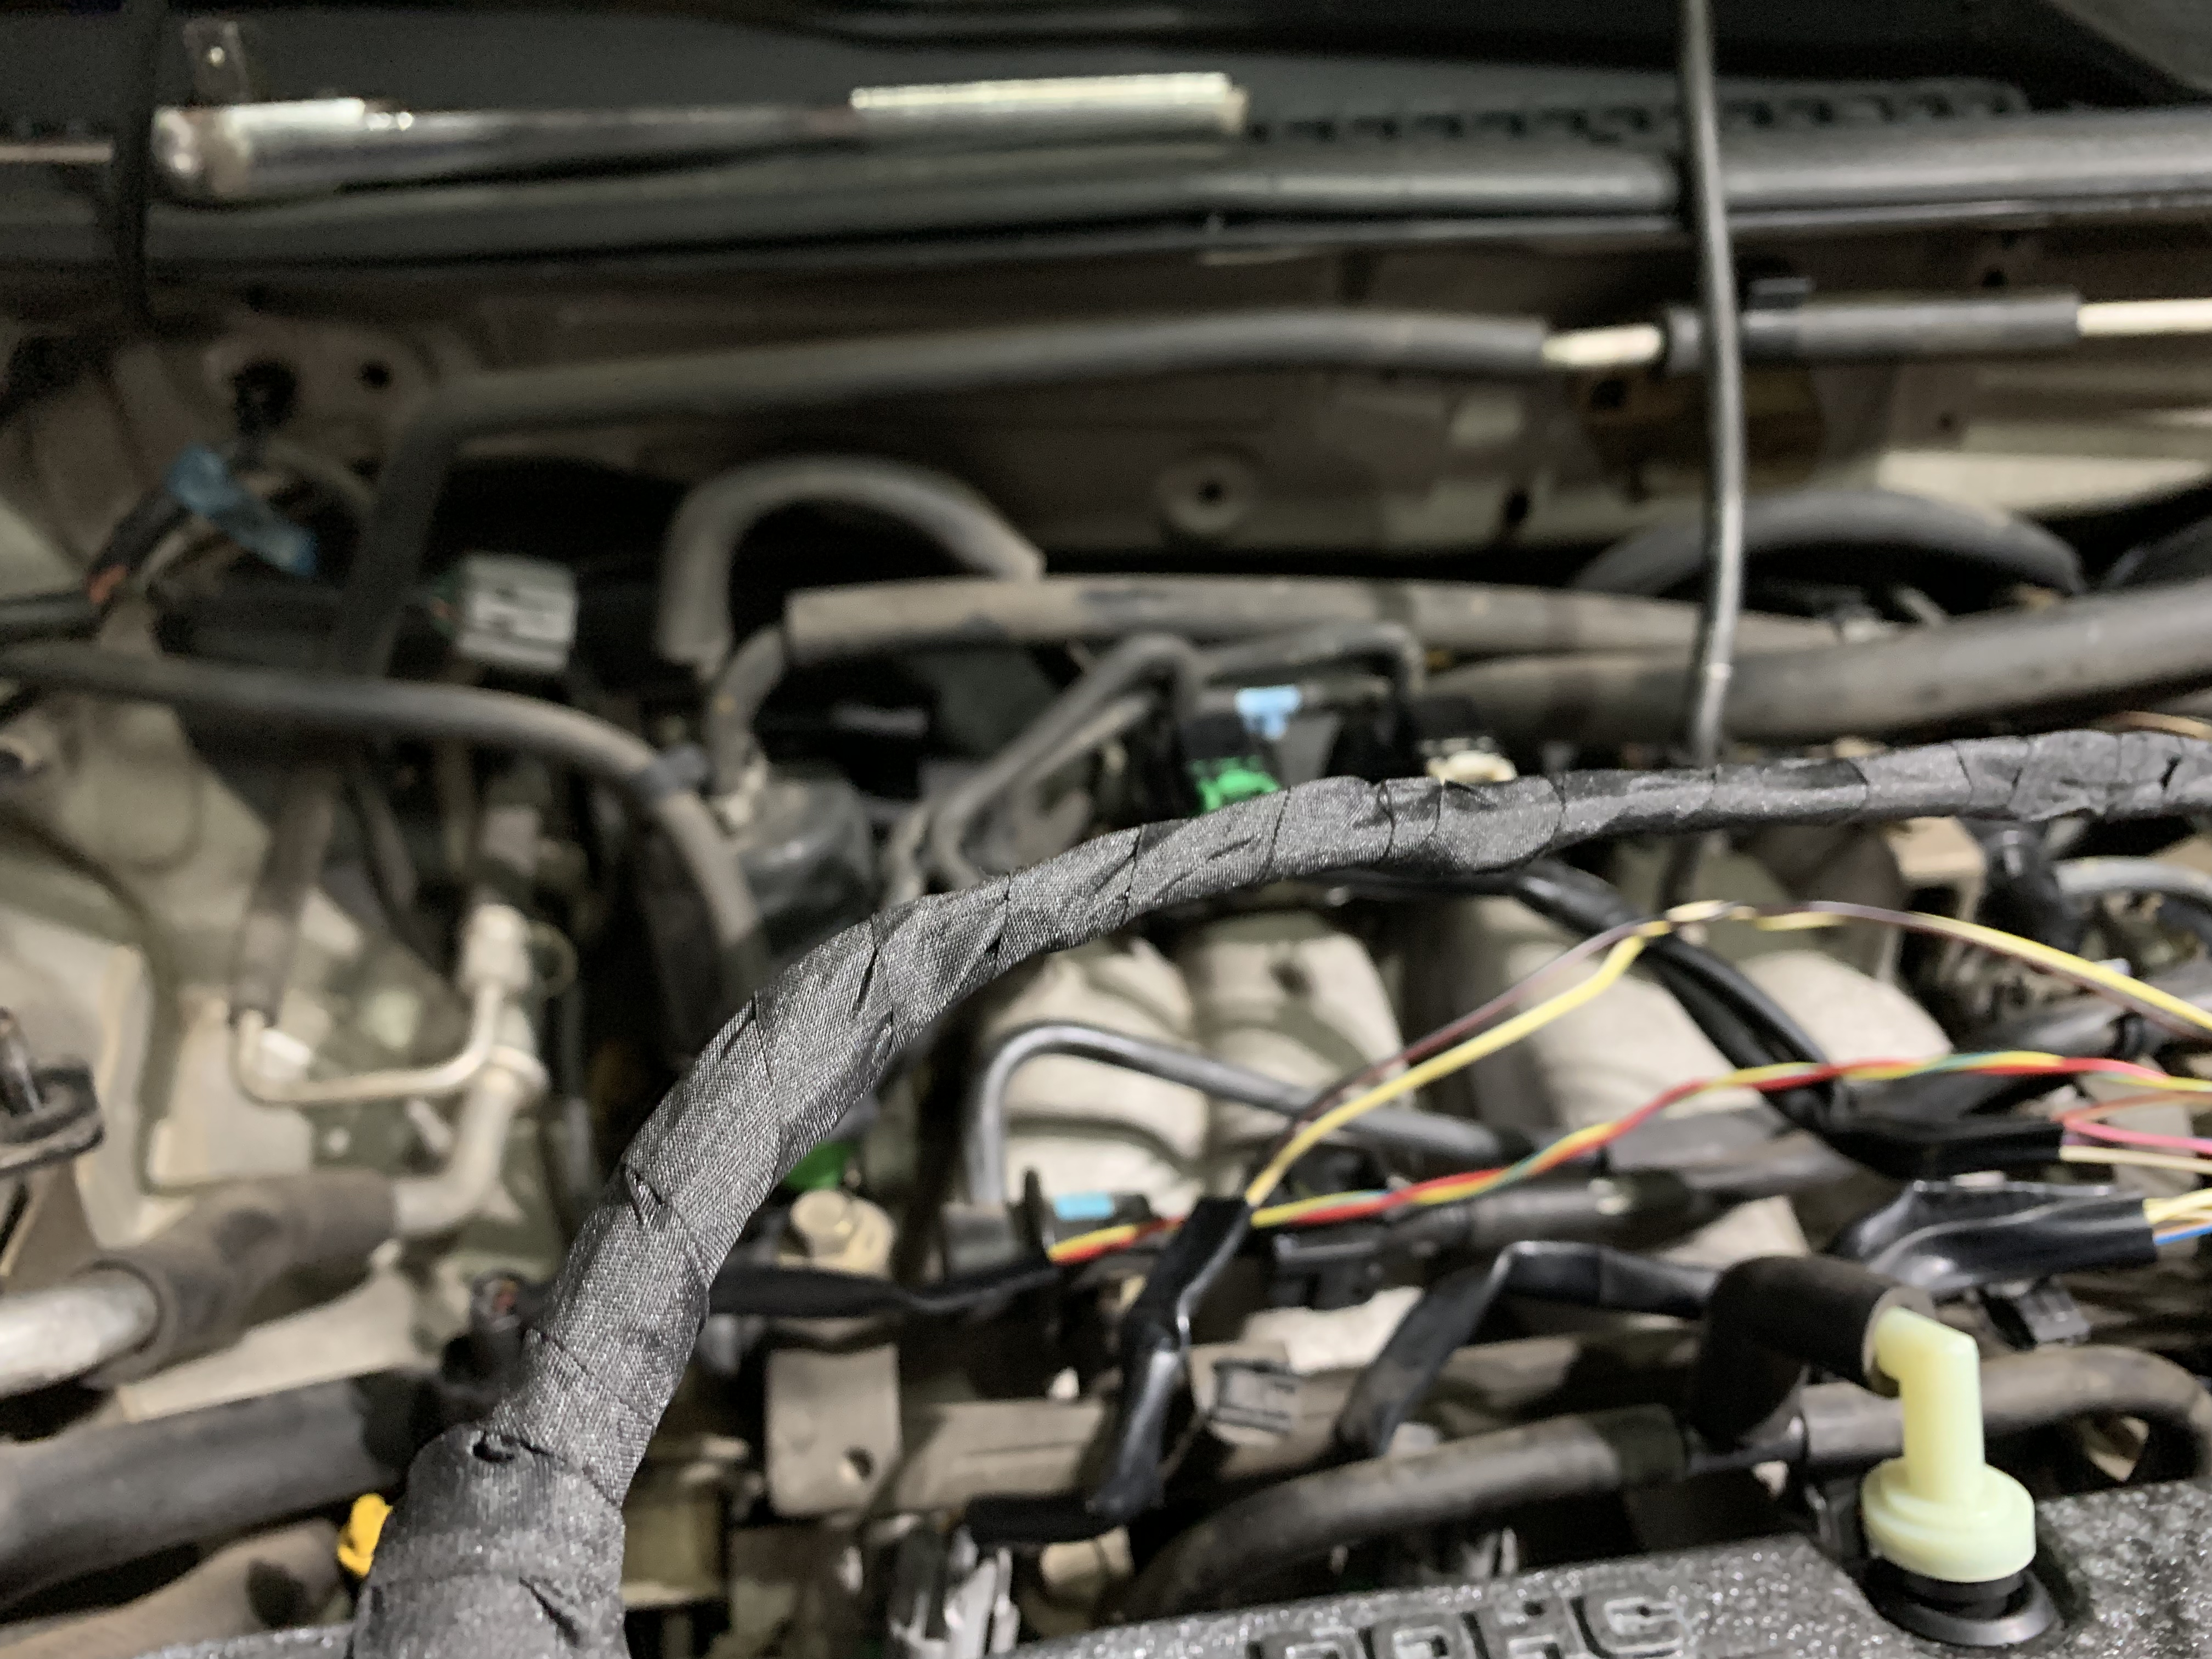
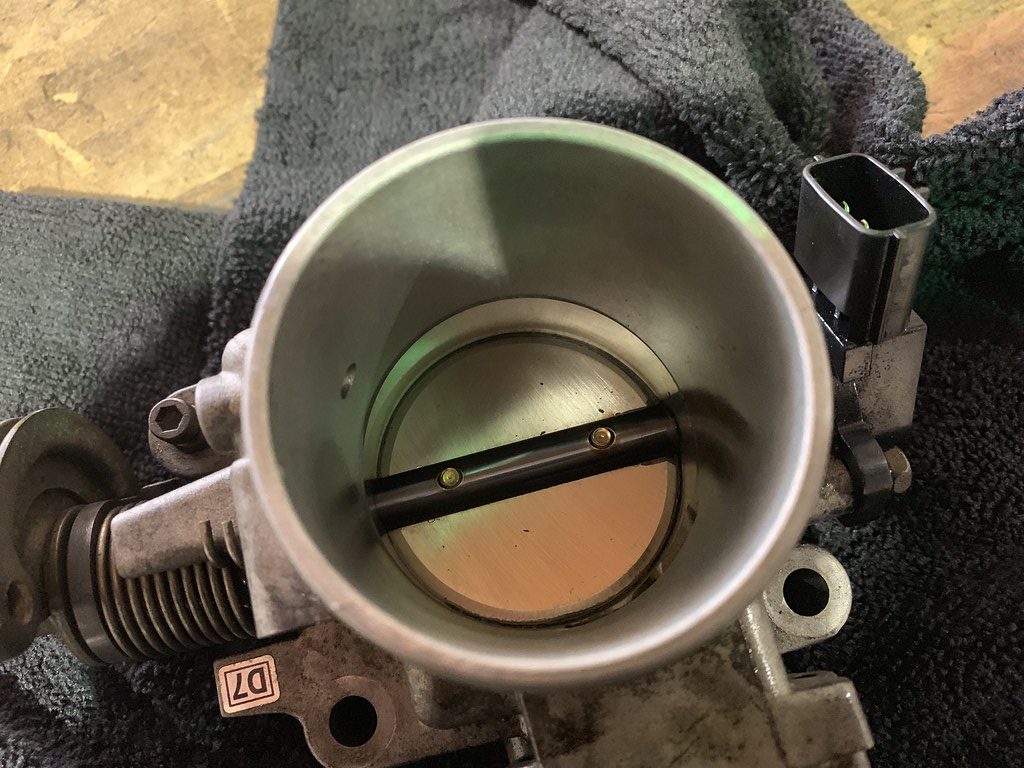
The only thing is the extra long coil wire on the right, but that will be handled later.  Total this cost $94 and Valve cover Gasket with parts from Rockauto.   

  •  
    • 2002 Mazda Protege 5: $1200.00
    • Mazda 6 brake upgrade: $90
    • Coil pack conversion and valve cover gasket: $94
    • Total: $1384


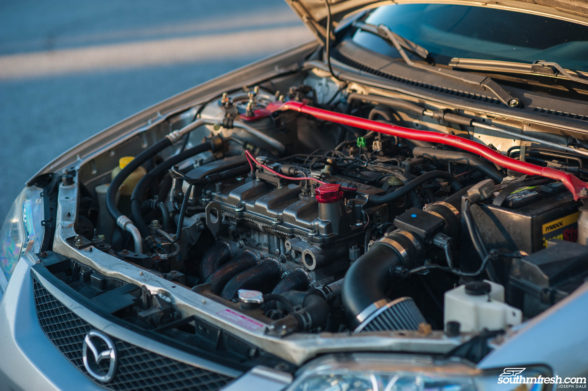
After getting those things taken care of, I felt better about driving the car on the street and really see how the car drove on the road.  Next we get on to the wheels / tires and suspension..


Thanks for reading!  Comments, suggestions, recommendations are welcome in the comment section or via email.

Southrnfresh_Joe
Southrnfresh_Joe New Reader
6/13/21 9:27 p.m.

12/10/2018 The Protege 5 is not the fastest car available for this sort of thing, and the FS motor is not the most powerful without some sort of force induction. So I just want to try and get some bolt-ons and squeeze every bit of efficiency out of this 2 liter. The car does have 288,000 miles on it, but it does not look or feel like it , and the motor runs like it has half of that on it. 
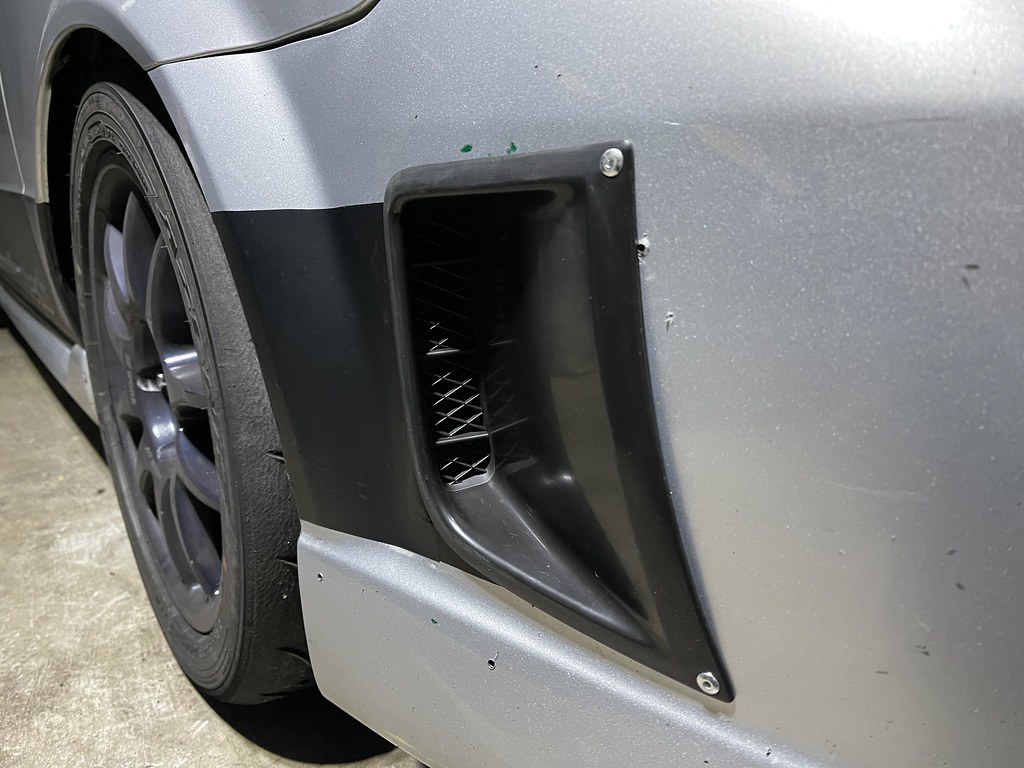
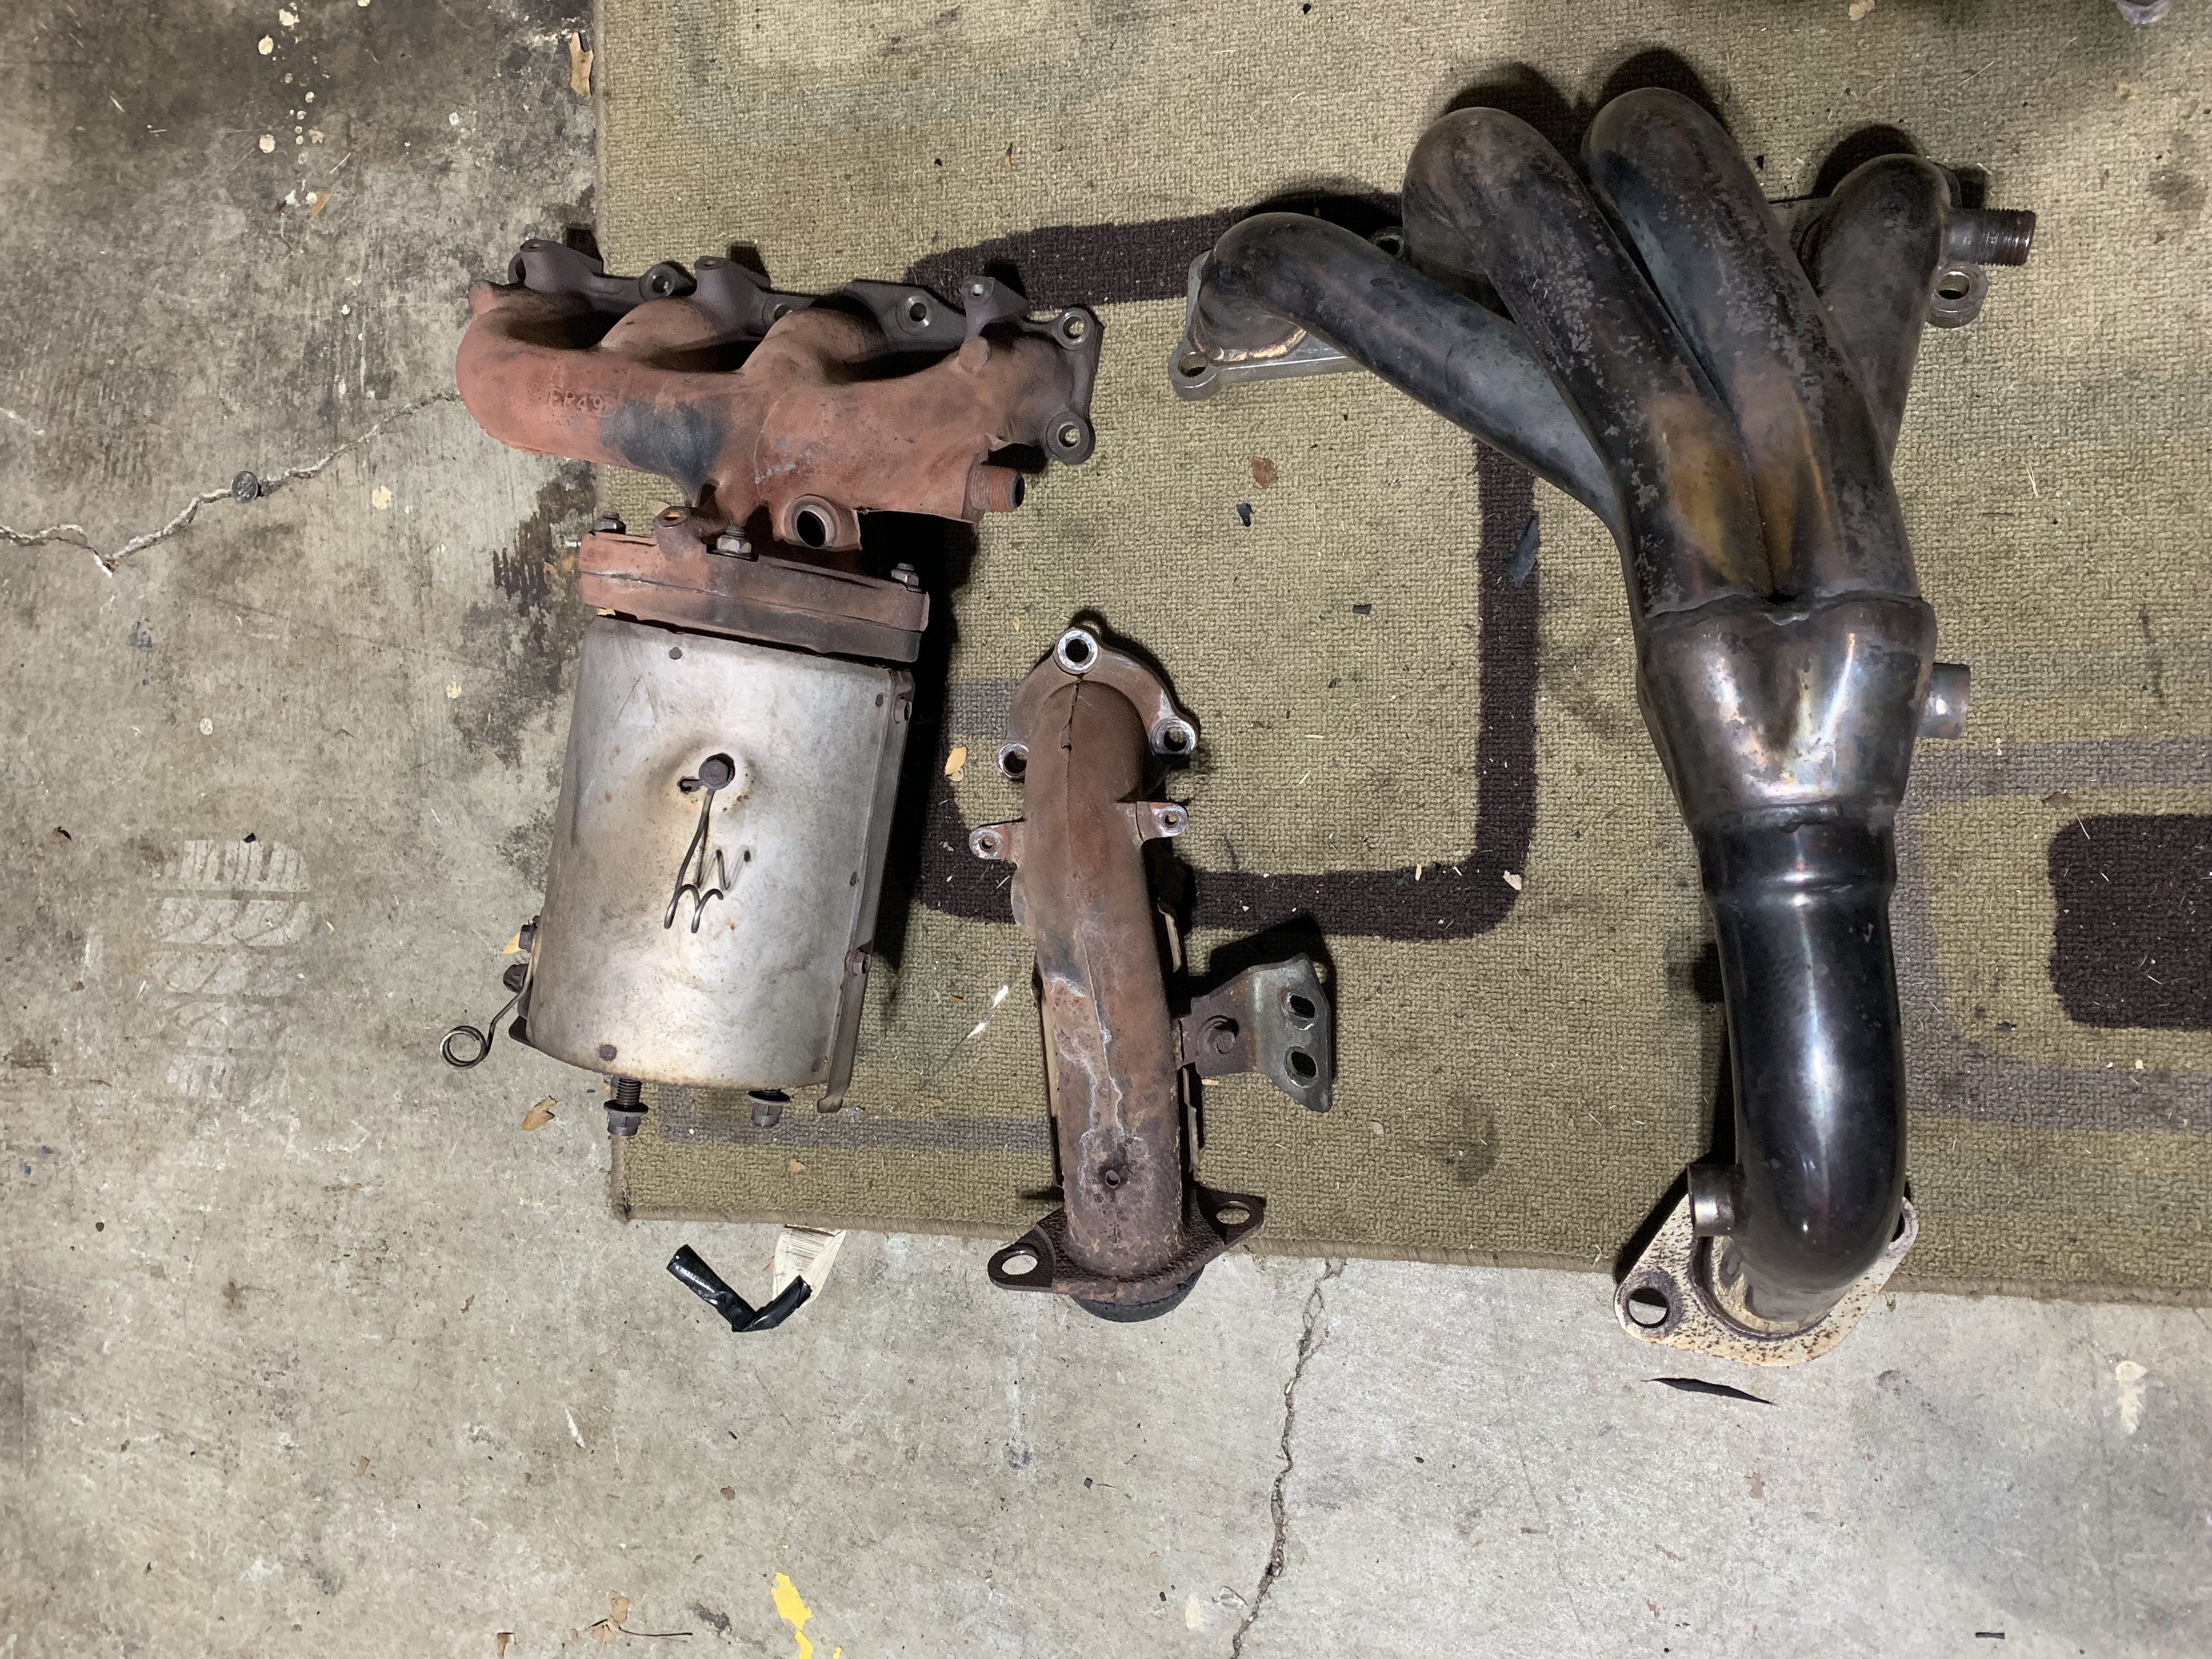
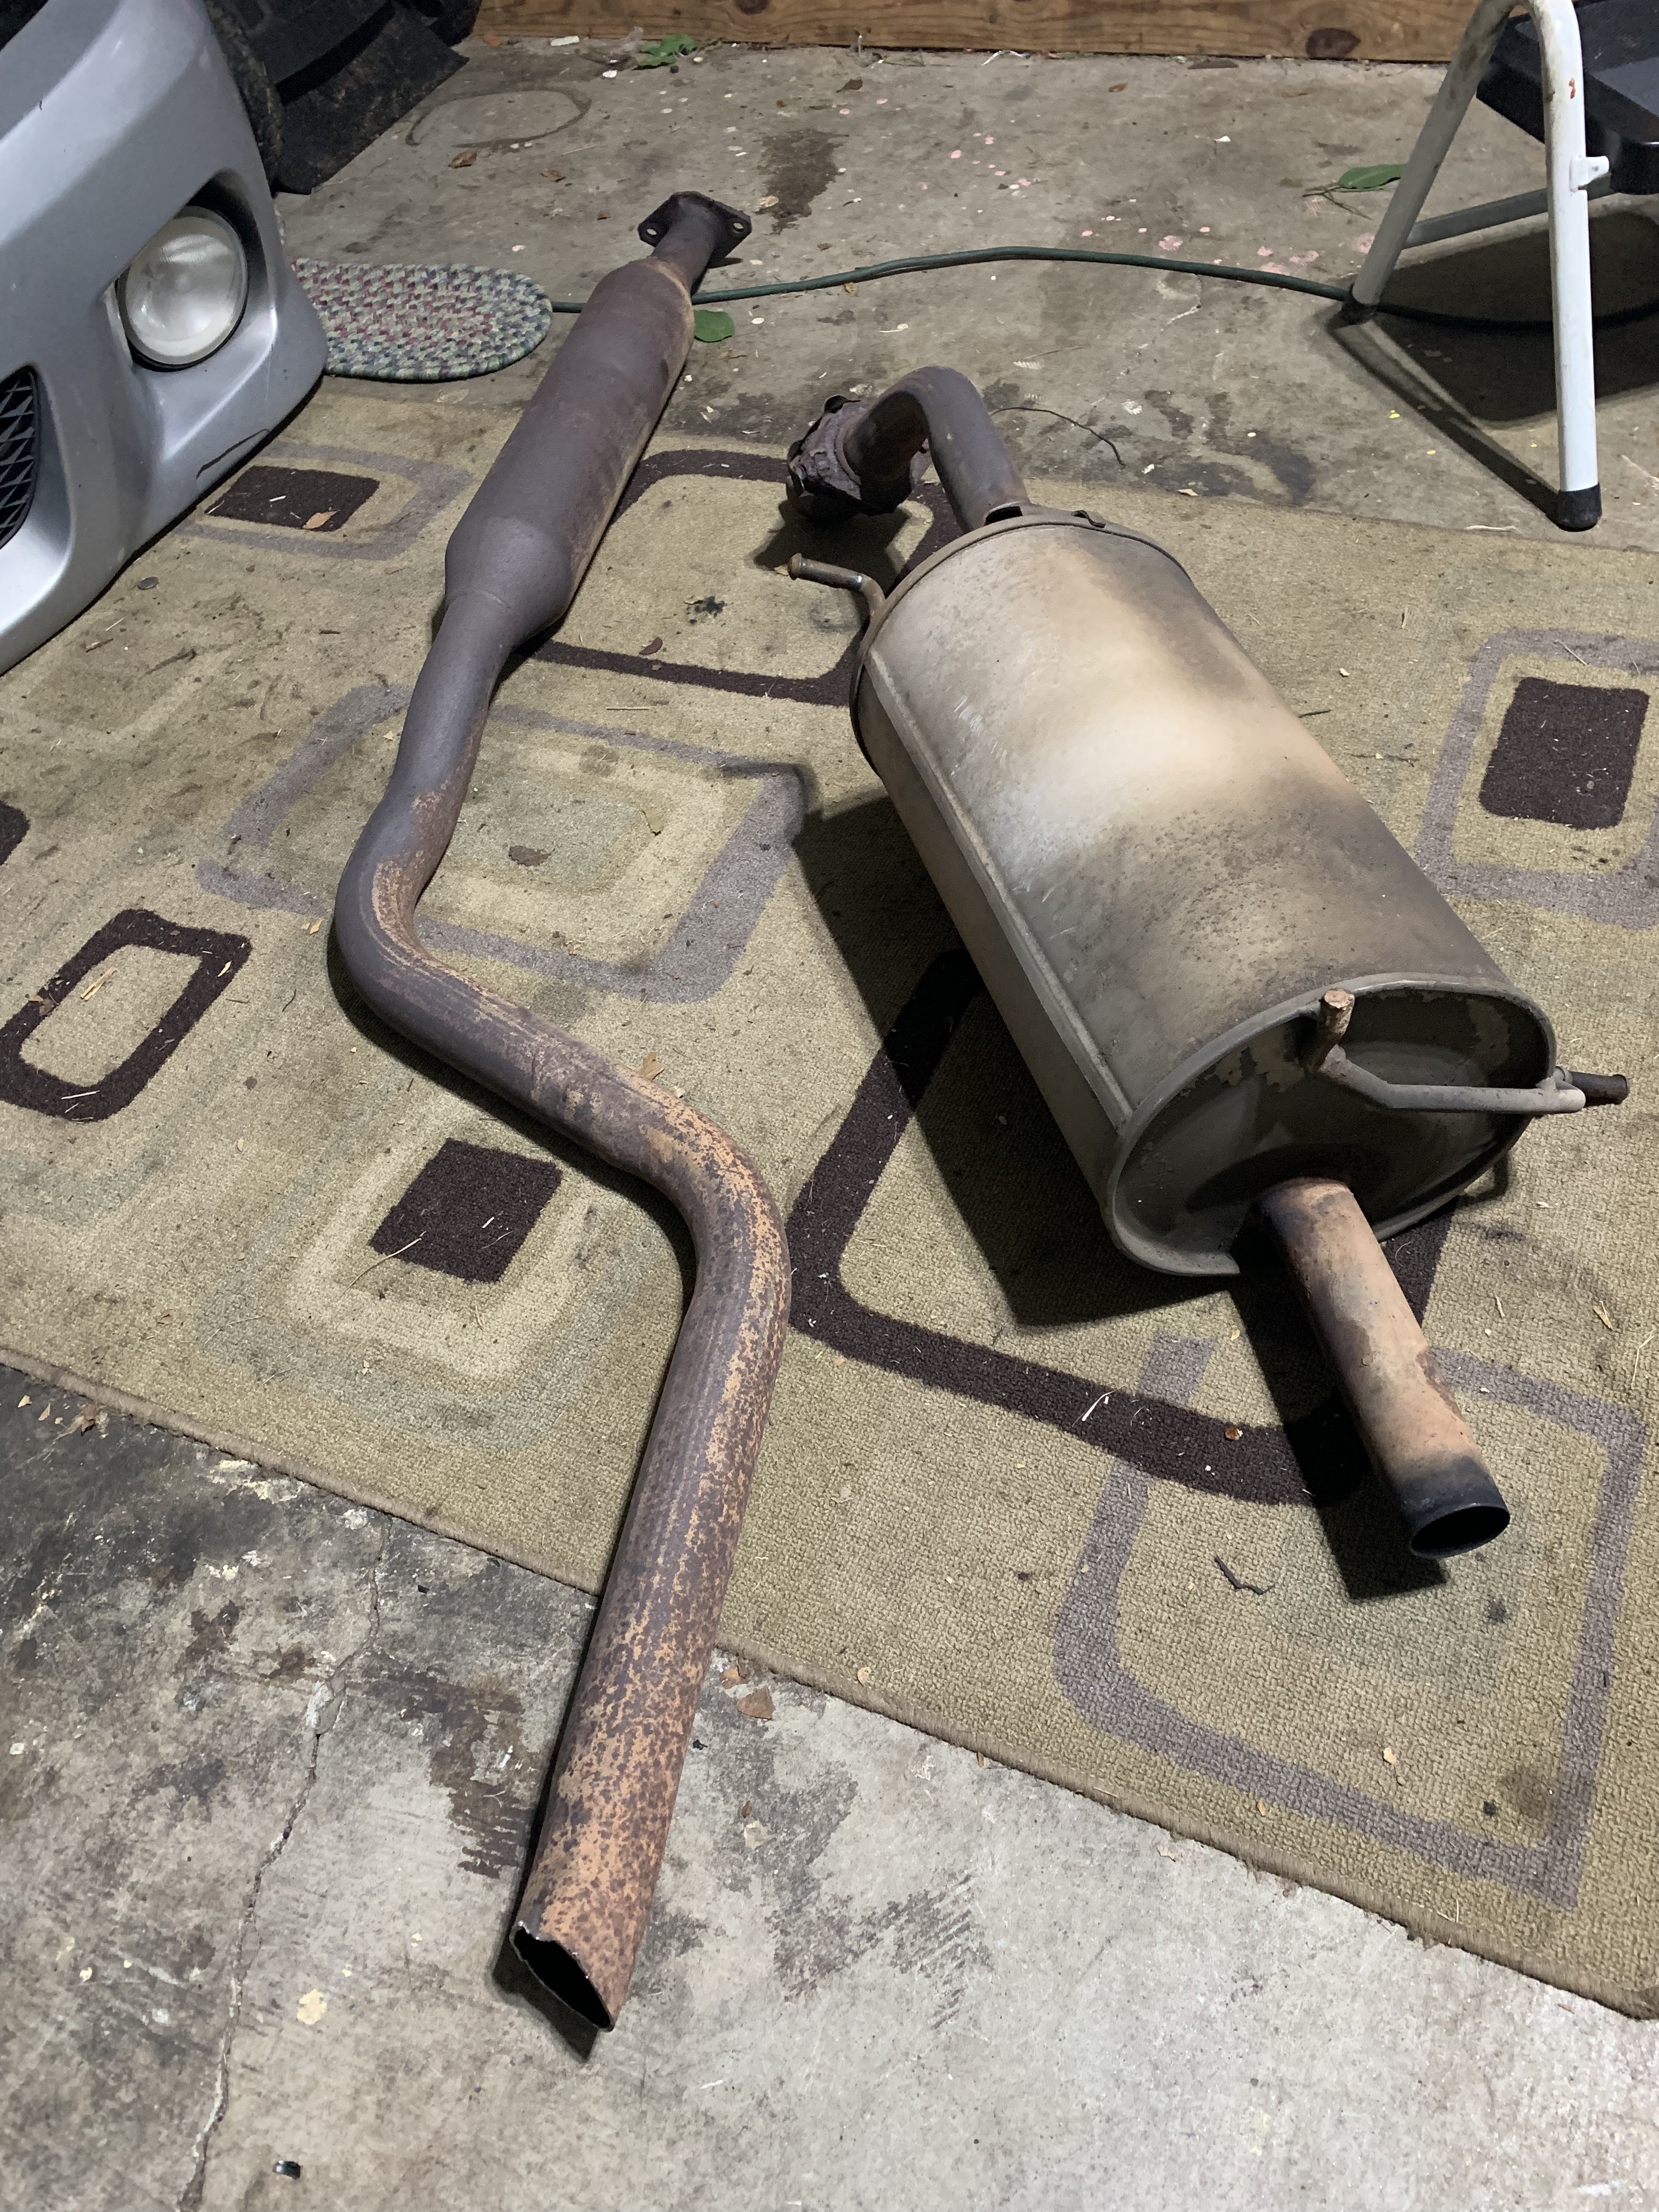
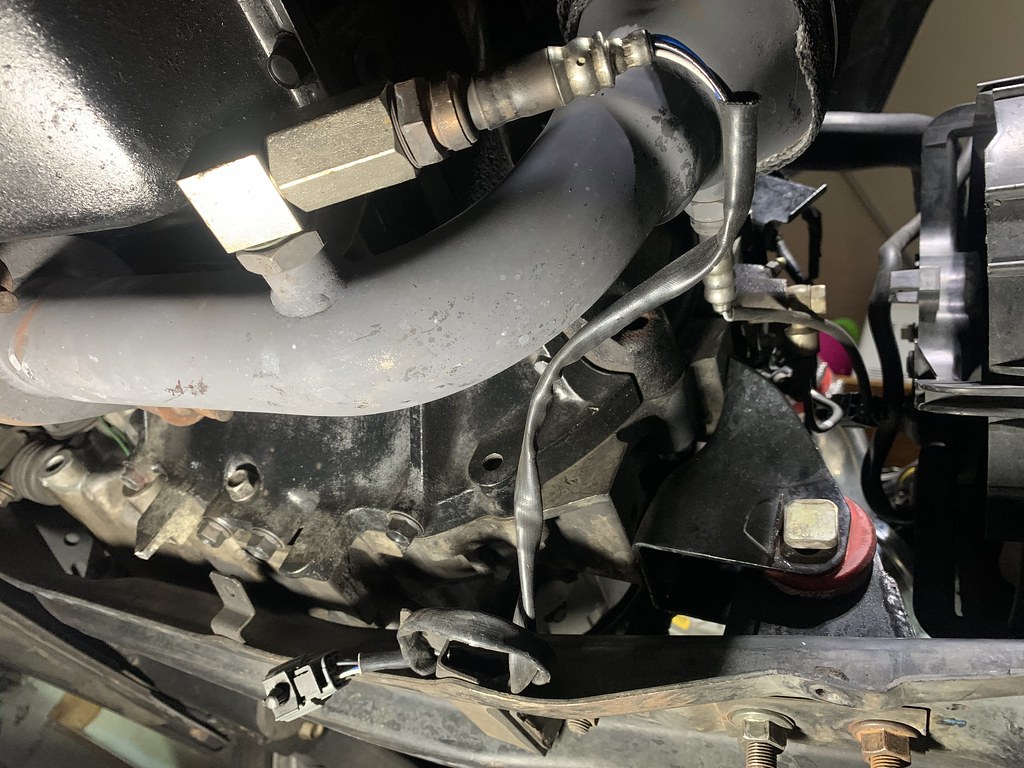
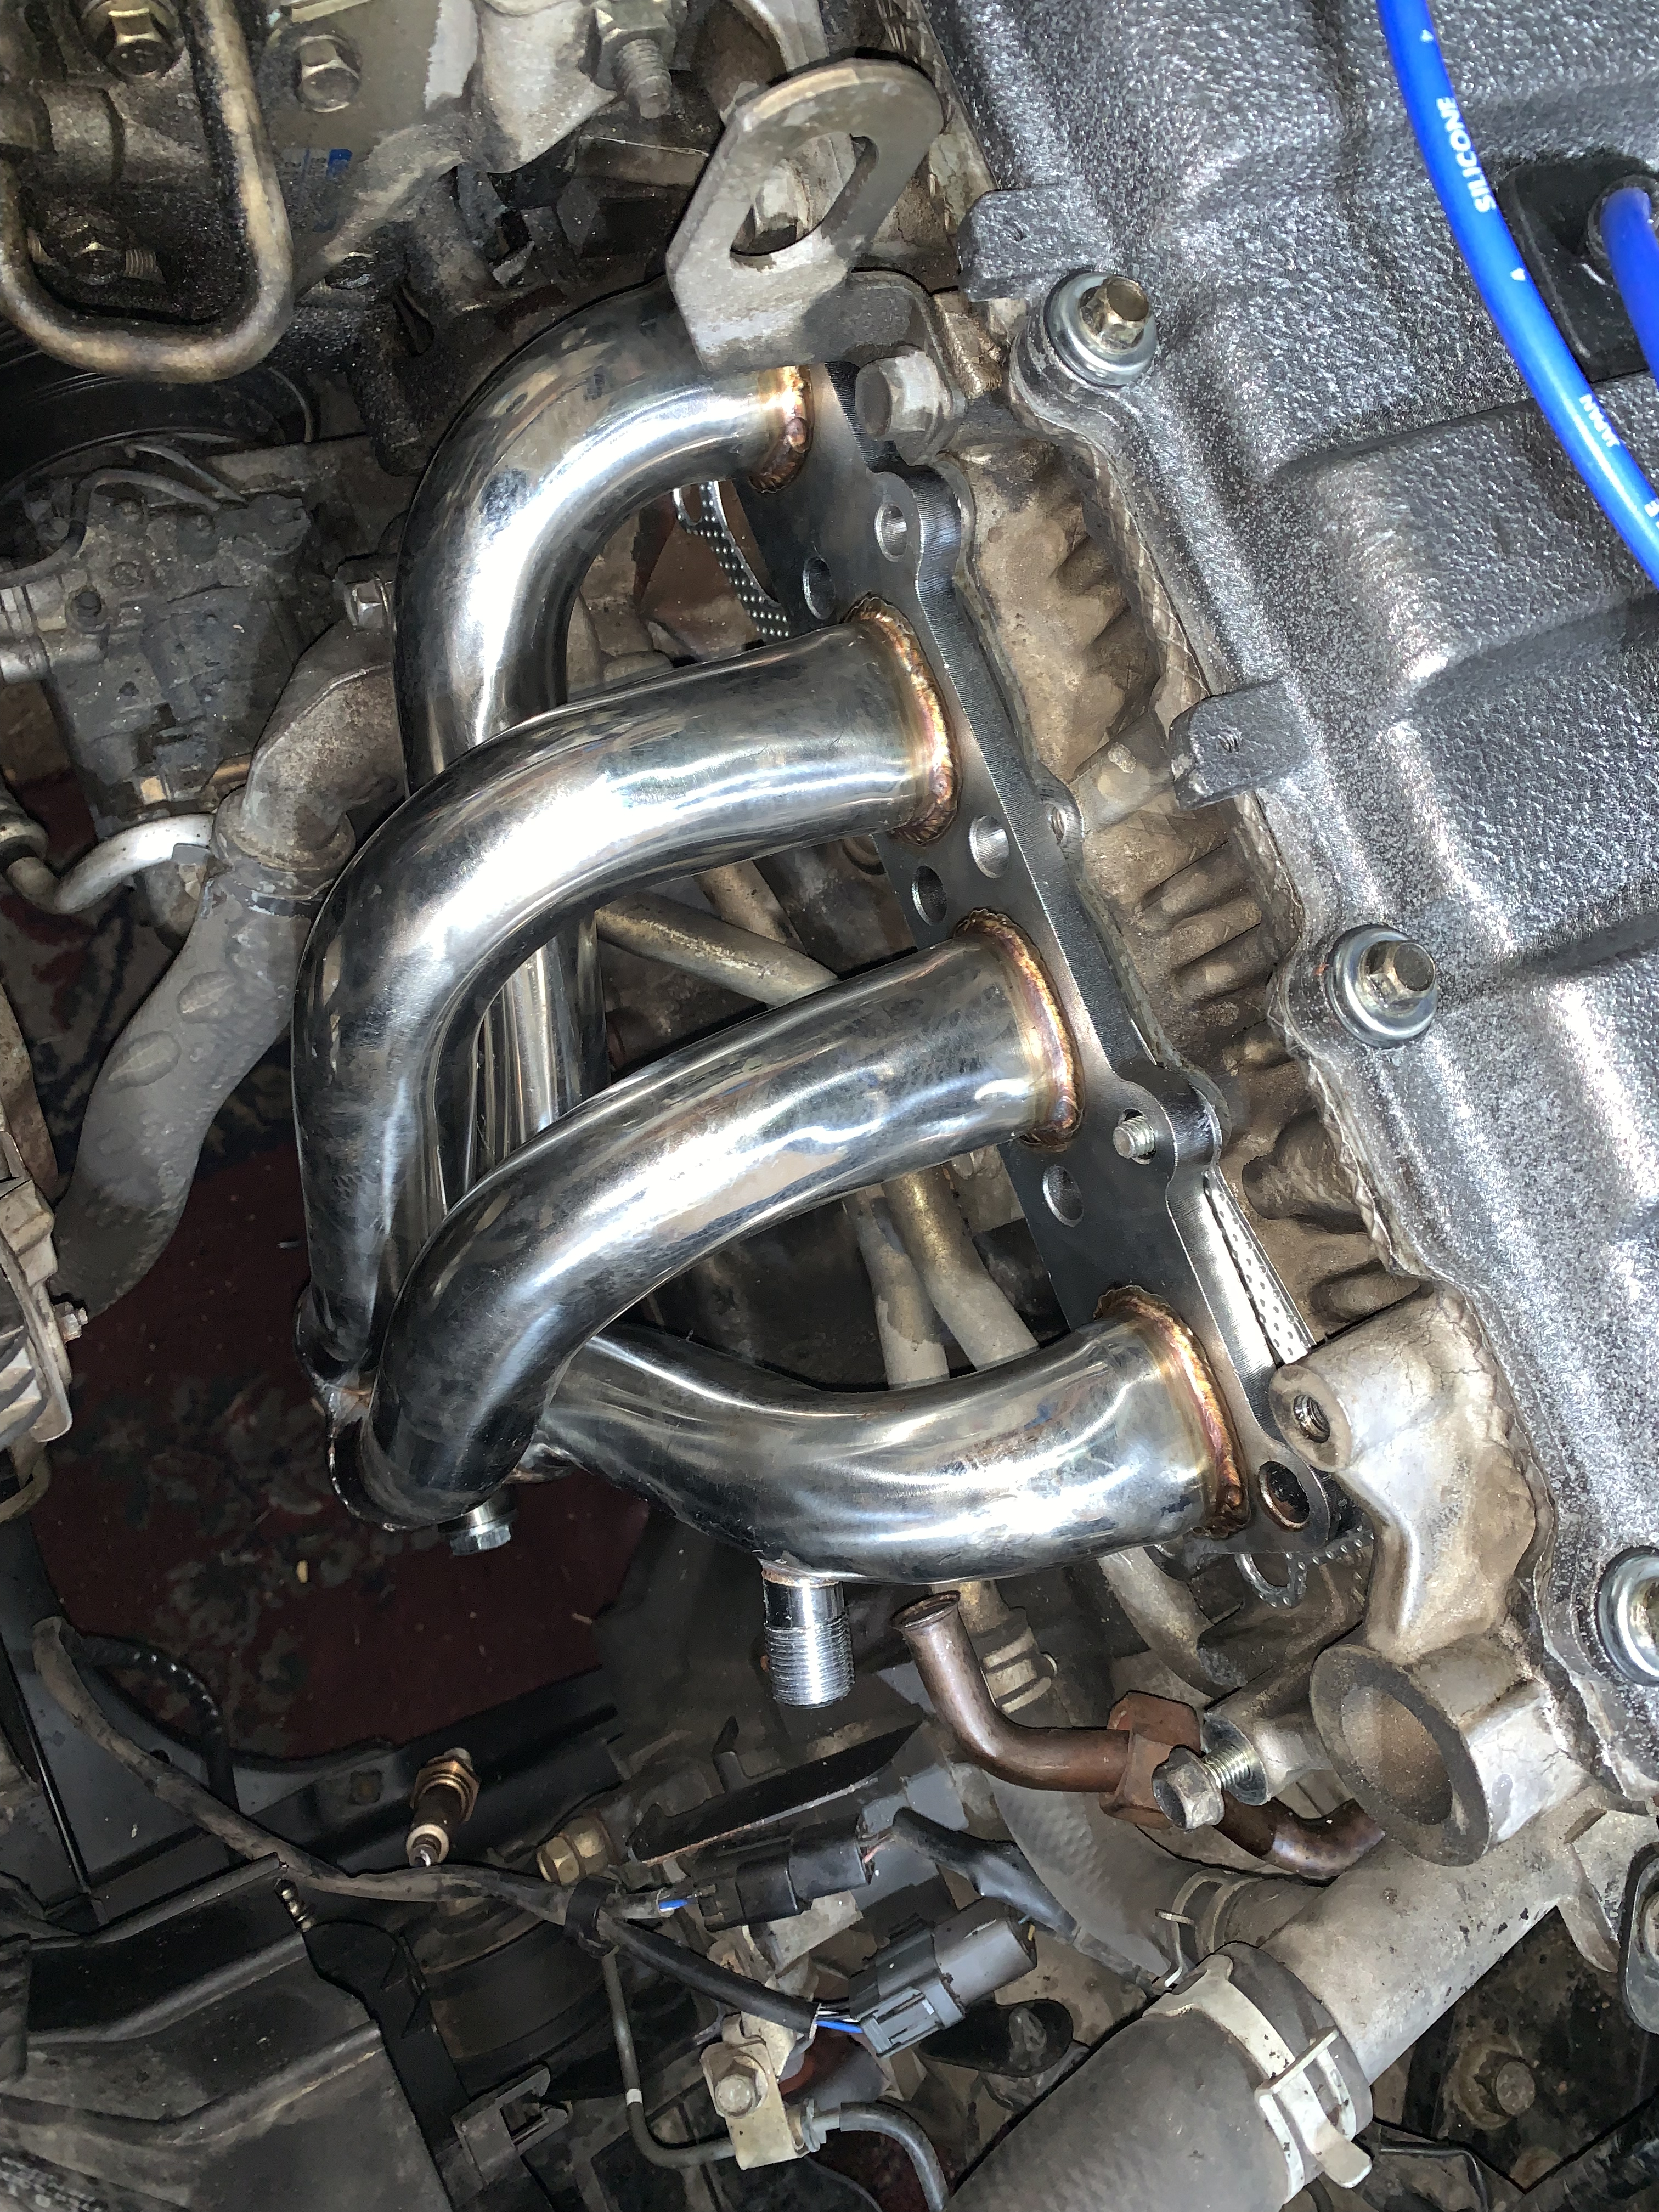
One of the issues that previous owner told me about was the catalytic converter code the car had, so the best solution was a header.  There are not many companies making bolt-ons for these cars, so budget in mind and saving money when possible.  I decided to go with the cheapest header I could find on ebay.   I found one for $56 free shipping, it arrived a few weeks later, and this is the result.  A decent piece of metal in the shape of what should be a header.  I at the minimum expected E36 M3ty welds, and eventually having to have it repaired several times.


For a $56 piece it was half way decent, and looked to play the part and allow me to remove the heavy and clogged catalytic converter and let the engine breath a little better.  It did none of that..


The FS 2.0 came in so many different cars, and has tons of small variations, sometimes vendors do not really know what to make the parts for.  This header could fit a Mazda MX6, Probe, 626, but it did not fit the Protege 5. 


In the photo above you can see clearly that the EGR pipe is way off, and has no chance of connecting to the header.   
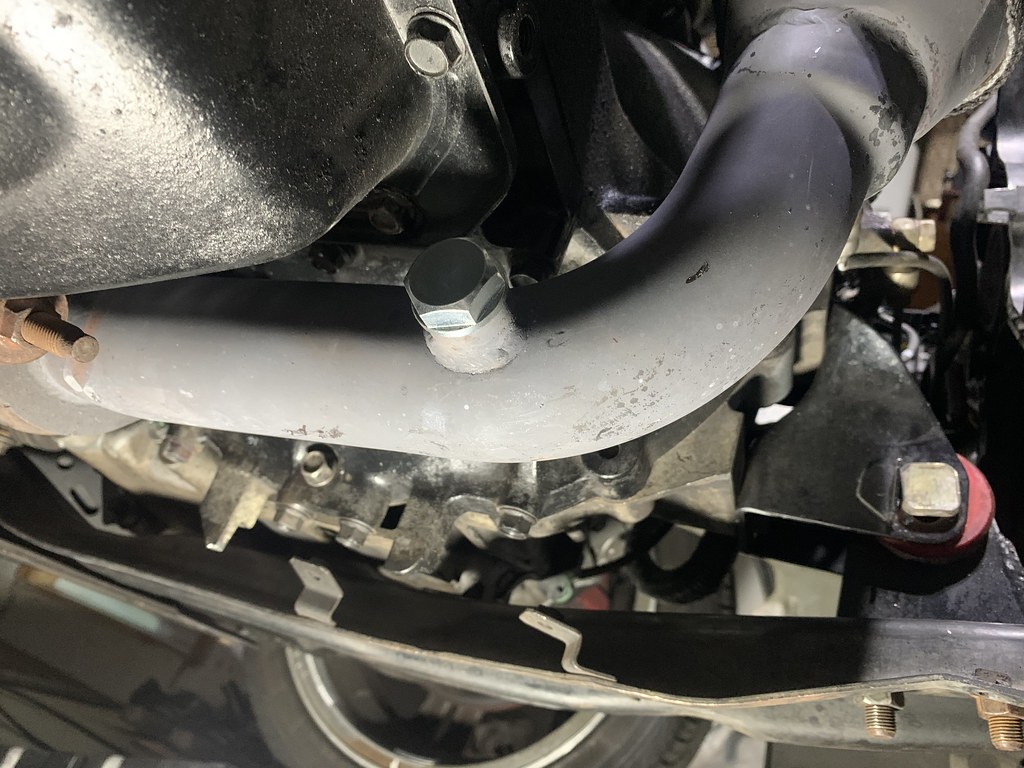
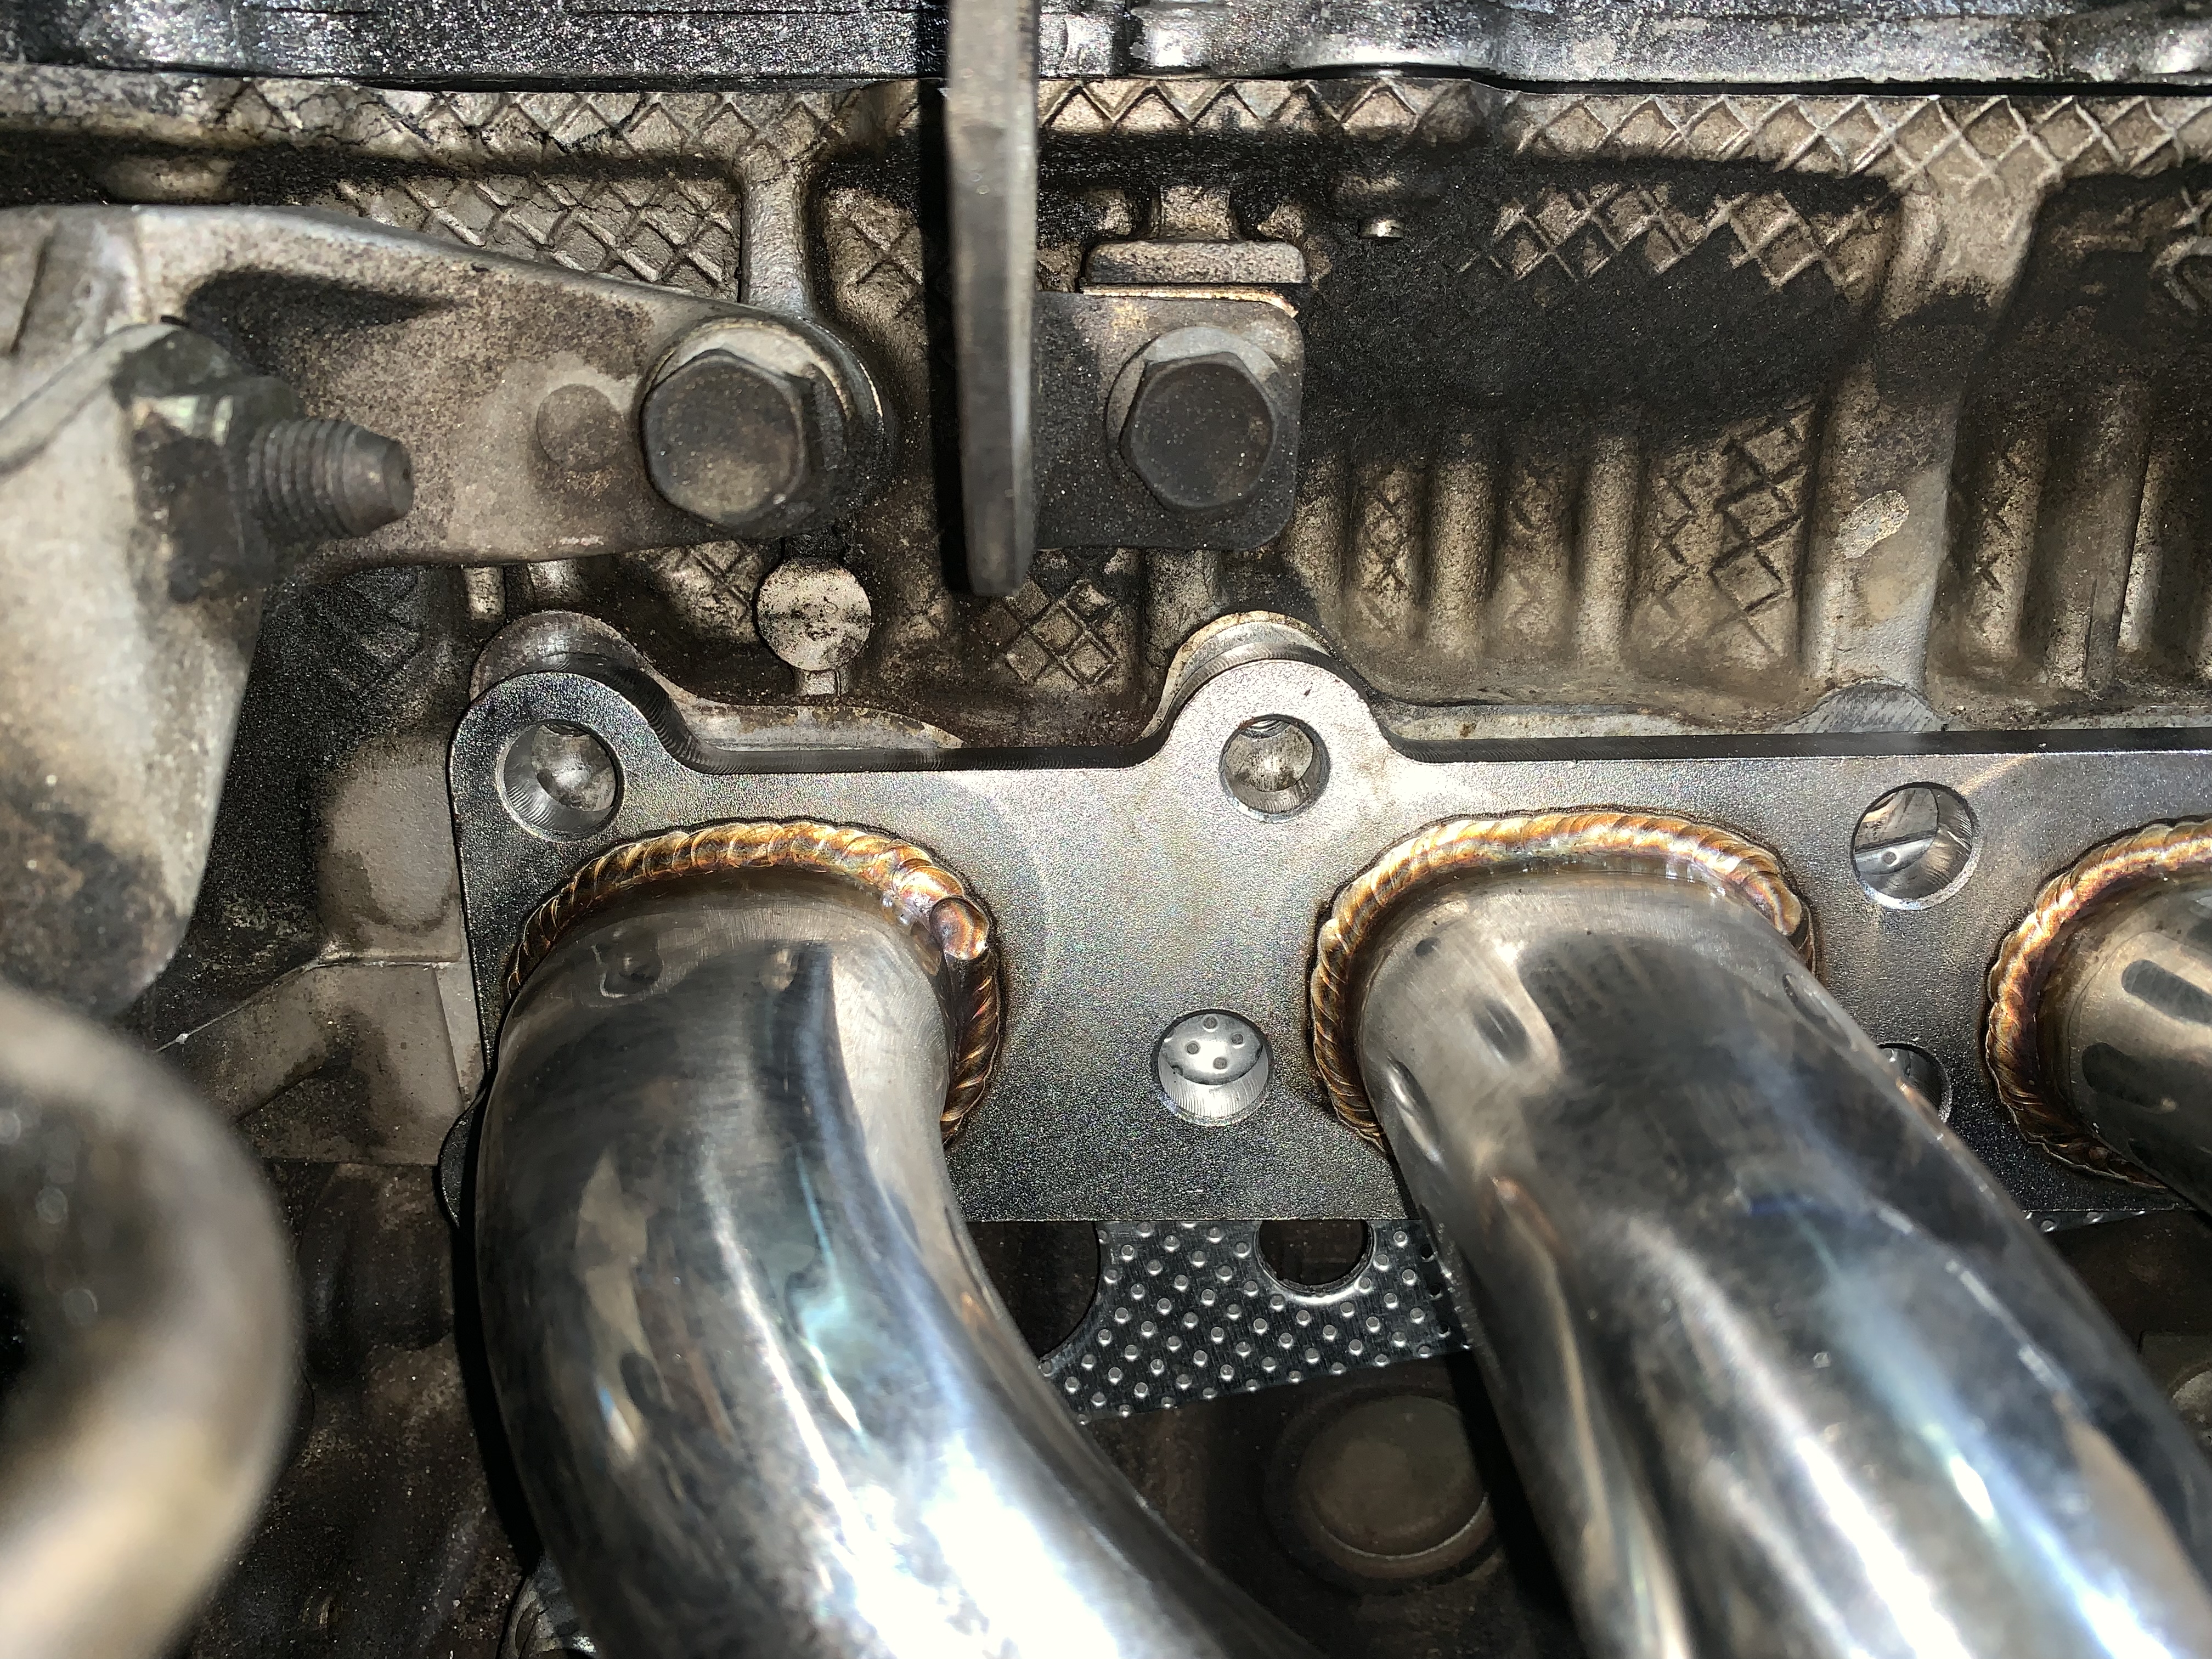
The second problem is that the header either fits the head, or the exhaust.  In this photo the header is bolted to the exhaust, and it does not line up to the head.  
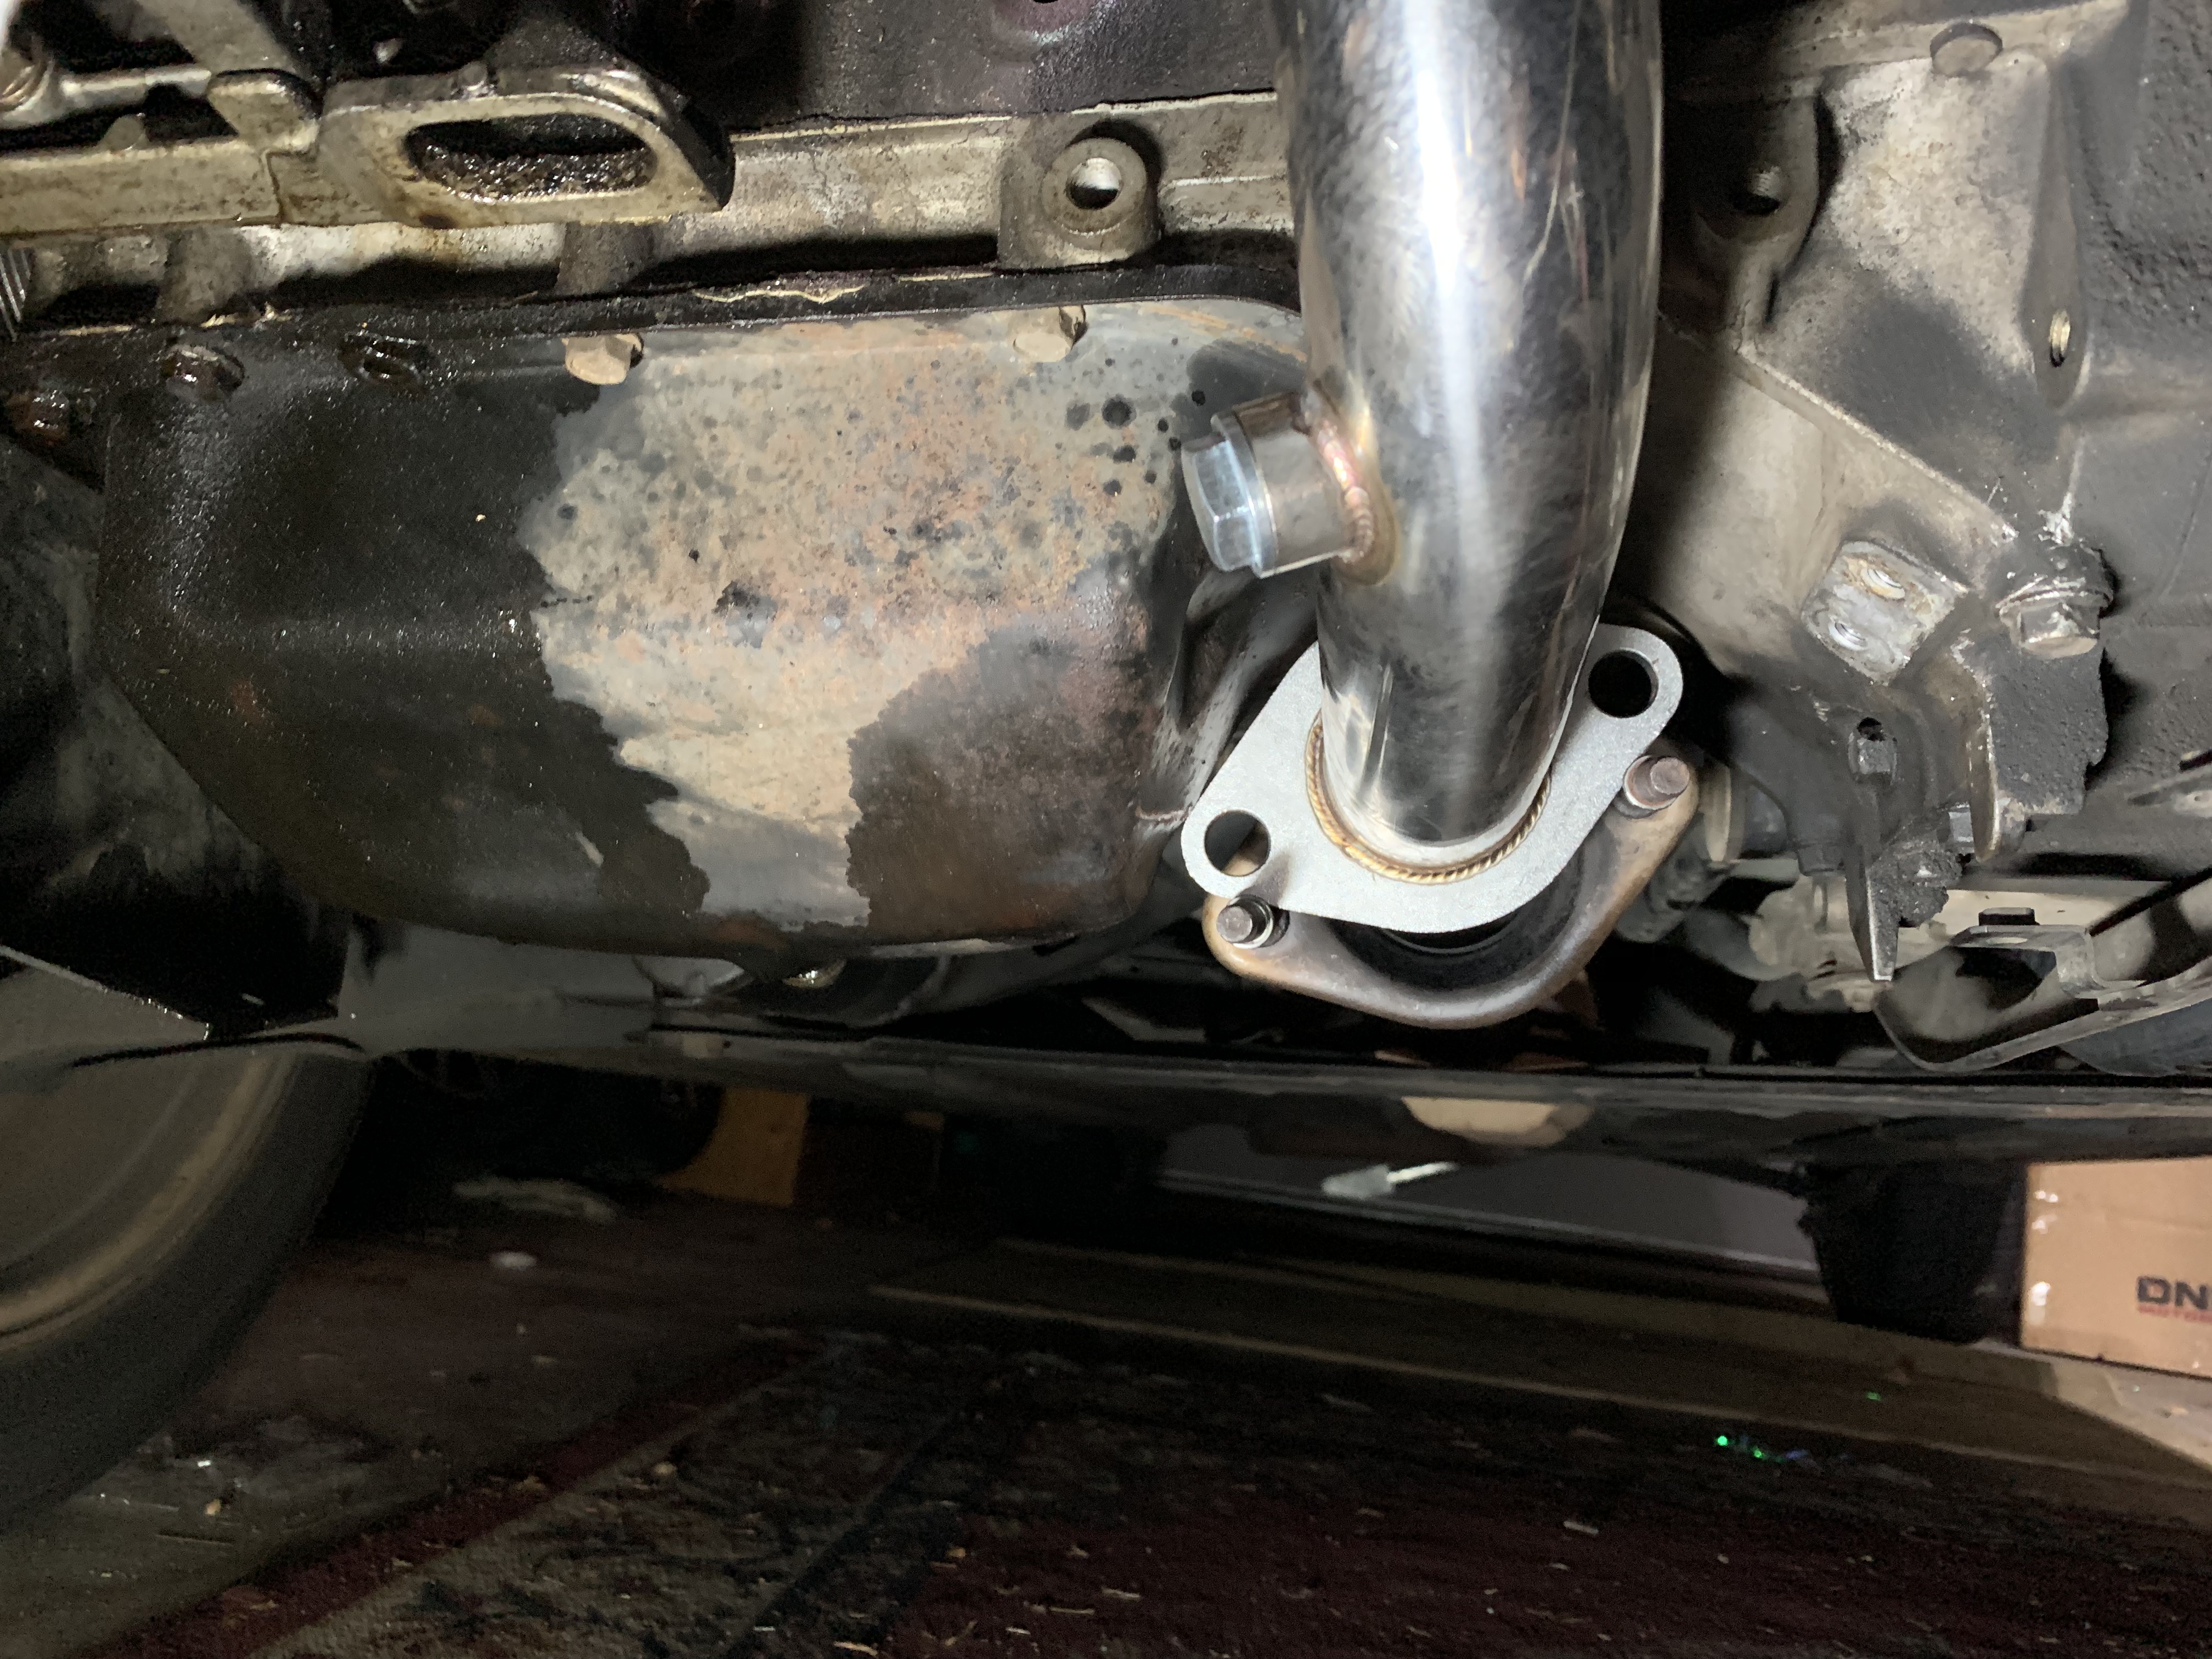
This photo shows the header installed on the head, and it does not line up with the exhaust at all.  I thought it may work with a aftermarket exhaust, but you can also see it forcefully resting on the oil pan.  After about 45 mins of  thinking of ways to make this thing work.  I went on Ebay, and setup the header for a return, and as of today it has been returned and I have been refunded.  I was forced to re install the OE manifold and Catalytic converter back on... so to be continued on the header situation.


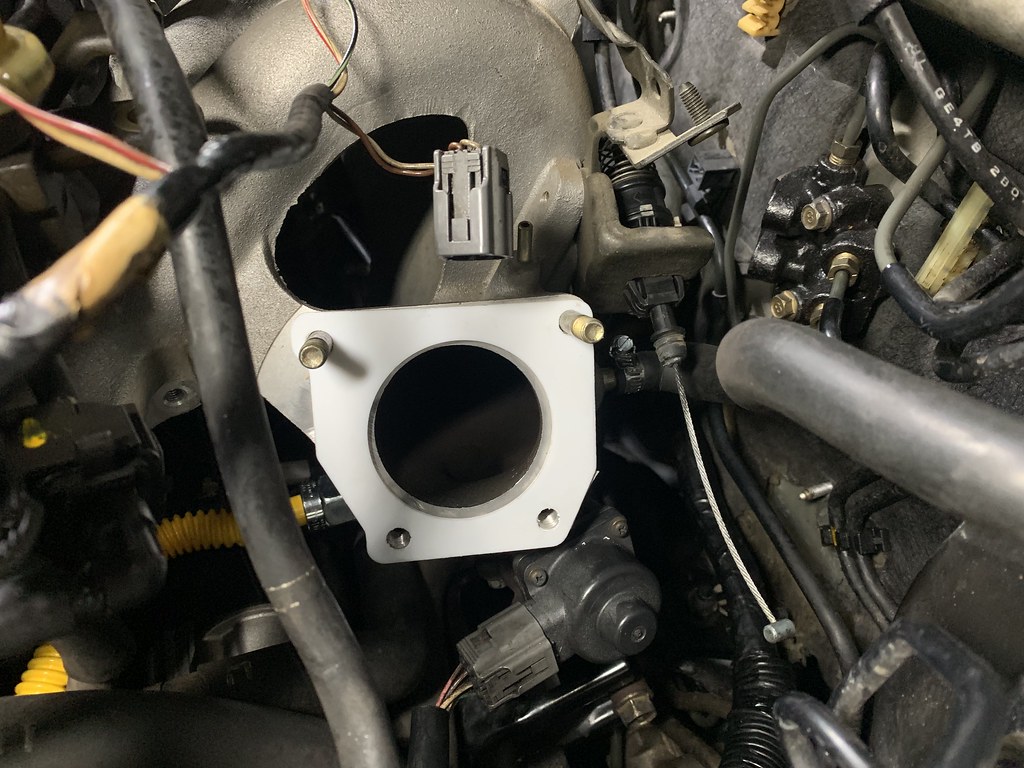
I tried my luck again with eBay with the intake.  Injen and AEM make intakes for these cars, that are known to fit, but they are more then what I wanted to spend.   So I found a cheap ebay intake for $31 shipped.  It came with a crazy heat shield that I did not install.  But the intake very well and was straight forward and it fit pretty well for the price, I will more then likely swap out the filter later on.   
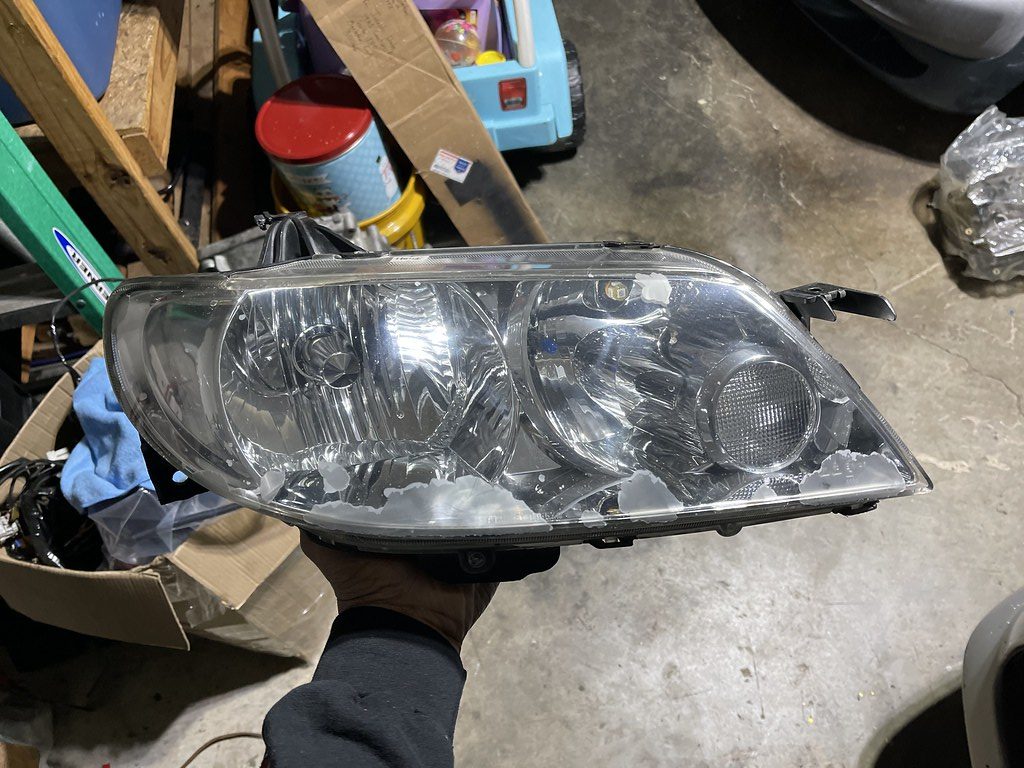
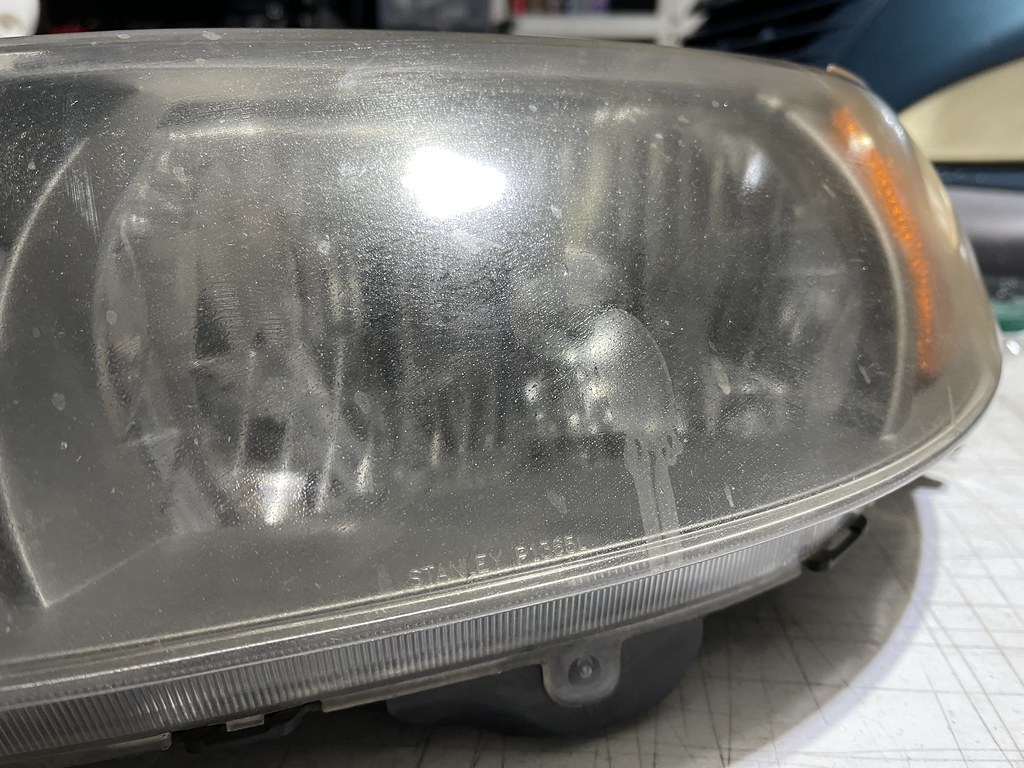
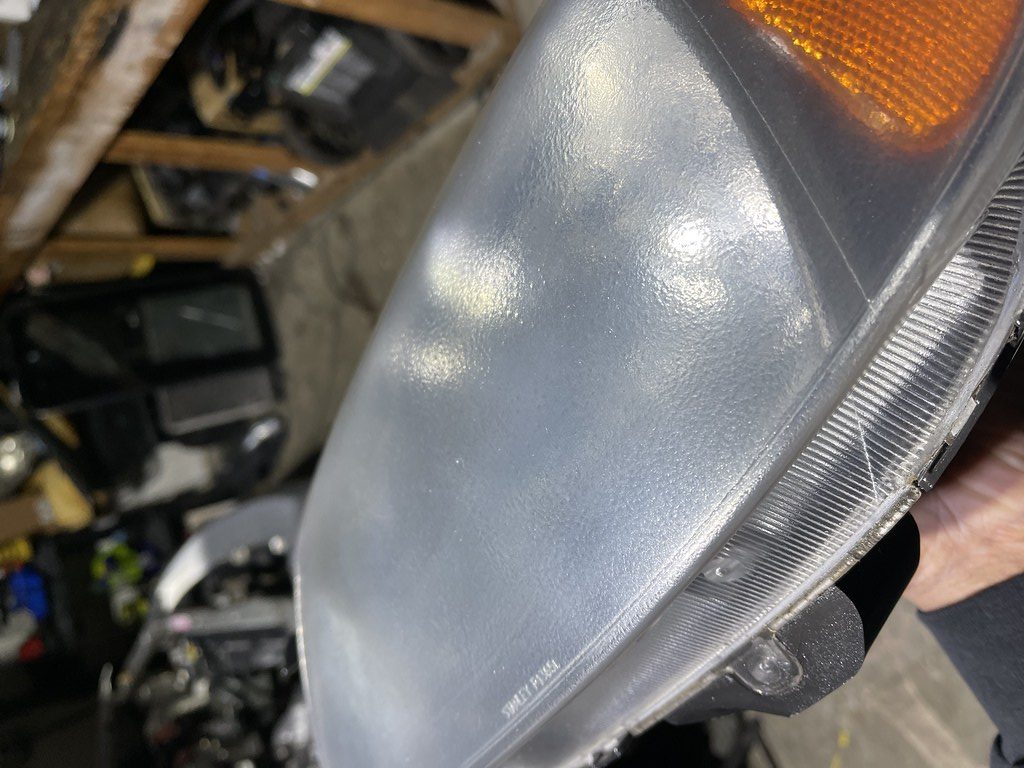
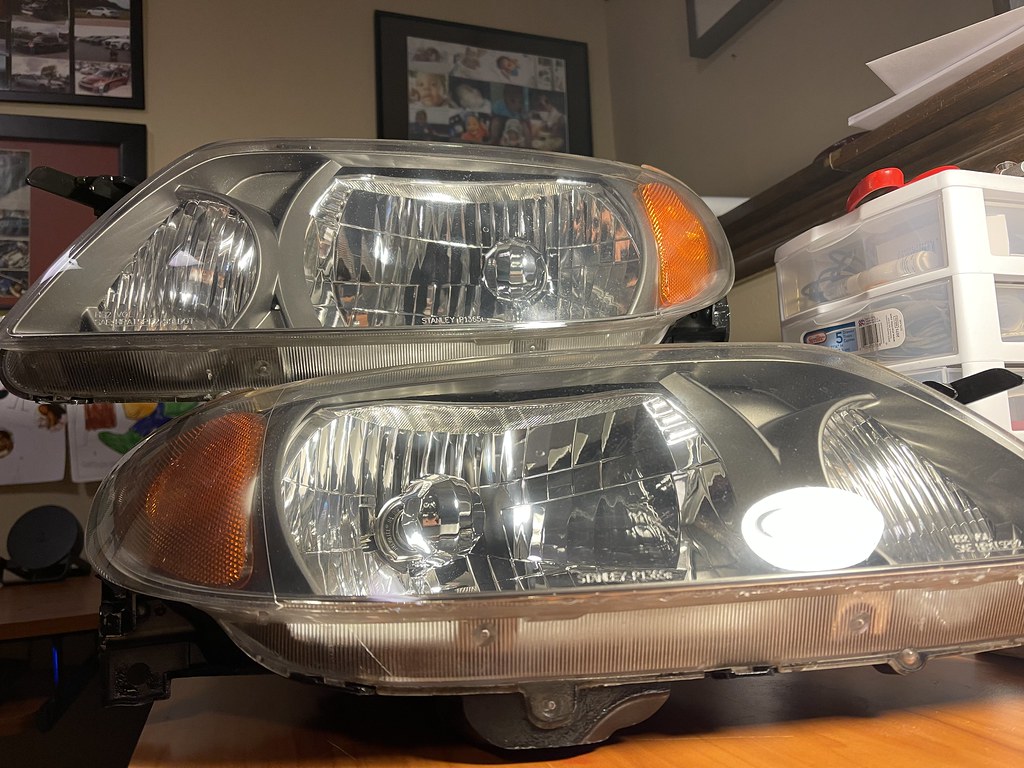
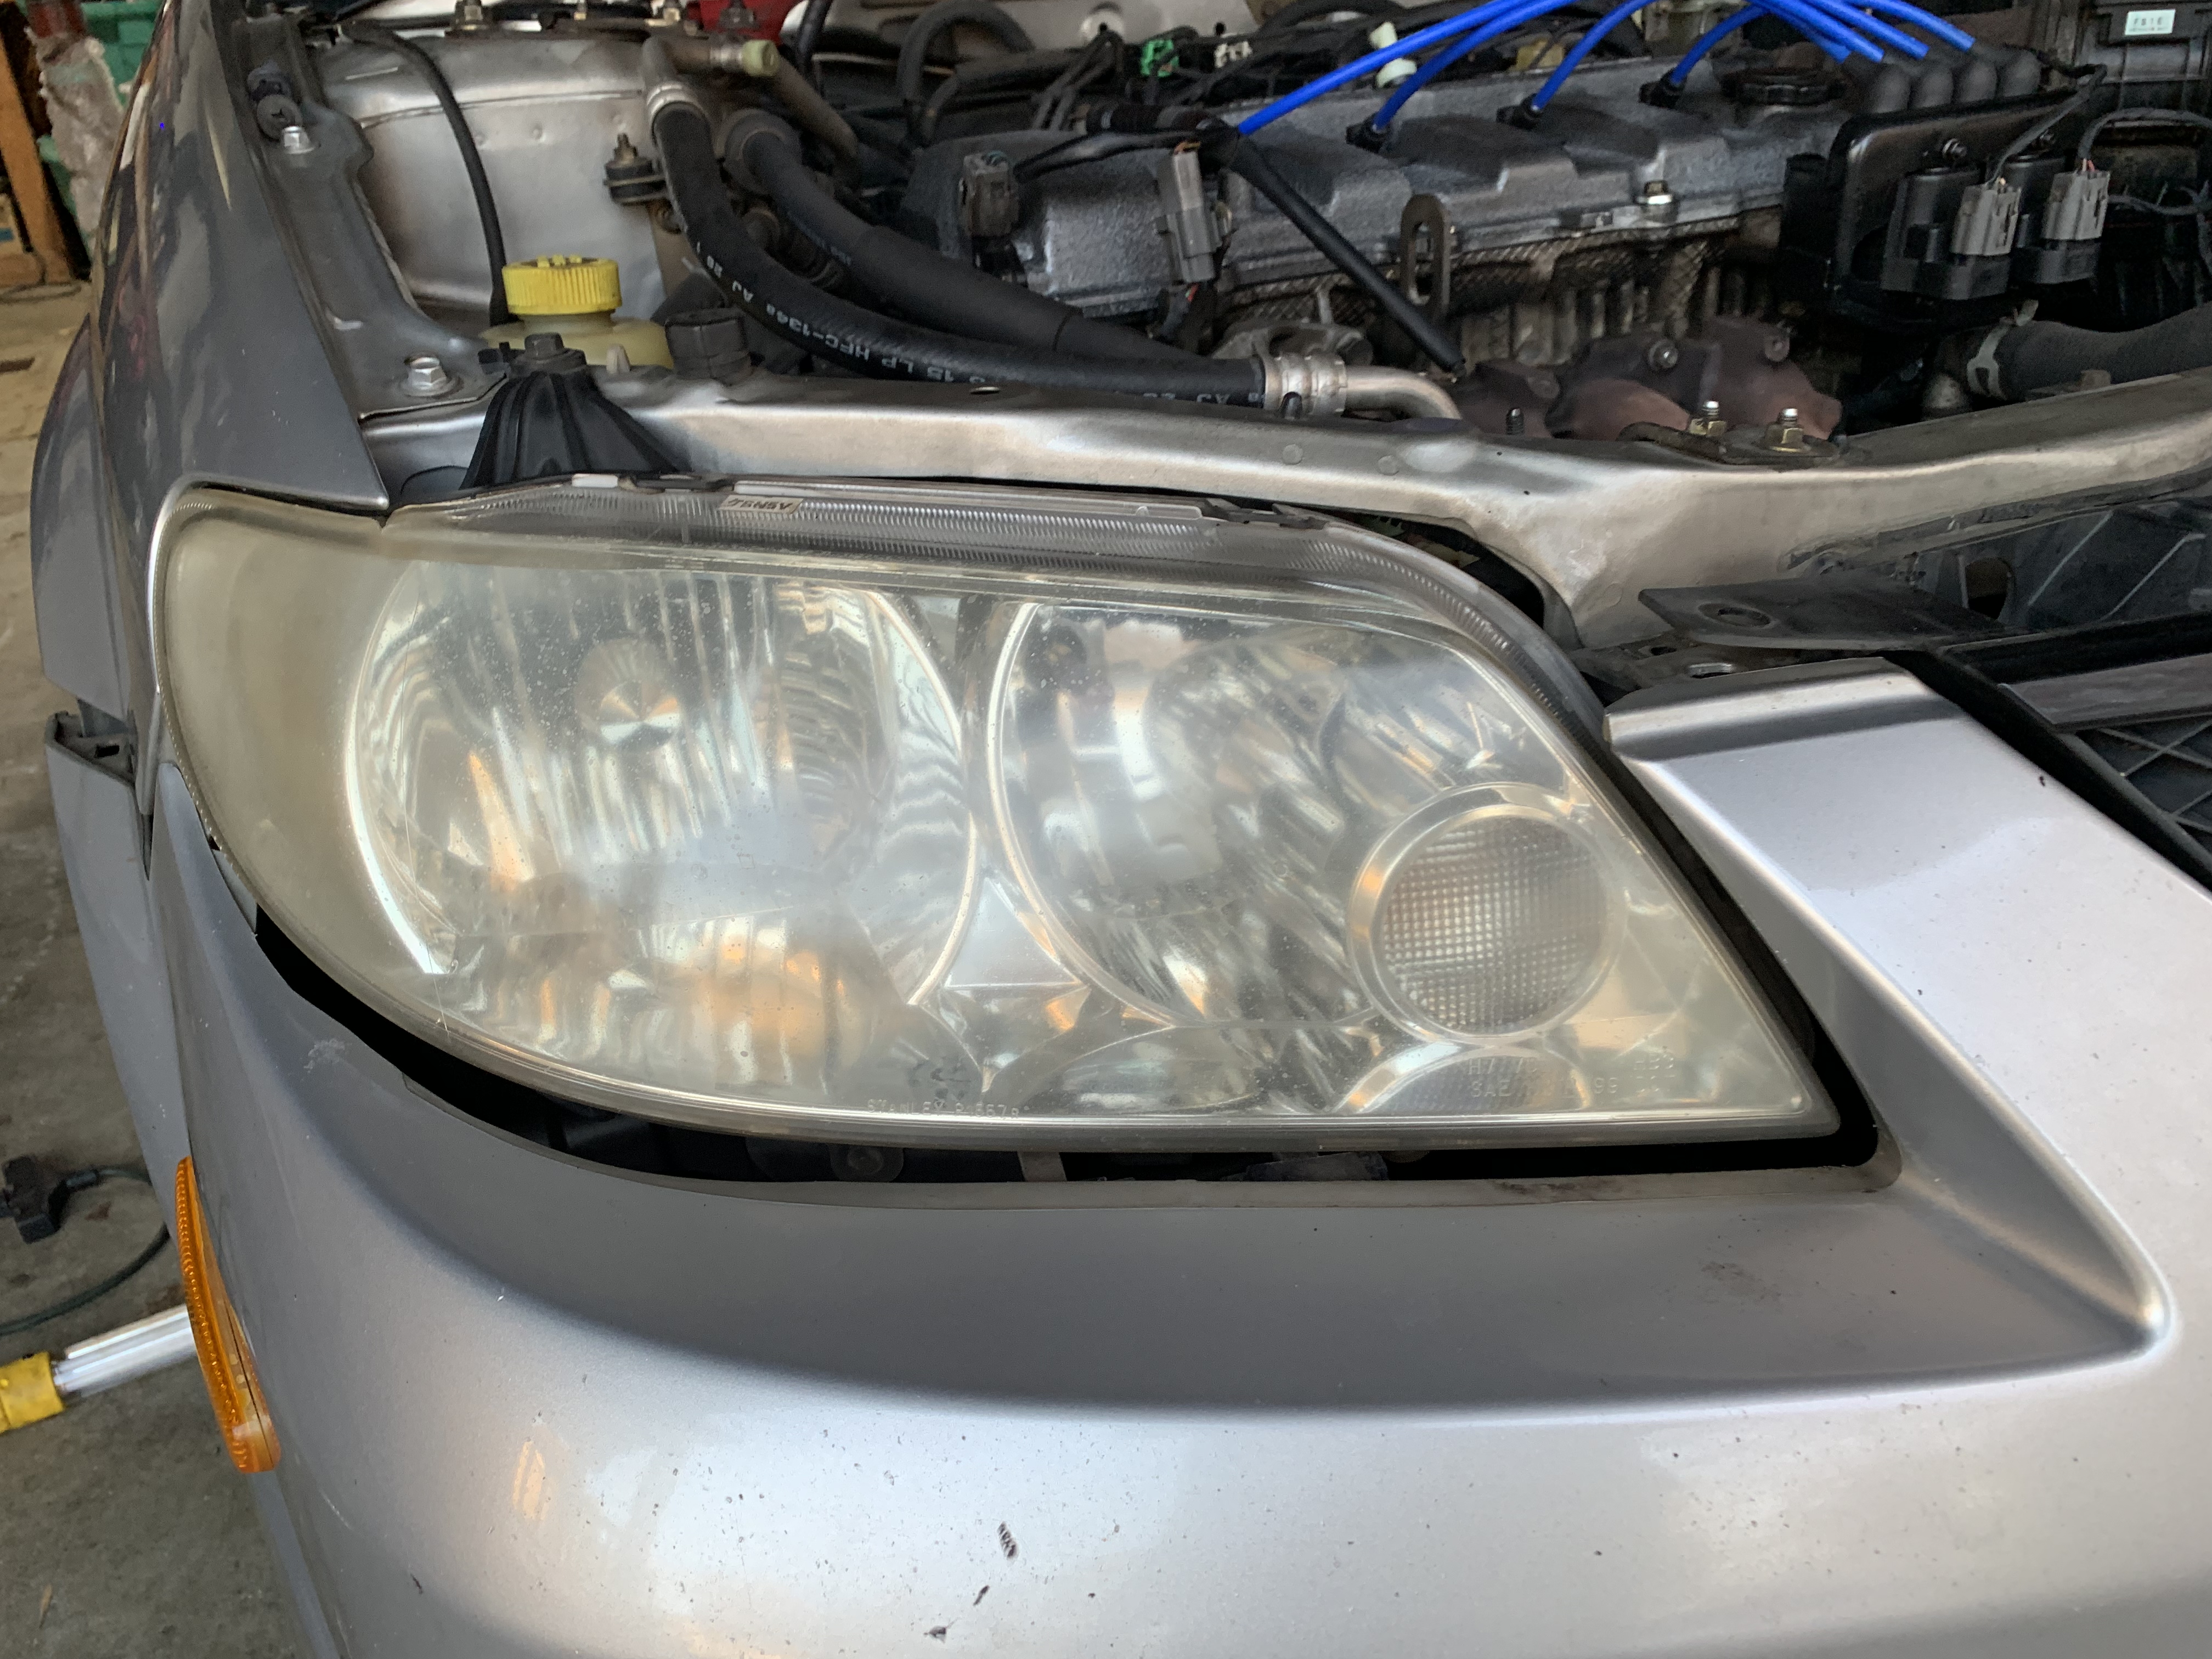
Foggy headlights have always been a pet peeve of mine, and the plastic headlights on the Protege are known for yellowing.  My first thought was to get a cheap set online, but I could not find a new set for a reasonable price.  The regular protege single beam headlights are under $100 , but the dual beam P5 ones are still a little pricey.   
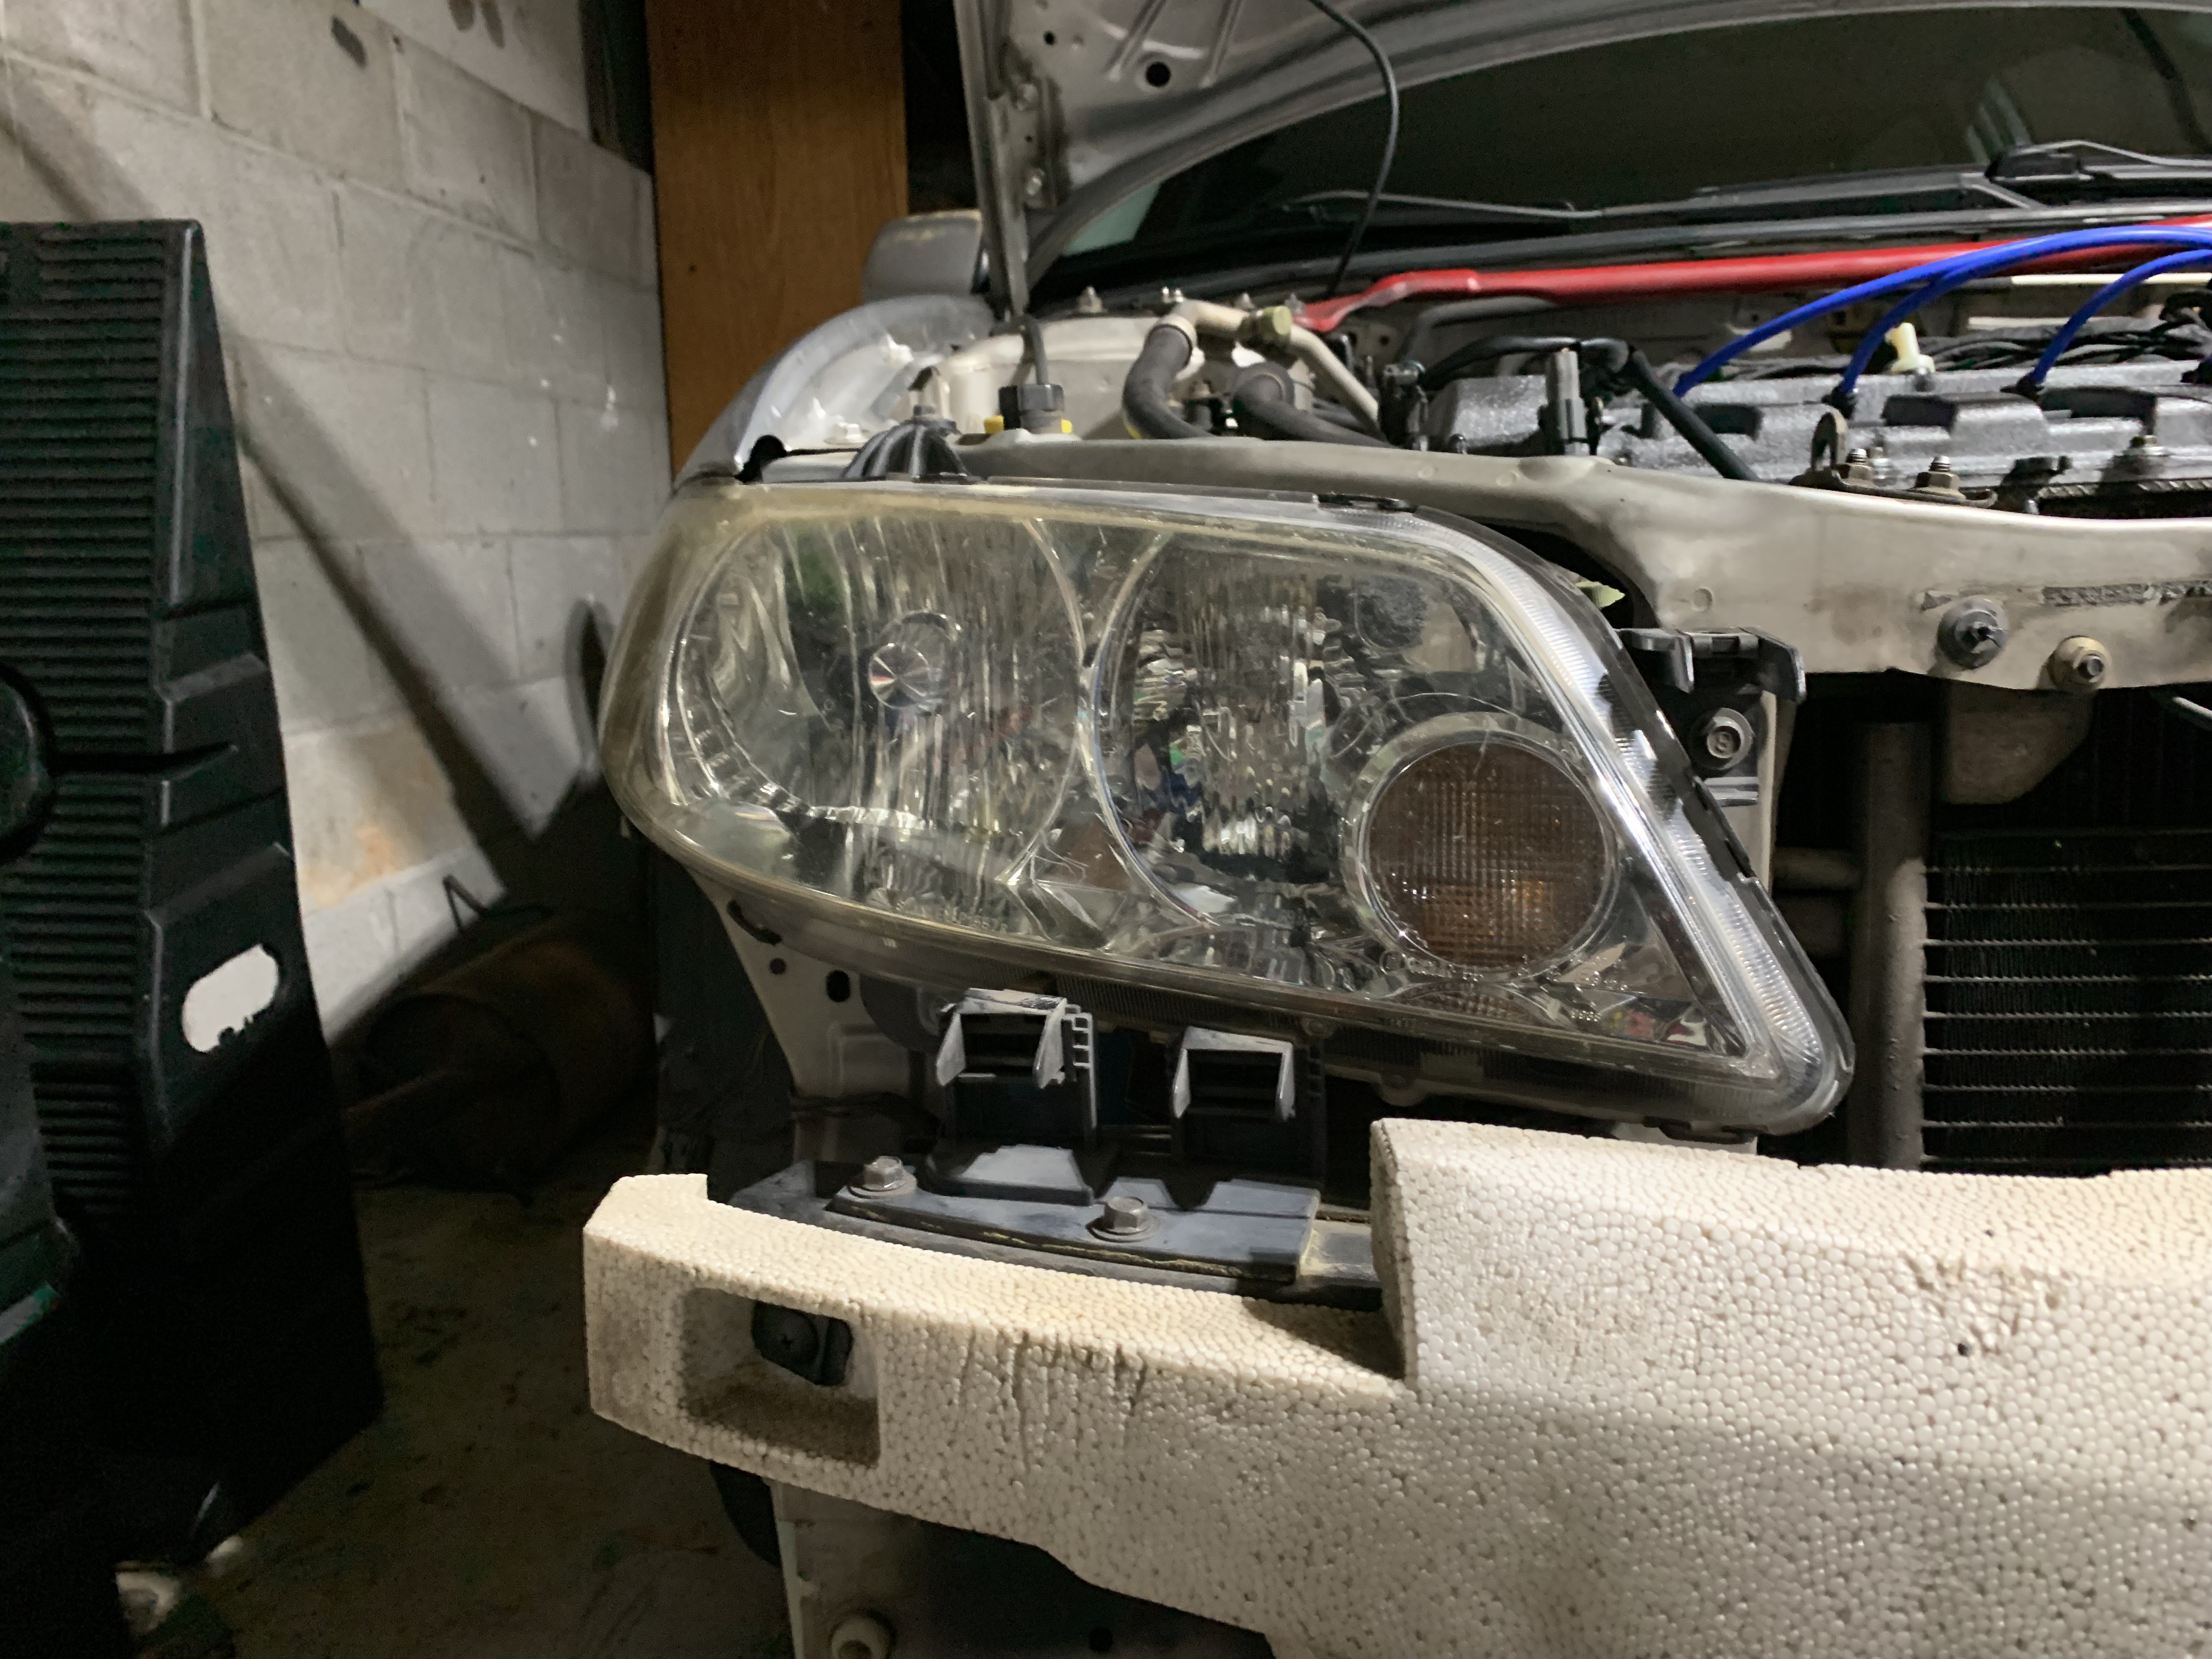
I got lucky and found a set of used headlights from a guy on Facebook for $100.  He said they were the Japanese version headlights, but I really did not care.  I just wanted something in better condition.  They ended up being different from what we offer in the US, and possibly Japanese market.  I am very familiar with these cars, but the Protege 5 was a really popular  car and sold all over the world with pretty much the same parts, so its hard to truly tell what region these headlights are from.  The bulb for the high beam was totally different, and it has a city light in the high beam also.  The low beam and turn signals work fine, but I will have to wire the high beams and city light in later to get them to work.  
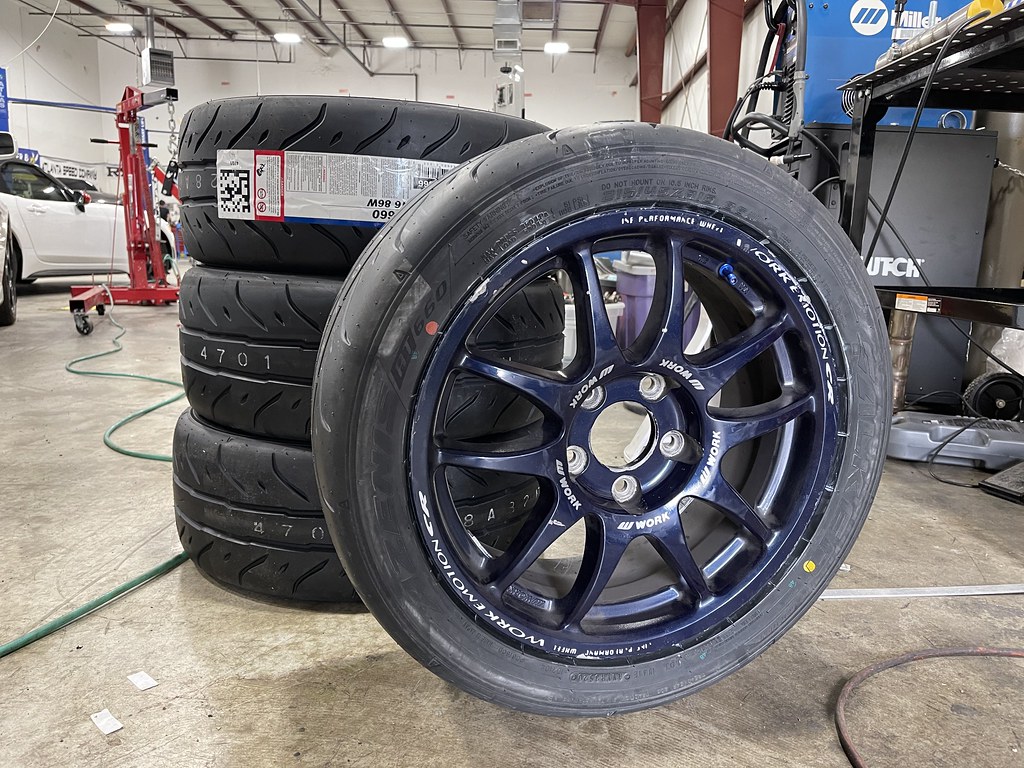
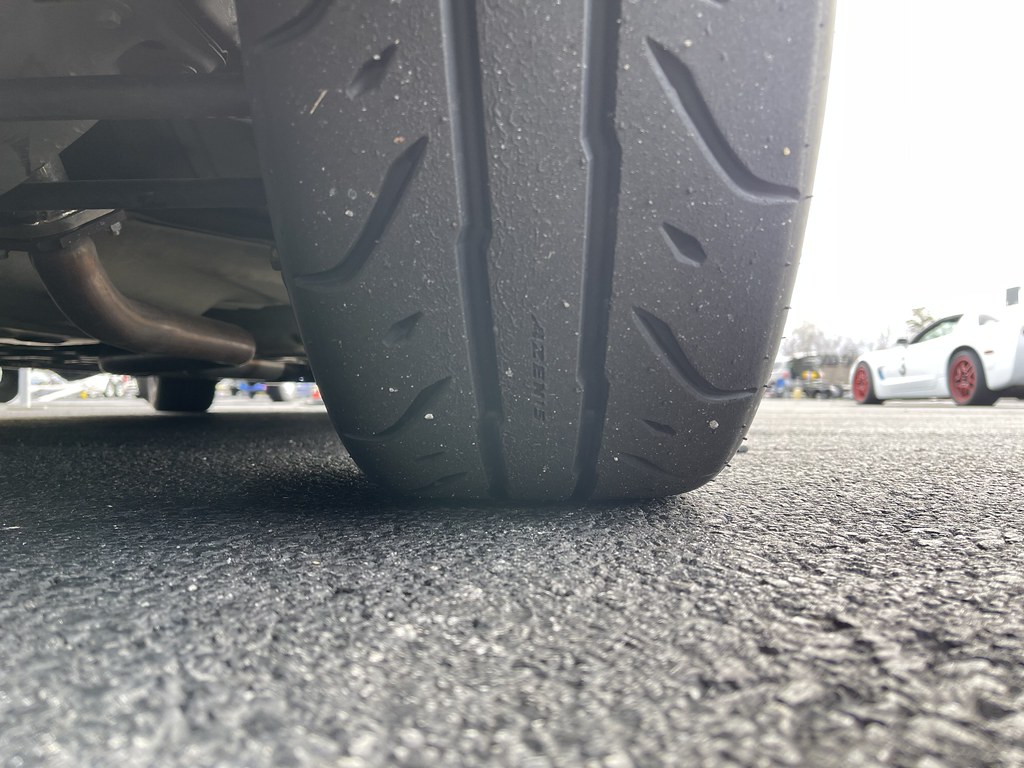
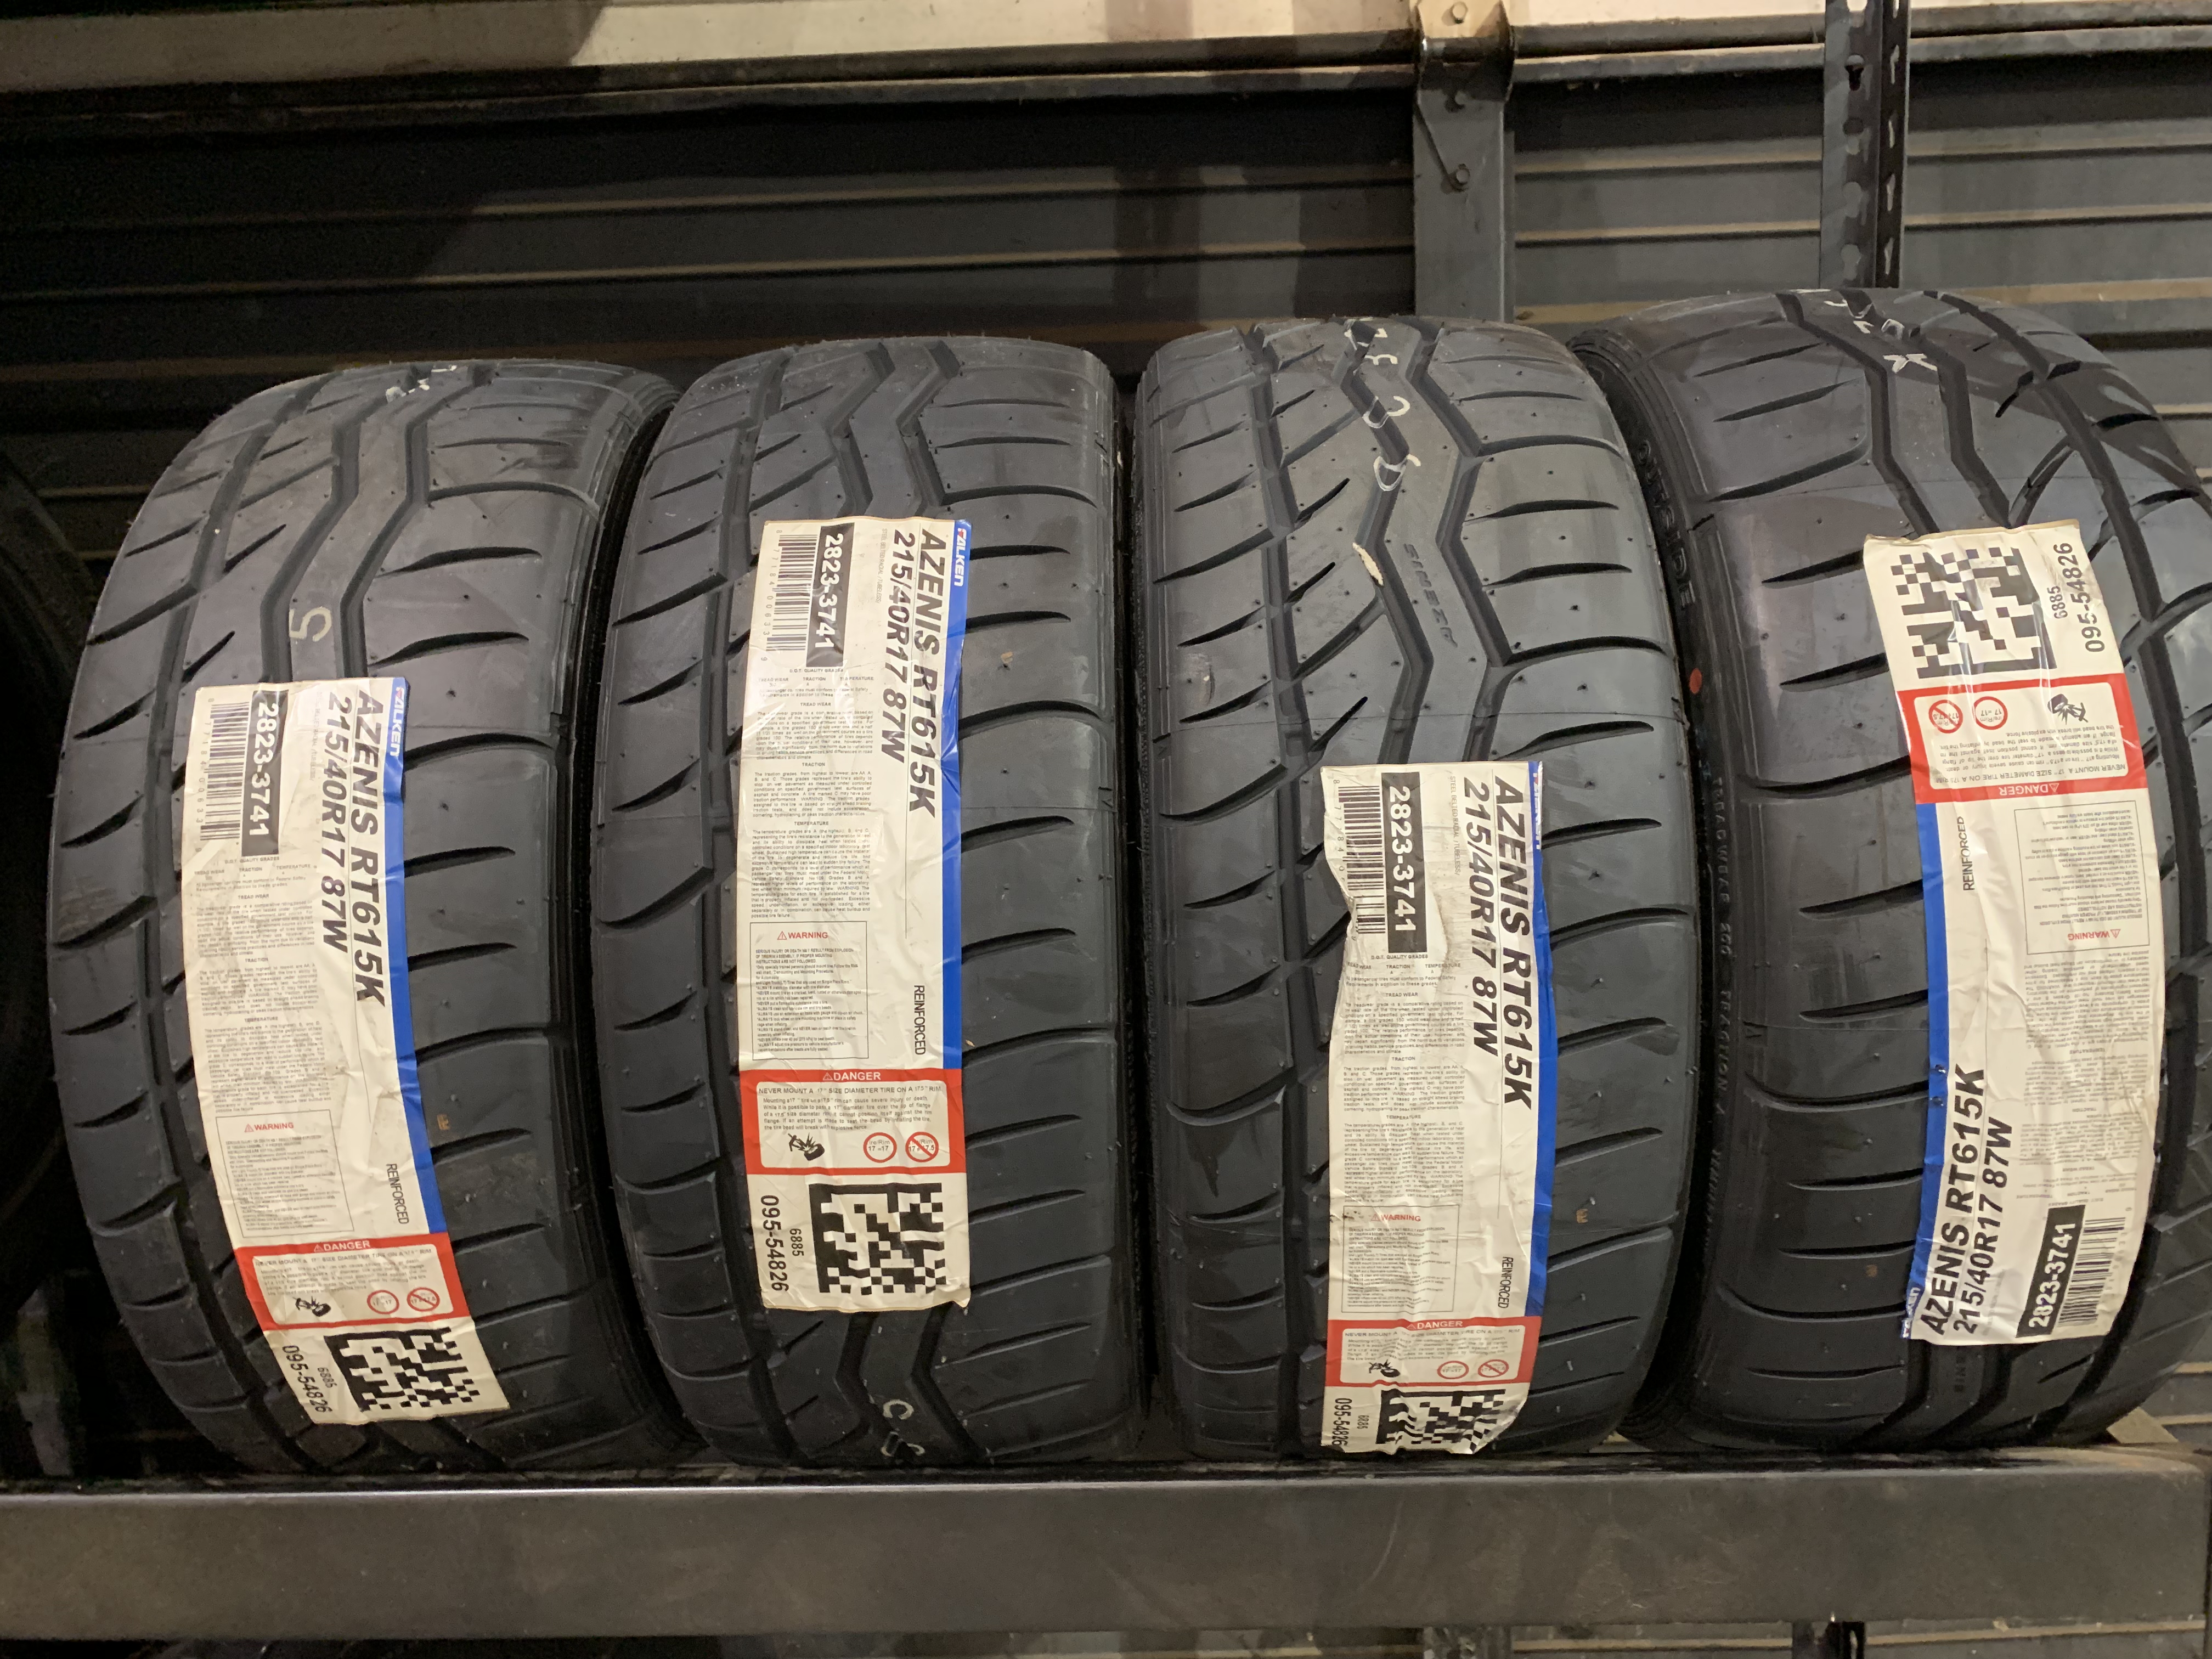
I also found a deal on  the  Falken Azenis RT615k for track duty.  Found a set of new old 2017 stock for $360. 
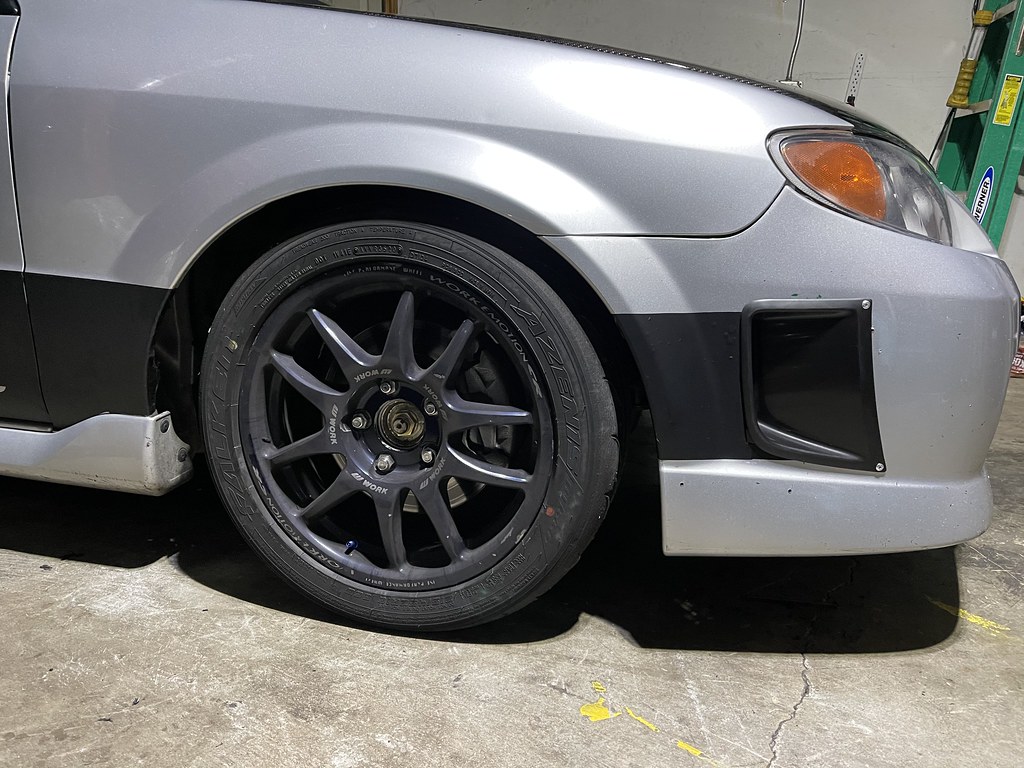
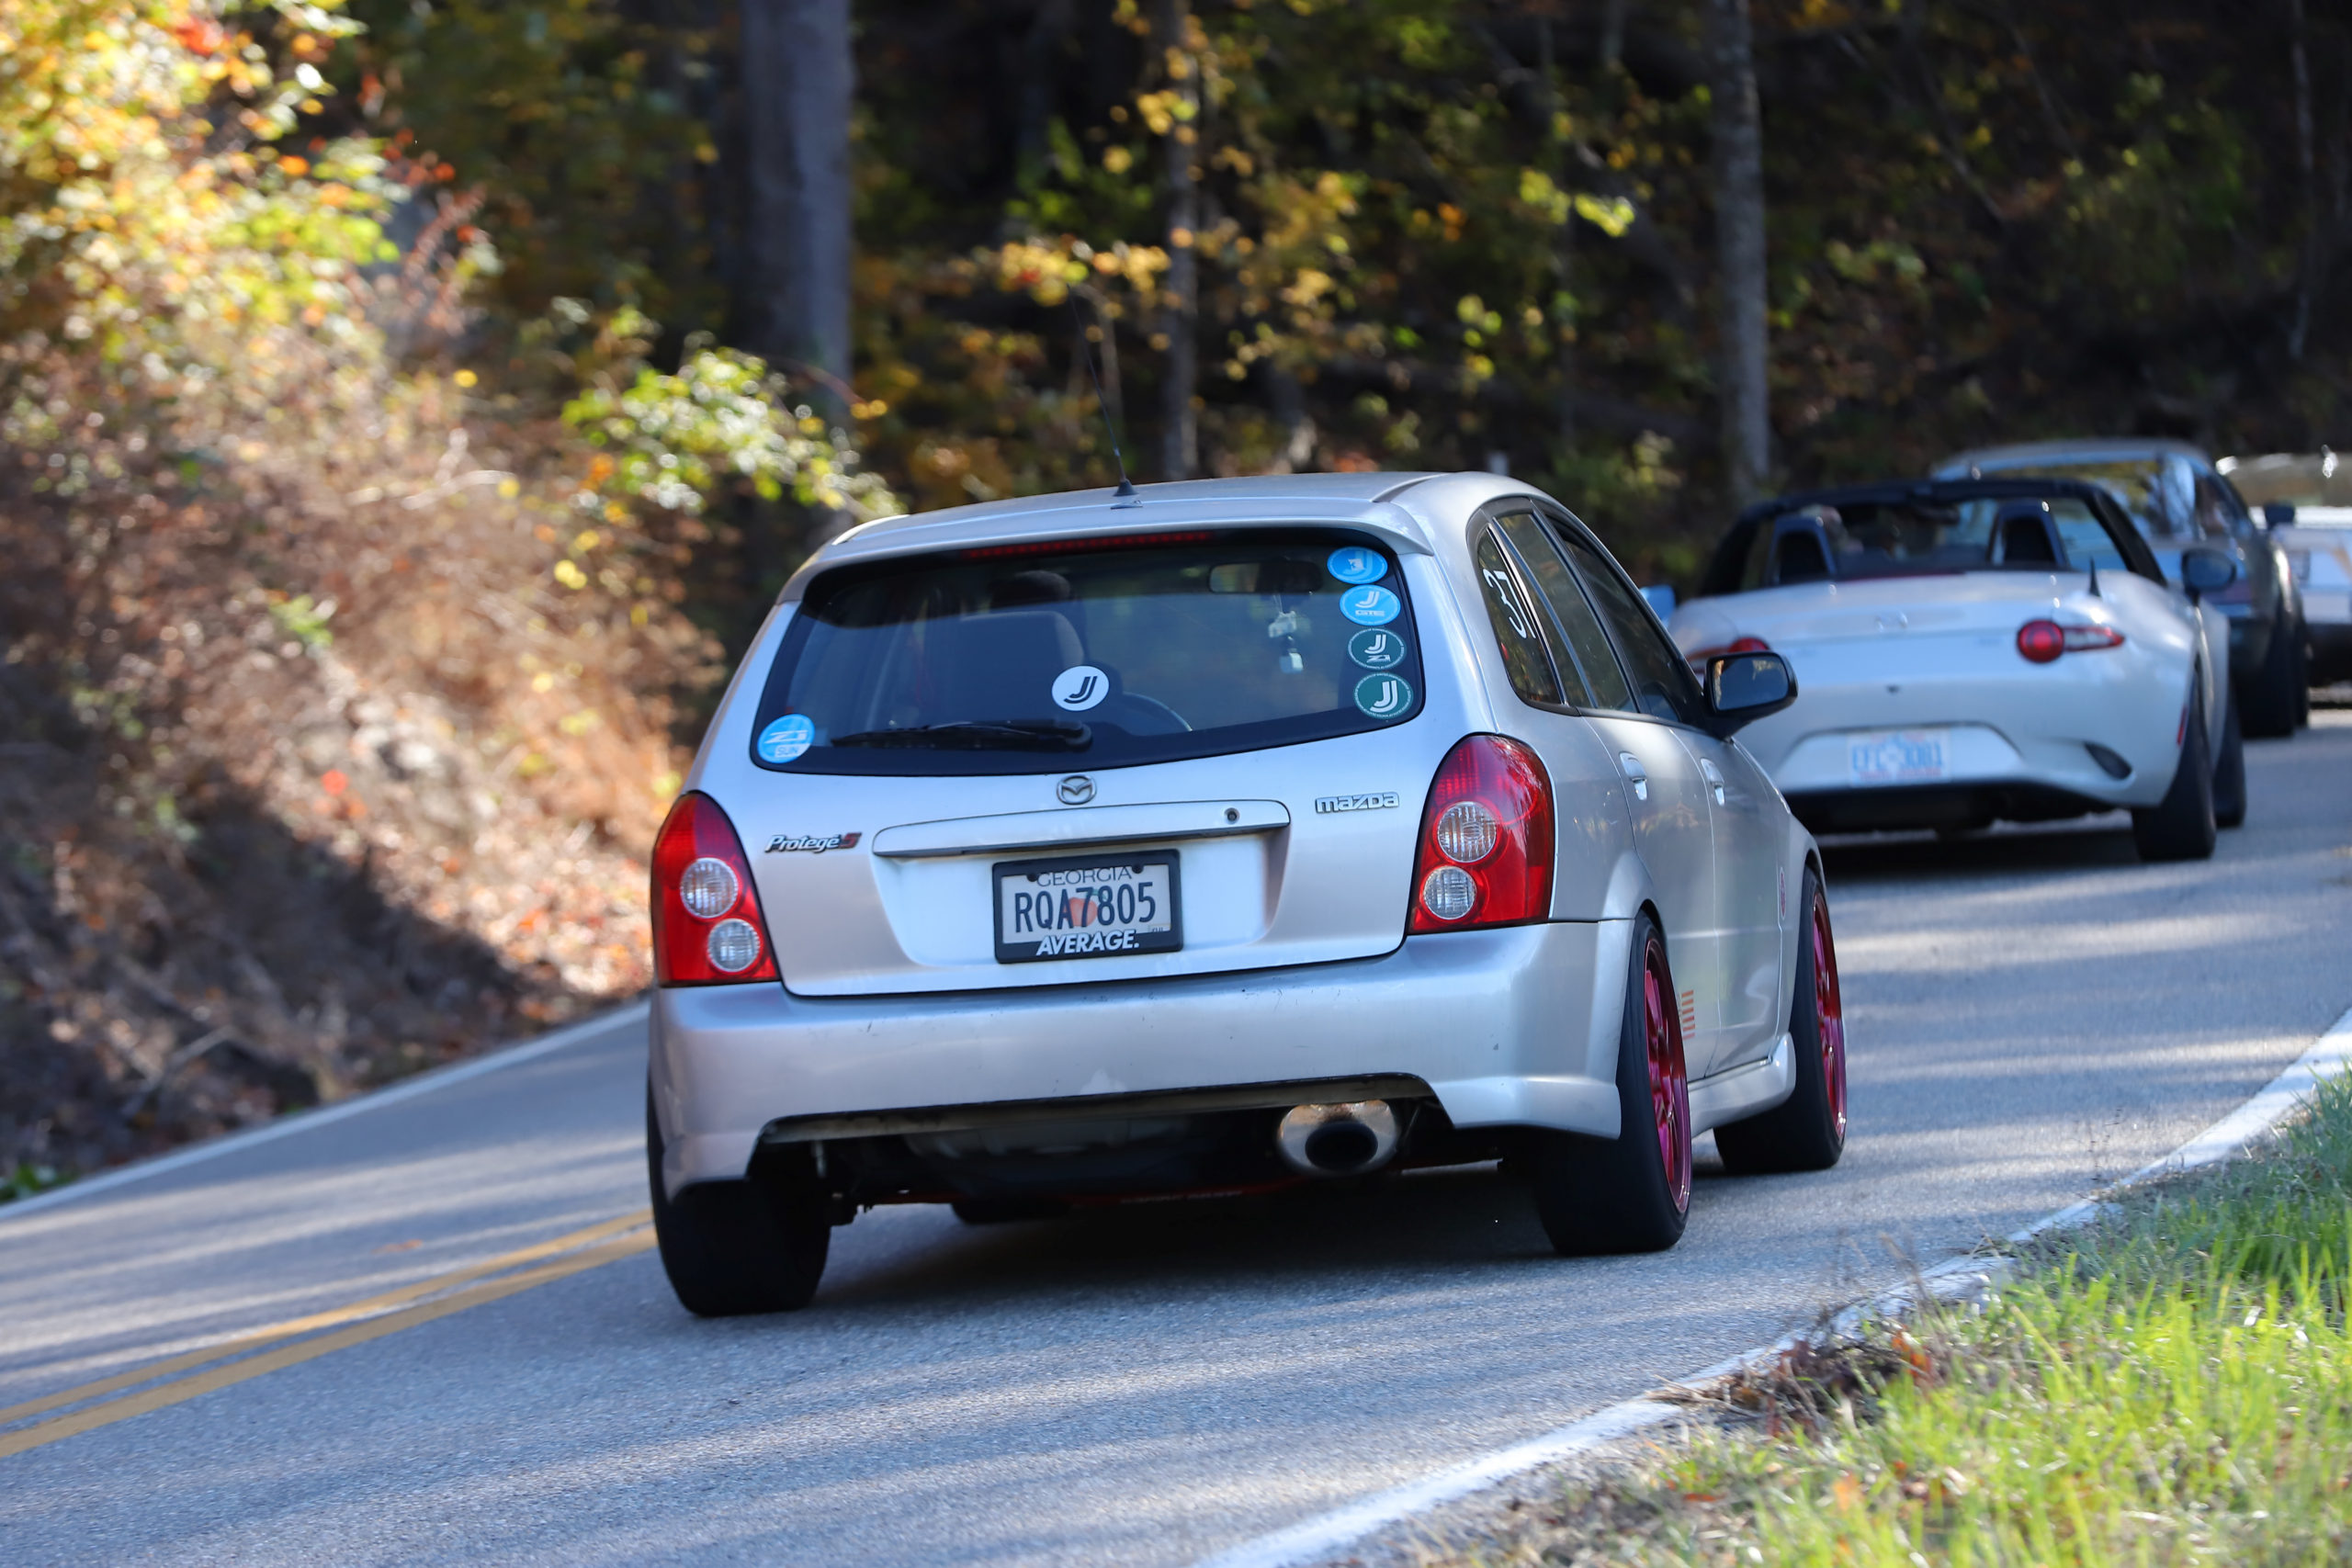
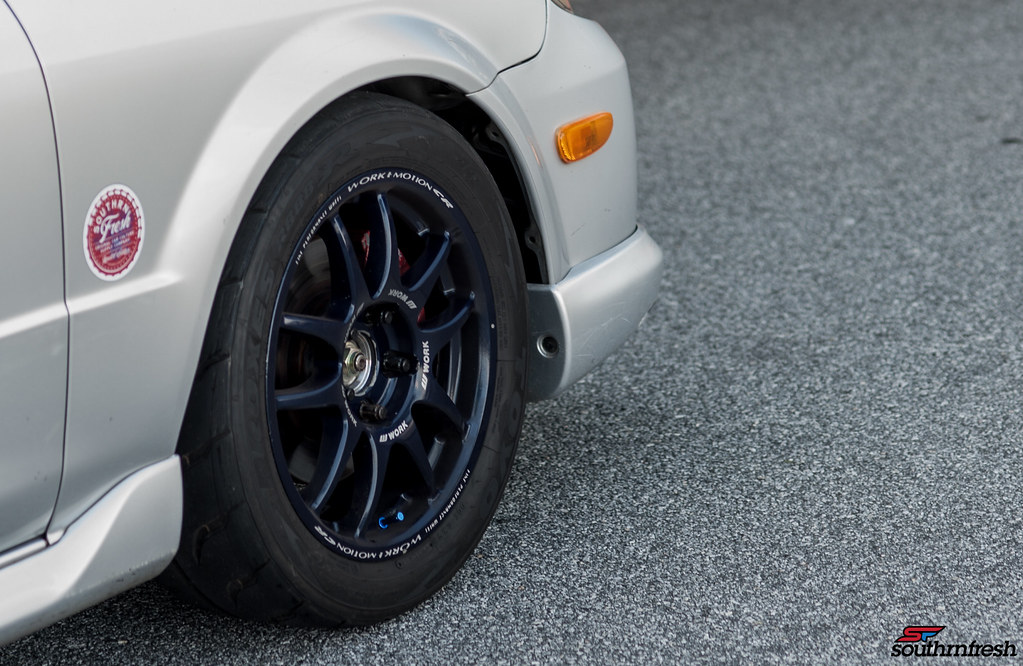
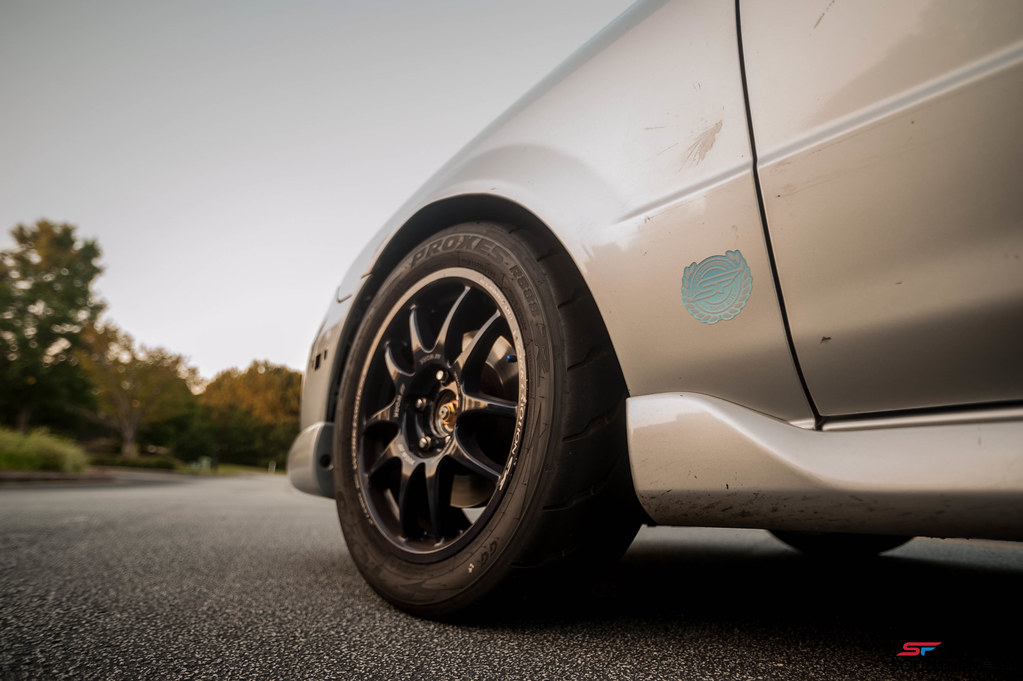
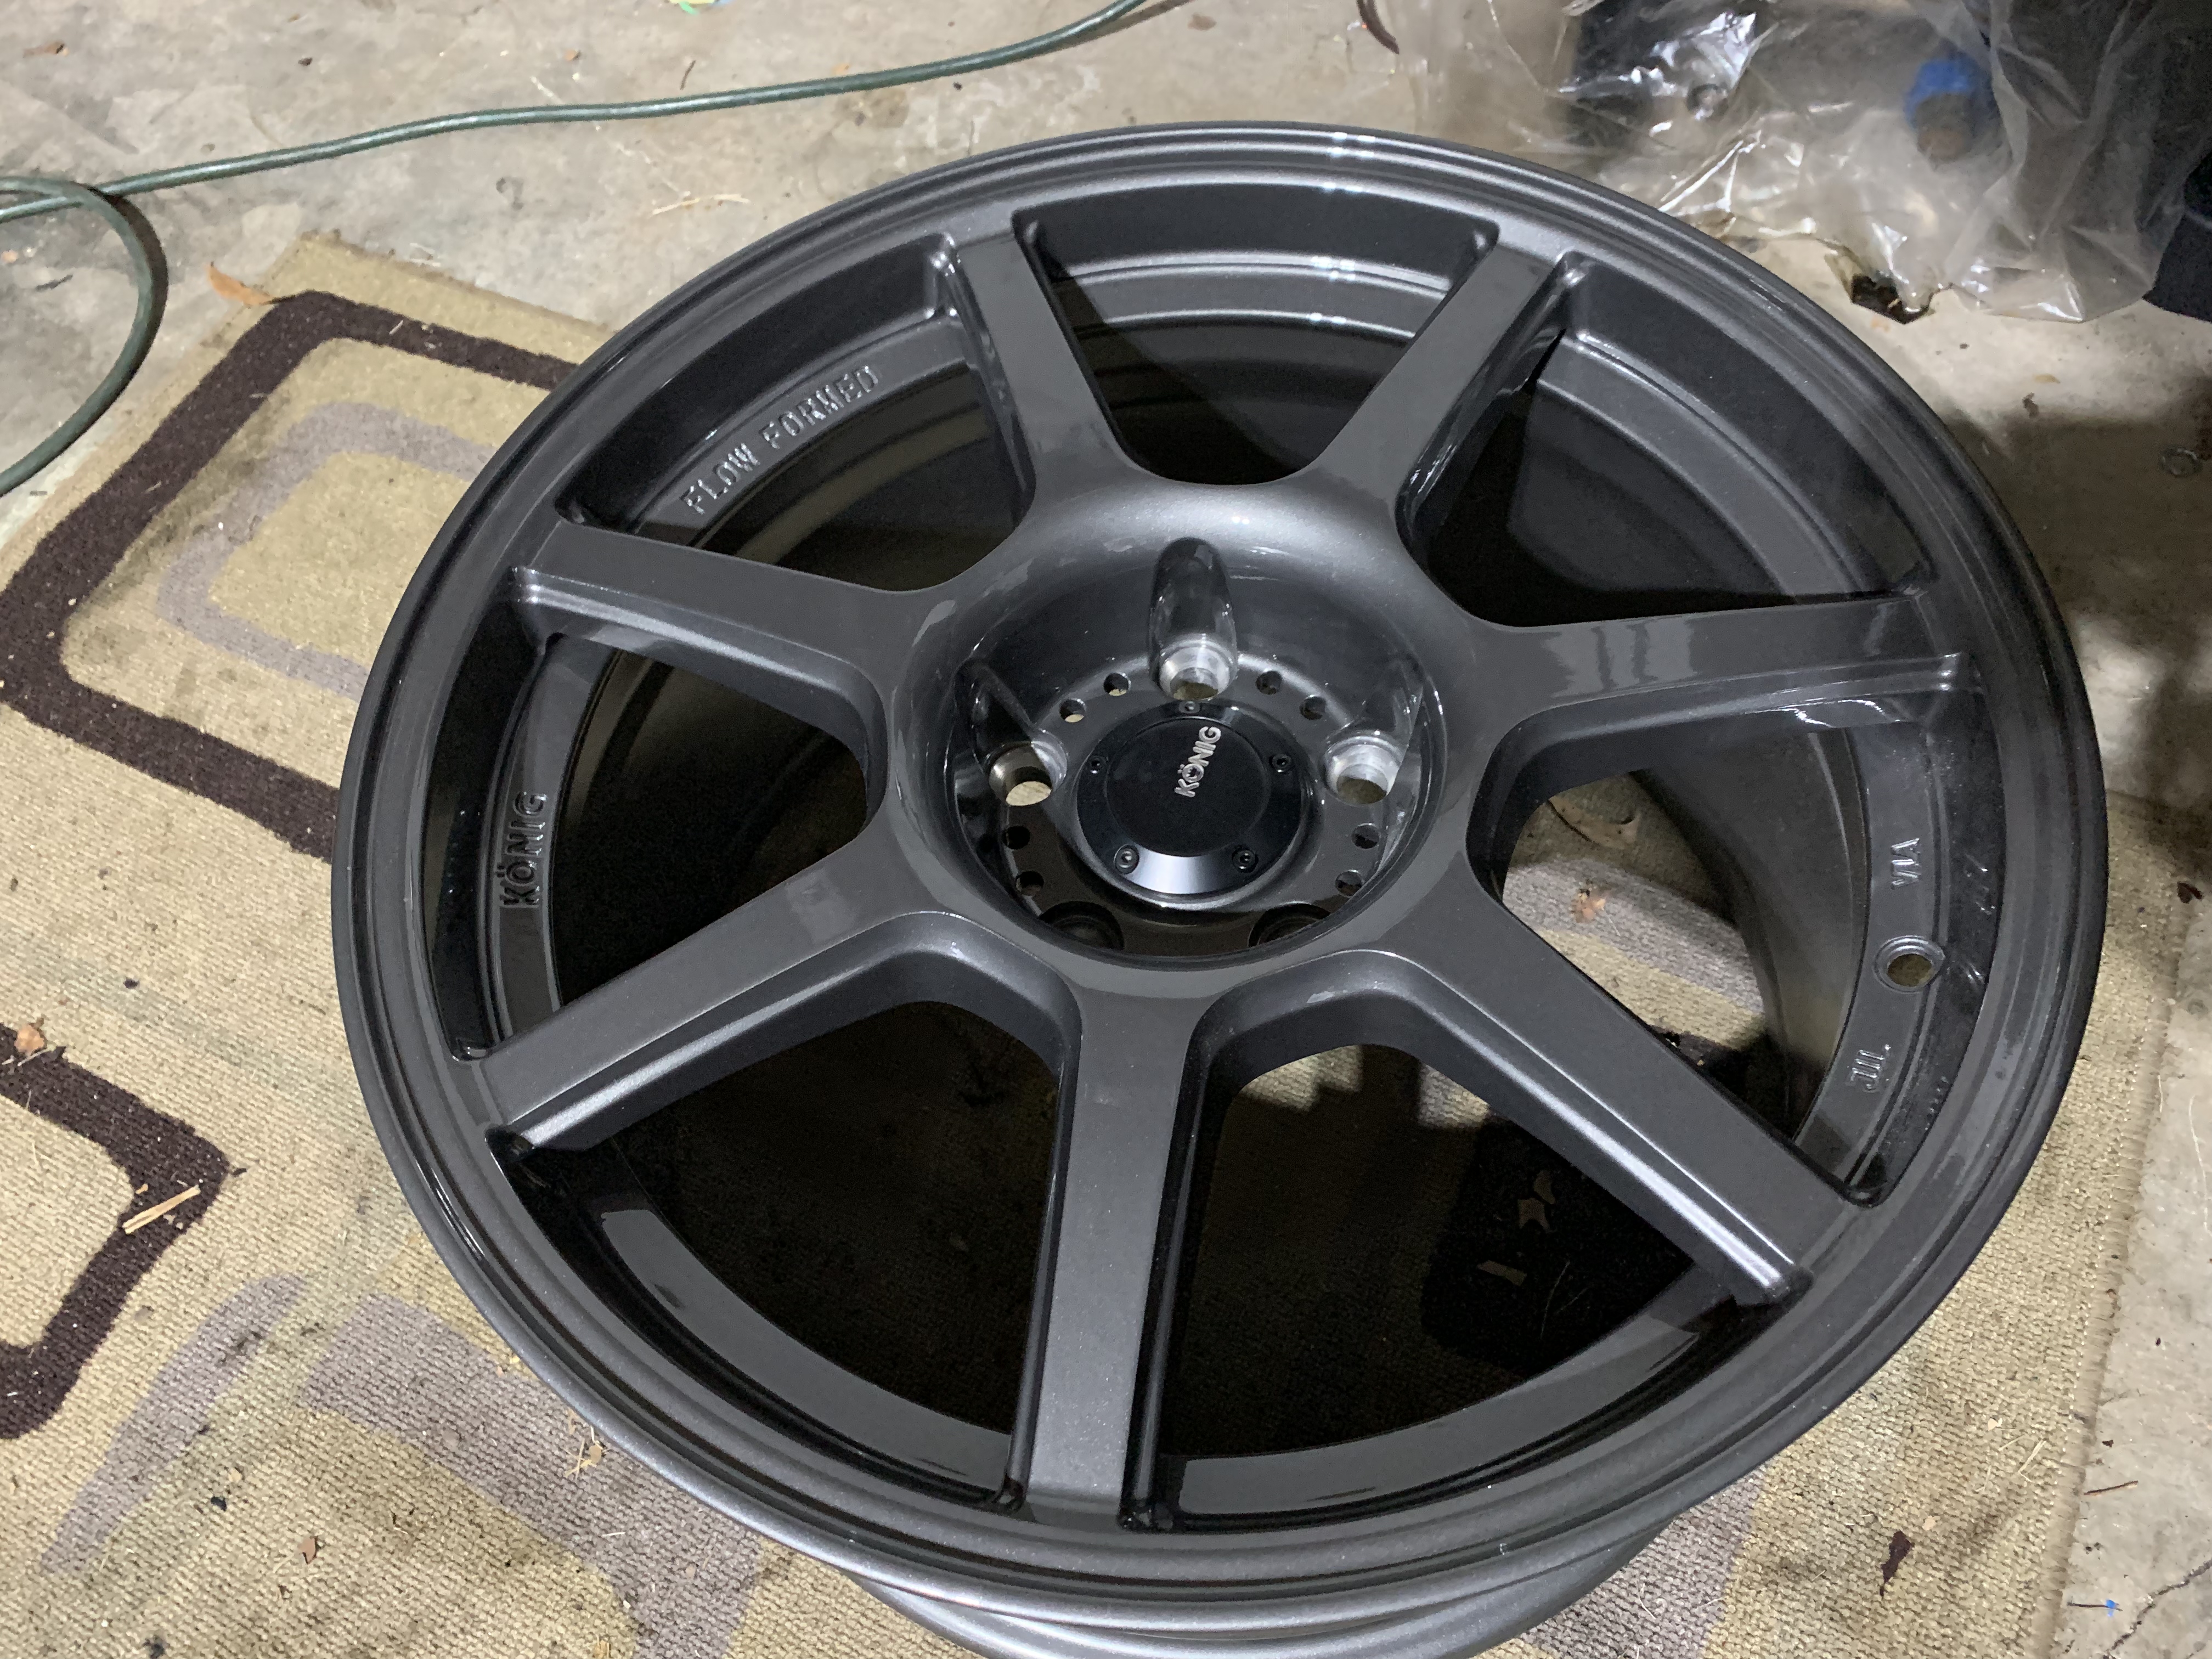
I had been debating on if I should stick with a 16" wheel and save as much weight as possible.  But I did some research on wheels that are affordable and lightweight that can hold up to track use. And did not  want to take a chance of old ancient JDM relics that would need work to look decent and be safe for track duty.   Konig has made a effort to hit that market perfectly with their flow form series.  My good friends at Koruworks are one of the only Konig vendors in Atlanta, and they had a set of the Ultraforms in 17x9 +34 (18.4lbs), eager to get the oem wheels off of the car, I snatched them up.  
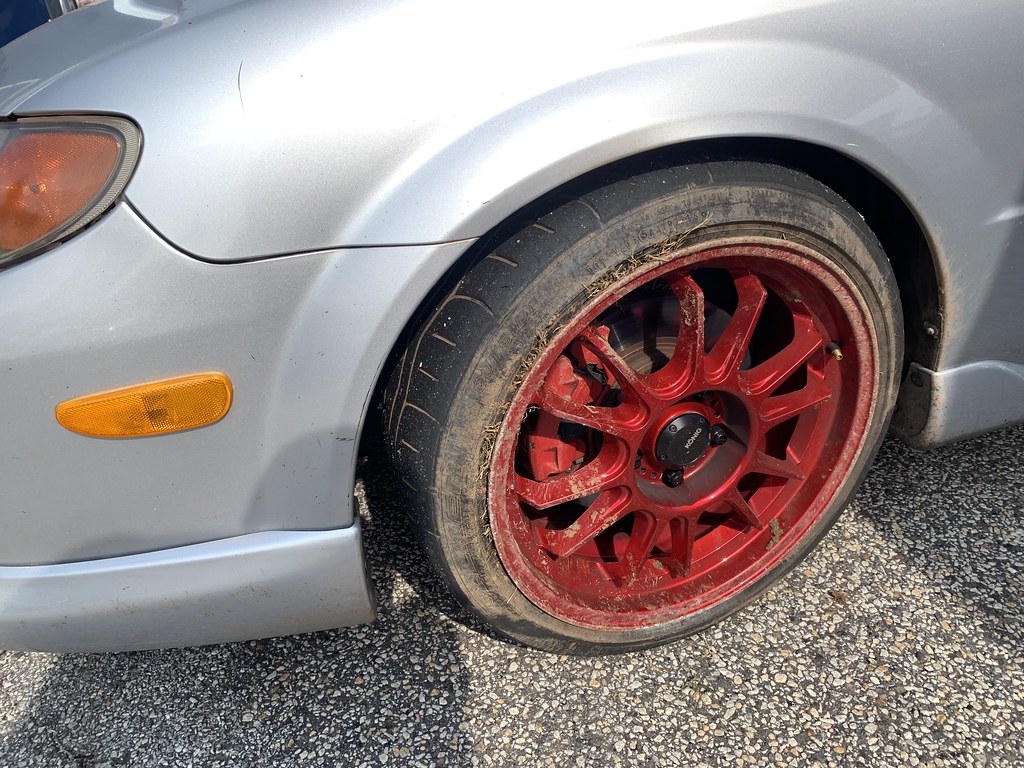
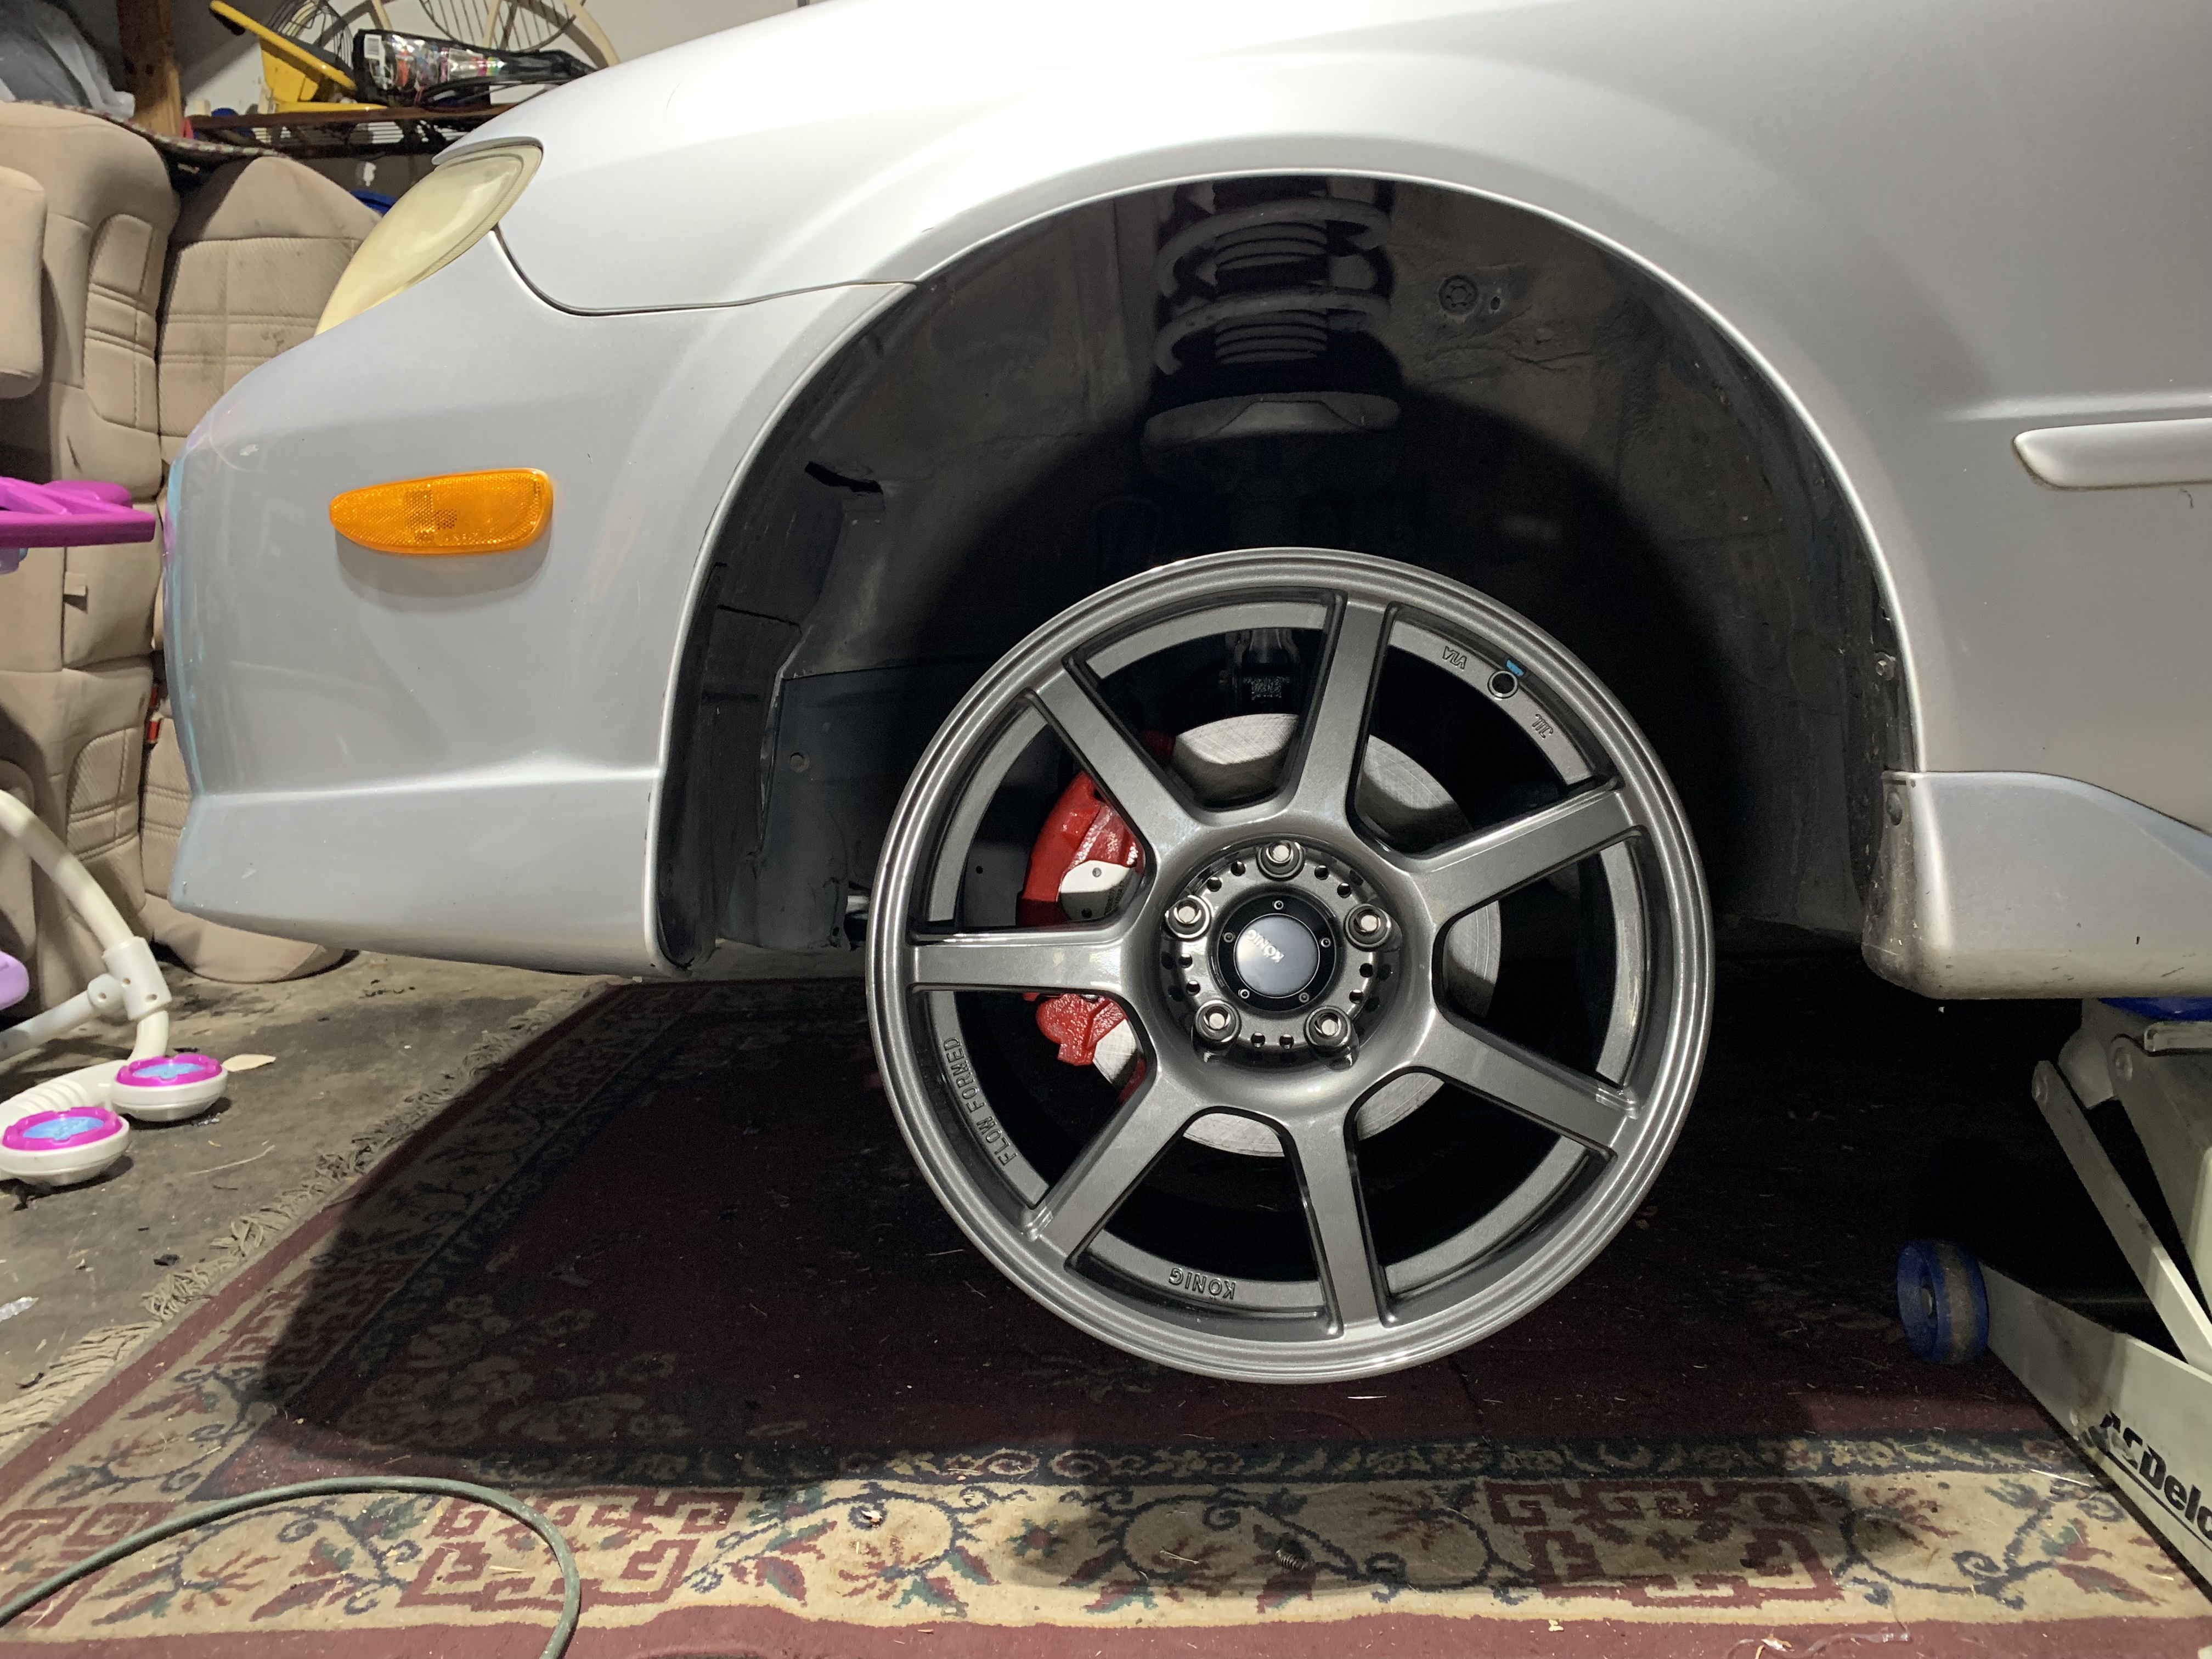
The overall look of the gloss graphite ultraforms looked great on the car, but were a little too aggressive for the P5.   
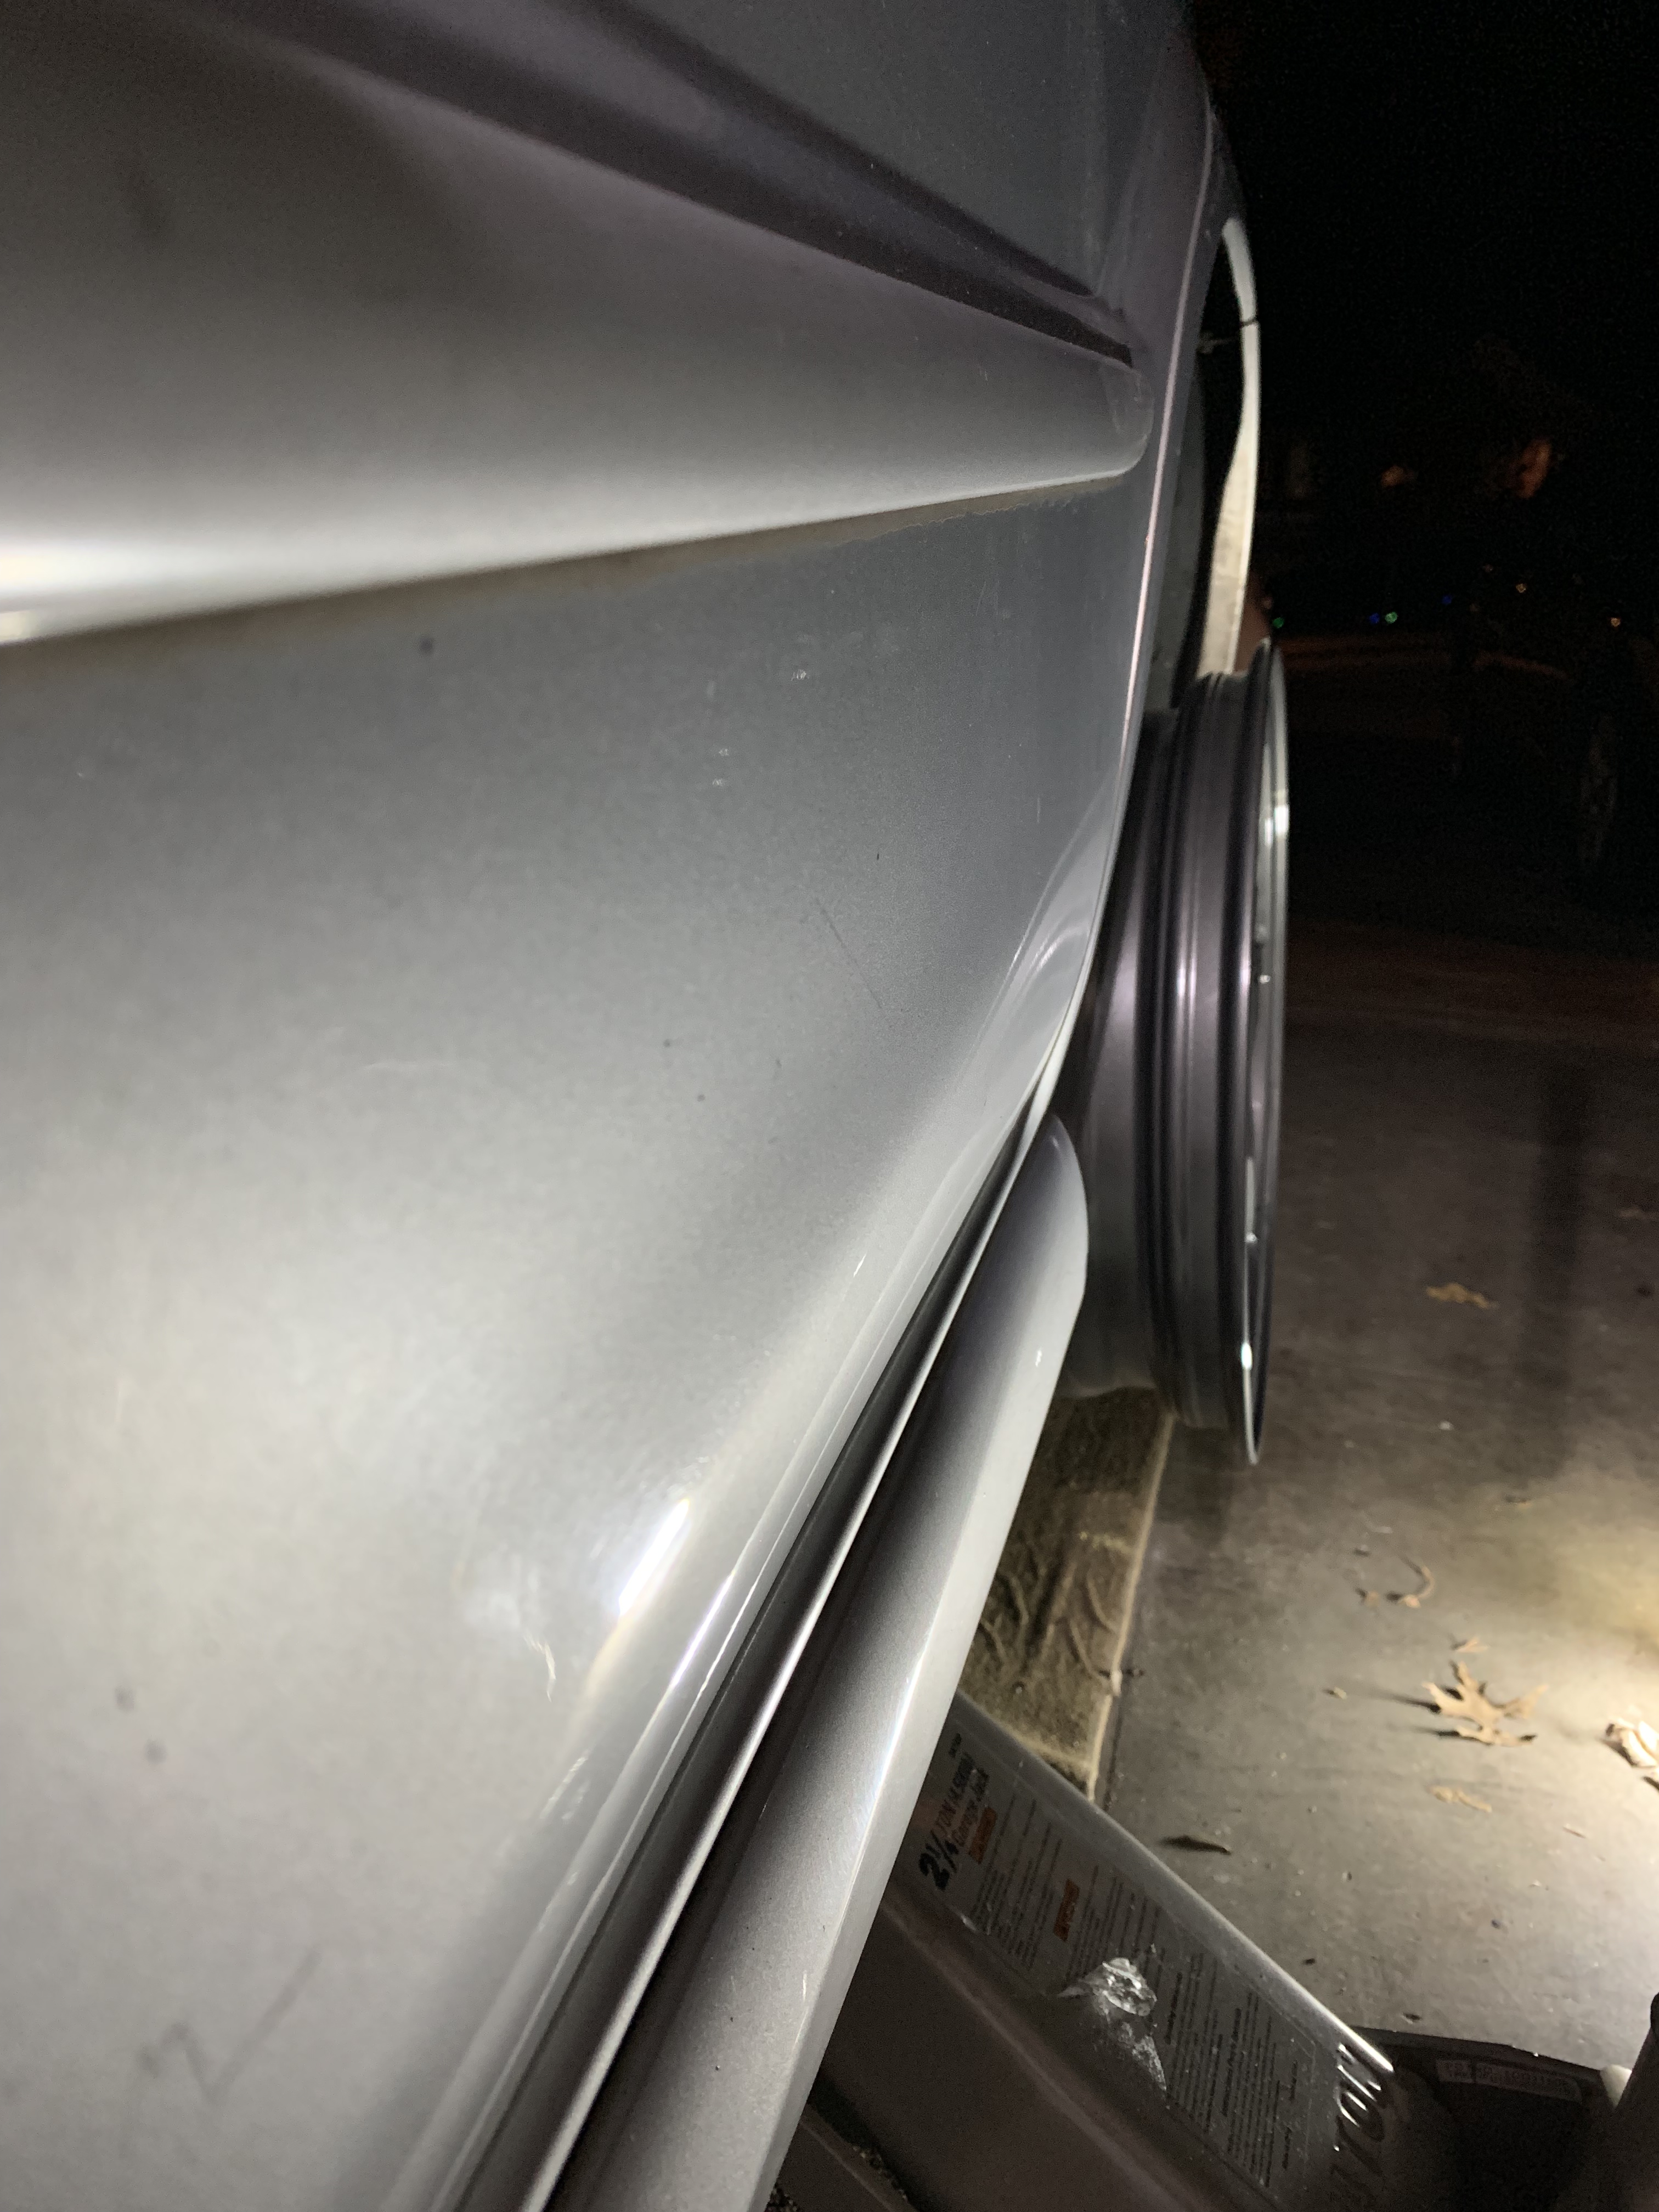
Another thing with the P5 is how the rear of the car is more narrow then the front.   So you can really see how much they poked.  
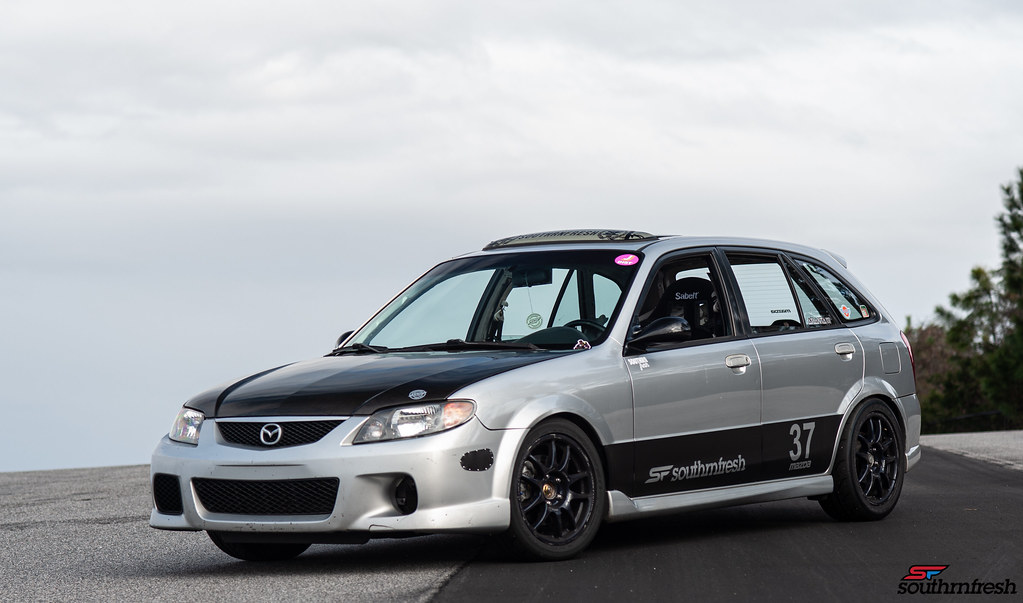
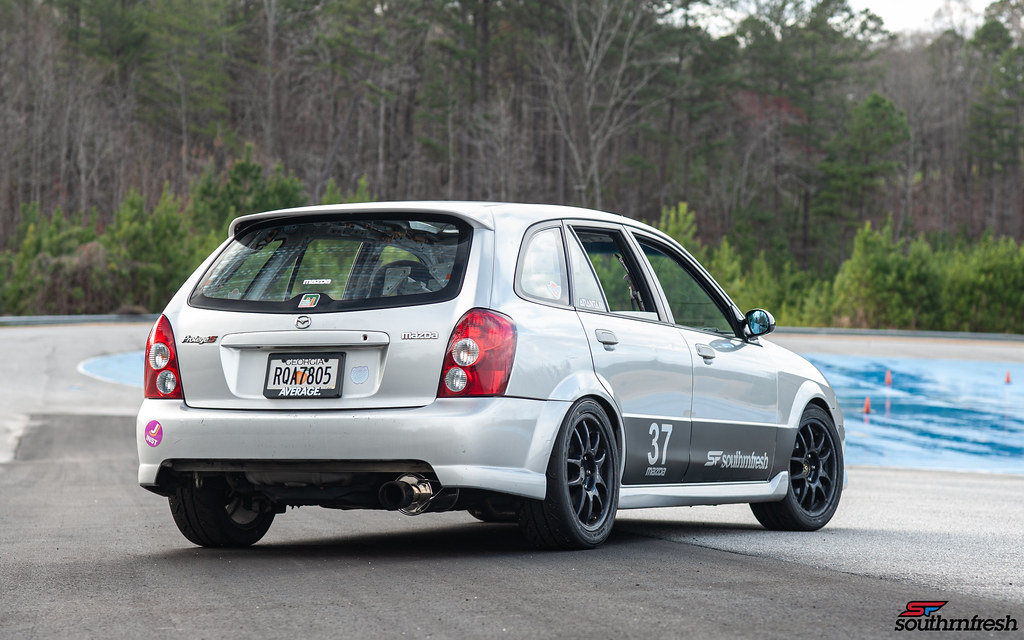
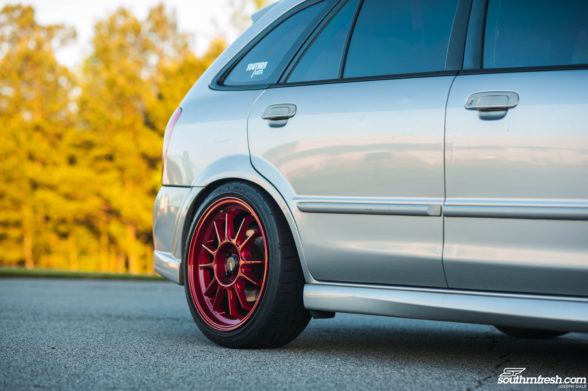
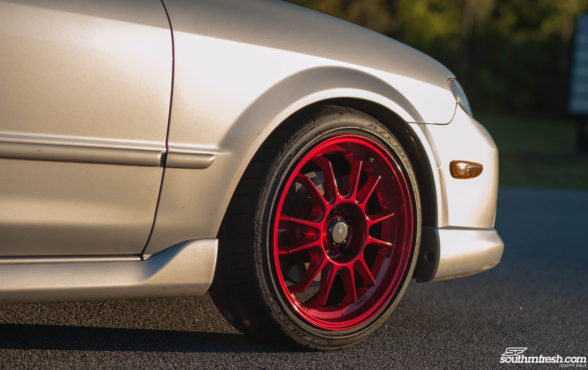
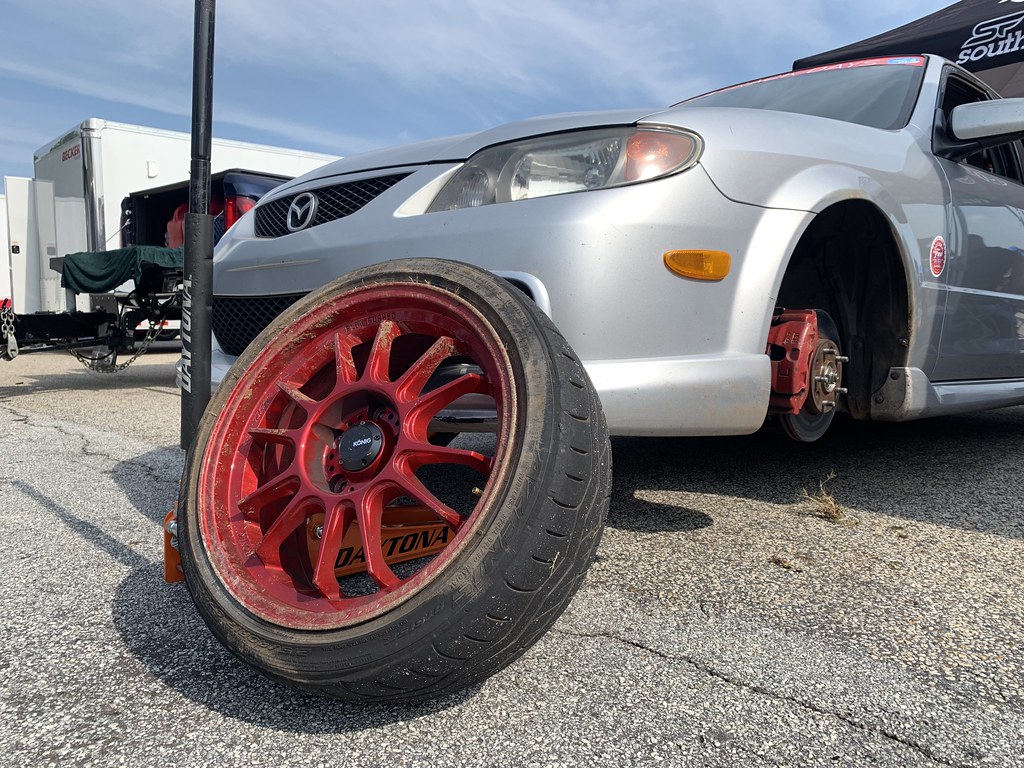
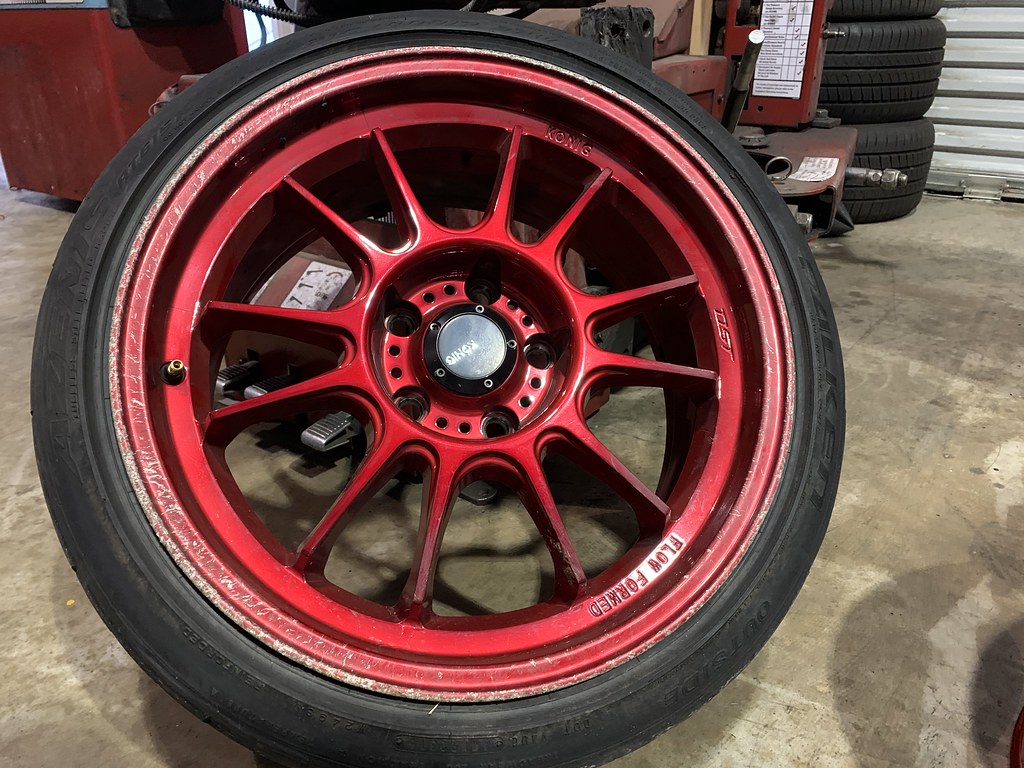
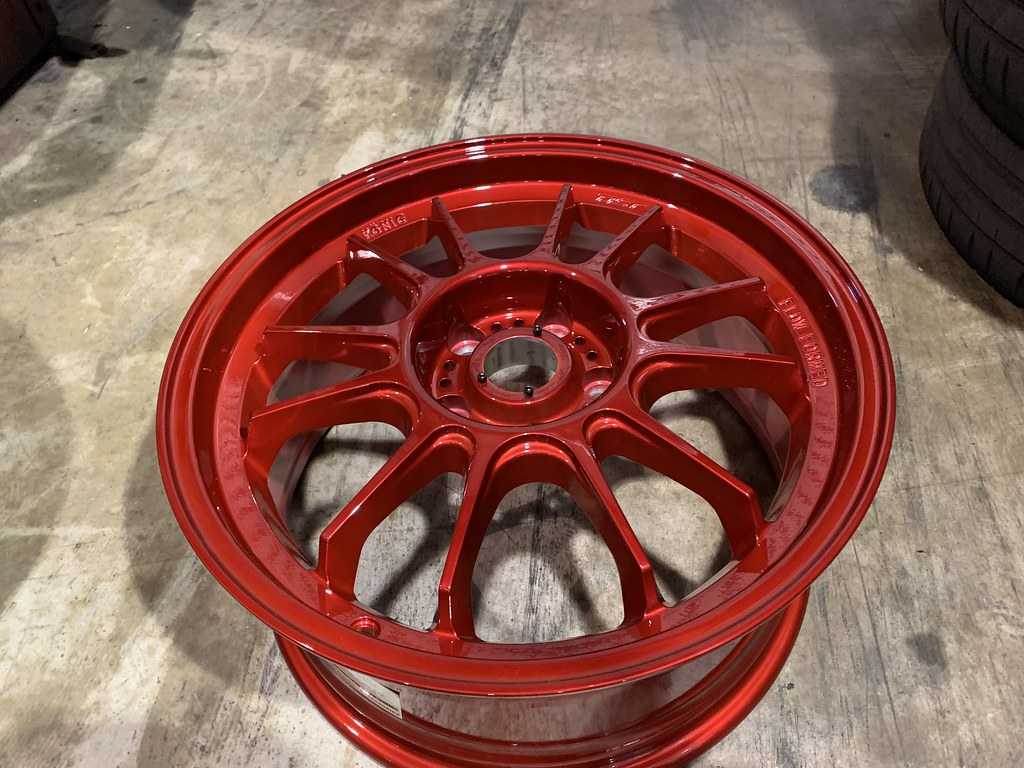
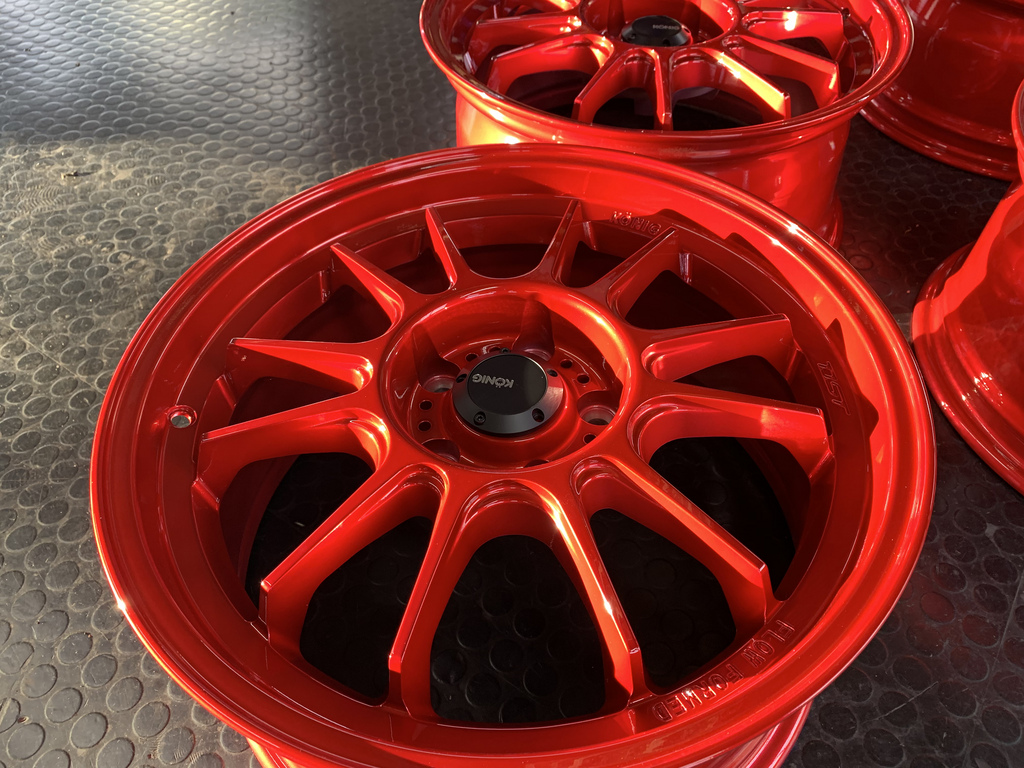
I decided to change up from the gloss graphite Konig Ultragram to the red opal Hypergram in 17x8 +35 for $720   
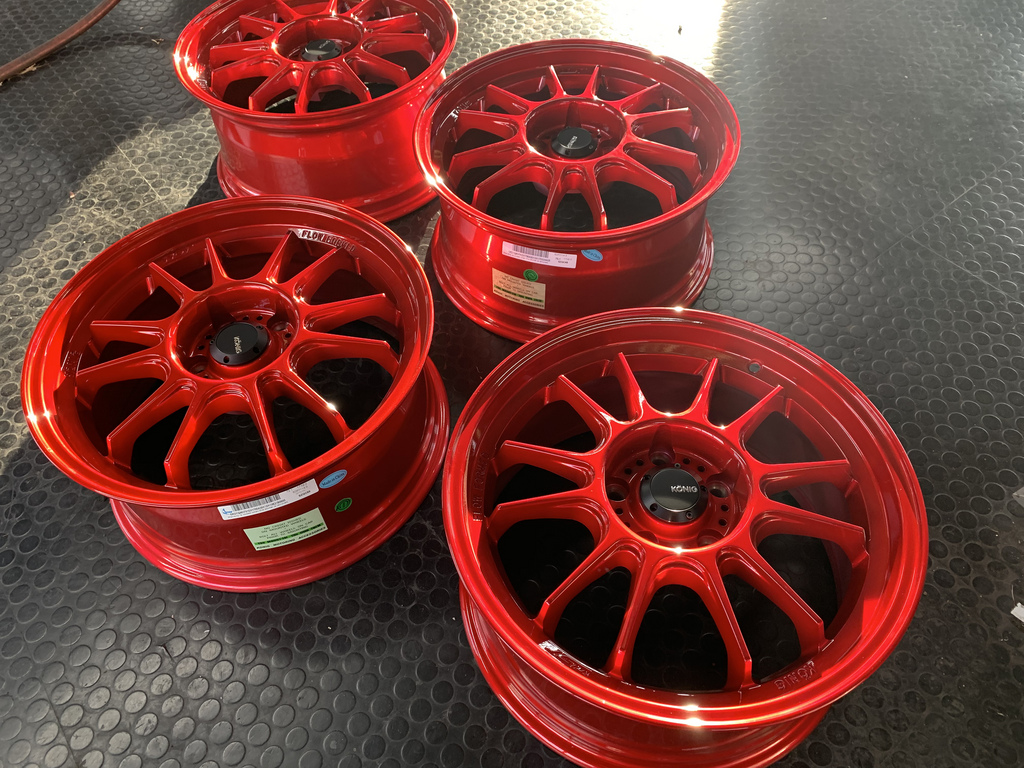
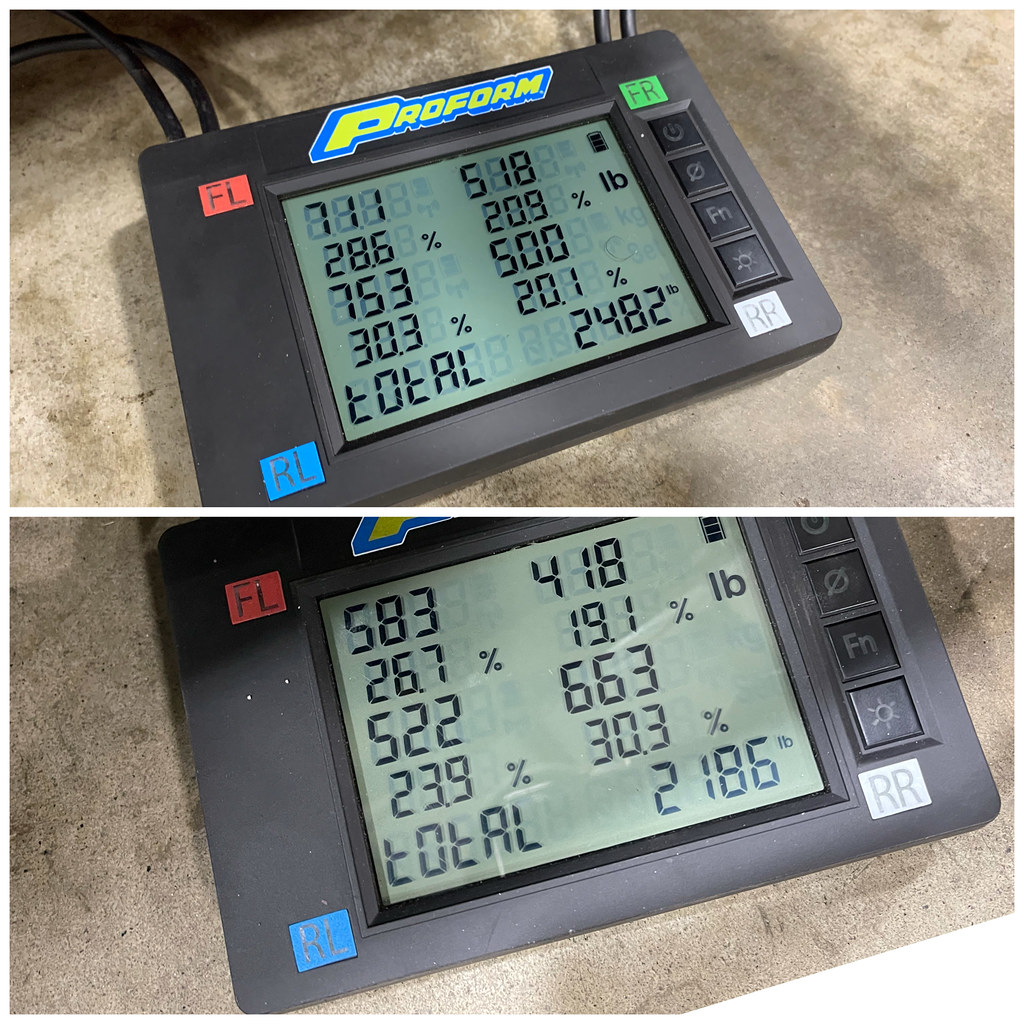
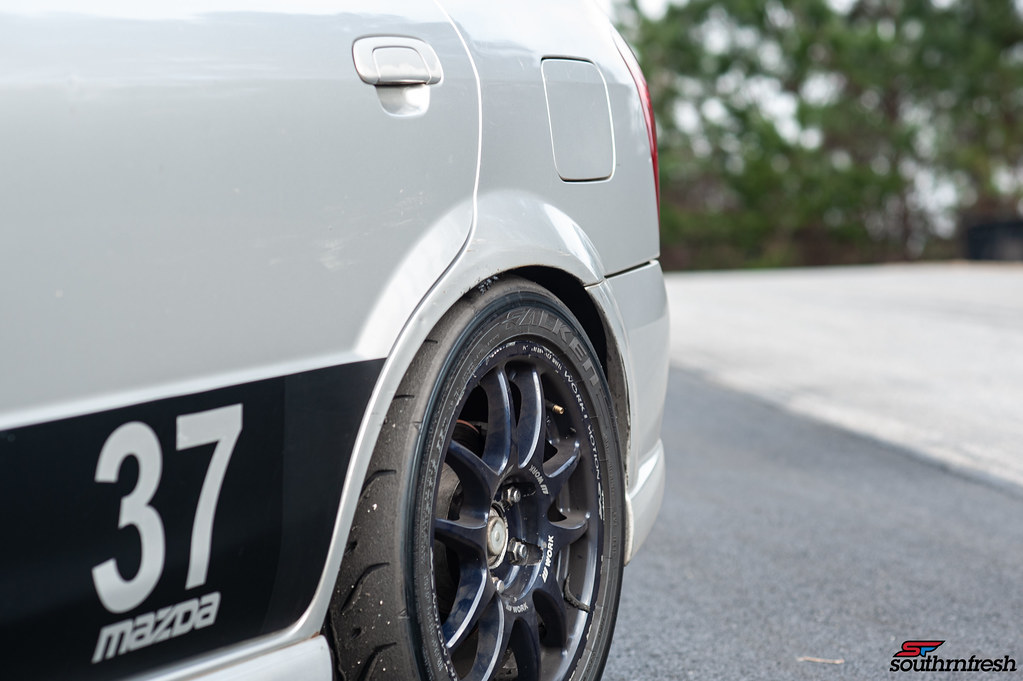
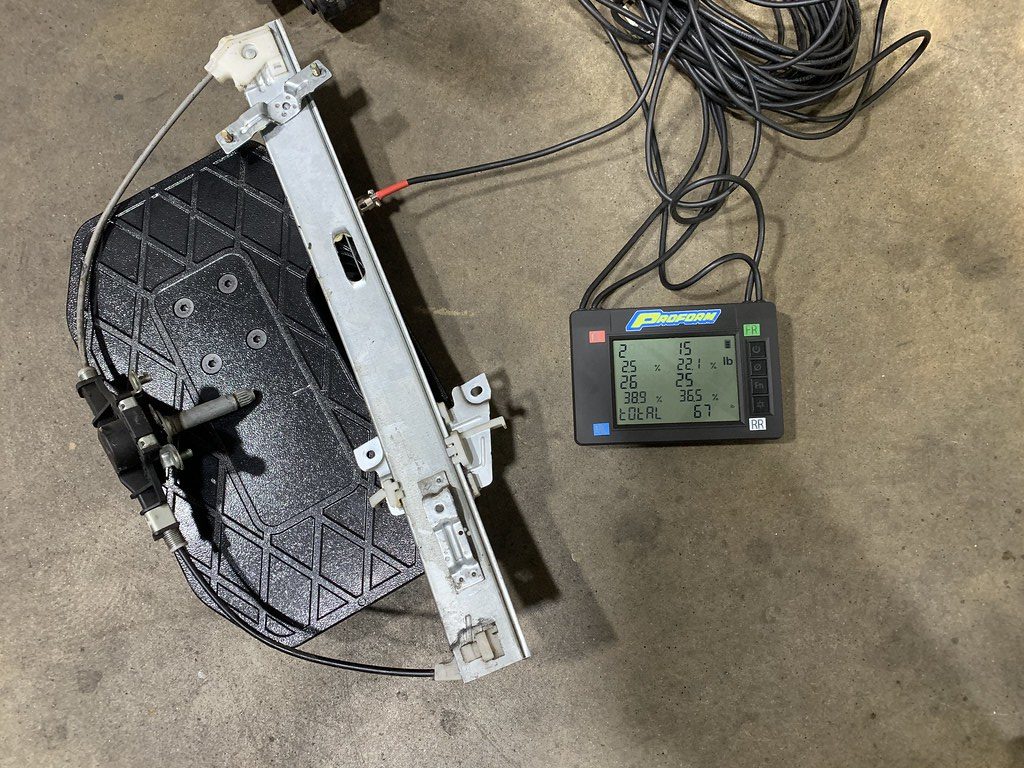
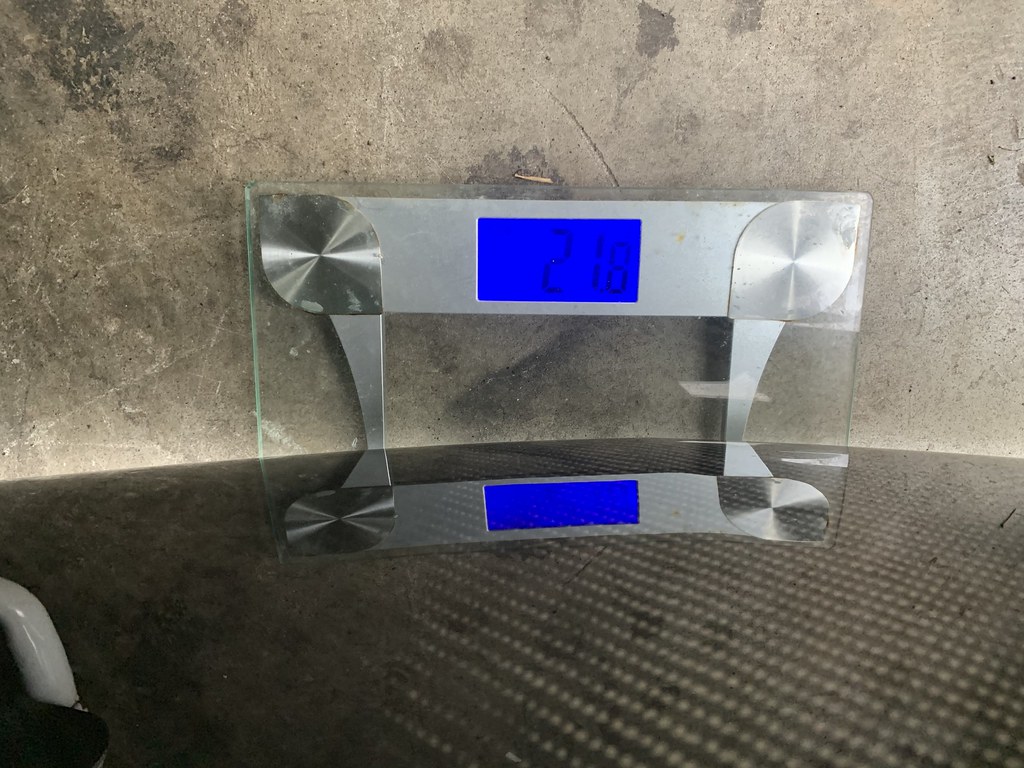
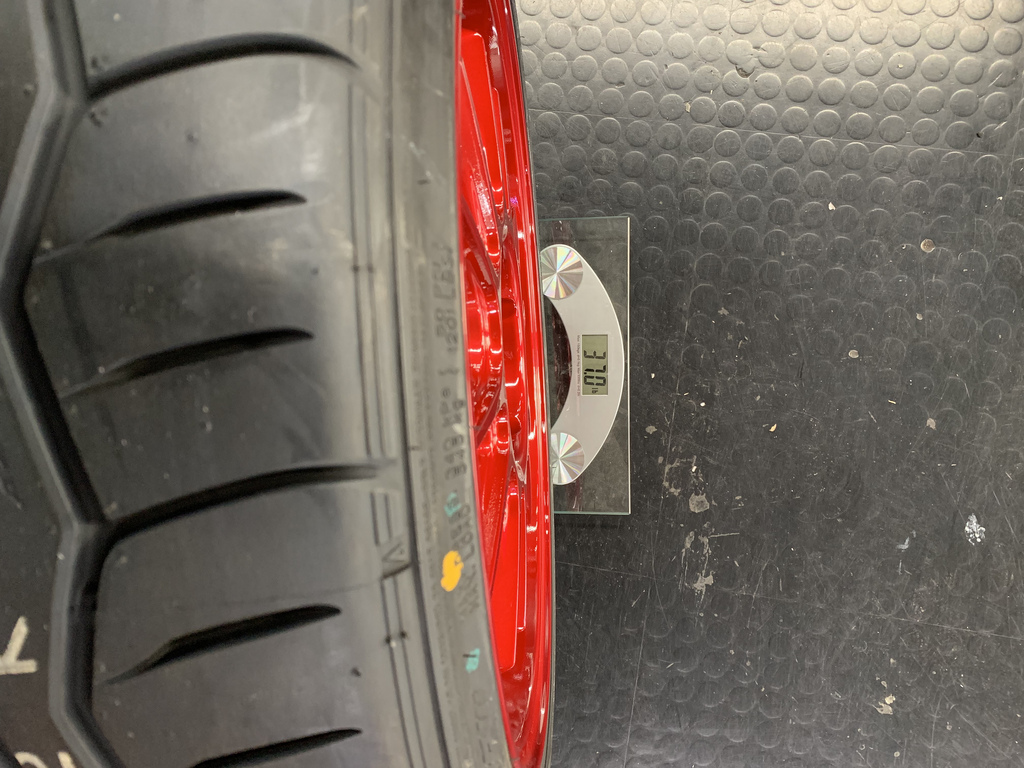
The 17x8 Hypergrams are also lighter then the 17x9 ultragrams by 2 lbs at 16.3lbs.  With the tire mounted and aired up to 36psi, it came up to 37lbs even.  I would highly suggest the Konig wheels to anyone looking for something lightweight and inexpensive.   


That is where we are at the moment, we have a good bit of mechanical things to get done to the car for the next update.  And finally get to the most important part of the build the suspension.  Thanks for reading. 

  • 2002 Mazda Protege 5: $1200.00
  • Mazda 6 brake upgrade: $90
  • Coil pack conversion and valve cover gasket: $94
  • Intake - $31
  • 215/40r17 Falken Rt615k - $360
  • 17x8 Konig Hypergram - $720
  • Used Headlights - $100


Total $2595

Southrnfresh_Joe
Southrnfresh_Joe New Reader
6/13/21 9:28 p.m.


Back with a few updates showing mostly maintenance and making sure the car makes it through the track day in one piece.  The goal is to be at the March 17th Atlanta Motorsports Park Jzilla track day.  I hope to be able to attend all the events this year, but the first event will be the most important one.  Because if the car breaks then obviously things will change.  I dont plan on breaking any records with the P5, but just enjoy it and learn.  And hopefully motivate more people to bring their cars out and enjoy them.


I can take care of a good bit of the wrenching on the P5, but some things I have never felt comfortable with doing.  So I had my good friends at Atlanta Speed Company take care of the timing belt and water pump for me.  As you can see it was on its last leg, and way past over due. 


Old belt off...


New belt / Pump on..


Next was to take care of the blown out motor mounts .  The 3 of the 4 mounts on the P5 are pretty simple, but the rear mount is a complete pain in the ass, and i will save for a later date.


Managed to find a deal online for a set of used AWR Motor mounts for $75, it had all 3 I needed minus the rear.  So it worked out perfect. 


Passenger side mount installed


Front mount installed.  I was afraid of too much vibration from but it was minimal.  But the car felt much better without the motor tilting out of the hood. 


After the mounts and the car driving so much better, I was gonna put it on the road and drive it more to see if any other things needed to be addressed with the motor.  The previous owner seemed to have took care of the car as much as any other regular person would take care of a P5.  So the next task will be to work on getting fresh fluids in it.  As you can see the car was way overdue for a oil change.


The 2.0 FS motors have terrible baffles, and have a habit of oil starvation during spirited driving.  So I decided to pickup some Liqui Moly Anti-Friction 10w40 from Atlanta Speed Company.   And also help restore whatever was lost, with the conventional oils.  I also will be upgrading the baffle for a aftermarket one before the track day to help with this. 


Went to Mazmart to see if I can find any extra parts. 


Wondering into Mazmart without a real reason, I ended up buying this Autoexe oil cap.  And matching shift knob, that I like so much I didn't even want to install it on the car. 


Good quality product as always from Autoexe, but is not the easiest to remove after a few heat cycles.  But I assume all Aluminum oil caps are like that.


Also got a 626 intake manifold, that I am debating on installing.  It does not have the VTCS system , which to some it restricts air flow.  But it is better used for force induction.  So I may not install any time soon.  But if I do decide to do it, It would give me access to replace the rear motor mount.


Corksport is one of the few original vendors that still support this platform.  And one of their best products have always been their bronze-oil bushings.  Front wheel drive Mazda transmissions are naturally notchy so these are a must.


I only installed the linkage mount bushing at this time.  The rest of the kit goes along with the short shift kit.  At the time I was not in the mood to deal with that. 


  This along with the motor mounts made one of the best improvements to the car.  Excited to see how much of an improvement the rest of the kit makes.  


After returning the other header from ebay.  I was finally able to find one that fits properly.  I found a used header from SNS Mazda Parts (Alex Todd) , that he sold to me for $60.  I was finally able to get rid of the clogged catalytic converter, and get rid of the check engine light. 


Unlike the first header, this one fit perfect. 


The next project was to finally install the $120 eBay exhaust.  I went in expecting the exhaust not to fit at all.  But the initial layout looked like it may actually fit. 


Old exhaust out.


Surprisingly the kit fit pretty well and bolted right up to the factory secondary cat .  . 


The only issues with the exhaust were the bends that go around the spare tire and over the rear subframe.  The exhaust got a little too close to the frame underneath and did touch in a few spots.


Besides the look of the colorful titanium look tip, the muffler has a decent tone to it for what it is.  But it is a little loud and drones pretty bad.  So in the future I will swap out the rear section or replace the muffler. 


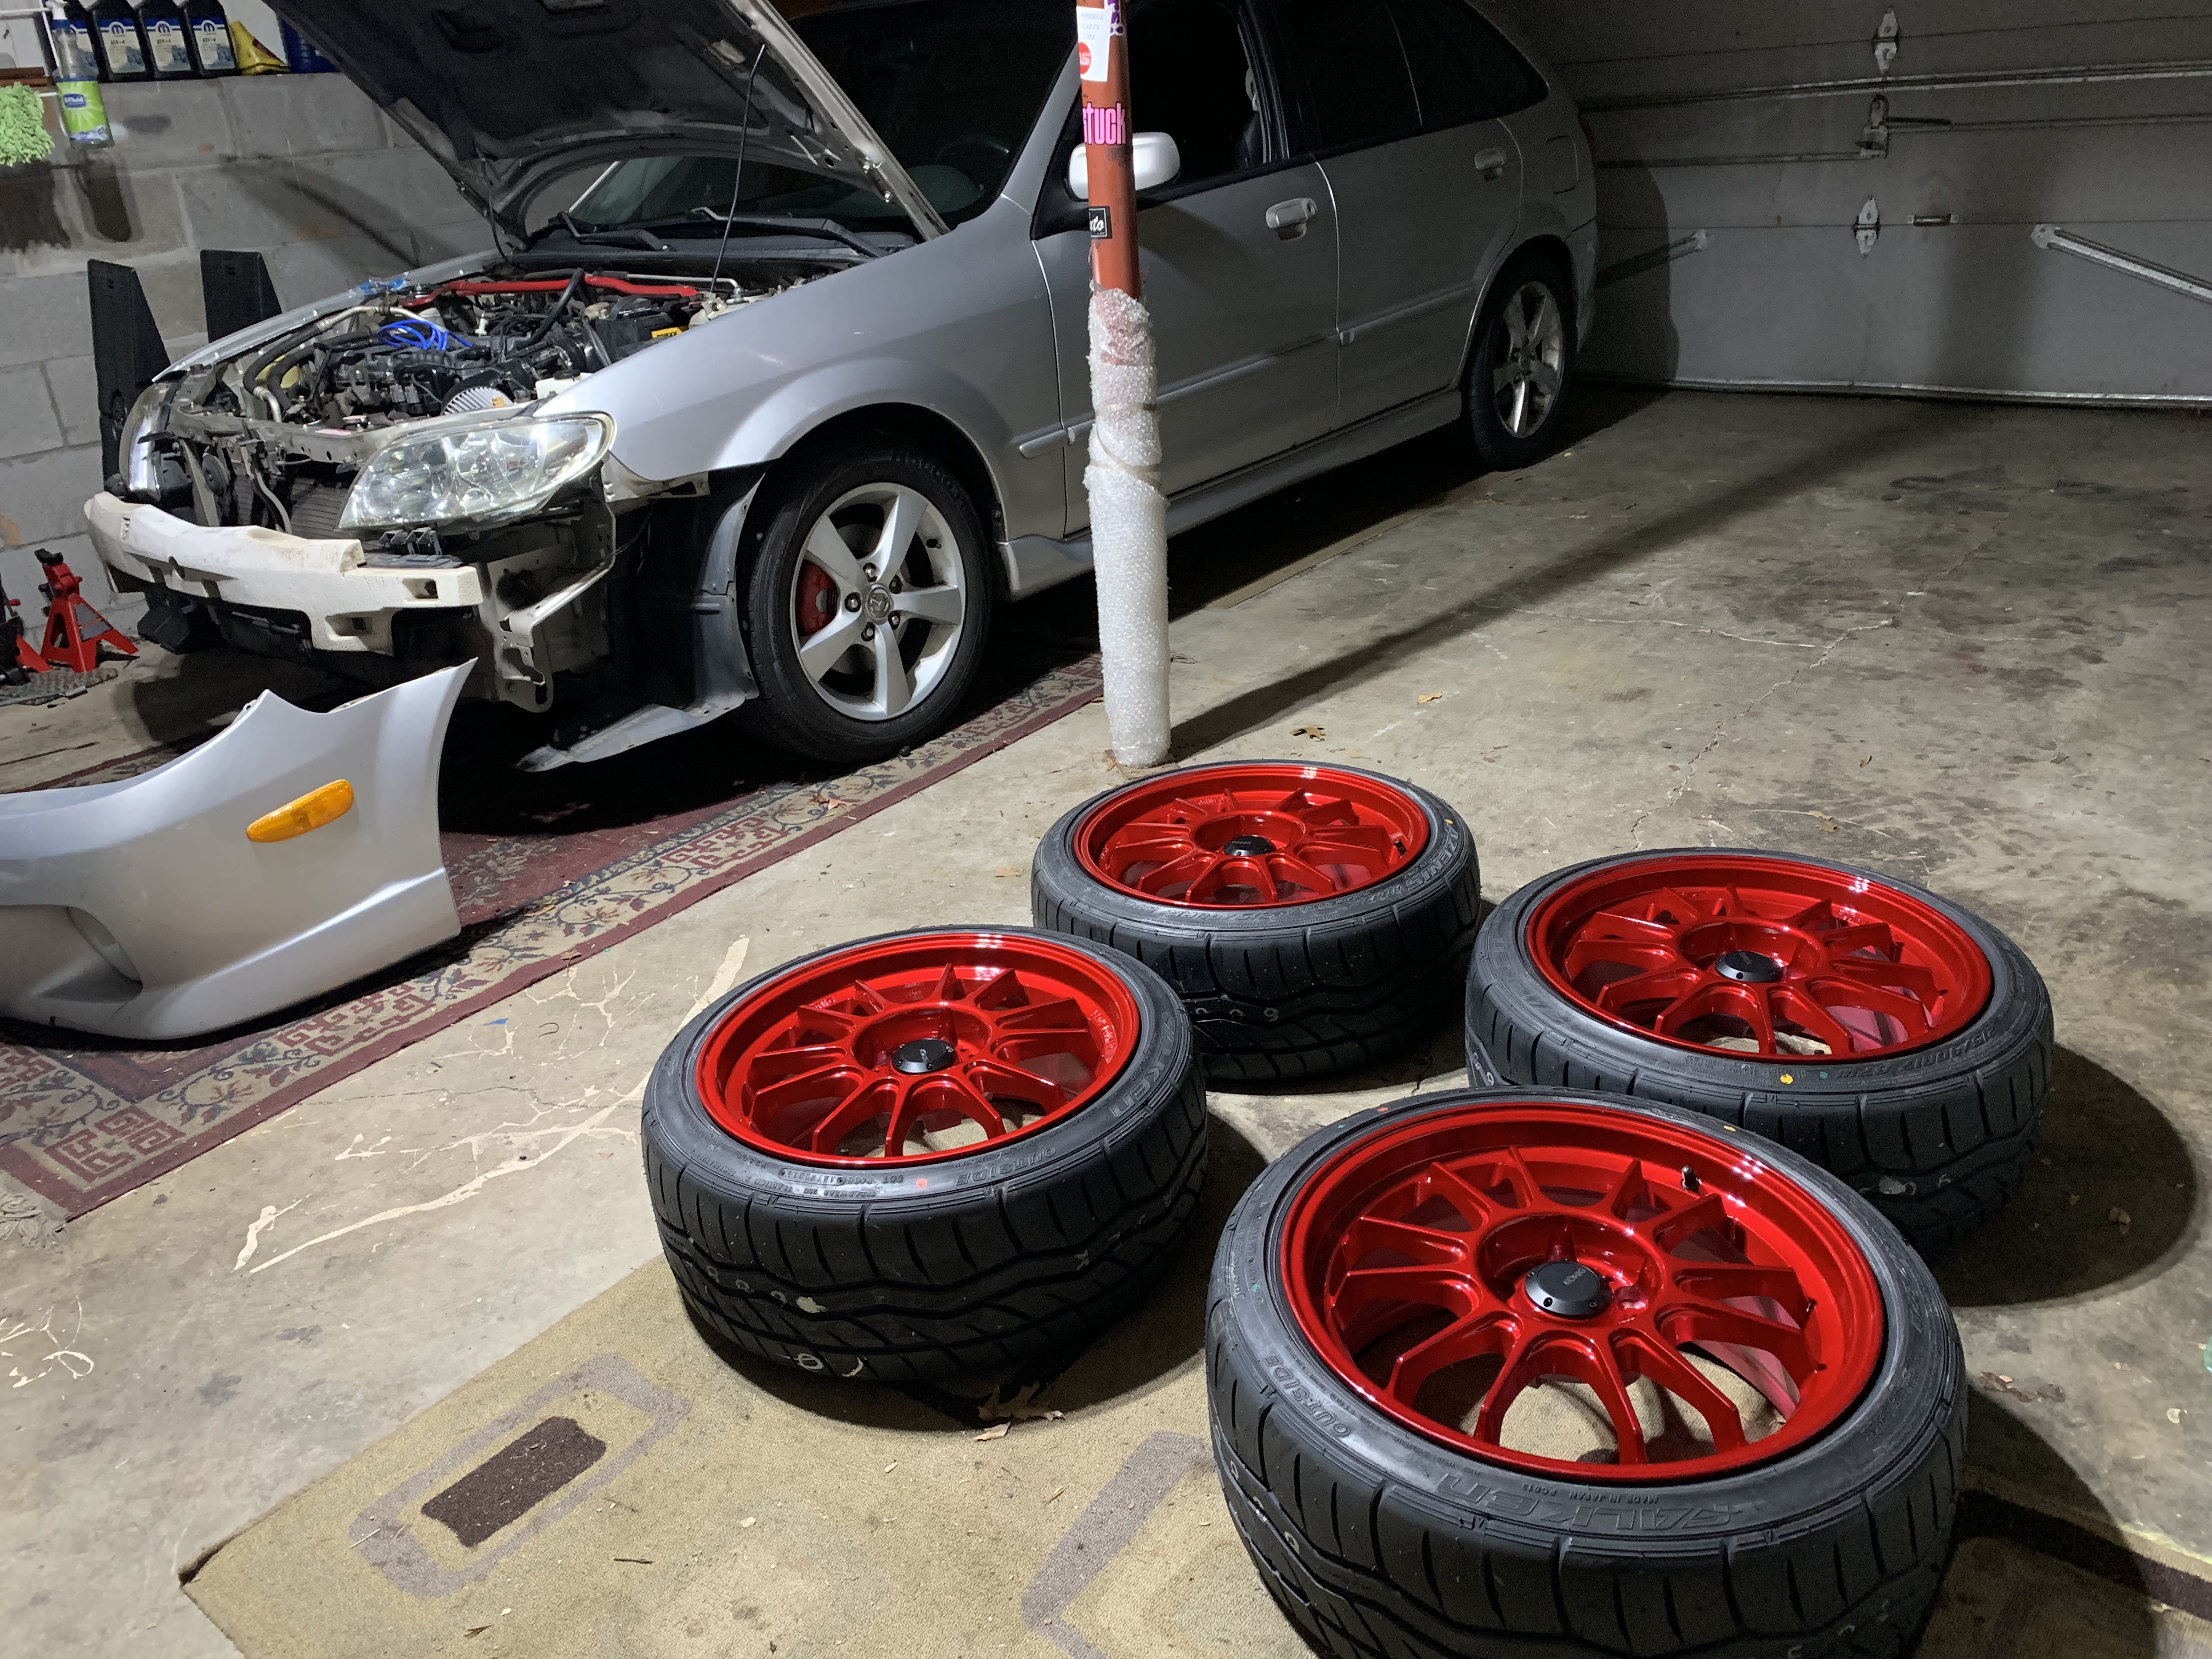
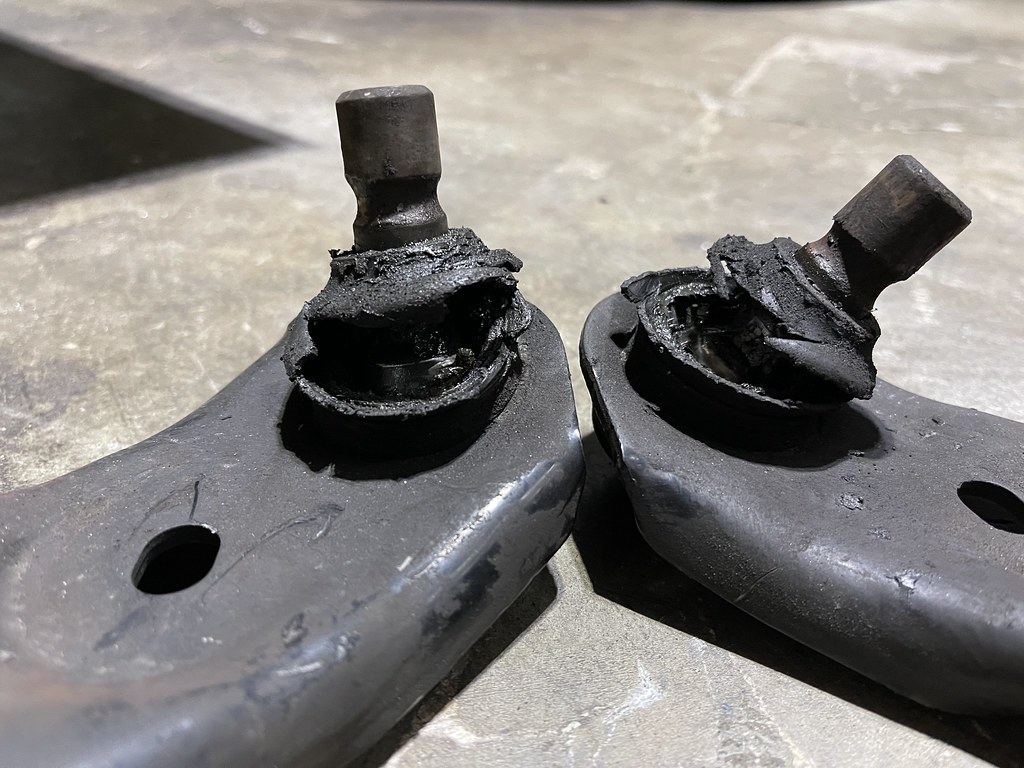
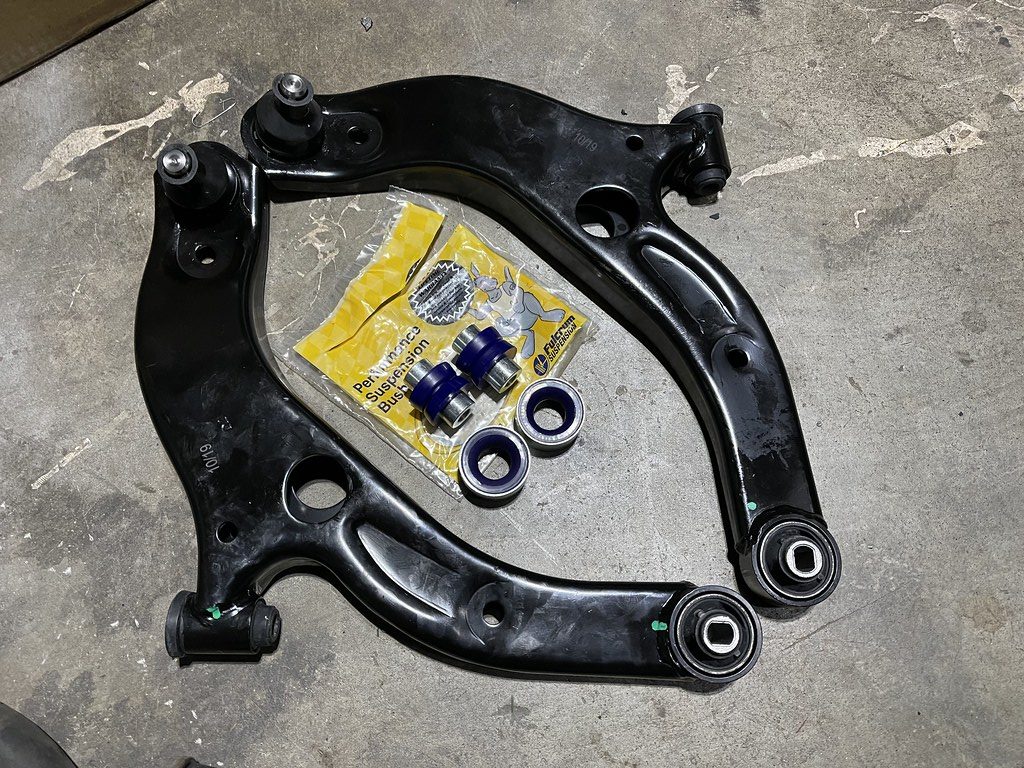
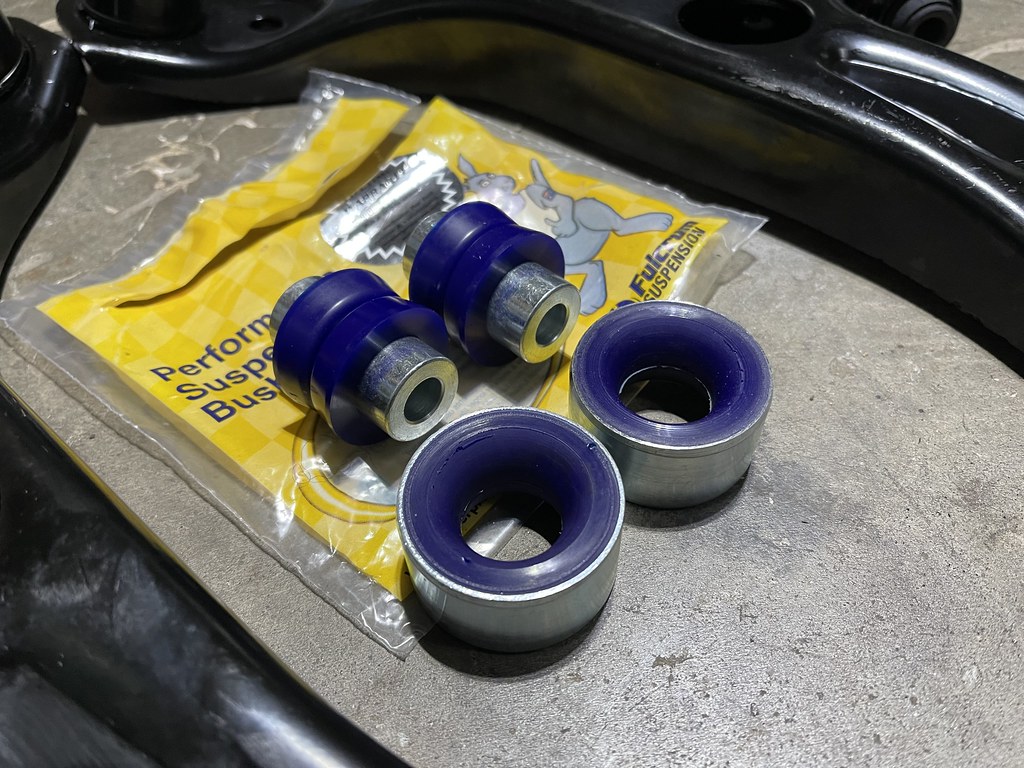
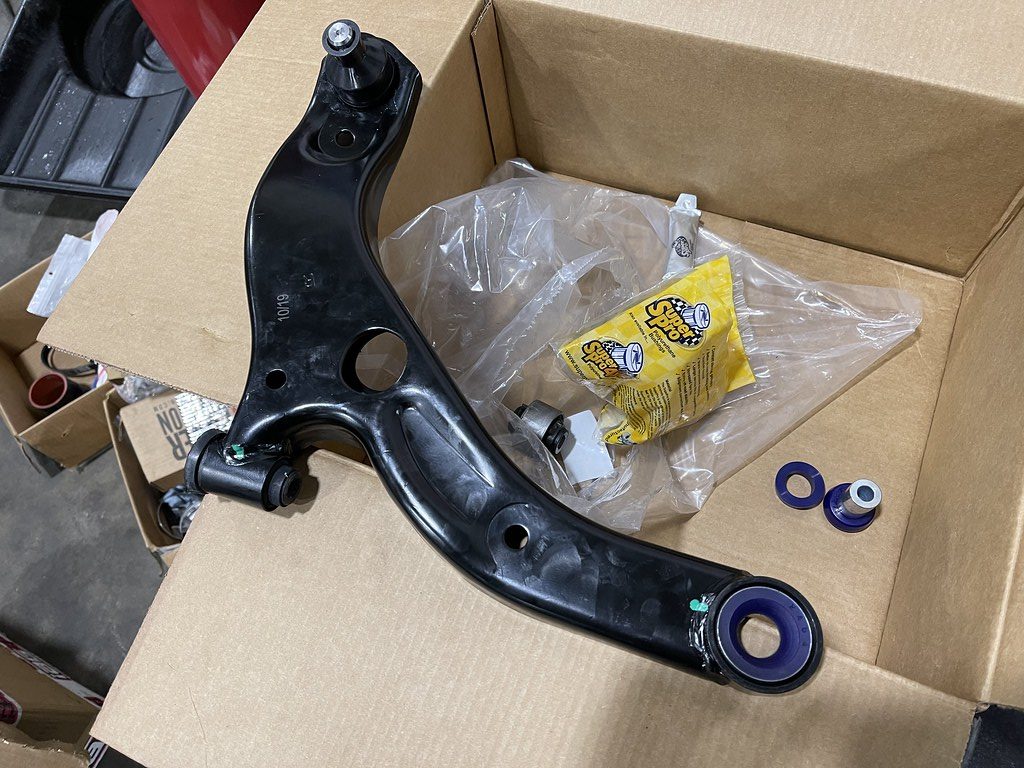
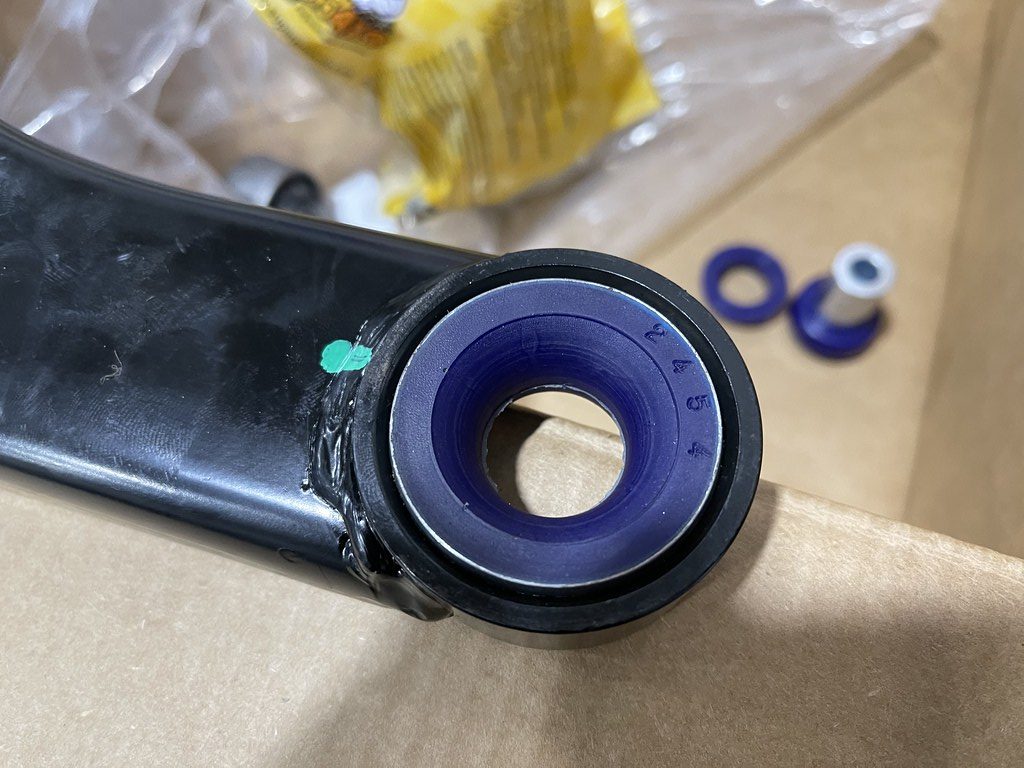
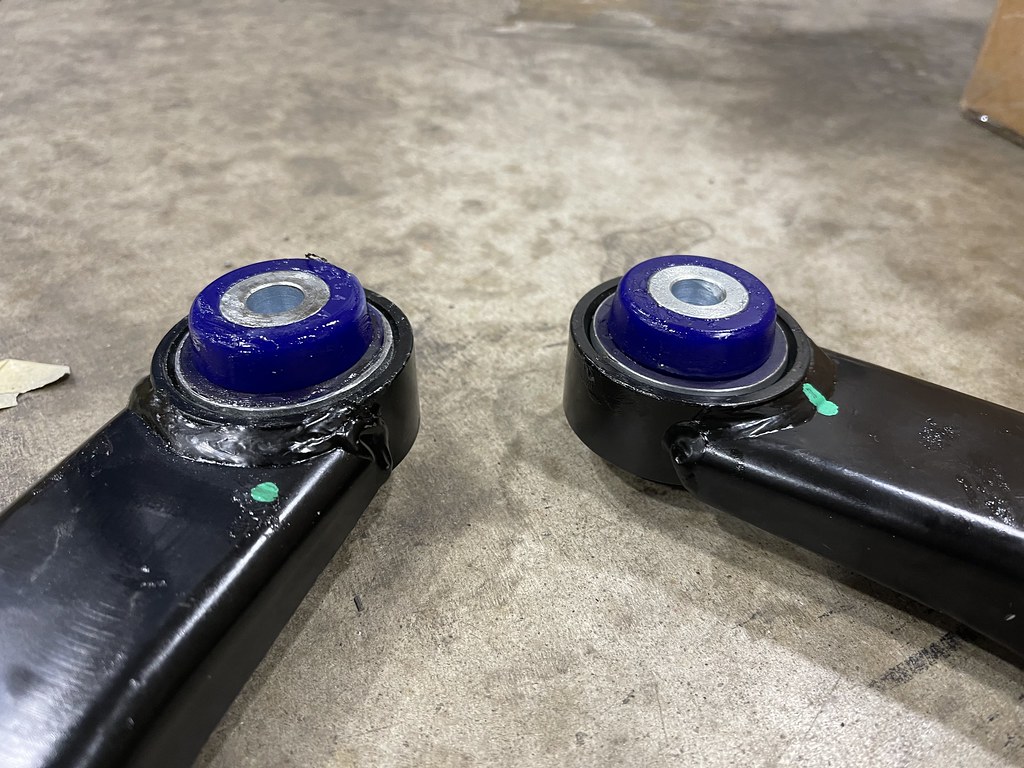
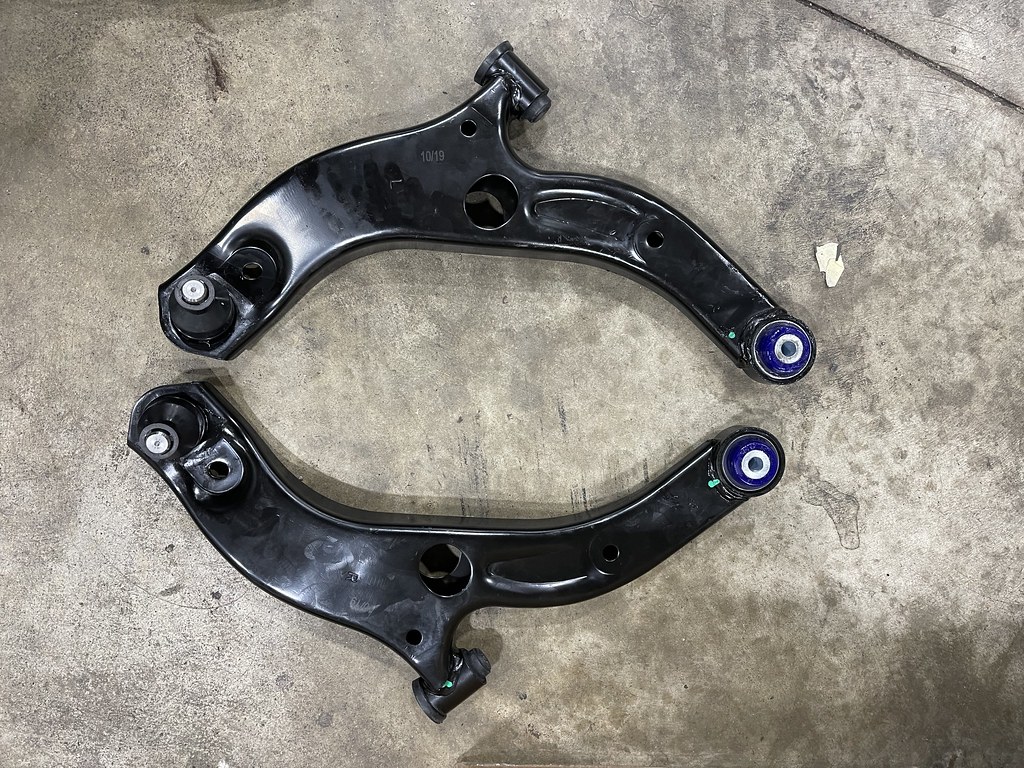
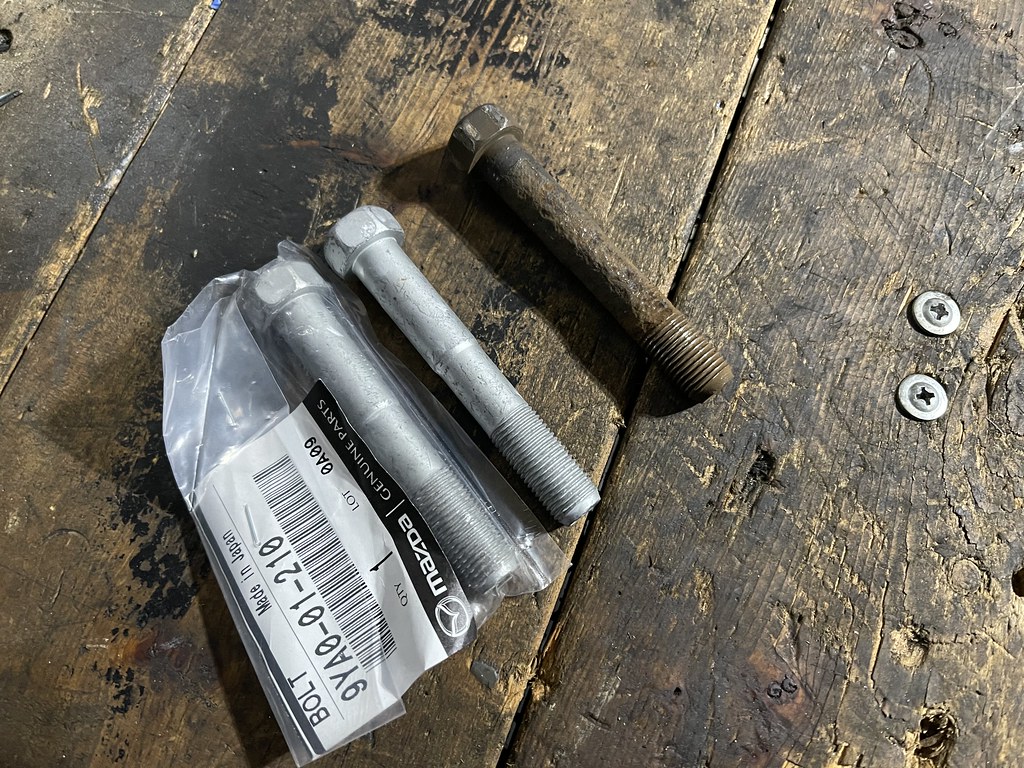
The rear section ended up being a little too close to the frame, so I had it modified a little so it would not touch, until I replace it.  I am driving the car as much as possible now, and plan to try and take it on a trip up to the dragon before the track day.  So hopefully next up date we can finish up the suspension and replace some of the worn bushings and get some fresh fluids.

  • 2002 Mazda Protege 5: $1200.00
  • Mazda 6 brake upgrade: $90
  • Coil pack conversion and valve cover gasket: $94
  • Ebay Intake - $31
  • 215/40r17 Falken RT615k - $360
  • 17x8 Konig Hypergram - $720
  • Used Headlights - $100
  • Timing Belt Parts/Labor $550
  • Used AWR Motor Mounts $75
  • 10w40 Liqui Moly Oil Change $60
  • Autoexe Oil Cap $60
  • Mazda 626 Intake Manifold $ 0
  • Used 4-1 Header - $60
  • Ebay Exhaust - $120

Total $3520

Southrnfresh_Joe
Southrnfresh_Joe New Reader
6/13/21 9:29 p.m.

Sorry for the lack of updates, we have been busy getting ready for our show in July.  But we have been working on the Mazda as time allows, and we have plenty of progress to show.The last few things we did to the car ended up being the most important, and most crucial.  The car has 290k miles on it, so in the long term I want to have every bushing replaced.  But with the time frame and cost, we had to knock the most important parts out.
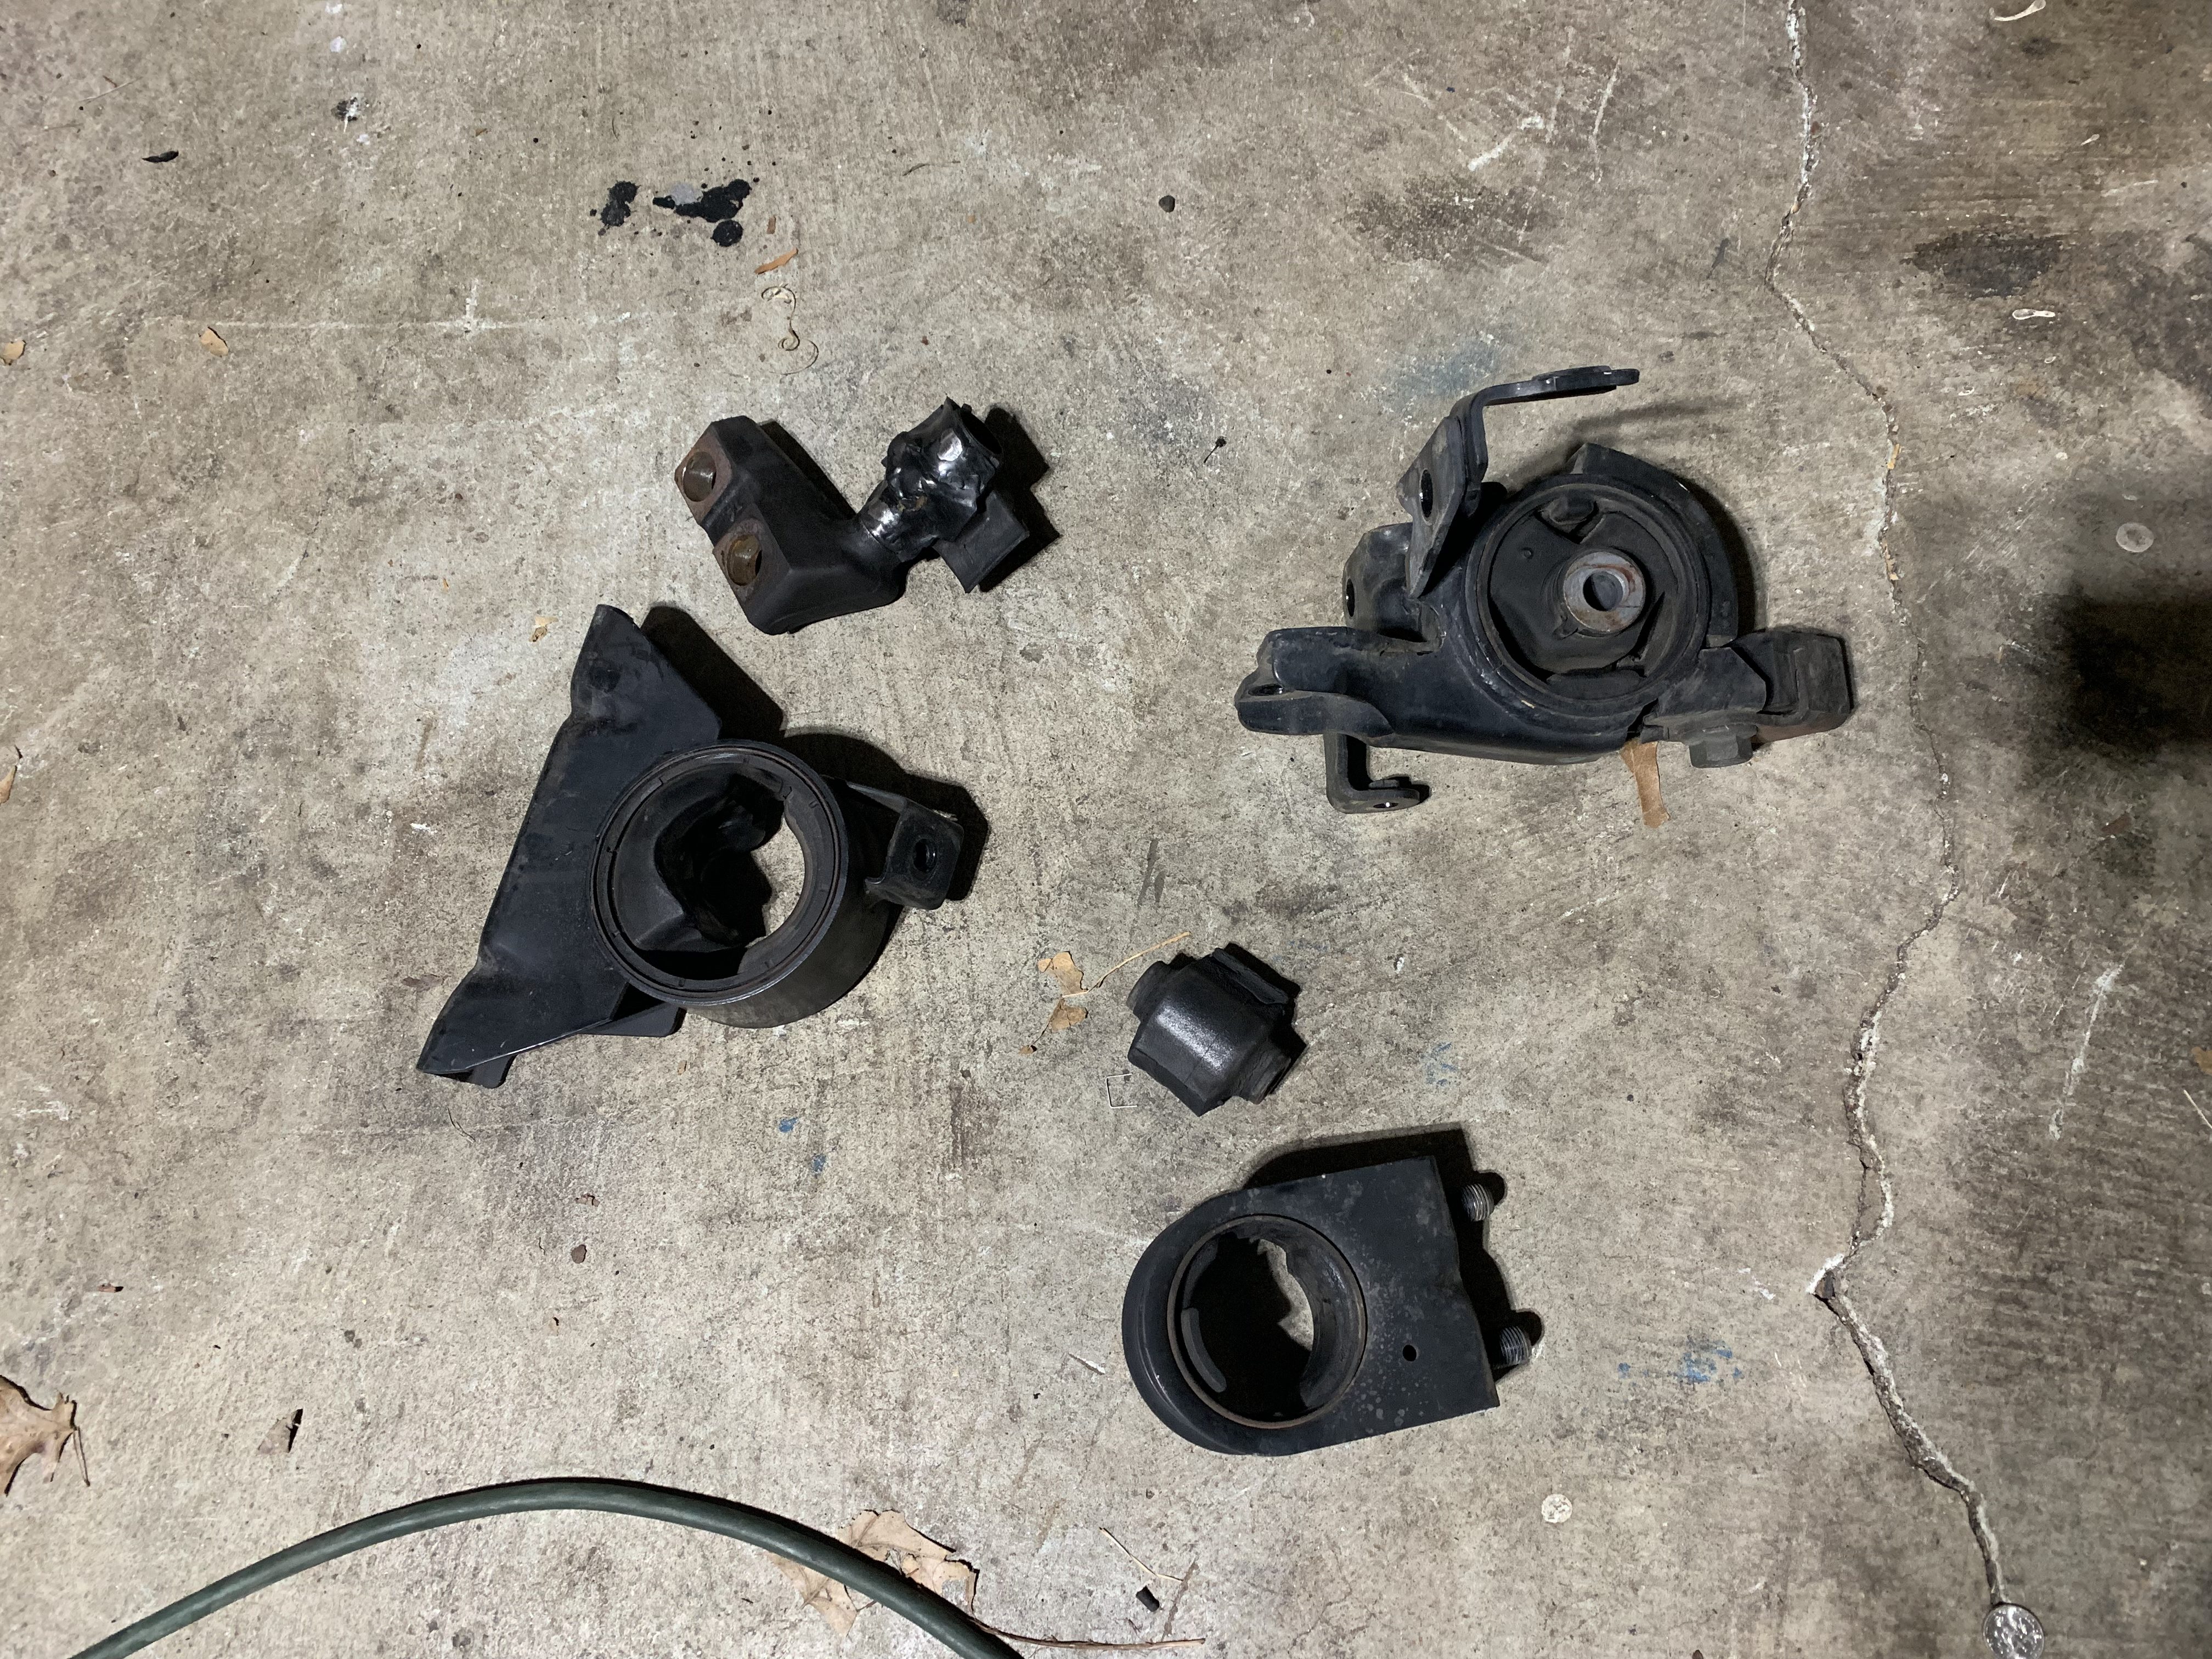
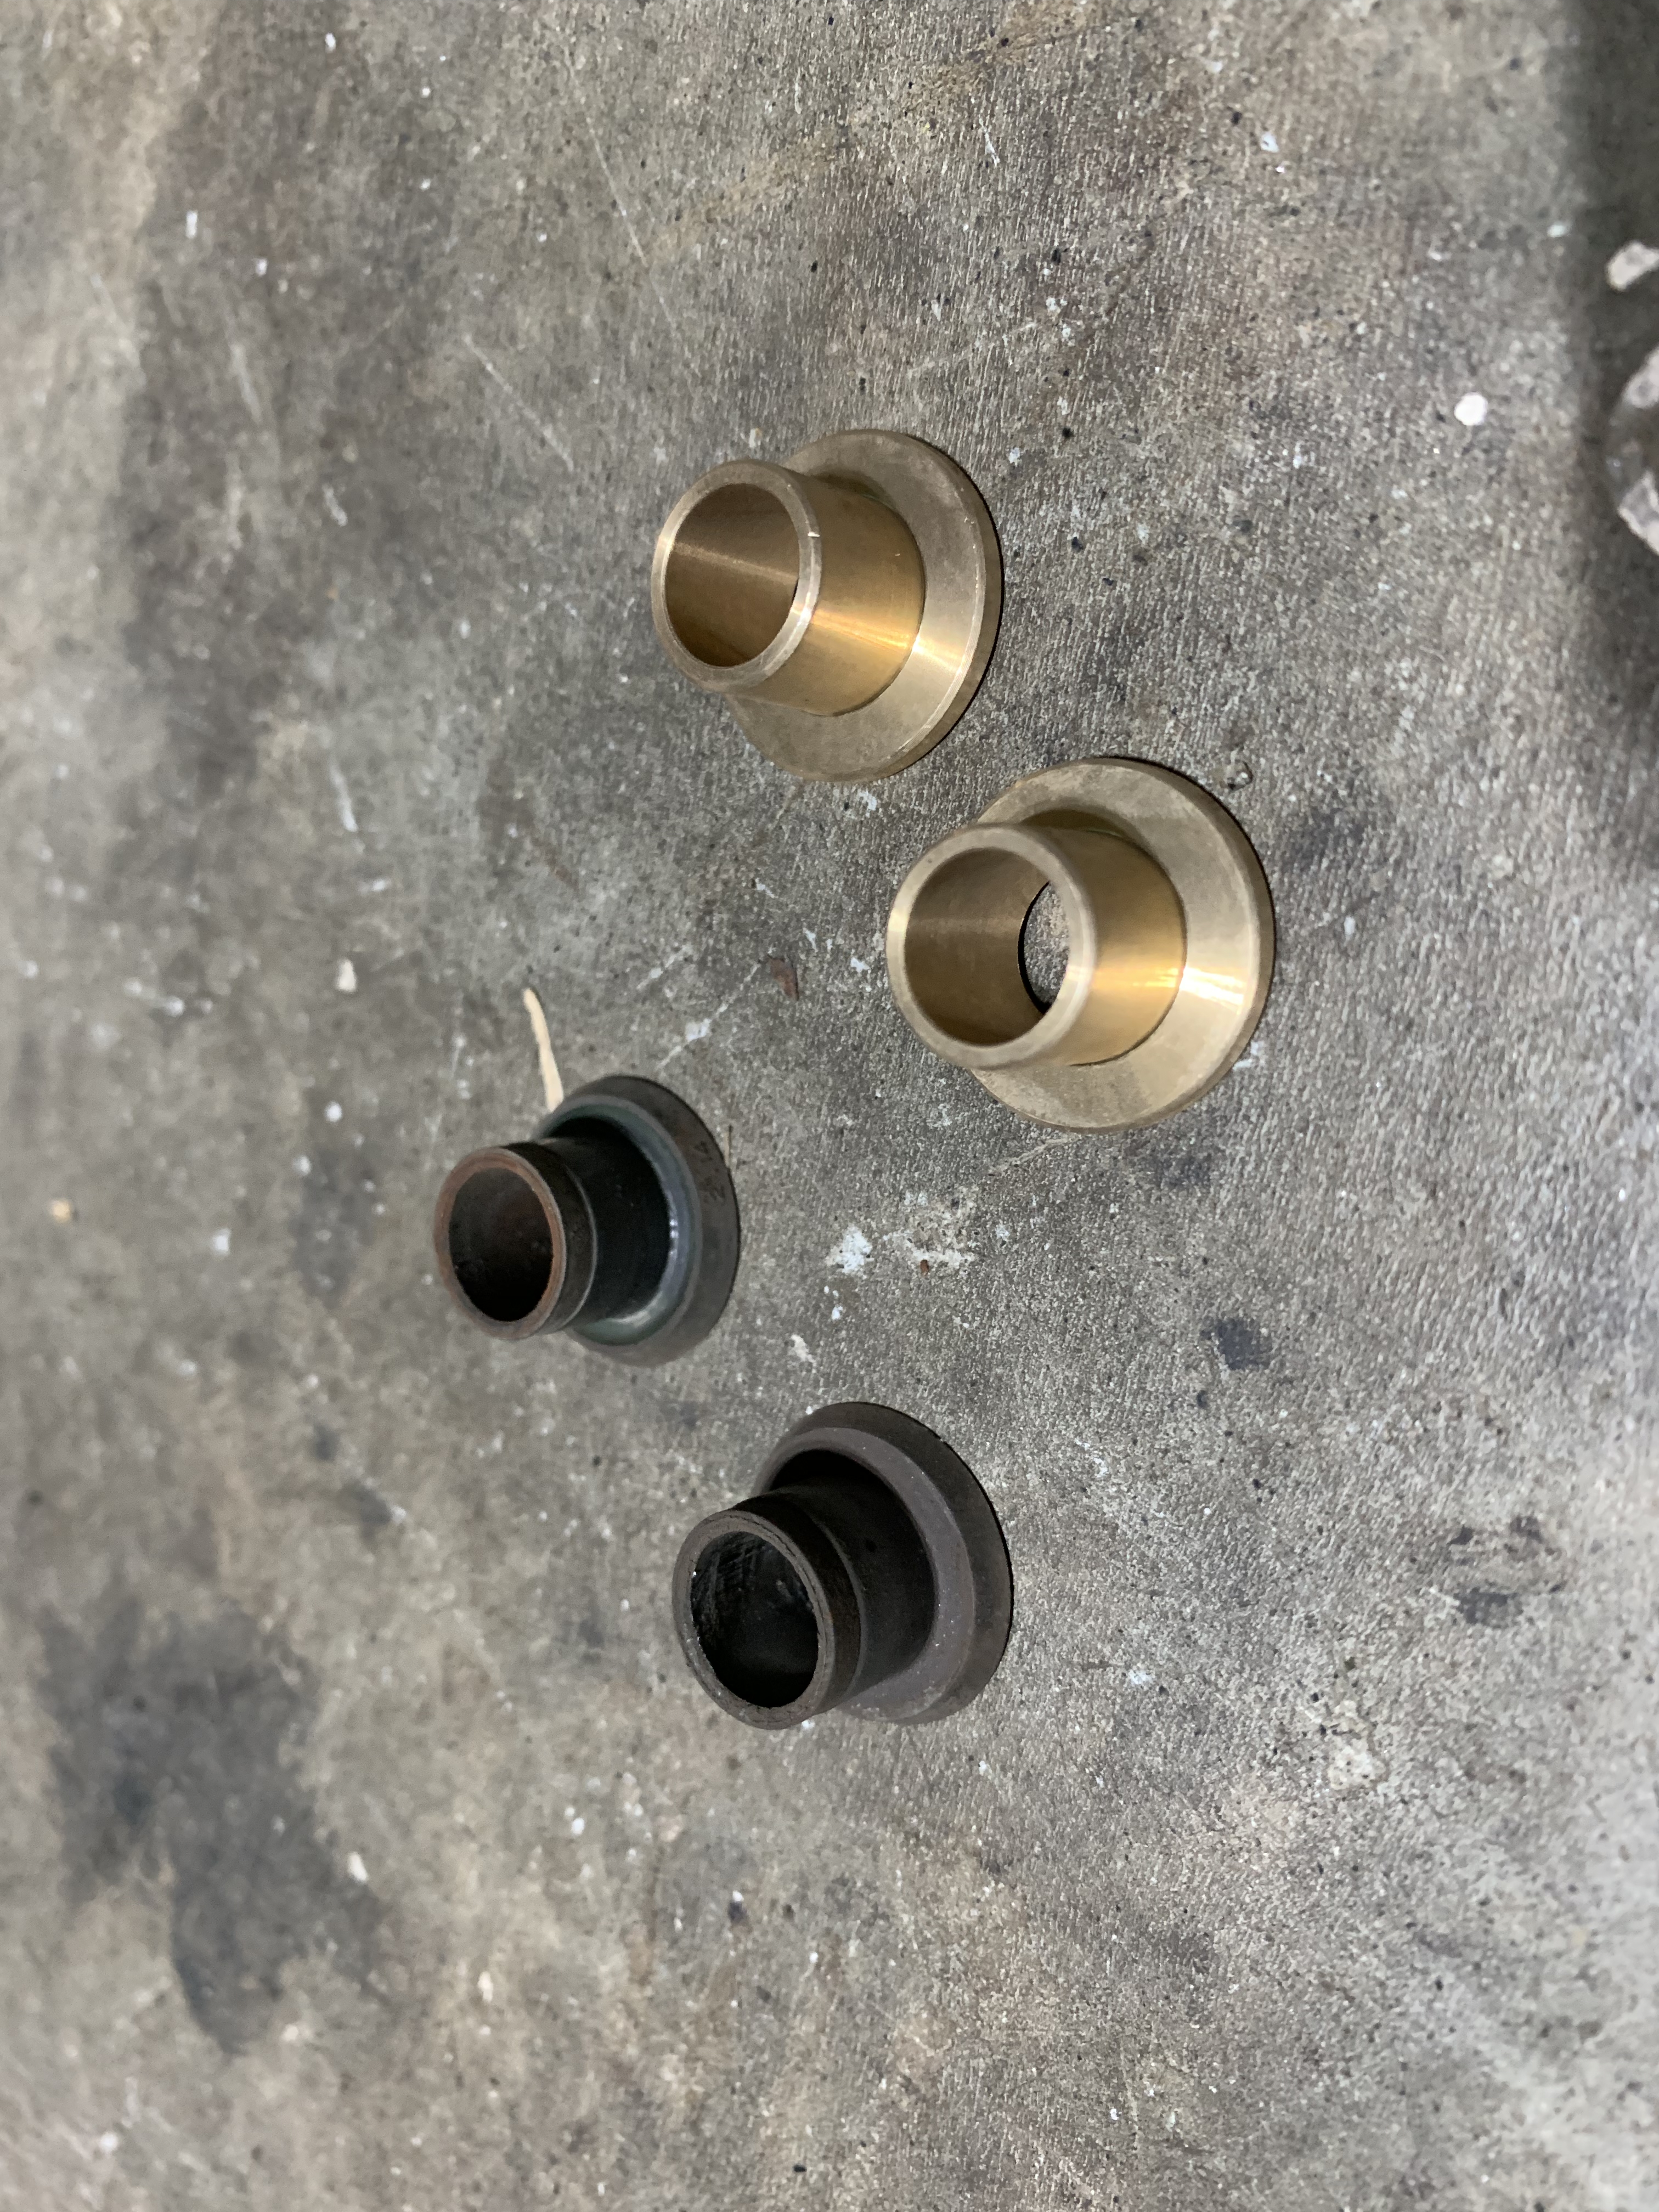
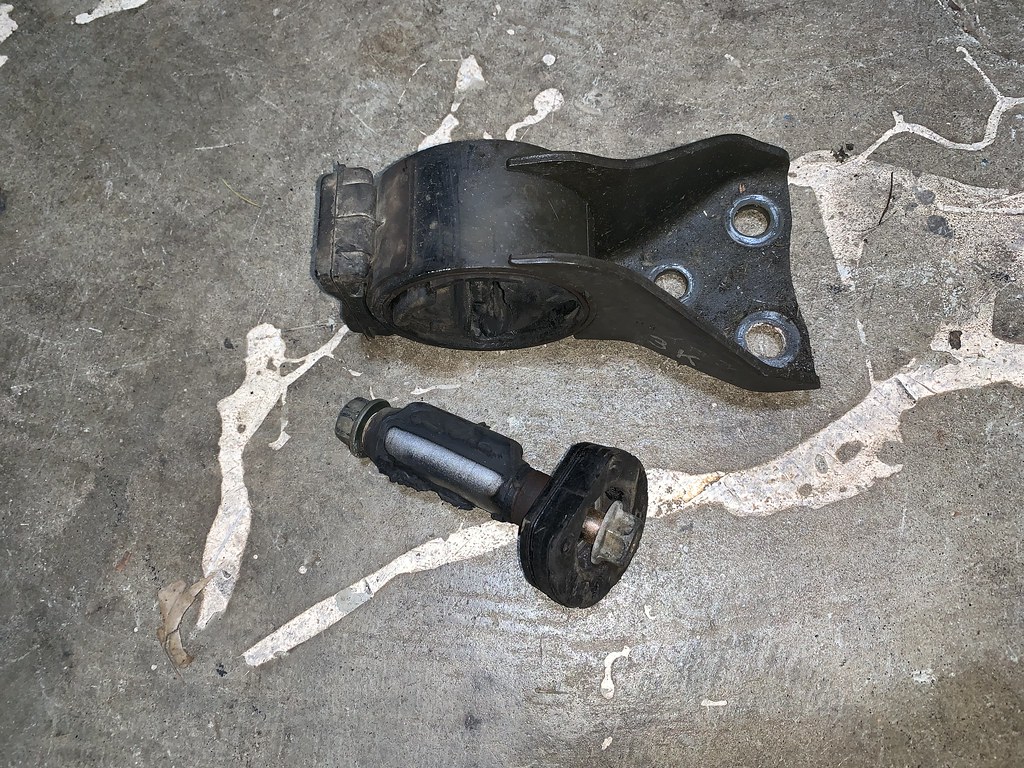
Corksport is one of the few vendors still making parts for the P5 Chassis.  Most FWD Mazdas have long throw shifters, and one of the weak spots is the rubber bushings in the shift linkage, so its a must to replace them.
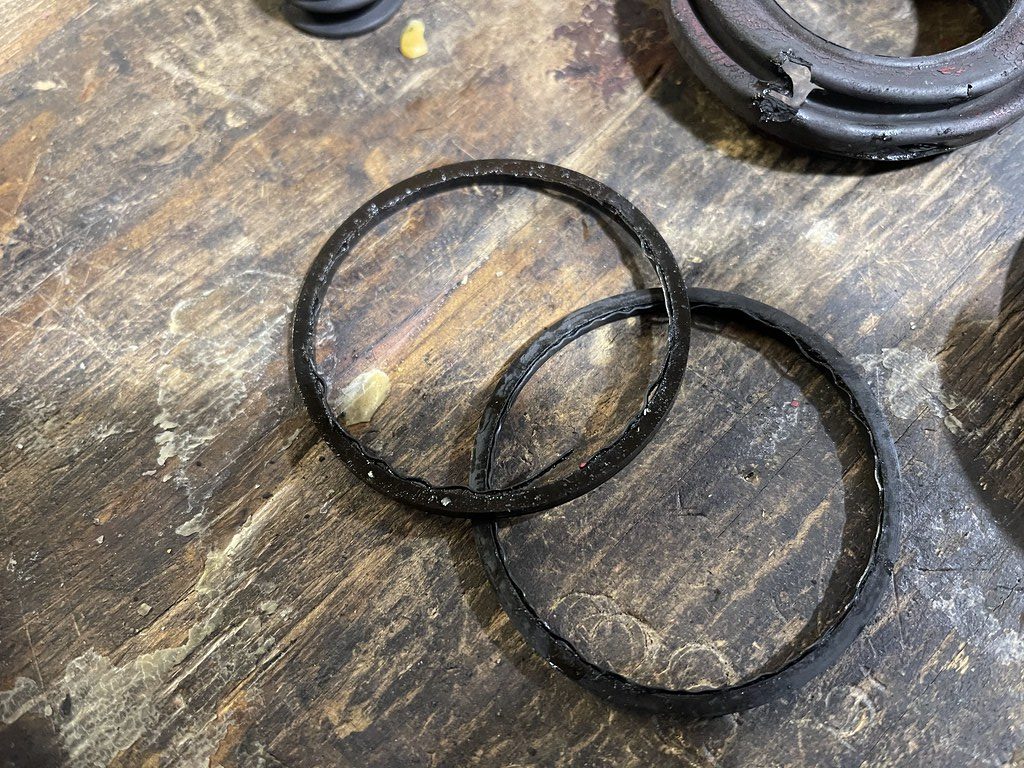
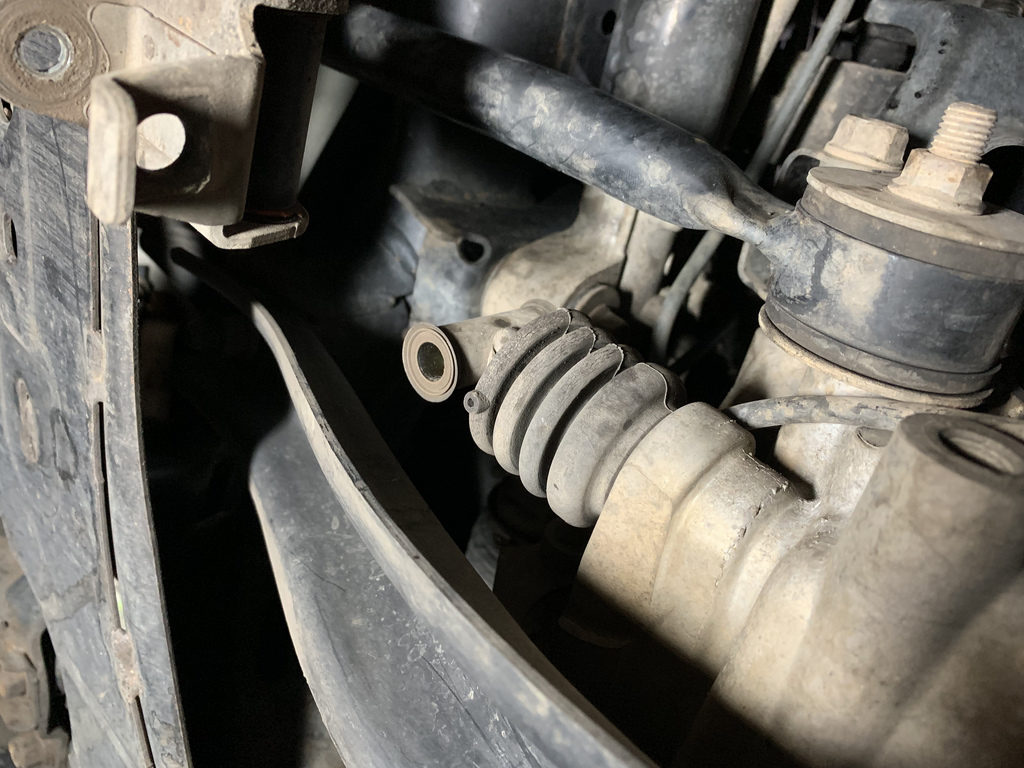
Old bushings in transmission side of the linkage.
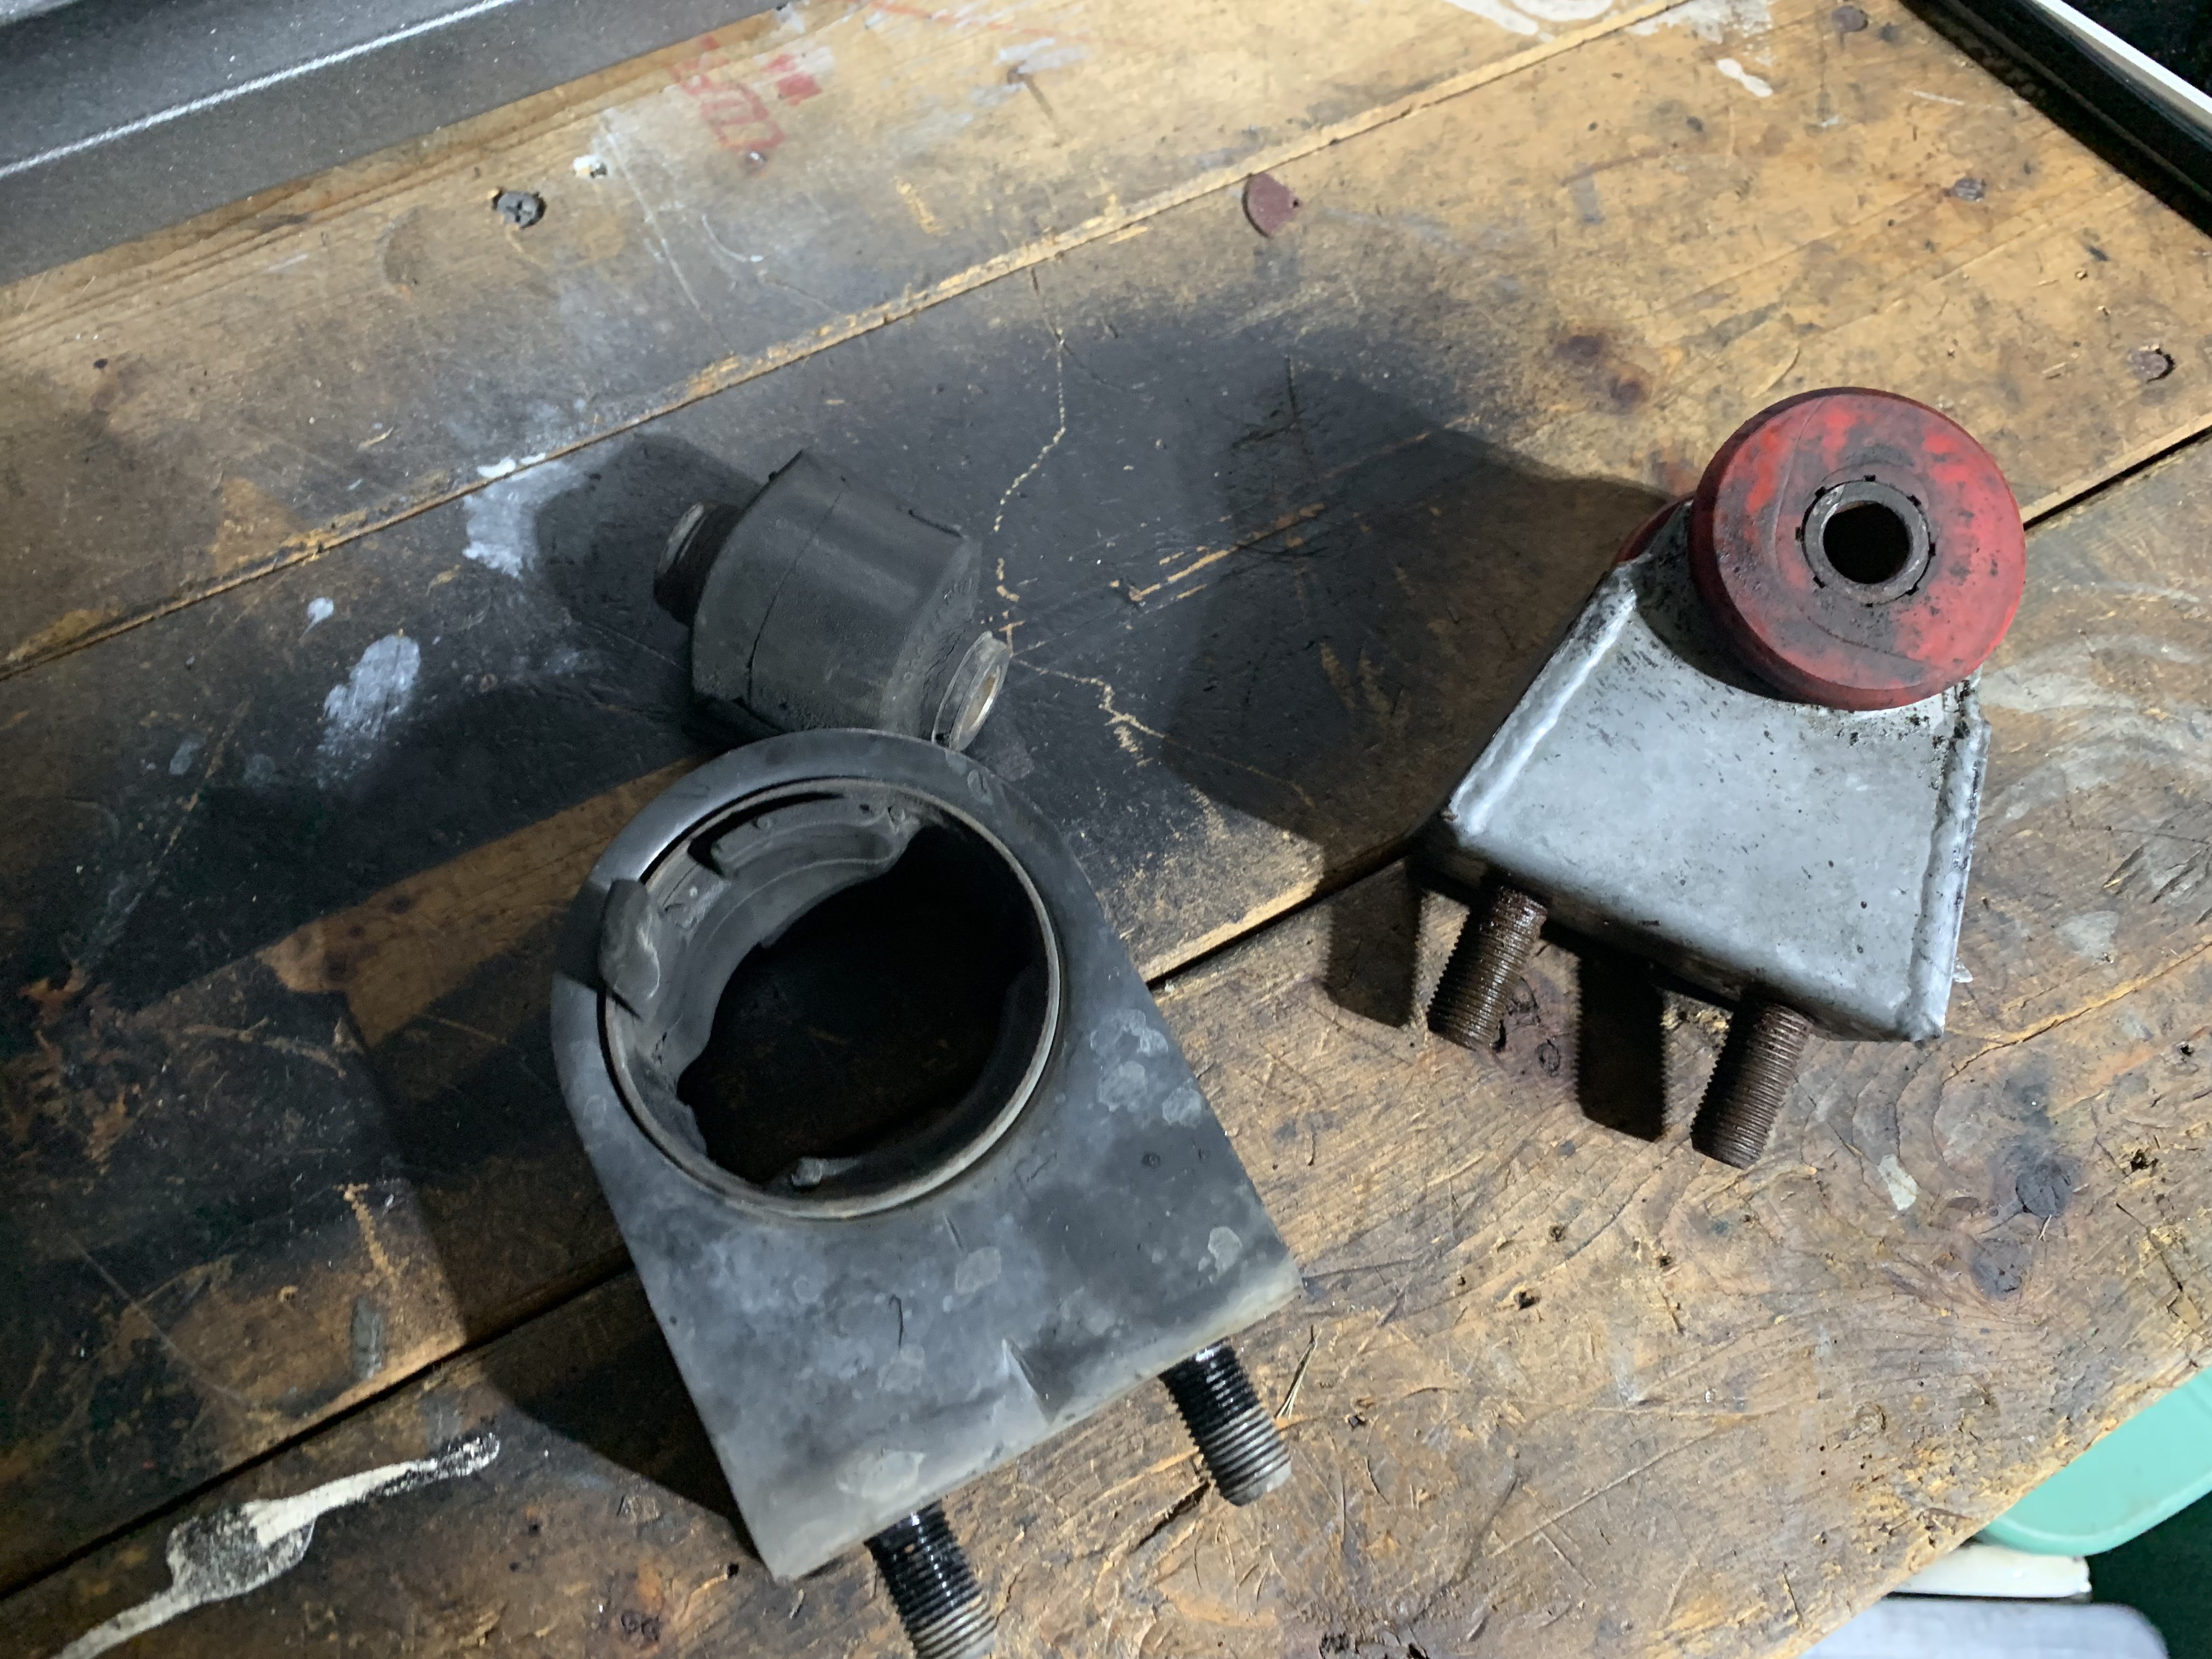
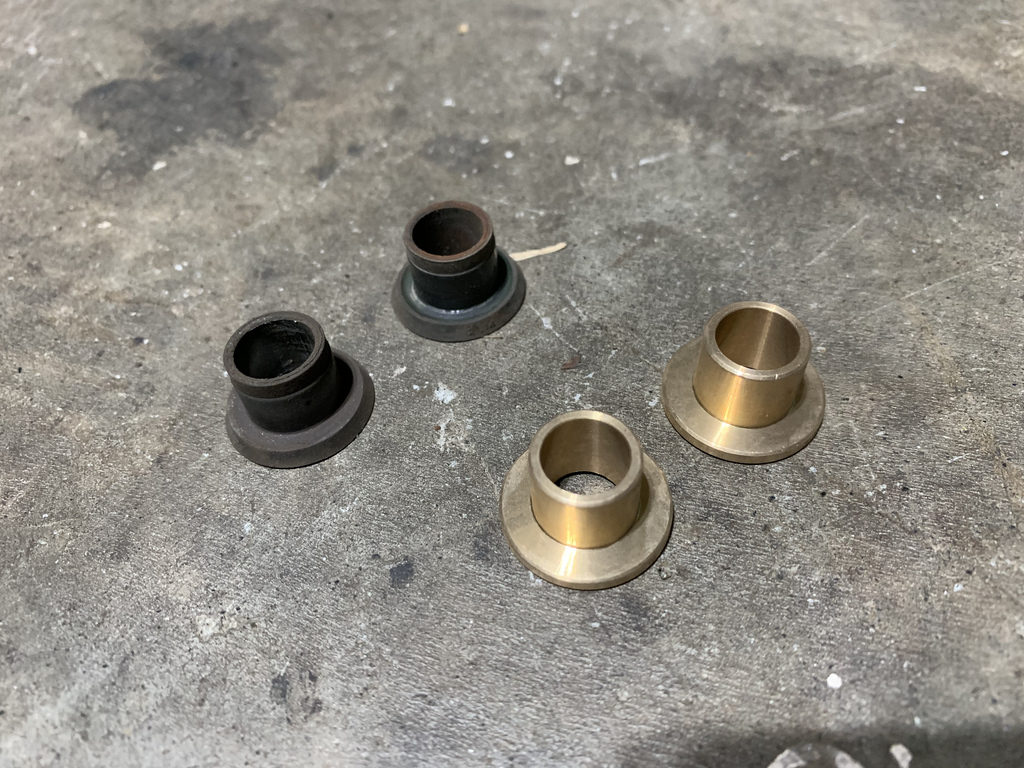
Rubber and Corksport bronze oil bushings .
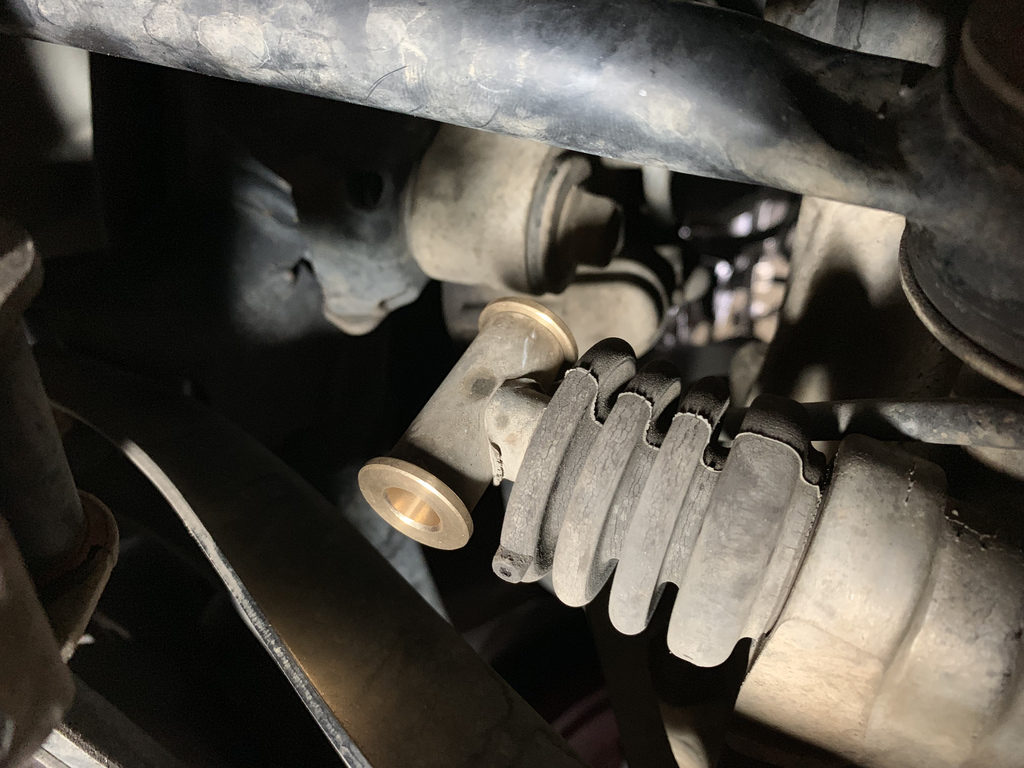
Bushings installed on trans side.
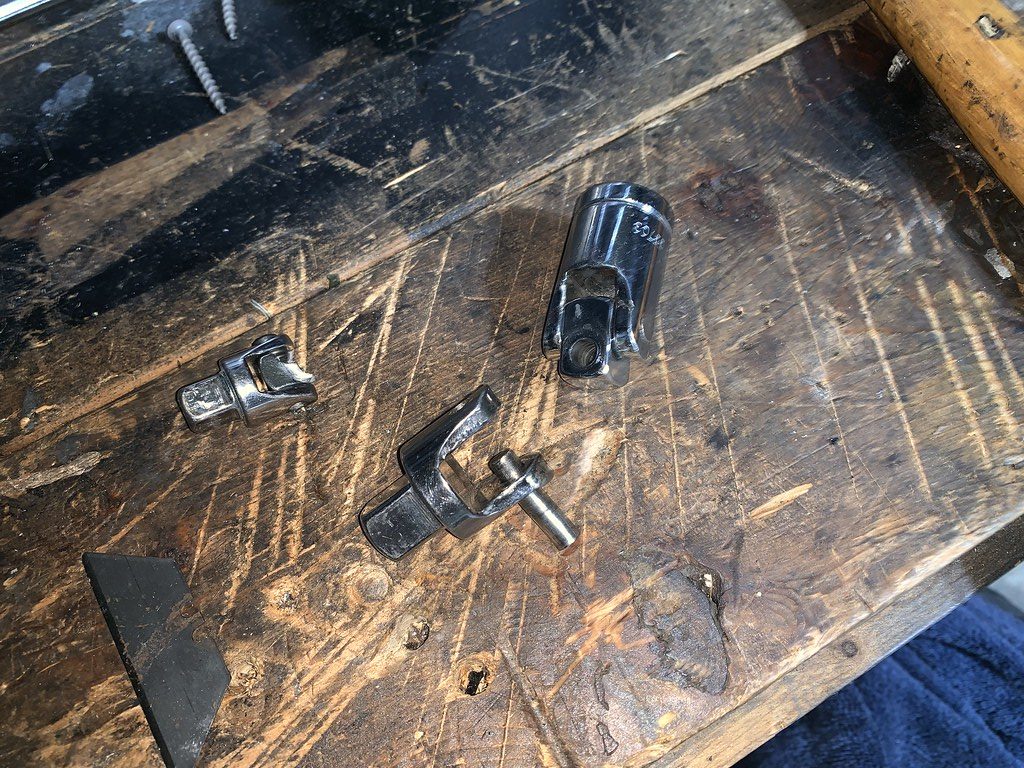
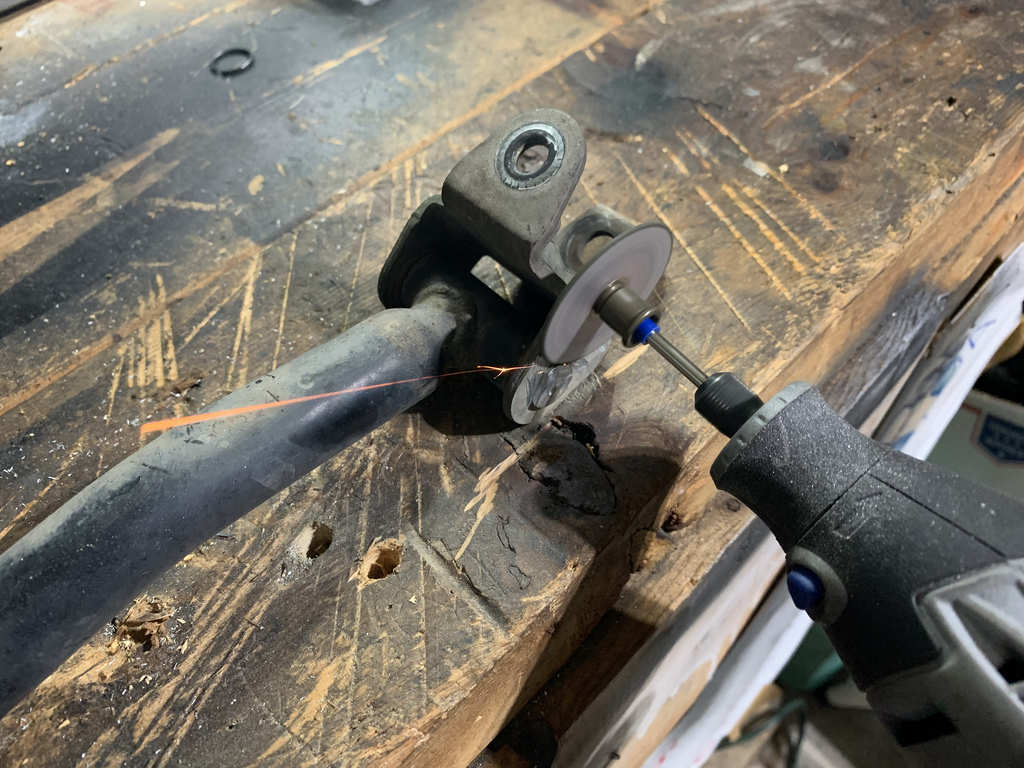
The second part of the kit has comes with the bushings and bolt for the shifter linkage side.  But they are riveted into the shifter.  You are supposed to drill it out from the inside.  But I did it the wrong way, and tried to shave the top and knock it out.  It did not work, and I ended up cutting off the head of the bolt from the inside and knocking it out that way.
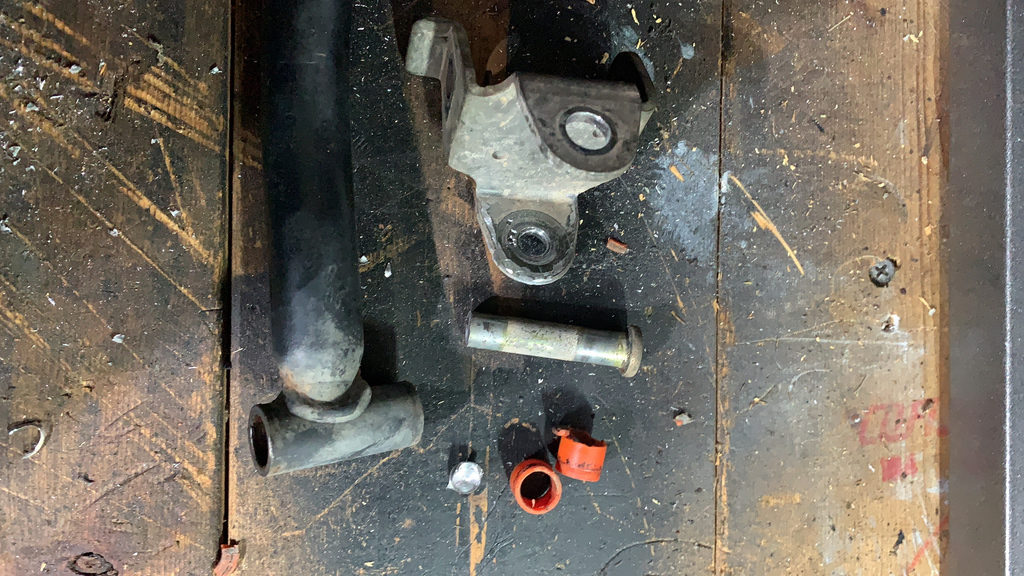
Shifter linkage bolt and bushing out of the linkage.
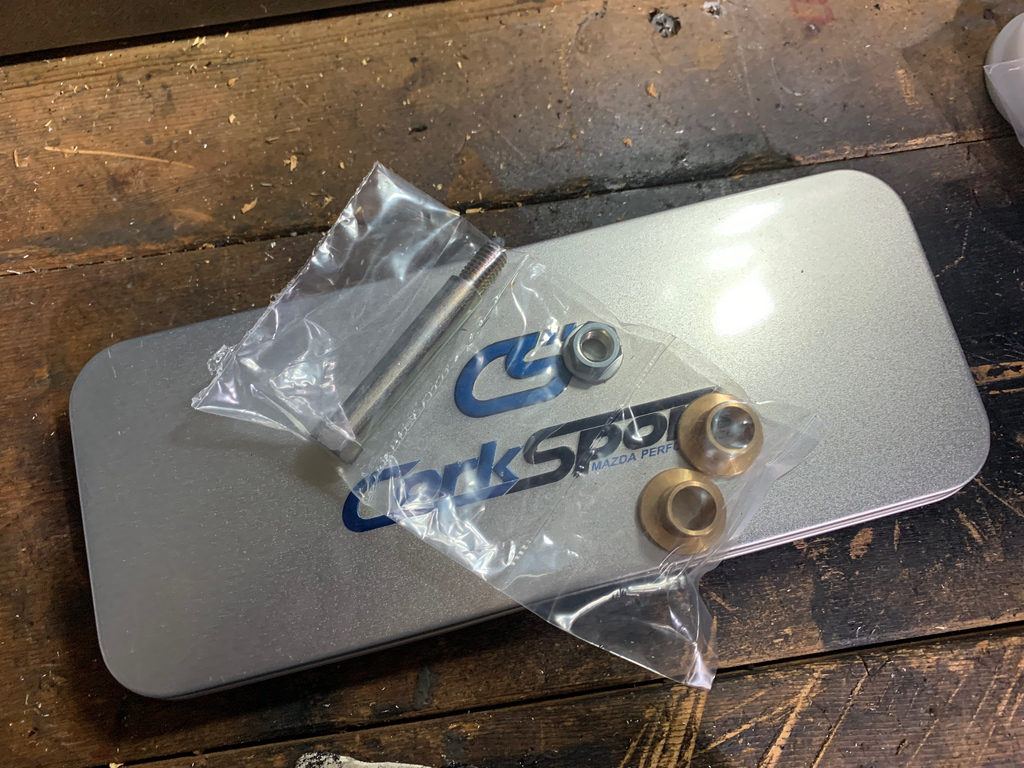
New Corksport bronze oil shifter bushing kit
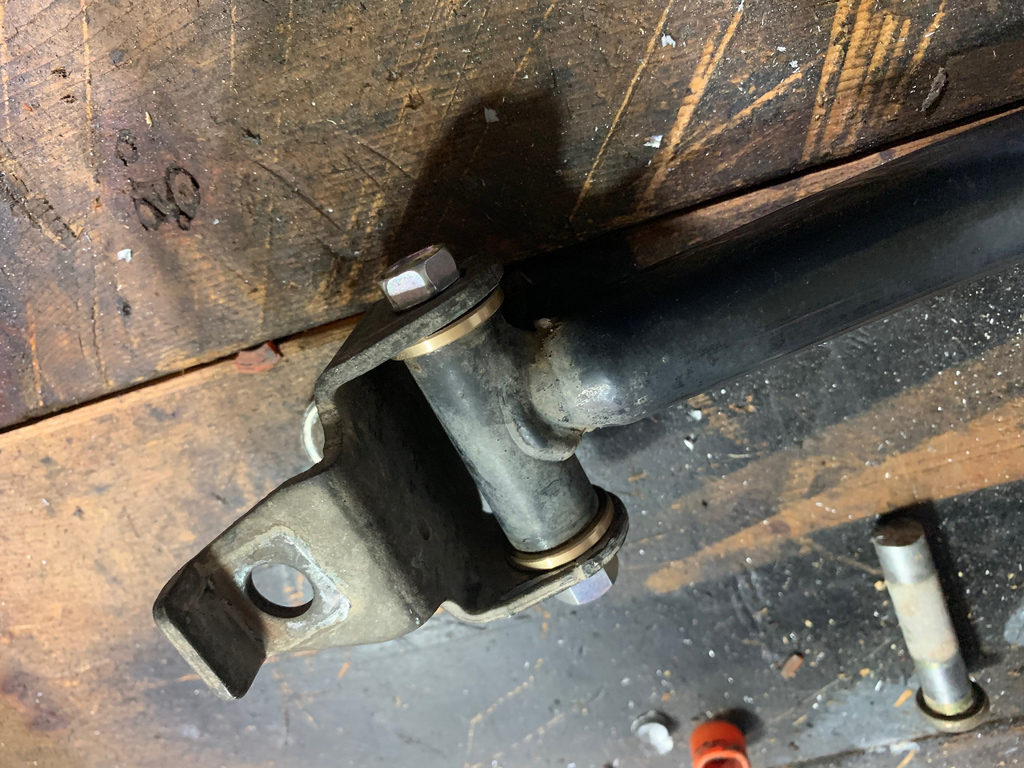
New bushings and bolt installed.
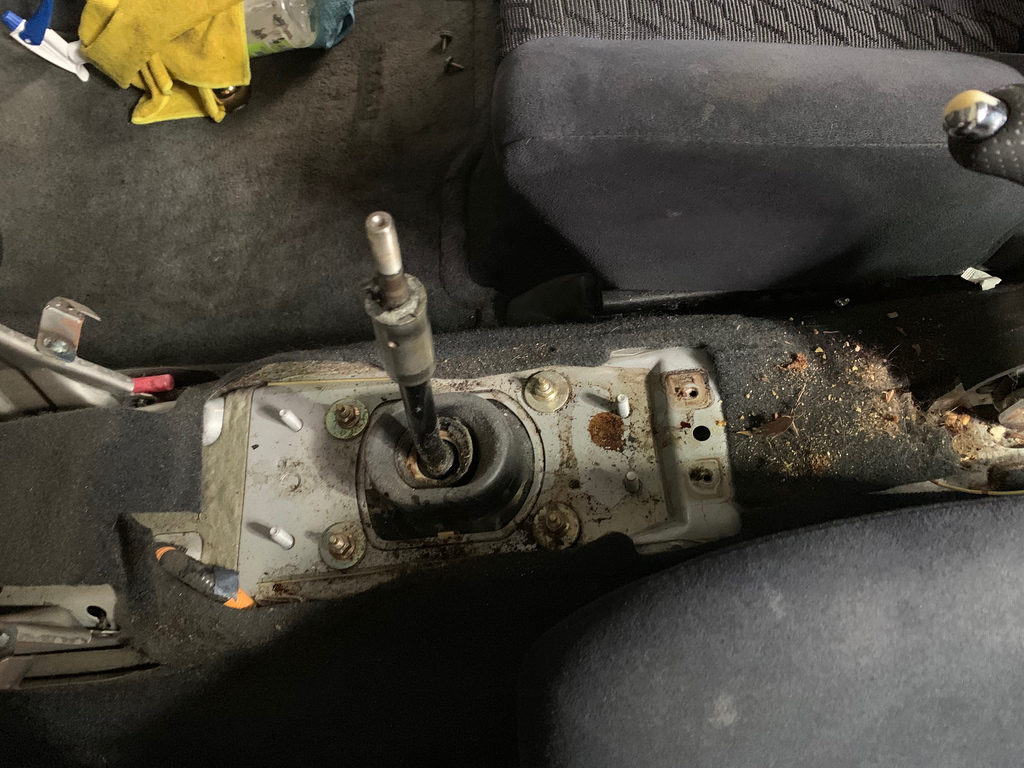
Next was the short shifter .
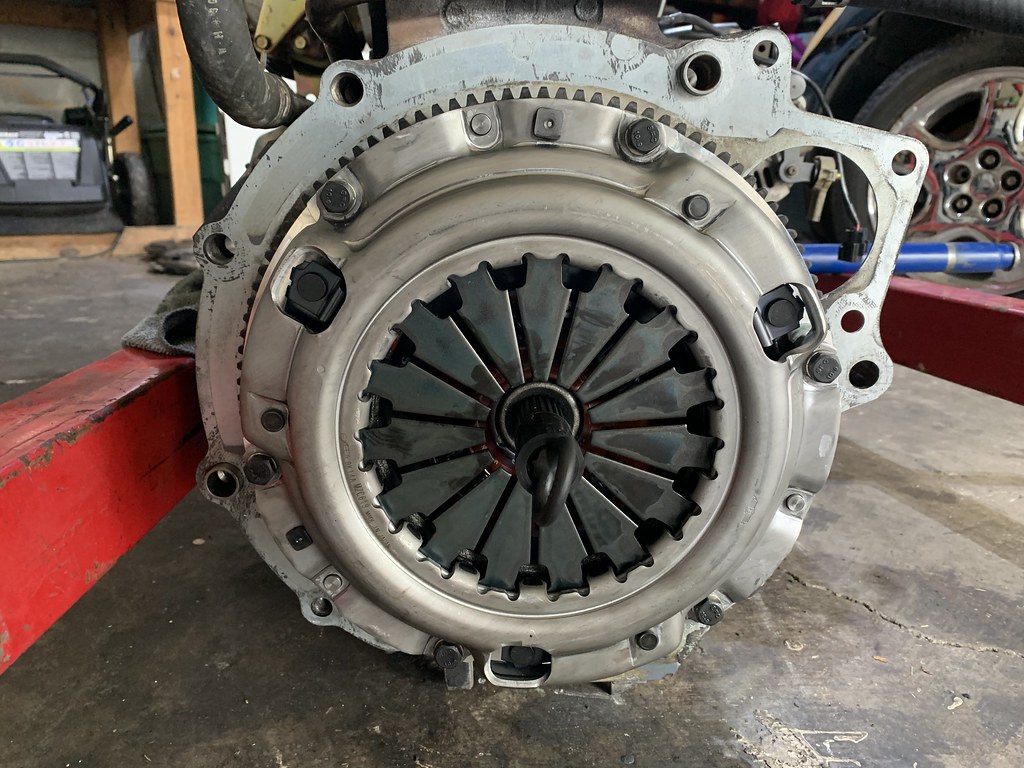
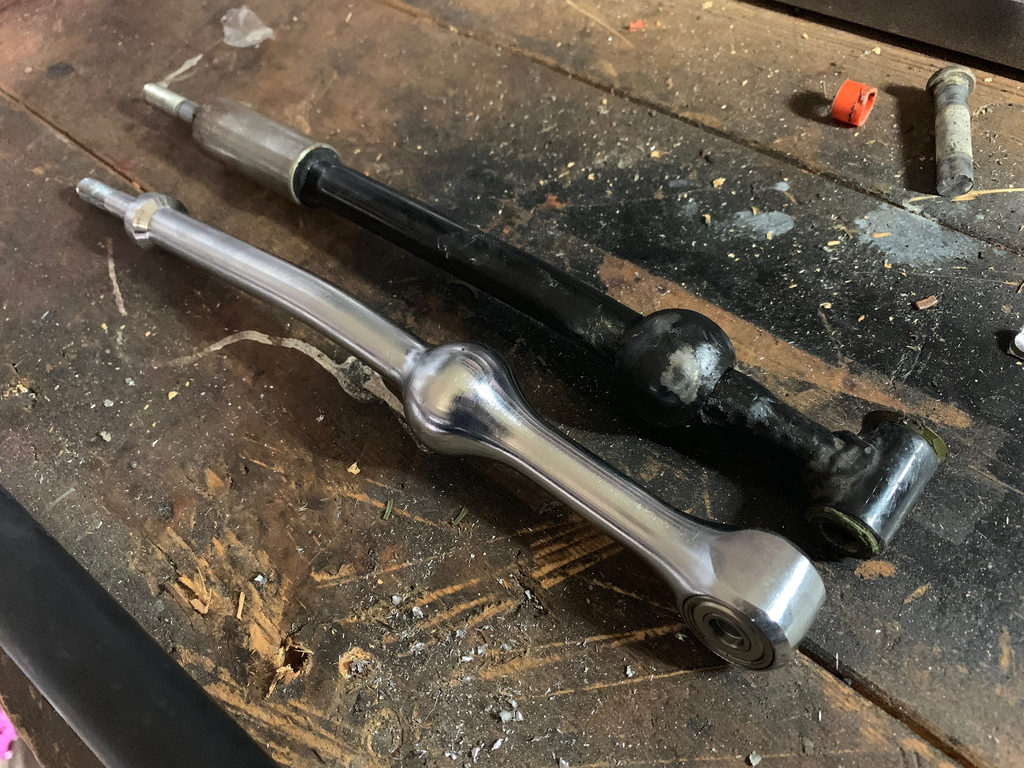
I searched for weeks to find a old TWM short shifter.  But no luck, so I found a Razo short shift kit on eBay for a decent price.
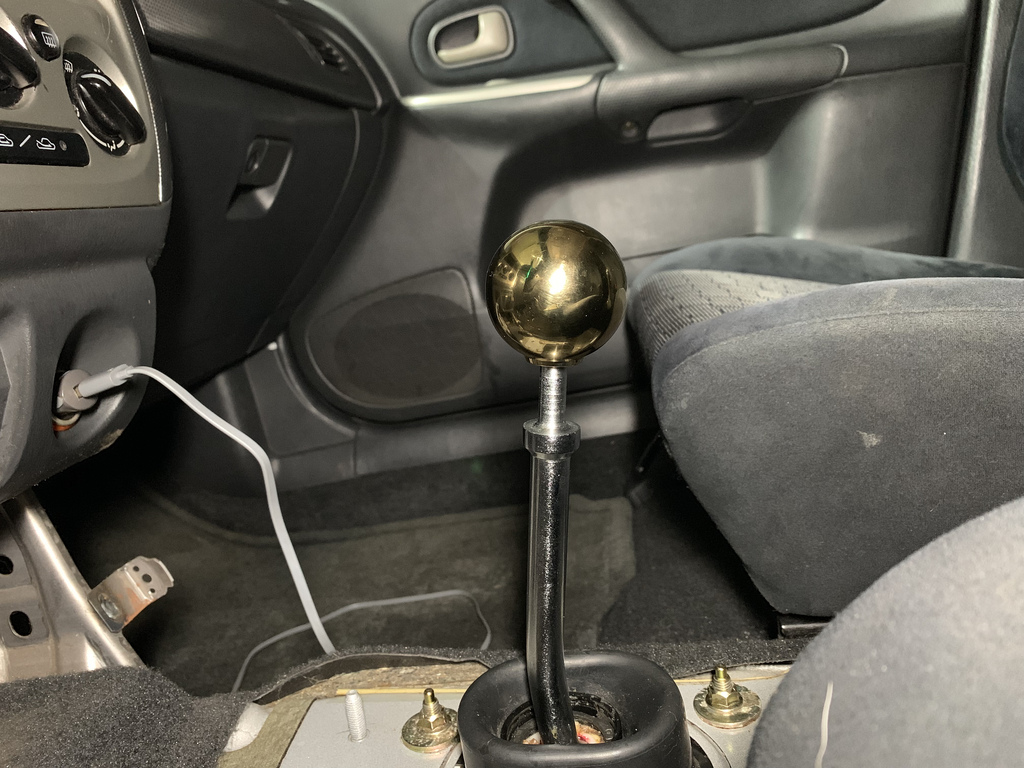
The kit fit good, and made a huge difference in shift throw.
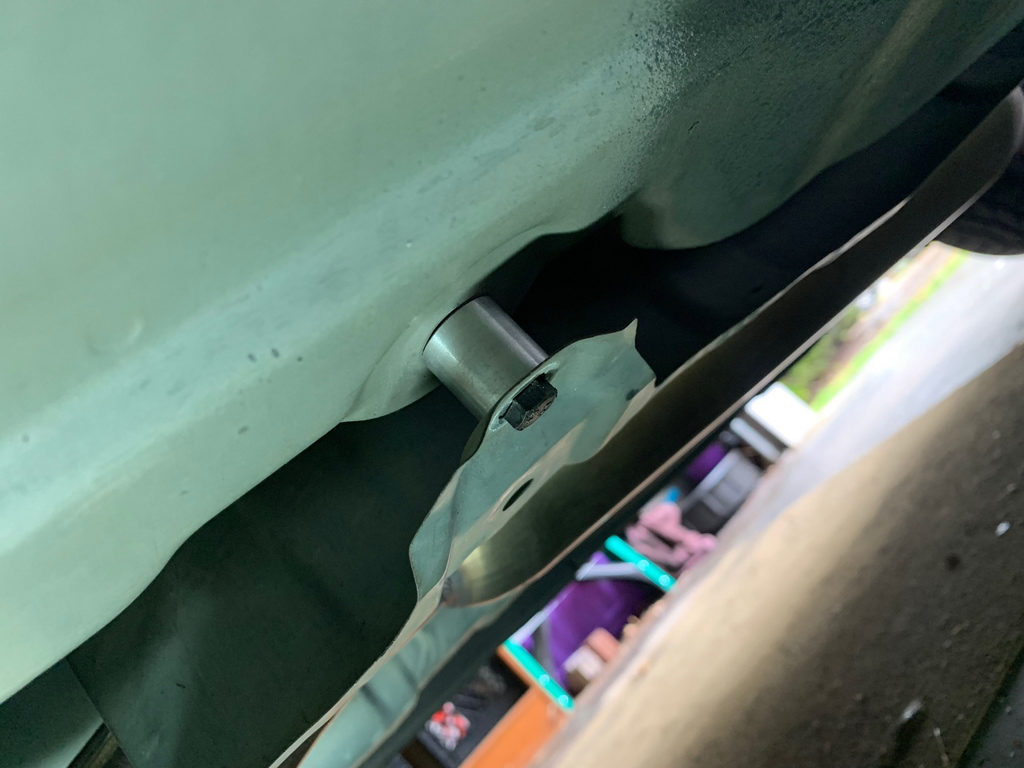
Kit even came with a spacer for the exhaust heat shield.
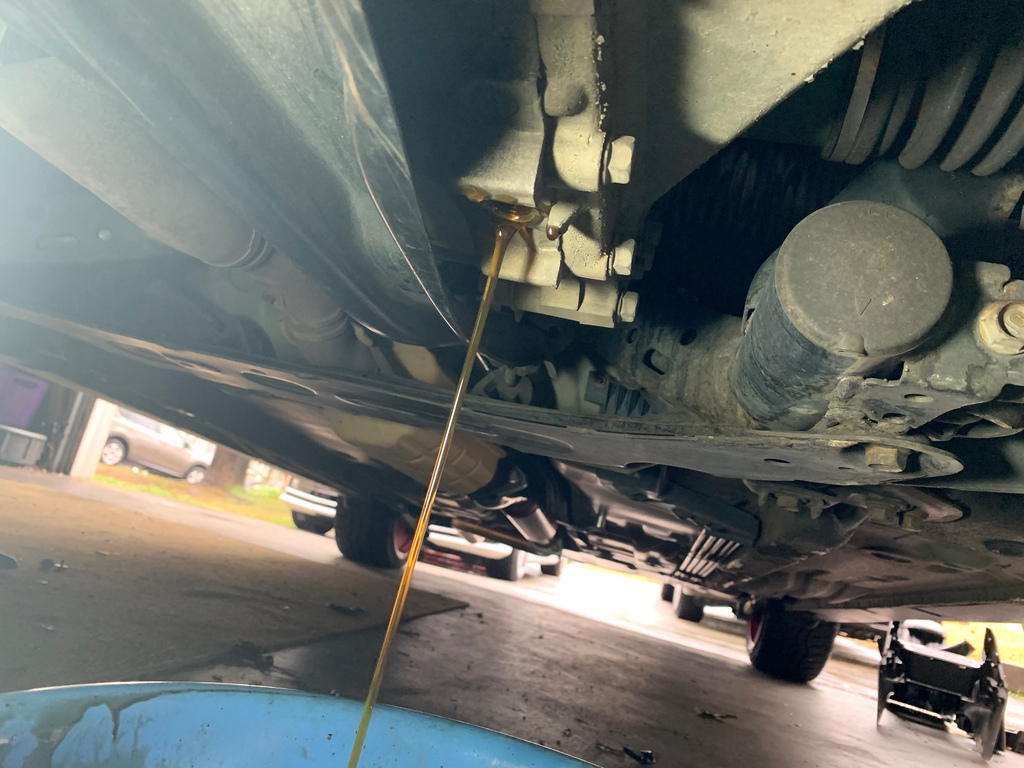
Next was the gear oil,  It did not look or smell as bad as I thought it would.  But I had no idea when the last time it had been serviced.
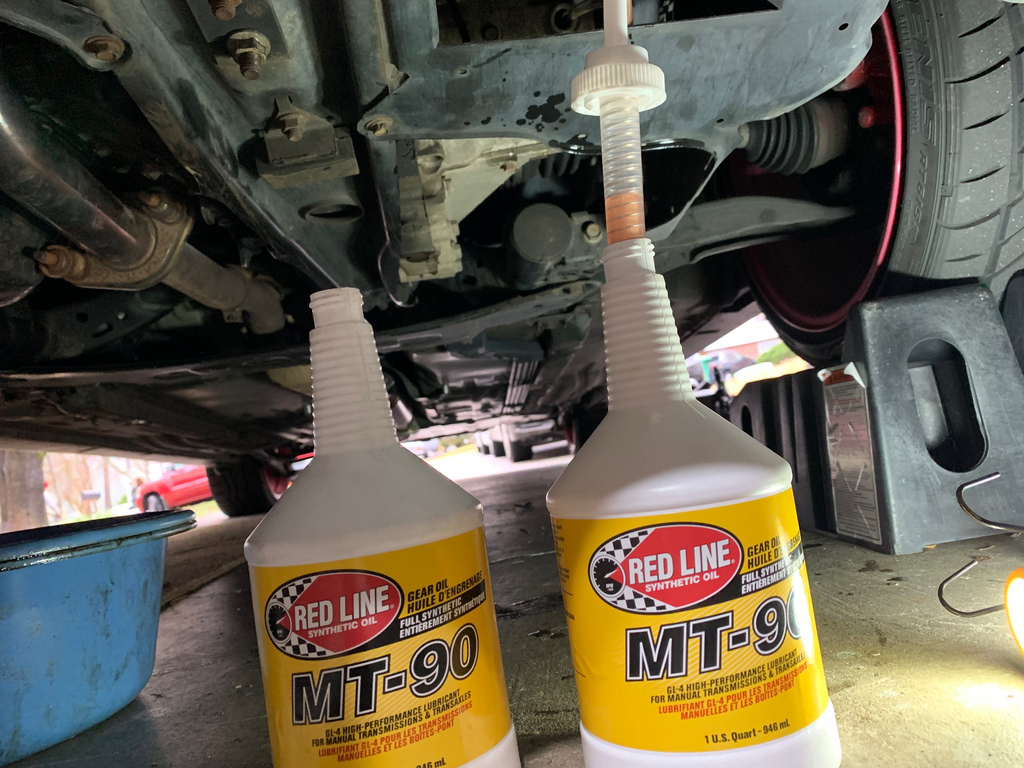
Most people swear by the Redline MT-90 Gear oil, so I gave it a shot.  And it seems to have made my slight 3rd gear grind a little smoother, but doing the shift linkage bushings, short shifter may have had something to do with it as well.
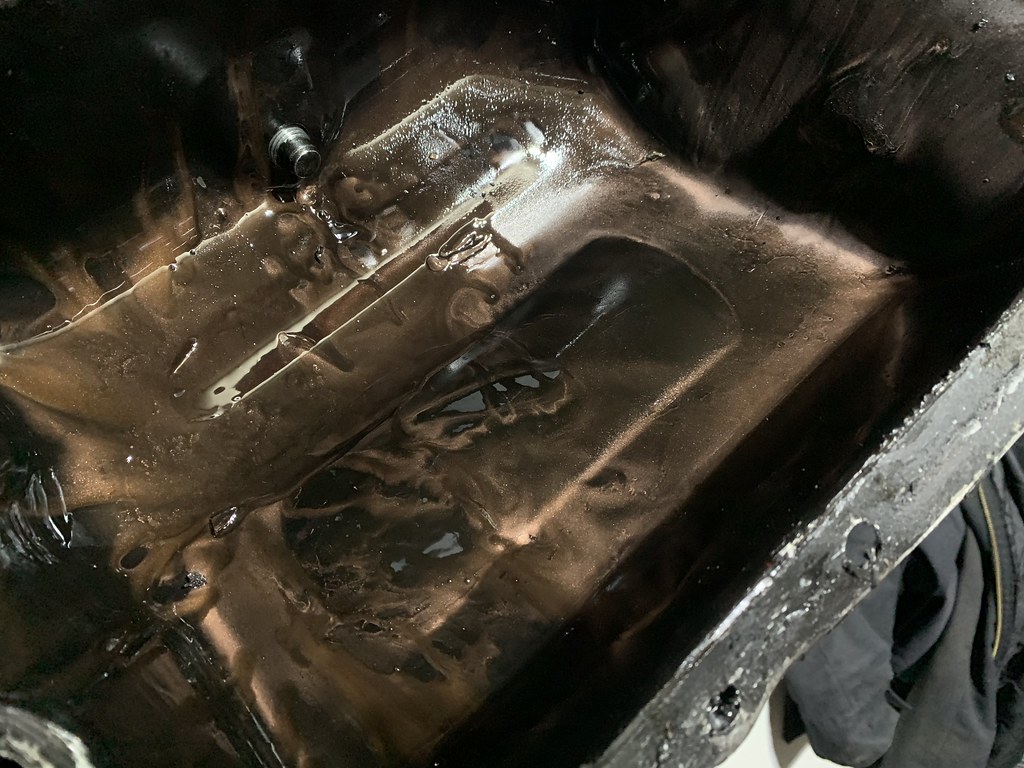
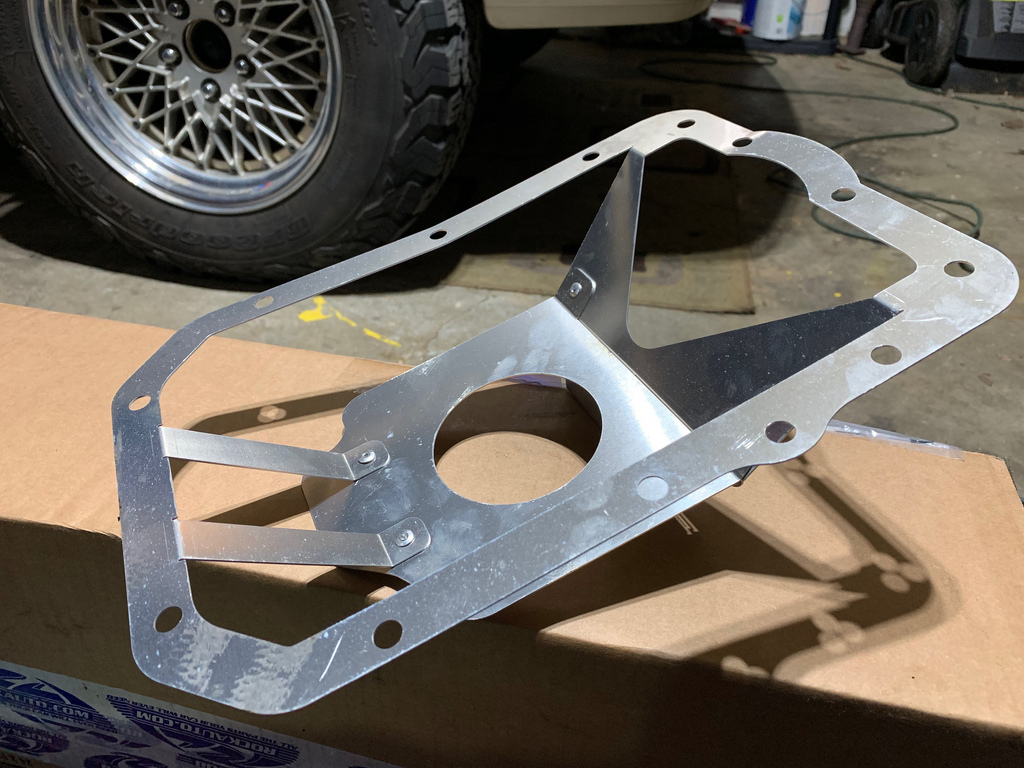
The next thing was correcting the oil starvation issue these motors are plagued with.  The oil baffle system on the Mazda FS , is not built for any sort of spirited driving.  The best way to resolve the problem is to either replace the pan with one of the few aftermarket oil pans that comes with an improved baffle setup to help.
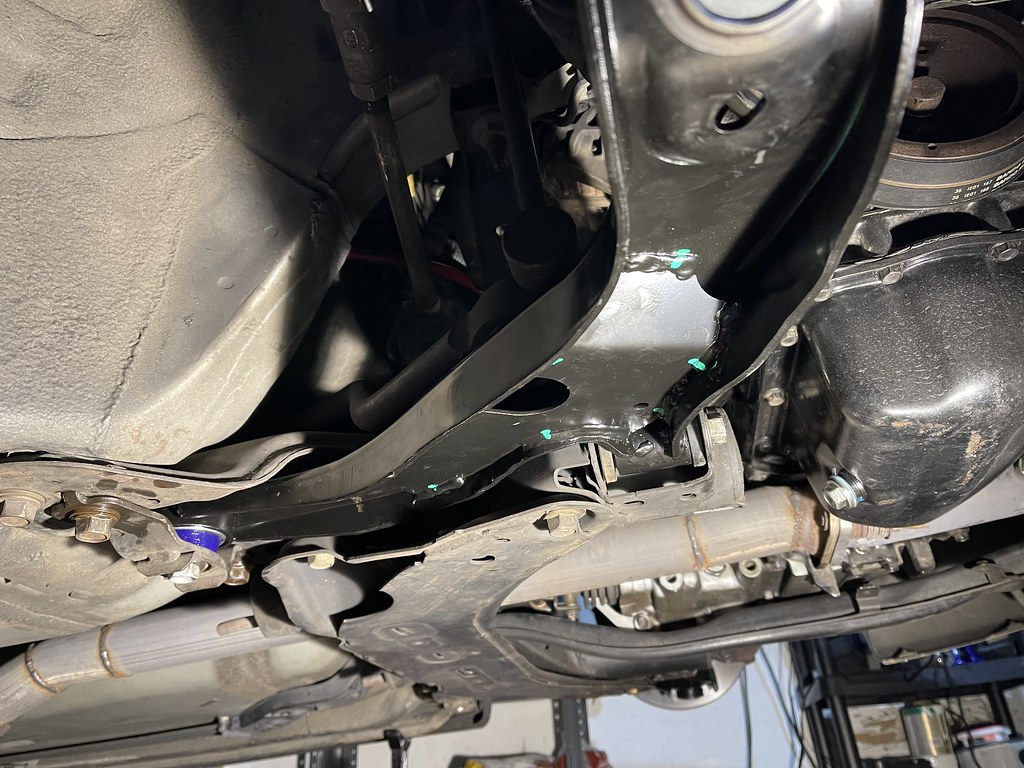
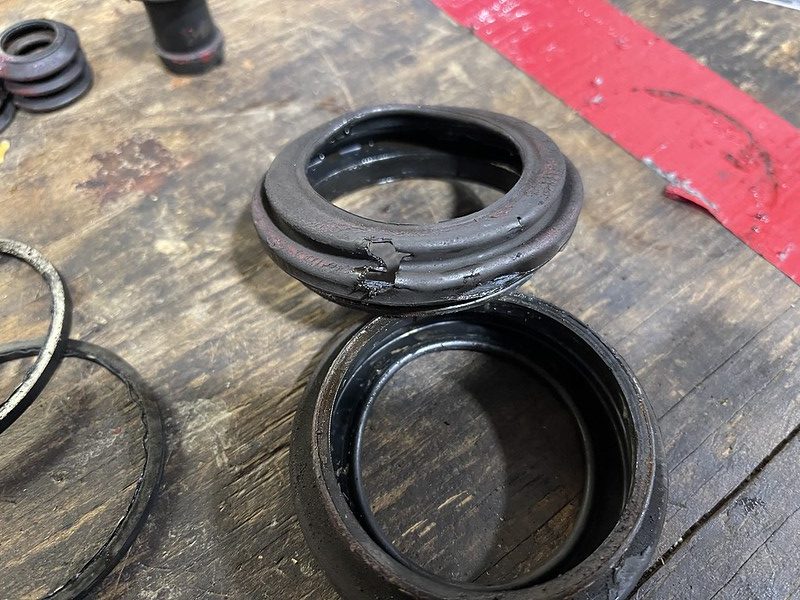
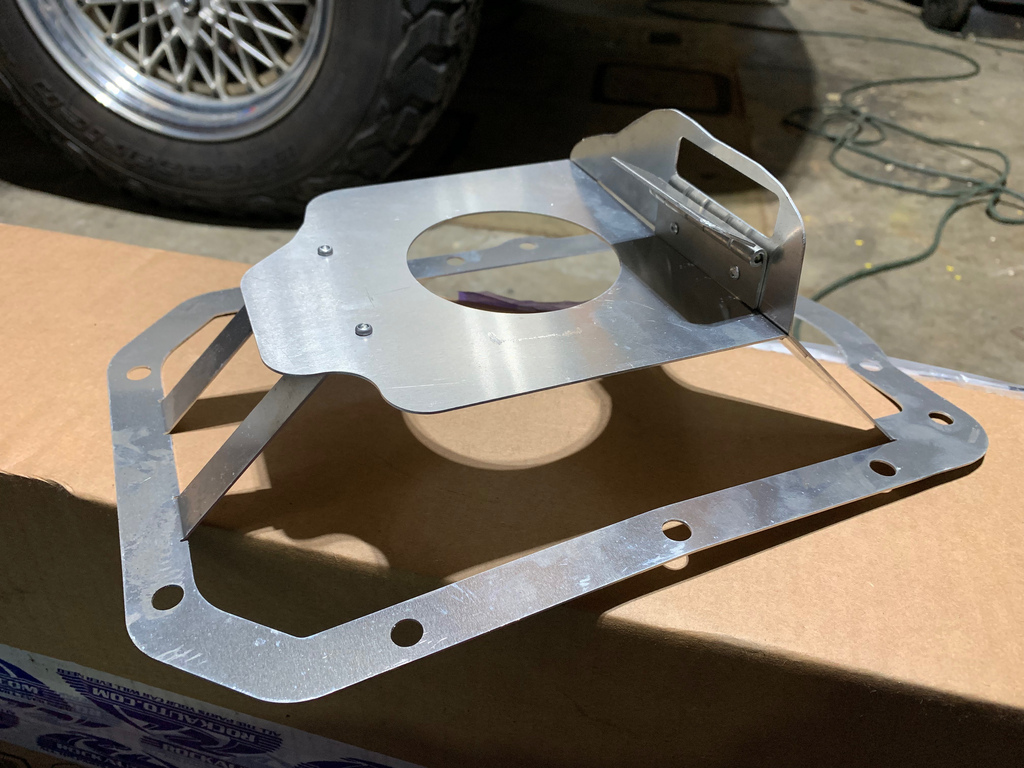
I wanted to keep a budget so I opted to go with a oil baffle insert that just lays inside of the oil pan.  You can see the trap door that keeps oil from going back away from the oil pickup.
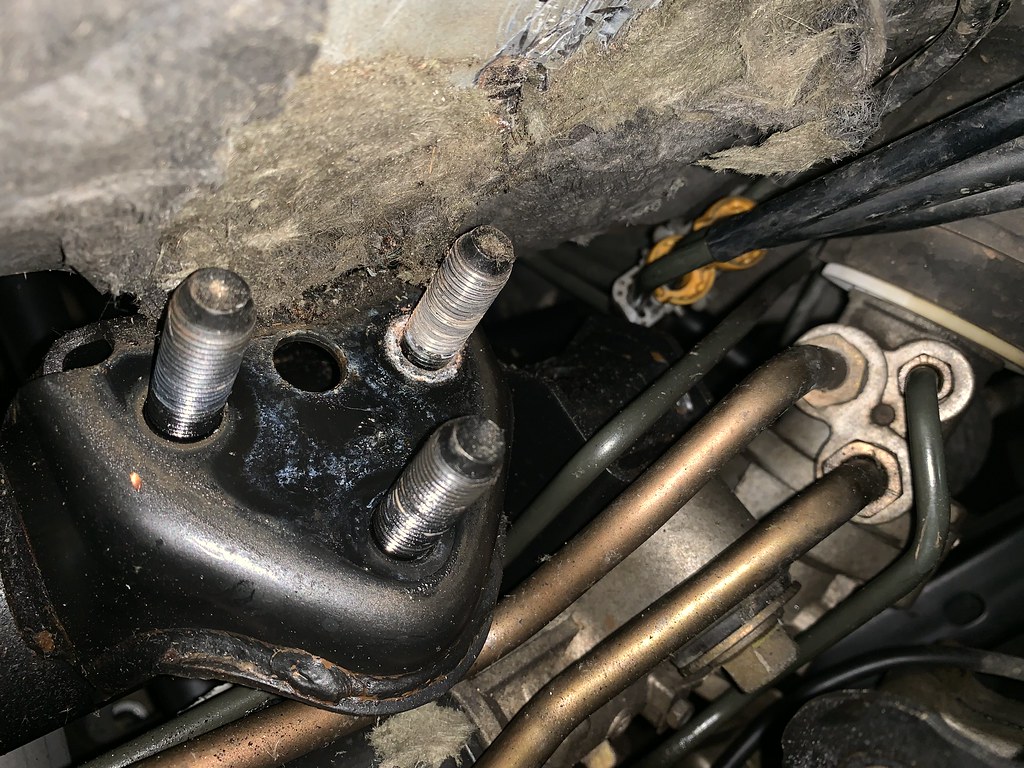
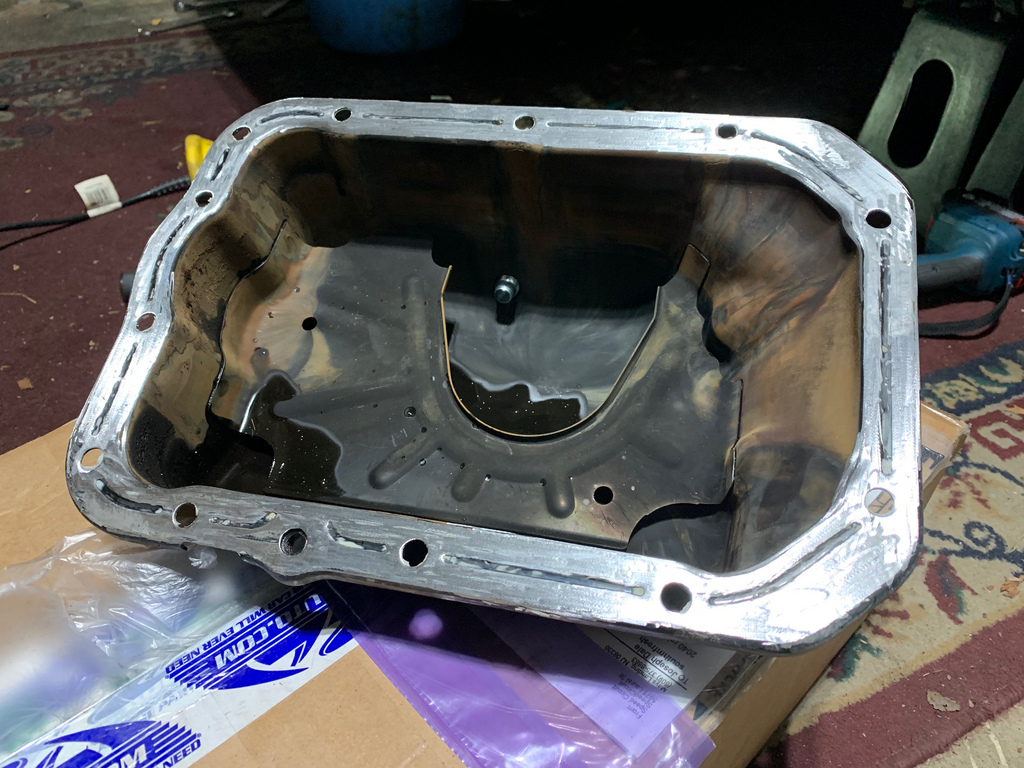
You can see in the oil pan that there is not any sort of baffle in the lower pan to keep the oil centered by the oil pickup.  In order to install the oil [an baffle , the factory baffle has to be removed.
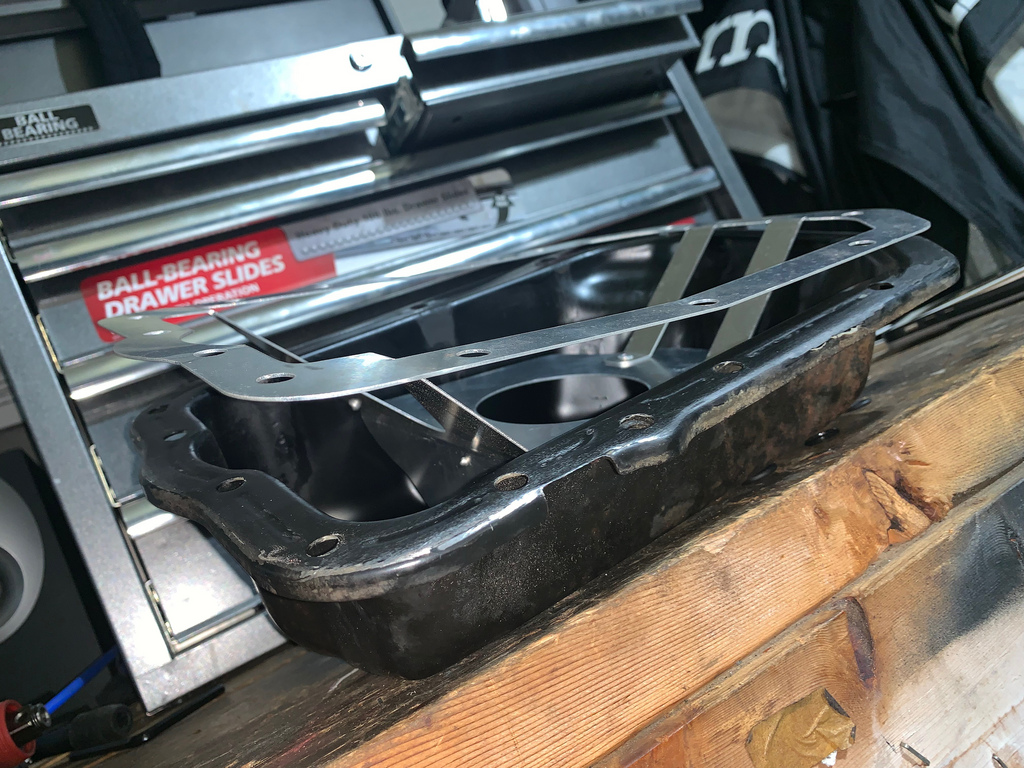
Again my friends at Atlanta Speed Company took care of me and I got the oe oil pan baffle removed.
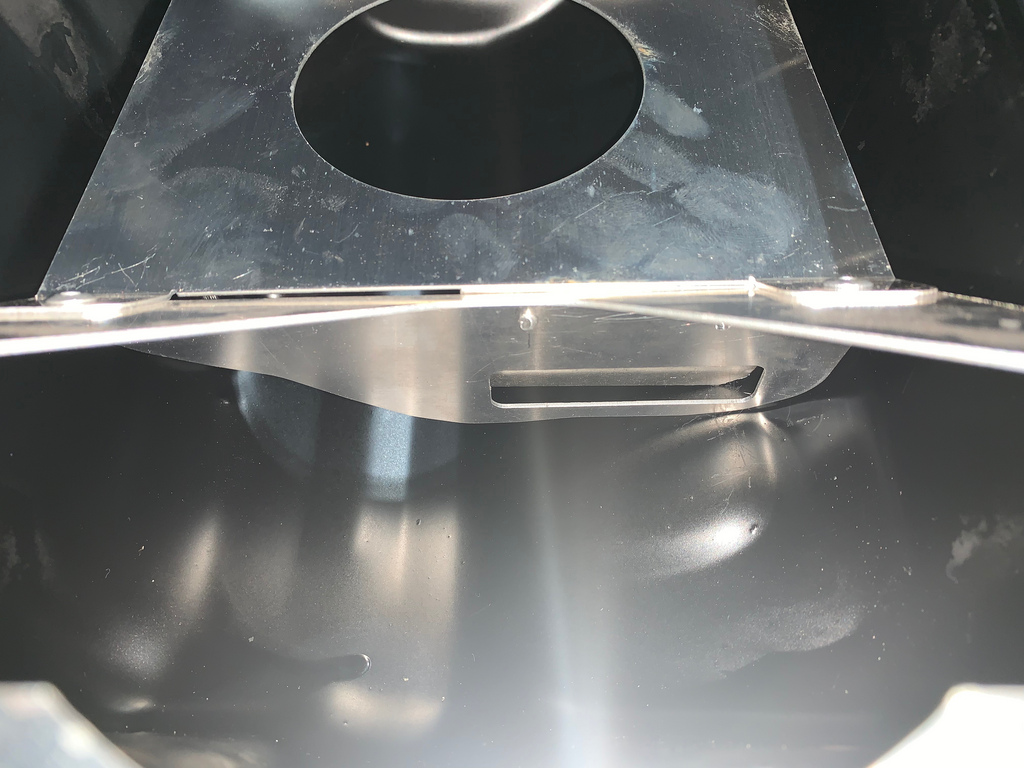
As you can see in the photo , the baffle appeared to be made incorrectly.  Its almost like it was made backwards.  I should of known that this would happen, because no one had ever installed one, and there were no instructions or information about them online.  Years ago people would just replace it with the upgraded oil pan, which also had fitment problems.  So I did not wanna take the chance and spend the extra cash for something that may not fit right.  I spoke with the vendor and they took it back, and said they would get it redone and built right.
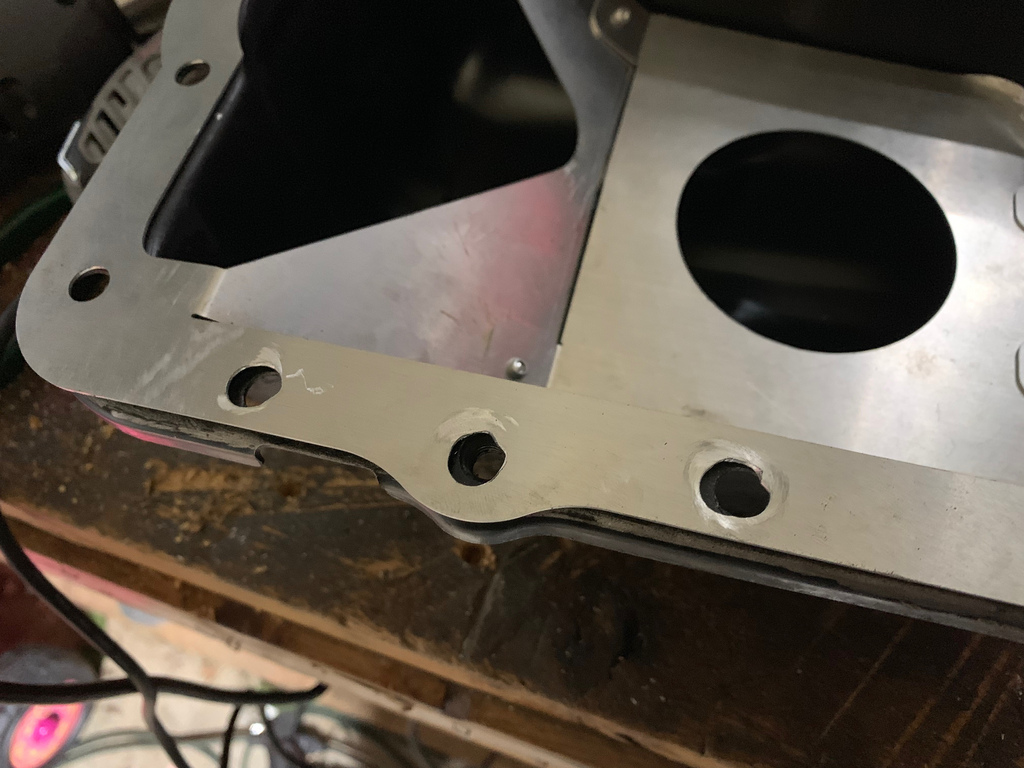
After a week, I got it back.  And it still had some weird fitment issues.  In this photos you can see that the holes were off.
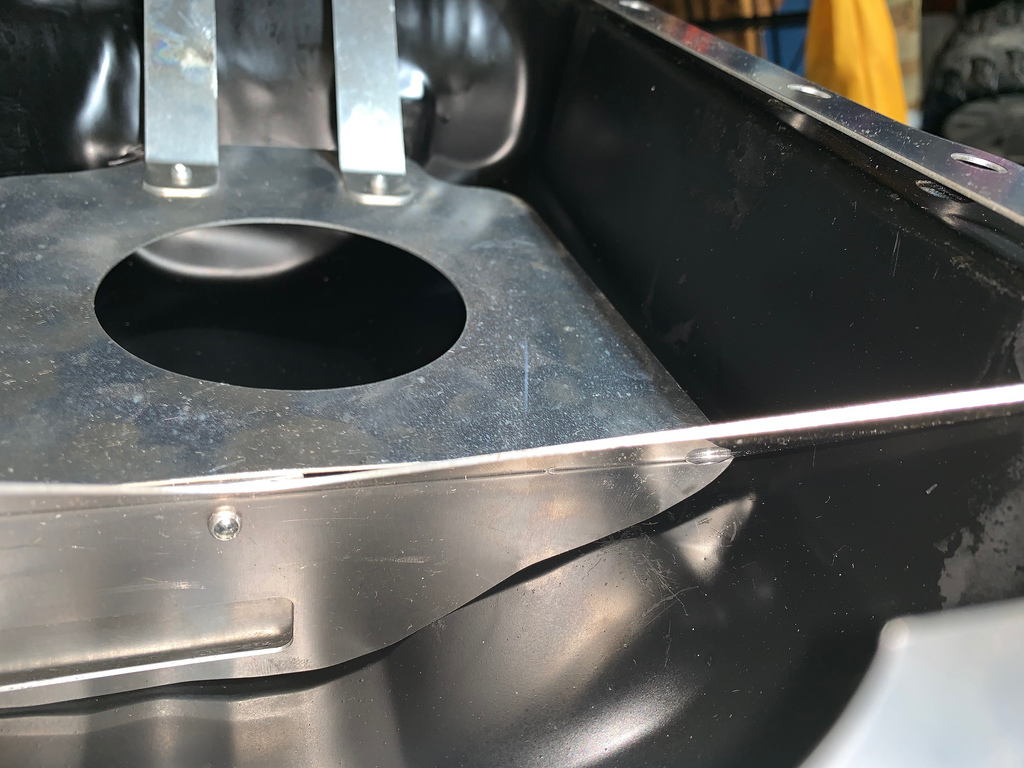
The edges that laid in the pan were much better, but still off as you can see.  So the insert could not sit flush on the edges.
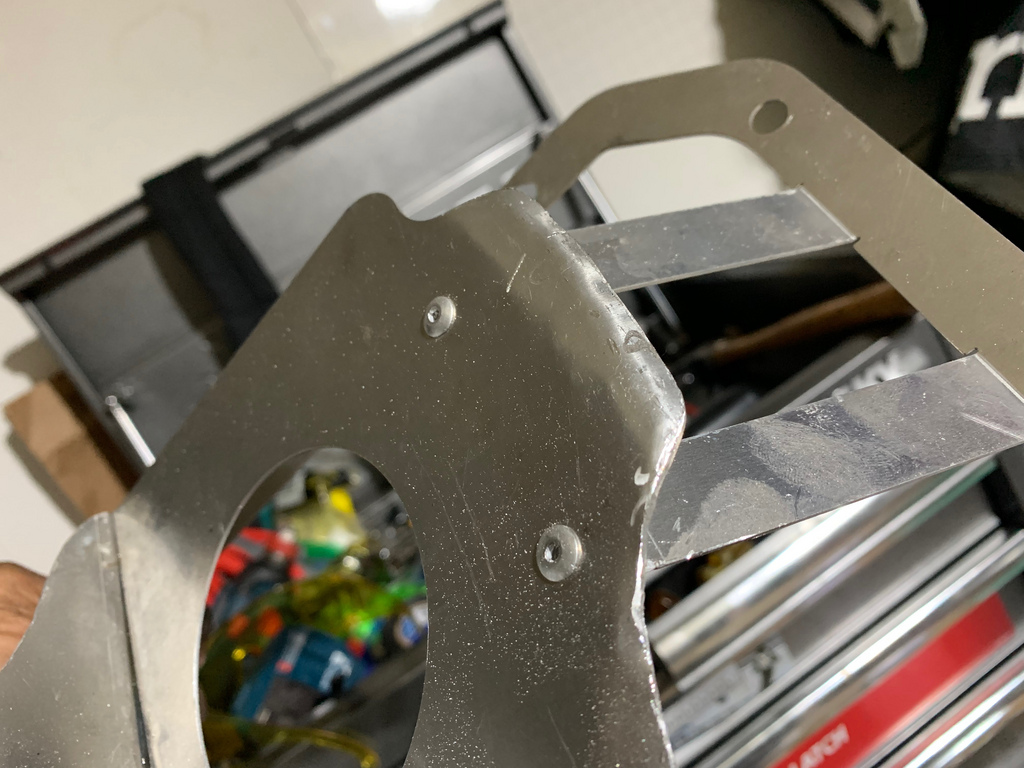
The shelf portion of the baffle was also shaped wrong.
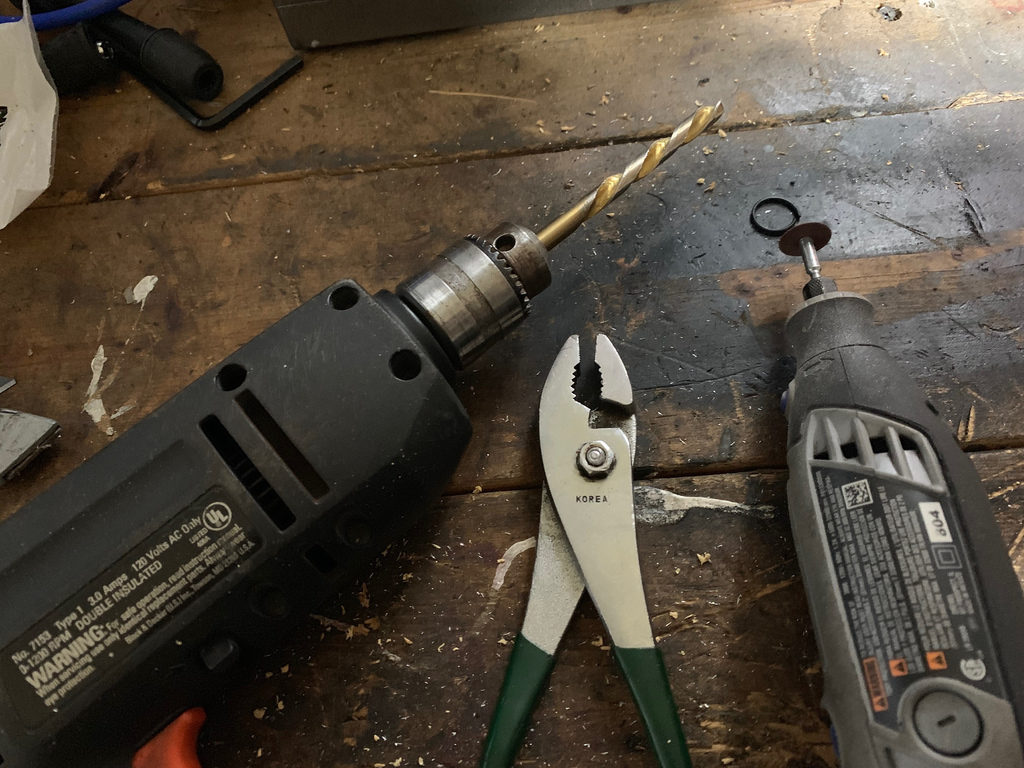
At that point I did not have time to have it fixed again for a 2nd time.  So I got out some tools to fix the problem and make it fit.

Southrnfresh_Joe
Southrnfresh_Joe New Reader
6/13/21 9:31 p.m.

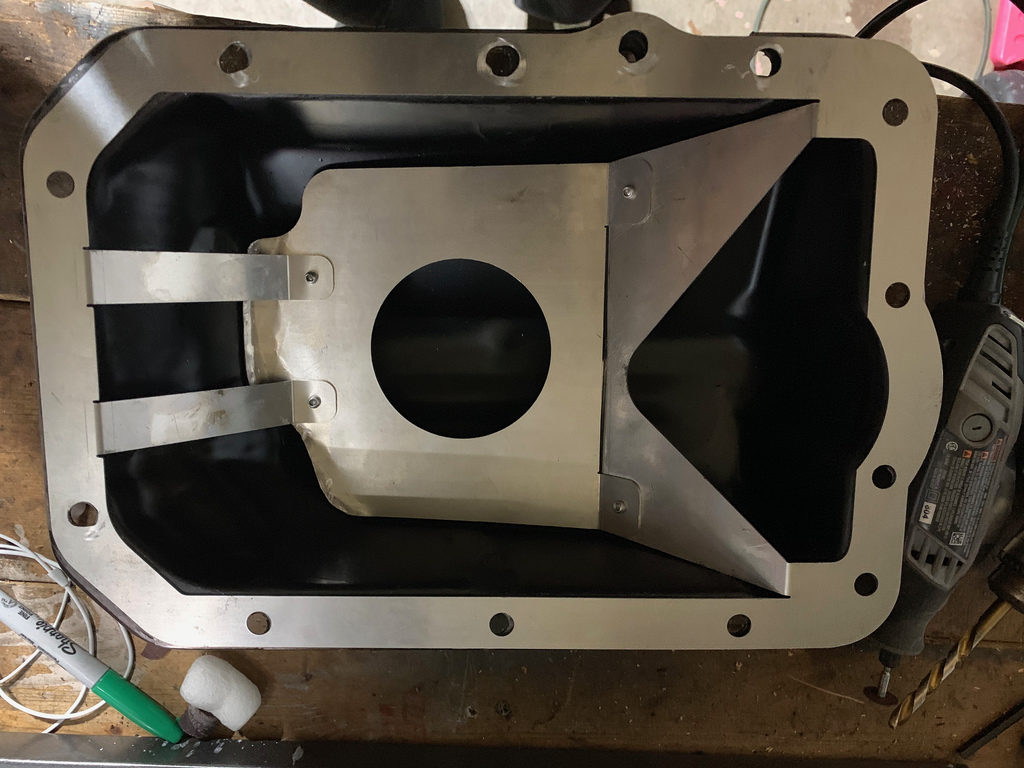
After about a hour and half of bending, trimming , and drilling I managed to get it to fit properly.
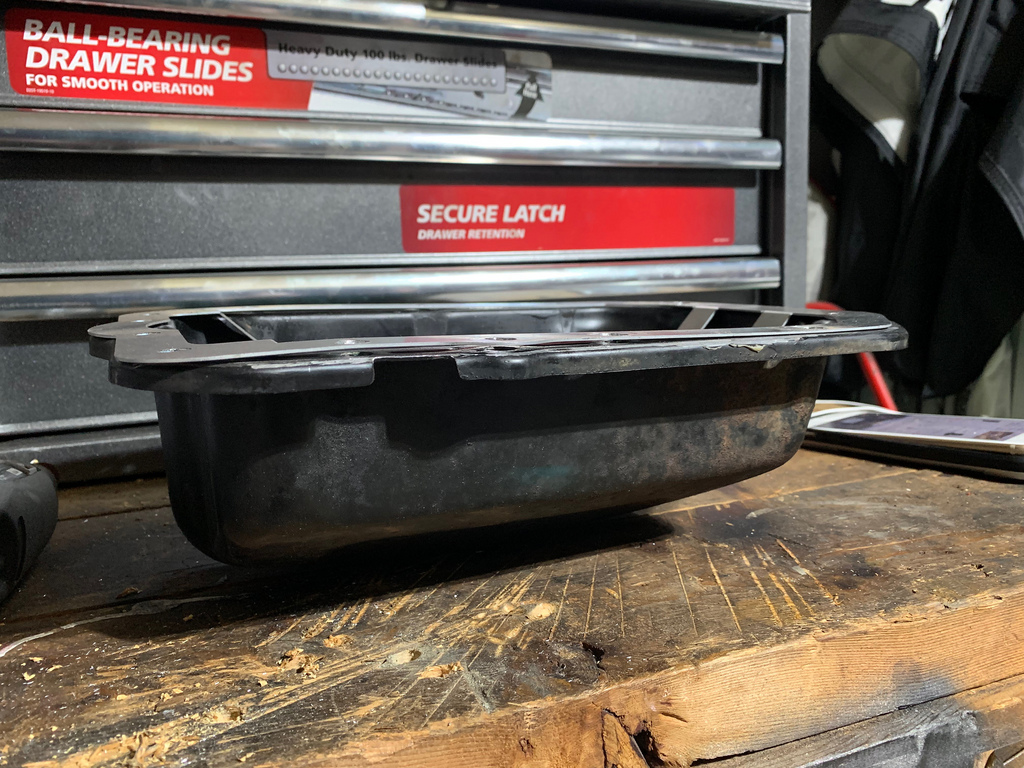
Finally sitting flush.  If I had more time, I would have liked to send it back and get it made to fit exact.  There is another company that is working on a upgraded oil pan that I am waiting to be released, so when that releases I will change to the whole pan.
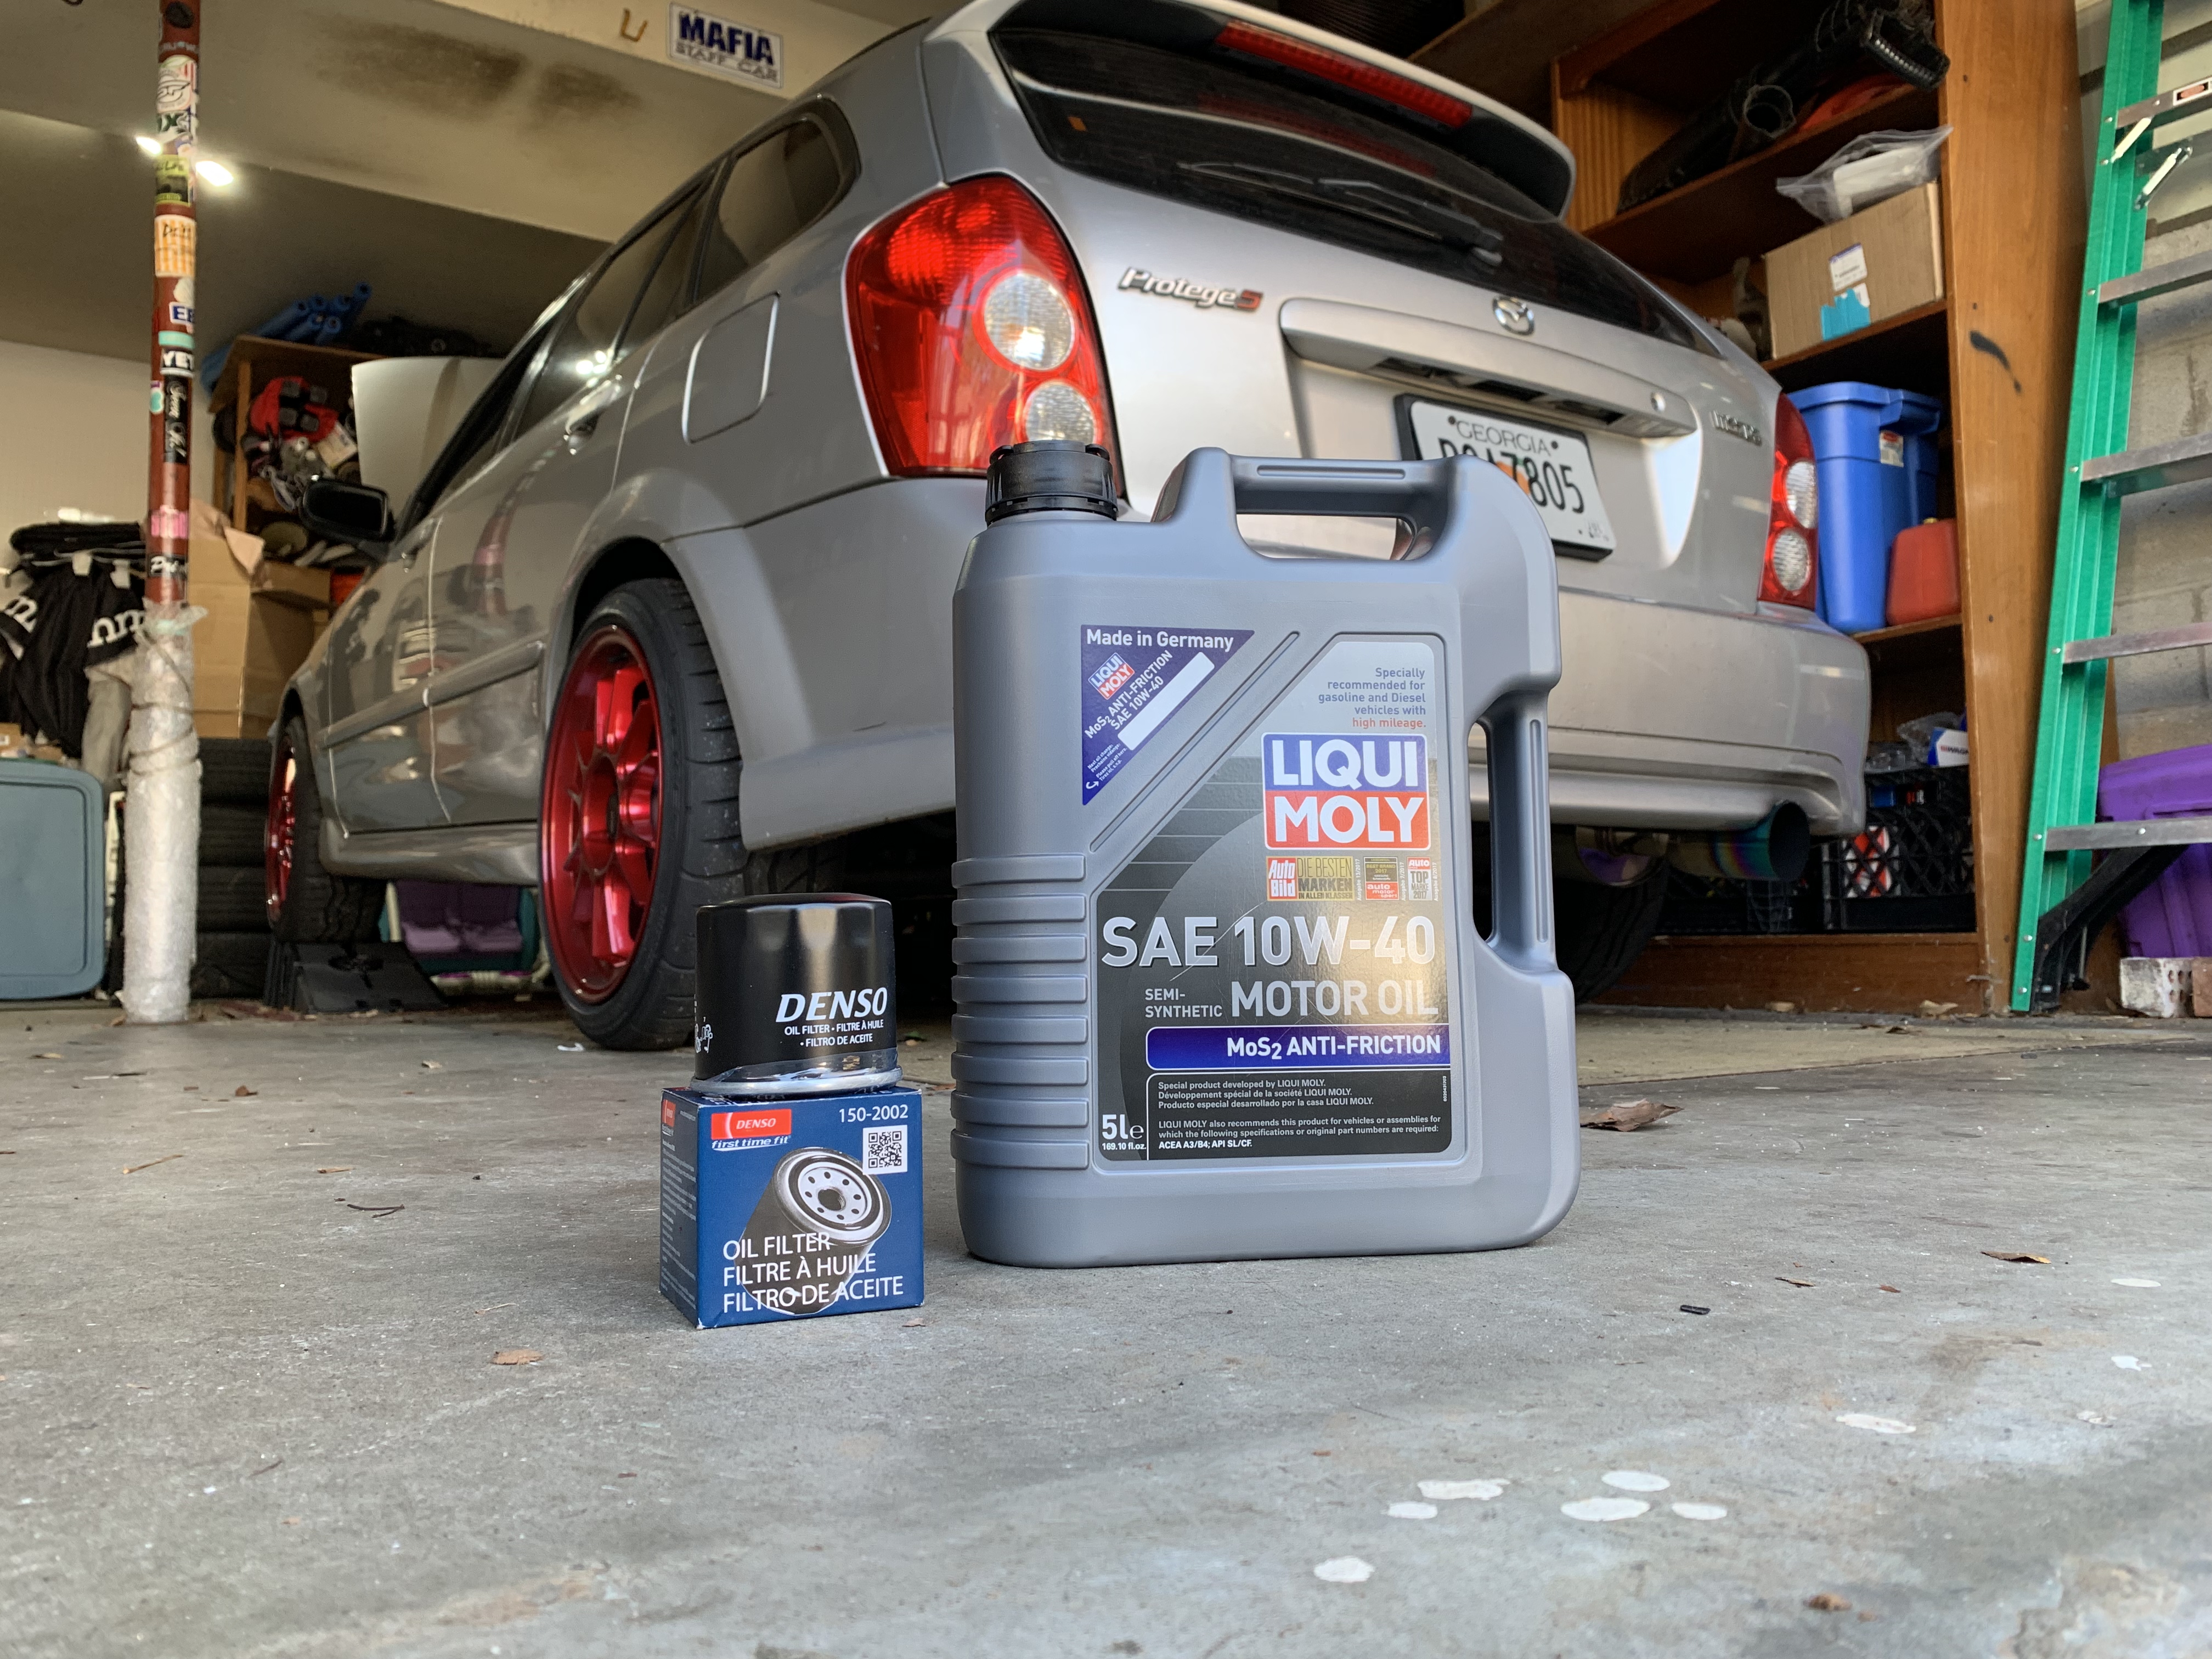
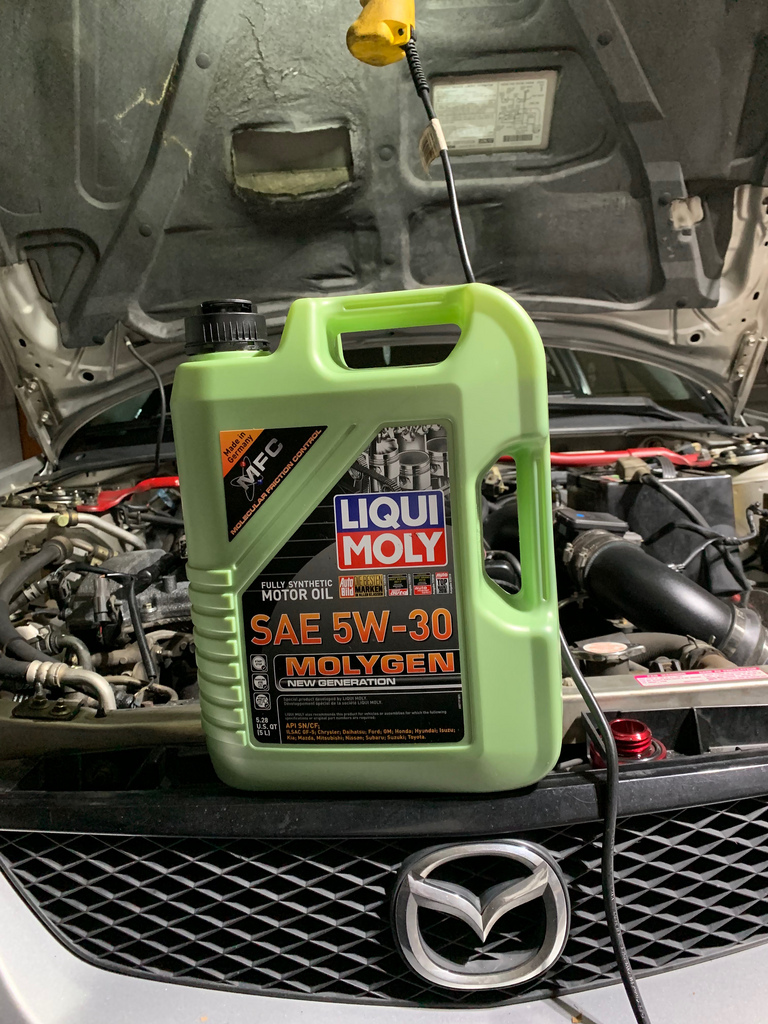
I also decided to change up to the Liqui Moly - Molygen a try.  Since I have heard so much about their new green bottle oil.
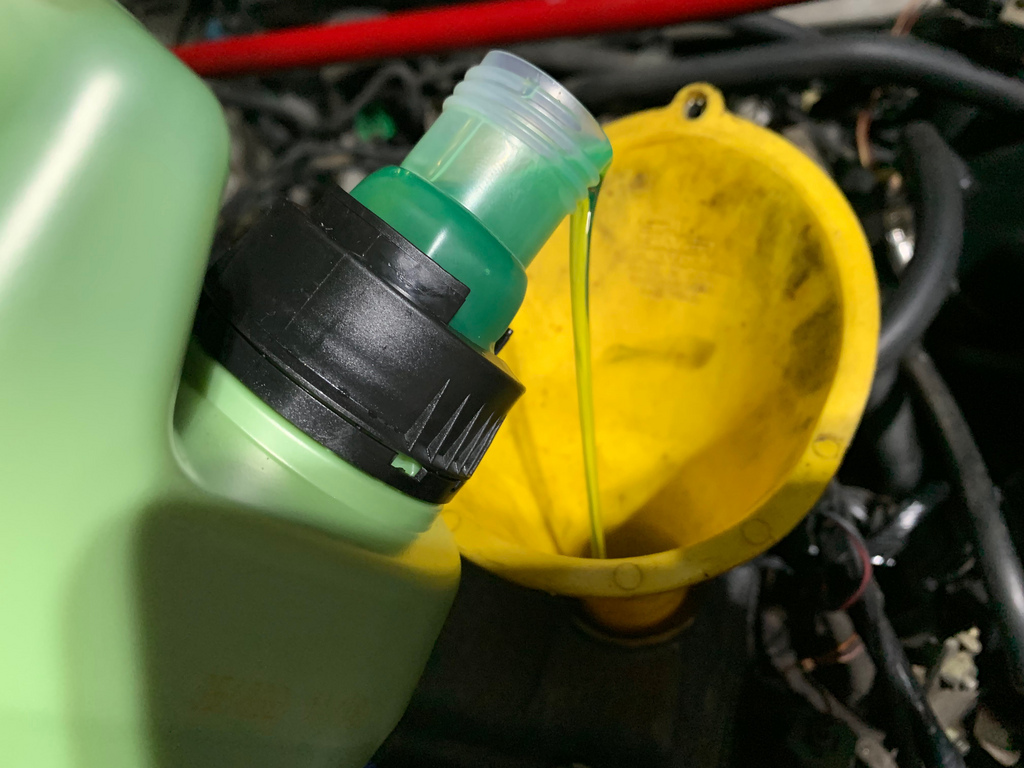
And its green..  But I wanted to be sure that the bearings were protected as best possible, and I had absolutely no chances of oil starvation.  My only regret was not going with a heavier weight.
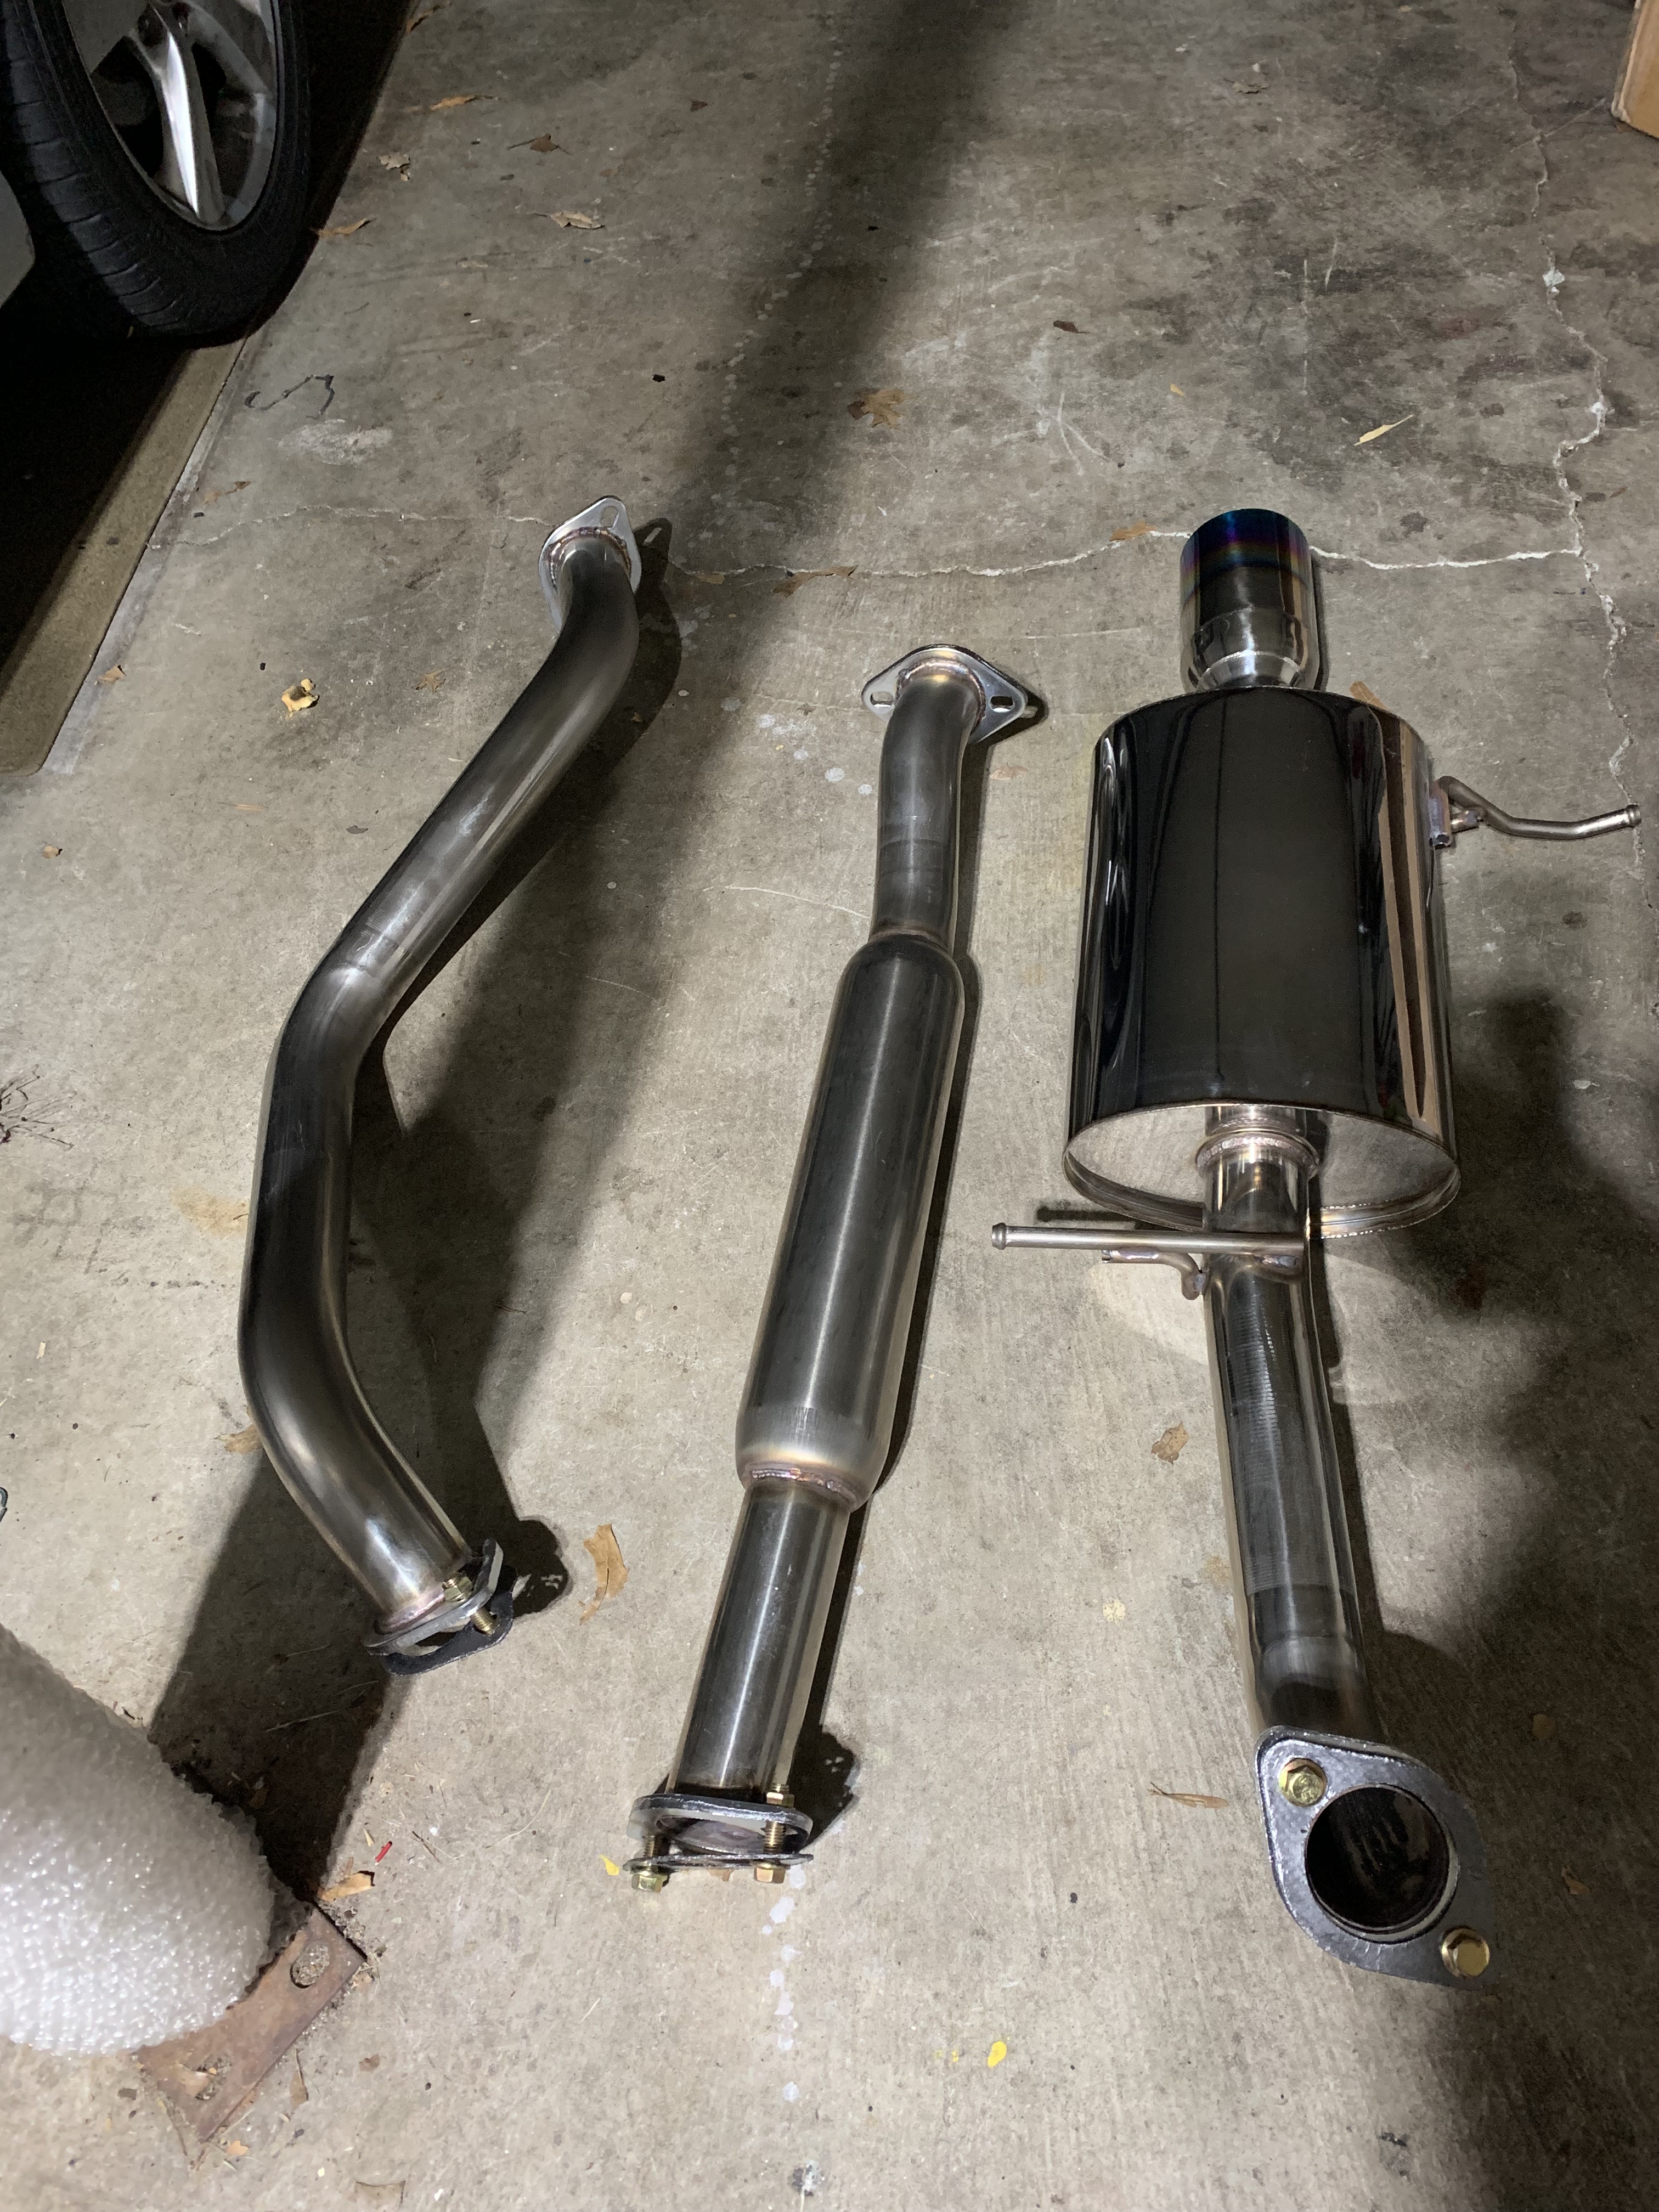
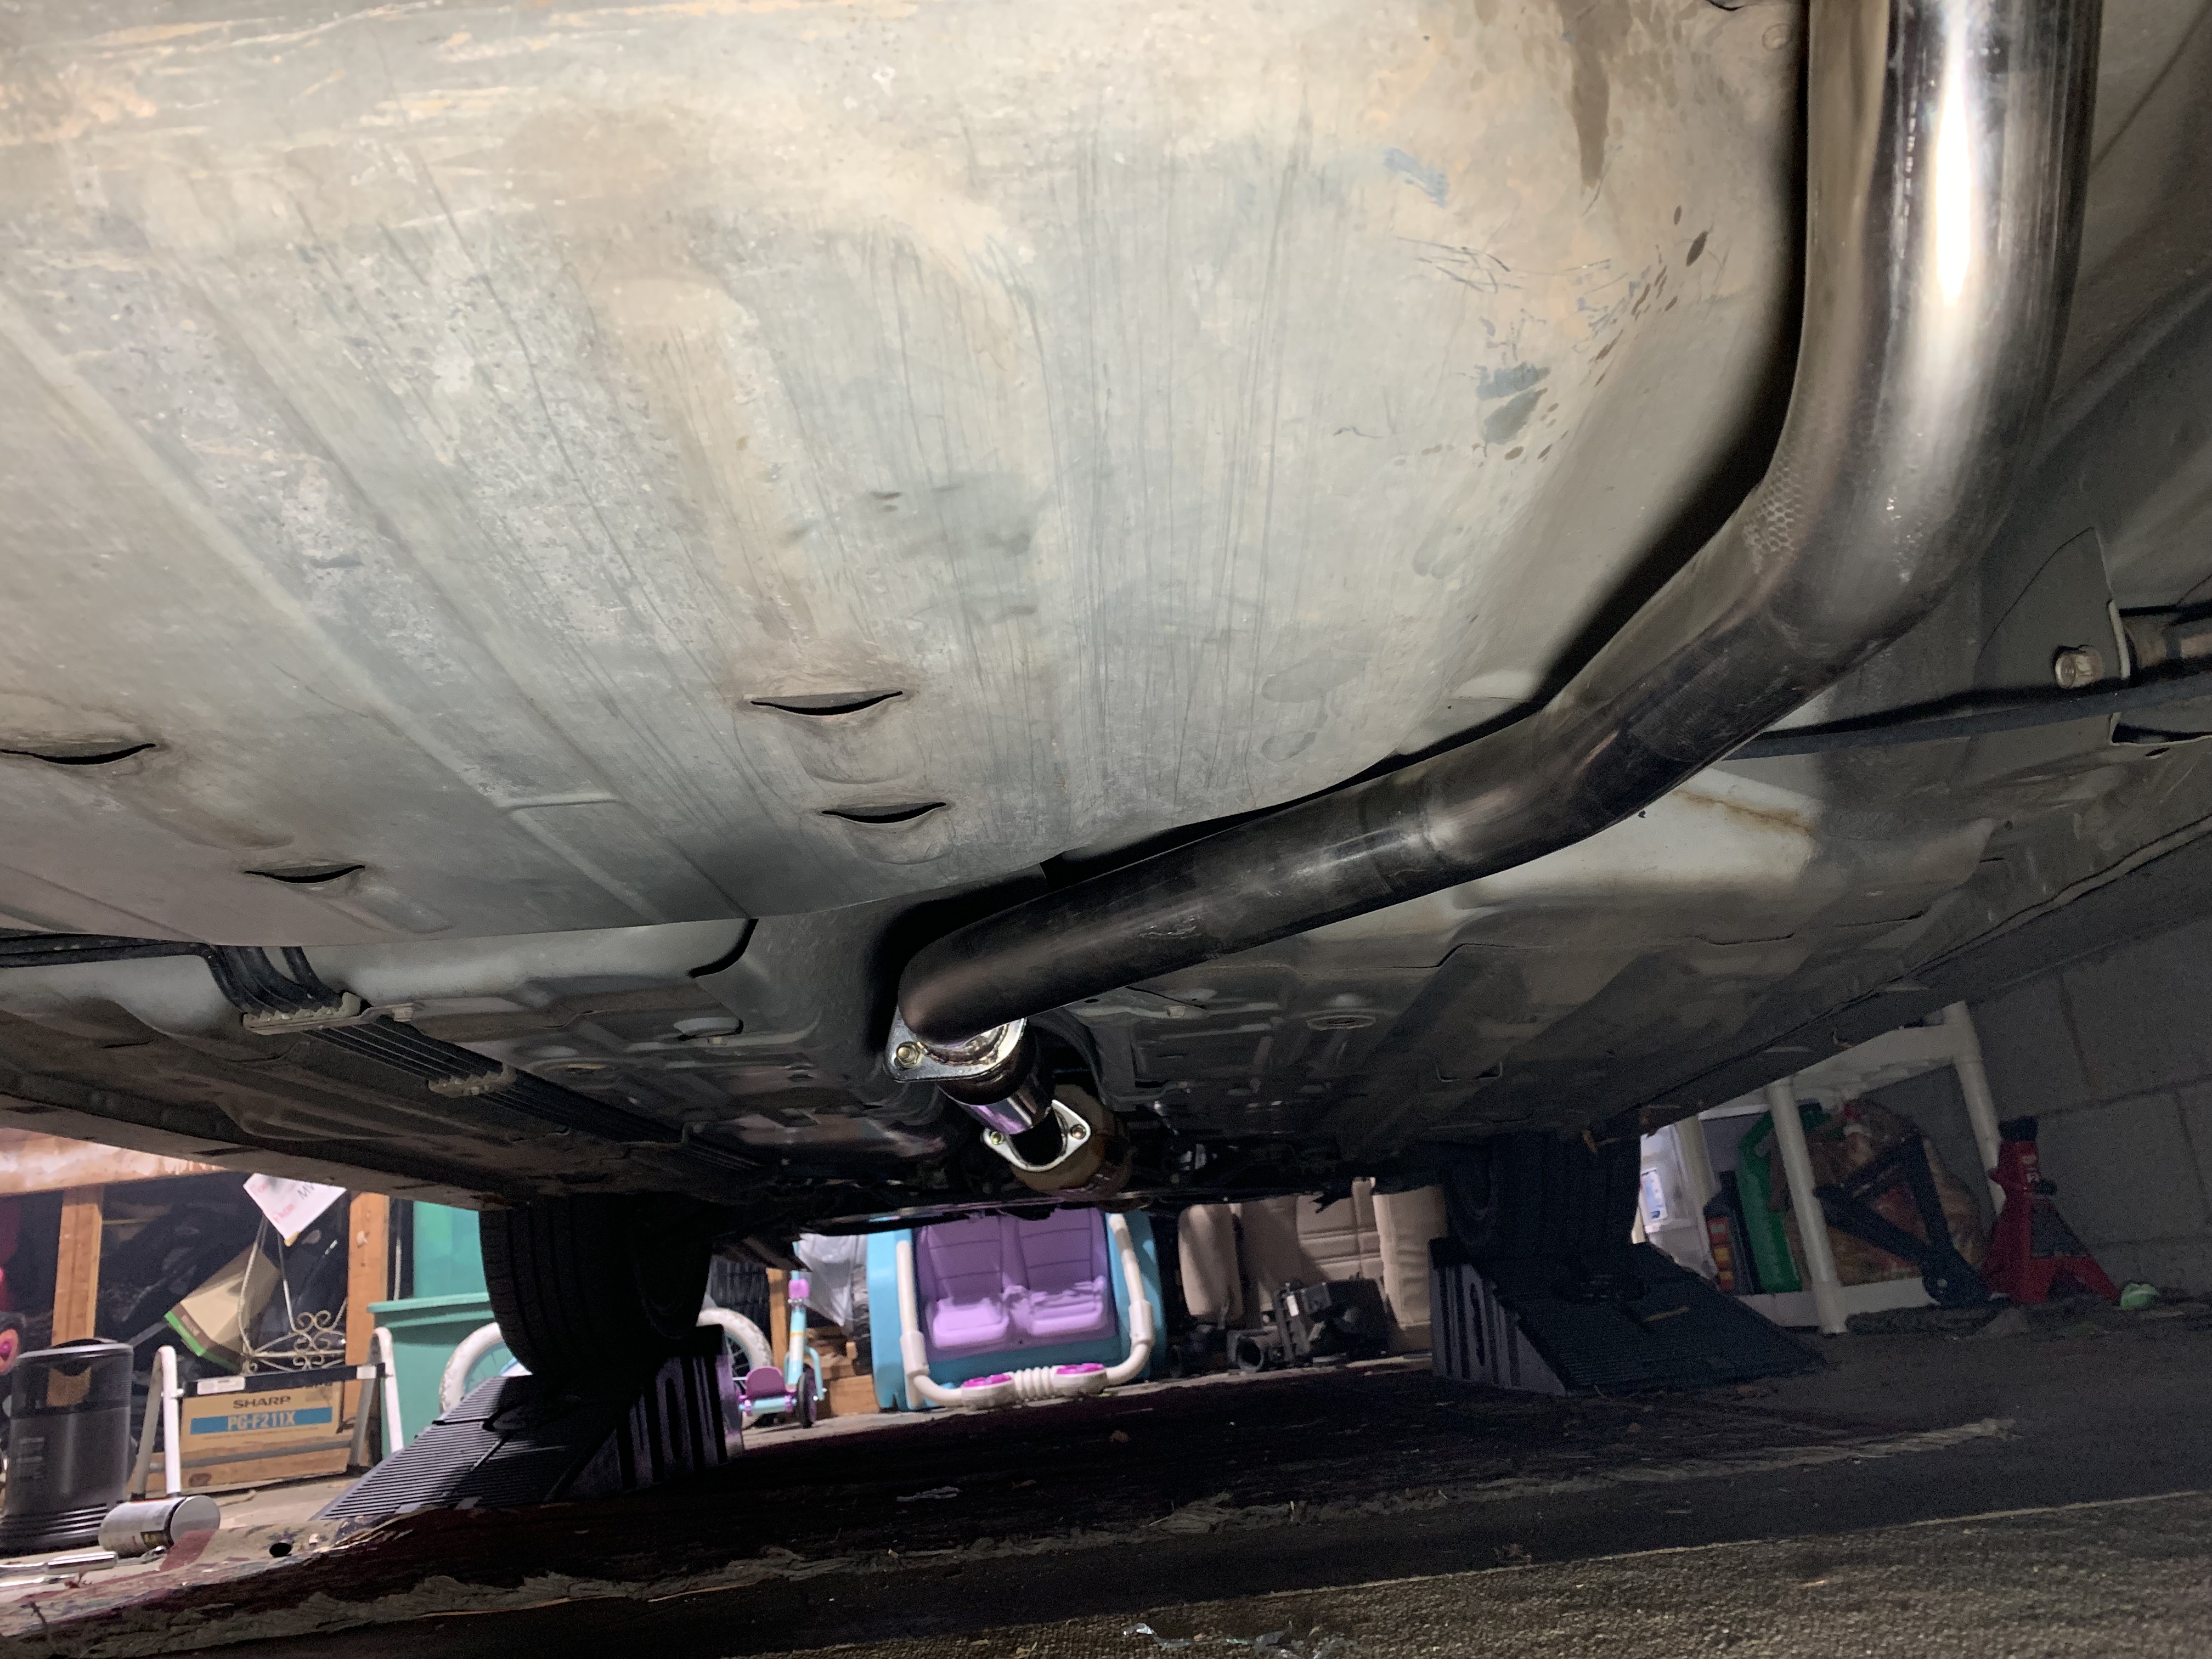
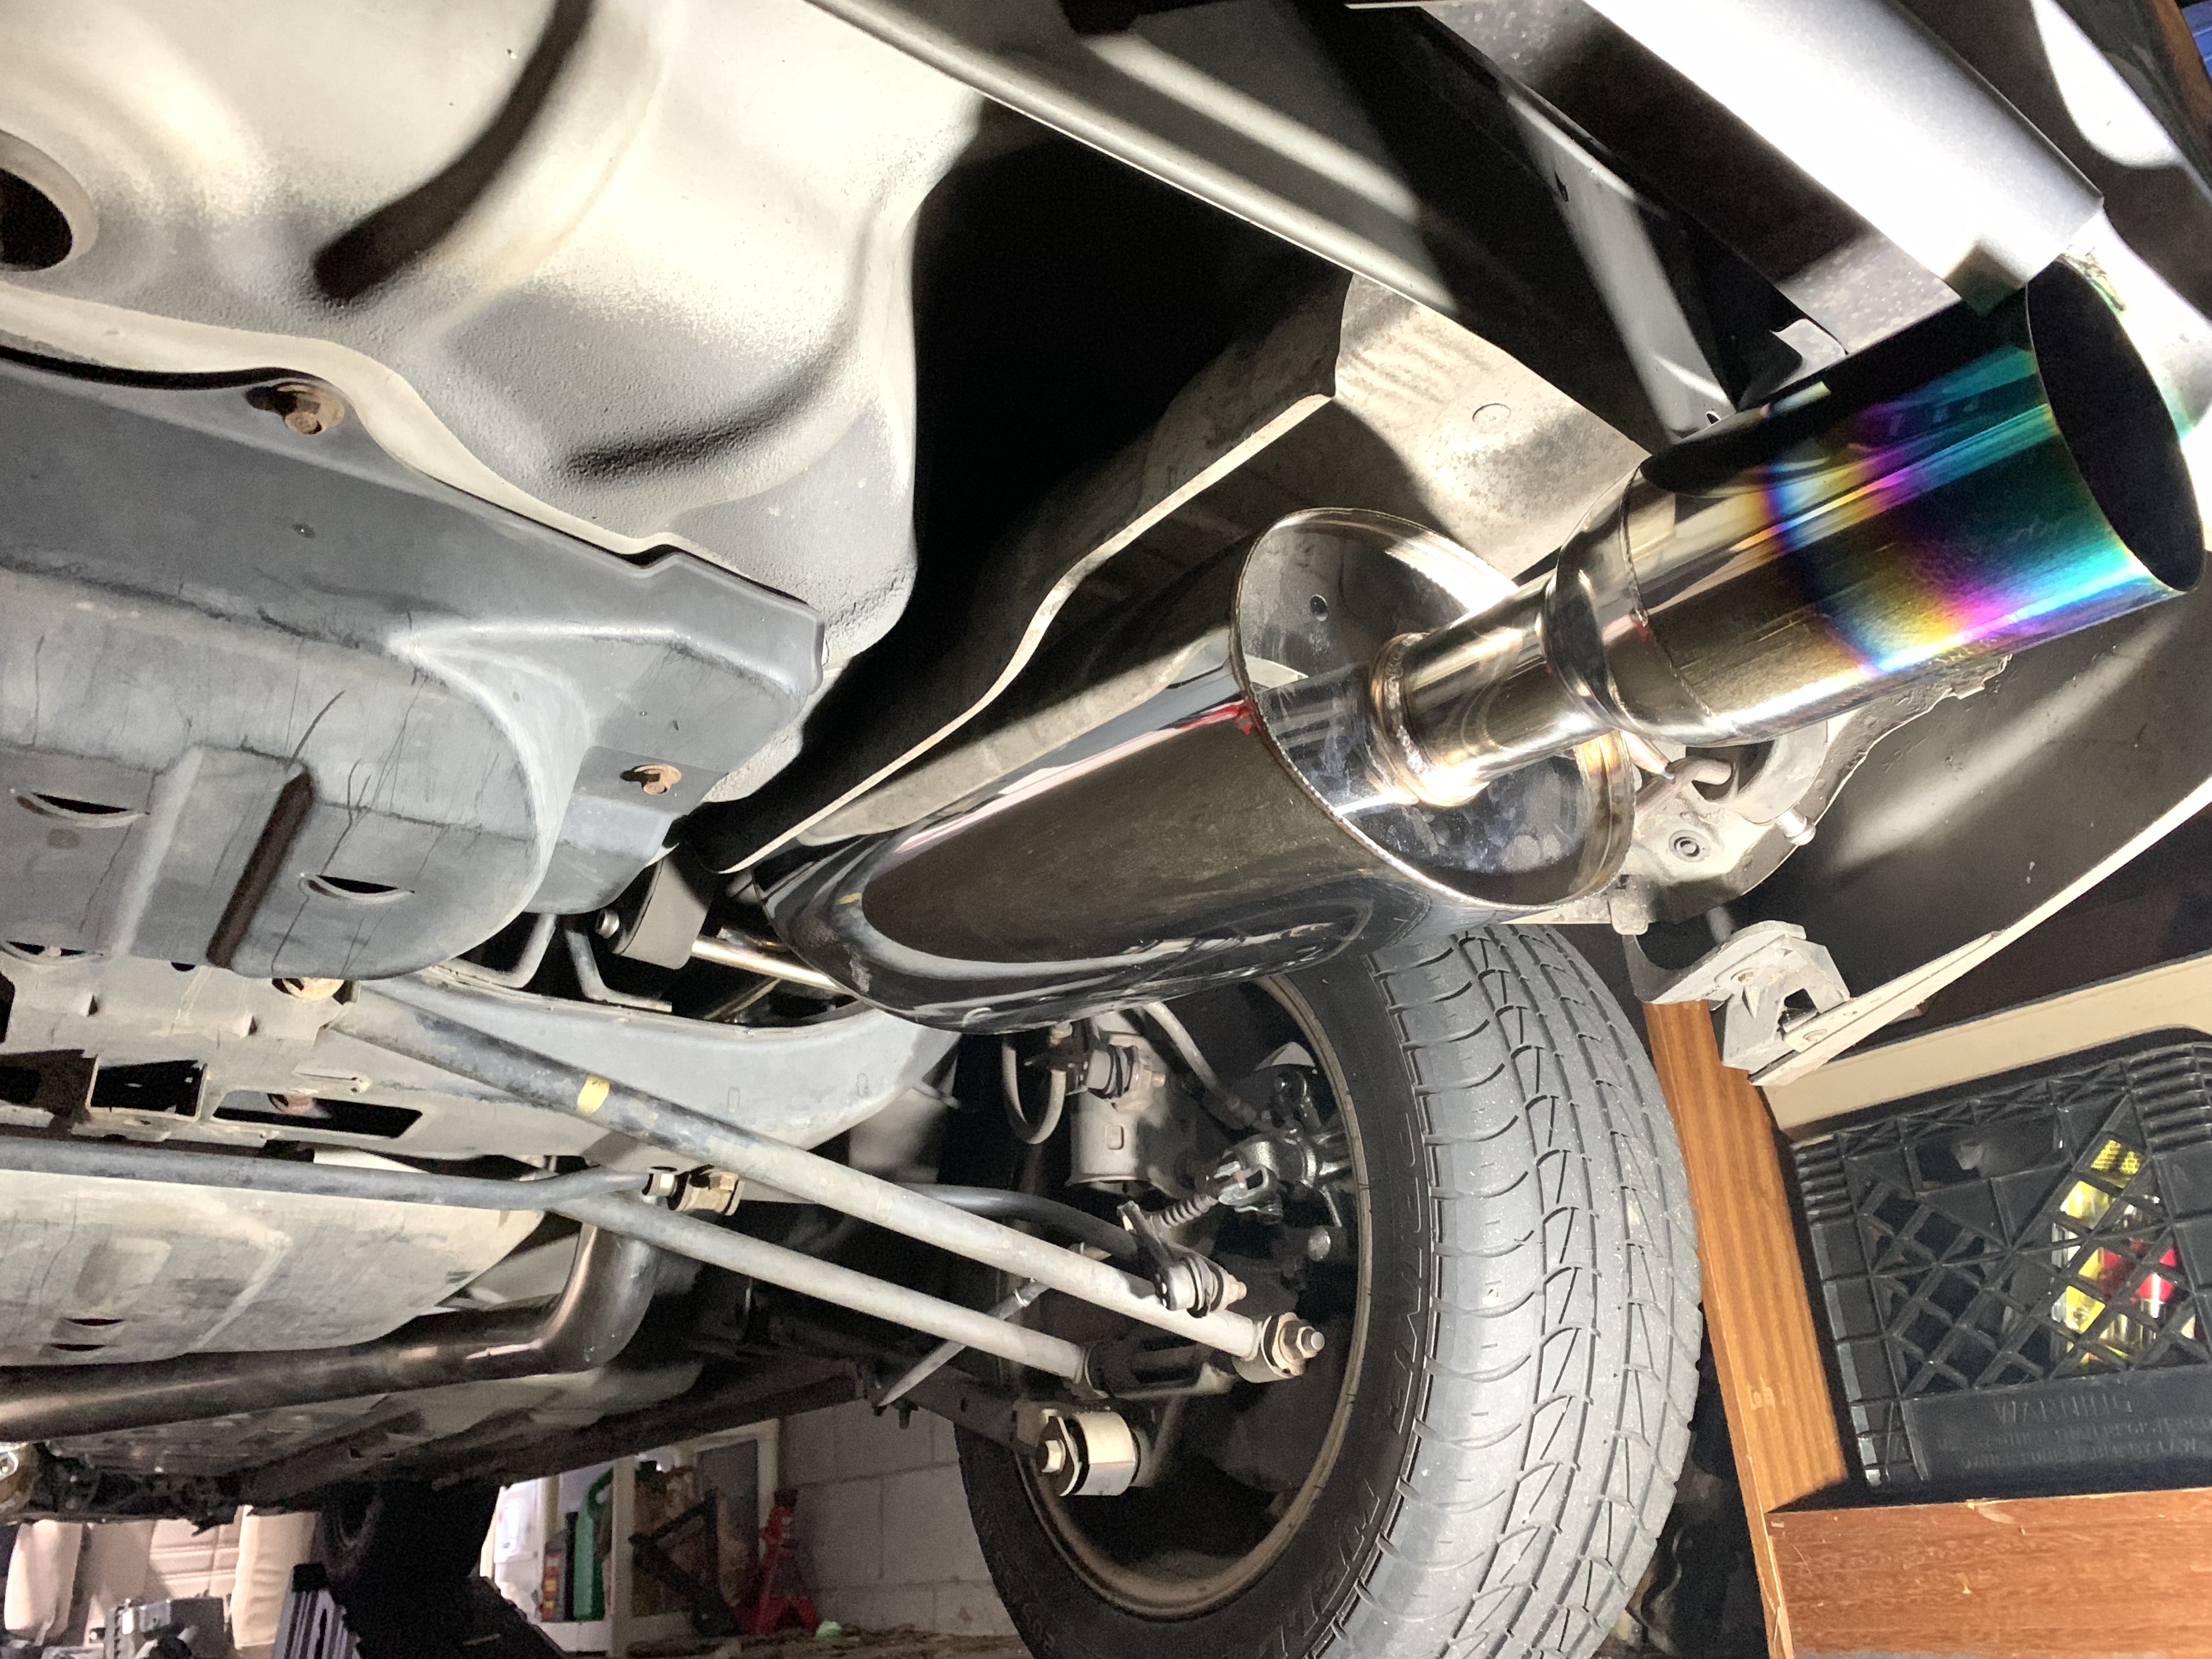
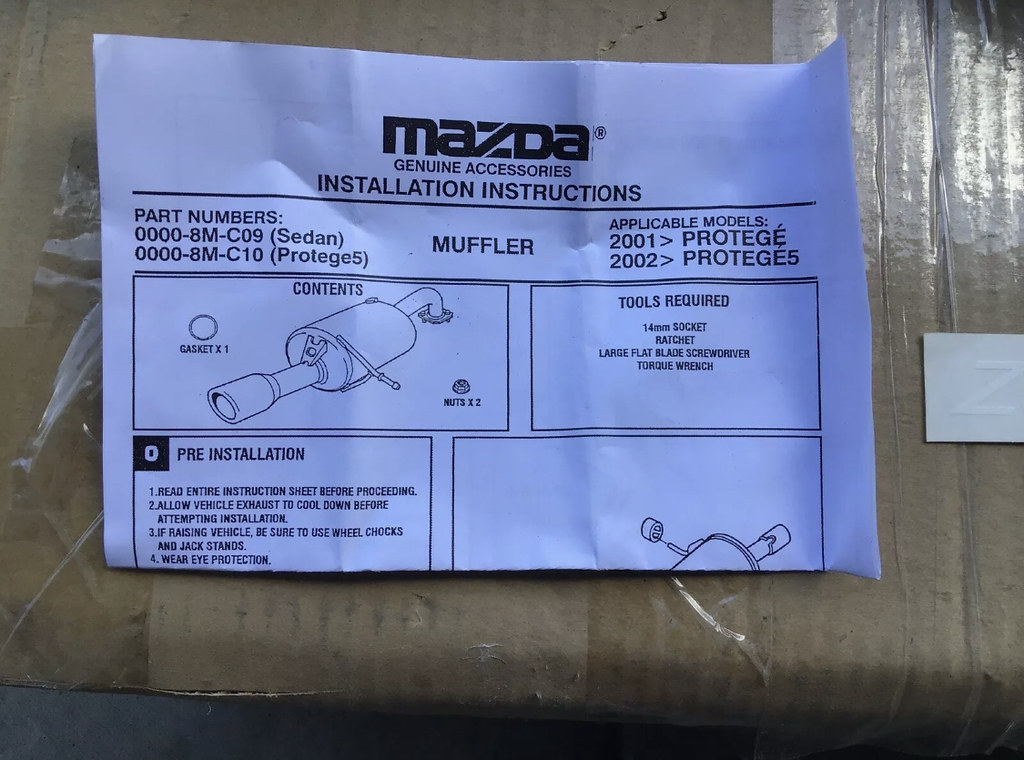
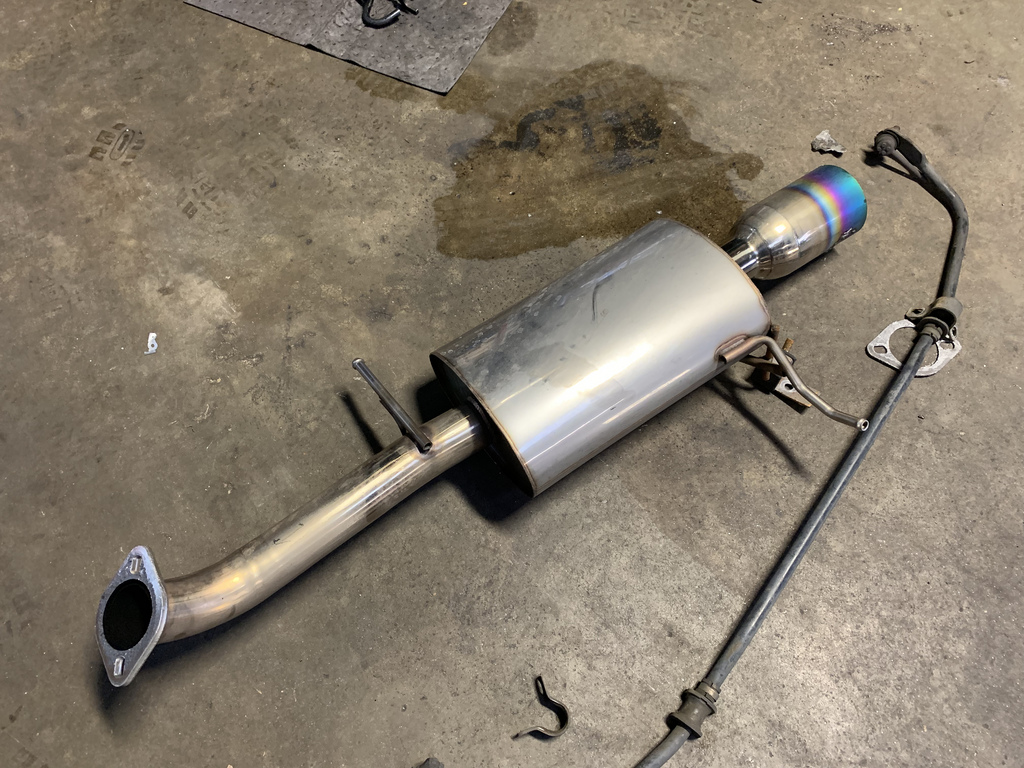
The cheap exhaust system from eBay fit well, and got the job done as far as being an exhaust.  But the car was too loud for me, and sounded terrible.  The muffler it came with was pretty much an empty canister.
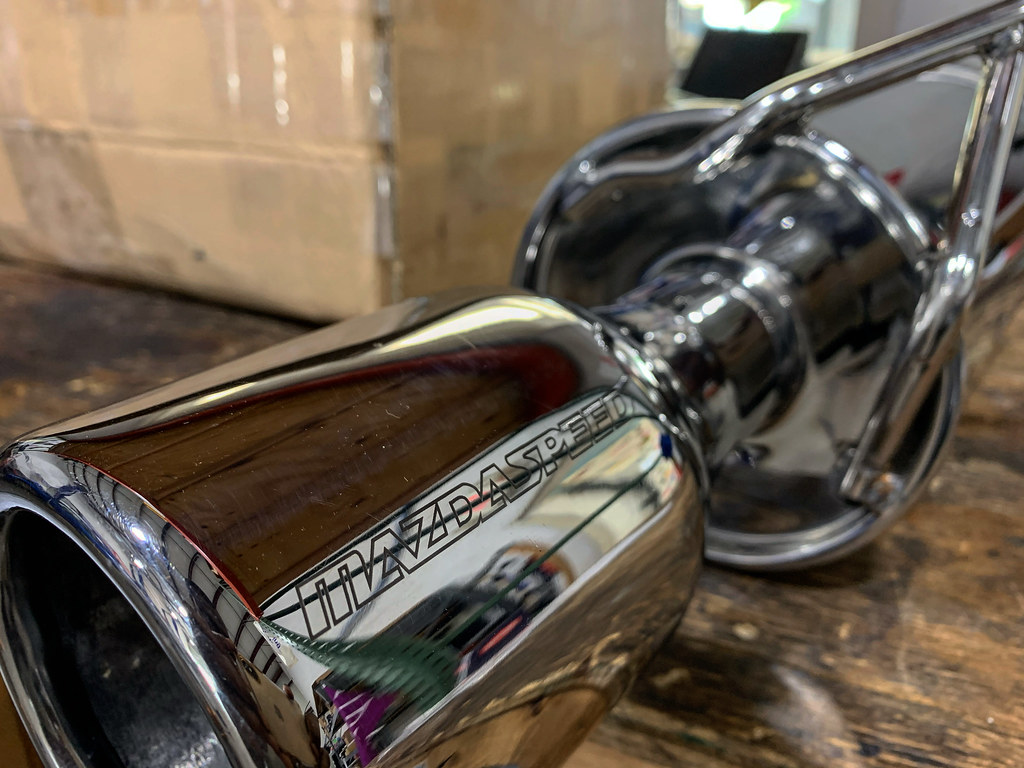
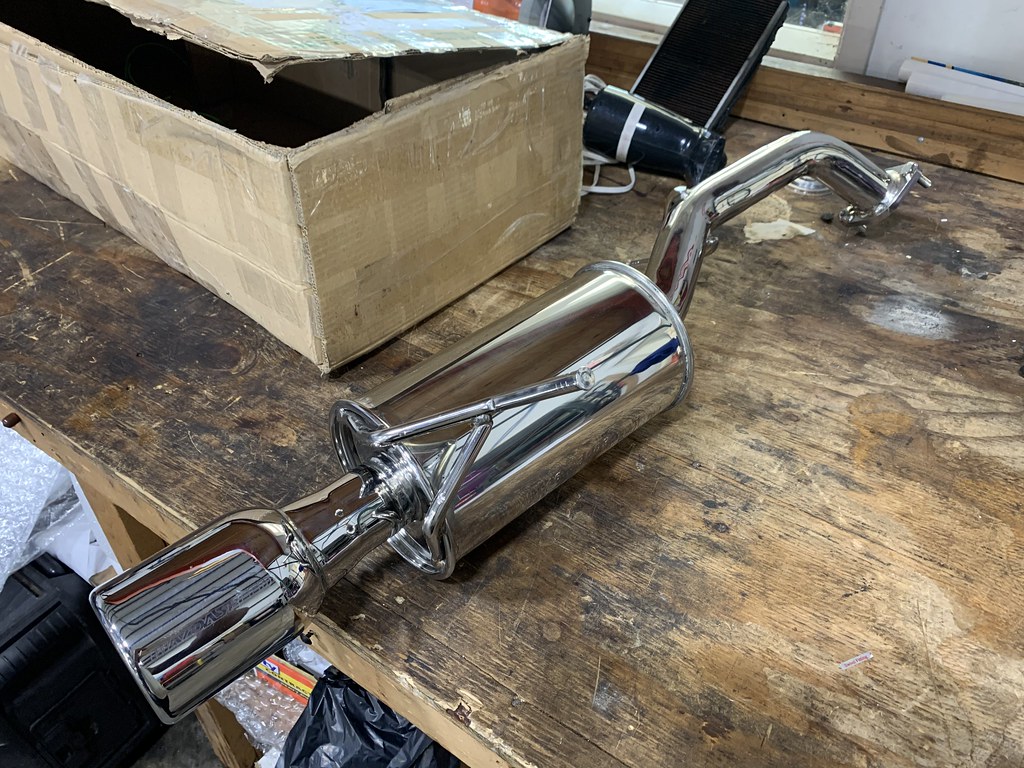
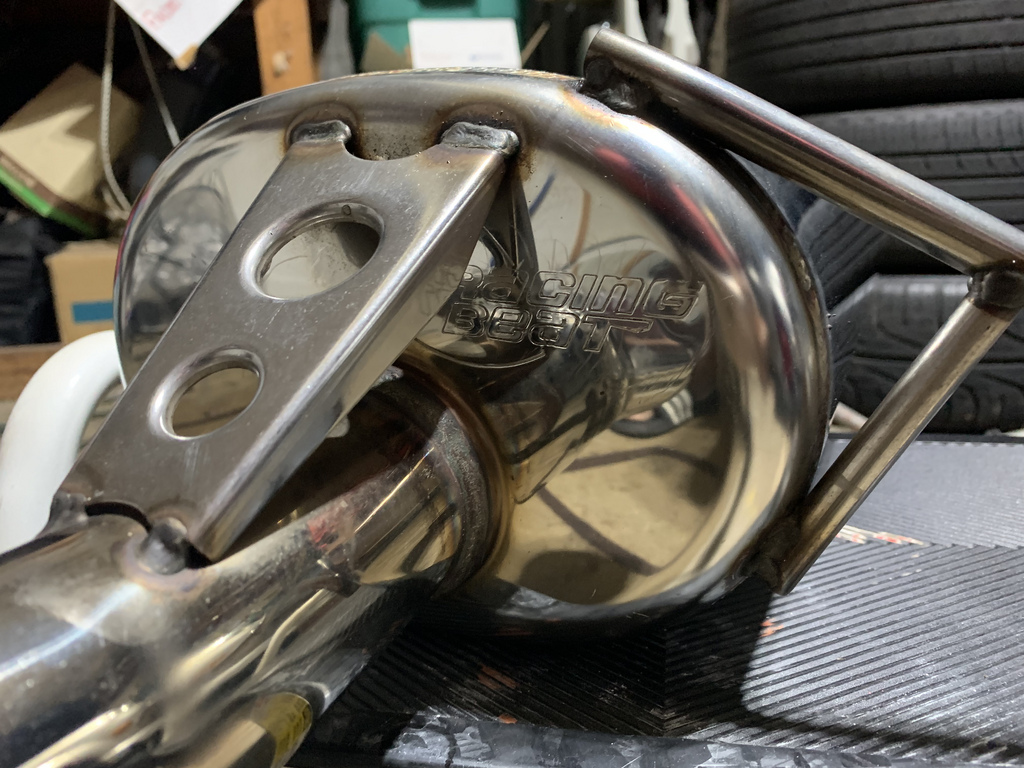
I decided to go with a Racing Beat muffler from a Mazdaspeed Protege, to hopefully quiet the car down. 
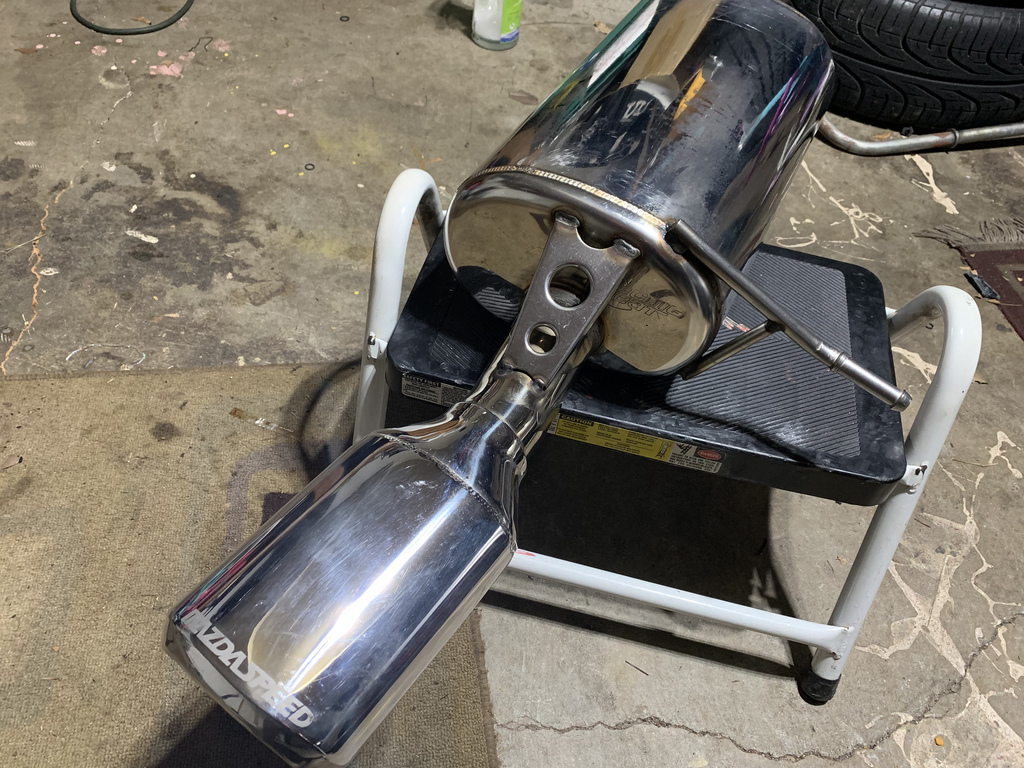
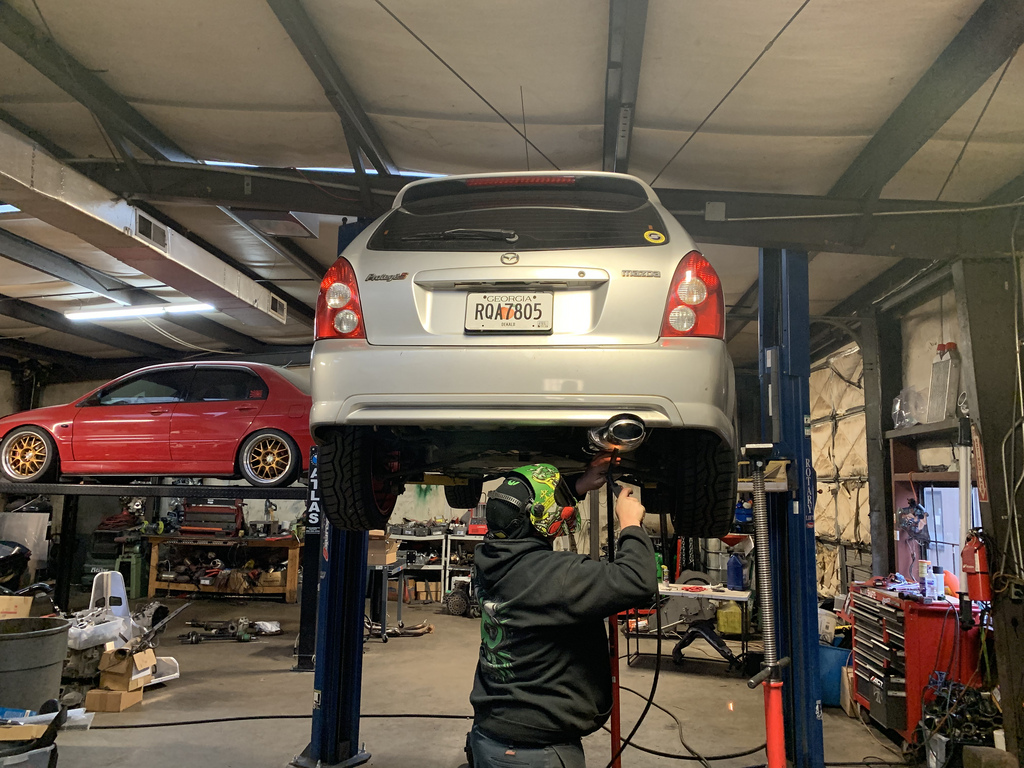
James at EBtec installing the Muffler.  The Protege 5 is not as long as the Protege sedan.  So it had to be modified to fit under the bumper
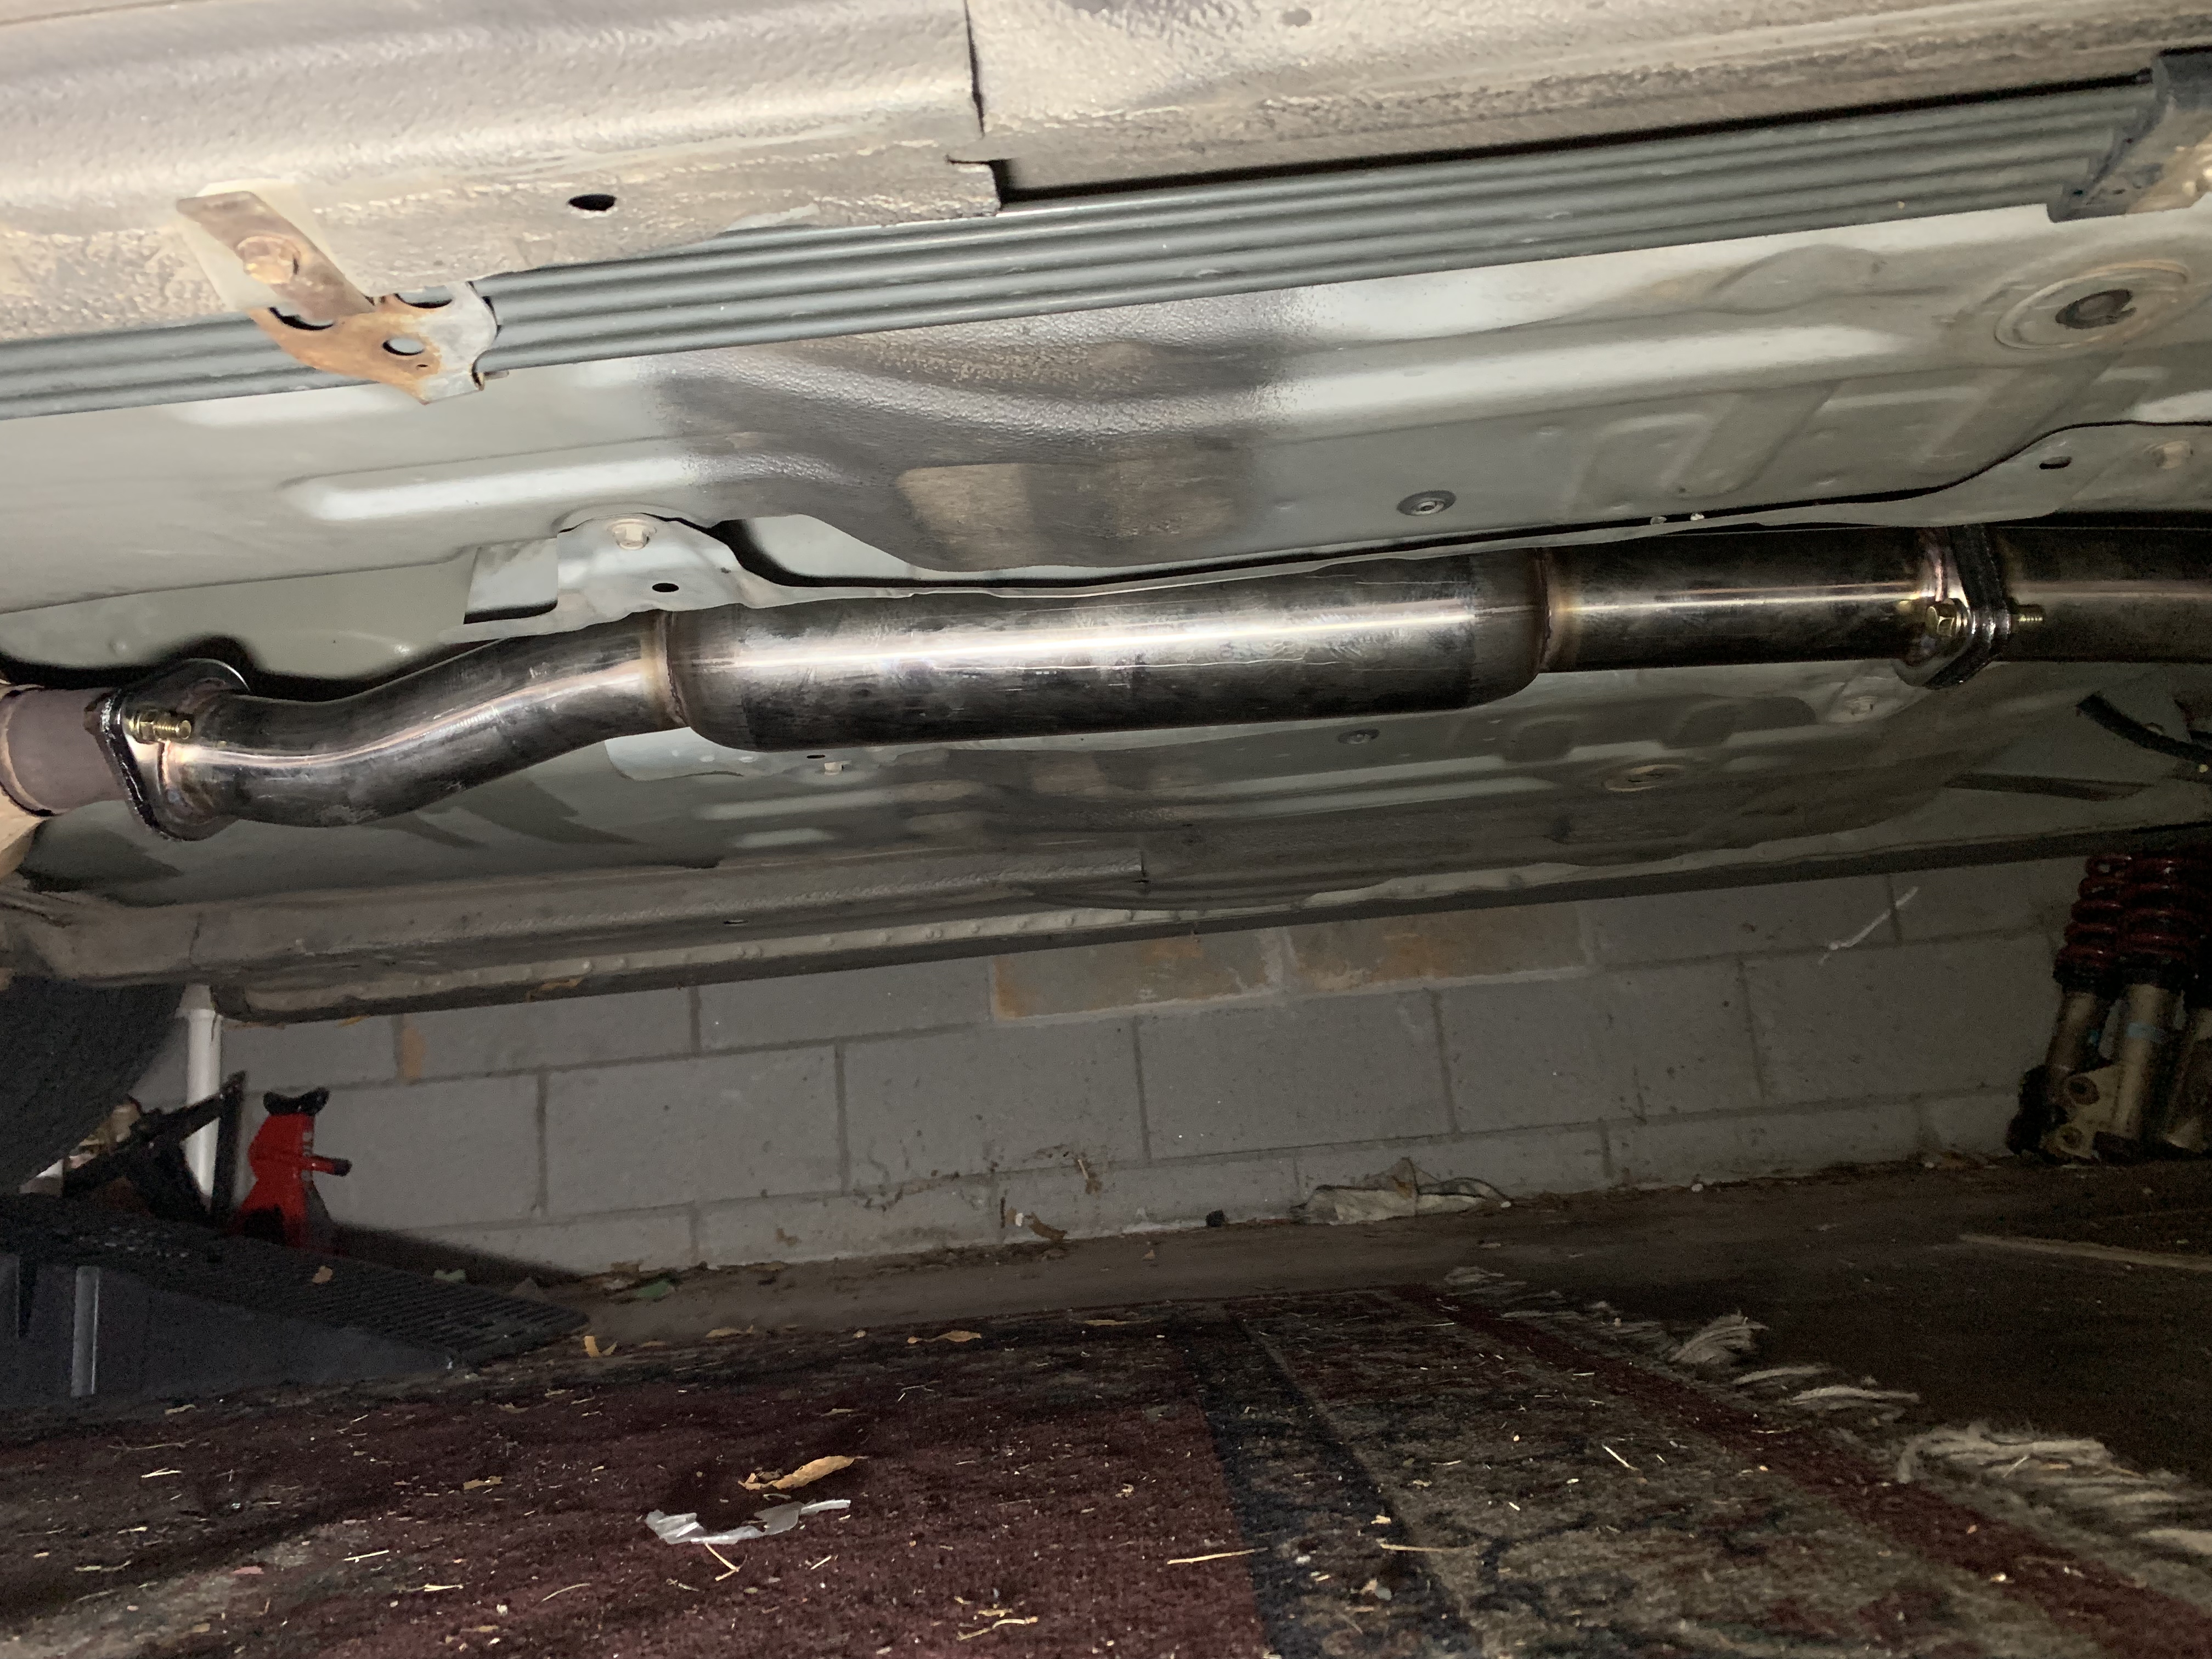
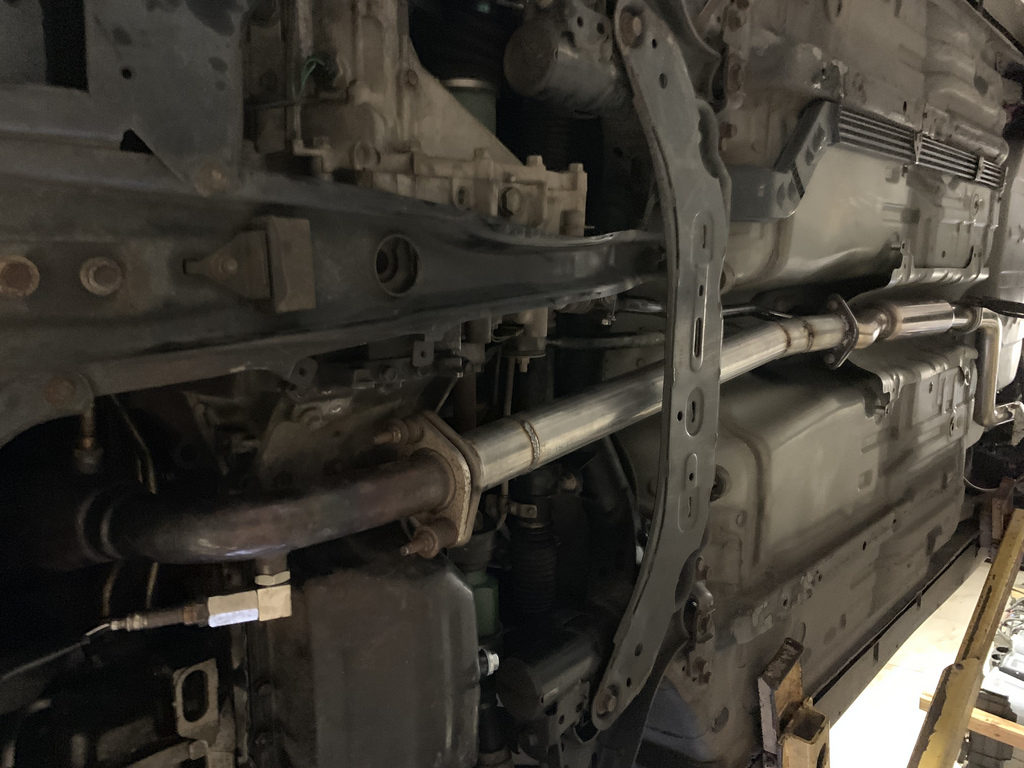
I also had them remove the catalytic converter.
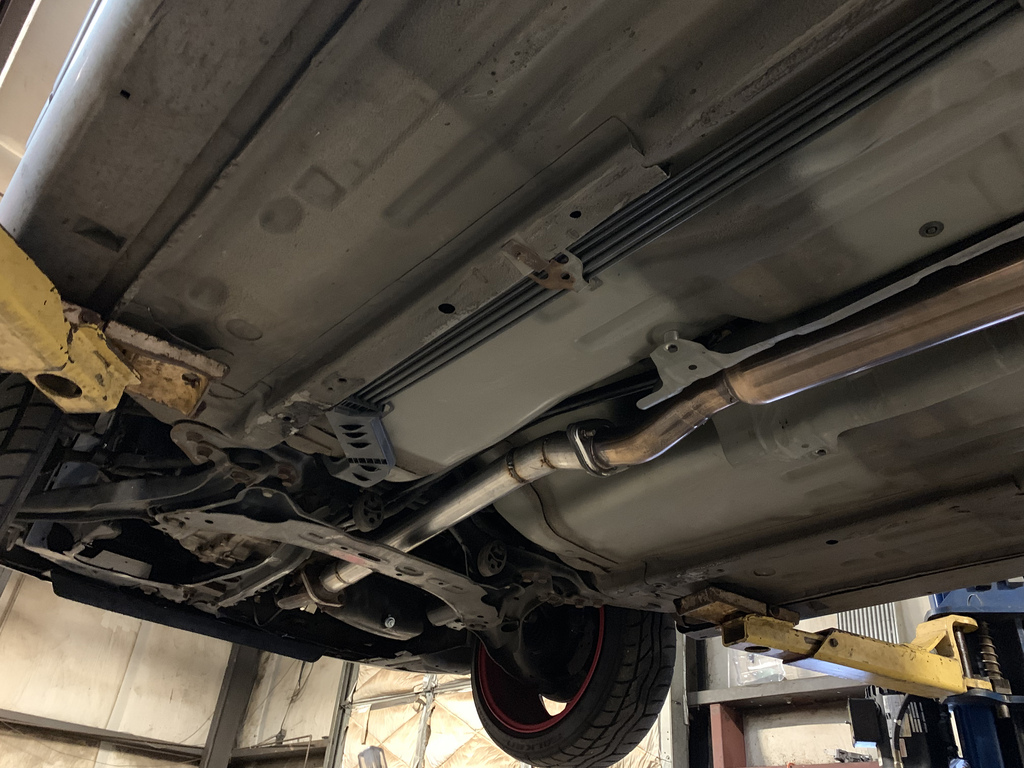
Mid to rear section.
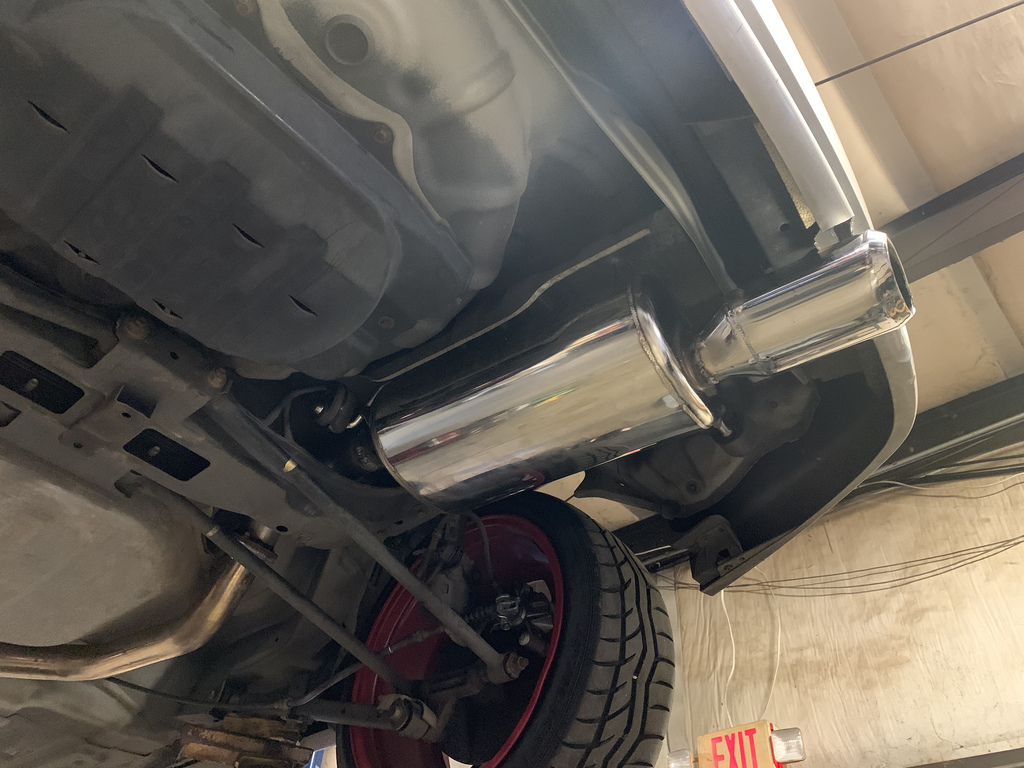
The muffler was much quieter, but still a little louder then I would like it.  So in the future ill need to add a resonator and flex pipe to it, and possibly replace the muffler in the future.
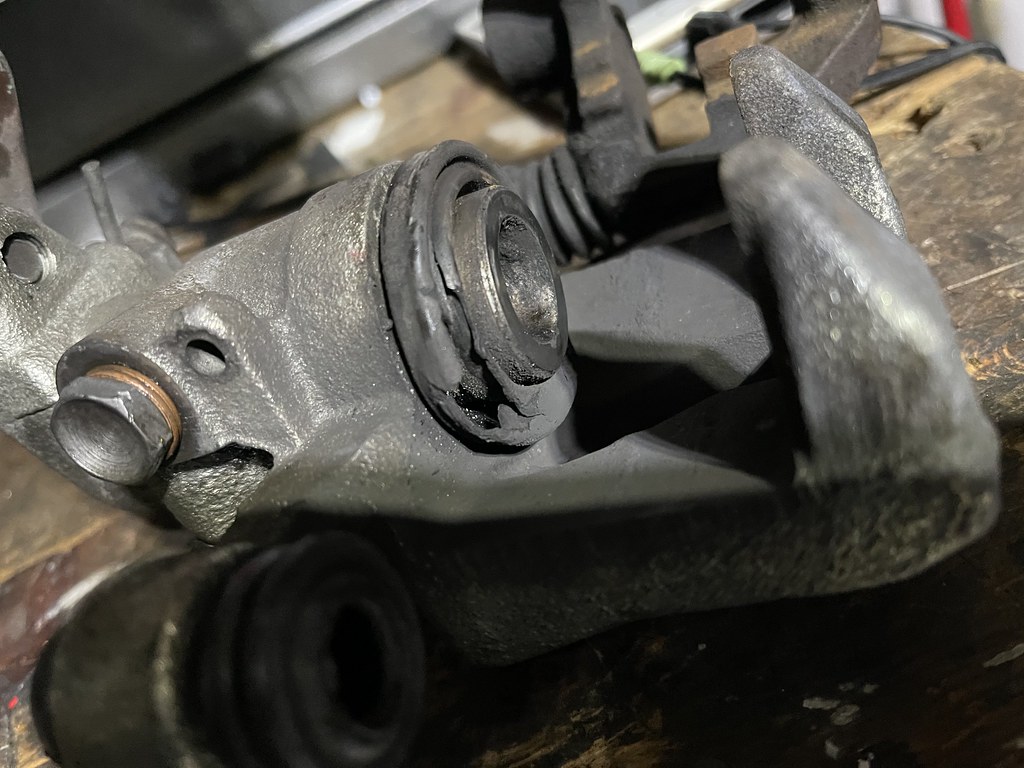
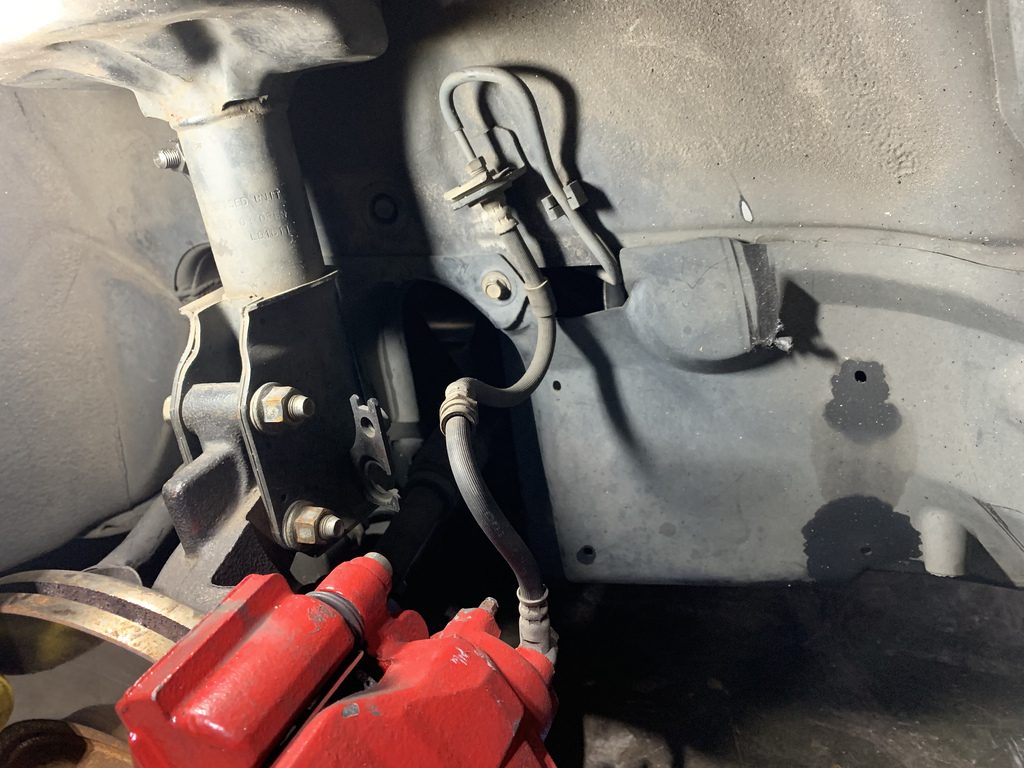
The next project was changing the brake and clutch lines to stainless steel lines.  As mentioned before the car was taken care of by the 2 previous owners, and it looked like one of the rear calipers had been replaced at one point.  But if I am going to be putting all confidence into my brakes then I needed to upgrade the brake lines.
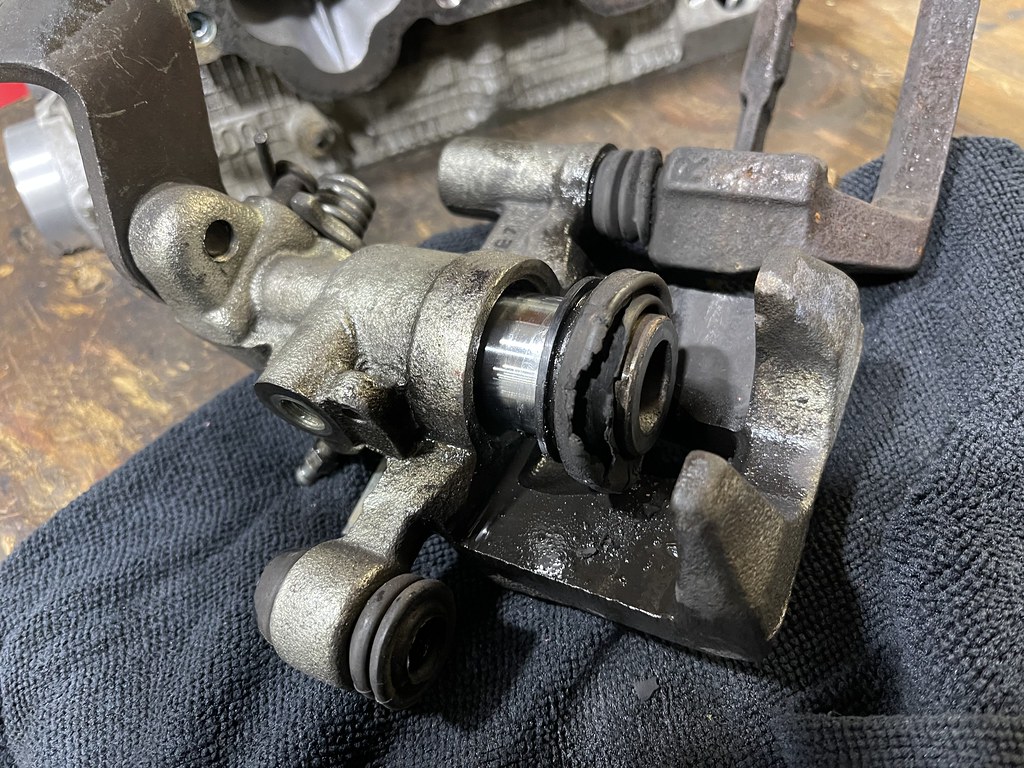
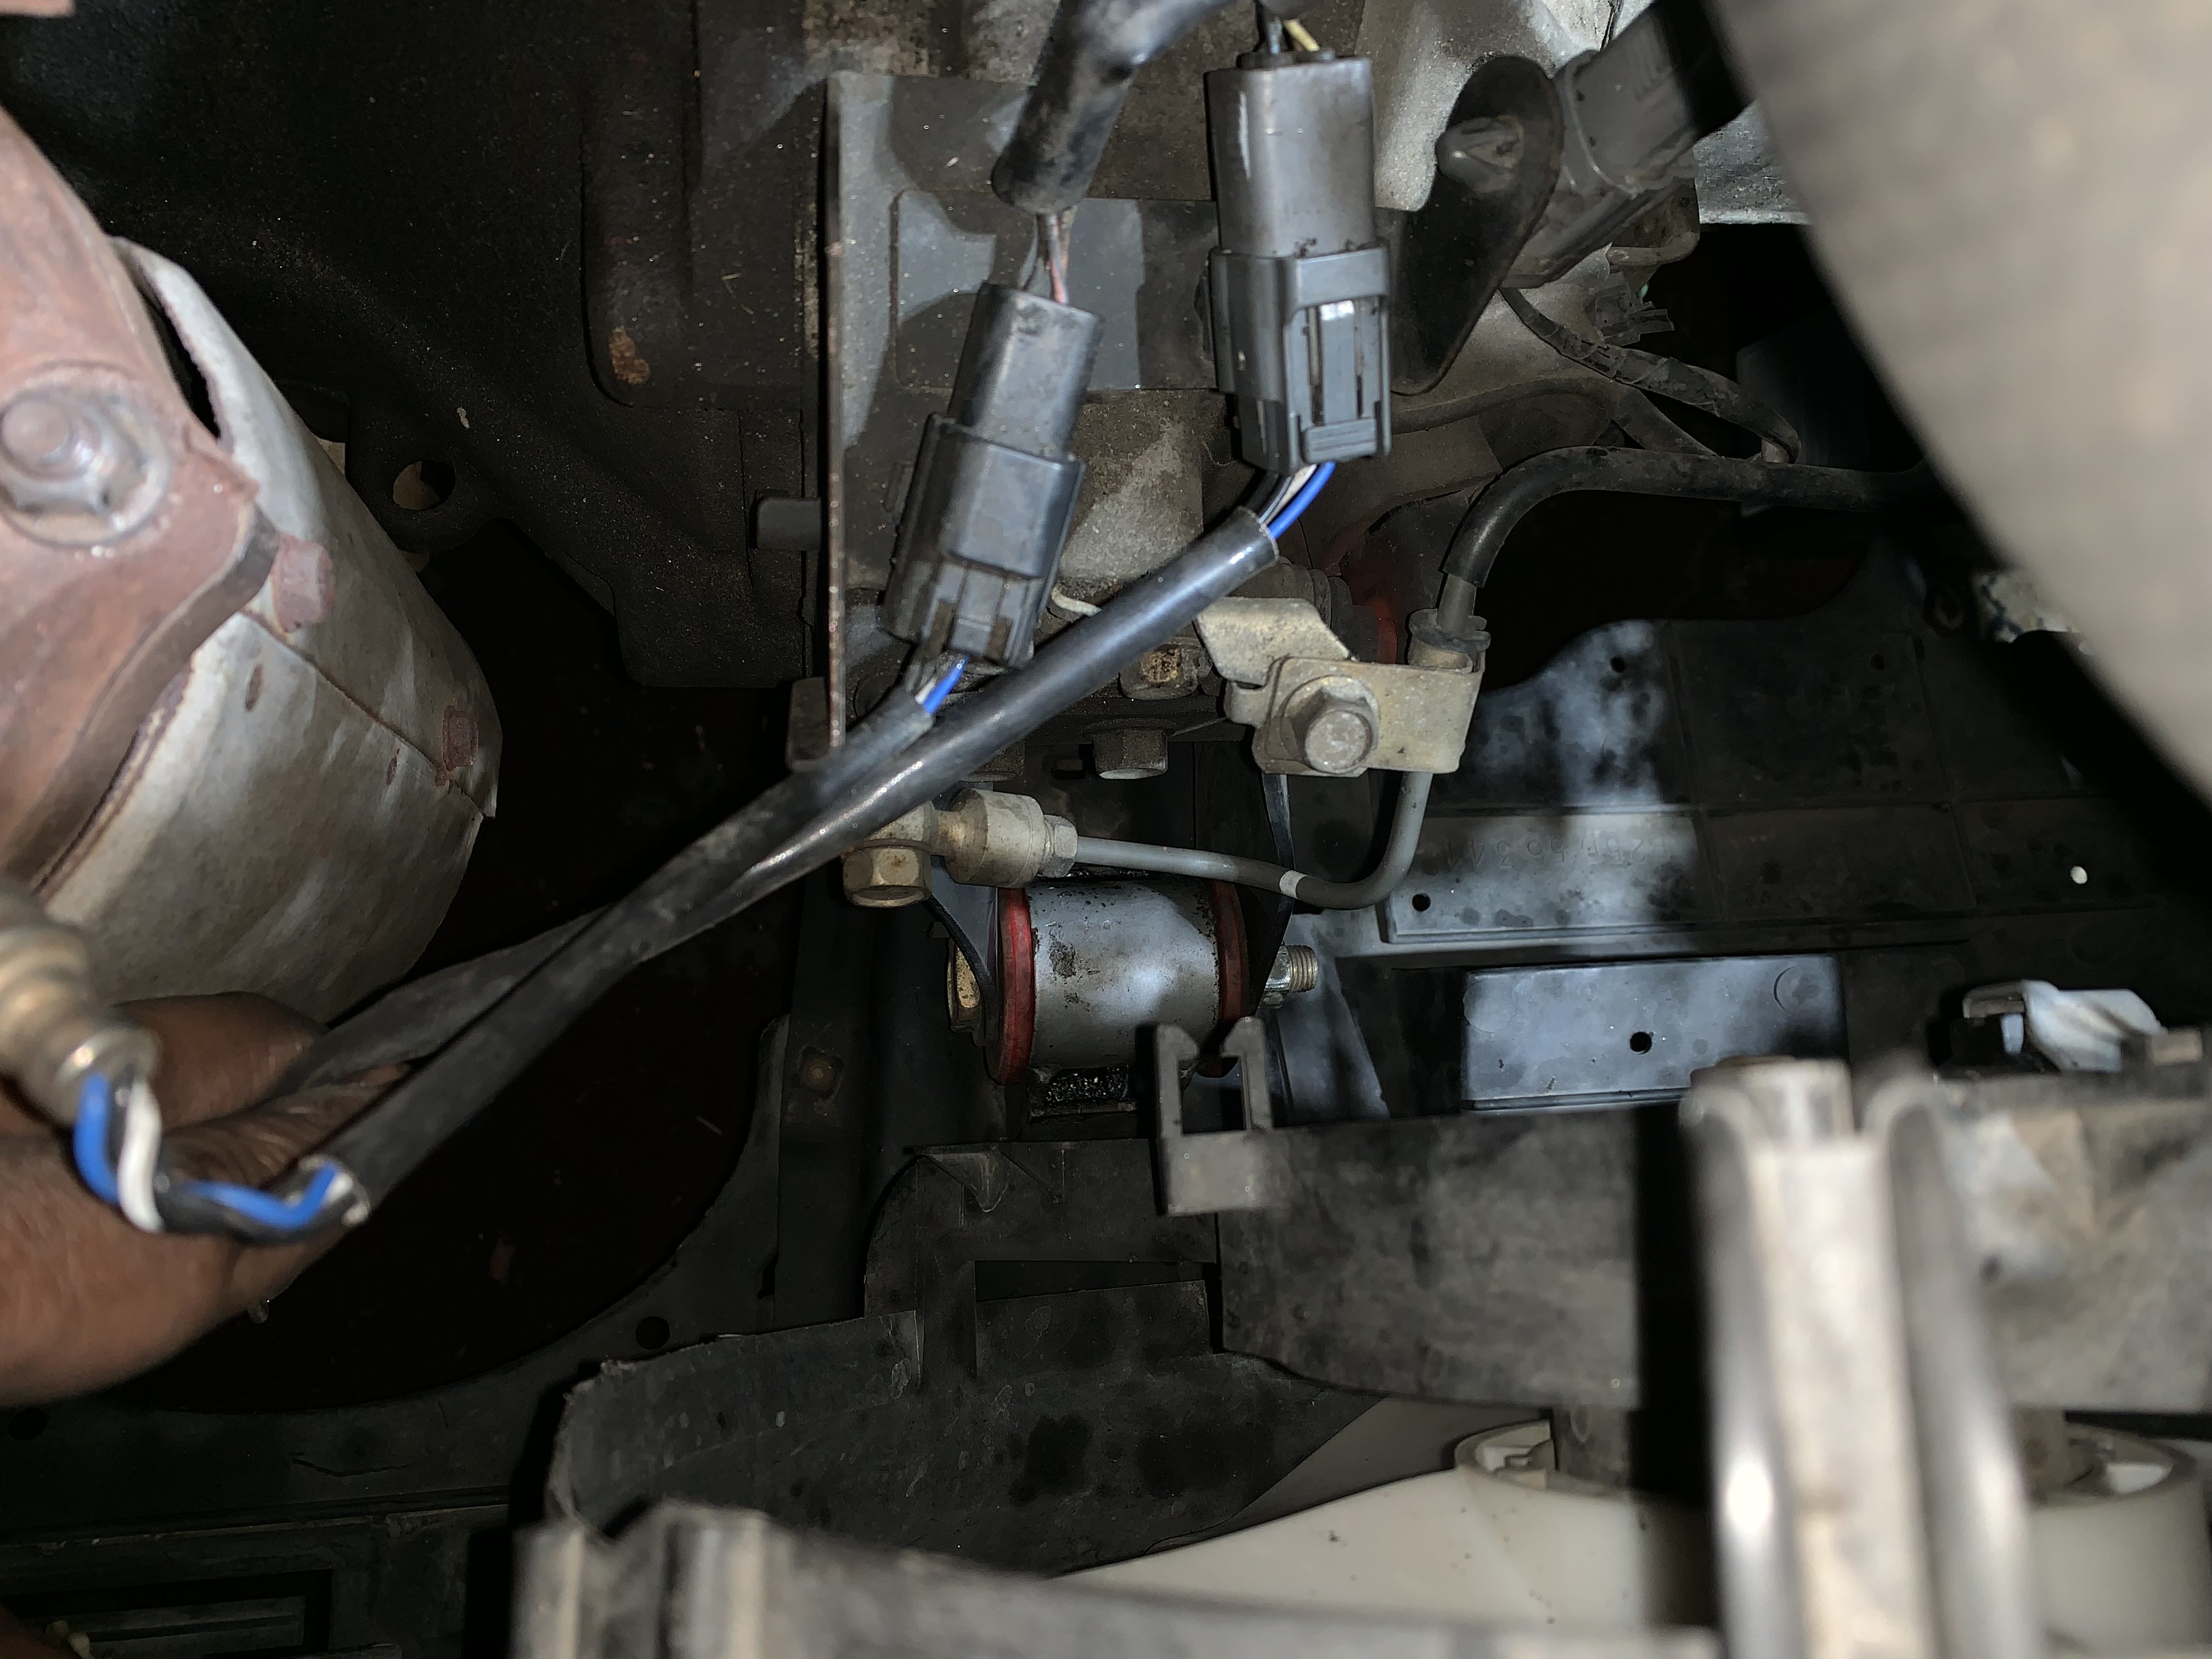
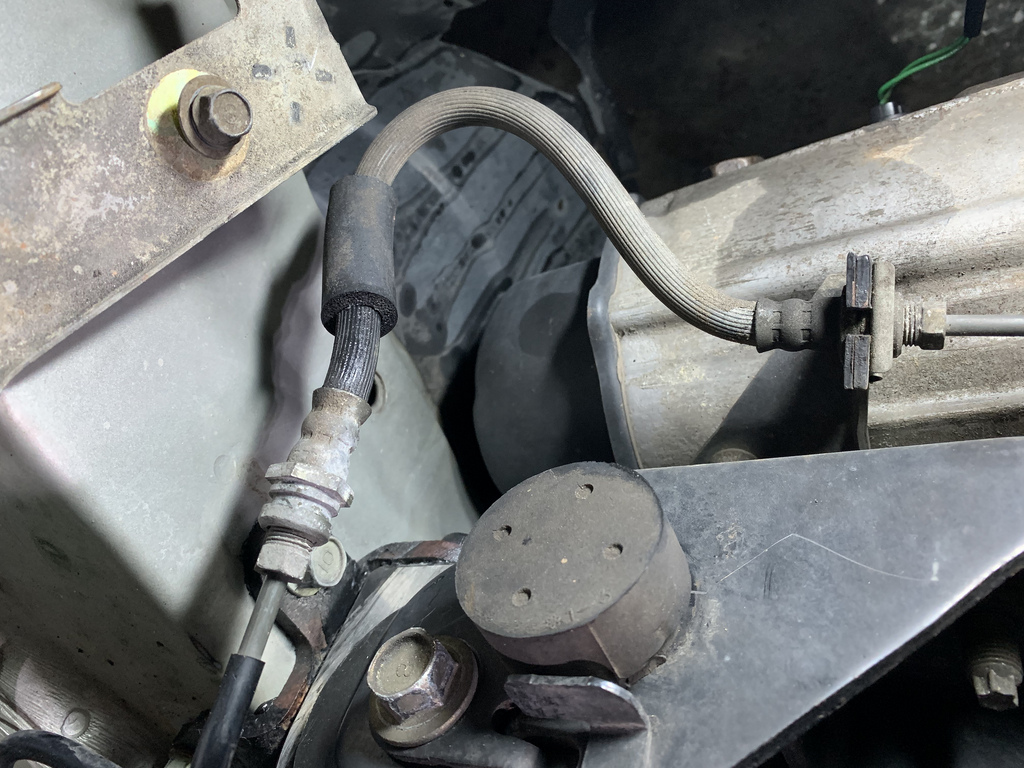
Most of the clutch lines are metal, but a part of it is rubber, and looking at one of the ends, you can see that it could be a potential issue if abused or put under any additional pressure over regular driving.
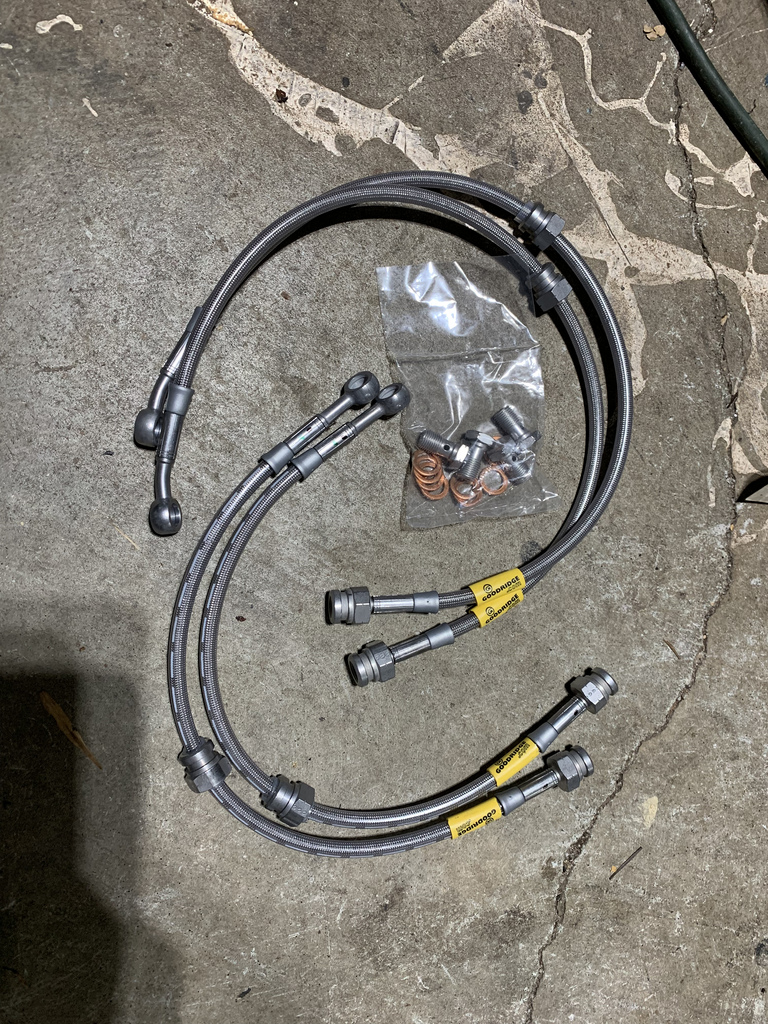
Went with the Goodridge Stainless Steel lines from Atlanta Speed Company 
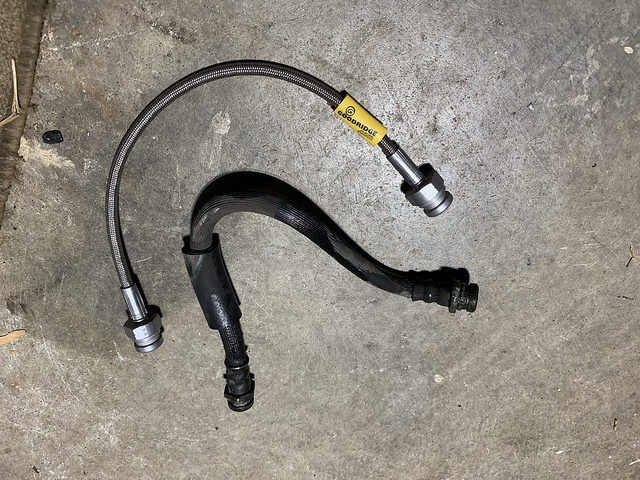
I was able to find a matching stainless steel line for the clutch on eBay to match the brake lines.
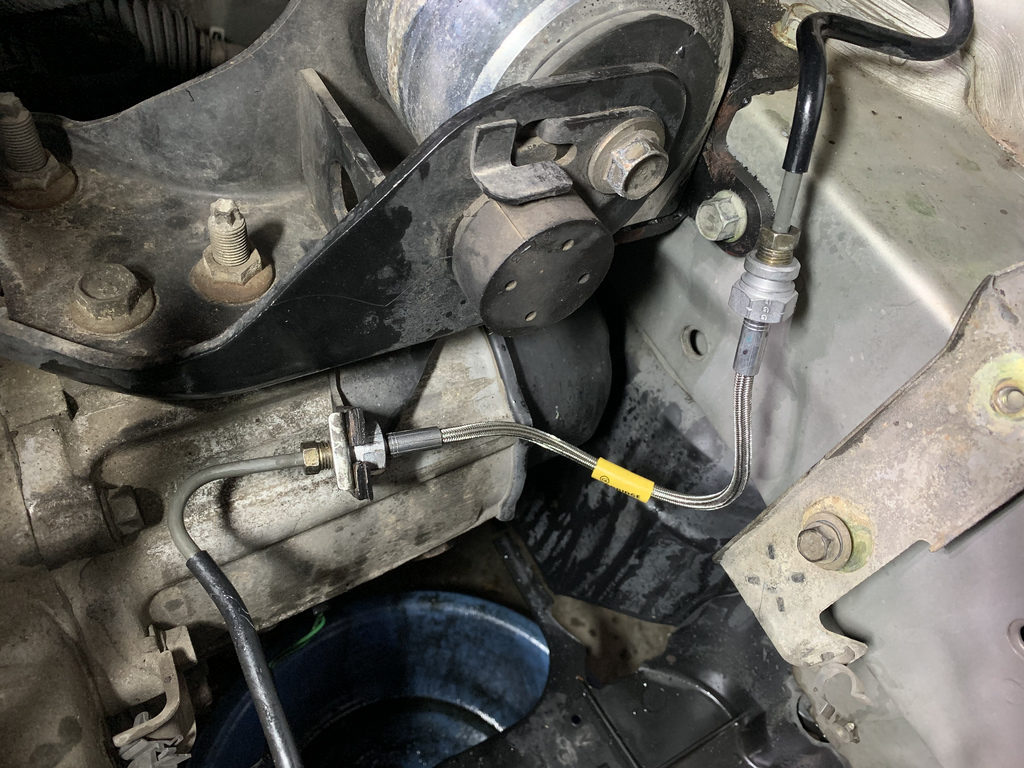
Clutch line in
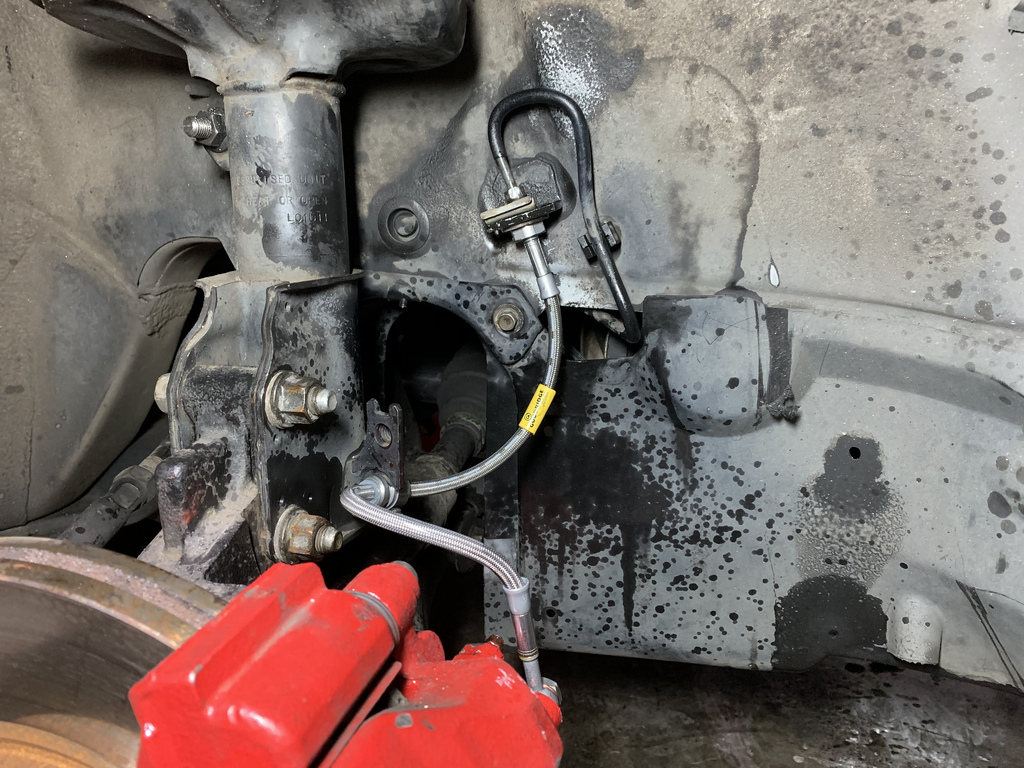
Everything fit well, and went on without a hitch.  I had a little trouble with getting the caliper bolt off, and unbolting the bleeder line, so excuse the mess from PB blaster.
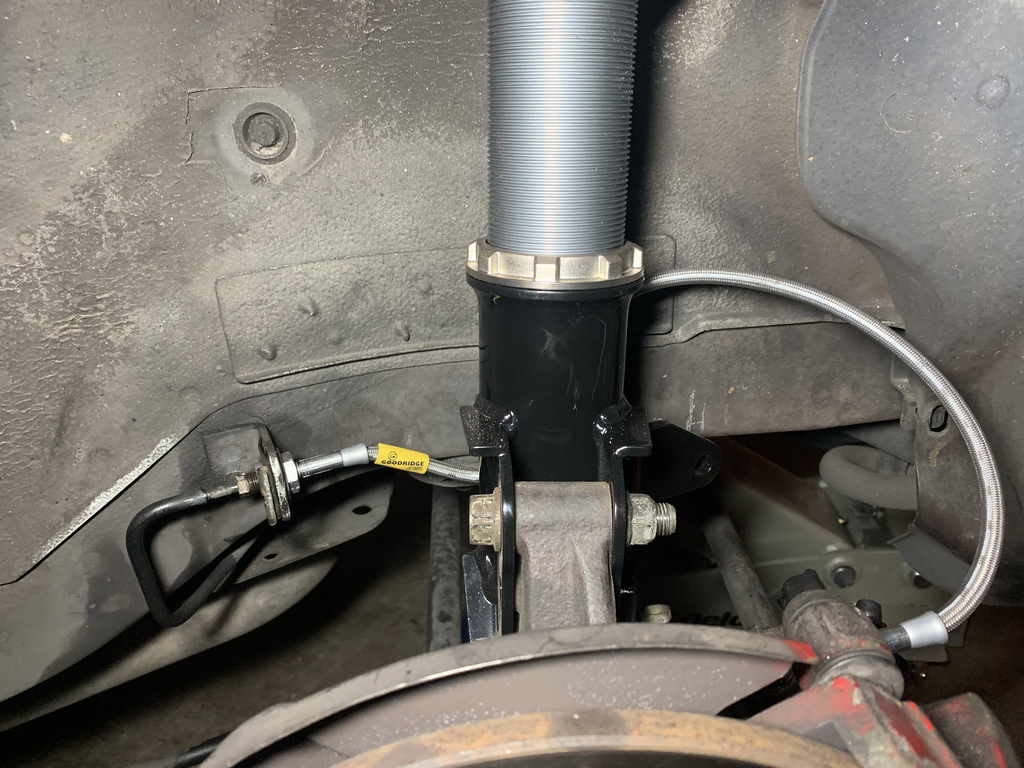
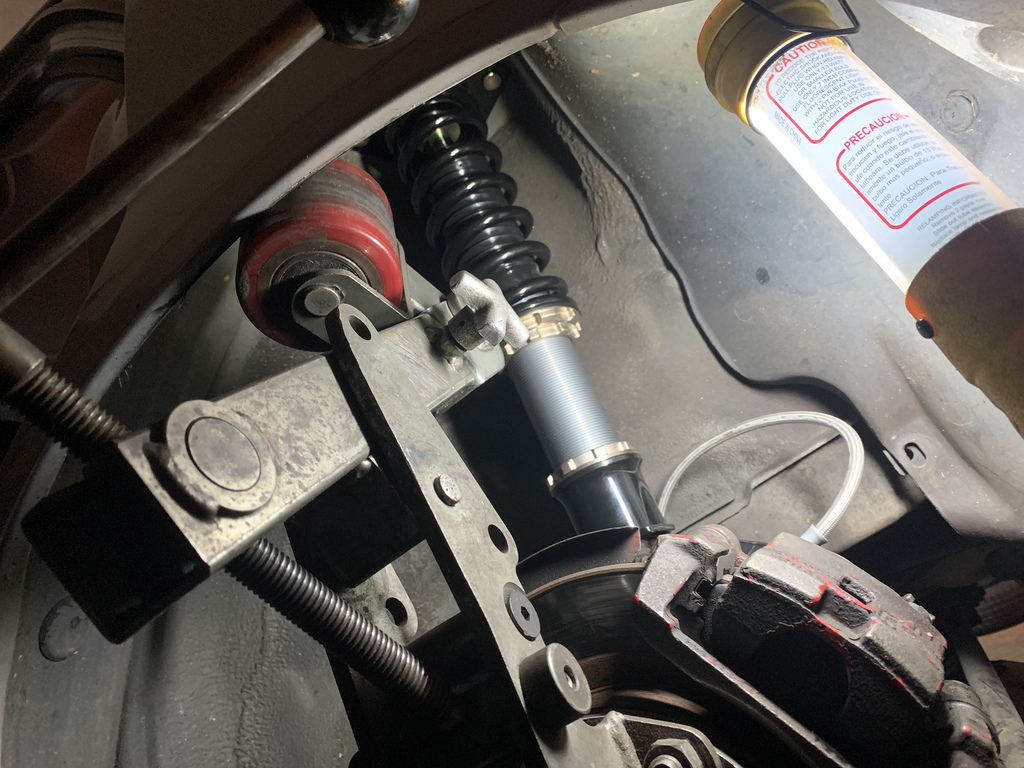
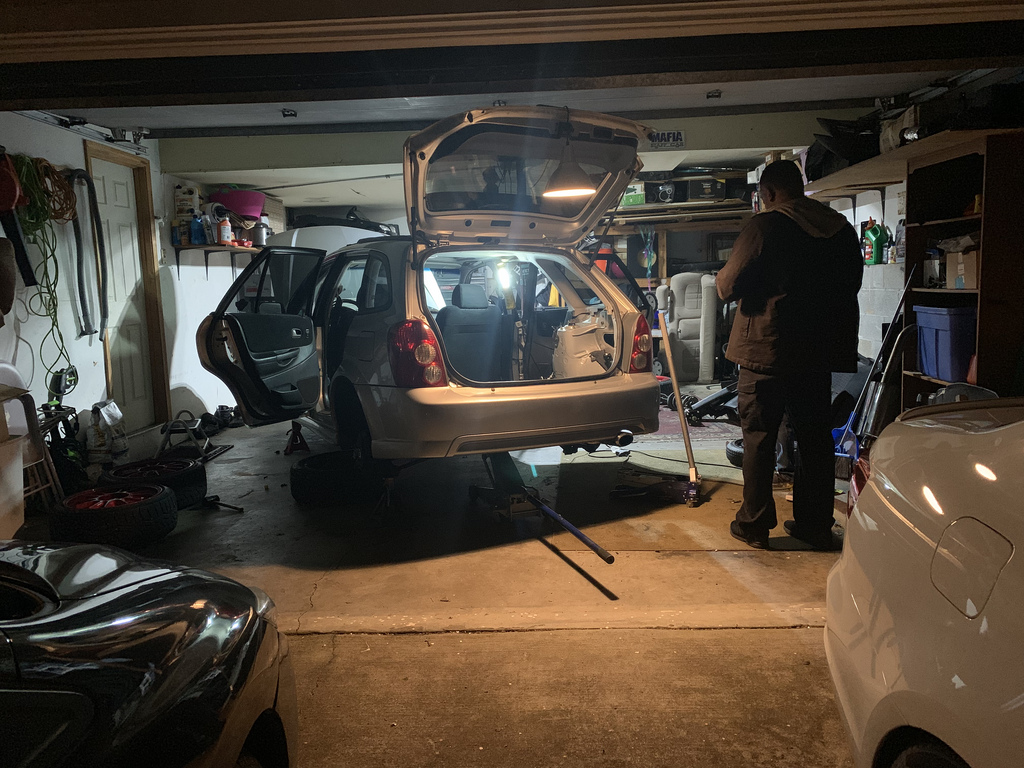
It was crunch time, and down to the wire, and we still had not gotten coilovers for the car.  But Friday afternoon we received our goodies from BC Racing just in time for Sundays track day.  From the start I was not sure on what coilover to go with after not having any luck with the used set I bought when I first got the car.
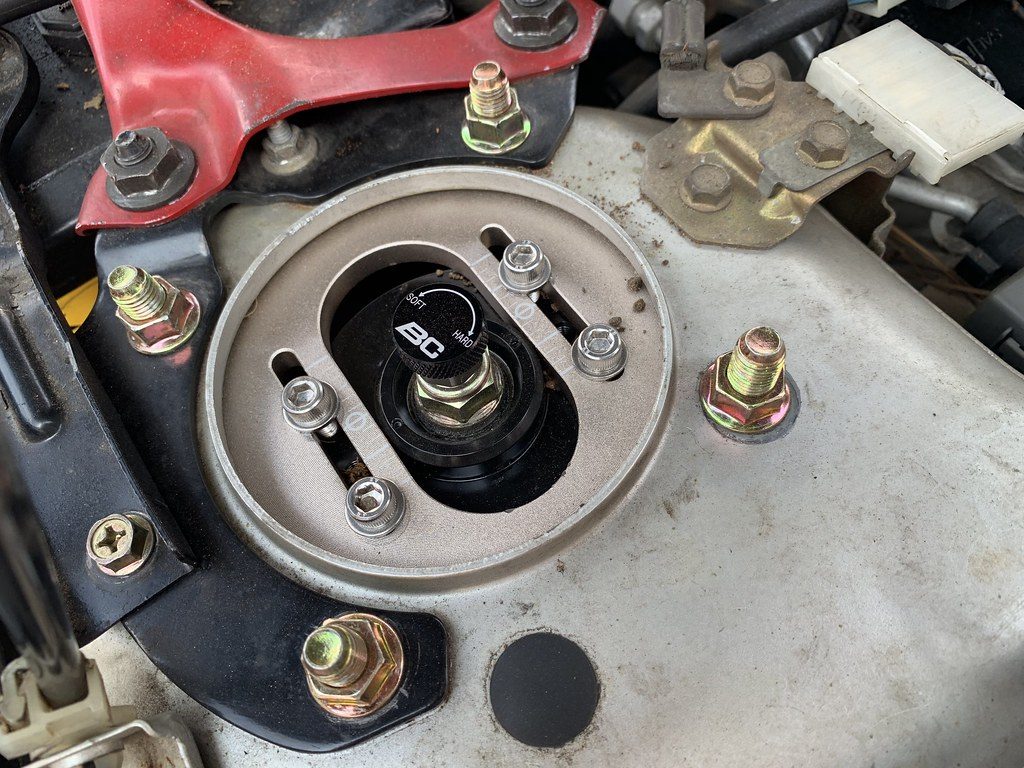
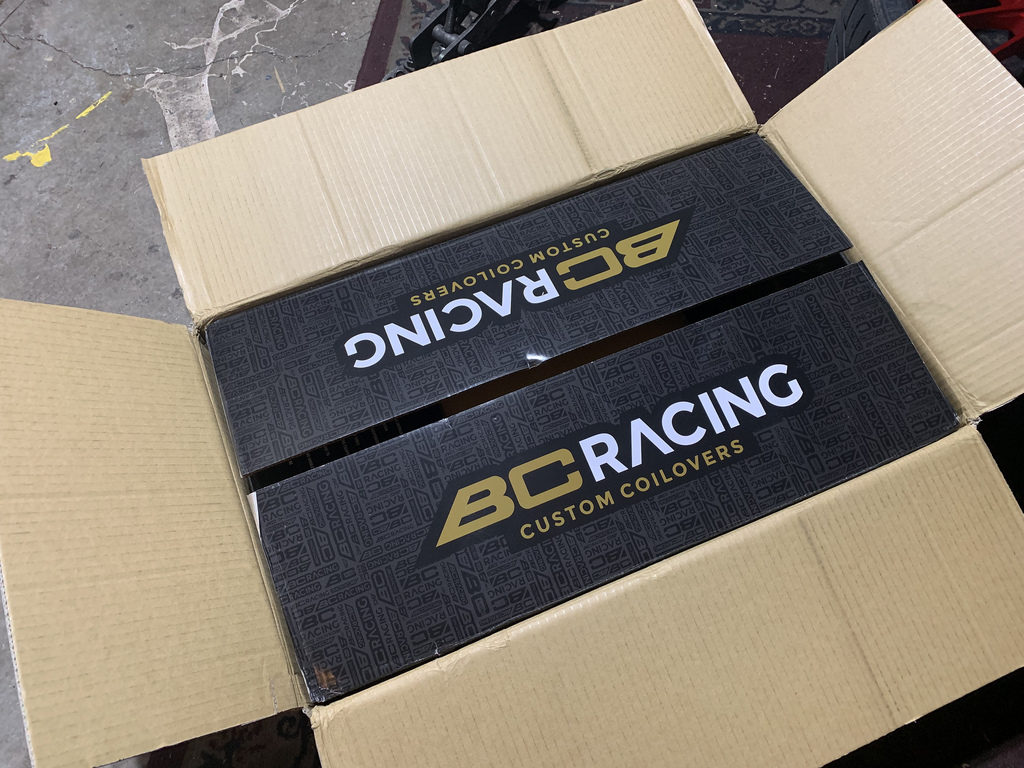
Having worked with BC Racing with my Mazda 6, we decided to run them on the Protege 5.  The Mazda 6 was put together to look good, and be low so we used their BR series , and they worked out great and achieved what I wanted with that car. 
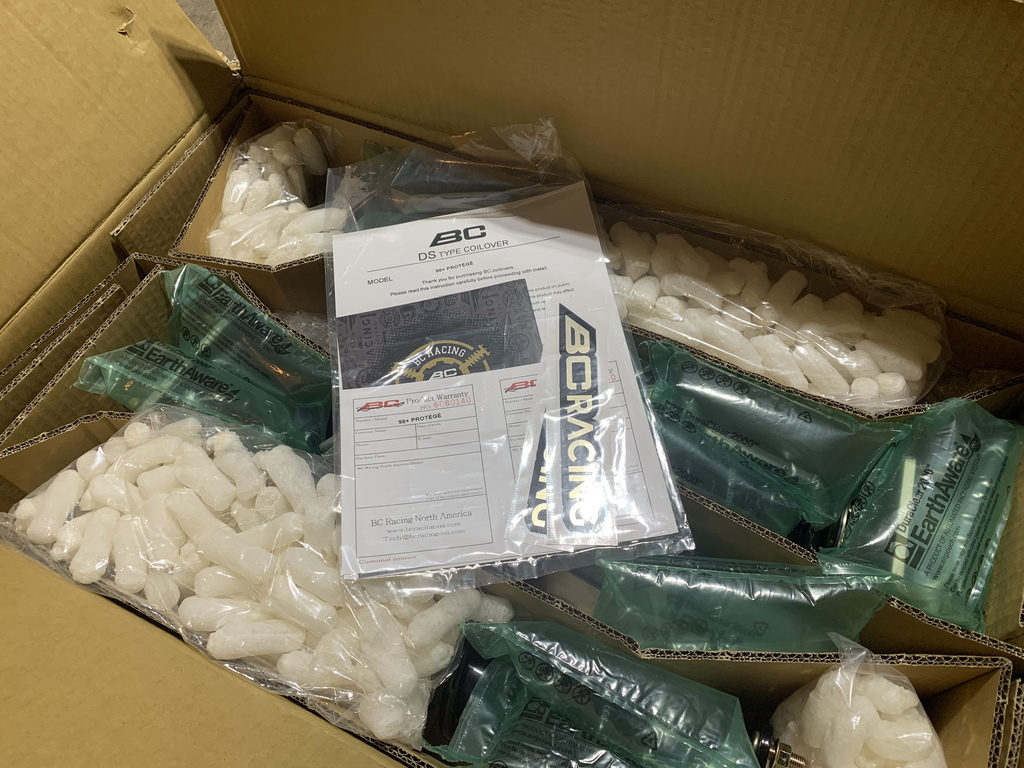
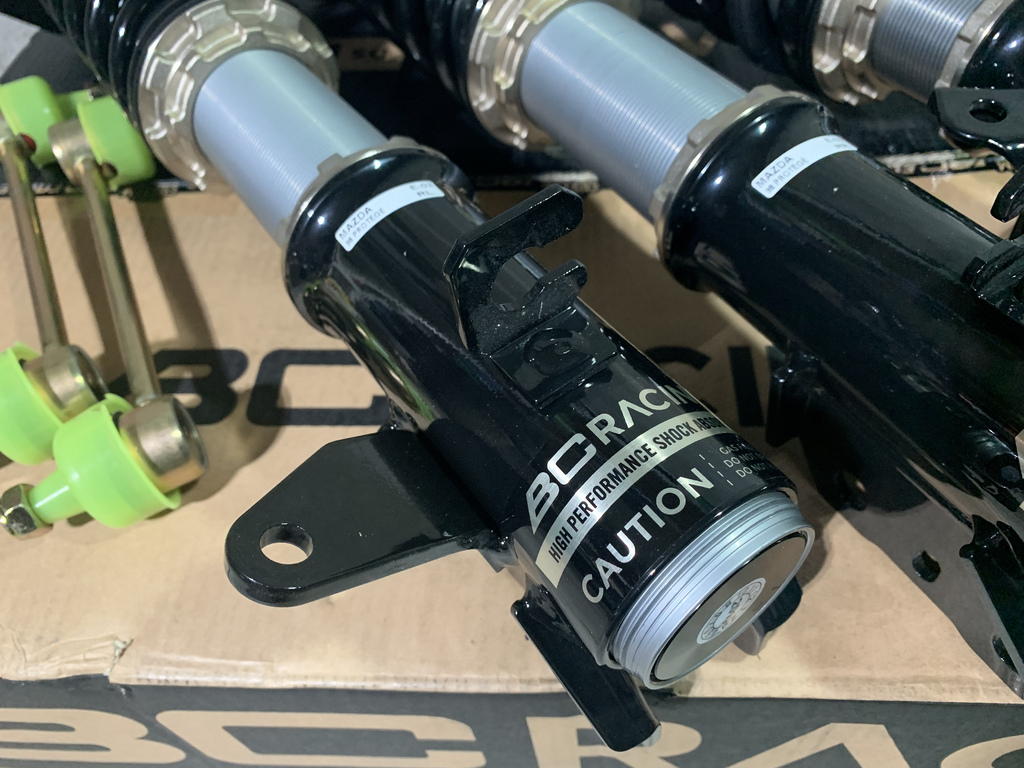
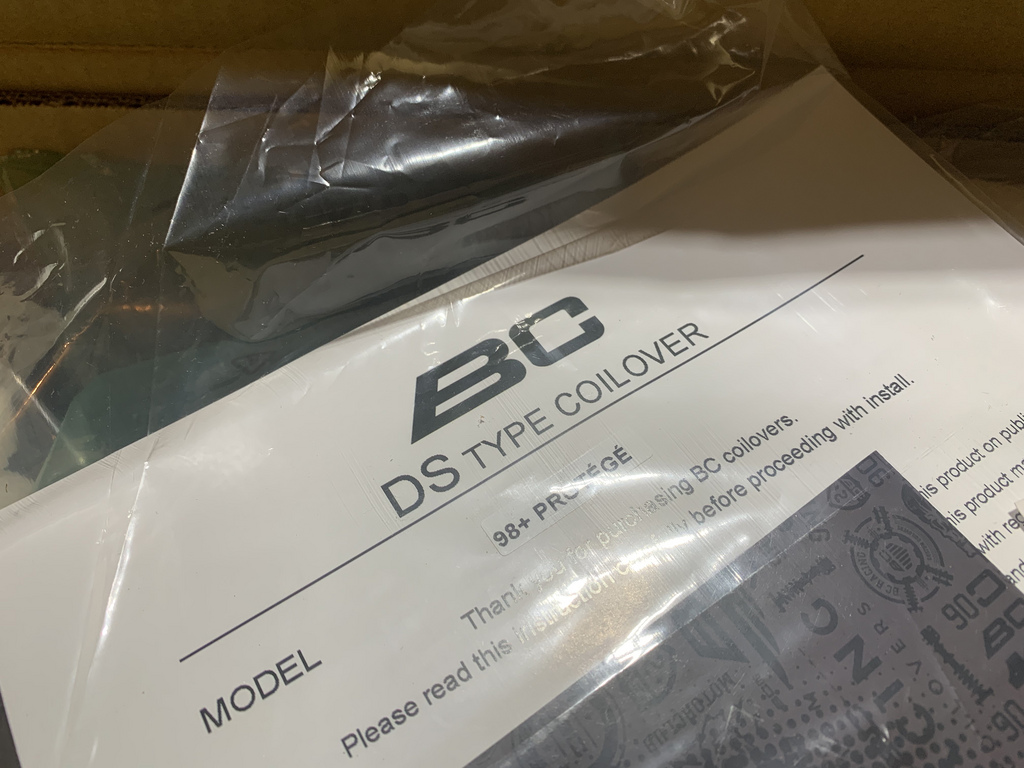
BC Racing has introduced a new DS Series , that is geared more towards track use, instead of just being low.  The biggest change is the digressive style shock over the linear style in the BR Series.  I really never knew the difference between the two, so I read up and learned as much as I could about the differences.
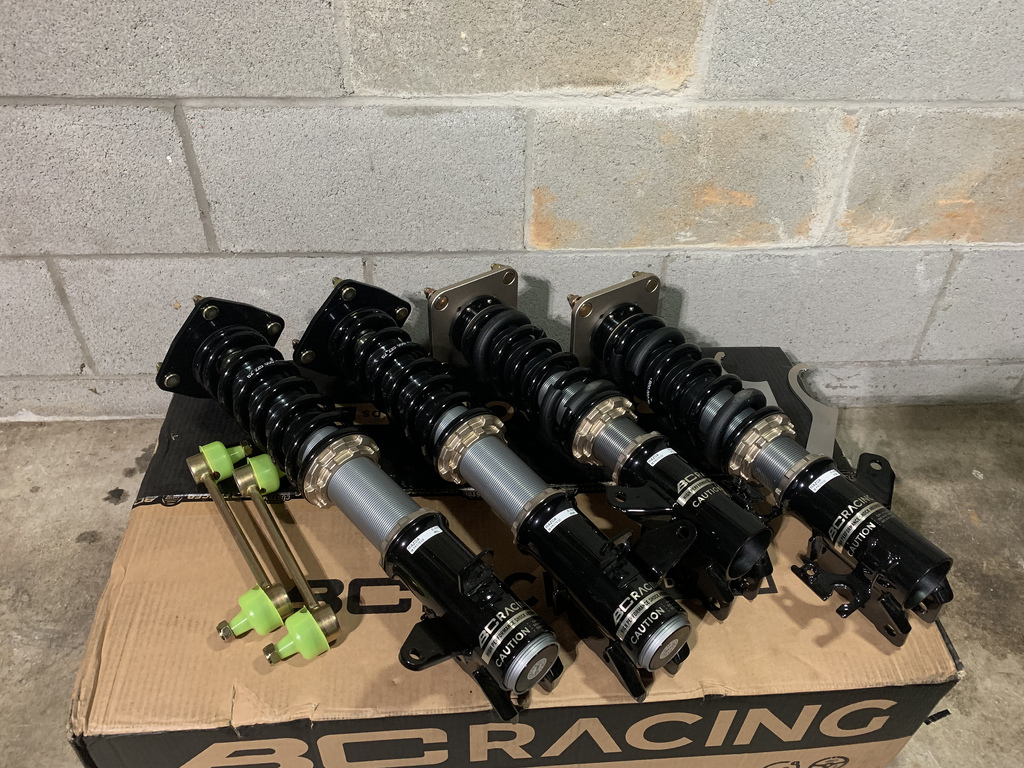
The Digressive piston shocks provide a slower rebound at higher speeds , and hard cornering, which is perfect for track use.  The down side is the alternative to having a slightly harsher ride with daily driving and small bumps at slower speeds.  From what I read up about the two styles, it seemed like the perfect setup for the Protege.
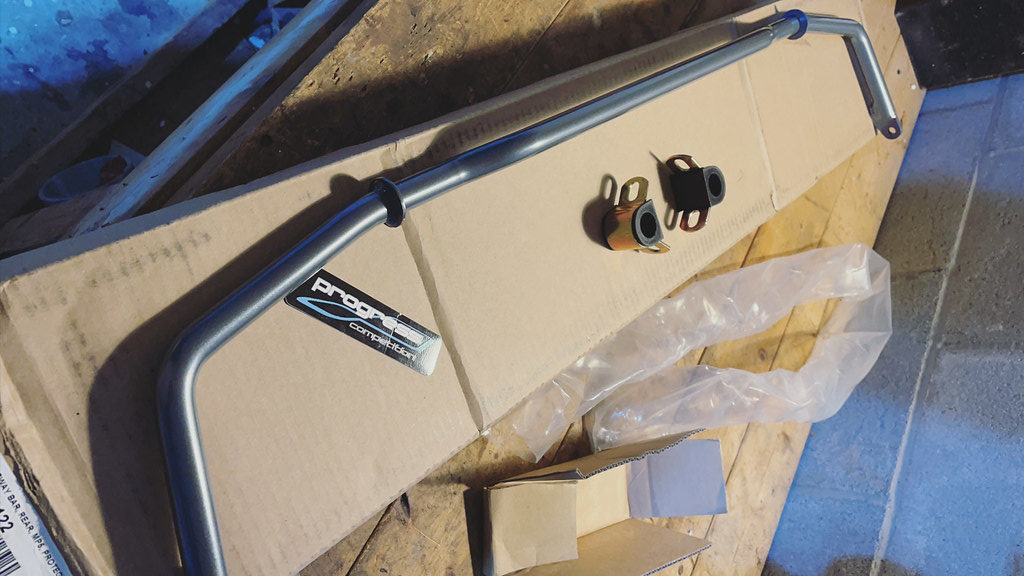
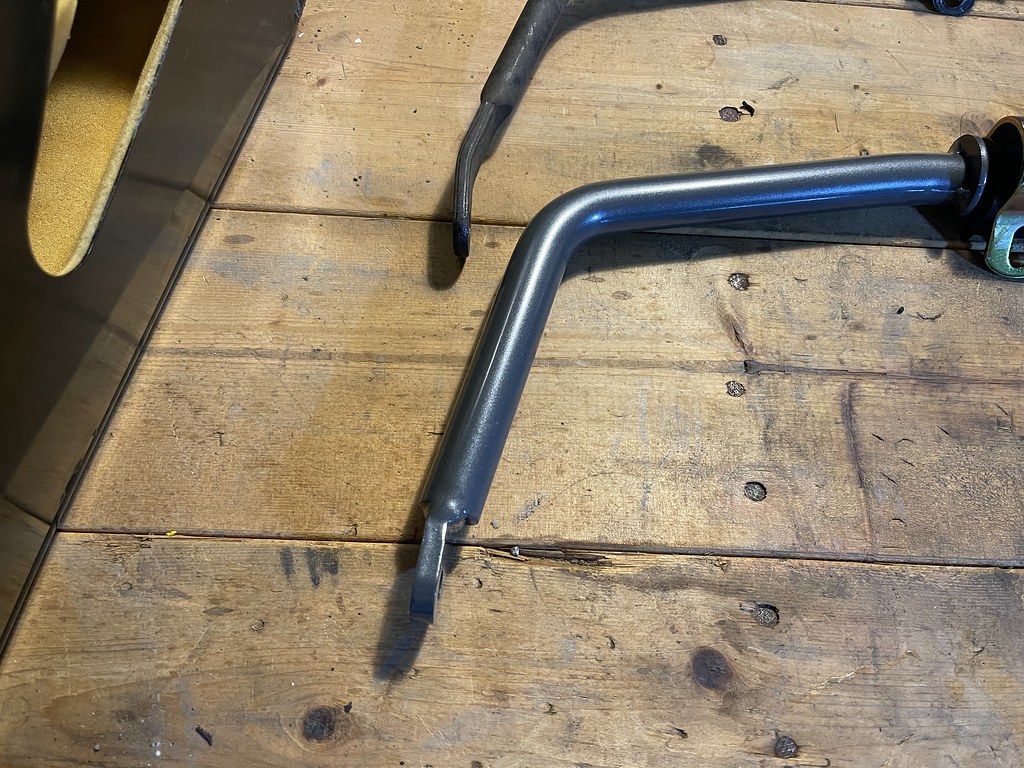
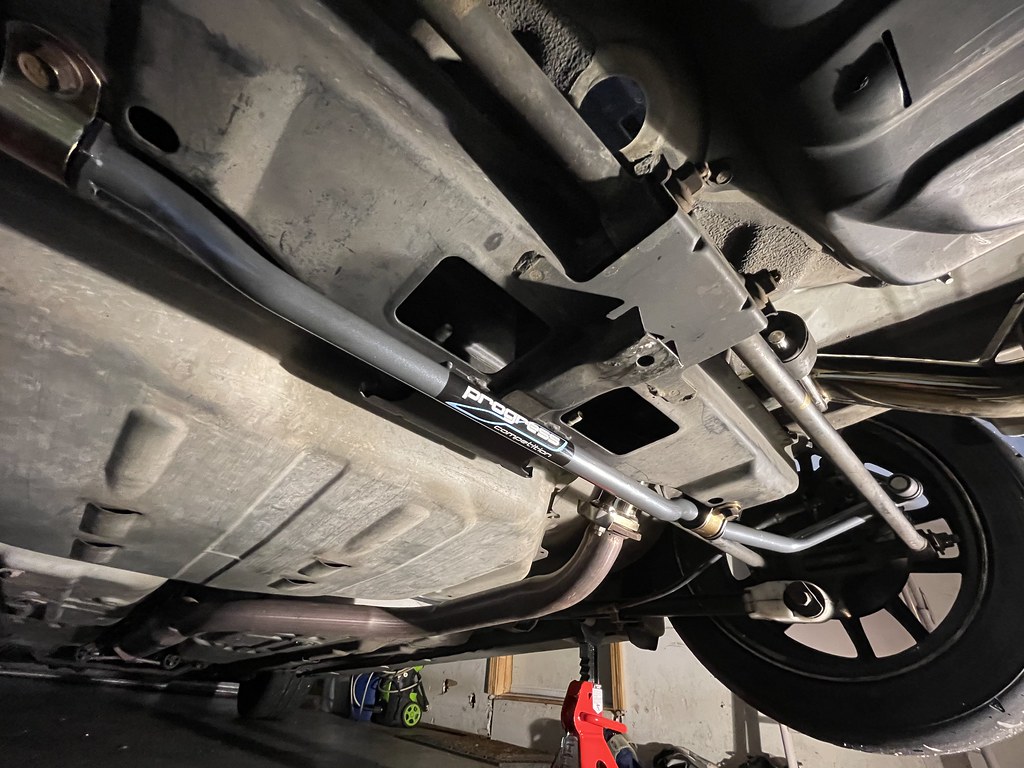
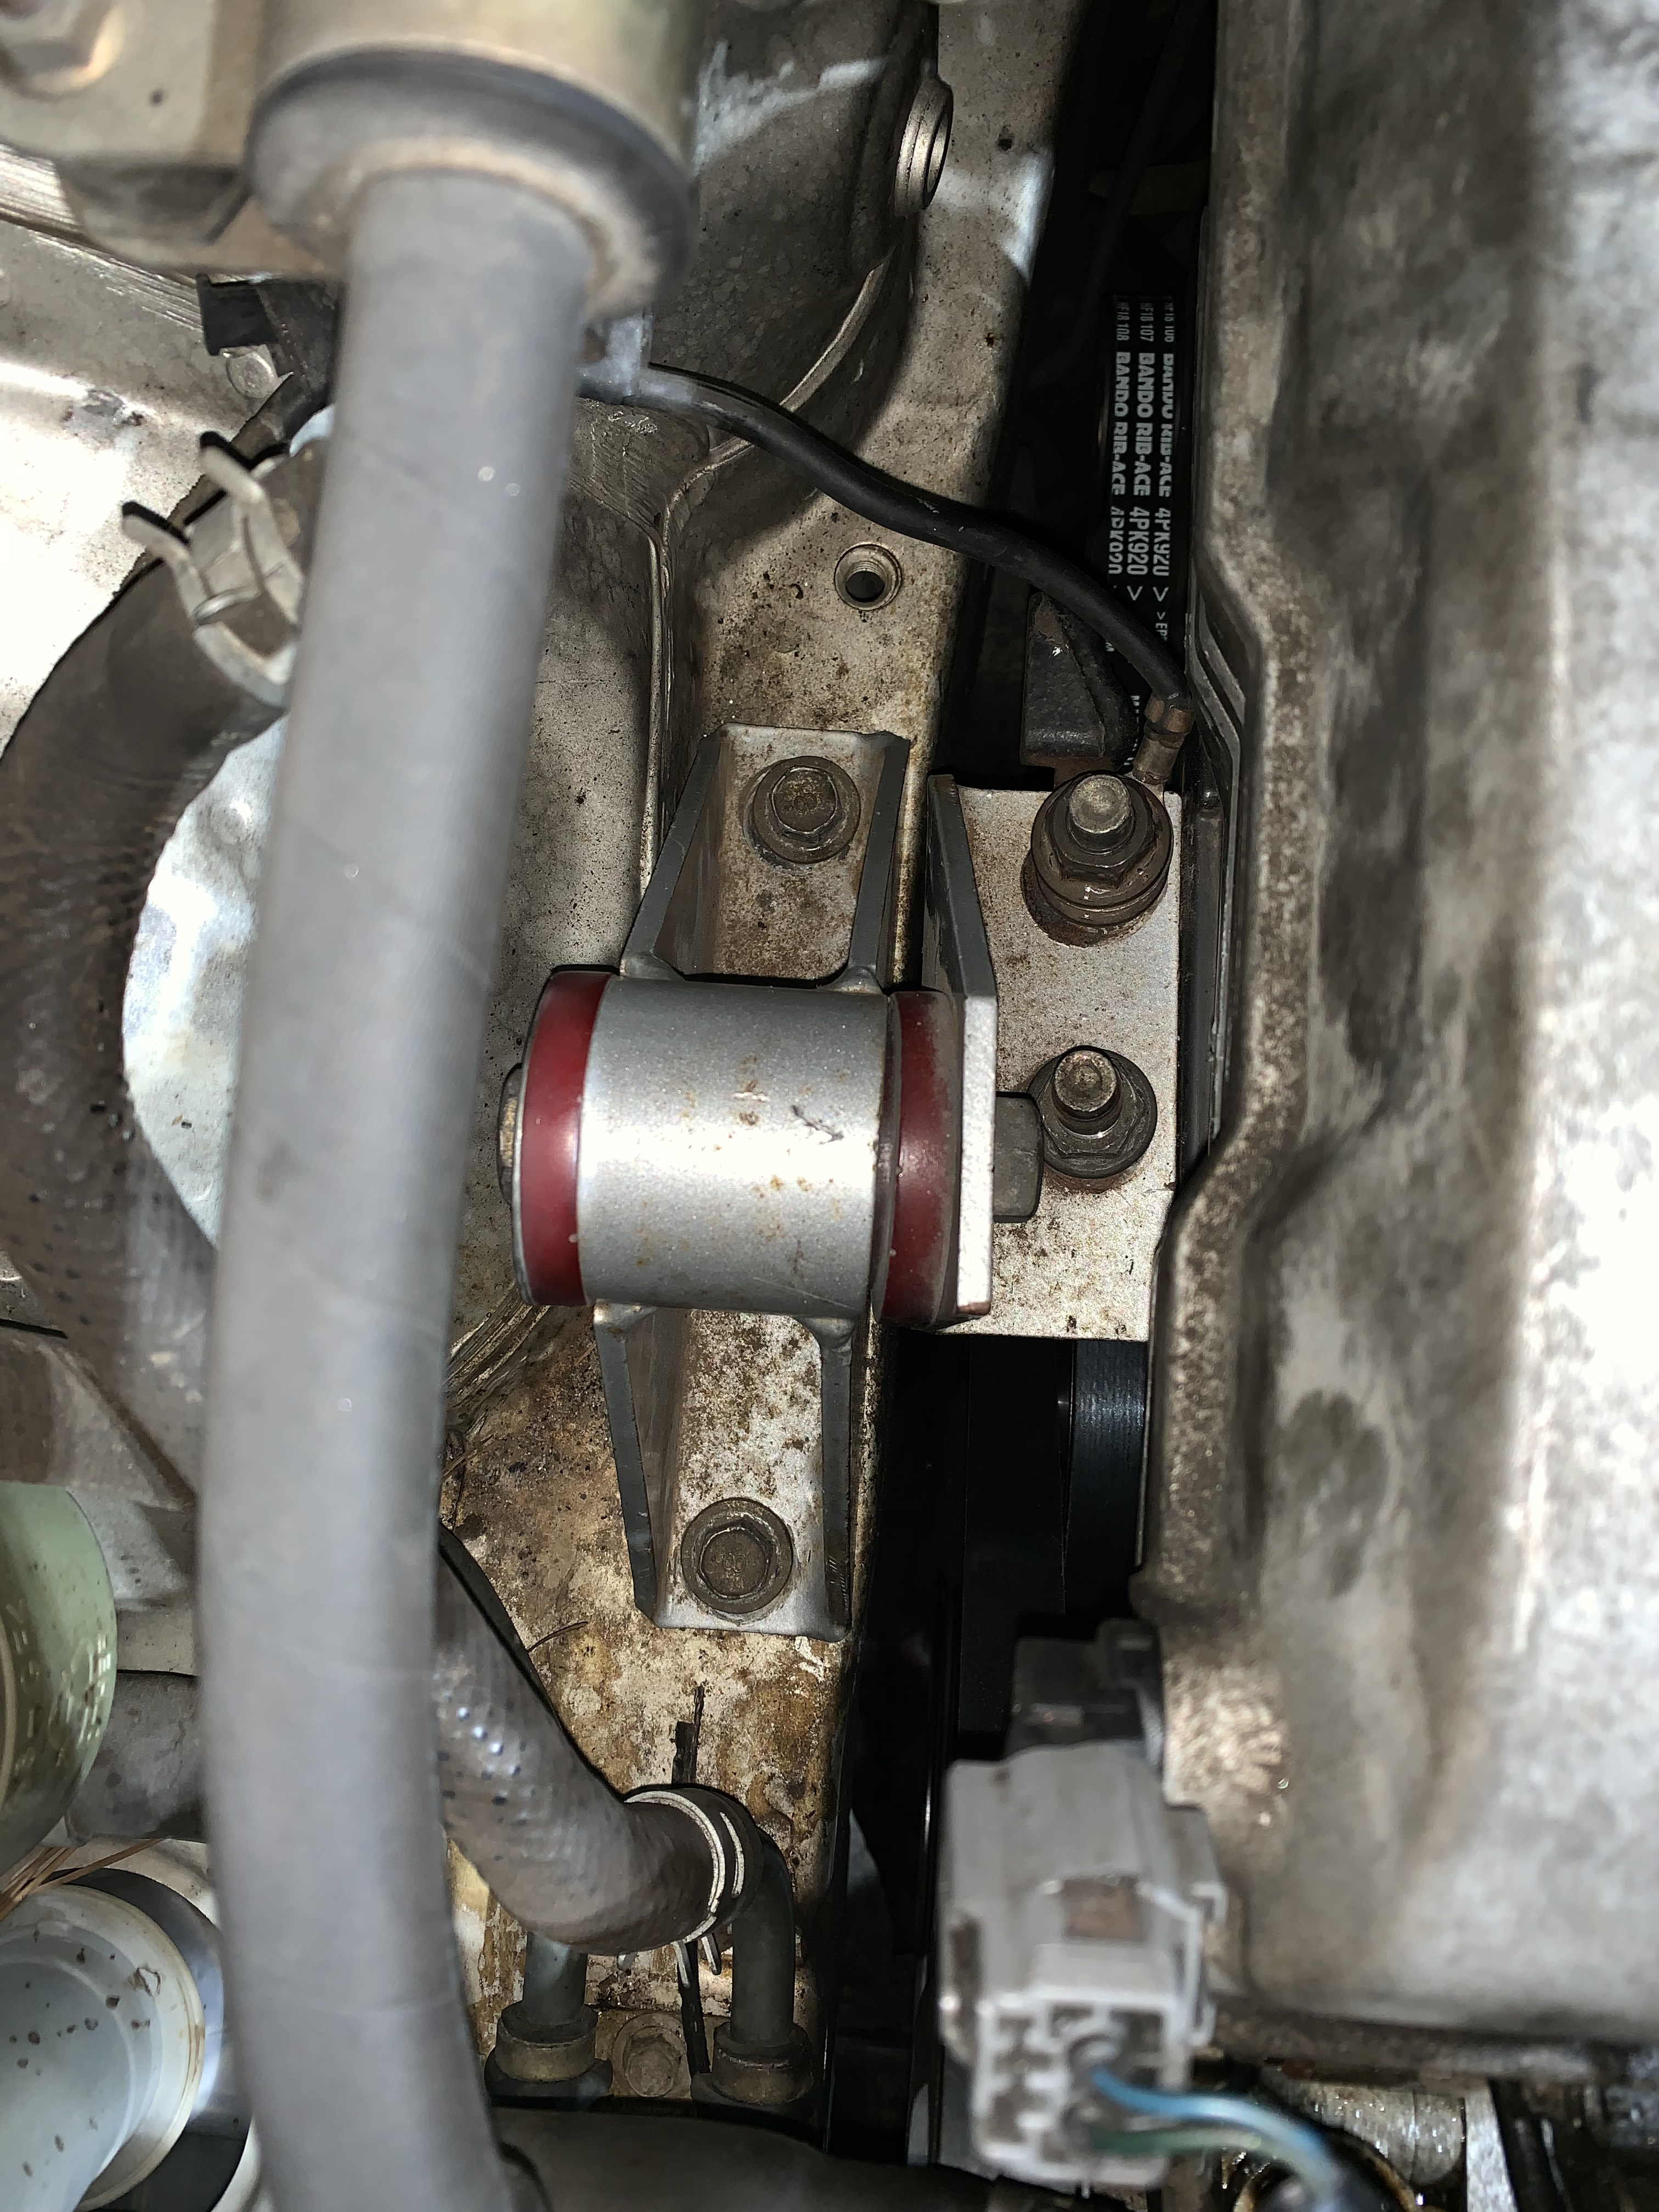
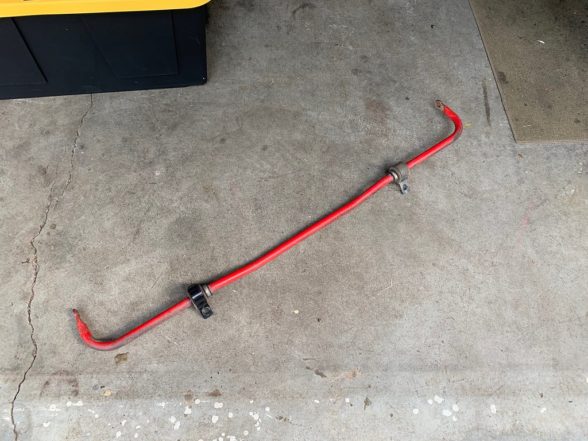
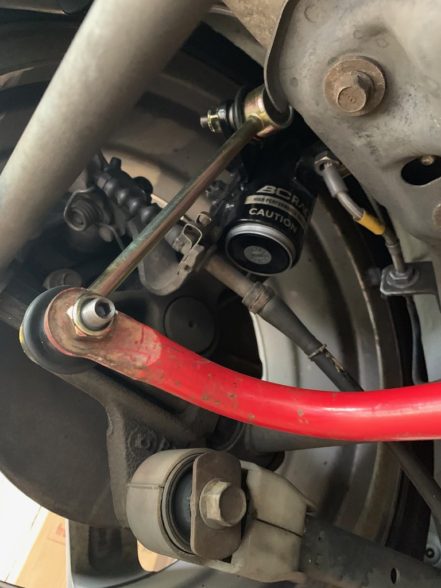
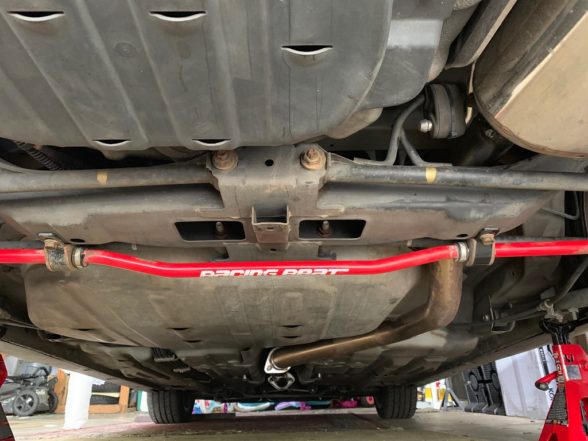
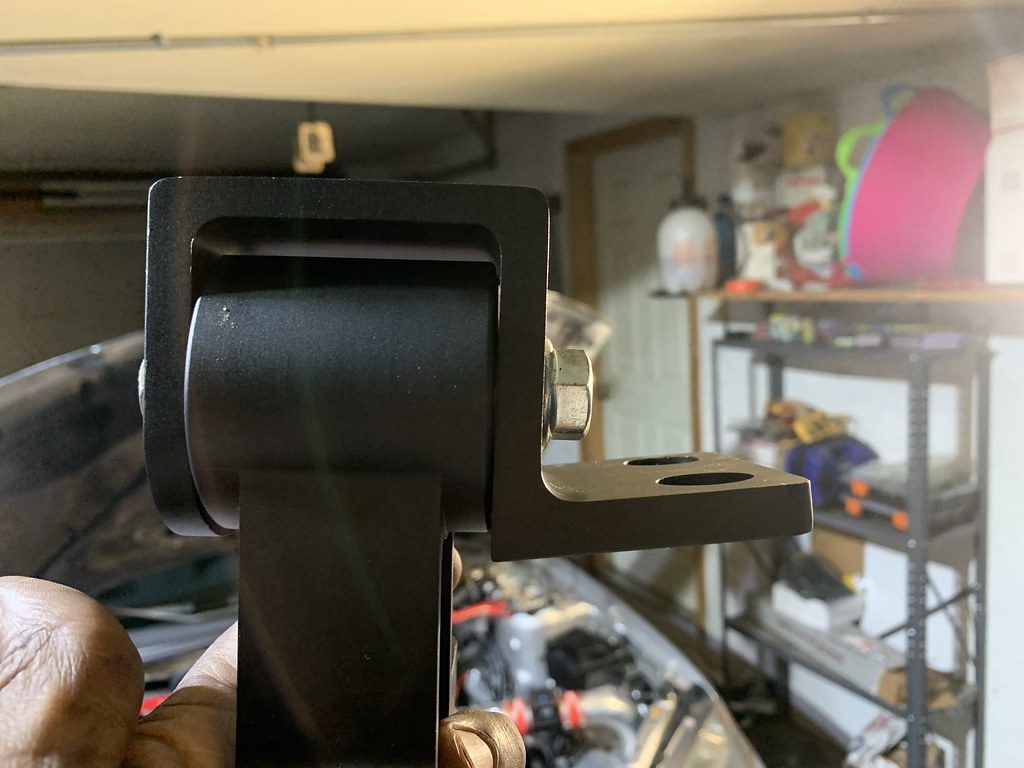
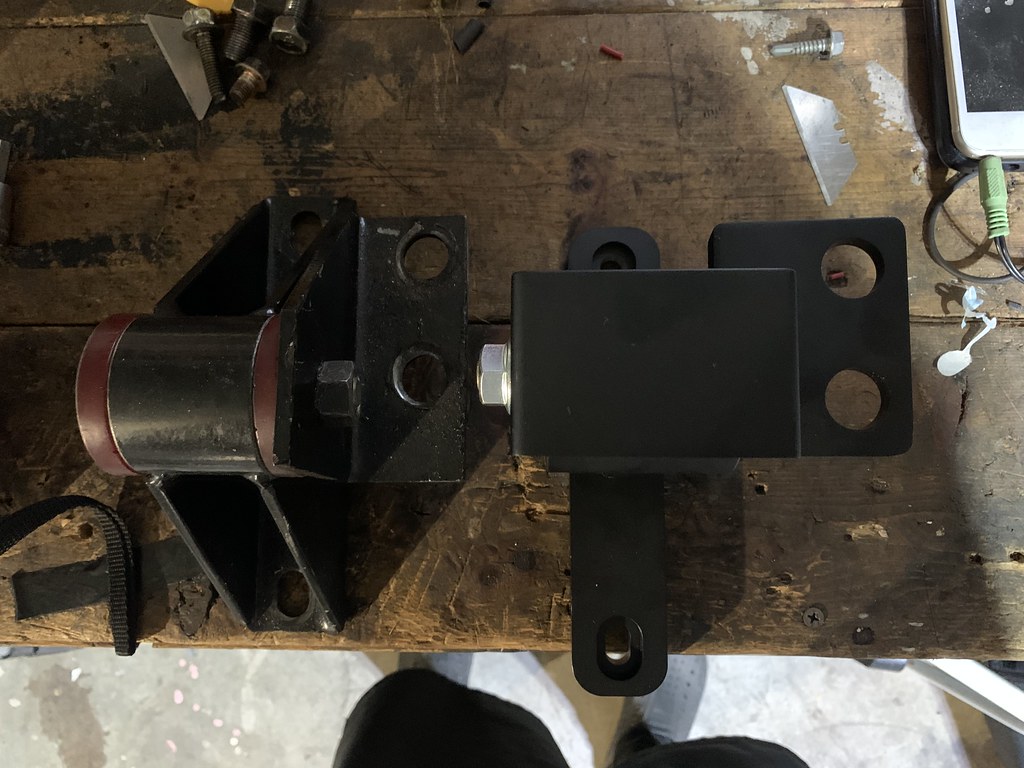
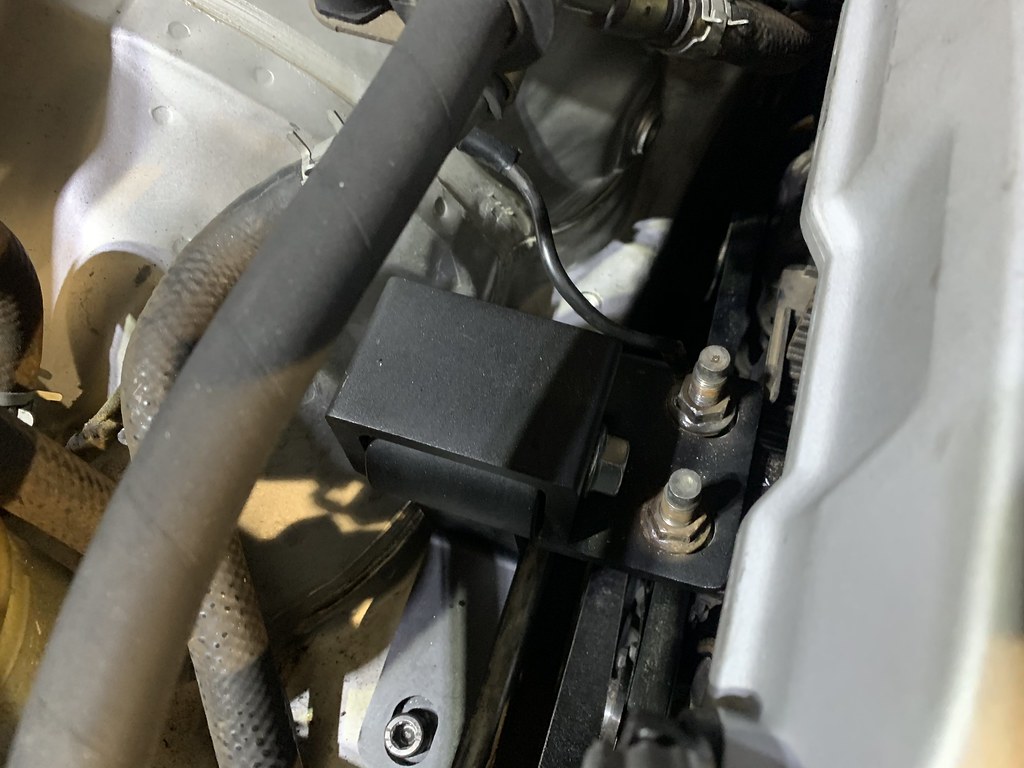
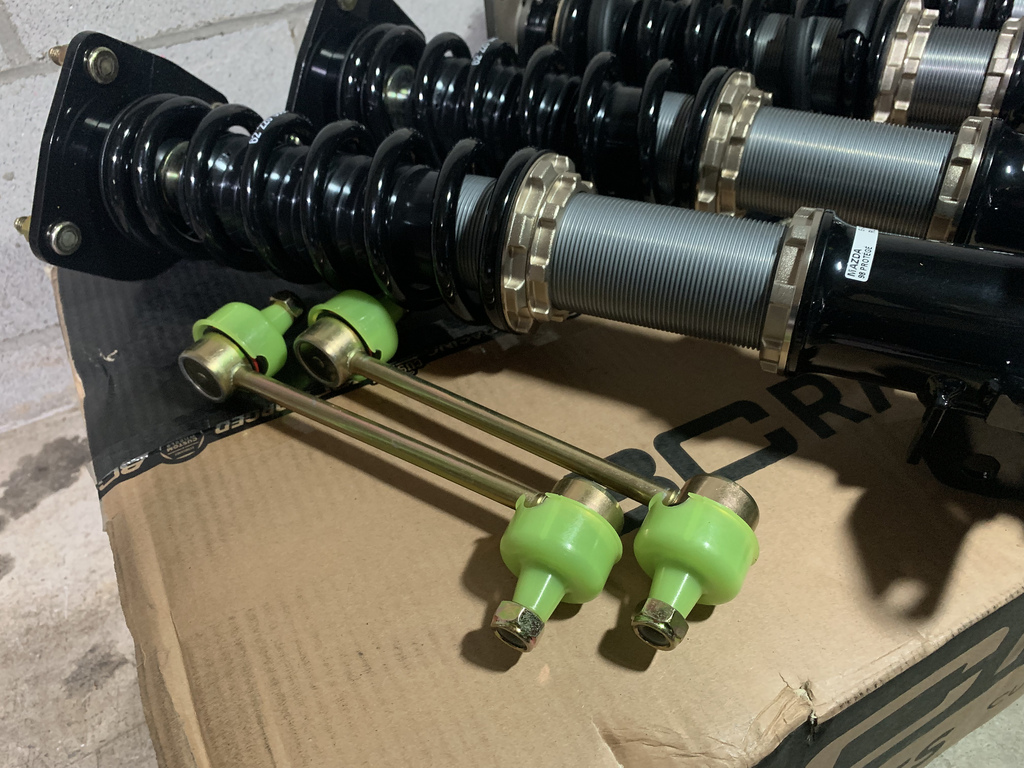
The kit also includes a pair of reinforced, shorter sway bar end links, that is a must. 
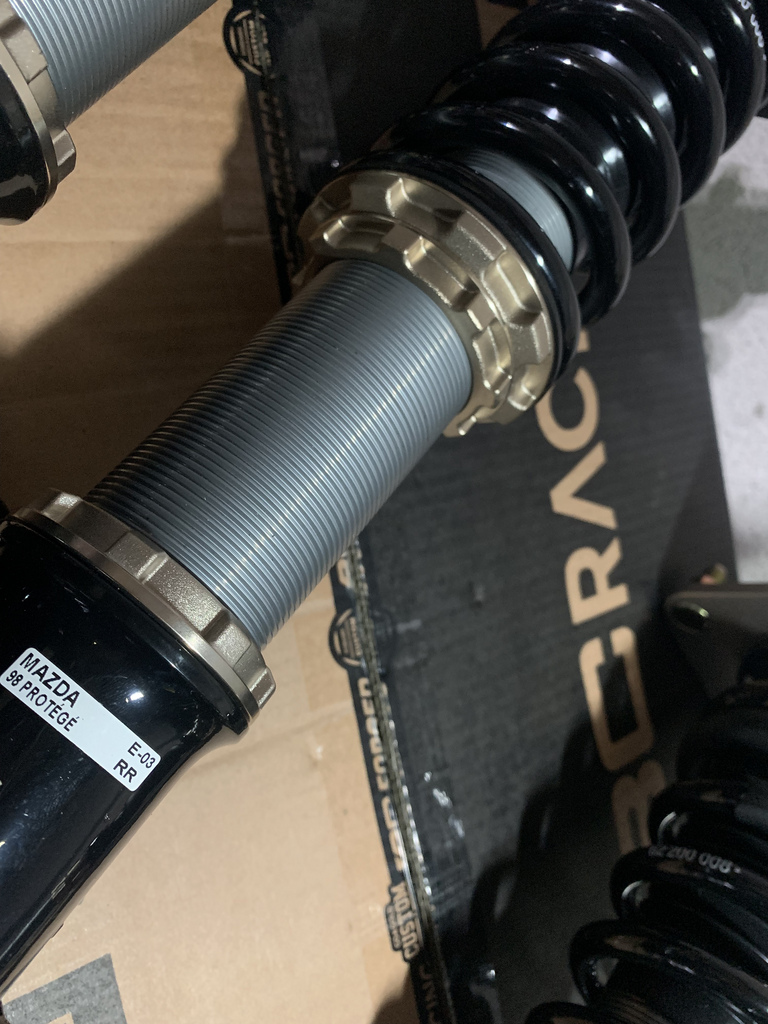
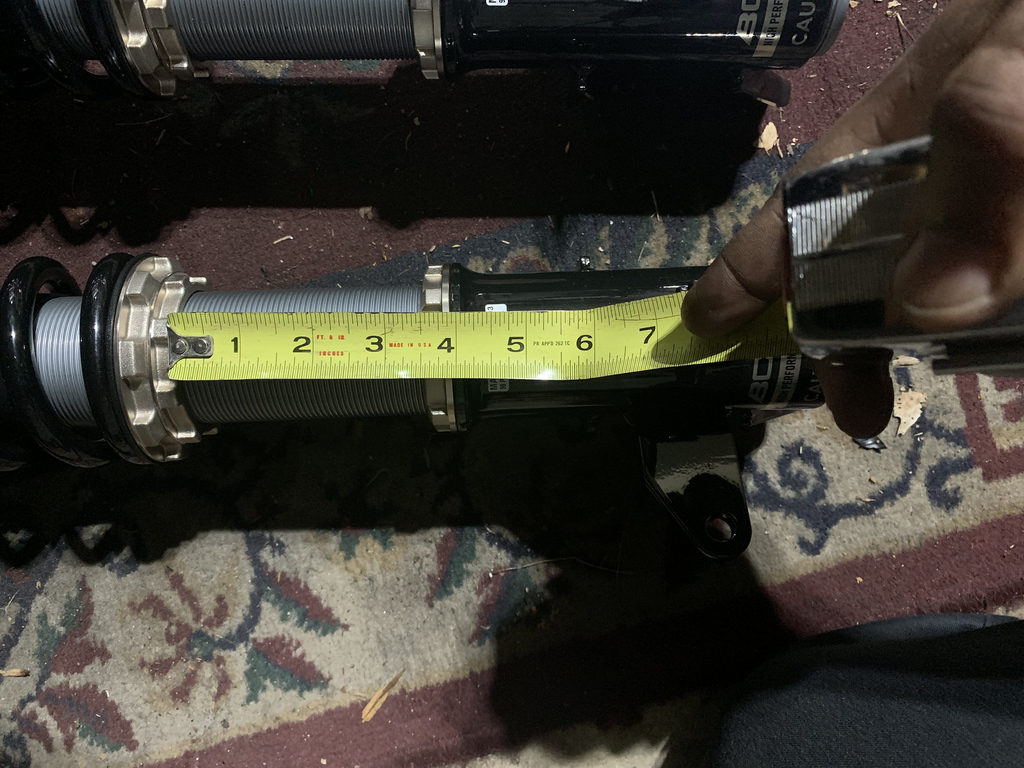
The DS Series strut body is a little larger then the BR Series, and the threads are silver, opposed to the black threads on the BR Series.
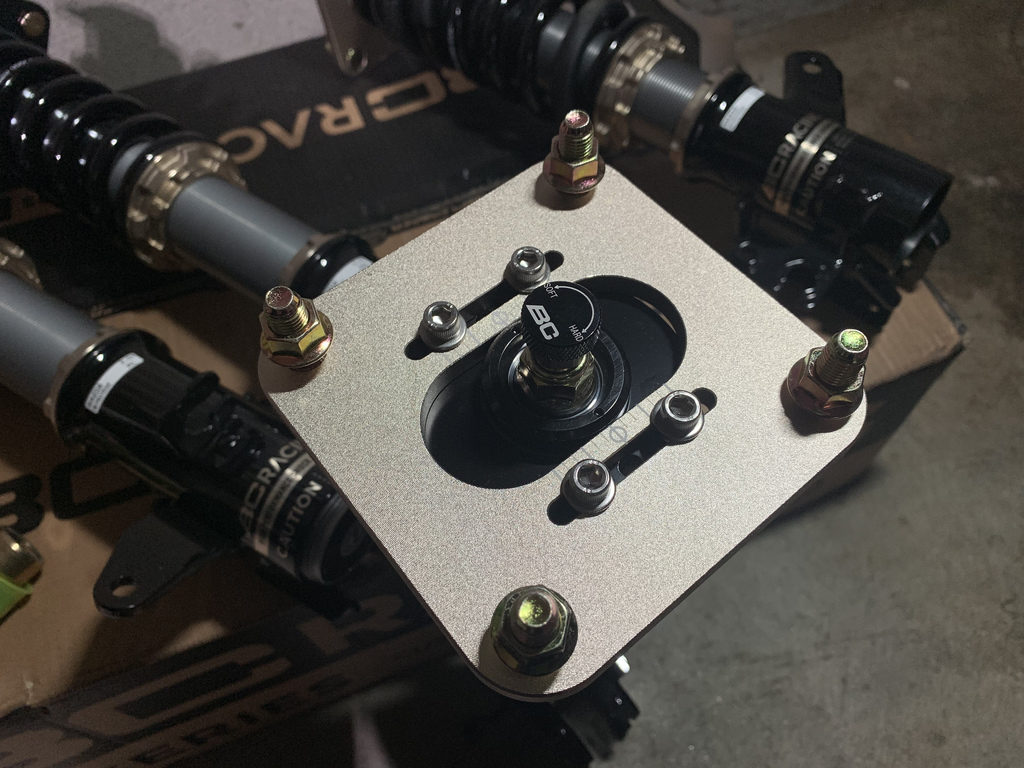
The front coilovers offer a camber plate, and also with most BC Racing coilover kits they have adjustable compression and rebound adjustments.
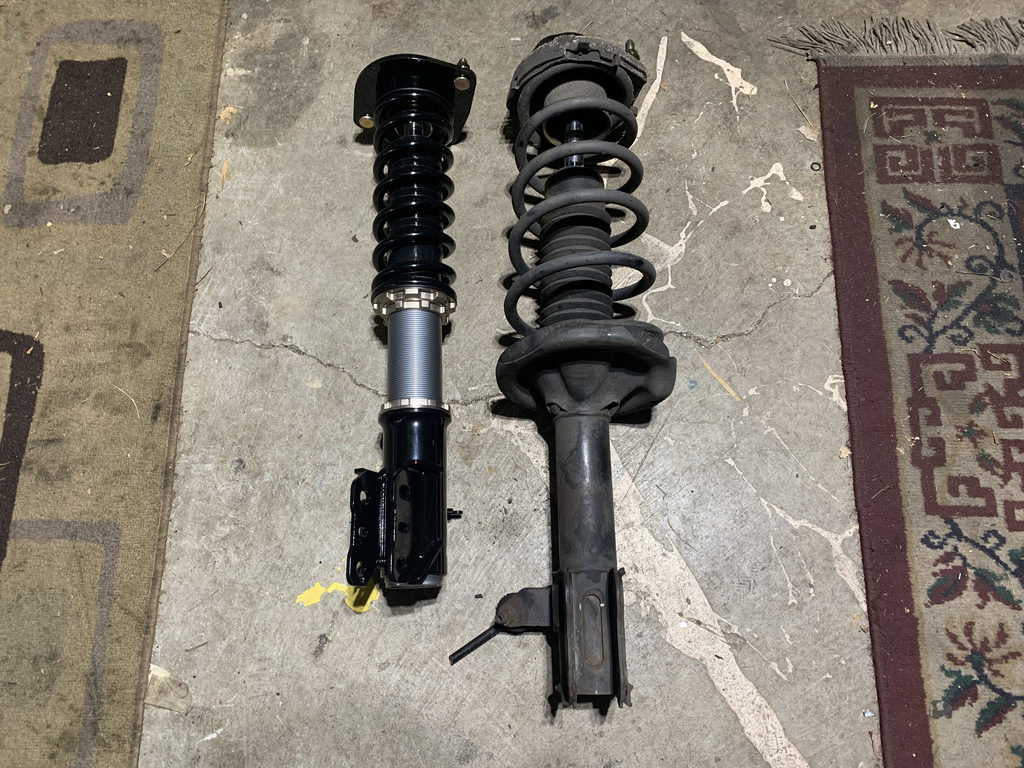
Another plus, was that the coilovers come already pre-loaded out the box and were set with 6k / 8k springs.  So that saves the hassle of doing it incorrectly, and having a terrible ride.  When I received my old set a few years ago, the pre-load had to be done by the user, as far as I knew.  Now it seems that they do it out of the box, and advise installing them as they are, and adjusting once installed.  It really saves the trouble and hassle of potentially ruining your ride by not knowing how to set up the coilovers out the box. 
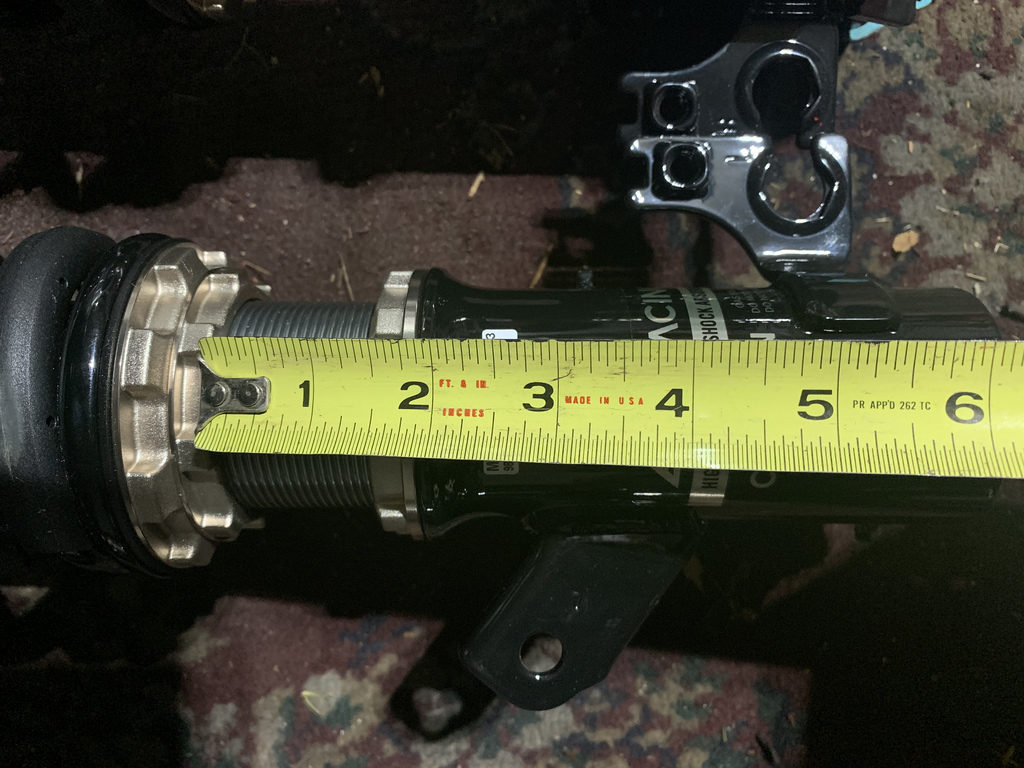
Like they said, both front and rear were set, pre loaded , and dead even front and back out of the box.
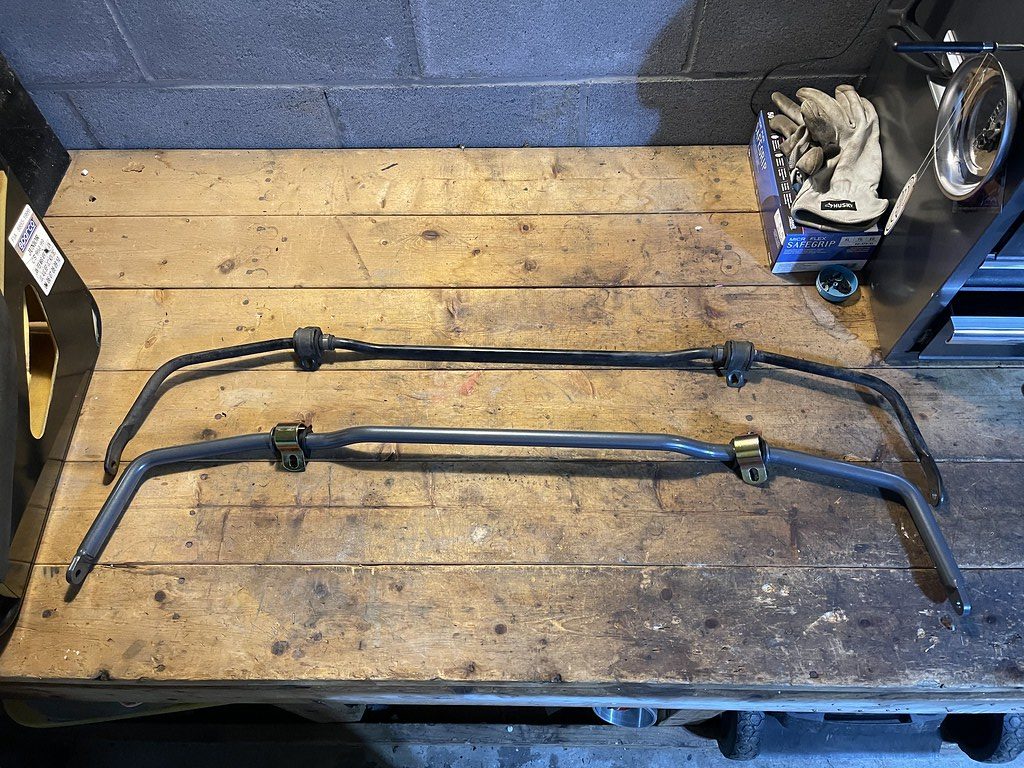
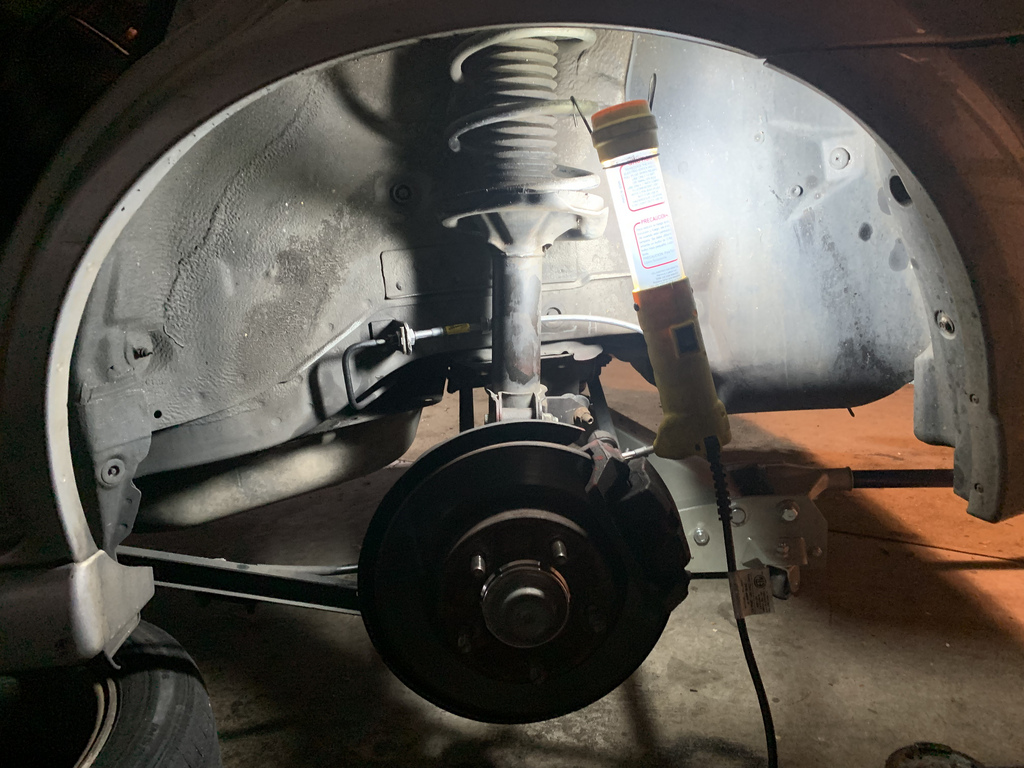
Old 17 year old 289k mile Struts.. 
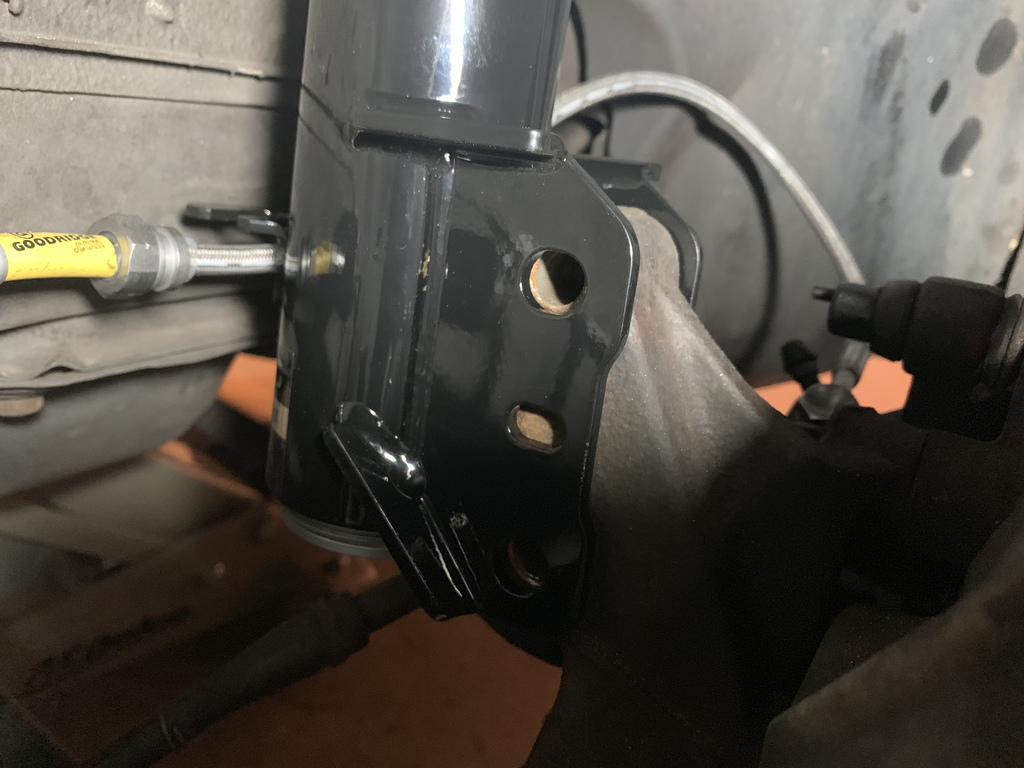
Fitment was good no issues.
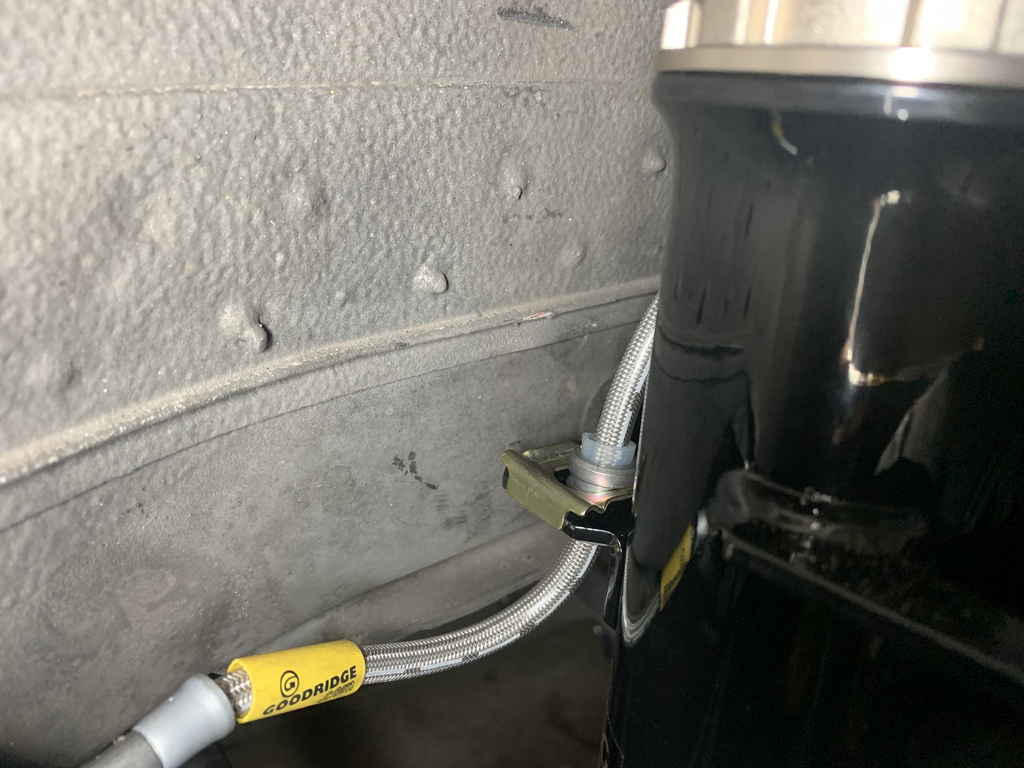
Brake hose fits back in the oem place no issues.
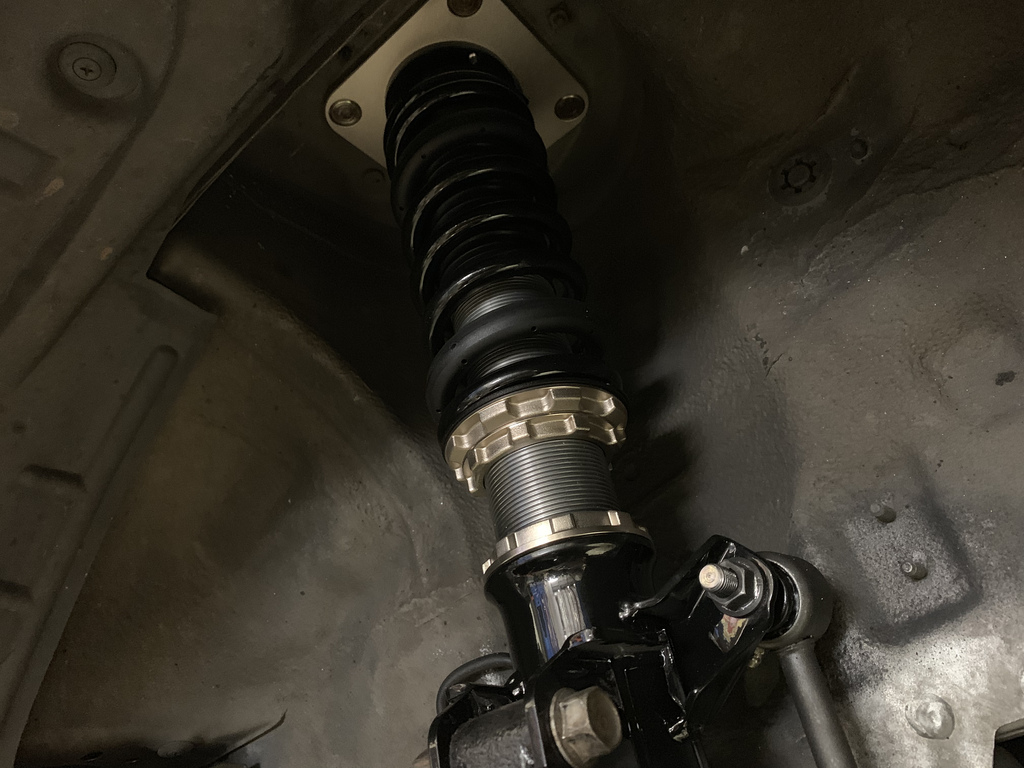
Everything in all good no issues.
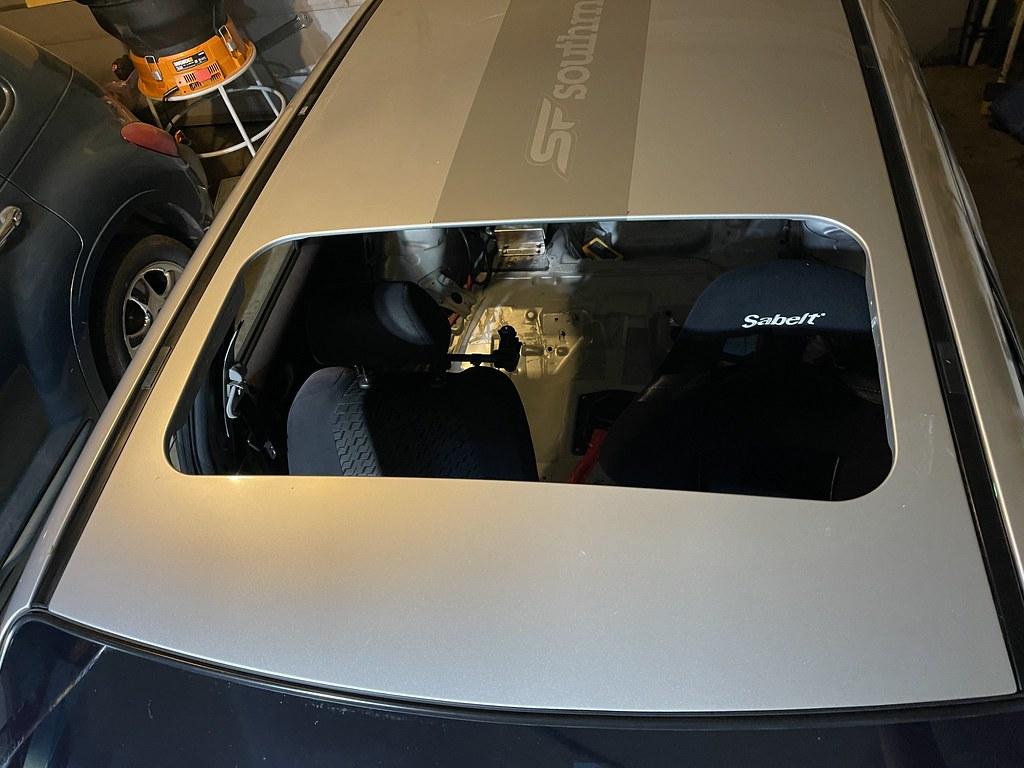
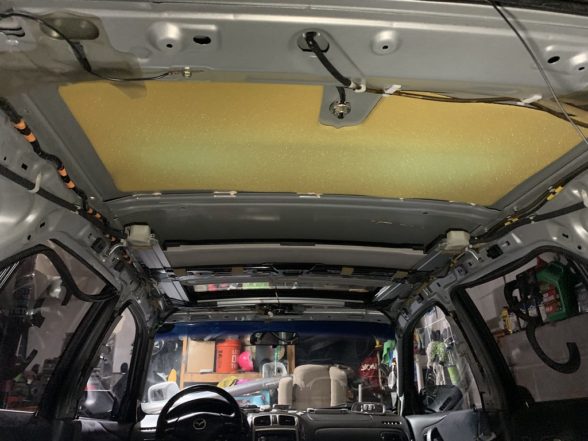
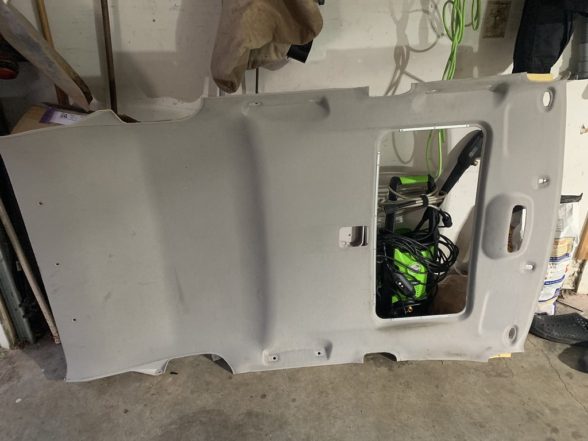
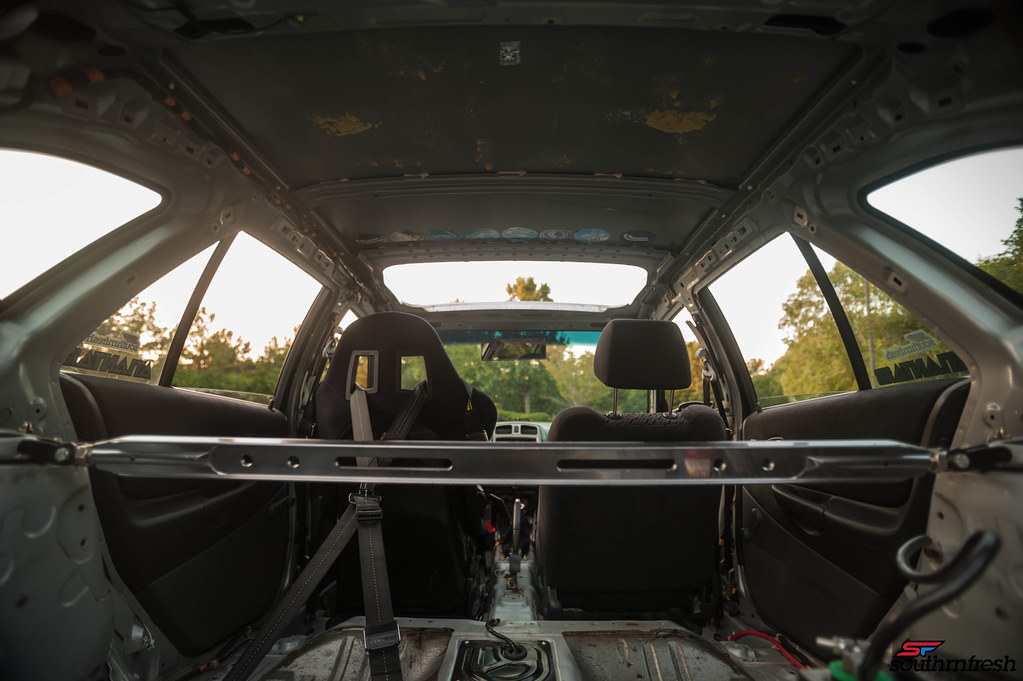
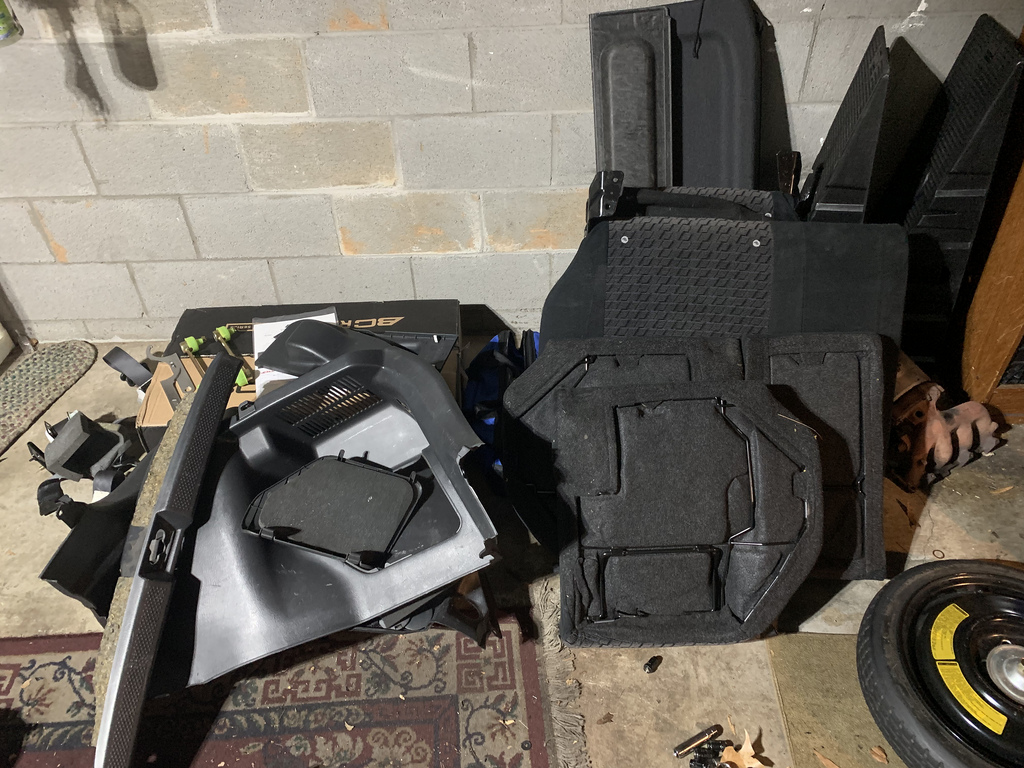
Most of the rear interior panels have to be removed to get to the rear struts, so we made the decision to go ahead and remove the seats, and all the panels in the rear for the track day.
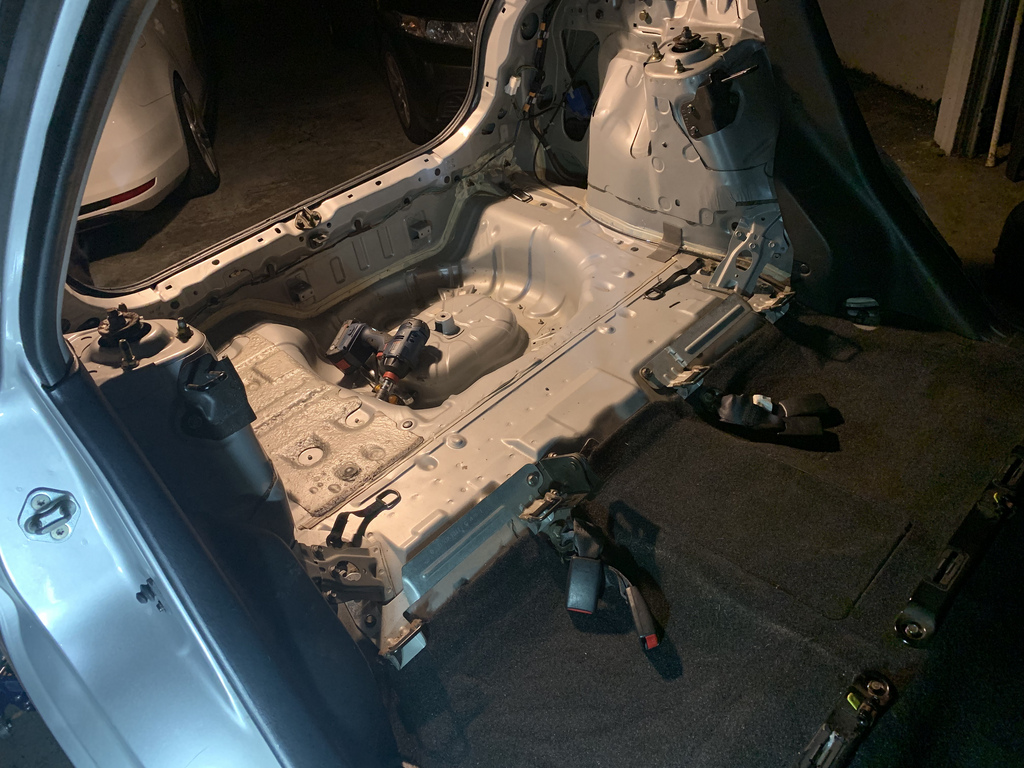
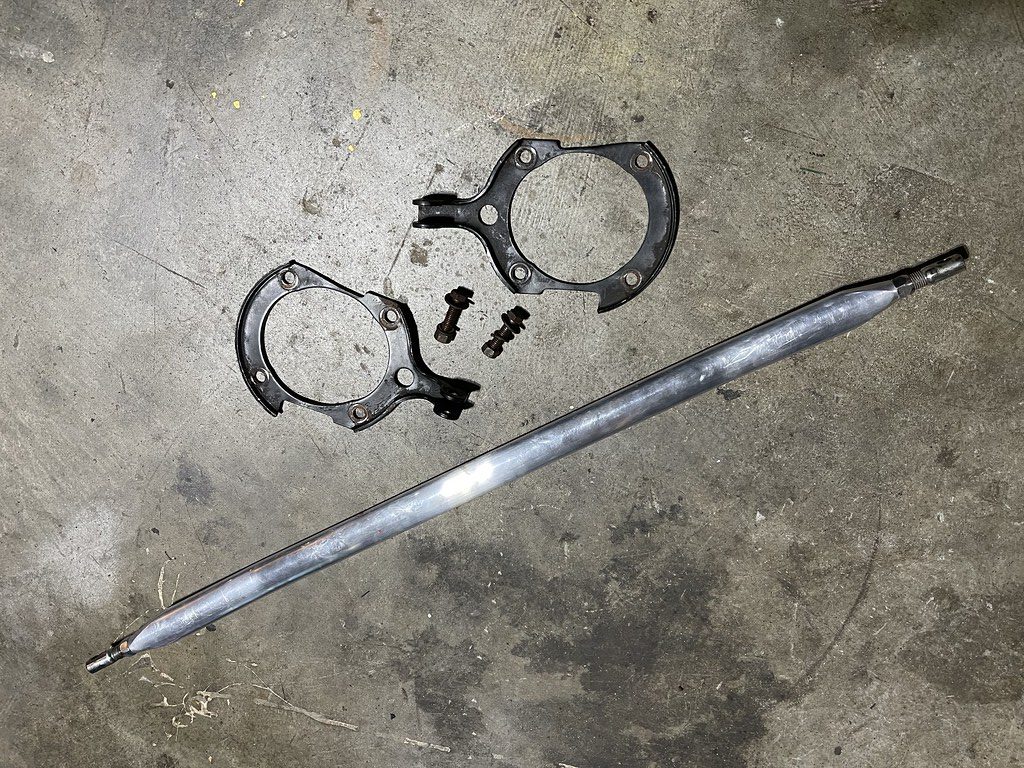
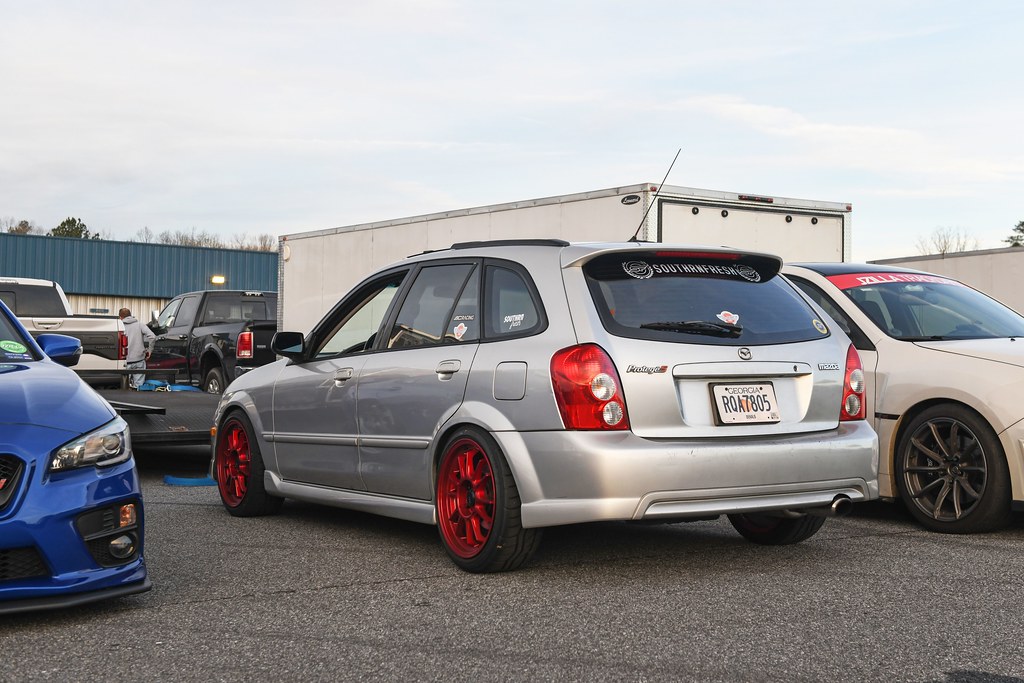
The protege 5 is built of the protege sedan chassis , and shares pretty much everything with it.  Except that the rear is slightly more narrow, and shorter then the Sedan.  So it makes wheel fitment a little different.  So we had to roll the rear fenders to clear the tires. 
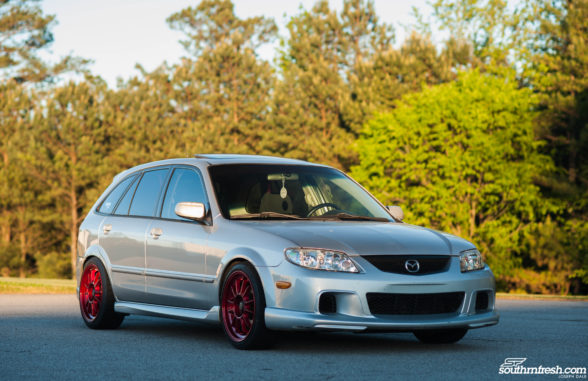
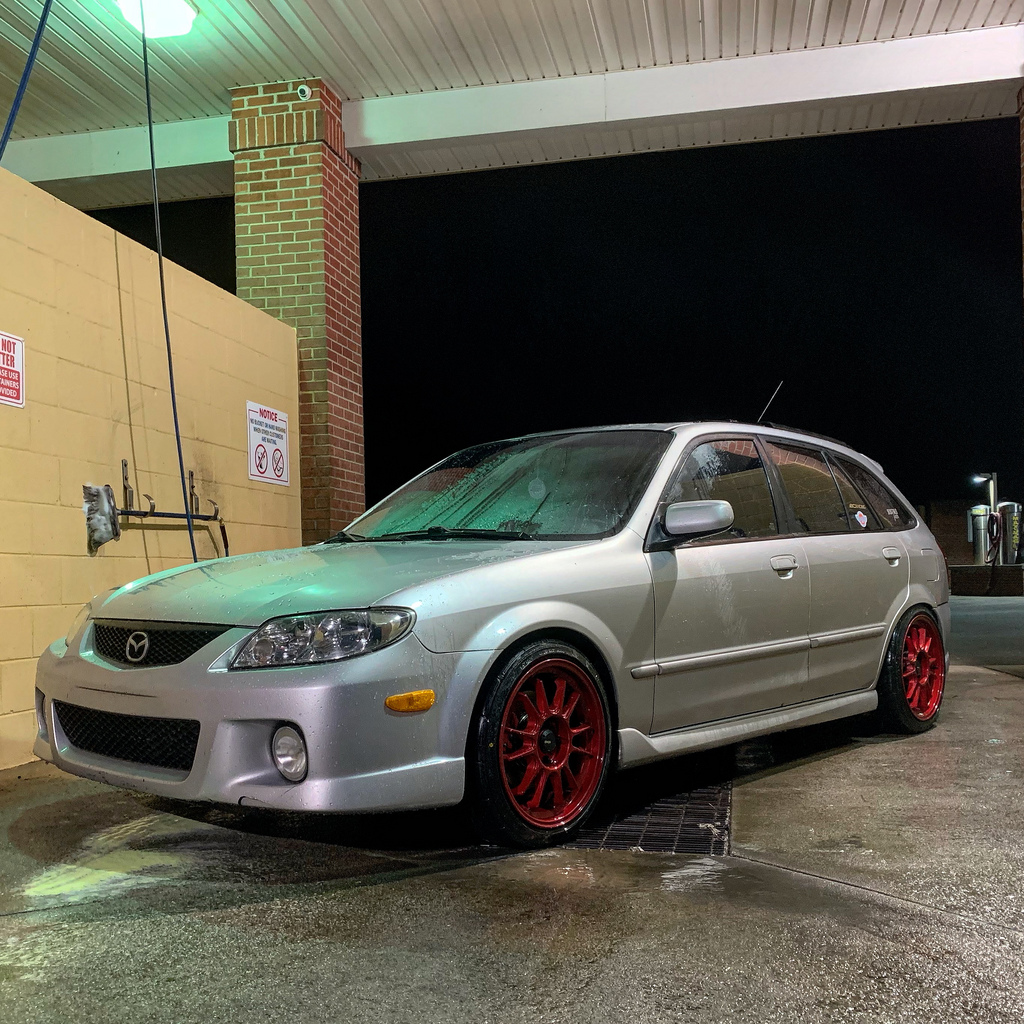
Finally the car was looking sporty and sitting lower.  First trip was to the car wash for a quick bath.
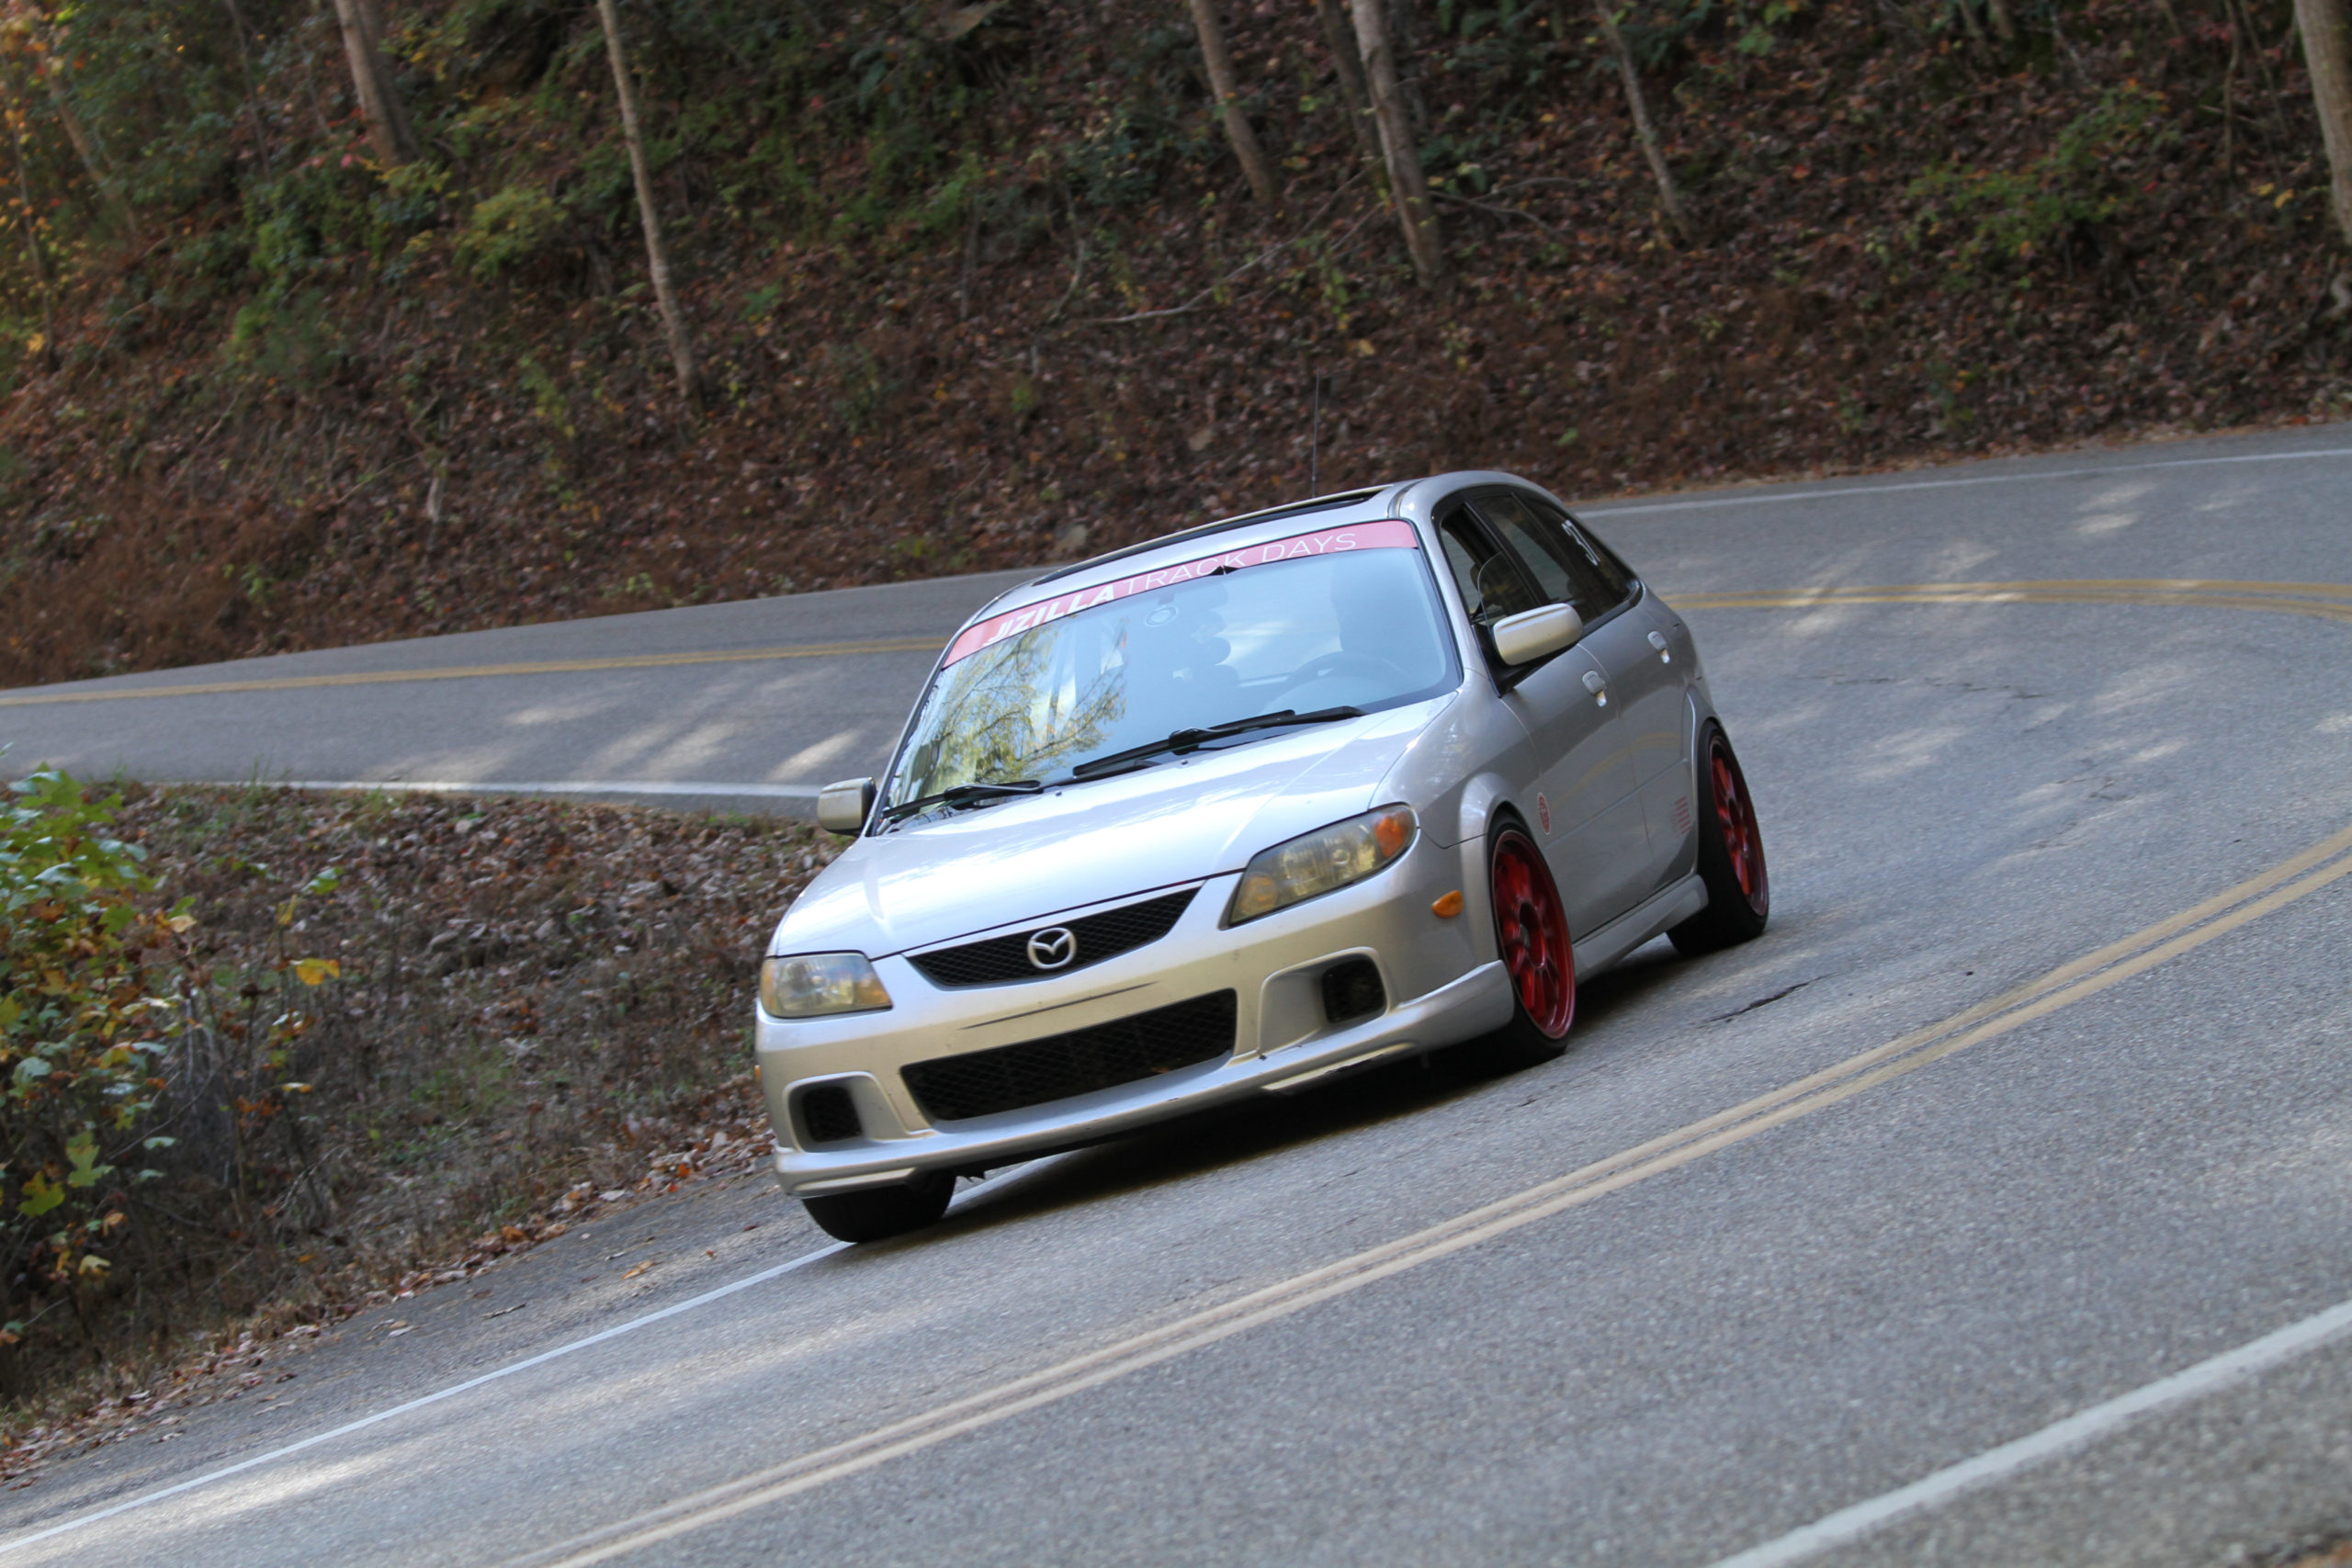
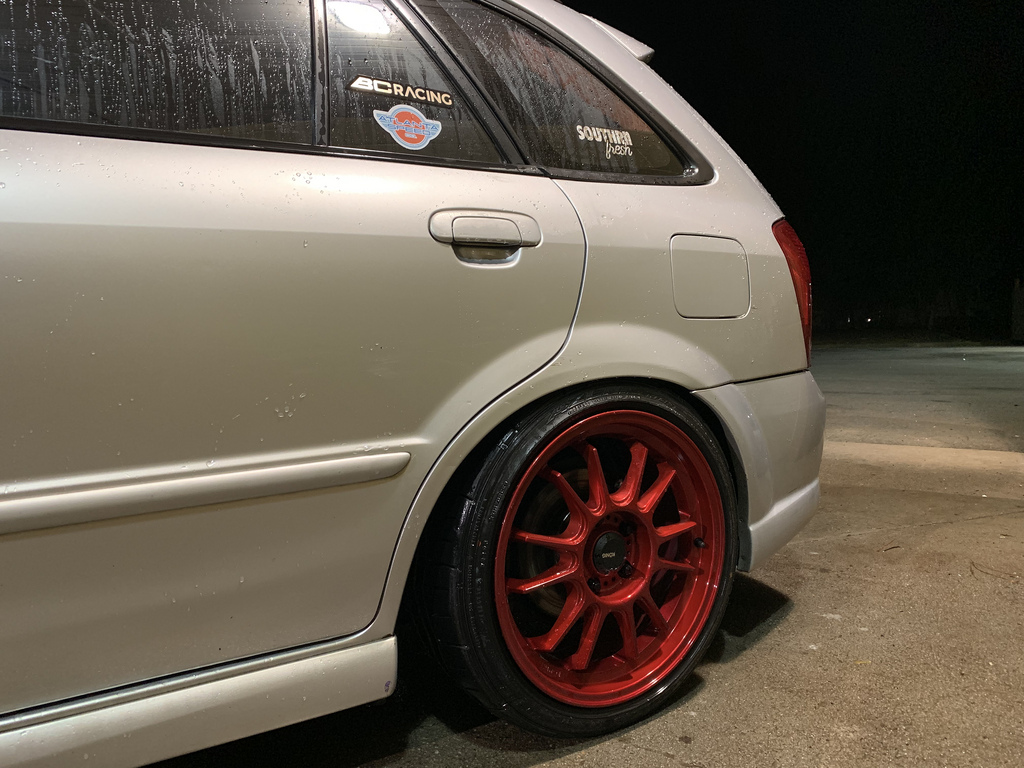
The car rode really well, but as specified with the style of coilover at slow speeds it was really stiff, but with any sort of speed and quick turns everything smoothed out, and the car was planted, turn in was sharp and all the unwanted body roll disappeared.  Very impressed how the car drove out of the box. 
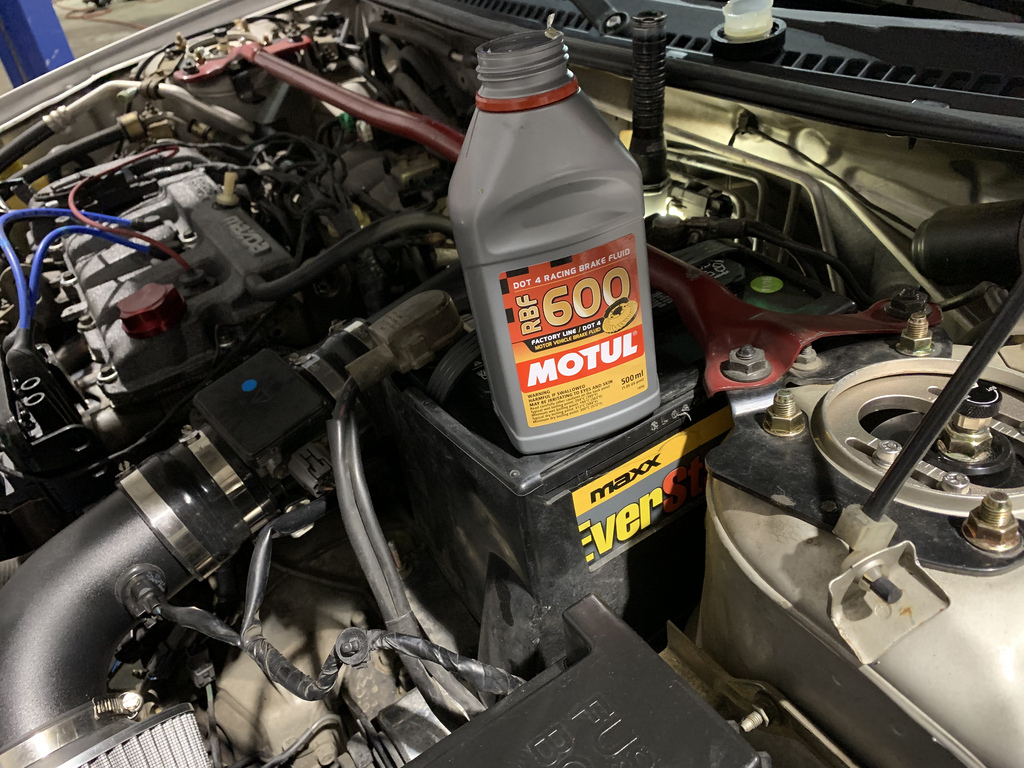
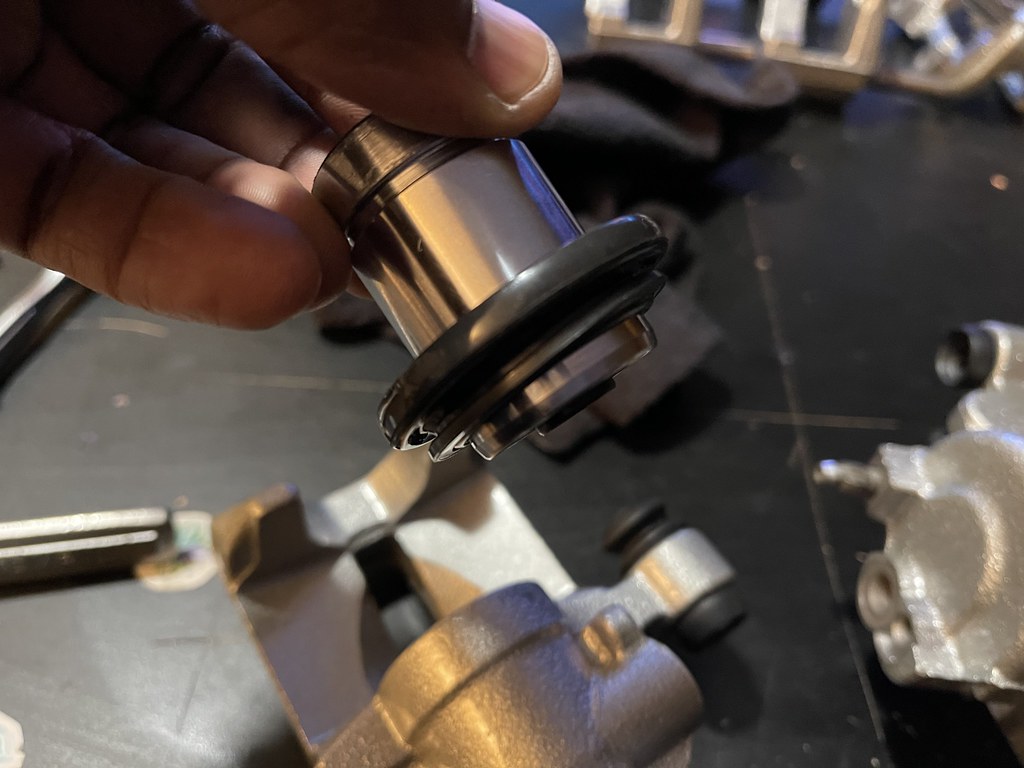
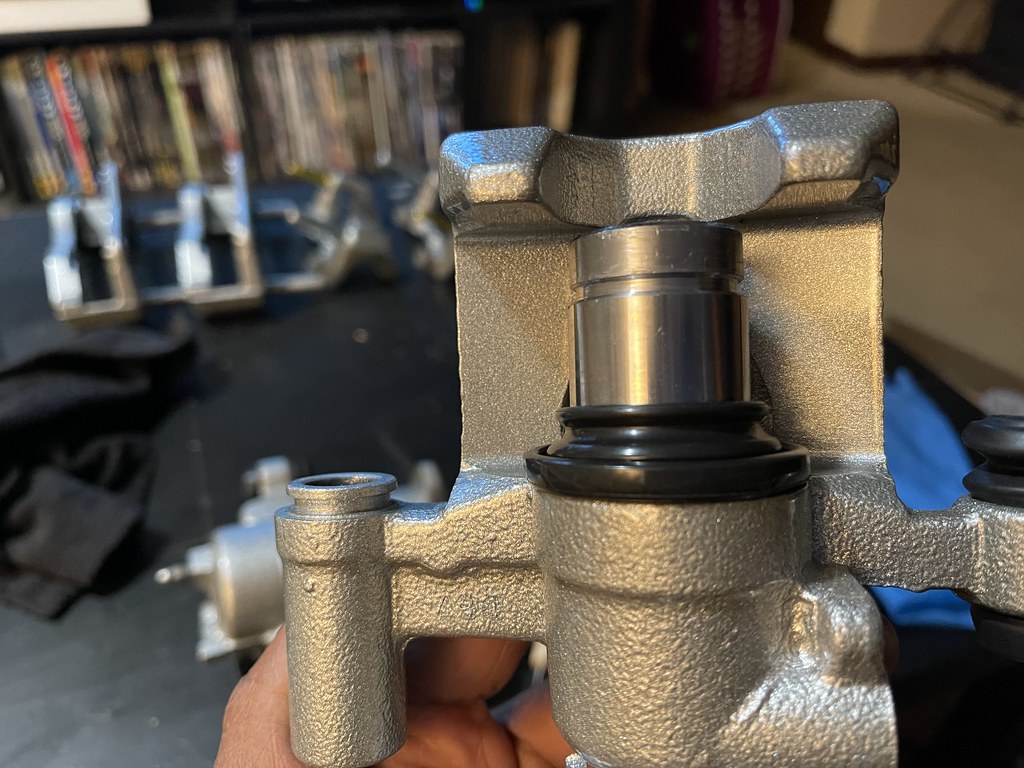
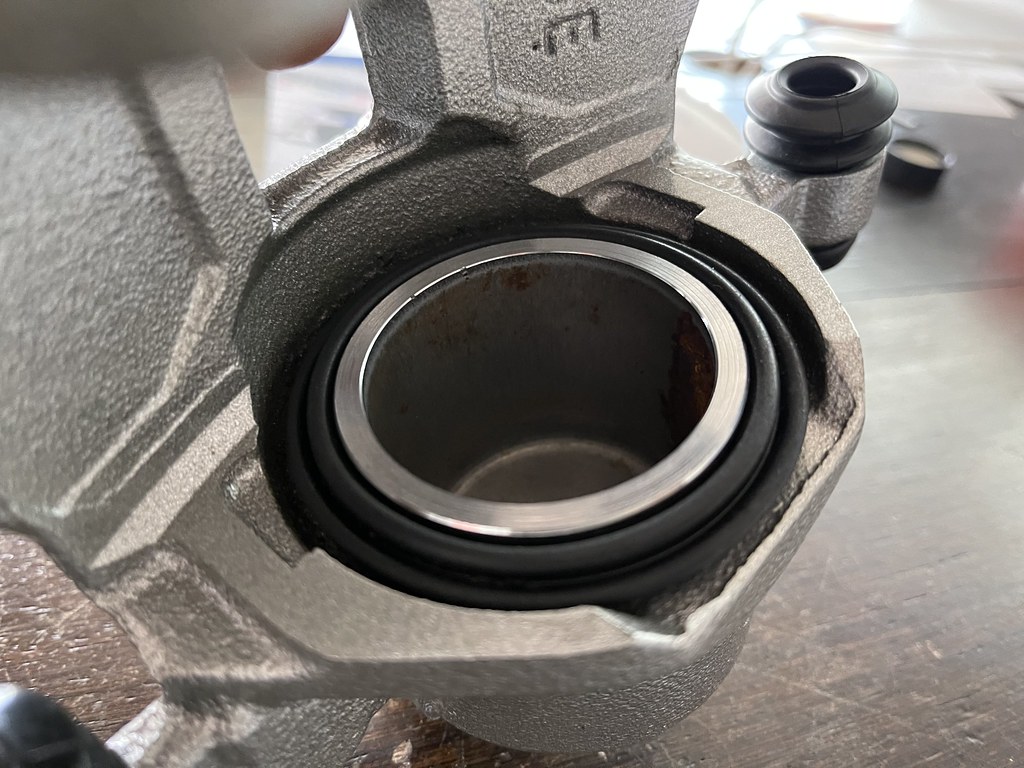
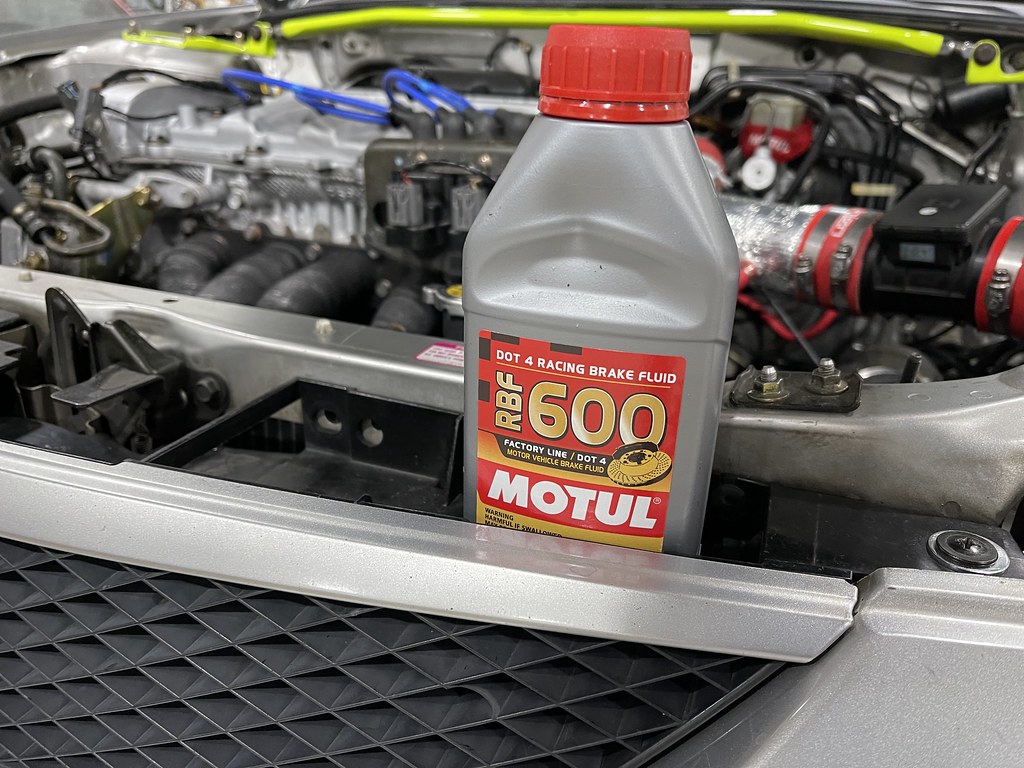
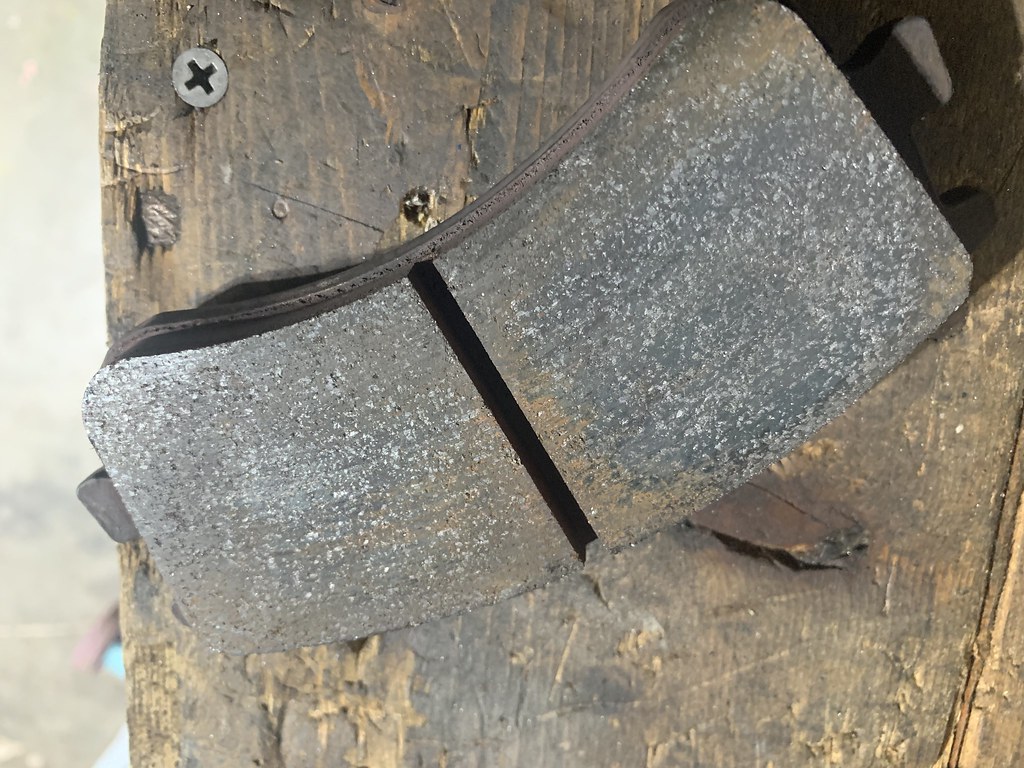
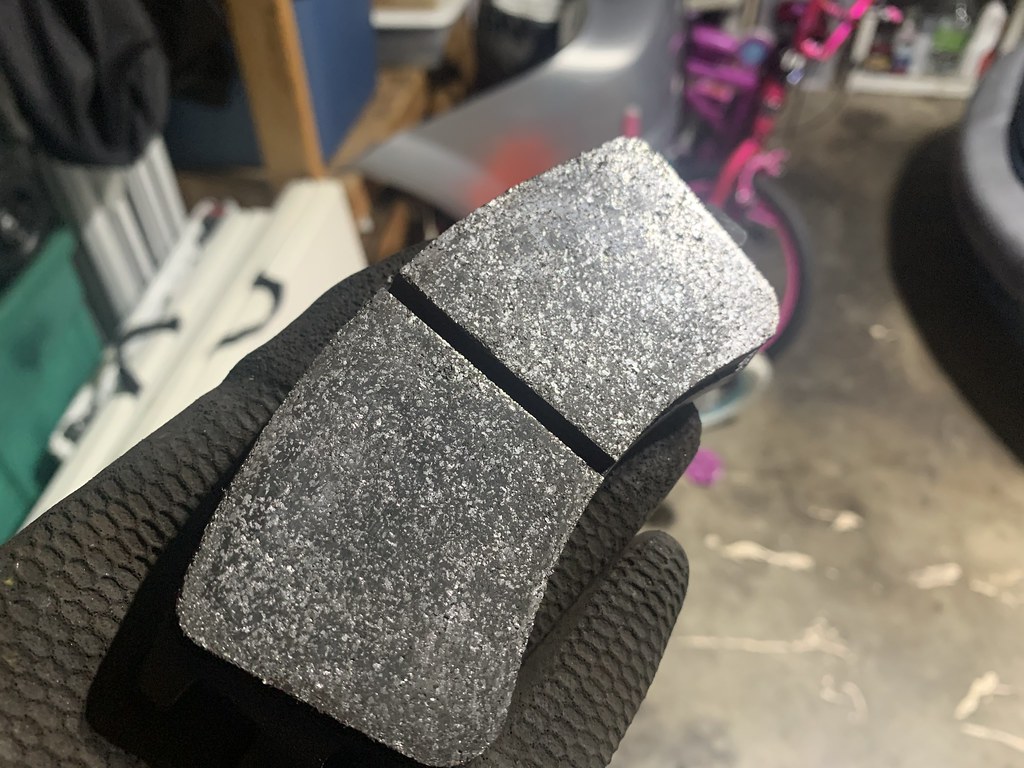
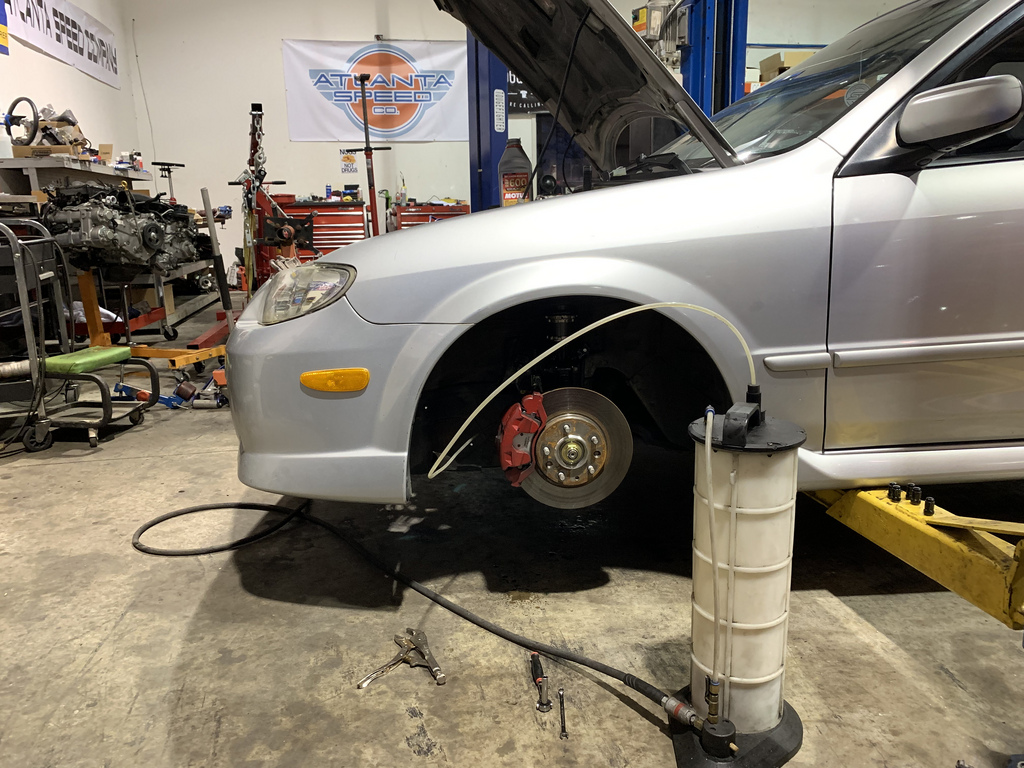
While installing the stainless steel brake lines i ran into a issue trying to bleed my left front caliper, because the bleeder screw was stripped.  I had to get the fluid replaced anyway so I limped to Atlanta Speed Company and had them replace the fluid with some Motul 600.  We had planned to use hawk DTC-60 pads on the car, but we had a mix up on part numbers since the car has Mazda 6 front brakes.  So we just stayed with generic  blank rotors, and ceramic pads from the local part store.
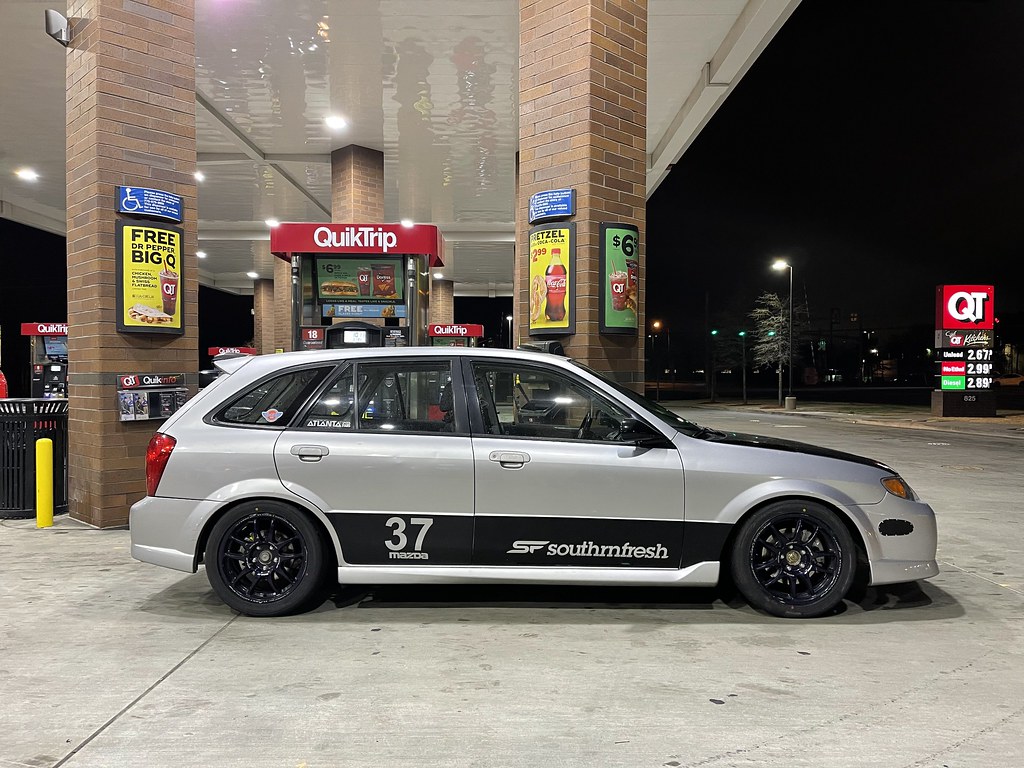
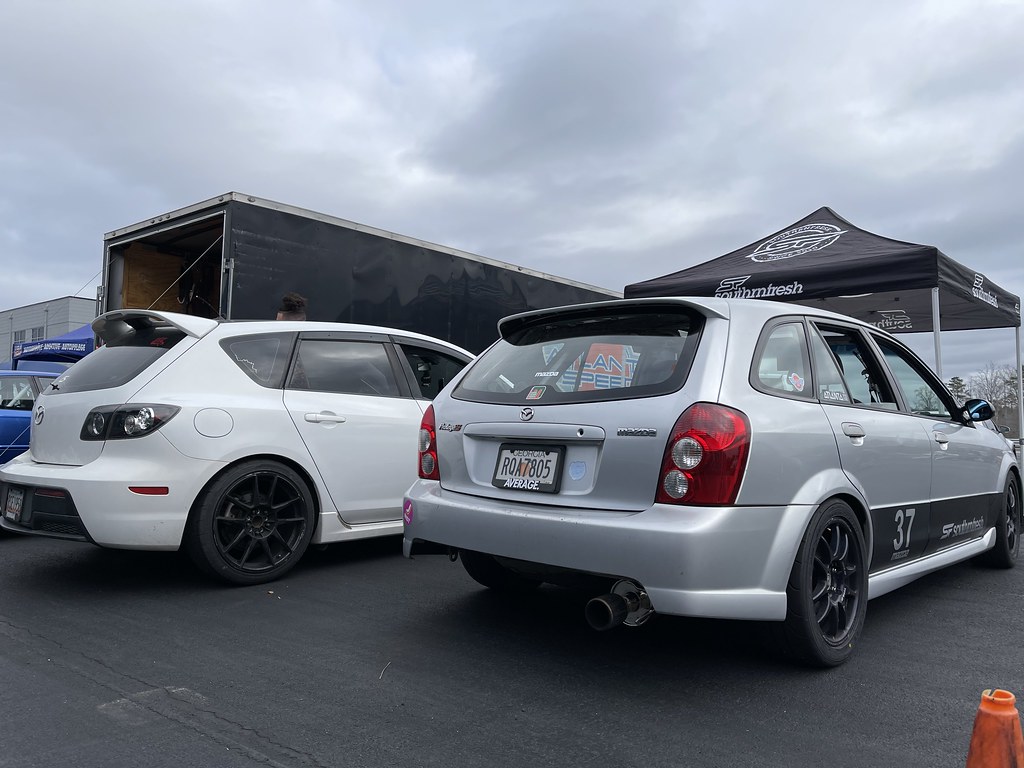
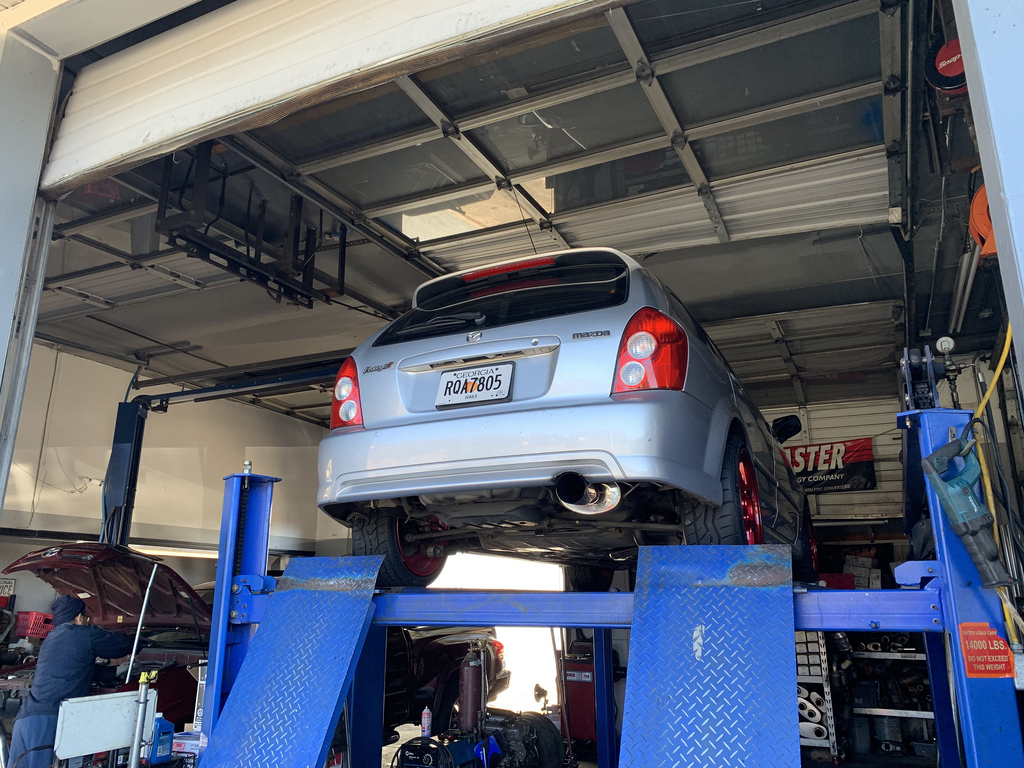
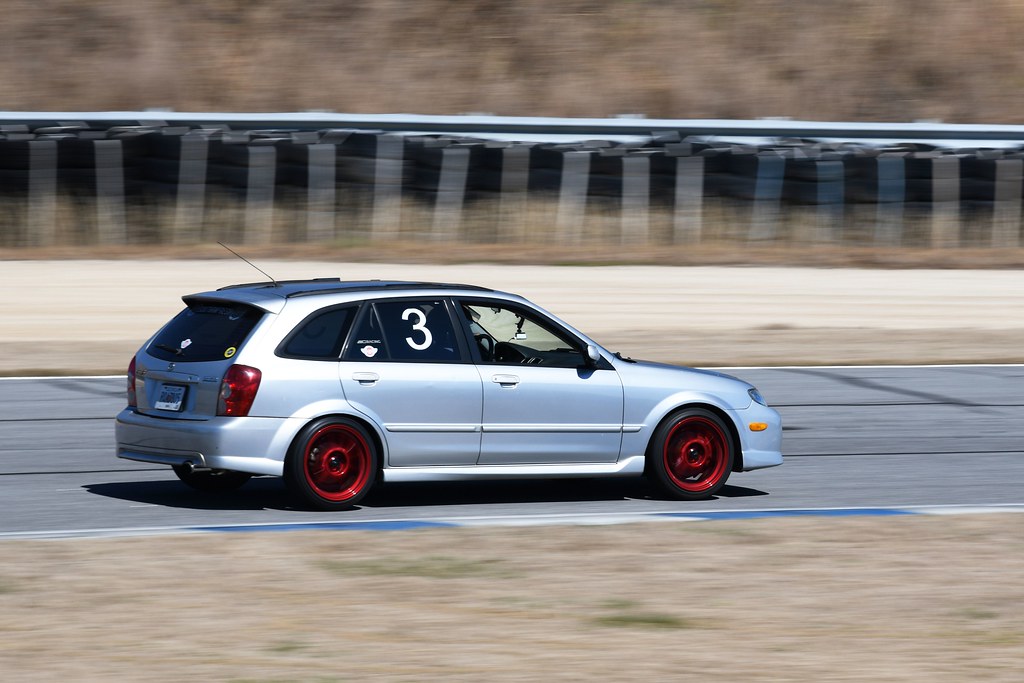
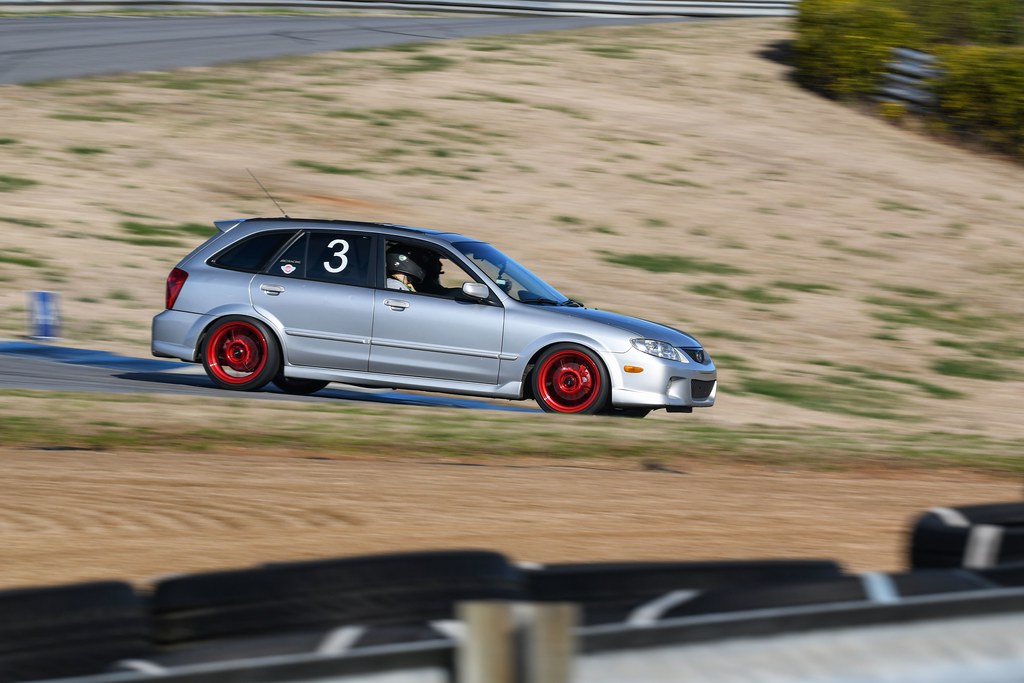
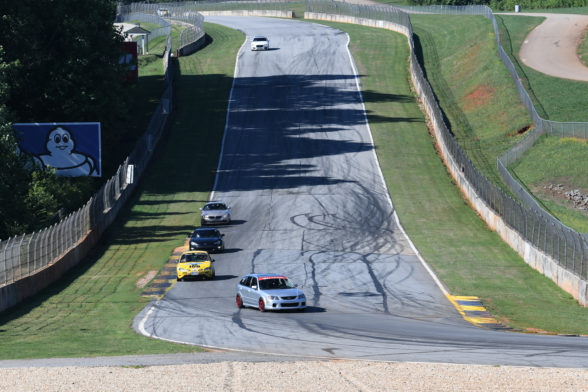
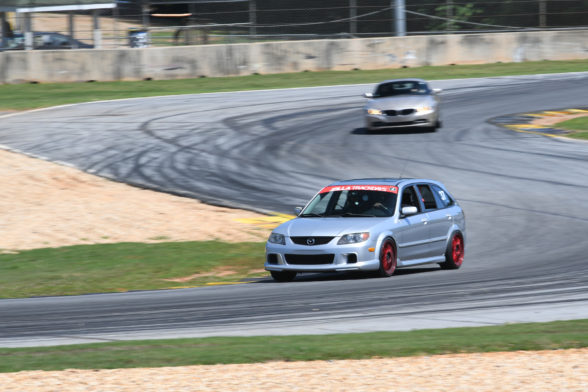
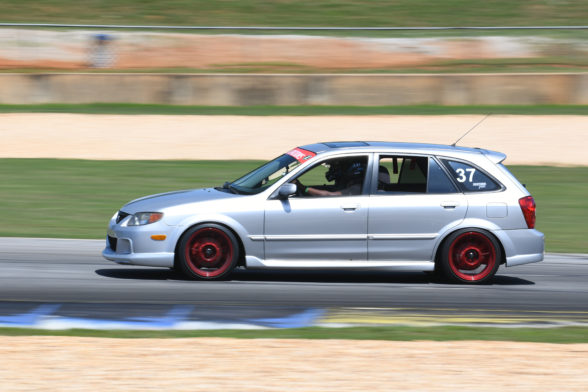
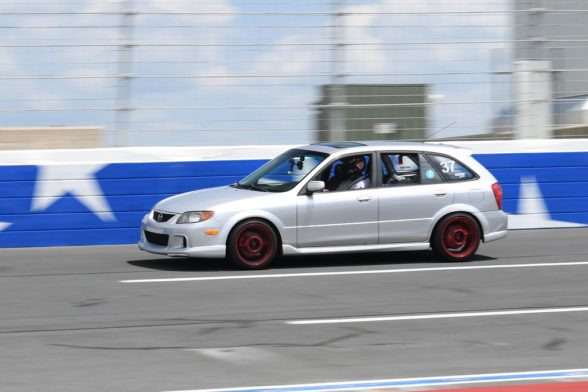
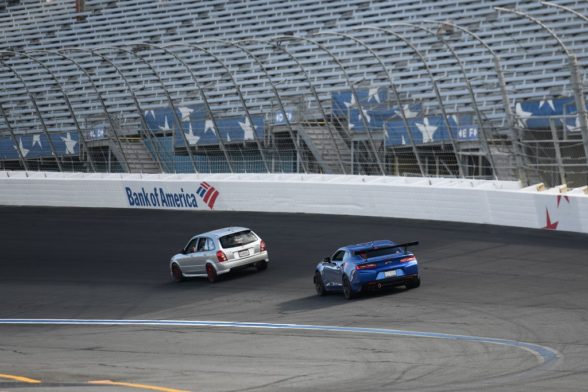
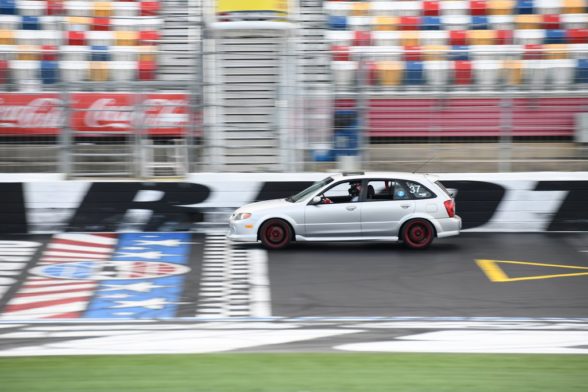
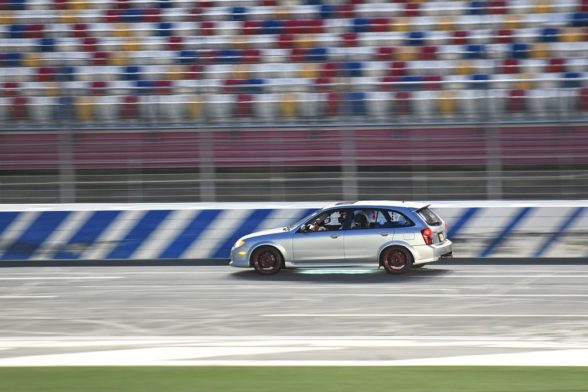
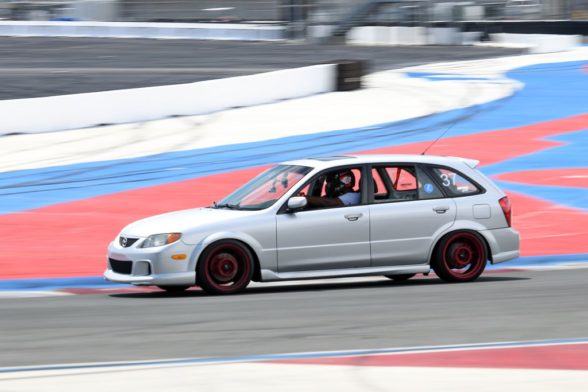
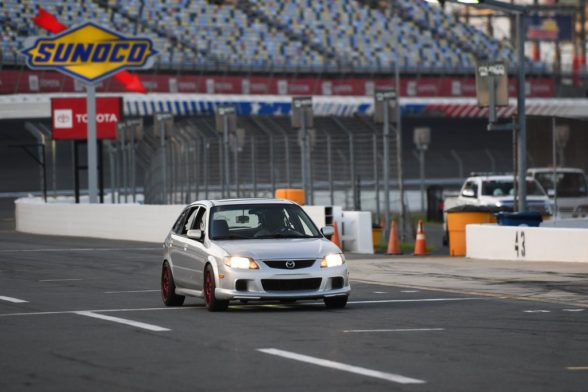
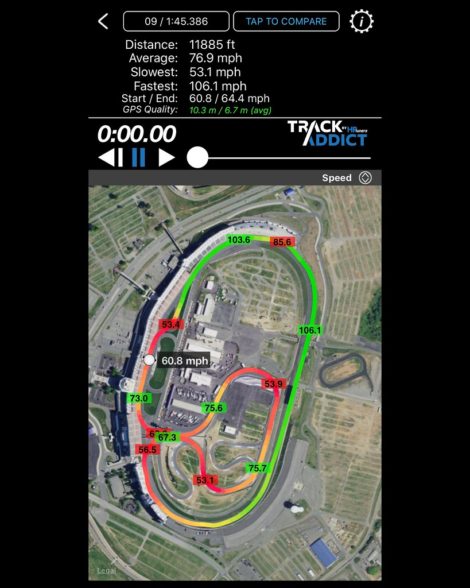
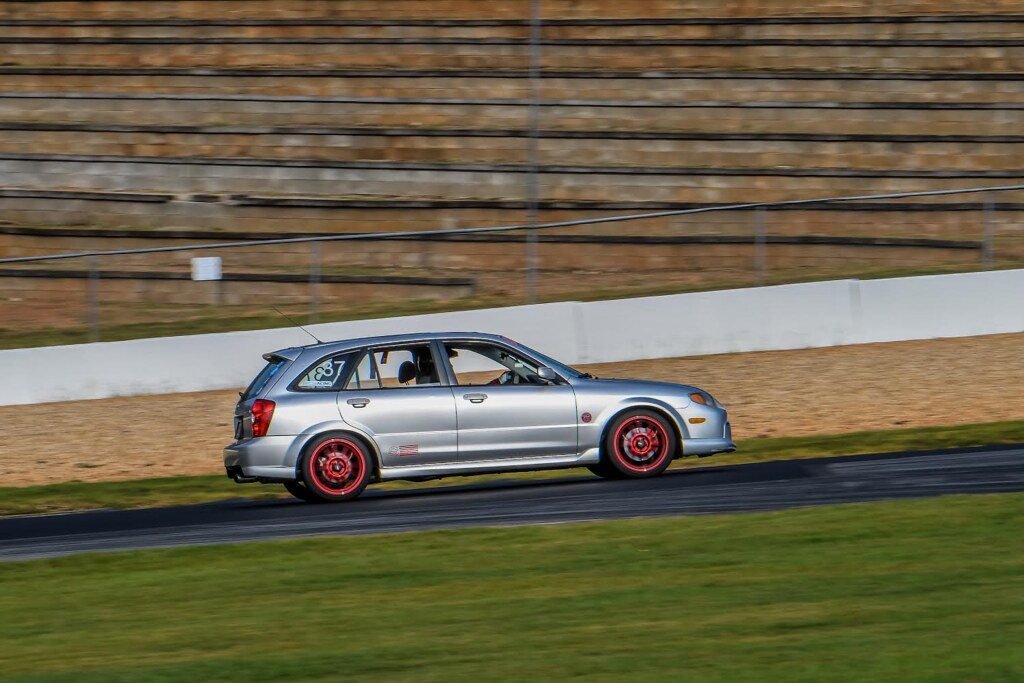
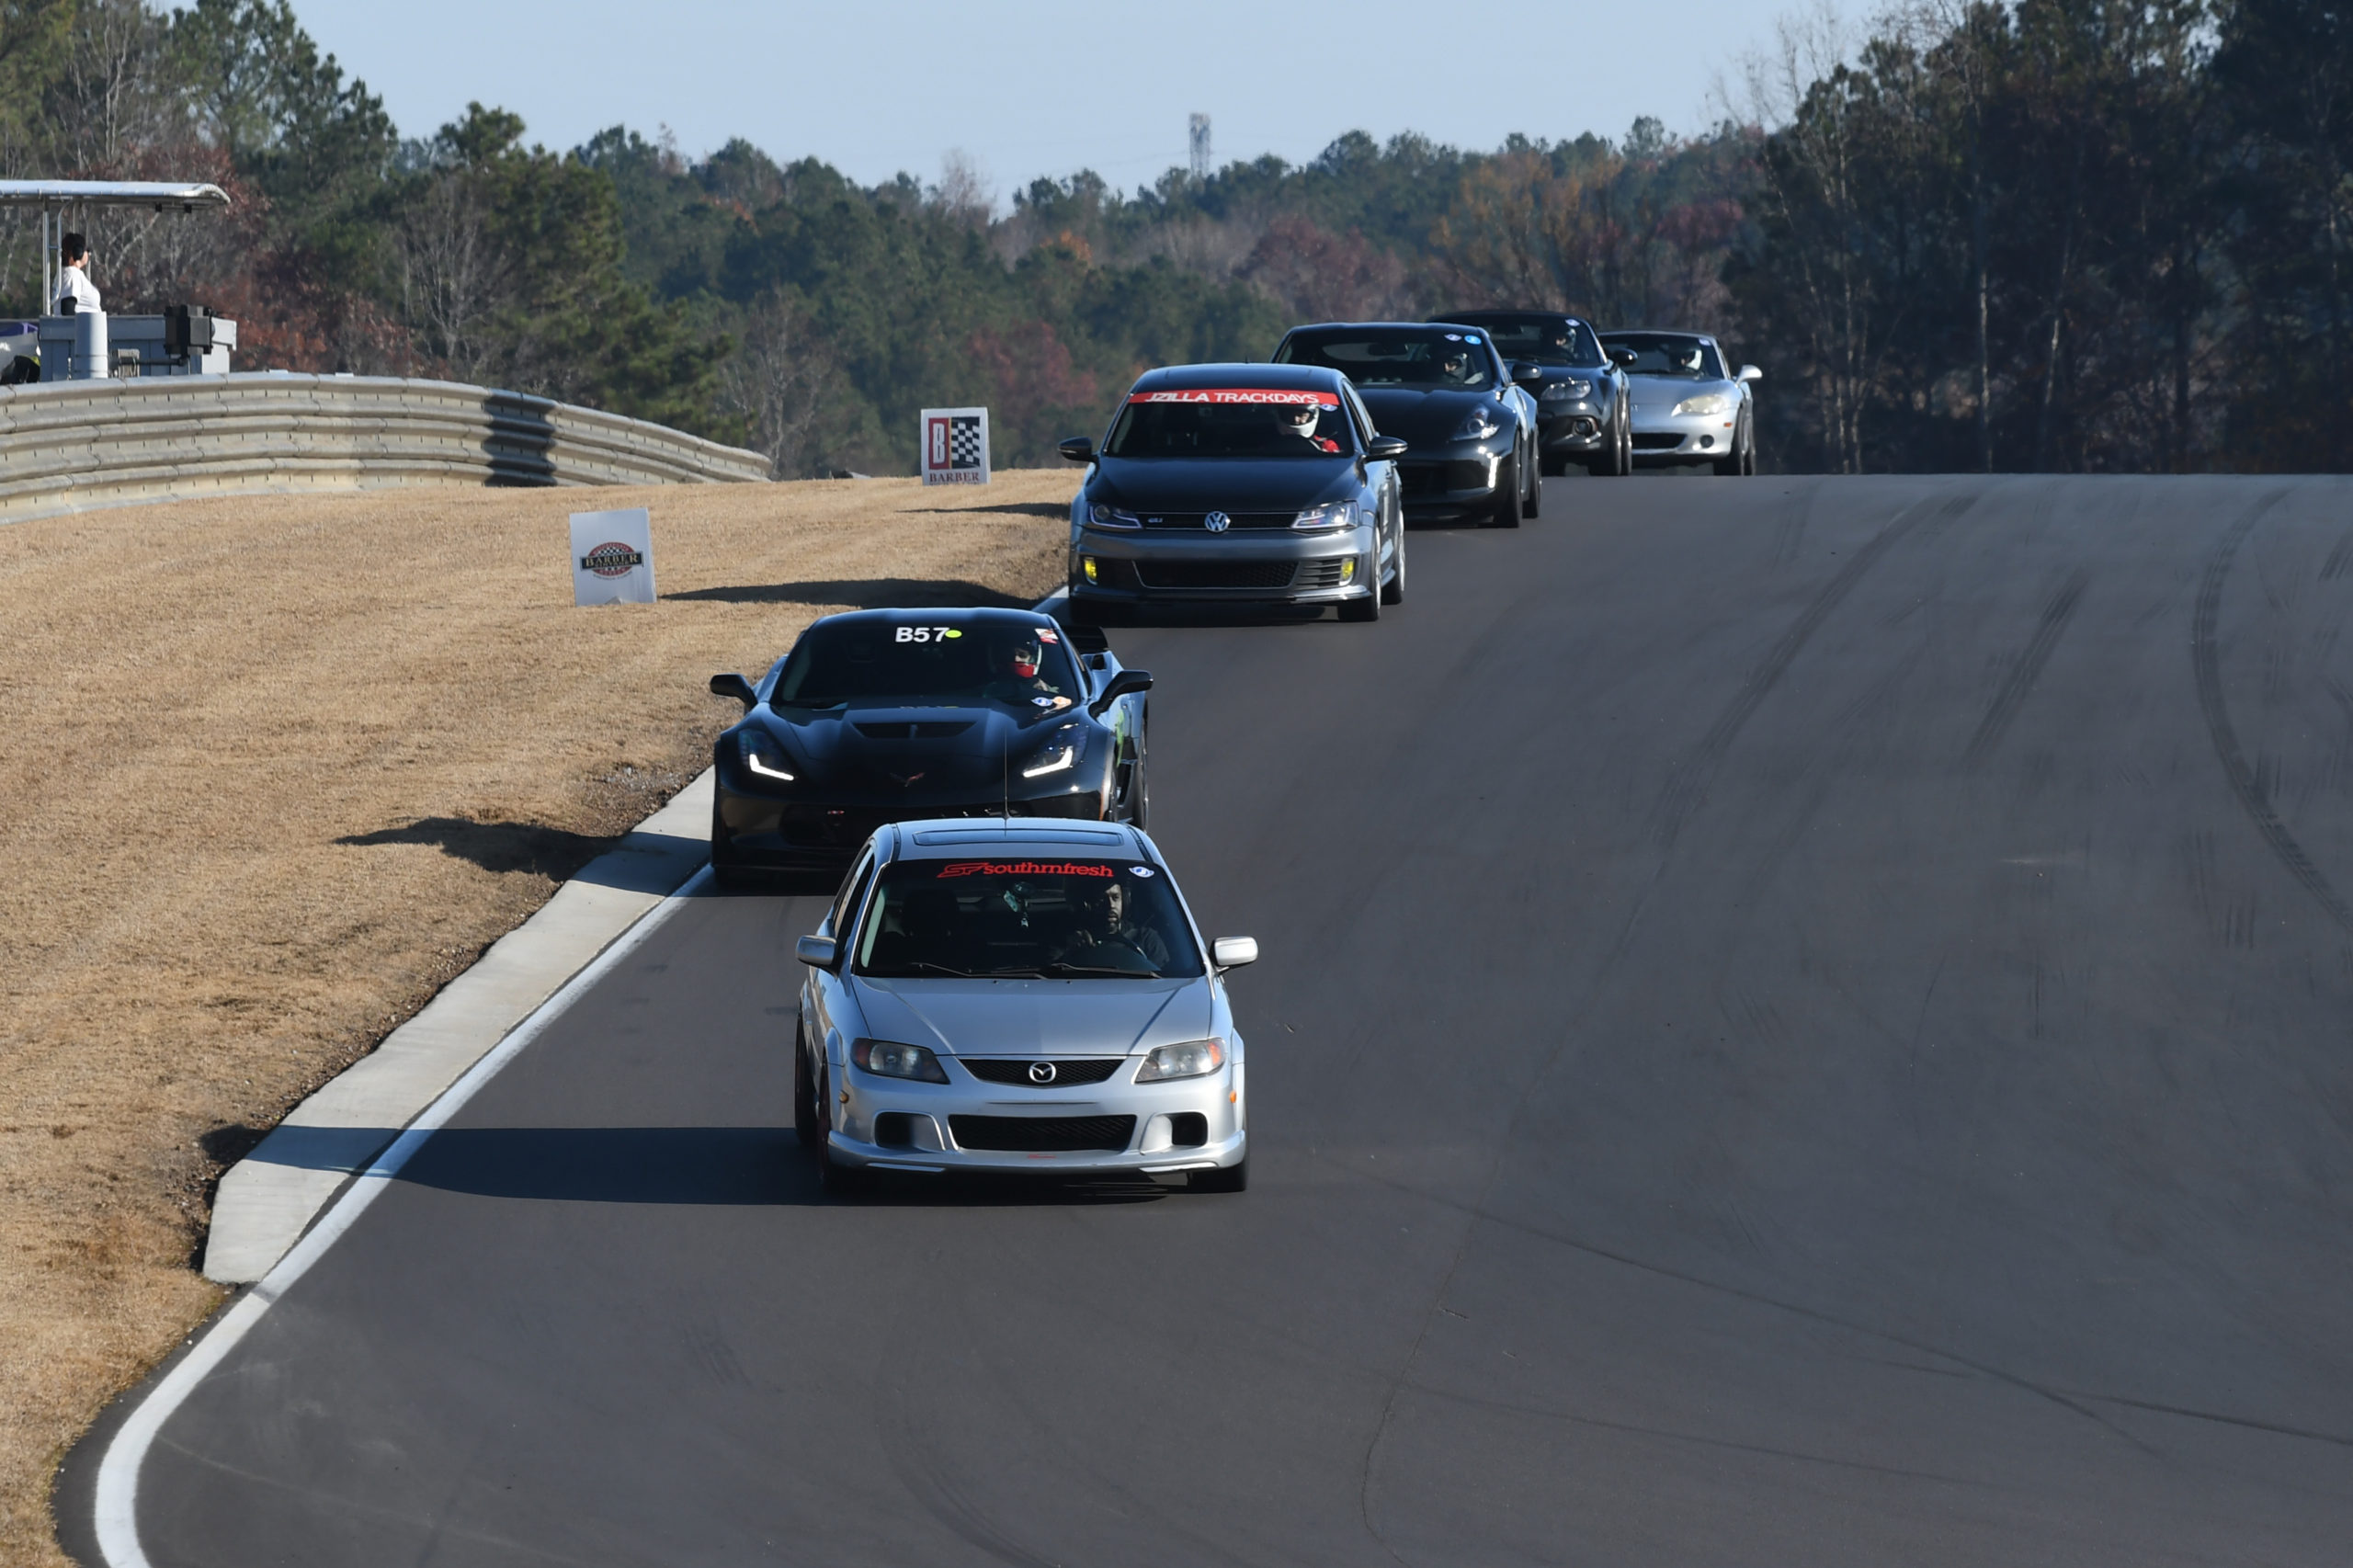
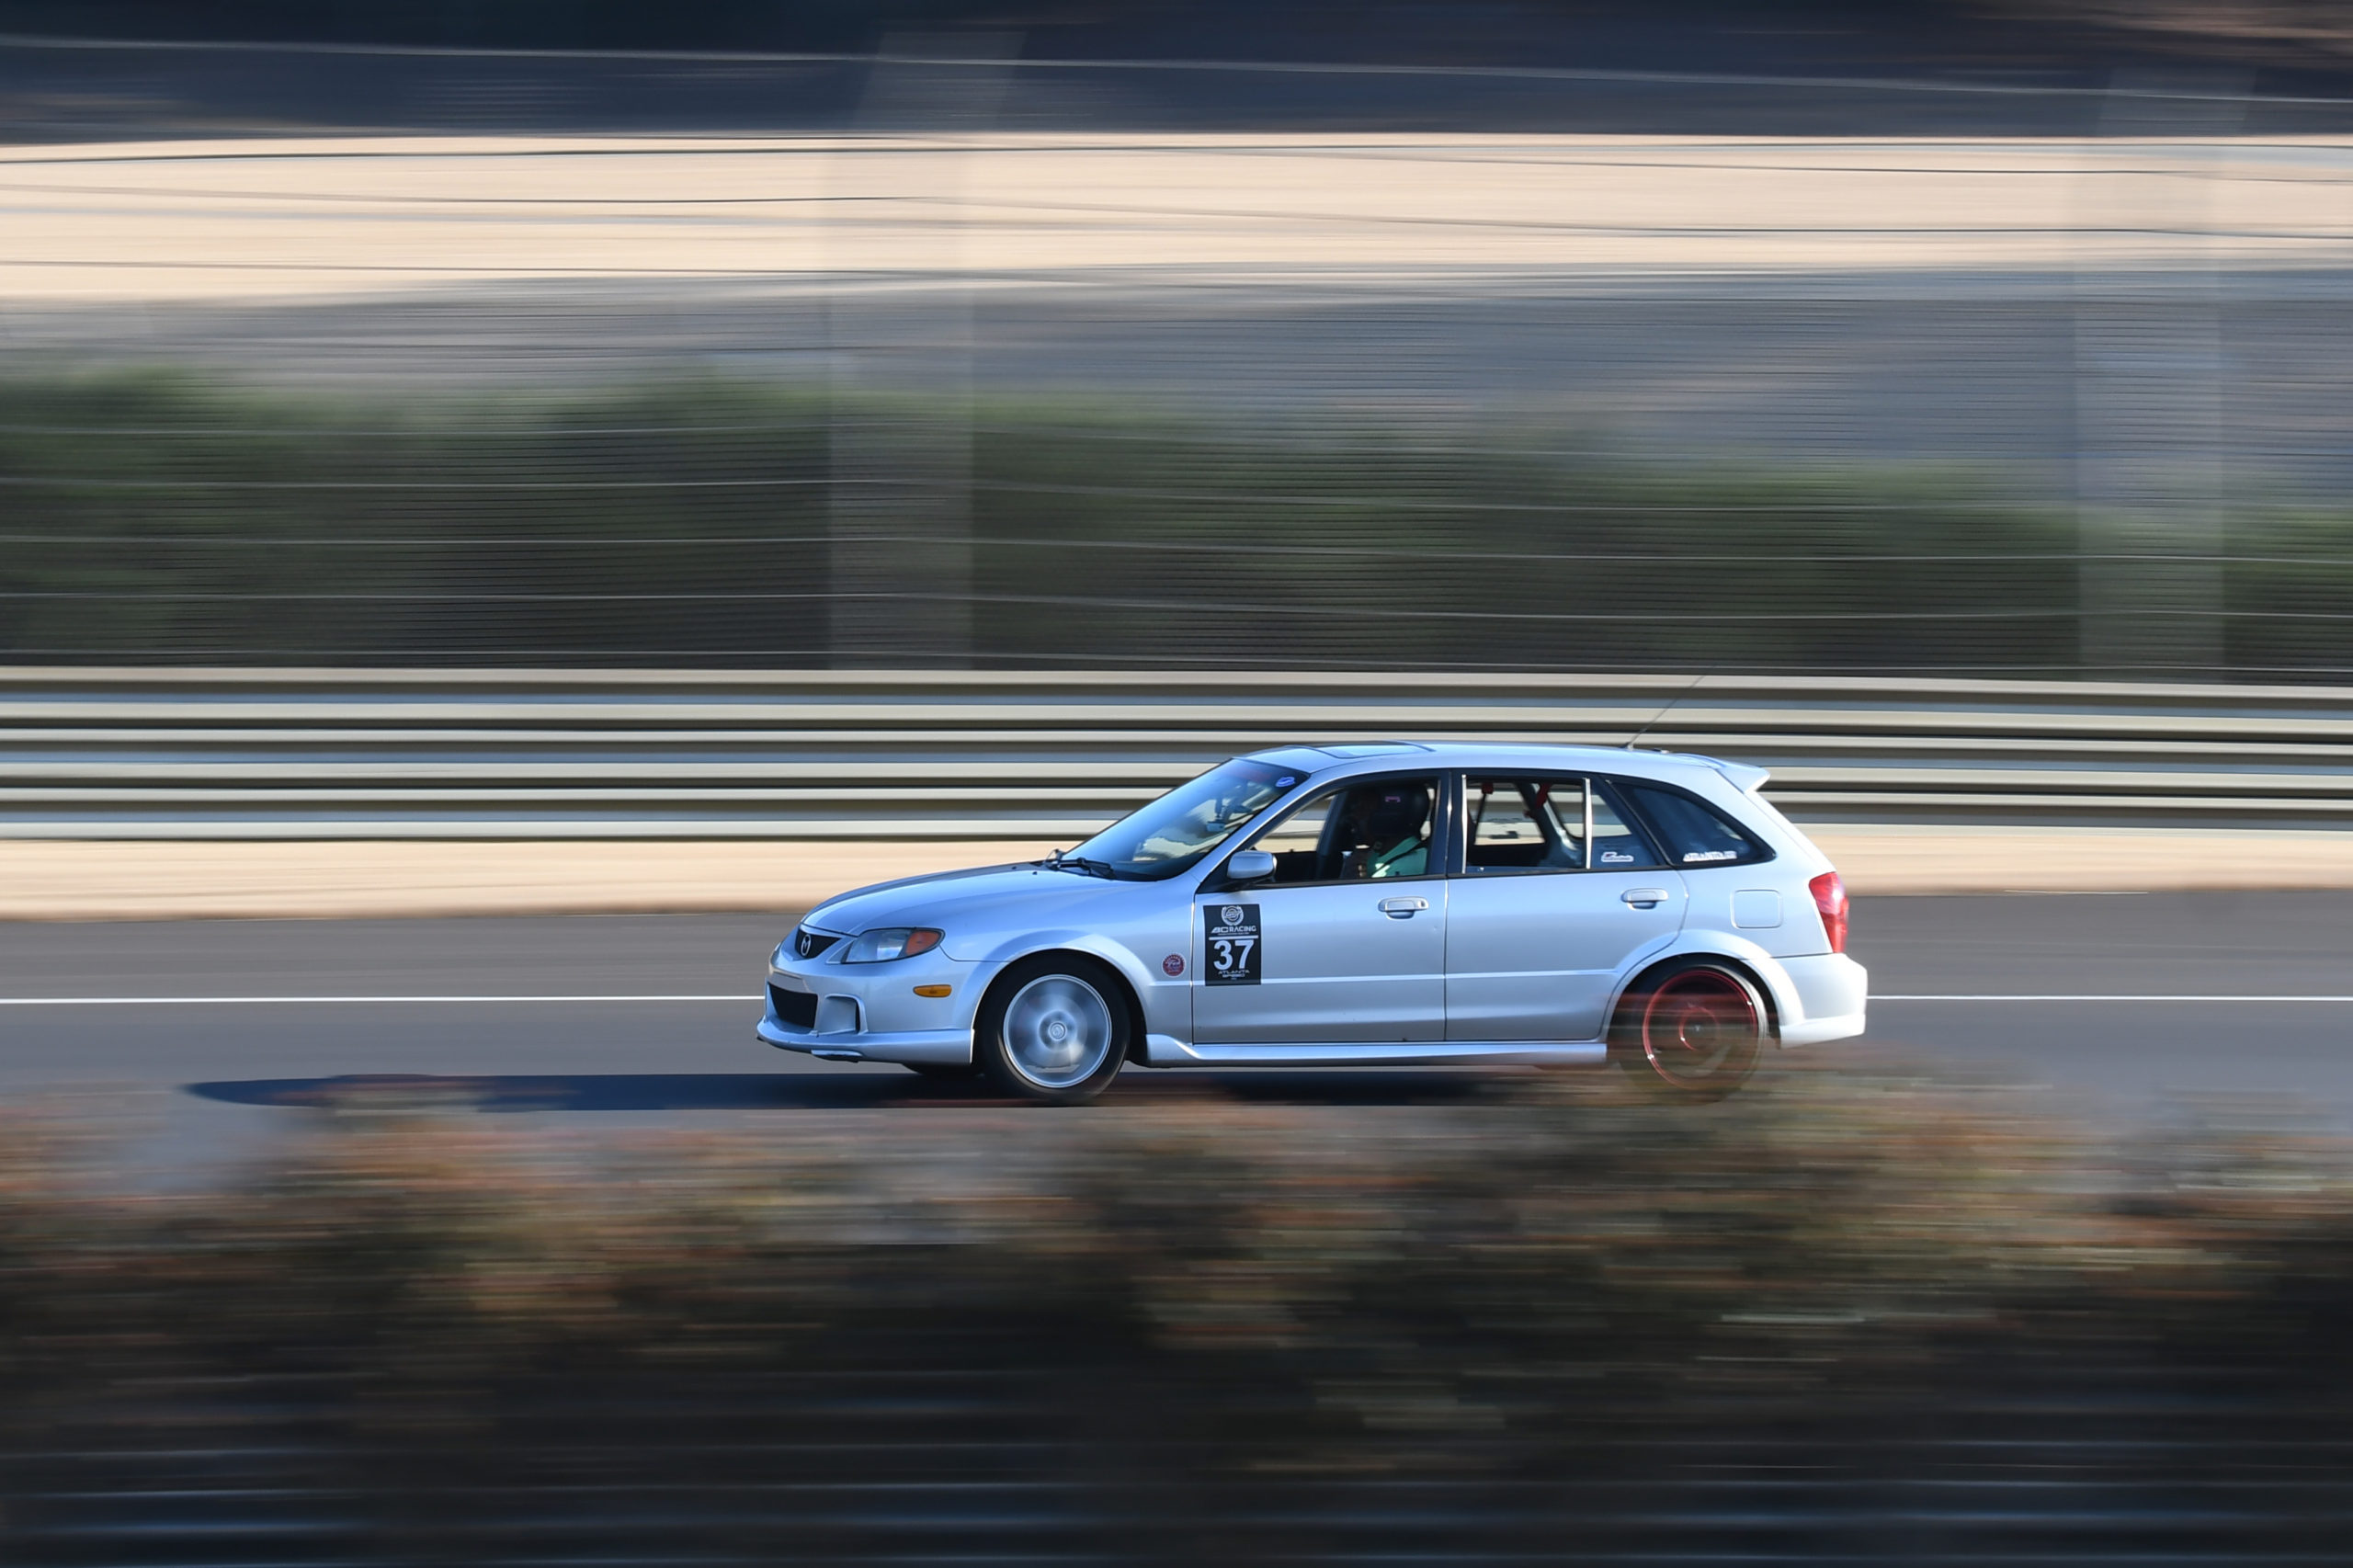
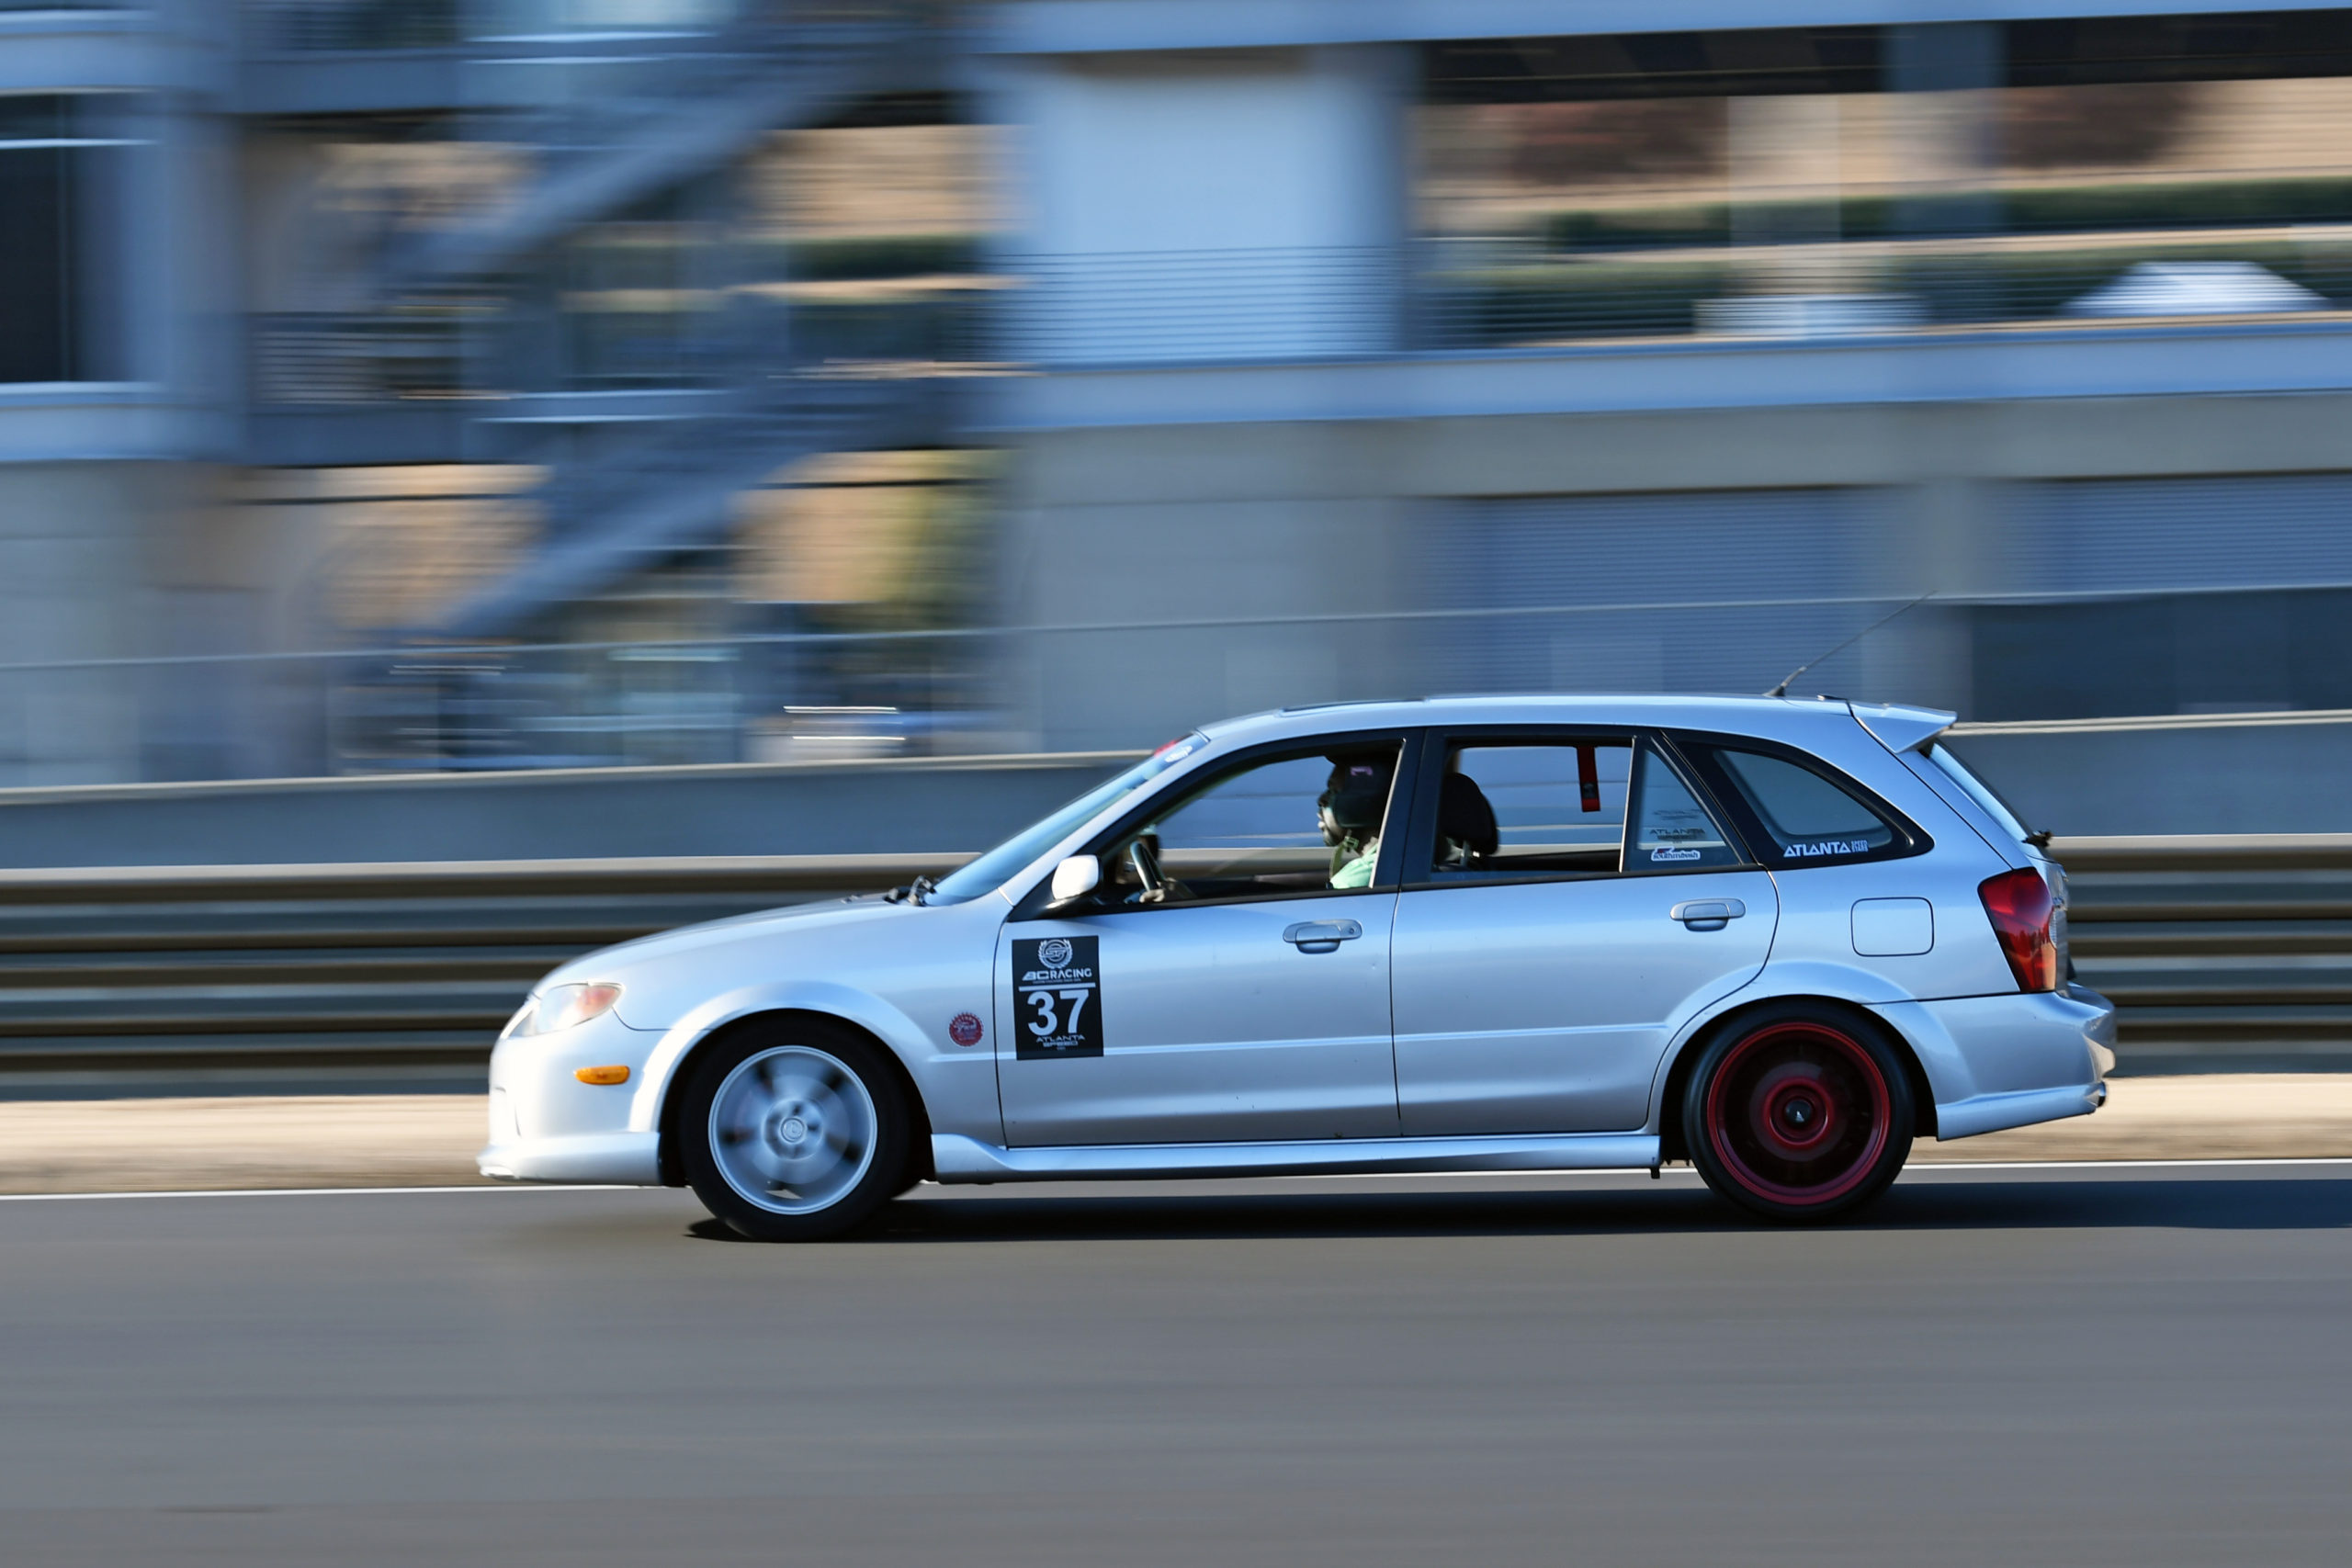
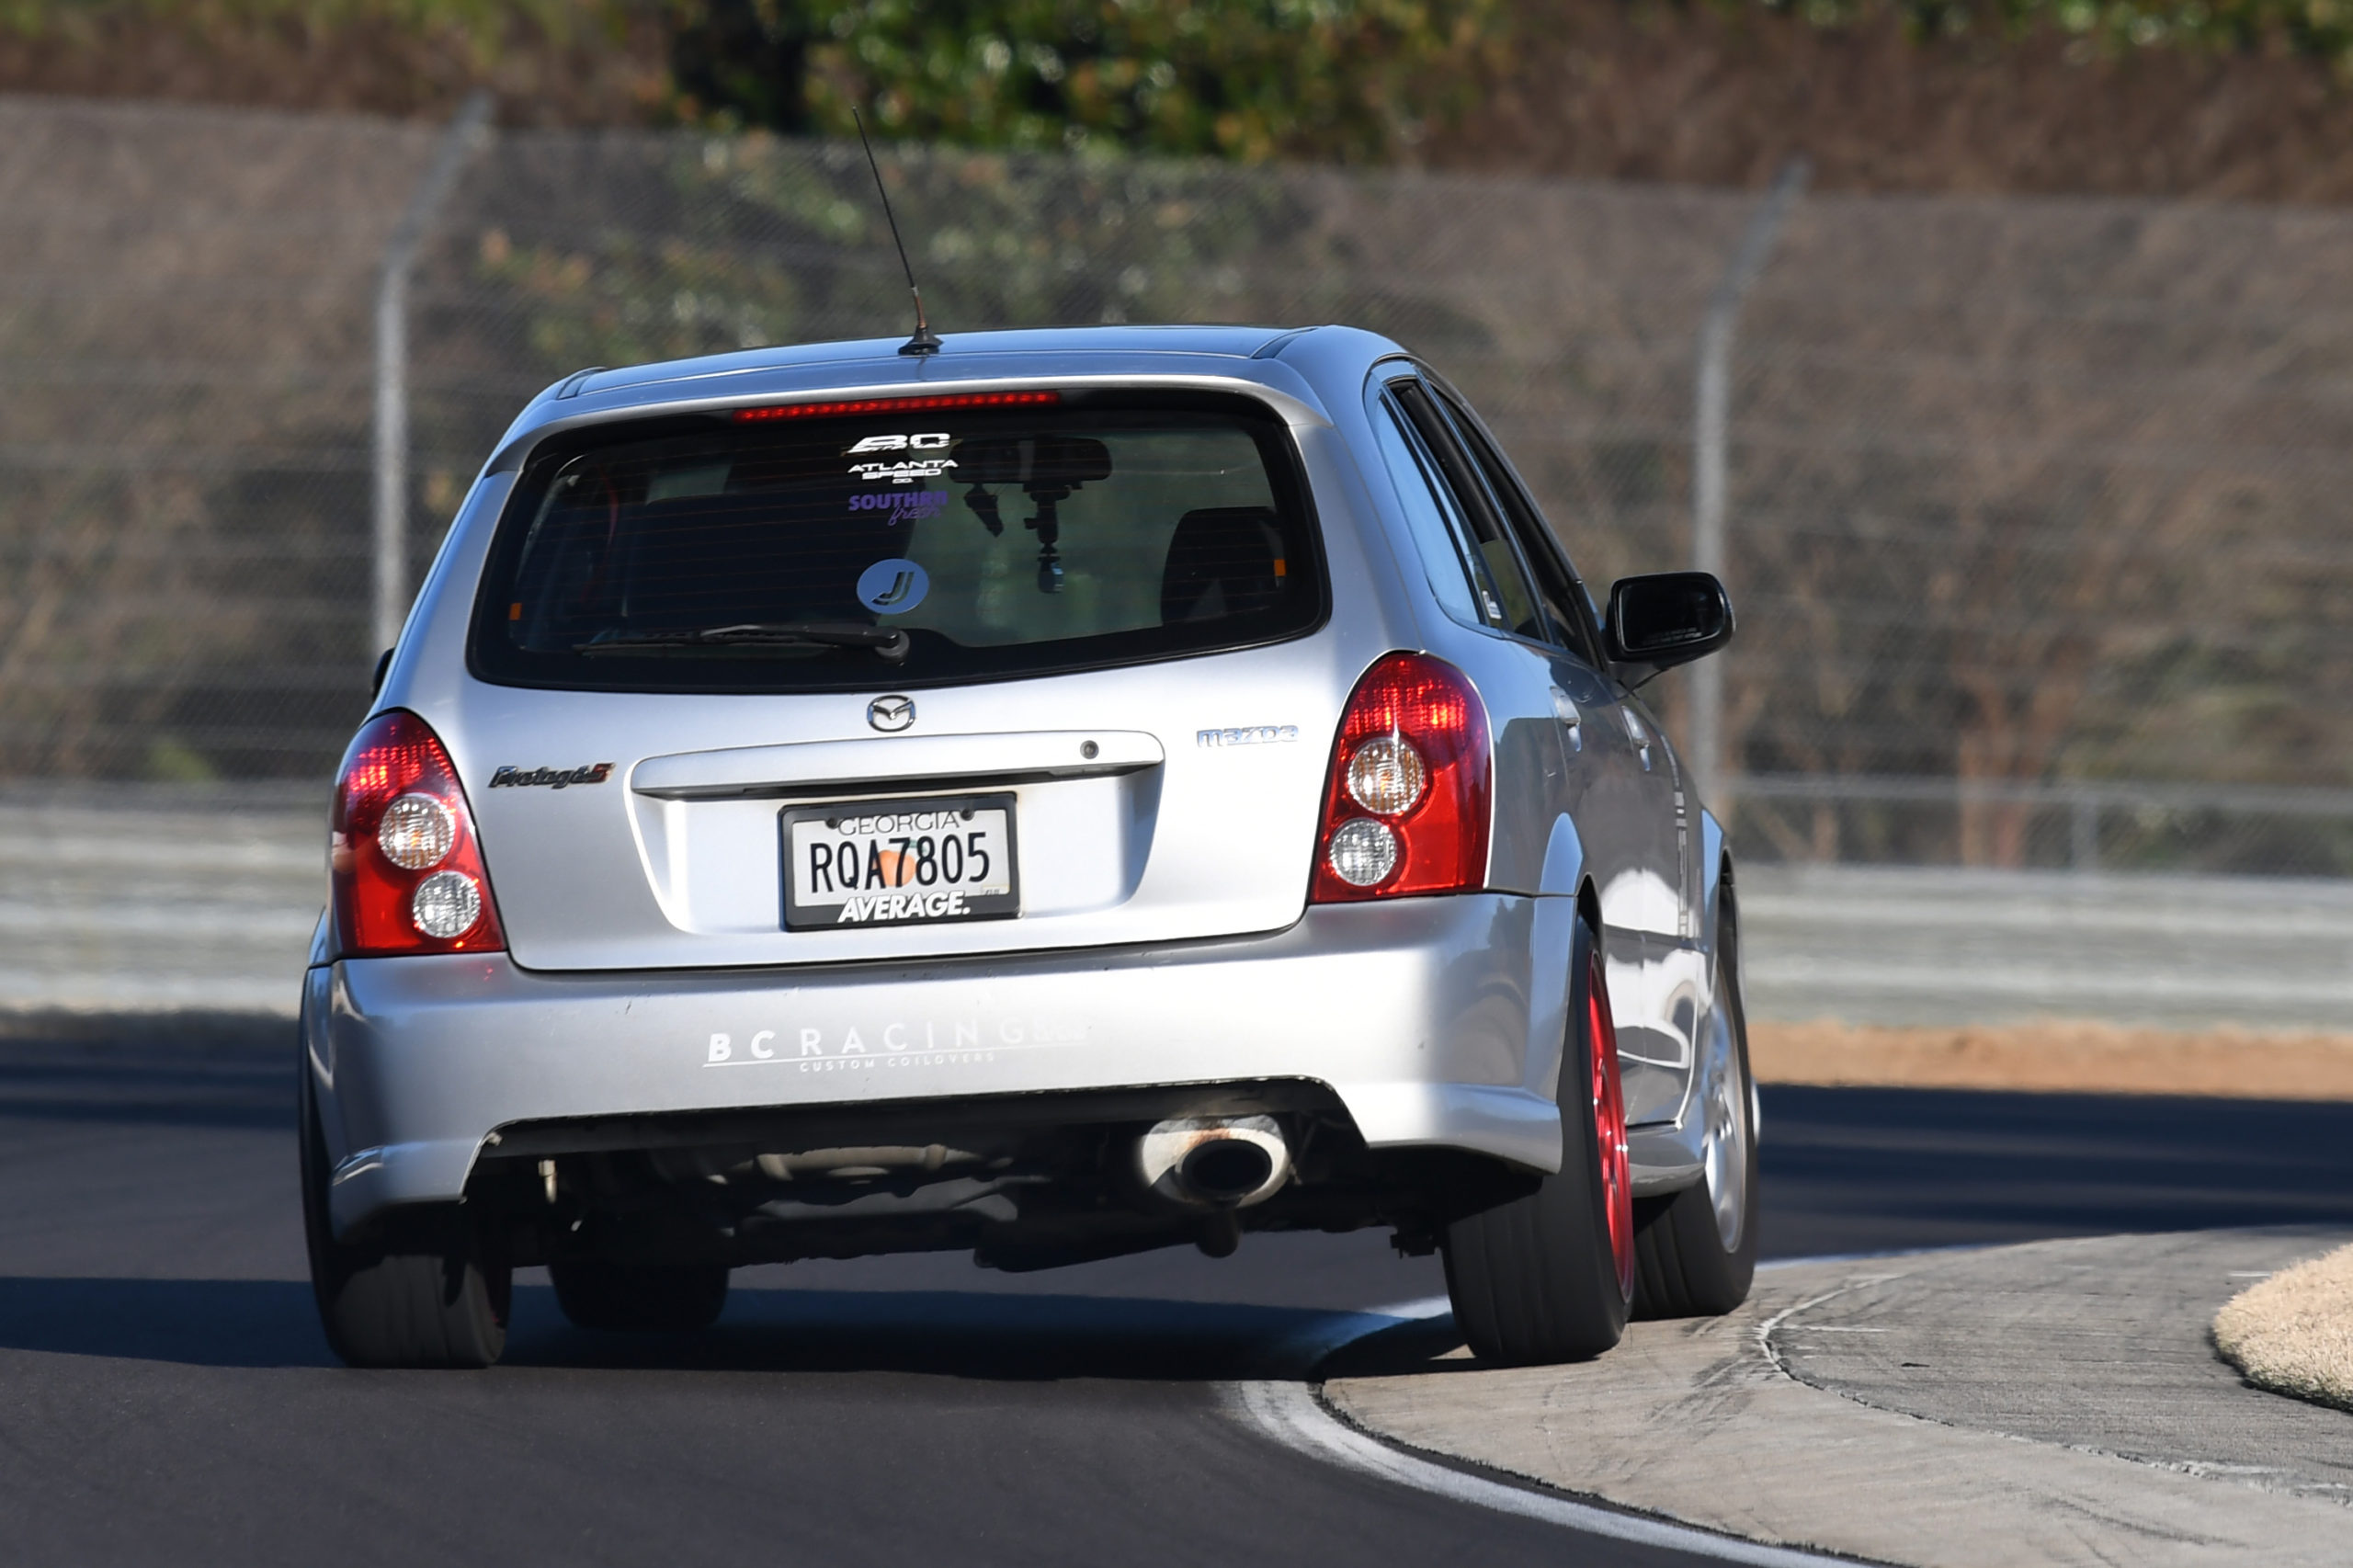
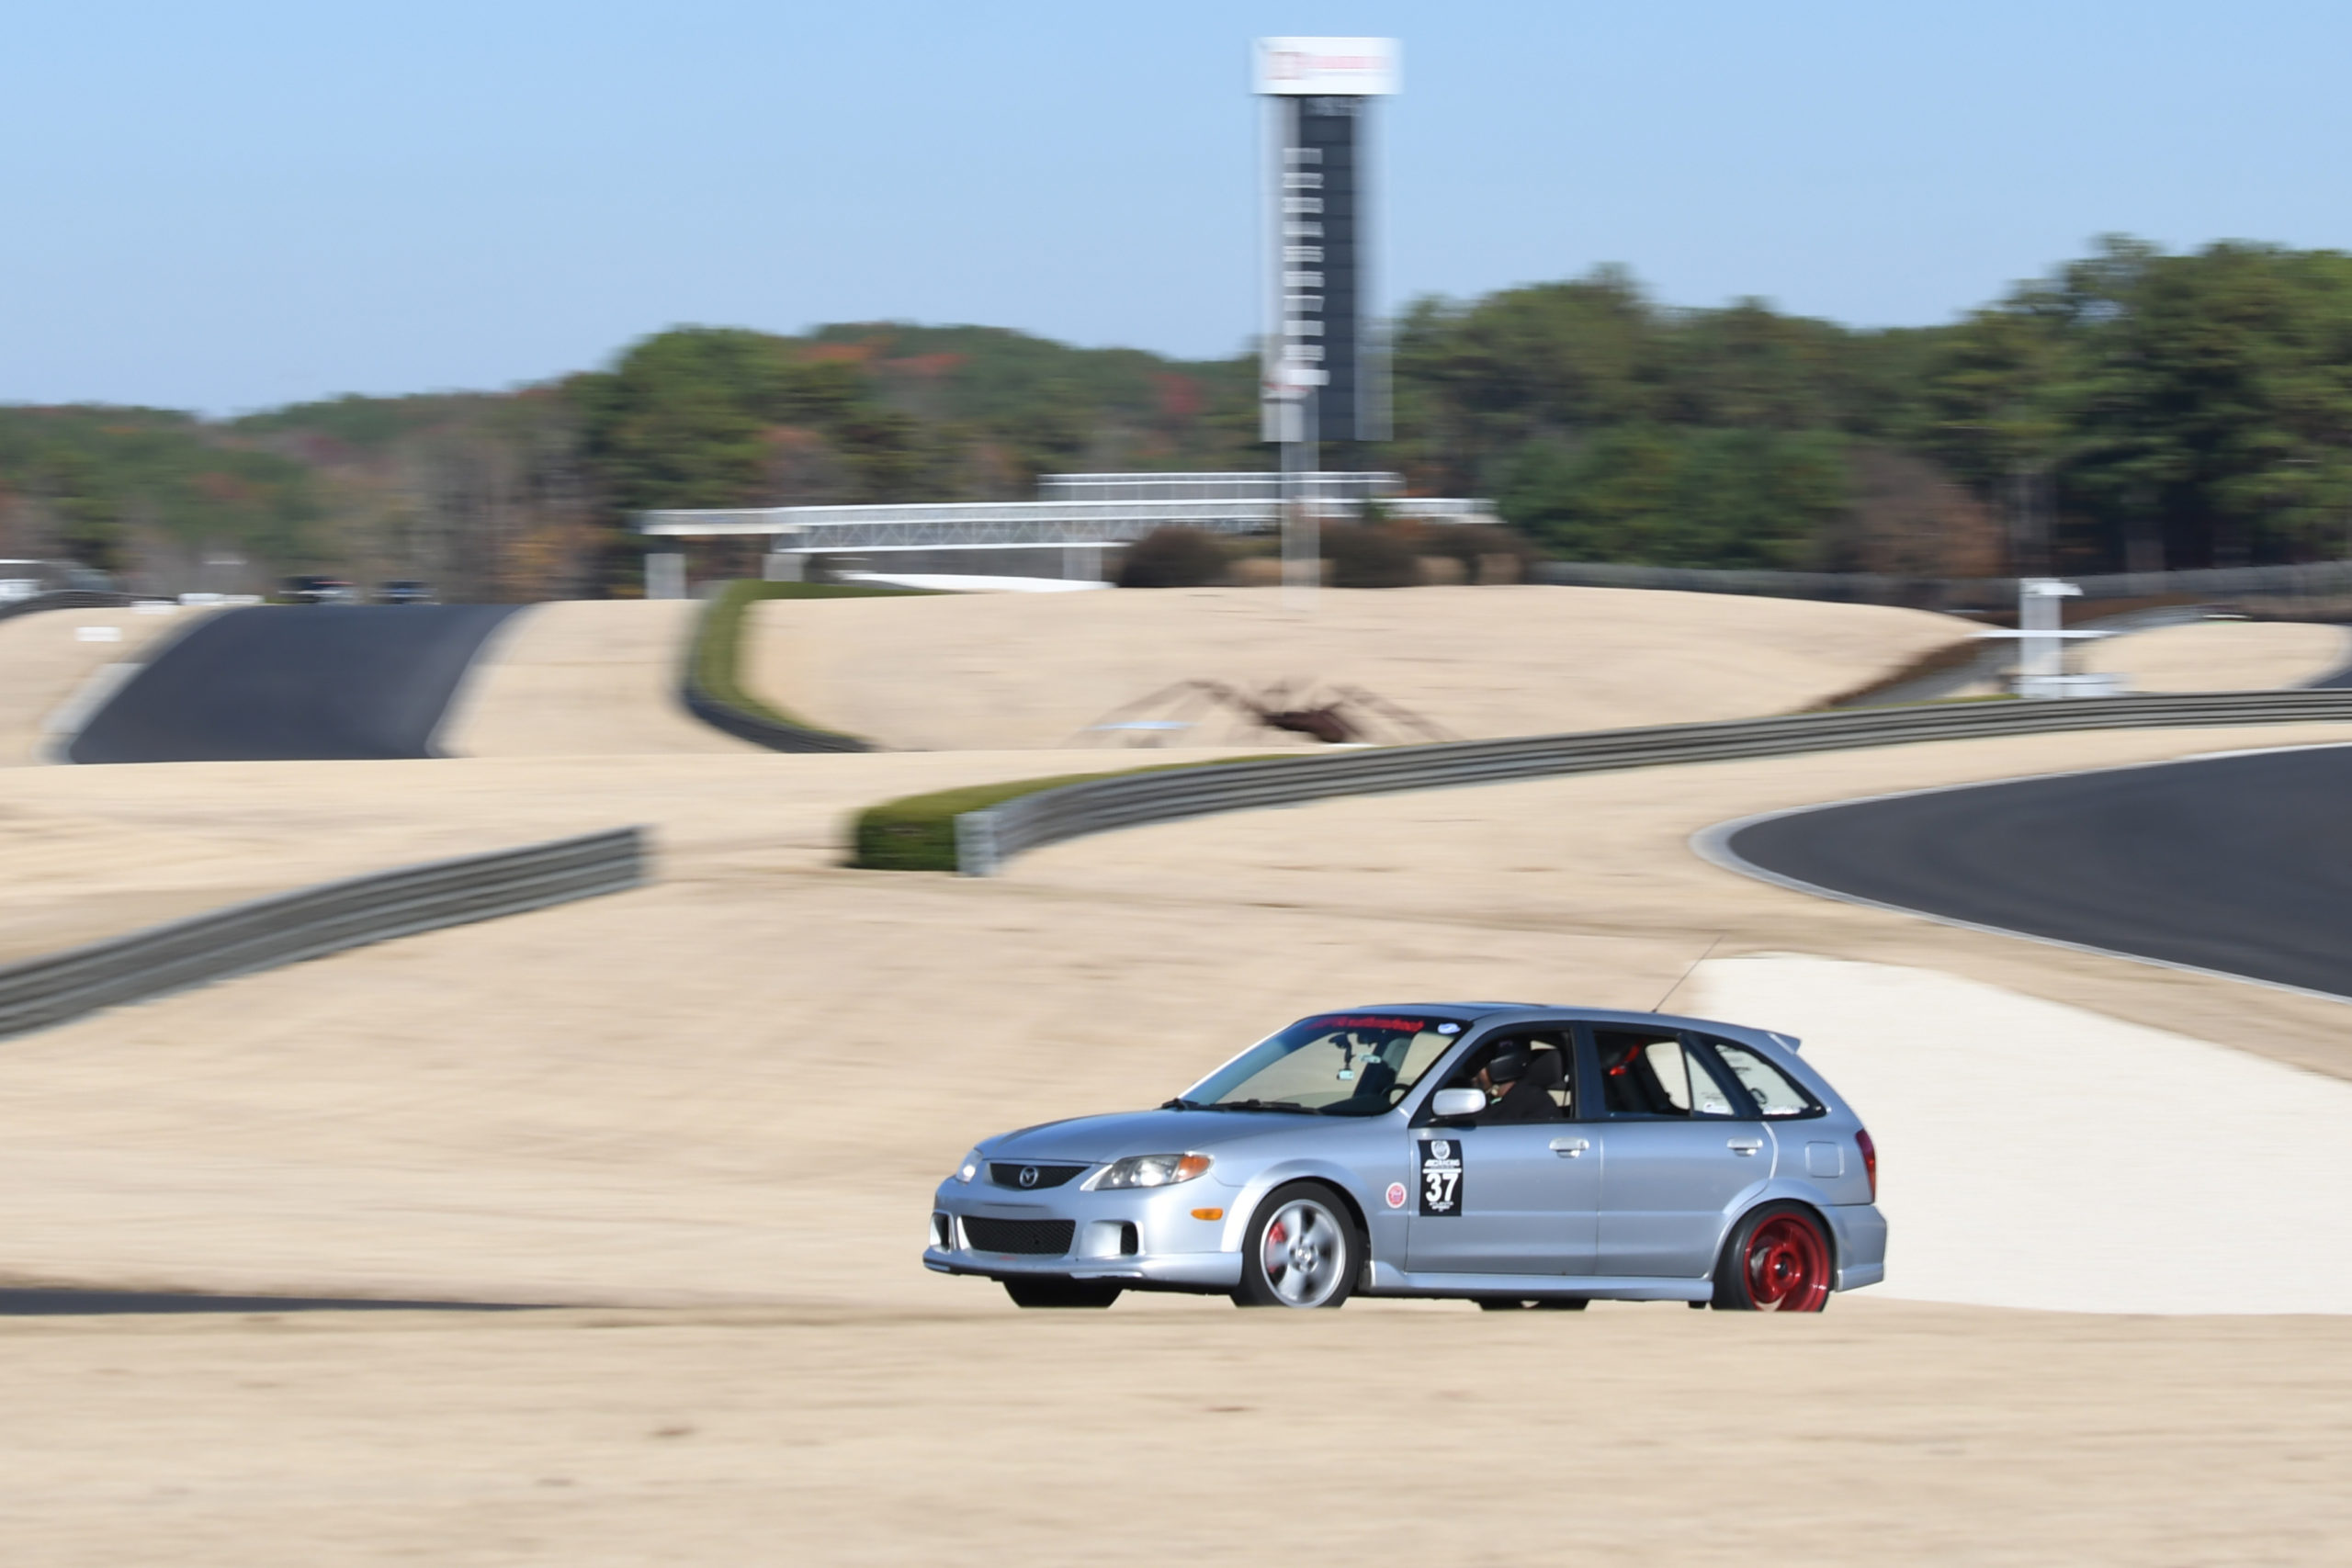
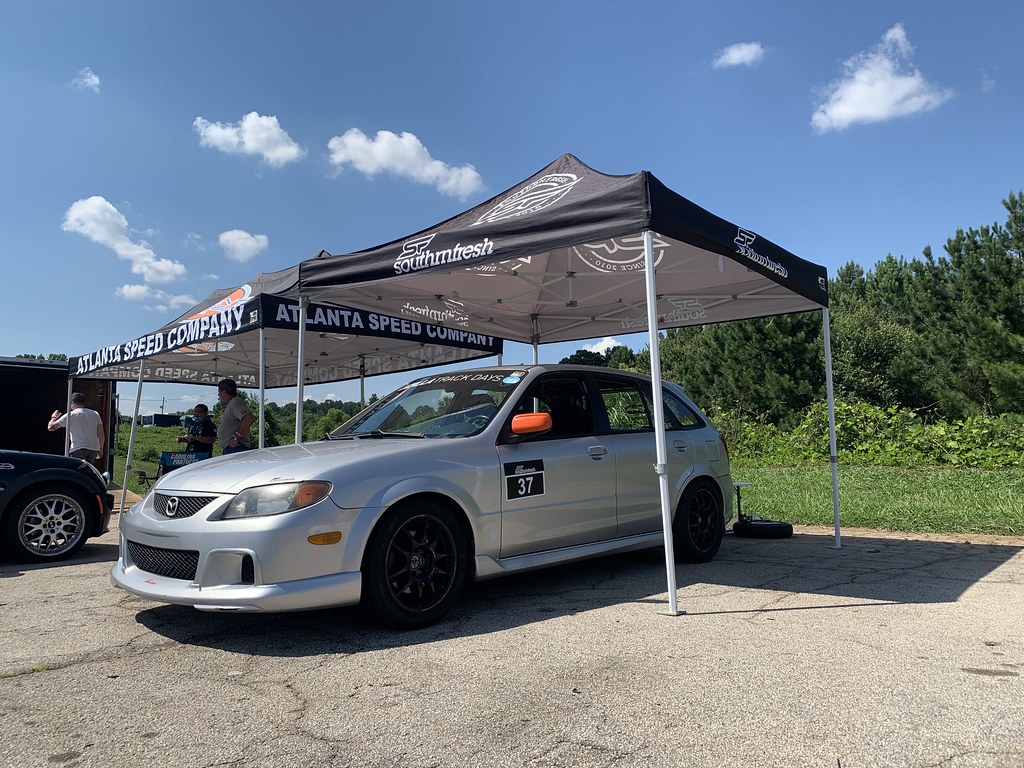
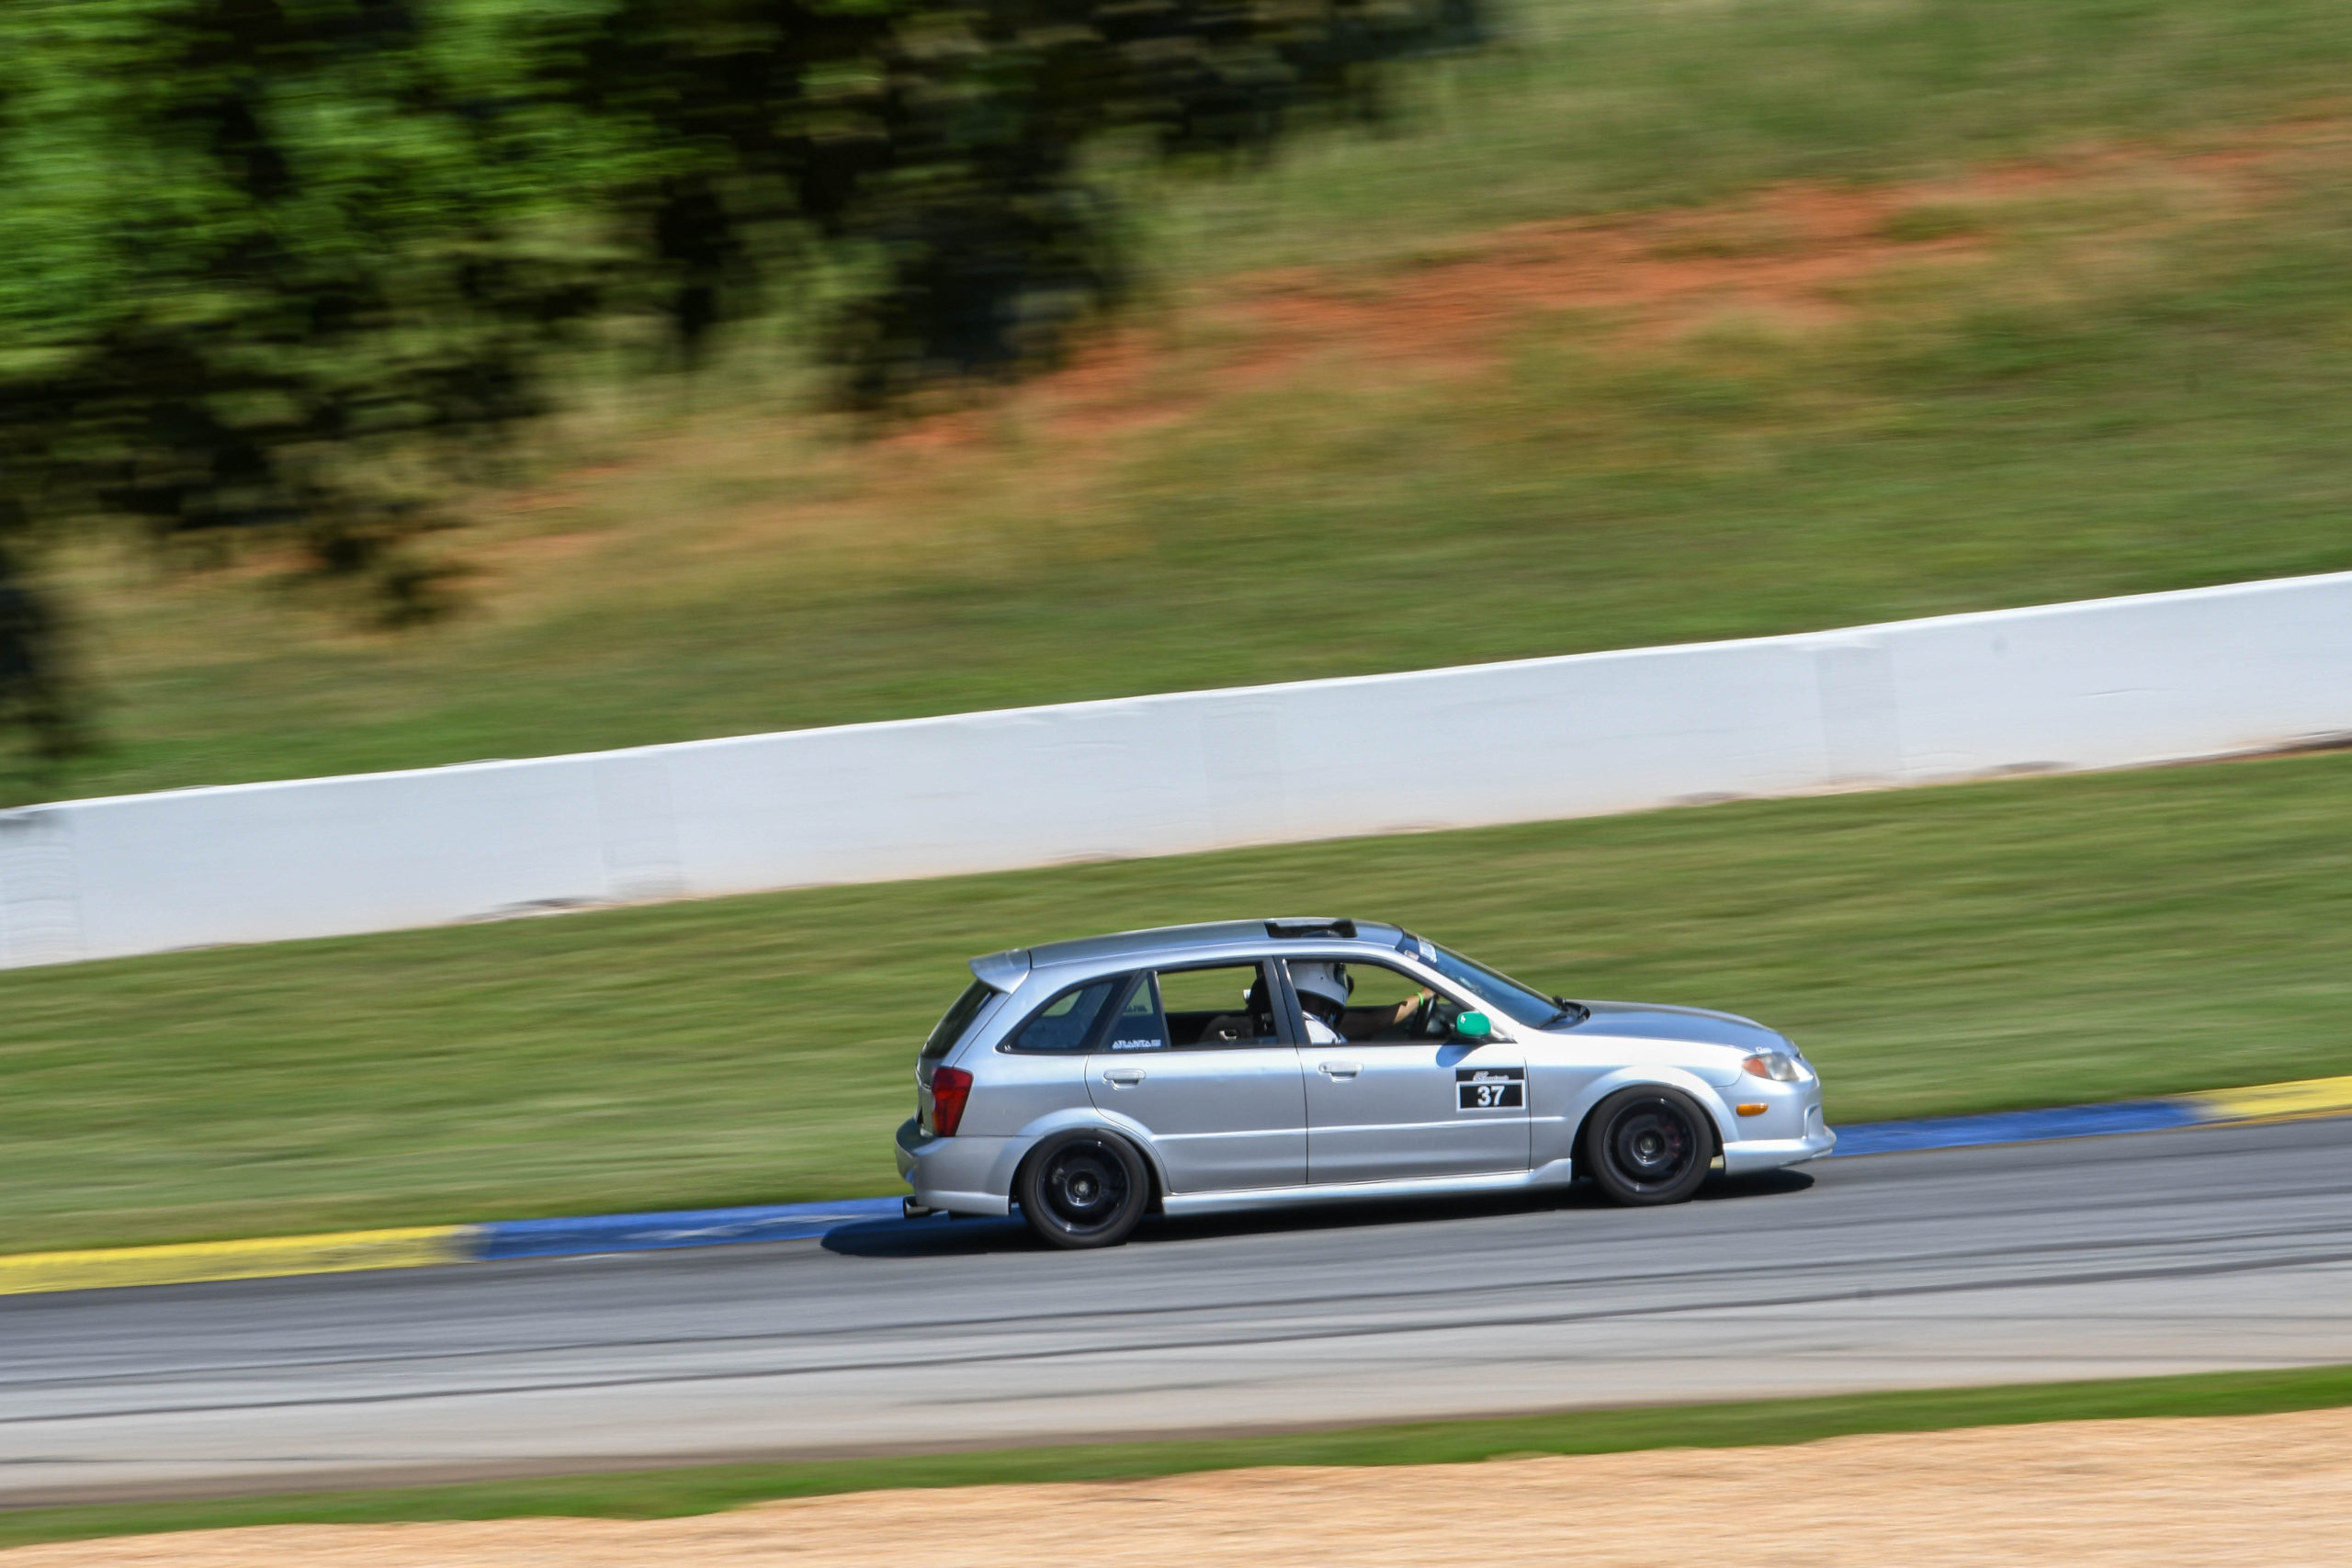
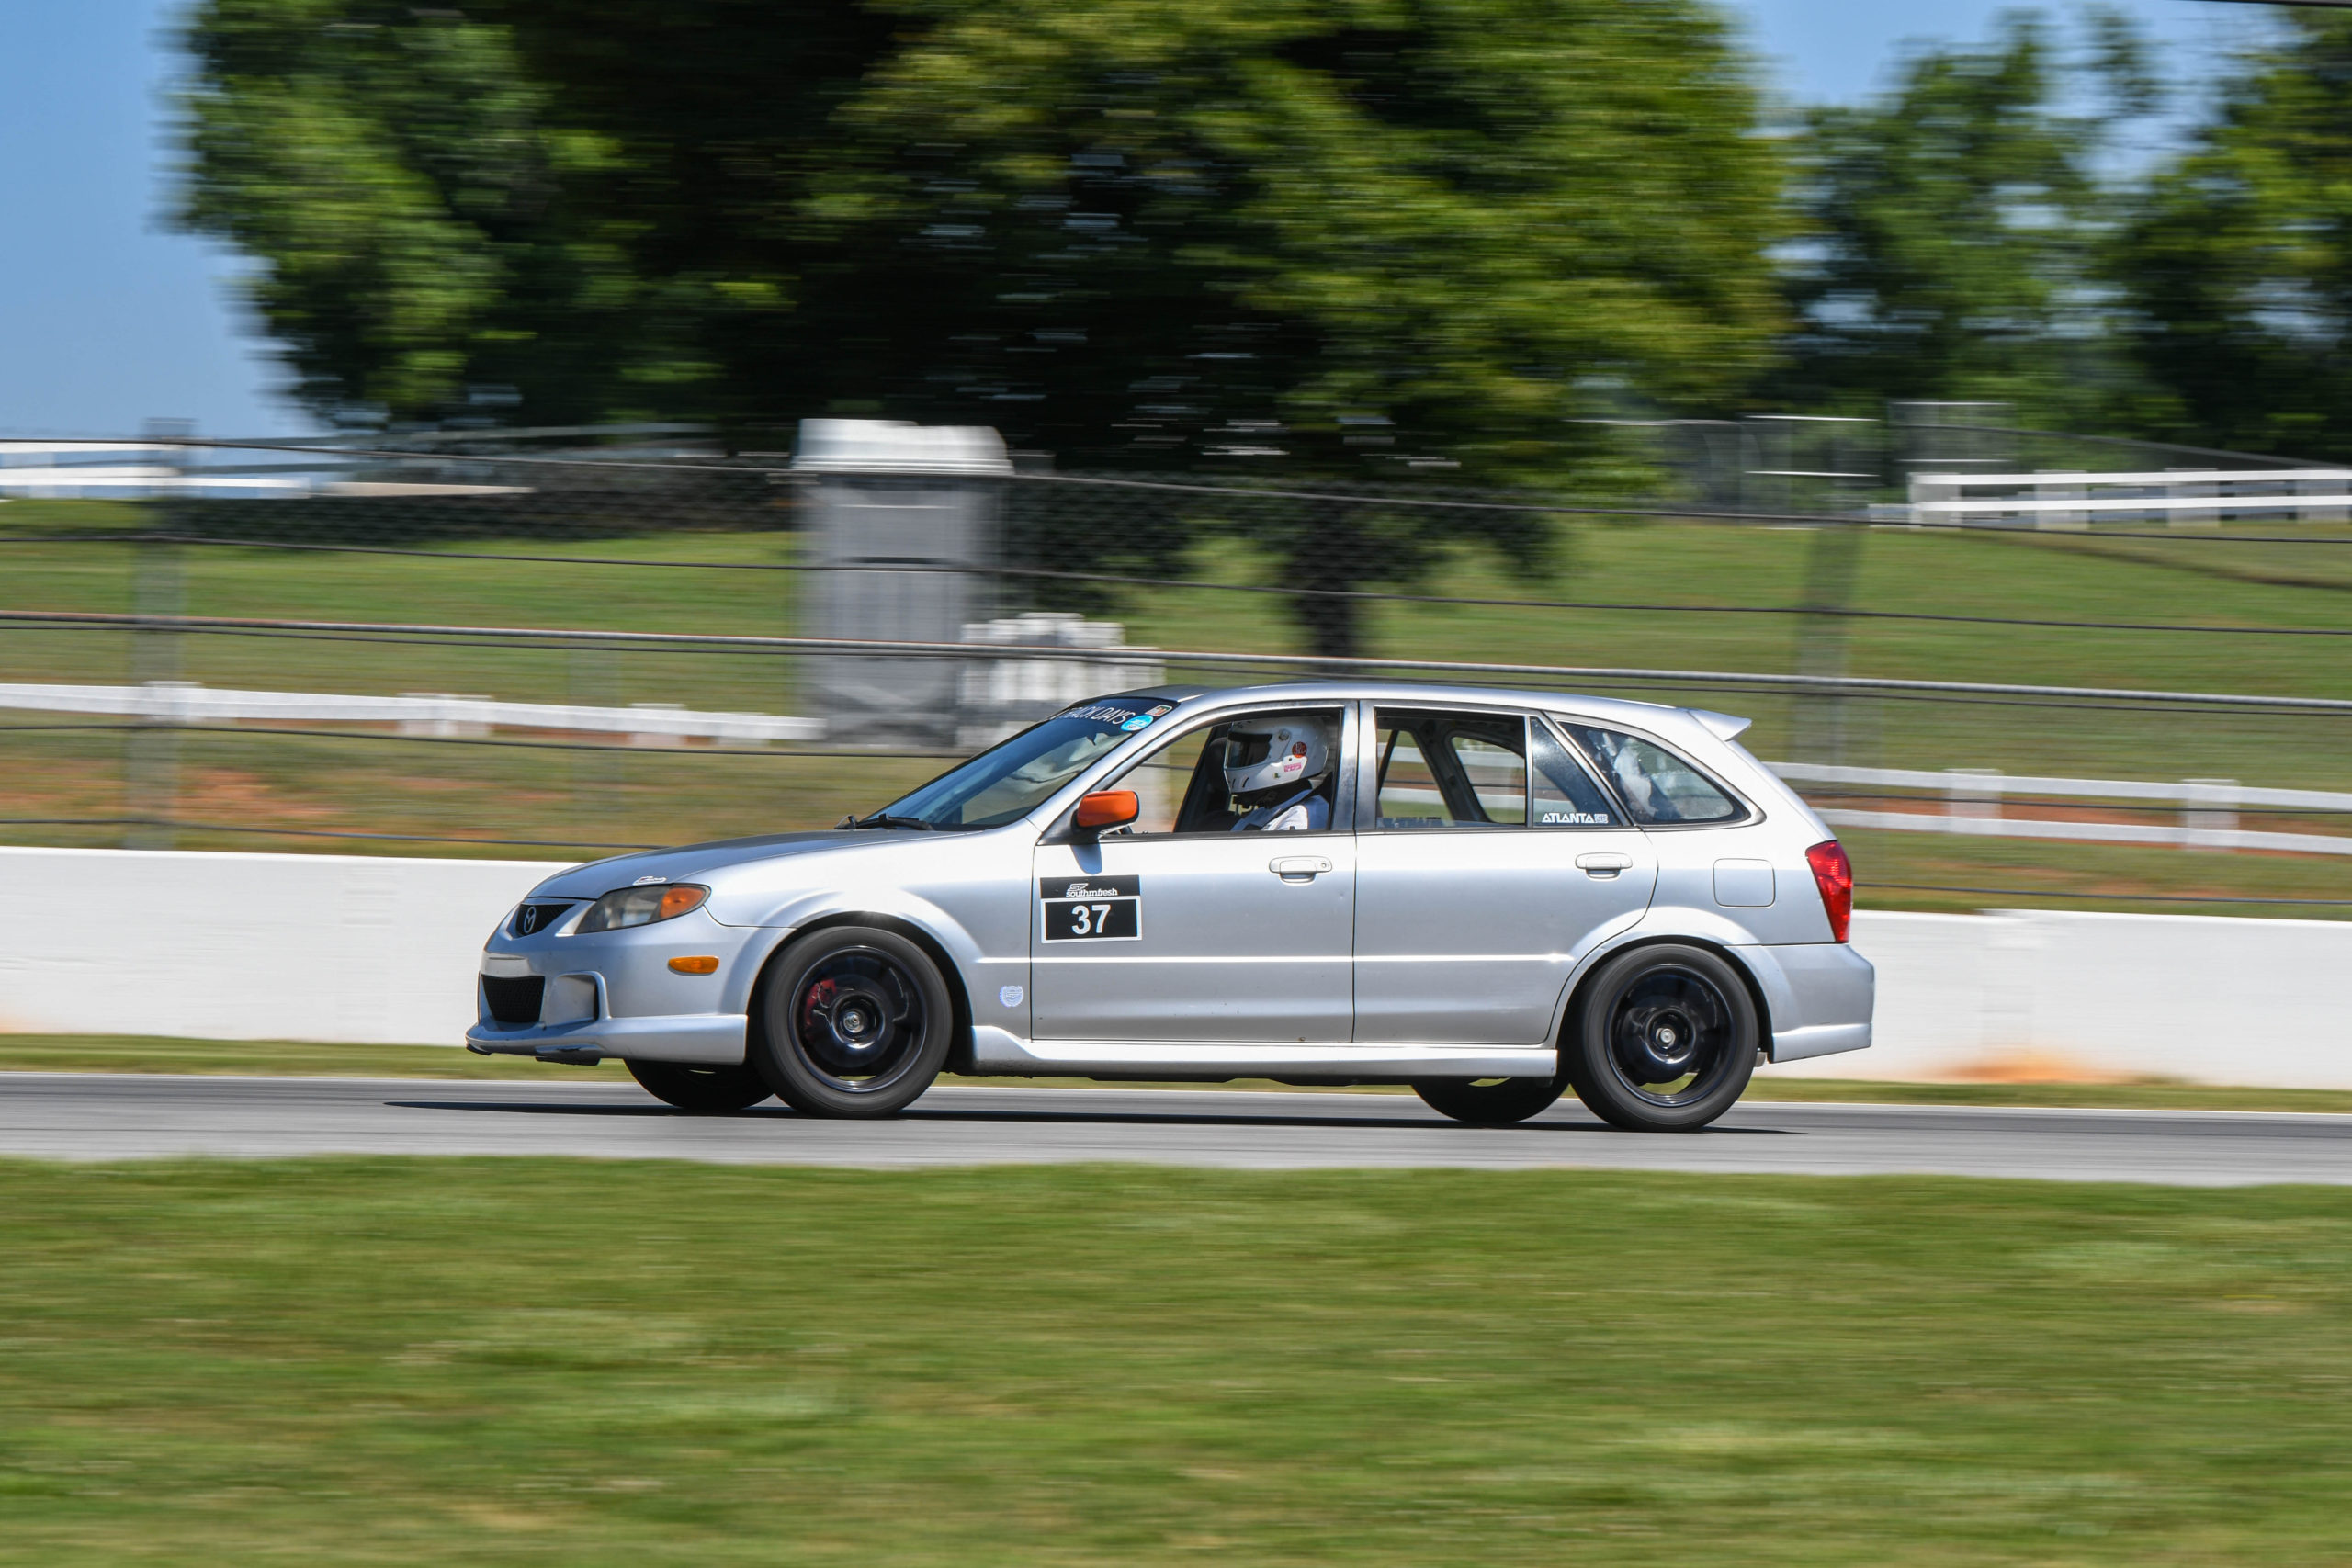
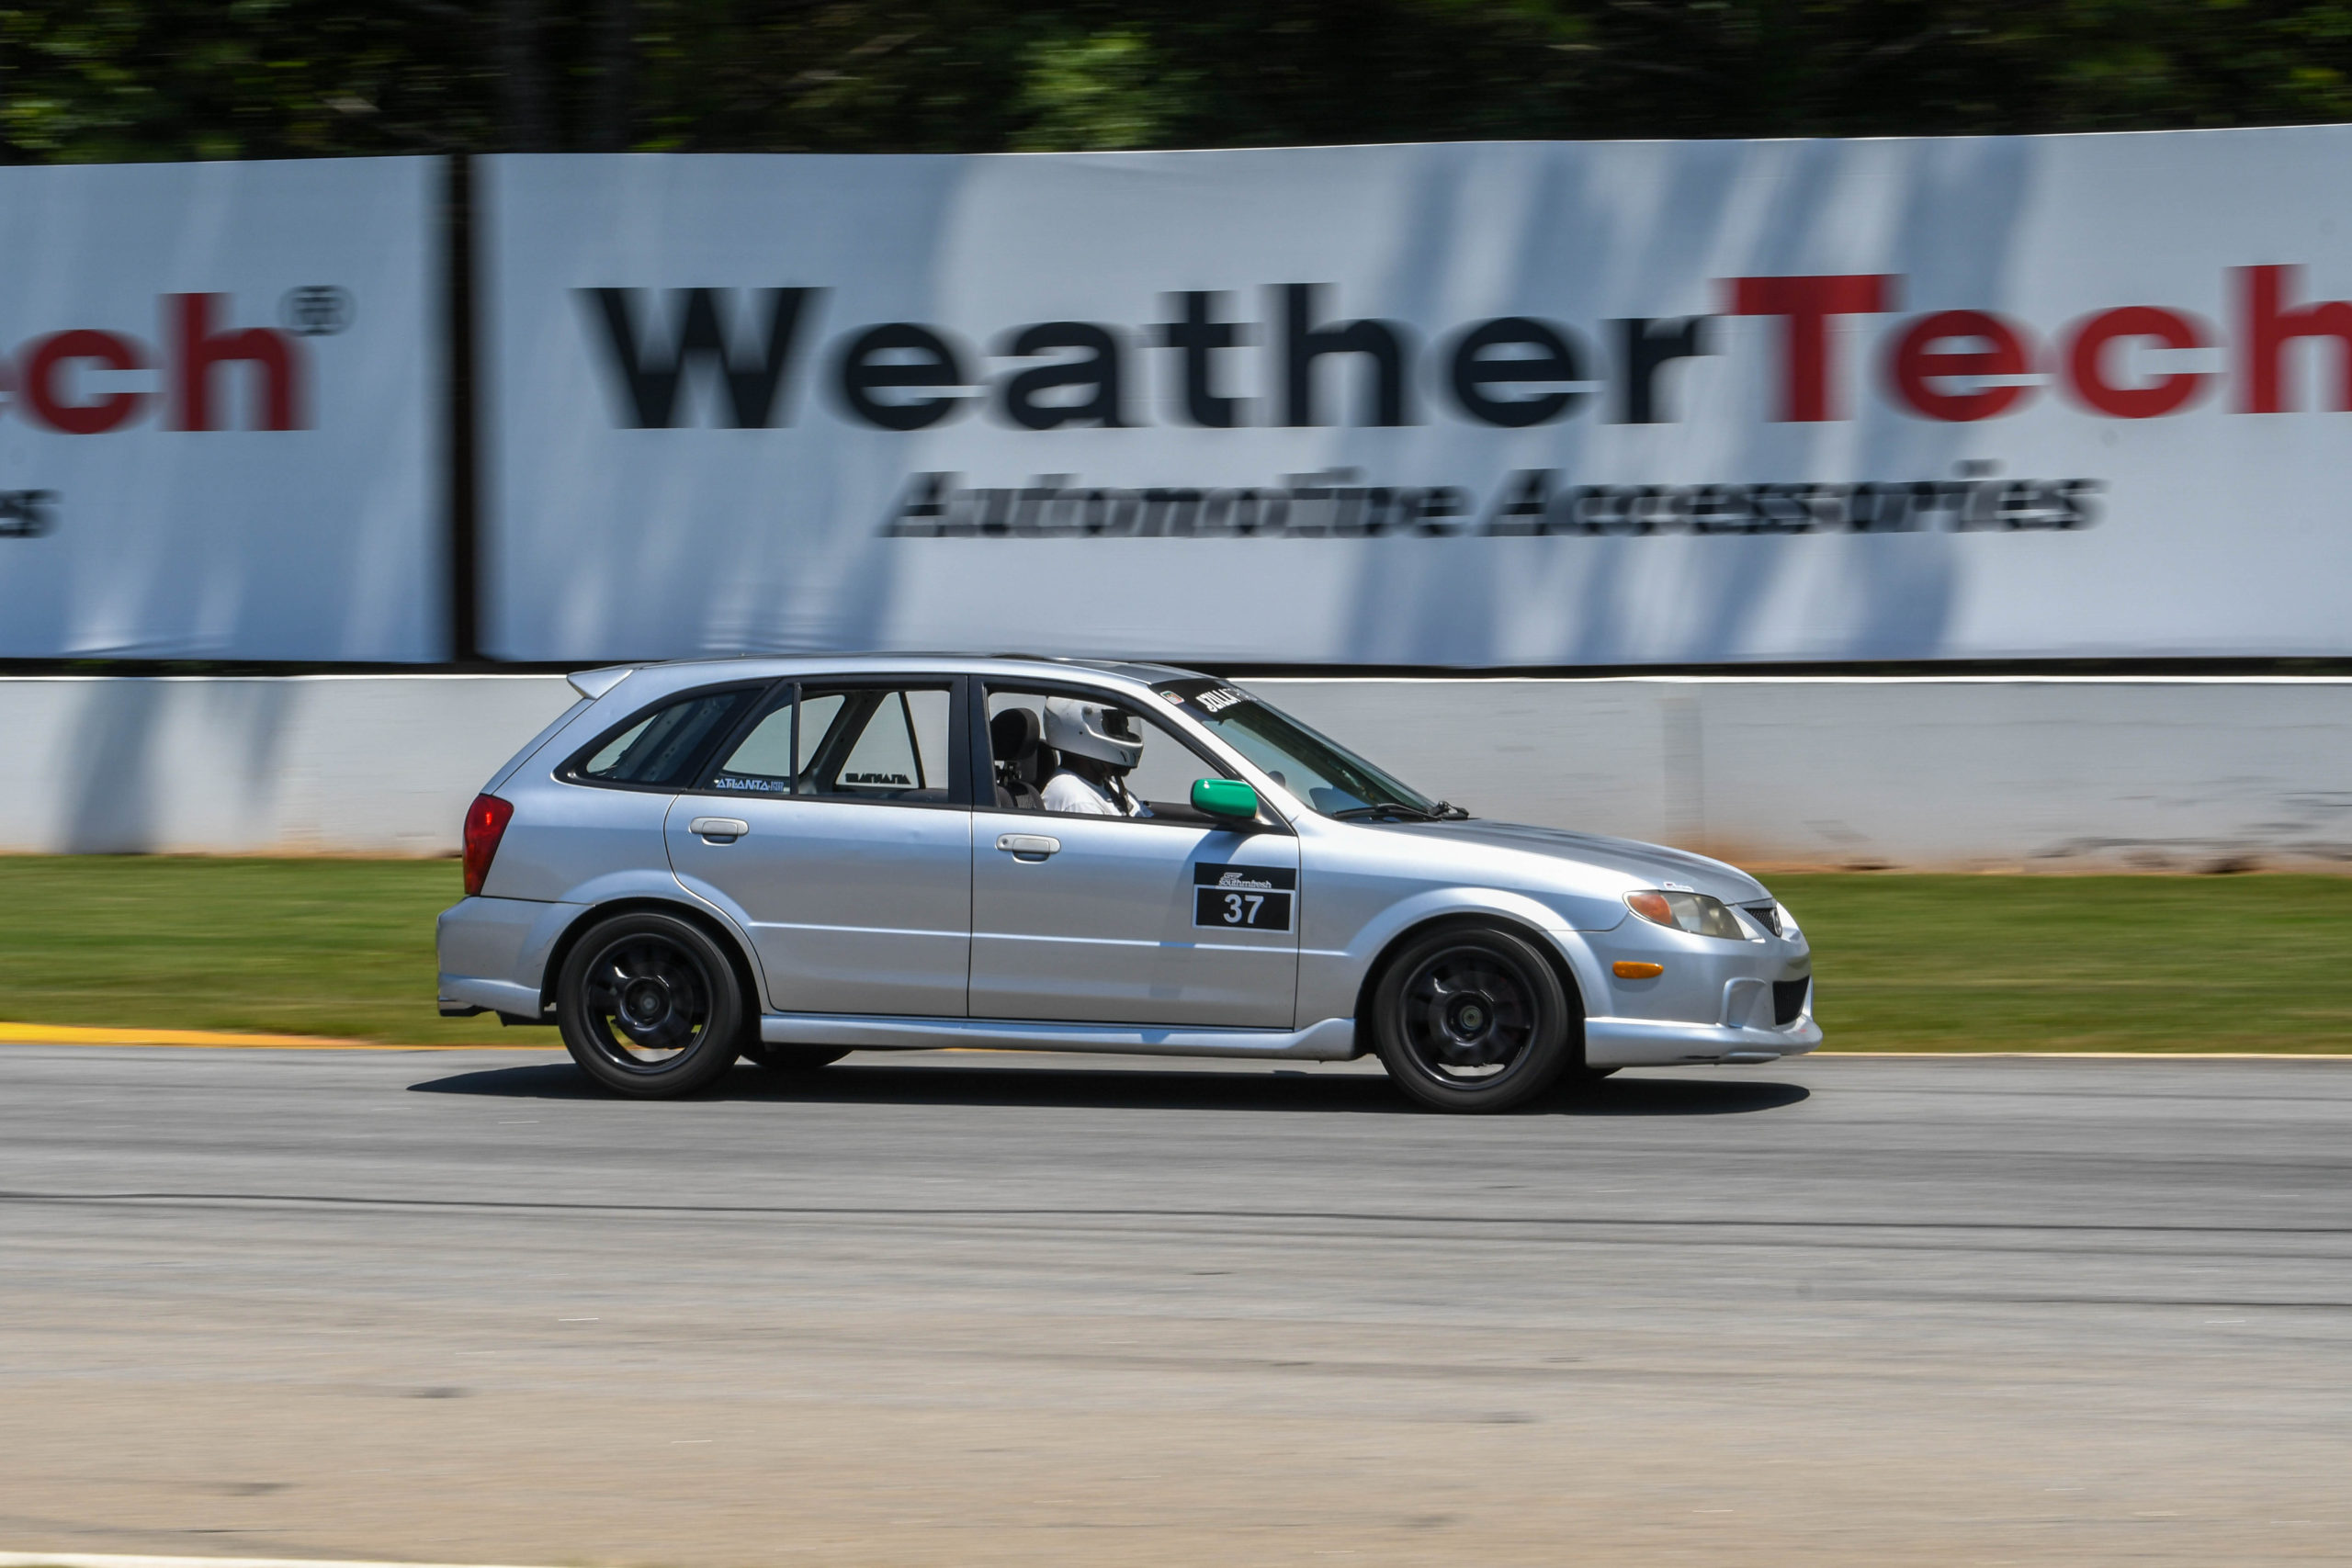
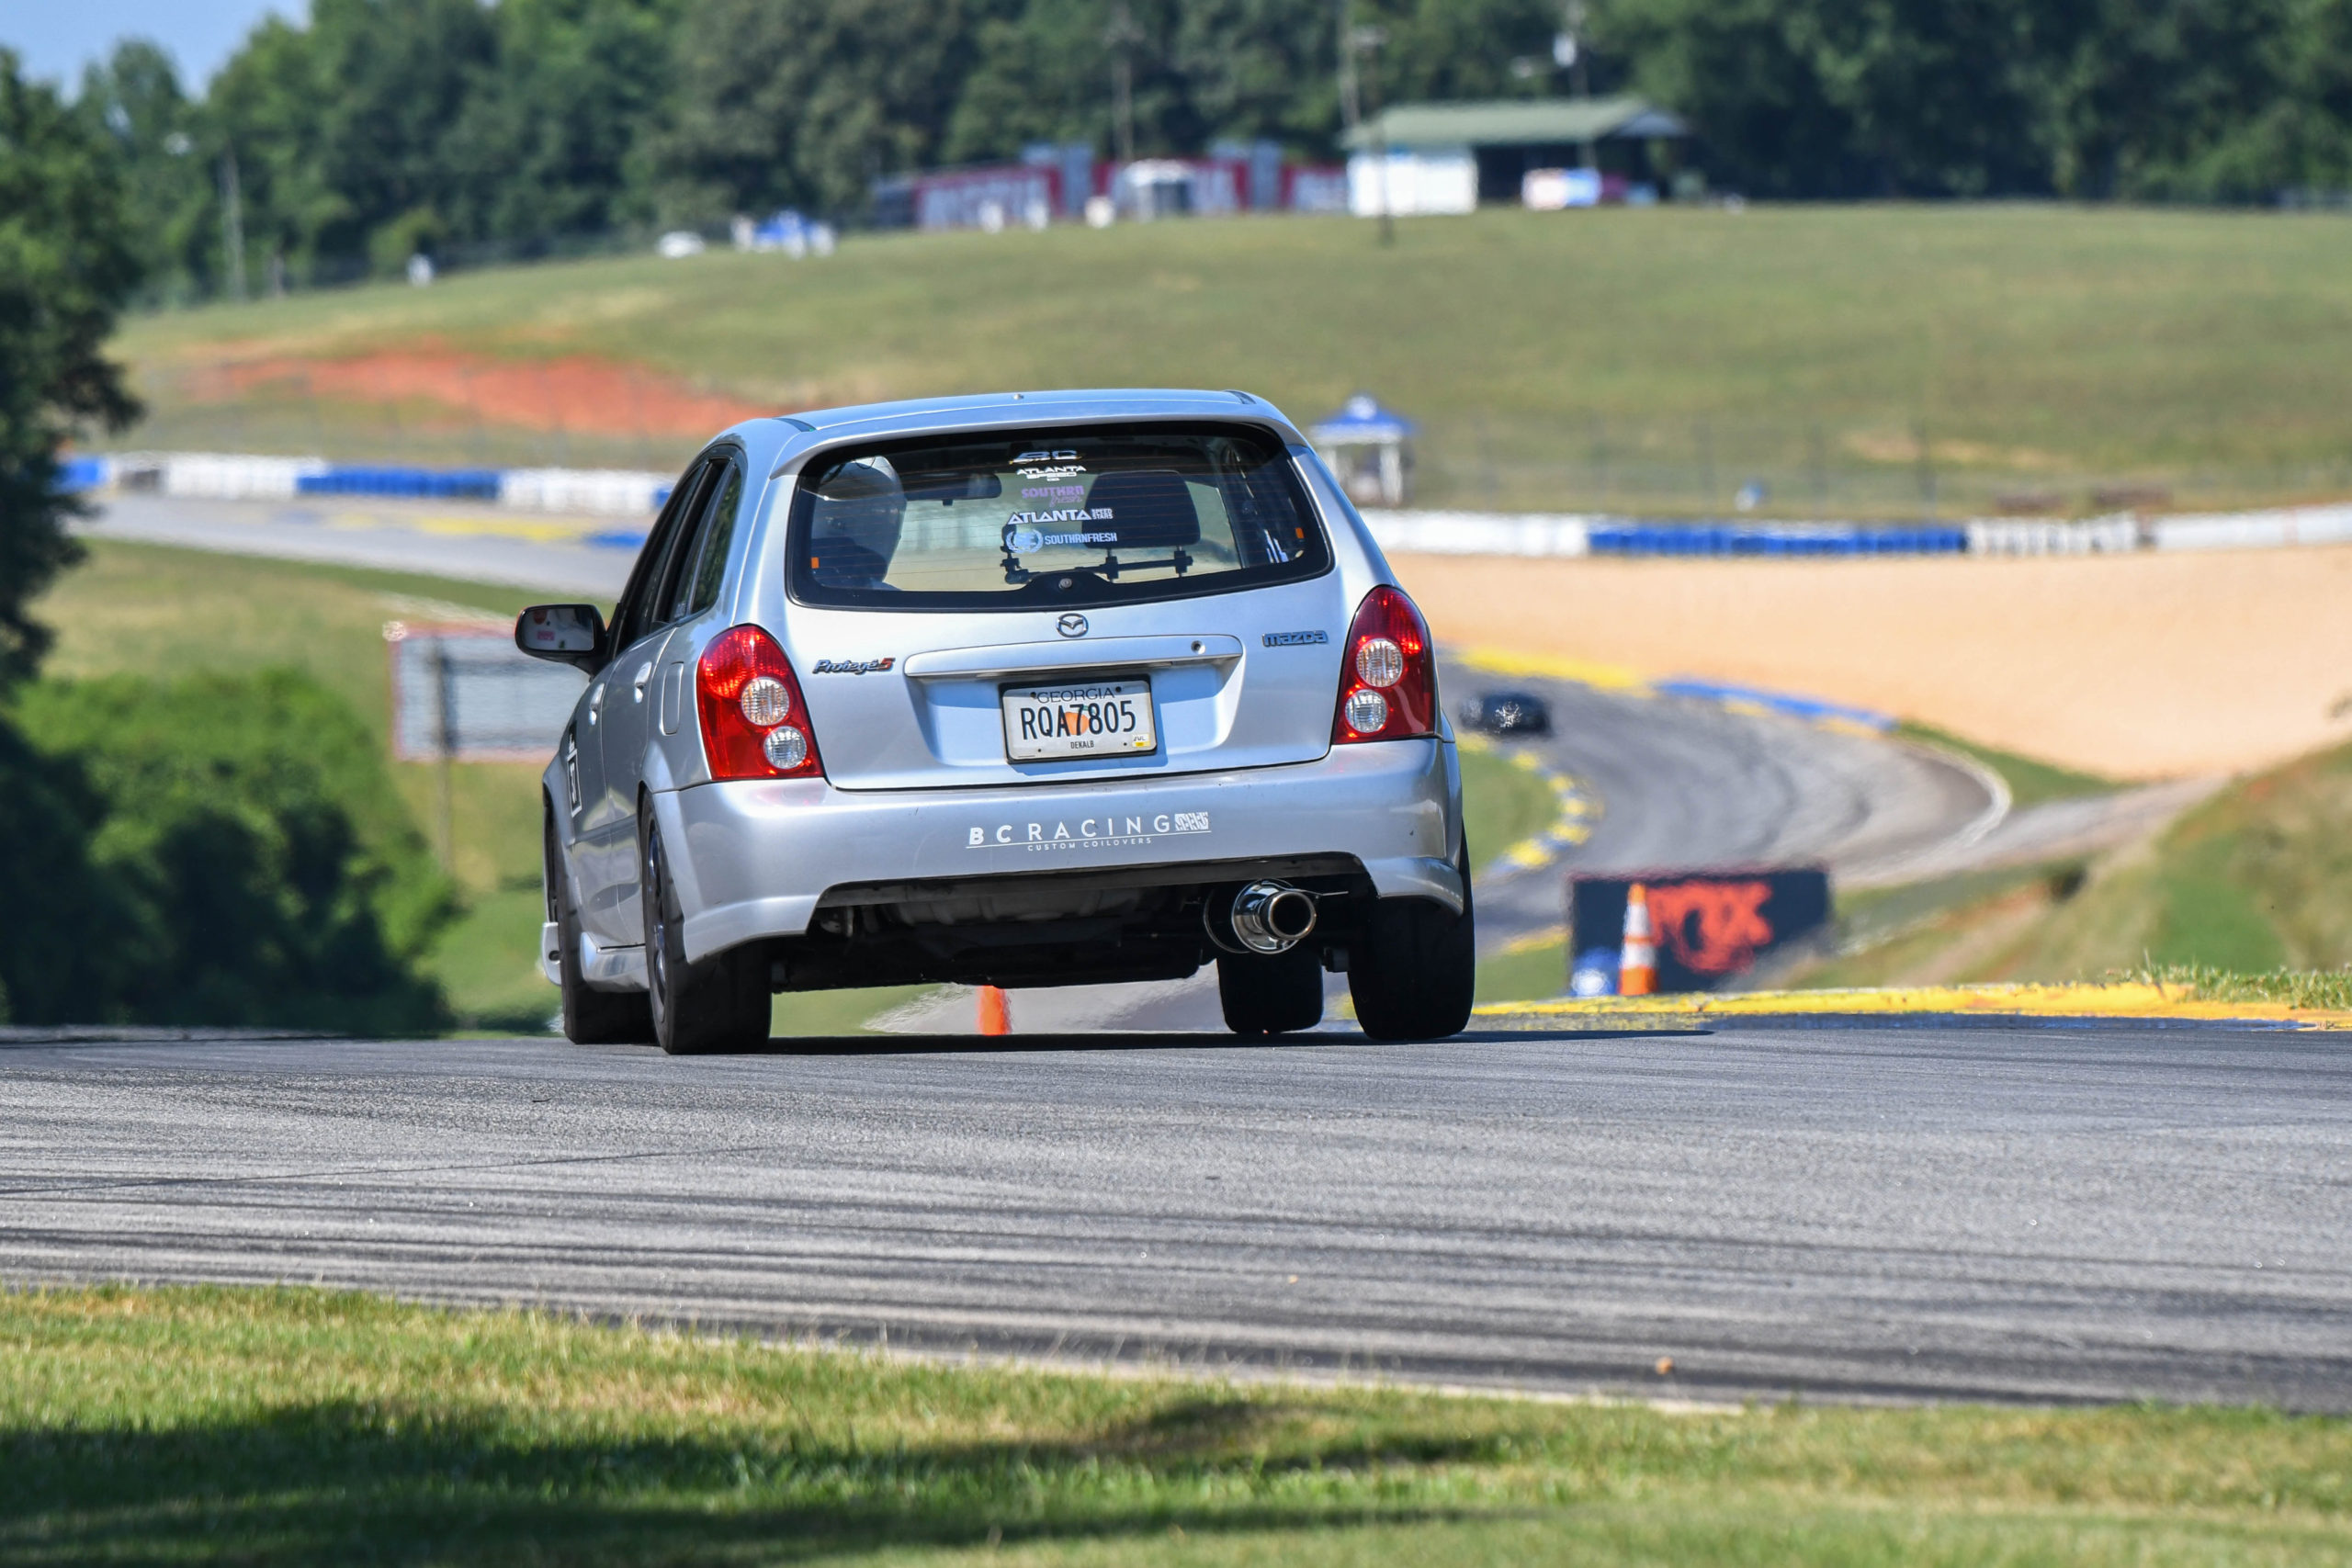
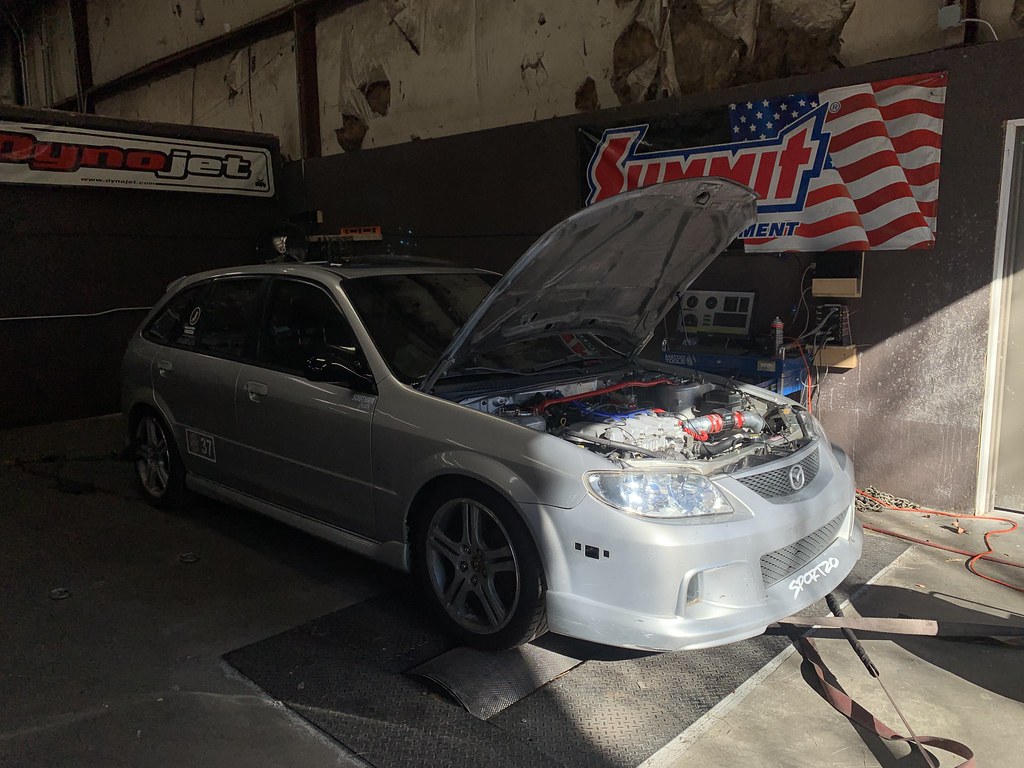
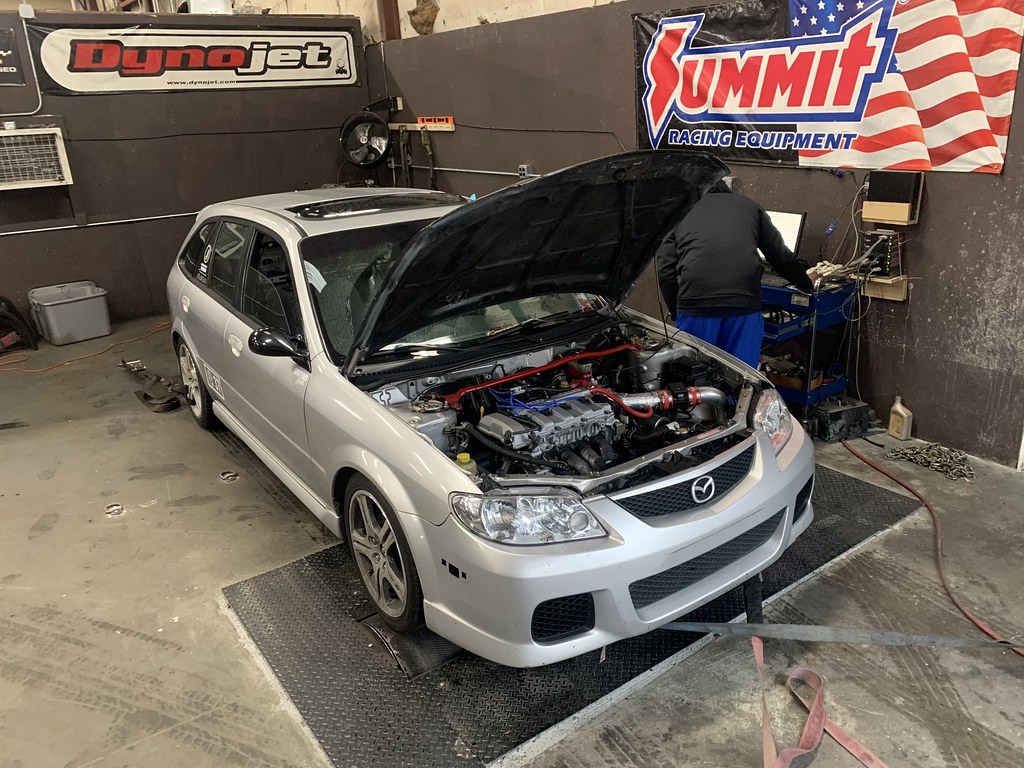
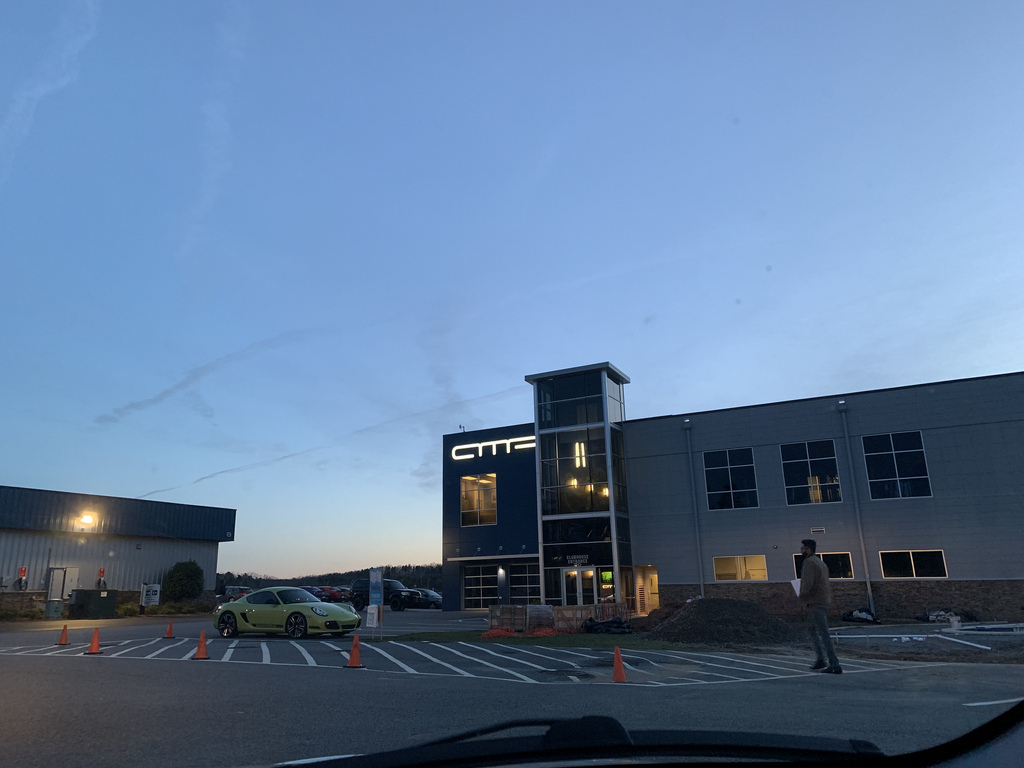
Time was up and it was time to put it all to the test.   We had arrived at Atlanta Motorsports Park for the Jzilla: Death of winter track day bright and early Sunday morning.  We are gonna stop here, and continue with videos, photos of the track day on the next post.Its surreal to see everything come together up till this point.  Especially it only being only 5 months.  I had always wanted to put together a car for one specific thing.  And hopefully anyone else that is interested in doing the same is motivated by this.  Thanks for reading, and we should have the track day post up in a few days.

  • 2002 Mazda Protege 5: $1200.00
  • Mazda 6 brake upgrade: $90
  • Coil pack conversion and valve cover gasket: $94
  • Ebay Intake – $31
  • 215/40r17 Falken RT615k – $360
  • 17×8 Konig Hypergram – $720
  • Used Headlights – $100
  • Timing Belt Parts/Labor $550
  • Used AWR Motor Mounts $75
  • 10w40 Liqui Moly Oil Change $60
  • Autoexe Oil Cap $60
  • Mazda 626 Intake Manifold $ 0
  • Used 4-1 Header – $60
  • Ebay Exhaust – $120
  • Corksport Shift Bushing kit -  $79
  • RAZO Short Shifter kit  - $59
  • Redline MT-90 Gear Oil - $35
  • Speedcircuit oil pan baffle - $150
  • Mazdaspeed muffler - $0
  • Muffler install / exhaust - $150
  • Goodridge Stainless Steel Brake / Clutch hose -  $120
  • BC Racing DS Coilovers - $1300
  • Brake Flush w/ Motul 600 - $160
  • Jzilla Track day - $260

Total : $5833.00

Southrnfresh_Joe
Southrnfresh_Joe New Reader
6/13/21 9:32 p.m.

Finally it was time to take the Mazda out on the track and see what it could do.  I was nervous, and anxious to see if the day would end in me towing the car home.  We arrived at Atlanta Motorsports Park bright and early and met up with our friends from Atlanta Speed Company


First stop, the drivers meeting, to go over the track and some safety points, to ensure everyone has a safe and fun day. The track day was hosted by Jzilla, and it was by far the smoothest most organized automotive events I have been apart of. 


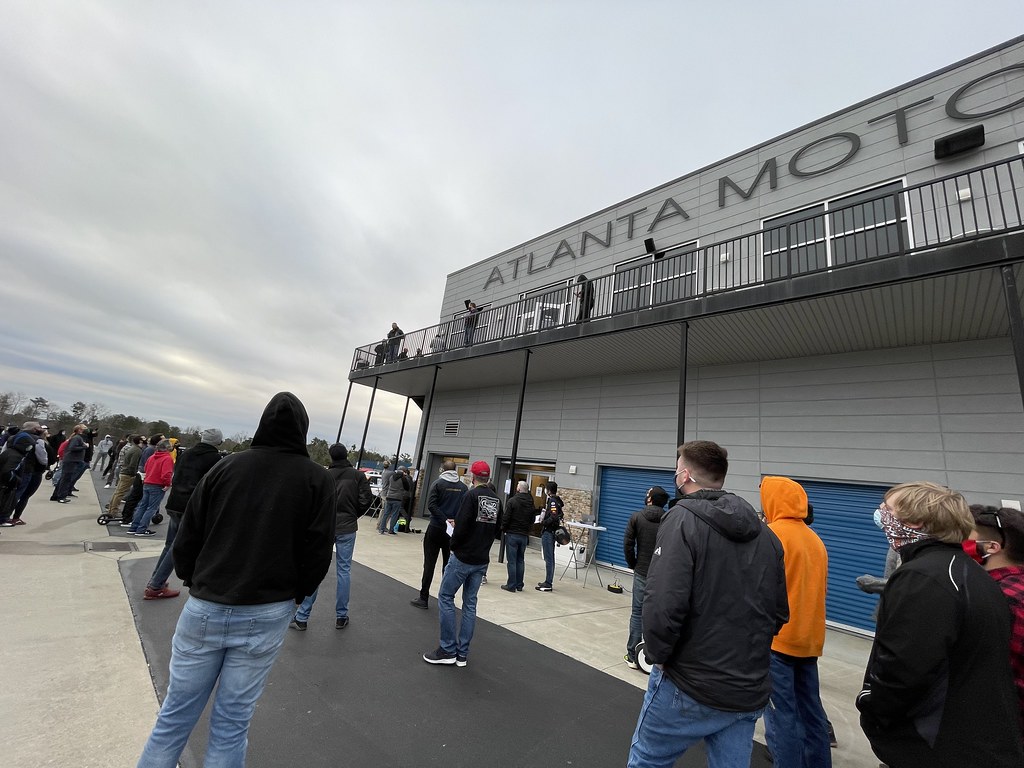
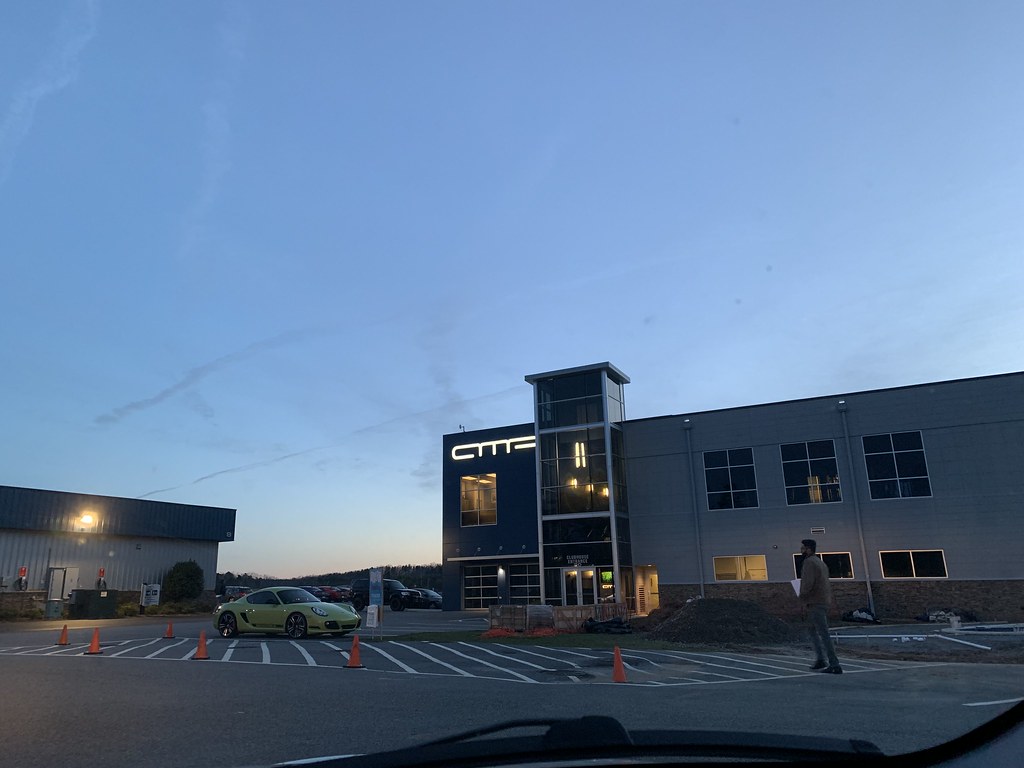
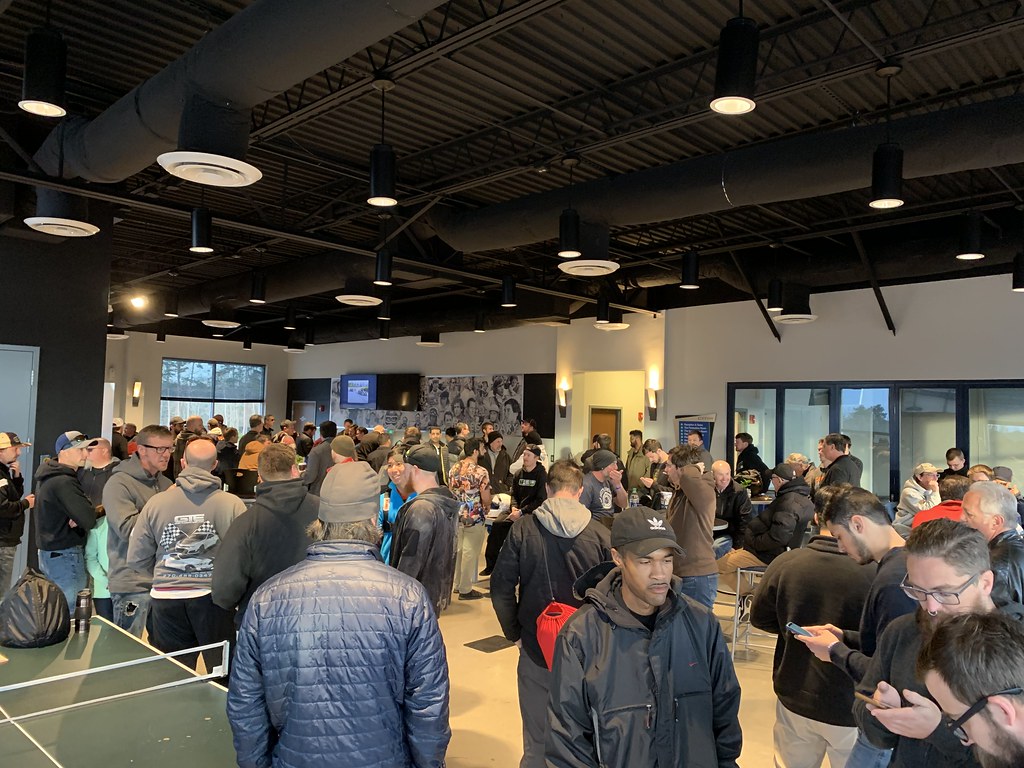
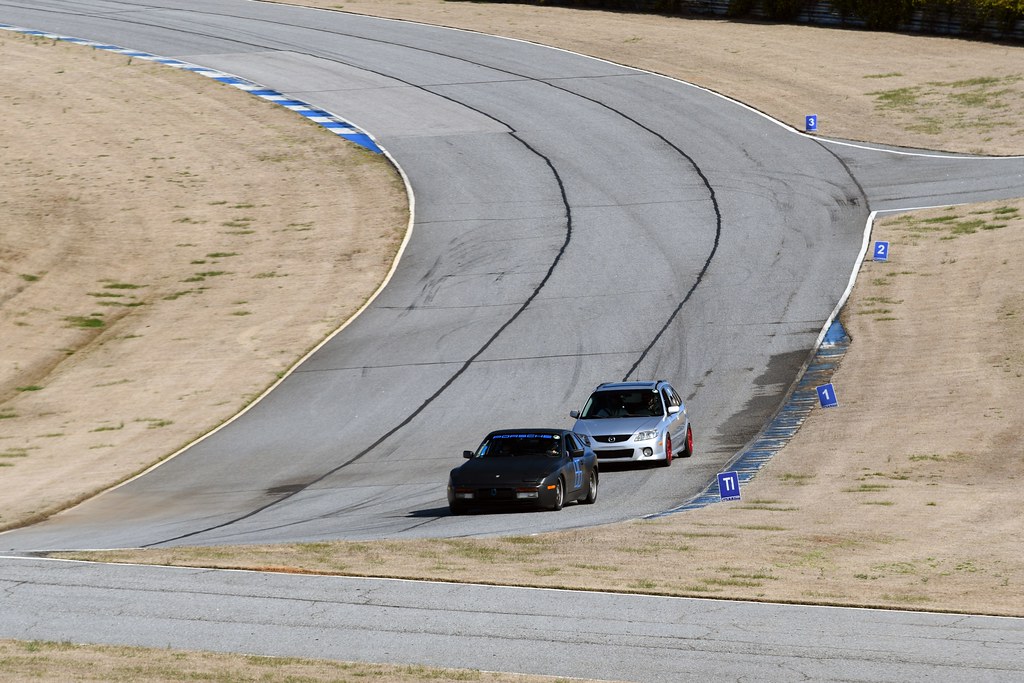
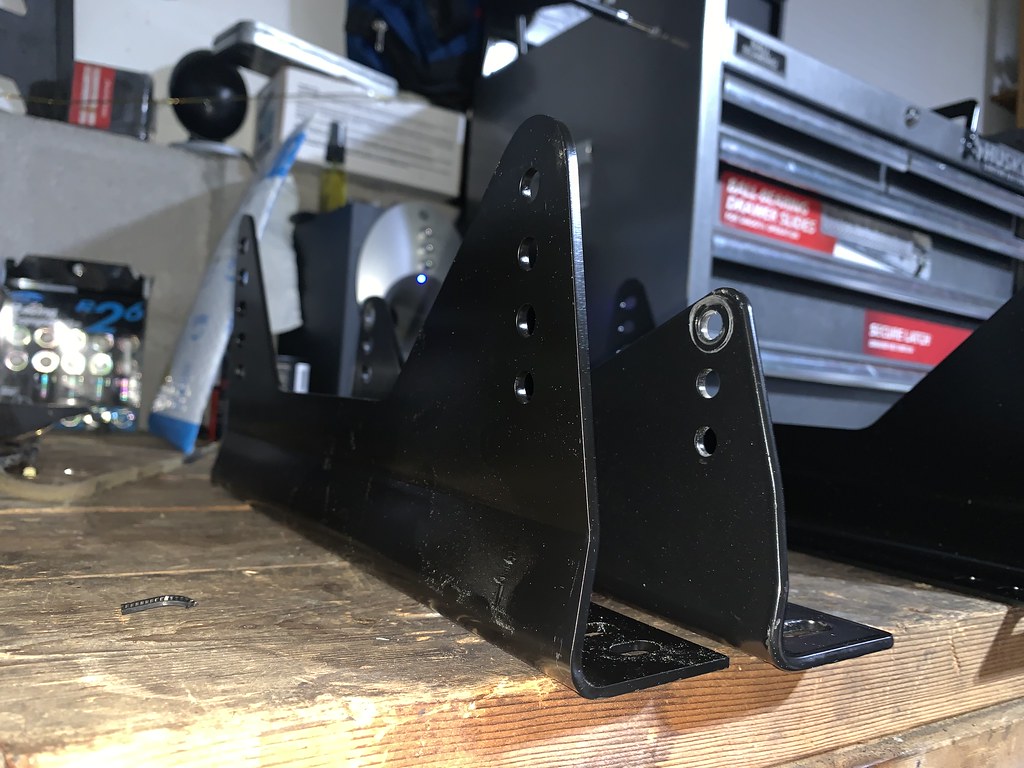
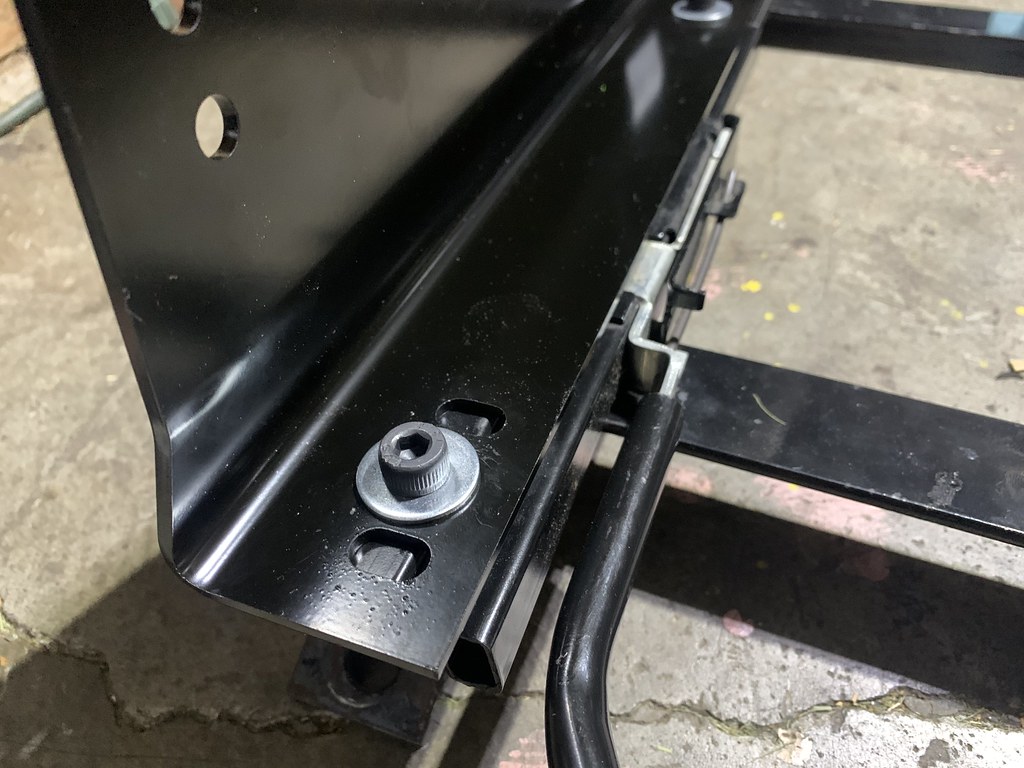
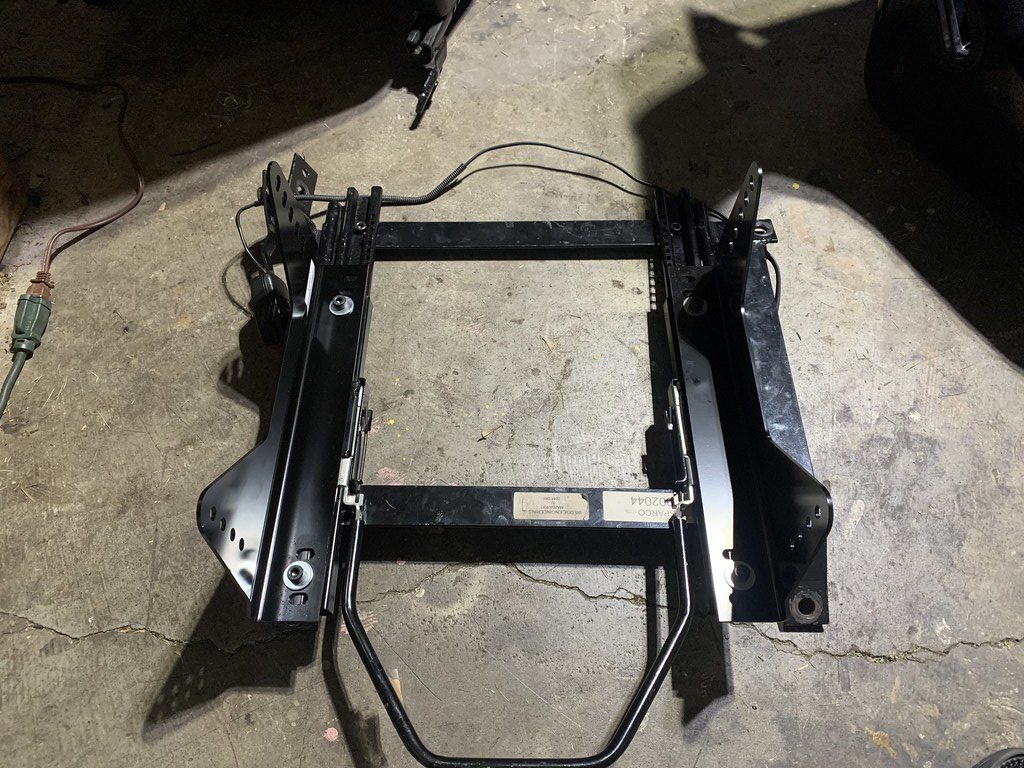
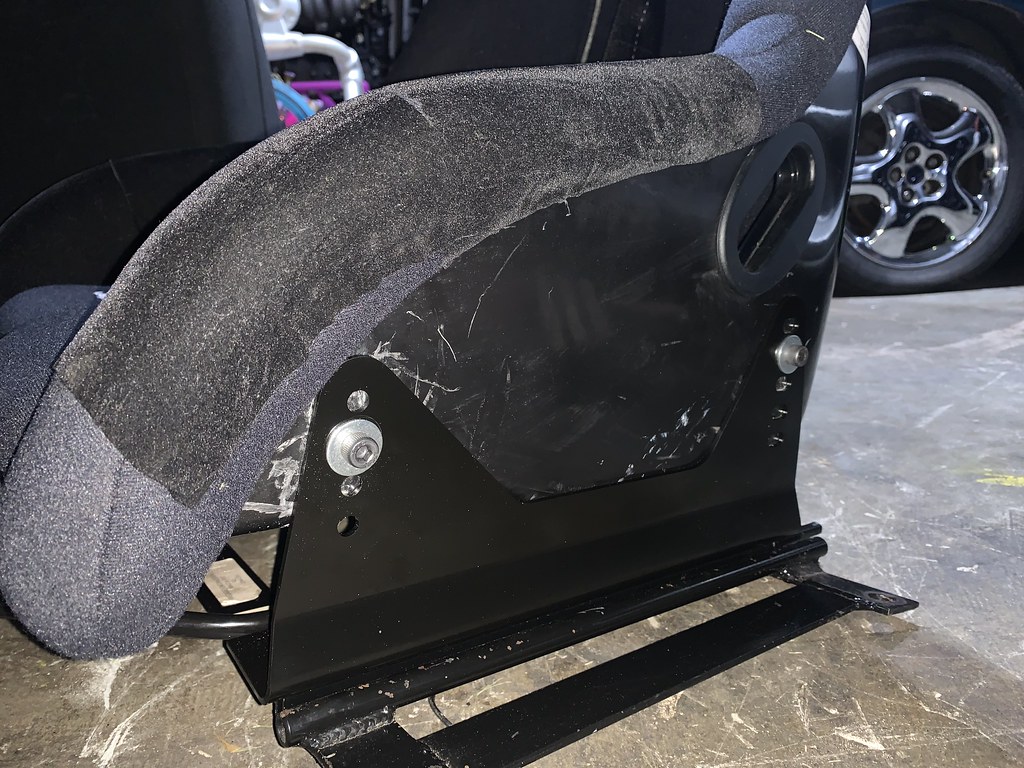
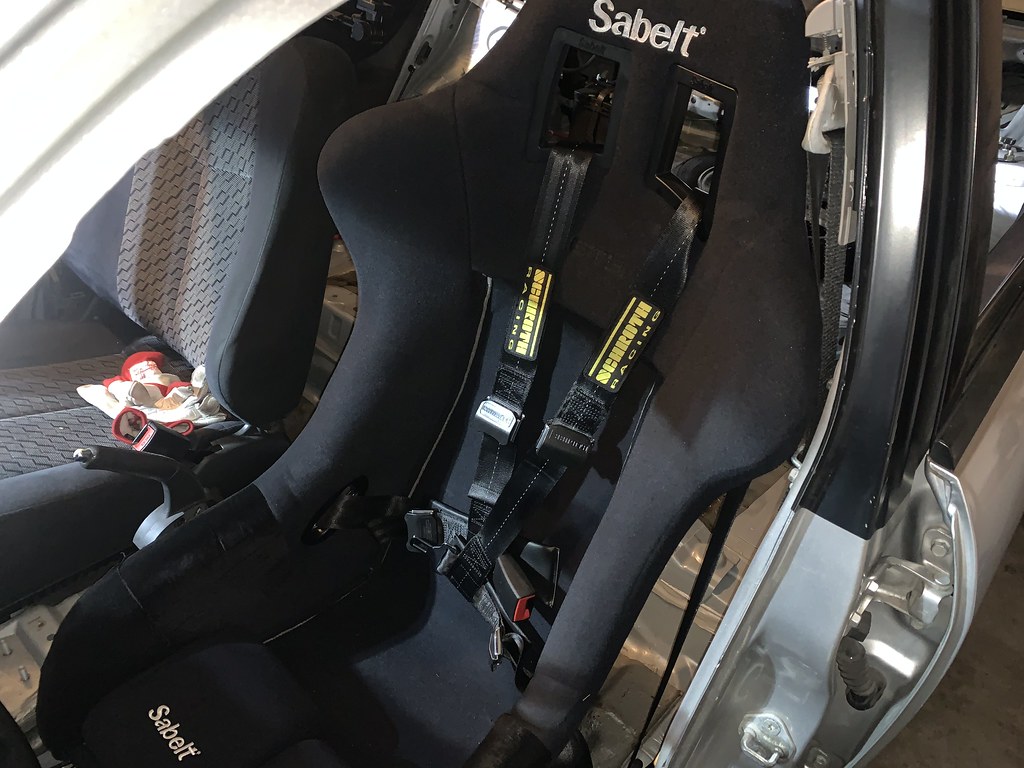
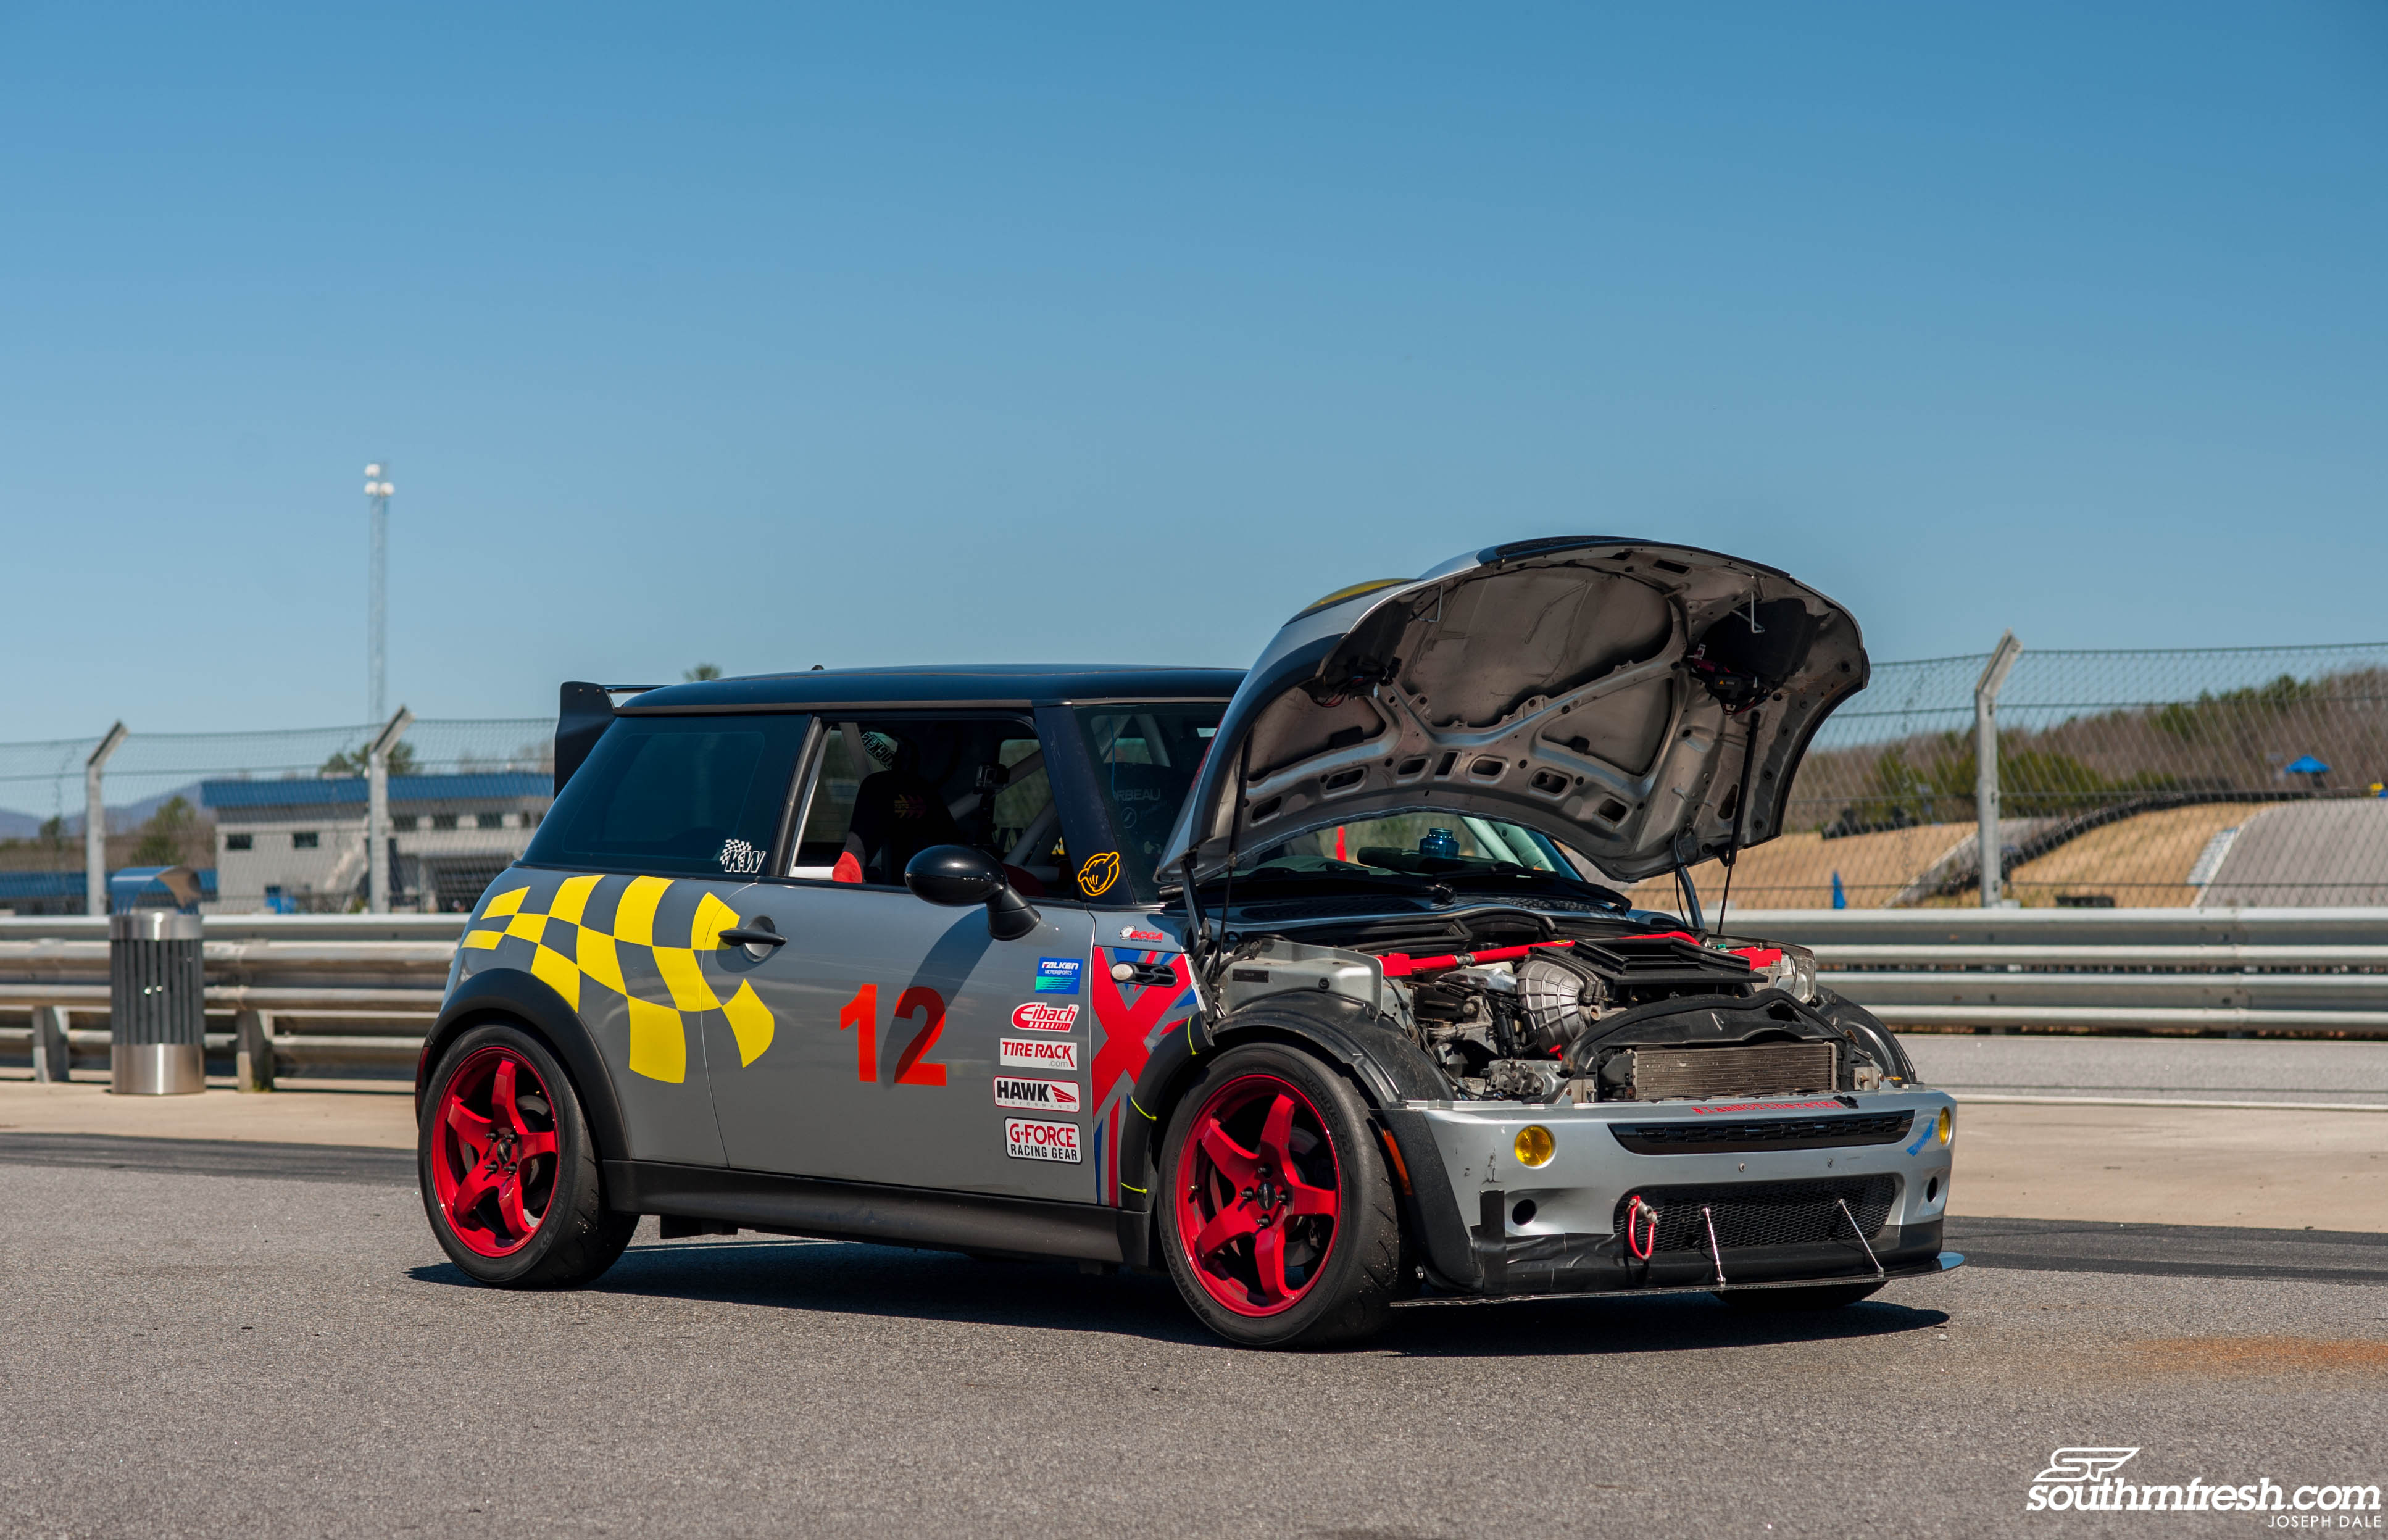
Once the meeting was over, our beginner group went to another room and had another brief meeting to meet our instructors for the day. My instructor was also driving that day in his Mini Cooper. Henry's Mini was a terror on the track. The biggest things were his brakes, power, and racing seat and harness. It's crazy how much proper seats and a harness changes your experience, and allows you to focus more on driving...

My first session out, we started out great and the car was solid. I was most impressed on how well the brakes did. No matter what I did they never felt weak or had any fade whatsoever. I did have some scrubbing issues from the right rear on the back half of the track. We had rolled the rear pretty good , but there was clearly more that could have been done. 

Another positive point with the car was how well the BC Racing DS Series Coilovers kept the car planted. The digressive style shock of their DS series made a huge difference. AMP has so many elevation changes and a huge high speed carousel that can easily disturb the cars suspension, but at no time did the car feel unstable. 


The weight of the car, brakes, and suspension, gave me such an advantage in the turns throughout the day. Even though it was not a race, and most people in my group were learning like myself, it felt amazing to receive the point by some true sports cars. But I was humbled on the straights, by many others. 


The P5 and I made it through all 5 sessions, and drove home in the same condition it arrived.  One of the best experiences was being able to take the car out and feel it change so much from when I first got it.  Its hard for me to look at another vehicle without thinking of it being driven on a track.  I expected to have a lot more to say about the day, but it was a smooth day overall.  There are a few things I need to work on with the car in the coming months as we prepare for the next track day.  I managed to record a good amount of video footage of the track day.  Its 28 minutes, but shows some one of my most entertaining sessions, and the last session by myself with the advanced group.


Trackday Vid[MEDIA=youtube]bDbQFyZcIXk[/MEDIA]eo


Southrnfresh_Joe
Southrnfresh_Joe New Reader
6/13/21 9:35 p.m.

It has been a few months since we first took the Protege 5 out on its first track day at Atlanta Motorsports park with Jzilla .  There was another track day at Barber Motorsports park, after that , but me being only on my second track day, I was not able to drive on Barber since they did not allow instructed drives that day.  But in a few weeks I will be hitting Road Atlanta.  The car did pretty good at AMP, so I only needed to do a few things mechanically to get it ready for Road Atlanta.  


I recently ran across a great deal from a old friend in the Mazda community.  He has had this Mazdaspeed Protege since it was new in 2003.  The car had been taken care of very well in the past, and had been autocrossed a lot, and had started to have some issues a few years ago.  And it ended up sitting in his driveway.    

If you didnt know, the Mazdaspeed Protege chassis is no different from other 3rd generation protege's.  But the Mazdaspeed was turbocharged by Callaway with a outstanding 6lbs of boost from the factory,  equipped with a LSD, Tokico shocks, racing beat springs, racing beat exhaust , sway bars, and a host of appearance, and interior updates. 

The car had a crazy misfire, and barely cranked, and had not been touched in a few years.  I was curious to see what was wrong with the car and messed around with it a little bit. I found out the spark plugs were swimming in oil, from a bad valve cover gasket.  So I replaced the valve cover gasket, removed the oil from the cylinders, and put some spark plugs in it just to see what it would do.  The car started up , and idled somewhat decent, we did a compression test on it, and found out that one of the cylinders test a little lower.  So we are gonna drain the gas out of it, and see if it will drive.


I am indecisive about what to do with the Mazdaspeed because I have already owned a Mazdaspeed Protege in the past.  And I have always been partial to the Protege 5 wagon.  So as of now, I want to pull the setup out of the mazdaspeed, rebuild it and put it in the protege 5 for a much needed bump in power.  The Mazda lover in me does not want to waste a complete Mazdaspeed Protege, so the fate of the MSP after that is still up the air. 


In the meantime, I have been pulling off parts from the mazdaspeed and putting on the P5.  First was the mazdaspeed front lip.


Pretty simple and straightforward swap, just requires you to remove the foglights, and the lip slides right on the P5 bumper.


The lip was a little banged up, but it flowed with the rest of the dings and scratches on the P5.


The broken roof rack always bothered me, and I had been searching for either a way to remove it, or the moldings to replace it. 

I got real lucky and found someone selling roof rack delete moldings locally, they are typically $60 a piece new, but he had them for $75, but did not have the mounting clips.  After a few google attempts, I was able to find part numbers for the brackets to mount them.


Its a relative simple installation and straightforward, but you do have to remove the headliner to remove the roof rack, and install the moldings.


Headliner out...

Moldings installed...


After I removed the moldings and installed the Mazdaspeed front lip, the car looked much better.  So I took a few shots as a milestone of its current state, just to see how far its come from when I first got it.


Very pleased about how well the car drives with the BC Racing DS coilovers, and I am very excited to push the car around Road Atlanta.  The car scrubbed a lot at AMP, so i will be raising the rear up about a inch to help with this.  Road Atlanta is a much faster track, and the last thing I want is a cut tire on track.   I also will be installing the Racing Beat sway bars from the Mazdaspeed.


I am beyond surprised on how well the cars engine runs with 293k miles on the dash.  The engine feels strong, but it is beyond fast.  The FSDE shines best with forced induction, so hopefully later in the year or end of summer I can get started on building the motor out of the mazdaspeed to swap in for more power.


I am beside myself on if I want to completely gut the car, or keep it halfway gutted.  The car is in much better condition then it should have been, so I hate tearing apart a perfectly good interior to sacrifice a few pounds.  But I do need to shave some weight, and get better seats.  So I am looking to remove some of the interior, but keep it somewhat decent looking inside.


I would like to go down to a 16" wheel, later on and go with a taller profile, and wider tire.  I went to narrow with the 215/40 . But I would rather not spend more money on another set of wheels when I have 5 17" Konigs, so I may try and squeeze a wider 235/40 on the wheel once these tires wear down.  The only issue with that is rubbing issues on the fenders, so we will see how that goes.  I will end this post there, I have a good bit of updates to post, and a few maintenance things to do before Road Atlanta.  Thanks for reading.  And check out some of the previous posts here

Southrnfresh_Joe
Southrnfresh_Joe New Reader
6/13/21 9:44 p.m.

Since the last update , not much was done to the P5 except install the Mazdaspeed Protege Racing Beat rear sway bar, and the reinforced end links that came with the BC Racing DS Series coilovers. It was not because of a need , but just an experiment to see how the car would behave.


Road Atlanta was a huge goal for the car, and the build in general. So naturally I was excited to finally be able to drive the car on the track. All the advice and things that people ever told me about Road Atlanta came to be true, but overall the legendary Road Atlanta was not as big and bad as it appears.


My instructor Gino , was very familiar with FWD cars so he was able to offer a lot of helpful tips on the track. Turn 1 - 4 is by far my favorite part, because it enables the car to keep so much speed . Up until 5 when I have to down shift and turn up hill.


The least enjoyable part was the back straight, which I spent most of that time doing point bys and letting the faster cars go by me. But it would always give me a chance to check gauges and reset myself for the last half of the track.


Coming down 10 and down shifting to 3rd gear, and hitting full throttle through 10 and 11, was a reward for the back straight struggle. In the early laps, we would stay in 3rd gear out of 11 and down through turn 12. But it would have the car at redline down the turn 12 hill, which would have been death to my motor by the end of the day. So Gino advised to shift to 4th, at the top of 12 under the bridge. That subtle change made a huge difference when we came out of 12 to the finish line.


Overall no complaints about how the car performed as it creeps up to the 300k mile mark. It continues to impress me and do everything I tell it to. Once again I tell anyone reading this, that it does not take much to get on the track at least once! Next stop we are going to be at Charlotte Motor Speedway. Huge thanks to Jzilla Track days and Atlanta Speed Company Check out a lap in the video below.


[MEDIA=youtube]s8s5v8lkTkU[/MEDIA] Video


Southrnfresh_Joe
Southrnfresh_Joe New Reader
6/13/21 9:47 p.m.

Since our last post we have since done 3 track days in the Protege 5 and we have a good bit of changes and updates to the car. In the last post I had a track day at Road Atlanta and the car did very well, so we did not need to do much more to get it ready for Charlotte Motor Speedway at the end of July. 


The rear bumper on the Protege had a lot of deep scratches on the top from the previous owner, and the exhaust cut out was widened to fit the Mazdaspeed muffler tip.  So I had played with the idea of cutting out the bottom section.  I had already gotten a new bumper from pull a part in case I did not like it.  


Pretty straight forward once you get the bumper off, mainly because the foam already has a line to follow to make the clean cut.  


Same with the bumper..


The bumper material heats up with the dremel and melts where the area is cut.  But if you go back over it with a light buff tool it will smooth it all out.  


The end result was alright, I am still debating if I want to install the new bumper on it .  I may wait until I redo the exhaust to make a final decision, because the muffler looks odd at some angles with the cut.  I had the pleasure of getting my car taken on our trailer for no other reason but it being available.  I am sure the car would have made the 5 hour trip just fine, but the trailer made the P5 look like a real race car.. haha.


Arrived and setup with the Atlanta Speed Company team.


Charlotte Motor Speedway is a Nascar track, and 70% of the track is high speed banks.  So naturally it did not favor the Proteges 130hp..


The biggest thing with a track like this was coming off the high speed banks and slowing down for the bus stop at the end.  As the day went on, I pushed the braking the most at this spot to hold as much speed back into the infield.


Gong on the Nascar banks was intimidating to say the least.  I thought I would just floor it through it all and glide through it since the car doesn't have much power.  But I found myself backing down and keeping it at 100-105mph when I hit the banks.


When you get on the banks you immediately start thinking about, your tires, wheels, tie rods, transmission, lug nuts, and air pressure.  Wondering if you forgot to check something, listening for sounds, or trying to remember if your wheels are properly torqued , as you are at a 24 degree angle flying by a concrete wall at triple digit speeds.  


Besides the bank, the rest of the track was a learning experience.  It was the first time I feel like the car got a serious workout.  I could smell the brakes, hear the tires squeal in the infield.  The more laps I did, the more I was able to utilize trail braking in the infield to keep as much speed as possible.  I have always heard the term in the past from other drivers, but never really used it or experienced.  But being front wheel drive under steer is the enemy, so the counter to that is to tap the brake to shift the weight, and it magically rotates the car to where you need it.  It took a toll on my rear tires, but helped me significantly to keep control through hard corners in the infield.  It also helped me get a better idea of how the car feels and how to make it do what I want.


This time I made sure to log some of the lap times and speeds throughout the day.  So at the beginning of the day I ran a 1:54, and by the end of the day on the last lap of the last session at night, I got it down to a 1:45.  I had a lot of video footage , and a lot of it was me doing point bys to everyone on the straights.  But in the late afternoon I got some action with 2 drivers, wasn't much but it was a good feeling to give a point by, and get it back the next lap from far more capable cars.  Thanks for reading..next stop back to Atlanta Motosports Park..


Trackday Video[MEDIA=youtube]rnjwM93KEo8[/MEDIA]


Southrnfresh_Joe
Southrnfresh_Joe New Reader
6/13/21 9:52 p.m.

So after the amazing experience at Charlotte Motor Speedway.  I decided to do a few things to the car before I return to Road Atlanta.  


The first thing was to replace the P5 intake manifold with the one from a 626. It is one of the common modifications to the Protege platform for the turbocharged guys, because it gets rid of the VTCS system in the manifold. The system is not all bad, but when it works properly it is better suited for what I have. Removing it opens up the car significantly on the top-end, but it does take every bit of power from the low end.


My race car brain told me that it would benefit me to have that little bit extra piece of power at the top end as opposed to the bottom when driving. And I had the manifold every since I got the car, so why not experiment..


I highly doubt this manifold has ever been off before, so you can clearly see what 300k miles of carbon build up looks like. I had always gotten a random code for the VTCS solenoid not working every since i had the car. But usually its the solenoid itself, but at this point, carbon buildup could have been the reason.. 


Throttle Body after 17 years, and 300k miles of use...


Cleaning..


Cleaned more...


AS good as it could get..


The replacement was this intake manifold from a older model 626. The Mazda 626 uses the same 2.0 in its base and lower trims. The engines share a lot of things, but they do have a good bit of differences. The most beneficial being the intake manifold which as you can see has nothing but runners and no VTCS..


The second part of this adventure was finally replacing the rear motor mount. Most cars its not as tough to replace, but on this chassis its in a terrible spot. Its buried under the main harness, slightly tucked underneath the firewall. 


Most of the work, is removing the plastic bracket that holds the harness in place. Again the bolt for the harness is tucked under wedged between the mount and the firewall..


The only way to remove them, without stripping is using a swivel, penetrating oil, and prayers. I attempted to strong arm them, the first day, and it cost me a swivel joint. So I surrendered and soaked it in penetrating oil and let it sit over night.. 


Woke up early, with this mount on my mind, and managed to break all the bolts loose..


You can clearly see the problem here...


In its place was this rear mount made by Hydra Motorsports, one of the few companies that still support the BJ chassis. 


Hydra Motorsports also makes thermal spacers for the Intake Manifold and Throttle body. 


Good fitment...


Swapping the manifold on a NA car does not require much, just rearranging a few vacuum hoses and its done. 


Everything all good, and back together...


Next order was new plugs.. even though I had replaced them when i first got the car. The amount of oil this thing burns , i knew it was time to replace them again. 


The car ran well, but started to develop a weird idle at times. I took it to work and used our smoke machine to find, a huge leak from the crusty old fuel injector seals, and some old vacuum lines...


Most of my prep had been for Road Atlanta, but there was another track day before that at Atlanta Motorsports Park that I went to.  The biggest changes to the car that made the biggest difference was the rear sway bar. I had installed the Mazdaspeed protege rear sway bar before Charlotte just to see the difference.  It helped me rotate very well at Charlotte with the extra stiffness in the rear.  But it took a heavy toll on my rear tires.  So when I got to Atlanta Motorsports Park the car was really loose in the rear at every turn, so much I ended up rotating the rear tires up front to help counter the over steer.  It helped a lot , and it let me get much more comfortable with the car throughout the day.  But I never felt as comfortable as before.  It was a cold day so I chalked it up to just a cold track.  I did not manage to get photos setup by the event photographer  at AMP.  But I did have a few laps on video below.


Trackday Video

[MEDIA=youtube]B-sgYr4B2fc[/MEDIA]


Finally back to Road Atlanta the second time with the new rear sway bar, and 626 intake manifold. The car felt much better on the top end, giving me great momentum from Turn 3-6. I did notice that the car did feel a little loose at some turns, but I thought I was just finding the limits of what was left of my tires .The car felt so good , I started to push a little harder and harder. I broke one rule, and started to see my lap times decrease. I peaked over, and saw that I did a 1:50. I had an idea on where I could make up some time and get under 1:50. I pushed hard through 2,3,4 and 5, and finally took Turn 12 full throttle. 


I came down Turn 12 at the top of 4th, went to 5th crossing the finish line. I made a mistake and down shifted and then getting on the brakes which unsettled the car, and combined with my extra stiff rear. I lost traction in the rear and it sent me sideways at 80mph going into the wall at Turn 1. My first fear was actually hitting the wall... but after the car got into the grass it slowed down dramatically. But my next fear was the car flipping because it started to hop pretty bad. What felt like 10 minutes, only lasted 3-4 seconds...haha  You can see the whole thing here....


Trackday Video


[MEDIA=youtube]kZ1WyCKfz6o[/MEDIA]


When the dust settled, and I finally got my bearings together, I took a quick look around to see that I had completely covered the track in grass. Once I started the car back up, and limped back to the pits I can instantly tell something was wrong. 


When I got back to the paddock, I noticed the wheel had a ton of positive camber.. I thought I had bent the coilover, or knuckle or something by sliding and hopping in the grass. I tried to make the best of it, and correct the camber at least to make it home. Once I eyeballed the camber to match the side. I drove it around the paddock and it felt a little off. I messed around with the toe and tried to make it as best as I could so it drove decent 


I got the car to drive somewhat normal on the streets around the track, so I felt pretty confident about taking it back out on track.  But as soon as I got on track, the car just did not feel right after the spin.  After the track day, I found out that the coilover had just been loose at the knuckle after the spin, which explained why it drove so crazy on track.  A fresh alignment got the car back to driving properly.   Results from my experiment... 626 Manifold was a good upgrade.  I need a bigger front sway bar to match the rear.  I had a discussion with a few friends that have been tracking and racing the Protege chassis for years.  And they were not surprised about the amount oversteer I was fighting with the rear bar.  They all warned me how much these cars like to rotate, and how I need to set the car up in the future.  And also it is something that I will have to learn to use to my advantage!  Next stop... Barber Motorsports Park

Southrnfresh_Joe
Southrnfresh_Joe New Reader
6/13/21 9:55 p.m.

When I first bought the Protege 5 , i had my Jetta and my MPV as other cars. But since then, my MPV has been out of commission and my lease was ending on my Jetta. I didnt want to be in a position where my track car was my only car. So it was time to go daily shopping...


I had been considering something under 5k originally.  But I saw a post pop up about another P5 for sale , that needed a head gasket for $650.  The car was about 8 miles from my house.  I first considered it for spare parts or something to buy and sell.  I went and checked it out, and made a offer of $500, and the next day Mazda #14 was in my driveway...


The car was driven by their son and they had bought him a new Mazda 3.  So it was time to sell, as they did not want to invest any more time into it.


It had been taken care of pretty well overall, had a crazy coolant leak from the heater hoses, and the water pump was pouring coolant.  A short list of maintenance, new water pump and timing belt.  And the car ran perfect..


Linked up with a guy on facebook in Chattanooga and got a new bumper to replace the damaged one..


Put the Mazdaspeed Protege Racing Hart wheels on it, and it started to look like something. I certainly did not expect to be driving the car as a daily, but it turned out to be a really nice car once it was cleaned up and a few repairs.  The best part was being able to be able to be without a car payment for the first time in almost 12 years.  More money saved, and more money to waste on the "race" car..haha


The Silver car had been set back right after the alignment, and all good.  The wheel held air, and was not bent terribly.   But had been damaged pretty bad from sliding over the rumble strip.


I had already purchased a 5th Konig wheel earlier in the year so I swapped the tire on the fresh wheel for Barber Motorsports.  I was honestly surprised that the wheel had not broken from sliding across concrete.  I always recommend their wheels for any track car based on the price and the lightweight flow formed options.  Also when I posted about the spin at RA and posted the wheel, they immediately offered to send a replacement.  I had already had a replacement so I did not want to waste the good faith gesture, but I really appreciate them offering.


I had been plagued with brake noise from my Hawk pads since I installed them earlier this year.  I tried to resurface the rotors and re-bed them, but they still squeaked like crazy. I finally was able to quiet them by scuffing the pad with a metal buffer tool.  In the photo above you can see the rust on the pad surface..

About 20 seconds of work it was clear and fresh.  Im sure most of you already know this, but I was so happy that this got rid of the god awful noise from my track pads.


I took the car up to the Tail of the Dragon for Touge Fest.  Which is a weekend event held at The Dragon.  It has become a huge event in the Southeast that brings people from all over to hang out for a weekend in the mountains.

The spin at RA had left me a little shook, so it was good to get out in the car and get the feel back. Before I had always pushed the car and got excited when it broke loose or when I heard the tires squeal a little.  But now tire noise terrified me.  So I needed the drive to clear my head and reset my nerves so I could enjoy Barber..

I had been to the dragon plenty of times in the P5, but this was the first time I had managed to actually go back and look for photos of me from the photographers that sit along side the road.


Finally back at Barber Motorsports Park, after not being able to drive it earlier in the year.  I was so excited to mark this track off my list. One of the things I made sure to do was to remove the rear sway bar and set the car back how it was in the beginning of the year to assure I would feel comfortable in it.I started the day by riding along with one of my instructors Gino Manley to show me some of the lines before I went out on my own.  Gino is very familiar with FWD cars and how to drive them, so he showed me how much potential my car really had.  And it was mind blowing riding with someone while they drive your own car and do so well..


Immediately after Gino drove me in the car, we went to pits, and I hoped behind the wheel to give it a shot myself.  I took the first warm-up pace lap and everything felt good.  I started the second lap, and the car felt extremely loose and almost uncontrollable at every turn.  I didnt know if it was me or the car.I was stressing out trying to figure out whats going on.  I had gave someone a point by in the wrong area, and gotten black flagged.  So my stress level doubled thinking something was really wrong...


I go in to the pits, and meet with the guy in the pits, and he tells me what I did wrong, and lets me continue.  But I take a minute and check my driver front tire, and notice it completely flat and almost off the wheel.  I limp to the air station and fill it up with air,  which it takes and fills up.  I go to my tent, and jack the car up and see the big bubble in the sidewall..


My first thought was to put the factory wheels back on that I drove on.  But 2 of them were sketchy and 2 were almost new.  So at first I threw them on the front, and went back out next session.The tire noise was already bad from the new pavement at Barber.  But it got way worse with the Kelly All Season tires up front.  The car had absolutely zero grip up front...I had no confidence in anything.


Someone suggested that I try them on the rear.  Deep down I knew it was a bad idea, just based on my experience with rear grip and how much the car likes to rotate.  But at this time I just wanted to be able to have some sort of confidence on track.  Against my own judgement I tried it out...and made it through 2 turns sideways before I just gave up for the session.By that time it was lunch time, and I had been debating on just packing up and going to take photos and be a spectator.


I swapped the tires back and just fought through the under steer and no grip up front.  And just took the turns steady and spent the session learning the lines instead of trying to go fast.


The second session after lunch the car started to misfire at Turn 3 every lap.  I came in, checked the codes, and it was Cylinder #3 misfire.  The car ran fine, went back out, and then it happened again, but it changed to Cylinder #4.  Once it happened again I just kept going and prayed that the car was able to make it home under its own power.


There were 2 sessions left, the misfires and check engine lights had stopped and I had settled myself on how the car handled with the mis-matched tires.  So I went out and got pace behind a guy in a Miata and for the first time all day had a really good trouble free session.


The biggest issue with Barber and low hp cars is the elevation change.  The hills at Barber kill all momentum that you gain on each turn.  To me it makes this track very challenging.  The back section really gave me the most trouble through the blind uphill right.

But it was great to finally get to take the car on such a challenging track.  The issues i had helped me learn the track a little more rather then try and be fast.  At the end of the day I felt accomplished with this project , because it was the last track day of 2019.  And the car had made it to every event without any mechanical failure.  JZilla has transformed me to a different type of enthusiast.  I was never hardcore into one side of show or into the function side.  I just liked the complete aspect of the automotive culture.  I am happy at the positive feedback I have received about the car, and from people contacting me about getting involved in more track activity.  Being around the scene for so long, I knew a lot of you all always wanted to be involved in motorsports but just did not know how or where to start.  Hopefully I have motivated some of you to get on track! The Protege 5 will continue to go into 2020 with a few updates and some new goodies.  Next post we are going back in the garage and get ready for Atlanta Motorsports Park in March!

Southrnfresh_Joe
Southrnfresh_Joe New Reader
6/13/21 9:59 p.m.

Its been a few months since the last trackday, and finally after the holidays settled down. I was able to get back in the swing into working on the Protege and make a few changes for 2020.The car has been very reliable and did everything that I asked it to do. First thing was changing the wheel size from 17" to 16". The 17" Konig wheels did great, they only weighed 16lbs but I did not like the 215/40R17 tire size on the 17x8 wheel. The car rubbed under harsh turning , and the 215/40 stretched slightly on the 8" wheel.Finding a 5x114 wheel in a 16x8 in anything besides a Enkei for a reasonable price was tough. I could have went with anything, but I did want to get something that I can feel comfortable with tracking, and somewhat lightweight.


I ended up finding a set of 16x8 Work Emotions from a guy in Florida off FB Marketplace.  Even better the set came with a great barely used set of R888Rs in 225/45R16 .


They had been painted a metallic blue color, but they were straight and had good tires on them.  So it was exactly what I needed.The next thing I wanted to focus on was the engine.  The old engine ran good, but it had 301,000 miles on it, and it burned a lot of oil.  I had kept the oil level full all last year, and it ran strong.  But when the car sat, it would smoke like it was on fire for about 10 minutes.  So it was time to either refresh the motor or replace it...


This is what a typical cold start would look like for about 10 minutes...


The good folks at Mazmart had been sitting on a block out of a 2001 Mazda 626 with only 18 original miles!  The story behind it was that the car was delivered to Jim Ellis Mazda in Atlanta and the car fell off the truck somehow, and the accelerator was stuck in full throttle, and the car overheated.  Mazmart purchased the damaged car back in 2001 brand new with only 18 miles on it.  And parted the car out.. and the only part left from then was the short block..


The original plan was to get my cylinder head rebuilt, and use it with this short block.


While I was putting together a parts list and making a plan of action for the motor swap.  I ran across a wrecked P5 with 98,000 miles on it being parted out.  I decided to just take this known running motor and use it.  Once I have the old motor out I plan on using that head with the low mile block to try and put together a motor for force induction in the future.  I mainly just wanted to get the car back on the road with a fresh motor as soon as possible.


I had some plans to do a few things in the engine bay while the engine is out.  I wanted to remove the A/C , relocate the battery, and remove some clutter out the bay and clean it up as much as possible.


Motor out!

I never knew how old the clutch was in the car, but it really never felt bad.  But by the looks of the flywheel, it was clearly on its last leg.

The residue left in the bottom of the oil pan, is a mixture of any and every kind of additive, oil weight, I experimented with to stop the oil from burning.  And also showed signs of sever bearing wear.. even though car ran fine , but after 300,000 miles what can you expect.. 


You can see oil pooling on top of the valves on the intake side.


And on the exhaust side you can see the results...


Block prepped and cleaned for oil pan and baffle.


One of the best things I ever did for the car was install this oil pan baffle .  It has a trap door in it to help keep oil in the pickup.  The FS engine suffers from severe starvation so this was a must.  And it has proven to be a very worthy investment!


Found a killer deal on a used lightweight crank pulley on Ebay.  The OEM crank pulley weights 5lbs, and the lightweight one is 1lb.    


With the motor out it gave me a chance to wrap the header.


Deleted the EGR with the use of a Mitsubishi 4G63 block off plate.


The power steering pump worked fine, but I had a super low mileage one I got from Mazmart available.

Ready to go... 


I stuck with the OE Exedy clutch but did upgrade to the Fidanza 7.5lb lightweight flywheel. 


If you look closely you can see that I forgot to install the pilot bearing in the flywheel prior to installing it.  And of course this was after I torqued the flywheel bolts and everything.. 


It was late, and I thought it would be a good idea to install it with the flywheel still attached... as you can see from the photo it was damaged by the time I got it to sit flush.


The pilot bearing barely rotated and would have been a problem if i had used it.. 


Early morning trip to Oreilly's got me a fresh one, that went right in with no problem the correct way after removing the flywheel.  


Clutch installed and ready...


The radiator didnt have any issues, but it was in bad shape, and I did not want to take any chances with it falling apart. 


Install was pretty smooth honestly.  The engine started on the first crank without any issues.  I had finished the car on Wednesday, installed the radiator and a few things on Thursday.  And Friday after work was my day to take the car on the road, and put some miles on it and make sure it was all good to go.  


Friday I get home, take the car to get some dinner and put some miles on it to make sure everything was fine.  The car felt great, lightweight flywheel really woke the car up, everything was perfect.  It was great to finally drive the car with a healthy motor.  As I am driving I smell a constant scent of coolant.. I figured it was just what I spilled burning off, and never really worried about it or bothered to check.  I get about a mile from getting my destination , and the car shuts off , but immediately cranks back up.  I get to the restaurant and order my food, and then I check everything out under the hood while I wait... and it looks fine.  I head back home, and the car starts to misfire like crazy, and hesitate, and loose power.  I am thinking maybe its a loose vacuum line or something silly I forgot to tighten up.  Not once.. did I stop and or look down at my gauges...I get about 4 miles from my house, and the car finally cuts off at the light, and wont crank.  I push the car out of the street and get it in a parking lot....And finally I take a glance at the temperature gauge and see the car blazing Hot and about a inch past the H symbol.... by then I realize that I never once looked down at the temperature gauge when the car started to act funny.  I get out and pop the hood, to a steaming hot and smoking engine like something you would see in a movie.   I grab my light and look down and see the lower coolant hose completely off from the radiator and the car bone dry of any coolant.  The clamp did not fail ,but I did... and never even clamped the hose on to the radiator.  And halfway through my test drive I had dumped all the coolant on the road.   I made one last effort to save the day, by walking to the gas station to get coolant and  attempt to possibly fill it back up and limp it home.  But it was way too late for that..


Got the car towed home, and let it cool off reconnected the lower coolant hose and secured it this time,  filled it up with coolant and topped the oil off, and it started up and idled fine for about 10 minutes.  But as soon as I drove about 50 feet the temp would start to creep up, and the sweet smell of coolant out the exhaust was overwhelming...At first it was actually kind of funny what I had done.. But a few hours later I was so mad at myself for doing something so silly, and ruining a perfectly good motor.  


Saturday morning, the only way I could feel any better about what I had done, was to remove the head and investigate more on the condition of the motor. 


Once the head was off, I could see that the root of the problem was a blown head gasket.... I decided to take the head to a machine shop, and have them check the head and see its condition before replacing the head gasket. Maybe I could get away with a new headgasket and everything be ok.. 


I dropped the head off at the machine shop on Monday , I received a call early Tuesday morning telling me that the head was severely warped and none of the valve seals are holding.  And he suggests to replace the head and or spend way more then its worth to repair it.  And also that the block maybe damaged by the looks of the cylinder head..So here I am back to were I began........

Southrnfresh_Joe
Southrnfresh_Joe New Reader
6/13/21 10:03 p.m.

It took me a few weeks to find a good replacement engine for the P5 because the car has gotten a lot older and finding good replacements for reasonable prices has become very difficult. Local yards were asking 5-600 for 170,000 mile engines that had been rotting in a yard. After going through and communicating with a few sellers on Ebay , I ran across Tennessee JDM online, and saw that they had 2 JDM engines available. There are 2 versions of the JDM engines, one is a FSDE which is rated at 130hp (similar to the us version) and the other FSZE that has higher compression and more aggressive cams. At first I was not looking to go with the FSZE because with out the proper harness and ECU, it does not make the power it is supposed to and I just wanted to get the car back on the road. 


One of the engines was nice and pretty, and the obvious choice, but upon further inspection it was determined to be the lower compression version out of a Japanese MPV from 2002.  After communicating with them on IG I gathered enough information to know which engine was which, the main giveaway was the valve cover, which has studs for a plastic engine cover.  That and the plastic resonator box on the intake manifold are 2 of the easiest ways to identify it.  The engine came out of a 2002 Mazda Capella GZi  AWD, which is the 626 in the US.


It was my first time purchasing a JDM engine from a company, and it was a breeze, and it was delivered in about 2 days, so I highly recommend Tennessee JDM if you are looking for a engine.


Another way to determine if it is a FSZE or not is the FSH9 cam on the intake side.  


The engine tested good and had good compression, but it was very old and had a lot of signs of corrosion mainly from the coolant side.  


The intake manifold looked like it had been sitting for a long time.


The Engine was marked as if it had under 70k miles on it, and by the looks of the cylinder head it did not look like it had many miles on it, and it looked to have had a decent life.  


I went through a few things, and pretty much swapped everything off the other motor onto this one, and replaced the water pump and timing belt and it was ready to go in.  

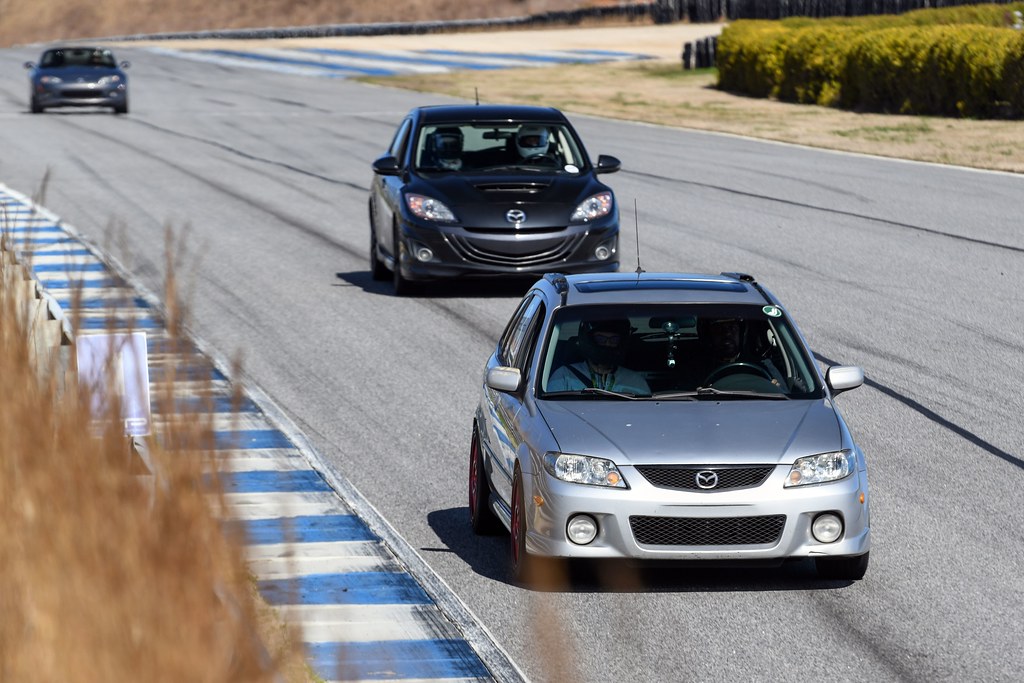
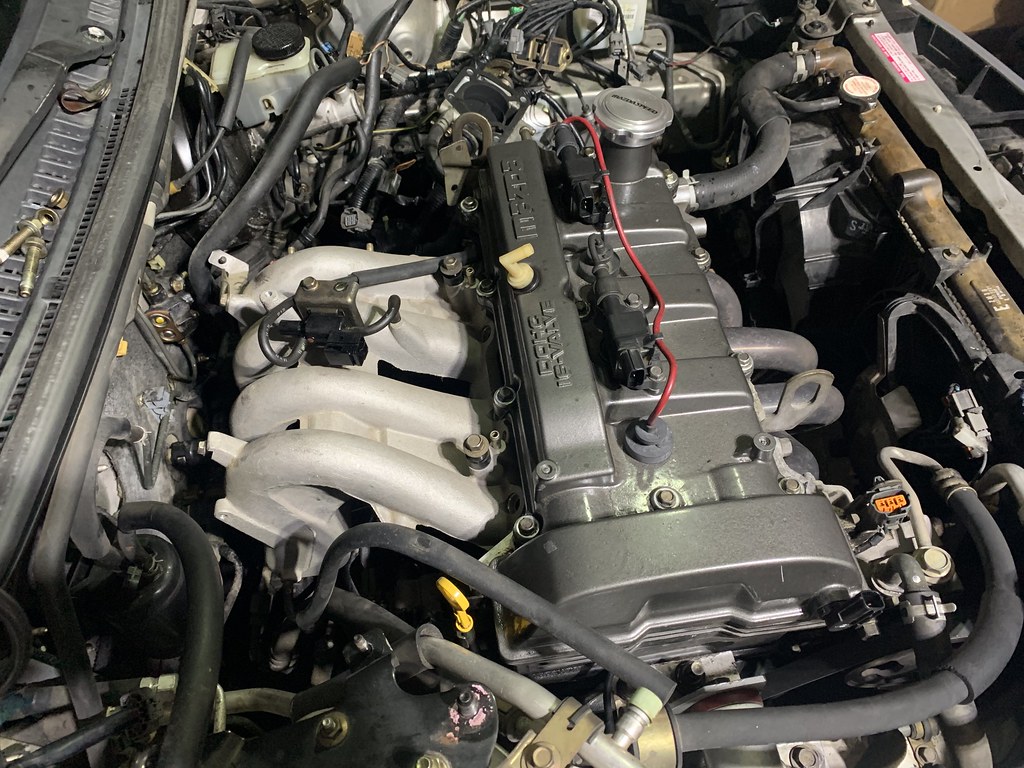
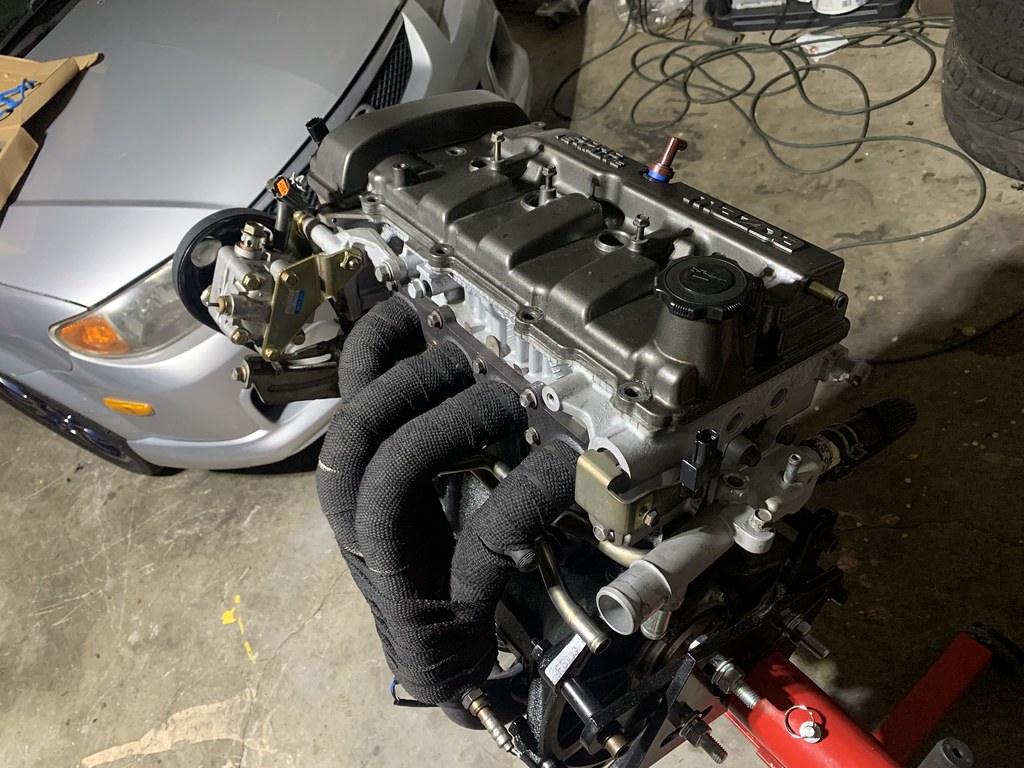
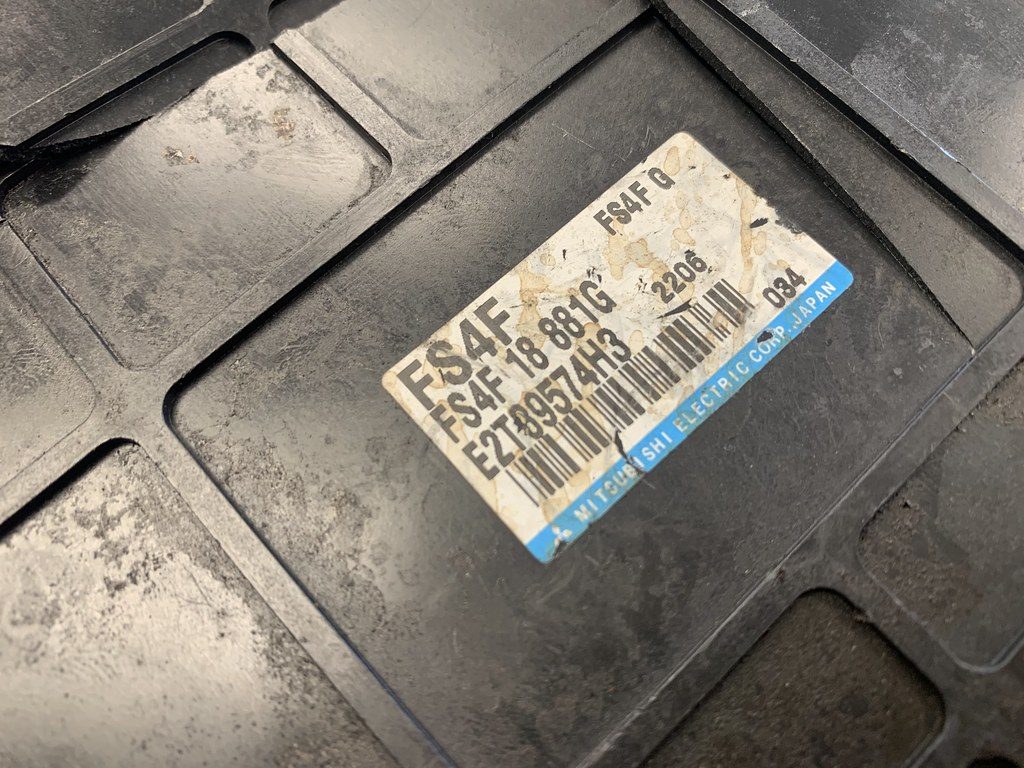
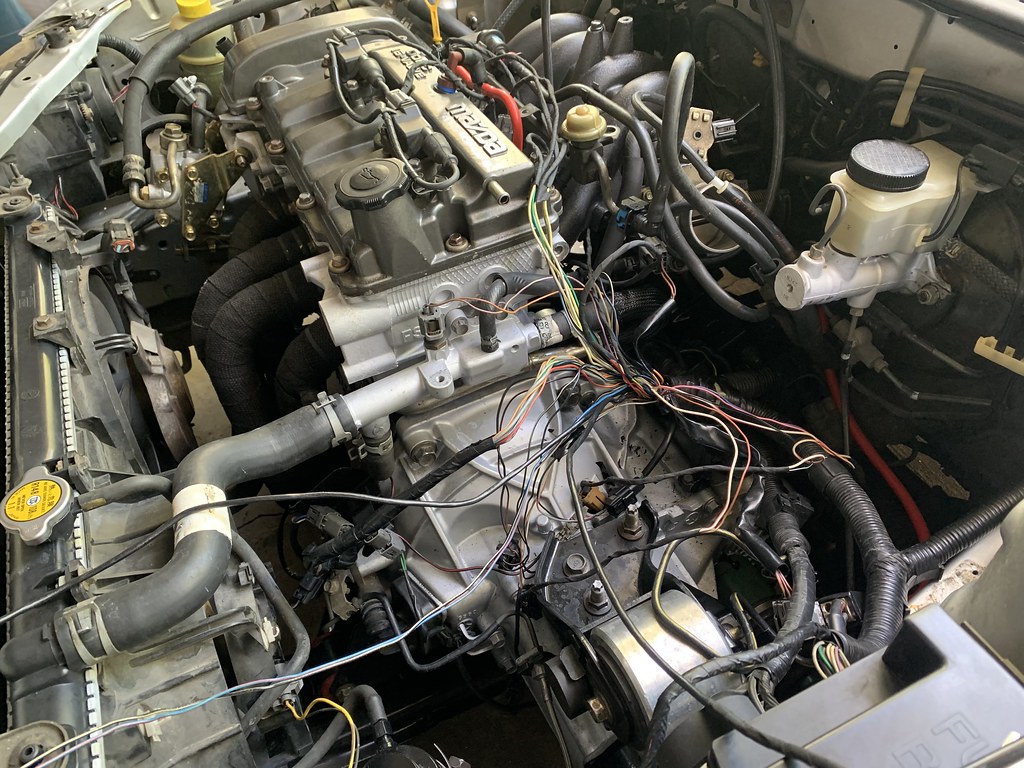
 As mentioned before, this engine is a
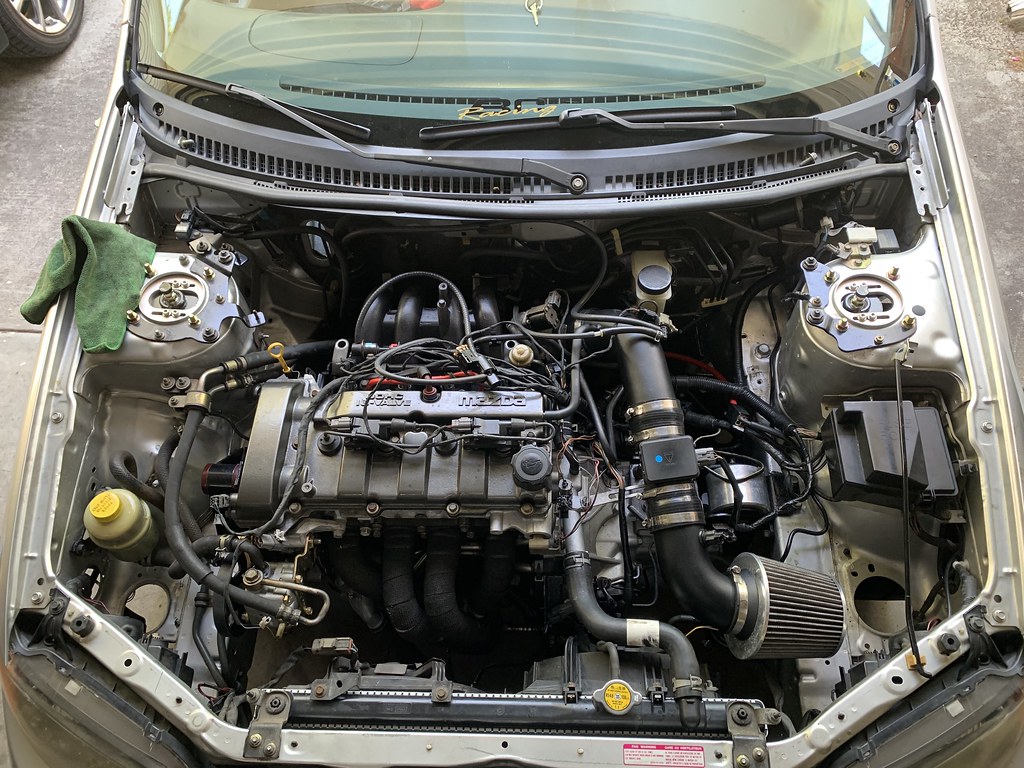
Japanese version and a higher output then what is available in the states.  But in order to achieve its full potential you must use the matching harness and ECU because it is a OBD 1 engine.  I did have the matching harness and ECU come along with the engine, but they had cut the harness at the fuse box connection.  Being a completely different vehicle the fuse box is much different from the US protege.  So I would need to source another one or use standalone to tune it for its full potential.    


The good thing about these engines is that they can run on the US harness just fine, the only thing you need to swap is the crank sensor and pulley and it will fire right up.  I got the engine in, and it cranked right up...


I had gotten the engine in and made sure it was running right.  The next job was to clean up the harness as much as possible.  With the battery gone, and much less in the engine bay, it annoyed me to see so many wires all over the place, so I cut some of the harness wrap back, and re- routed a few connections .  


Cleaned up and re routed..


I ran most of the harness under the intake manifold and it made a world of difference with the look of the bay without getting crazy with it.  


Swapping from power windows to manual windows...


My next task was to shave some weight from the car.  The P5 only came with power windows, so I was able to source a set of manual window regulators out of a DX base model.  I was also removed the door speakers, the window regulators themselves saved me about 8lbs total, not sure on what the door speakers weighed, but it was much more then the regulators.  


I initially was trying to make my own door panels, but after heavy consideration I gave that up for now, and just resorted to the DX manual door panels.  


So after this photo was taken that night, the car all of a sudden had a really harsh idle, and stumbled under 2k rpms.  It was late, and I had to get home from work, so I drove the car home.  Once I got to my exit the car stumbled again, and I limped it home and started to check all connections and everything that you can imagine.  I spent the entire weekend trying to figure out the problem.  As days went on, it got worse.  To the point were the car would crank up fine, but stumble and die within 10 seconds, unless I unplugged the MAF or O2 Sensor.  I have plenty of spare parts , so I started to replace them, and nothing changed.  I then went on to replacing the Intake manifold gasket , Throttle Body Gasket , Throttle Body , Intake Manifold , Injectors , Injector seals , all the vacuum lines , EGR Valve , checked timing several times , I even started the process of chasing wires, and started to go through the wiring diagram to see if I missed something and or pinched a wire.  Because it was really strange how the car all of a sudden just started to act crazy.  


I had literally replaced and tested every single component on the engine , someone had suggested I check ground wires.  The engine only has 1 main ground  that mounts to the transmission mount.  That is when I immediately remembered that I painted that.....I grabbed a razor blade, and scraped off the paint on top of the mount, and re attached the ground wire and the car started and idled perfectly.  I sat there in disbelief happiness and shame all at the same time.  After 2 weeks of chasing a issue, something so simple had me so confused..


So after that nightmare was over , I started to look into  removing the rest of the HVAC components.  


I had always dreaded removing the dashboard, but at this point the car was pretty apart, and taking it out was not as bad as I thought.  


Dash removed...


Vent ducts removed


Heater core and HVAC components removed 


With the dashboard out , I was able to remove the rubber OE pedals and  install the pedals from the Mazdaspeed Protege , which were made by Sparco.  


Removed the fire protection fabric off the firewall...hopefully ill never regret it..


I had been wanting to redo the exhaust for awhile.  The exhaust is a mix of ebay catback, and a modified Racing Beat axle back from a Mazdaspeed Protege, that had been modified to fit the P5.  It was rusting, and way too loud for my taste. 


I was able to find a Autoexe Japan axle back off of Yahoo Auction Japan , by way of @thepartsstache on Instagram.  


The axle back is a direct fit on all BJ chassis cars, but it is only made for the JDM market cars.  So it is a little short on US cars because the JDM cars have short rear bumpers.  


My rear bumper was cut, so it is barely noticeable, and it fit really nice.  


The muffler is really quiet, but does give the car a really nice tone. 


After months and months of work and heartache and headache, the car was back on the road and much better then ever.  I had achieved all the goals I set for the car, just in time for the upcoming track day.


The exhaust was great, but it was very very quiet, but I loved the way it looked.  The new engine seemed to have a much more aggressive tone, and it felt so good to have a solid power plant under my feet this year.


The wheel / tire sizing was exactly what I wanted.  And the exact tire I wanted to go with.  I was excited to put the R888Rs to the test.  


Finally the car was ready to get back on the track...and with a few weeks left to spare..

Southrnfresh_Joe
Southrnfresh_Joe New Reader
6/13/21 10:06 p.m.


I  wanted to clean up the engine bay for awhile, but i wanted to wait until i knew the  car was all good and ready before I started to mess around with anything. I also wanted to install the 1.8 coilpack conversion on the the car as well. This mod is somewhat of an update, it gets rid of the Dual Coilpack setup that tends to fail. It removes the shared coil on plug setup, and replaces it with 2 coilpacks mounted elsewhere.


I also had a set of Valve Cover hardware from Hydra Motorsports that I wanted to install as well.


To do this conversion, you must use the 626 valve cover in order for the wires to seat properly. Normally the coilpacks mount right above the manifold, but the point of the conversion is to get the coil packs away from heat.


With some re-engineering I was able to mount them up top away from the heat and bolt it to the intake manifold.[/caption]


I got lucky on Ebay and was able to find an brand new Mazdaspeed axle back for the Protege 5.  Back when the car was new they sold these as an accessory on the Protege 5. There were 2 versions one for the Sedan and one for the Protege 5.


It's different from the Racing Beat Exhaust that comes on the Mazdaspeed Protege.  These are designed for the Non -Turbo models.   I did not get any photos of it installed at this point, but I will add some later.  The muffler has a much better tone then the AutoExe axle back, which was very quiet.


I was able to get an Injen Cold Air Intake in a trade.  I had been looking to experiment with a cold air intake on the car over the short ram, and my friend was wanting to get rid of the cold air and go with a short ram, so it worked out.


June 2020, we finally get on track for the first time since we were locked down.  For me the extended break gave me time to correct the errors that I created with the engine catastrophe.


It took a few sessions for me to get back in the groove.  The last time the car was at Road Atlanta.  It was running on a 300k mile oil burning engine, stock clutch, flywheel and a full interior with all of the creature comforts.


The changes were so dramatic it was like driving a whole different car.  It was much lighter on its feet.  The FS-ZE felt much more smoother through the RPMS, the car was much more responsive with less weight.  The wheel / tire combo gave me so much more grip.


I have a video of me doing a lap, and followed by another lap from Gino Manley.  Just to see how much I need to improve.  The biggest thing I the shifting and engine braking.  Its hard to be so aggressive on the car when I will be the one having to fix and or pay for the repairs.  But its something I will need to be more comfortable doing.  I loose so much time being gentle with down shifts, and easing the clutch into gear , and coasting instead of using the engine / trans to assist with braking.  He also showed me how I should be shifting, mainly going into Turn 1 in 5th Gear, and downshifting to 4th, instead of holding 4th gear all the way into turn 3 when I shift down to 3rd.  Its tough for me to do that mentally im still fearful of losing control and spinning again. But I will eventually have to pickup these habits.


Trackday Vi[MEDIA=youtube]_9xQanfyu30[/MEDIA]deo


Southrnfresh_Joe
Southrnfresh_Joe New Reader
6/13/21 10:10 p.m.


I had to make a trip down to Daytona to shoot the Jzilla Track Day.  And while I was down there I linked up with a friend of a friend who used to have a Protege 5 years ago.  And he still had his old VIS carbon fiber hood from years ago..


The hood was in pretty bad shape and been halfway paint matched.  But for $100 it was  steal because these things are usually about $8-$900 if you can find one.  I was really interested in the weight savings, but I had to get it looking somewhat decent.  So I had to send it off to my good friend to have him strip it and re-clear it before I installed it. 


I had wanted to pull the dash out for awhile and completely remove the rest of the HVAC system.  So on a bored friday night I went in the garage and started to look at a plan of action for removing it.  And about a hour later I had the dash laying on the floor...  I had no intention of taking it out but for some reason at 1am on a Friday I decided to do so.  


I removed all the vent ducts and any random mounting or brackets that were no longer needed.  


Everything removed


While the dash was out, I took the time to install a set of the OE Sparco Pedals that come in the Mazdaspeed Protege.  I didnt really think pedals could be a big deal until now.  But the extra grip and size of the pedals helps keep my foot in the proper position.   


Removing the Dash was not as tough as I thought.   I spent more time connecting the steering wheel to the shaft then anything. 


For awhile I had noticed a vibration / noise at around 45-55mph.  I suspected maybe my rear wheel bearings are starting to go out.  I had a spare low mileage set that I got from Mazmart.  Of course replaced the wheel bearings, and still same noise / vibration... 


I thought maybe it was time to replace the axles, the car has 300k on it, and they may still be the OEM axles.  Replaced them... still same noise.  So after wasting money on that, I left that issue alone for now...


I had an extra set of injectors that I sent out to get cleaned.  They came out of a MP3 with less then 2000 miles on it.  But they had been sitting since 2001.  So they were all gunked up pretty bad.


My good friends at EBtec cleaned them up for me, so I swapped them out just because....


I also got my hands on a Protege MP3 ecu!  This ECU is out of the 2001 Mazda Protege MP3 which was our version of the Mazdaspeed Familia that was available in Japan.  But the Familia had a 190hp higher output version of the FSZE that I have swapped in my P5.  The US version came with the standard FSDE version that made 140hp, but was equipped with a modified ECU to squeeze out a extra 10hp, and a much better power band.  Since I dont have the proper ECU for the FSZE, this MP3 ECU is the best alternative.  


My first time back at Atlanta Morotsports Park with the new setup was amazing!  AMP is perfect for the P5s setup being so technical, and the straightaways are perfect for the power band.  The MP3 ECU made a noticeable difference in the higher RPMS.  The day was flawless, and I noticed my times decreasing all day. 


I was in the groove, and I heard a loud thump in the back... and looked back and saw my battery laying sideways in the trunk midway through turn 6, being held by the power cables.  For some reason I thought a rubber tie down would suffice for track duty.  But it was a silly thought, and something I did not think to be an issue.  So that ended my day at AMP..The only issue that I had was trying to stay in my seat.  With the current setup, I had to have a race seat, because it started to become a job to stay in my seat..Check out the video of one of the better laps..


Trackday Video

[MEDIA=youtube]0zwva2NRt18[/MEDIA]


Affter AMP, I went on a hunt to find a seat.  After almost buying a new Sparco, I was able to get a killer deal on a new / used Sabelt GTS seat from Greg over at Koruworks.  It was missing the back pad, but the deal was too good to skip.  


 I rushed into installation and got cheap universal brackets , and pieced together the hardware.  It led to a squeaky seat, and the brackets didnt fit the seats properly.  Not to mention I had to drill a new hole for the rails.  


I ordered new Sabelt rails for the seats.  


Side by Side you can see that they are even shaped different..


I also ordered a set of Sparco mounting bolts.  Fit better, and looked much cleaner.  


Mounted up... Shout out to CR3 Motorsports for the Seat brackets! 


You can see in the photos the scratches on the side of the seat from the universal seat mounts.  Much better with the proper hardware, no more squeaks and loose feel of the seat.  I also added a patch of felt fabric to the bolster side, so they wont wear down when I slide in and out of the seat.


I do not have a harness bar for traditional belts.  So I had to go with the Schroth Anti-Submarine harness, perfect for any car that does not have a harness bar.  It also keeps you from sliding down under the seat in case of an accident.  And it also holds you in place very well!  


Late night browsing Ebay led to me finding these mirrirs.   They were only $30, and I felt obligated to purchase it just because it was APC brand.


The Mirrors fit pretty good, and looked decent.  And actually much lighter then the OEM mirrors since they are manual.


Got the hood back, and it looked a million times better!  I had initially wanted to have it paint matched.  But I changed my mind right before it was going to be painted.  


OEM hood 36.6 pounds. 


Carbon Fiber hood 21 pounds.


                                Finished a good

weekend of parts install with a photo session.  Thanks for reading!  Next stop I go back to Road Atlanta with JZilla Trackdays!

Southrnfresh_Joe
Southrnfresh_Joe New Reader
6/13/21 10:11 p.m.

I had the honor of being asked to help the Jzilla Trackday team instruct this event.  I dont consider myself a pro, and I treat every event as a learning experience.  But I was really humbled to be asked to instruct new students to the group.


I had 2 students, one with a STi, and another in a Audi S5.  I felt bad, that these guys had to follow me around the track in my ole P5.  But the key to any trackday is to have fun and be safe.  So its part of the process.


On the second day, only one of my students was able to make it.  So it let me focus more time with one student.  My student had done a few track days, and had plenty of experience on track, so at this point we were just going over things to be sure he was ready for his ride-along for the solo group.  Being my first time instructing it was a great experience.  I am not a professional by any means, but I am thankful for the team at Jzilla for trusting me with the task of doing so.


[MEDIA=youtube]rWmlcVYUgbY[/MEDIA]


My personal track day was pretty good, no real complaints except for the weather.  And with the big hole in the sunroof it made it far more complicated.  But I took advantage of the wet conditions and did a few sessions in the rain.  At first the idea of the challenge was fun... but Road Atlanta tends to create puddles in the worst areas during hard rains.  And with the R888Rs it was sketchy at times. But this video above was one of my most fun runs in the rain.  Being wet on track, it gave me the advantage a little and helped me keep up with some of the quicker cars in the run group.


I ended up leaving during the last session to get ahead of another round of storms.  But I managed to run right into it on my way home.  Besides the foggy windows, it wasnt too bad.  And if I kept a decent speed I would not get wet.


I made a stop for some food....and the weather had made a full turn to sunny skies...


A good friend of mine, sent me a craigslist ad for a Free Protege 5.  I honestly was not looking for one, but it was semi- complete and had a engine and transmission in it.


Upon further inspection I found out that the car was owned by Paul of Mazmart for many many years and had spun a bearing and had been sitting at Mazmart for years before someone got it for parts.  And the guy had gotten all he wanted off it.  So it was my turn....


The main thing that I wanted was the transmission out of it as a spare for future build / upgrade.  The car was full of random protege parts, but at this point I had plenty of spare parts.  So besides the engine harness , engine , trans most of it remained.  And it was sent off to the scrap yard...


I also took the time and upgraded the passenger side engine mount to the newer Hydra Motorsports Billet Engine Mount .


The AWR Engine Mount I originally had was absolutely fine, and worked well.  But I got it used, when I first put the car together and it was time to get something fresh in there.


The engine mount fit like a glove, but in order for it to be installed , you will need to cut and or remove the top timing belt cover.  The difference was crazy, the engine went from slight movement to no movement.


Next stop was Atlanta Motorosports park...

Southrnfresh_Joe
Southrnfresh_Joe New Reader
6/13/21 10:12 p.m.

It was time to get back on Atlanta Motorsports Park, this was my first time there with my new seat.  And I was so excited to finally be able to be secure in the seat and focus on driving. But I had been struggling all day with grip.  I had initially thought it was because the track was cold earlier in the day.  But as the day it never went away, and I was fighting with the car in the turns, and it just didnt have the grip it normally had.  You can see how much effort it was to make the turns, and how noisy the tires were in the carousel..


[MEDIA=youtube]dZ8bgBcJQBQ[/MEDIA]


After the event, I looked over the car and noticed that my tires were done, and I put the car back on the alignment rack, and my alignment had been all out of wack.  In the past I tried to re-align the car before every event, but I had gotten away from it this year, and this is the results.  This ended up being the last event of the year for me.  As I decided not to spend the money on tires for one event.  And I did want to look into changing wheel/ tires setups again next year.  So back in the garage for the winter, and some updates...

Southrnfresh_Joe
Southrnfresh_Joe New Reader
6/13/21 10:14 p.m.


With the JDM engine installed last year, I had always been curious on what it actually makes in comparison to the US engine...


Above, I have the dyno comparison of the US FSDE engine with bolt-ons that makes 113 hp and 102 tq .   And with the JDM FSZE my car put down 132hp and 137tq on the dyno using the US engine harness and Mazda MP3 ECU. 


The real reason for going to the dyno was because I was able to source a proper JDM harness and ECU to properly run the FSZE engine in my car.     The harness and ECU was from a guy in Canada that had purchased from someone else, that extended it to fit in a LHD vehicle.   So I removed the US harness to get ready to install the JDM harness...


Here is the US harness shown up top, and the japanese harness below.  The car that the harness came from was a ABS car, and mine was not, so it is excessively long with things I did not need.


In order to use the FSZE ECU I will need to remove my lightweight pulley and swap the crank sprocket to the matching JDM sprocket on the left...


The harness was in, and I just needed to plug in everything and crank it up..


So being that the JDM harness was a ABS car, it used the ABS unit to monitor speed with the speed sensors on each wheel.    In order to get around that I needed to run a signal to the speed sensor in the trans.


I had a spare harness to pull the proper connector from and make a harness for the speed sensor.


I was lucky enough to be able to get in touch with a guy from Australia, that had access to the JDM wiring diagram, and combined the information with another local friend that was able to identify the proper pin to remove and install to plug the speed sensor in..


I ran the speed sensor plug to the speed sensor on the trans...


And magic... we have a working speedo!


The JDM cars only run off a single o2 Sensor, so I plugged the secondary O2 sensor bung..


I was able to get back on the dyno and compare the two numbers.  So with the US MP3 Ecu the car made 132hp and 137tq, but with a dying power band, that peaks at 3500-4000 rpm and falls down to 90hp at redline...which explains how and why the car drags on the straights. 


And with the proper JDM ECU , the car makes 130hp and 135tq... but the powerband is much more useful and ideal . From 3500 rpm to 5500- rpm I am making power and holding it in a decent range to redline...


Here is a video of both sessions..


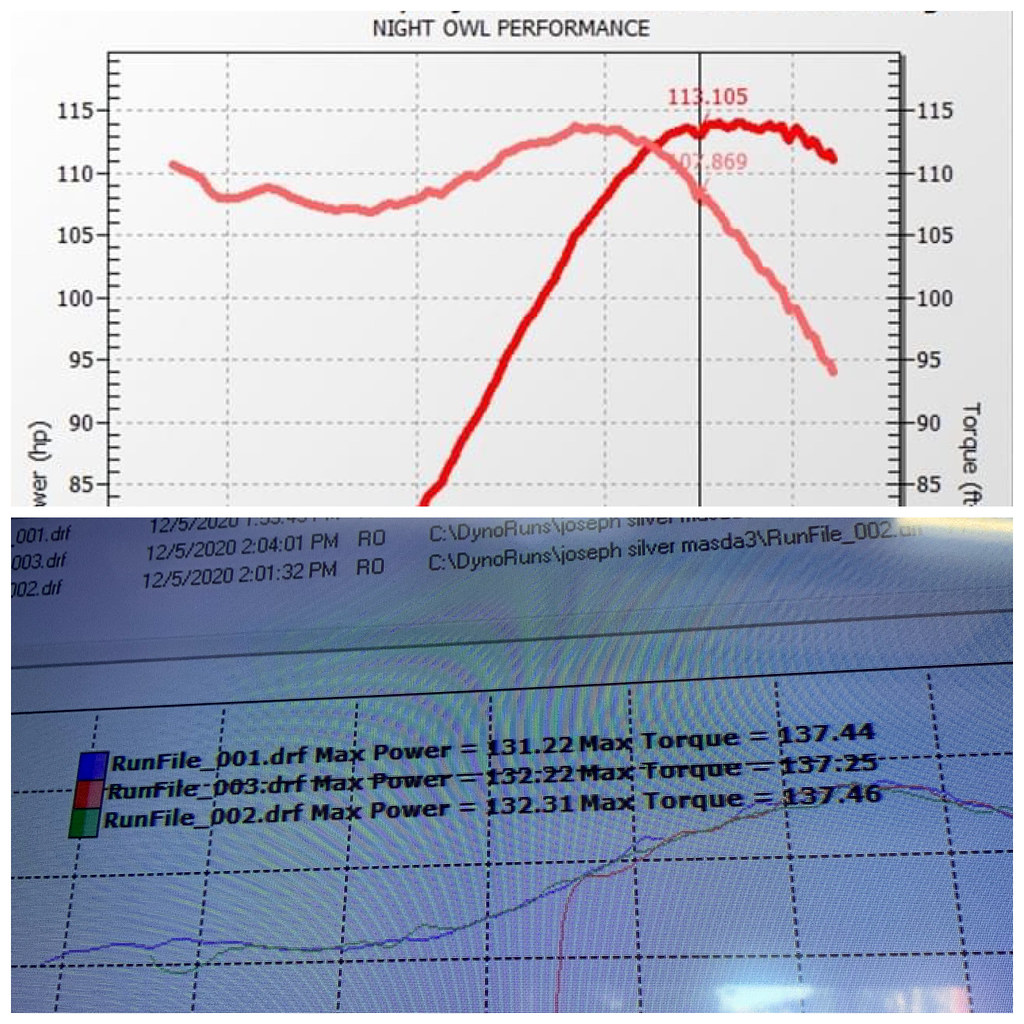
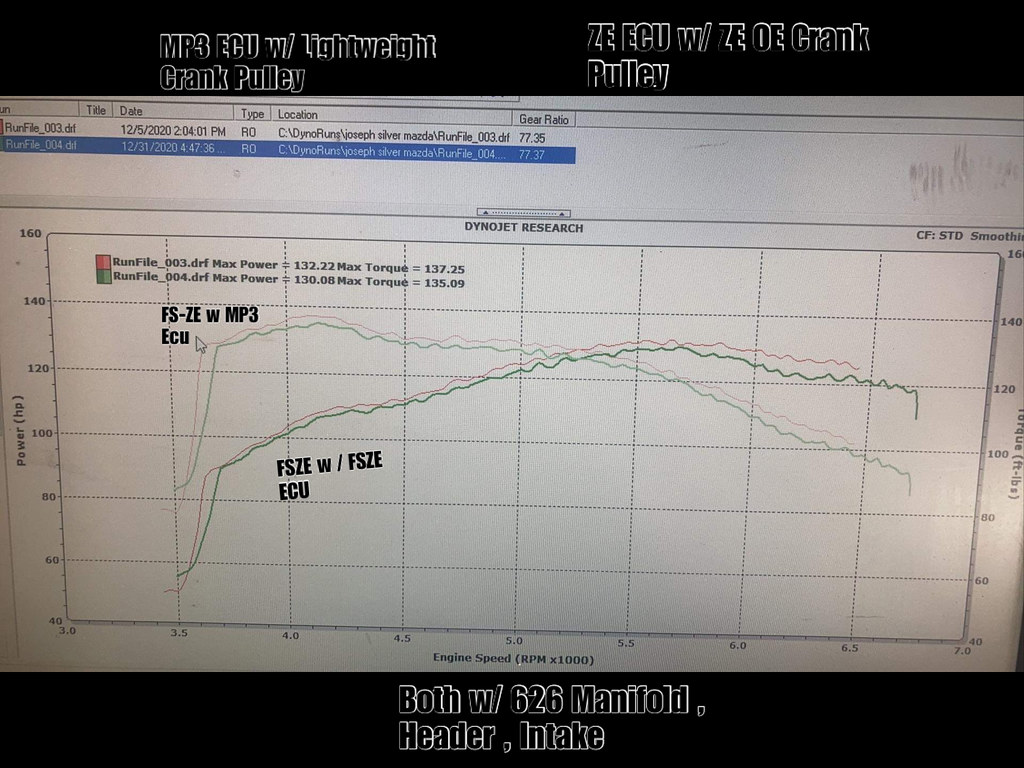
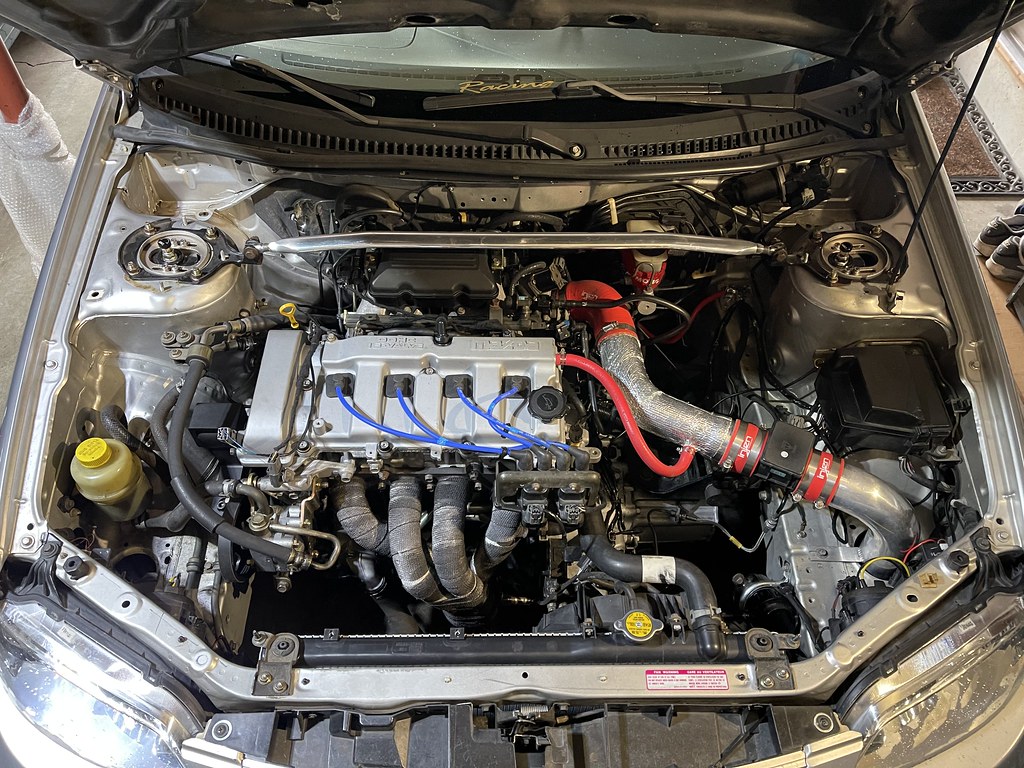
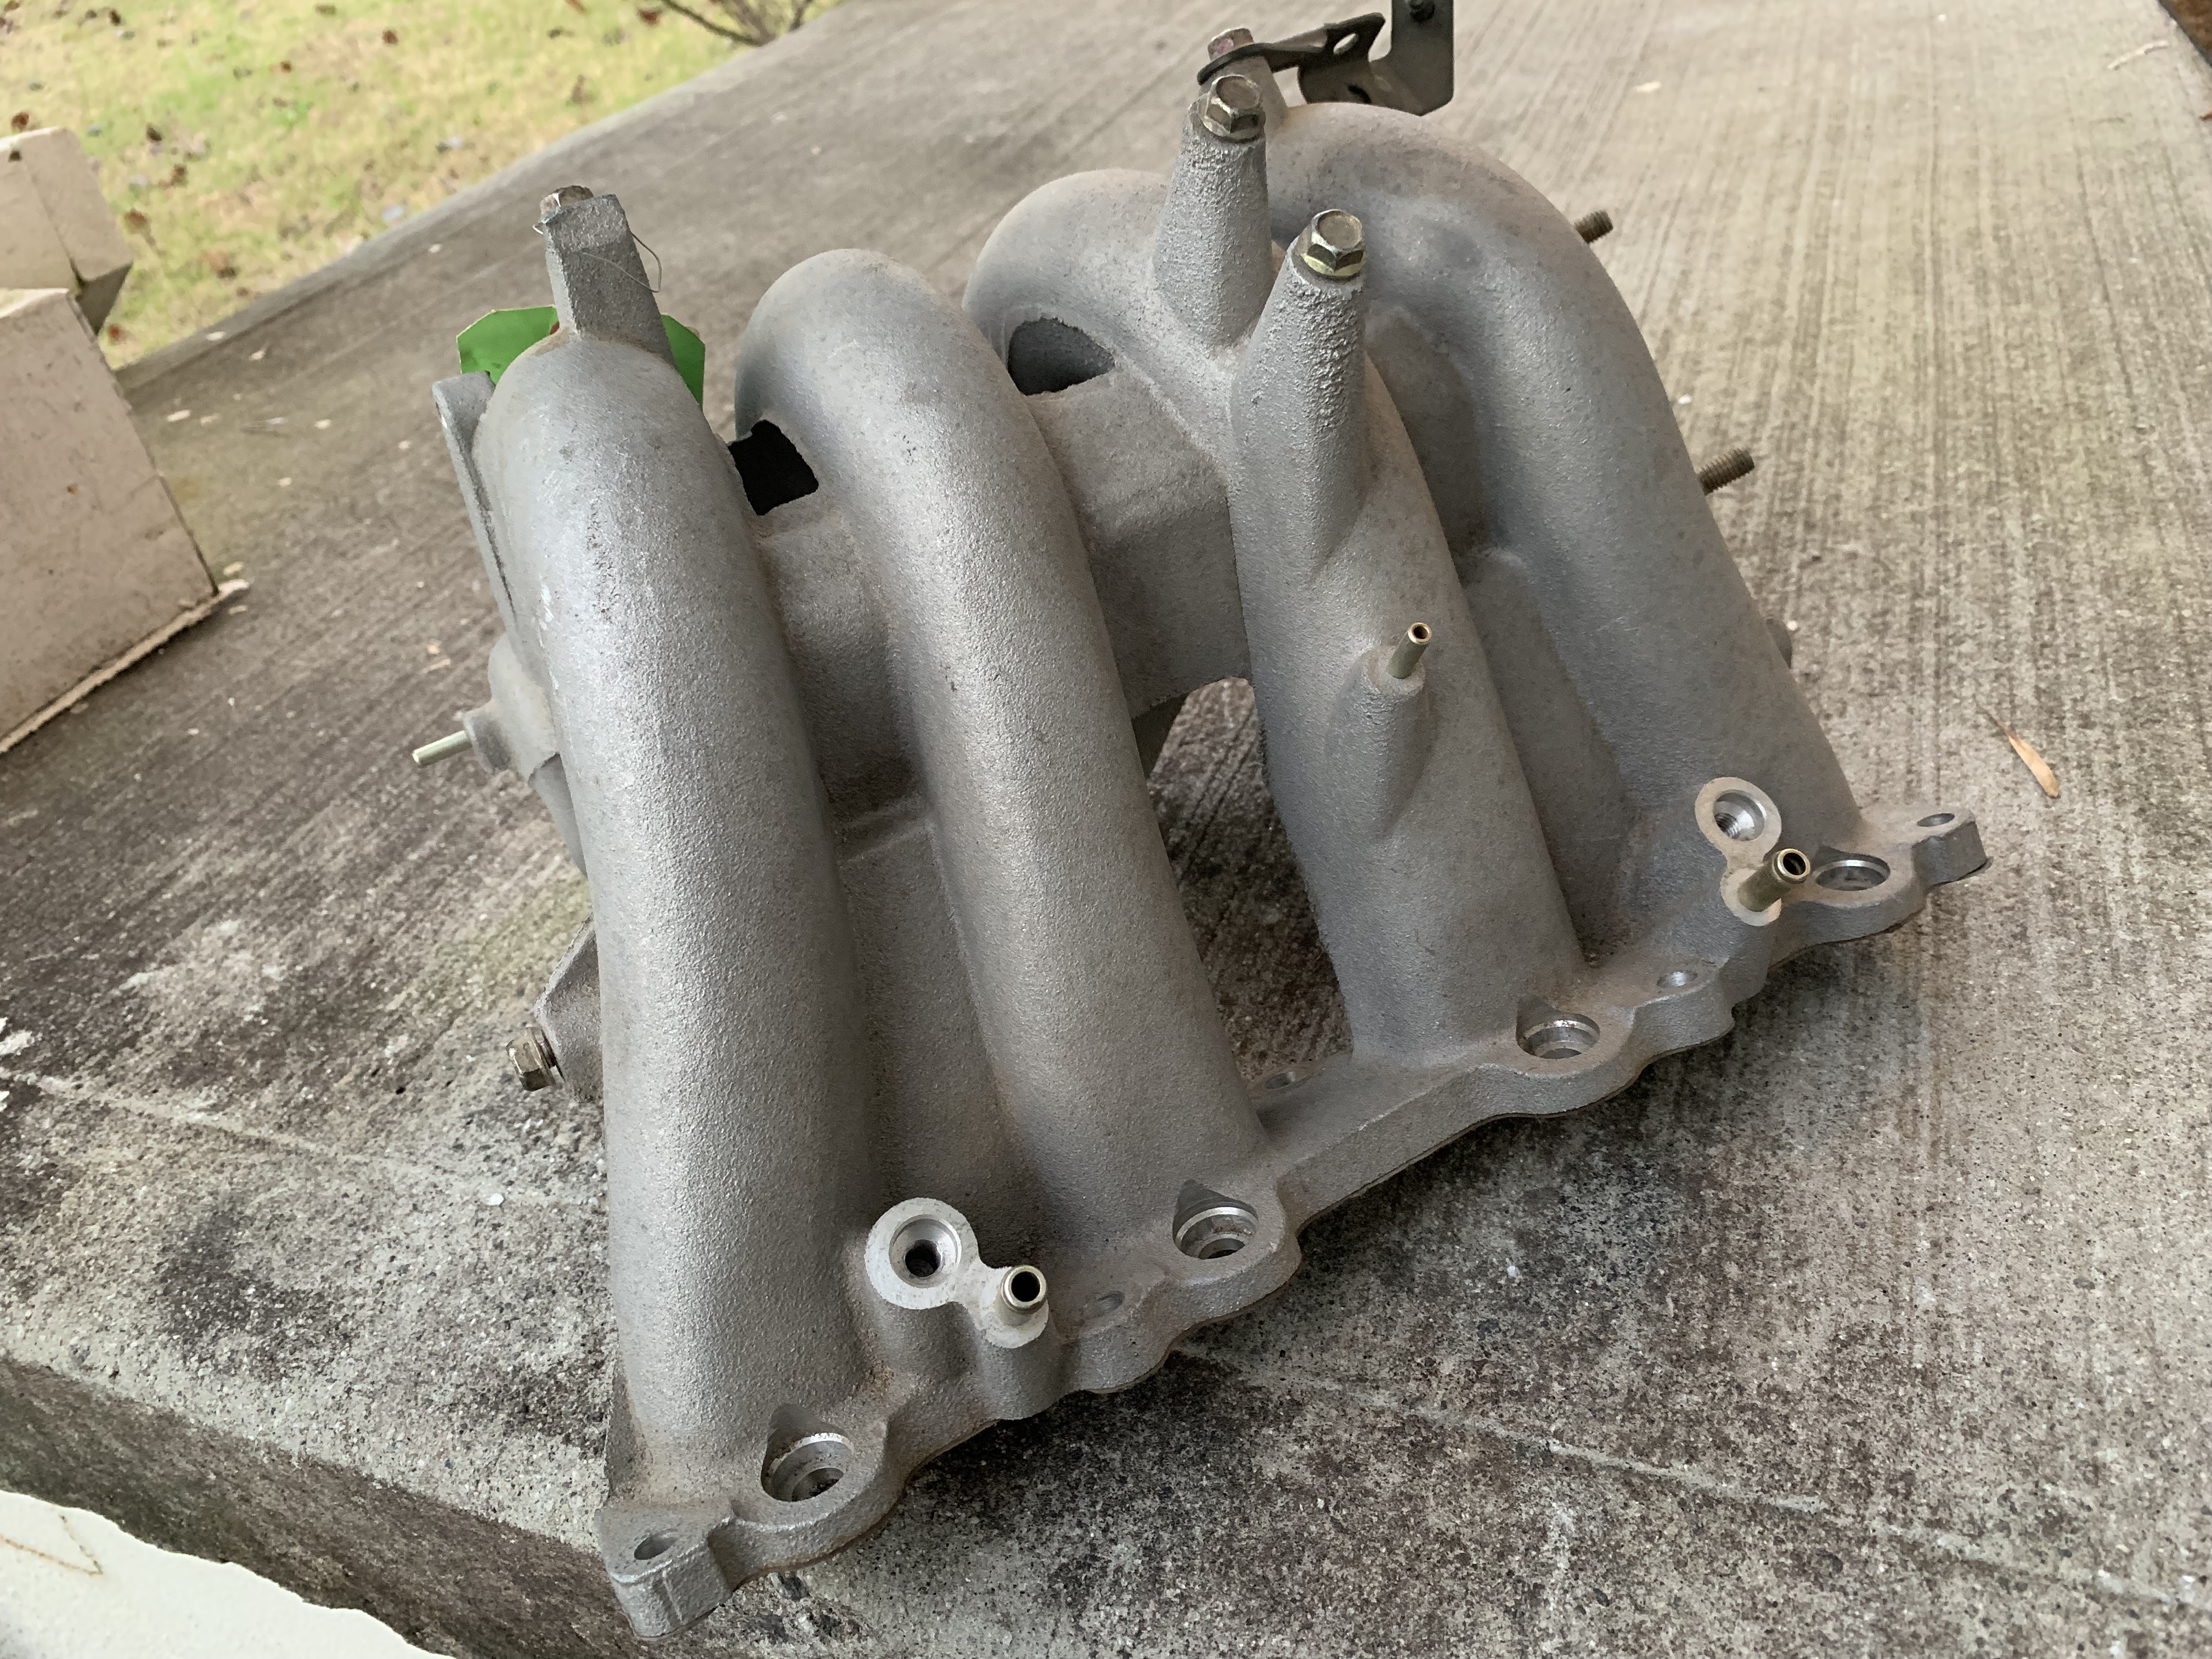
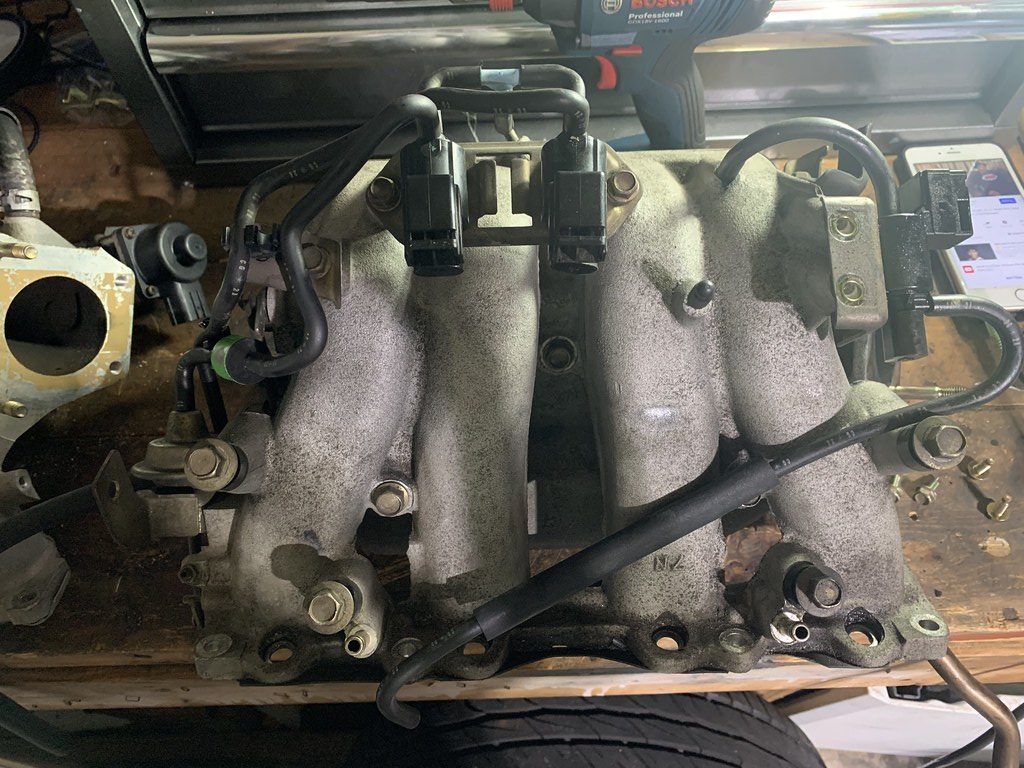
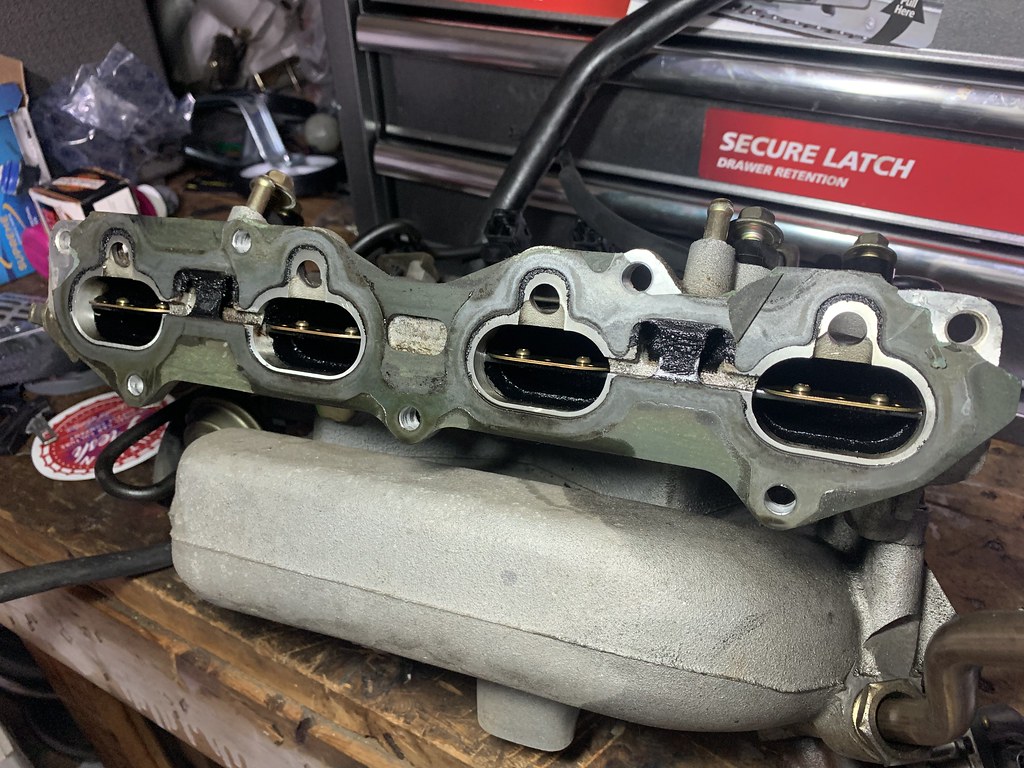
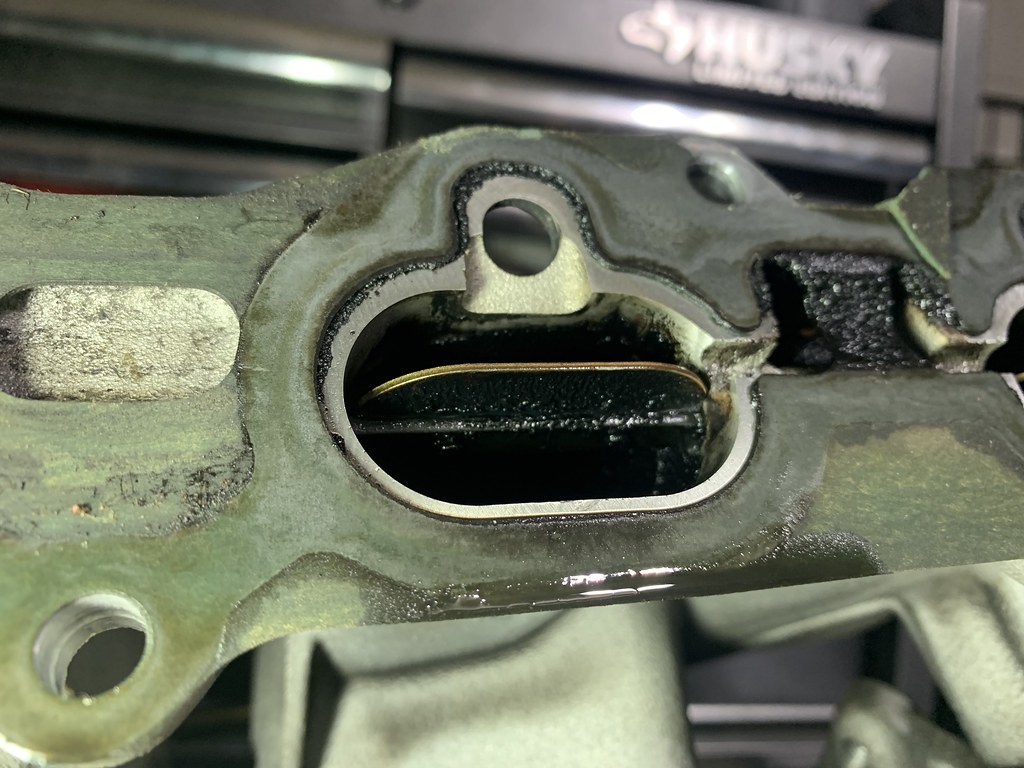
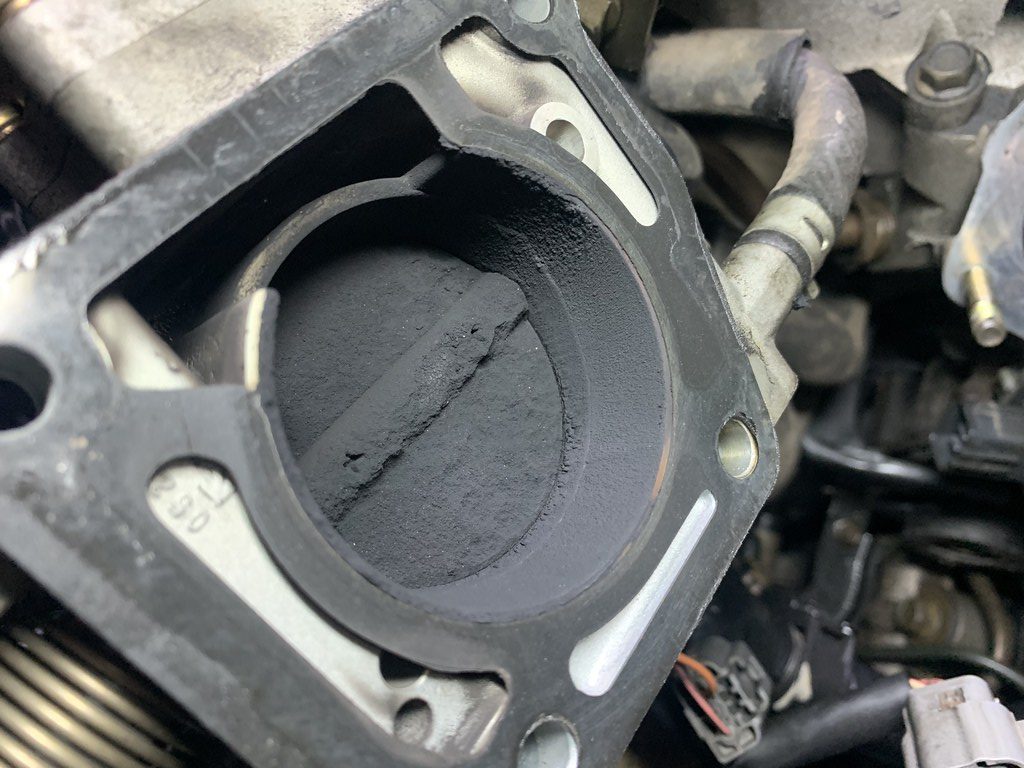
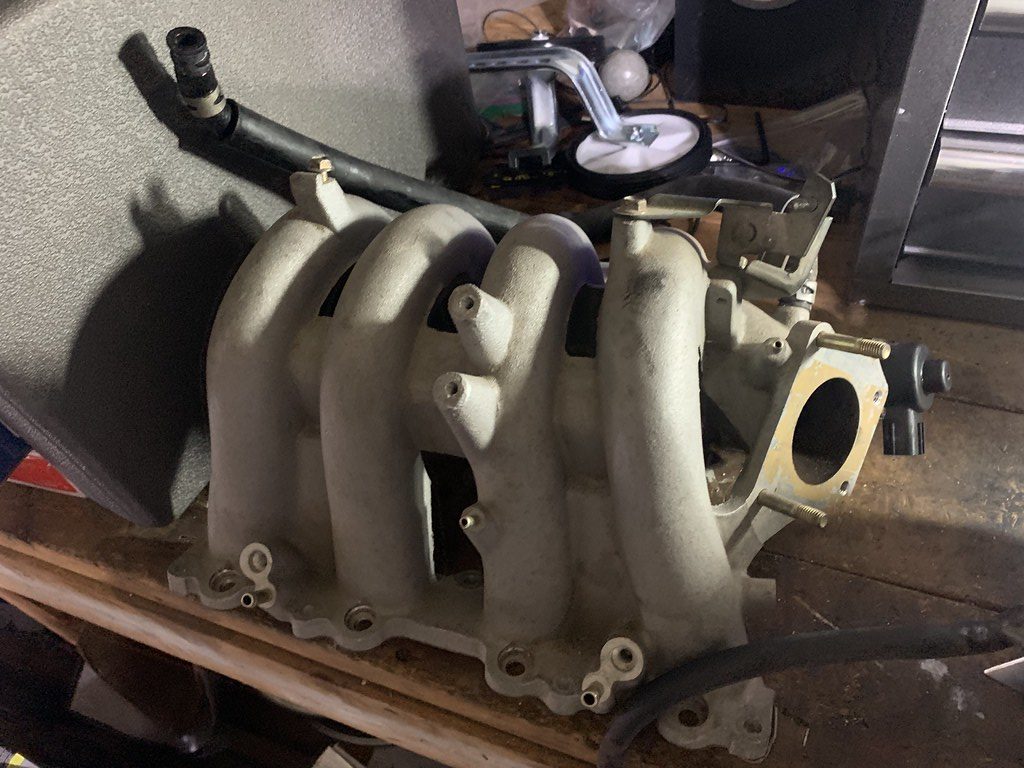
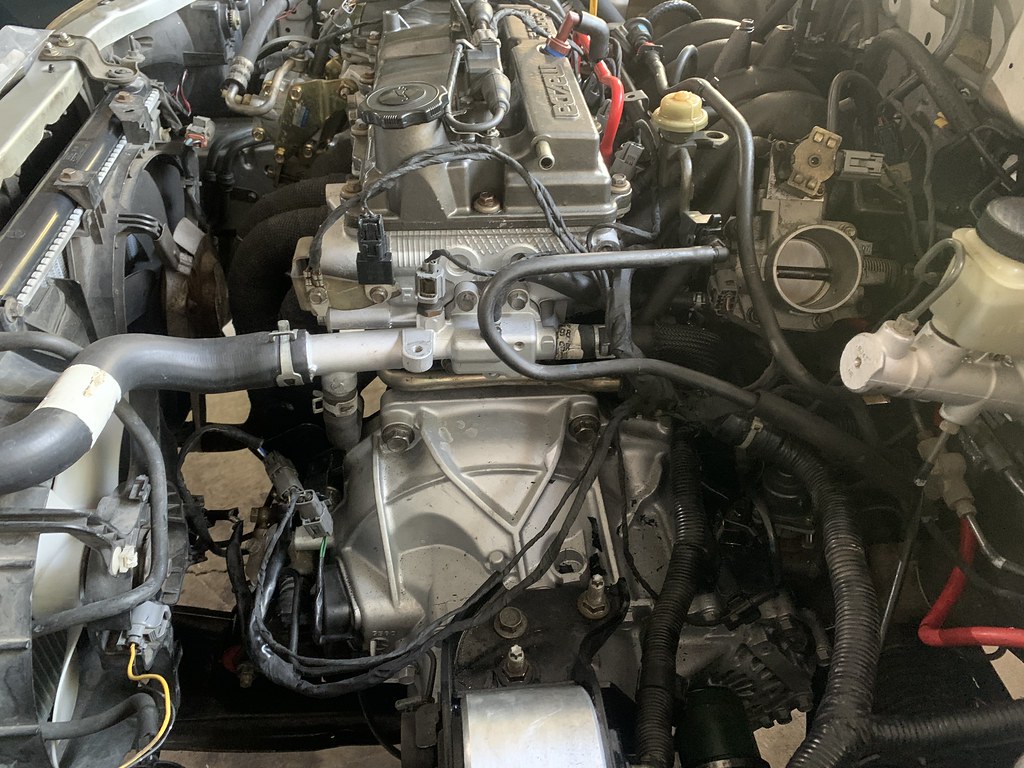
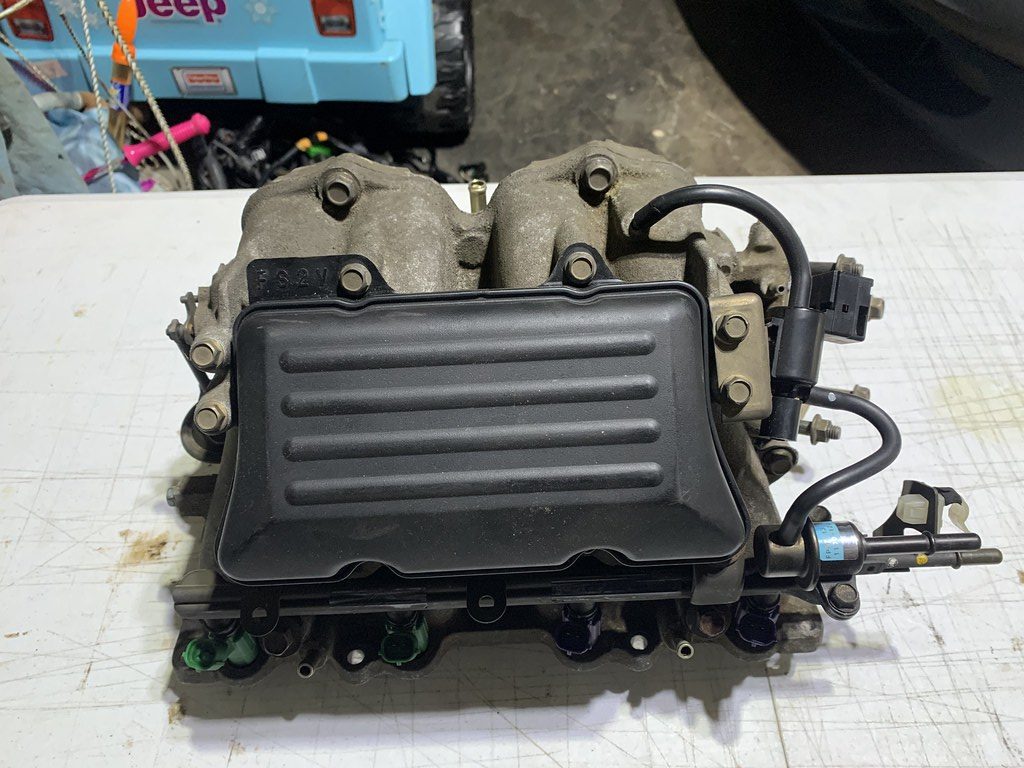
There was a final piece to the JDM puzzle that I needed to experiment with on the dyno.  And that is the intake manifold, which features a resonance chamber to match the performance of the FSZE engine, which may make up for the loss of power in the higher rpms.


The intake manifold is a oem part, so it fits like a stock manifold would.  But the fuel rail is different, which will require some re routing.  But its a pretty straight forward install.


It was time to address the clutter of ABS mess stuffed in corner above.  The idea was to remove the covering of the harness, and completely remove the ABS portion, since I had no use for it. 


Harness out again...


Harness wrap removed, and the exact point of regret set in.  As you can see the harness was extended previously by someone else and while they did do a good job.  The cluster of red wires just makes this much more tedious. 


ABS plug , and speed sensors portion removed from the harness.


Everything wrapped back up, and ready to go back in the car...


I would be lying if I said everything went as planned.  It absolutely did not, first of all when I attempted to install the harness back in the car.  I had the lengths off on several sensors, so I had to then go back and extend a few connectors to make it sit properly.  Once that was settled the engine bay was much cleaner.  And the mess of wires were gone.  I am wanting to get back to the dyno and see if the intake manifold changes anything power wise or makes the powerband even better.  But I realized I have spent weeks on this hunt for power, and I needed to get back on track with the long list of repairs for the 2021 track season.....

Southrnfresh_Joe
Southrnfresh_Joe New Reader
6/13/21 10:15 p.m.

I have been delaying and wasting a lot of time on other things during the winter.  And I completely forgot about the repairs that I needed to get done before getting back on track.


One of the reasons I did not make it to the Barber Motorsports event last year was because of these ball joints.  They look to be still stock, and after 300k miles and 19 years they were done.


Originally I looked into getting the Hardrace arms, but time and availability were not on my side.  So I got new complete arms, and a set of Super Pro Rear Arm Bushings.


This job is impossible to do with out the use of a press.  Once you press out the old bearing, you simply press in the new one.


And insert the new inserts and ends into the bushing...


Also while removing the control arm, I noticed how corroded and pitted the old bolt was when I removed it.  There was no way I could put that back in, no need in risking failure over a $7 bolt.


New arm w/ bushings installed...


I had these headlights in last season, but they started to peel and look pretty rough.


I had a second set of Mazdaspeed Protege headlights from years ago that needed some attention, so I tried my hand at polishing them...


After buffing them, and attempting to clear coat them this was the result.  Some sort of matte , smoked transparent wrinkle finish.  It was terrible...


I reached out to a professional (Alex Perrucci ) , and had them do it for me, and the results were a million times better!


I also decided to remove the Mazdaspeed Protege front lip off the car.  It looks good visually, but I wanted to try something simple with the front end.  So I sourced a set of the foglight deletes, and removed the front lip.


Personally I like the look of the P5 bumper with the foglight deletes.  But I am sure no normal person would ever notice the change.  Granted my intake filter is directly behind the drive side, something I may address later.


I had always heard about using dry ice to remove sound deadening.  So I finally decided to give a try with all hopes of it not working.  Or being way more trouble then its worth.


Start off with dry ice, broken up in a bucket.  Then you pour in the rubbing alcohol to make it last a little longer and help it spread...


Pour it on the material, and wait...


You will hear it crackle and pop, which is the glue coming apart from the panels.


Once it starts to crackle, you take a flat head or a scrapper of some sort, and it will lift on its own.  Some pieces may need to be tapped with a hammer, to help break some pieces loose.


I used about 3lbs worth of dry ice to do all of my interior.  There will be some residue left, but you can use mineral spirits to clean it up and make look clean.


It took all of a hour and a half and $30 to shave off 22 lbs.


Next project was to rebuild my brake calipers.  The front calipers are from a 2004 Mazda 6 that I sourced from my local pull a part.  I always had a issue with the car pulling heavy to the right on initial braking.  But I never really got into correcting it, because once after a few hard stops it would stop.


Boots removed...


The most important part of the calipers is the piston seals that pretty much the heart and soul of the braking system.  And clearly you can see the that they are worn and not sealing to their best ability.


I removed the caliper pistons and cleaned them and found a good bit of corrosion on the driver side.  Which would explain why the car would pull so hard right during the initial brake.


The rear calipers have always been a problem on this car.  And its obvious why, the rear boots were hard as a rock to touch, and obviously not keeping the internals clean.


When I took apart the driver rear, one of the sliders for the caliper was stuck , and I decided to just replace it.  But another issue that will prevent the car from braking properly.  At this time I will be taking the time to get them powder coated and completely rebuild...


As of now the car sits and waiting for the calipers to be powder coated...

Southrnfresh_Joe
Southrnfresh_Joe New Reader
6/13/21 10:16 p.m.


After getting the calipers seals removed,  I was able to get some help from my good friend at LLOYDS .  He powder coats for a living, and he let me come over and give it a shot.  First step was to strip the calipers to strip them and ready to be sand blasted.  This is a photo of them fresh out of the stripper. 


Second step was to sandblast, that gets the surface rust off and the remaining paint and or impurities off and and ready for the powder..


I decided to go with a basic silver and alot of flake, and I added a hint of green just to see what would happen. 


Spraying the powder...


Final Bake with the clear coat...


Final product...


New seals, and slide pins


Rebuilding the calipers is pretty simple, but the trickiest part is re-installing the pistons back into the calipers.  Initially I laid the seal on the piston and tried to press the piston in with the seal on it, and wrap the seal. 


It was very difficult and I ended up damaging the seals trying to put the seals on the ridges of the caliper. 


I watched a Youtube video, and found a easier method.  Place the seal around the caliper, and then press in the piston into the caliper, and the seal goes right in place with minimal effort....


Much easier....


Everything fresh and new ready!


I was initially gonna re-use my Hawk HPS pads.  Because I have been trying to find a harder compound, So I wanted to give the EBC yellows a chance.  G-Loc makes a pad combo for the Mazda 6 calipers and P5 calipers in the rear.. but I was running low on time


The one thing about EBC is that they have a very intricate break-in period.  The initial break-in period is 200 miles, and it continues on up to 1000 miles.  But that 200 mile period will have it ready for use..


Everything installed...


Final step for the brakes, was to get some fresh RBF 600. 


Initially I wanted to sell the Work wheels, and get a set of RPF1s for the weight savings, and go down to a 16x7 from the 16x8.  After a month they did not sell, and I didnt want to spend the money on a set of wheels if I didnt need to, so they are going back on.  I went down in size from a 225/45R16 R888R to a 215/45R16 in the new Falken RT660 from Atlanta Speed Company .  The R888R did well, but I have heard great reviews about the RT660s,and wanted to give them a try.


After powder coating the brake calipers, I was so addicted transforming things, I decided to get the Strut bar done.


Before after sand blasting..


We made a plan to start a transformation with everything and this is the main color choice with it all..


Right now it doesn't match what so ever, but when its all done it will make sense!


I was finally able to source a long discontinued GT Spec rear trunk brace from a a Protege group member guy in Hawaii.  Great upgrade from the Megan Racing strut bar..


Installed...


It was finally time to get rid of the huge stock size battery.  I found this kit on Ebay , the Odyssey battery is 12lbs, a huge weight savings of 30lbs...


I had to drill out the mounting holes to mound it in the trunk.


Much better... hopefully I will be able to get the trunk cage refinished...


So the results of the diet over the winter, the car was down to 2186lbs from 2482lbs the previous year..


Finally done and ready to roll and get back on track in 2 days.  Last minute I decided to add the Southrnfresh lower banner on the car.  It came out pretty well from a distance, but up close its pretty rough.  But it works...


Finally after months and months of wrenching Jzilla track season was officially back .  The first track day is always the most nerve wrecking because you are finally putting to use all the changes and updates to the test.   I spent a lot of time this winter trying to make things a little better with the car. And just improving things over just adding parts to the car.  It was a lot of trial and error and trying out things so I was nervous that I had forgotten to bolt something and or just over looked something.  But the drive to Atlanta Motorsports Park was smooth, which usually translates to a smooth track day. 


My student for the day was in a Mazdaspeed 3, so some of my personal tips were pretty useful to him out on track.


The Falken RT660s were really good.  They seemed really consistent throughout the day.  From the cool start until the end of the day when it warmed up, they never felt unstable even in the tire killer carousels.  The true test will be the summer time track days and the hot days that I will be doing later in the year. 


[MEDIA=youtube]_61DQ7JeBKo:2[/MEDIA]


So my Sony camera stopped holding a charge the night before the event, so I had to resort to using my cell phone to record sessions.  This video is of me attempting to keep up with Joe Ippolito of 2J Racing .  I first met Joe many years ago at Road Atlanta, when he was competing in his VQpowered Sentra Spec V.  Amongst all the big power cars and usual track cars it was cool to see something unique out on track and being competitive.  We kept in touch and I have seen Joe at many events in many different cars through out the years.  But the original VQ Sentra still sits at his shop collecting dust.  And every time I see Joe I bug him about the old VQ Sentra..


So it was a personal achievement to be able to get out on track with Joe and attempt to keep up.  The video is me trying to keep up as he goes through the traffic in his bolt-on Spec V that he has just purchased.  By this time I was all in with the car and was having a blast.


Since I started to track the car I had a issue with locking up one wheel under hard braking.  And pulling under hard braking, and just abnormal habits from the brakes.  The car stopped great, but it wasnt perfect.  I had gotten used to it so now having it working properly took some getting used to.  The EBC brakes were perfect, and the car stopped evenly, and the pedal was much more firm and exactly how I wanted it to be.  I wish had timed myself because I am sure I would have set a new personal record and gotten under 1:40...


To keep with the tradition I took a minute to celebrate the new look and the start of the season with a fresh set of photos to start the year.  I was uneasy about removing the mazdaspeed front lip, but I think it looks pretty simple and clean without it.  The side Southrnfresh vinvyl is growing on me.  I am usually not a huge decal guy, but I wanted to make the car look much more official.. haha


Not much changed from this angle.  I may or may not redo the exhaust this year, but the mazdaspeed rear axle back works really well and sounds good..


AS mentioned before I was hoping to be able to go with different wheels but I did not get a chance to.  As seen sometimes the car rubs in hard high speed turns, and I thought it was because of the 225/45s so I figured it would stop with the 215/45s but apparently not.  Its not a big deal I will try and roll the rear fenders a little more.


The best improvement over the winter was improving the power band and making the 135hp useful with the matching FSZE JDM ECU and harness.  That change was felt dramatically, I have a set of adjustable cam gears that I need to install and a toyota coil on plug kit as well.  So once that is done I will take it back to the dyno and see how much more power I can squeeze out of it...


Crazy to look back at all the transitions from stock to current.  The car has came so far from being a 288k mile $1200 Protege 5 with a bad wheel bearing to what it is now.   We still have plenty work to do!

Southrnfresh_Joe
Southrnfresh_Joe New Reader
6/13/21 10:17 p.m.


I usually use my cellphone to record lap times and data.  But I always wanted to install a tablet to do it instead.  I had an old Android tablet for a few years around, that I used for our events to check people in and make sales at the booth.


I test fit the tablet behind the center console, and the screen opening fit directly in the double din area.


I coincidentally had a piece of punched metal to use a brace to keep it secured.  I did have to make a new hole on the left side and I ran a bolt a nut through it.


Now the other part was to be able to keep the tablet charged up.  So I got a usb harness and tapped it into the radio fuse so it charges when the car was on.


The guys at Koruworks released a limited wheel along with Grip Royal.  The colors were not my favorite, but I had to support the home team.  I also coated the steering wheel with Gtechniq's Smart Fabric so the sued stayed nice and soft.


OMP Hub adapter.


Installed.... Not sure how I feel about the steering wheel color...feels good tho.


I was on Instagram and I ran across a guy that installed these STI bumper vents on his P5.  And I wanted to give it a try...


This spot is normally where the turn signal goes.  Previously I had removed it and riveted a piece over it to cover the hole it left.  So I removed it, and cut a spot for the STi bumper vents.


On the STi the vents are facing the other way.  But I opted to mount it facing the other way.  I am no professional aero engineer... but it looked cool and made sense to me..


I messed up the cut on the bumper, so I had to hide it with the vinyl.  Its an experiment, so I will stare at it for awhile and see how I like it.


Every since I removed the battery and cleaned up the engine bay, I had always wanted to get rid of the L bend in the Injen cold air intake.  And the red silicone always annoyed me.


I transformed the injen intake to this with a few pieces from amazon.  Much more pleasing to the eye, and my simple logic says that a straight flow into the engine is much better then the L..


Next project was to finally fill up the hole in my roof from removing the sunroof.  I could have bought a standard oversized piece and riveted it to the roof. But I really did not want to put holes in the roof.


I got a piece of aluminum and traced the sunroof glass ..


I found some small 2 inch L brackets and self tapped them to the flaps on the sunroof hole in the roof.


After a few minutes of trimming it sat flush....


Once it was sitting in the hole properly, the edges were a little rough.  While driving like this the roof insert was loud, and vibrated pretty bad at idle.


I got some rubber form trim to go around it, and it acted like a seal and also absorbed alot of the vibration and movement.


Done for now, its not water tight, but it is much much better than what I had before.  In the future I will probably re do it and make it a little smaller so it sits flat, its hard to tell it photos but its a little warped.

Southrnfresh_Joe
Southrnfresh_Joe New Reader
6/13/21 10:18 p.m.


Back in 2019 I installed the Racing Beat Rear Swaybar on the P5.  It dramatically increased the amount of rotation the car had in initial turn in.  Which lead to me spinning at Road Atlanta at Turn 1.  At the time I dont think I was ready to deal with it.  Fast forward now, I was advised by someone that " I cant continue to hold the car back "   Its been 2 years and I have learned alot about the car on track.  So I decided to go with the Progress 23mm rear sway bar.


The stock Protege 5 rear sway bar is 21.5MM, so the extra 2mm is a great upgrade.


The install is pretty straight forward and simple.  It does take a little bit of effort to get the mounts into the subframe.  But fitment is perfect..


While installing the rear sway bar, I saw brake fluid leaking from my passenger rear caliper.  I tried to reseal it, but it had seized, and would not slide back in place.  So I did have to replace my freshly powder coated caliper with a new one.  I was just happy that I was able to catch it...

Southrnfresh_Joe
Southrnfresh_Joe New Reader
6/13/21 10:18 p.m.

[MEDIA=youtube]so5sPLwcO3Q[/MEDIA]


Back out at Atlanta Motorsports Park in the Protege was a much different experience with the Progress rear sway bar.  In the first 2 sessions the car rotated much more.  After the second session I made some adjustments to the rear coilovers, and reduced my air pressure.  The more I threw at the car the better it seemed to behave, and it almost felt like we were dancing at times.  The Falken RT660s were consistent all day, in the video you can hear the tires talking, but it was very predictable.  I was able to put down a personal best of 1:41.2 this go round.  The car was perfect at AMP, and it gave me great confidence to see how the car handles Road Atlanta with the rear swaybar..

78CobraII
78CobraII New Reader
6/13/21 11:58 p.m.

In reply to Southrnfresh_Joe :

Thanks for the detailed journal. I have an 8th gen Civic sedan with a manual trans that was no longer needed by the family and was still in reasonable shape, so I decided to try my hand at some inexpensive auto cross. I have a lot of learning to do, so making the decision to get a more capable car is still a ways off. Modifying the car doesn't make much sense as there is currently no LSD for the trans, so I'm thinking about swapping in an Si engine and trans, brakes, etc, and run it as an Si.

Your journal has given me a lot of things to think about along that path.

rattfink81
rattfink81 Reader
6/14/21 12:57 a.m.

That was one hell of a build thread dump but I enjoyed. Never owned a protégé but have come close a couple of times.

1 2 3

You'll need to log in to post.

Our Preferred Partners
4zdbSo0X3ubf9EAmZB4TIFHRn5l1xwWDQ0xtw7irL0JXKWu3yA27fDBiVwmB0CaR