


This thread brings back soooo many memories. I was super involved on Mazdas247 back in the day (was MSProtege when I joined). I never got into tracking my P5, but it got me hooked on Mazda and it's why I have my RX7 today. Sometimes I miss this car.


This thread brings back soooo many memories. I was super involved on Mazdas247 back in the day (was MSProtege when I joined). I never got into tracking my P5, but it got me hooked on Mazda and it's why I have my RX7 today. Sometimes I miss this car.
In reply to infernosg :
Man i saw a photo of your car through a google search here and it motivated me to make the post. And yea I've been on the forum since before Mazda forced them to change the name .. lol. And this is my 5th BJ, they are definitely addictive..
In reply to Southrnfresh_Joe :
Thanks! It's been over 12 years since I sold it and I regret it every time I think about it. It'd be a fun, unique little DD these days. It had the full Mazdaspeed swap with just about every available bolt on. The next step was building the engine and going with a full standalone ECU and I just didn't want to take that leap. There was a nationally-competitive Protege in TTD/E for a while. I knew the driver and he sold the car back in 2012, I think. I wonder what happened to it.
I feel like we had to have crossed paths on Mazdas247 back in the day. Even after getting my RX7 I stayed involved for years despite the forums becoming more focused on the new 'Speed models and the CX5.

Incredible thread. Very well done. I love your attention to detail both in the build and it's documentation. I'm definitely going to be following along for future updates.
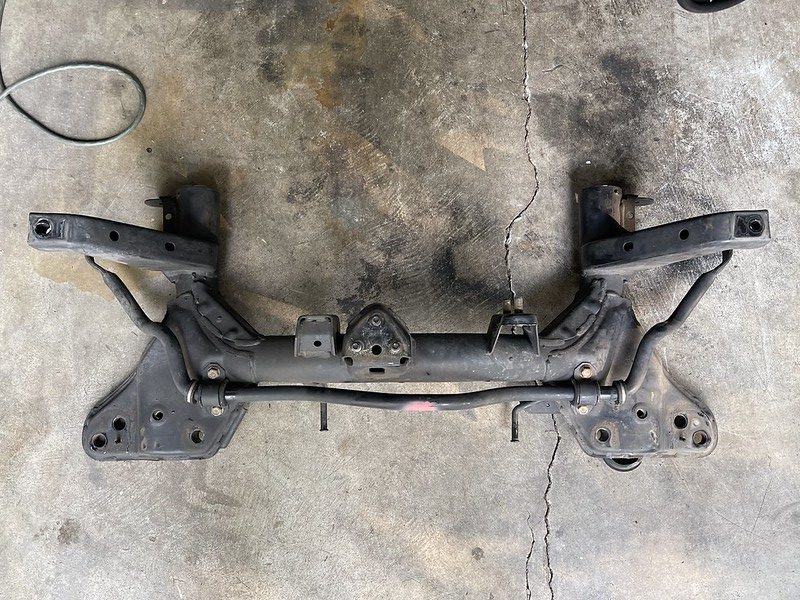
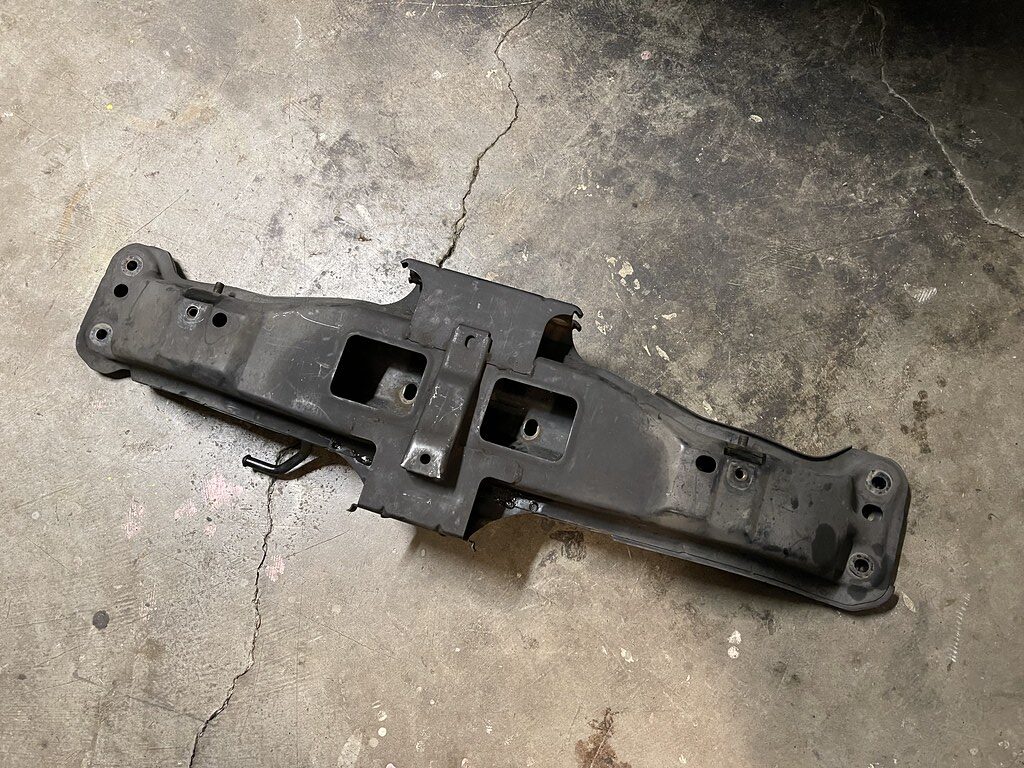
I have been wanting to install the Mazdaspeed Protege Racing beat front sway bar on the P5. This requires you to either remove or lower the subframe.
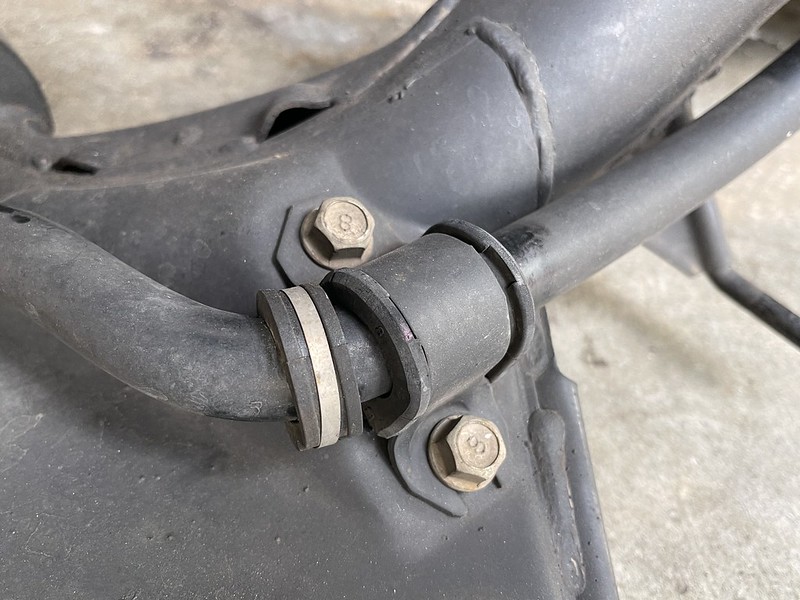
Bushing are original from 2002, so they were not doing much...

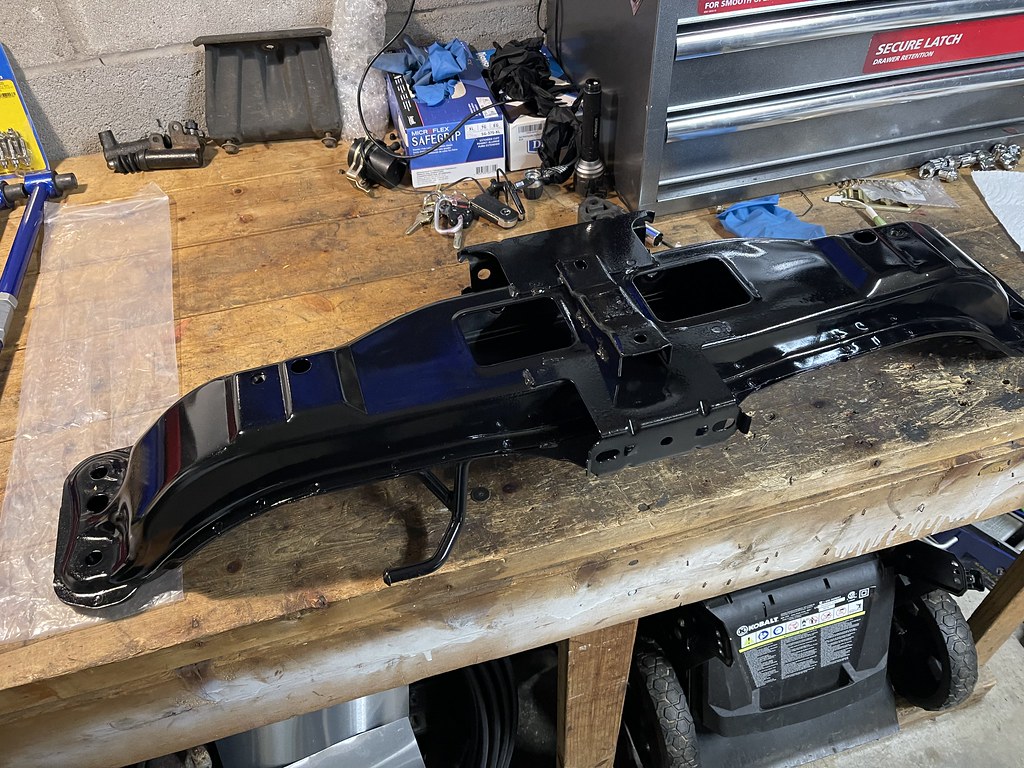
I had gotten a low mileage subframe from Mazmart about a year ago, so swapping it out was made sense at the time.
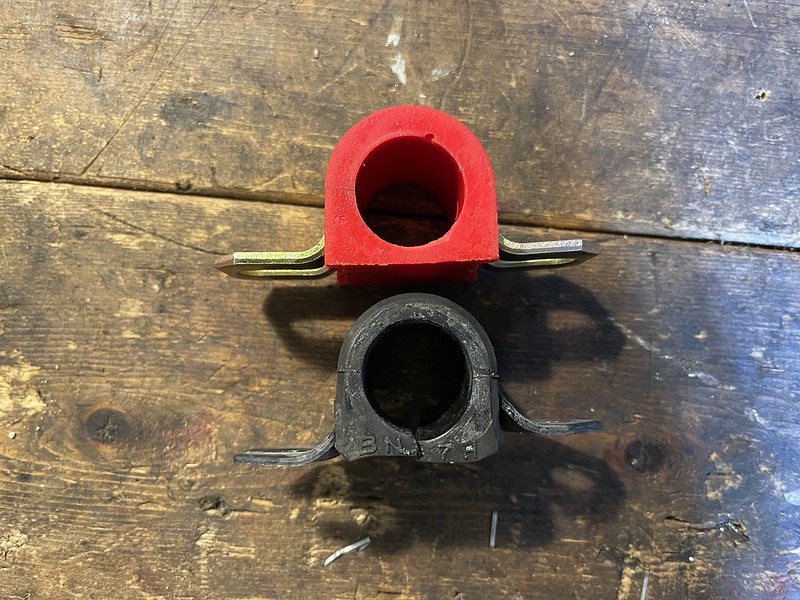
Bushings were still fresh, but no reason not to upgrade while there were accessible. So I went with some 25mm Energy suspension bushings.
Cleaned up and ready to go back in...

These are the subframe and control arm bolts. These bolts were in pretty rough condition, no way I could put these back in.
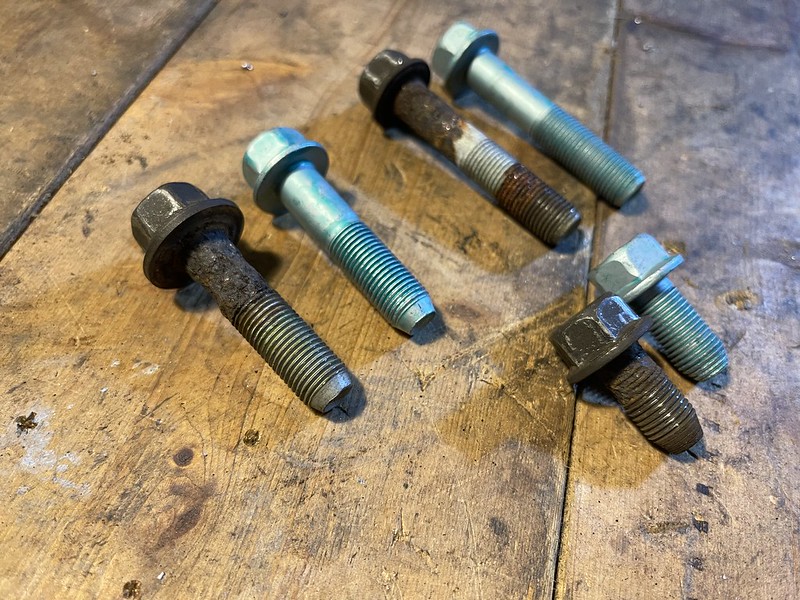
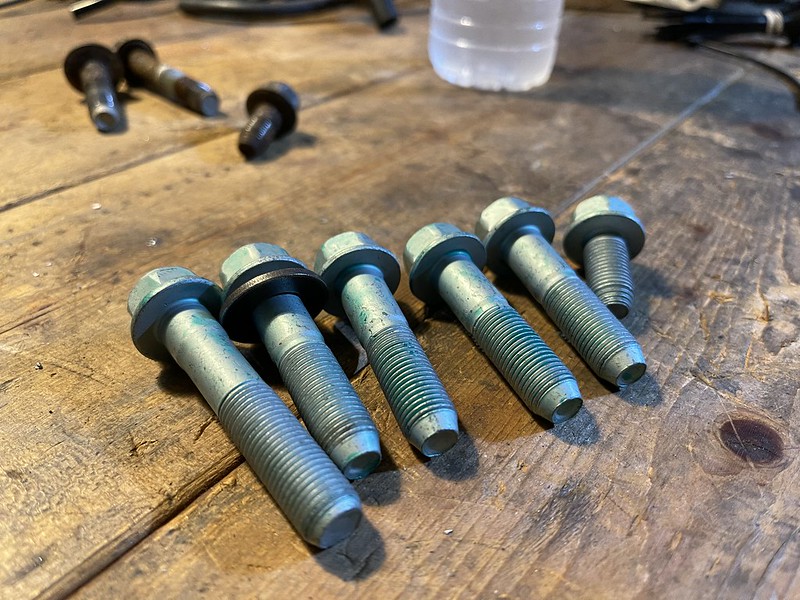
I had to wait a few days to get them from Mazda, but the piece of mind was worth the $40 in bolts..
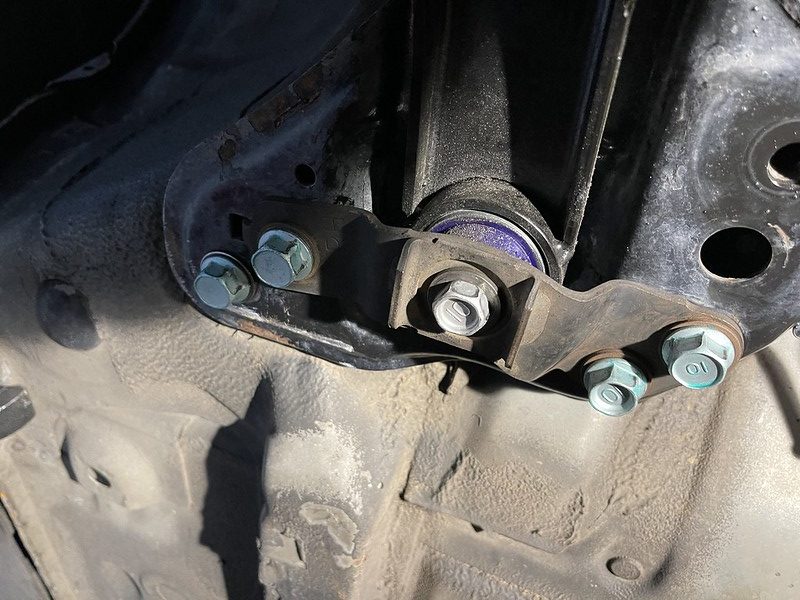
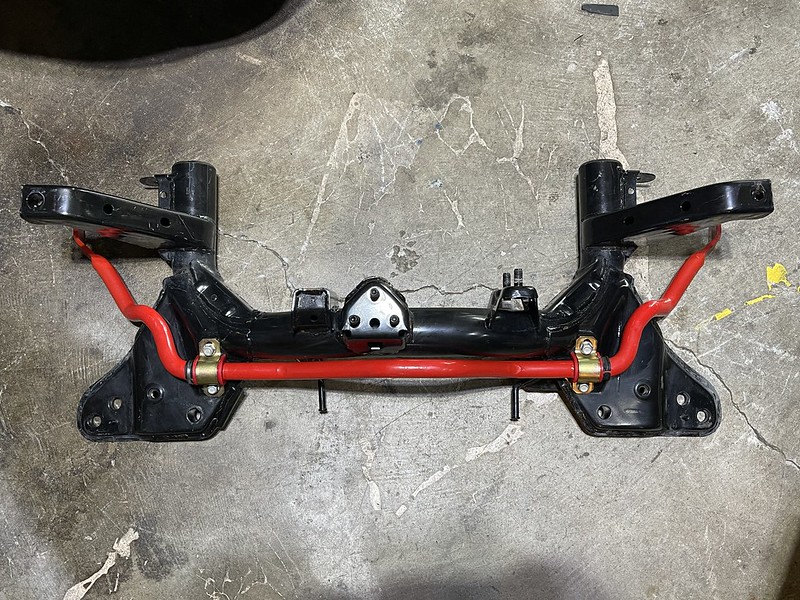
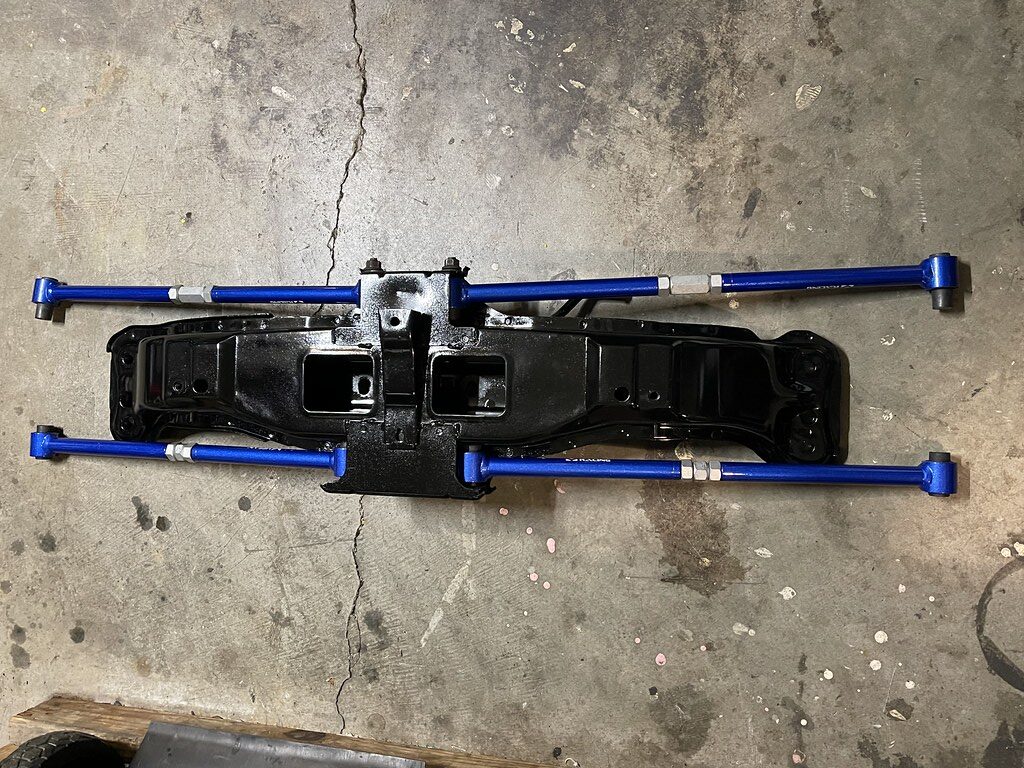
Bolts in...
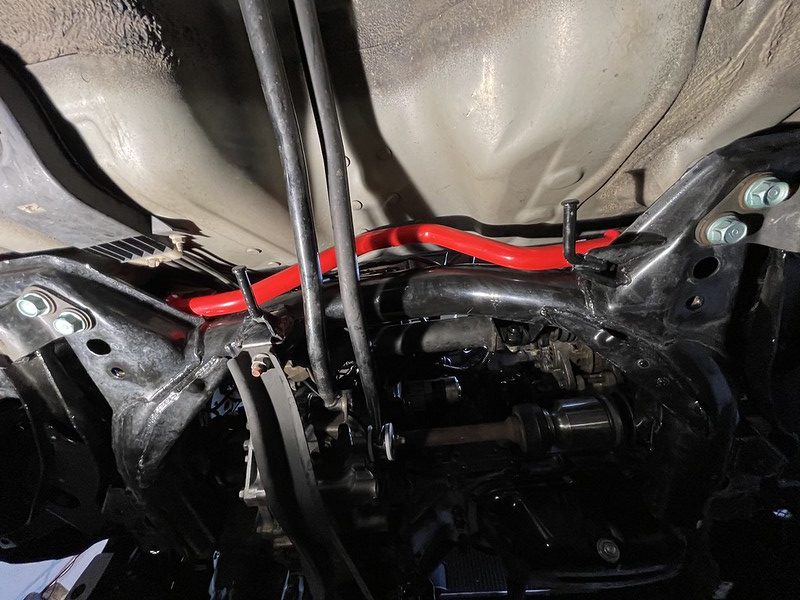
Subframe tucked back in..
I have also had this Corksport shifter bushing for a long time... but never installed it. Probably because its kind of annoying to get the old one out. The only way to remove it seems to be to trim the edges and press it out, simple process just annoying..

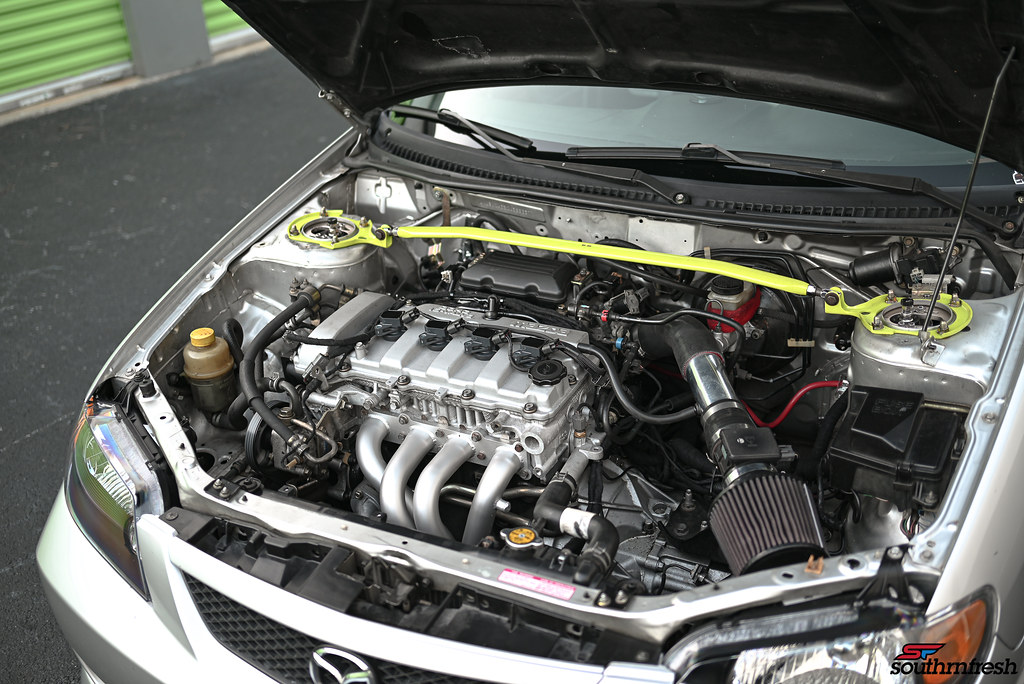
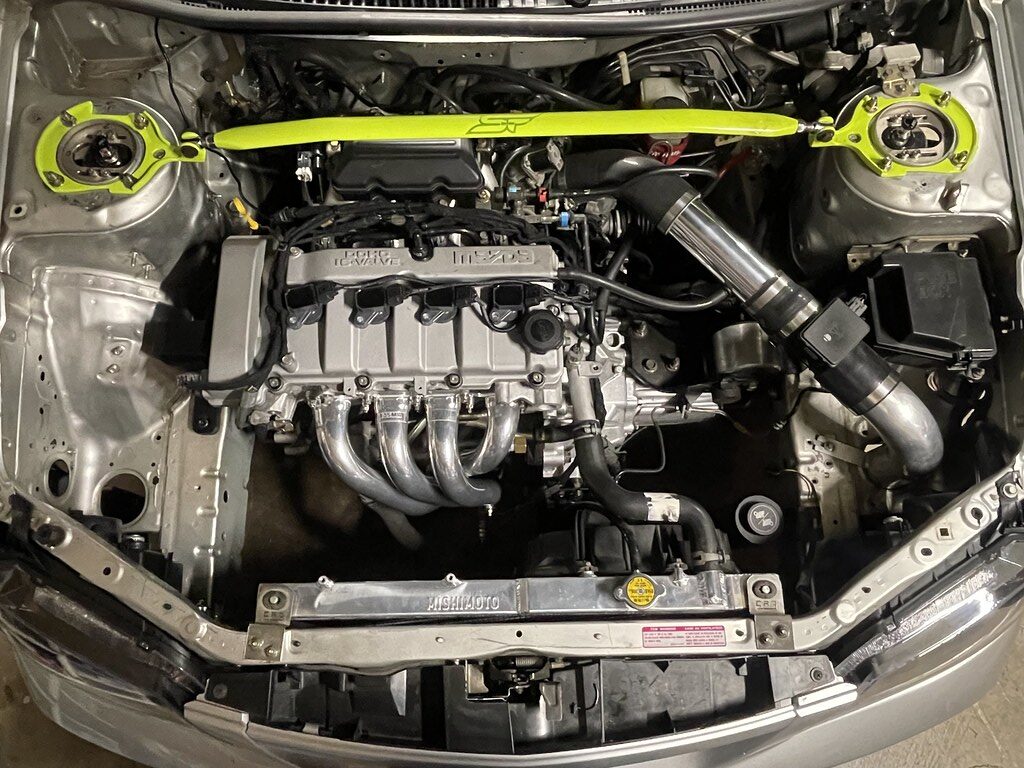
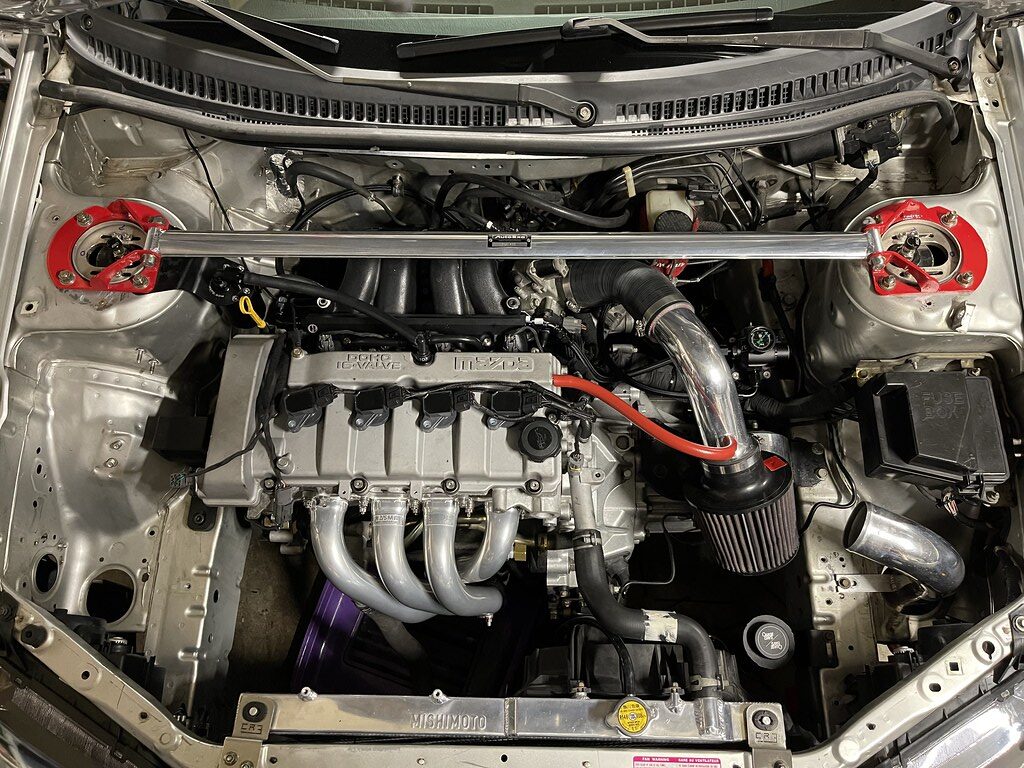
While the car was down, I wanted to get the header wrap off the car, and have it properly cerakoted. The header is a cheap no name brand, but it has held together and gotten the job done. 2 years ago Icoated it with some sort of heat paint, and wrapped it. I am surprised it hasnt rusted through.
Once again my good friend assisted me with stripping the header in the sand blaster, and cerakoting it..
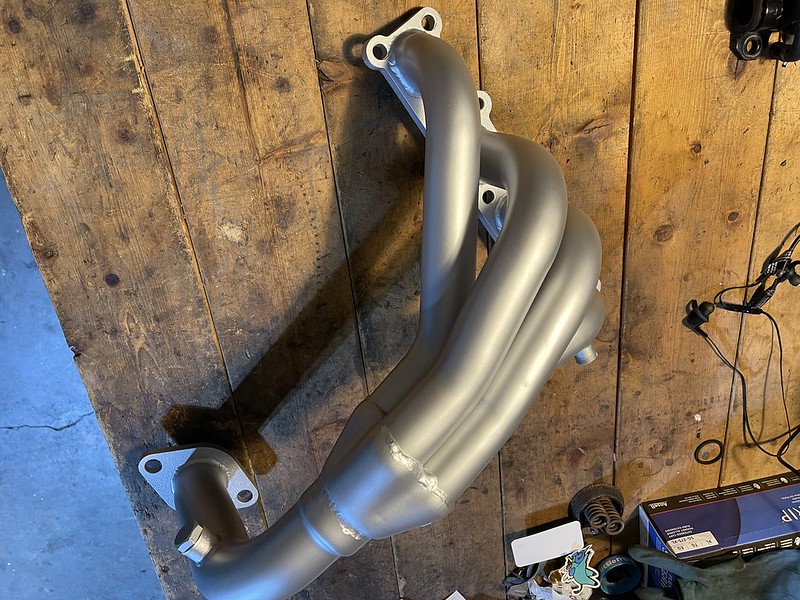
Once cured, it looked much better, and that crusty wrap was gone...
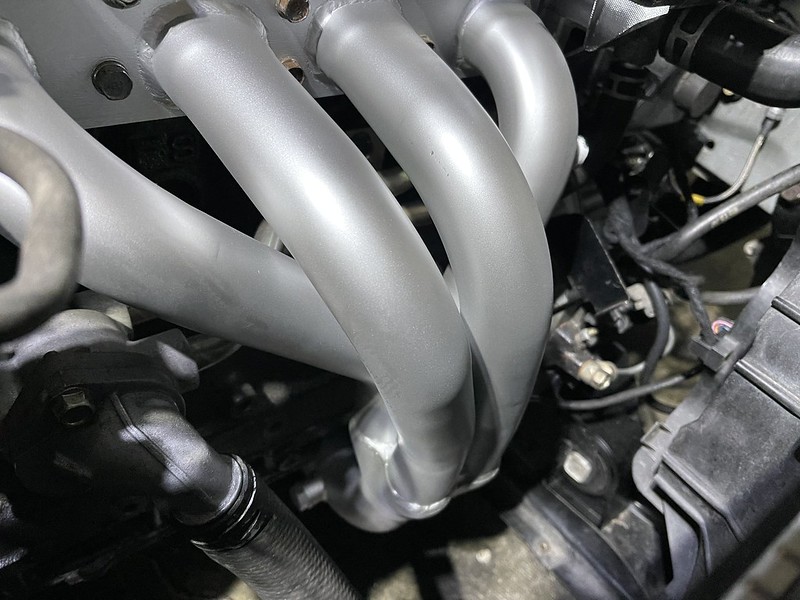
The heat dramatically decreased from before. The header was not cool enough to touch, but the heat wasn't overwhelming in the engine bay. And it looked a million times better..
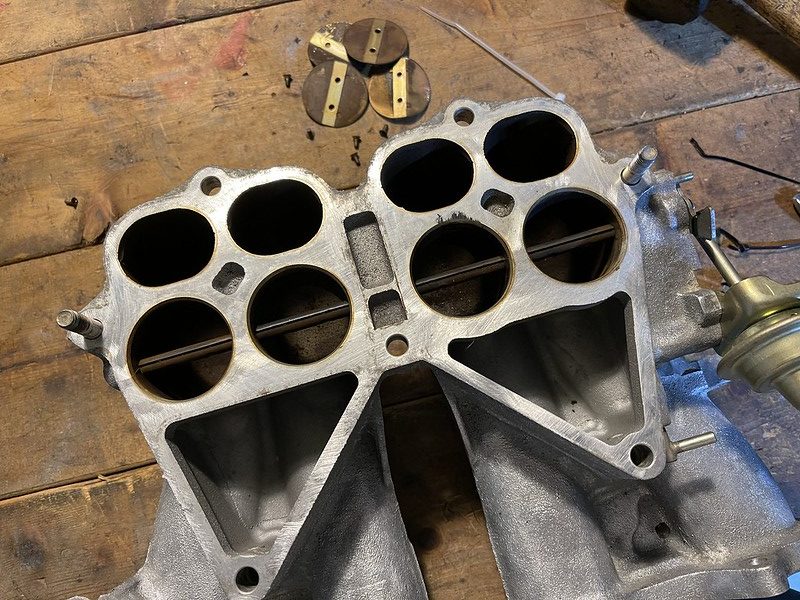
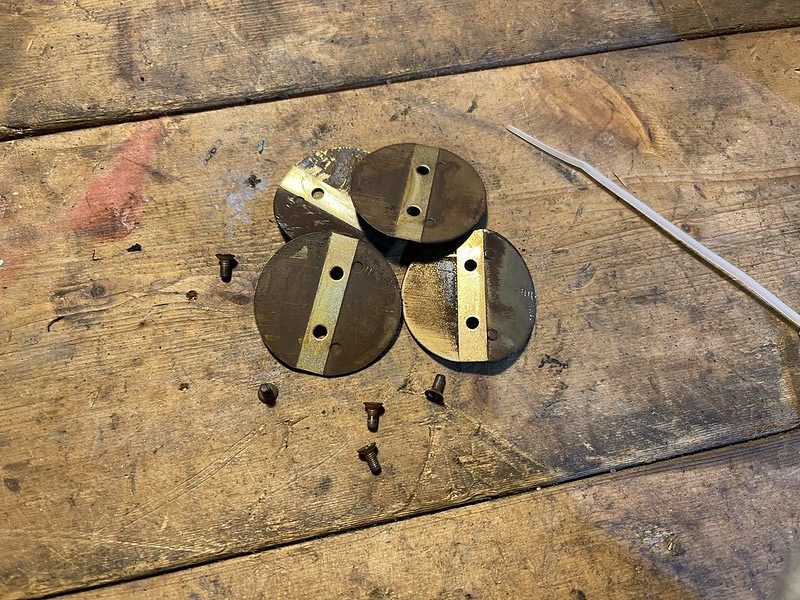
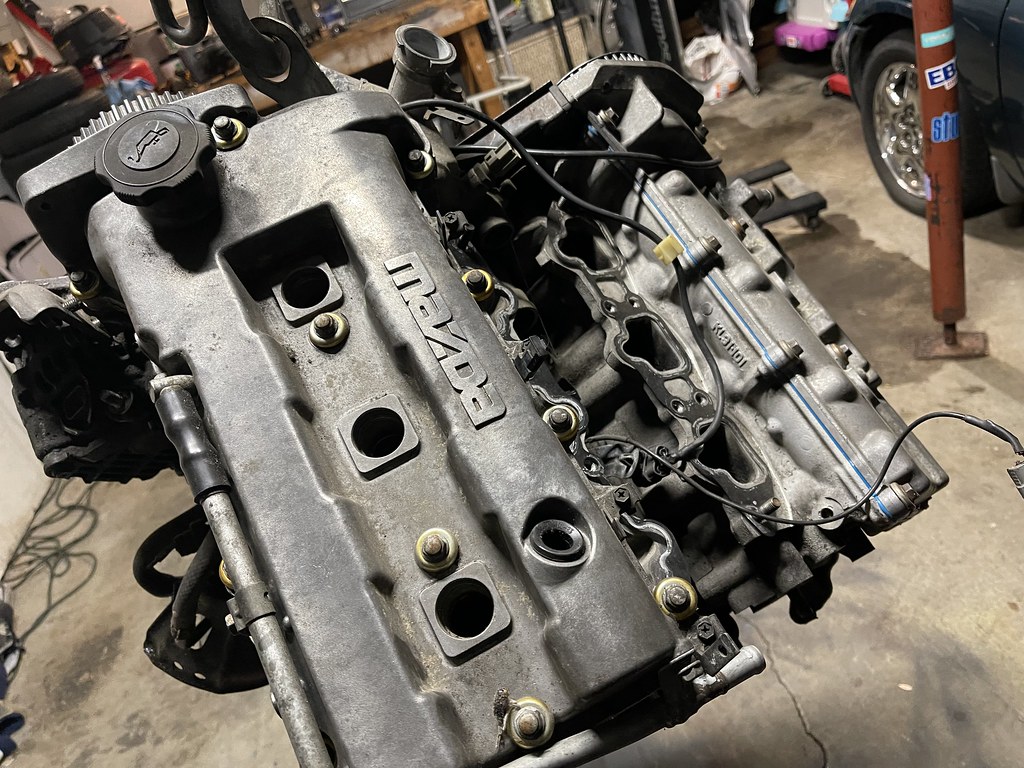
I hadnt gotten the VTCS to work properly on the FSZE intake manifold so while the intake manifold was out to access the rear engine mount bolts. I removed the VTCS and plugged the holes. Typically its good to have it in for lower end torque.. but not working it was better to just remove it rather then have the restriction..
Late Subday afternoon after having the header done, I could not resist with putting a little coat of paint on the manifold while it was apart..
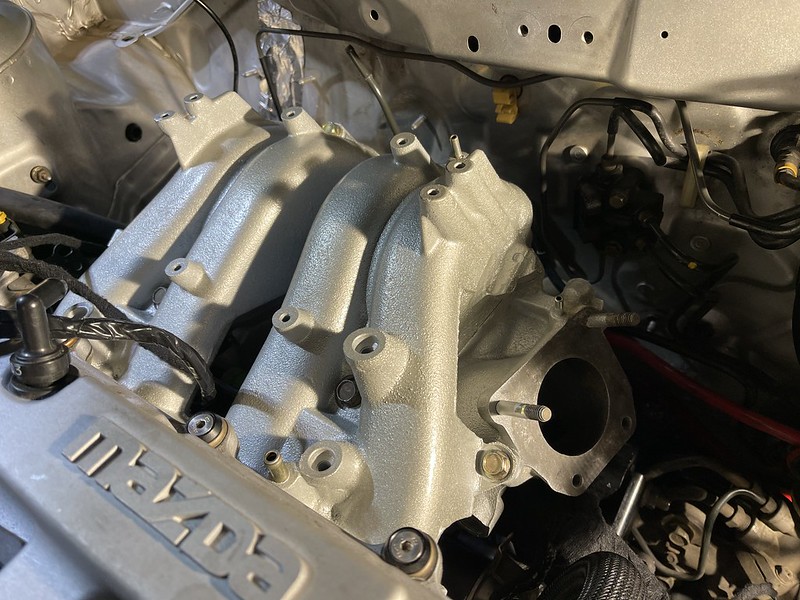
Much nicer...
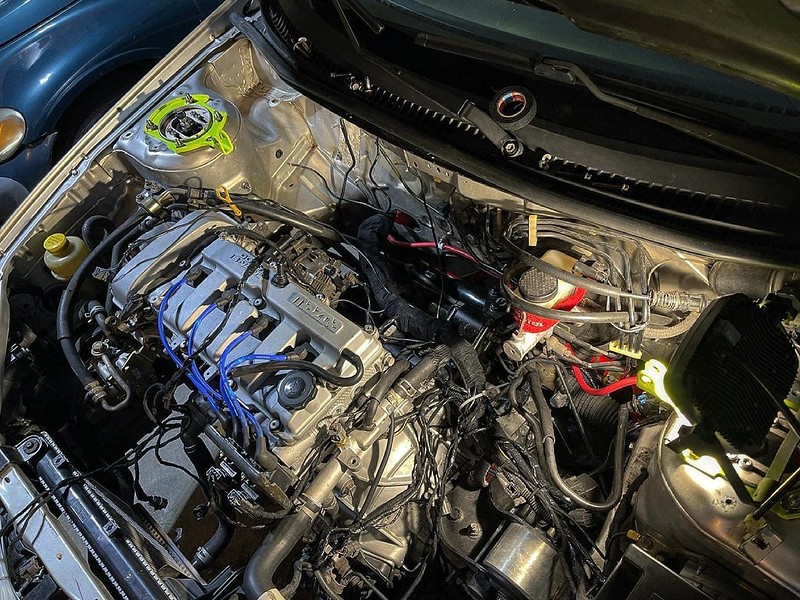
Also while everything was out the way, I took some time to clean up some wiring from the jdm harness. I this point I had removed emissions and only had 3 sensors going to the intake mainfold and the rest were crank sensor, coil packs, temps sensor, o2 sensor and a few grounds. So i wanted to simplify things..

wrapped the harness in Tessa tape ..

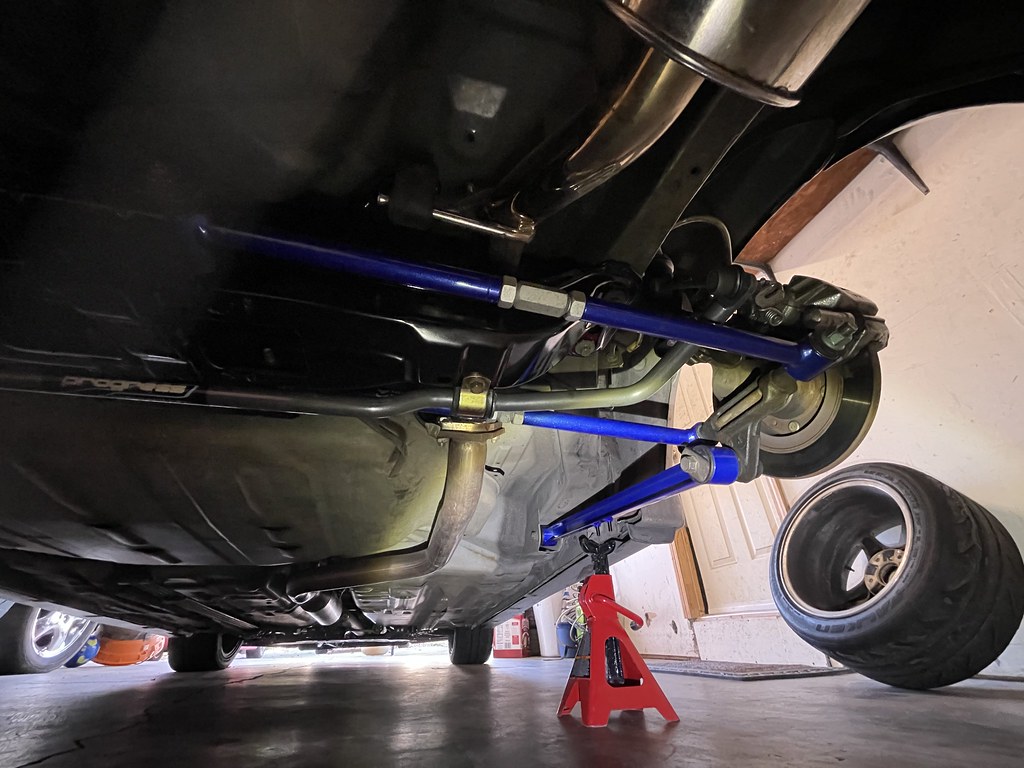
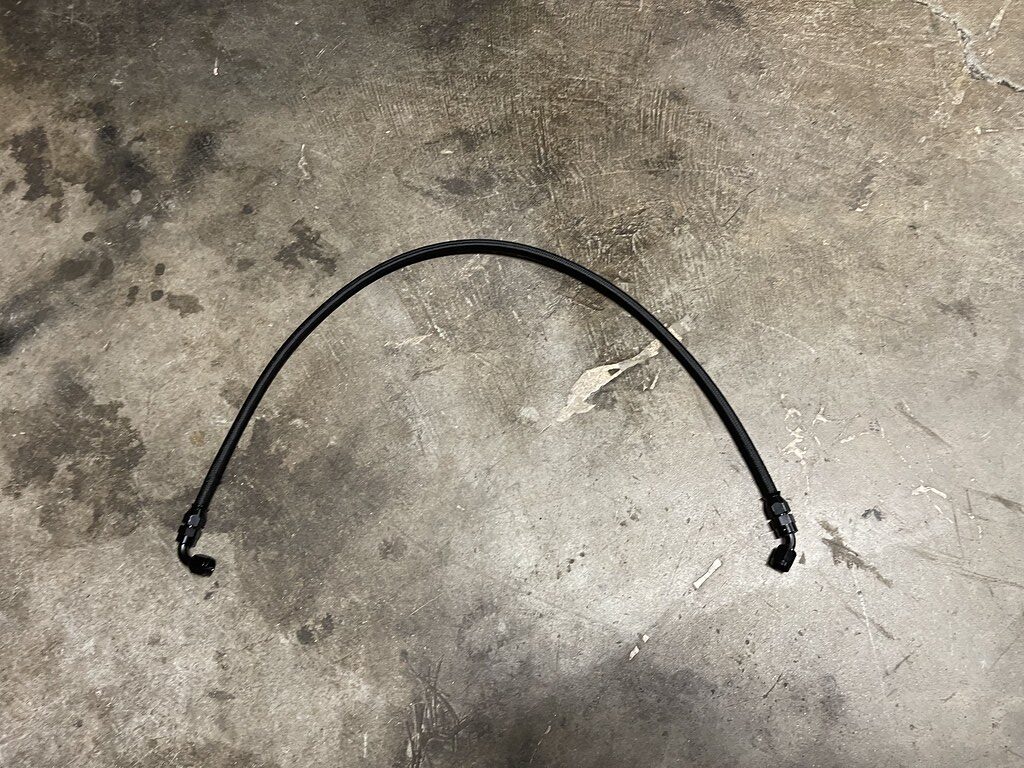
Everything back in. Im working on the coil on plug conversion, and converting the power steering lines to AN fittings just because it looks way nicer..

Loooooove these cars! Yours looks great. Lots of the pics from the dump don’t show up for me, but what I do see I really like. Thanks for posting.
I’ll get to the crash later...
I have been wanting to install the Mazdaspeed Protege Racing beat front sway bar on the P5. This requires you to either remove or lower the subframe.
Bushing are original from 2002, so they were not doing much...
I had gotten a low mileage subframe from Mazmart about a year ago, so swapping it out was made sense at the time.
Bushings were still fresh, but no reason not to upgrade while there were accessible. So I went with some 25mm Energy suspension bushings.
Cleaned up and ready to go back in...
These are the subframe and control arm bolts. These bolts were in pretty rough condition, no way I could put these back in.
I had to wait a few days to get them from Mazda, but the piece of mind was worth the $40 in bolts…
Bolts in...
Subframe tucked back in..
I have also had this Corksport shifter bushing for a long time... but never installed it. Probably because its kind of annoying to get the old one out. The only way to remove it seems to be to trim the edges and press it out, simple process just annoying..
While the car was down, I wanted to get the header wrap off the car, and have it properly cerakoted. The header is a cheap no name brand, but it has held together and gotten the job done. 2 years ago Icoated it with some sort of heat paint, and wrapped it. I am surprised it hasnt rusted through.
Once again my good friend assisted me with stripping the header in the sand blaster, and cerakoting it..
Once cured, it looked much better, and that crusty wrap was gone...
The heat dramatically decreased from before. The header was not cool enough to touch, but the heat wasn't overwhelming in the engine bay. And it looked a million times better..
I hadnt gotten the VTCS to work properly on the FSZE intake manifold so while the intake manifold was out to access the rear engine mount bolts. I removed the VTCS and plugged the holes. Typically its good to have it in for lower end torque.. but not working it was better to just remove it rather then have the restriction..
Late Subday afternoon after having the header done, I could not resist with putting a little coat of paint on the manifold while it was apart..
Much nicer...
Also while everything was out the way, I took some time to clean up some wiring from the jdm harness. I this point I had removed emissions and only had 3 sensors going to the intake mainfold and the rest were crank sensor, coil packs, temps sensor, o2 sensor and a few grounds. So i wanted to simplify things..
Wrapped the harness in Tessa tape ..
Everything back in. Im working on the coil on plug conversion, and converting the power steering lines to AN fittings just because it looks way nicer..
[MEDIA=youtube]NqgJWDzA0NA[/MEDIA]
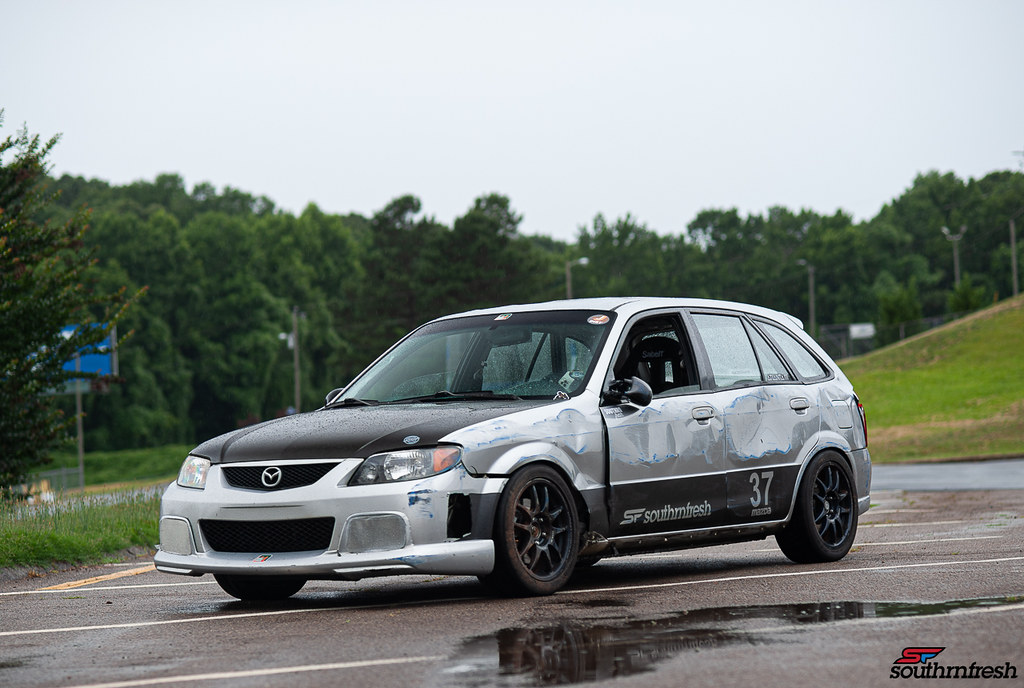
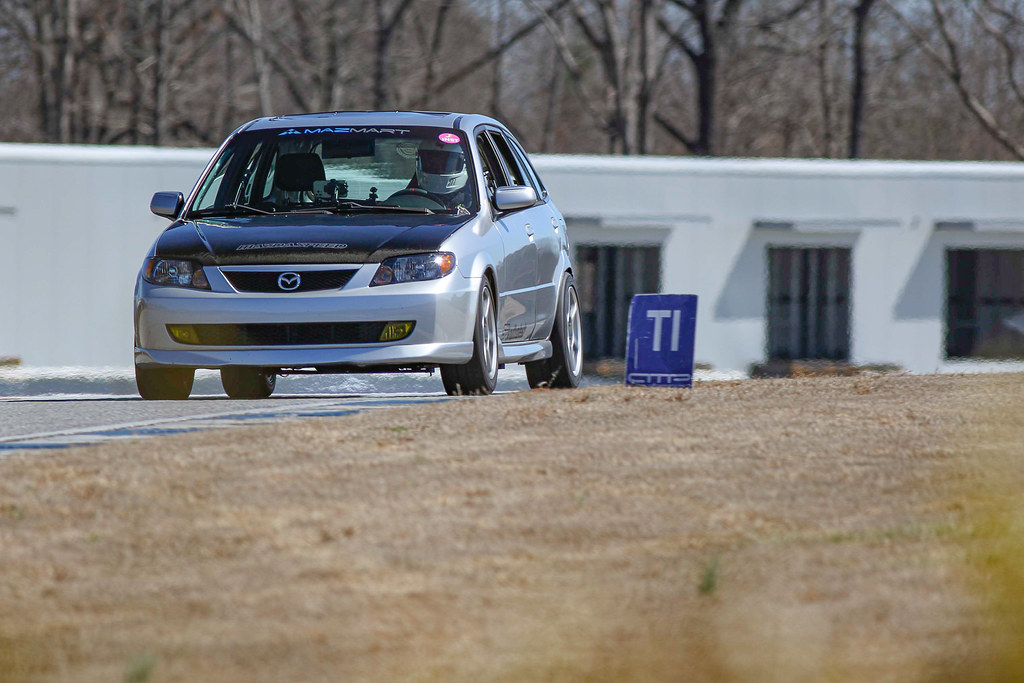
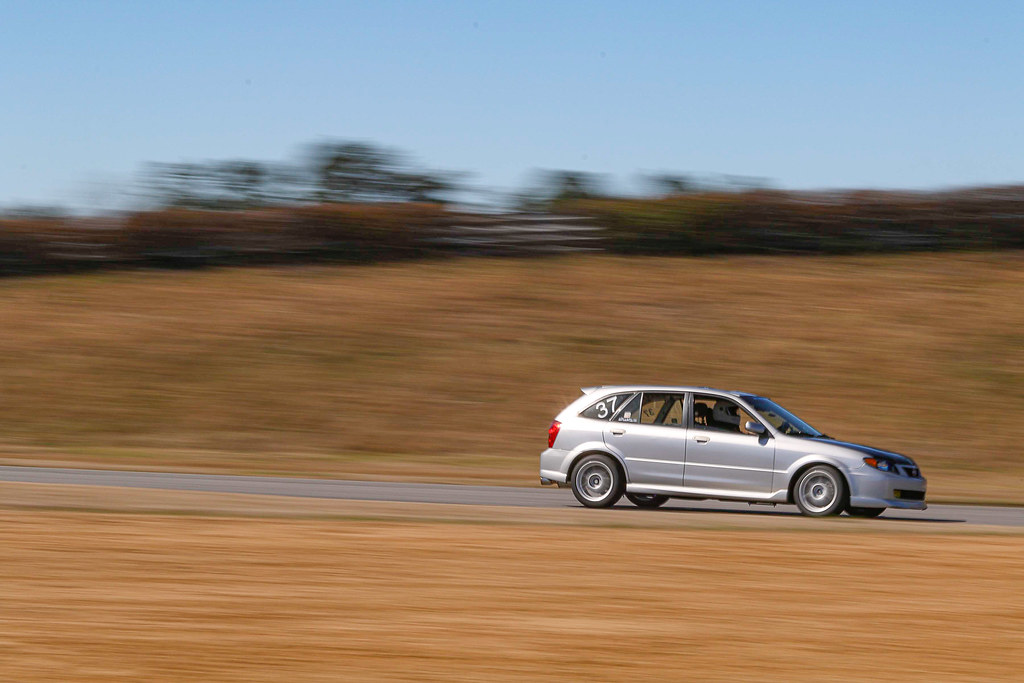
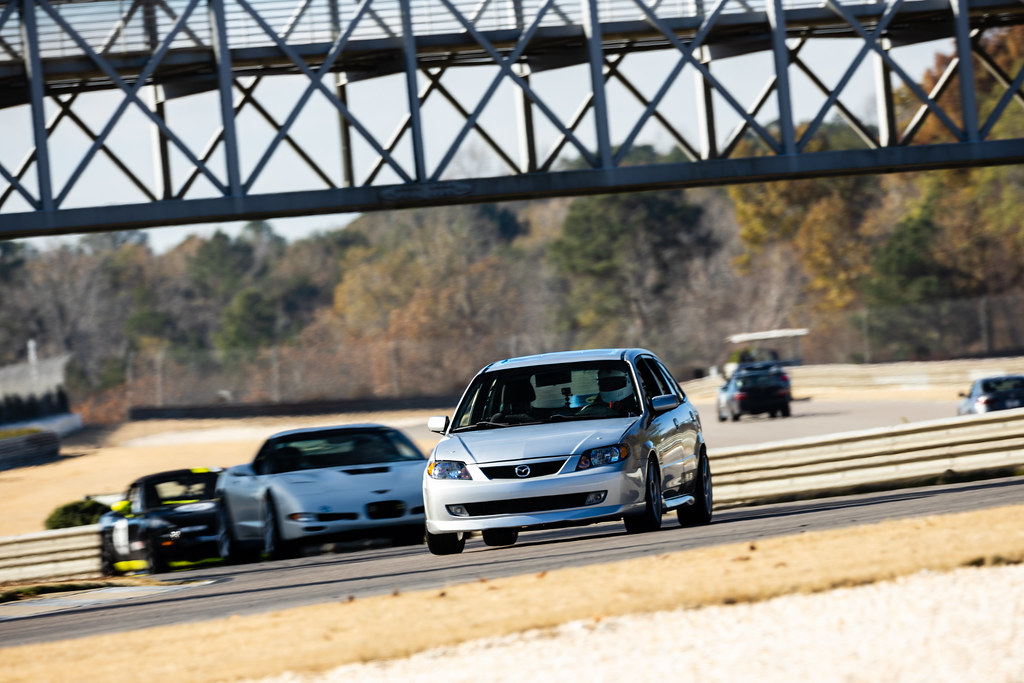
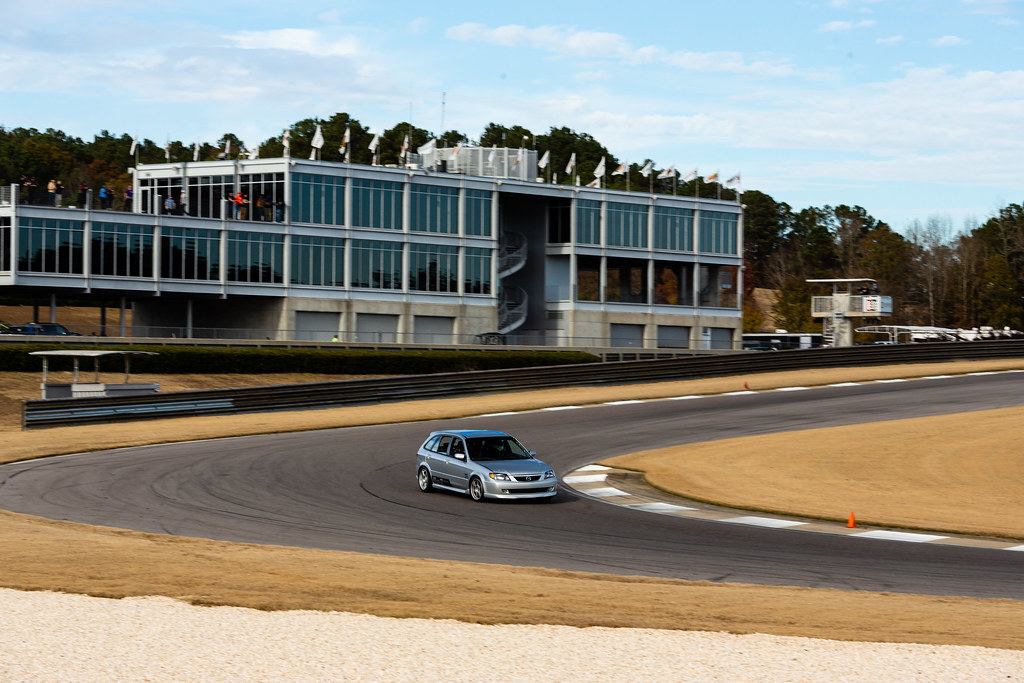
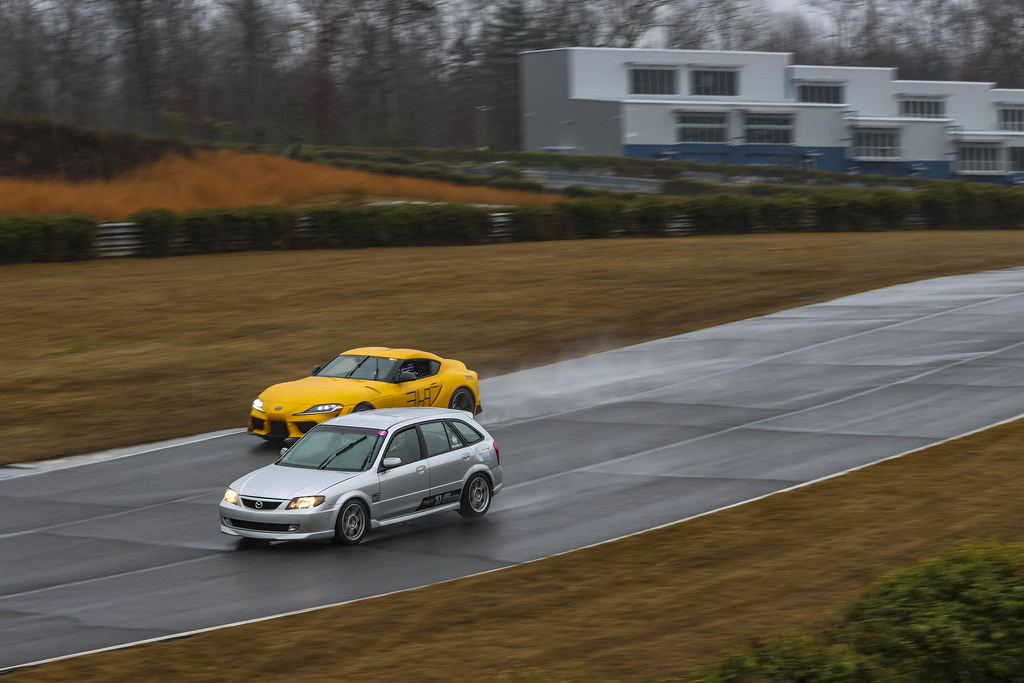
So back out at Road Atlanta, my biggest fear with Road Atlanta is the sway bars making the rear too stiff, and the car being sketchy at high speeds during turn-in. Which is why I had to upgrade the front sway bar to match the rear. My first session the car was super neutral and it didnt too much of anything unless I wanted it to. I experimented with Turn 1 by braking early and downshifting and powering up the hill. It worked, but coming down the front straight and braking hard I felt like I was losing so much speed to prepare just to accelerate up the hill. And if I waited to late I can feel the rear get a little light. So I started to hold 4th at a slightly higher speed and turn in early, and push out to the outer apex. It gave the car much more speed up the hill, but I had a small window to hit it right before it pushed me out too far. But the car felt much more stable. I did manage to get a new personal best of 1:54.1 early in the day. 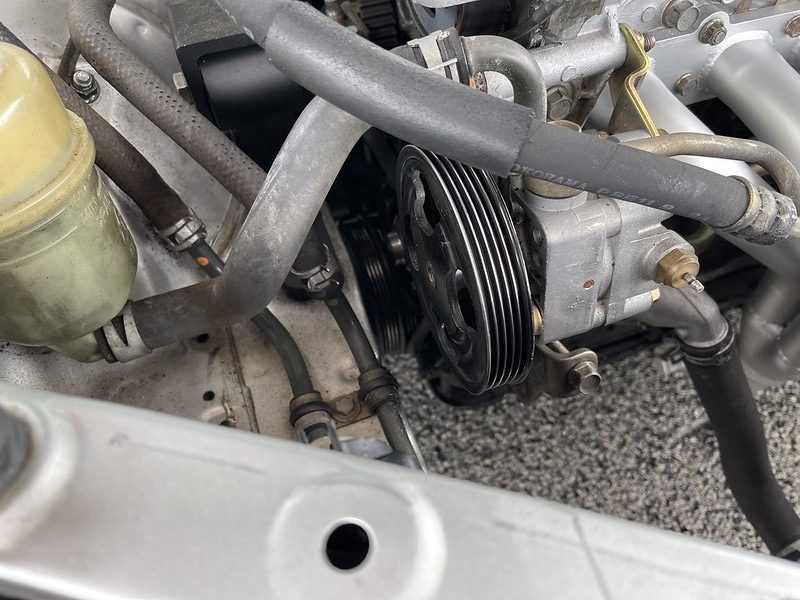
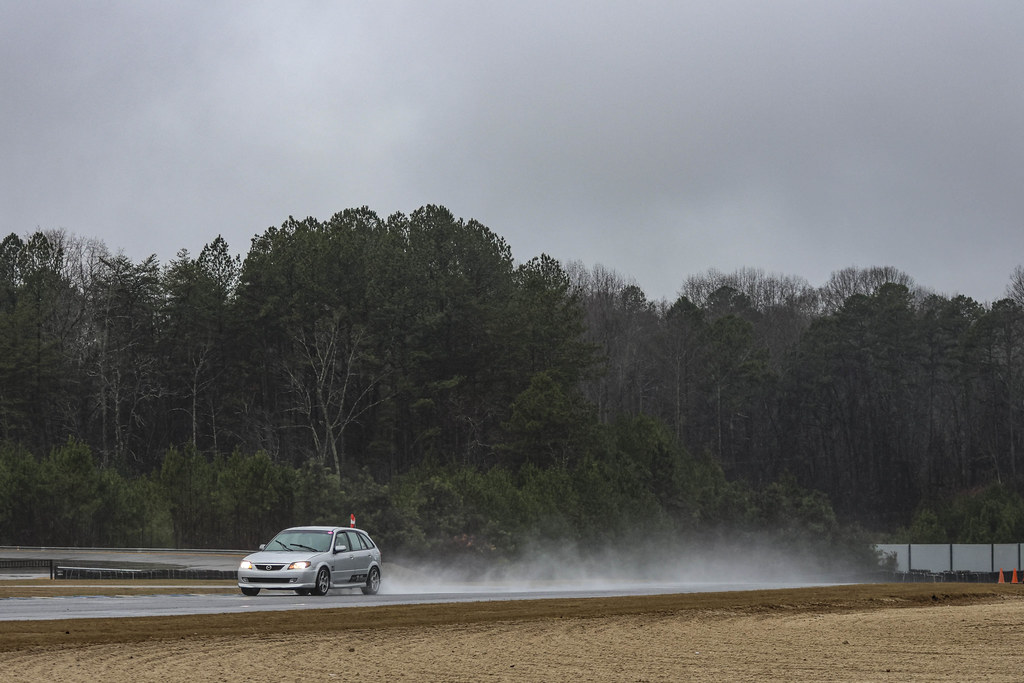
I am sure I would have gotten it down more later, but after lunch I lost my power steering belt , and it was a workout on a some of the longer turns. So before it started to rain I never got a chance to get any good laps in..
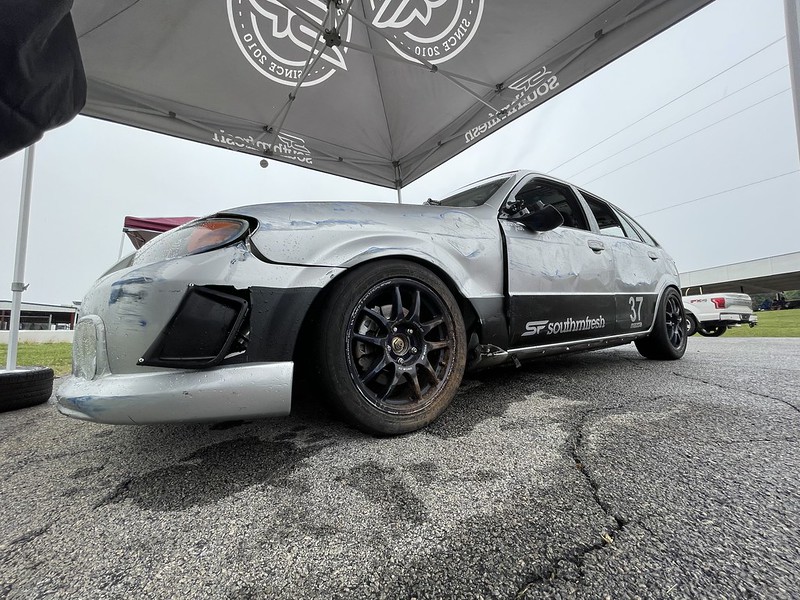
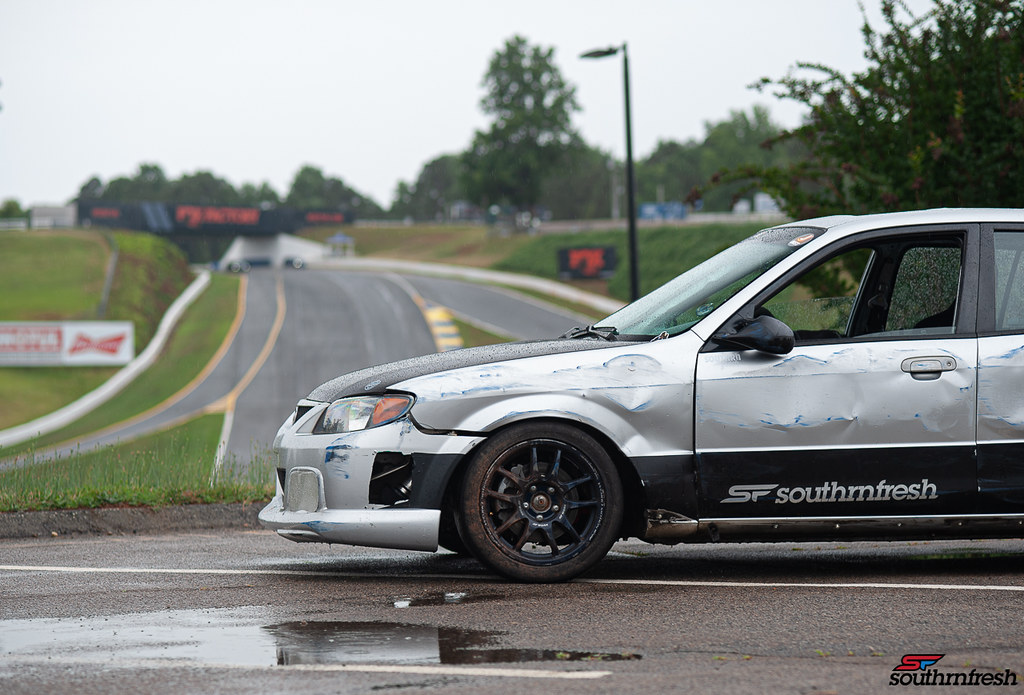
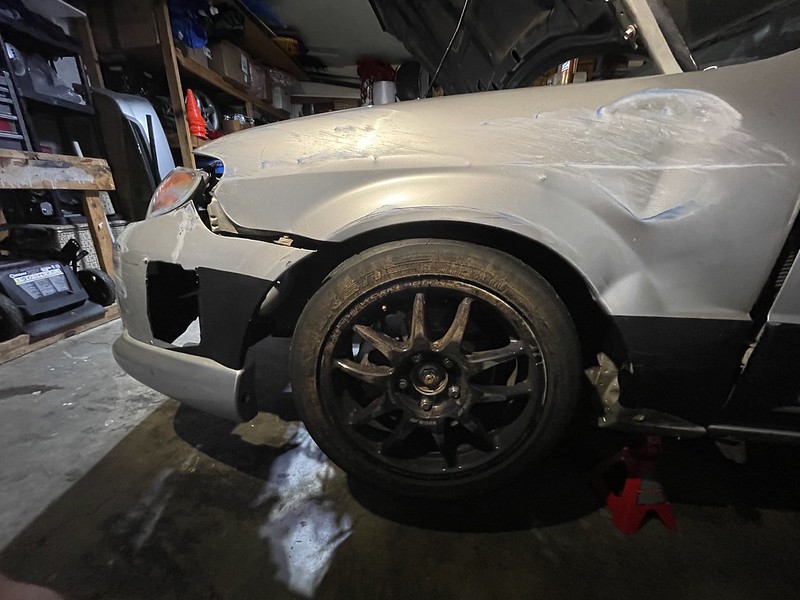
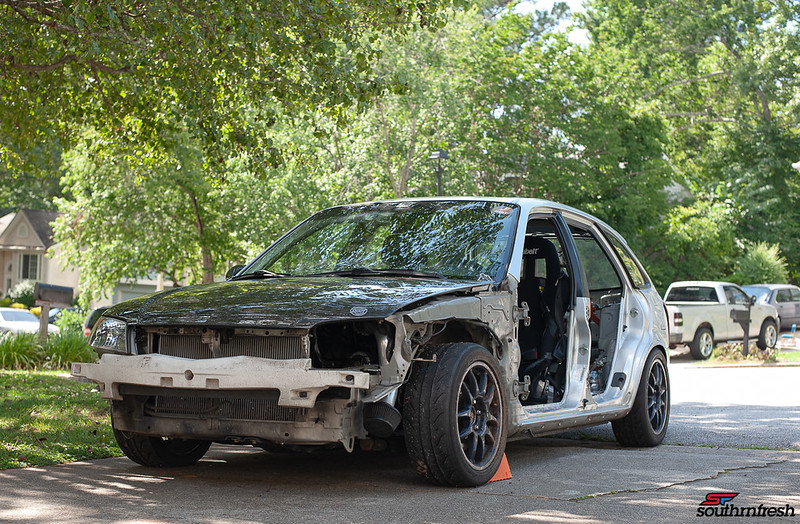
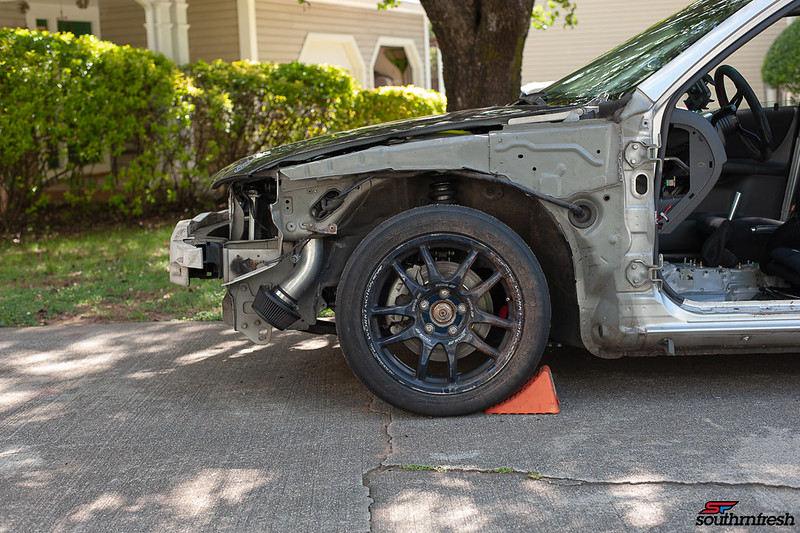
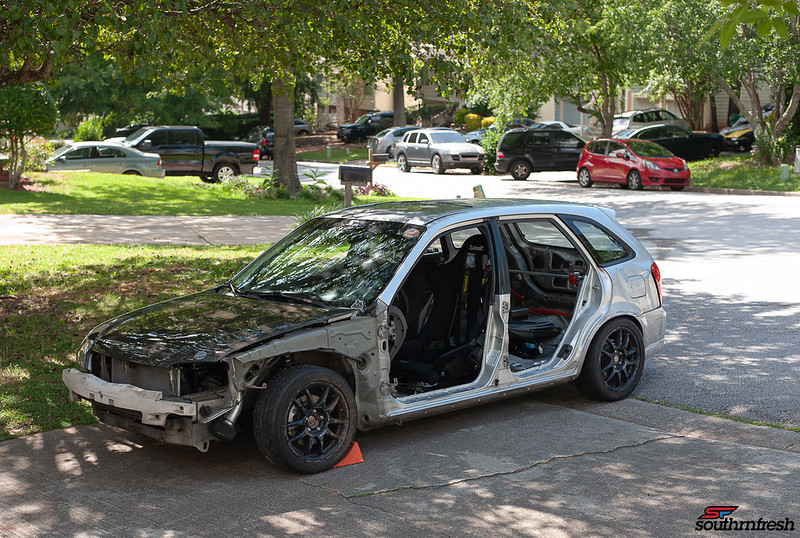
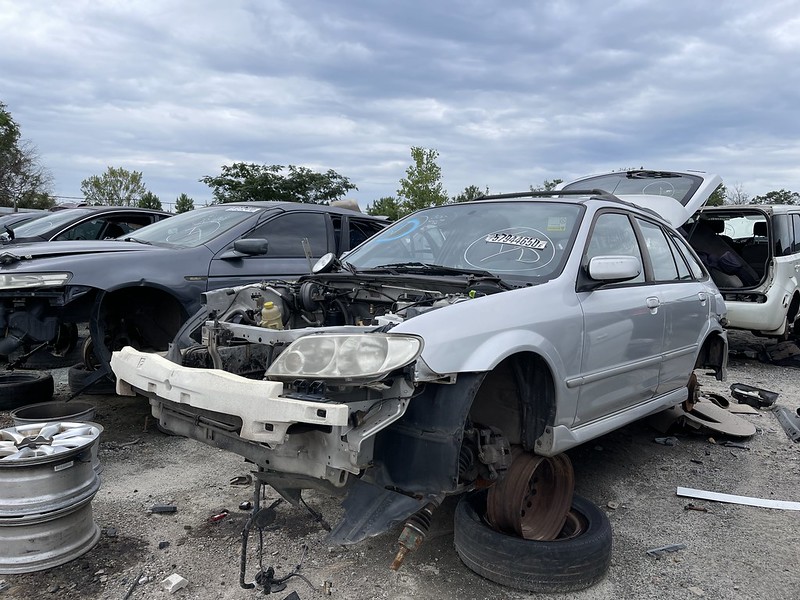
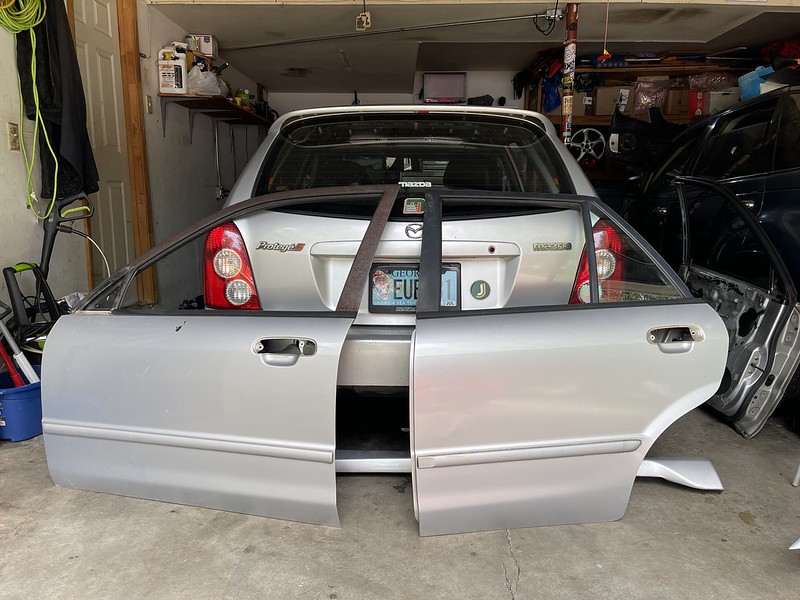
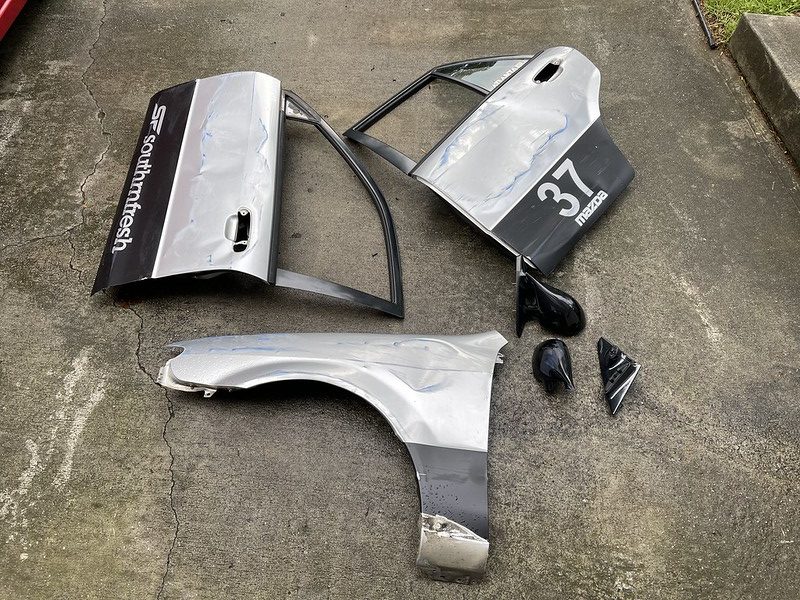
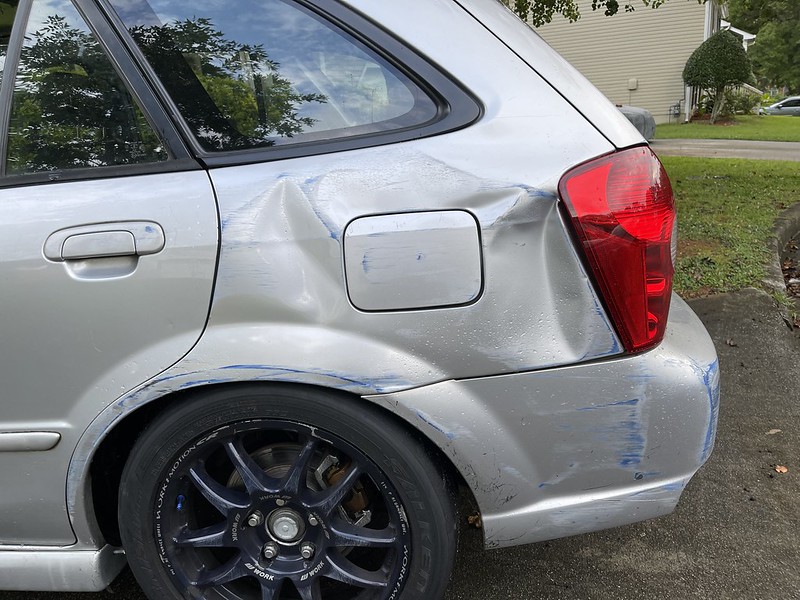
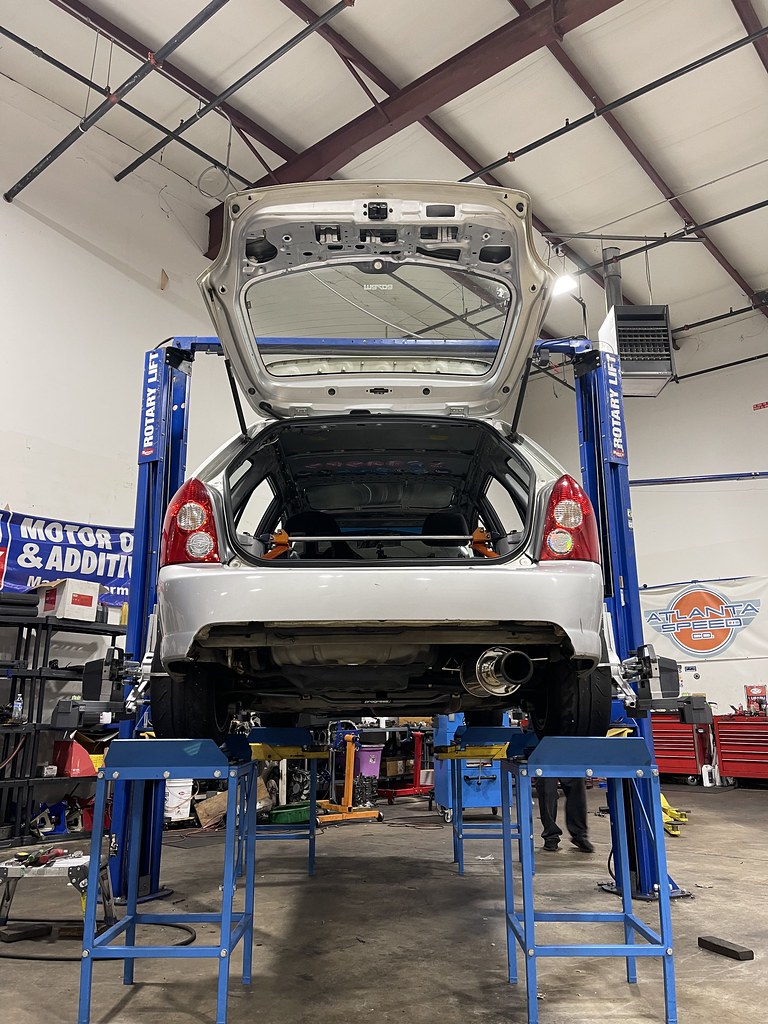
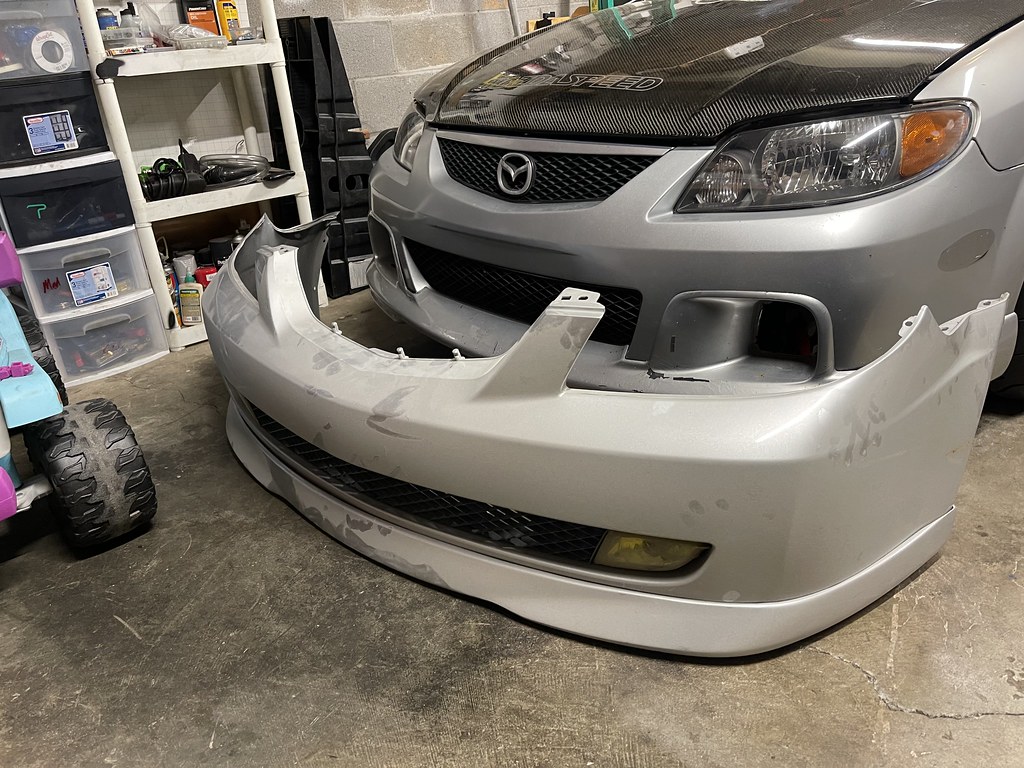
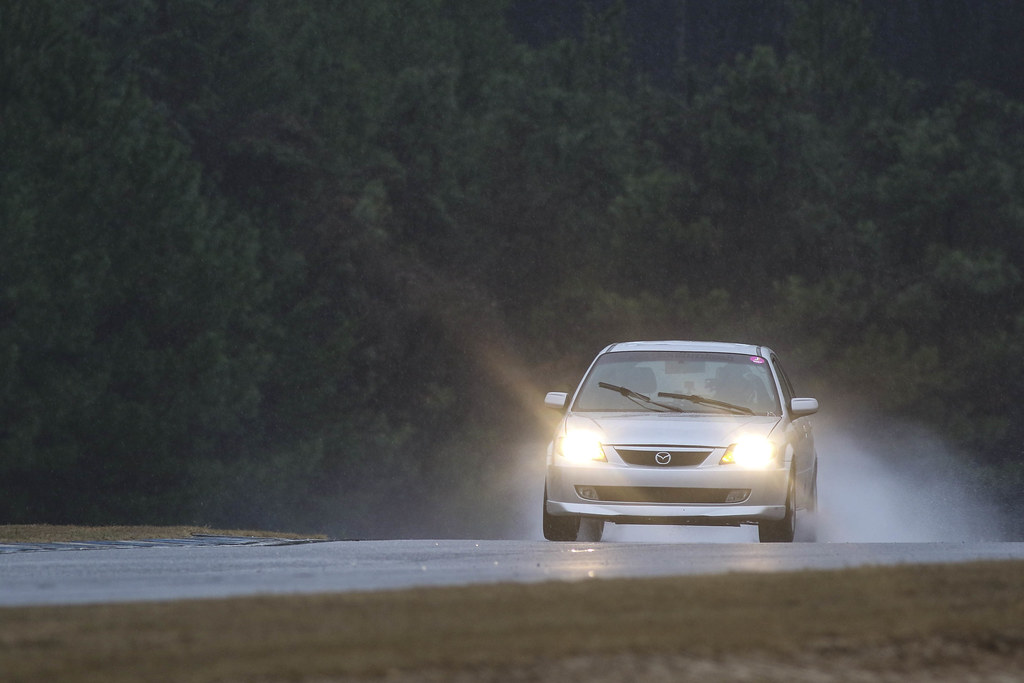
Speaking of rain...around 2pm it started to rain pretty steady. Usually I dont have much trouble in the rain, and it allows me to keep up with some of the faster cars. And its a bit fun as long as I am careful. Well I had been out for about 3 laps. And decided to take one more lap. And I came around turn 3 and lost traction in the rear and the car spun around, and pancaked the tire wall. By the time I hit the wall I could not have been going but 10-15mph at the most. I was uninjured, and the car drove the same, but was a bit bruised as you can see...
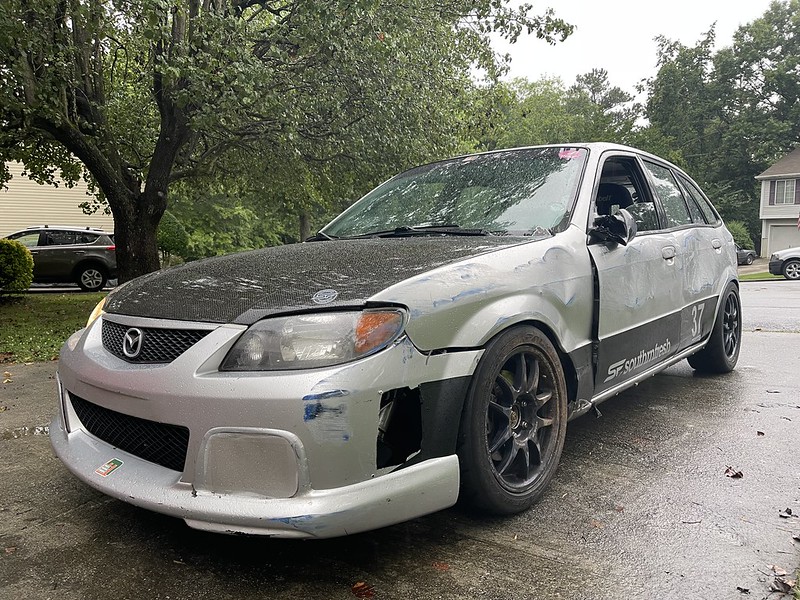
The car drove back home fine, and did not feel out of the ordinary.. I can maybe salvage the front bumper, but the side loops that held it up did break.. so that maybe an issue.
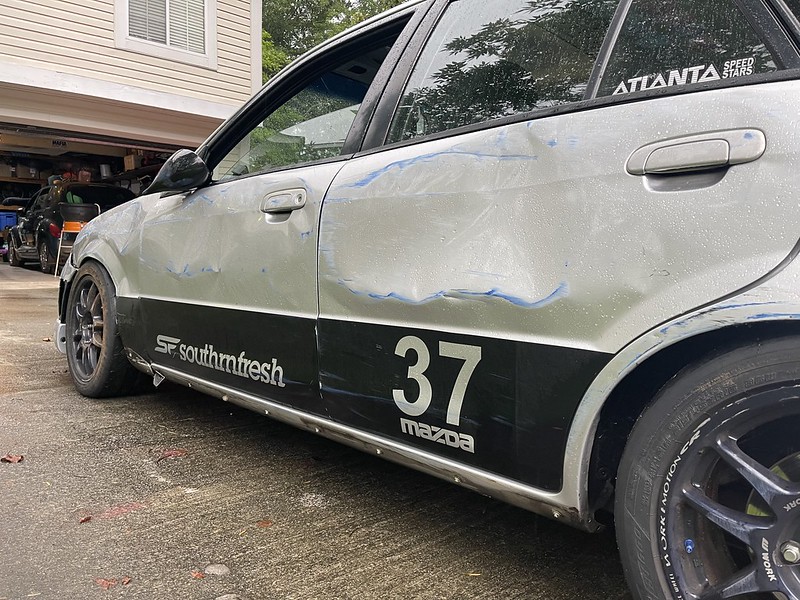
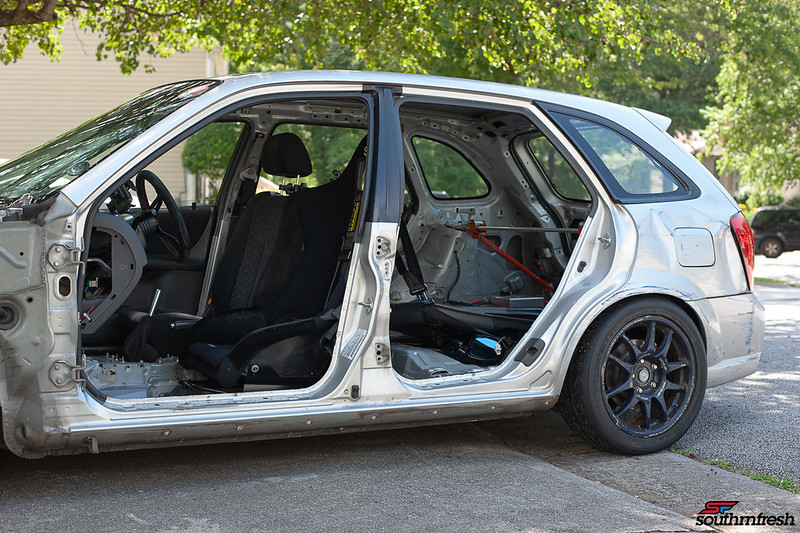
Did not realize that I was missing my side skirt until I got home. But the doors are dented pretty bad. Glass held up..
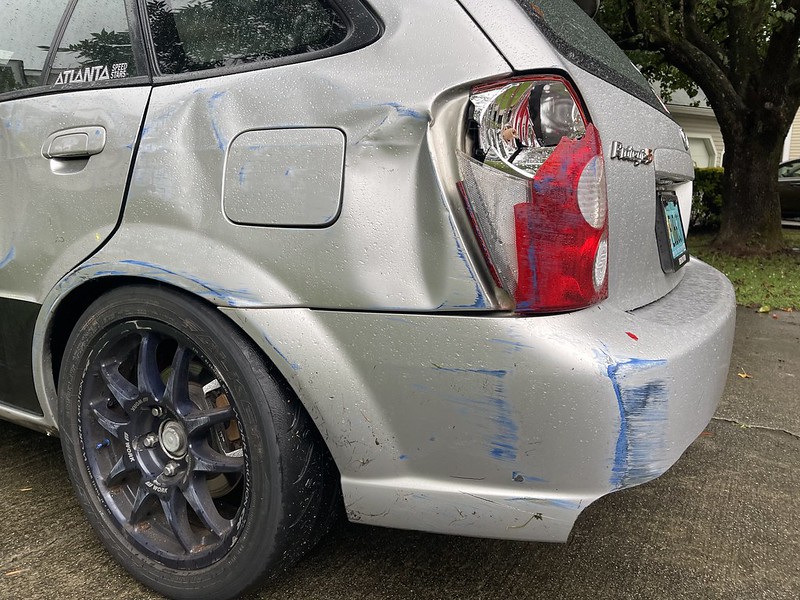
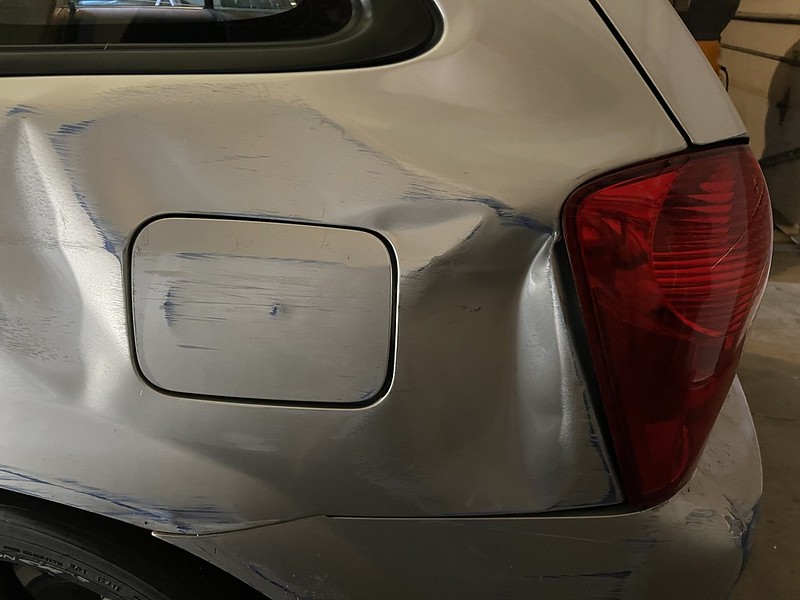
The worst part is the rear quarter panel, which can not be bolted on and off. Once the other panels are replaced I may see how much of it can be pulled and or repaired..just so its not as ugly.
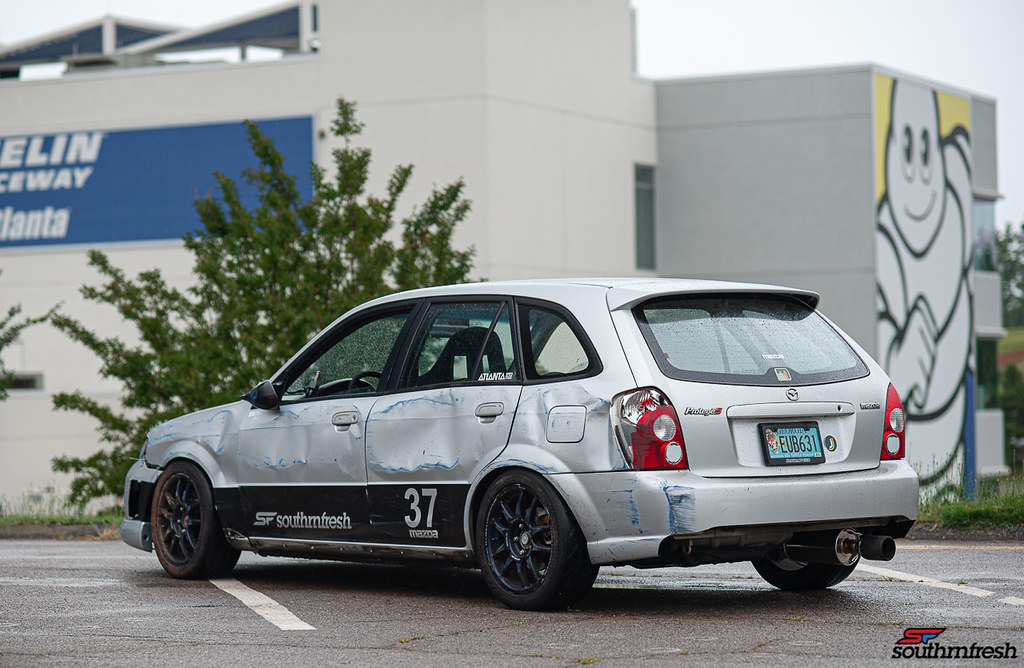
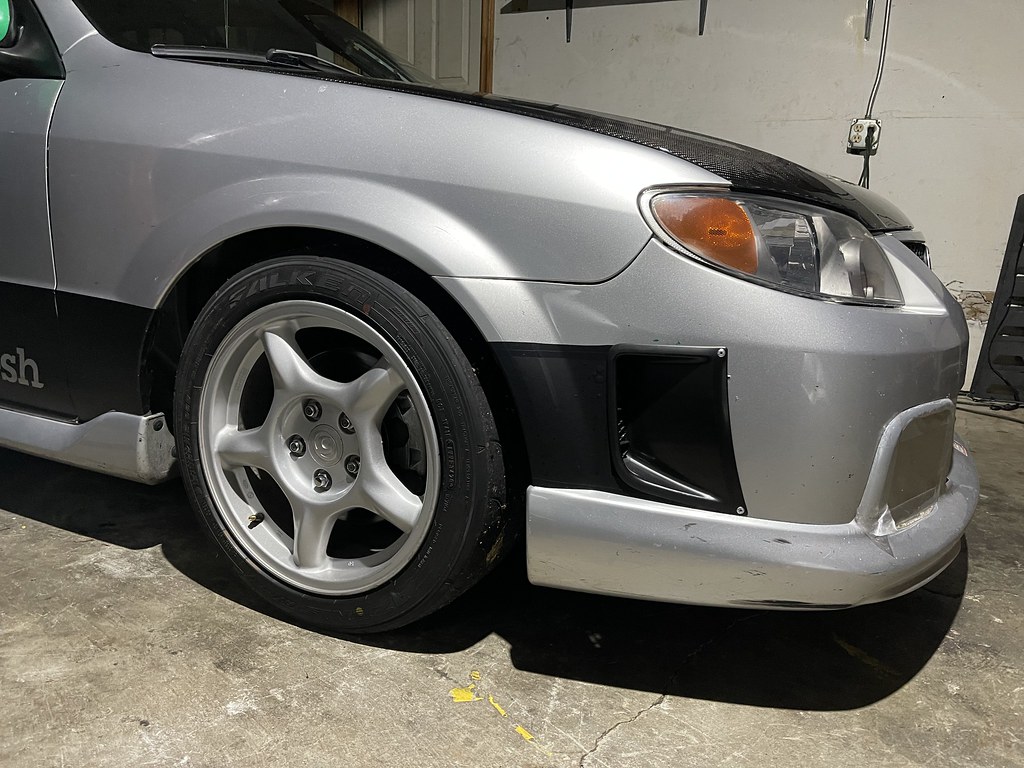
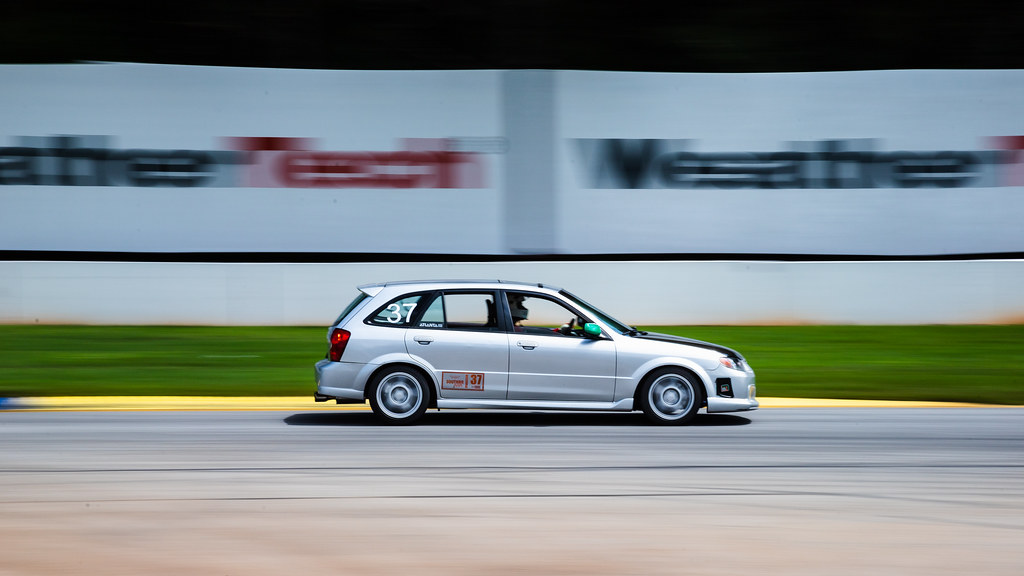
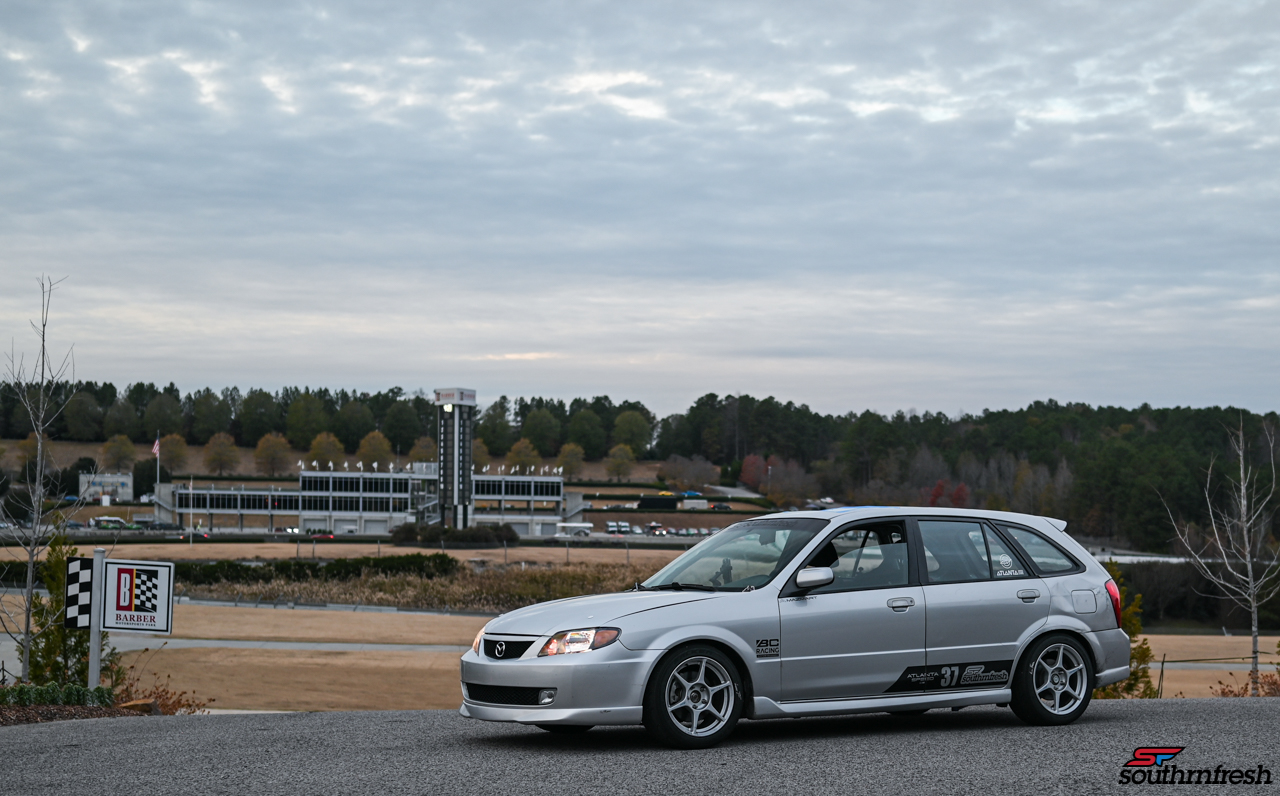
With every big milestone, I like to take nice photos with the camera as a memory of the journey. I cant lie it sucks to see the car get damaged. But I am glad its still able to keep going. Next stop is Barber Motorsports park in August, lets see how much I can get repaired by then...

This thread rules. I hate seeing those last images, but look forward to what comes next with this car!
Nice. I almost ended up with a Protege 5 but a friend of mine convinced me to pick up an xB instead (he was working for Scion at the time).
I did make up for it when I bought a 2009 MS3. Such a fun car.
Great thread so far!
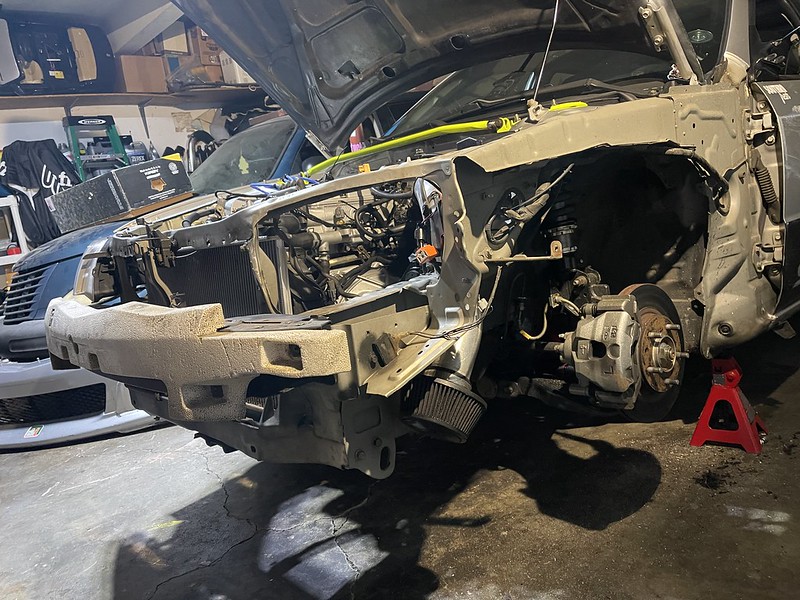
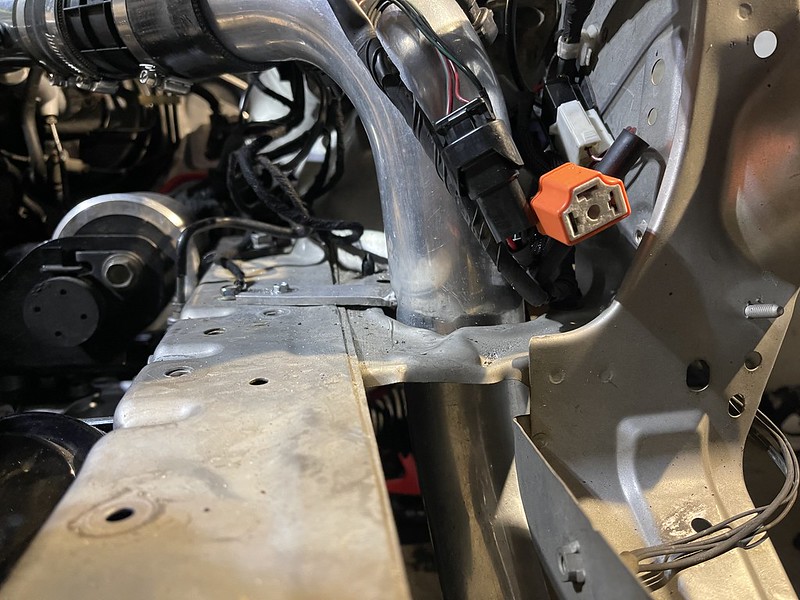
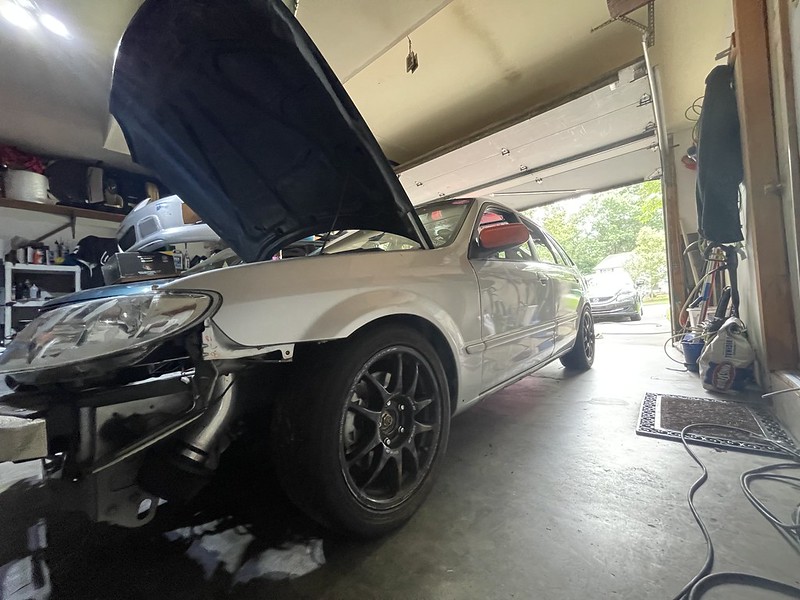
Time to see the extent of the damage...
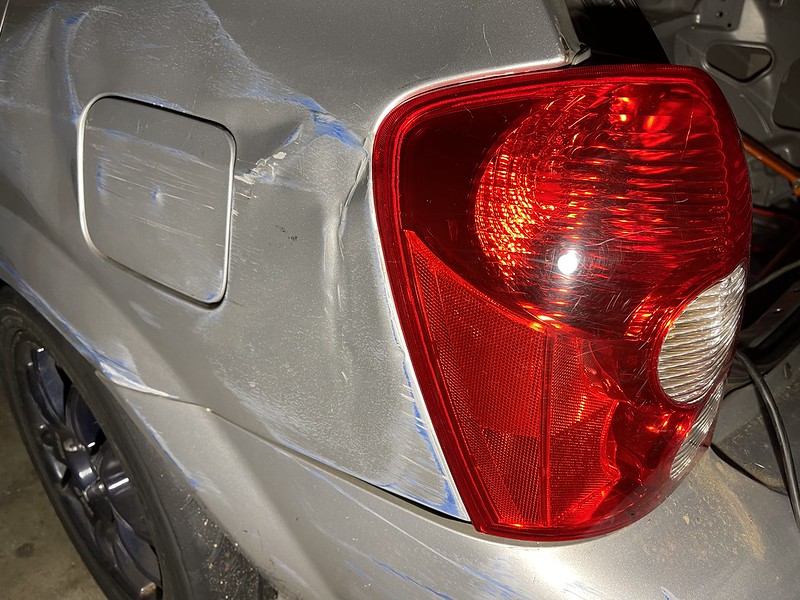
The positive part of all this is that there didnt seem to look like there was any damage hidden behind the dented panels. My wheels are a little scrapped and damaged, but nothing structural.
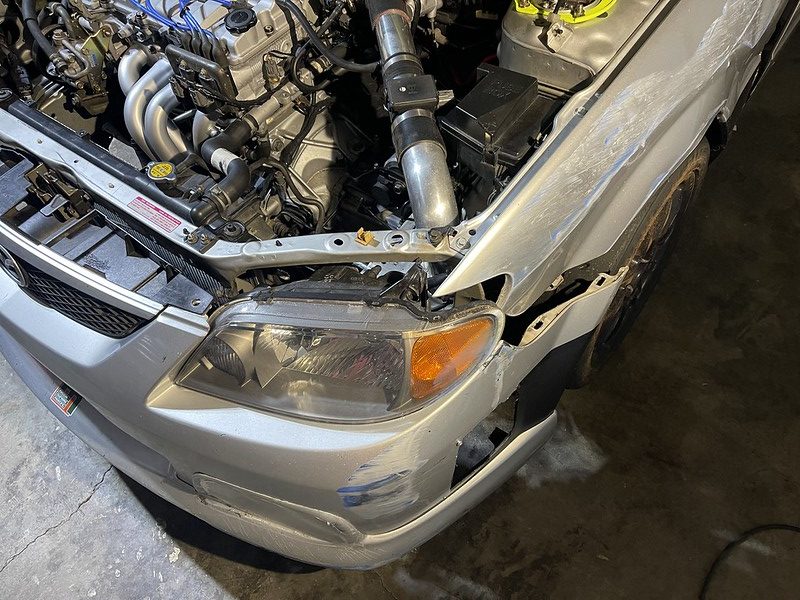
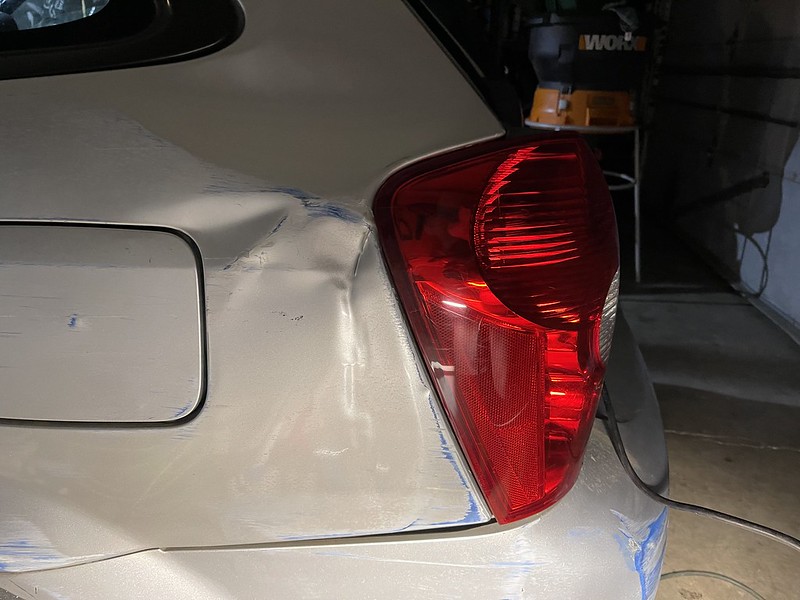
I was worried about by the headlight socket being damaged and it never fitting properly again, but visually I didnt notice anything major.
Good news is that the new taillight fits in its place still... which is a good sign.
Fender and bumper removed...
There was a slight crease here were the intake pipe goes through. I managed to straighten it out with a few taps of a mallet. It also pushed the side headlight mount back in its place as well...
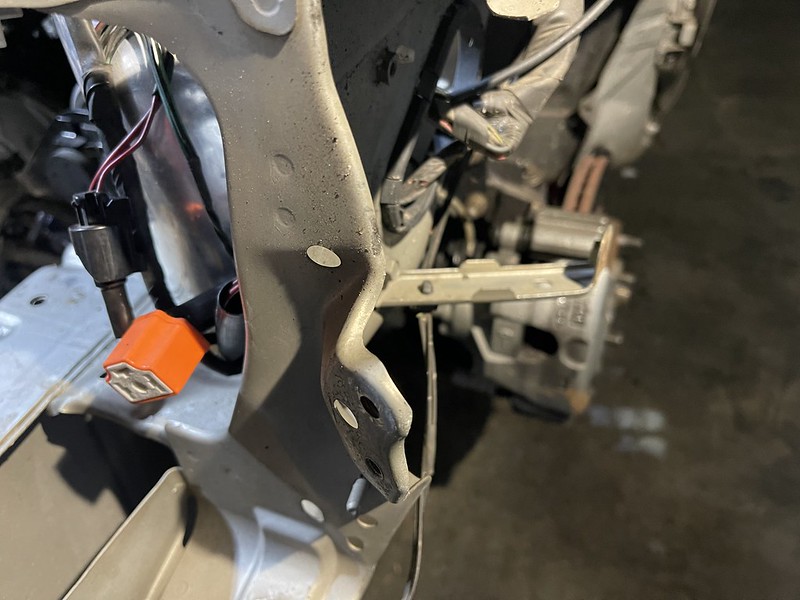
Here is a photo of the side headlight mount that was pushed in slightly.
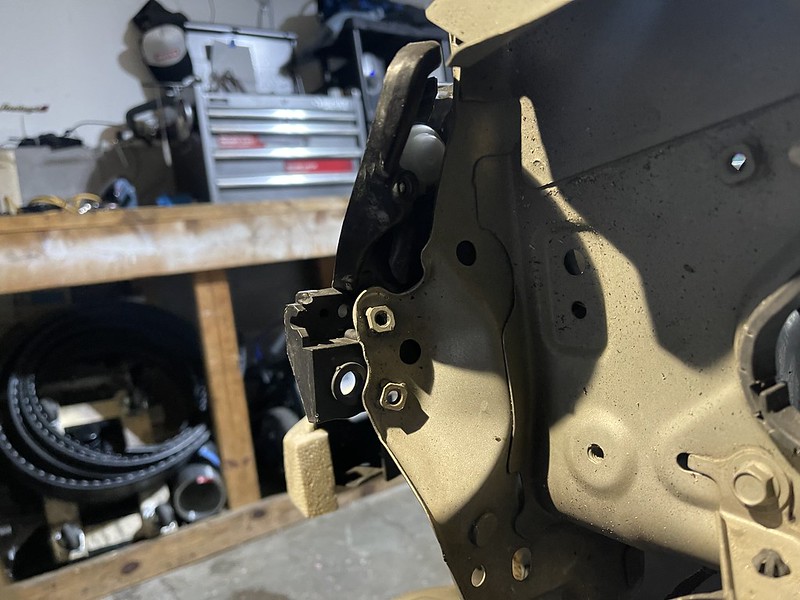
I had a headlight shell to test fit in its place to see how much it was pushed in. You can see its off by about 2 inches..
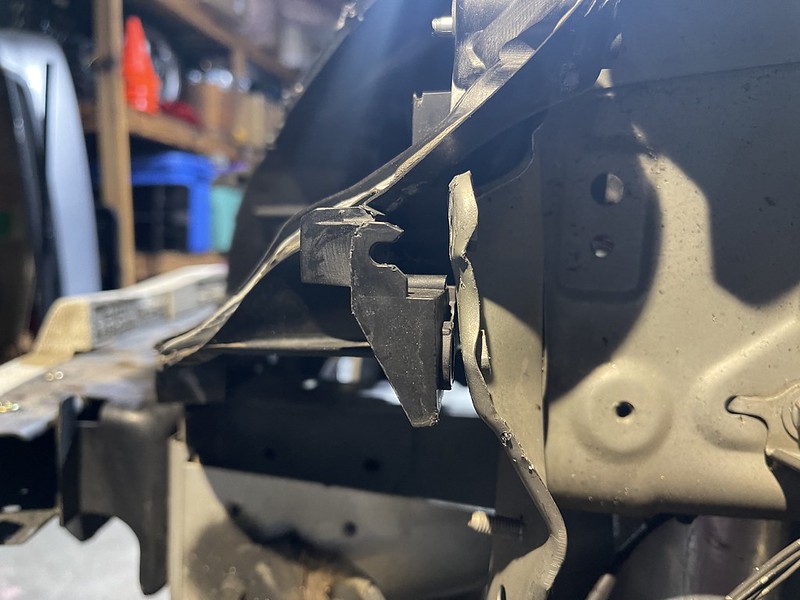
Took some pliers and maneuvered it back in place, so the bolt should fill in the gap..
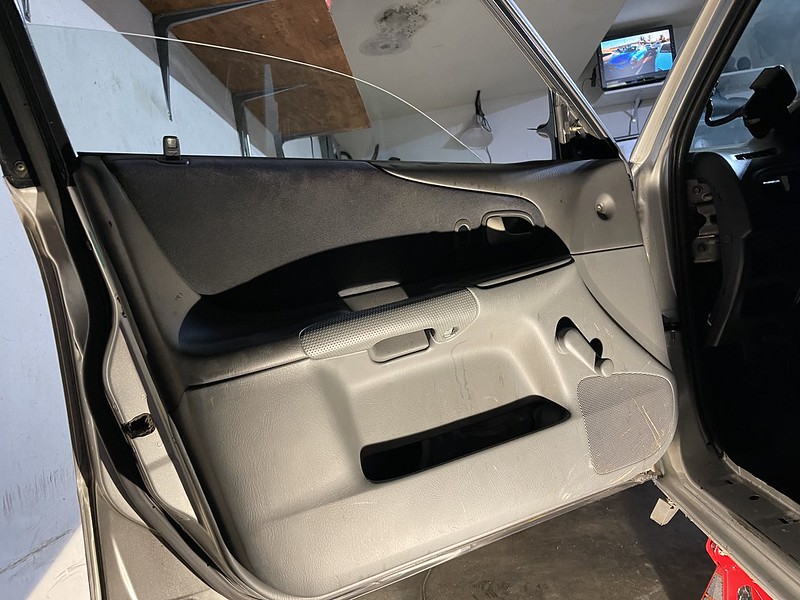
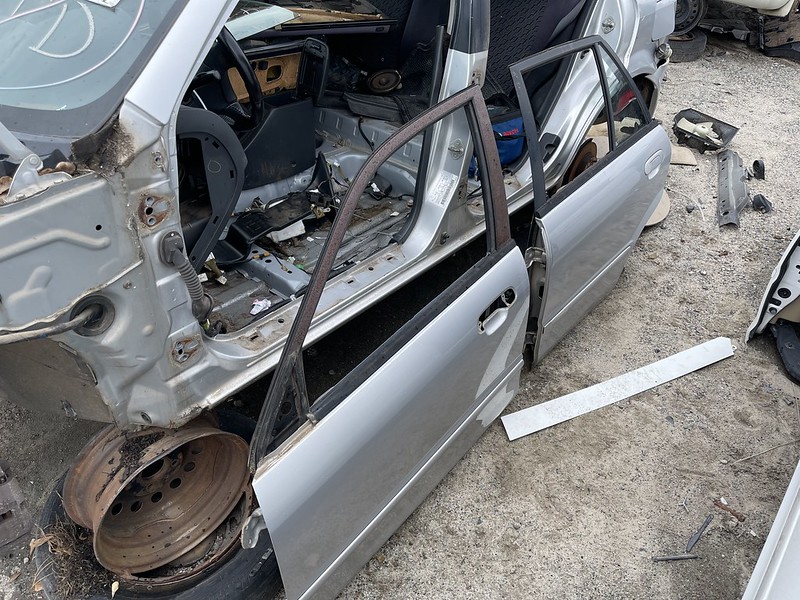
I went ahead and started to remove the doors to get practice for having to remove doors at the pull a part..
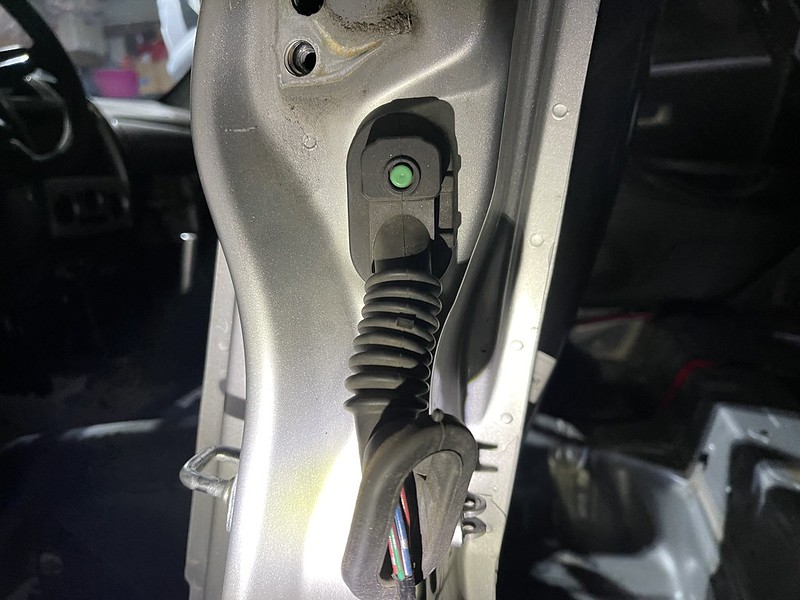
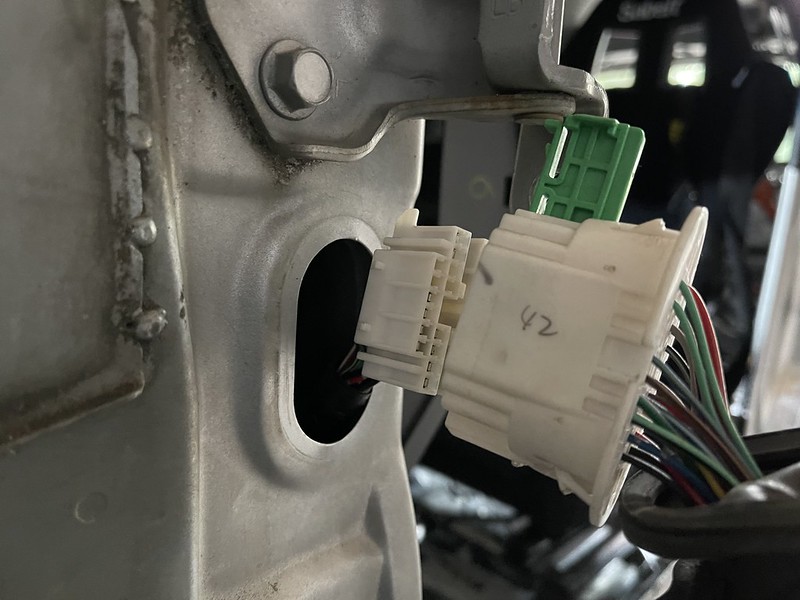
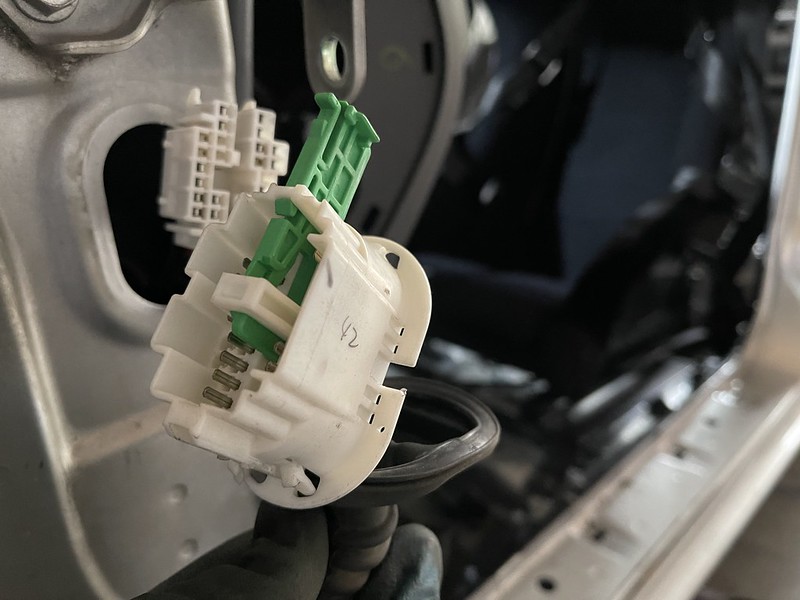
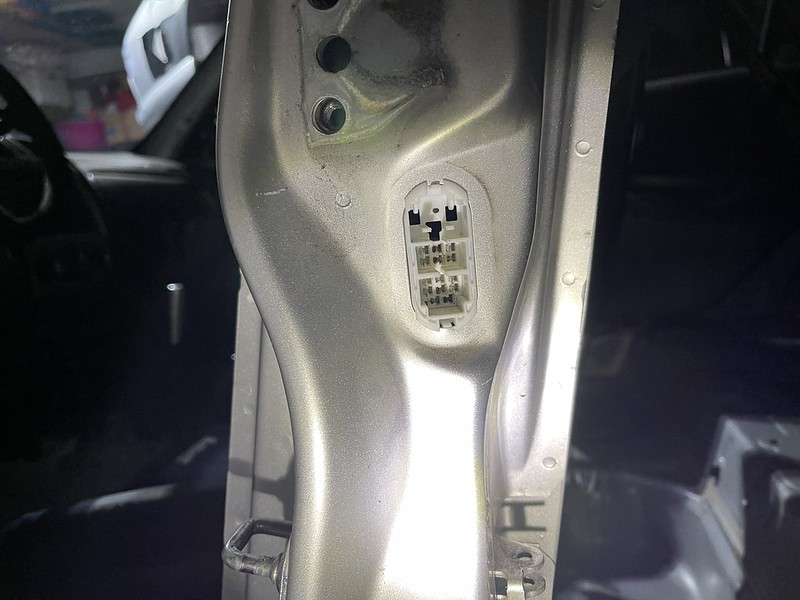
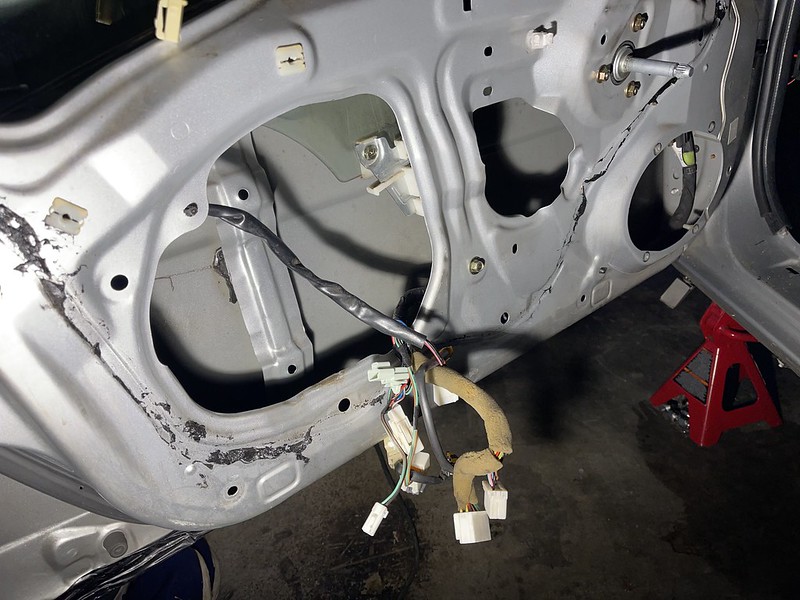
The car doesnt have a radio and or power windows anymore. So i just had the wires zip tied in the door, but I found out that the door wiring has a quick release at the body panel. So it made that much easier..
Door off, glass , handle regulator all removed...
My floor in the garage was full of gravel and dirty so I put the P5 outside so I can clean up.
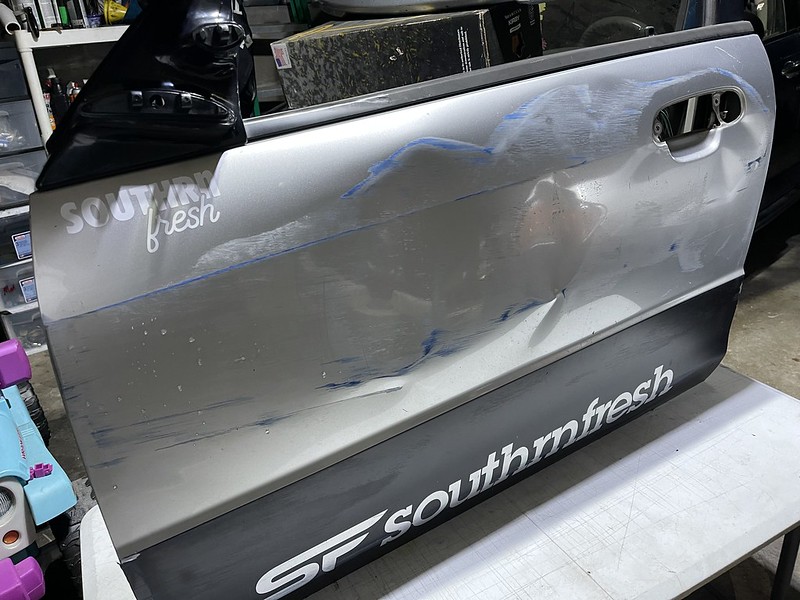
I had found 2 P5s at a local Pull A Part, but they were marked black. I had planned on getting those body panels from those cars and just having a mismatched car for awhile. But I checked another yard that had a P5 listed, but no color. I decided to check it first to see the condition and or if it was silver. I was pleased to see it was silver, and all the panels I needed were still in perfect condition..
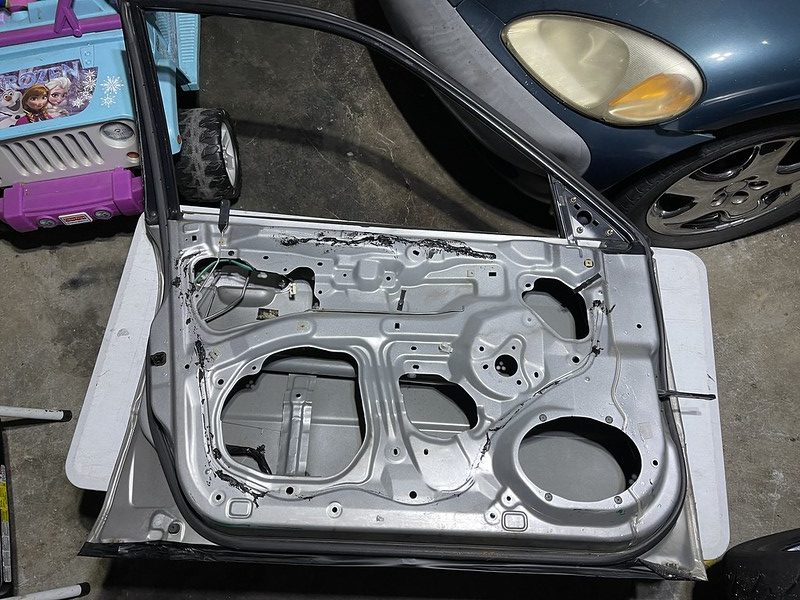
Its pretty simple to get the doors and fender off, but I did need to gut the door internals so I would not be charged for things I did not need..

Made out like a bandit..
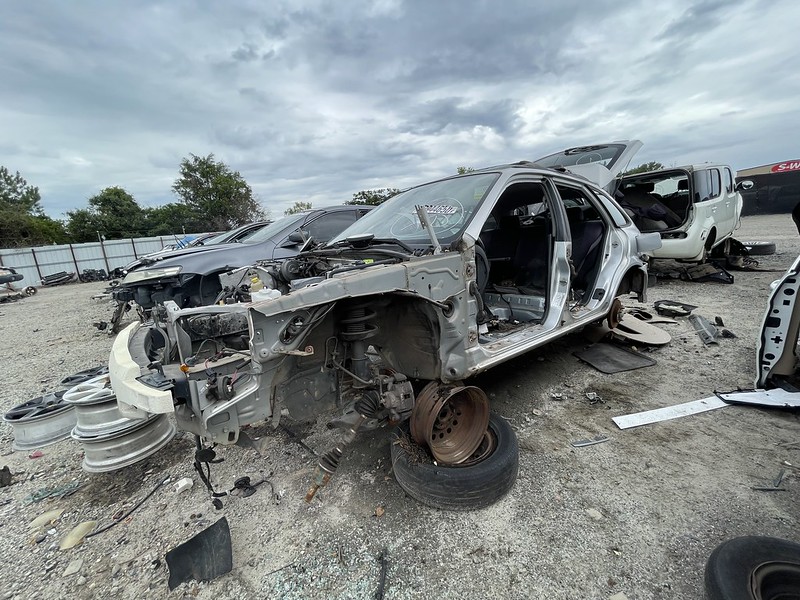
What was left...
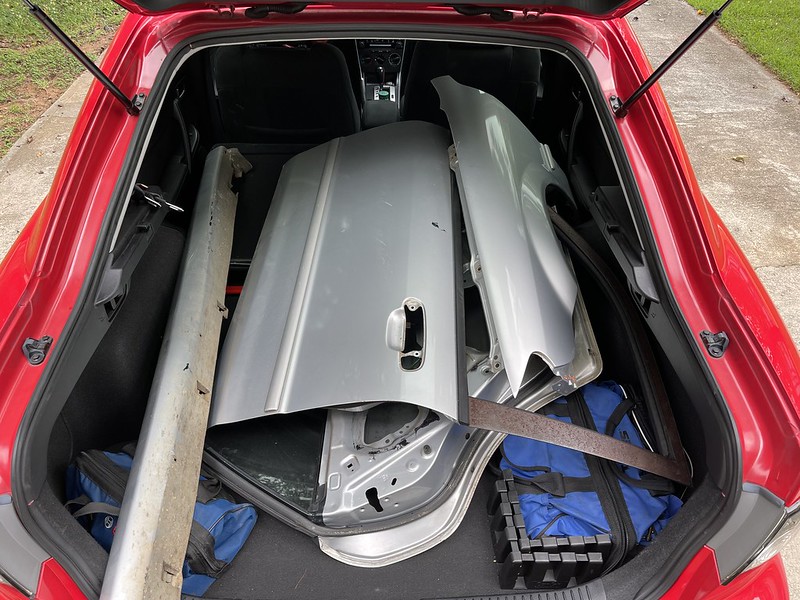
Since I gutted the doors, everything was only $139 out the door. The fender itself was the most expensive part.
The only thing I will need to do is remove the side molding later..

Upon further inspection it looked like the fender was replaced and the car was repainted at one point. There was runs of clear on the inside of the door, and the fender was black on the inside, compared to my old one.
Fit like a glove... almost like it never happened.
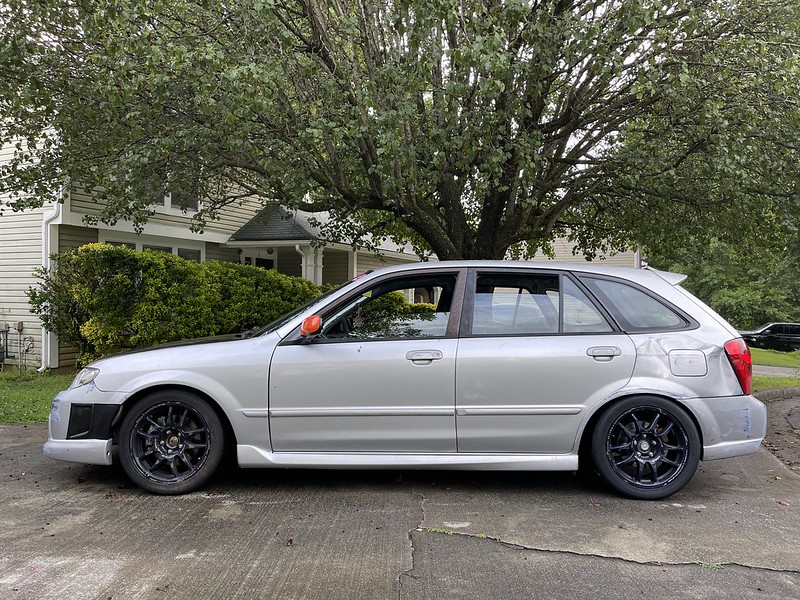
Extremely pleased and thankful that the damage was not worse. The panels went back on and lined up perfectly. The only sign of damage is to the rear quarter..
Still a little bruise on the bumper...
Hopefully this is the last time I have to deal with this...
Now, ill see what I can do with this damage to the quarter..

The car is gutted so I can access the dent on the back side. I took a rubber mallet, and used it as a tool to push the crease out..
A few taps, and it was much better. I am going to try to get some proper dent tools and see what I can do to the damage instead of just beating on it with a mallet .

Loved my P5. Nothing needed but oil changes and I added factory leather and MP3 racing beat exhaust, wheels, stereo, etc.
Smaller than the new family needed but I really liked it. Went with the Mazda 3 GT when it came out and loved it too. Bullteproof and did it all.
Now I'm$4k into repairs on a Jeep Wrangler an thinking a 5 speed Mazda will be perfect for my son as he gets to learning permit age.
In reply to Southrnfresh_Joe :
Great work brother.
Been reading your thread, great job persevering.
Question: Where's your harness bolted? It looked like it's bolted to the floor. If so, I highly advise against it. The belt mounting point needs to be at or higher than shoulder level for your protection... In the case of an incident (God forbids), the belts would compress your spine. Not good. Harness bar is necessary. You might even be able to mount the harness to the rear deck area safely.
Also, the scoop in front of the wheel is faced towards the wheel. The reason is it provides a stream of air acting as a curtain around the wheel, thus minimizing disturbance in the area (sorta). By reversing direction, you essentially ramming air into the wheel wells, which is not what you want. You want to evacuate air from the wheelwells.
Keep up the good work.
Also, sorry abou the wreck... I know it's gut wrenching..
In reply to madmax98 :
The harness is a schrothe ASM rallye 4 harness. And I had worried about the angle of it, but I was informed that the angle of this version was ok inthe instructions. But some of the other versions are needed at a higher angle. And it is solely based on the model of the harness, my Rallye 4 version does take rear lower mounting. But I assure you a roll cage is on the horizon this winter, and a new harness the traditional way!

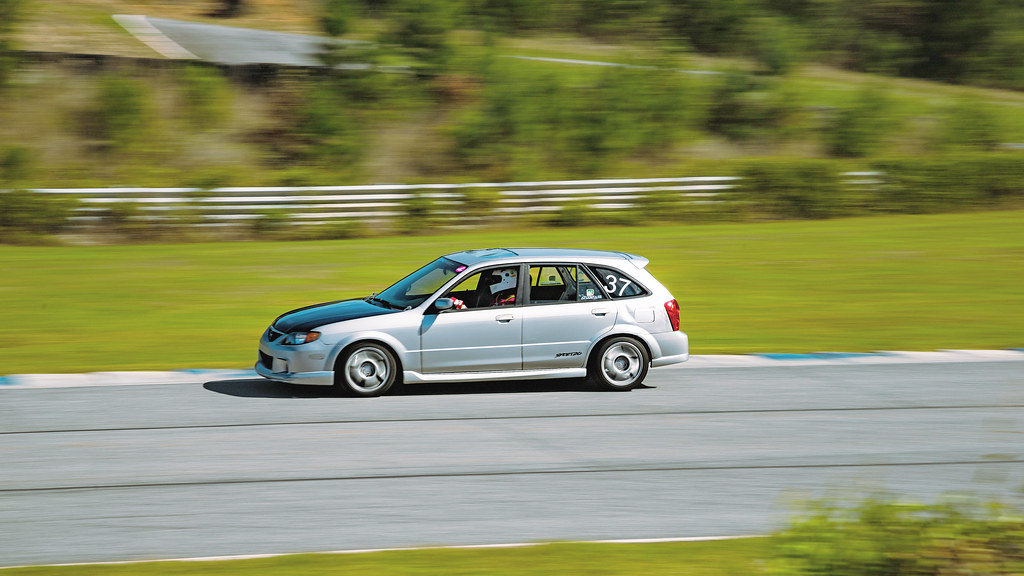
It has been awhile since I have updated the build process, so there is a lot to catch up on. First thing is selling the Work Emotions, and getting a set of FD wheels to try and save some more weight. The FD Wheels are a popular choice for Proteges due to their spec 16x8 , but their high offset and the lip on their hub makes it require a minimum 3mm spacer.

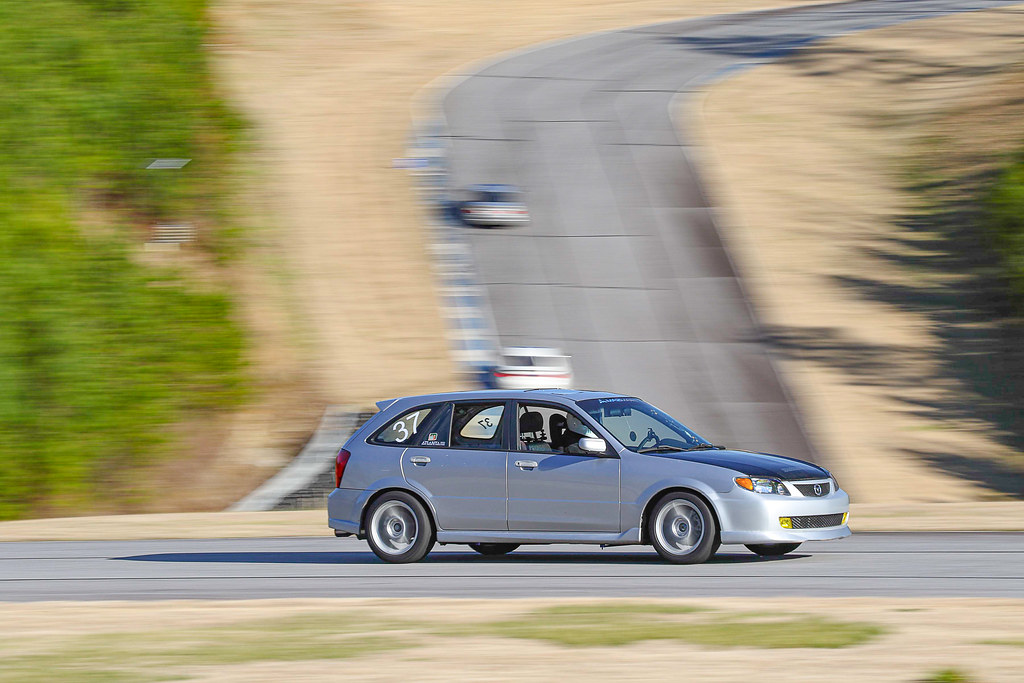
Back out at Road Atlanta with the FD wheels. I also got the idea of sealing off the foglight covers to help me with any sort of restriction. I cant say it helped at all, or made a difference, but I liked the look..

I had a pretty good consistent event, but under hard turning I kept getting a light squeal. I kept checking and checking, and I had attributed it to the pads, and the brake dust plate toughing my warped rotors.
I was not in a push hard mood because it was my first event back at Road Atlanta since hitting the wall. But being dry i had nothing to worry about, but I was more concerned about the car being the same as it was before. The scrubbing squealing noise really got in my head so I could never fully relax. I did manage to get 8mph faster around the track, but still lacked in some areas. I think if i would had been able to focus on driving instead of the noise I could have done a new Personal best, but I did not wanna take any chances pushing too hard.
Here is a video of one of the laps from the day.

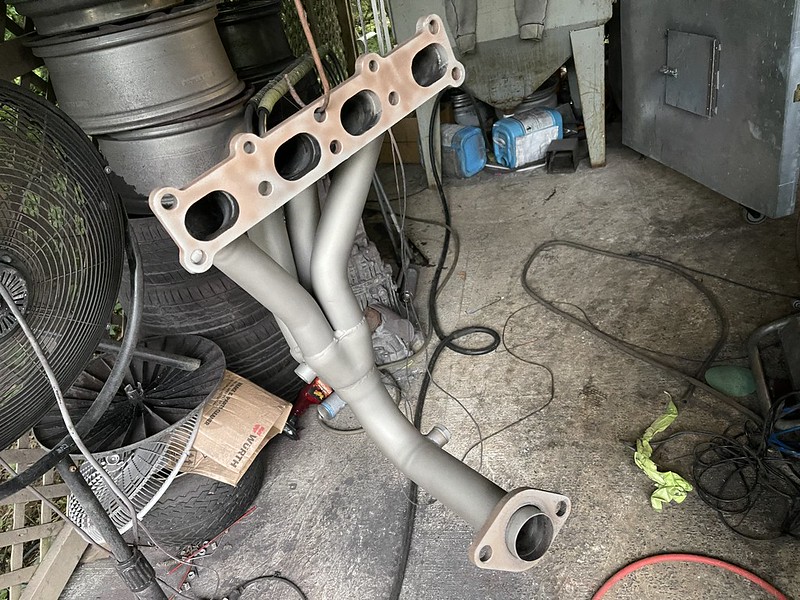
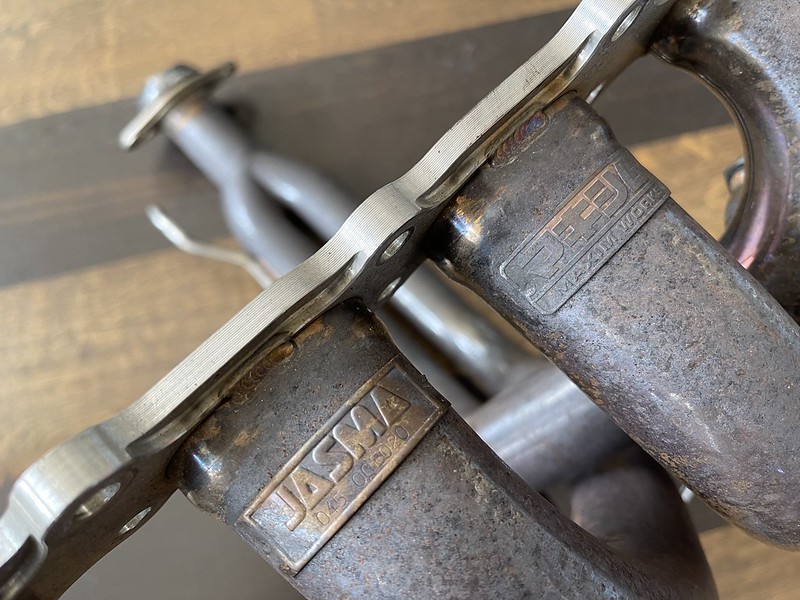
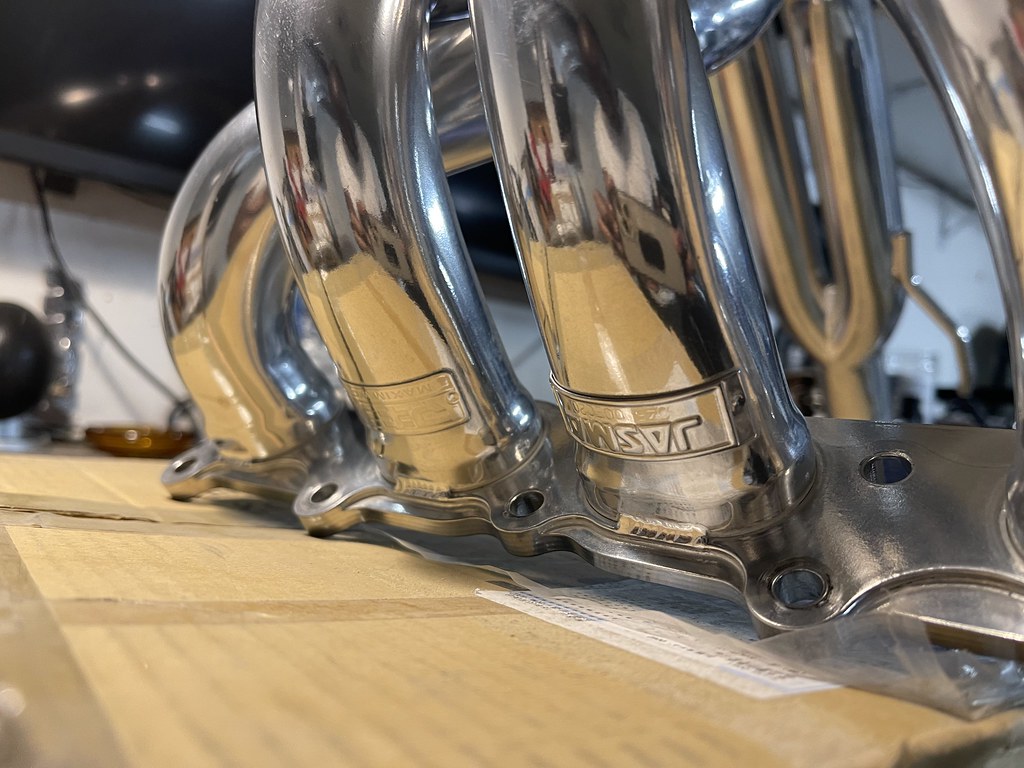
A late night Yahoo Auction Japan search granted me these rare and discontinued Autoexe / Maxim Works 4-2-1 header.

Quick comparison of the 2. You can see the difference in the OBX header and the Maxim Works header. The small wrinkles in the OBX header is minimal, but at this point everything counts.
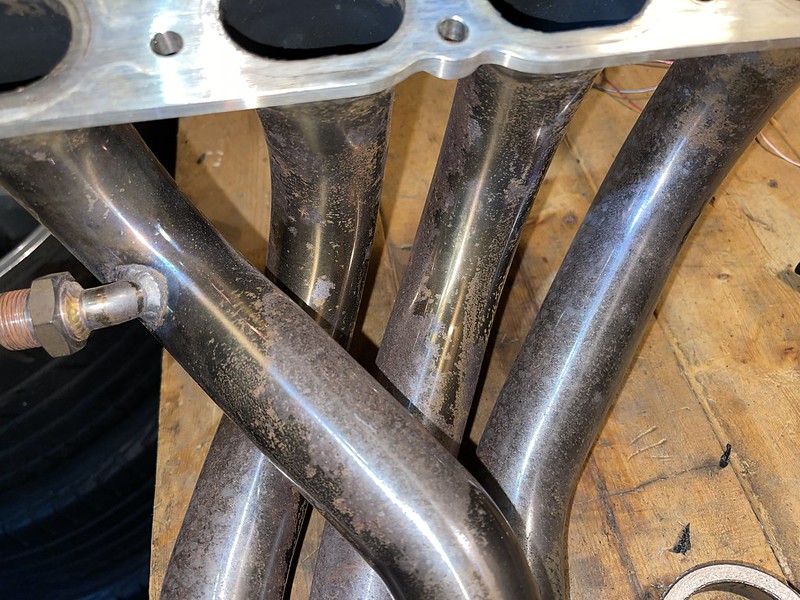
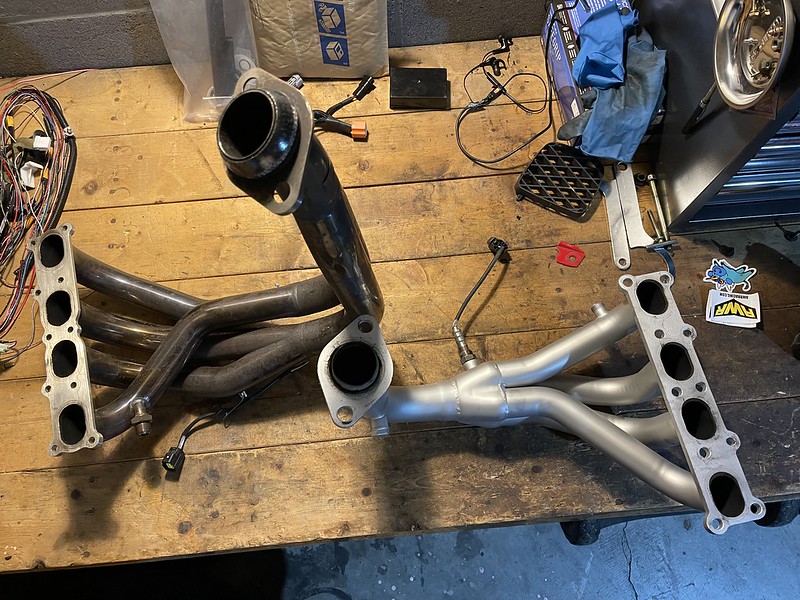
In order to run this header I will need to have my midpipe shortened to fit properly.
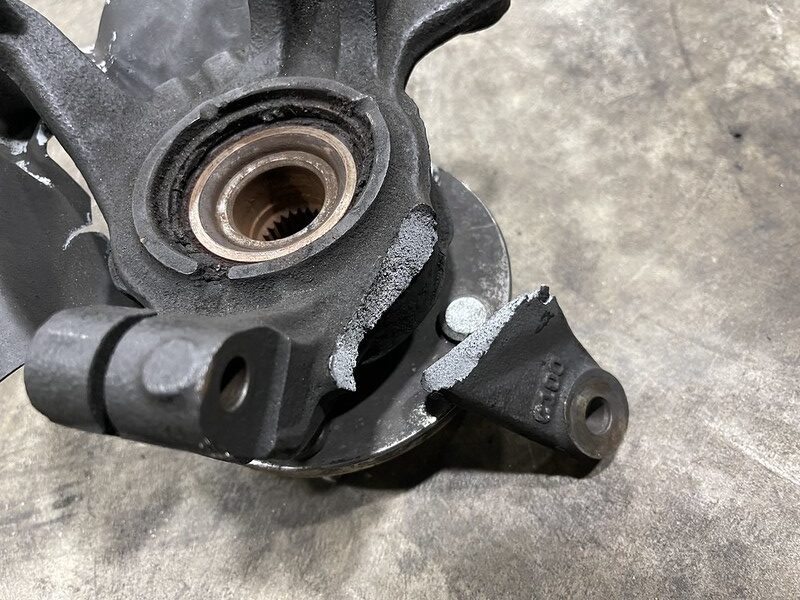
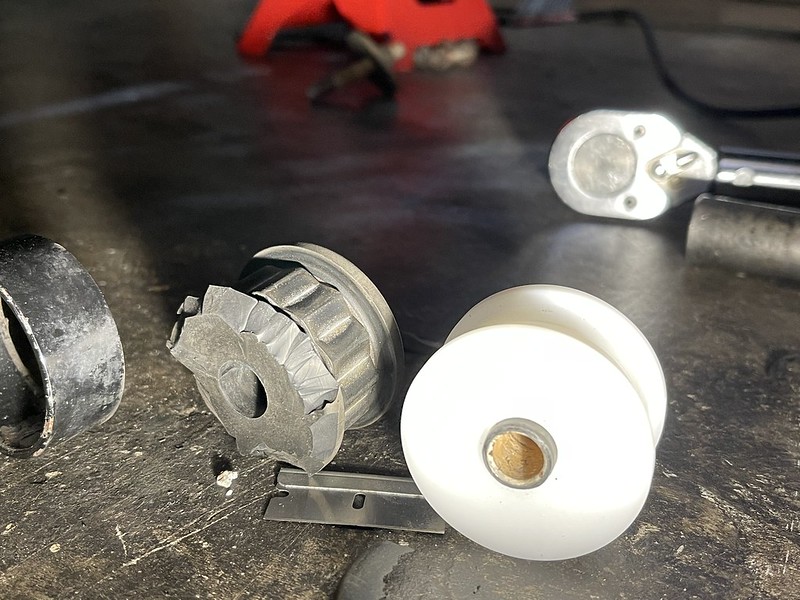
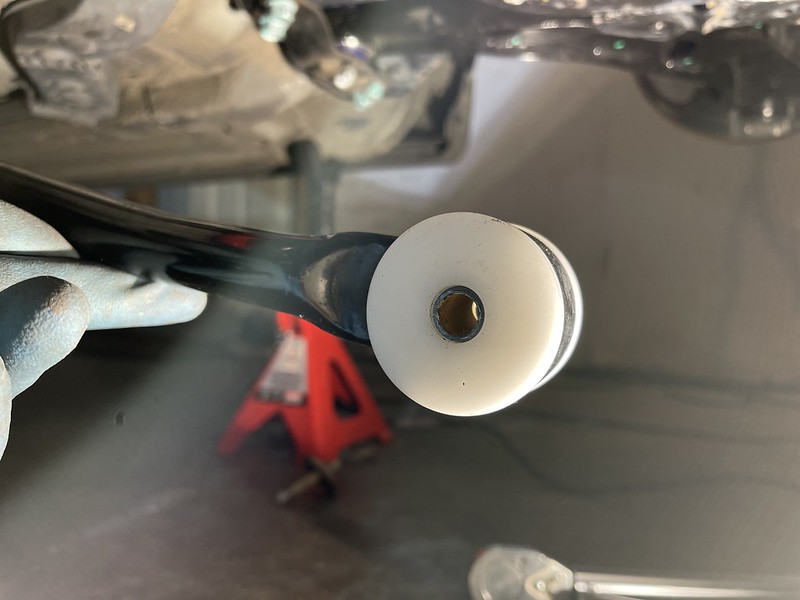
So I was able to finally find the source of the squealing noise on the front of the car. It was the front driver side wheel bearing. I had replaced it when I first got the car, but on Proteges' its a high failure point, so it was no surprise. But I did want to show a photo of the broken knuckle from me trying to press out the hub bearing without removing the retaining ring clip. The worst part about it is that I managed to break both of them, before a friend of mine saw my silly mistake..
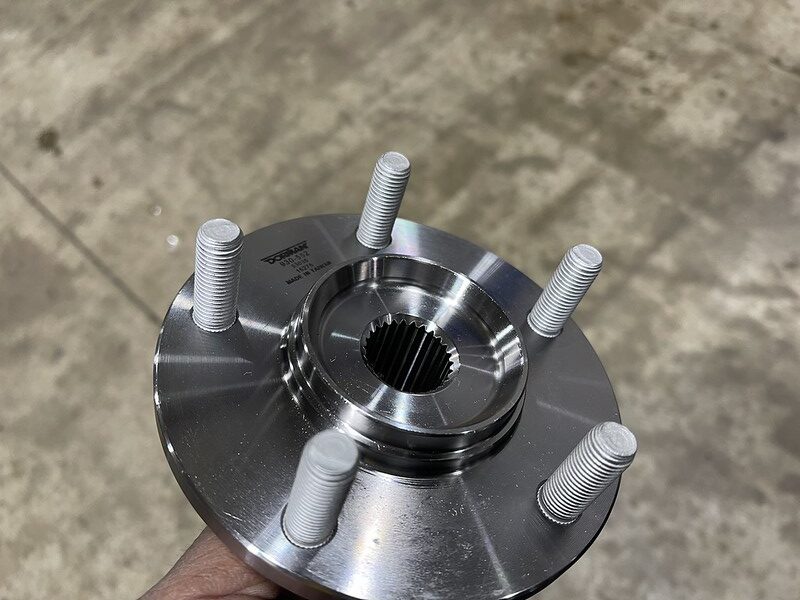
New Dorman Hub Bearing. Side note, about these hub bearings. When I installed the FD Wheels, I only had about 4 turns on the lug nuts. So I ordered extended studs. But the hubs I had on the car had a crazy size stud that was not OEM, after days of trying to find a matching extended wheel stud I gave up. Coincidentally I found out that my front wheel hub was bad, so it gave me the chance to replace it with a Dorman hub bearing which does carry the proper OE size wheel studs. I purchased the other set of hubs from Rock Auto, and at the time it was the cheapest brand, I would not advise them, because if you ever break a stud you can not replace it.
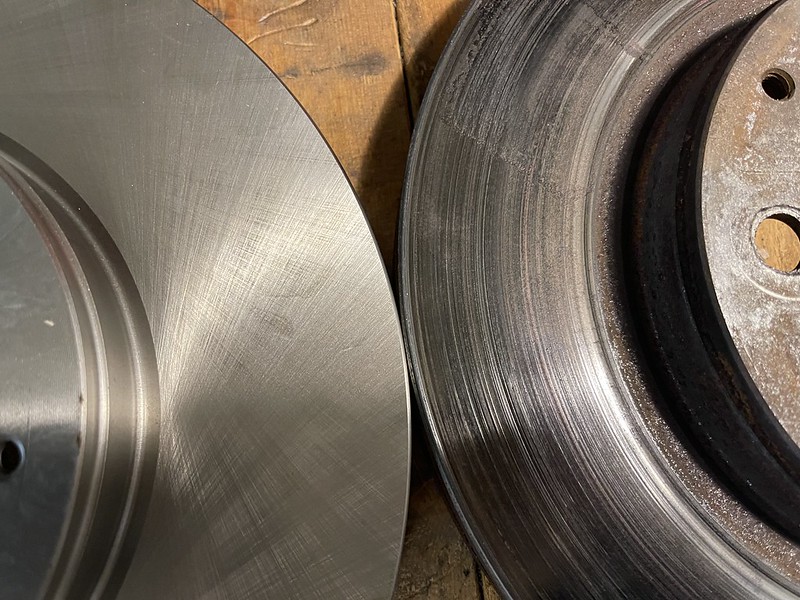
2 years of abuse on these rotors, it was way overdue.
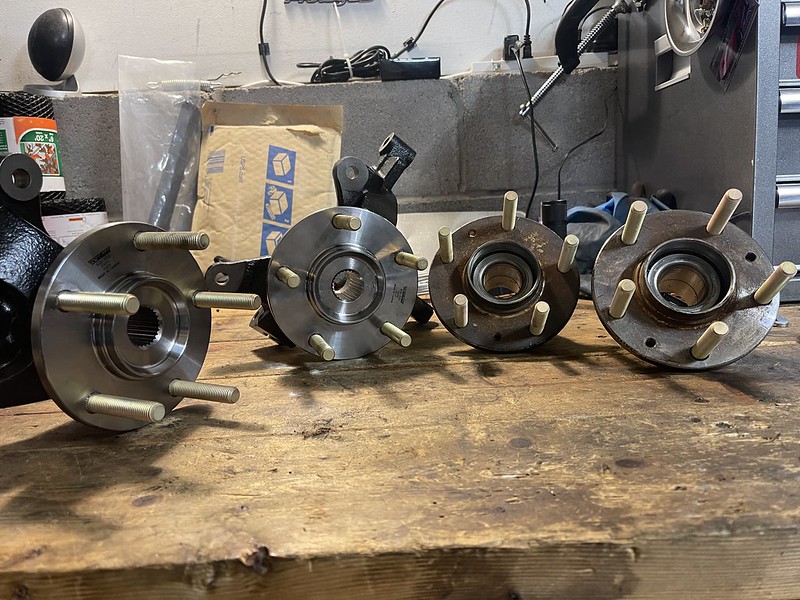
New Front Knuckles , bearings, hubs, and extended studs.
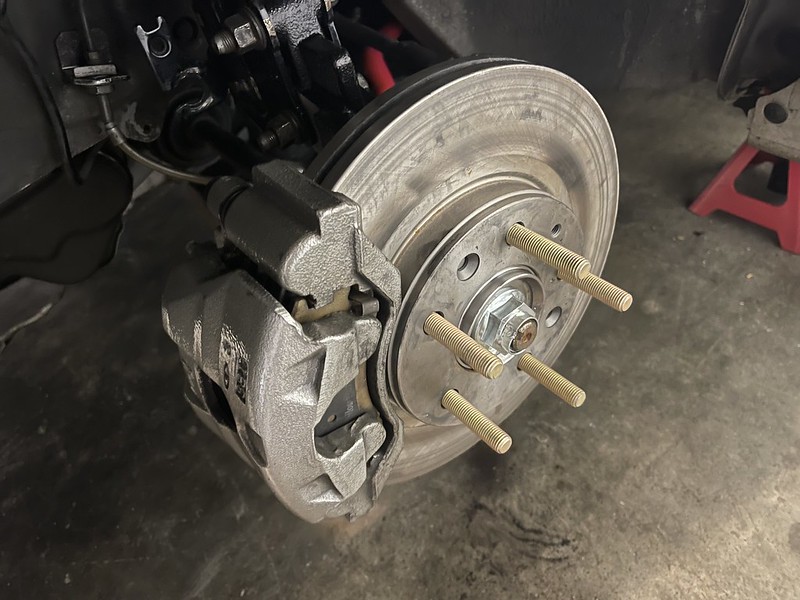
Everything installed back on, as well as the hub centric H&R 5mm wheel spacer so the FD wheels can sit flush on the hub.
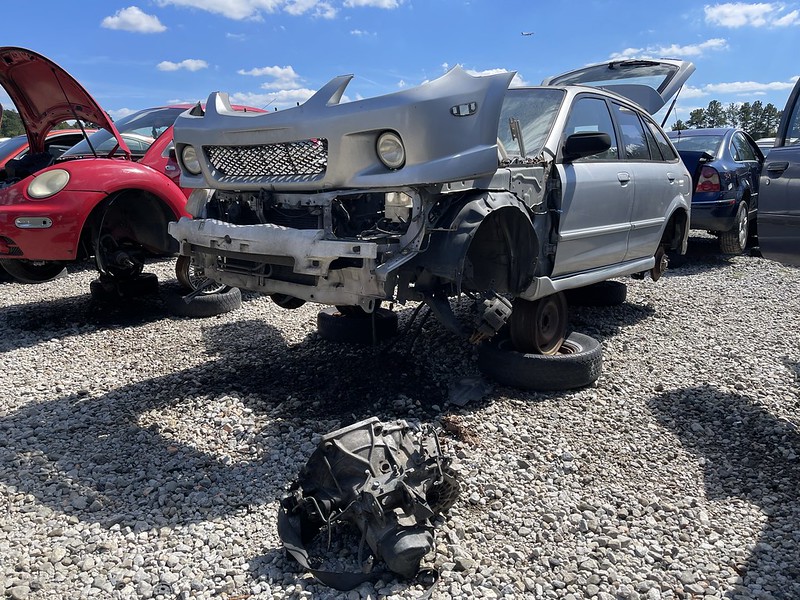
A trip to the pull-a-part and I scored a transmission as well as a new front bumper. I literally walked to the car and the transmission was laying on the ground already ready for me...
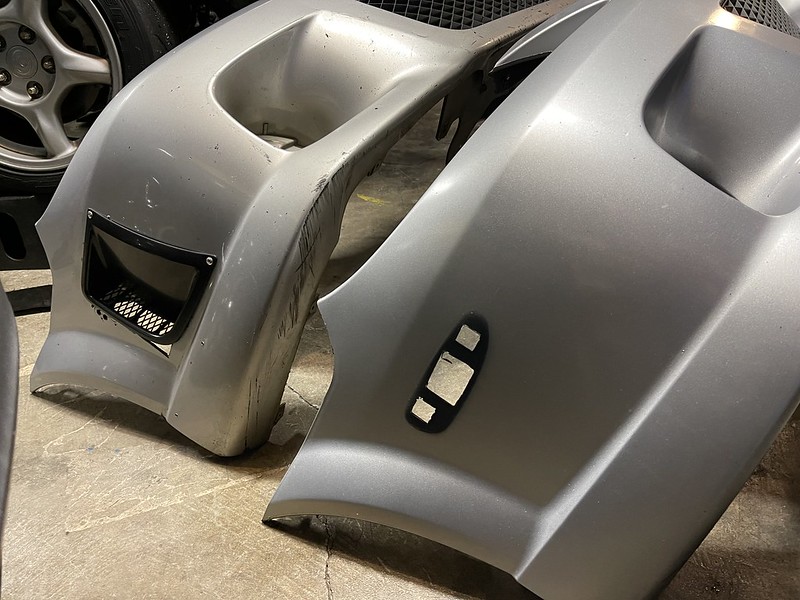
I was never too pleased with side bumper vents I made, and it was slightly damaged form the wall at RA, once I got the bumper home I realized it was aftermarket and the mounts had already been torn.
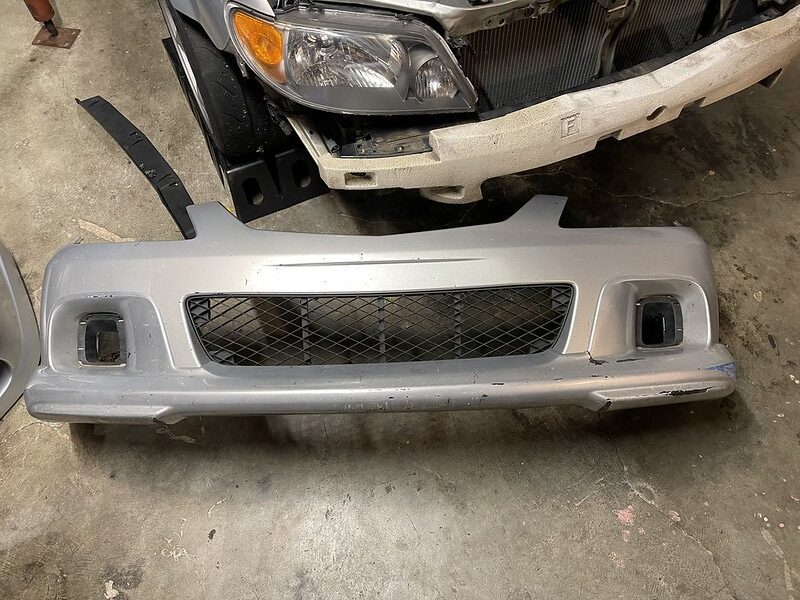
Mazdaspeed lip installed..
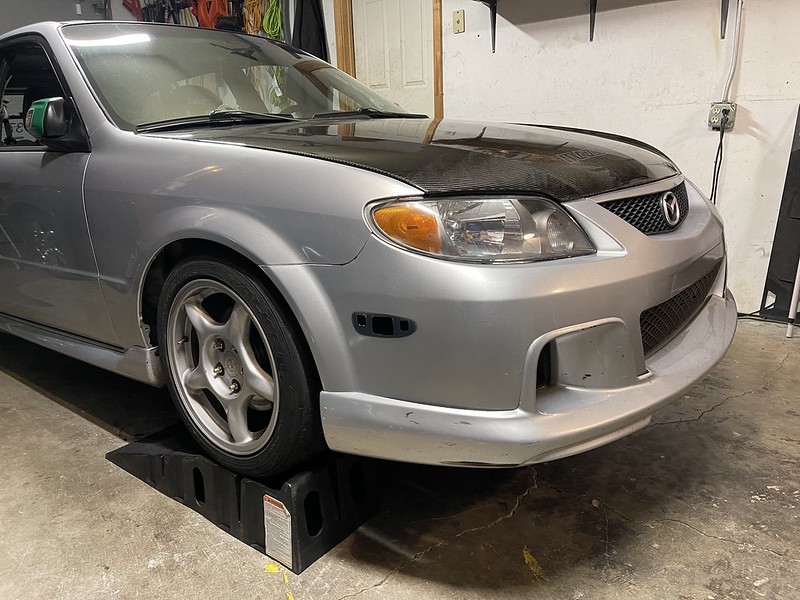
installed...
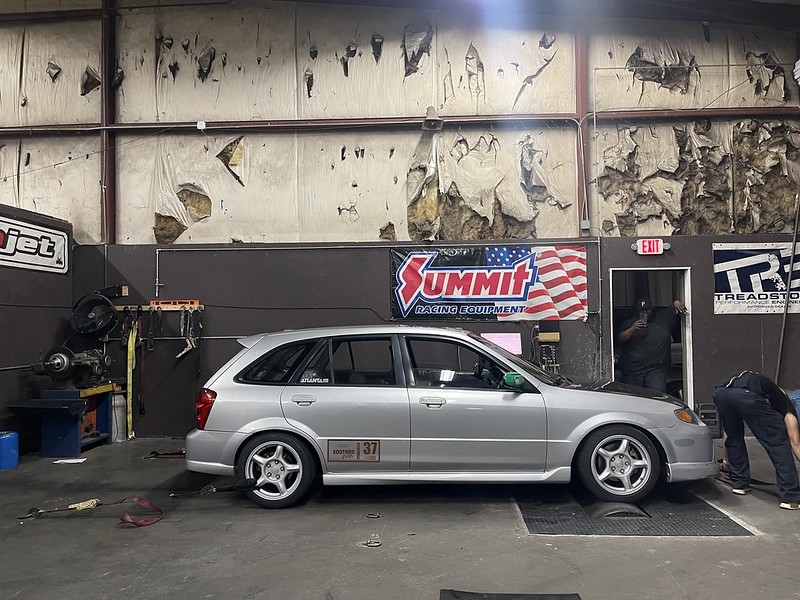
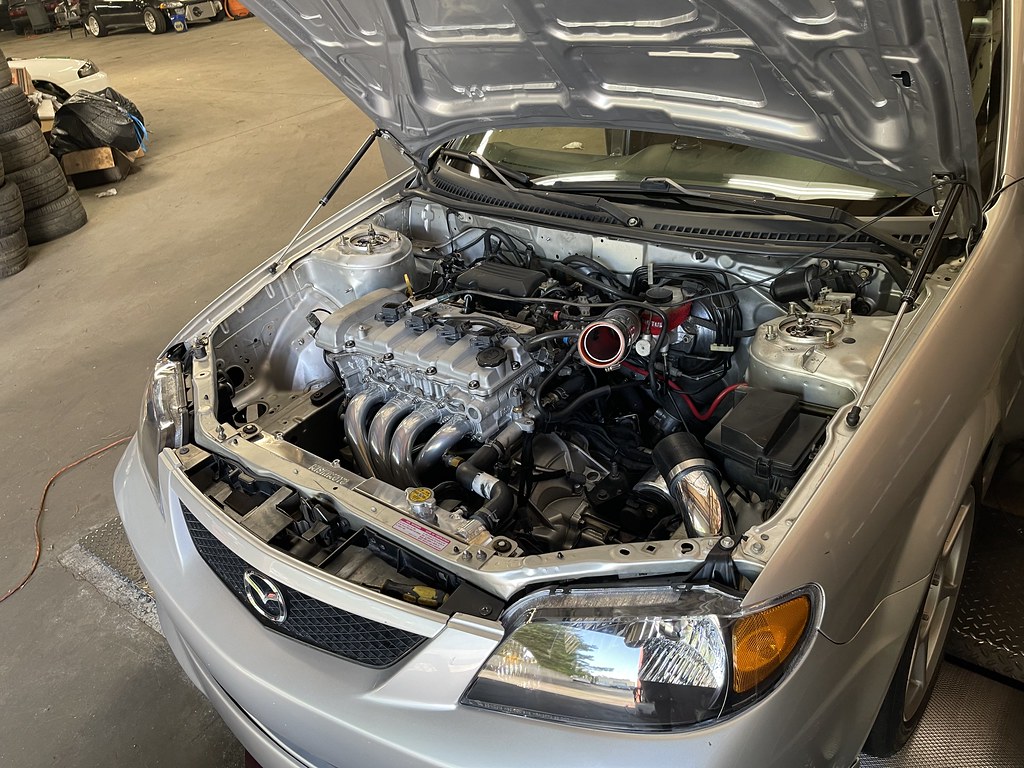
I also got a chance to get the car back on the dyno with the FS-ZE intake manifold. This intake manifold is the matching manifold for the engine, it has a extra resonance chamber specifically for the VICS butterfly system, but mine was not working. So I removed them, and sealed it up. The results was a smoother powerband despite a loss of power and torque. Which could be attributed to the lack of the VICS valves.
LOVE this! Thanks for sharing.

Really enjoyed reading through you're build thread, very nice attention to detail!
Very impressed at how little the car weighs for a wagon.
I bet a KLZE would make a healthy addition in the power department ;)

This was a ton of fun to read. Thank you for sharing!
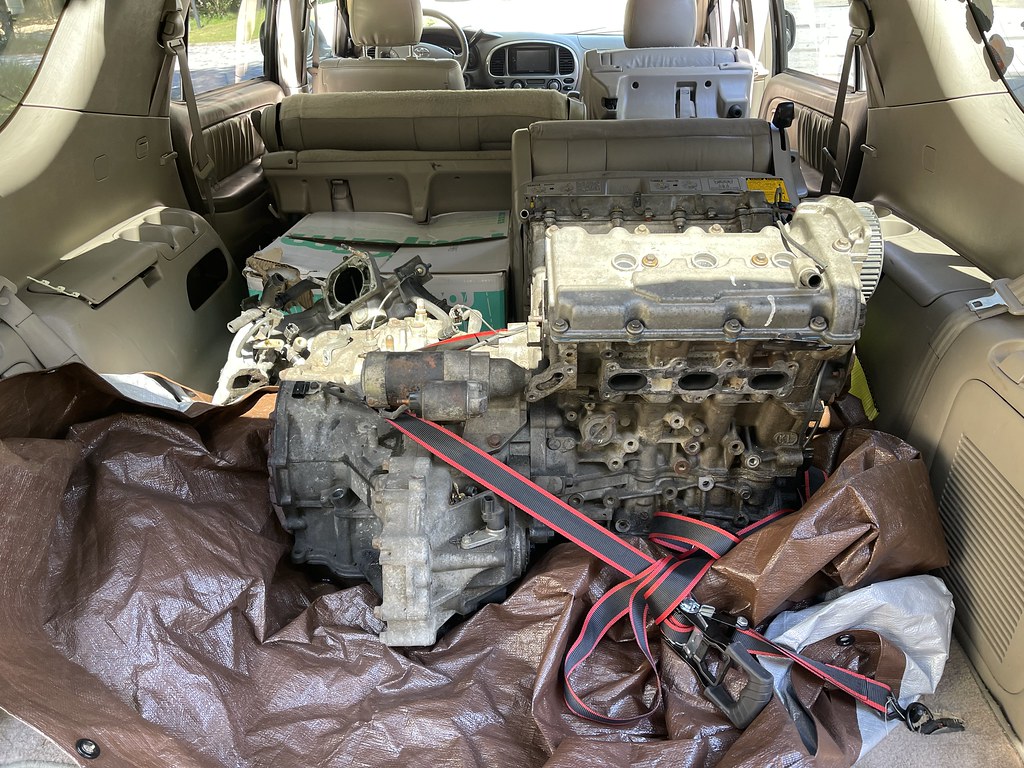
I received a message from a guy in the protege group that someone in Atlanta was looking to get rid of a KLZE that had been in storage for a few years. To me the KL has always been a perfect swap for the BJ chassis. I was lucky enough to do the swap in my old 1992 Protege many many years ago. Every since I started this journey the KLZE was the only swap I was interested in doing once I got to that point. If you are not familiar the KLZE is the Japanese version of the KLDE that is found in the MX6 , 626, and Millenia. The KLDE in the US is rated at 160hp, and the KLZE is a 200hp version with more aggressive cams and higher compression. The gentlemen I got the engine is a MX6 collector, and purchased the KLZE many years ago but had removed it due to the transmission failing for the 3rd time. Being that he has several engines he decided to pull the whole swap and go with a lower mileage one. And this one had been just sitting at his mechanics shop.
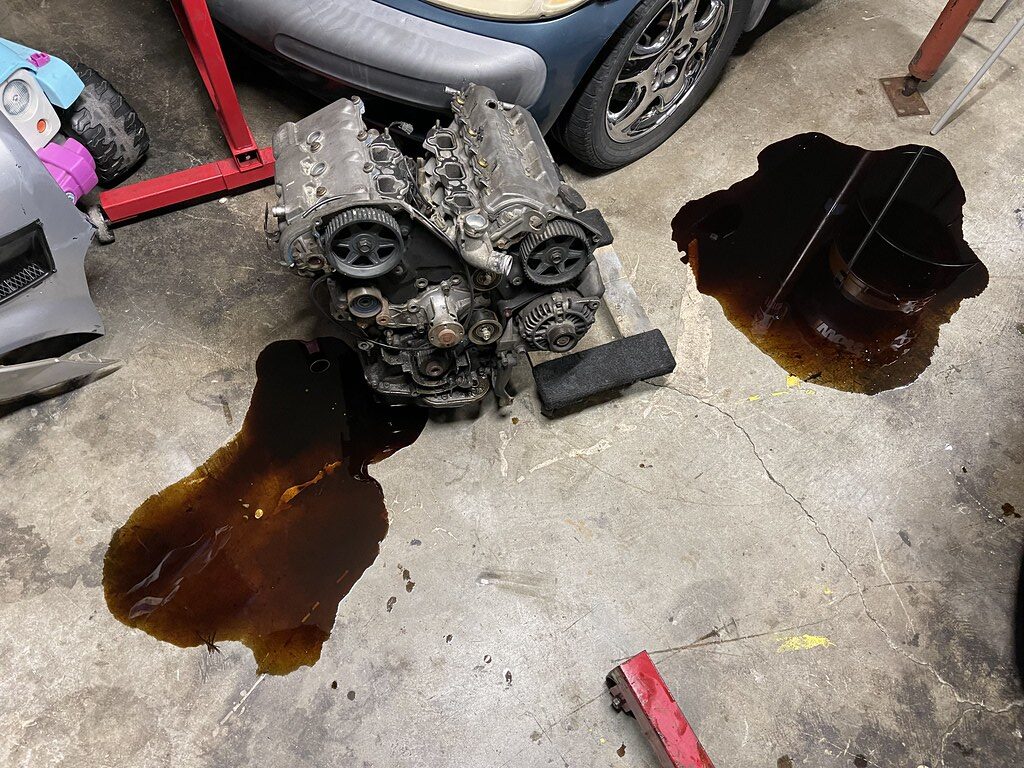
The moment I found out it was full of oil...
I initially thought about trying to source the other components and start on the swap, but I dont think I have reached a point where I really need to tear the car apart and do the swap. I am going to take it slow and get the block and the heads checked and possibly get head work done at a steady pace..
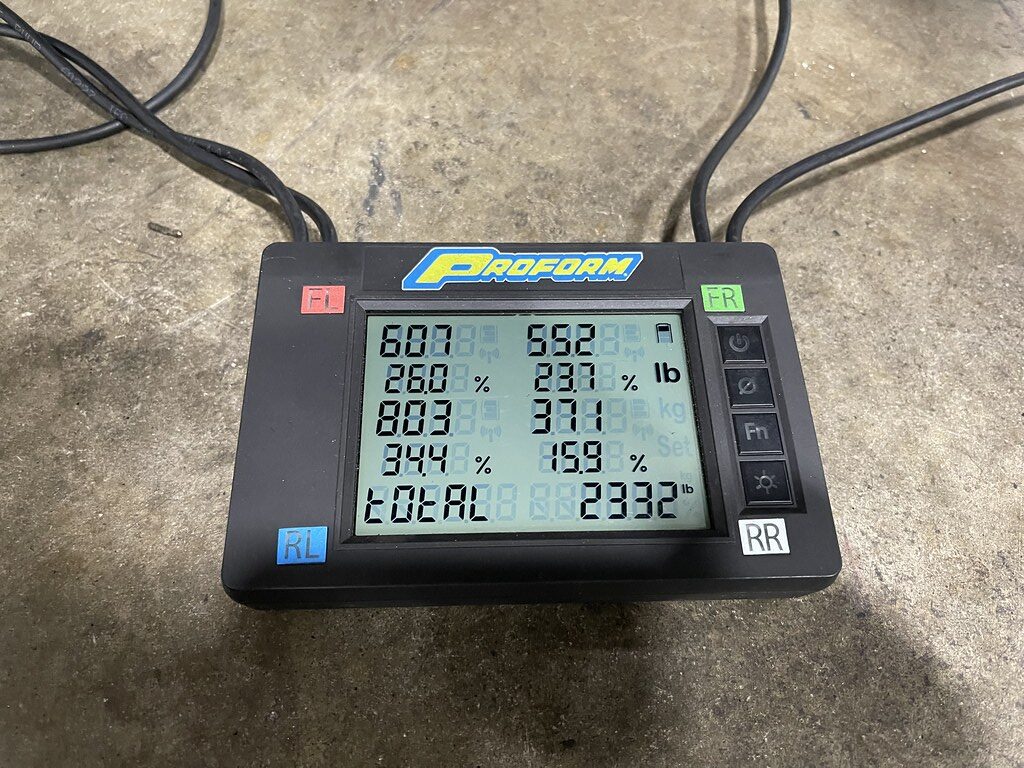
I got a chance to get back on the scales at work, and found that my preloads were all over the place in the passenger rear. I do remember messing with my height months ago, and that may have been when I screwed up the preload.
I had one of my coworkers set my preload properly to be sure it was correct this time.
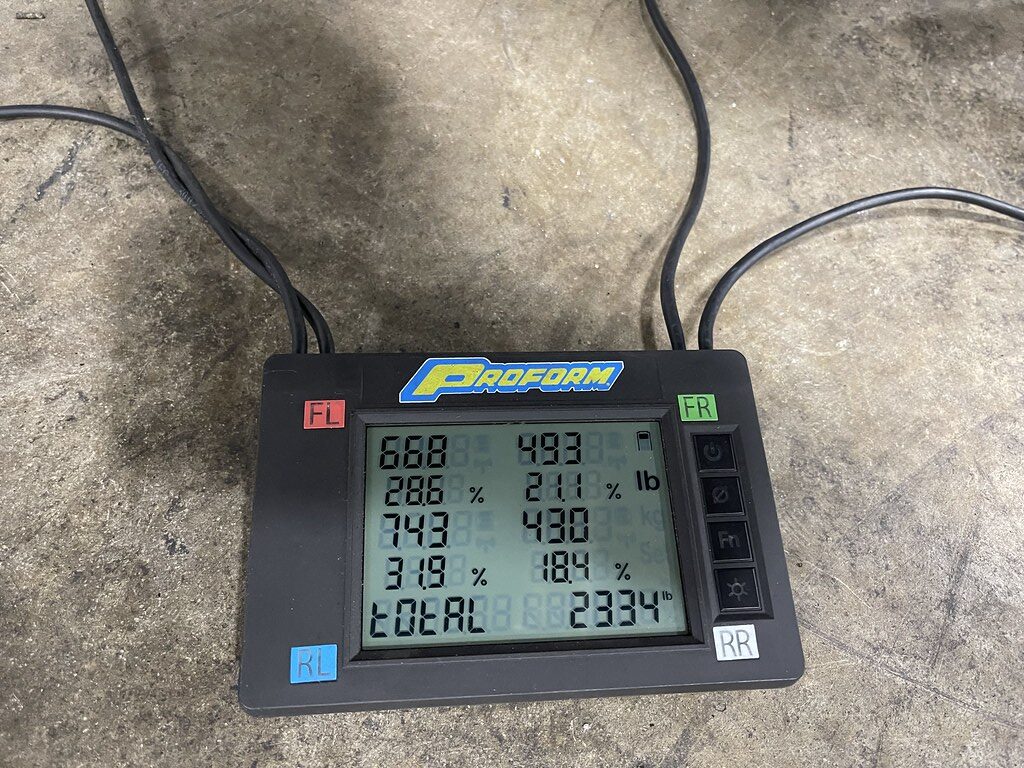
You can see that we shifted over 60lbs to the passenger rear, and were able to get the corner balancing set to as close to 50 \ 50 as we could...
Alignment time!

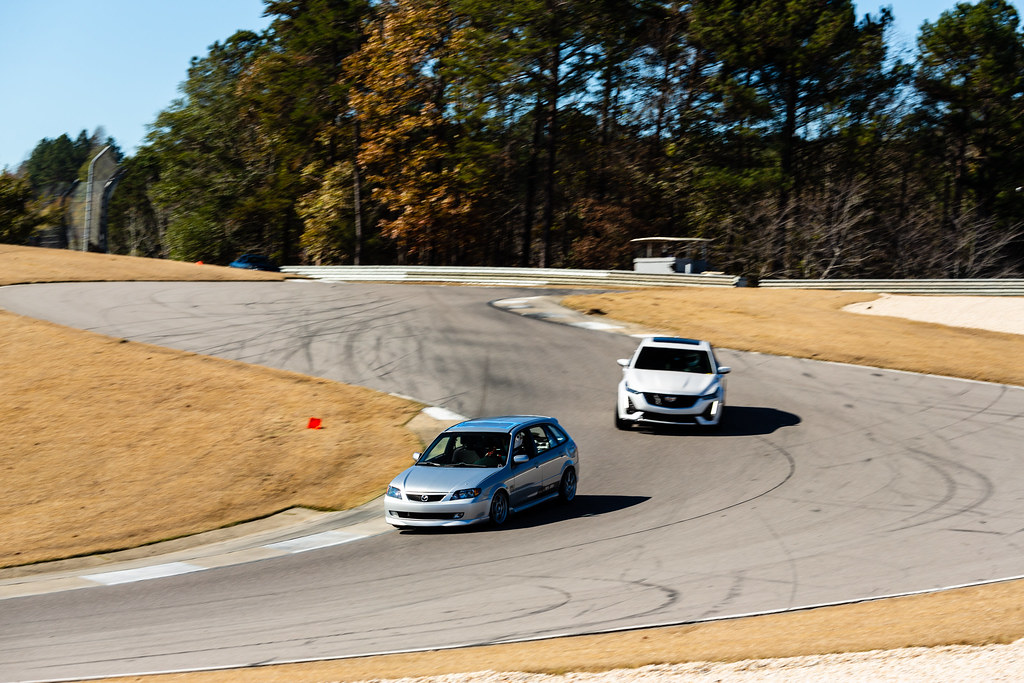
Back at Atlanta Motorsports Park with Jzilla Track days. My student for the day was in a Matrix XRS.
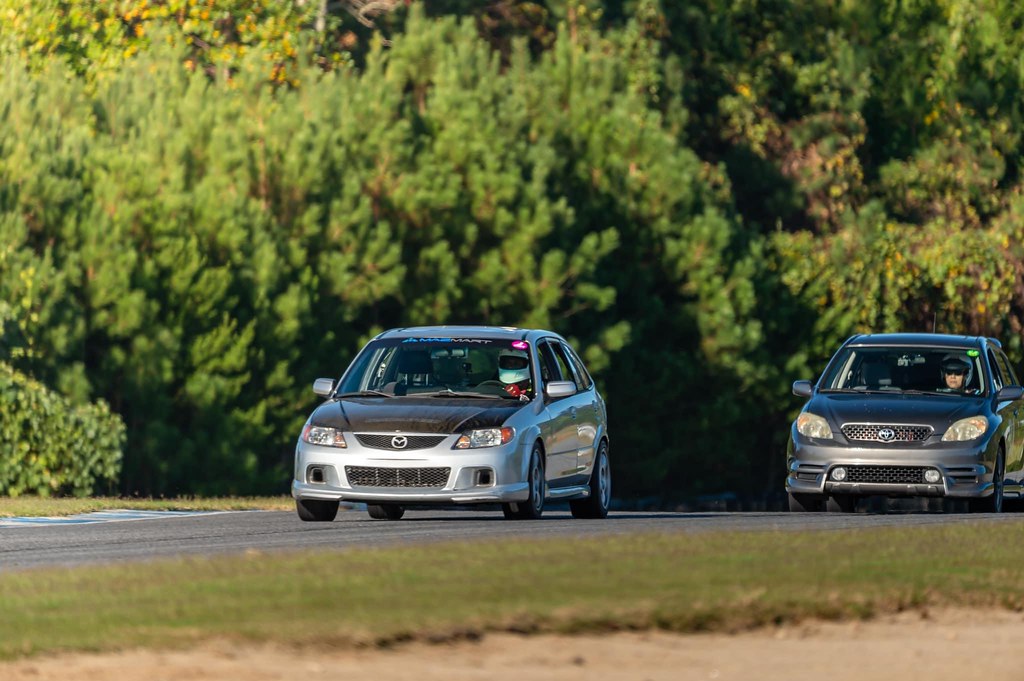
The proper pre-load made a huge difference on the carousels. But early in the day I started to feel my tires loose their grip under braking. Normally I would chalk it up to a cold track. But as it warmed up, I had to start braking early because the car felt a little un stable under hard braking into Turn 1. The brakes worked, but I was getting closer and closer to losing grip every lap.
I was experimenting on no downshifting to 2nd gear into turn 6, and it felt alot smooter and it set me up much better for the rest of the track instead of fumbling with shifting and taking the hard right. The last dyno session gave me less torque, but it peaked at 3k RPM and flatlined to 7k. Instead of peaking at 6-7k, that change gave me the idea to hold 3rd and focus more on the lines. I was busy learning and never really felt liek i pushed it 10/10, but focusing on the lines and smoothing out the lines dropped me .5 of a second on my PB. So there was progress. But during all this my tires finally gave away, and it ended up 2021 track season for me a little prematurely. I wanted to make Barber the following month, but I decided to end it this year at AMP and start getting ready for 2022..
Video of me trying to keep up with a S2000..
[MEDIA=youtube]LFO-aeHwEHs:5[/MEDIA]
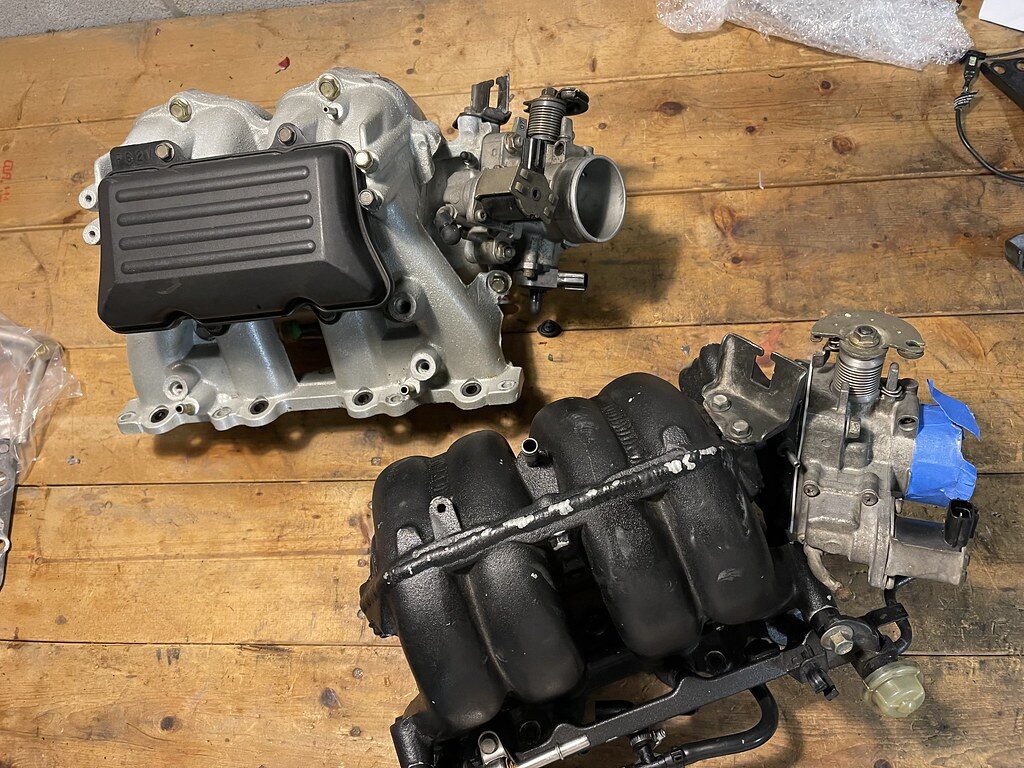
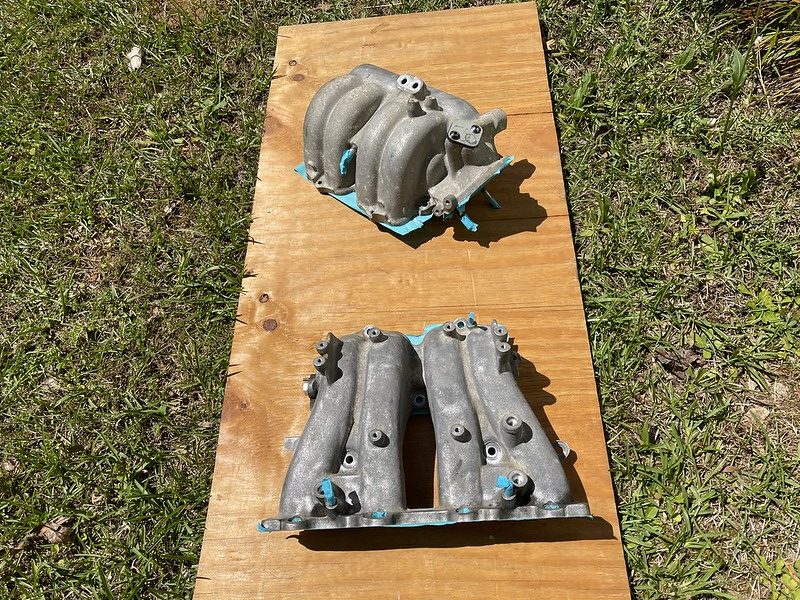
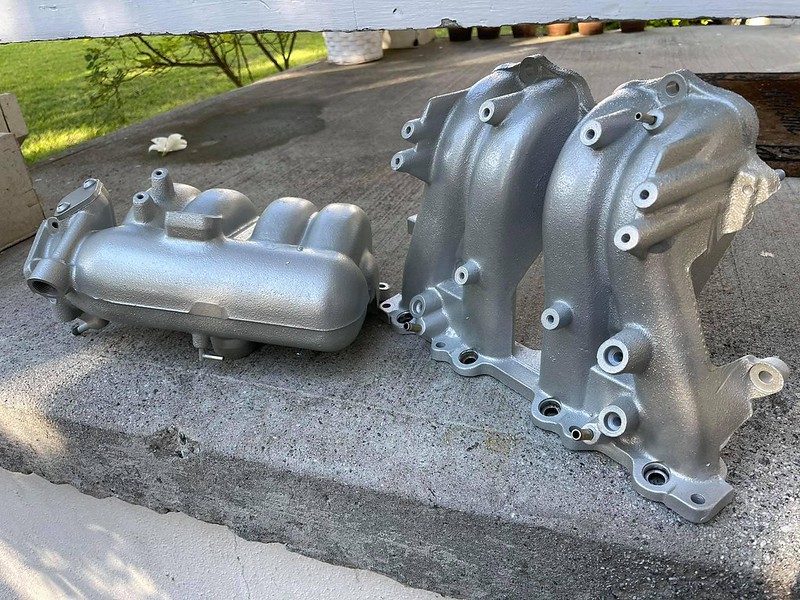
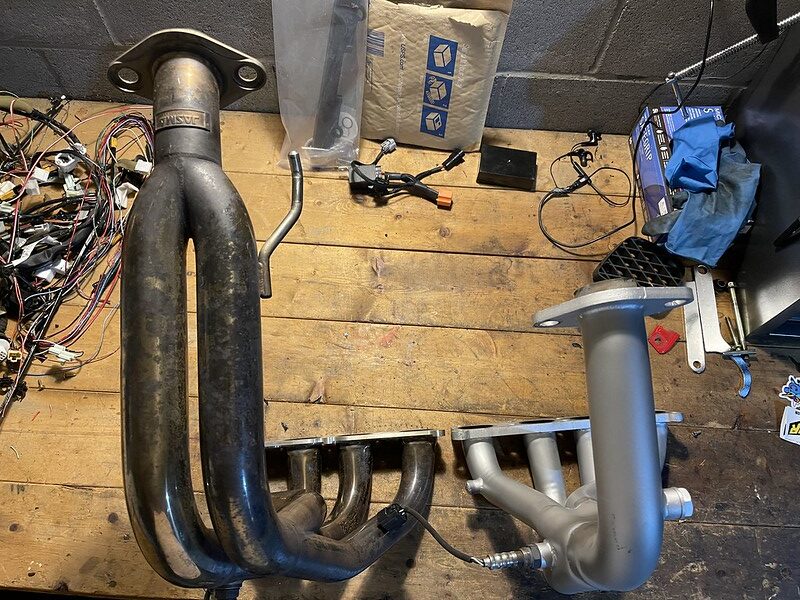
I had a FB Group member reach out about having me test out a ported manifold on the P5 to see the gains.
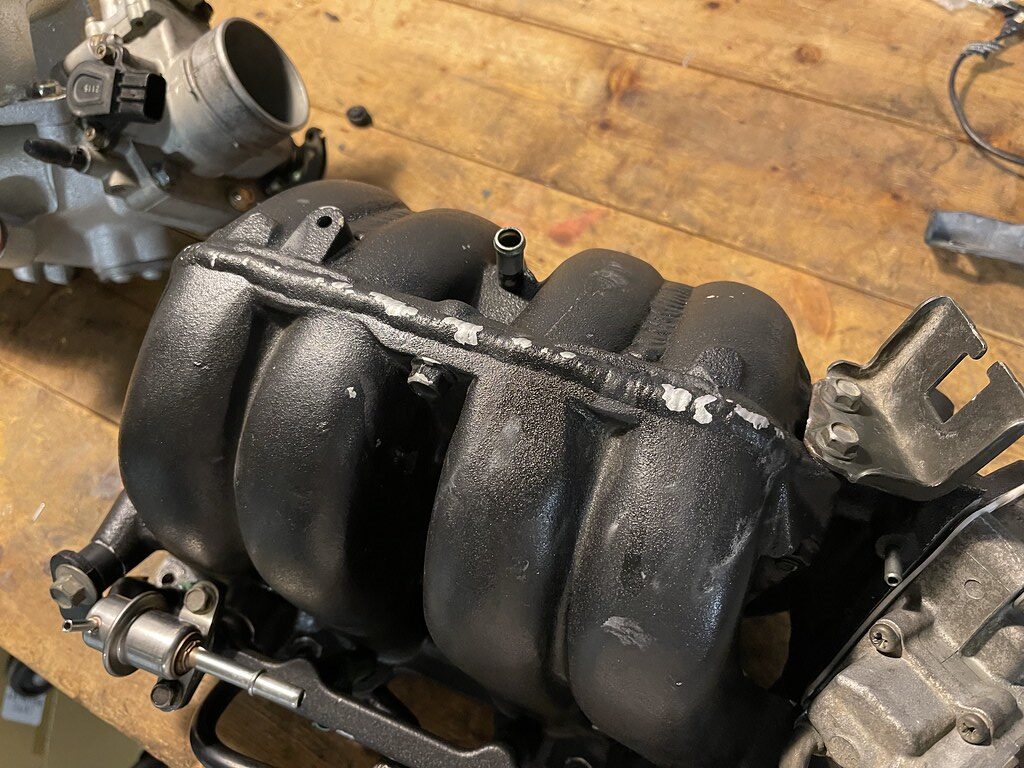
The most noticeable difference was that the manifold was welded to one piece and shaved. Most of the work had been done internally. Stock these manifolds have secondary valves that open and close at certain RPM for torque. It all has been removed, and the internals have been ported into 4 large runners, instead of split up by individual ports used to direct air through the valves.
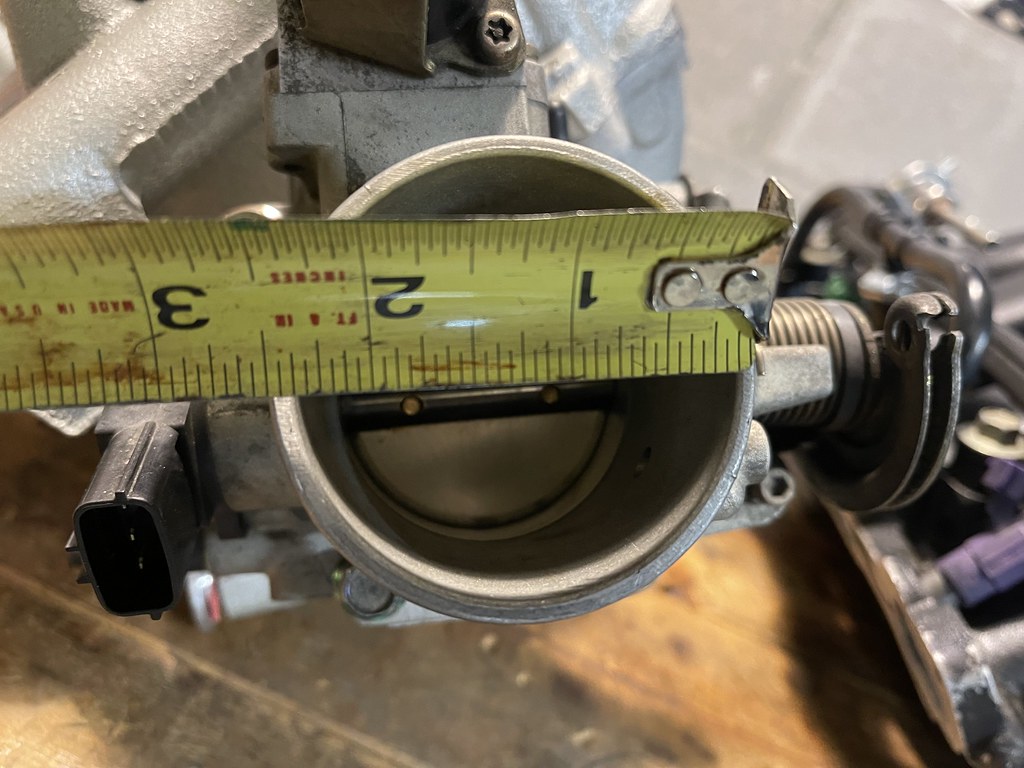
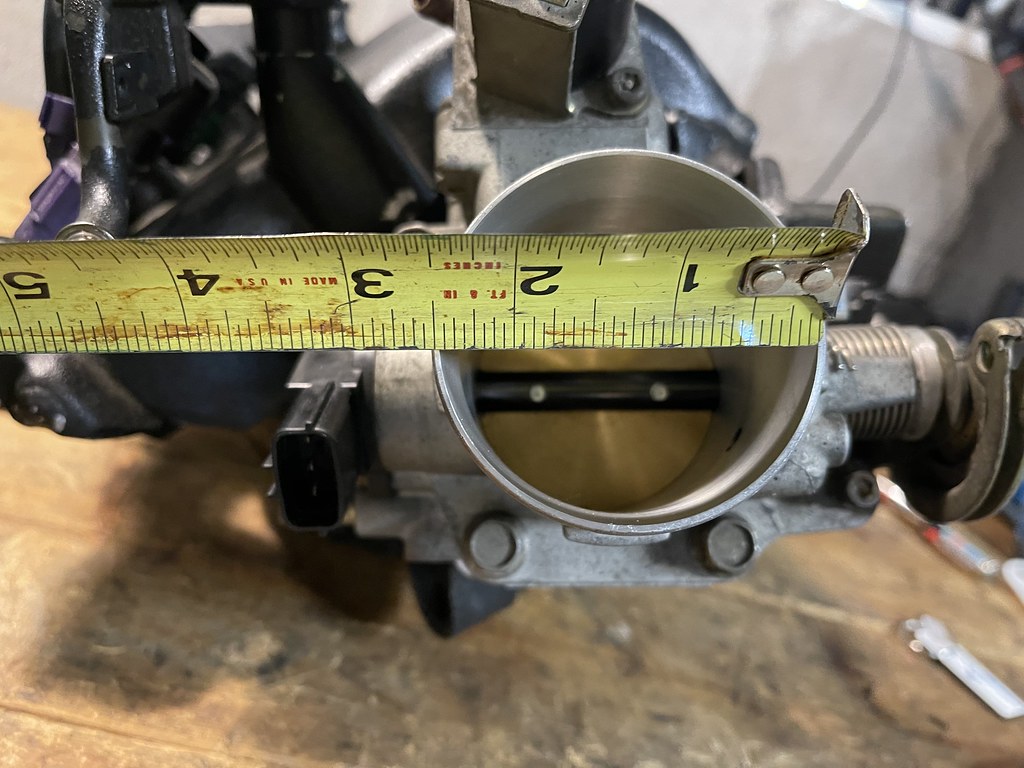
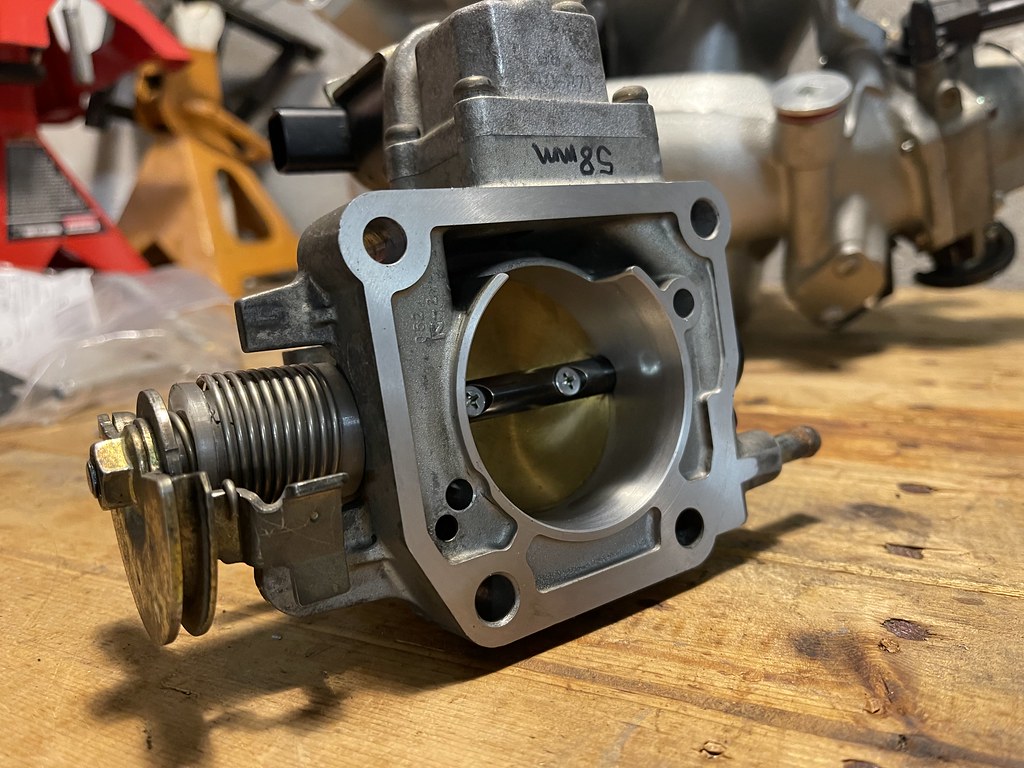
Also it has a ported throttle body. Stock size is 53mm and this one is 58mm.
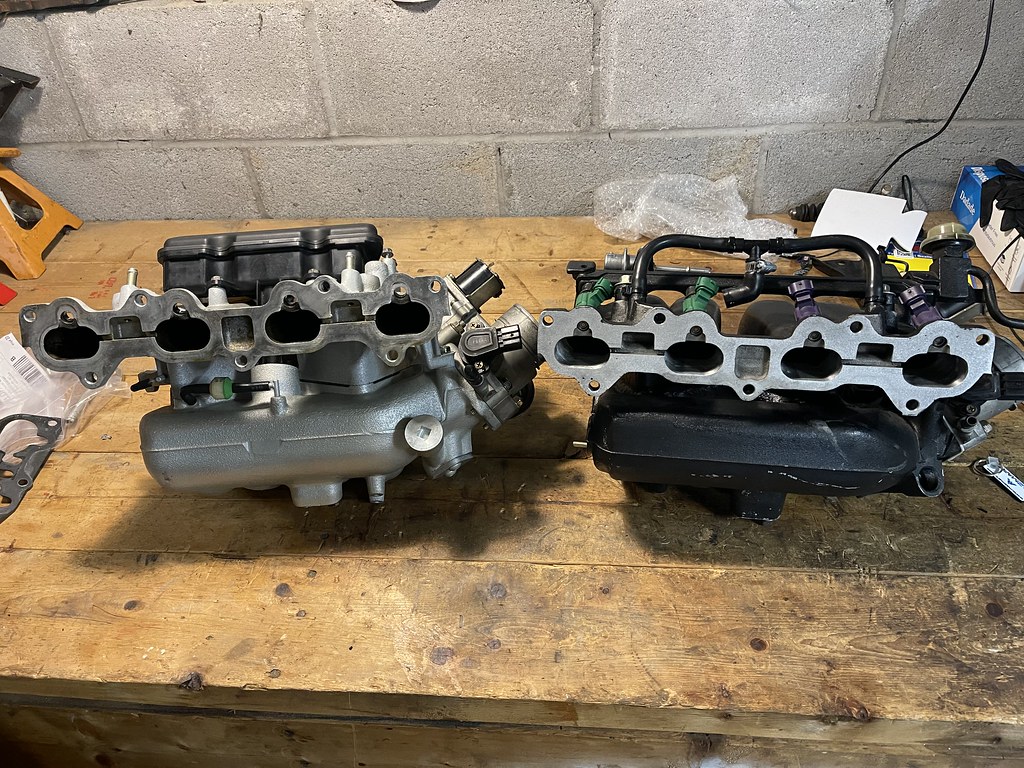
The ports were matched as well. Very interested to see the difference with this manifold on the dyno...
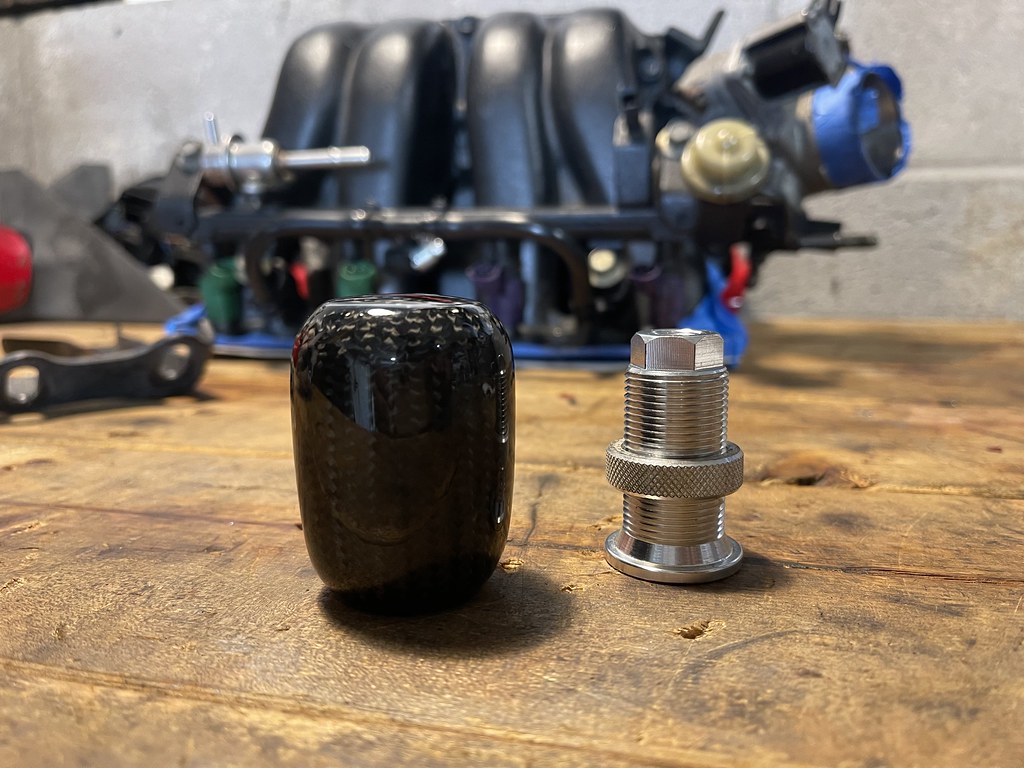
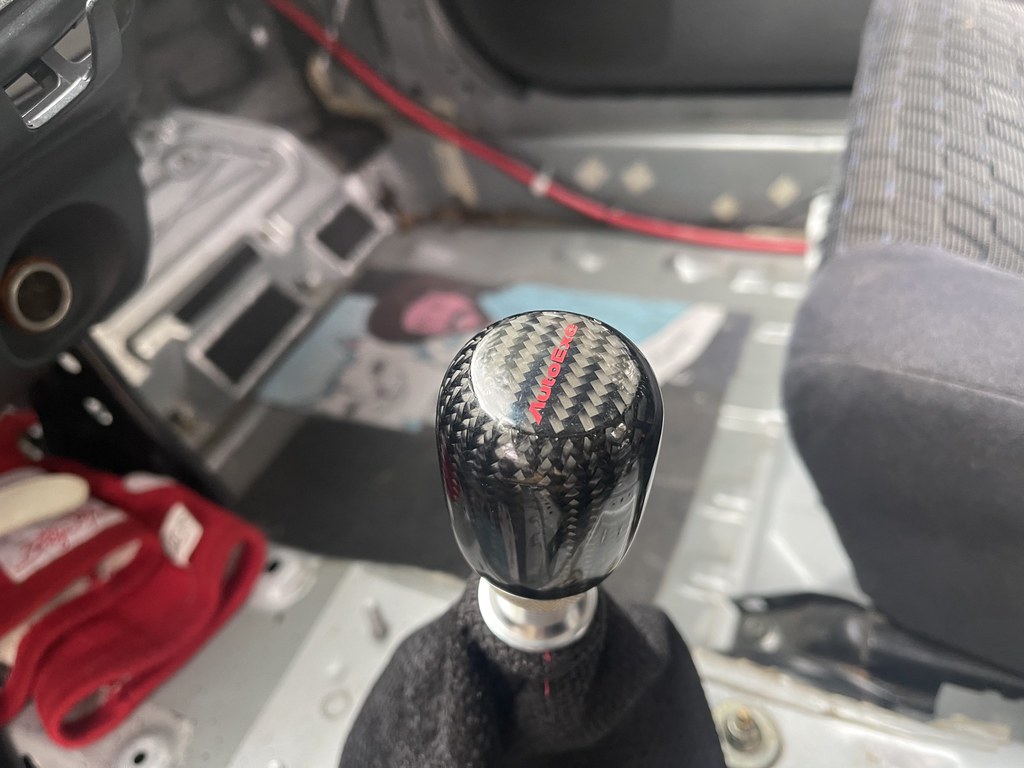
Gifted the race car with the elusive Autoexe carbon fiber shift knob..
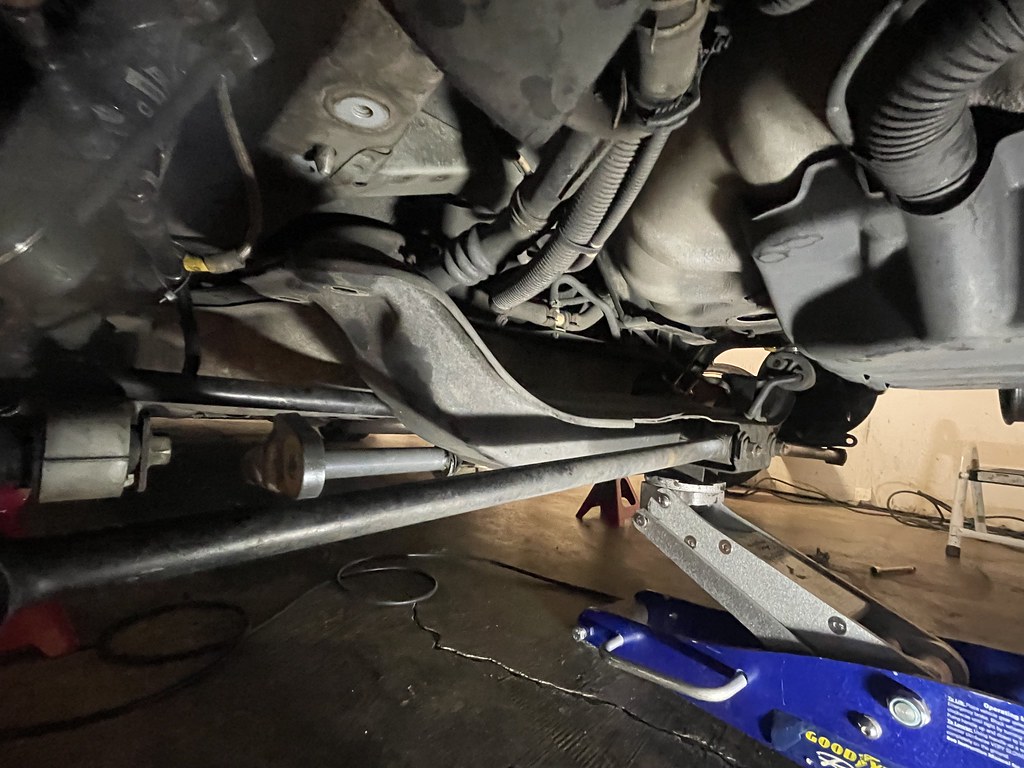
Since I finally had time I went started to install the megan racing control arms and trailing arms. This does require removing the rear subframe, which is a pretty straightforward job besides the really stubborn knuckle bolts..
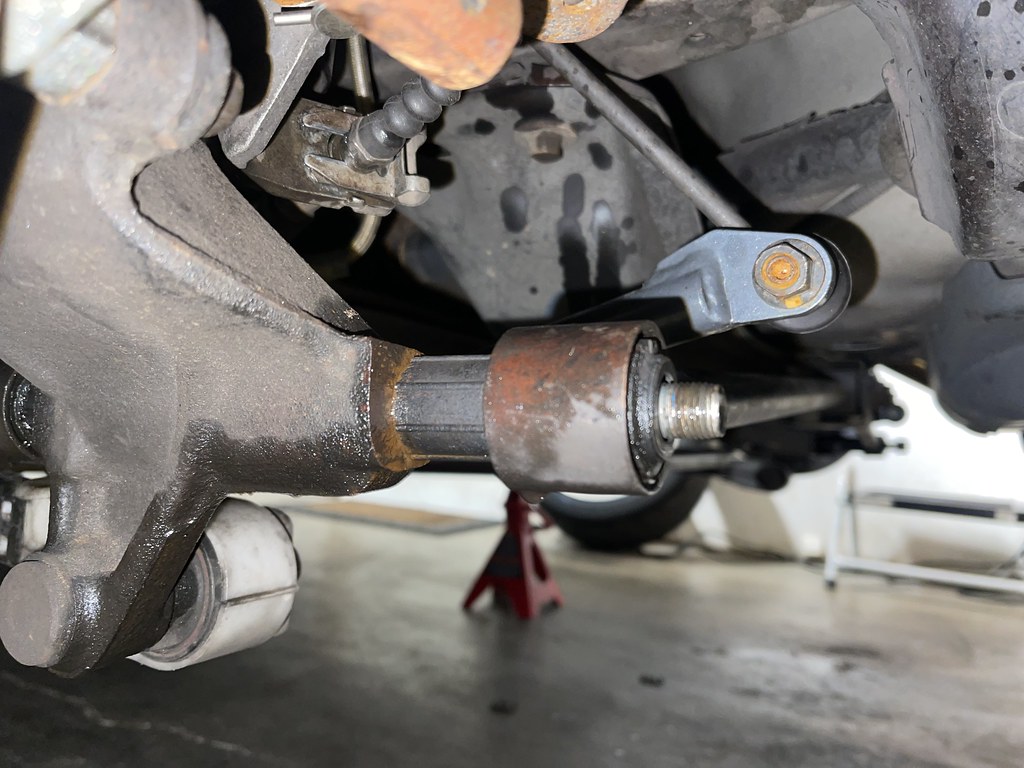
The nut can be loosened with a good impact. But the real tough part is getting the actual bolt out. Once you remove the nut, you need to spin the bolt free and slowly work it out of the lower knuckle and arms.
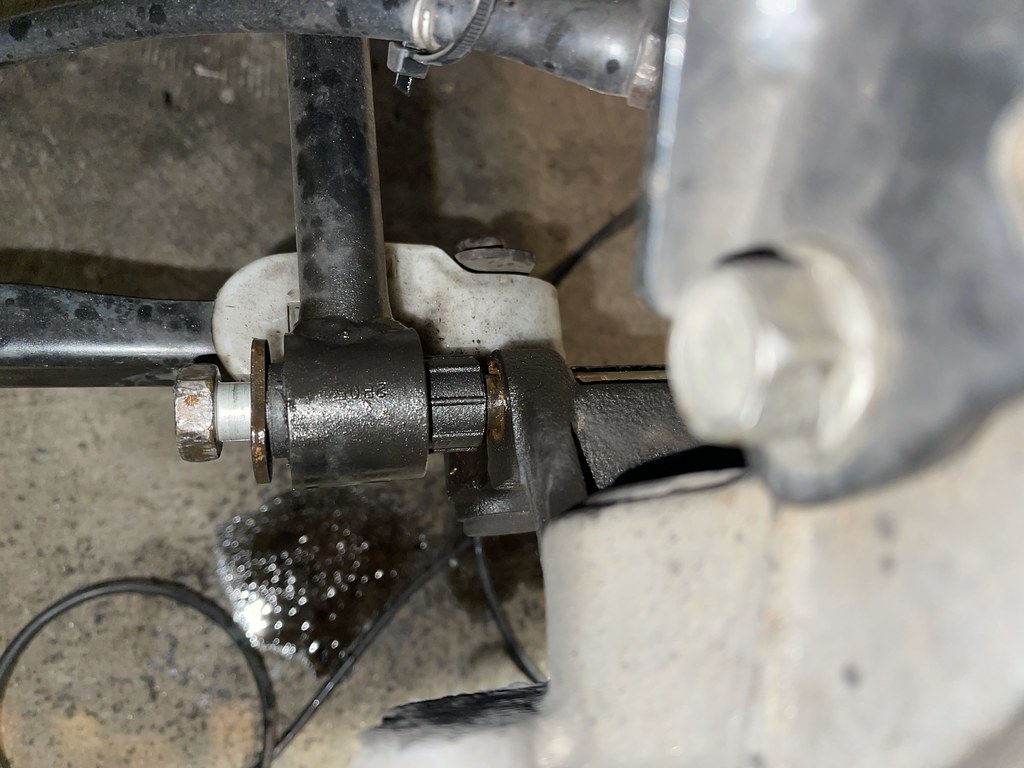
The bolt gets seized when it goes through the aluminum knuckle. I used a breaker bar and sprayed a good bit of lubrication to try and free it up. Once you get that initial turn its all downhill from there, but its tough. I did notice things started to free up once I concentrated the thread lube on the knuckle portion to free it up.
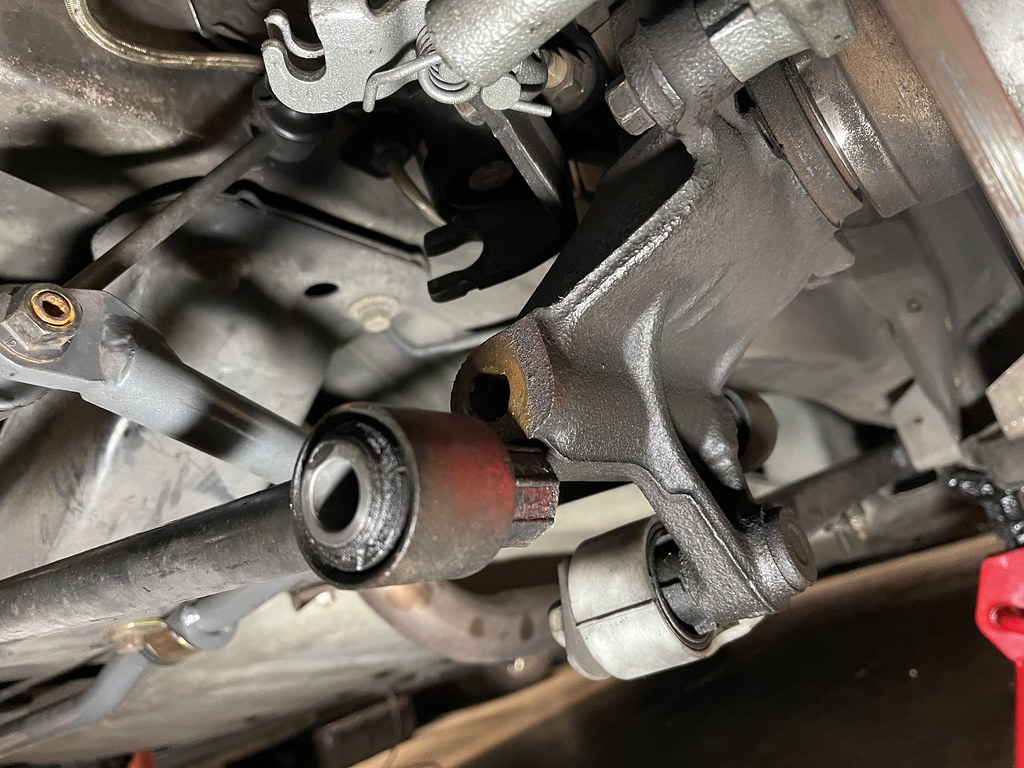
Once you get it to spin freely, you should be able to punch it out.
Once that is over everything else is simple..
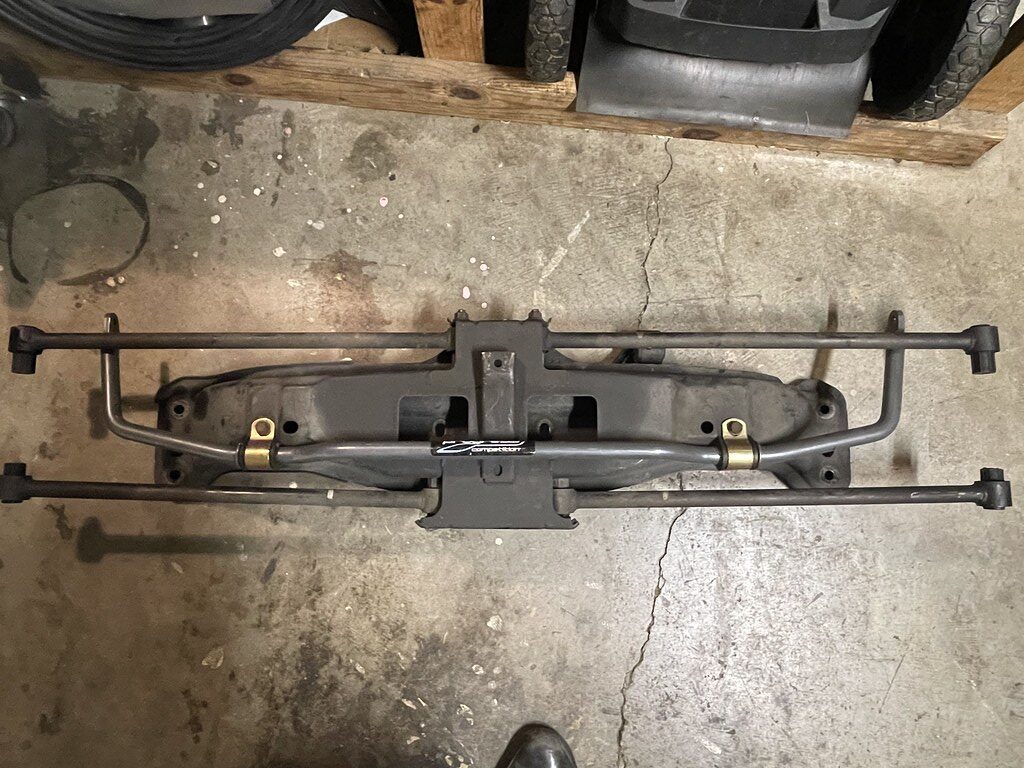
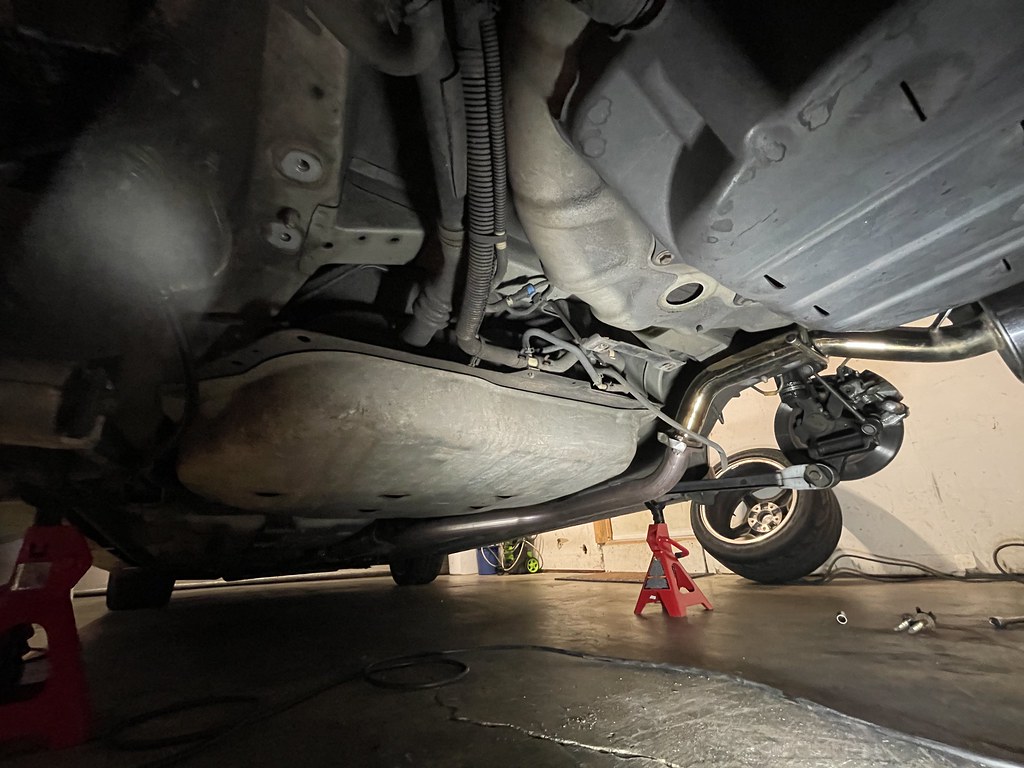
Rear subframe out!
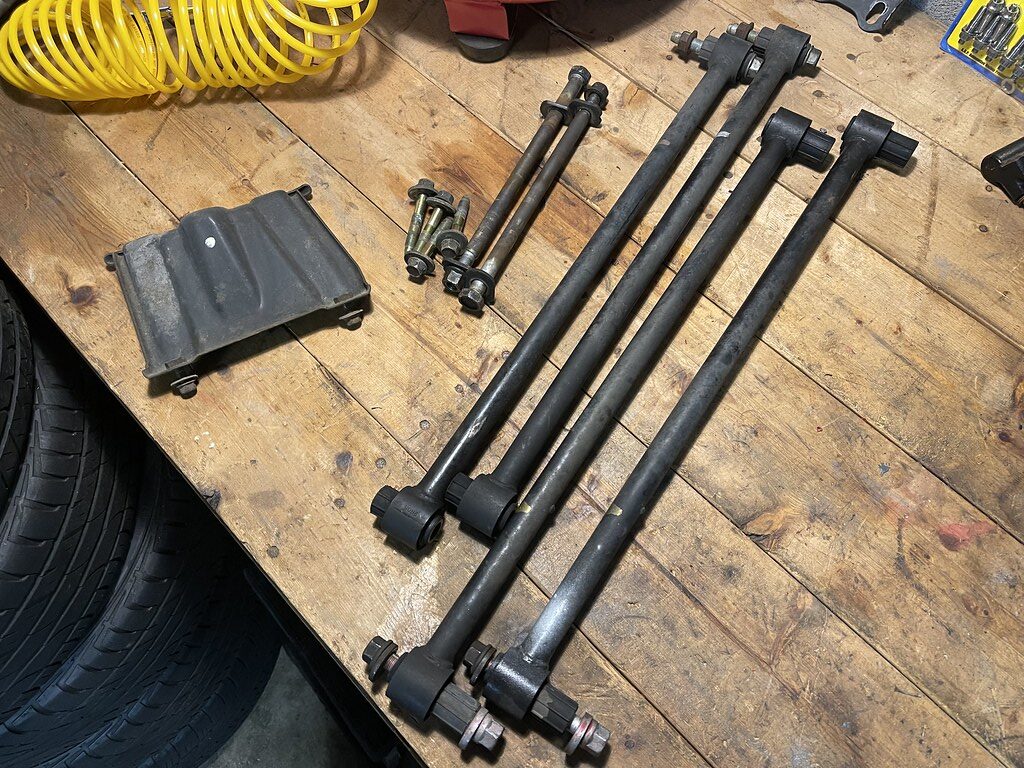
Rear control arms, and subframe brace out..
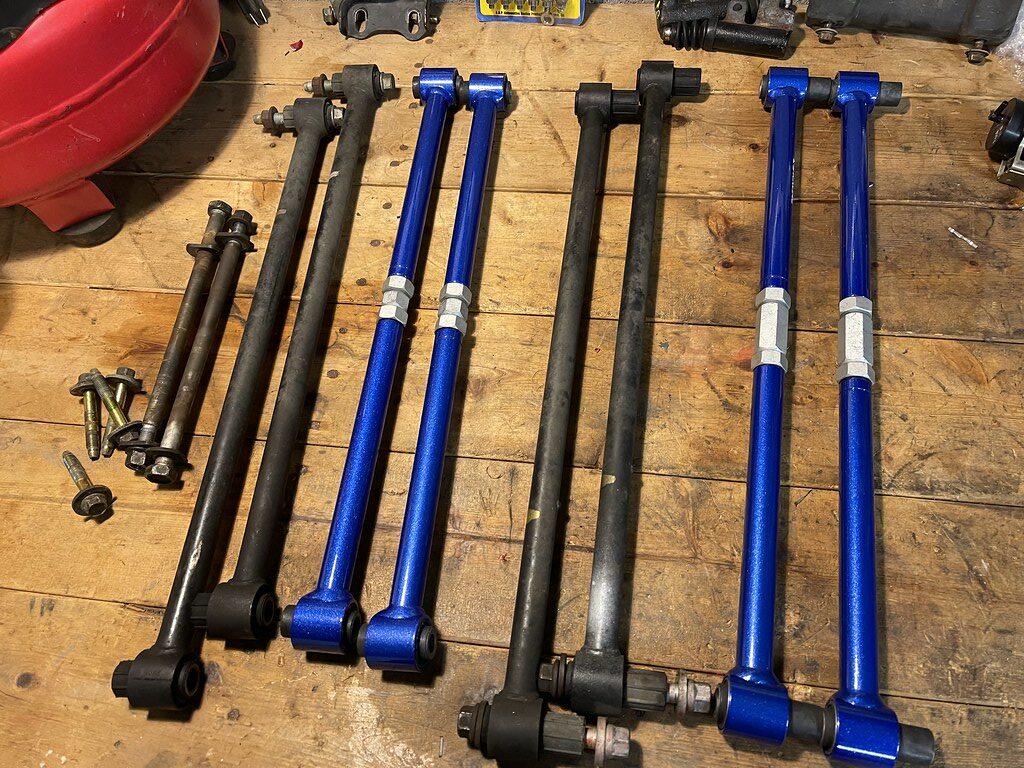
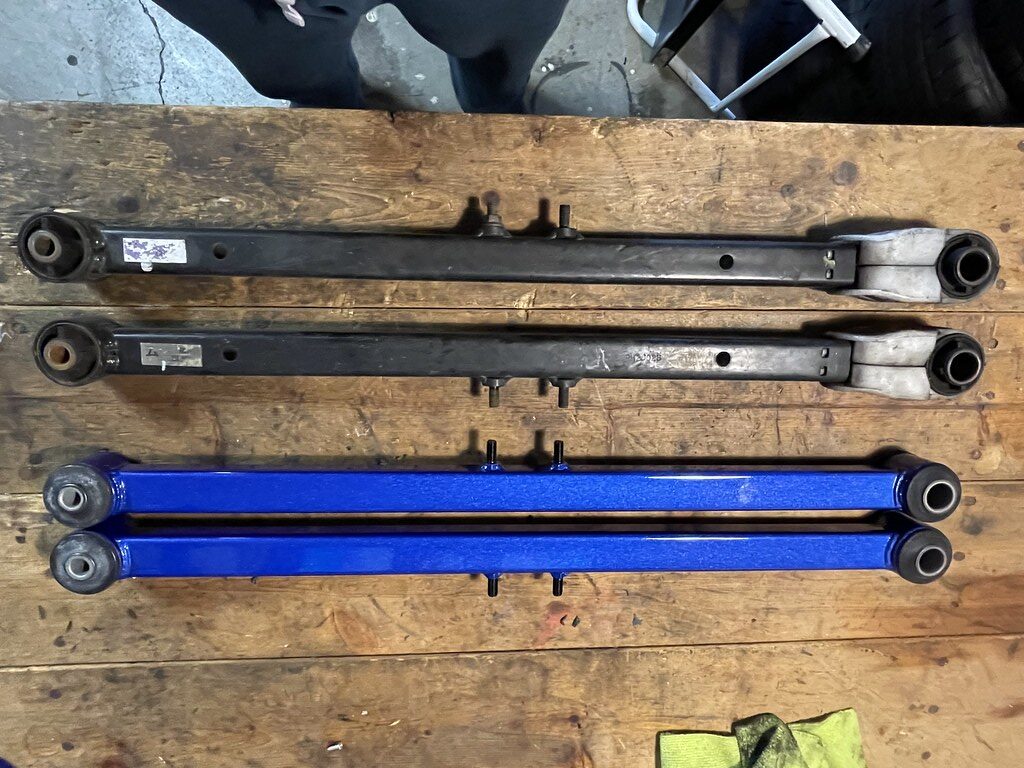
Comparison of the OE arms and Megan arms. The main reason for this is more camber adjustment in the rear and being able to get rid of the camber bolt for a more consistent alignment in the rear.
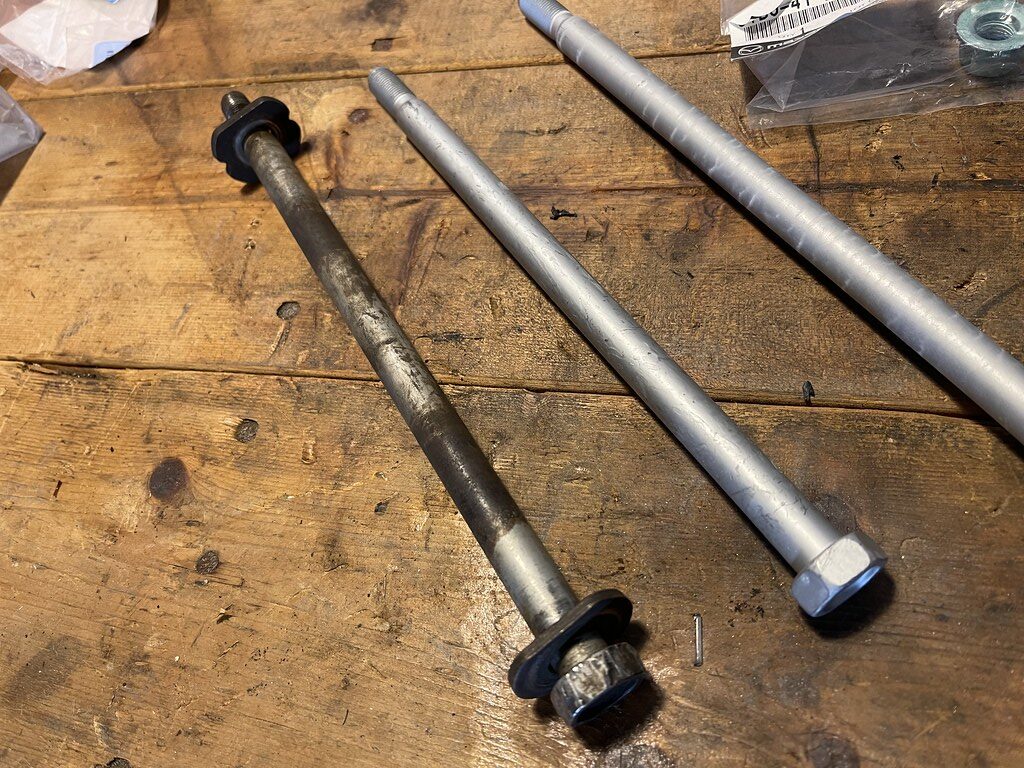
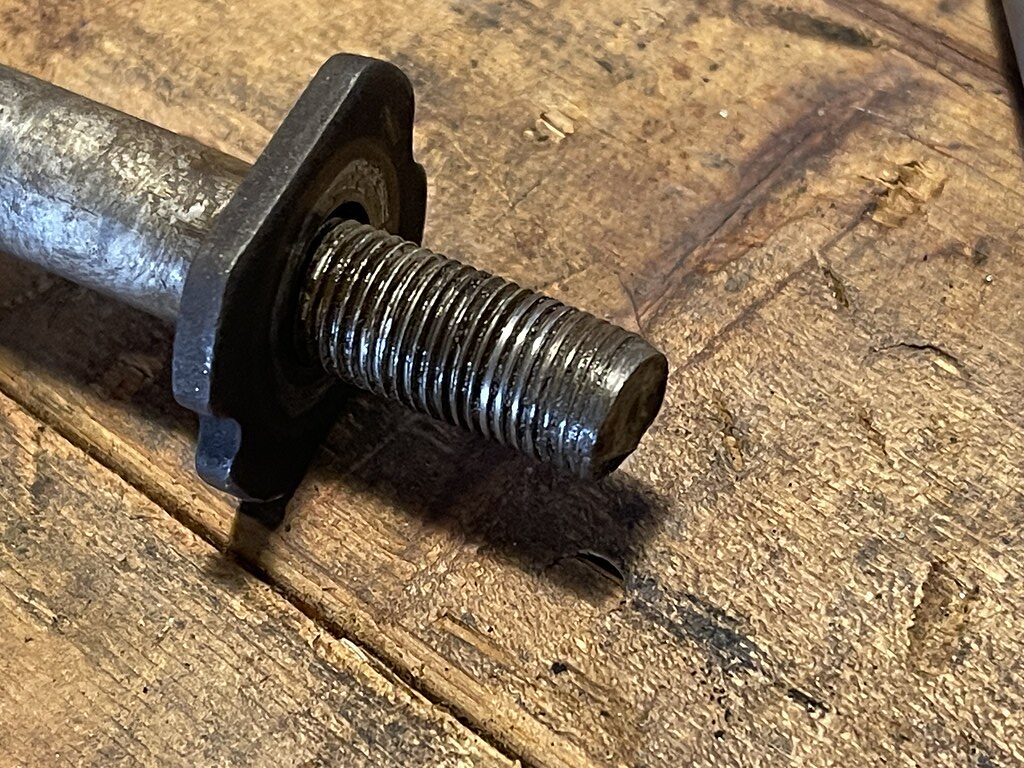
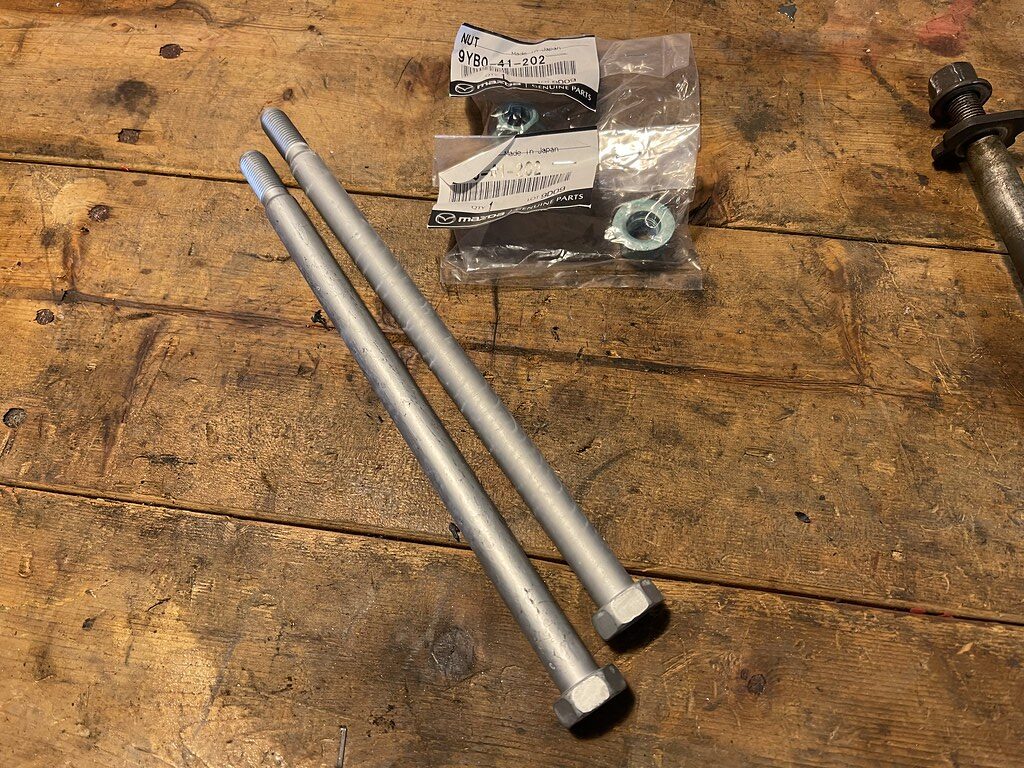
I got a little too happy with the punch, and damaged the lower control arm bolt when removing it. I went ahead and replaced them both with fresh bolts, they are about $22 a piece from Mazda.
I also had the trailing arms to go in..
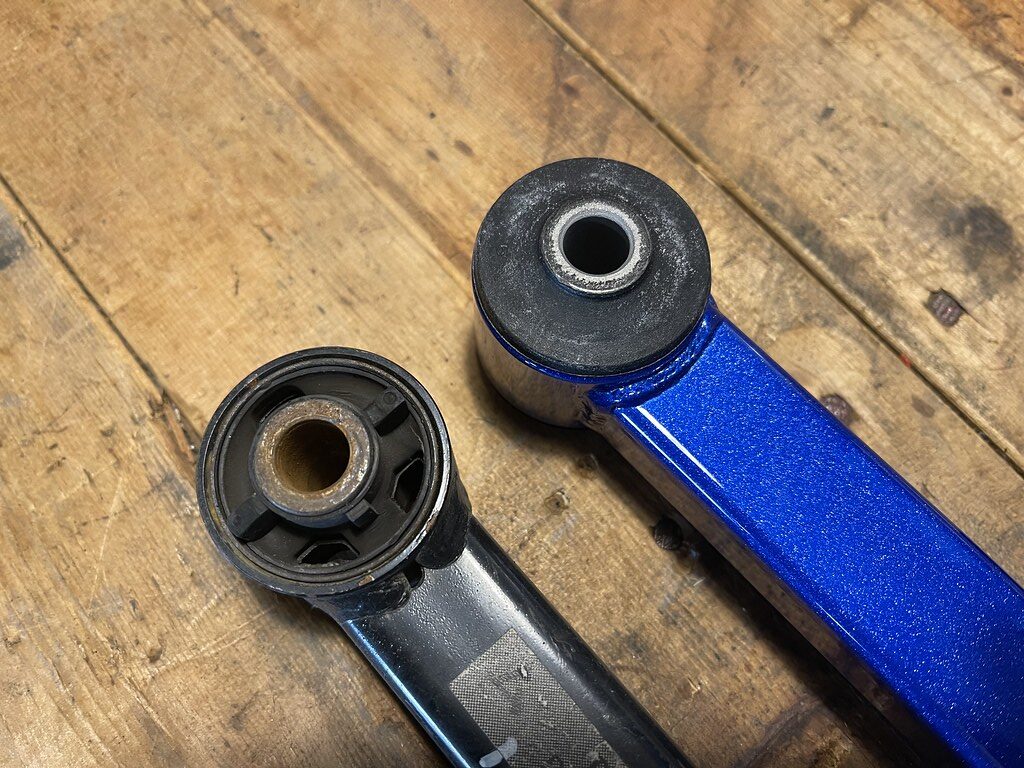
Comparison of the the OE bushing and the Megan bushings in the trailing arm.
Rear subframe stripped of the arms and sway bar..
Subframe cleaned and sprayed
Arms installed and ready to go back in.
Installation was way less eventful than removing especially with fresh bolts and hardware. I set the control arms as best as possible until I can get it to work for the alignment!
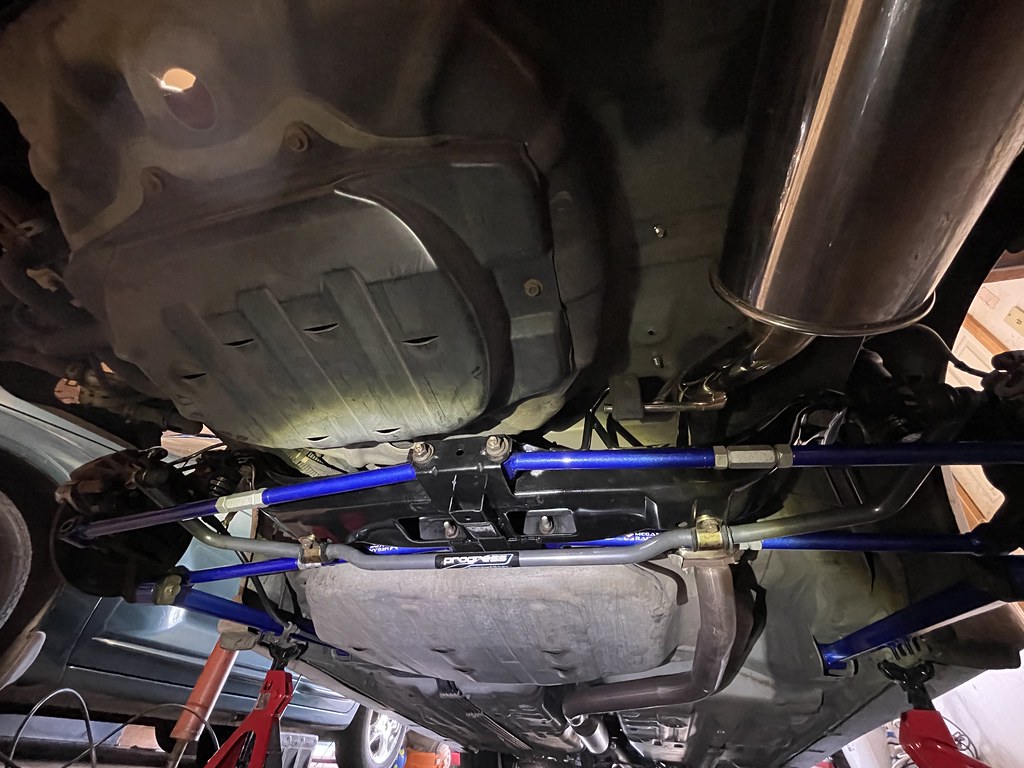
Its been awhile! But the build has been continuing at a steady pace. I was pretty busy with planning Southrnfresh 9, and holidays and with the weather warming up it was just a lot going on. But the build has been going on at a steady pace, and I have a lot to catch up on.
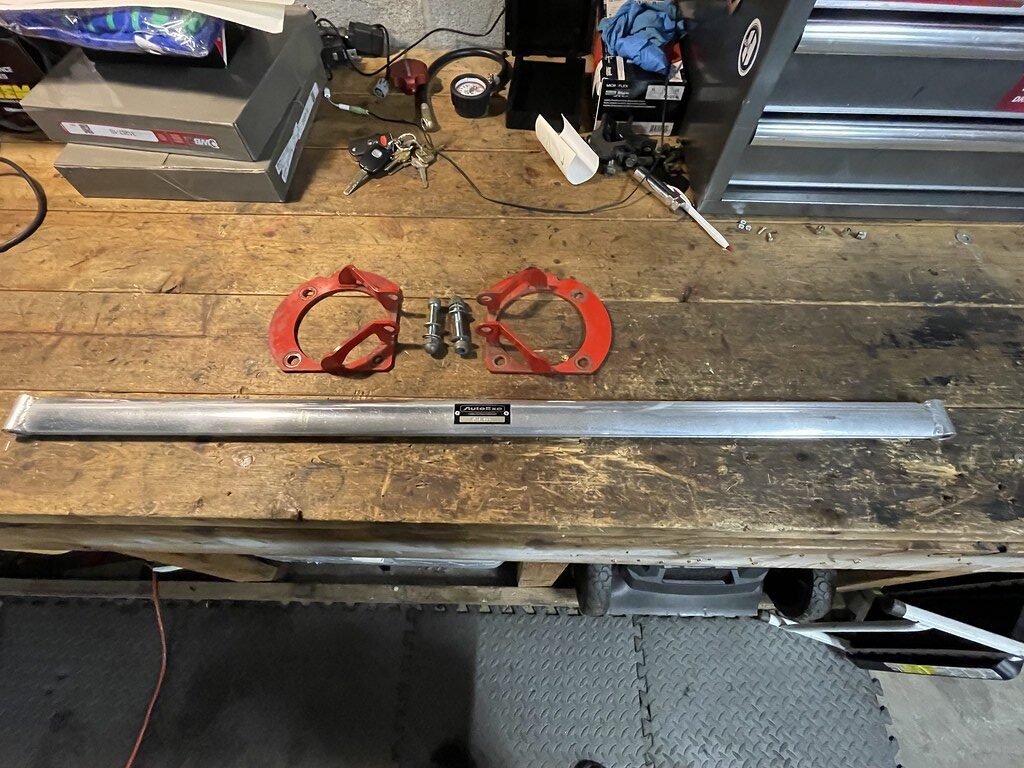
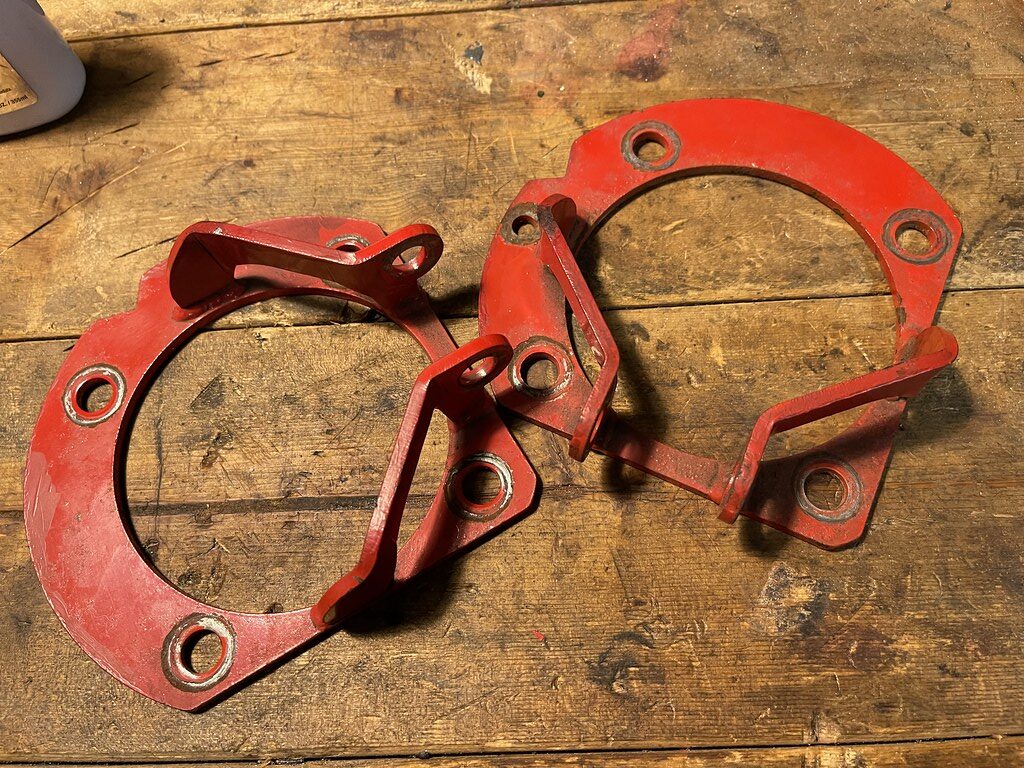
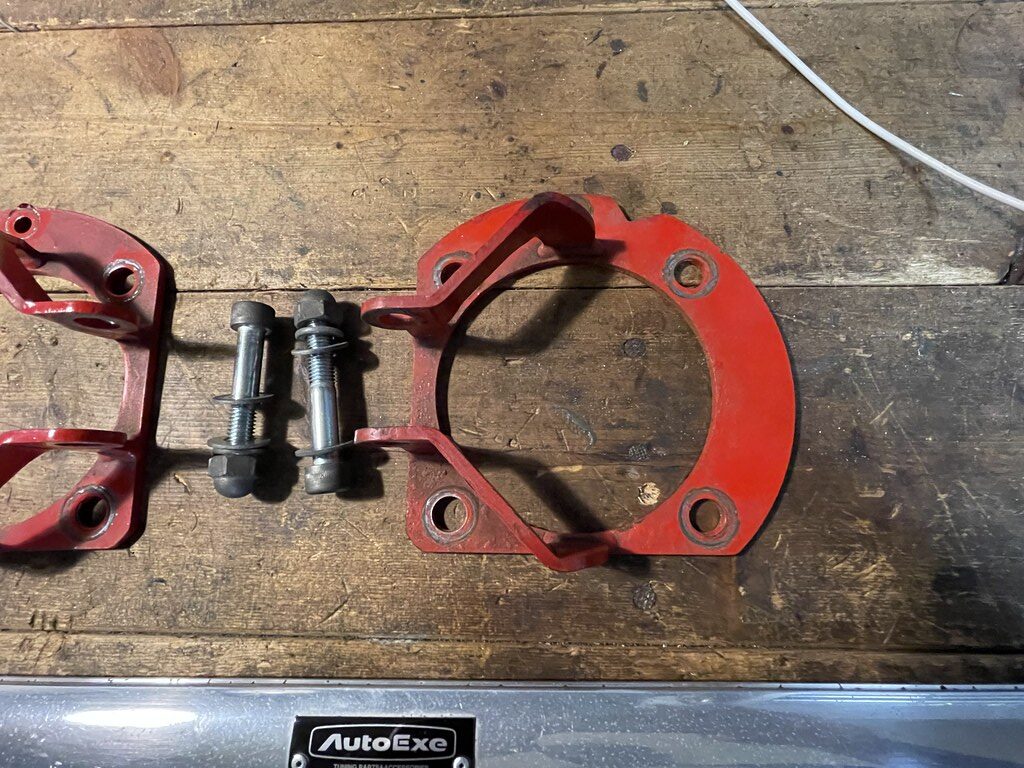
Last post I installed the megan rear control arms. A few weeks later I received the carfield braces from Taiwan. This kit is a replica of the rare Autoexe bracing kit, it includes a reinforcement bracket for the rear subframe, rear subframe bracket, middle cross brace, and a front subframe brace to replace the OEM one.
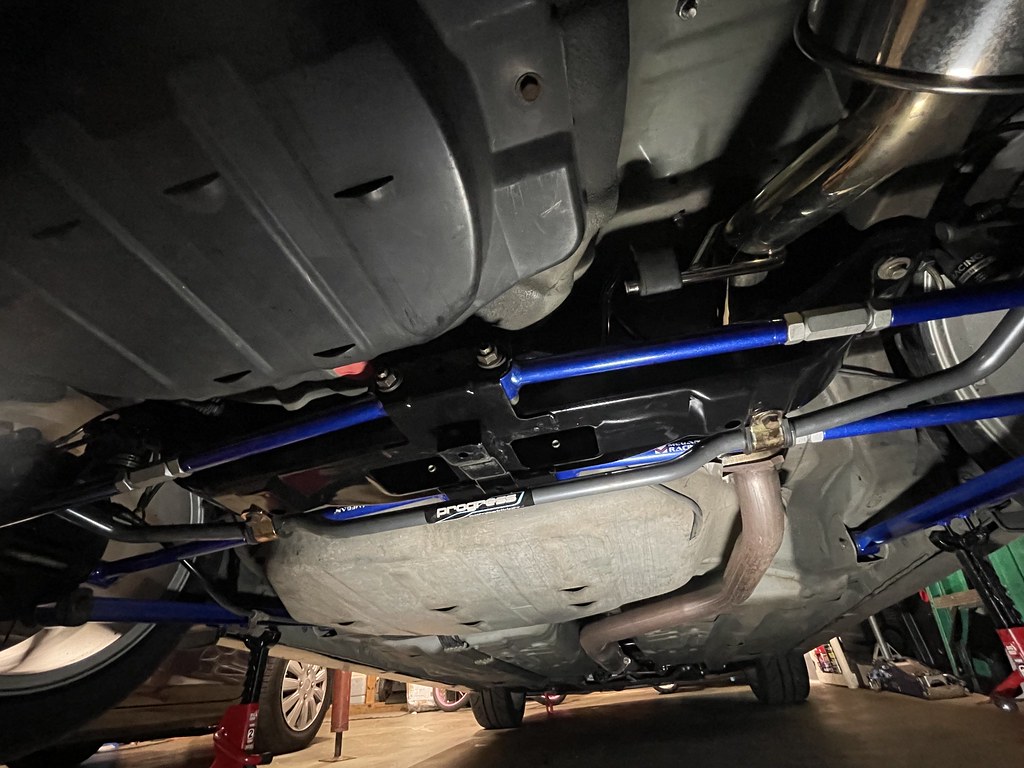
Installation is pretty straight forward, but it does take a minute get the correct bolts in their proper place. They also have spacers to add to clear larger sway bars and the exhaust.
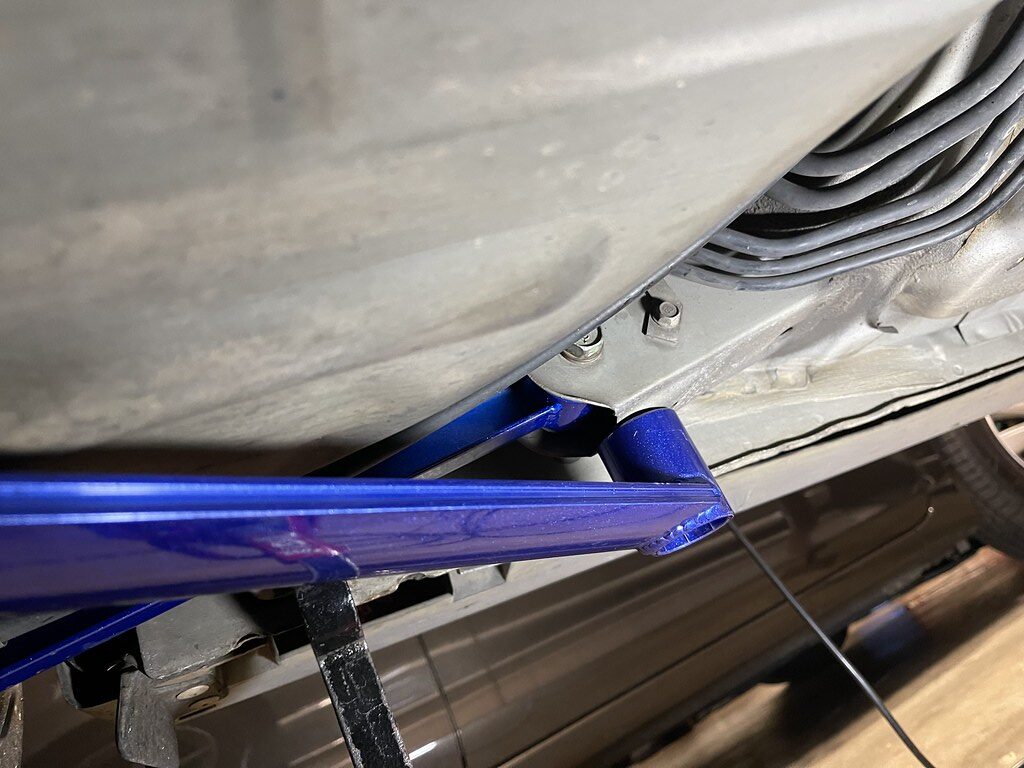
You have to remove the rear trailing arm, to drop the bolt through the hole. And then you can tighten the subframe braces in place.
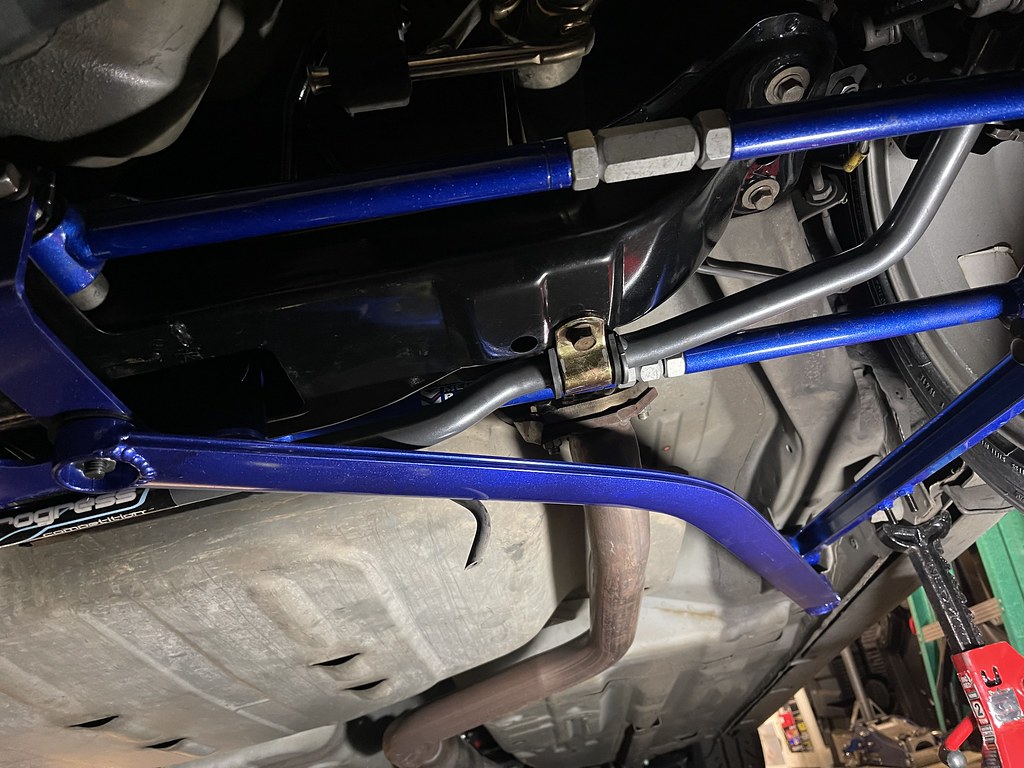
Right side sits a little lower to clear the exhaust, so it takes a few more spacers then the left.
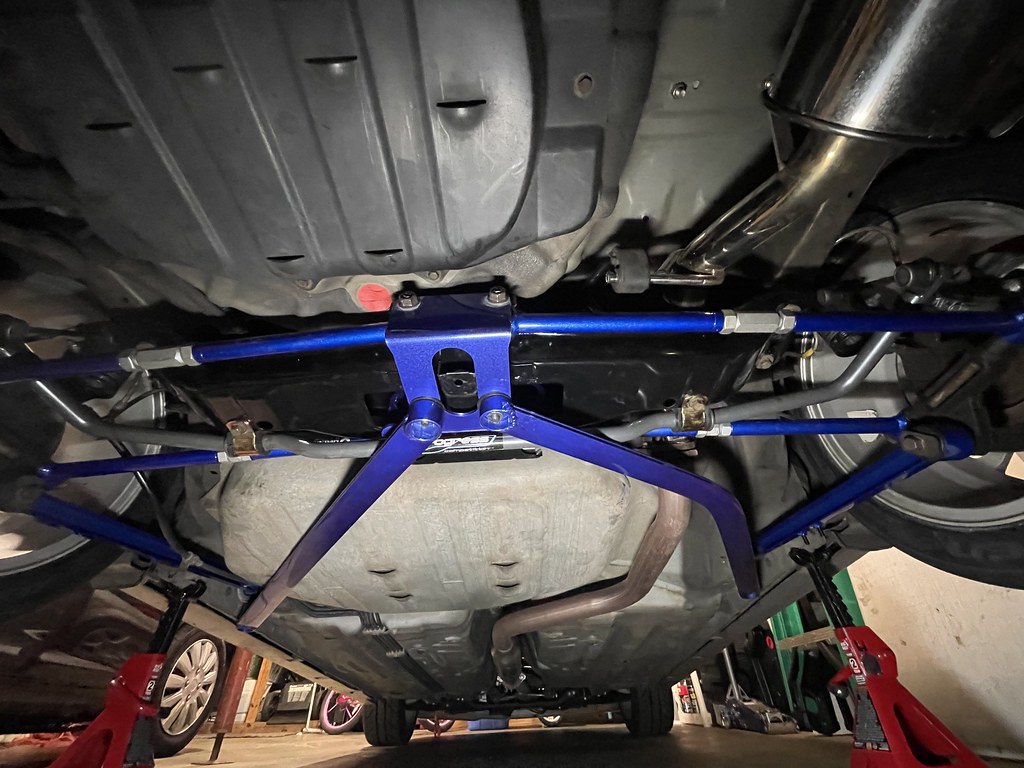
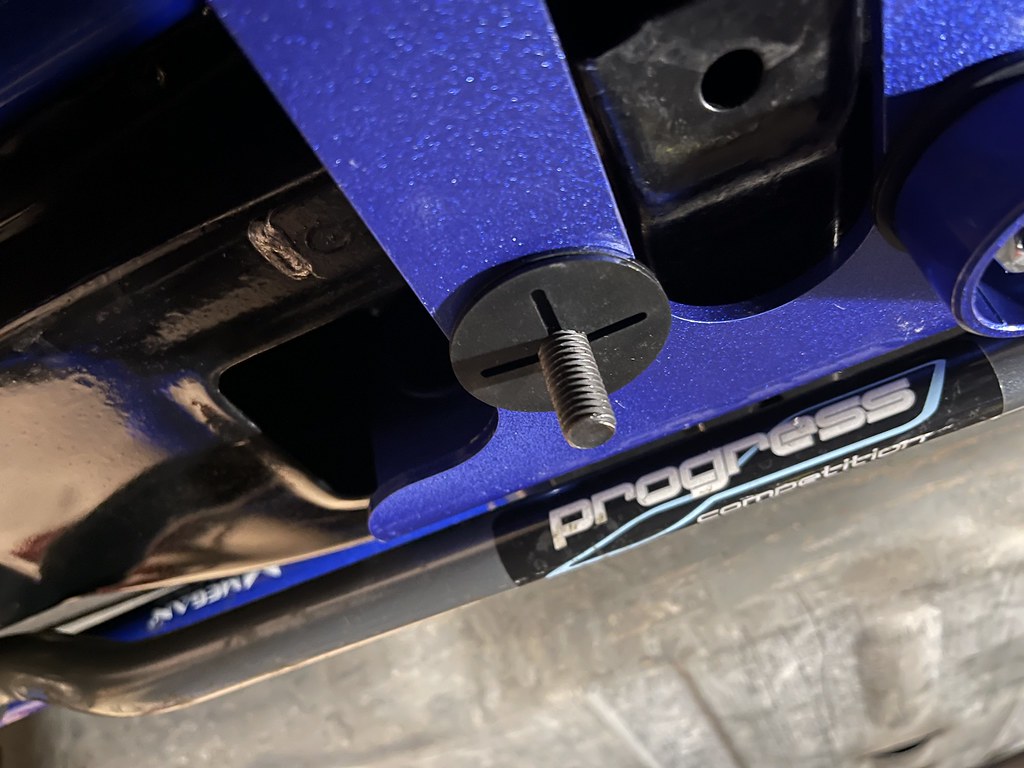
Center brace uses a rectangular head bolt to fit into the hole in the chassis and drop down and bolts in.
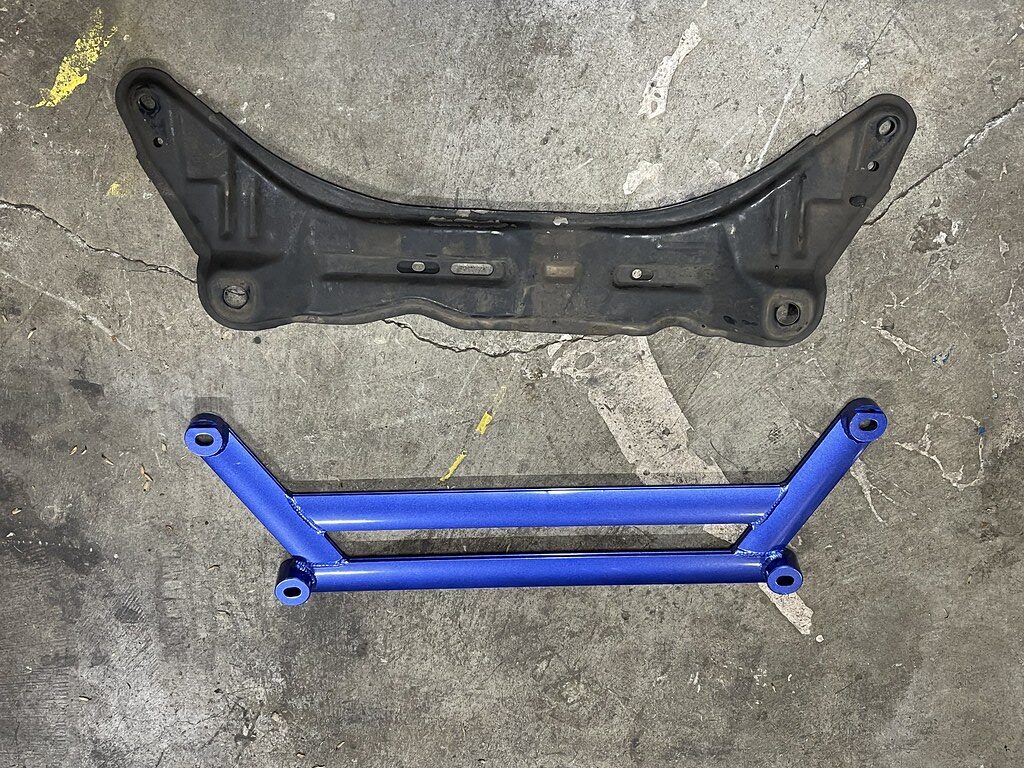
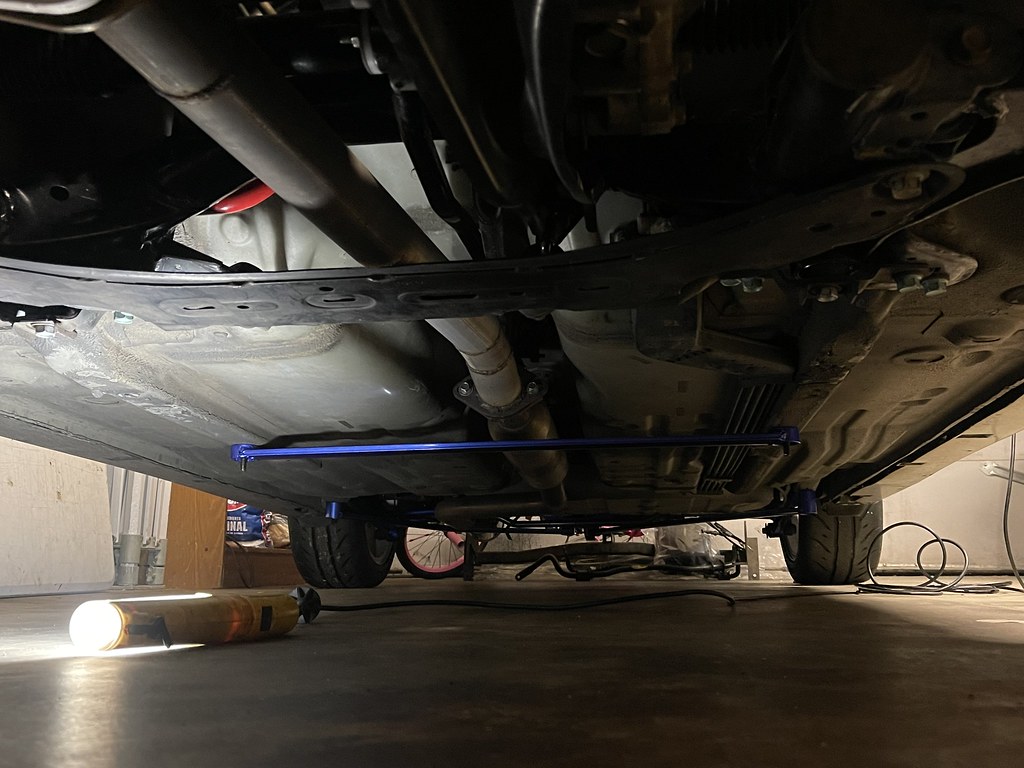
I ran into a issue with the front brace not fitting at all. But honestly the bracing didnt feel as sturdy as the oem brace, so I left it off.
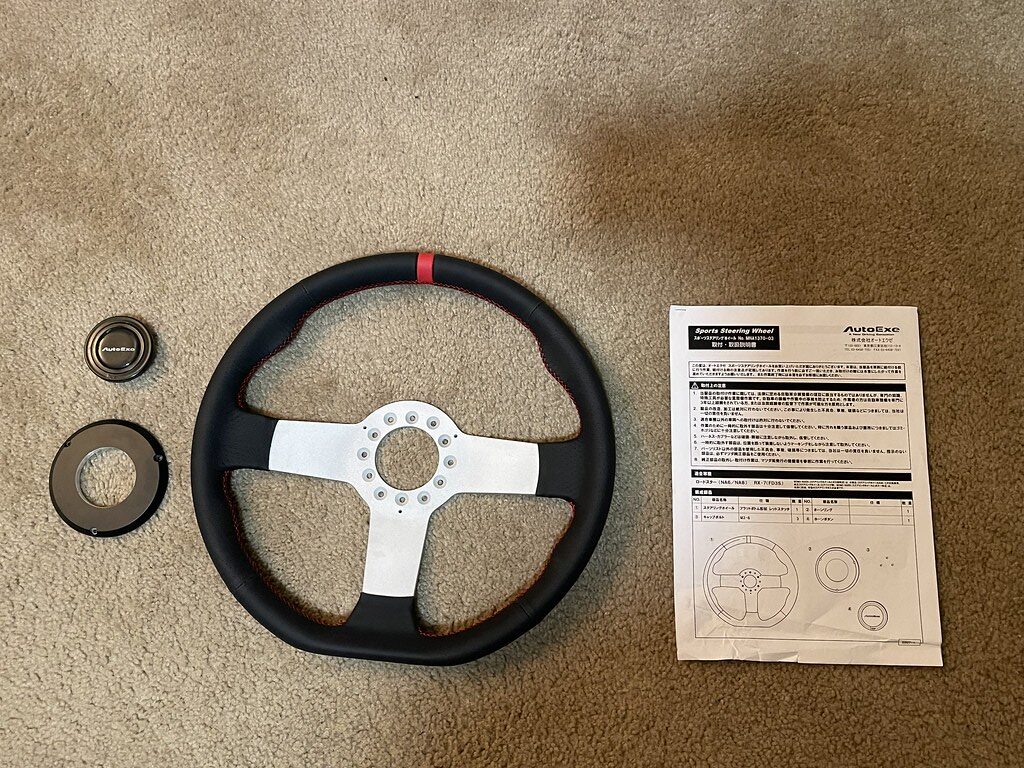
Next it was time to install this rare piece from Autoexe that Mazmart had in stock. Its a Limited Edition Sports Steering Wheel for the NA Miata by Autoexe. Up until seeing at Mazmart I never knew it existed. Autoexe typically make OEM replacement wheels, and rarely do aftermarket style ones.
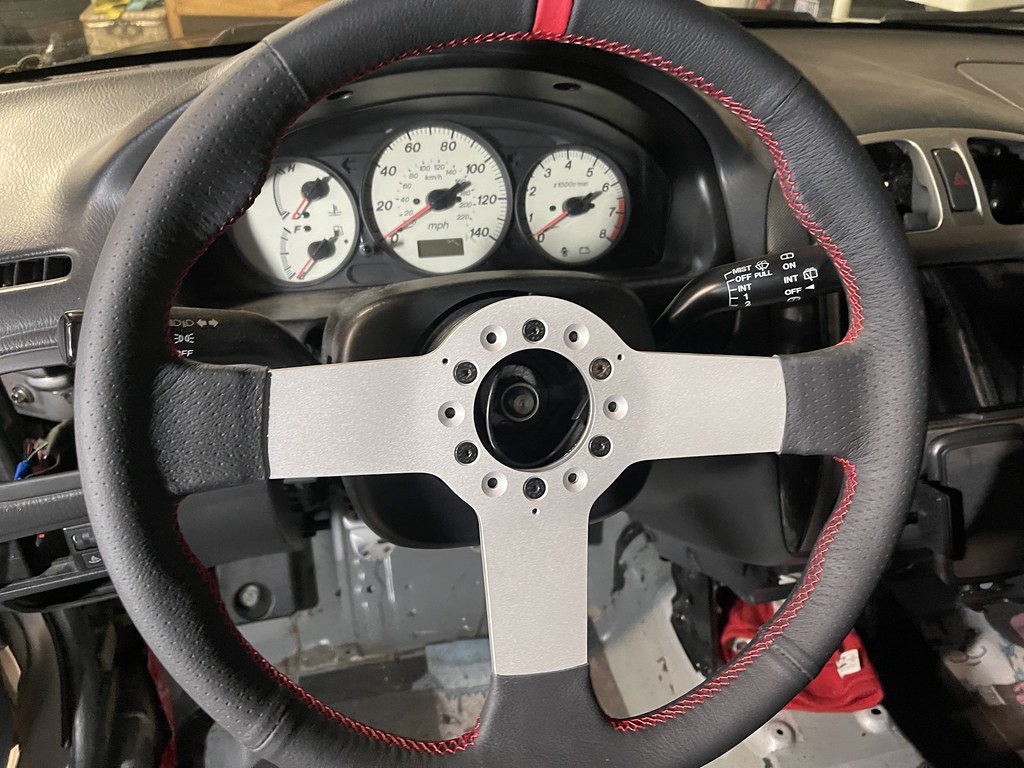
A few alan key bolts and its on..
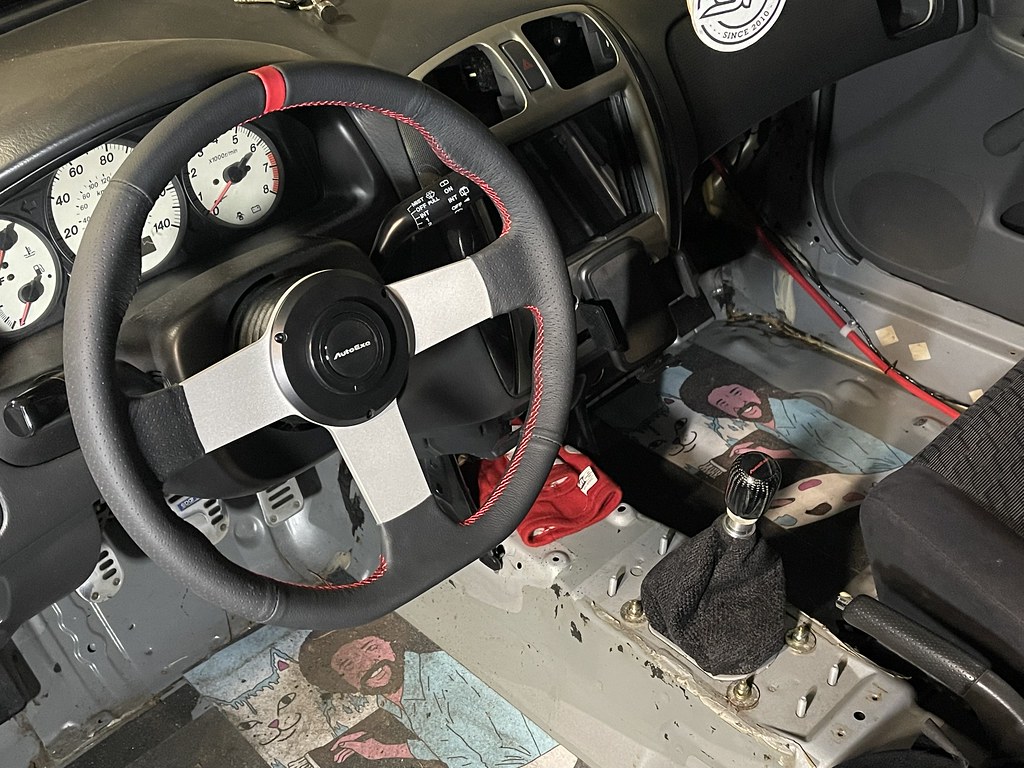
Installed...
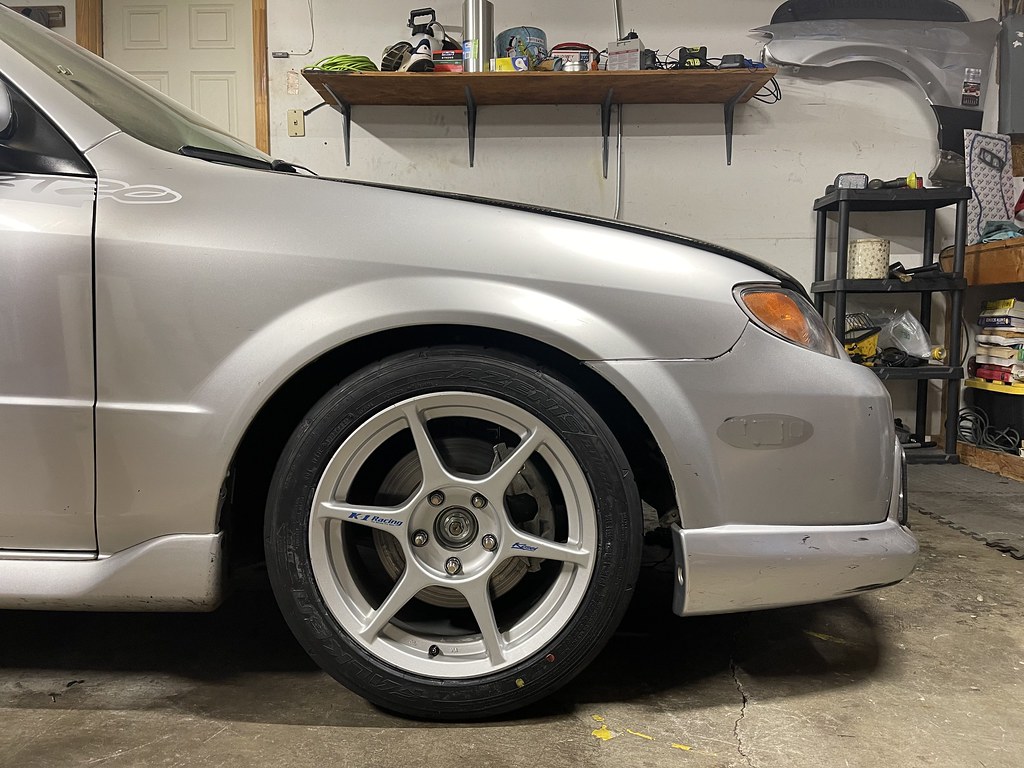
Another update was a new set of wheels. I ran across a deal of a set of 16x7 +38 Kosei K1s for sale from a good friend. They seem to be a little lighter then the FD wheels.
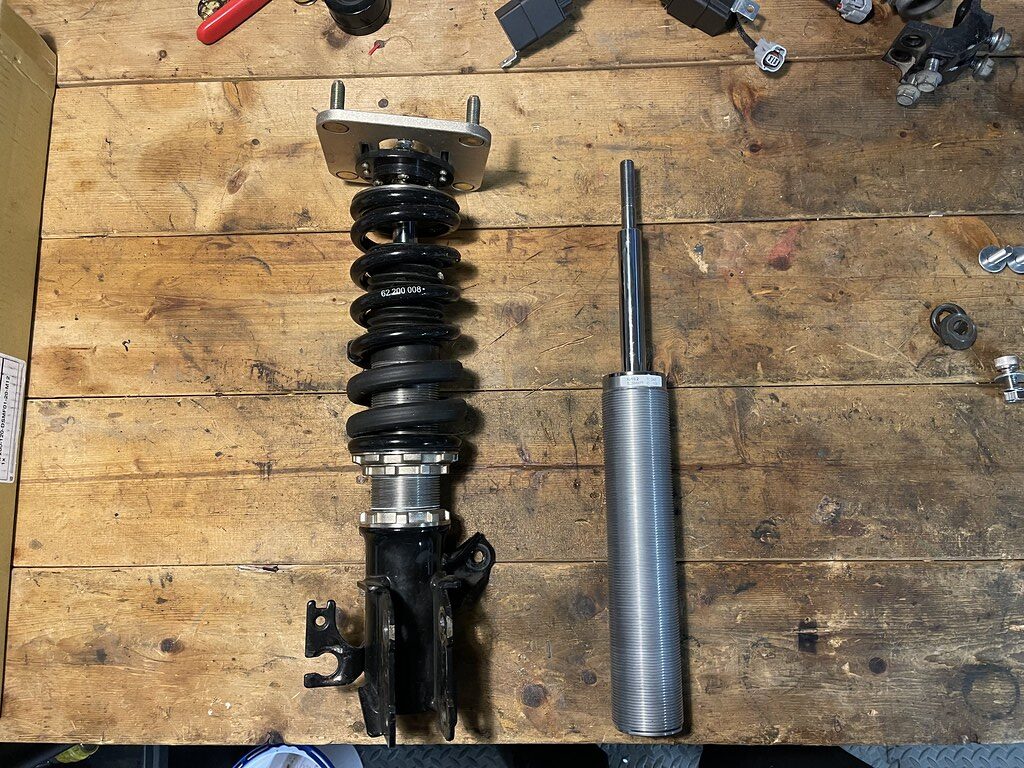
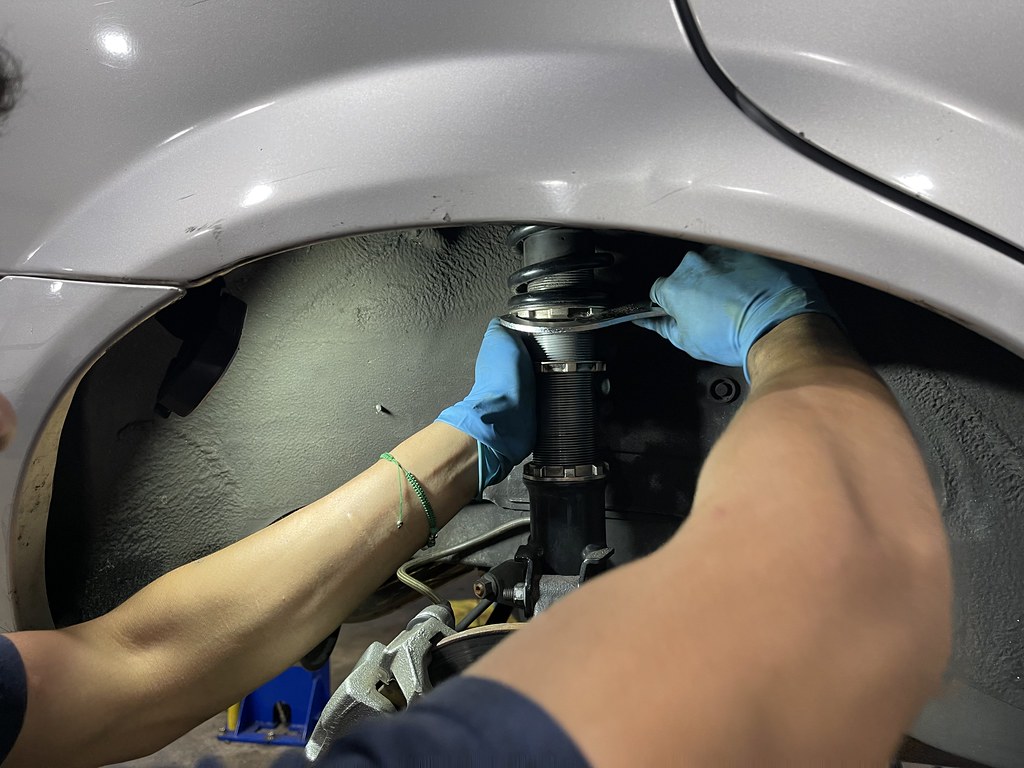
Every since I spun at Road Atlanta a year and half ago, I have had a issue with matching camber up front. I replaced my front subframe, knuckles and all parts. The last piece was the strut insert on my BC-DS coilovers.
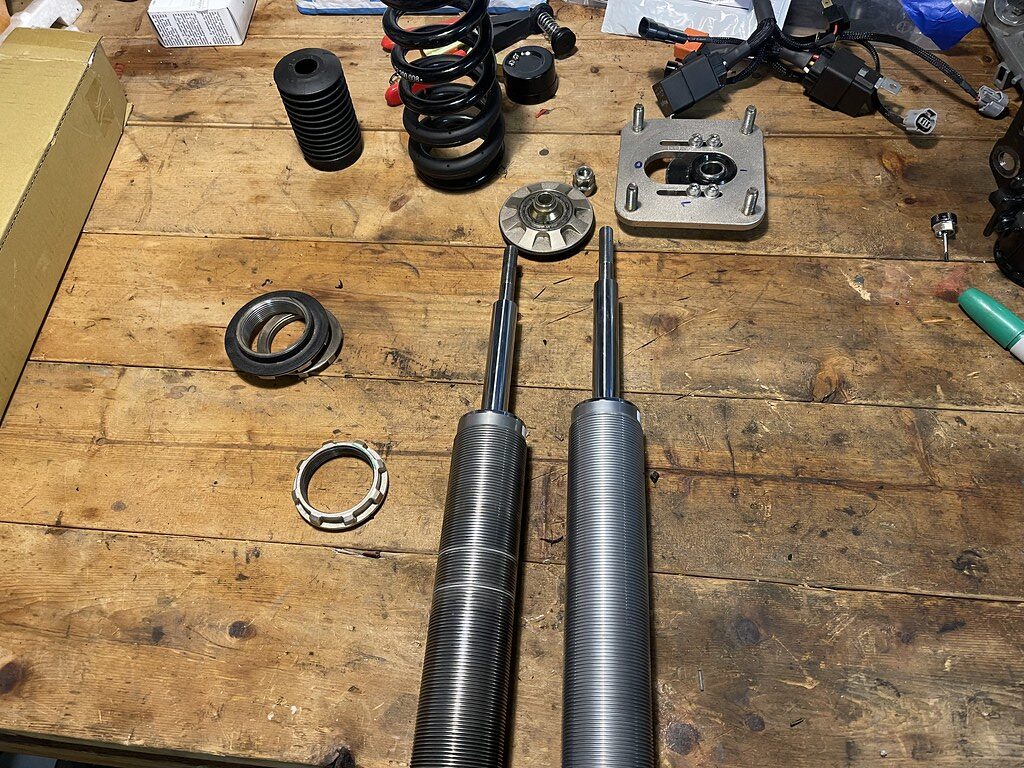
Its impossible to see, but the old shock was slightly bent enough to cause issues with the driver side camber settings.
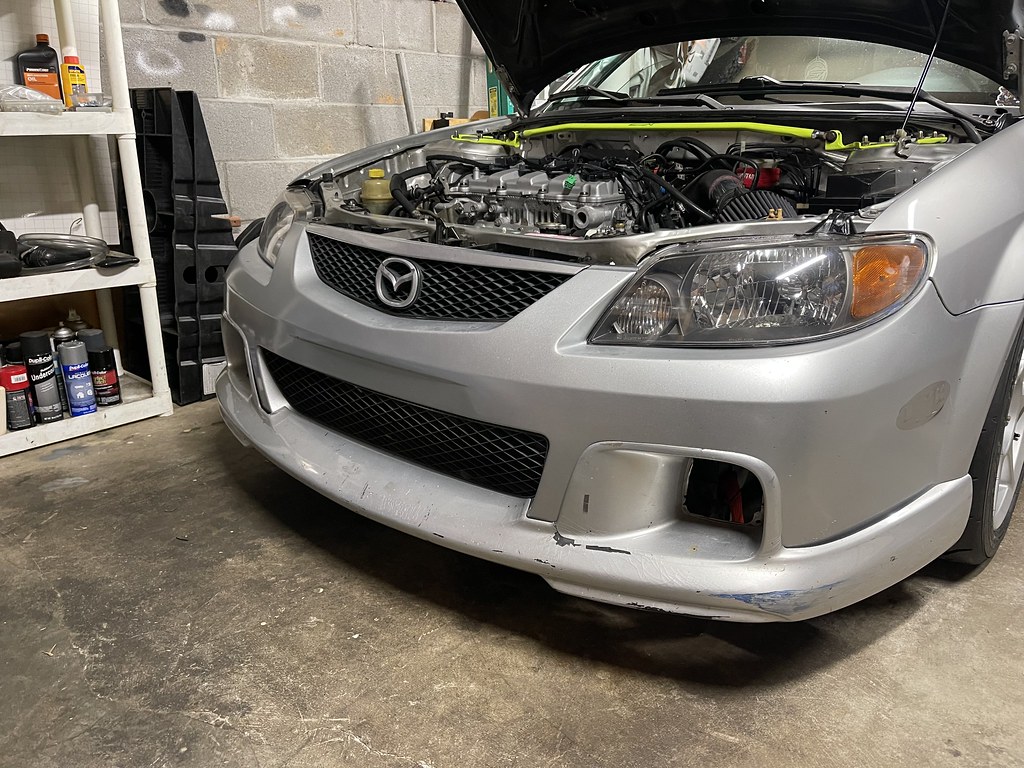
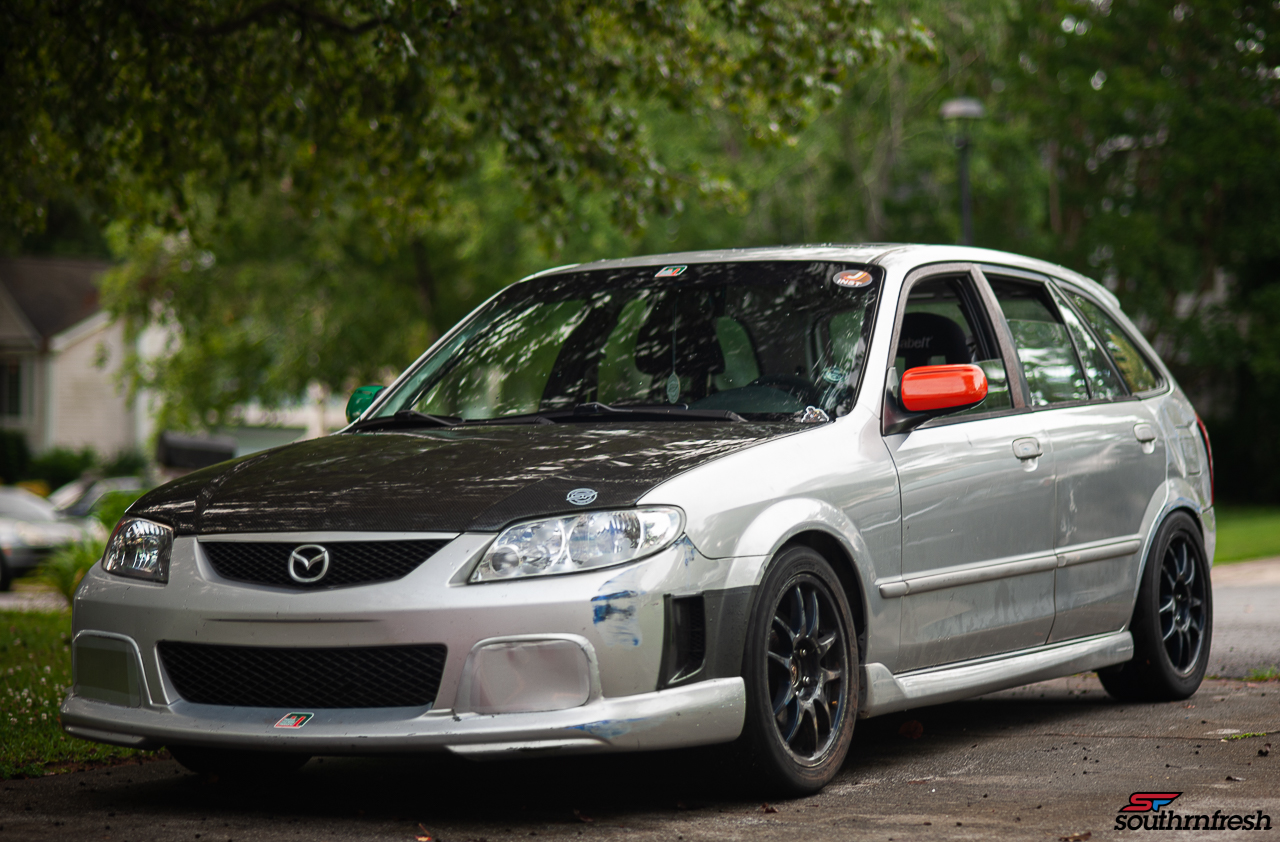
Next step I wanted to update the front end and get rid of the beat up bumper and front lip. So I got a Protege sedan front bumper with the optional and rare front lip off my friends Alex's Protege. Without the front lip its a pretty boring and weird looking bumper. But with it it gives it a nice clean look. At first I was ok with leaving it on, but I am looking to get the OEM Protege 5 bumper and MSP lip resprayed and repaired, I think I prefer the aggressive bumper a little more.
[MEDIA=youtube]LFO-aeHwEHs[/MEDIA]
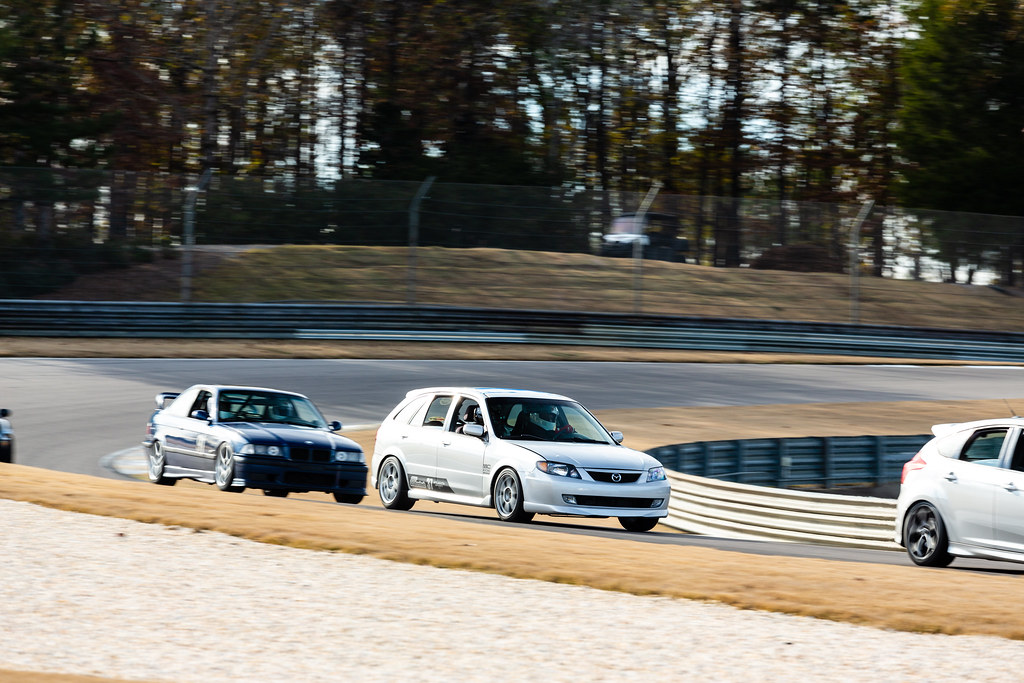
So we were back out at Atlanta Motorsports Park with the new bracing and new shock. And I must say the car felt better then it had ever felt, we went a little aggressive with the alignment, so in the beginning I felt the car push a little more. But the car felt much more predictable and stable at all times. Even when I tried to flick and rotate, it would rotate when I asked it to, and stop when I needed it to. The video above is of me trying my best to keep up with a bolt-on S2k..
Like I said, I really dig the ES bumper with the lip. But I kind of miss the aggressive oem bumper and MSP lip.
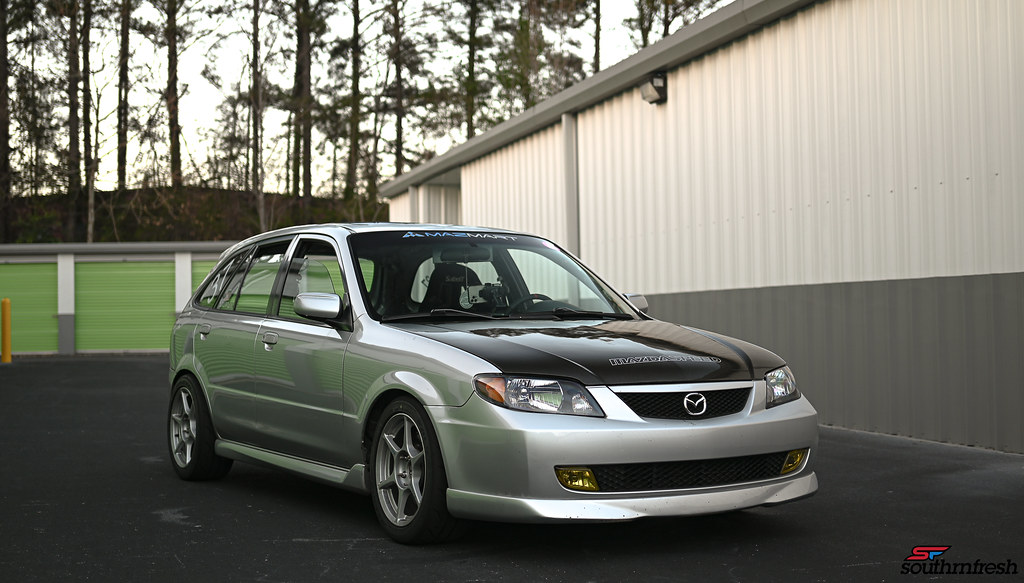
After the event, I took a moment to take some new look photos with the DSLR at the storage unit.

The battle scar from Road Atlanta is starting to be annoying...
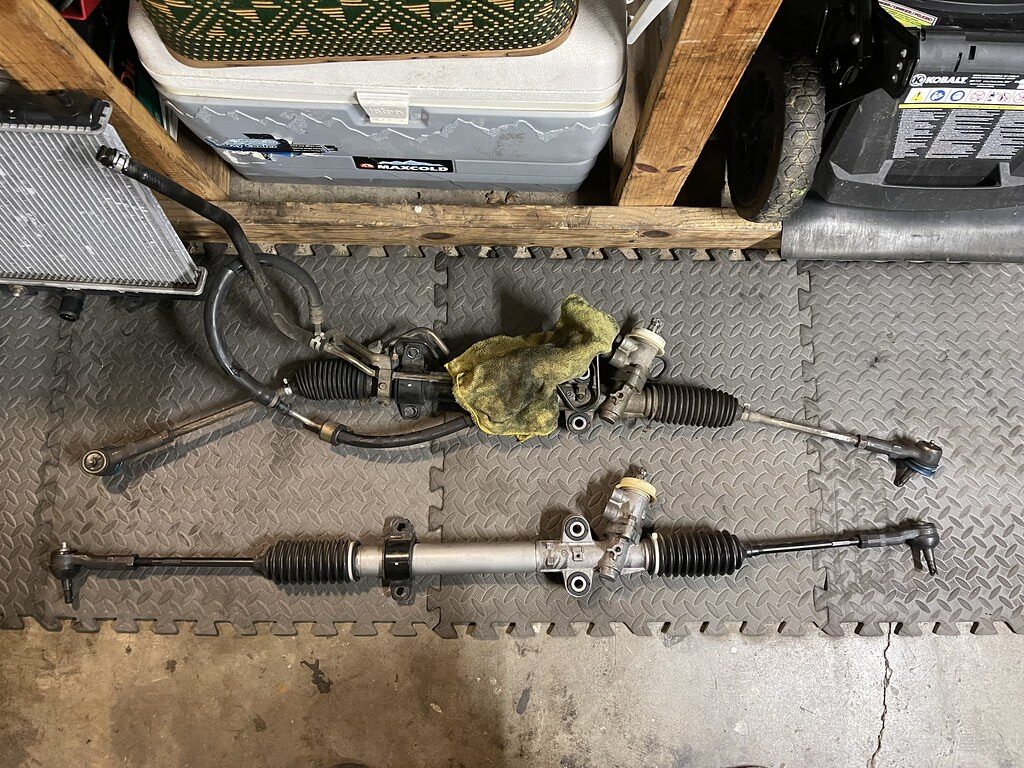
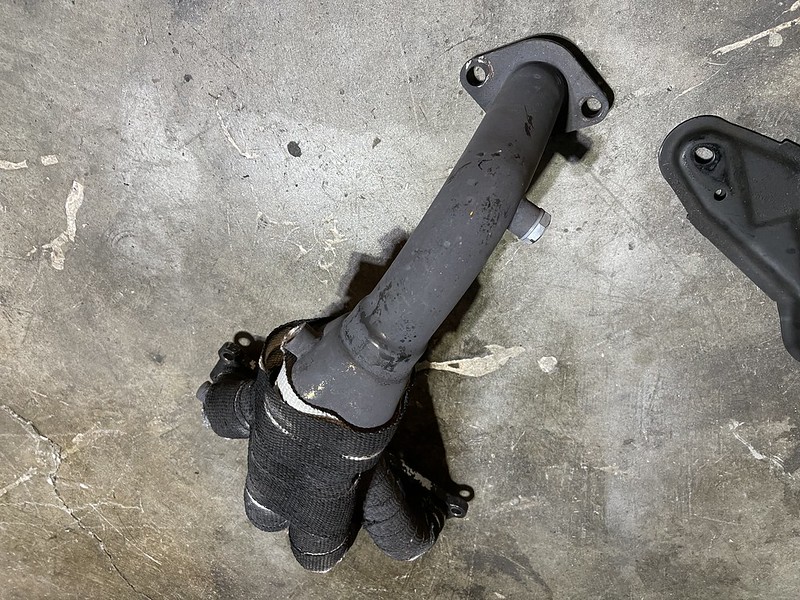
After much thought, I made the move to get rid of power steering. Every since I started to track the car, I had issues with the power steering belts walking it self off after hard sessions. Ive experimented with different crank pulleys, and it still would happen. The pump worked fine, but after a few sessions it would walk itself off a few teeth. Shown above is the OEM steering rack, and below is a modified and sealed steering rack.
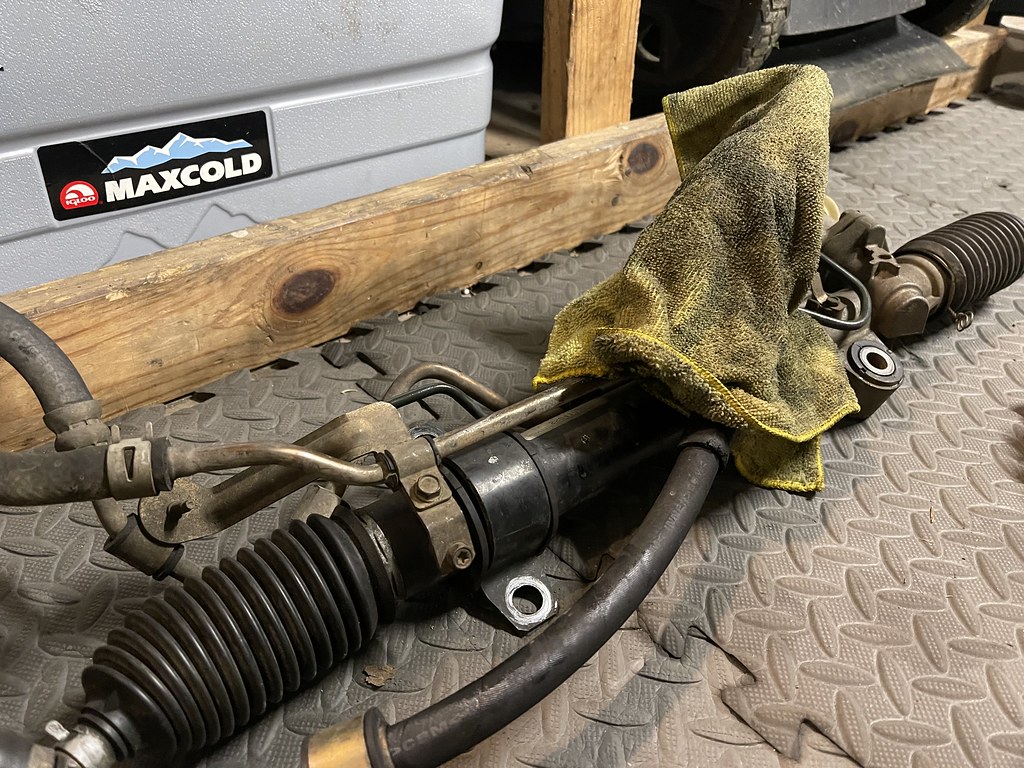
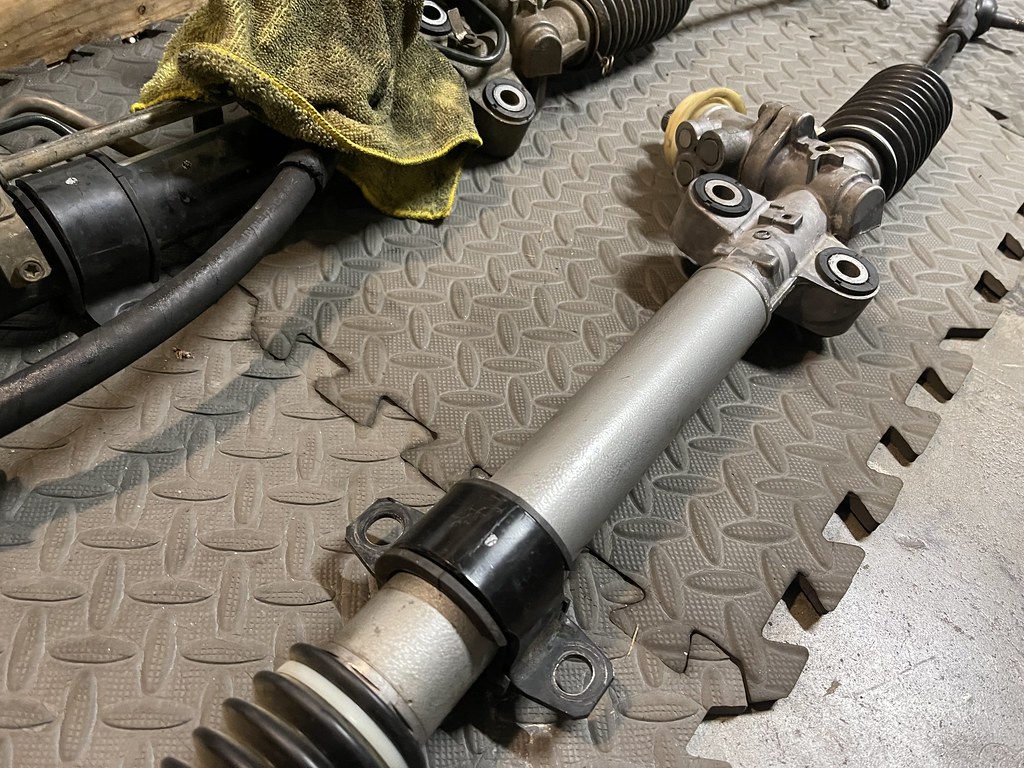
This rack has been sealed, and internally lubricated so it wont seize up.
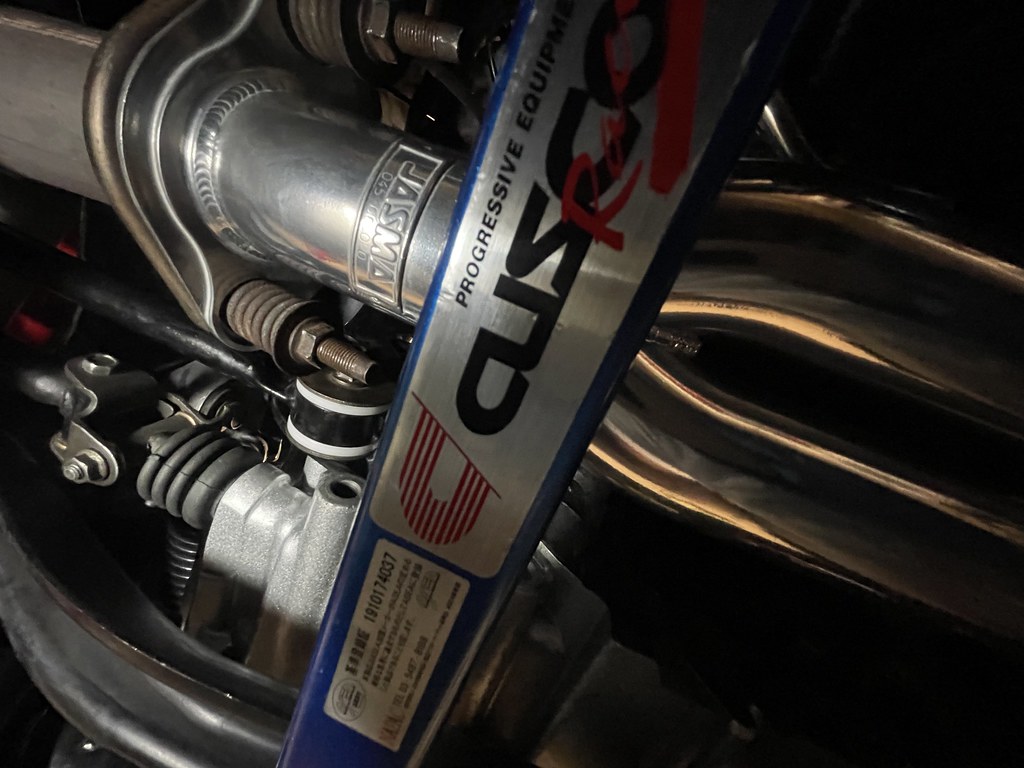
Finally it was time to get this Autoexe 4-2-1 header installed. The issue with this header on US cars is that it needs the mid pipe shortened to fit. So I had it instlled and had my friends at Heat Lightning modify the midpipe.
I had planned for them to completely redo the exhaust, but at the time I did not have the rest of the exhaust pieces so we will save the for a later date.

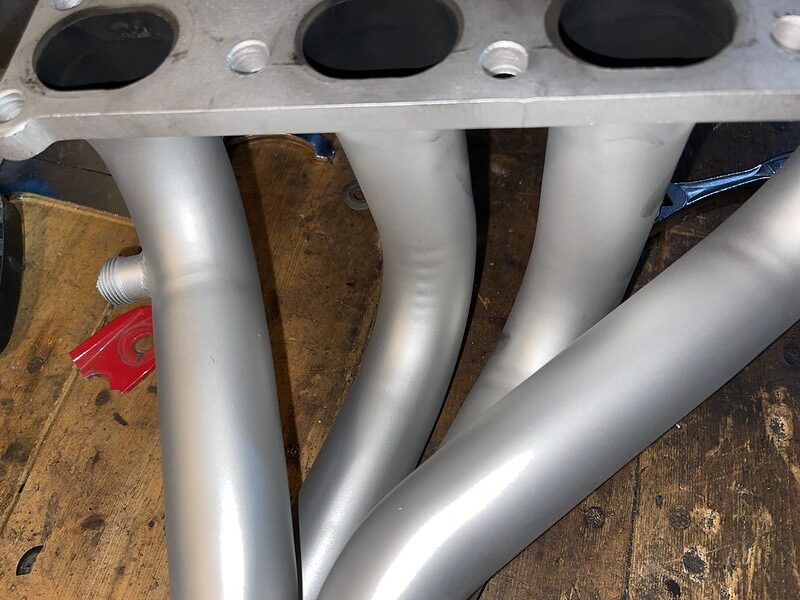
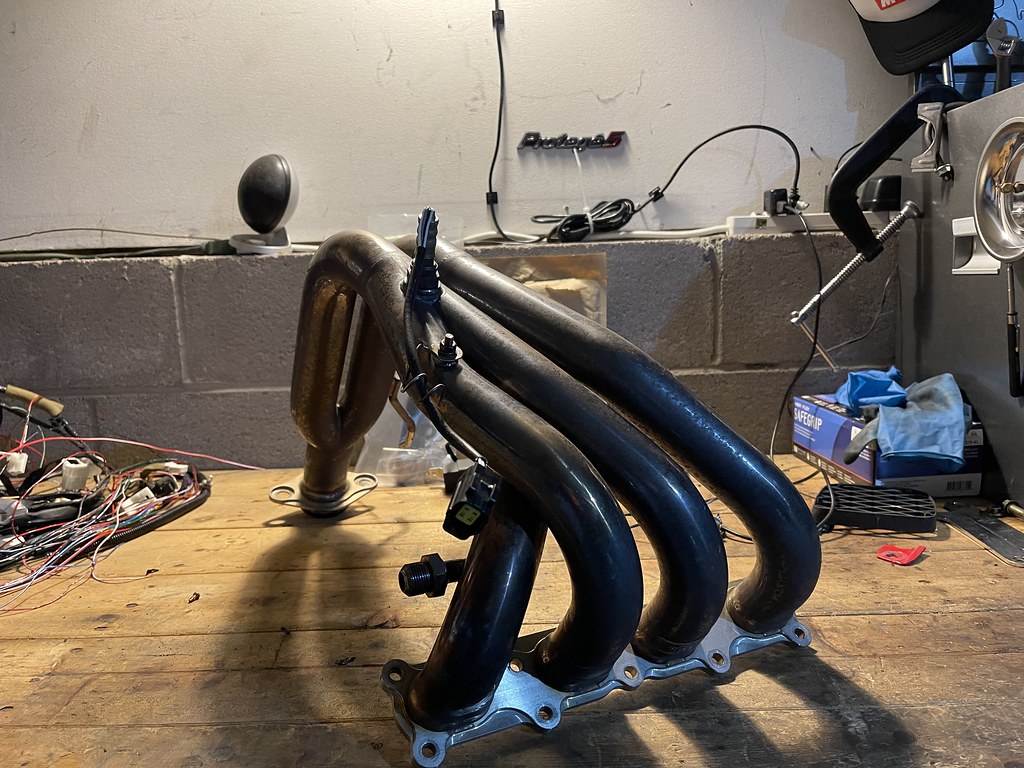
So originally I had planned to have the header cerakoted for heat. Well Alex was selling his brand new Autoexe header that had already been cerakoted and polished. I was able to sell my used Autoexe one and purchase a brand new one.
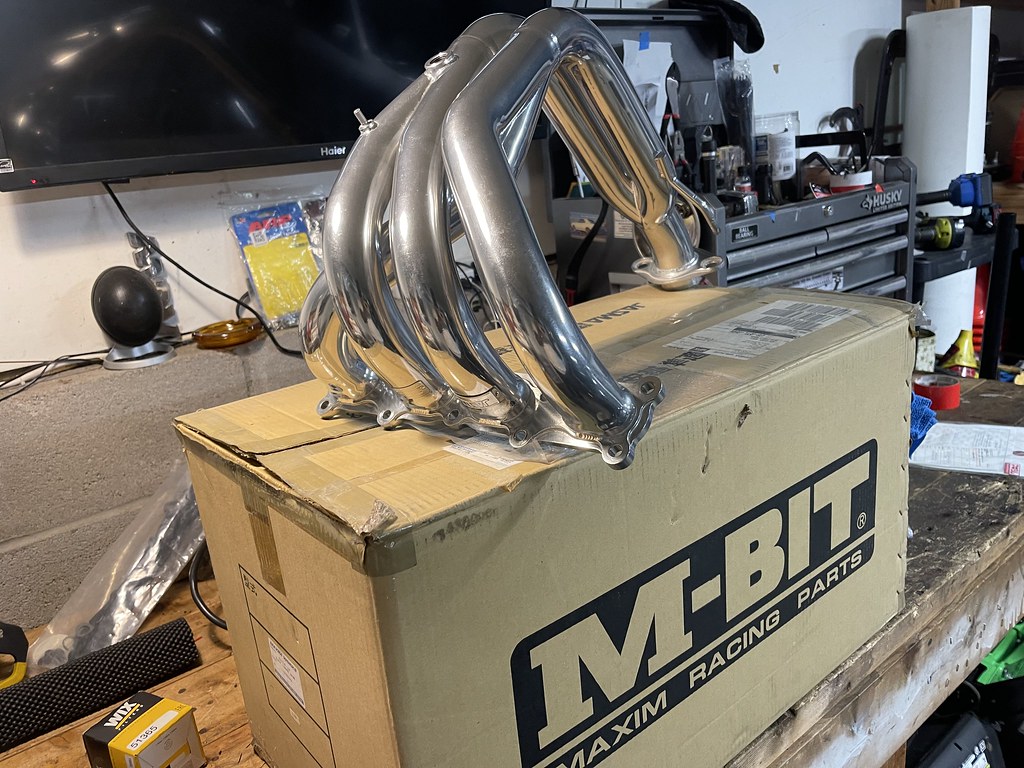
Alex bought this header about 5-6 years ago from Mazmart but never had it installed. The header was decided and built by Maxim Racing in Japan, and is the best header available for the FS engine. Me being a lover of all Autoexe parts I was excited to be able to run it on the P5.
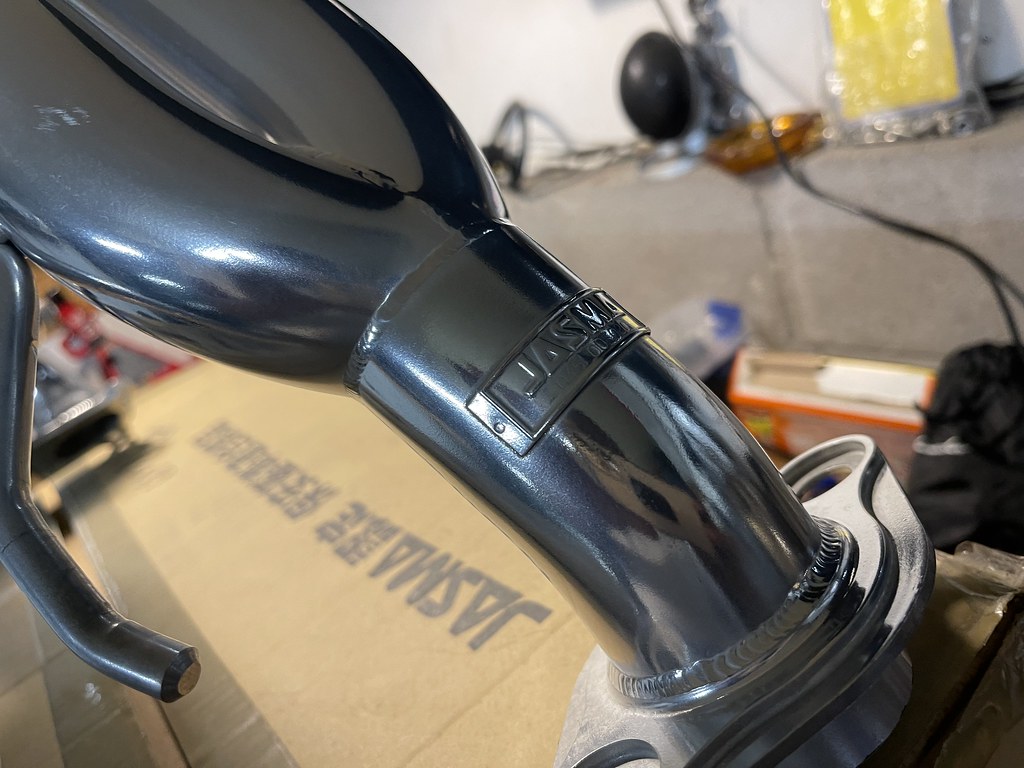

Fit like a glove, replaced all the hardware with ARP bolts.
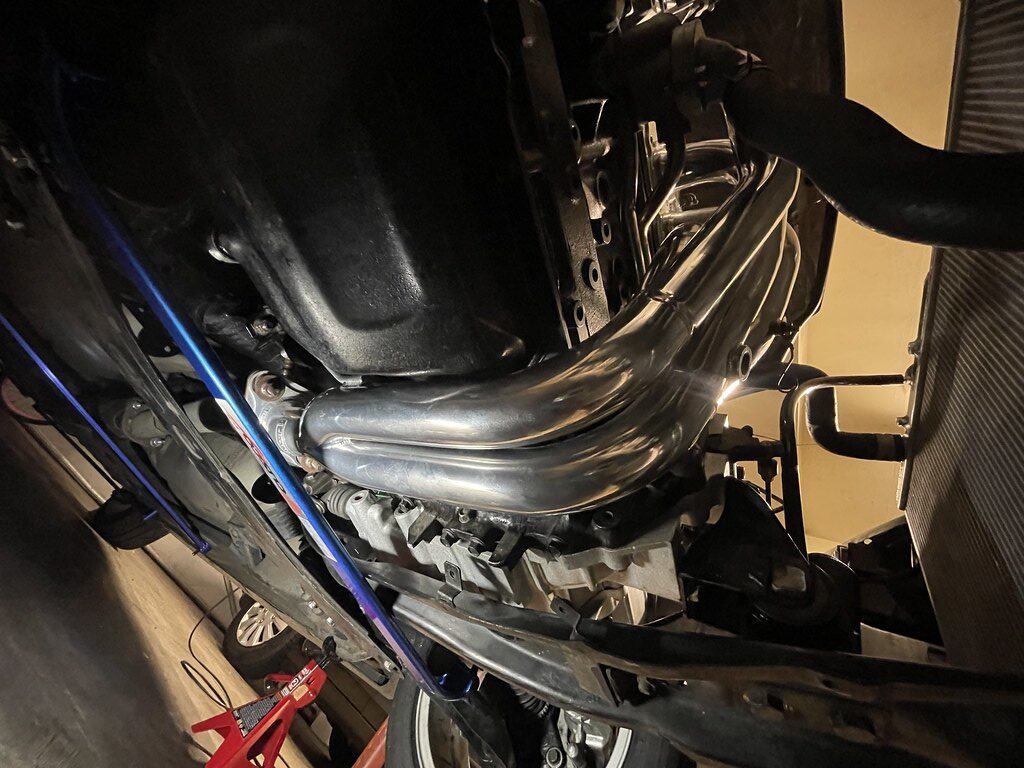
Much better view..
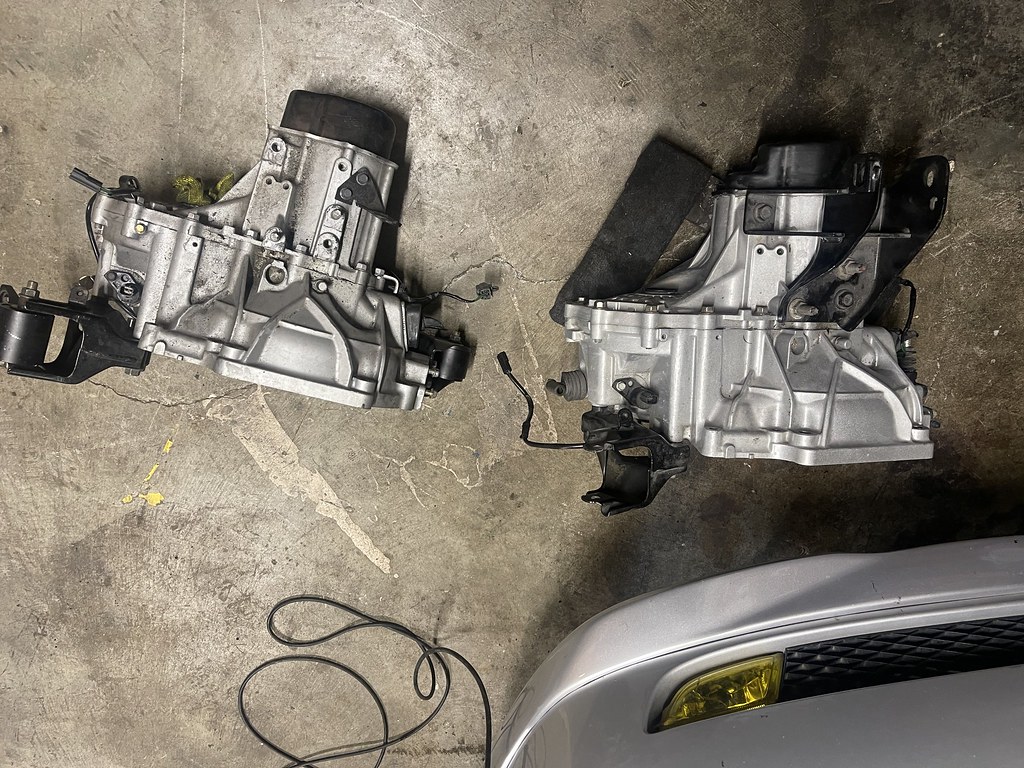
I was on a roll and installing all the parts that I had been sitting on. So I went ahead and started swapping the transmission. My transmission was fine, but it was old and pushing 305k miles. I got a Mazdaspeed Protege LSD transmission as an upgrade. The MSP transmissions have a big weakness with the metal rivets holding it together. So under harsh driving they would come apart. The solution to that issue was to weld the differential and reinforce the differential from coming apart.

This one was taken apart in the past, and welded and ready for track duty.
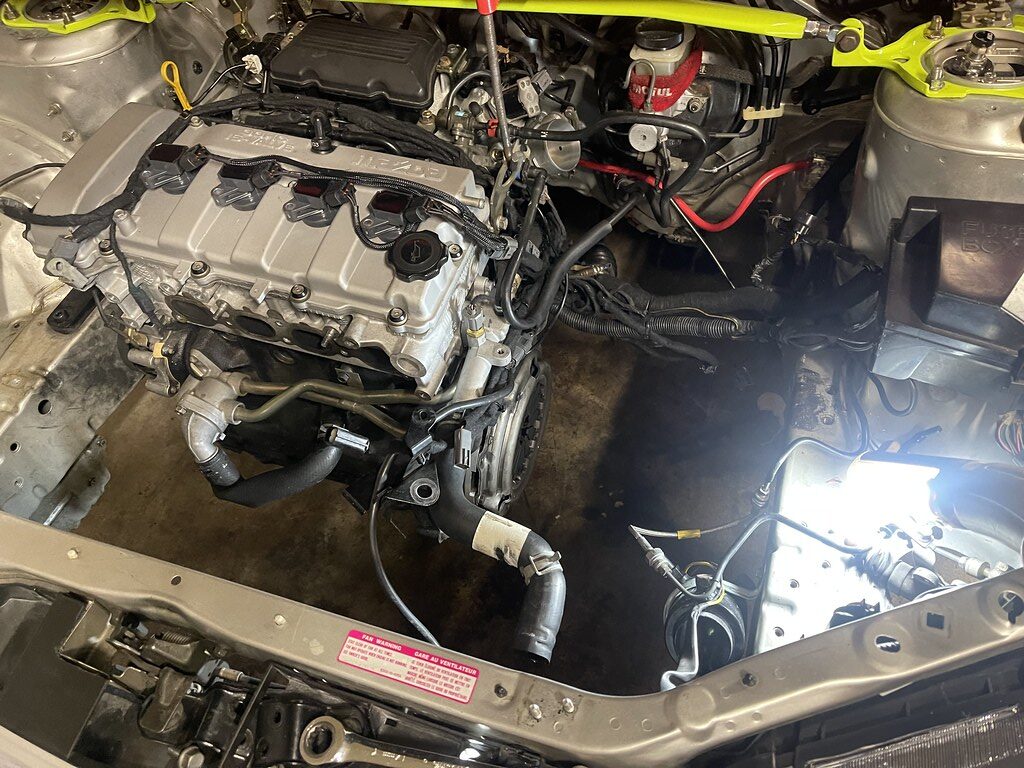
I had originally planned to do this with the engine out, but with the steering rack out it made sense to just drop the trans and get it done. I tried my best to drain the fluid, but as soon as I started to get the trans out I dumped about 2 qts of fluid on the floor at 1am in the morning. But it was out...
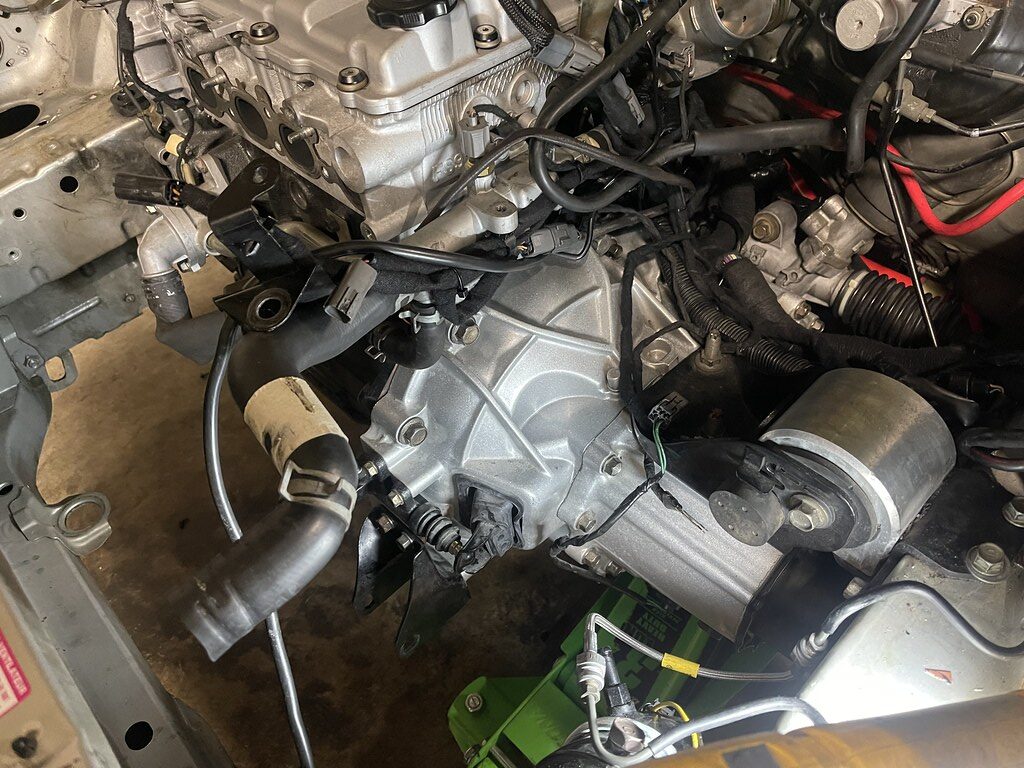
The car gods looked out for me going in, because it went back up and in place with ease and minimal effort.
Done! Flet good to knock out everything. My initial test drive was a wake up call with not having power steering anymore. But once moving it wasnt nearly as bad as it was standing still. But it really cleaned up the engine bay alot..
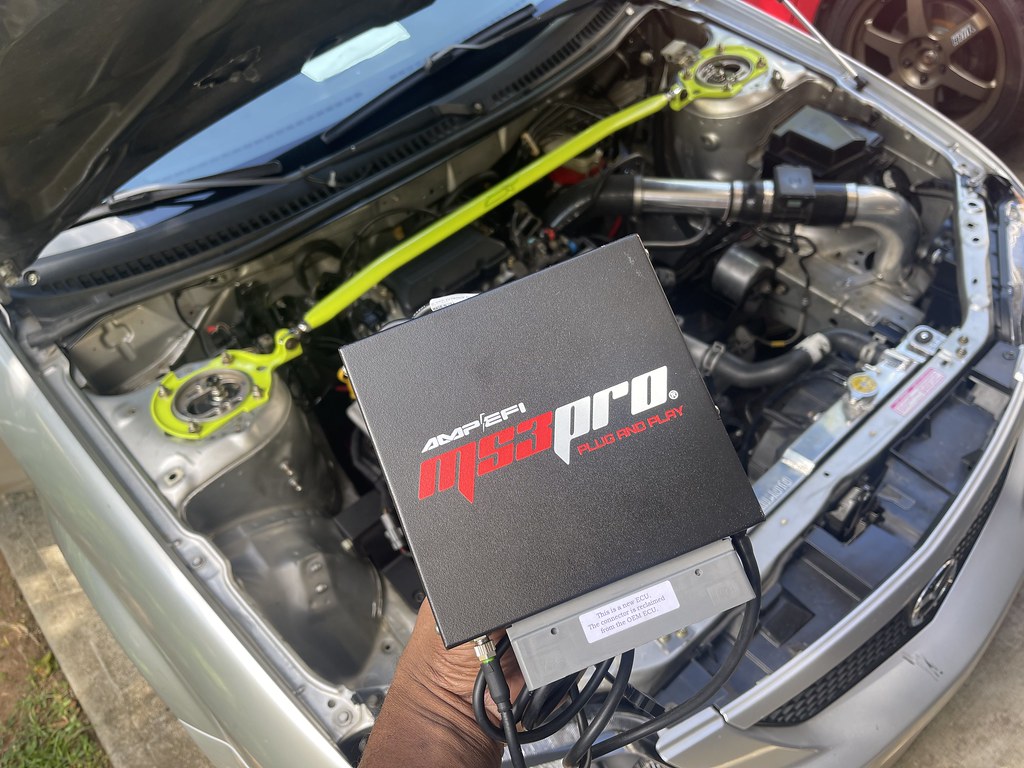
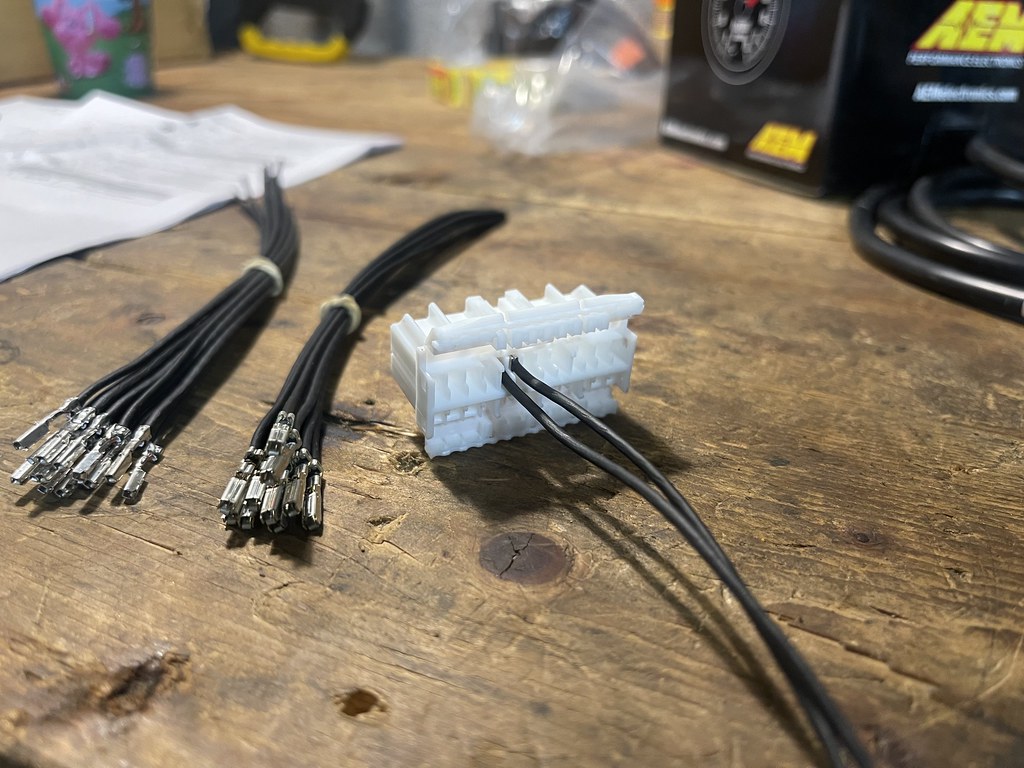
After months of bothering them Kevin over at DIYAUTOTUNE finished the Megasquirt Plug and Play ECU for the 3rd Generation Protege. As mentioned in my trials and tribulations with the JDM FSZE ecu and the MP3 US ecu each one uses different connectors. The US got stuck with Fords style connectors, while the rest of the world uses a Denso style found in most other Mazdas. Which is why out of the box tuning options were never available outside of custom wired in standalone. So it was a pretty big deal for DIYAUTOTUNE to put fourth effort in making this ECU for the community.

The ECU bolted directly into the US harness. The only thing needed is to run a vacuum source for the map sensor on the side of the ECU, and its ready to go.
The first start up I had to run through a few checks with Kevin to make sure everything was setup. But the car started up, and was a little hesitant to idle because none of the parameters had been set.
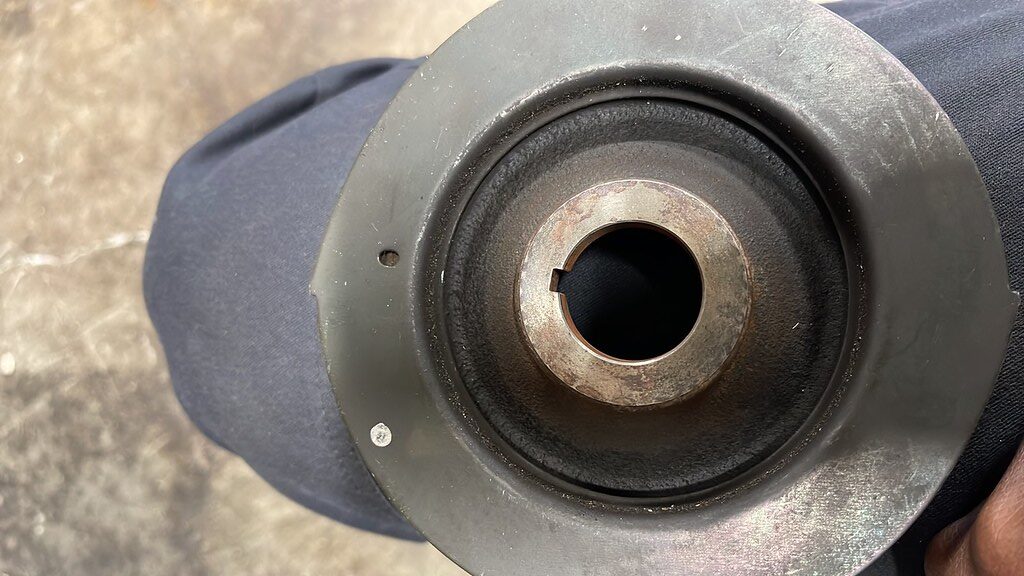

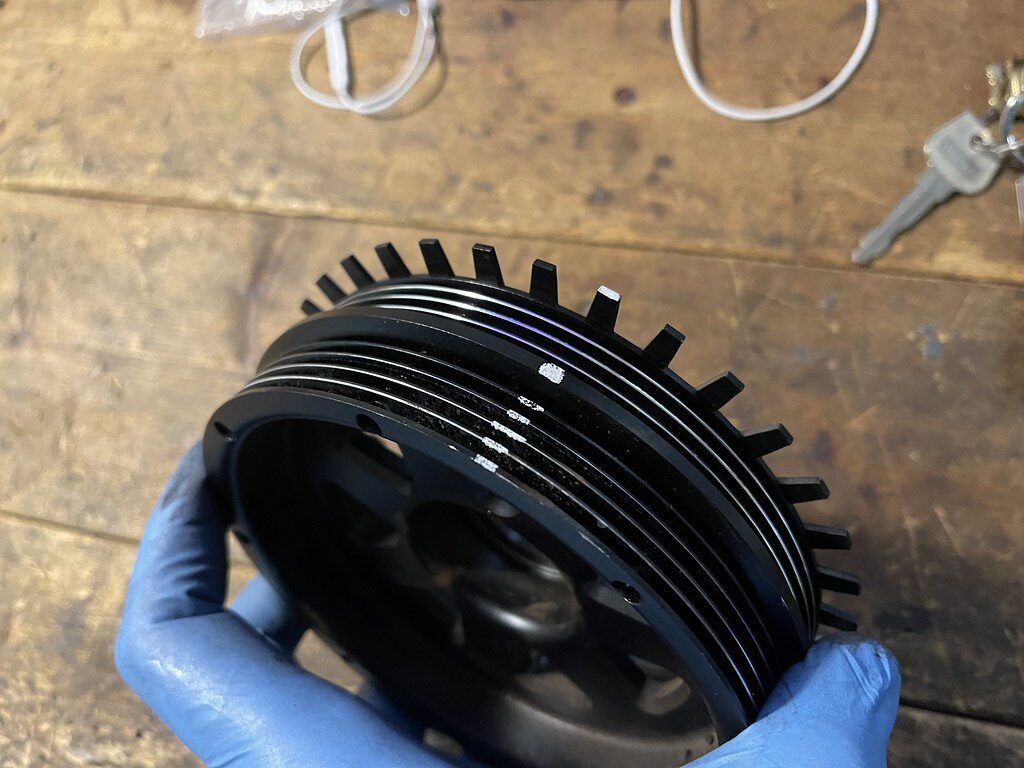
With any Megasquirt checking timing and entering it into the tuner studio is priority. My version of the Hydra crank pulley did not have any identifying marks for TDC. So the best I could do is mark it based off the OEM one and pray it worked.
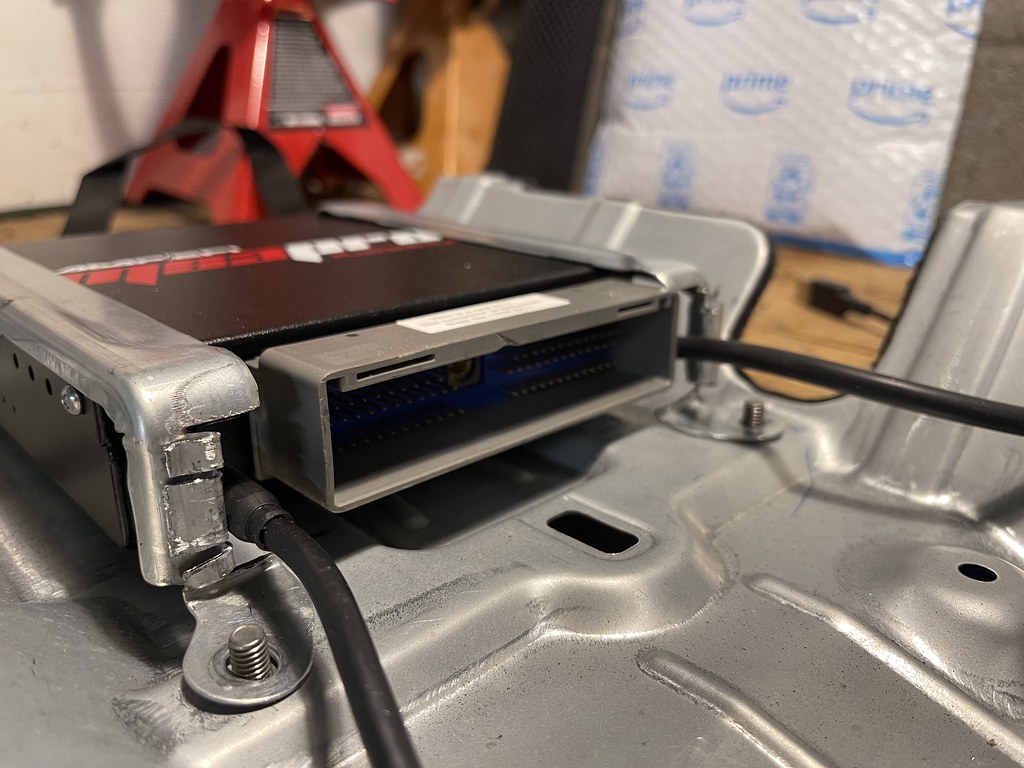
The ECU fits in the factory ECU place with minor modification to the brackets for the Map vacuum and data cable.
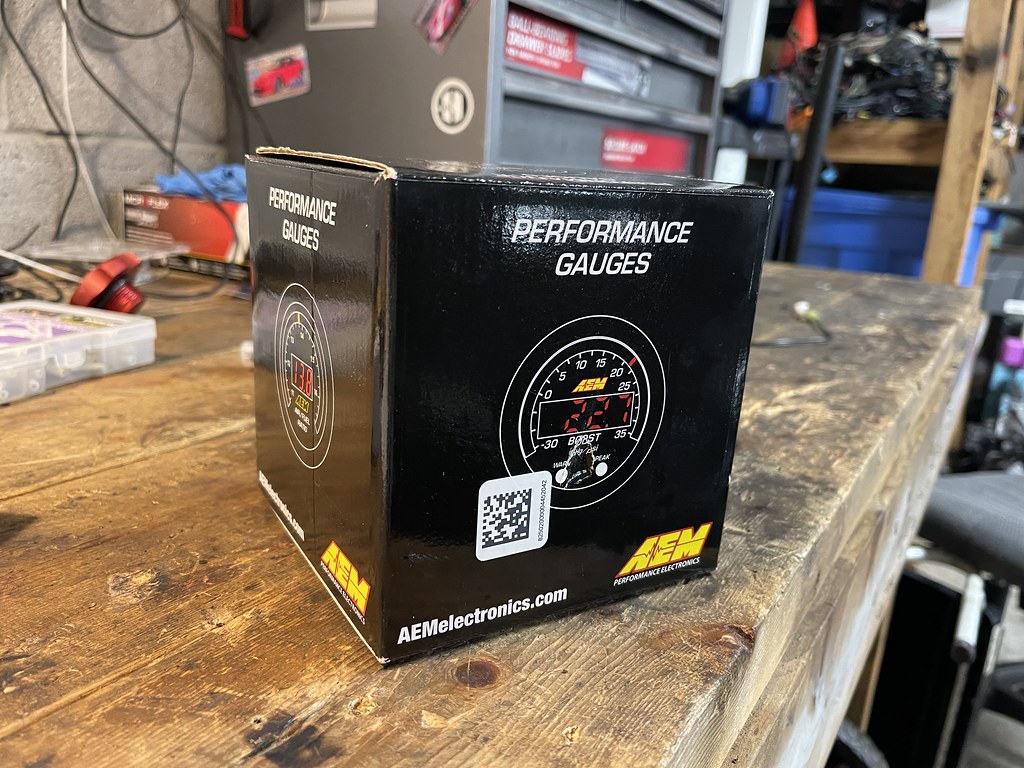
Next step before tuning was to install the wideband and wire it into the ECU.
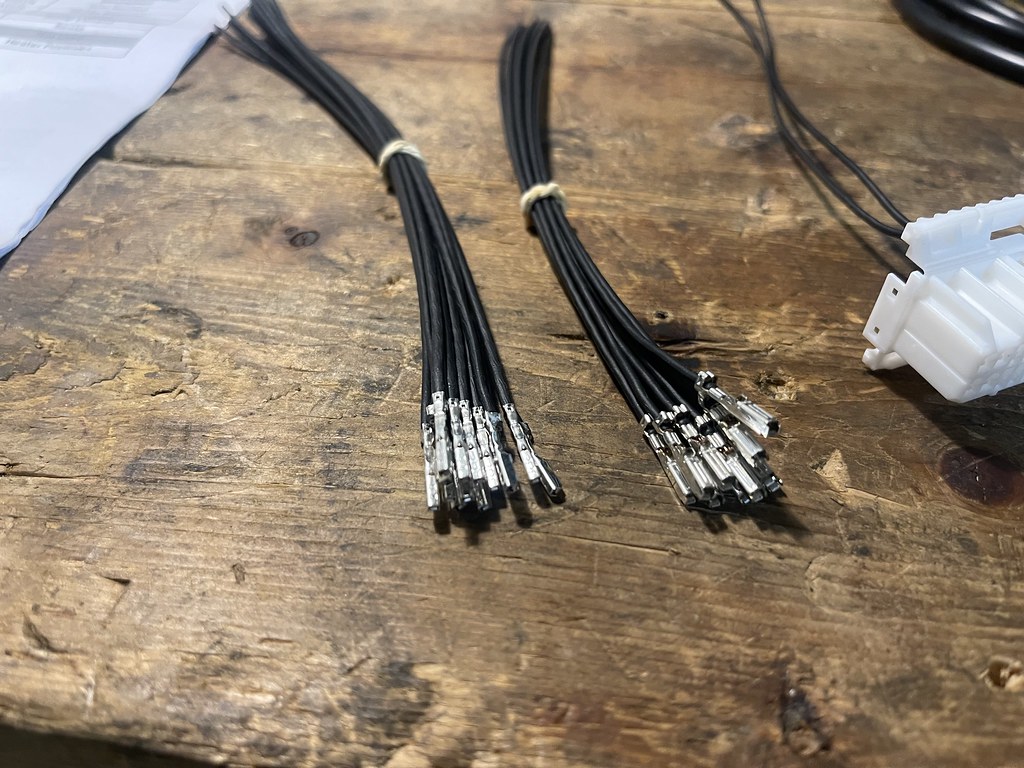
The MS3 comes with an add-on connector which makes adding gauges a breeze with the diagram. I was able to use the canbus slot for the for the gauge, which made installation a breeze.
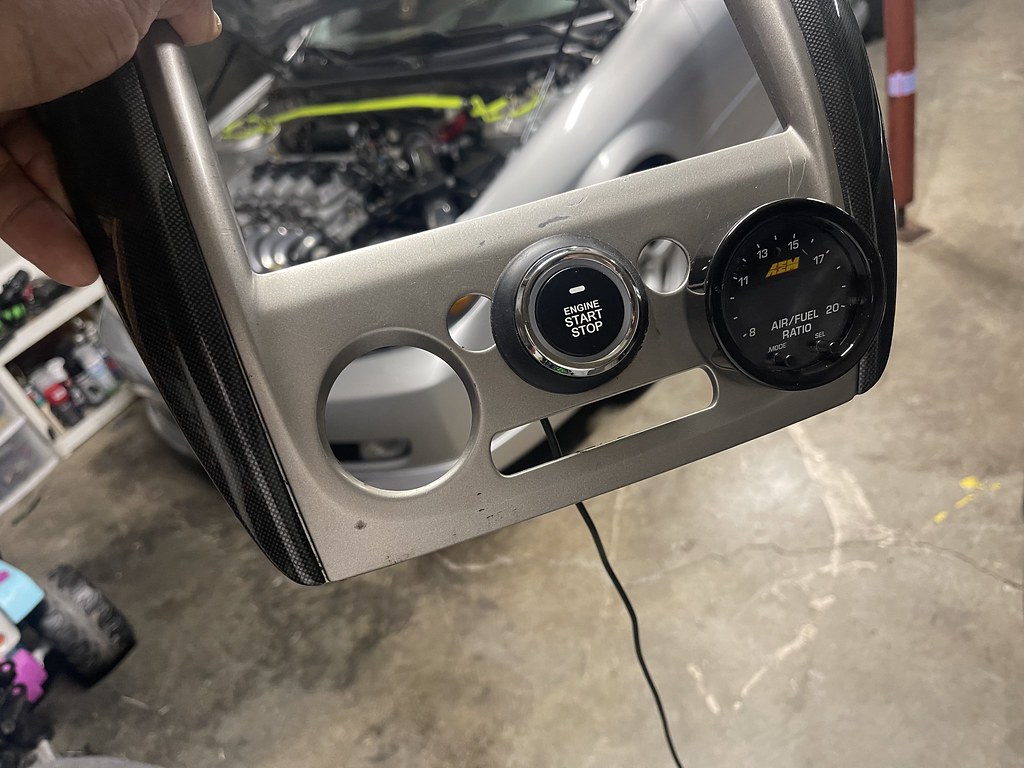
The gauge found a temporary home in the old HVAC position along with the temporary start button, which was moved after this photo was taken.
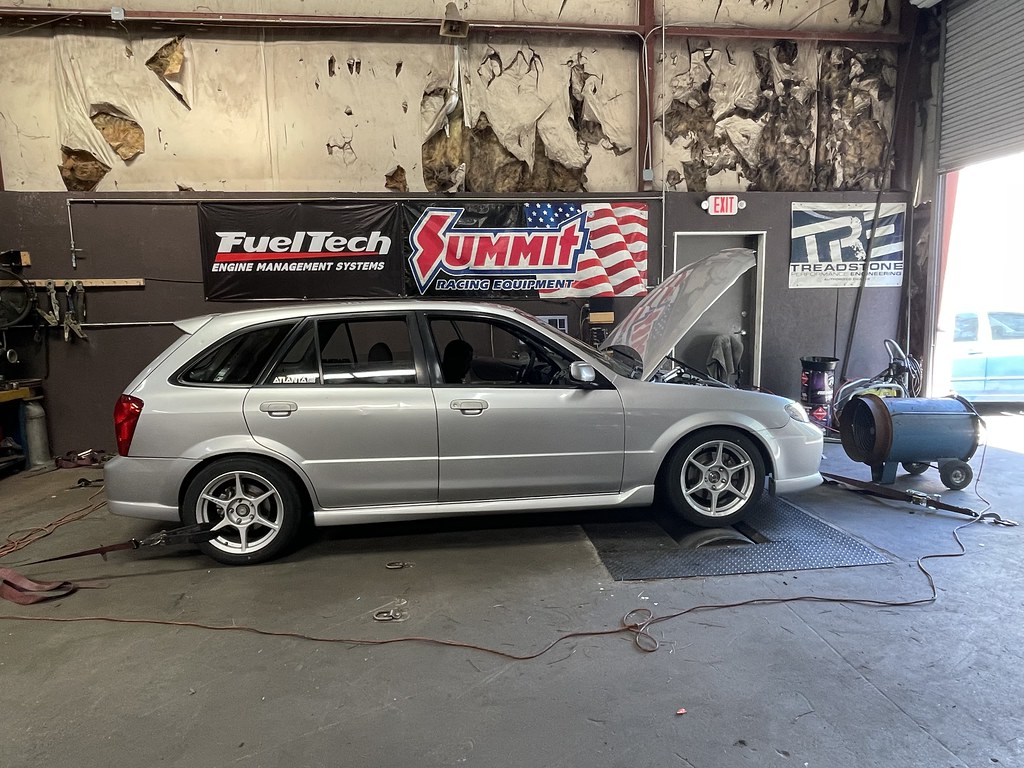
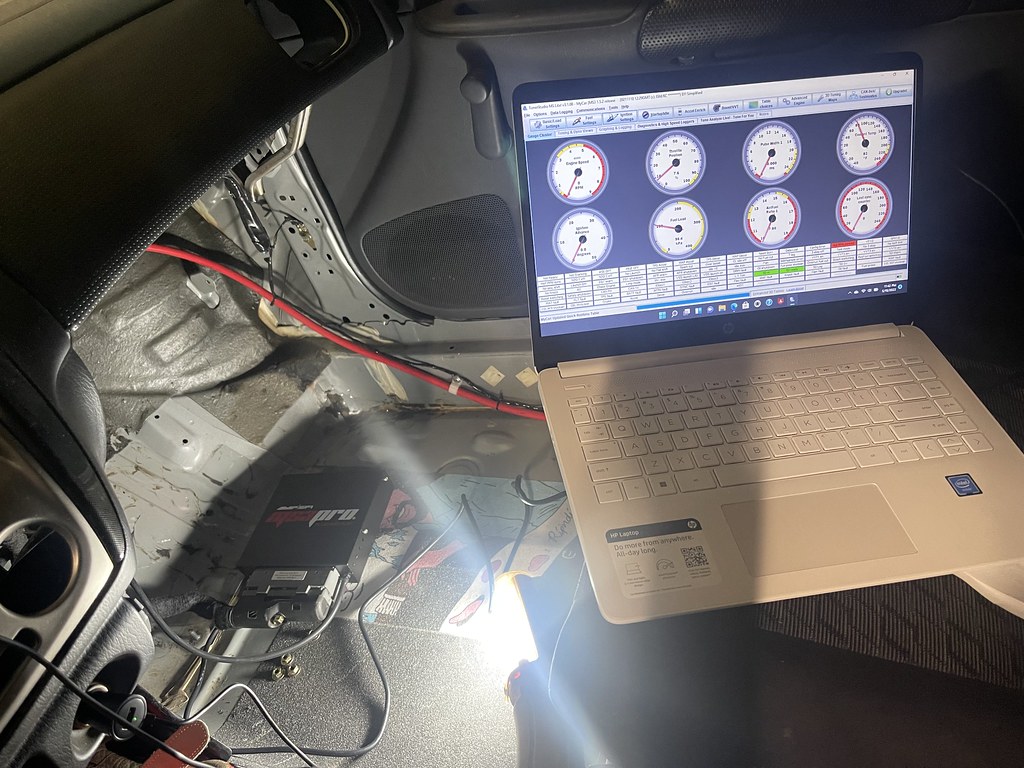
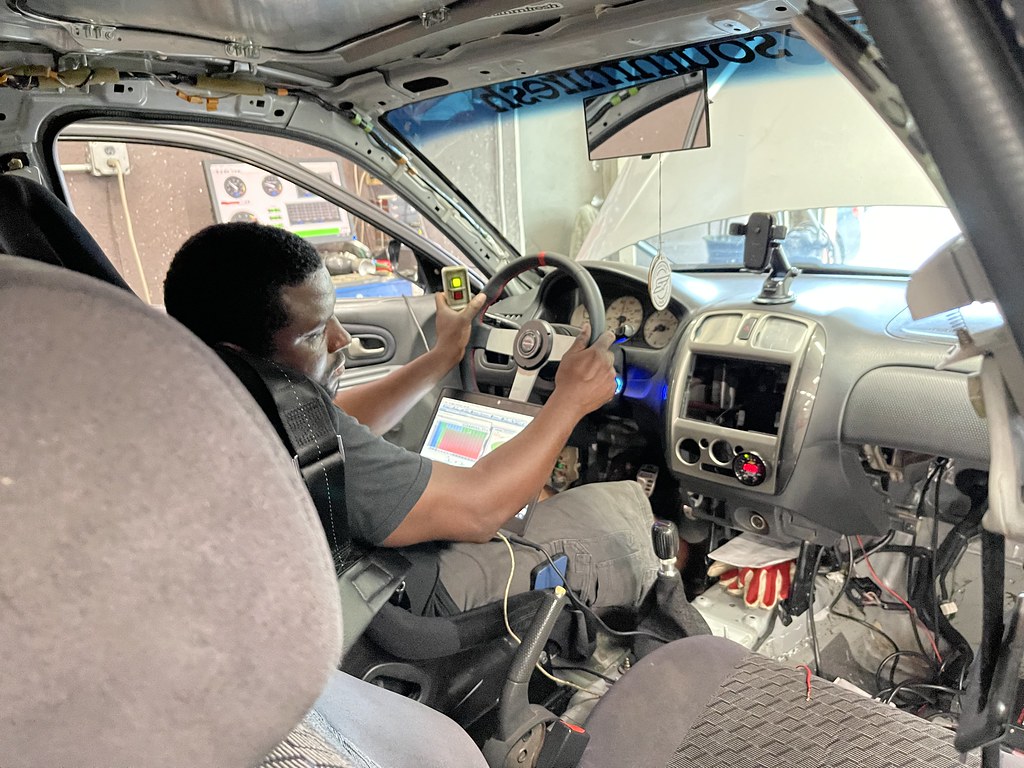
Once again I was back on the dyno. This time with proper tuning software for Arjay to do his magic with. The first hour was mostly working out the bugs and getting everything set up to work properly.
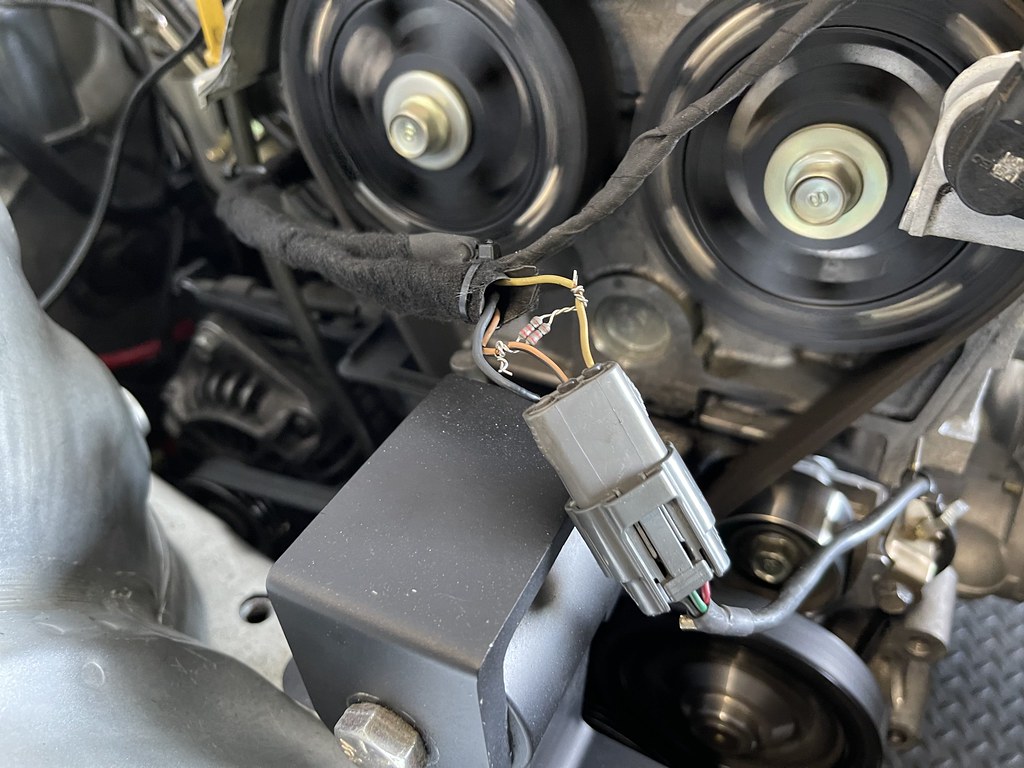
Once we got the idle setup, and the car was able to idle on its own. We ran into an issue with the car losing a crank signal causing a breakup at 3500rpm. We had to rig up a resistor in order to solve that issue. Kevin at DIY was able to correct this issue by adding a resistor in the actual ECU so this wont be an issue.
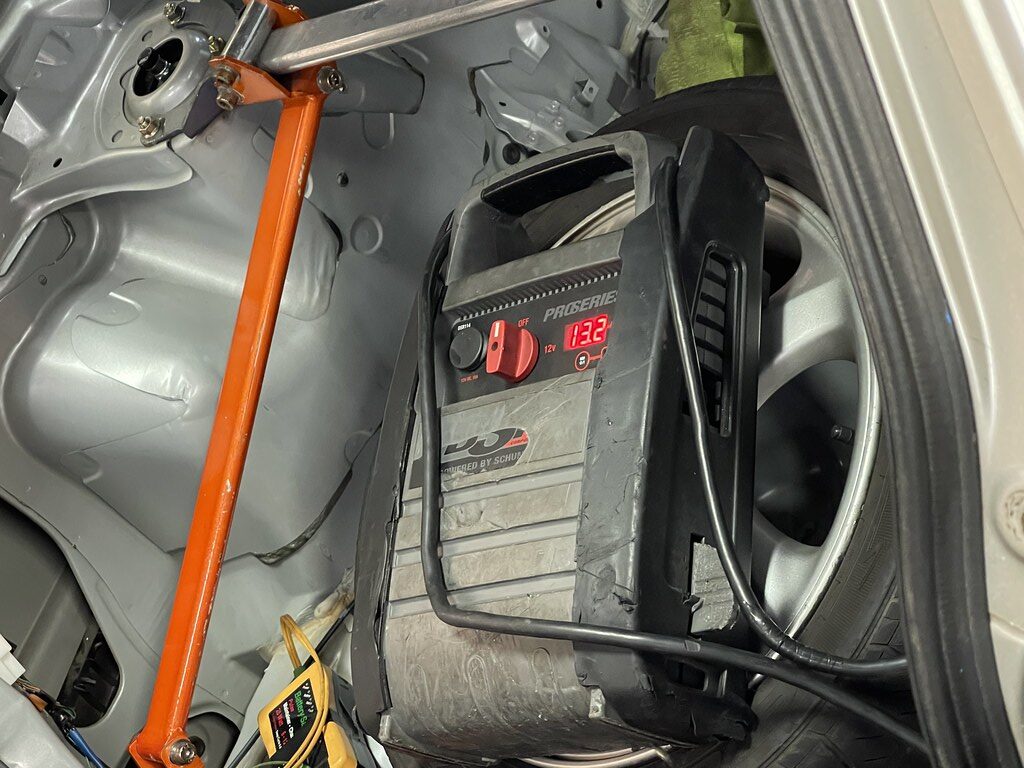
Once we got the crank signal sorted, we noticed the alternator was overcharging the battery up to 18 volts during dyno pulls. We were able to adjust the alternator output and keep it steady at 13 volts.
After a few hours of getting past those issues, we were able to see about putting some numbers down.
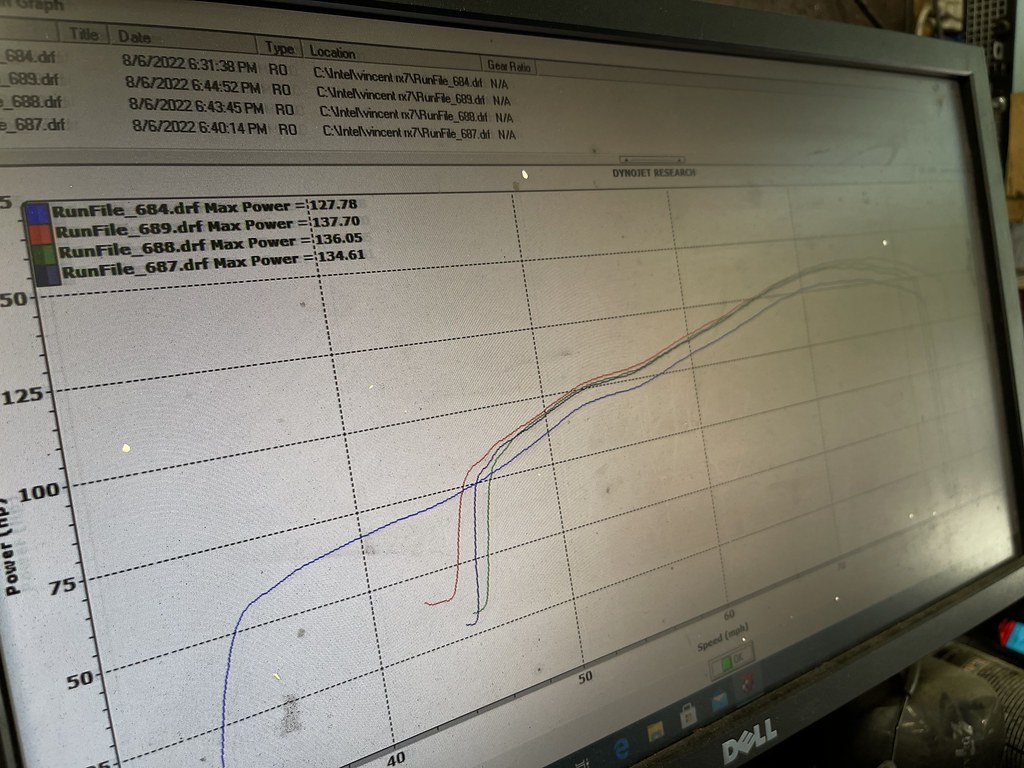
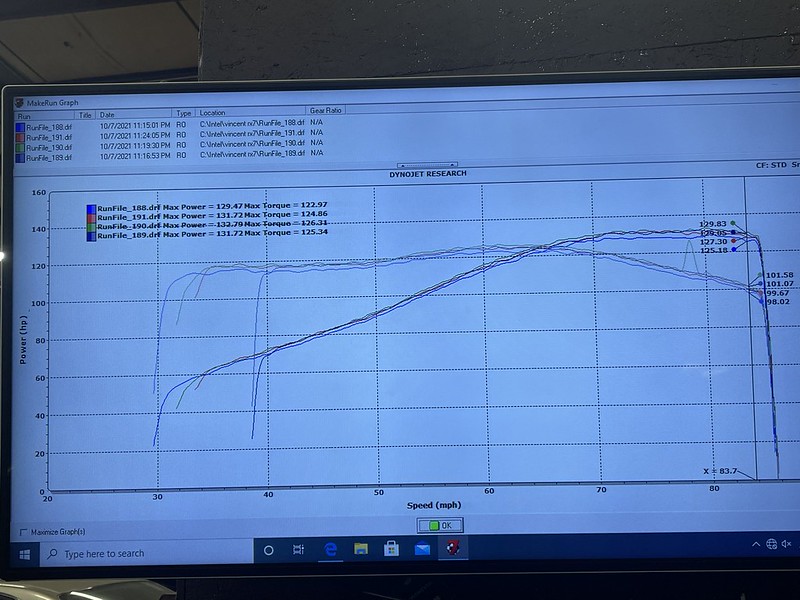
First clean run the car made 127hp out the box which was way down from previous. But we picked up a good bit after a few runs..
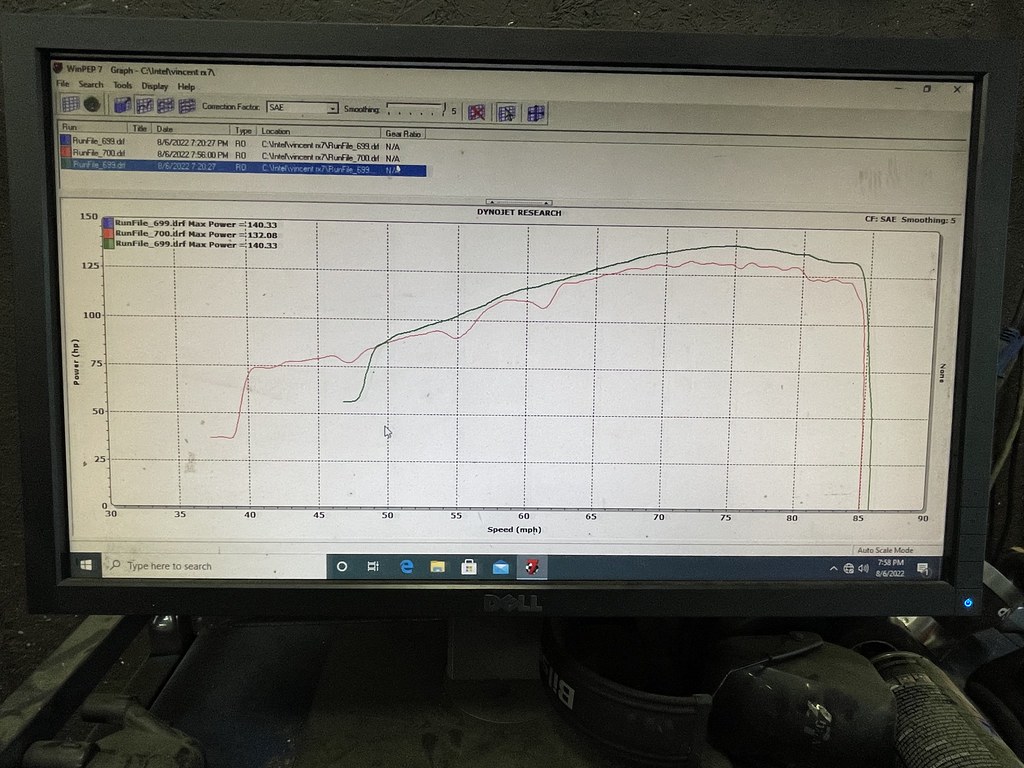
After fighting with issues most of the 3 hours, we only spent about 30-45 minutes doing power pulls. Arjay was able to get a nice and smooth power band and get it at 140hp at the wheels, which is the most it has made so far. We were unable to get any torque readings this go round, but it will be back on soon to mess around and see what we can squeeze out of it. The Megasquirt is a huge milestone for the car because it opens it up for anything i want to throw at it in the future, so I am extremely satisfied with it all.
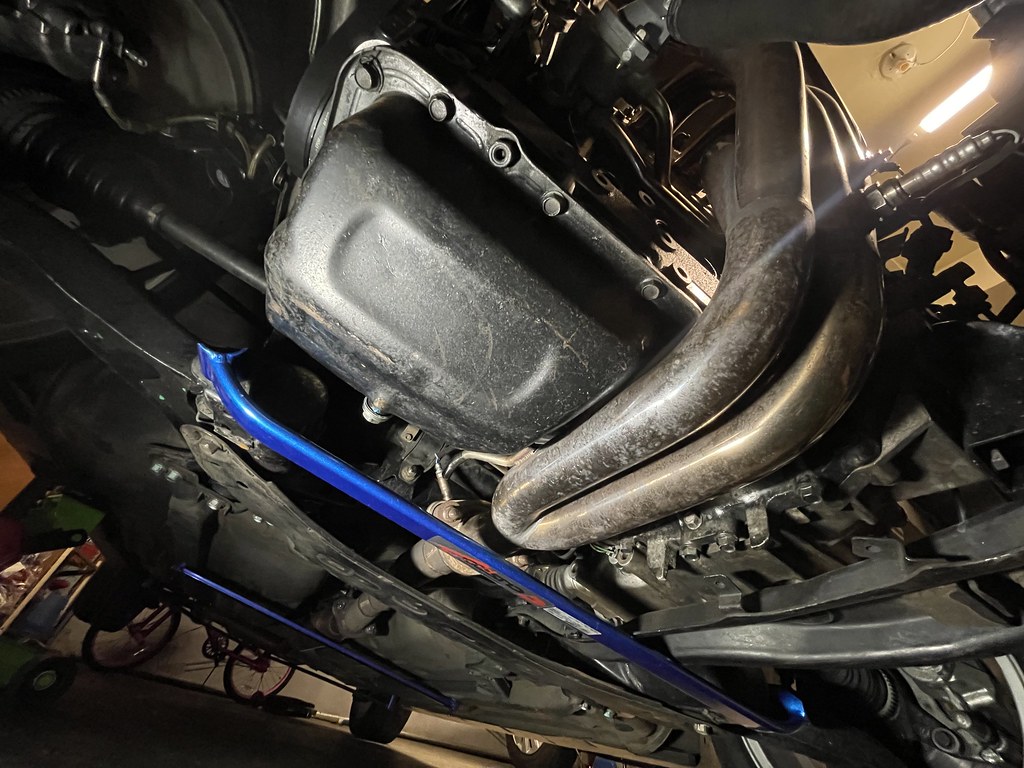
After the dyno session I was looking for things to do, so I started to pull out some of the parts I had been collecting. And figured its time to get this stuff installed. I stumbled upon this Autoexe strut tower bar on Yahoo Japan.
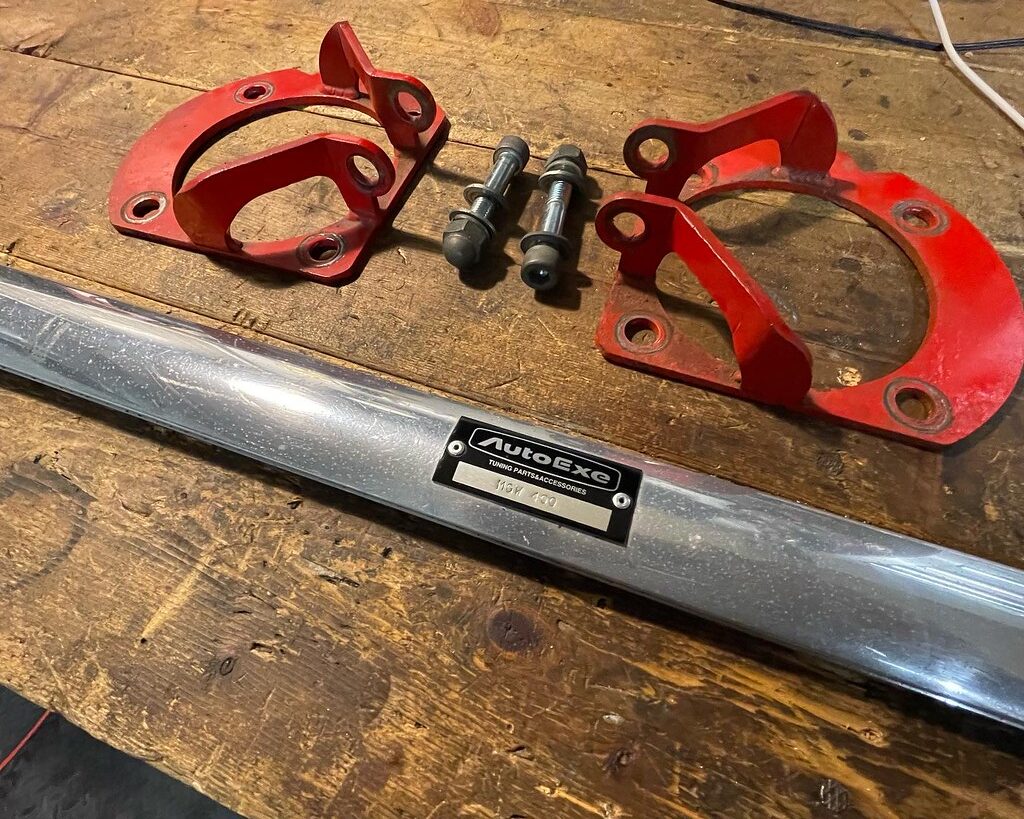
It was listed as "mazda strut bar" on the auction. But one of the photos showed the parts number, and I cross referenced it and it came up as being for a BJ chassis car. It was in decent shape, but was in need of some restoration.
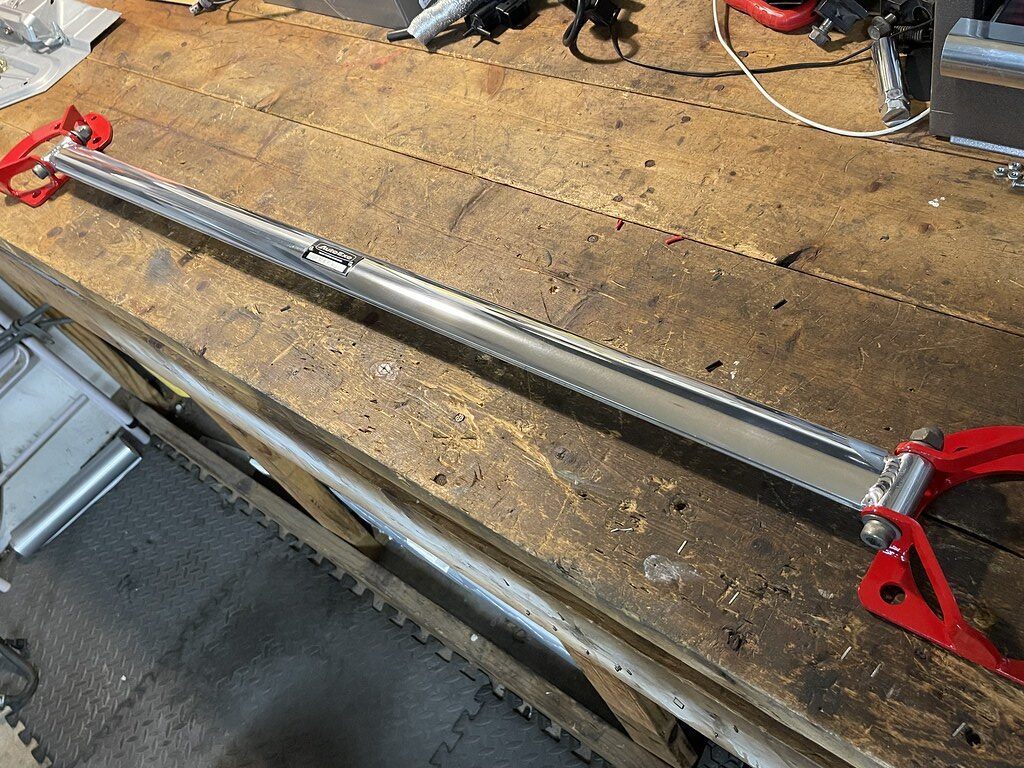
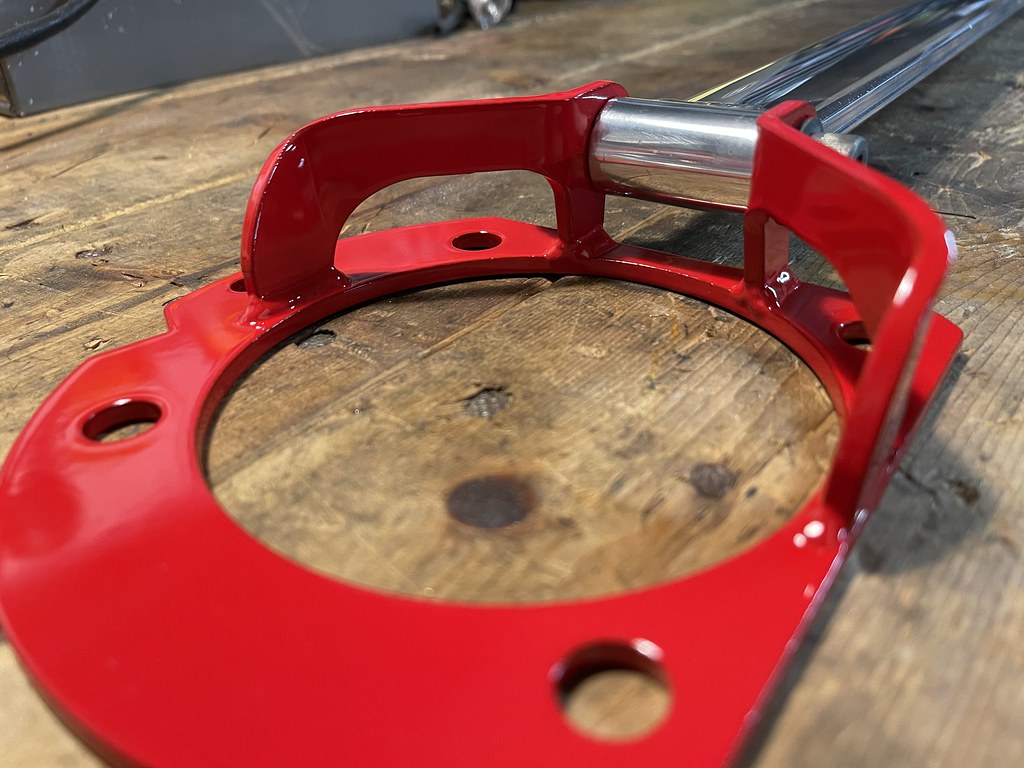
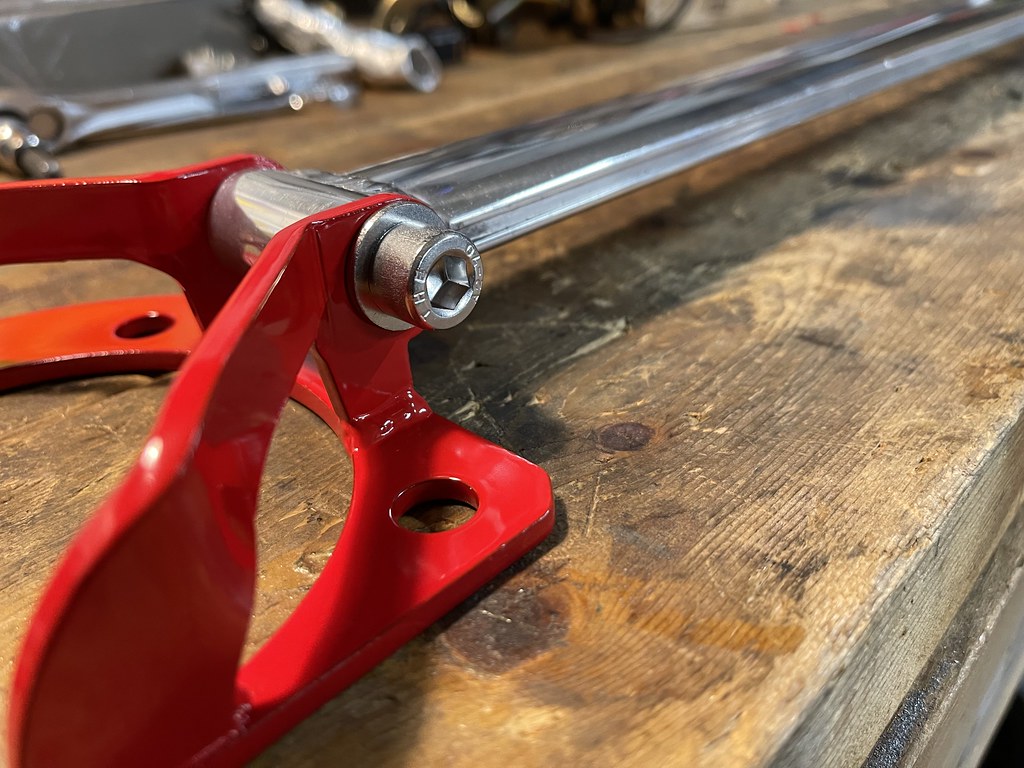
I had my good friend Matt ( @lloyds_atl) assisted me on refinishing the mounts and polishing the bar to its glory. I also replaced the bolts to match the new look.
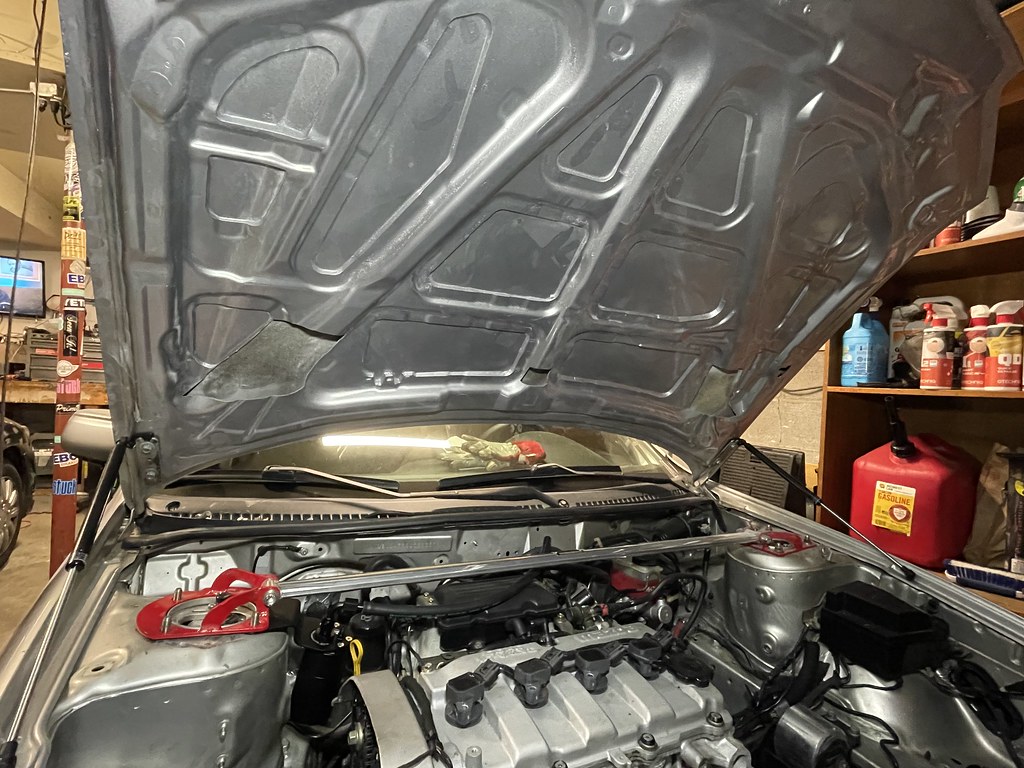
Once this was all done, I installed it... that is when I realized that the hood wont close. The side brace mounts, were keeping the hood for closing. I started to look a little deeper into the part number and found that the bar is actually for the 2000 Mazda Premacy, which is the same chassis as the 3rd Gen Protege. But the Premacy is a compact van, which later became the Mazda 5 thats based off the Mazda 3. Which explains why the side mounts are so tall. I test fit the bar before I had it powder coated, but i guess I never tried to close the hood.. So the only thing for me to do was to trim the hood.
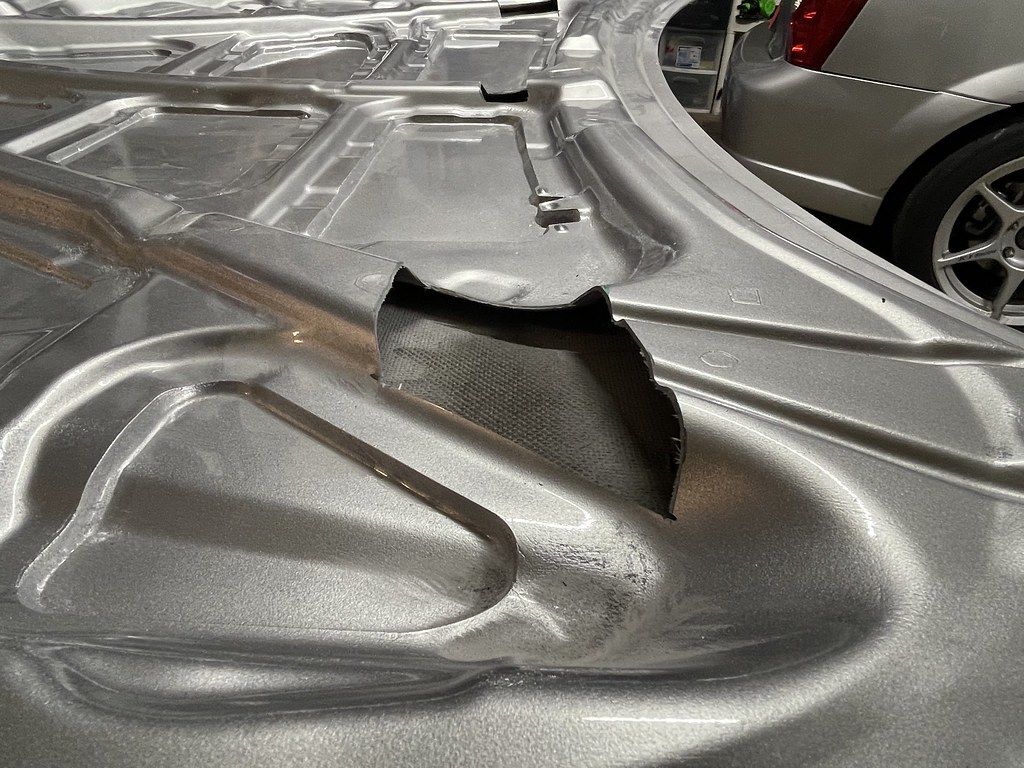
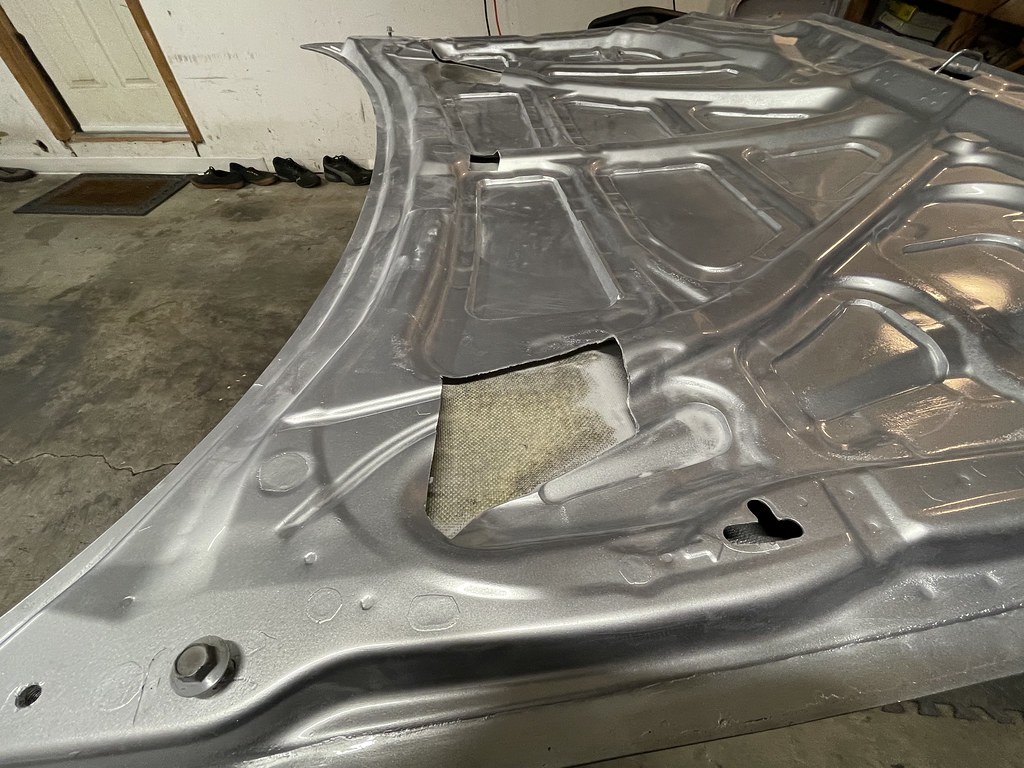
It took all of 12 minutes to trim through the fiberglass under panel and make room for the brace.
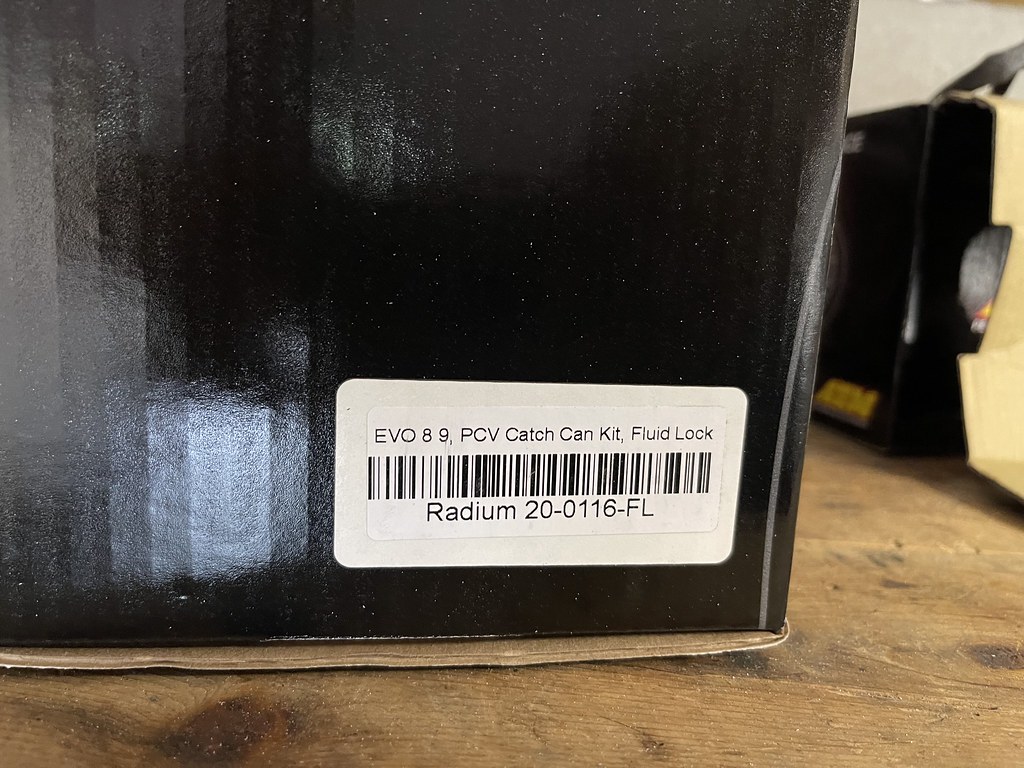
Next project was installing the Radium Catch Can Kit
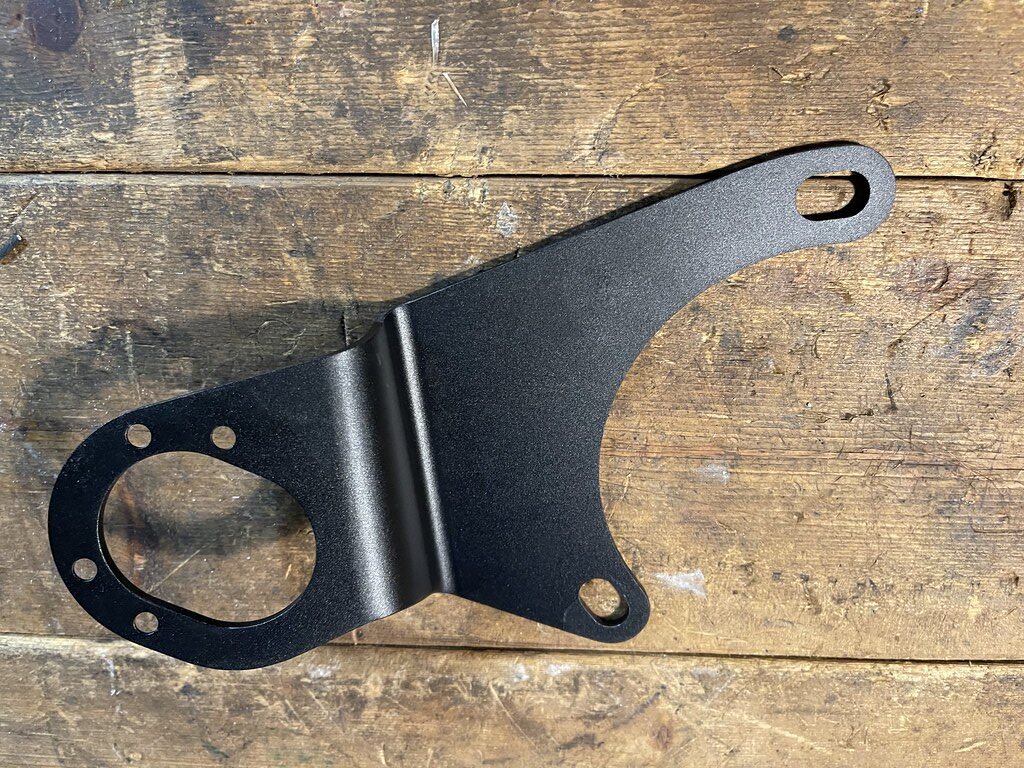
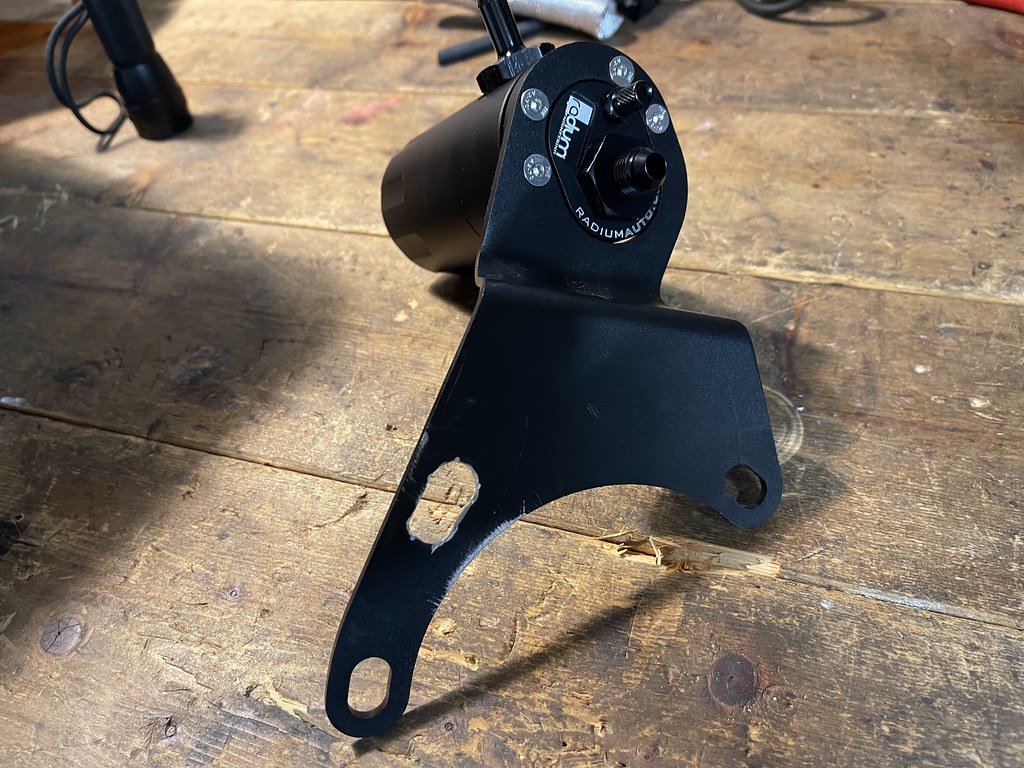
The Evo kit mounts on the strut tower, the only modification needed is to slot the inner hole to fit on the Protege strut tower.
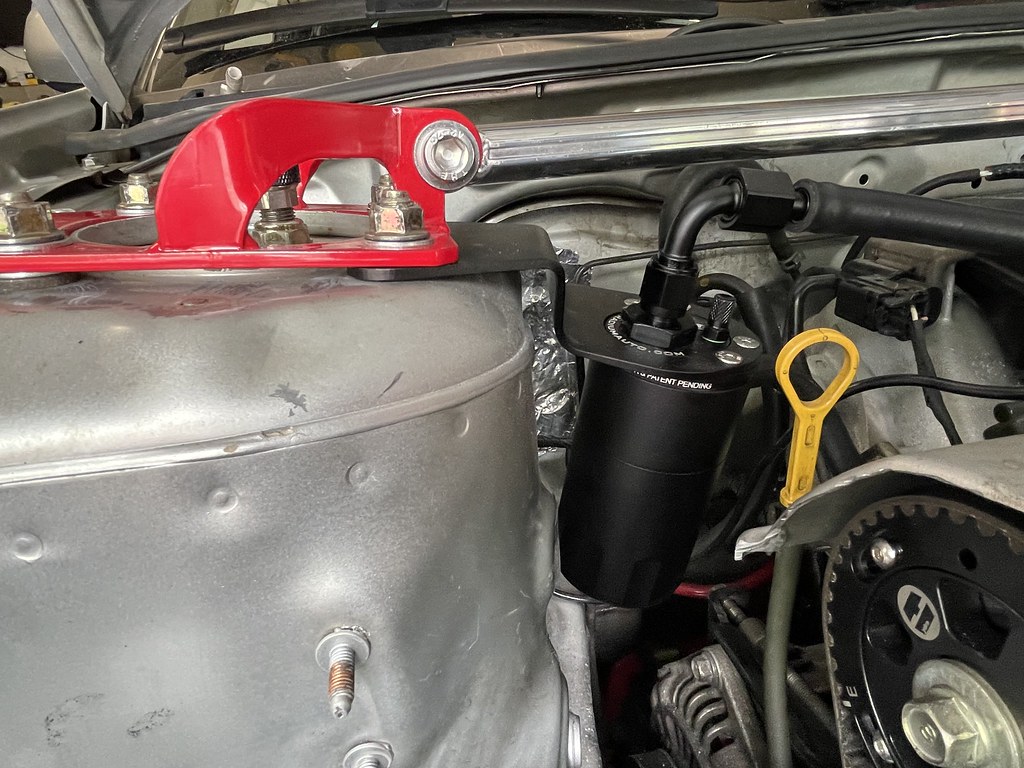
Catch Can mounted in place....
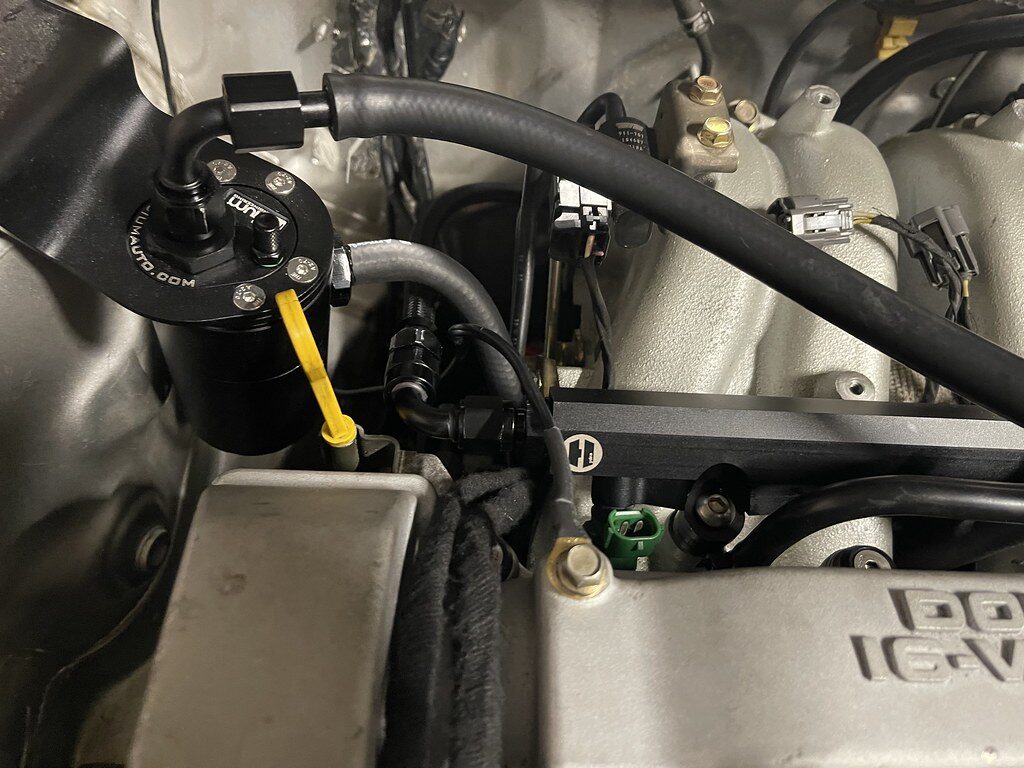
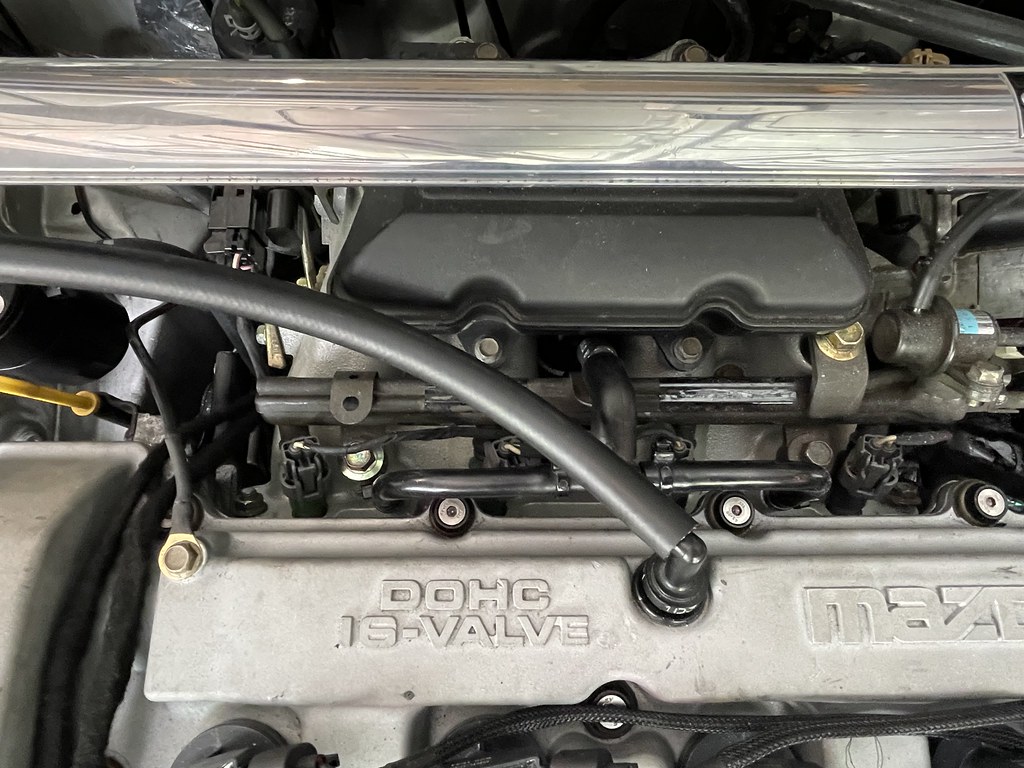
The top hose runs directly to the PCV valve. The other hose goes under the manifold and easily plumbs into the intake manifold elbow that feeds into the intake manifold. It may not be as a concern on my engine being na, but I did start to notice a bit of oil in the PCV elbow every so often.
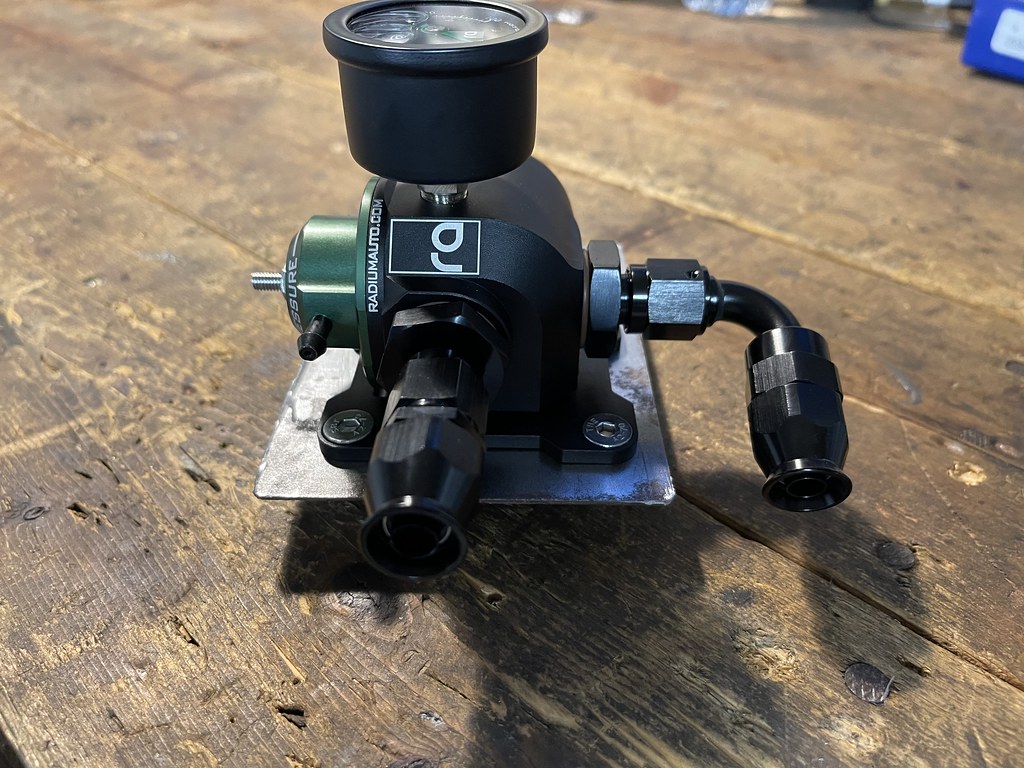
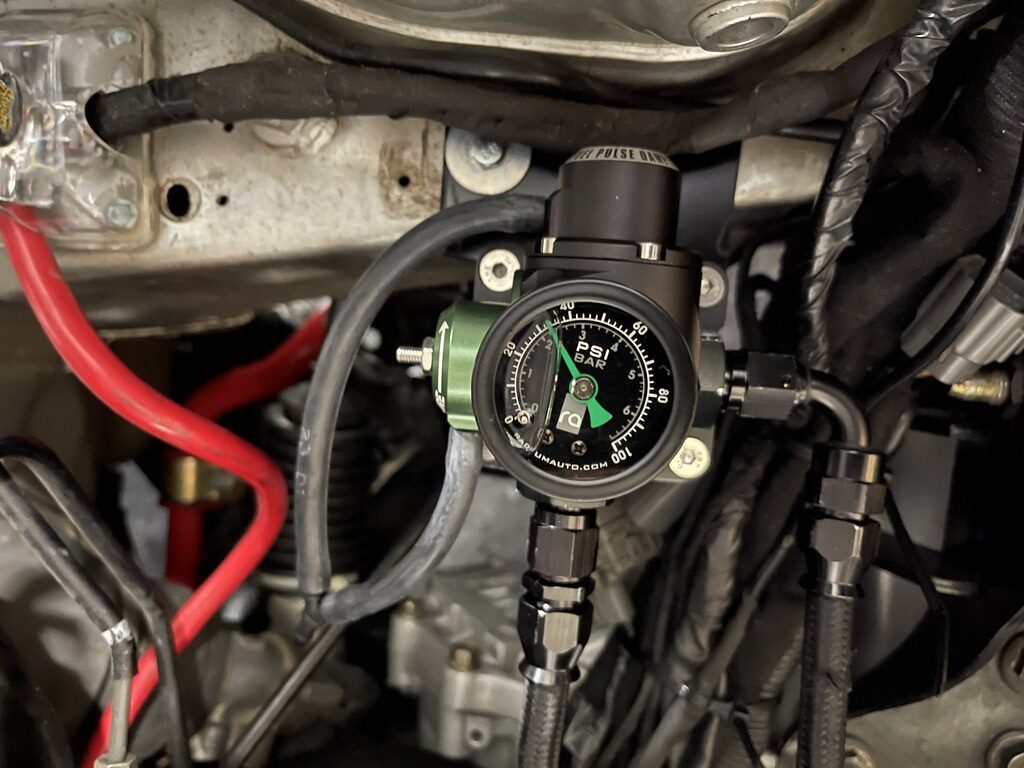
Now it was finally time to install the Radium Fuel Pressure / Damper combination kit, and the Hydra Motorsrports Fuel Rail .
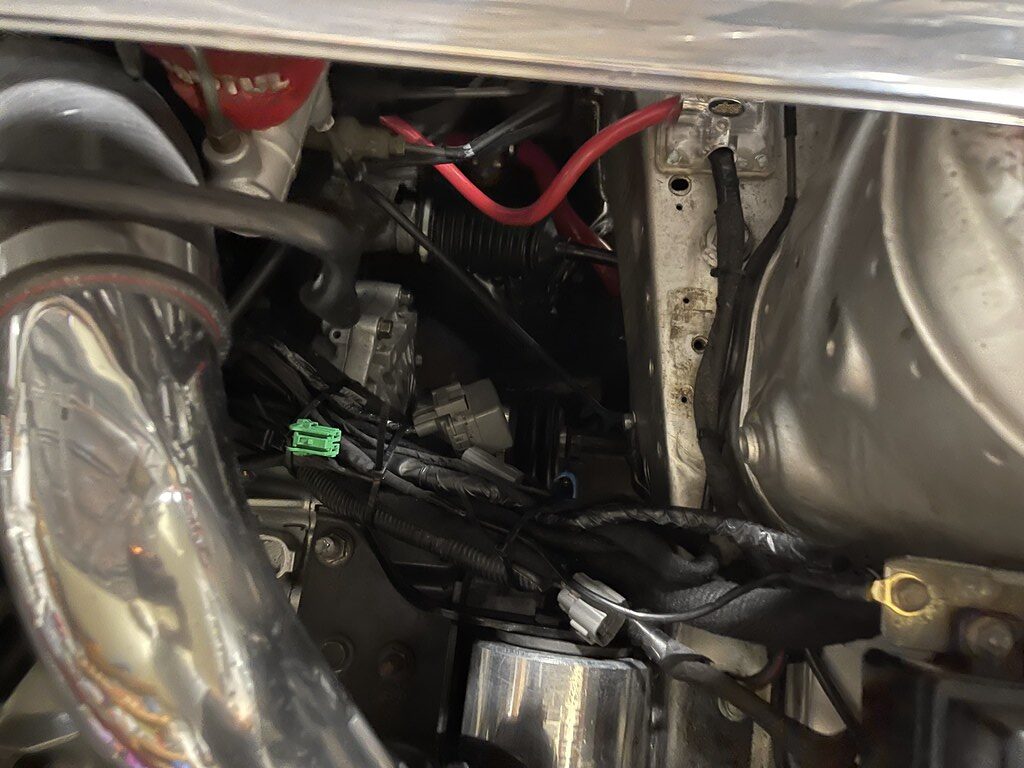
I didn't really have much room to mount it on the firewall, so I found a space under the passenger side normally where the battery would sit.
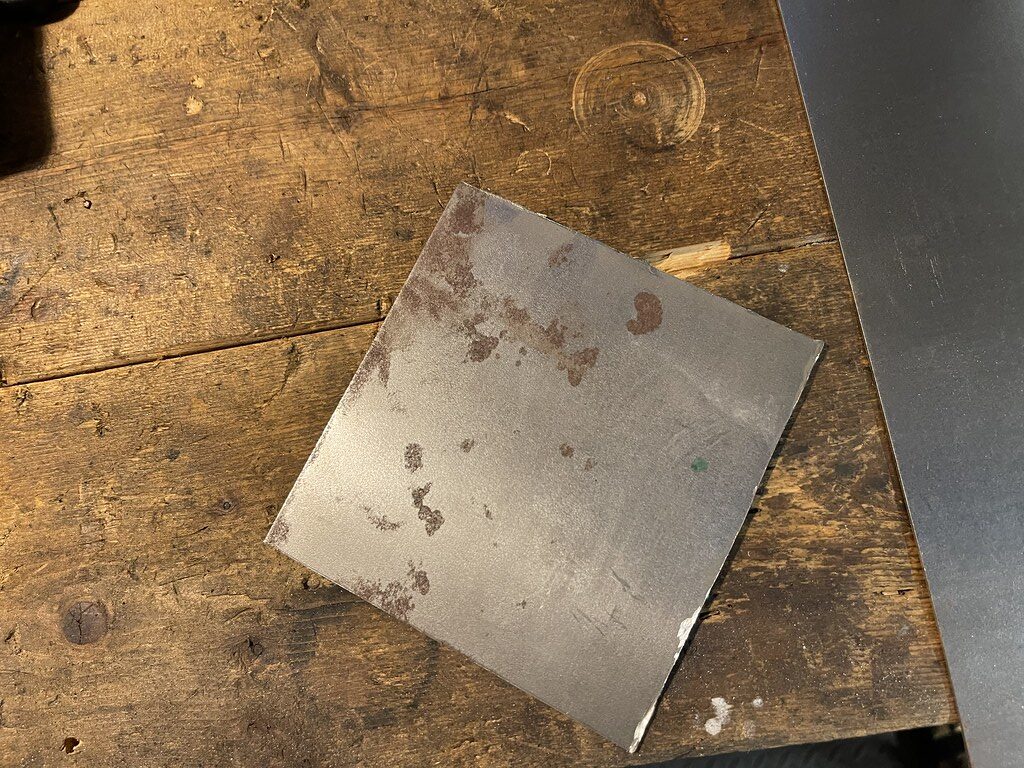
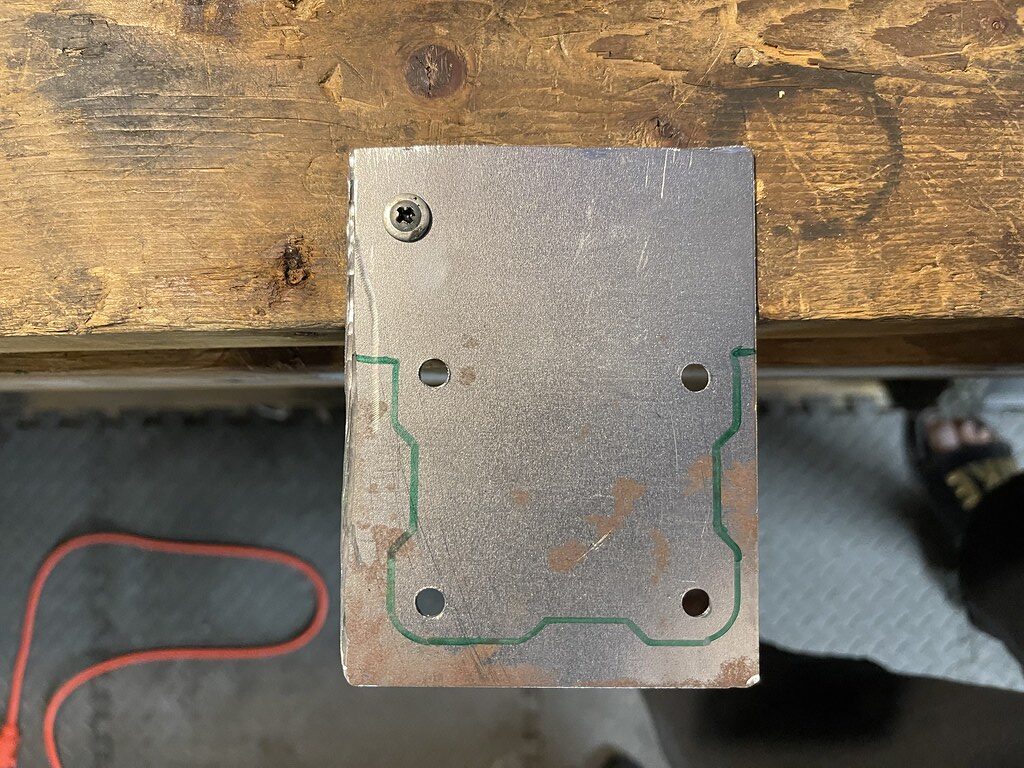
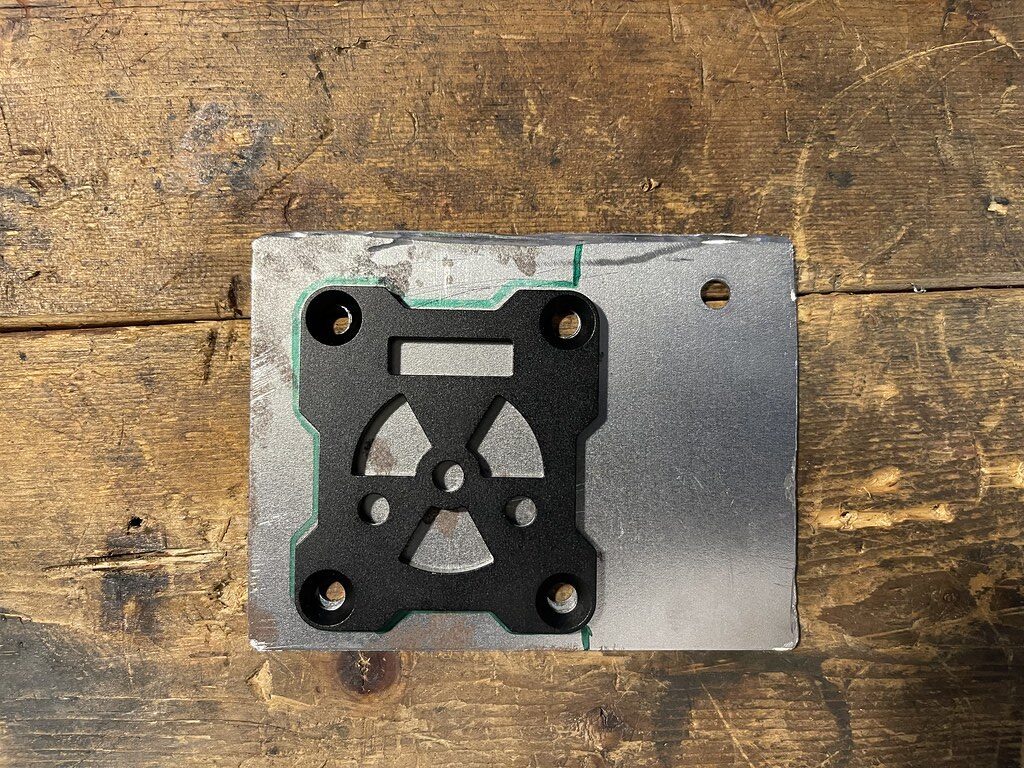
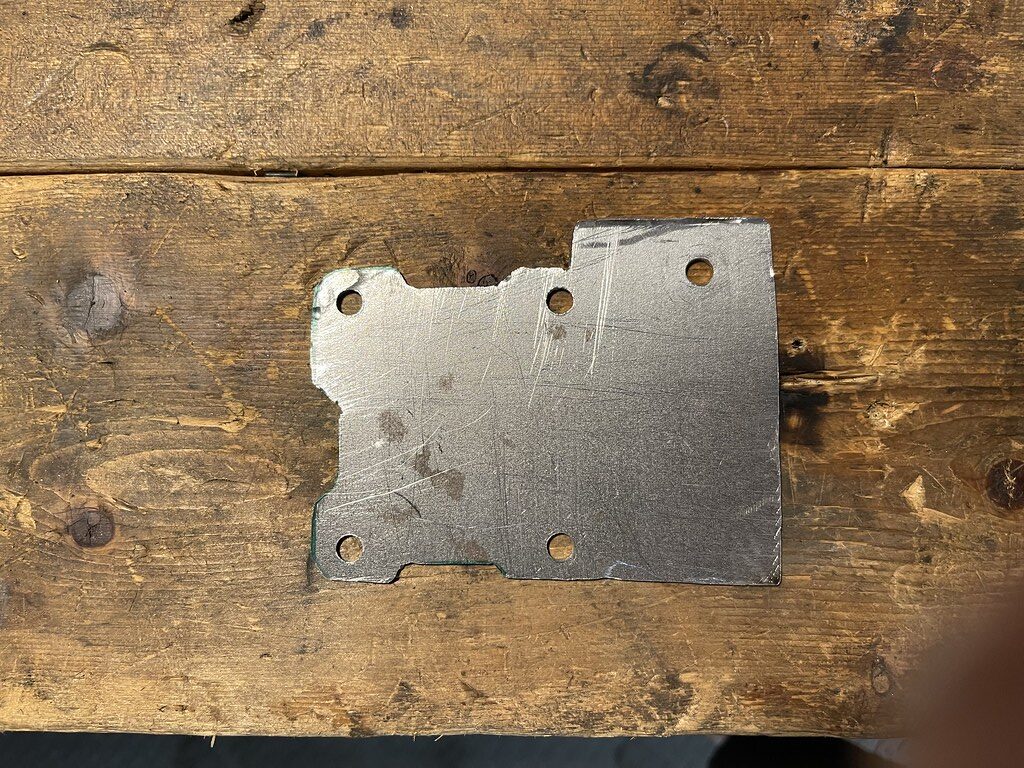
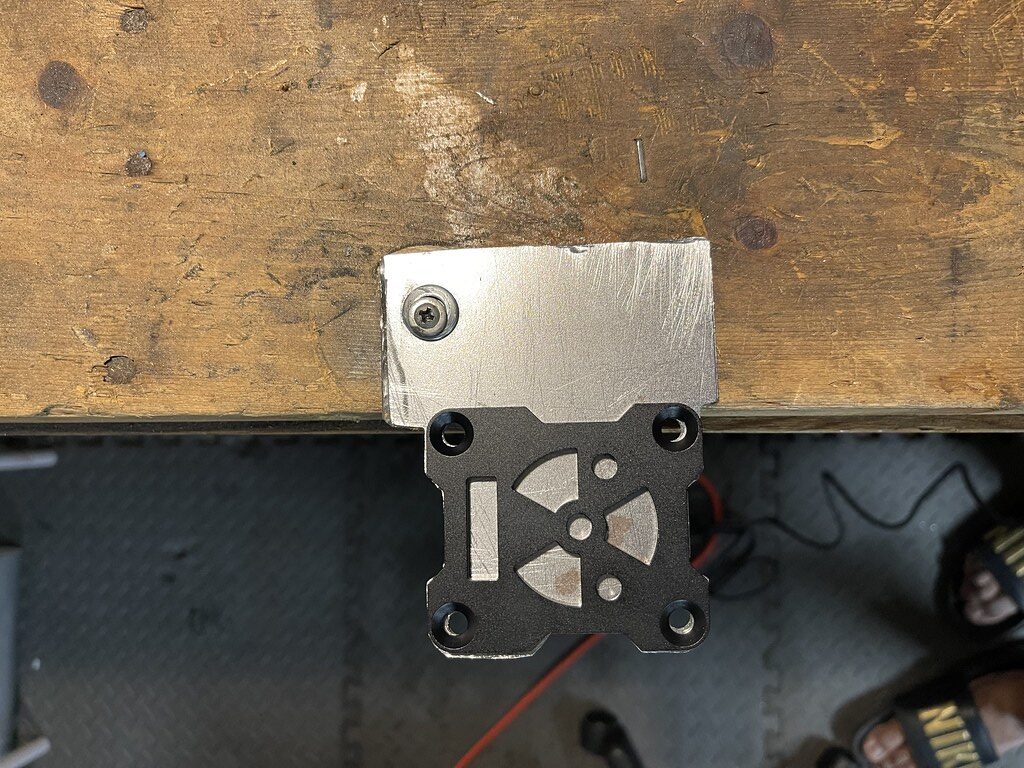
I found a piece of scrap metal and went to town on it making a plate to mount the FPR to. It was not perfect, but I did spend more time then I should have making it look nice, only to realize it probably never be seen. After this photo I cleaned up the sides and painted it so it would not rust.
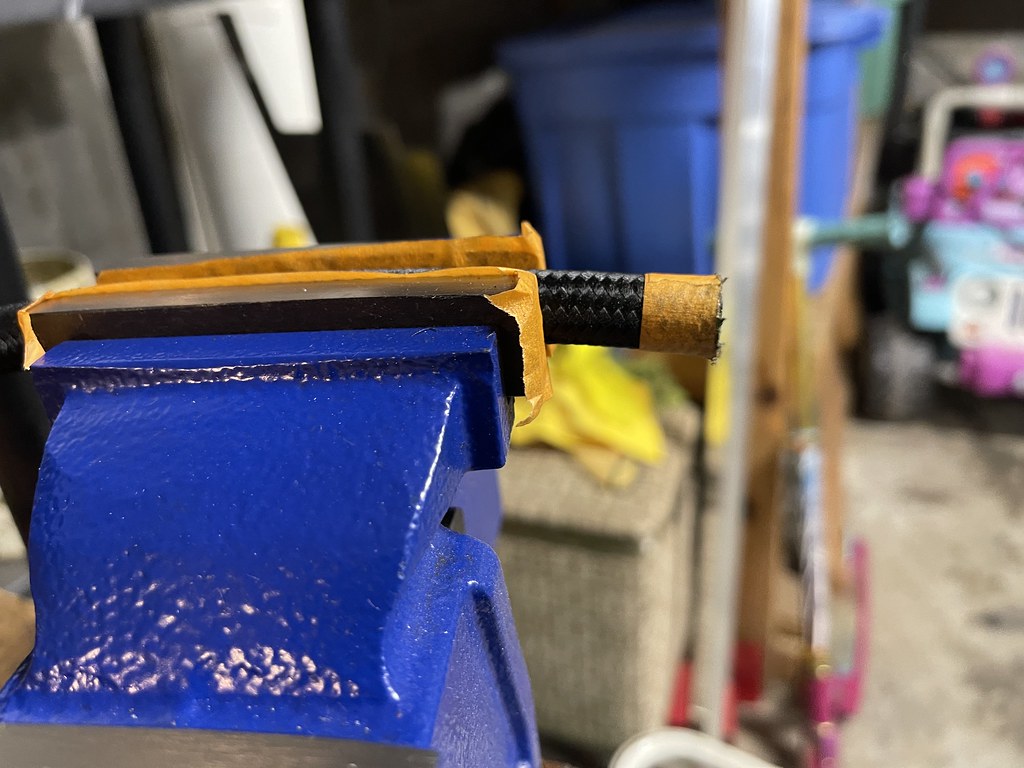
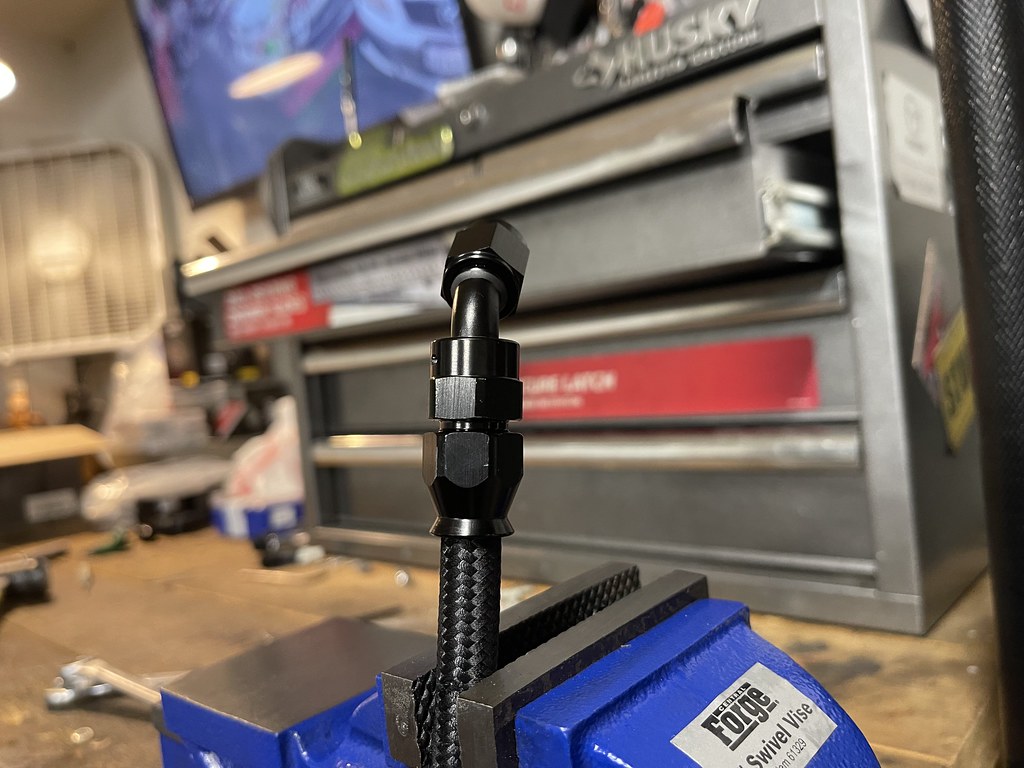
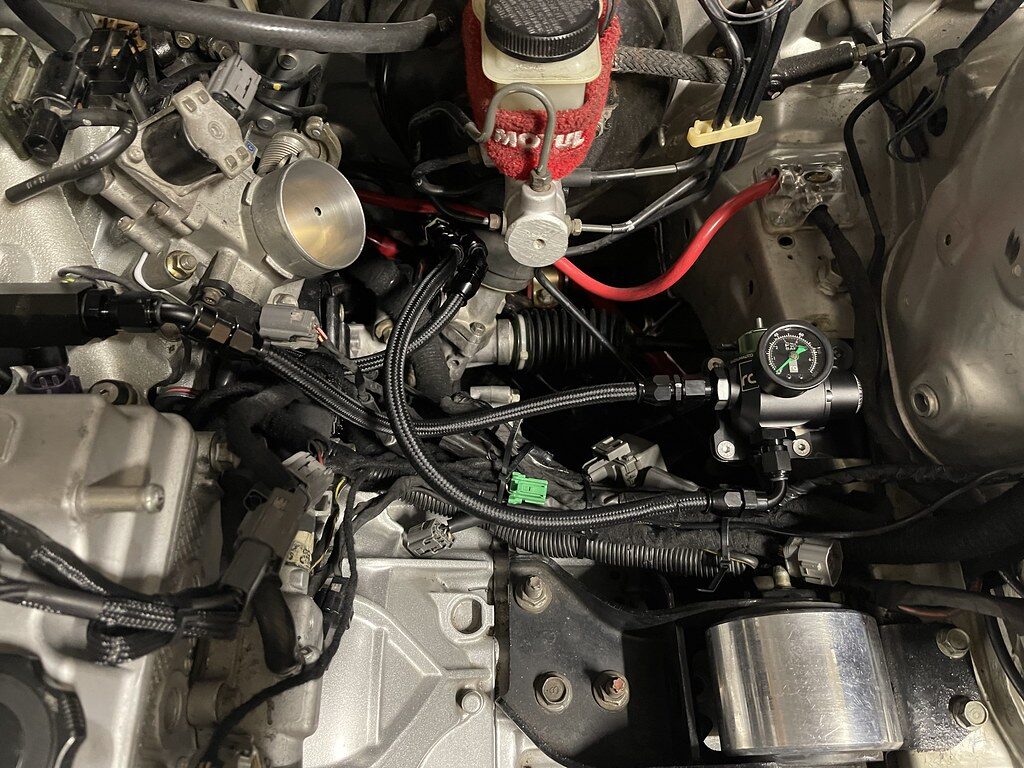
I had prepared myself for cutting these lines, by watching hours of you tube videos. It honestly was not as difficult as I anticipated, the only tool I really needed was the table mount clamp to hold the hose in place. I didnt have the proper wrench, and I messed up a few of the ends.
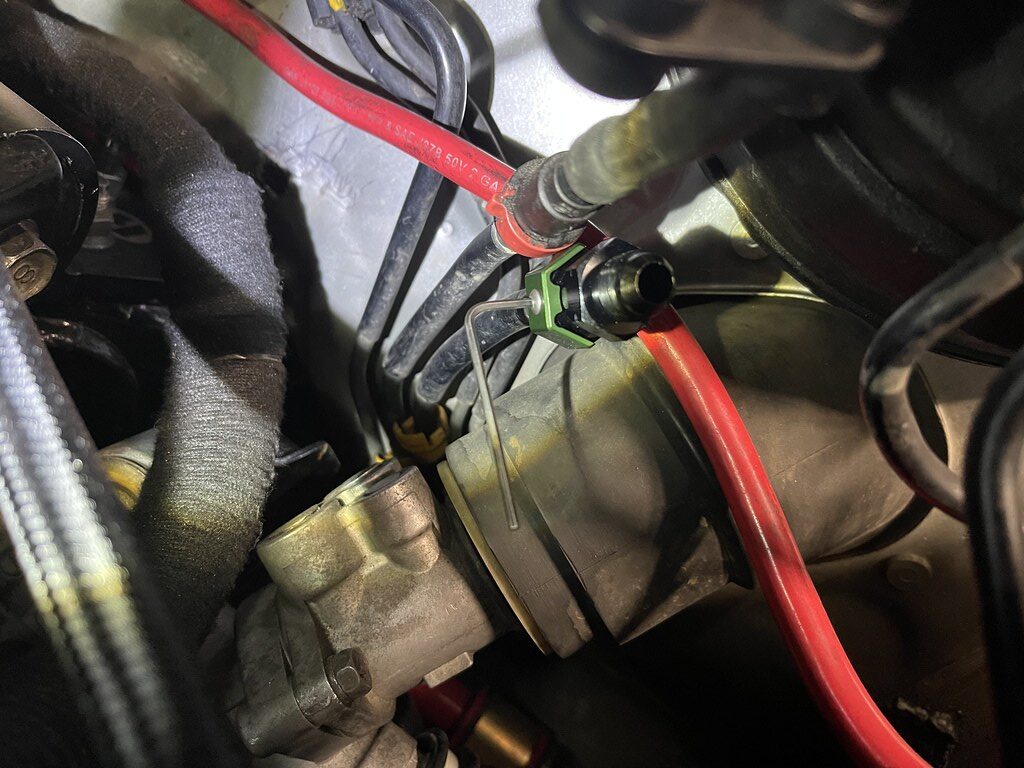
Quick release fitting attaced the OEM fuel feed and return lines. Install pretty simple and straight forward..
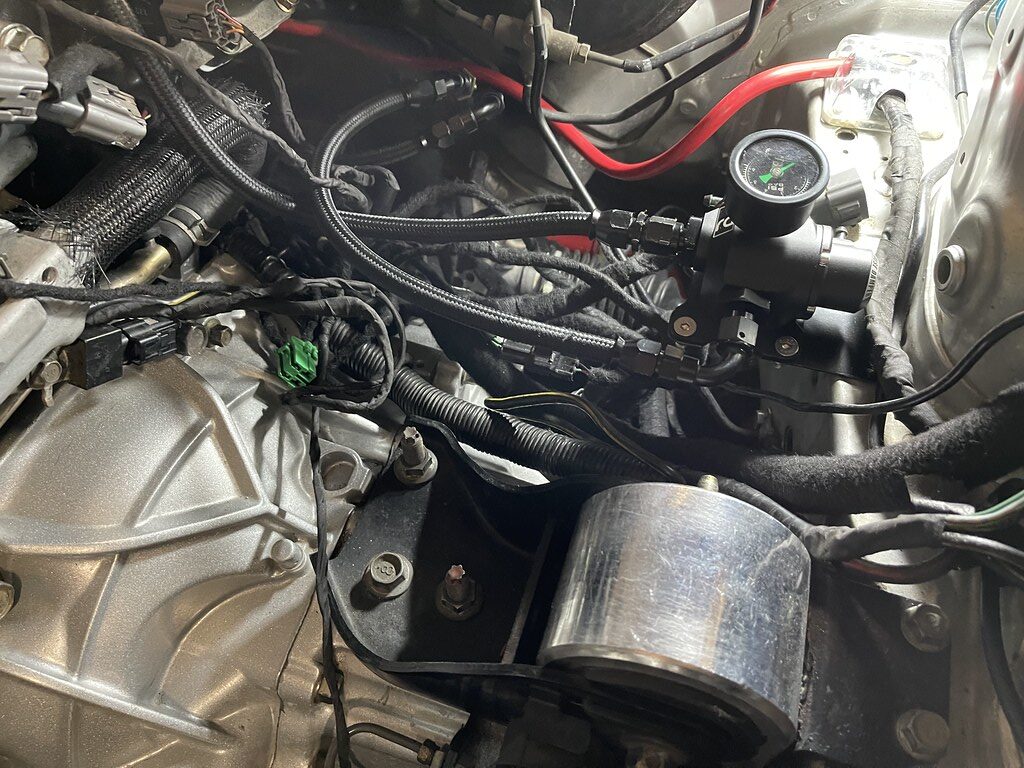
Installed and with only 2 leaks at the fuel gauge, and one on the feed line...
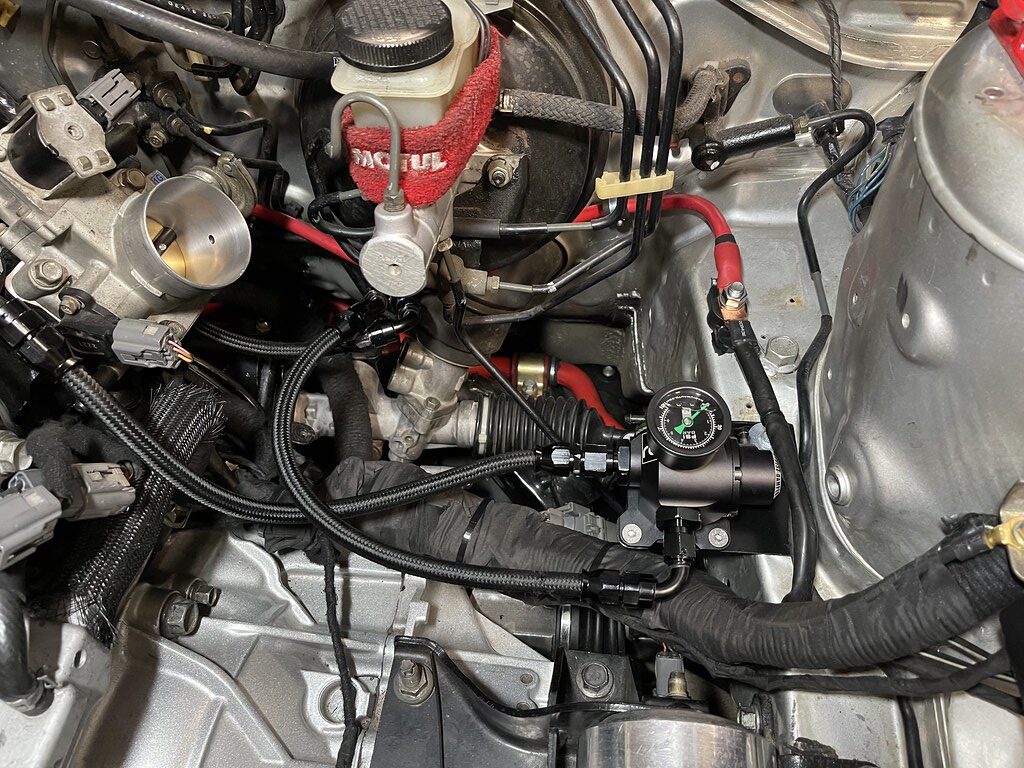
Leak free...
The next task was to clean up and get rid of some of the sensors no longer needed with the Megasquirt, and clean up this mess of wires.
First step was cleaning up the power harness, and cleaning up the starter and alternator harness. I also removed all sensors I no longer needed, and tucked them into one and wrapped it all up as shown.
Done for now, next step is to figure out some sort of permanent intake solution, and finally get these coilpacks mounted properly and get this crusty valve cover powder coated!
First track day with the plug and play Megasquirt ECU at Barber Motorsports Park. My last time here was not a pleasant experience. The first session I lost a tire, and had to run on my stock tires all day, and I had a random misfire issue I was dealing with. So I was hoping for a smooth day this time!
This time we decided to make the hour and half drive the night before and stay the night instead of leaving early in the morning. Driving the car isnt that bad, but the forecast called for it to drop down to 38 degrees during the drive. The drive wasnt terrible, but the cold breeze coming in from the open air duct on the firewall had me freezing. But by the time it got bad, we were already there...

We got up early and we were greeted with 26 degree weather. My run group was the first group out so it was not ideal conditions. Barber is a pretty tricky track surrounded by a lot of walls, and I had only been here twice so I was still learning how to drive it. The first session I was all over the place, the ice cold track was super slick, and I had zero confidence in pushing anything. So most of the first session I just paced myself for safety and memorized the lines..
Around noon the track started to heat up, and the tires started to warm up and I felt more confidence in pushing more. I can feel that I am losing most of my time at the first turn, and back carousel. I am not sure if I can blame the worn tires for not holding my confidence or just the car improving so much over the last year.
I left Barber with a list of things for me to improve on. Before the LSD, the car would rotate and I can control the rear with the gas pedal and weight transfer. At the time I thought that was how it was supposed to go. But with the LSD the car does still rotate, but I am able to control the car through the turn with the throttle and the steering wheel. But I did remove power steering, and it takes much more effort with the wheel to handle the cars rotation at higher speeds. I am not sure if its me that needs to learn, or if I need to put power steering back on. The lack of power steering seems to have a effect on my focus at times....
Here is a 2 laps from the event. Overall solid day....
A few weeks later I was back out at Atlanta Motorsports park. I was excited for this event, as it would give me a chance to get a good day at a familiar track to end the season. But mother nature had other plans with a rain storm in the forecast for the entire day.
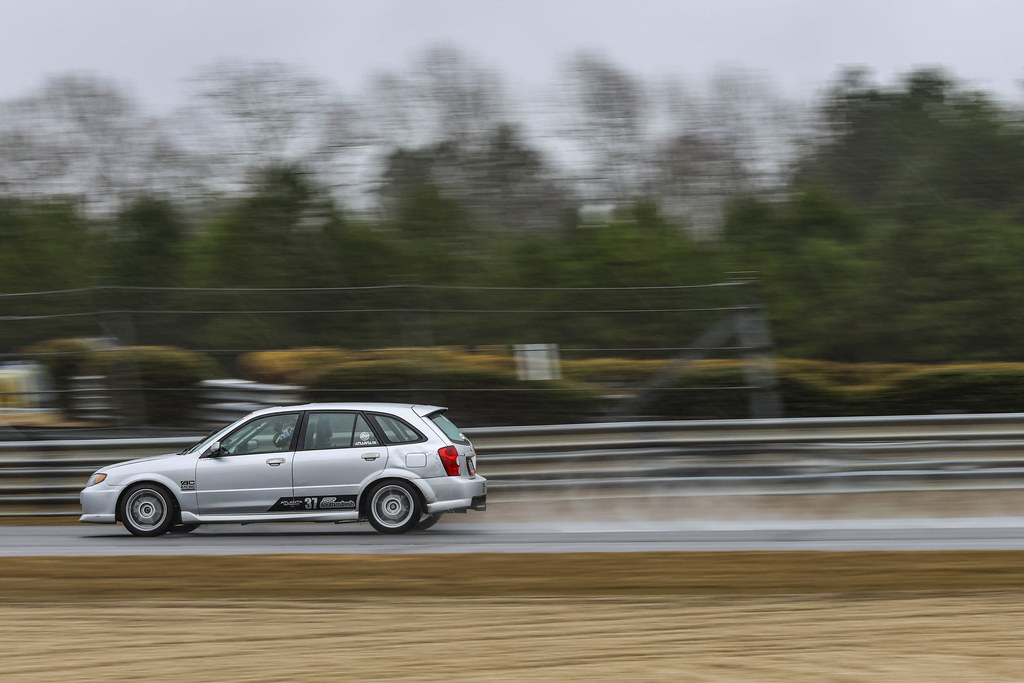
From the start, the track was just slippery at the most crucial parts of the track. And the RT660s just did not have enough life left in them for my comfort.
I can’t really report back, because I spent most of my sessions gripping the wheel and trying to stay straight. We got a brief break in the rain right before lunch , and the track had a nice dry drive line, but when we went to lunch it rained again and it all went away.
The event was an eye opener, and a thought of possibly having a second set of tires for wet conditions so I can go out with some sort of confidence. But I was happy to have had the experience on track, and make it home without any sort of serious issues.
[MEDIA=youtube]kSKMcrzHbn0[/MEDIA]
You'll need to log in to post.


