1 2
Chris_Heideman
Chris_Heideman New Reader
11/27/22 10:36 p.m.

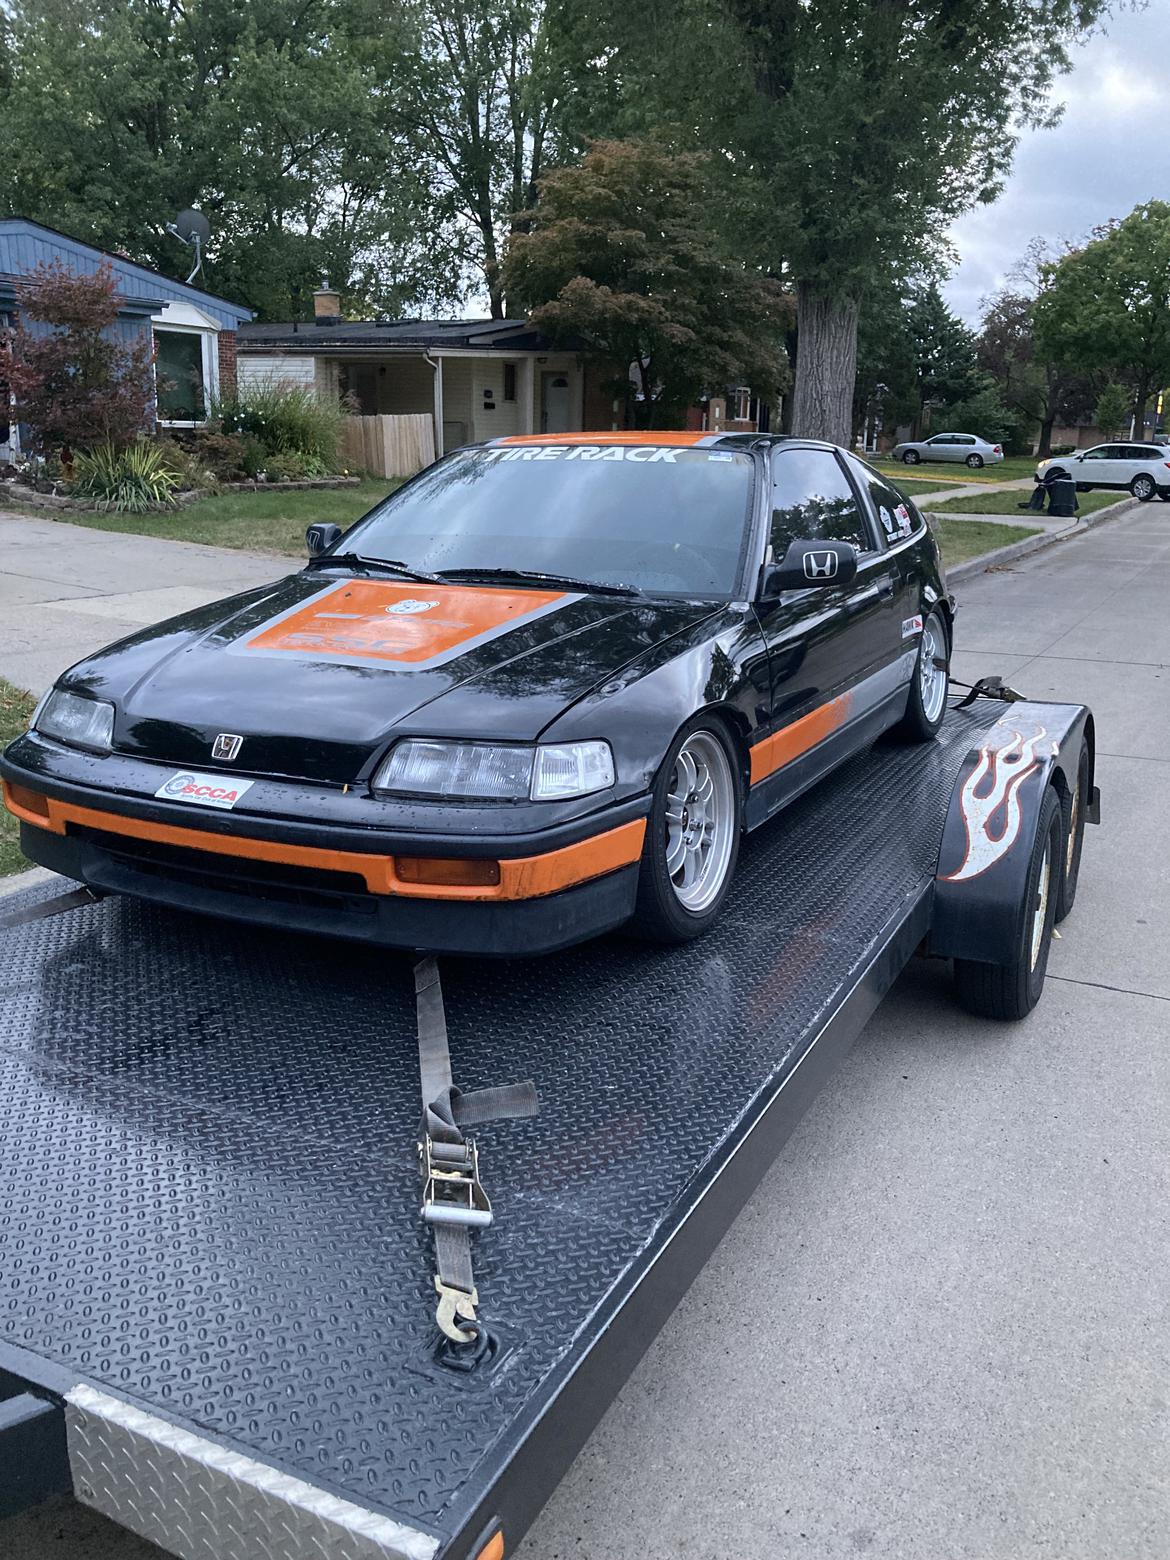
As those who have been to an SCCA Solo National event know, the first time you attend one of these events you're blind to the caliber of drivers they draw, and promptly think you can walk out with a trophy (or at least I am arrogant enough to believe that I could). I have fallen victim to this situation in the past two trips out of Lincoln. I continually fell into a trap involving an uncompetitive car (wrong tires, not fully prepped, etc.) and disappointment at Nationals. Well, I have finally come to the conclusion that I ought to rule out the car in my list of racer excuses. That transpired into a 1989 Honda CRX Si built for STS. This car has a history as an autocross car, as can be seen here. However, a car that was nationally competitive 6 years ago does not mean much if it hasn't been maintained. Thankfully, this car seemed to be pretty well maintained, however after passing through a few sets of hands over the last 6 years means it probably is not well prepped.

After picking this car up, I promptly decided to sign up for an autocross at Grissom two weeks out, because, why not? It runs and drives. So I put it on the lift, figuring it needed a good prep. My hypothesis was not wrong. After working through all of the suspension components, and engine bay I had determined a couple things. This car had a lot of loose fasteners probably due to poly bushings and engine mounts, and the battery "mount" was atrocious(I mean seriously, it is not that hard to mount a battery), new tires, there was no cold air intake mount, and it needed the brakes bled, badly.

This photo shows a bold that holds load from the lower kingpin being held on by maybe 3 threads.

The brake fluid that came out after the first purge of the system


The first fabrication project on this car that was required was a fix for the battery mount, I decided that a bungee cord and a cheap plastic strap would not do.

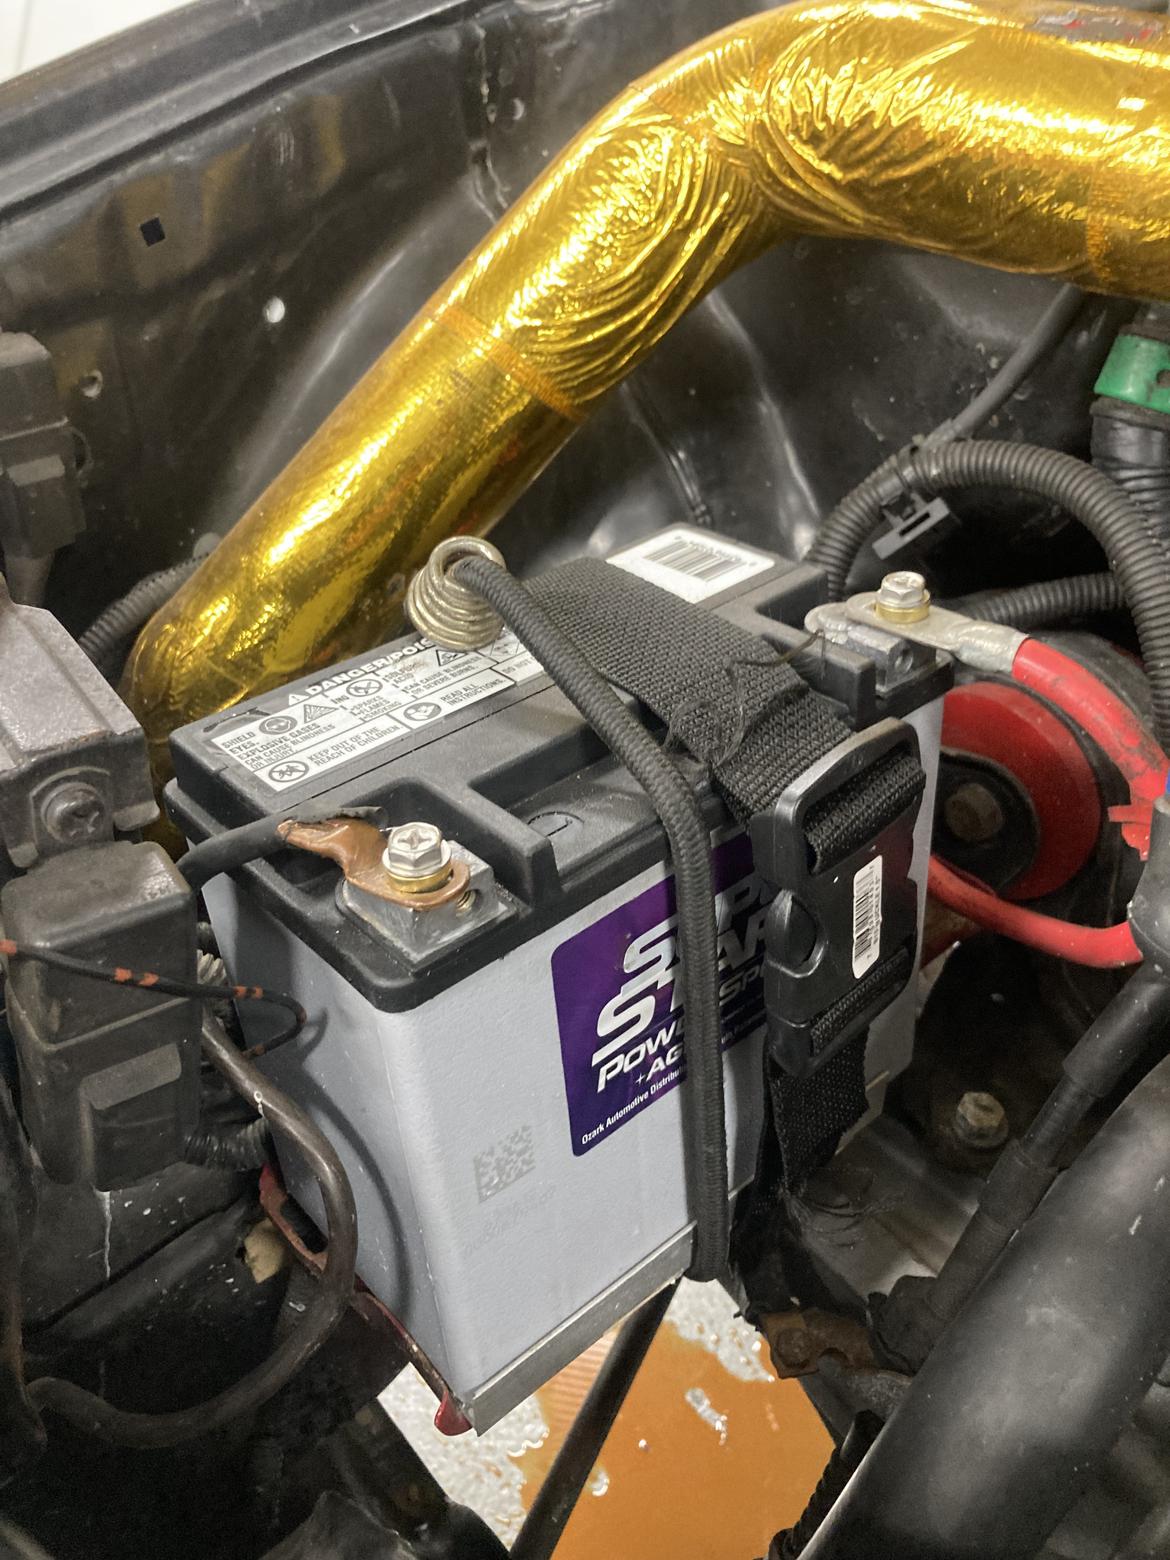
The replacement was made with just a simple aluminum strap that would secure it to the mount. I did this pretty quickly, and it is not very serviceable, so I figure that is something to fix in the future.

I also flushed the cooling system, as I couldn't tell if it was filled with water or coolant, and living in Michigan, I figured it was worth it to drain the system to know it won't freeze if the car is out in cold weather.

After the car was prepped, I took it out to a divisional event at Grissom. The first day I ended up 4th on pax, beating someone who trophied this past year in ES, which gave me some confidence in this car. The second day did not go quite as well, the tires were corded as the previous owner street drove the car with the aggressive alignment, resulting in crazy camber wear. I think I ended up 14th on pax. Being a college student, I decided to hit the books for a while before touching the car again. However, with Thanksgiving Break this past weekend, I decided it was the perfect time to get back under the hood, with the intention of fixing some slight frame rail rust.

The first day with the intention of completing this project, my brother, Jack made a snarky comment on the appearance of the car with its orange accents.

So I decided I would see how it looked if I pulled off some of the wrap, which I found I enjoyed the look of more. Next thing I knew 6 hours had gone by and I hadn't started the project I meant to, but I had pulled off all of the orange wrap. This led me to my next revelation...I will never buy a car covered in stickers, or that's wrapped ever again.

With all of the really important de stickering done, it was finally time to cut the car apart. I am fortunate enough to have access to a lift, and decades of sheet metal fabrication experience through my dad, Carl Heideman. 

This is how the frame rail looked before the repair

After cutting back the first layer of sheet metal on the floor, it looked like it would need to be taken further back to get a good spot to weld to (no rust), and to prevent it from rusting again.

This was the first patch, not the prettiest work ever done, but at least only everyone who reads this thread will know about that one. After this first patch was burned in, the second patch was built, burned in, welds were grinded, and it was hit with undercoating.

The wheels that came on the car were 15x7 Enki RPF1's, which are a good looking wheel, but I was looking for a lightweight 15x7.5'' wheel. All of the real competitive guys seem to run the SSR Competition wheels, but due to the fact I am a broke college student, I figured I'd settle for spending far less than a couple thousand bucks for a couple extra pounds. I was able to pick up a set of 949 6UL's from a fellow autocrosser, and found they weighed in at 12 pounds, not too bad in my opinion.

With that done, what I see next in the full preparation of this car is to get the Whitener shocks rebuilt if that's still possible, or replace them with a higher end shock, check the alignment (and try to get some testing in), get some new tires, and maybe put the car on the dyno to check the tune and see how much power the little 1.6 liter engine can make.

David S. Wallens
David S. Wallens Editorial Director
11/28/22 2:53 p.m.

Dang on the loose threads, but so glad to see this car go to a good home. (And totally jelly.)

Thanks for sharing. 

JG Pasterjak
JG Pasterjak Production/Art Director
11/28/22 2:57 p.m.

Yeah every time this car came up for sale recently I closed the ad immediately before I did something I didn't have capacity for. Glad to see it went to a good home, and that it stil has good bones.

AnthonyGS (Forum Supporter)
AnthonyGS (Forum Supporter) UberDork
11/28/22 3:19 p.m.

I hear you on battery mounts.  I don't know why but every older vehicle I bought in the past several years has a battery that is flopping around.  I usually fix that and sell them though....  My recent Miata purchase has been a nice exception to this.

Good job catching all those loose fasteners!  And nice job on the frame rail repair. 

So you want to compete at the pointy end of anything.  Practice, practice, practice... you need to know your car and combo stone cold.  The better you know your car and hone your skills the better chance you have.  Just like musicians the best drivers drive more.  A lot of people like to think there is a magic solution, but often it's dedication, preparation and practice.  It's a big part of humanity and how the brain works.  If you want to be the best at any skill you need to do it more often. 


Chris_Heideman
Chris_Heideman New Reader
11/28/22 4:15 p.m.

In reply to AnthonyGS (Forum Supporter) :

Yeah, I've done tech for local events for the past couple years, never ceases to amaze me how many cars don't have proper battery tie downs. 

In response to being towards the pointy end, I have been working far harder the past year to really get it down, the issue I've run into is not having a competitive car so I jump around to different cars a bunch.  Hopefully this car will solve that issue 

Carl Heideman
Carl Heideman
11/28/22 9:47 p.m.

Action shot of unwrapping.  

Inappropriate words were uttered when he started the roof. 

Lots of individual orange dots. 

AnthonyGS (Forum Supporter)
AnthonyGS (Forum Supporter) UberDork
11/28/22 10:52 p.m.

In reply to Chris_Heideman :

Switching cars too often also means you don't get to know your car.  That experience will probably translate, but knowing your car very well is also important.  My dad (not a LeMans champ) once beat a LeMans champ in lap times in the same car on the same course on the same day.  Knowing your car and venue always pays off in a big way.  I think that driver may have won at Daytona for the 24 hours too.  Get seat time in your combo.  If it is a competitive combo, you can get there! 

Chris_Heideman
Chris_Heideman New Reader
2/22/23 2:04 p.m.

Well, with the 2023 season about to start, I have started to prepare the car for it. I am planning on putting a bolt in roll bar as I plan on doing SCCA Time Trials in the car, and do not feel the factory Honda rollover protection from 1989 is sufficient, I would also like to be able to run a proper harness as well as a HANS device. From my searches on the internet, I have found a few options. I am looking for a 4 point bar, and have found a few, but the Autopower bar seems to be the best from my searches, as I do not necessarily trust a cheap Chinese roll bar.


My question is, does anyone have any insight into roll bars for 2nd gen CRX's? If so, I would appreciate any guidance. TIA


Chris_Heideman
Chris_Heideman New Reader
4/11/23 10:48 p.m.

Its been a while since I've posted an update, however there no time like the present. As mentioned before, I am still a college student, which means this time of year is quite busy for me, however, I was able to sneak away to mid Illinois over my spring break to get the car out at an autocross. The club I ran with was the Champaign County Sports Car Club. Ironically enough, the event I attended was the first autocross I ever attended, 6 years ago (it's kind of an annual start of the season event). I got a set of Yokohama AO-52's, and mounted them on my 15" x 7.5" wheels, as well as a general nut and bolt. The first day of the event was a lesson in Street Touring FWD car control, as it was around 35 degrees and wet. The second day was right around 50-55 and sunny, which meant there was actually a little grip out there. I do have to say, it was probably the most competitive local autocross I have attended, with a past national champ present, and multiple guys who have trophied at nationals in the past. A link to my fasted scratch can be found here.


After this event, the car sat for a couple more weeks. As I had previously mentioned on this thread, I was planning on getting a 4 point roll bar so I can run a 5 point harness, as well as a Hans Device on the track, as I do not trust the 80's Honda crash protection. 

I ended up going with the Autopower 4 Point roll bar, and it just arrived today. As I have a couple busy weeks ahead of me, then I will not be able to attend any event the month of May, I figured I might as well start the installation as soon as possible so I can be ready to go a the beginning of June.

The first thing I did was remove the seats, as I figured those just might get in the way of the roll bar installation, followed by a quick vacuum cause it was pretty dirty.

The next thing I did was "unbox" the roll bar, however this term is used very lightly as it was strapped to a pallet, which made for very easy "unboxing".

I then promptly decided I did not need to read the instructions, and I could just try to muscle it into place to mock it up, without removing any of the rear plastic. 

From the initial look, it almost seemed as if I would be able to remove the covers for where speakers would go, and could just pop it in place, however I quickly found out I was only able to get one of the rear supports into place. No dice. I suppose this is a lesson in humility, and instructions are typically a good place to start.

From the look of it, I thought I would be able to get away with only removing one side of the rear plastic, and then I would be able to get it into place (Pro tip, buy a car that's been raced for over 10 years, the plastic basically fell out of the car due to the lack of plastic clips). I was pleasantly surprised by how clean this car was under the plastic. There was a base layer of dust, but no rust, or visible bondo, which was a good sign. 


The next issue I ran into was I totally forgot I would need to be able to get a drill into the mounting points, which resulted in the removal of the other side of rear plastic.

Once I had it all mocked into place, I tried to make sure it was square as best I could, the best I was able to manage was having both sides within 1/4" of each other. I decided that would be good enough, as the instructions just said, push it back as far as it will go, and drill the holes, which to me did not seem like the best way about it. 


I then went around to all of the holes, and drilled through the chassis while placing a bolt in the previous hole drilled in order to keep it as square as possible. Unfortunately I do not have pictures of this process.


Then the trickiest part of the installation was getting the backing plates, that mount to the underside of the chassis into place. With a little coercion from a hammer, I was able to get all four backing plates in. 

This was the first time I had the rear wheels off the car since I last autocrossed it and noticed some new rubber. Looks like I'll need some bigger spacers, especially on track with the roll bar mounting hardware.

I also found during the instillation, had I been a forward thinker, I should have removed the rear wheels while drilling the holes. I managed to hit one. Thankfully, the tires that were on the car are shot, and it still holds air.


All in all, it was a pretty easy installation, and the fit of the roll bar was really quite good. I still have to remove it again, and paint it, however I made good headway tonight. Before I started the installation, I talked to my dad and brother, who had both installed a roll bar in a NA Miata, and from what they said it was quite a nightmare. I was very pleasantly surprised by the ease of this installation. Below is a picture of it fully mounted in the car. 

A hatchback sure is a nice thing when you are done for the night, and do not want to re-install the interior. My dad will most likely cringe at this photo as he is a firm believer in never using a car for storage, however I will be back at work this weekend.


I also forgot to mention that I was able to take the car to the dyno last week as well. My dad and brother built a vintage Formula Vee last spring (A thread on this car can be found here) and after an extensive rebuild, they went to the dyno to make sure the car was making as much power as it should, and I was able to sneak on before they went. 

Due to my competitive nature, I must refrain from posting a dyno sheet, however the car made a peak power number of 112 HP at the tire. This was without messing with any timing, so I will probably go back again and see if I can get a little more power out of it, however it seems to be in the right ballpark for STS as far as torque is concerned, although the peak power number may be a little lower than other cars.

For those who are familiar with Autopower bars, they may be wondering why it is unpainted. I opted for the rush shipping, as when I ordered it I was planning on attending the Time Trial National Tour at NCM the first weekend of May, however due to unforeseen circumstances with the trailer I tow the car with, I may no longer be attending. A picture of why can be found below.

Thankfully, apparently the failure was uneventful, as my dad was towing it unloaded at the time of failure. Still pretty creepy though. 

Chris_Heideman
Chris_Heideman New Reader
4/13/23 5:20 p.m.

Last night I pulled the bar back out for paint. The removal was surprisingly easy, and took almost no time at all, remembering how the interior went back in was a different story. 

To prep the bar for paint, I hit it with a 3 inch DA sander, running 80 grit, and then wiped the whole thing down with a dry paper towel a couple times, then with a general degreaser until there was no more dirt coming off onto the paper towels. I wanted to try to paint the whole thing in 1 shot, so I grabbed a couple pieces of 1" steel tubing that was lying around, and put it in the holes for the rear support so I could hit both sides at once. 

I used white Rust-Oleum, and probably put about 3 coats on. I am not a very good painter, especially when it comes to spray paint, but the runs are in pretty hard to see spots, but I think it came out pretty nice for spending $10 on paint.

greasemonkeyreborne_5x1gs
greasemonkeyreborne_5x1gs New Reader
4/20/23 8:10 p.m.

Great job on the bottom frame rail restoration and cancer elimination.   I'm a 1g, owner, not 2g.  Can't offer any help.  Have fun w ur Rex!

Chris_Heideman
Chris_Heideman New Reader
4/21/23 10:26 a.m.

I'm not sure if I had mentioned it previously on this thread, but I had not aligned the car since I bought it, so with some extra time this week, I figured I would see how far out of wack the alignment was, as I am pretty sure that it has not been aligned in years.  The main reason I felt as if things were out of wack was due to the camber wear I got on my AO-52's from 17 autocross runs, and thanks to my brother, Jack Heideman, we noticed that the spring on the left front was in contact with the upright.

I checked the camber, and to my surprise it was at -5 to -5.5 degrees at every corner! I was going to go off the Red Shift STS civic setup guide, however after talking to some other guys who run CRX's, they said they ran around -4 degrees of camber, so I decided I should end around there, rather than 3. This car's camber is adjusted by shims in the front, and due to the fact I didn't get any shims with the car apart from what was on it, I got a small fabrication project. I figure that I will CAD up some shims, and get different thickness's cut laser out of aluminum to save weight in the future.

I started by taking out a shim to make a template from.

I then traced the template onto a piece of 1/8" steel we had lying around, then use a bandsaw and a series of grinders, and bench sanders to achieve a "close enough" part, as I do not intend on these being on the car long term. I used a drill press to drill the holes, and the actual part as a template for the pilot holes to make sure it would actually line up on the car.

I ended up finding that on my car, a 1/8" shim would change the camber by about half of a degree. So I ended up making 4 shims, and installing them to get the front camber where I wanted it. This also fixed the issue I had with the spring touching the upright.

Its still pretty close, but after moving the steering to full lock left and right it was still not making contact, so I figure I might put some marks on it with a paint pen, or something similar to make sure it wont make contact when under cornering loads. 

My brother Jack, also noticed a couple other things about the car that I had previously missed, like three out of the four brake lines running through the springs. 

As I prefer being able to stop whenever I wish, I zip tied them out of the way of the springs, and called it a day. 

Purple Frog (Forum Supporter)
Purple Frog (Forum Supporter) Dork
4/21/23 11:17 a.m.

Not sure camber shims should be made out of aluminum.  If they compress over time, they stand a chance of loosening and falling out.

YMMV

Chris_Heideman
Chris_Heideman New Reader
4/21/23 12:36 p.m.

In reply to Purple Frog (Forum Supporter) :

Yup, that's a good point. However before every autocross or track day I go to I nut and bolt the whole car, so I think I'd be able to catch it before it becomes and issue. 

KingKwong
KingKwong
5/7/23 7:33 a.m.

Im looking for a autopower rollbar for my 90 crx si. Did you have to cut any interior parts? Also what is the part number for your rollbar?


-cheers

SkinnyG (Forum Supporter)
SkinnyG (Forum Supporter) PowerDork
5/7/23 11:38 a.m.

Is that the Dave Whitener suspension in there?

Chris_Heideman
Chris_Heideman New Reader
5/9/23 3:23 p.m.

In reply to KingKwong :

I did not have to cut any of the interior parts, as I just removed the rear plastic entirely. If you wanted to have the rear plastic in, you would most likely only have to cut one side, as I think one of the supports would be able to go in through the speaker holes. I cannot find the part number right now, it's just the generic CRX roll bar from autopower, in regards to fitment it is really quite easy to install.

Chris_Heideman
Chris_Heideman New Reader
5/9/23 3:24 p.m.

In reply to SkinnyG (Forum Supporter) :

Yup, its on Whitener dampers, they are leaking a little bit so they might need to go in for a rebuilt pretty soon.

thatsnowinnebago
thatsnowinnebago UberDork
5/9/23 6:03 p.m.

I got a good giggle from the photo of where you drilled into your tire. Reminds me of the hole I put in the fuel filler tube on my old F150 when I was drilling holes in the bed for some tiedowns...

How did the brake lines end up IN the springs? Glad you guys caught that. 

AngryCorvair (Forum Supporter)
AngryCorvair (Forum Supporter) MegaDork
5/10/23 9:58 a.m.
thatsnowinnebago said:

I got a good giggle from the photo of where you drilled into your tire. Reminds me of the hole I put in the fuel filler tube on my old F150 when I was drilling holes in the bed for some tiedowns...

How did the brake lines end up IN the springs? Glad you guys caught that. 

may i join your club? i once drilled a corvair front floor patch panel screw hole right into my gas tank.

Jim Pettengill
Jim Pettengill HalfDork
5/10/23 11:38 p.m.

Angry - we did exactly the sane thing with a Corvair stage rally car back in 1975!  Most embarasing!

Carl Heideman
Carl Heideman
5/11/23 9:44 a.m.

I'm in the club, too, and even warned him before he started drilling that it might happen.

Angry, when I worked at University Motors in the 1980s, we had several MGB customers who drilled holes in their trunk floors because the seal leaked and left standing water in the trunk. Sure enough, they drained their trunks into their gas tanks right below.

Chris_Heideman
Chris_Heideman New Reader
5/19/23 3:22 a.m.

In reply to thatsnowinnebago :

That is a great question, there was some funky stuff going on with the geometry due to the car being so low and having so much negative camber, so I would image that is where it stems from.

Mrfurzzy
Mrfurzzy New Reader
5/19/23 5:34 a.m.

In reply to Carl Heideman :

I am sadly guilty of doing this on my demo derby car. It sits outside with no windows or interior in it, so I decided to add some drain holes. The first couple went great, the last one not so much. Fortunately I was able to seal it back up with a bolt and some epoxy. This also why I try to avoid working on cars after I've had a few to drink!

Chris_Heideman
Chris_Heideman New Reader
6/7/23 2:15 p.m.

I was out of the country for the past month, however right before I left the CRX started to have issues starting. I figured it was a combination of both a bad battery, as the battery in the car was similar to what can be found on a jetski, or an ATV, and the starter motor. My brother races a vintage Formula Vee, and runs a really lightweight lithium ion battery that he has not had issues with for over a year. Although I am not a huge fan of lithium batteries due to special chargers, and they cannot be boosted, I figure the weight savings are worth it for a 1900 pound car. After swapping the battery, the car had no more issues starting, so I figure I'll keep the new starter as a spare.

Weight of the new lithium battery.

Weight of the old battery. I figure although charging and boosting are a pain now, saving 13 pounds makes it worth it.

1 2

You'll need to log in to post.

Our Preferred Partners
QZkURB7eGwy98BtQSNWKoZ9ej3Nw71h6Wp9zyv1eGq4lvT1b1gWsp1ausPjceotQ