1 2
Ransom
Ransom PowerDork
11/23/16 1:30 p.m.

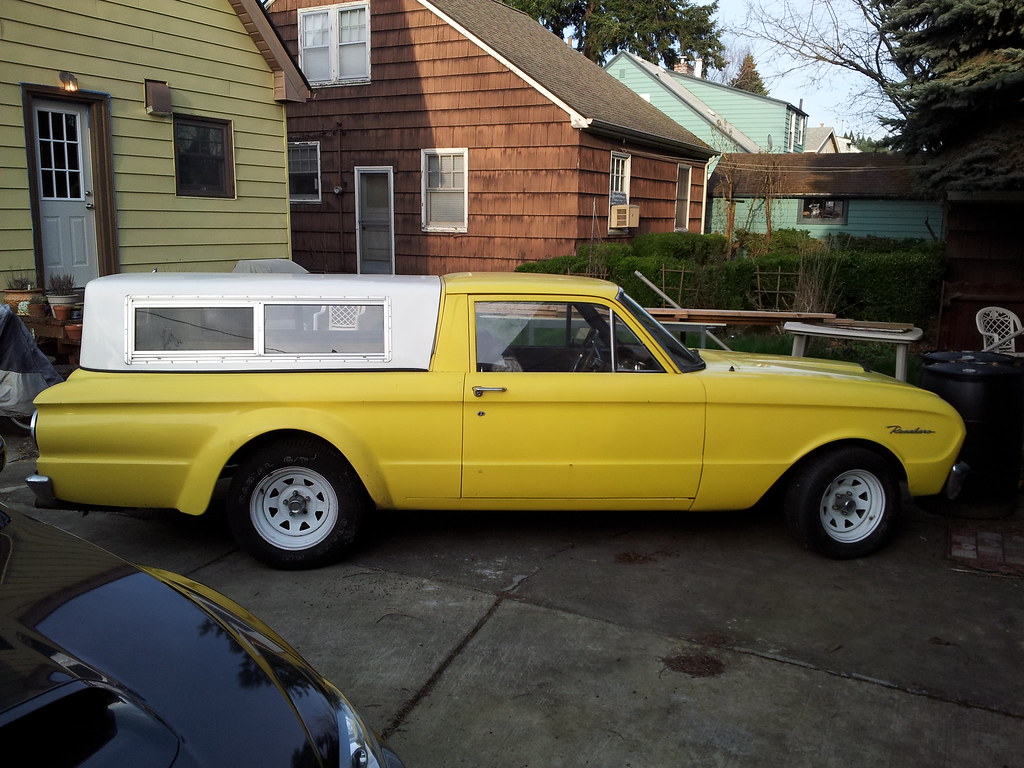
It's time. Although this post may be little more than figuring out whether Flickr's going to work for pics...

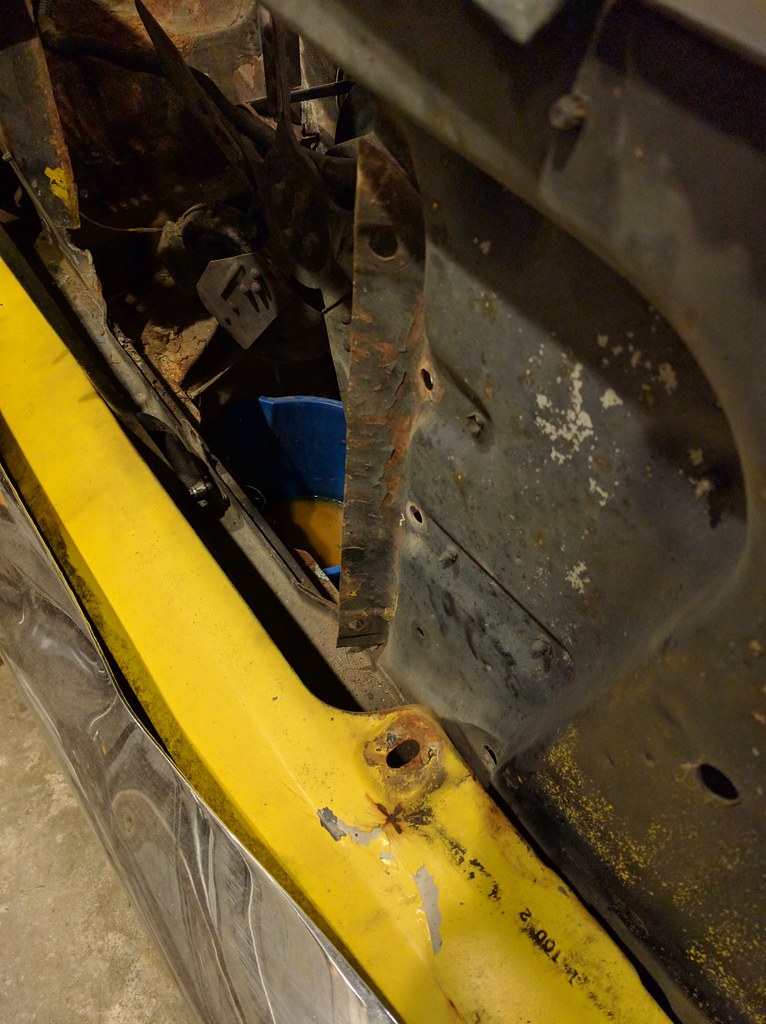
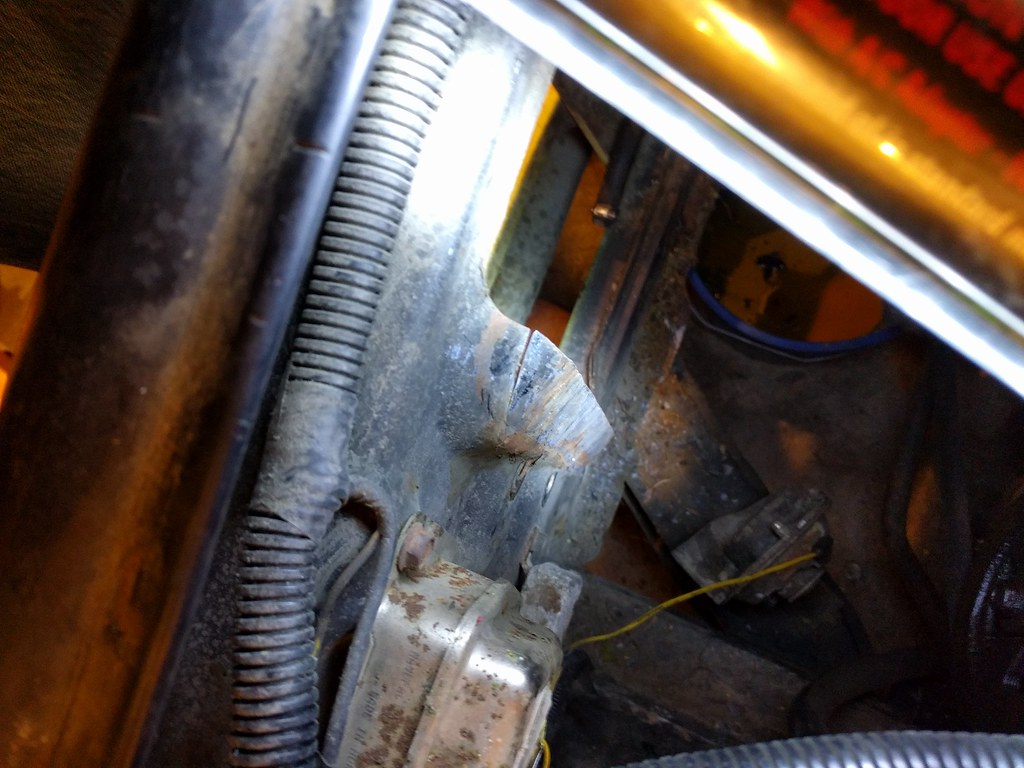
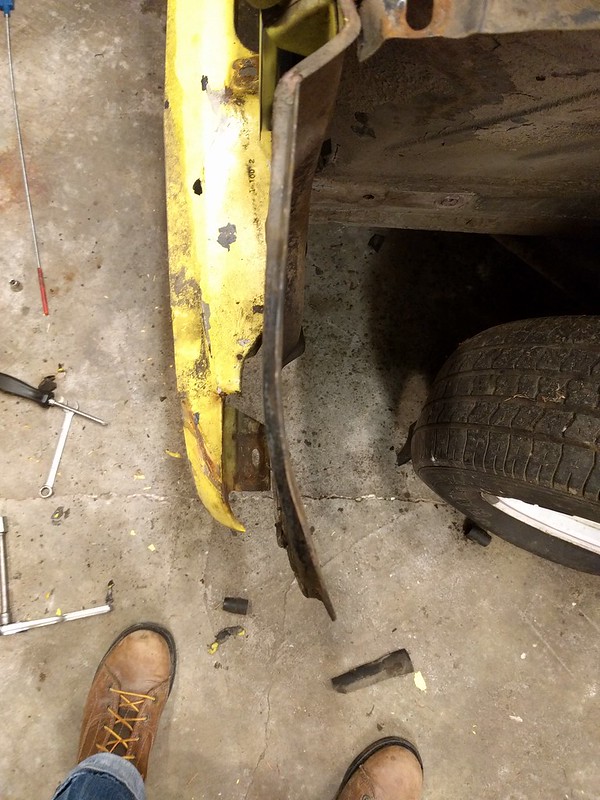
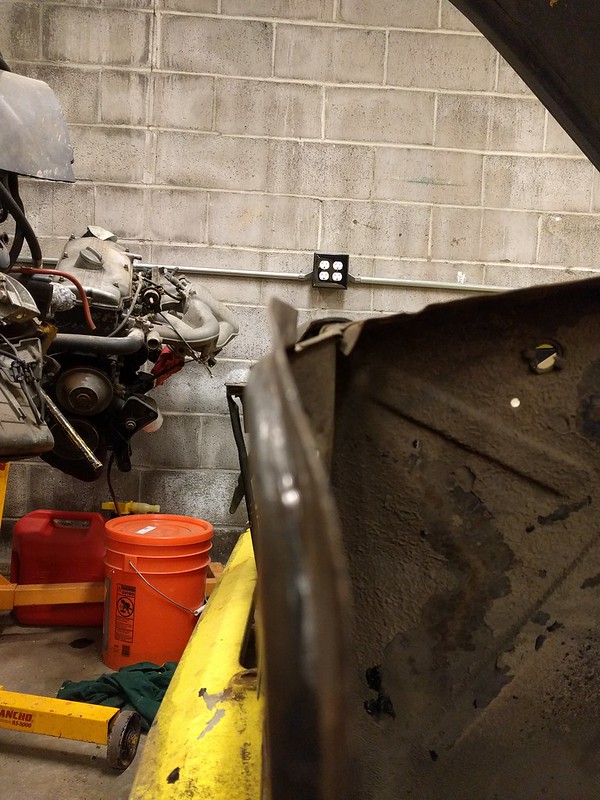
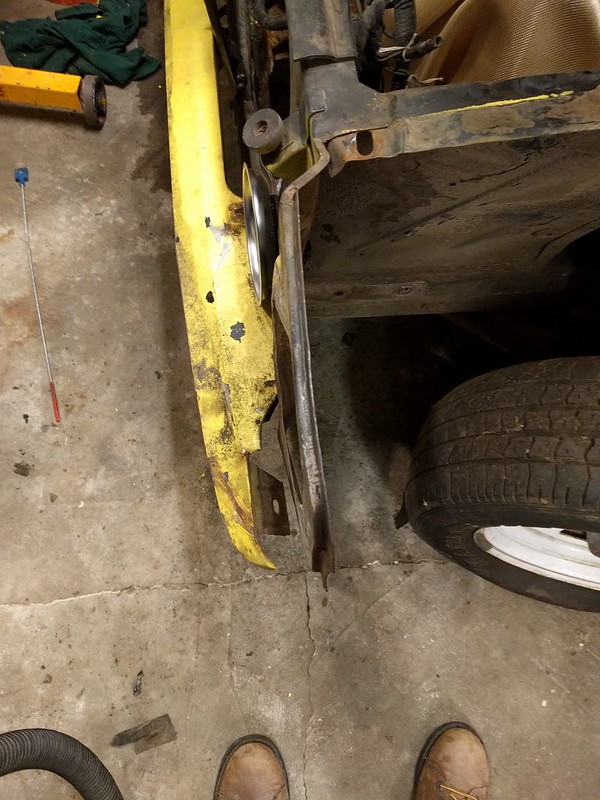
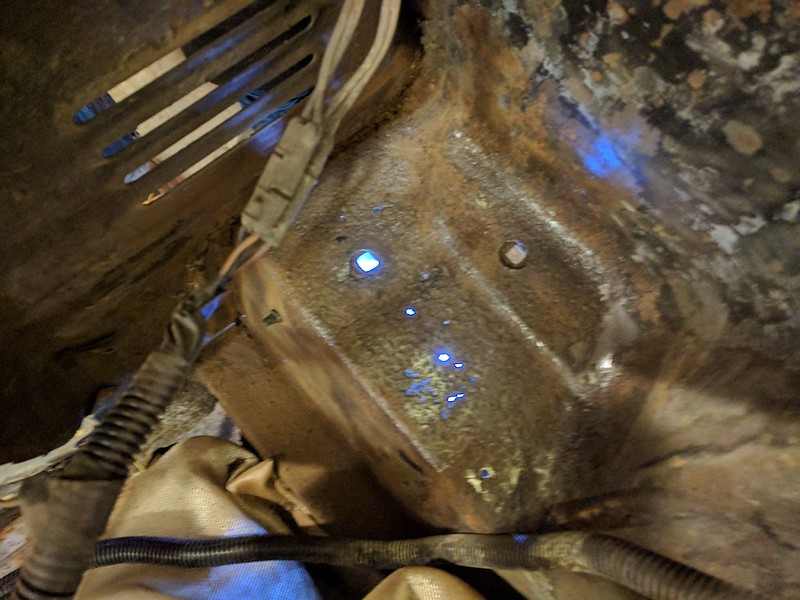
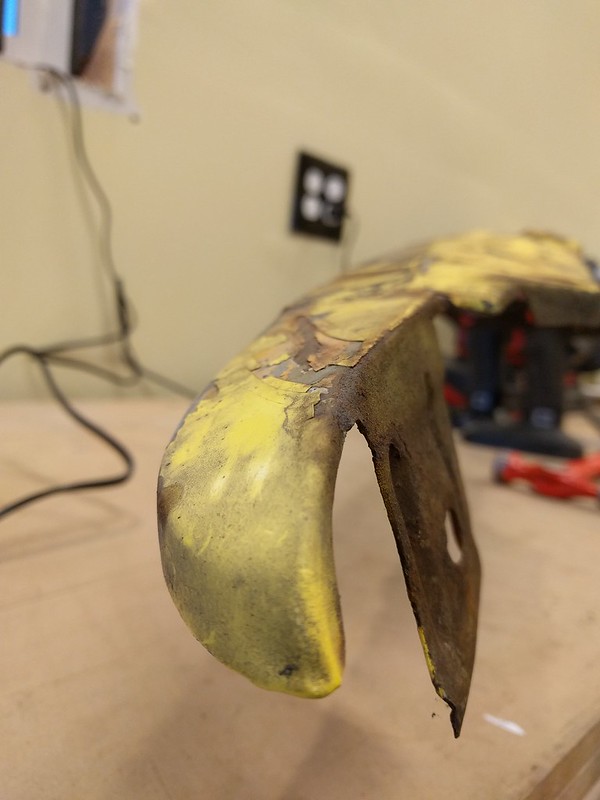
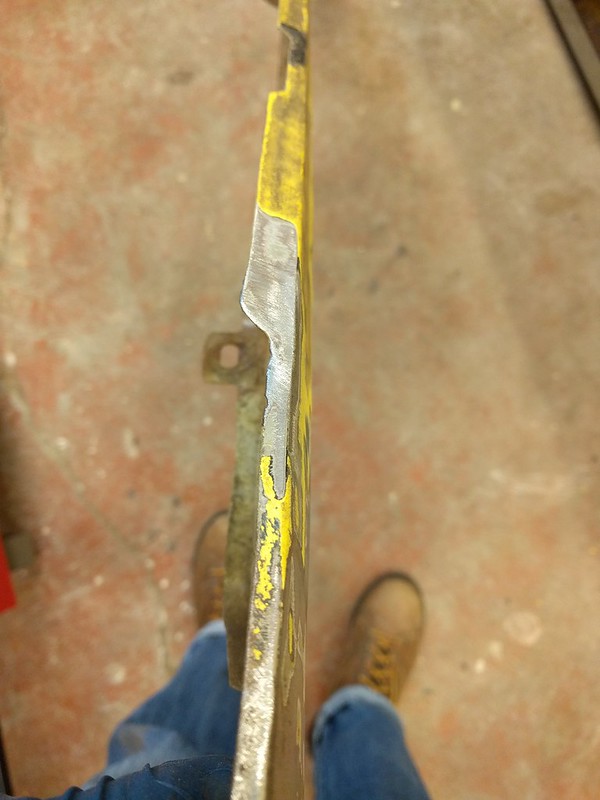
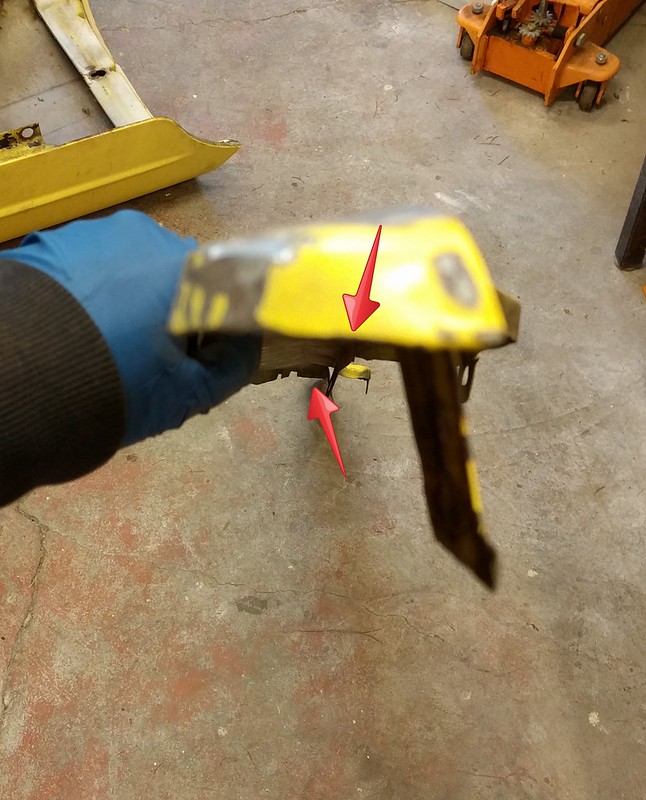
I couldn't pass up this Ranchero for the price. Mostly pretty straight and complete, except for the worst fender flares in the world, consisting of the outer 3" of a pair of bug fenders screwed to the car and bondoed over.

20130318_181743

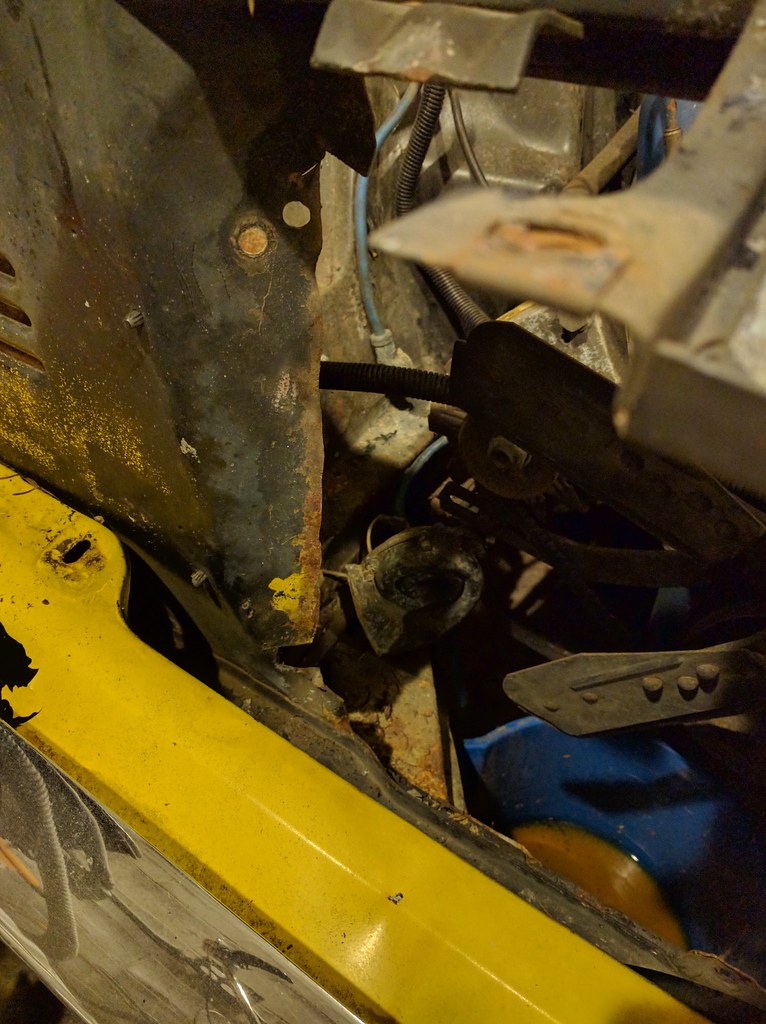
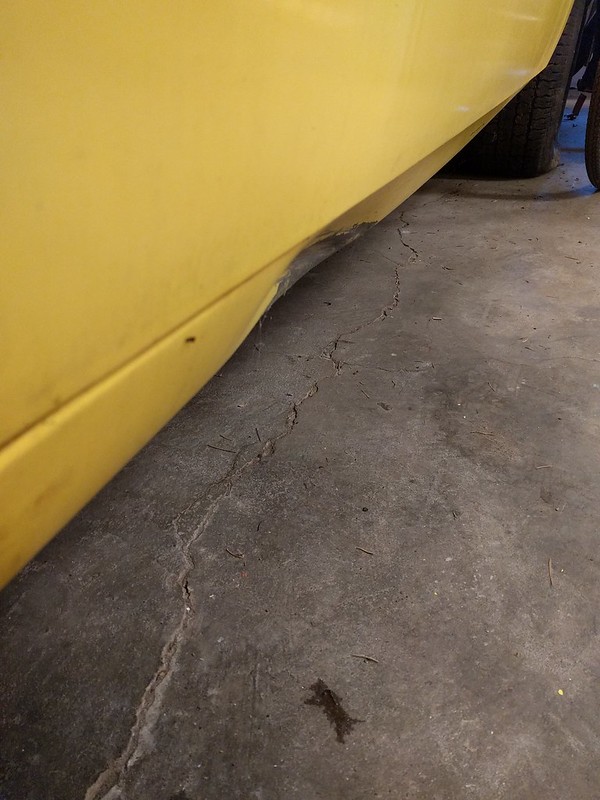
Even if I were tempted not to fix the flares (and I hope I never lose what taste and self respect I have to the extent I could live with those), one of the reasons the car was so cheap was that the other side manages to look even worse.

20130318_182005

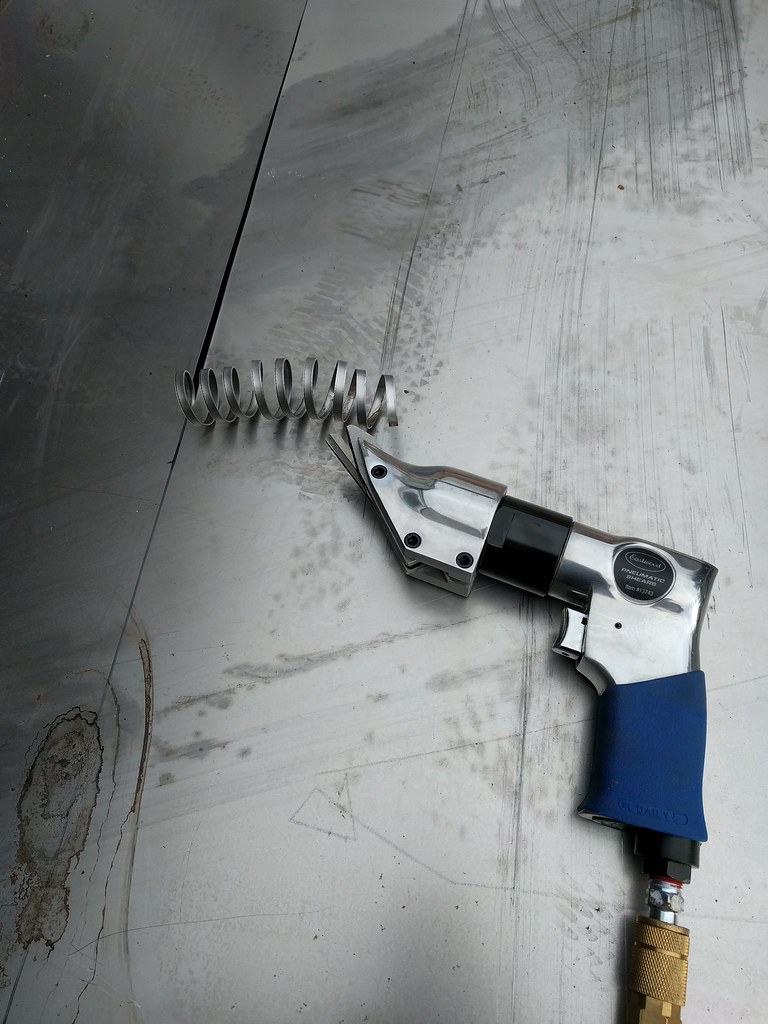
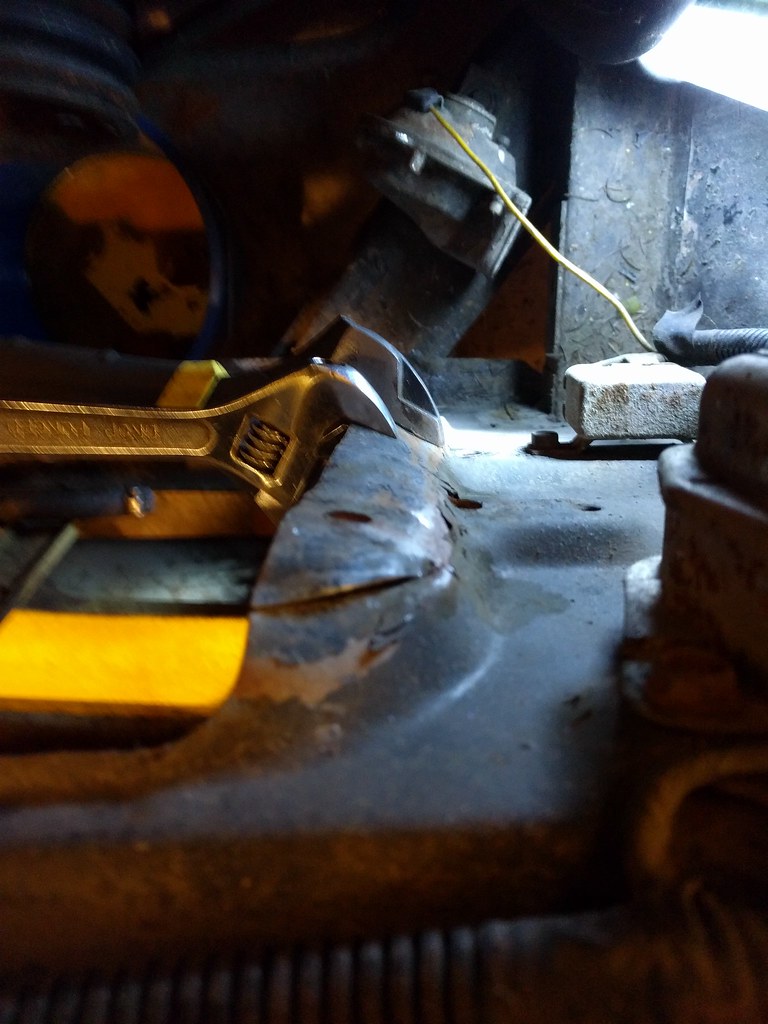
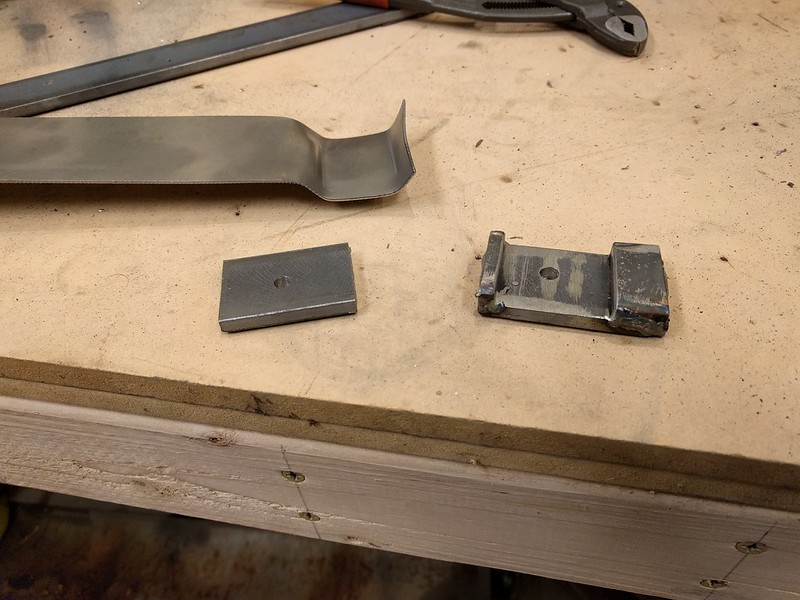
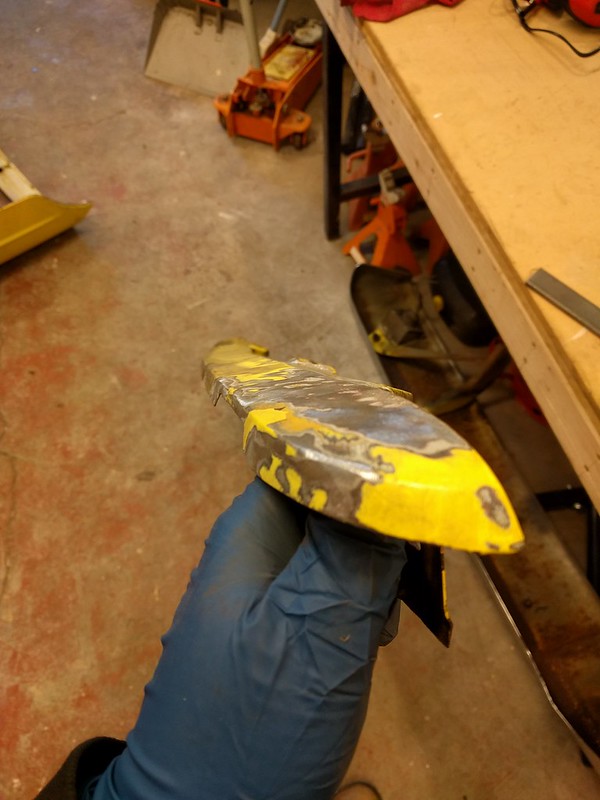
The plan is to replace the quarter panels (I have some cut from a donor), fabricate some new inner fenders (they didn't create inner fender extensions, just hacked them up and left the wheelwells open to the quarter panels), generally fix other issues, EFI, front discs, real seatbelts... Generally "make it right" without getting too too carried away.

And now that there's a build thread on GRM, I have to get on with it, right?

Jumper K. Balls
Jumper K. Balls UberDork
11/23/16 2:19 p.m.

 photo 20130317_144813_zps1b53e8ea.jpg

Quarter harvesting!

dropstep
dropstep Dork
11/23/16 3:07 p.m.

Thats the one thing i want more then another 70s f150. So much easier to find elcaminos so ill follow along!

Ransom
Ransom PowerDork
11/23/16 3:34 p.m.

In reply to Jumper K. Balls:

Oh man... Now I'm staring at that inner fender and thinking about how badly I wish I'd taken that, too... Didn't realize they weren't available as reproductions.

chandlerGTi
chandlerGTi UberDork
11/23/16 7:54 p.m.

Didn't you try this build thread once before? I cant wait to see Your progress!

Ransom
Ransom PowerDork
11/23/16 11:48 p.m.

In reply to chandlerGTi:

Oh. My. God. I am so embarrassed. https://grassrootsmotorsports.com/forum/build-projects-and-project-cars/ransoms-1963-ford-ranchero/61874/page1/

I'm just going to pretend that doesn't exist, and carry on here like my life isn't slipping away like sand through an hourglass.

I googled for welding table info the other day and found another of my own GRM threads. Apparently when I wander away my memory goes all goldfish.

NOHOME
NOHOME PowerDork
11/24/16 5:24 a.m.
Ransom wrote: In reply to chandlerGTi: Oh. My. God. I am so embarrassed. https://grassrootsmotorsports.com/forum/build-projects-and-project-cars/ransoms-1963-ford-ranchero/61874/page1/ I'm just going to pretend that doesn't exist, and carry on here like my life isn't slipping away like sand through an hourglass. I googled for welding table info the other day and found another of my own GRM threads. Apparently when I wander away my memory goes all goldfish.

In all fairness to yourself, If I may quote your from three years ago:

This thread will probably be pretty slow for a while, as I still need to finish wiring the shop (and drywalling, and ???, and...)
pres589
pres589 UberDork
11/24/16 5:56 a.m.

Found myself wondering the other day if Rabbit fender flares would work on one of these. Falcons/Rancho's really got some odd wheel openings.

Will be watching the thread. Good luck!

chandlerGTi
chandlerGTi UberDork
11/24/16 7:55 a.m.

Ha, it's all good I never get past a page when I start a thread because I've sold the project, you still have it and still want to work on it!

Ransom
Ransom PowerDork
11/24/16 1:30 p.m.

At least the shop really is done! Light, power, insulation, heater... This is the first winter ever I've had a comfortable place to work. Now I just need to get on with it. (EDIT: In my own further defense of slow progress, I'm typing this on a short break from productivity. On finishing the baseboard trim in the dining room and hallway... Just got home from Thanksgiving with my folks, and hoping to have an update on the Ranchero before I run out of weekend.)

Ransom
Ransom PowerDork
11/27/16 8:33 p.m.

Okay, not much real progress to report... I blame renewed vigor on house projects and a very late brunch today. But I did at least get my air hose reel and fire extinguisher mounted in the shop, and hung the router up in the corner so it's no longer sitting on the kegerator that needs to go back to the house's basement. Would you believe that in a garage with something like 24 outlets, the power cord on the router's so short it doesn't reach any of them? Blargh.

Anyhow, so I didn't really work on the Ranchero, but I did work on the shop a little. And I stared at the Ranchero a bit and took a couple more pics to show some stuff I'm going to be doing...

The DPO put in a bigger radiator out of... something else. It doesn't leave room for the stock battery tray, which I would prefer to use. And they hacked away a bit of the core support to make the hole bigger for this other radiator. On the left, they just cut a couple of slits and folded it back:

20161126_core_support_bend

On the right, they actually cut some away, so I'm going to need to try to clean up the opening and make a patch panel:

20161126_core_support_cut

So I got a sheet of 18ga steel, and I ended up with a 4x8 sheet, which was stuck in the van 'til I figured out how to make it more wieldy. I love this tool:

20161120_pneumatic_shears

This part of the project is way off in the future, but it was obvious while I was getting at the core support. It looks like I'm going to be spending some time learning to straighten a grille:

20161126_grille_needs_straightening

Pretty pictures are no substitute for progress, and ugly pictures might not even be worth the full thousand words. But I figure it's a good habit for me to check in here, just like it's better to get a few minutes in the shop than not.

Ransom
Ransom PowerDork
12/10/16 9:03 p.m.

As Inigo Montoya once asked, "Slow going?" Yes, yes it is. And I don't mean to be rude, but this is not as easy as it looks. Not for me, anyhow... I'm having fun, though! I got to spend a couple of hours in the shop, and made at least a little headway, though I didn't quite break out the welder like I'd hoped...

In the previous installment, I pointed out that on the left side, it looked like they'd just slit the core support in a couple of spots and all I'd need to do was fold it flat. Not quite...

20161210_shiny_bit_of_core

Turns out the whole area had gotten flattened a bit, and when I folded the flap it, there was extra material. Facepalm time... Of course! The whole thing needed a bit more contour, and clearly originally made a bit more of a bulge into the engine bay, so I'd need to resurrect that...

Here, it's at least getting a bit flatter. As I poked, prodded, bent, and beat on it, flatness sort of ebbed and flowed...

20161210_getting_core_left_contour_started

This was one of the more effective bits. After having an "I've got no clue despite the books I've read" moment, I realized that there was little I should be doing with a hammer, because save possibly for the corners, nothing had a compound curve; it just needed its bends corrected. The larger crescent helped me keep the whole flap sort of pointed the right direction a bit inward into the engine bay while I worked a bit more of a return parallel to the radiator in with the smaller wrench.

20161210_two_crescent_wrenches_and_half_a_clue

Huh, and I apparently forgot to take a pic of "done for today". Some of the stuff I've learned by just being around for conversations between Burrito and Jumper K Balls has been life-altering, even some of the really simple stuff. The little Green Corps Roloc discs on a die grinder made removing paint so fast and easy! I bought those months ago, and it took me half an hour to figure out what I'd done with them in the shop shuffling...

Ransom
Ransom PowerDork
12/11/16 7:25 p.m.

Today was an adding-weatherstripping-around-the-garage-door-to-reduce-the-giant-gap-so-the-heater-doesn't-burn-the-car's-entire-budget day. No real progress on the Ranchero itself...

Ransom
Ransom PowerDork
1/9/17 12:39 a.m.

I'm going to keep this brief, because I should already be in bed. But I did finally get out to the shop today.

I've been studying the videos from the folks at Bad Obsession Motorsport, and I've learned some important stuff. With that in mind, I've mostly switched from coffee to Irish Breakfast when in the shop.

A few days ago I got the bumper off, and then started today by pulling the left headlight bucket and further mangling the departing fender for access to the last of the hardware, finally freeing said fender. But not before starting some stock for tonight's soup. I had a feeling I'd need some chicken soup for the beginning metalworker. (There's the carcass of a roast chicken under there somewhere)

IMG_20170108_120037

The core support extends all the way out to be bolted to the fender and hold the headlight bucket. It definitely took some of the damage from one of this car's mishaps.

IMG_20170108_130633

I tried naively flattening the flange with a urethane mallet and dolly, and this did remove the whoop, but I think I may have successfully (?!) shrunk the flange, resulting in this nifty curve as the flange pulled on the rest of the piece:

IMG_20170108_133826

Continuing the "I have half an idea what I'm supposed to do and I may as well give it a whack, so to speak" approach, I hammered the flange against a dolly to stretch it out 'til it was curving:

IMG_20170108_141053

Then I stood the curve up with the trusty crescent wrench, thus encouraging the whole thing to stop sweeping. This was done in several passes... Almost there.

IMG_20170108_175241

I also made a little tool (okay, a first draft of that tool; forgive me, it was exciting to fire up the MIG for the first time in... was I actually middle-aged last time I used it?) for adding the recesses to the core support which I didn't know it needed at the radiator mounts (and which I think are part of why I've had trouble getting that section into a nice shape; it's effectively got extra metal piled up)

IMG_20170108_175224

And then it was time for soup and a different brew. I much prefer Harviestoun's "Old Engine Oil", but I was curious and they were out of that.

IMG_20170108_185446

Ransom
Ransom PowerDork
1/9/17 9:00 a.m.

I should add that I'm all ears if anyone with actual metal skills is looking at this and asking themselves what the berk I'm doing...

It was super fun to take what I think I've learned from a bunch of books and see it actually cause my mangled Ranchero to start looking a bit less mangled, but it's also clear that I've got a lot to learn.

Ransom
Ransom PowerDork
1/15/17 7:52 p.m.

"Slow and steady"?!! Aw man, I was getting so used to "Slow unsteady..."

Har har har. Sorry.

Today was making the apron better than it was, and doing some rust removal on the area of the engine bay around the battery tray. Unfortunately, once I removed the rust, there was clearly an insufficient quantity of matter remaining...

IMG_20170115_161230

But I did get to spend some more time basking in having my hose reel and vacuum cleaner right there, and doing this stuff in a heated garage with snow on the ground outside. Perspective.

The apron had been spindled, folded, and perhaps a little mutilated.

IMG_20170115_143509

This was caused by the left side being pulled rearward when the LF fender was hit. I need to re-read the pertinent chapters, but didn't do so before starting, with reasonable results, to try to shrink it a bit by resting the surrounding area on wood and tapping the back of the crease, hoping I'd get some of that effect of trapping the metal, driving the stretch of the crease back into the surrounding metal, and avoiding stretching anything else by working on a soft surface (and not hitting hard enough to drive the spot I was hitting down to the support underneath). I'm not sure whether I was correctly applying theory, but it looks better than it did...

IMG_20170115_143414

I'm sure that in my attempts to undo this stuff, I've done a bunch of things which aren't ideal, but it does look like my half-learned, "The Key to Metal Bumping" collides with half-remembered Ron Covell and Lazze videos, mashed up with descriptions of shaping things on stumps as filtered through the end of a 2x4 clamped in my vise, has achieved movement the right direction. A little hard to capture in photos, but...

IMG_20170115_152339

IMG_20170115_152404

I believe this photo was to show that I got enough twist out of it that the edges pointed to by the arrows are now pretty close to parallel... though in this shot the outer mounting flanges are clearly not.

IMG_20170115_153259

Also, the rocker panel's going to need some attention.

IMG_20170115_155540

Maniac0301
Maniac0301 Reader
1/15/17 8:14 p.m.

My last name is Ransom so this thread kinda messes with me a lot. Still nice progress hope it all goes well for you.

Ransom
Ransom PowerDork
1/15/17 8:34 p.m.

In reply to Maniac0301:

Thanks!

Ransom is my middle name. Not common, but I'm surprised how often I come across someone else with Ransom somewhere in their name.

Ransom
Ransom PowerDork
2/6/17 12:37 a.m.

Photo phail. I didn't take any tonight, not that anything very exciting happened. I pulled the replacement fender out of the bed and looked at how it lined up with my work on the radiator core, and got it to where it didn't seem like I'll be doing anything too ugly in closing up the last gaps with the fasteners.

And that's the kind of boring stuff I'm up to: Finding the funny large-head bolts (elevator bolts? Those seem to have a slightly tapered disc where these are flat...) which go into blind keyholes to hold the trailing edge of the fender in place, and digging up a few other bits of hardware.

I keep hoping to find a patch panel for the battery tray area of the front inner apron, and Jumper K. Balls thought he'd seen some, but neither of us are having any luck there, so I've been sort of idly pondering how to shape it. Most of it is flat or has relatively simple bends, but the result is an area that's lower than its surroundings in the manner of an ultra-1960s sunken living room. So all of a sudden it's stretching instead of just bending. And/or cutting, bending, and welding (with a side of hammering for the "corner").

What, that's not all obvious from the underlit cell phone photo with a light behind the panel half a page up?

Also found that there's some darker school bus yellow in odd places under the lemony yellow, and oddly, in some places under other stuff. Having concerns about what sort of prep it's going to take to make this thing one reasonable color.

Other than that, continuing here and there with improving the shop itself as I work in it more. Still need to set up a welding area, and get rid of the old M10 that's never going back in the 2002.

Slow progress is still progress. But I really miss having something more interesting to drive and that I'd be more excited about autocrossing than the Mini. I'm in a no-man's-land of not being excited enough about it to put real tires on it, and then not very excited about autocrossing on factory all-seasons... And thus rages the battle of "Must make headway on the Ranchero" vs "I want to drive something fun NOW!"

NOHOME
NOHOME PowerDork
2/6/17 5:23 a.m.

Like seeing the progress. Nice work on the tin straightening.

Woody
Woody MegaDork
2/6/17 8:36 a.m.

How do you plan to attack that rocker panel?

My Miata has similar damage that I'm hoping to fix once it warms up around here. I was thinking of welding some nails to the area and trying to pull it out with a Vise-Grip/Slide-hammer, but if there's a better option, I'd love to hear about it.

 photo IMG_7930_zpsdsaksqtk.jpg

NOHOME
NOHOME PowerDork
2/6/17 10:16 a.m.

I don't like slide hammers because you risk a lot of local metal stretching.

Think of welding sheet-metal strips to the deep parts and arrange a way to uncontrollably pull in the tab by tightening a screw.

I would try and bridge between the tires with a stout beam. Drill some holes in the beam and using the strip of sheet metal with a threaded rod attached, gently pull the metal back.

Let me know if that makes no sense and I can draw image.

Woody
Woody MegaDork
2/6/17 10:22 a.m.

In reply to NOHOME:

I think I need that image drawn...

Ransom
Ransom PowerDork
2/6/17 11:14 a.m.

I think get it; find some way to support a beam to use as an anchor for pulling outward, weld tabs to the low spots and use threaded rod as turnbuckles to pull the dent out in a measured fashion. So doing the same action on low spots as with a slide hammer, but with finer control, and hopefully the ability to several or all anchors at the same time?

I'm worried that the trip over whatever obstacle that was stretched the material in the area too badly to bring it back. I think I'd resigned myself to cutting the area out and welding in a patch panel. But I'm clearly just getting my feet wet, and would be happy to be disabused of bad assumptions!

I'm kinda thinking Woody's looks like a better candidate for that approach, given that it looks like there's been a fairly direct inward impact as opposed to a gouging action, hopefully resulting in little stretching, and pulling outward on the outer surface of the rocker and trying to "unroll" the top of the kink by tapping it down might undo the damage significantly?

NOHOME
NOHOME PowerDork
2/6/17 12:00 p.m.
Ransom wrote: I *think* get it; find some way to support a beam to use as an anchor for pulling outward, weld tabs to the low spots and use threaded rod as turnbuckles to pull the dent out in a measured fashion. So doing the same action on low spots as with a slide hammer, but with finer control, and hopefully the ability to several or all anchors at the same time? I'm worried that the trip over whatever obstacle that was stretched the material in the area too badly to bring it back. I think I'd resigned myself to cutting the area out and welding in a patch panel. But I'm clearly just getting my feet wet, and would be happy to be disabused of bad assumptions! I'm kinda thinking Woody's looks like a better candidate for that approach, given that it looks like there's been a fairly direct inward impact as opposed to a gouging action, hopefully resulting in little stretching, and pulling outward on the outer surface of the rocker and trying to "unroll" the top of the kink by tapping it down might undo the damage significantly?

Yeah, you got it. kinda like a suspension bridge and you are adjusting the cables to get the road level. Control is the goal here.

Yes there will be some stretch from the original event, but that is just a good excuse to get in touch with a shrinking disc. I use mine a lot when trying to minimize filler. Google it up or Youtube; cheap and it works.

The cut it out, fix and weld back in option is also viable.

1 2

You'll need to log in to post.

Our Preferred Partners
WUdpEaVdpYgvc1bmdGg7iLJdvjS1A1cGnYZoFC6duWNfLepdX8l9iMqhqsoXYZhv