Making a Large, Low Battery Box that will fit a Group 24 Battery In the rear...
I am digging this already, even in the early pics! It always bugs me when the battery is just surface mounted and checked off the list. Looks like you’ll have plenty of room to drop it down for sure.
In reply to jerrysarcastic (Forum Supporter) :
Hello Jerry! Yes, With the Leaf Springs Gone and No plans to ever have exhaust over there Yep that R. Rear Corner has lots of potential for Component Relocation.
Greg
8/11/20
More Battery Work Getting Done.. Hope to have everything wrapped up tomorrow.. I still need to Run the Positive Cable to the front and figure out some Grommeting and Pass throughs into the Passenger compartment. Will do a partial Interior Disassembly, Including Passenger seat and Rear seat Removal.
Today I got the Box Burned in, Painted and Some of the Cable Grommeting and Runs Figured out. Also Added the master disconnect switch at the rear.
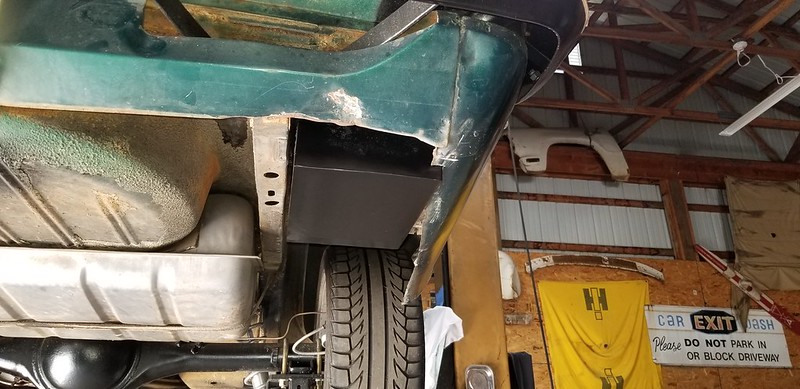
Here is the Box fully Welded up.. Test Fitting in Chassis. Needed to Nip a Bit of the Bottom of the quarter panel to get things to fit.


Sticks out / Down just a bit..


Got it Burned in / Ground Down.. Just needs some paint.


Painted..

Here's some More Trash That I will be removing from the front end.

Greg
I used these in my engine compartment to seal up a fan controller box I made. Been working great and as long as you pass a single wire through it (instead of a bundle of smaller wires) they are waterproof. Highly recommended.
https://www.amazon.com/Fastronix-Solutions-Weatherproof-Grommet-Parent/dp/B0847CC3D8
In reply to jerrysarcastic (Forum Supporter) :
Hi Jerry, thanks for the tip on those Fastronix Parts. Timeframe did not allow me to use those, but will be keeping in mind for future shenagians.
Greg
8/13/20
Got the Battery Box All tidy'd up, Cables run and the Master Disconnect Installed as well. Still need to wire the Alternator to the Master disconnect switch so that when the switch is turned off it actually shuts off the engine / ignition when the car is running.
Reason for doing all of this is so that I can preserve the cavernous trunk space on the early Darts... Will be able to have it all back when I use a smaller form factor battery.


Hold Down Hardware installed.... Skookum.

Clean master switch install..

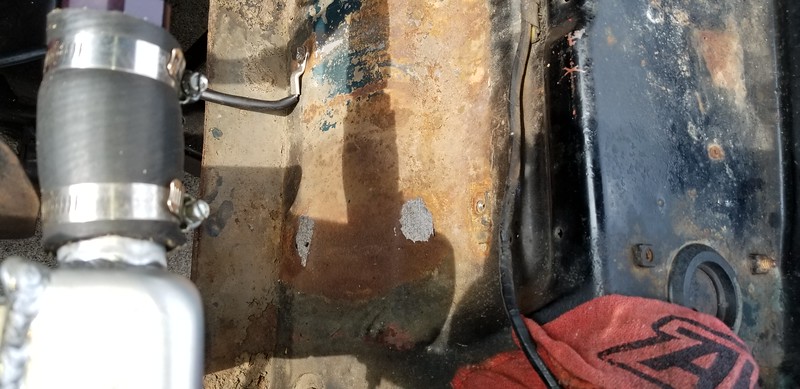
Ran the cable up through the passenger compartment and one grommet through the firewall to the Starter.


Will fix this swiss cheese and also remove some brackets and weight later.
Greg
8/22/20
I had the Original Z Bar Break on me Sunday... And Of course I was registered for an Autocross Tomorrow..
So Some Quick thinking and parts sleuthing in my attic.. Got it all fixed. Not Like I can go to the parts store or even scrap yard and ask for a z bar for a Chrysler A body..
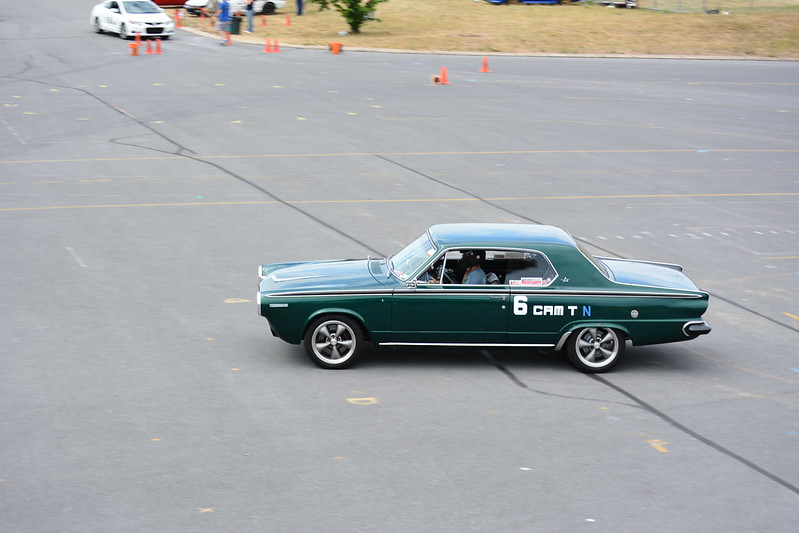
Had to confirm that it worked well.. so 350 Mile trip to Ohio and back yesterday... So far so good.
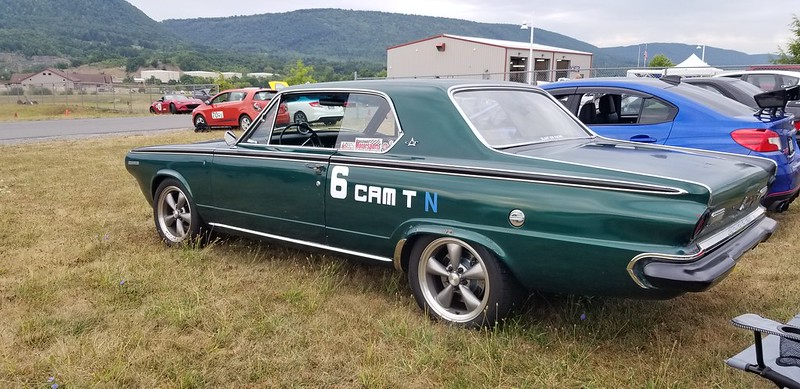
Also had to get Numbered up..

So Everything should be good. Need to get leaving Early tomorrow for a nice drive over the Mountains to get to the AutoX site.
This will be the first SCCA actual AutoX event for Grüne Hölle... Last Month's Carlisle thing was just a warm up.. and I found some fuel starvation Issues on tight turns with the mighty 1 Bbl Carb that I have hopefully sorted with a proper rebuild and setting the float level correctly.
Greg

8/23/20
Today was a good Day.
Got to take a nice 2 hour Drive over the mountains to the AutoX site.
Got 6 runs in.. Nothing broke or blew up.
Went off course first 2 laps, Then got it figured out. As the Car got hotter and I pushed harder it slowed down due to the Fuel Starvation on RH. Turns. I believe the Carter BBS 1 Bbl only has one Jet / Metering Rod and it's on the Right side of the Carb... I will look into that this week.
The Carter Designers should have really took this whole AutoX thing into account when they were designing their BBS 1 barrel carb in the 1950's :D
I think I might try putting a baffle in the float bowl and also raising the float a but more too.
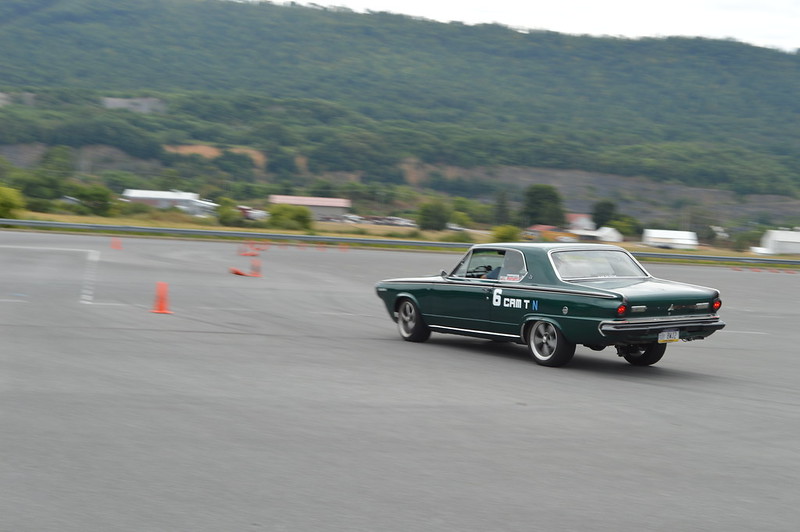
The CPR Region of the SCCA did a fantastic job organizing the event and I have 160 or so Photos of the car too!..
So for the car's First official AutoX Event I am happy. It wasn't the slowest thing there and it seemed to handle well for what it is.
Results:
Event Results..
Some shots..
On the Drive up..


In the paddock:

The Club took great photos!
Here are some:


'Till Next time!
Greg

ntsqd
New Reader
9/4/20 11:20 a.m.
Cool build. There are days that I wish that I had kept my '65 Valiant, but I only have so much room and wanted to move in a different direction.
On the Valiant I used isolated pass-thru's in the firewall for both main battery power & ground. A flimsy grommet and the cable insulation wasn't enough abrasion protection for my sphincter. Early pic before the fuel plumbing got in the way of seeing them:

I went with a 90A Bosch off a Jetta and made my own alternator bracket though I did re-use the tension arm. Sure uncrowded the RS of the engine bay in doing that:


The Valiant trunk must not be quite as wide because there wasn't room to french the battery in like that. I went with simple and set it on top of that box section. It does have a kill switch, but it is more about sitting unused for long periods as it was placed inside the trunk just to the rear of the battery. I used the Hella switch with the red plastic key, which added a degree of theft-resistance.

Was planning on a complete 2.8L TBI system, but got more interested in another project before that happened and the car was sold. I still have the TBI stuff and this 8 pin dist that I built to run GM or MS ECU controlled timing on a \, seen here mocked-up on the spare 170 block:

BTW, as much as I dislike SSD he is correct about using a GM module. I used a jy sourced GM 8 pin module (same as used with the TBI) mounted remote using the MOPAR elect. dist. and the matching GM E-Core coil. It was an order of magnitude better running engine over ANY of the MOPAR ignition boxes that I tried (gold, chrome, orange). As part of the conversion I converted the dist. to use a 2 pin Weatherpak connector, which eliminated the problems that I'd had with miss-fires in the rain. I screwed the module to a piece of heavy AL angle that bolted to the inner fender down low and right behind where the stock alt. was. Just be golly-gosh-darned sure to use to correct heat sink grease (anti-sieze is NOT a viable substitute!) or the module will cook itself and leave you stranded at the top of the off-ramp ~1/2 mile from work. You can probably guess how I know all of this......
and yeah, same user name as on \ org so some of these pics might look familiar.
I used a similar isolated pass-through on my Dart as well, although it's closer to the starter. There's actually two separate ones, one for the starter and one for the main 12V feed.
That is a really cool battery box setup. Makes me tempted to put a 4-link in my Dart just for the battery installation benefits.
@ Matt, NTSQD, Yes I need to get some of those isolated passthru's - Will hopefully get back to that over the winter.
9/23/20
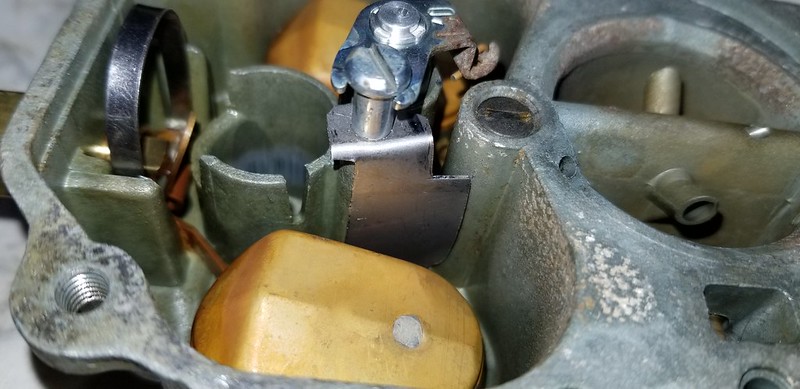
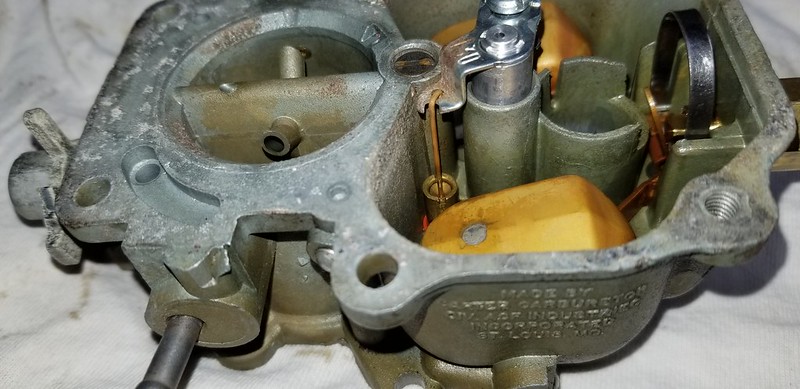
Getting some work done on the mighty 1 bbl - It had some fuel starvation issues pretty consistently in the last 2 outings of autoX on Hard R Turns - Fuel Sloshing away from the one Jet(located on the right side in the fuel bowl) in this carb.
I built a small baffle that hopefully will help.
I tried to drive it to work today, but It wouldn't' start. Maybe I set the float level too High... Those floats must be touchy in regard to level changes. I will pull the plugs and see if I flooded it and will also make sure there is spark.. will double check carb float levels and reset to stock if needed.
Some pics of the mighty autocrossing 1 bbl...


Greg
10/15/20
Well the Baffle Idea in the BBS had me baffled.... ha.. no It did not work.
Took the car to the Salem, Va AutoX and Still had Fuel starvation / Bucking issues with the car in Hard R Hand Turns. It was a blast however seeing some Stout Corvairs and Mustang II tearin' up the cone course.
I also was able to do some mountain Driving with friends on the Back of the Dragon from Marion to Tazewell Va.... whatta Fun Road!
I got Back home and last night the girls wanted to go to dinner and the fall weather was just right.. so a ~270 Mile Drive to Summit Racing in Tallmadge seemed appropriate. All interstates this time.
- Was able to procure some goodies for various projects including an aem 30-0300 and a Set of Enkei RPF01's for Grüne Hölle. We ate dinner near Kent State Univ, before heading home.

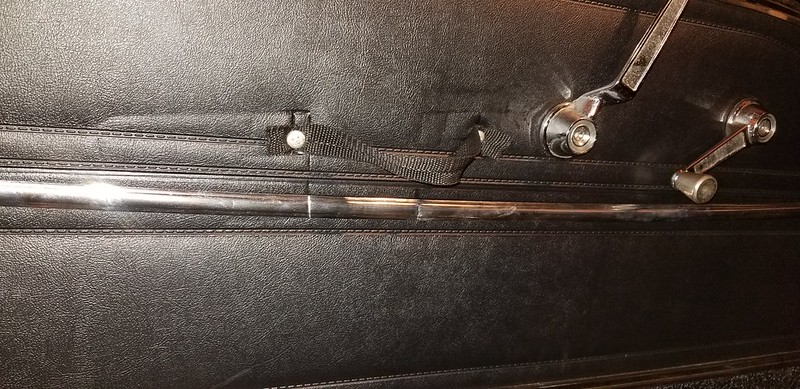
Also Found a decent fix for my Smashed Driver's Side Door armrest. I did a pile driver move on it with my elbow at the autox Course in Virginia. It was toast.

after I smashed it, I removed it from the door.

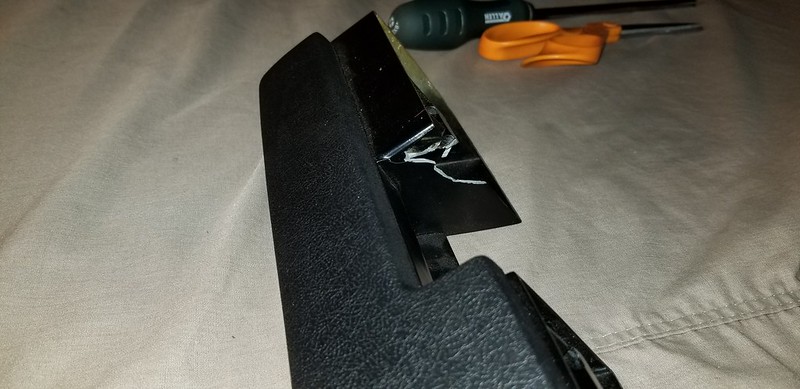
And Came up with a lighter more pliable alternative.. Dog Leash.

I can still pull the door shut when needed.
Future (Winter) Plans include:
-Building a Proper oil pan - I mean you can't go to moroso or canton or stefs for Slant 6 pans...
-Mounting the Falken Azenis's on the RPF01's
-Fitting the Fiberglass Hood
-Installing a proper engine / Intake / Exhaust with O2 Sensor
-Maybe fit up some better front Seats
Cheers, Greg
I'm excited to see those RPF1s on there. Modern rims on old cars can look so good. Plus they're light as hell. Good choice.
Awesome build! Thanks for sharing and for giving me expensive thoughts! I had a '65 dart which I converted to run on natural gas. I sold it because I was young and dumb and thought I wanted other cars more... I am eyeing a 1966 locally now, hopefully the owner will put it back up for sale. He was selling it last year and I didn't have a shop, now I have the shop and he isn't selling. :-(
NYN
Those arm rests are really brittle. Some of mine have been switched side to side to use different sets of holes. I haven't seen new repros, but I'll have to save the nylon strap idea in case I break mine.
Something arrived today..

Greg
On the armrest replacement you might want to look at 1969 Mustang bits. Urethane foam over a steel core. Available everywhere because Mustang.

Interesting find on the armrests. The looks are certainly appropriate; probably need to do something to make the mounting holes line up.
In reply to wawazat :
I will respectfully Decline that suggestion.
Everything is right.. ubiquitous and readily available.. But the Cockpit is already small and I was banging the seat belt on the thing all the time anyway...I also don't particularly care for the look.
Heck Maybe a can delete a 1/2# from the Drivers' side any way... that's cool with me.
Plenty of elbow down space there now.
Greg
Got it. Just wanted to mention it as a possible solution.

noddaz
UltraDork
10/21/20 1:54 p.m.
You are having fun! Great job so far.
Have you shot any por-15 up into the inside of the rust repairs? You don't want it to rust from the inside out.
10/22/20
✅Enkei's installed
✅Falken's Azenis rt615k+ Installed
✅Driving Tour Scheduled for Saturday
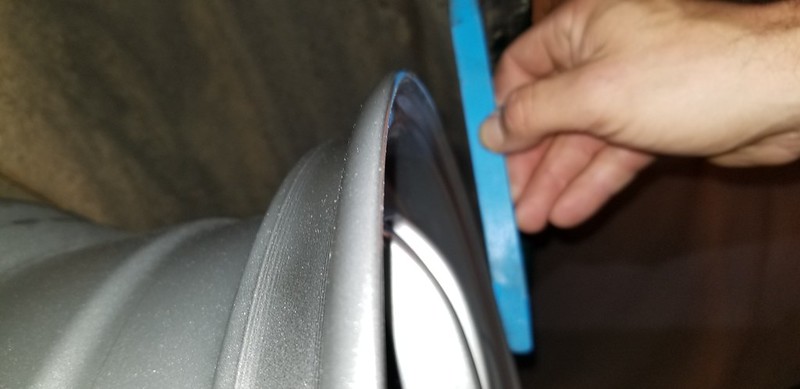
Got the new parts installed. I began by checking to see if the rear wheels would fit. I ordered 7.5" wheels in +48 Flavor as the Axle / Chassis setup I have actually likes more + offset to keep the tires from rubbing with an 8" wheel. The Previous Wheels I had on the back were 8" wide but I had them machined to +52 mm Offset to keep the tires from rubbing.

More than 3/8" clearance at the wheel lip.


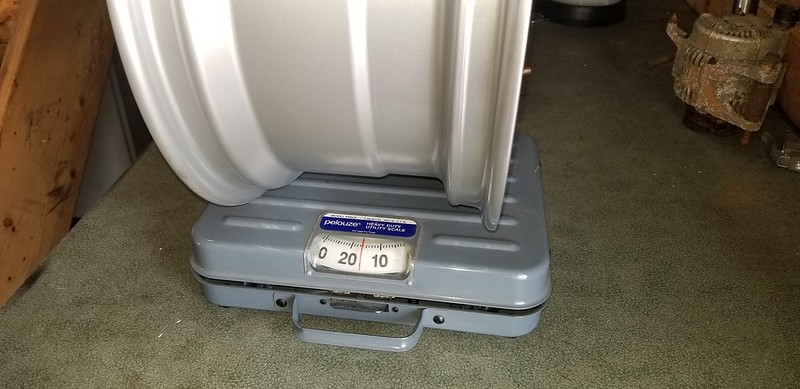
One bonus with the 7.5" wheel are that they are about 1# lighter than the 8" wheels :shock:

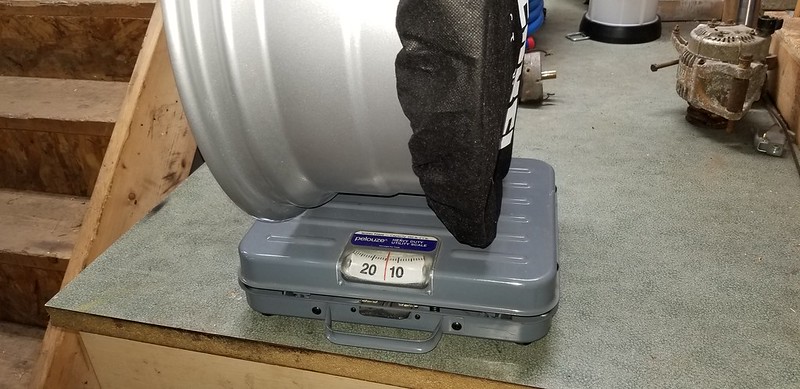
The entire 7.5" wheel assembly with new tire weighs 41#


The 8 " wheel weighs right in at 16# as advertised in the Enkei Catalog.

With the Falken on it weighs 43#


Nighttime View.


Greg
RPF1 FTW. They look great.


