
SkinnyG
UltraDork
9/13/19 8:41 p.m.
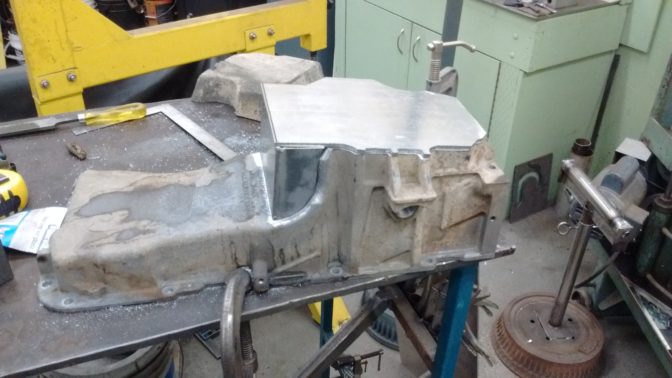
Dragged the oven outside off the welding cable to bake the LS oil pan clean prior to shortening this weekend.
I was a bit nervous about having the relatively un-tested "110V-stripped-out-and-220V-only" oven running un-attended in my shop, so it's in the middle of the driveway. Smoking away at 300°. Never done this before. I hope it works.

SkinnyG
UltraDork
9/13/19 11:38 p.m.
Three and a half hours cooking. Still smokey. Shut 'er down for the night. More tomorrow.
SkinnyG
UltraDork
9/14/19 11:46 a.m.
About seven hours cooking so far. Much less smoke coming off it.
SkinnyG
UltraDork
9/14/19 9:18 p.m.
Pieced together the bottom of the pan using 3/16" Aluminum plate. I'd already be finished, but I ran out of Argon. The pan is not as short as the F-Body LS pan, but I lengthened it to match. No idea what the capacity is now. The bottom is even with the bottom of the 4L80E.
In reply to SkinnyG :
Bake the oil pan clean? Wow! I am interested to hear about the results.
SkinnyG
UltraDork
9/14/19 10:55 p.m.
Never done it before. It -is- cleaner. Not perfect though. Not sure exactly what temp it should be at, and for how long.
"They say" it's how you get the oil out of the pores of the metal. Apparently sand blasting may "peen" the metal over the oil, trapping it, which bursts out during welding.
I am also NOT a fan of blasting anything that goes inside of engine.

ShawnG
PowerDork
9/14/19 11:06 p.m.
Our aluminum welder soaks pans and valve covers in acetone to draw out the oil.
That said, he still bitches about oil left in the castings after the process.
It probably doesn't help that 70+ year old casting are a lot more porous than what we have today.
SkinnyG said:
(Unsurprisingly) That looks Great!

NOHOME
MegaDork
9/15/19 8:53 a.m.
ShawnG said:
Our aluminum welder soaks pans and valve covers in acetone to draw out the oil.
That said, he still bitches about oil left in the castings after the process.
It probably doesn't help that 70+ year old casting are a lot more porous than what we have today.
I think it is more than just oils with the old alloys. Mixed in with the oil in the pores there is bound to be oxides of who knows what, plus the baked oil leaves a carbon residue behind. TIG hates everything.
SkinnyG
UltraDork
9/15/19 4:47 p.m.
Hmmmm. My Argon tank expired earlier this year. That adds complexity.
SkinnyG
UltraDork
9/20/19 10:37 p.m.
I cut bungs for the drain plug and the turbo drain. Hope to weld them in tomorrow.
1/2" NPT is not fun to turn by hand. I need a bigger tap handle. I started it straight on the lathe, but had to use a Crescent wrench and a length of pipe. Wish my vise was bolted to the floor....
SkinnyG
UltraDork
9/22/19 12:53 a.m.
Pan welded up. It was not fun aluminum to weld. I also sharpened a LOT of tungsten. Drain bung on bottom front, turbo drain bung left rear, oil level sensor right rear.
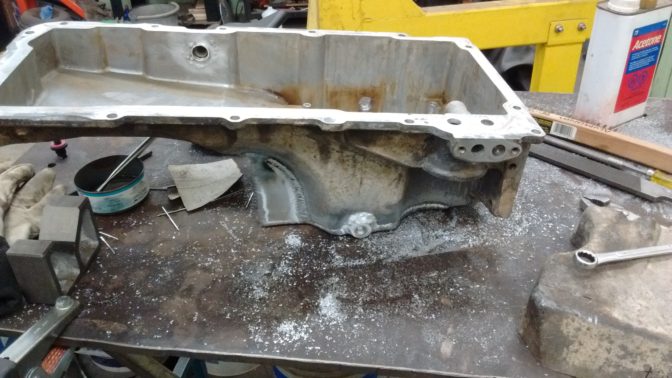
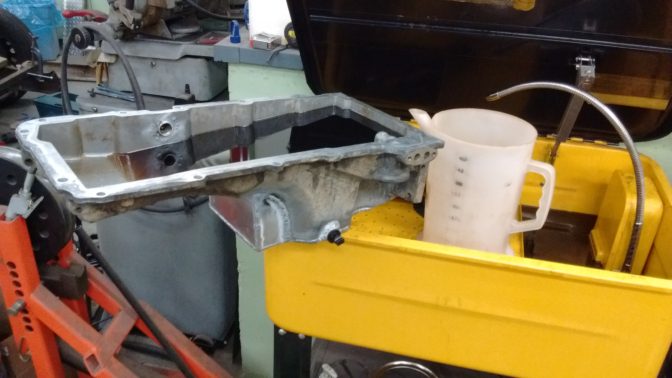
One wee leak at the back which I fixed. This is 6.5L of solvent in the pan; good capacity.
SkinnyG
UltraDork
9/29/19 9:04 p.m.
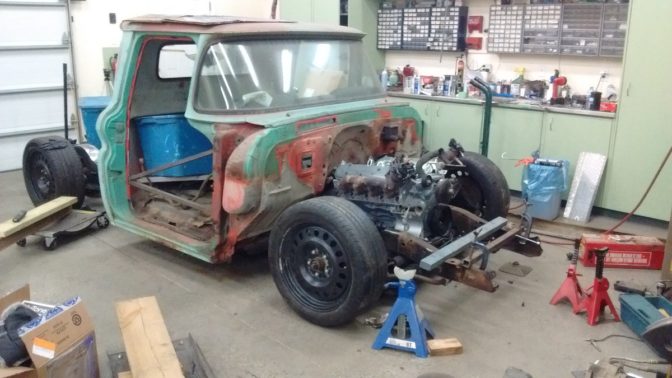
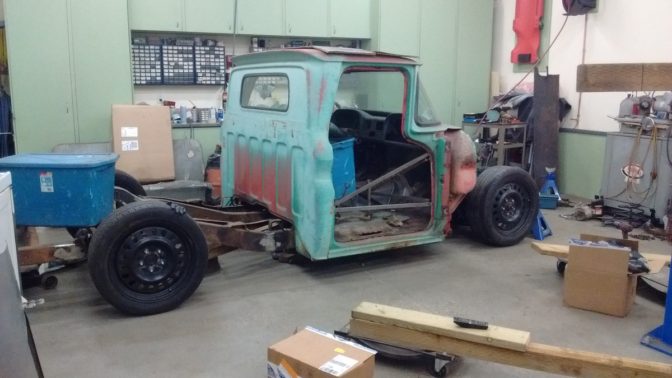
Motor, trans, and cab, at ride height. Oil pan flush with bottom of frame.
Fantastic work, as usual.
SkinnyG
UltraDork
10/6/19 10:50 p.m.
Working out how I want the motor mounts to go.
Debating either a simple "post" merely from the crossmember to the motor, or something potentially "structural," like this, tying the frame rails to the crossmember to the motor:

SkinnyG
UltraDork
10/13/19 7:56 p.m.
I think I'm really over-thinking this. Going to go pretty simple on the mounts. Couple of tabs on the crossmember, legs off the motor plate.
Steering rack shaft is making it a challenge to get symmetry, plus the inner fenders would need some hefty modifications (not the end of the world), but if I decide to lose the turbo and run headers, my initial design would be int he way.
Steering universals and DD shaft is on the way. Pricey buggers, those.
Dang Thanksgiving stuff getting in the way of doing things. Grrrr.
Decided to make 3" lowering blocks instead of 2", as I don't think 2" would be enough with coils. I have the scrub running 18" wheels.
Also put the wideband back into the Lethal Locost so I can refine the tune better. Was going to EFI the Silverado, but it kicked my butt every time....
SkinnyG
UltraDork
10/14/19 7:35 p.m.
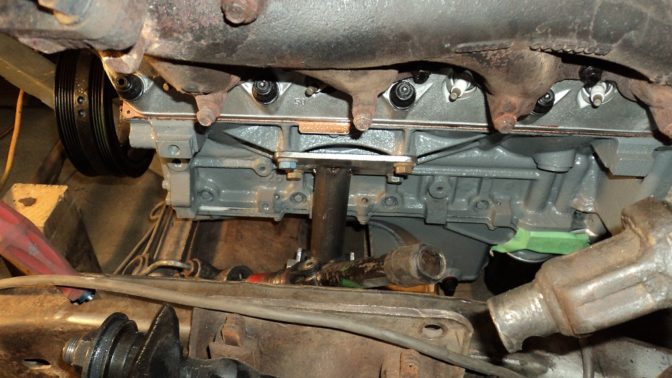
I shoved the motor around until it was centered in the frame rails, and just far enough away from the firewall that I probably could get the heads off the head studs without dropping the motor or pulling the cab. You know: serviceability.
Finally got motor mounts tacked together. I initially tried to mimic the 63+ mount in tube, but attaching to the new (higher) upper control arm mounts to give it rigidity. Worked fine on the passenger side, but not the driver's side because of the steering - nothing seemed to work well.
Then I thought if I ever wanted to ditch the turbo and run headers, that tube would be in the way, so.....
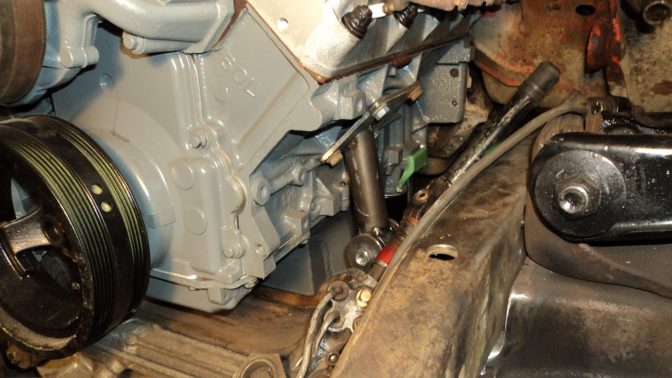
Simple "ears" off the crossmember, basic plate on the motor, the tubing will be gusseted.
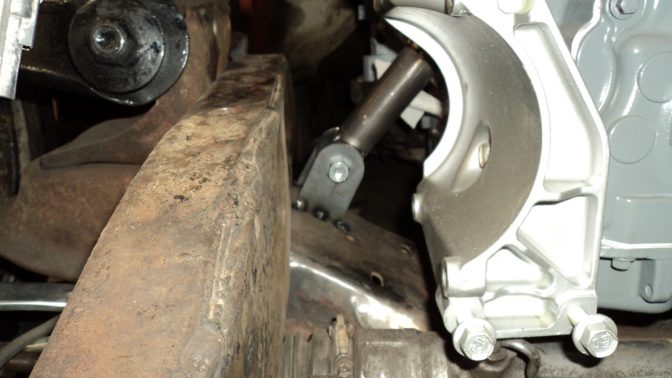
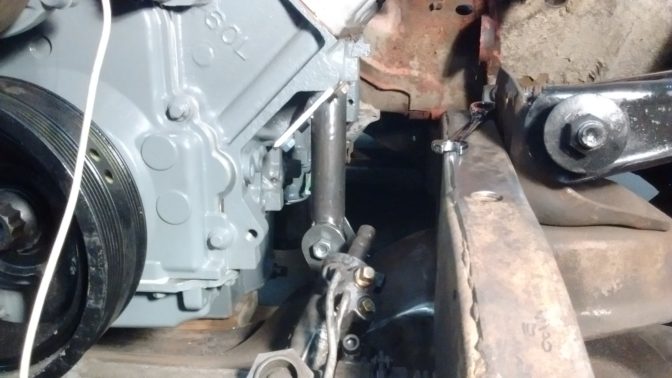
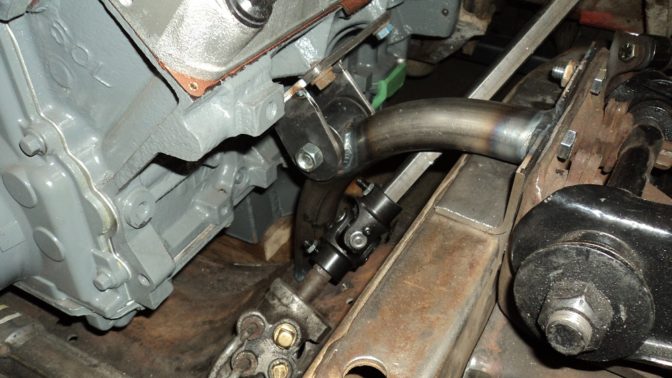
Driver's side got the ears further down to clear the steering (this is not the u-joint I'm using, I'm just gauging space). Not symmetrical (boo), but it will work (yay). Though I will very likely change the tube and make it centered in the mount plate (double yay).
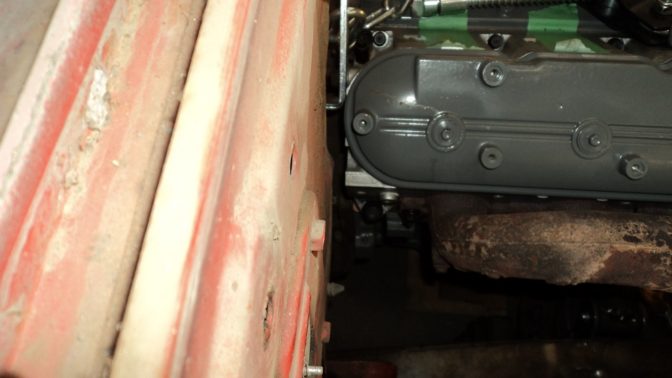
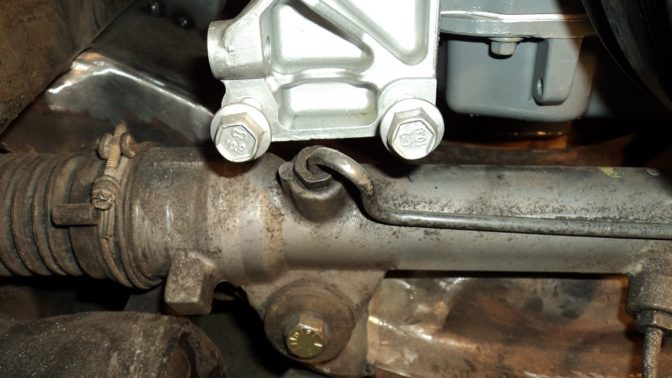
Not a lot of clearance between the motor and the rack:
SkinnyG
UltraDork
10/14/19 8:44 p.m.
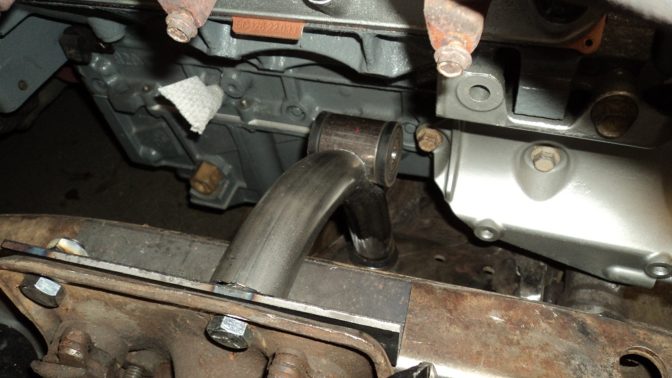
That's better. Vertical is more eye-pleasing. I'll gusset the back.
SkinnyG
UltraDork
10/17/19 12:11 a.m.
Not loving the motor mount design. It's going to change. U-joints arrived yesterday, DD shaft arrived today, so I can know where the steering goes.
And, in looking at pics of the truck with the wheels and fender on (previously), I'm beginning to think the truck is too low.....
NOHOME
MegaDork
10/17/19 5:52 a.m.
In reply to SkinnyG :
These are the moments that make or break a project. Funny that it is your gut that will tell you stuff needs changing, and the brain, that is supposed to be the smart one, will be trying to talk you out of doing it and spending the $$$. Listen to your gut.
Pete
No such thing as too low with bags.....
SkinnyG
UltraDork
10/17/19 11:29 p.m.
Tonight was Pizza & Movie night with the family, so nothing got done. Good seeing "The Hudsucker Proxy" again. Good movie. Kids both said it was "odd." (grin).
I may have found a 67-72 automatic steering column. Perfect! We'll see if the deal goes through.
SkinnyG
UltraDork
10/19/19 10:50 p.m.
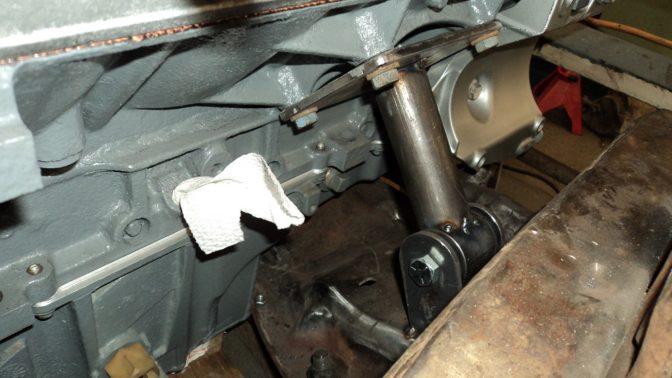
I was not happy with those motor mounts. I am very happy with these motor mounts.
Driver's side welded and installed, passenger side ready to be tacked.
SkinnyG
UltraDork
10/19/19 11:05 p.m.
The angle bracket at the top, was cut from the braces that my Rotary hoist was shipped with.


