


It looks like you can fit a radiator several inches wider in there, grab one out of some fullsize pickup and cut the core down?

It looks like you can fit a radiator several inches wider in there, grab one out of some fullsize pickup and cut the core down?

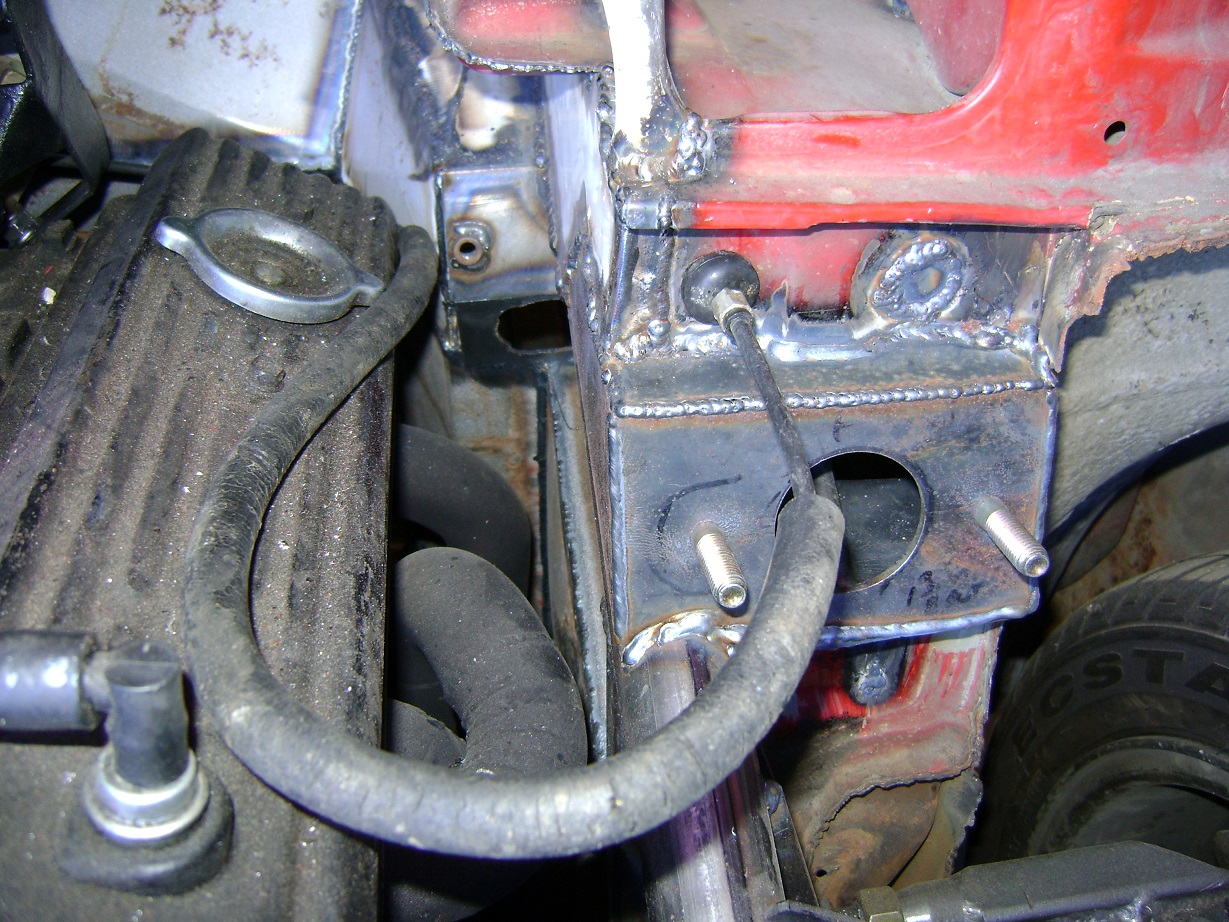
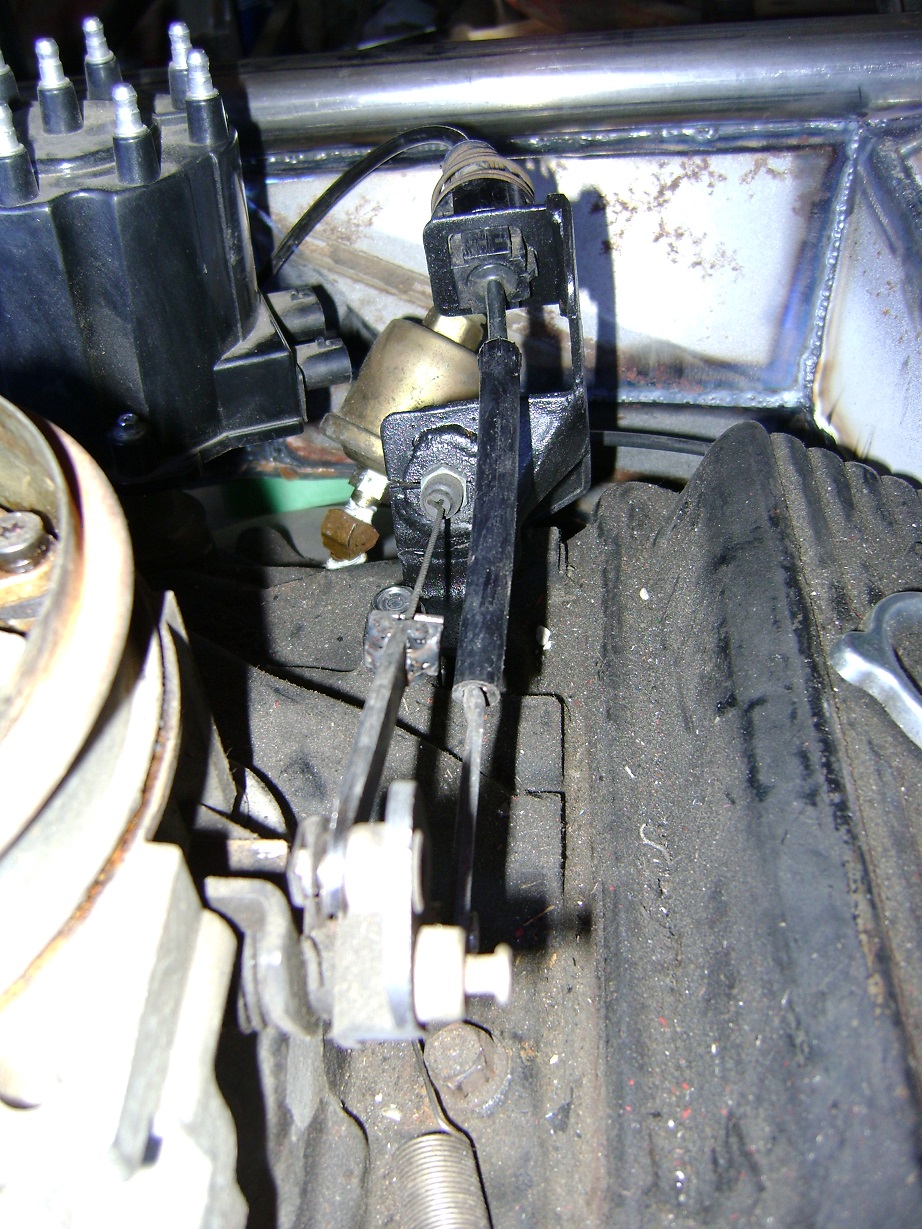
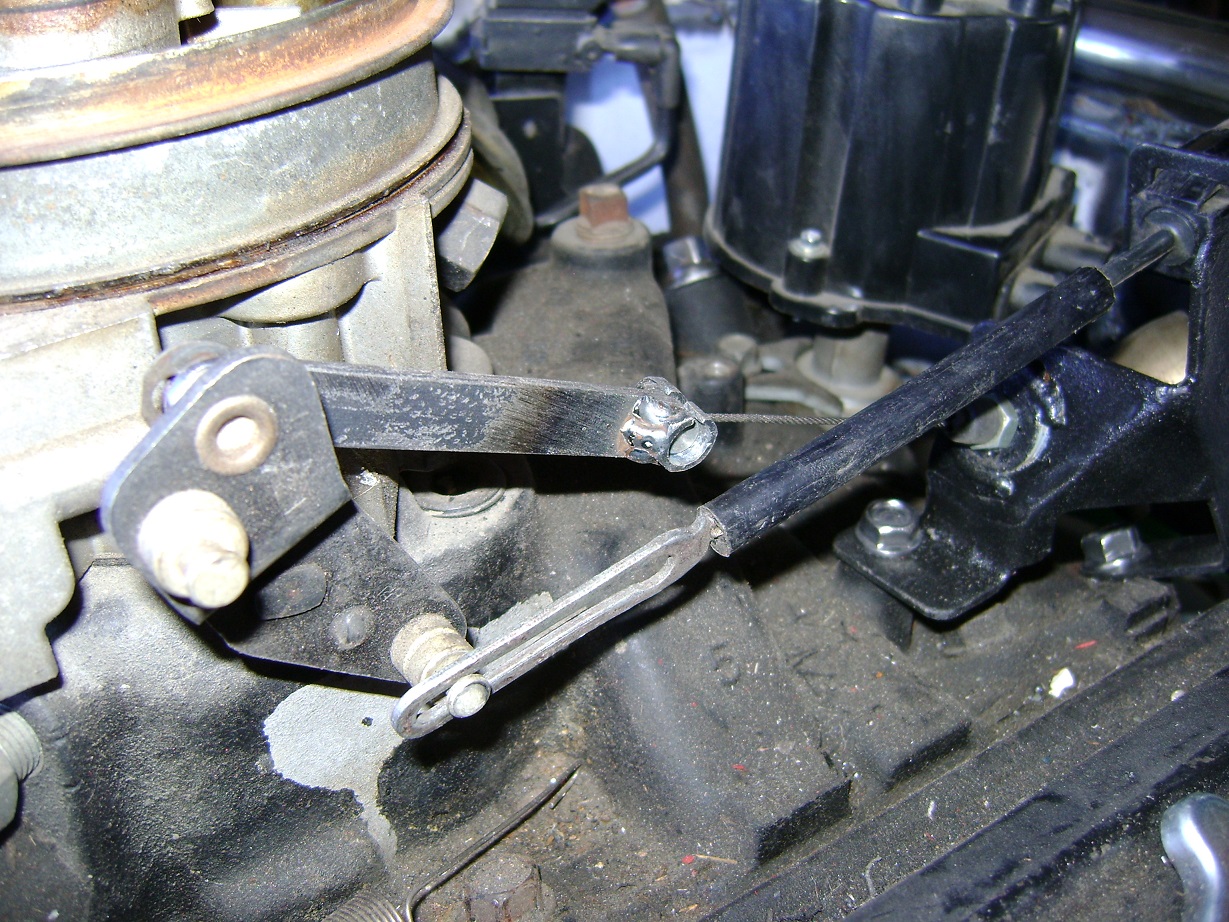
Got the throttle cable sorted out. Used the original Firefly cable, and fabricated a simple extension to connect to the TBI. Range of motion seems ok.
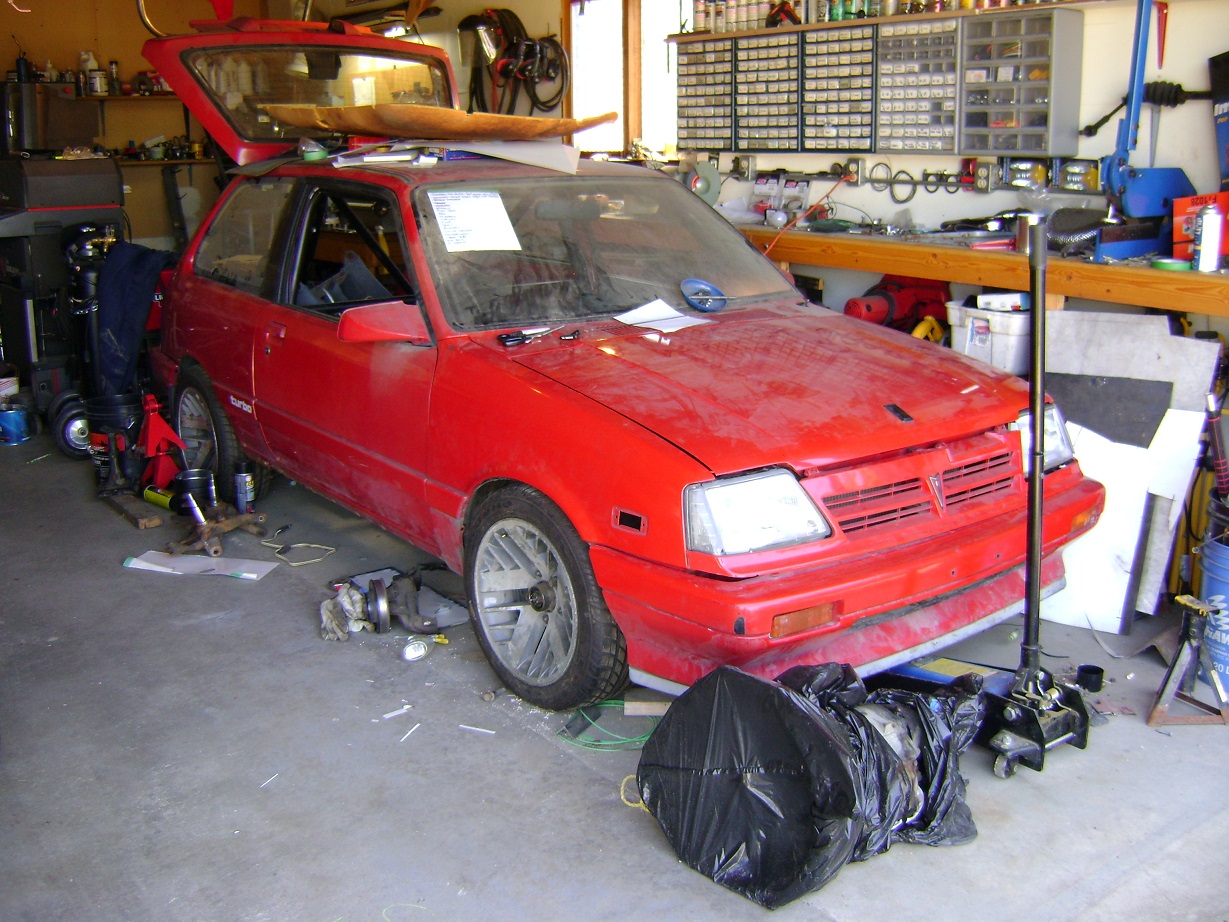
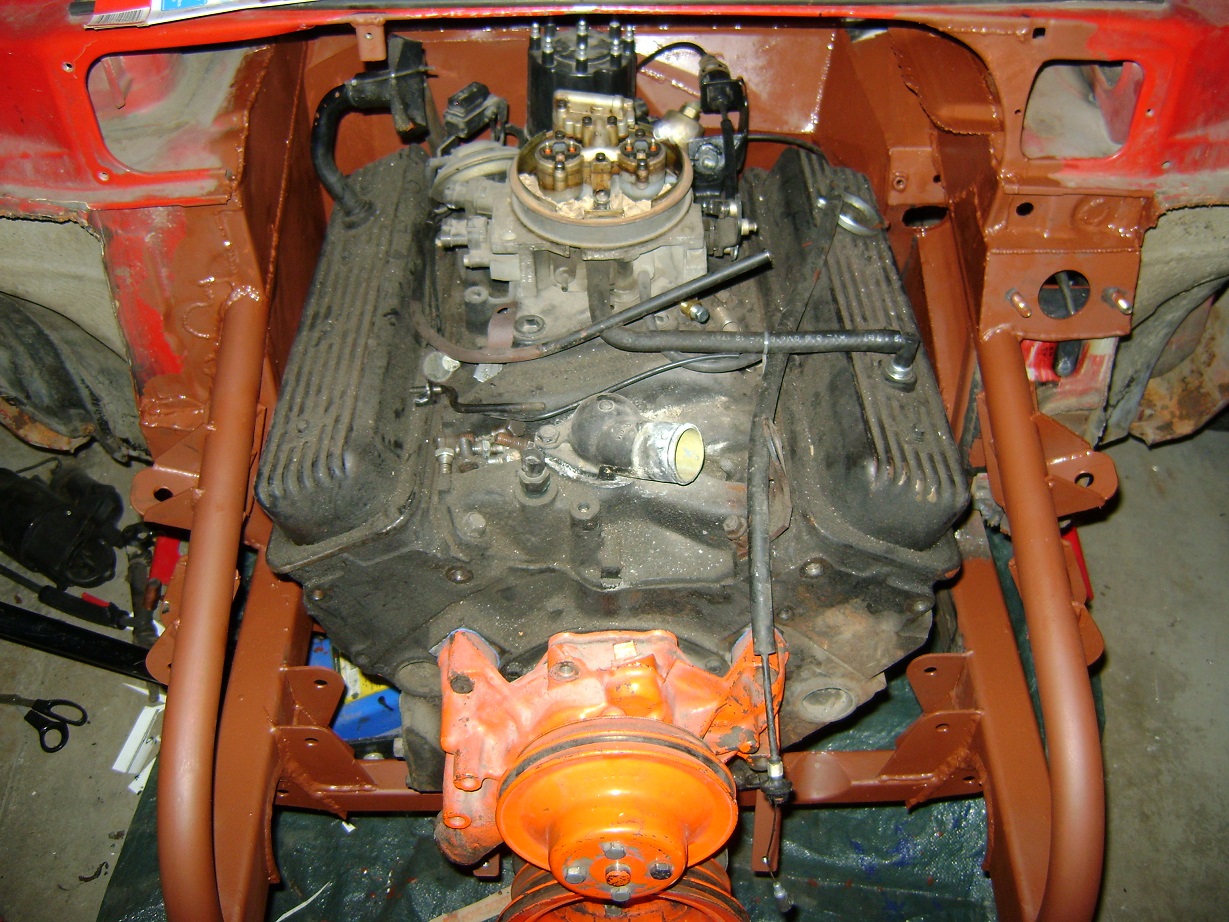
Prior to our strike and lock-out, our union advised us to bring all our personal belongings home. I tried to haul as much of the the remaining Firefly parts home as I could. Here is where we are so far, with the body panels set in place (haven't had one of these pics in a while):
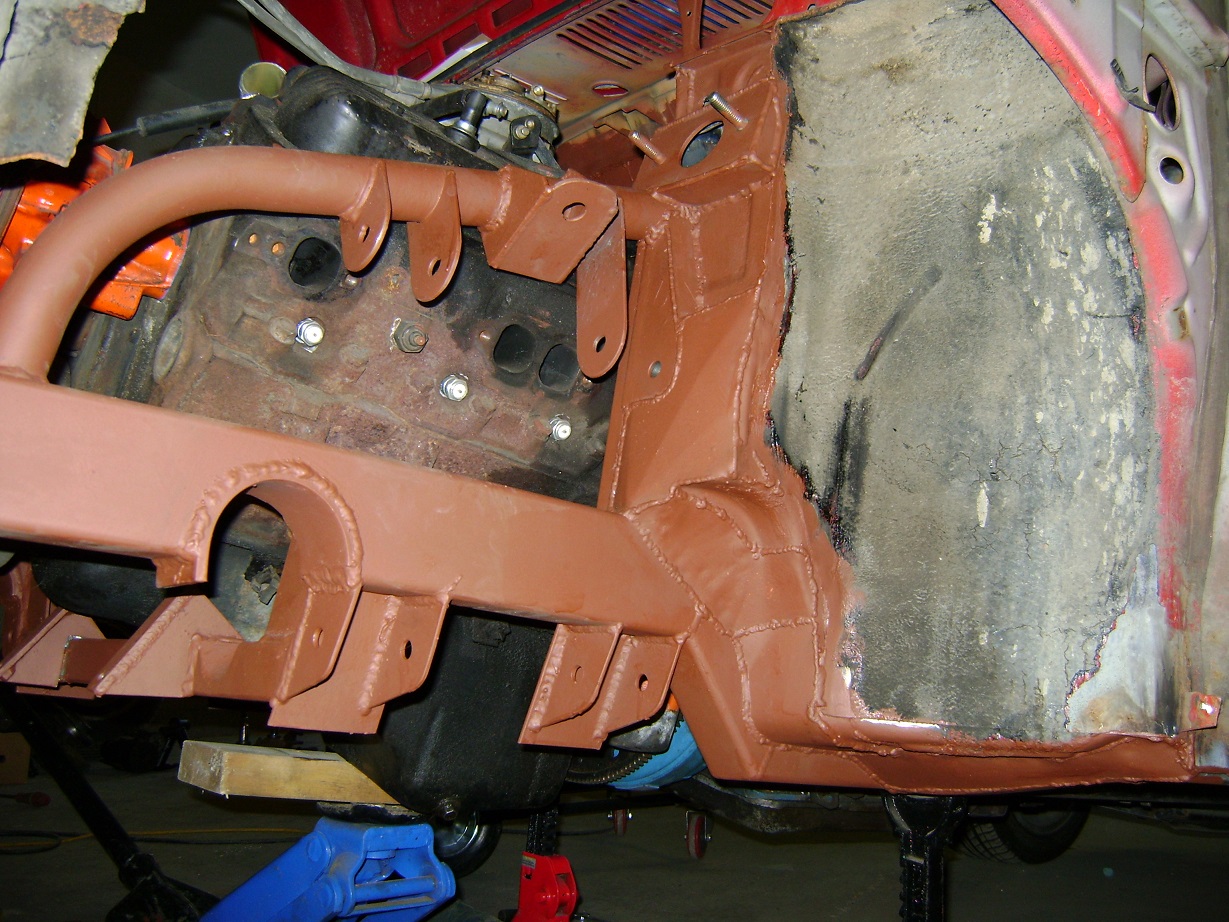
Next I took on the daunting task of trying to patch all the gaps between the body and the frame in the engine bay. I don't seem to have a systematic approach to how I go about this. I work on a section until either it bores me or overwhelms me, then I work on something else.
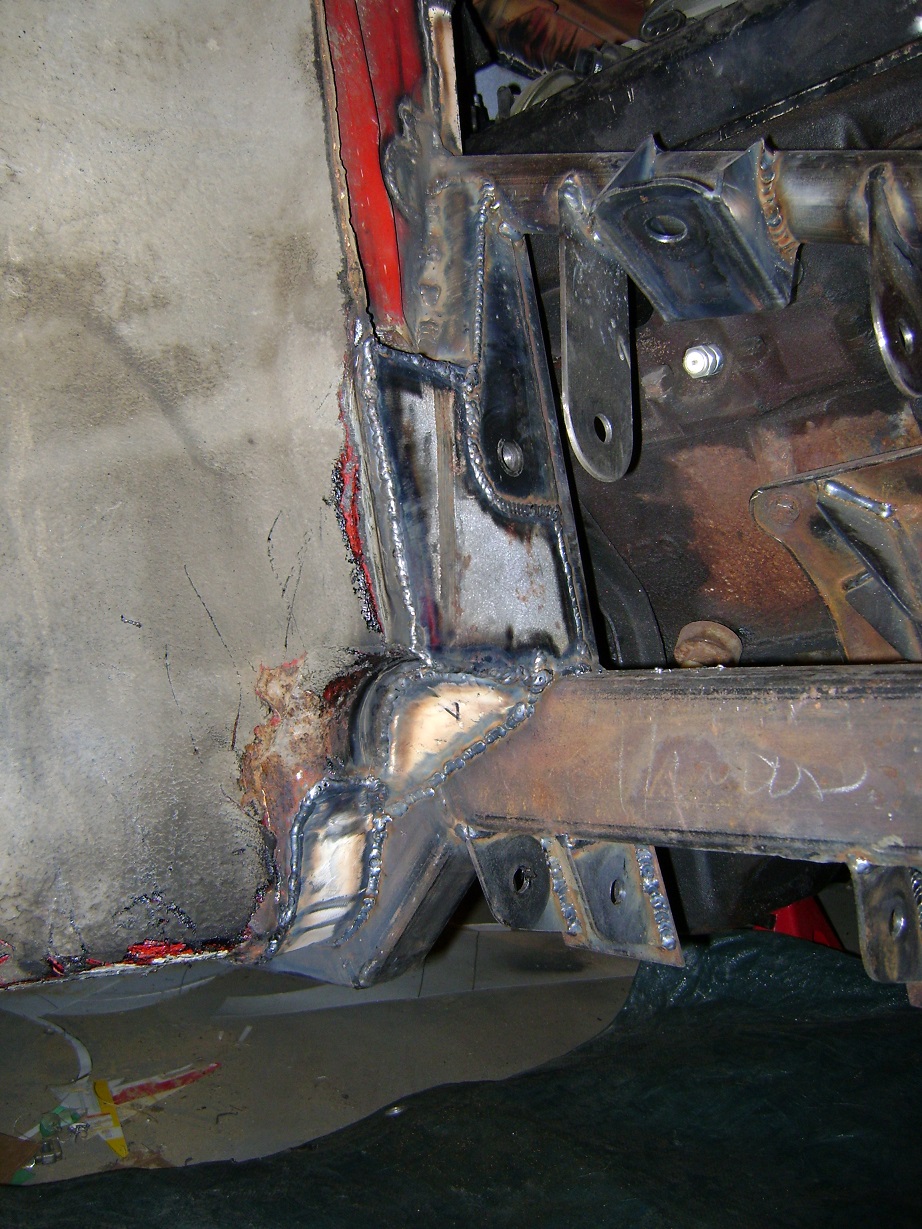
Patching complete
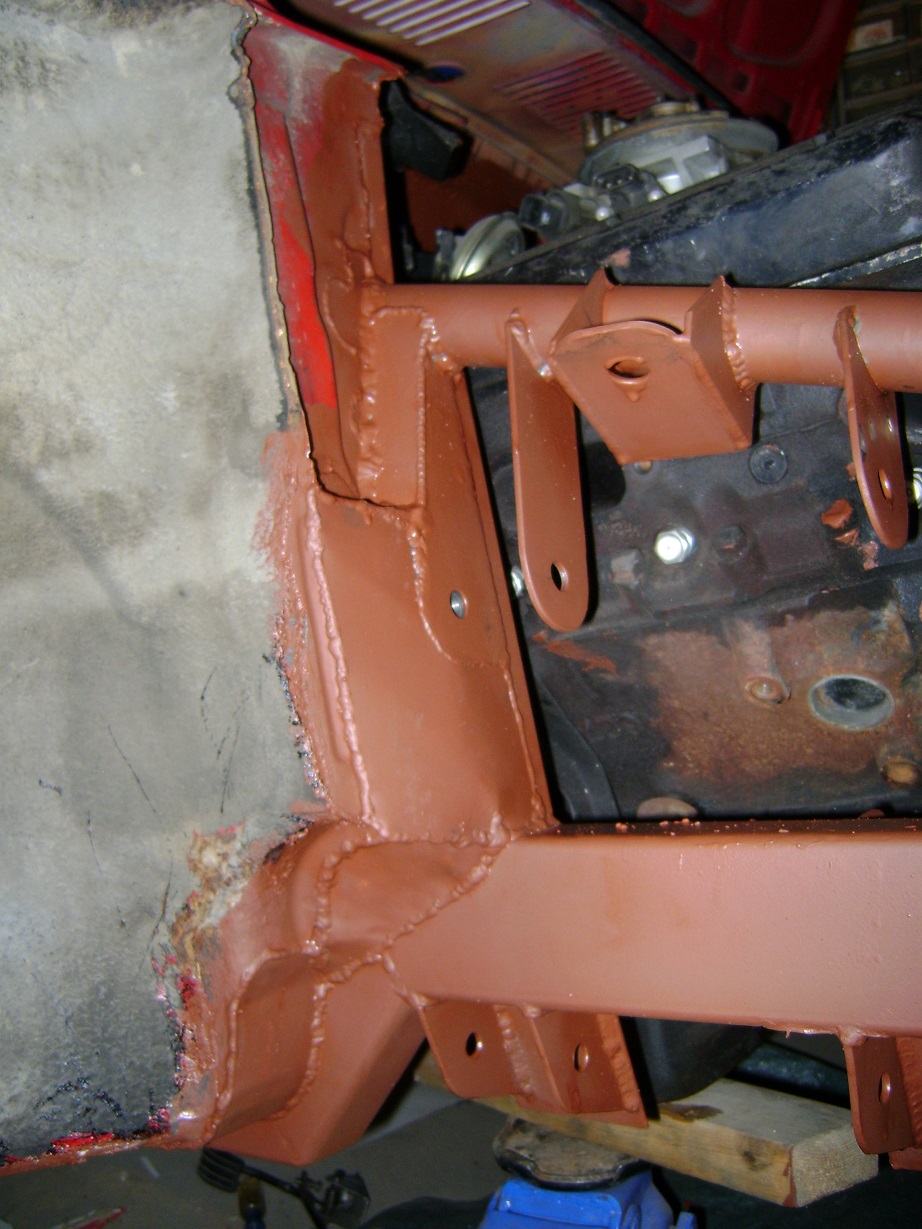
Primer, ready for seam-sealing.
I got excited and painted up to the driver's side. I have to move the car away from the wall to patch and finish priming that side.
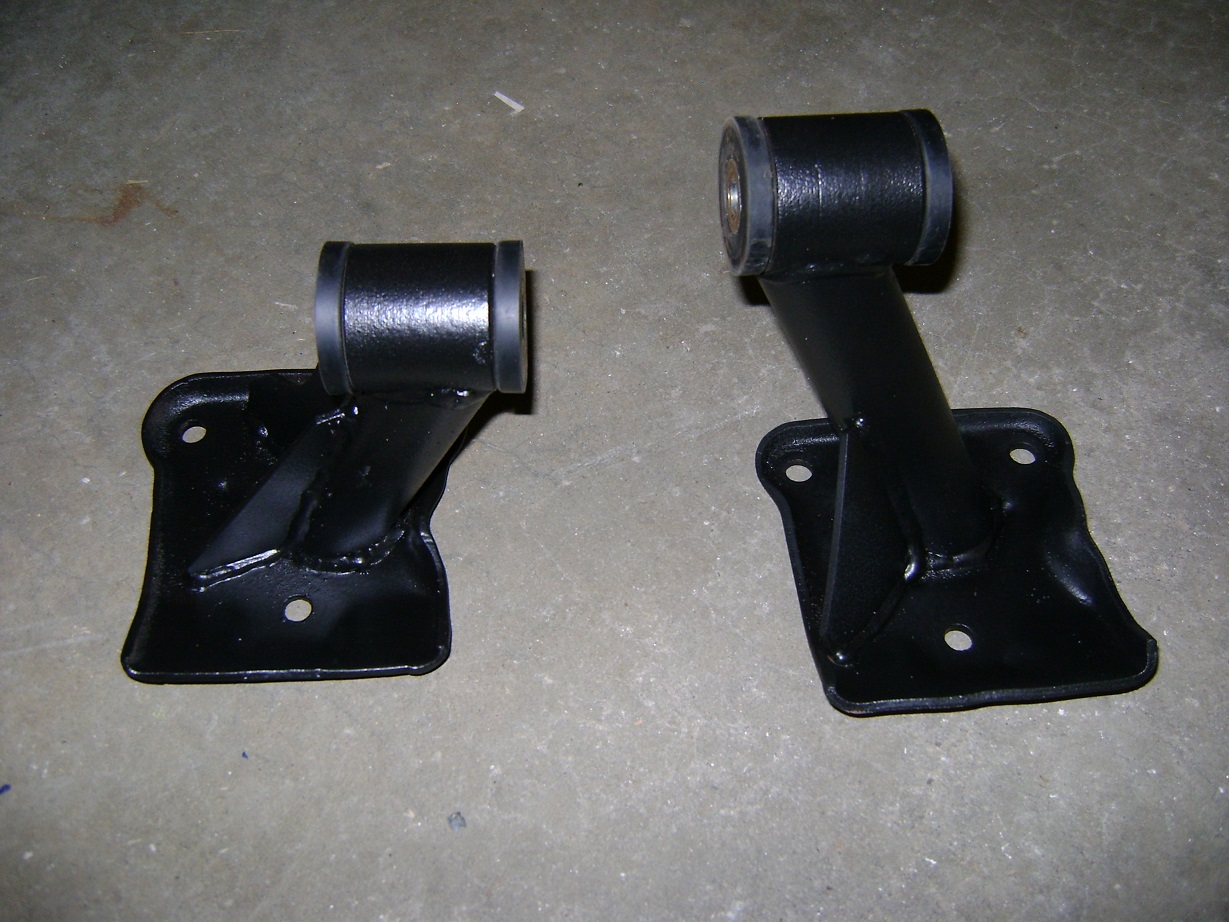
Motor mounts were painted in boxliner - my favourite paint.

This is awesome! Keep up the good work.

In reply to SkinnyG: Nice work! Those Firebird rims looks great on the Firefly too.
Pulled the car away from the side of the garage so I could get in the driver's side and finish it off. Seam sealer next when the primer has fully dried.
Jigsaw puzzle fun
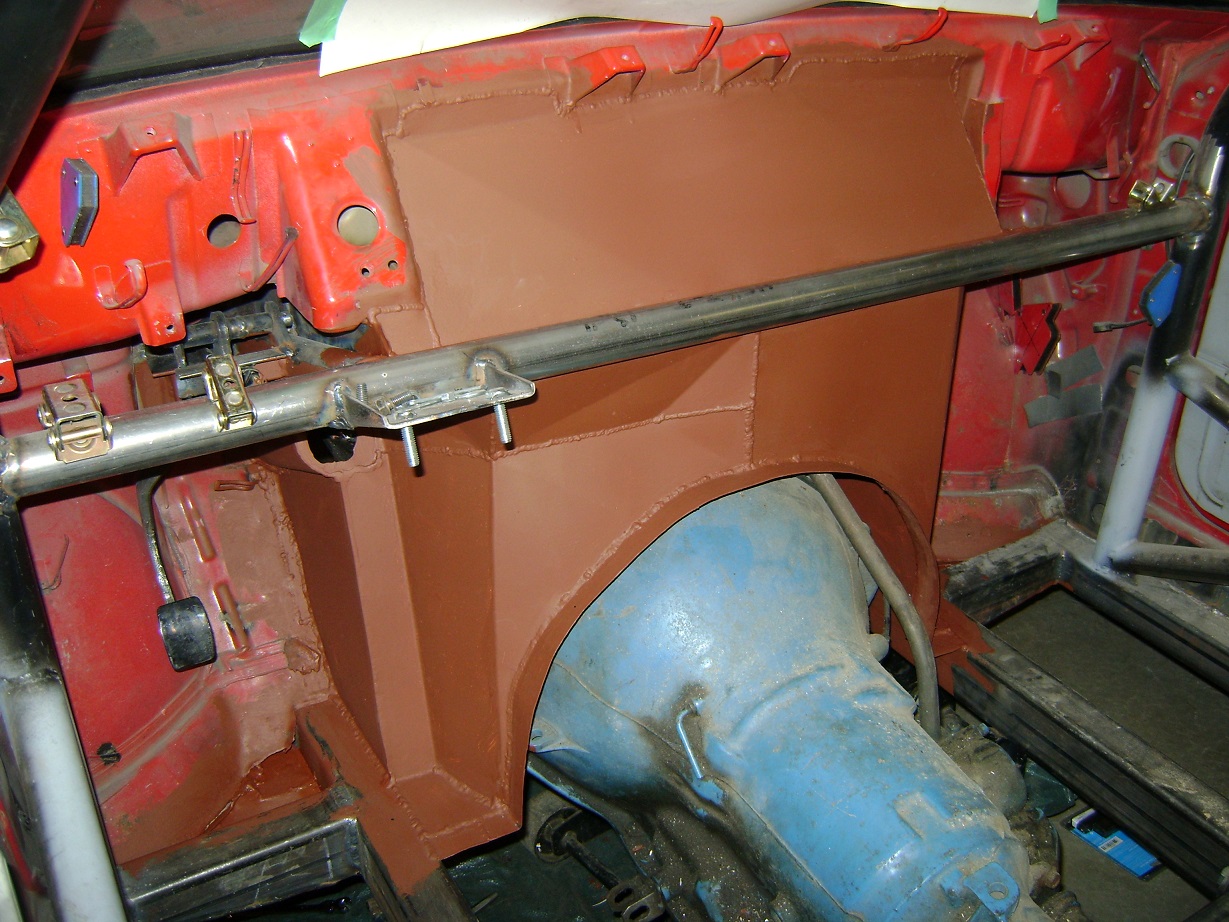
Inside all primed
I don't understand how people make money building custom cars.
Today I modified the dipstick tube. That took all day.
I tried to alter the original tube so that it could actually be accessed, actually be installed in the block, and yet clear the header, and clear the temp sender, all whilst the block was in the car. Hahahahahahaha.
Part way through tapping it into place, it jammed real good. This meant dropping the pan to get it out, or sure as shooting it will break off and I'll have to drop the pan AND get a new tube. Might as well deal with the weeping front seal. And a speedi-sleeve. And oh look - the timing chain is sloppy. And so on.
This is why I cannot make this build "challenge friendly" - I have a hard time balancing "Giterdun" with "Geez, y'know, this really aughta be fixed."
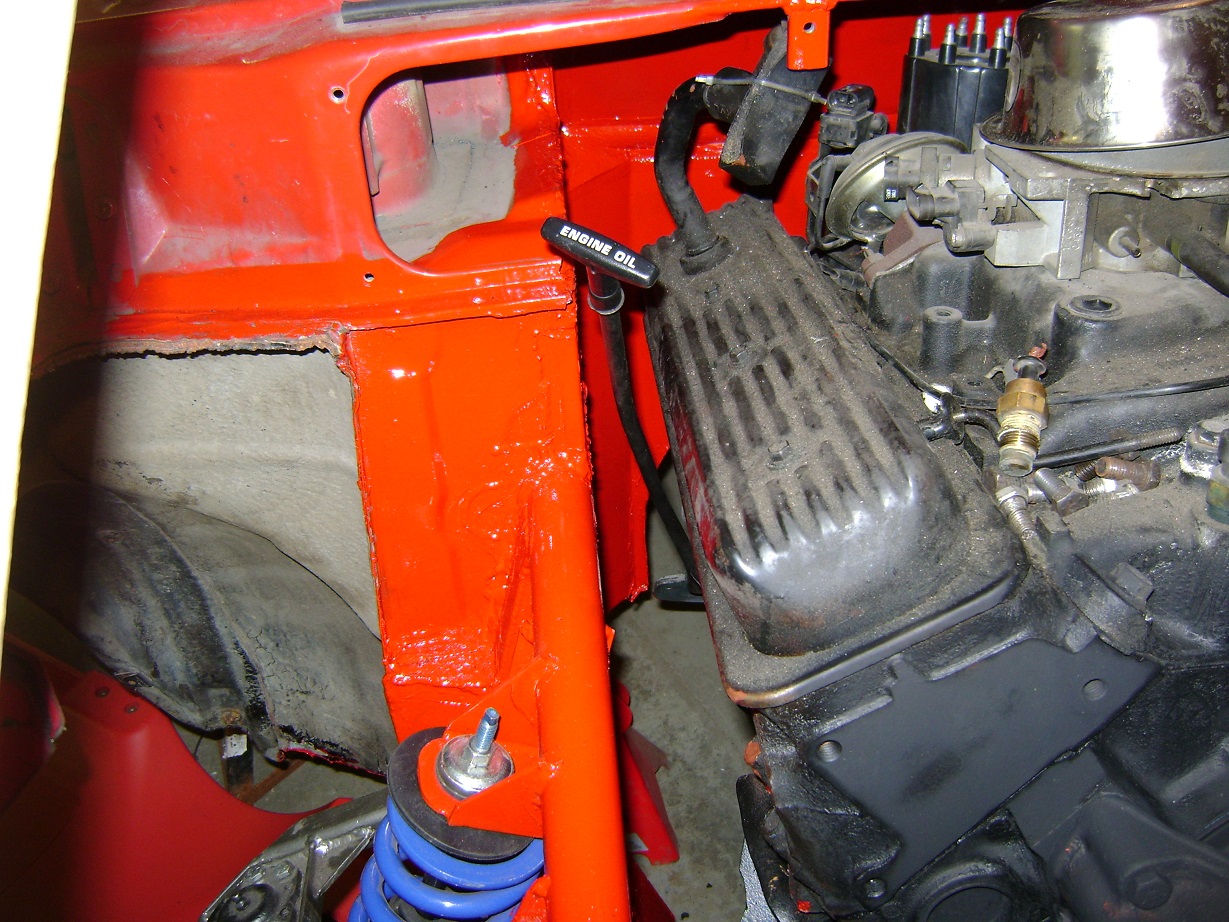
Yay dipstick. Can you tell this took all day? You will likely notice I painted the engine bay. Day before yesterday I seam-sealed everything. Painted yesterday. Also bought fuel lines, new spark plugs, and tomorrow I will pick up some header collectors.
OK, so I lied. The headers were a painful ordeal to install. There is almost no room to get in there at all. I had to remove the temp sender in the head, the starter support bracket, as well as what I believe is the knock sensor (threaded into what would be the block drain). The newly located dipstick tube was uselessly placed.
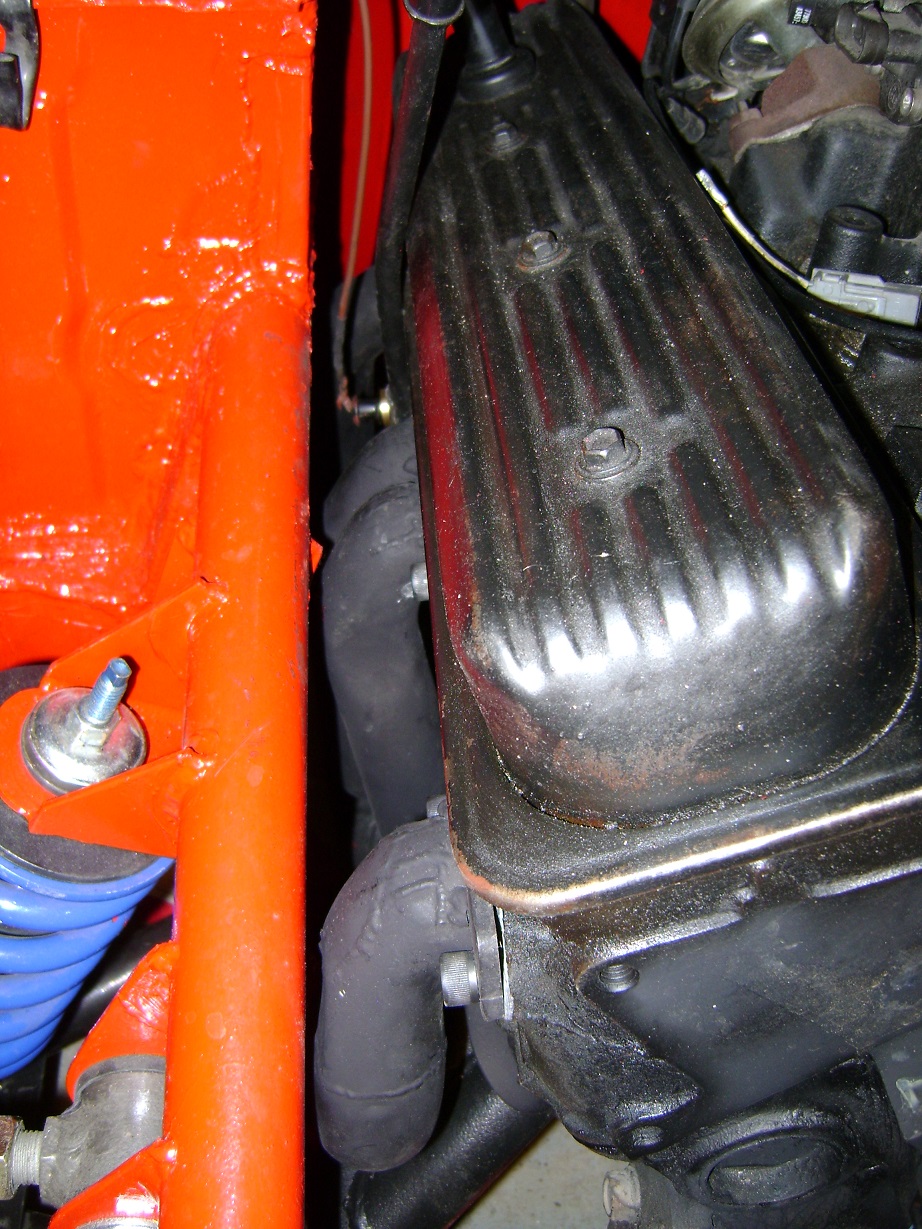
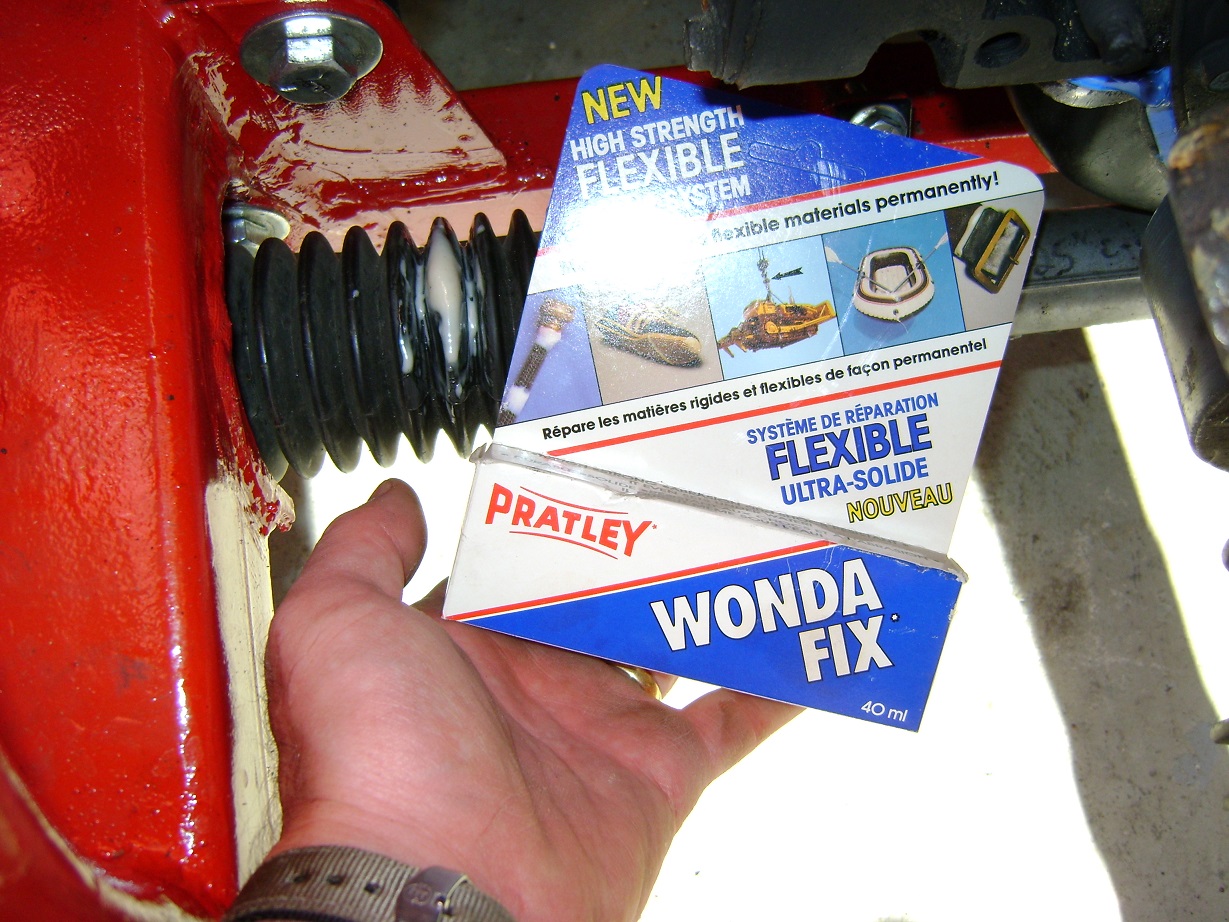
Yes, my manly mitts could get in there, sort of, with the use of colourful metaphors. Way back when I was welding up the front, I somehow melted a hole in one of the rack boots. I didn't really want to spend the gas to find another at the wreckers (daily driver at the time of this writing is 19L/100km), and the local auto parts store has ~never~ stocked this item.
Instead, I tried Wondafix, a flexible adhesive that mixes like an epoxy. It can fill holes. It's Wondaful. I used a Nitrile glove on the inside supported by a large washer to provide backing, and then mixed up two layers of Wondafix. Neat stuff.
Well, I got 7 of the 8 spark plugs installed. That's 88%, and an A grade!
Broke the last one tightening it up.
Sadness.
I took a video of the affair too, but that also sucked, so I haven't posted it yet.
Given the clearances you're dealing with, I'm still a bit surprised you went with headers instead of block huggers or ram horn manifolds.
Kenny_McCormic wrote: Given the clearances you're dealing with, I'm still a bit surprised you went with headers...
I'm banking on the element of surprise (grin).
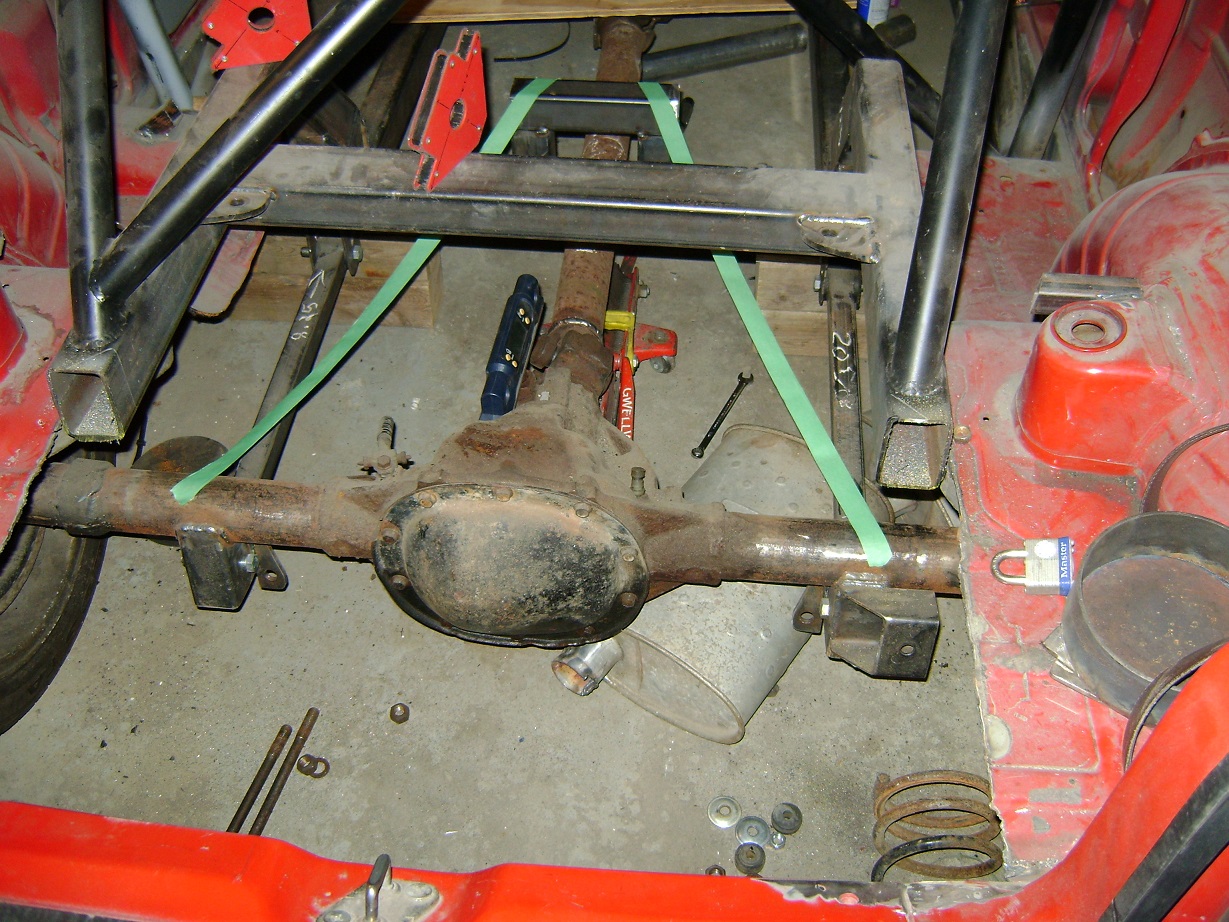
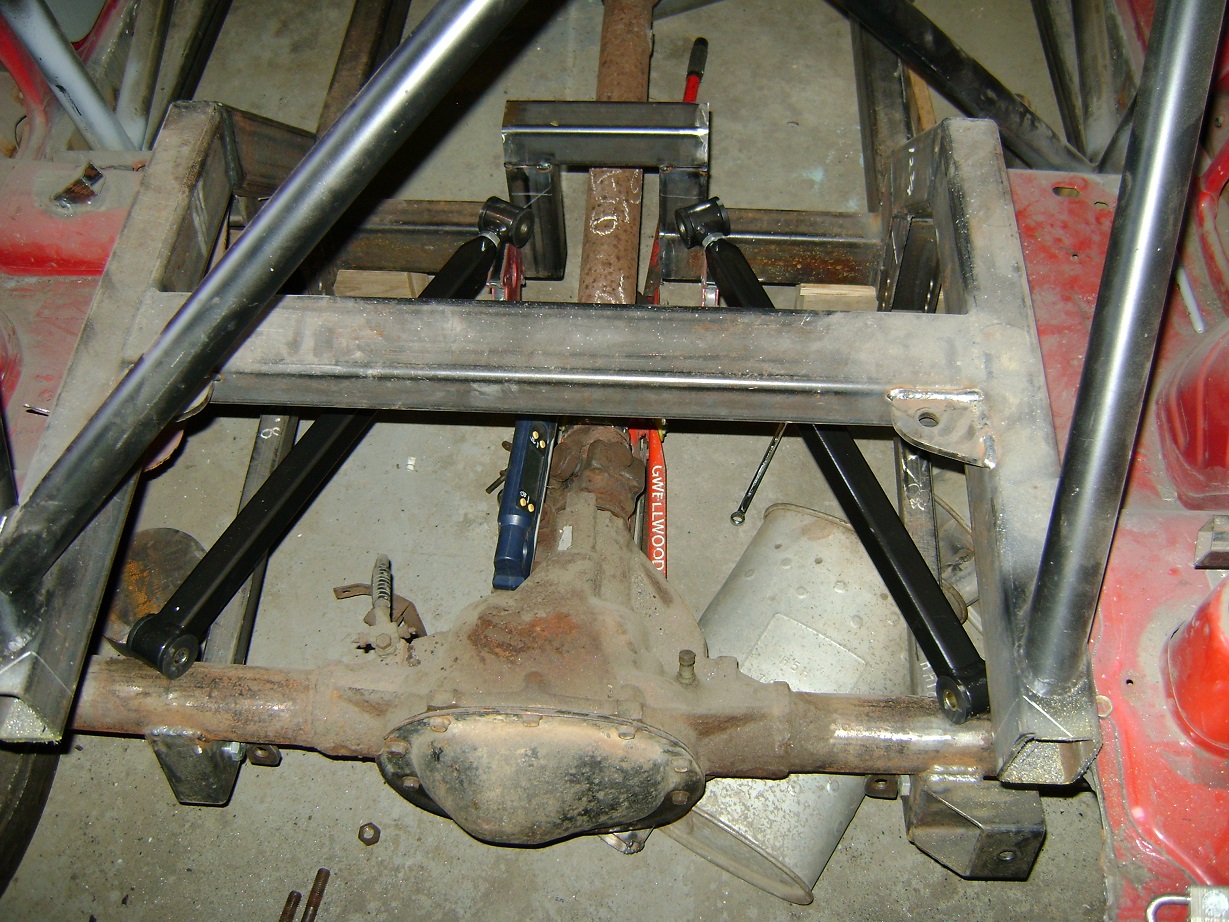
I started working on the rear suspension. I originally built the rear using the torque arm and panhard of the Firebird, but that is running into packaging issues with the exhaust, gas tank, and seats. So I will be changing it to a triangulated four link.
I can keep the lower links, but I need to fabricate new upper links. I turned a couple ends, and will pick up some 5/8" bolts to make the ends adjustable.
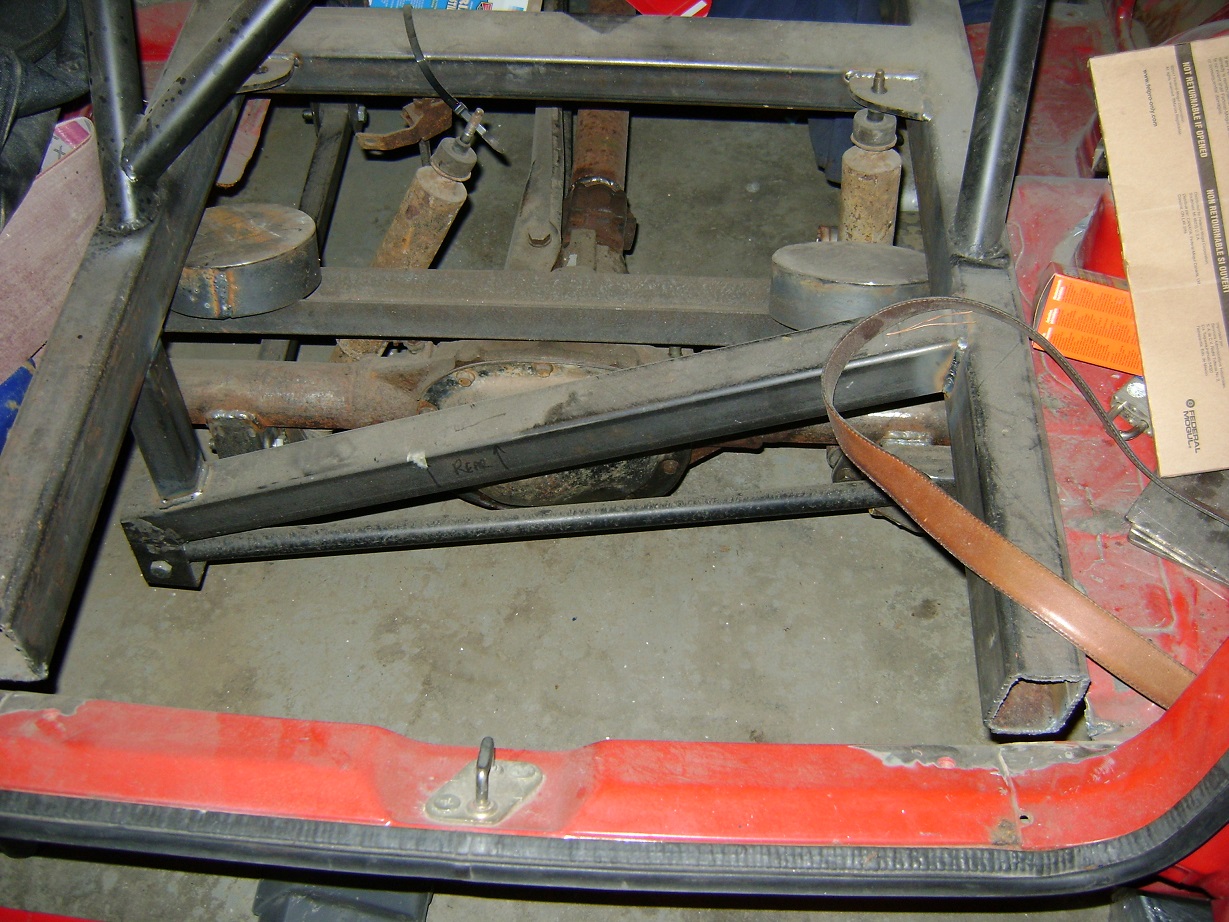
Not much room like this. Where's my Sawzall?? This is going to look vastly different very soon.
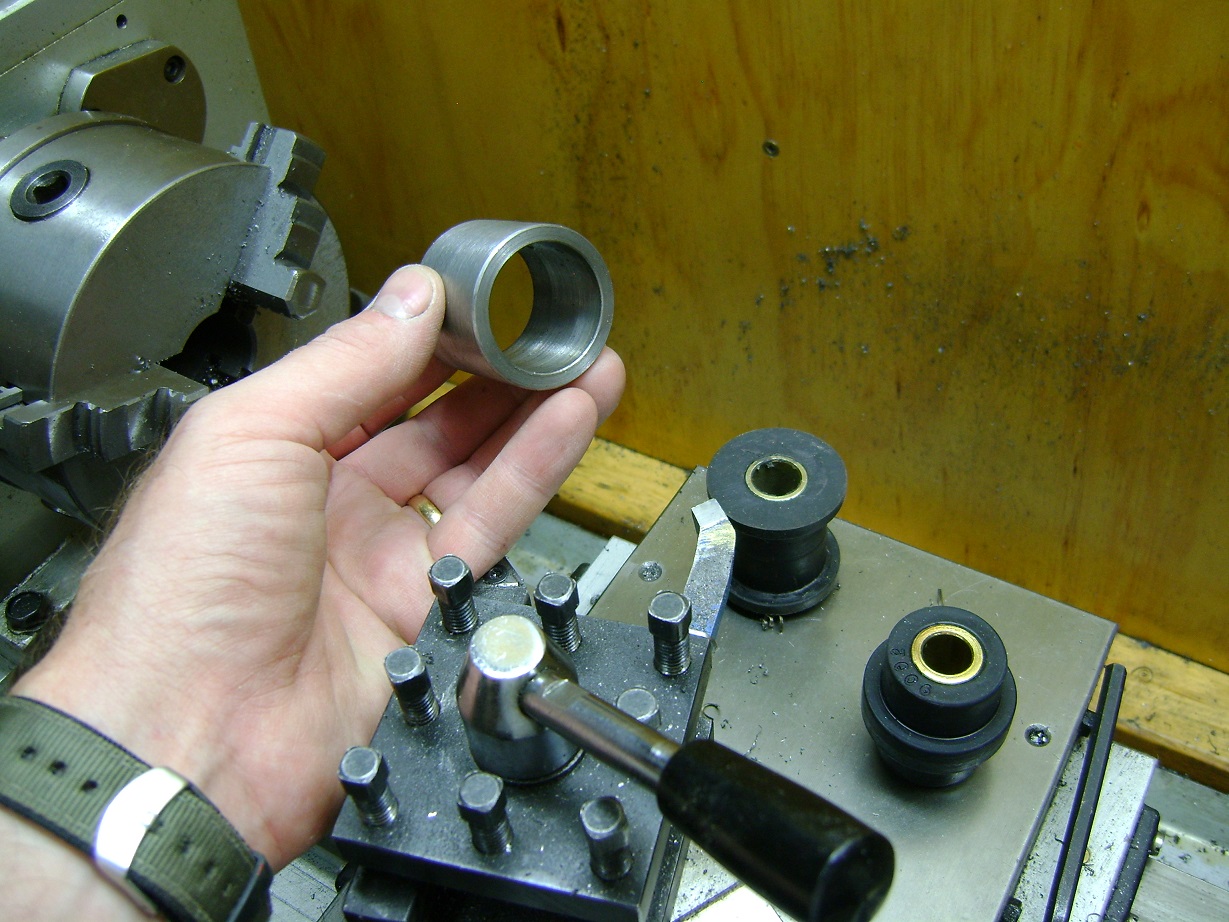
Ends for the four-link bushes
I take it the rear will need some narrowing?
The rear axle was narrowed 9" to fit.
I will be losing the panhard bar, the affiliated bracketry, and the rear "horns" of the frame.
I will tie the tube frame in with what's left of the sub-"frame" so there is actually some support for the rear bumper in the event of a collision.
This should free up more useful room behind the axle for a fuel tank and a muffler (I want a dual-tip muffler to exit in the factory location).
Switching out the panhard and torque arm for angled upper links maintains lateral location, and allows me to actually fit seats in there.
Will it be tubbed?
The thought had crossed my mind. If I tub it to where I have the frame rails now, I can fit 13" wide tires easily.
But for wheels that big, I would need radical backspacing to fit them to the existing axle, which isn't really what I want.
While tubbing is cool and all, I don't really want the big "steam-rollers-out-back" look. That would detract from the "sleeper" look I ~am~ after.
This is true, I suppose with a TBI 305 it wont be completely impossible to hook up on ~205mm tires.
I made sure there is enough room up front for twin turbos, but that's going to be a different story....
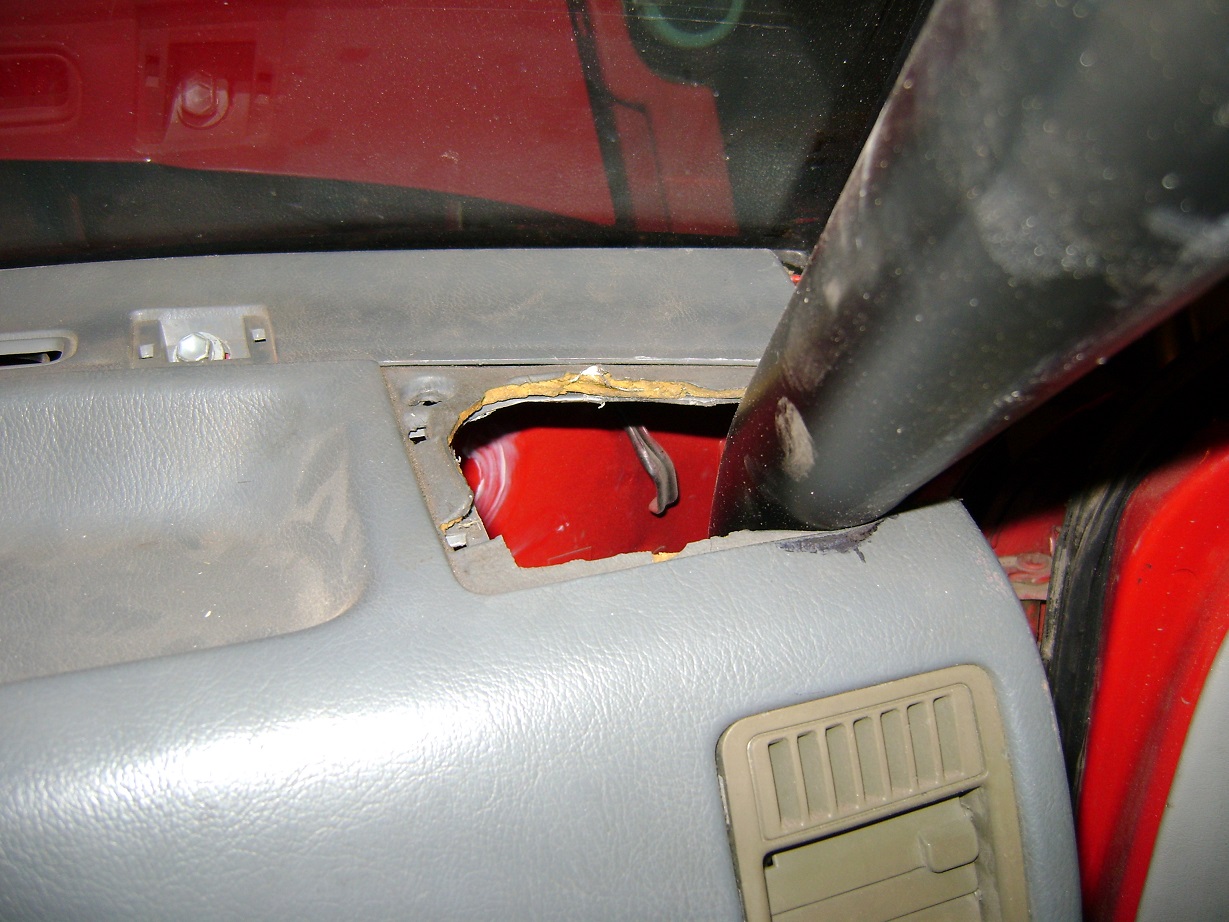
The bottom of the dashboard has a metal strip that supports it. I trimmed the support and welded it to the door bars. I did not try to find out if I can still remove the dashboard this way. Hope I don't have to find out it can't.
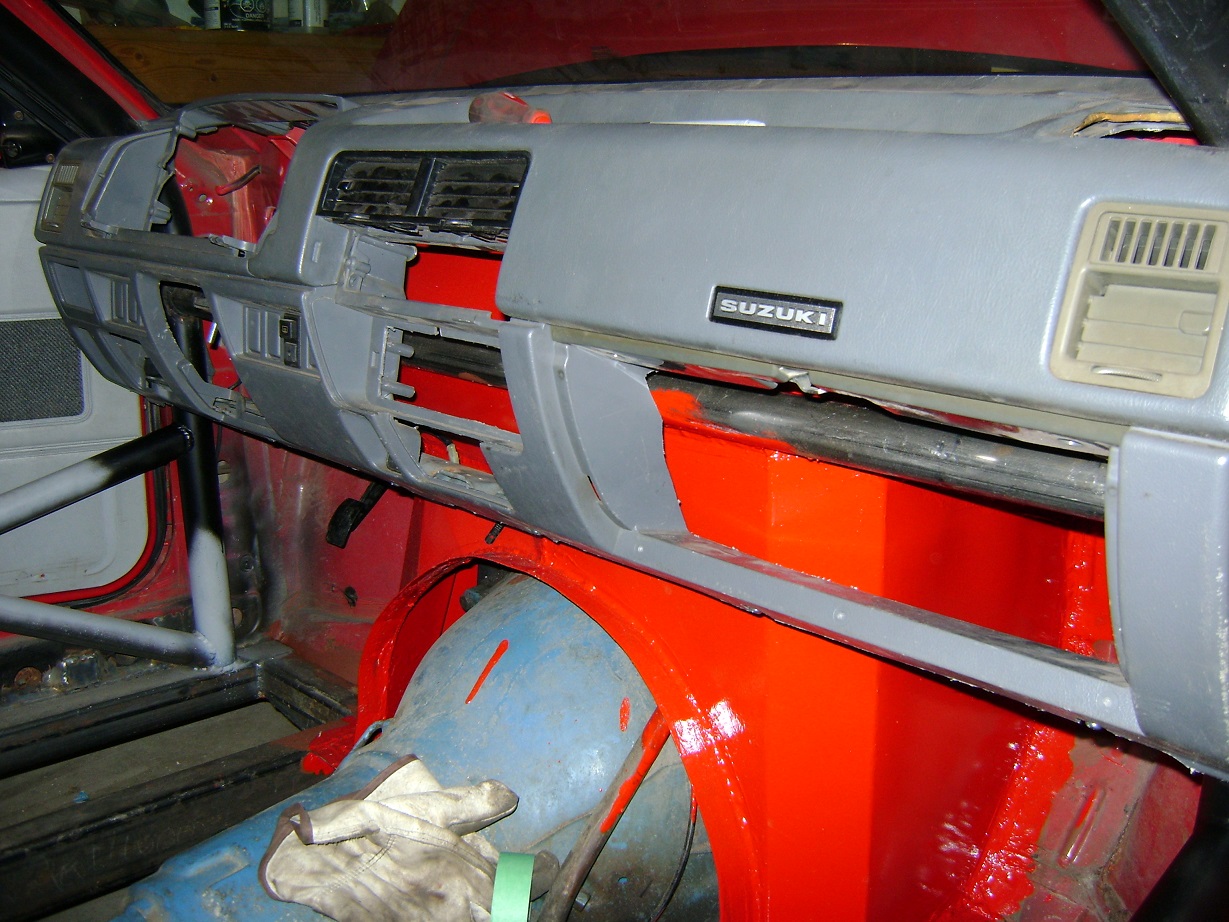
The OCD among you will be drawn to the paint drips. You will get over it. Once assembled, nobody will see it.
Hope I can find the speaker grills. If I can find the heater/defroster components, I could get a heater in this thing, and drive it in winter. Also spent a couple hours of staring at the back suspension to figure out what I want to do to change it.
Scheming
Playing with rear suspension ideas.
Using the Firebird rear springs would be cheapest, since I already have them, but packaging is an issue.
The fronts have an eBay pair of coilovers. I could use the other pair from the set in the rear, but on a solid rear axle it looks like 4cps or something unladen-garbage-truck-esque.
If I can find a pair of 2.5" coilover springs in the neighbourhood of 200 to 250lbin, I could use the existing upper spring perch of the Firefly, and fabricate my own lower mount.
Front OEM springs from an 88+ Civic might work. I could snag some from the wreckers, but that's money.
Trying to figure new upper arms. Either two arms triangulated, or an upper "A" frame with a single bushing at the front. Or fabricate some mount off the diff cover bolts to house an "A" frame pivot.
I have shock mounts fabricated, but not sure if I want to keep the shocks there (in front of the axle), or move them to behind the axle (which may become a packaging issue with exhaust & gas-tank), or use the original Firefly mounts (which may become a packaging issue with wheels & tires).
Stuffed it all in my subconscious to worry about, and began fabricating threaded bungs for the as-yet-unmade upper arms.
All the while waiting for a warranty starter to arrive for The Crusty Chevy. The solenoid stuck on, and just kept cranking. Frantically ran to the tool box, dug out some cutters and cut the wires to my remote solenoid (which did nothing), then cut the starter cable itself. Sigh

Battery cutoff switches are very useful things.

SkinnyG wrote: Also, I like Tuna55's idea of getting a thread up and running - keeps you motivated to do ~something~ on the beast to get it done.
Thanks! Your project is way cooler, though. I'm watching it with interest. The recipe looks a lot like the 500 Caddy Chevette that Hot Rod did so many years ago.
Alaska was nice. It's good to be back. I yanked the panhard bar off along with the frame ends and the bar mount. I removed the Firebird torque arm, and did some measuring and mocking up of triangulated upper control arms.
I also fabricated some adjustable end link bushes for the upper arms.
![IMG_0387[1]](http://gwellwood.com/wordpress/wp-content/uploads/2014/07/IMG_03871.jpg)
Bungs to be welded into square tube upper arms
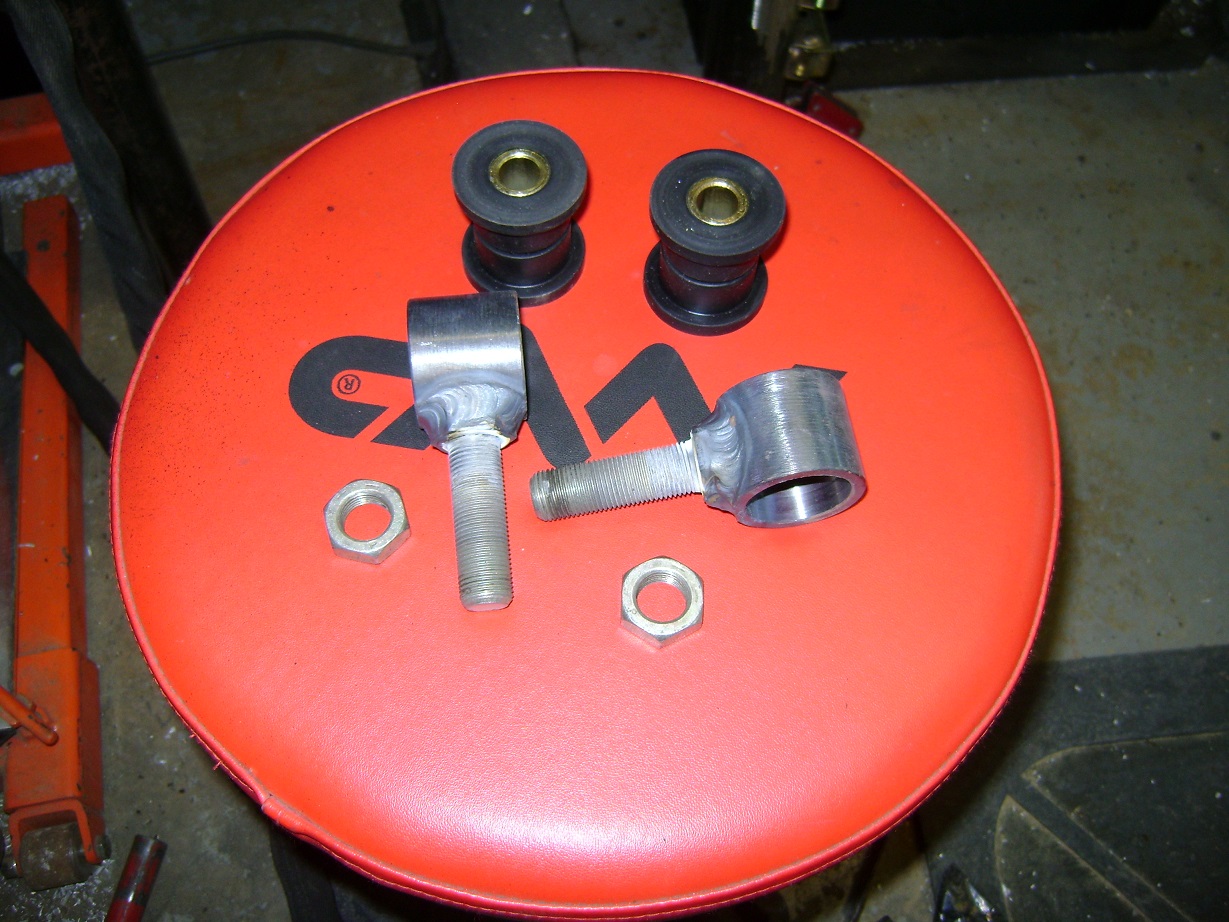
TIG welded goodness because I'm out of control

Cool stuffs going on in here ![]()
Finished fabricating the upper trailing arms, adjustable to correct any pinion-angle/driveline-vibration my guestimates screwed up on.
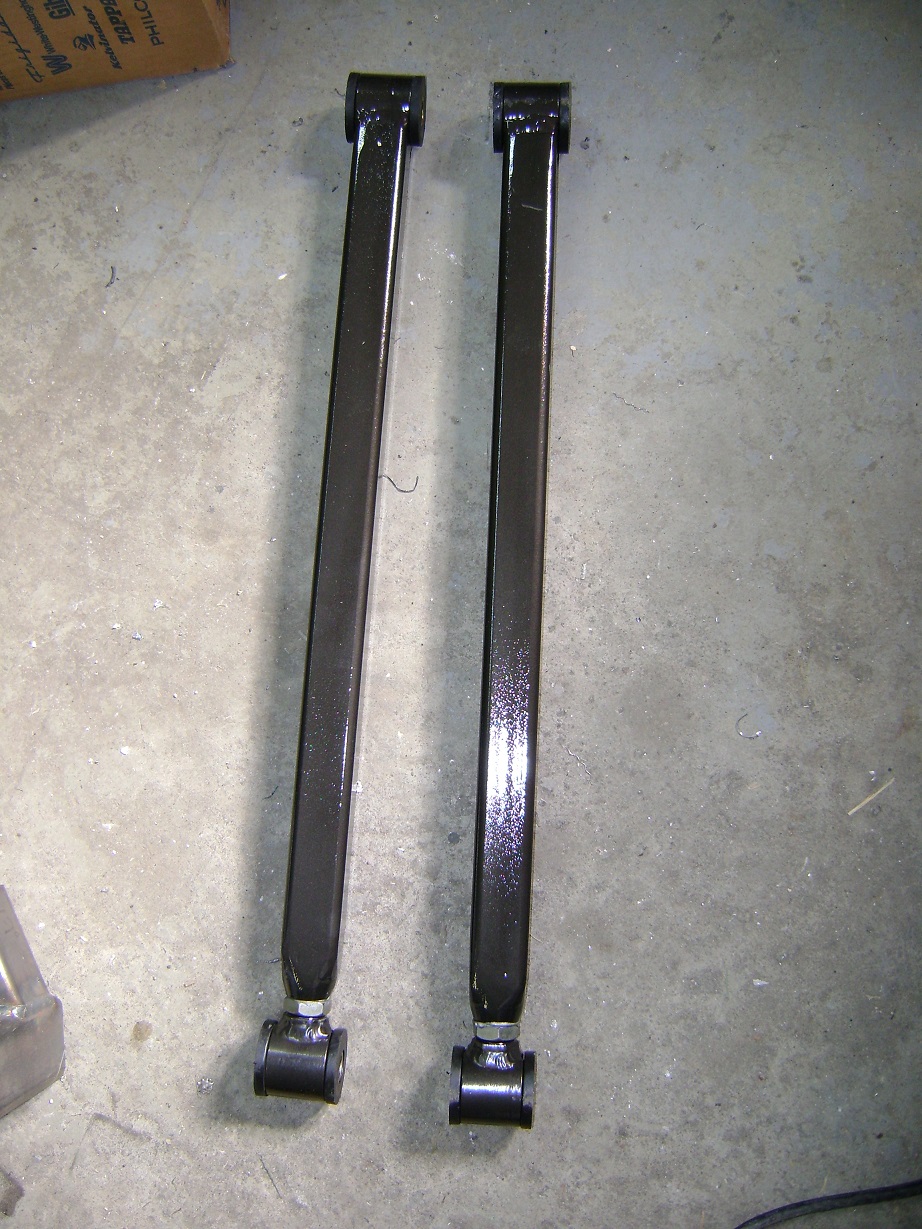
Here they are roughly where they will be. I drew up what would be adjustable forward mounts so I can change anti-squat without changing pinion angle. Brackets yet to be made. Had to get a new abrasive disk for my chop saw.
A former student and now fellow racer gave me some factory coil springs from an Integra that might just work perfect for rear springs. Hopefully they don't get too stiff when I cut them down to the required height. The shock mounts you see in the cross member will not be used - I'll be using the factory shock mounts.
I drew up the front mount for the upper trailing arm. Should be enough adjustment. 4th hole from the top is where I ~think~ it would work best for every day sanity, if there is such a thing with this car. Template was used to centerpunch the holes. "Computer-Aided-Design" just means "Very Accurately Done Wrong."
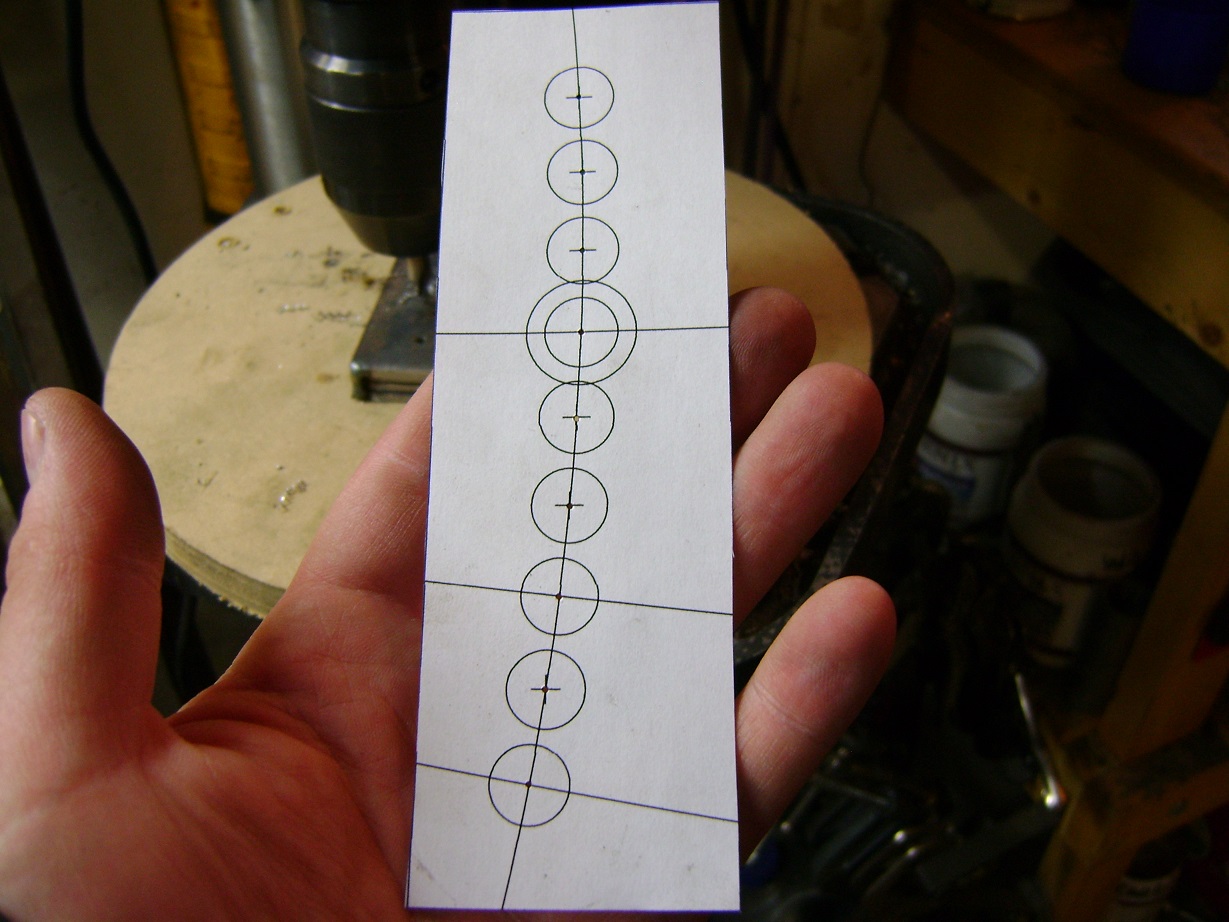
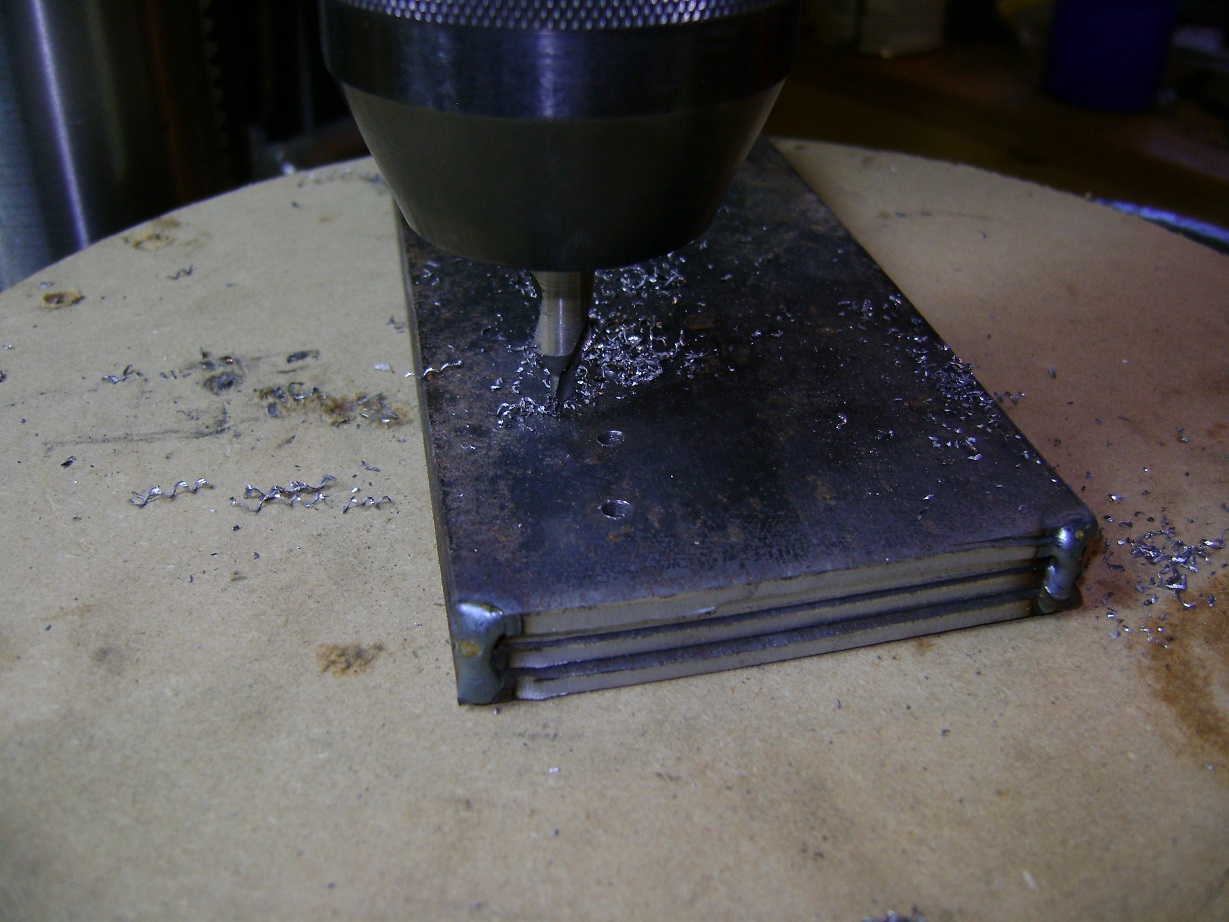
Tip for building a number of the same items - weld the plates together and drill the holes through all the plates. Use a lathe center bit to ensure the holes are drilled exactly where you want them. All subsequent drill sizes will follow the first hole you drill, so make it a good one.
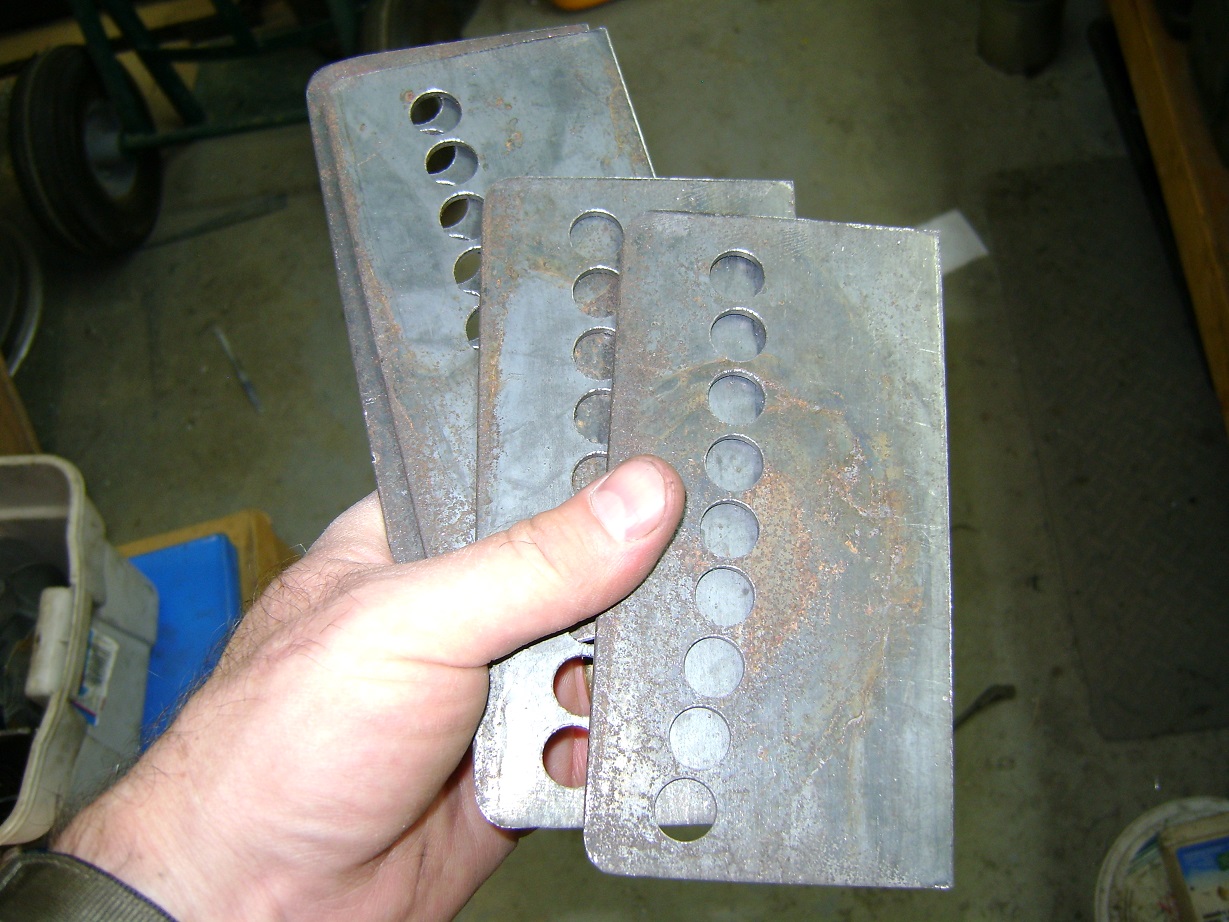
When you are done, grind the welds off, and smooth the edges.
Wanted to get more done today, but instead put a shift kit in a friend's Ford C4. That was a fun job, I like those. Kids will be away for a couple days, camping with the grandparents, so I hope to get the trailing arm mounts completed this week.
You'll need to log in to post.


