


Wow - so much win here. So impressed with how much thought and ingenuity you have in the suspension.

Wow - so much win here. So impressed with how much thought and ingenuity you have in the suspension.

I hope the rocker cover gaskets don't leak ![]()

Great progress. This thing is a real masterpiece. ![]()

We're still alive here. Just not much to report.
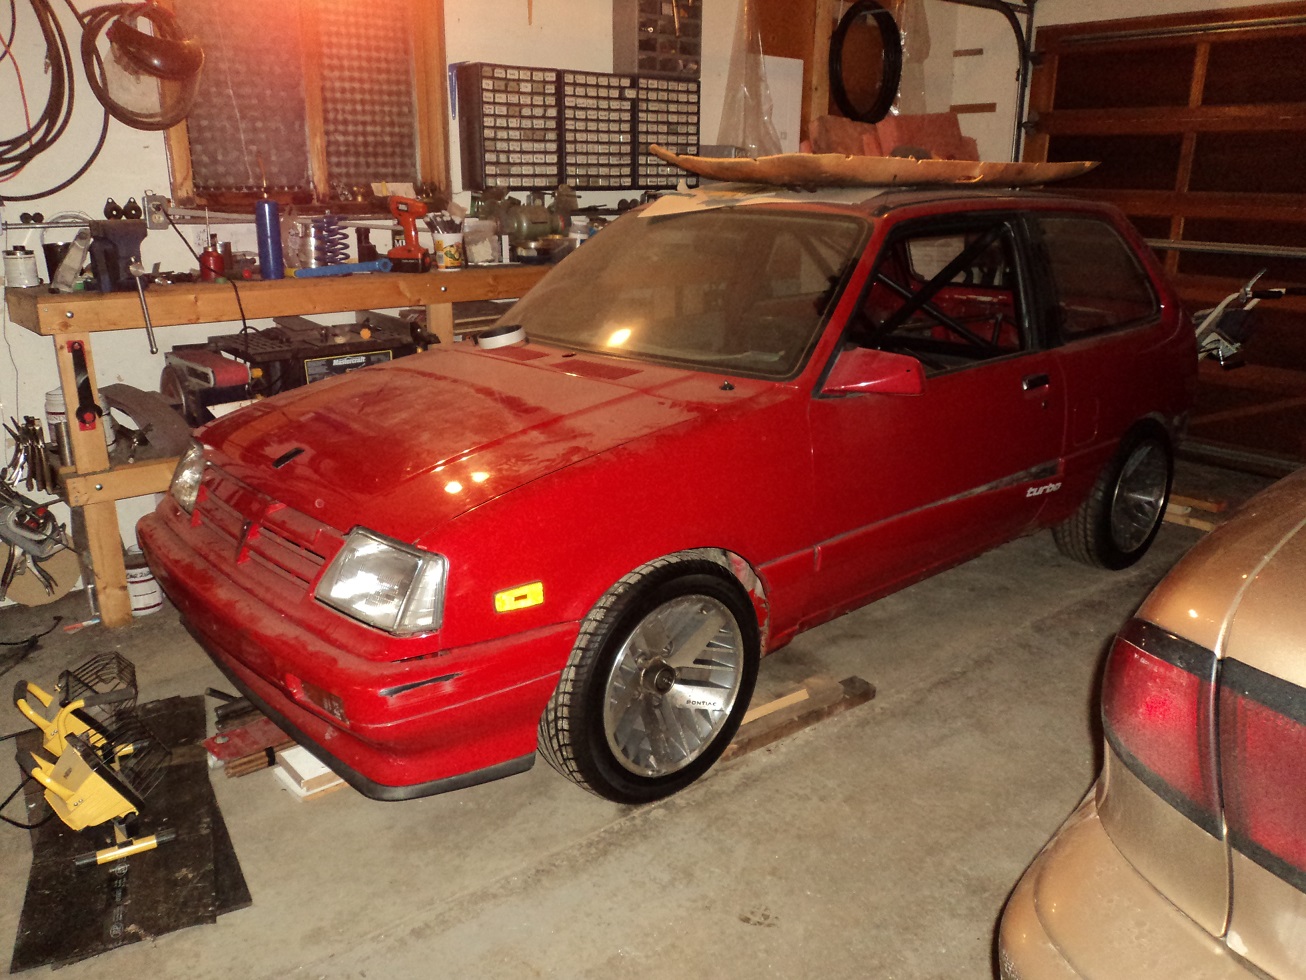
Had my boys (7 and 9) help turn the car around so I can work on the driver's side rocker panel. Nothing new to update, otherwise.
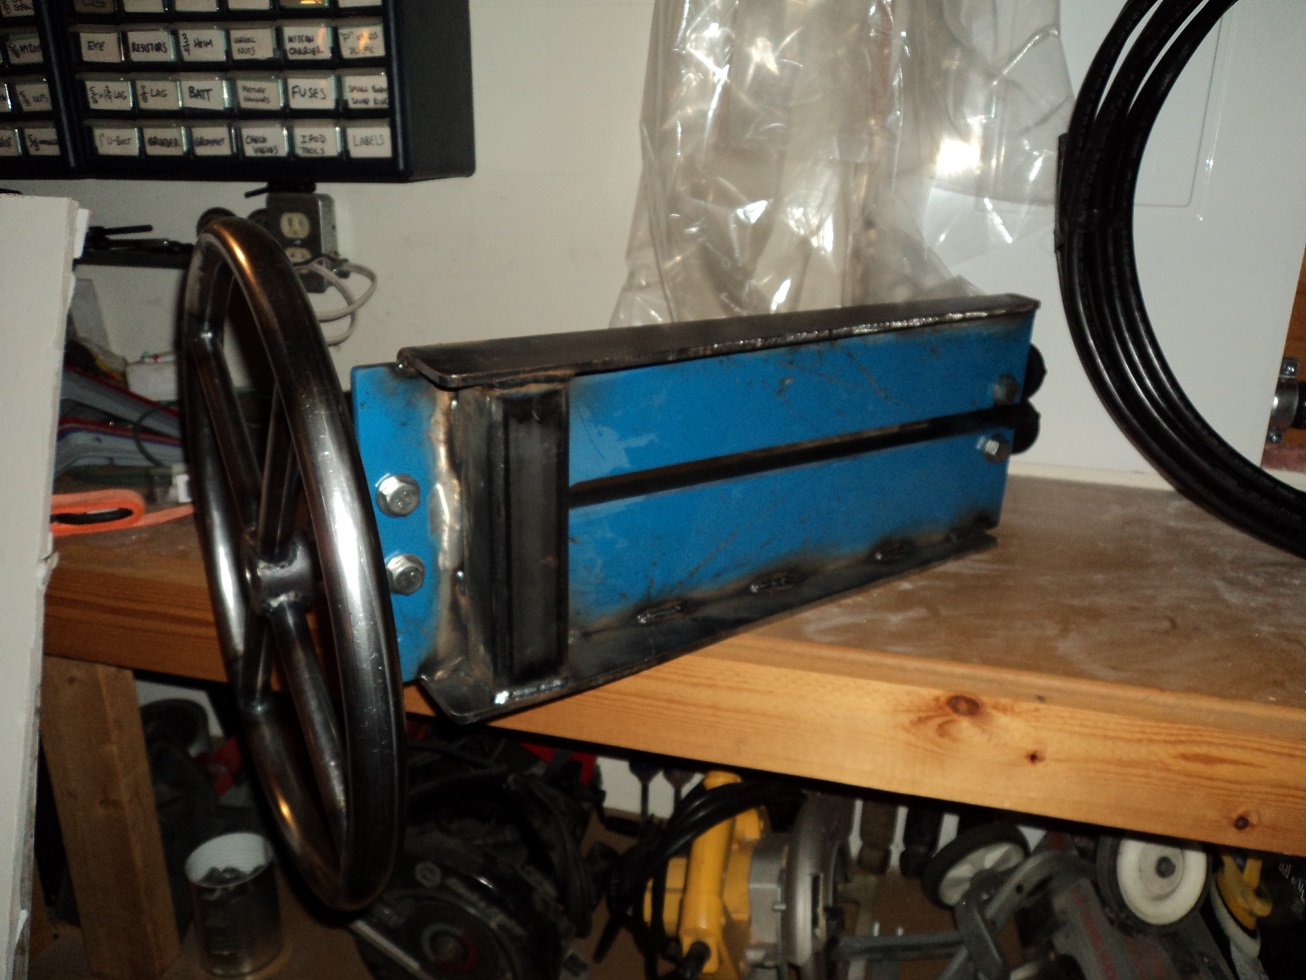
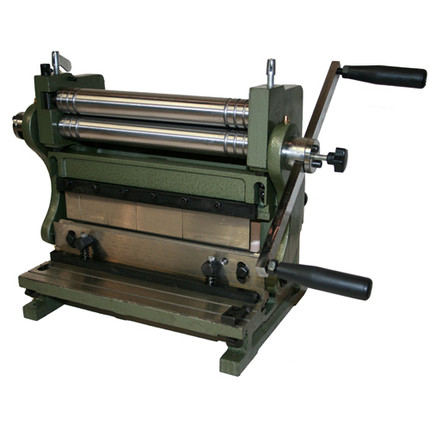
Bought an Eastwood/Harbor-Freight/Woodward-Fab/Princess-Auto/KMS-Tools/Equivalent bead roller on sale, which should help out when doing the floors later on. Added the obligatory reinforcements, and also fabricated a wheel to replace the crank for more precise control.
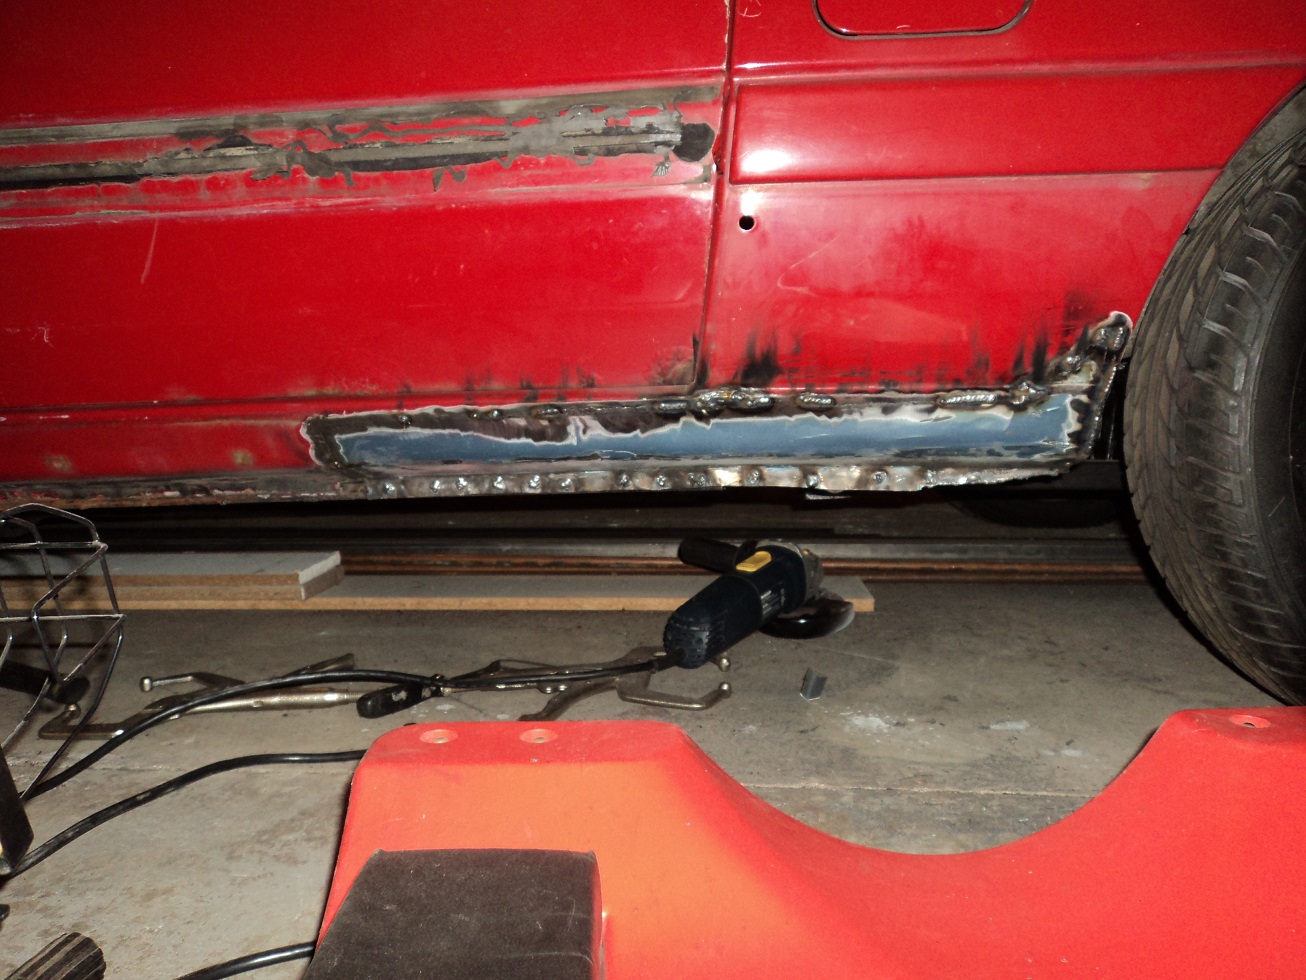
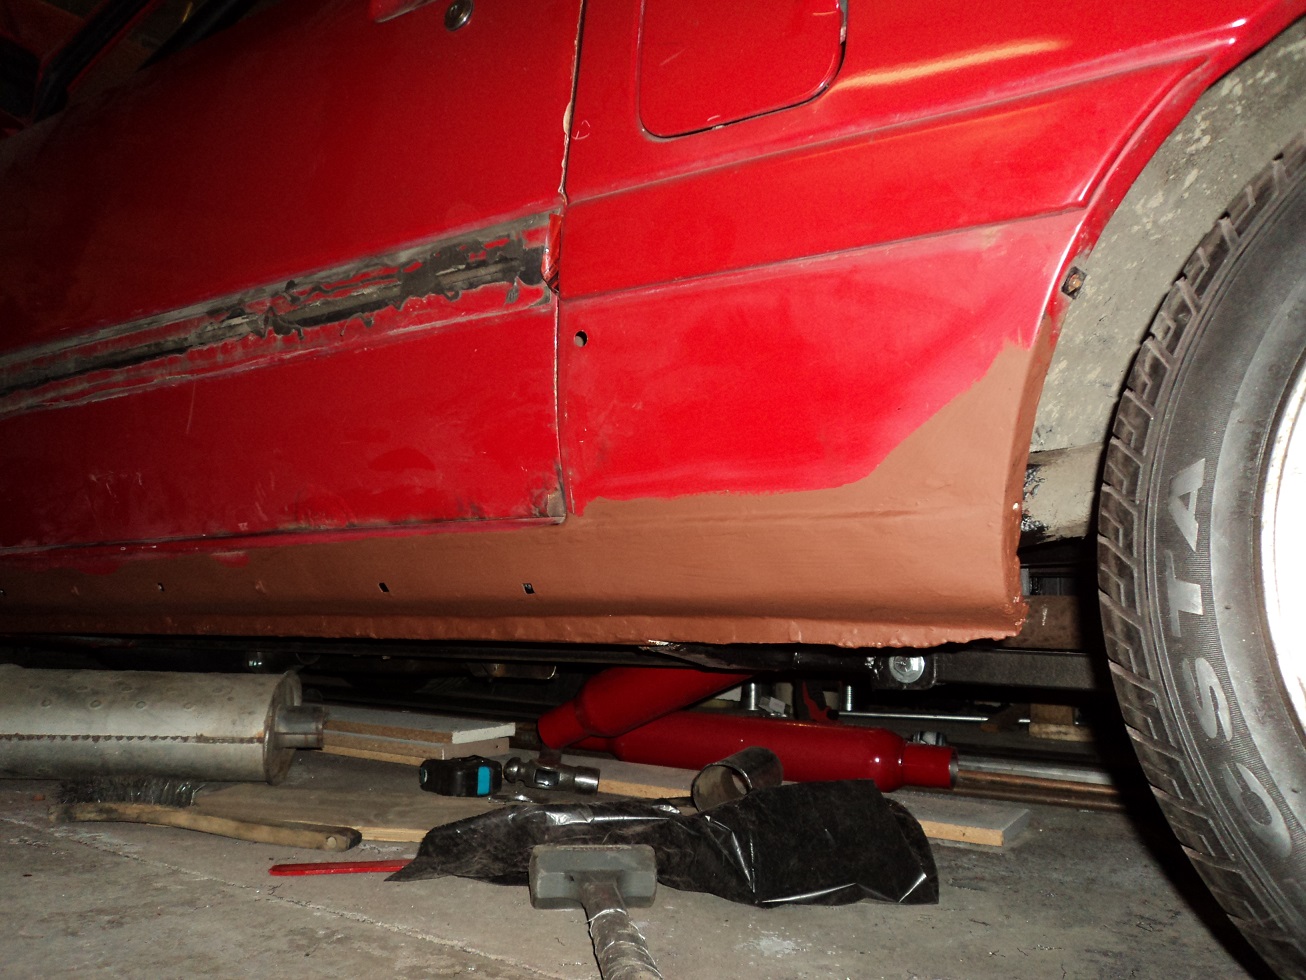
I'm not dead yet. I feel like going for a walk.... *sigh* More body work. I didn't have a rusty pair of pliers to extract my own teeth sans anesthetic, so bodywork will have to do. Chasing pinholes in this picture. This side will require a bit more finishing, since not all of the repair will be hidden by the plastic skirting.
I did a much better job in forming this panel. Good experience for future awesomeness. If I ever get there.
In my past, this would have been expanding spray foam and a thin skim of filler.
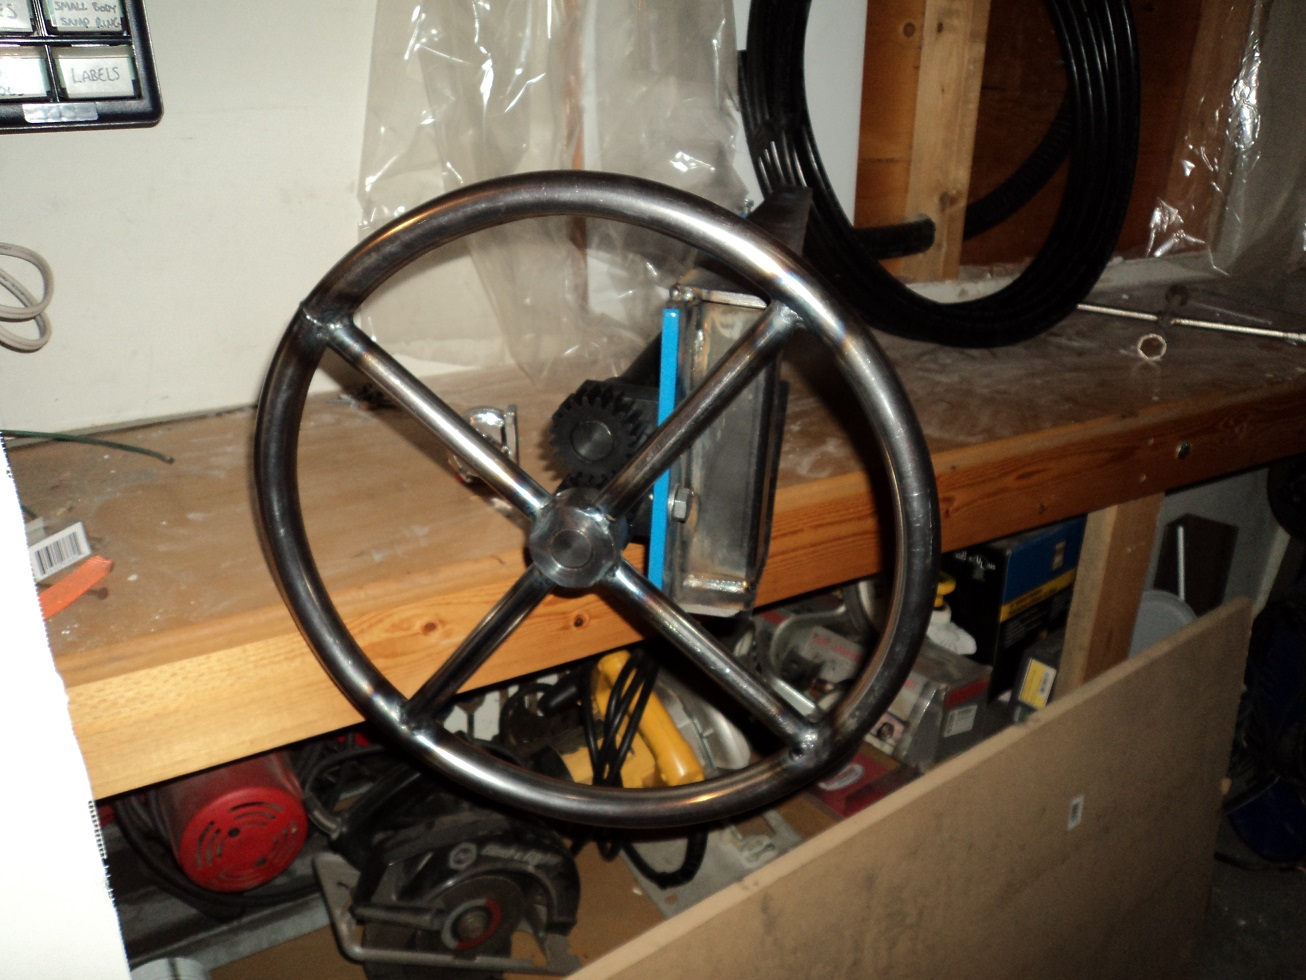
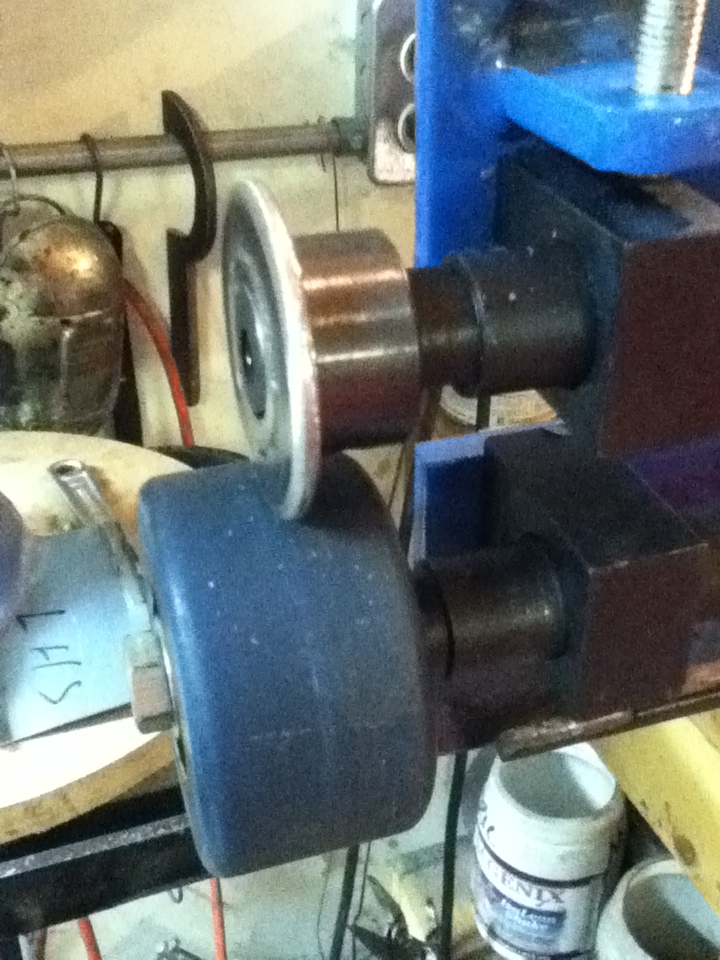
I thought I needed a "Tipping Wheel," which did not come with my bead roller. So..... I made one. I used a 7/8" ID sprocket hub, and the largest sprocket Princess Auto had, but then machined the teeth off. A tipping wheel is useful for forming flanges on sheet metal, and particularly good at curved flanges, which a sheet metal brake cannot do.
As I understand it (and I am no pro at this), a tipping wheel works best with a soft wheel below it (I used a wheel from my street luge).
Just fearfully added receipts up, aaaaaaand........ - I am still under budget! YAY! Only $1500 into it so far!!!!
SkinnyG wrote: Just fearfully added receipts up, aaaaaaand........ - I am still under budget! YAY! Only $1500 into it so far!!!!
From an interested board member-Wohoo! From a fellow challenger-uh oh.....![]()
JK-I welcome the nutty competition. ![]()

WOW! This is such a great project! I wish my shop teacher was as interested in the performance and madness part of the auto industry as you...those kids are lucky! Good luck on an awesome build! One day I will try and build my favorite dream build...Mid engine Honda Civic. I know it has been done but I want to do it on a challenge budget with some friends.
If I were to do a mid engine Civic, I would instead just grab another civic front cut, and put it in the back. Two engines. AWD. All Honda. Google the twin-engine Durocco for inspiration.

In reply to SkinnyG: I saw your post about the bead roller and pedaled my bike over to the local PA and bought one. I've picked up a few books on sheet metal repair and knew about some of the tools of the trade but they always seemed...expensive. I've already looked up what mods I'll need to do to reenforce the frame.

Moving_Target wrote: In reply to SkinnyG: I saw your post about the bead roller and pedaled my bike over to the local PA and bought one. I've picked up a few books on sheet metal repair and knew about some of the tools of the trade but they always seemed...expensive. I've already looked up what mods I'll need to do to reenforce the frame.
Beware the metal shaping bug. It is a slippery slope.
My most used tool is the 3in one pressbrake, shear and sliproll.
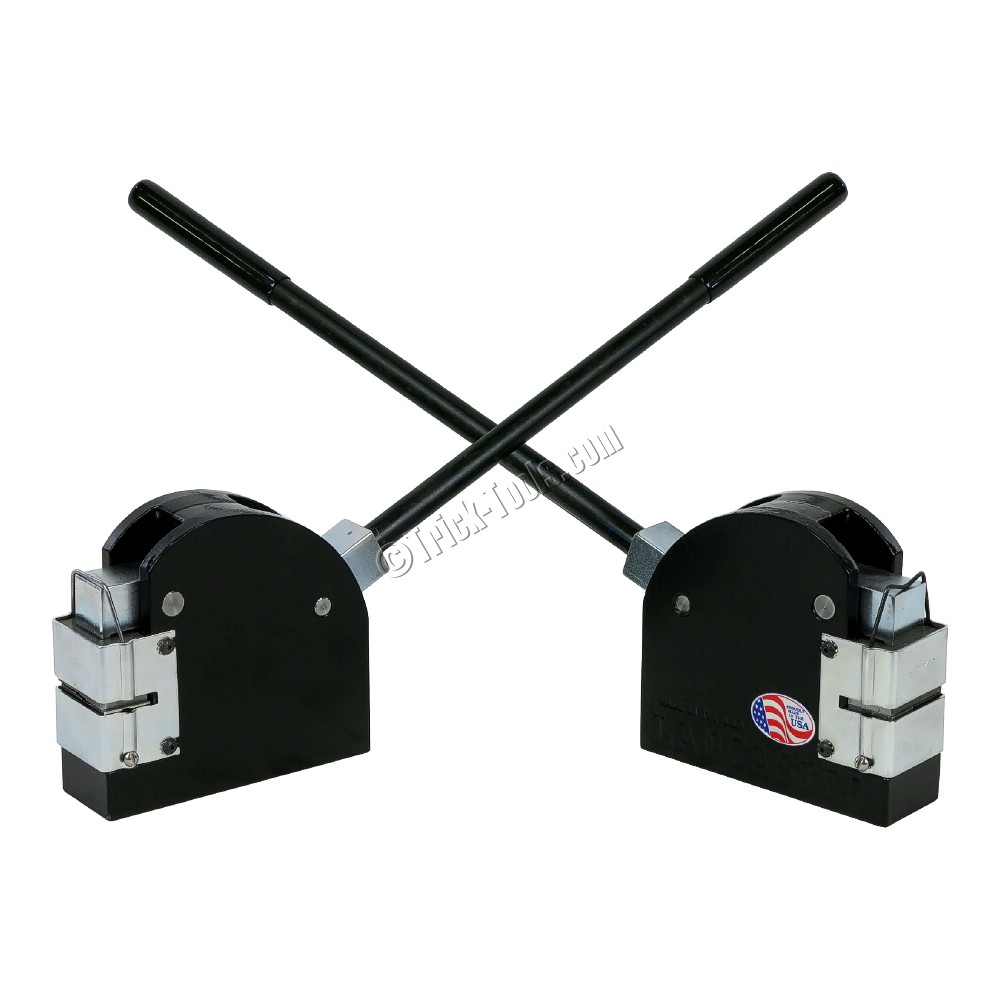
And don't forget the shrinker stretchers; pretty much essential tools for doing bodywork.
I like the twin engine idea but a mid mounted turbo v6 under plexi seems like a track weapon...I remember there was a Hyundai Tiburon twin engine car...cheezy turbo kit no intercooler automatic with a very well concealed rear engine that ran 10's all day, in the rain or in a sandy parking lot...and the donuts were epic! I'm sure he took lots of 5.0 money...
In reply to NOHOME:
But however shall I fit those things on my 10 speed? ![]() I'll have to swing by there again
and see if I can coax more stuff into my bike basket. I will most probably get the shrinker/stretcher combo. The 3-in-1 is bigger and more money so I think I'll wait on it.
I'll have to swing by there again
and see if I can coax more stuff into my bike basket. I will most probably get the shrinker/stretcher combo. The 3-in-1 is bigger and more money so I think I'll wait on it.
I hear you on the slippery slope. And it's already on its way - I'm saving up for the shrinker/stretcher already.
I detest doing bodywork, and yet - if it's a masterable skill, I should be able to master it. Cussing all the way. A former Department Head told me I hated bodywork because I wasn't good at it, and that once I got good at it, I would really get into it. Slippery slippery indeed.
Seam-sealing the rocker tonight, then maybe figure out how to route exhaust.
Thick coat of Tremclad Primer. I'm very pleased with this panel. Nice stuff! Soon the plastic "Turbo" skirting will go on.
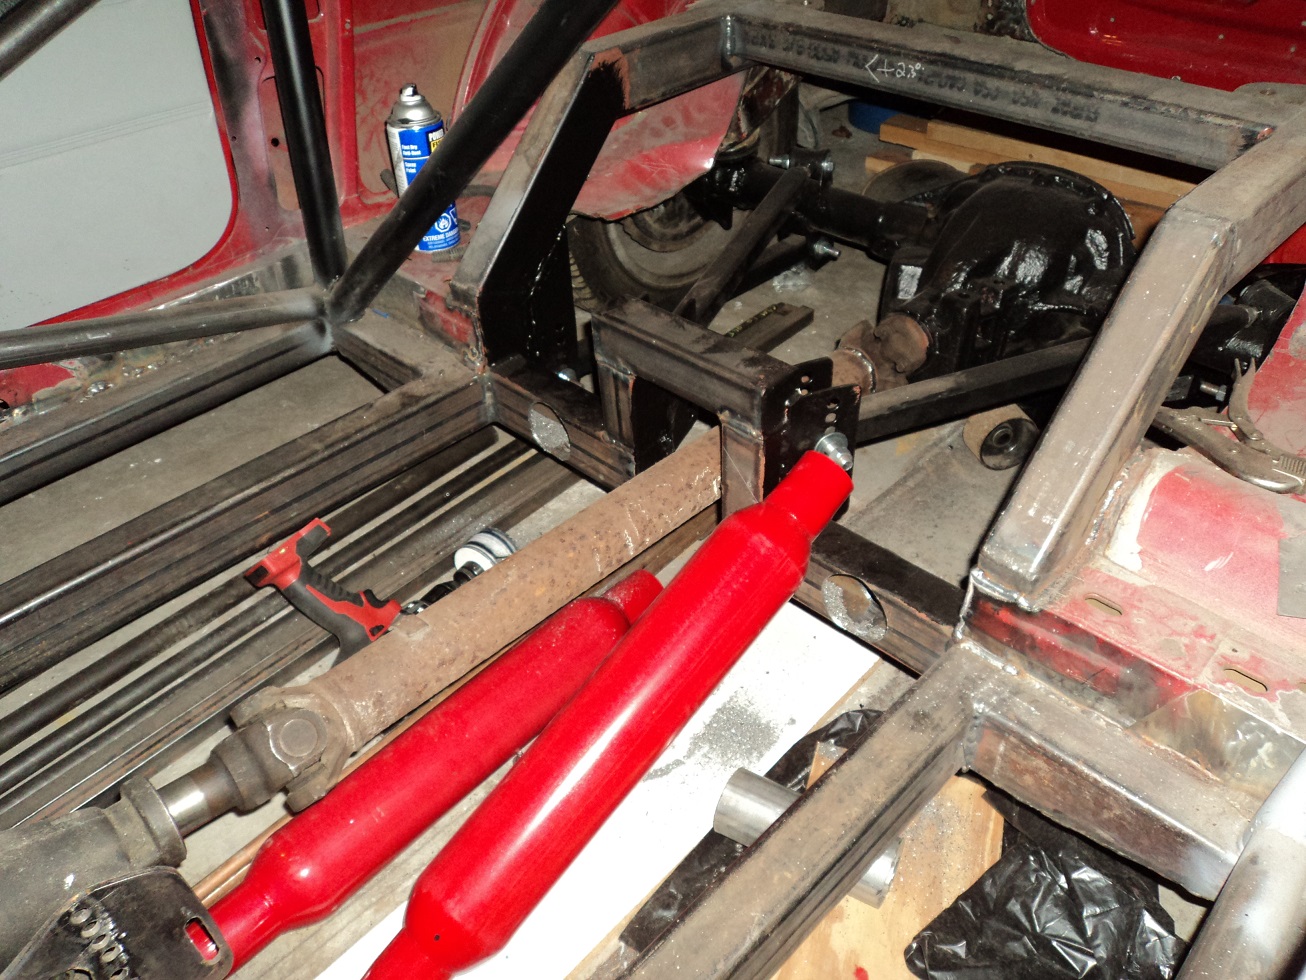
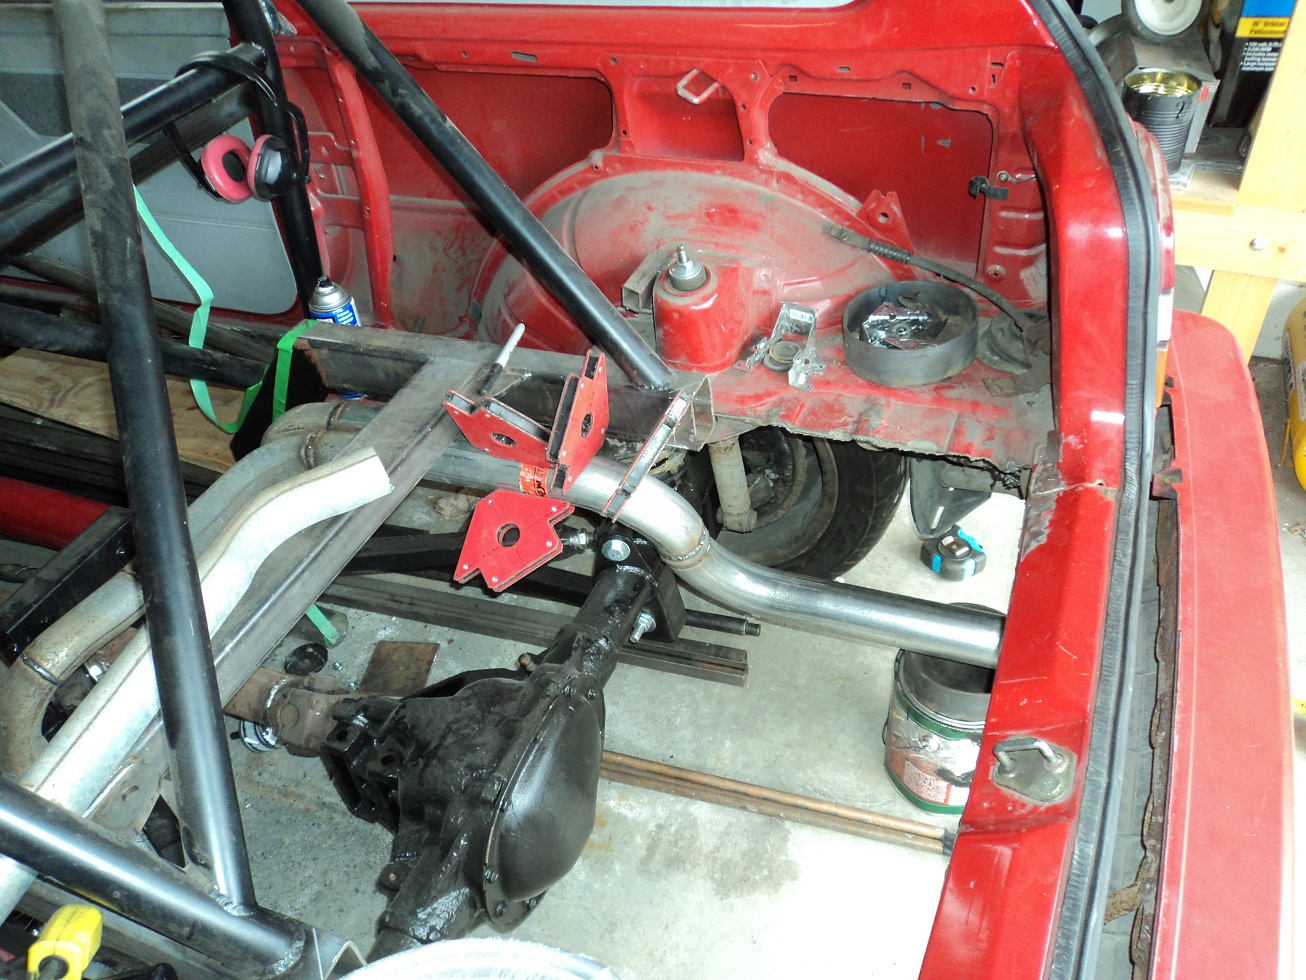
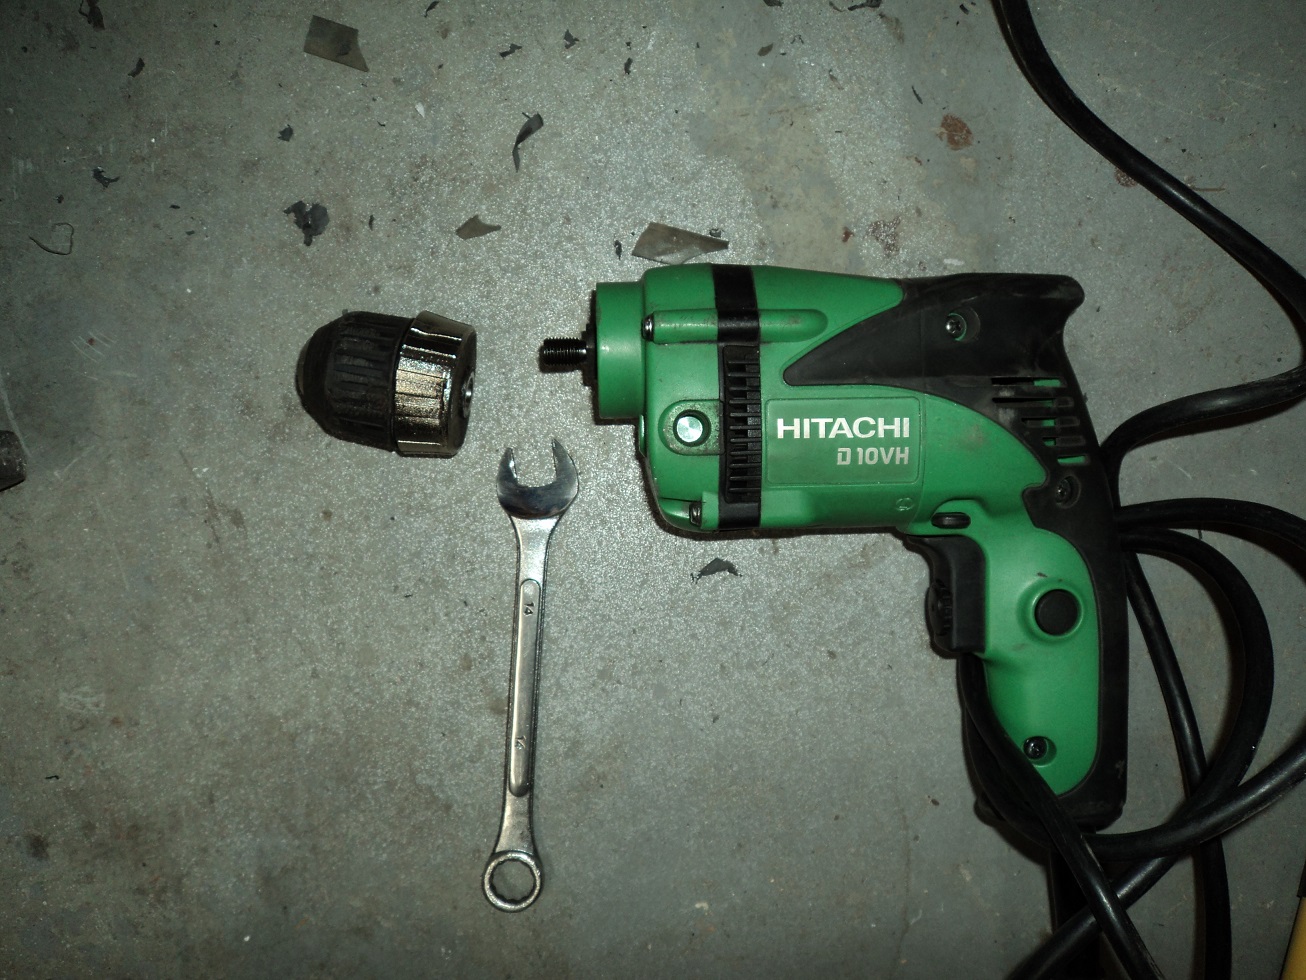
Also spent some time trying to figure out the exhaust. Ideally, I wanted a single-in/dual-out in the stock location, but there really isn't any room for that behind the axle; it would need to be about 12" long. In the end, a pair of glasspacks won out. I am in the midst of drilling a 2-3/4" hole through the rear frame crossmember. My cordless drill has the only 1/2" chuck, and I am eating through batteries pretty quick in doing so. Also started to figure out how to create some inner fenders up front.
In the mean-time, I have dropped off a building permit application for my impending Workshop in the backyard.
Sorting out the exhaust a bit more. Drilling 2-3/4" holes in the frame exploded the chuck on my corded Hitachi drill, as well as jammed the speed switch on my 18V Milwaukee cordless. I nicked the two-handled Makita single-speed wrist-breaker from work to finish the job. I fixed the Milwaukee, but not after snapping the tip off my T10 tamperproof Torx screwdriver. Not sure how to get the chuck off the Hitachi.

Still working out how the exhaust will exit out the back.

Shouldn't the chuck be a Morris taper? Or is that just drill presses?
I would think so - but I'm not sure. I'll be digging up the manual and searching on line. There is what appears to be the flats for a wrench in between the chuck and the drill body, I just need to "trim" a wrench and see if it does something. In all honesty, I don't use the corded Hitachi much.
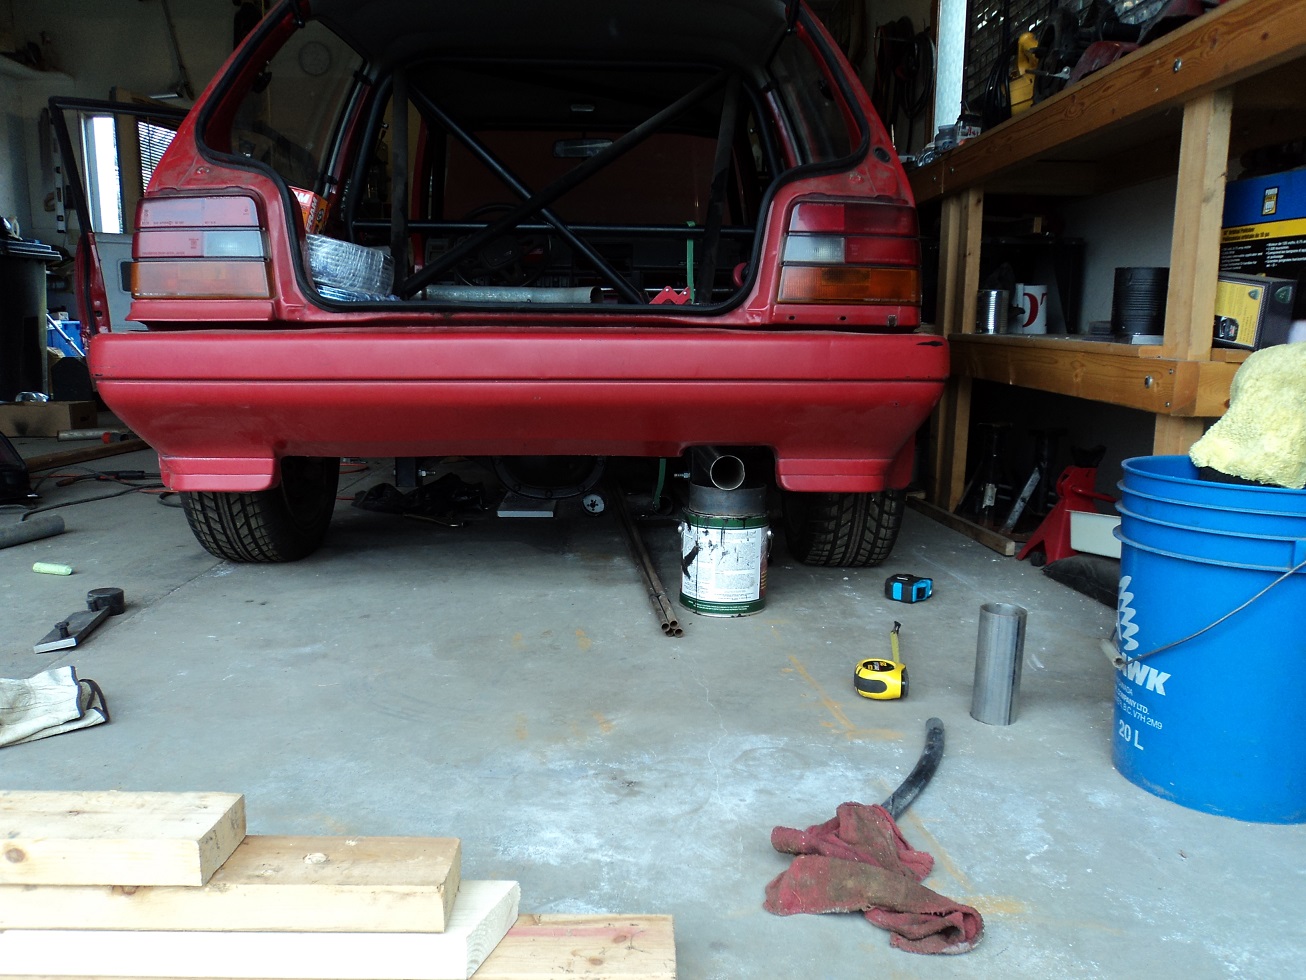
Got some more work done on the exhaust. You will notice the cost-effectiveness of using as much used pipe as I can (or had on hand). I decided, for ease of packaging, to join the dual 2" pipe into a 2-1/2" tail pipe. I formed my own "collector."
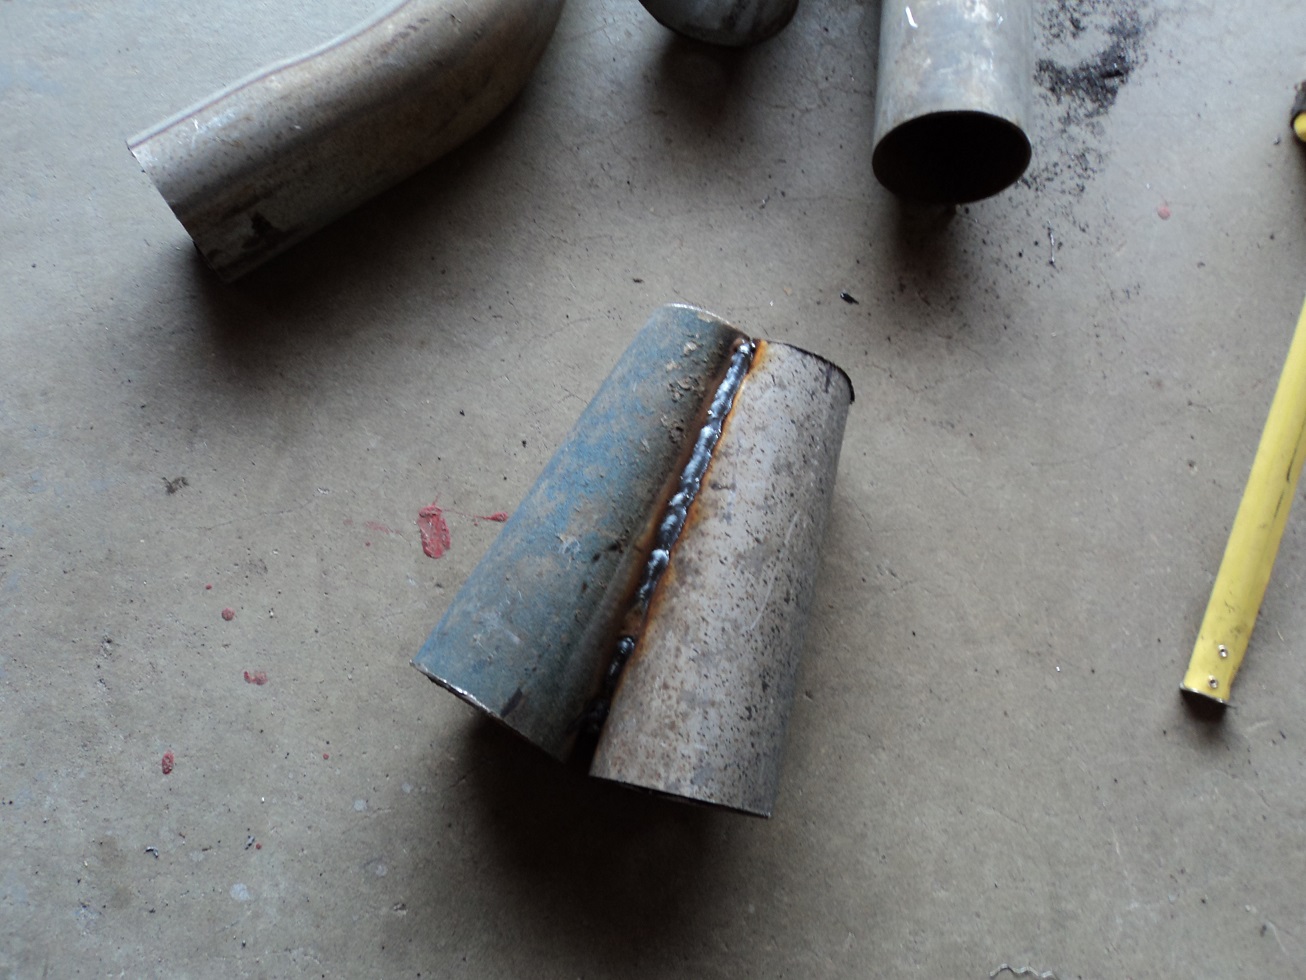
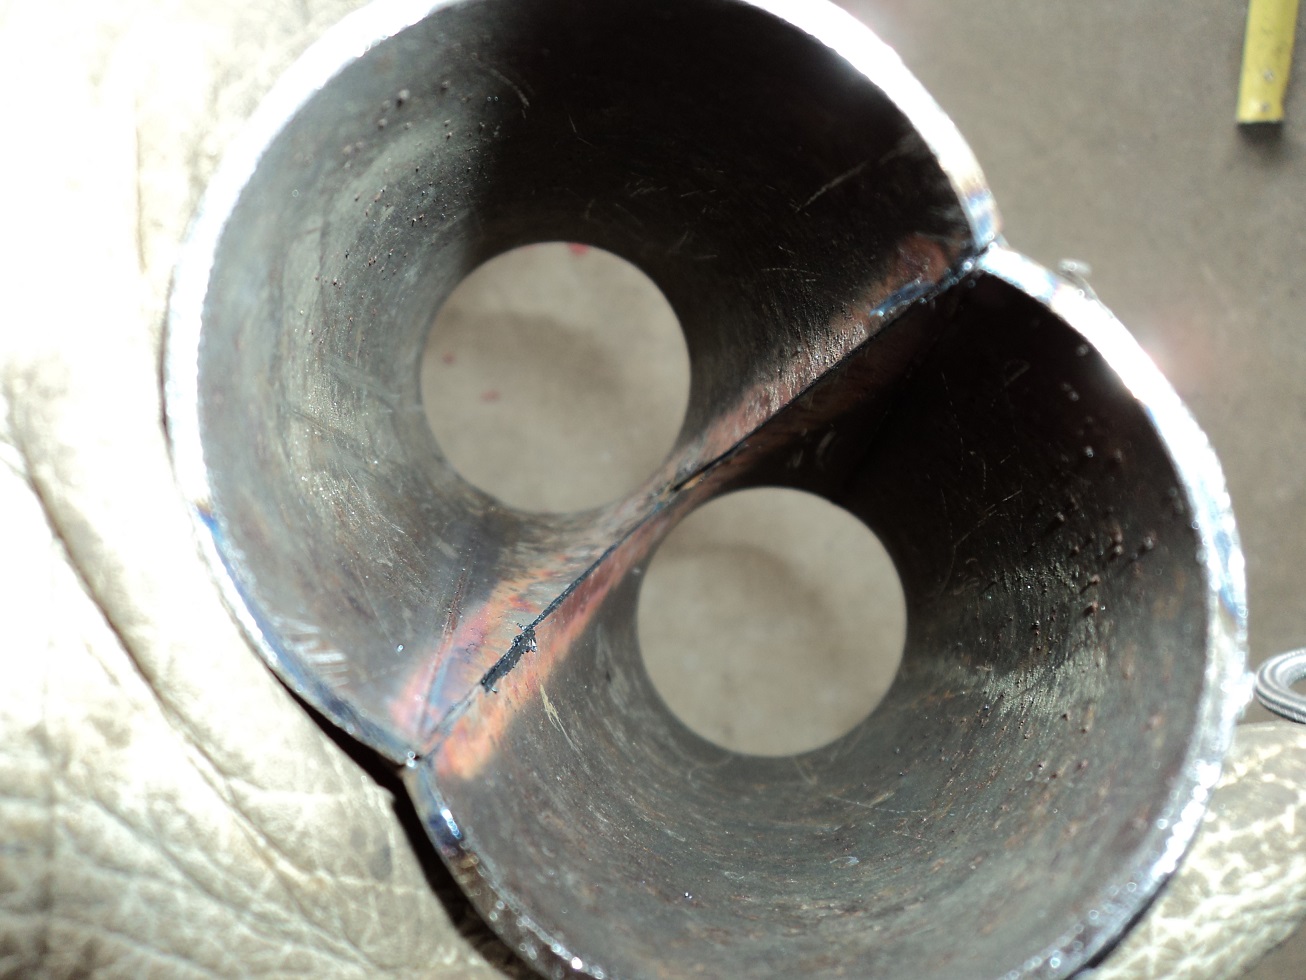
Then I welded that to a section of 2-1/2", and creased the perimeter where the two tubes intersected, to transition smoothly. Again, piecing it all together with used:
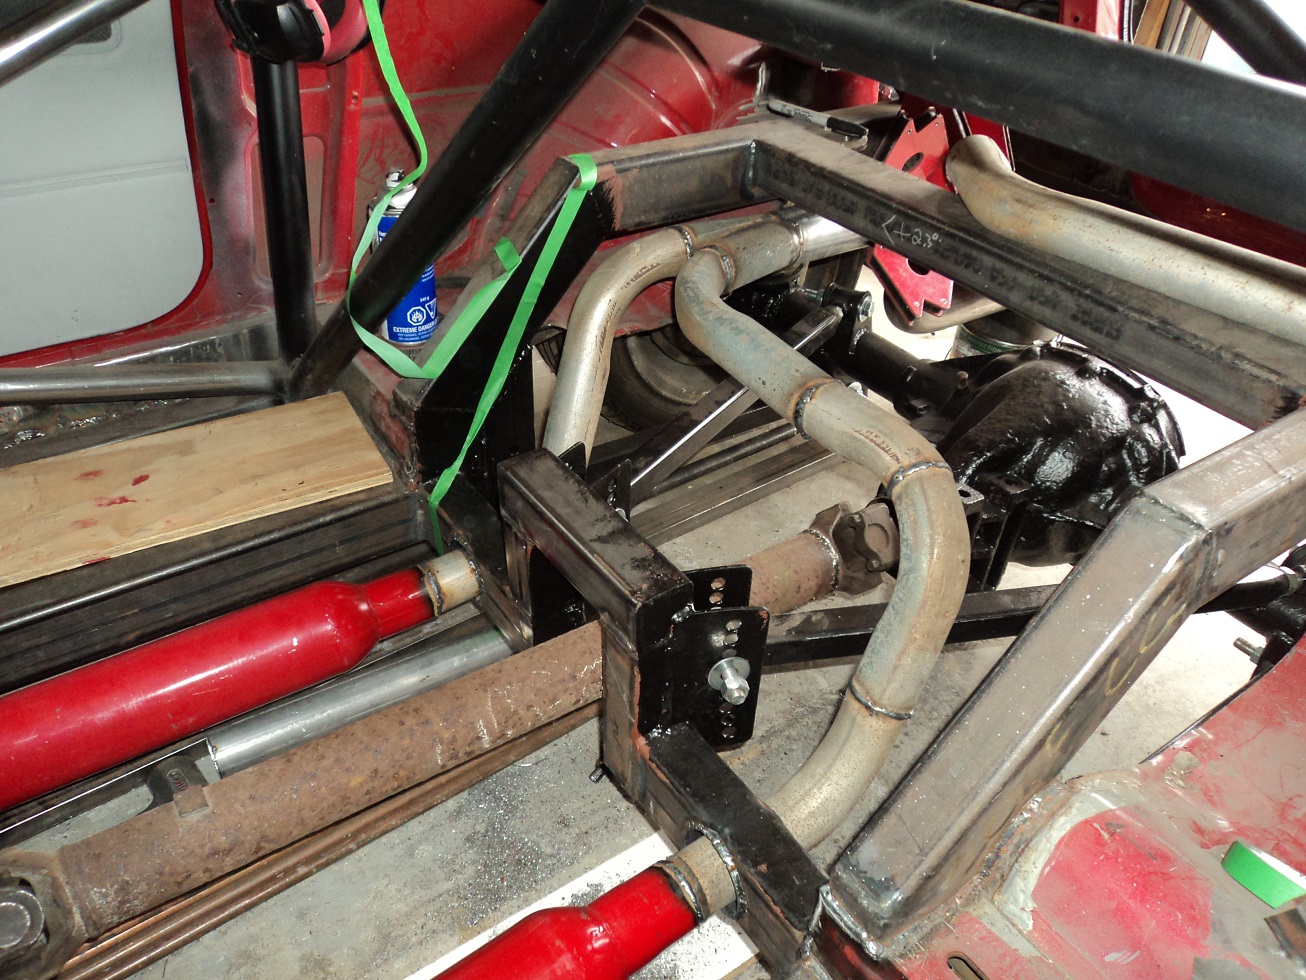
And finished it off with an un-used mandrel-bend 2-1/2" from The Crusty Chevy:
Looks like I could use a bling chrome tip, or dual tip on the back:
Put a thick coat of Tremclad Red over the Tremclad Primer. Probably do two more coats, then stick the skirts on.
Finished welding the exhaust, and adding a hanger at the back. Seems good.
Tomorrow I may tackle mocking a gas tank up in cardboard. Or wiring.
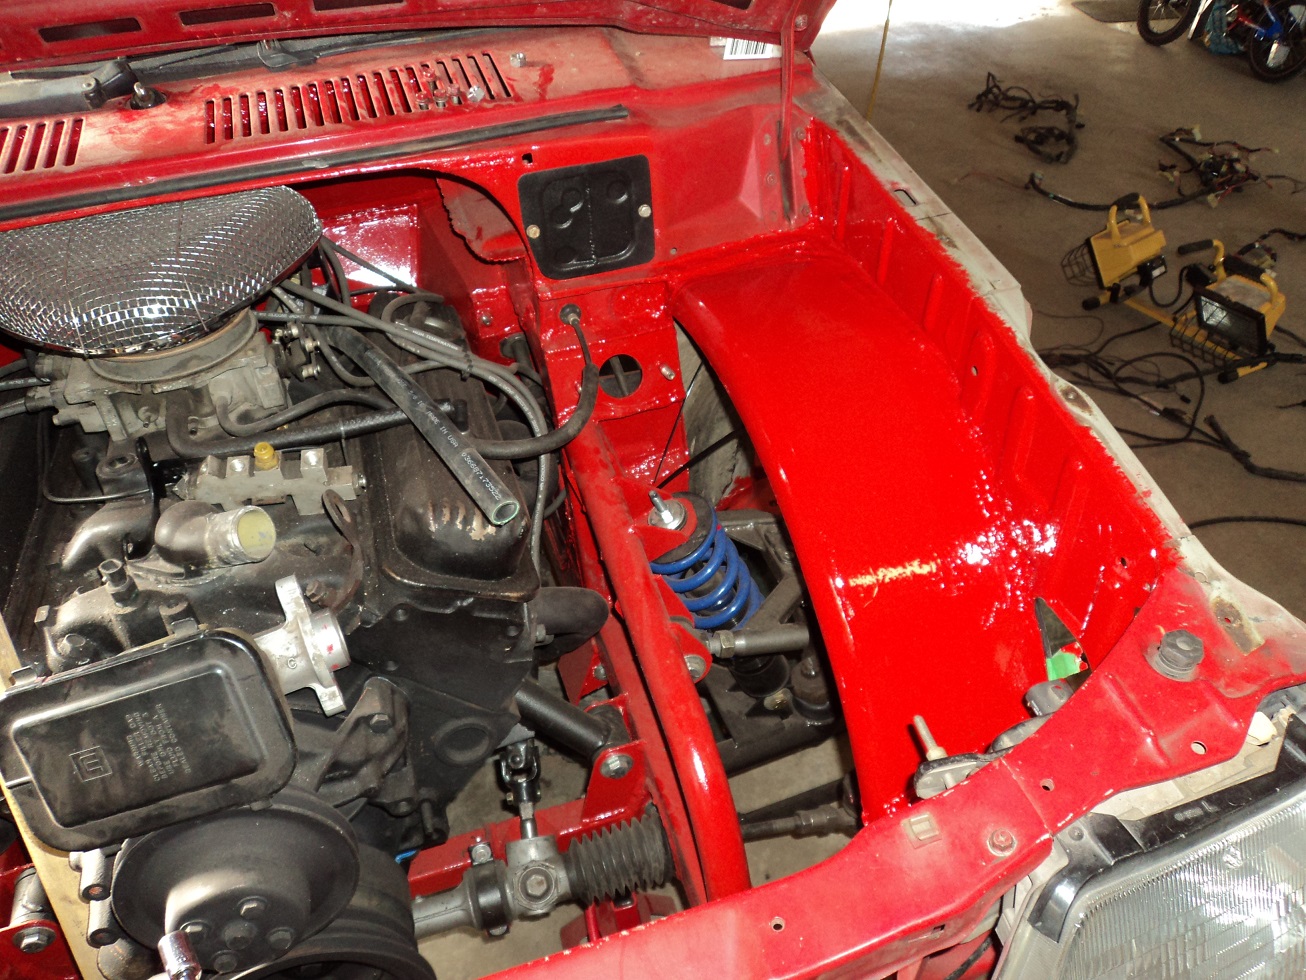
Apparently today I tackled the inner fenders up front. Inner fenders were fabricated from one sale-priced trailer fender from Princess Auto. I bought it last year. Each side is one half. This actually went surprisingly well.
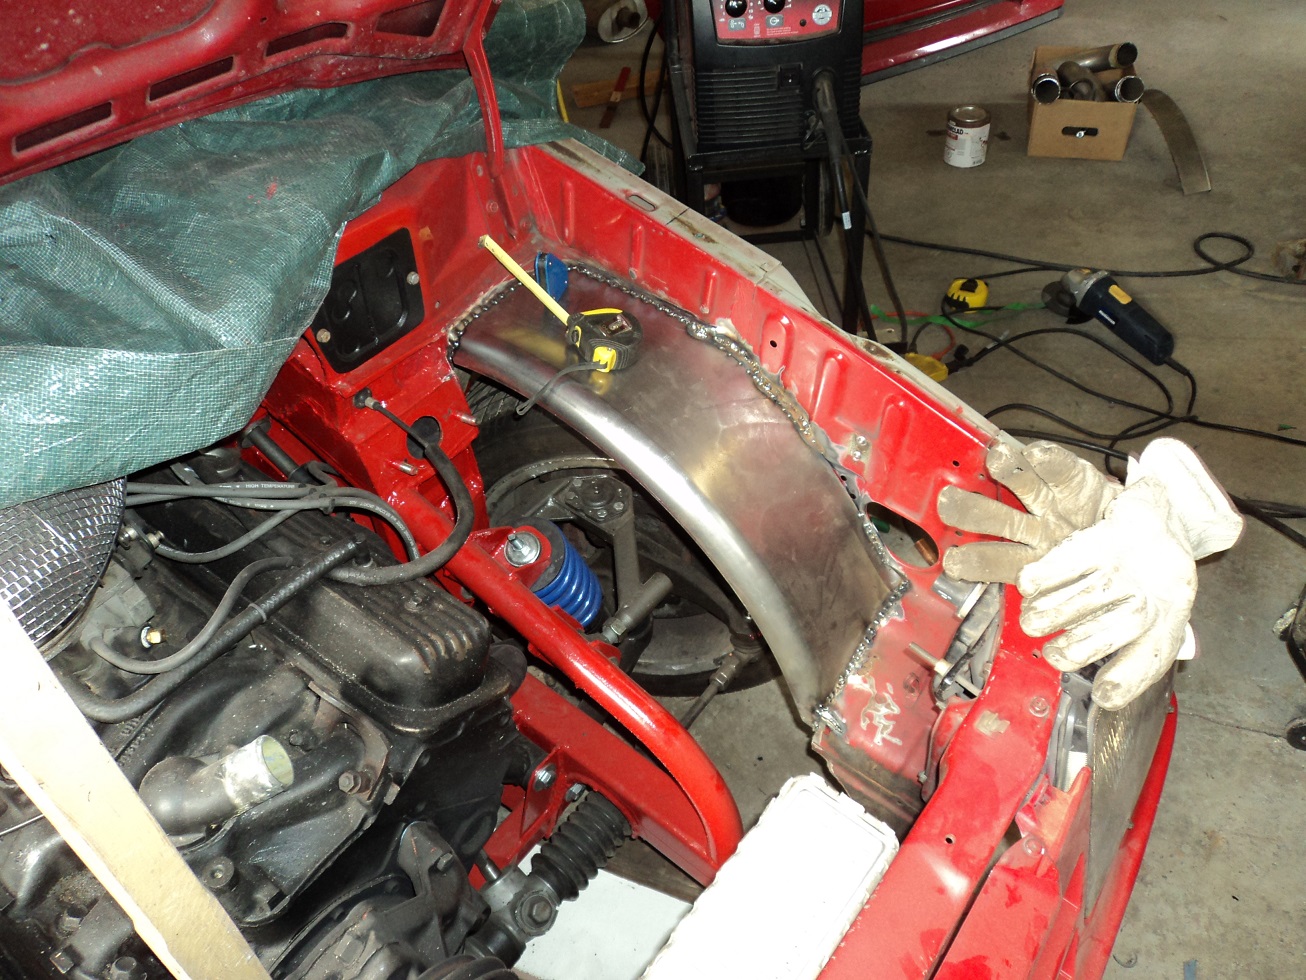
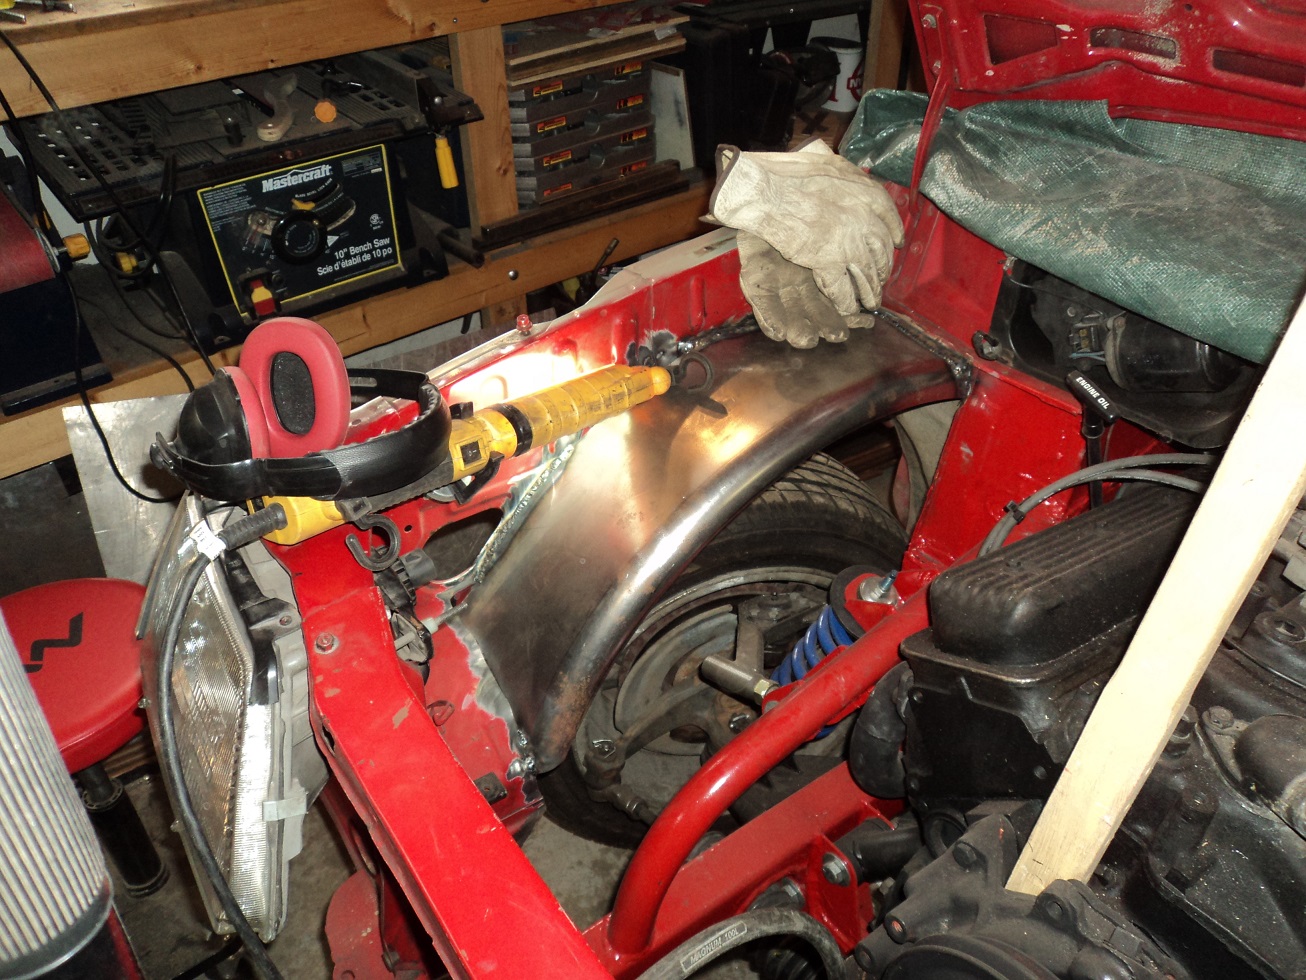
I also boxed in the front sections cut frame (not shown, but they are down in the lower front fender bottoms), and gave it a thick coat of Tremclad Primer.
An 11 x 11 x 33 fuel tank will fit nicely. Looking to see if I actually want to make it more complex than that.
Dusterbd13 wrote: Shouldn't the chuck be a Morris taper? Or is that just drill presses?
Got the chuck off the Hitachi. It's a wee thread in there. It took a substantial amount of abuse to get it off - likely the chatter from drilling locked it down good, before grenading the jaws. I saw chucks at Princess Auto today, so I may go get a new chuck. Decent drill, otherwise.
Primer wasn't fully dry on the inner fenders yet, so no seam sealing or red paint. Did a thorough cleanup in the garage so my sweetie can park in there again.
In reply to SkinnyG:
A happy sweety that can park in the garage is always a must.
Good news!
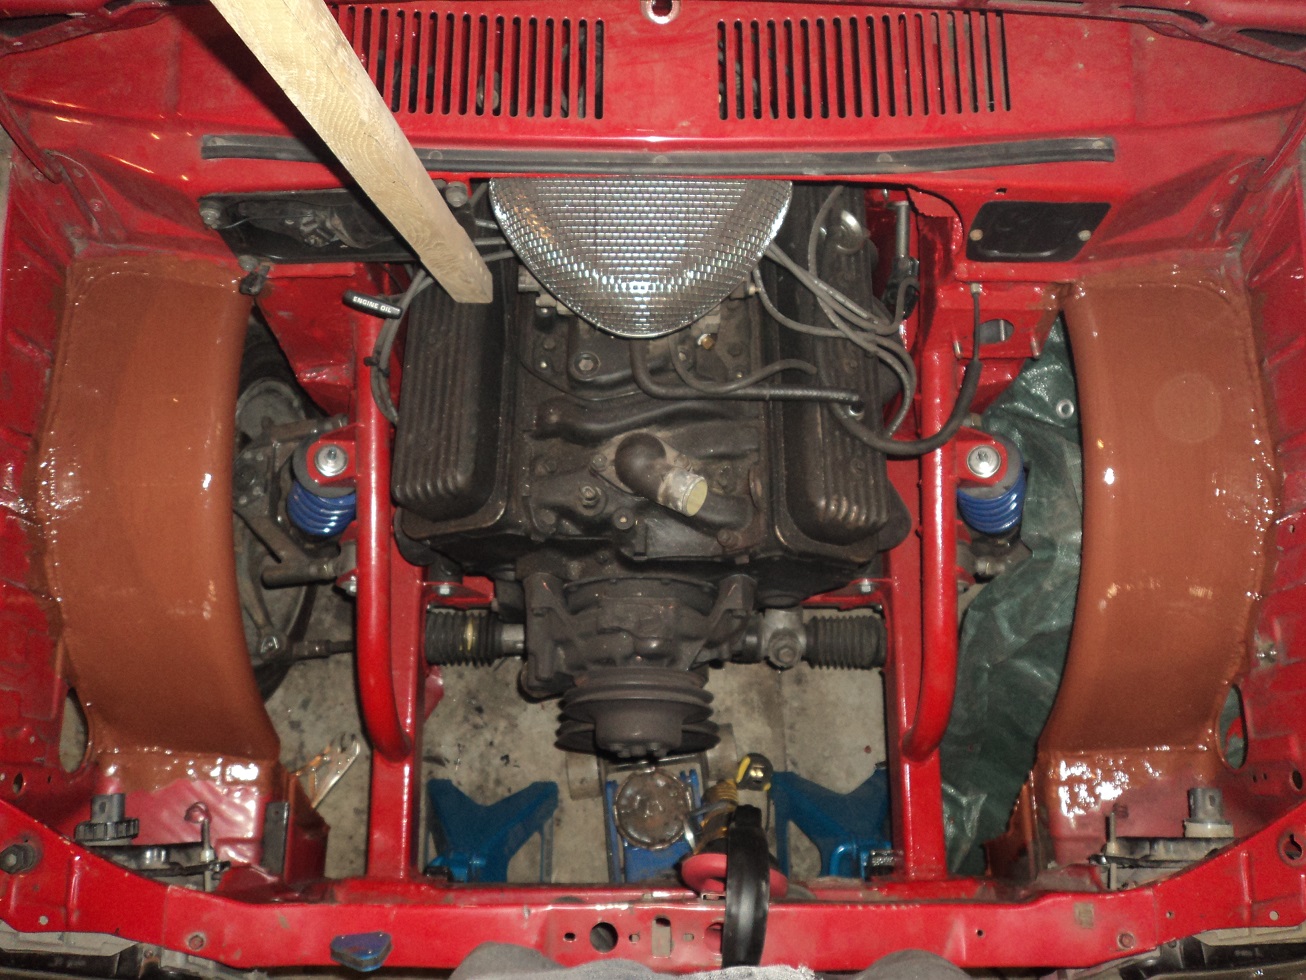
It looks like I can still run windshield wipers. The links run between the distributor and the air filter.
Applied seam sealer to the inner fenders. Likely paint tomorrow. Figuring where the windshield squirter and rad overflow bottles will go.
Also brought the wiring up from the basement. This is going to be fun.
Painted the inner fenders.
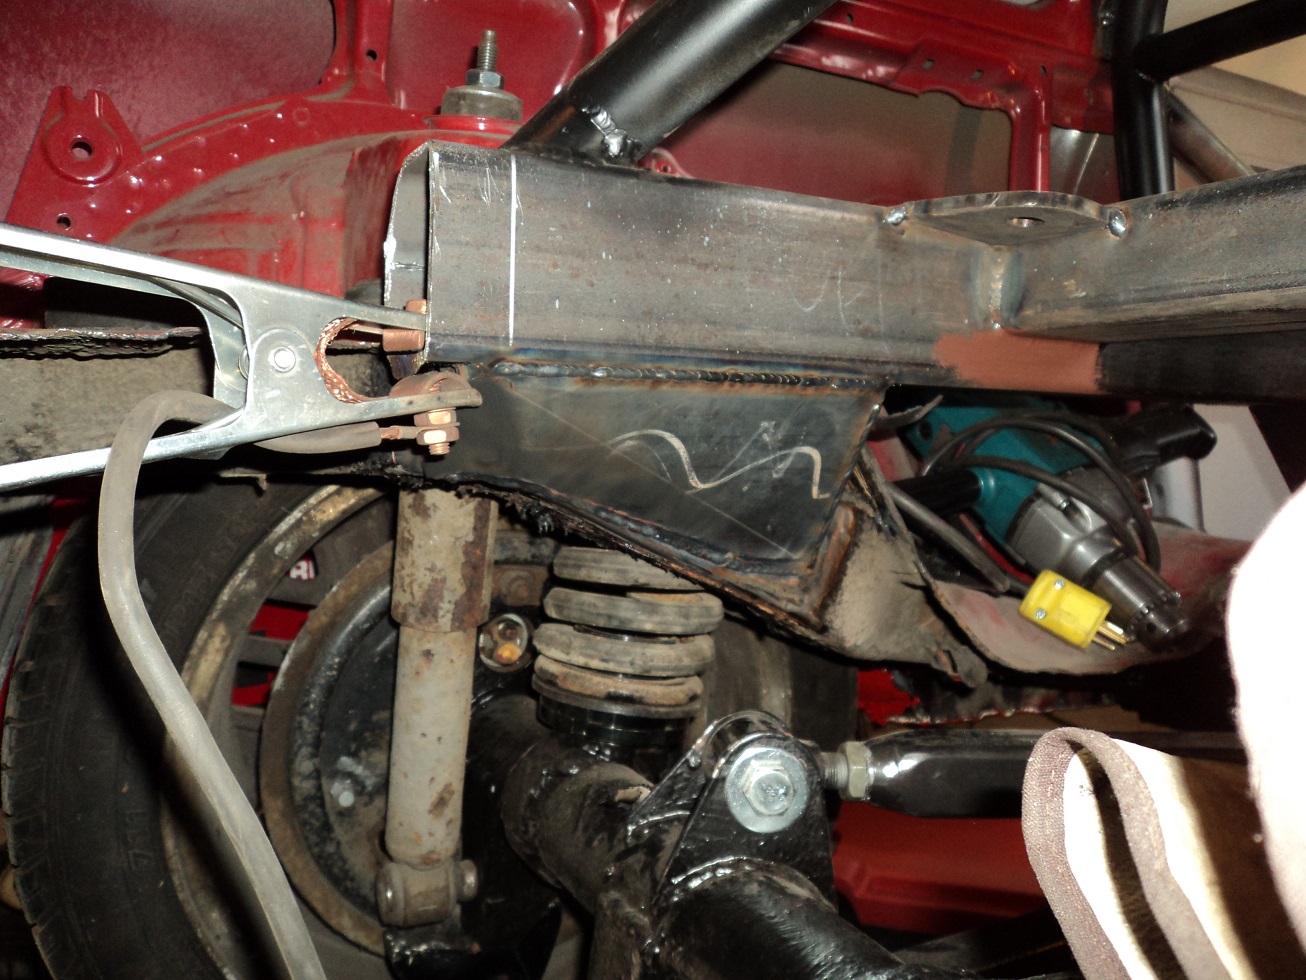
And tied the original spring mount/sub-frame to the full frame.
I think I'm loving Spring Break here.
You'll need to log in to post.


