Now, on to the brakes.
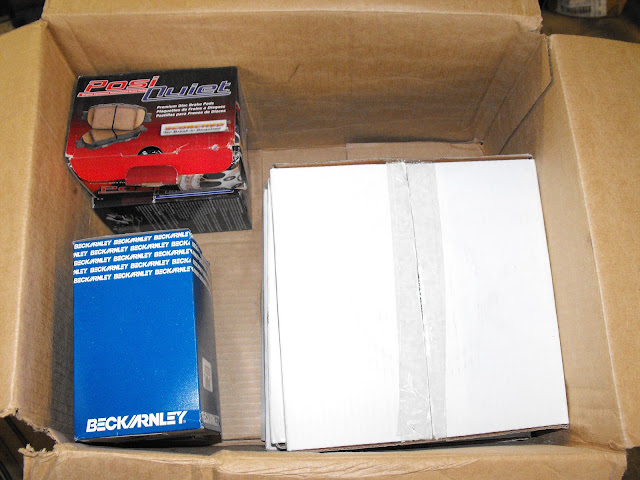
I've been agonizing over what setup to run for rotors and pads since this will be mostly a track car. I was on the fence with Centric vs Brembo blank rotors, but ended up going with the Centrics. If they don't hold up well I'll try the Brembos next. I've decided to run Hawk DTC-60 pads front and rear, but wanted to get something that isn't $200+ for driving to/from the track, so I also picked up some Centric Posi-Quiet pads.
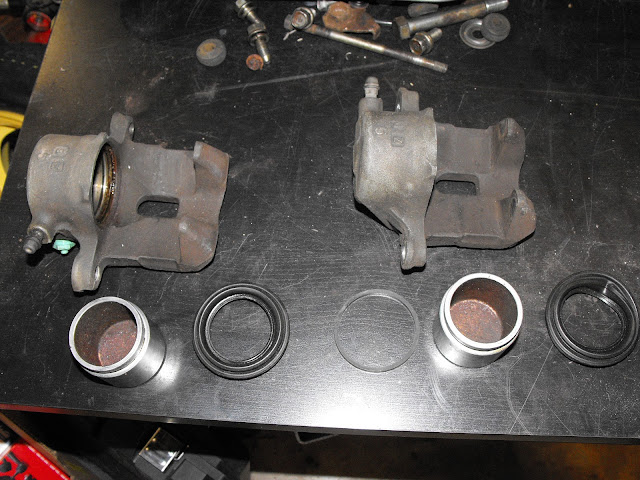
As I mentioned earlier one of the front calipers appeared to be leaking a little fluid, so it needed to be rebuilt or replaced. I brought them in to the shop and shot out the pistons with an air line. The pistons were in good shape so I decided on a rebuild and ordered those parts too.
Here are the disassembled calipers. They were actually in remarkably good shape (other than the leaky seal).
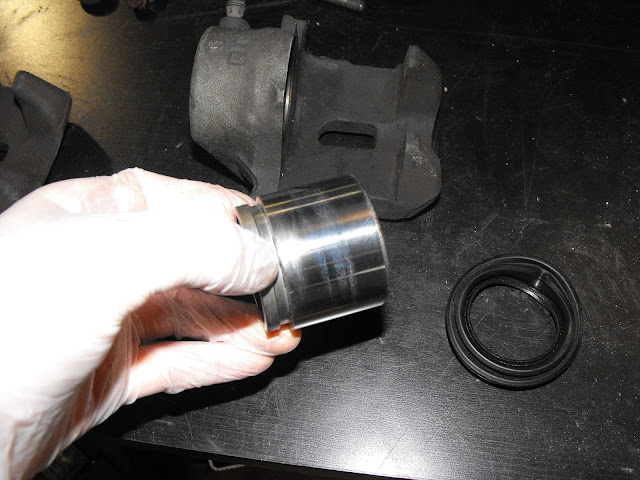
Here's the worst spot of wear on the piston, not too bad, and cleaned up well.
In order to install the new parts, a lot of folks recommend installing the new seal and boot, then using air to blow the boot out around the piston as it's inserted into the caliper bore. I didn't want to take everything back in to the shop to use the air lines, so I came up with another method.
First, I installed the seal, then got the boot around the piston and slid it all the way to the bottom of the piston. Then I worked the boot into the caliper groove, and finally slid the piston into the caliper.
Boot on the bottom of the piston:

Boot worked into place:

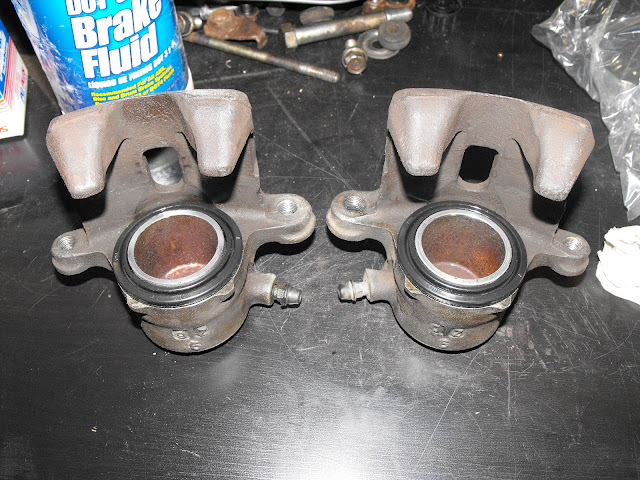
Everything installed and pistons pressed down:
After rebuilding the calipers, I removed all the 1.6 brake parts:

Then I installed the 1.8 brackets front and rear. I also took the chance to clean and lube all the slider pins on the calipers.
Here's the front driver's corner with everything installed.

I got lucky (lucky to live in the South) and didn't have any trouble with the brake adjusters in the rear. I used to dread anything like that when I lived in NY!
When I was doing the rear brakes, I noticed the upper bushing in the spindle was a little off-center.

It's nearly identical to an issue another board member had last year, which I remembered reading about:
http://grassrootsmotorsports.com/forum/grm/i-guess-i-shouldve-listened-to-keiths-advice/47443/page1/
I'll keep an eye on it and maybe order a replacement arm if it seems to be an issue.
One more maintenance item that came in recently was some new fluid for the transmission:
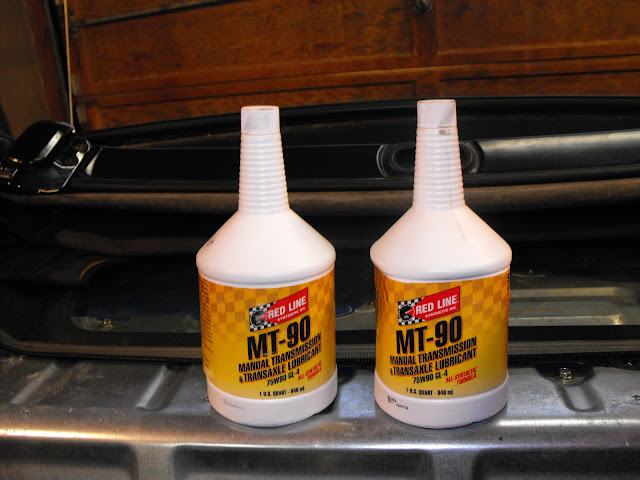
I picked it up from FCP Import http://www.fcpimport.com/. It was quite a bit cheaper than elsewhere and had free shipping.
I still need to change the engine oil and filter, so I'll probably do this at the same time.

And, last thing for this evening - the steering wheel.
This was another item that I had been agonizing over. I wan't sure what size/style wheel I should go for so I took a lot of measurements and spent a few hours checking out difference wheel styles. I did know that I really wanted a quick release so I wouldn't wear out the fabric on the side of my racing seat by wedging myself around the wheel every time I got in/out of the car.
In the end I decided to get a 280mm wheel. They're only available in a few styles for that size (if I want to keep the budget small), so I picked the one that was the least rice-a-rific.
I ended up taking a chance and getting it all on ebay (definitely Chinese knock off stuff). I was generally pretty impressed with the parts though. Everything is cast/machined aluminum and fitment is good. We'll see how it holds up. The bill for the hub adapter, quick release and wheel came to just $53.95 shipped.
Here's the hub installed:

I removed the OEM airbag and horn connector, and added a spade connector for the new horn wire.

The quick disconnect went on next. After I got everything aligned the way I wanted I marked the "top" position with a paint marker to facilitate quick installation of the wheel.

Here's the wheel installed.
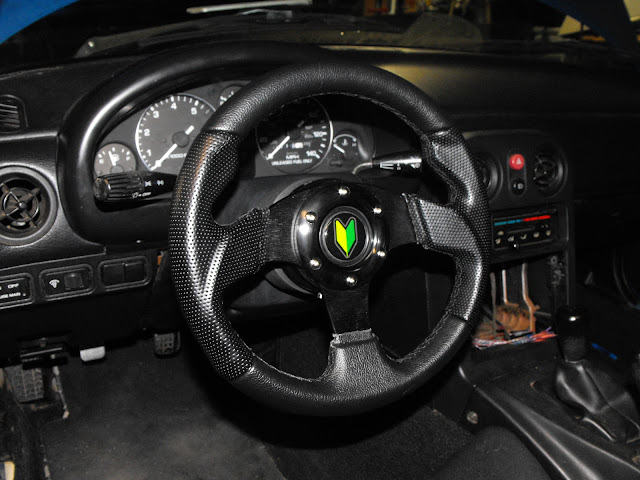
So far, I'm quite happy with this setup. There is no play in the wheel, which is great and the release mechanism is very secure (it's a slip-ring style) and has a good locking setup. The only downside so far is that the ring takes a good bit of torque to turn, so the GF has to really give it some muscle. Also, the small wheel blocks some of the tach from my seating position, but I can still see redline, so good enough.
I'll have to think of something clever to cut out on the vinyl cutter to replace the horn button - maybe I'll do a nice GRM logo. 
A quick look at the budget again. To date, I've spent $1,682.79 including the car and fluids. Major items left to purchase include Hawk DTC-60 pads, ATE Super Blue brake fluid, SFI roll bar foam, engine oil+filter, and springs/adjustable perches. I've already priced out most of that and hope to finish this all up with total expenses ending at $1,999.72.
The roll bar is the last major project, so I'll try to get some time to work on that soon - I really enjoyed working on the 1st main hoop and am looking forward to finishing that up.
Oh, one more thing to mention. When I got the car the airbag light was blinking and driving me nuts. I also didn't like the buzzer that came on when the key was in the accessory position and the door was open. Last night I took the buzzer/timer unit out from under the dash (it's a small black box). I took the plastic case apart, desoldered the buzzer and removed it from the PCB. I also found the airbag computer and disabled it by pulling the wiring connector on the passenger's side of the box. No more buzzer or airbag light!
All you need to do with that buzzer is unplug it 
As for the airbag stuff, just pull the computer and backup battery out. You don't need it and it's just extra weight.
Good to know. Thanks.
I wasn't sure if the timer did anything else, so I figured I'd just take the buzzer off and see what happened. (I just finished the wiring on my Impreza RS a few months ago and that damn car would go into limp-mode if ANYTHING was disconnected - nice to be working on a pre-OBDII car now.) I'm planning to pull more of the airbag stuff, but didn't feel like contorting myself in the footwell to fish it all out the other night - I'll pull all this stuff next time I'm feeling up for some punishment.
If the car isn't going to be daily driven, I've been super happy with my Carbotech XP10/8 setup (also have sport brakes and proportioning valve)
Why did you decide on the MT-90 over the Lightweight Shockproof? Did you find Miata guys having problems with it?
Keith recommended it in another thread.
http://grassrootsmotorsports.com/forum/grm/fluids-for-96-miata/30305/page1/
I bet the shockproof would work well too though. I think Redline doesn't recommend it for most syncro transmissions, but I've heard a lot of anecdotal evidence that it works great with no ill effects.
A stock-powered Miata with MT90 is a very well proven setup. Unless those Spec guys have been shelling transmissions and I don't know about it.
Been a while since the last update - I'm starting to forget what all I've done since then. Anyway, here's some of the small stuff:
- Changed the engine oil and filter (Mobile 1 filter and Castrol GTX 10W30): The fest oil got rid of the valvetrain noise as several folks on here have noted.
- Changed the transmission fluid (Redline MT-90)
- Flushed the cooling system
- Replaced the PCV grommet
Maybe the biggest thing is I finally got my emissions and got it registered. I've been daily driving it when I don't need the extra room of the celica and it's been a blast.
Other than that, I've been doing some more work on the roll bar. After looking at a lot of spec miata cages, I decided the best thing to do was to make some pedestal mounts on the floor for the main hoop. I mocked up the plates with cardboard, then cut them out of 0.10" steel with a plasma cutter. (Didn't feel like going over to the waterjet)
Here's one of the templates and plates. I used a piece of angle iron as a guide bar for the cutter, which makes getting nice cuts way easier. This was a great tip from a recent-ish GRM article - thanks guys!

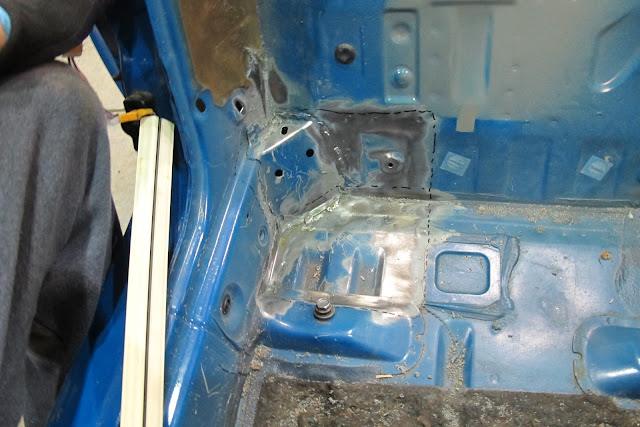
Here's the corner of the tub behind the passenger's seat where one of the pedestals will go:
Here's a shot of both of them mostly welded in. I left the top plates just tacked in place. After I get the hoop trimmed to the right height I'll partially weld that to the top plate, break the tacks on the top plate and remove the bar so that I can get complete 360 degree tig welds around the hoop material, then it will go back in.

I'll be waiting for another couple weeks to finish this up. I think I'm going to pick up one of the super lightweight fiberglass hardtops while I'm in FL next weekend, so I want to check the height on that before finalizing the hoop height.
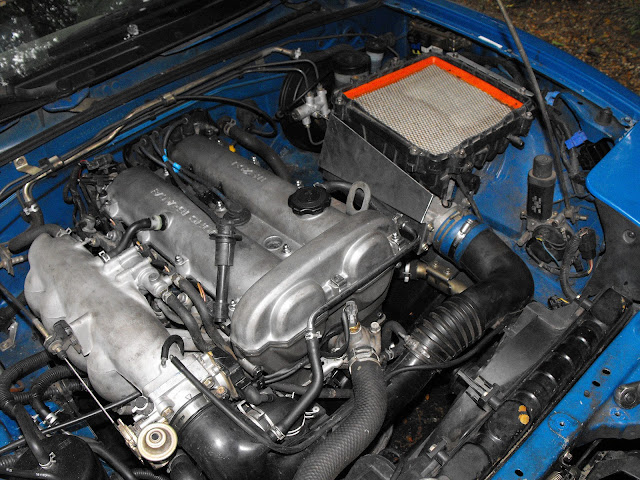
The other interesting project I was just working on is an RX-7 AFM swap. I stopped by the Pull-A-Part a few days ago and picked up one of these units from a '88 RX-7 complete with airbox. I'm interested in doing this for the high-rpm (6k+) hp gains.
I didn't want to have to cut or destroy any of the existing intake tract to that I can return to OEM if necessary for any class restrictions down the road. I also didn't really like the idea of using a cone filter, which would require some adapters and such, so I decided to try to use the RX-7 airbox.
Before putting it in, I spent a little while messing with the spring preload on the AFM. My camera was out of battery powa so I'll have to try to remember to take some pics of that later. Anyway, I pulled the AFM cover off and relaxed the preload spring by 8 clicks, checked the plugs a few times and the looked like they might be a little lean under heavy load so I relaxed it another 2 clicks and installed it. I'll try to check it with a wideband at some point, but it's probably good enough for now. As an FYI, without any adjustment the AFM caused the car to run super lean from what I could tell. I couldn't even get it out of the driveway without severe bucking and such, so be careful if you do this yourself.
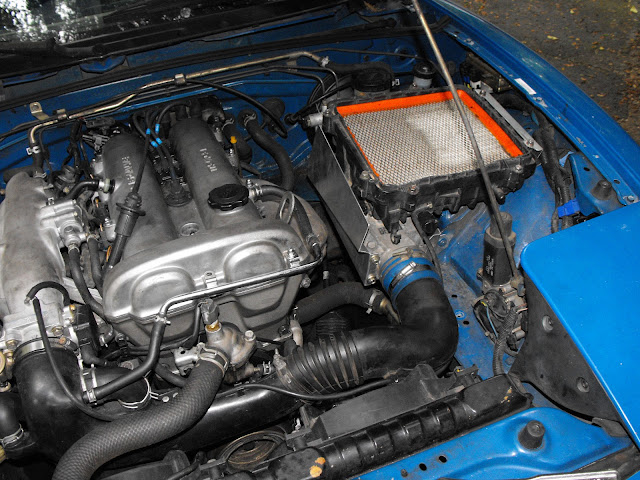
Here's some pictures of everything installed. If you look close, you can see the brackets and a small heat shield I made for it. (The AFM and wiring was pretty close to the exhaust.) I'll be replacing the air filter at some point and plan to make an insulated box that encloses the filter and directs airflow in from around the driver's headlight.
Works good for now, and sounds great (I love me some good intake noise).
Several things to update.
I'll start with the AFM, since that was the last thing I posted about. I was having trouble getting an air/fuel ratio that wasn't terrible either at idle or WOT. So, I switched back to the Miata AFM and spent some time recording the signal voltage at idle and WOT at different RPM, then swapped back to the RX-7 AFM and tried to match those values.

I ended up getting things pretty darn close to the Miata AFM. In the final setup, I had the RX-7 AFM clockspring preload 2 teeth looser than OEM. I then added in 17.7 ohms worth of resistors between the Vs pin and ground pin in order to lower the voltage. The resistors need to be able to handle a couple watts of power dissipation so don't use the little film resistors.

 Still need to get a new air filter and some baffling to direct some colder air to the intake, but otherwise, I think I'm done with this.
This is motivation for me to dump my crap Miata asap and wait for a better chassis to start with.
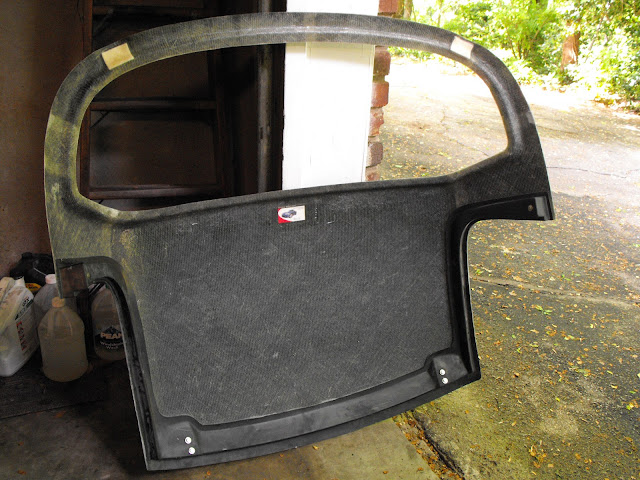
I also recently purchased a 12 lb fiberglass hardtop shell form Treasure Coast Miata :

There's a small discussion thread about this here if you're interested:
http://grassrootsmotorsports.com/forum/grm/miata-fiberglass-hardtop-shells/63072/page1/
As I said in that thread, in general, it's been a fairly large amount of work to get it weather tight and make all the latches. The rear window, seals, and latches weren't included in the ~$580 (after tax) purchase price, so after getting all those things, you're probably in OEM hardtop territory, and that would just bolt on worry-free (though it weighs twice as much, or more).
Anyway, here's the top:
There were some minor issues with the quality (cuts from being removed from the mold and being trimmed, and some delaminaiton of the two fiberglass pieces) but nothing too severe:


Here it is on the car:


In reply to PHeller:
Yeah, I've been very impressed with how clean/straight the chassis is. I guess that's the plus of buying a car from an older woman. EDIT: and in the deep south.
Although this is primarily a track car, it'll do DD duty occasionally and maybe some racing in the rain at some point, so I wanted to get the top weather tight. After removing the softop and frame I swapped the door/window seals from that onto the hardtop. Keith suggested this and it worked out pretty well. Here it is on the car:

I had to add some shims behind the seals in a few places to get them to line up with the windows, but it's pretty good now. (One of the guys at Treasure Coast mentioned that they've had to do this on most of the tops they've installed) I still have a very small leak in the corner where the door, window and top all meet, but I'll seal that up later.
Around the back of the top, I'm going to try using some pipe insulation, which was suggested by one of the guys at Treasure Coast. Here's the first few pieces I tried in there:

I've got some longer/larger pieces now, and it's kept the weather out well. I'll need to do some more messing with it to get it a little better though.
So, with the seals figured out, if not 100% complete, I moved on to the latches.
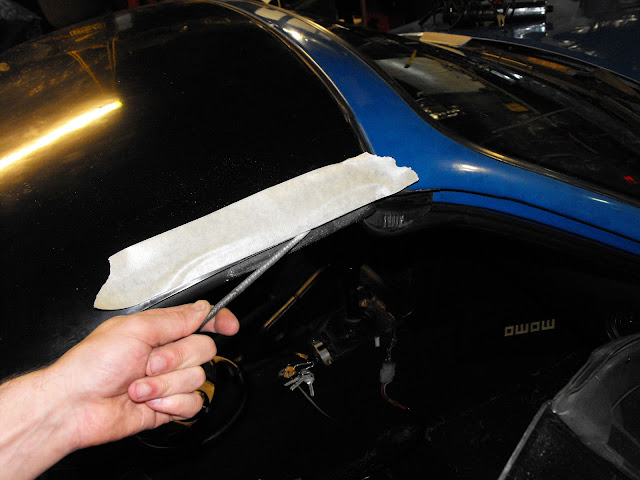
I started with the windshield latches. Originally, I was hoping to use OEM latches, since I have a few pairs of these. However, they don't work with this top. Apparently, there's an indent missing in these so the top interferes with the striker plate on the windshield. You can sort of see it here:

Basically, the top needs to be cut back around that "finger" that fits into the striker plate on the windshield frame.
Since that wouldn't work I just fabricated some of my own brackets:


And here's one installed:

I did something similar for the side brackets (they're pretty simple). I still need to do some rear brackets in the back as the top doesn't really seal that well with just the windshield and side brackets.
Keith, I think you were asking about this. I wouldn't run one of these without some kind of bracket attaching the top at the back.
I'll try to get some more pictures of the side brackets and, once I'm done with them, the rear bracket(s).
After getting the top mounted down tight and in the right spot, I noticed some interference with the passenger's window. This was a problem on one of the cars that I looked at when I was at Treasure Coast as well. They had recommended shimming the top up a little higher, but I think this was due to some extra material left after pulling the top from the mold. So, I just got out a file and shaved off some of the 'glass.
 Worked out great.


