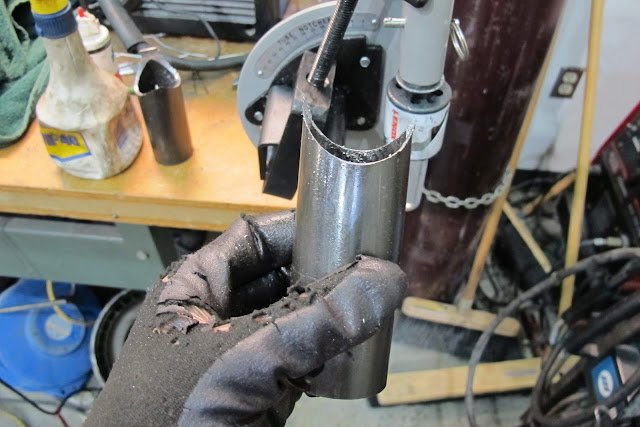
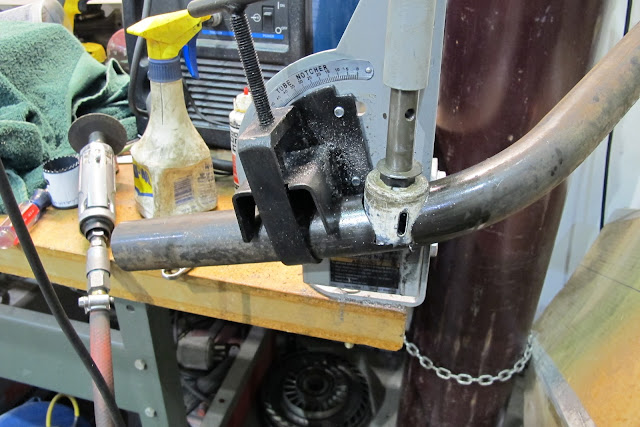
Next up, I need to weld in the plates for the rear braces (down tubes) and cut, notch and weld those to the main hoop. I'll also probably put in a diagonal brace or two on the down tubes. Then, I'll flame anneal the joints (recommended for chromoly to avoid stress cracks), paint it and weld it all in for good.
Also coming up, I'll put in some rear brackets for the top, install the passenger seat and all the harnesses, then start work on the shocks/springs.

Harvey
New Reader
5/8/13 1:26 p.m.
Looks good. Saving dough is nice. Does seem like you are putting in a few hours though. ;)
In reply to Harvey:
Yeah, it's been a lot of work. Something I enjoy though, and I'm learning a lot, so I can't complain.

Time for some updates - been lots of good progress. In fact, I'm starting to run out of major work to do, which is good because I've got plenty of other projects I'd like to make some progress on this summer.
I left off with the roll bar, so I'll start with that again:
After getting the main hoop, diagonal and harness bar finished up I did some fitting with the hardtop and then trimmed the main hoop so it just fit in under the top. Then I tack welded it to the mounting plates and started fabricating the rear braces.

I removed the paint and chassis caulk and tacked in the plates for the rear braces, then tacked the braces to those and the main hoop.

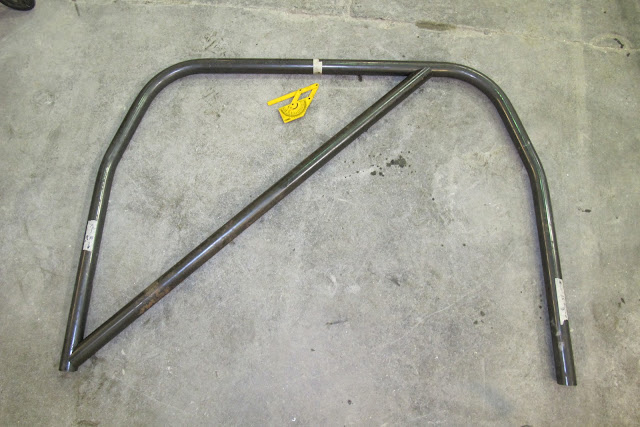
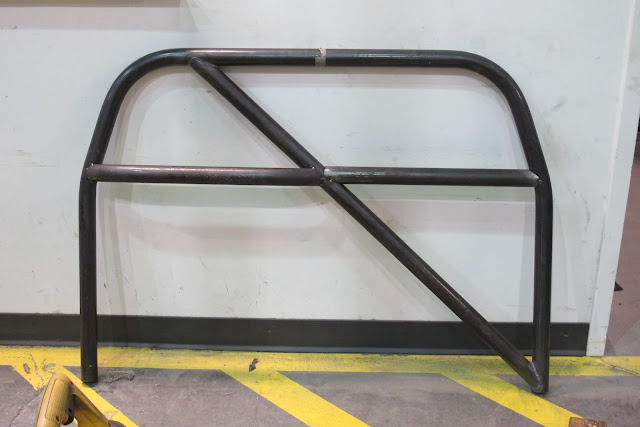
Here's everything tacked together.

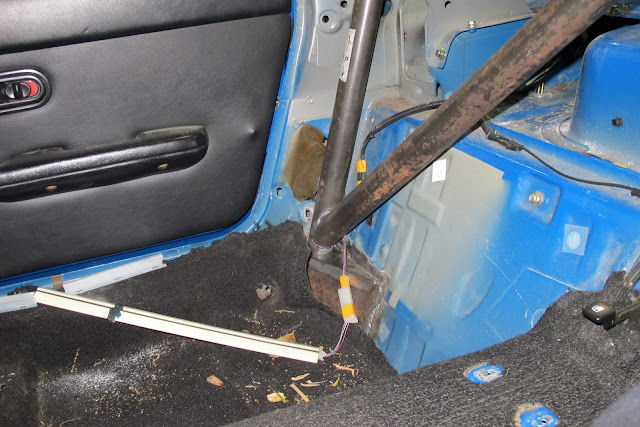
I forget the exact angle of the rear braces, but it's more than required by any of the sanctioning bodies (I was frequently checking the NASA and SCCA rulebooks during the build). I chose this mounting location because it goes into a really solid part of the chassis and is near the shock mounts. It also was a relatively easy place to access with the welder, which was a concern.
I didn't want to have to paint the cage after welding it into the car (didn't want to have to go through the hassle of masking off the whole car), so I painted it at this stage with some primer.
 Then I cleaned off the primer around the mounting plates and MIG welded them to the mounting points in the chassis - all done!
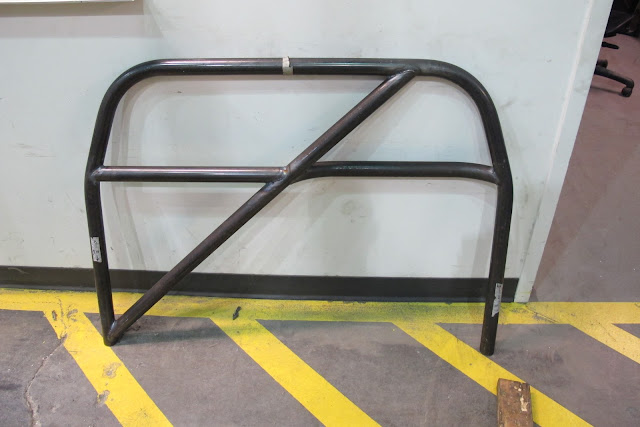
The finished product:


So, some comments on the roll bar; first, I can't say how pleased I am with how this turned out. As I look back through all the pictures and post these I'm really happy with the quality of the construction and really happy to have something built exactly to my specifications. Also, I've learned a lot in the process (as I've said before) and that's been a great aspect of this project.
On the other hand, this took a ton of time. It really makes me think twice about wanting to build a cage for a lemons or stage rally car, which were both projects I was considering doing down the road. I have no doubt that I could do it, but the time involved was pretty serious. It really makes me wonder how someone could make a living doing this. One thing that could certainly help would be using mild steel so MIG welds could be used on everything. The TIG welds are definitely slower. Also, on a larger car, the mounting plates might come together much quicker which would help reduce the time required. Either way, it's a big job.
Ok, so on to some other updates.
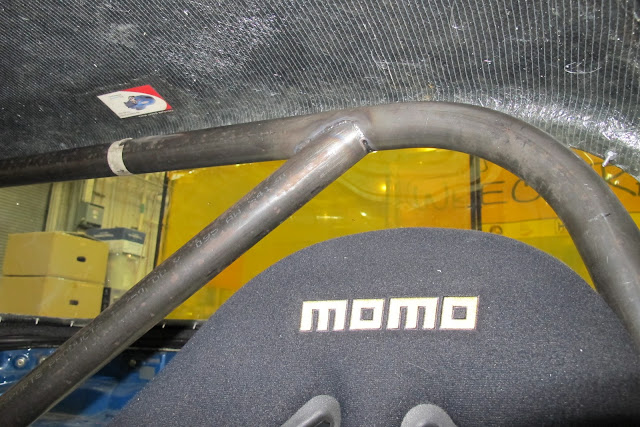
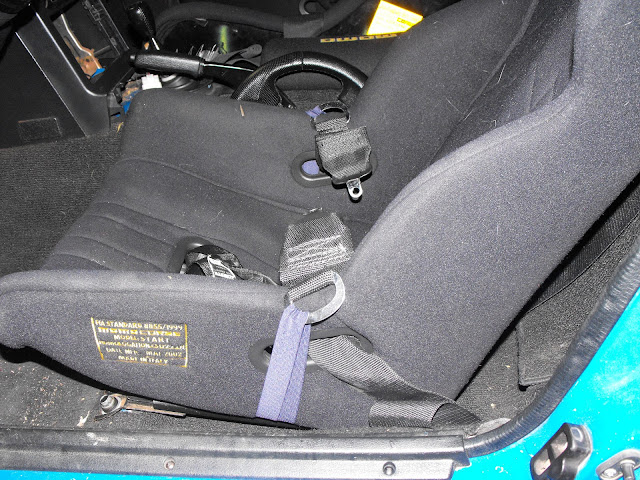
After getting the bar installed, I got the driver's harness installed. It's a used 6-point cam-lock Schroth Racing harness from an old FSAE car. I also installed the passenger's seat and belts. The passenger's seat is a Momo Corse which I had lying around (originally got on CL for $50). The harness is an older GForce Pro 5-point with the buckle-style lock.
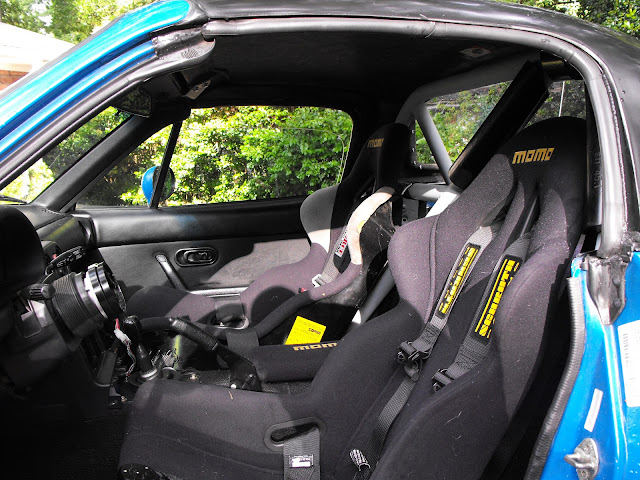
Since I drive this in to the lab most days, I also got some SFI cage padding and padded the area around my head (even though it's all behind the seat). Can't be too careful, right?
Reinstalled the carpet around the bar and the "cargo" area. I think it looks really nice and clean, makes the car feel a little less like a tin can, and doesn't add more than a couple pounds of weight.

As a quick aside. When I ordered the roll cage padding, I also wanted to order my Hawk DTC-60 racing pads and some more serious brake fluid (I used up most of my ATE blue when I rebuild and reinstalled the calipers). I priced everything out at the cheapest site I could find, then called up SafeRacer and ordered everything from them. Their list prices were higher, but they were happy to price-match and actually beat the pricing I got elsewhere. Great service and I think I received the parts in 2 days. I also made a big deal on the phone about their support for GRM and the Wreck Racing Team and made it clear that was why I was ordering from them.
Here's the shipment when it came in. Wasabi (the cat) loves cars and car parts and had to check everything out immediately. See my thread on this for more sillyness.

Ok, suspension time.
I wrote a little bit early on about picking up some NB Koni sports and a full set of NB shock mounts/bushings on ebay for a very reasonable price ($225 for all 4 shocks, $54.99 for the mounts, bushings, etc).
I pieced together some perches and springs from old project parts and made up some spacers and such on the waterjet as needed. Here's what I ended up with.

350 lb/in front, 225 lb/in rear. I wasn't sure if I could get the car as low as I wanted with such long springs, but I decided to give it a try so I could get out to an autocross with something respectable.
Some shots of this setup vs OEM and the install.


This worked out OK, but the rear spring rates were lower than I wanted and as I feared I couldn't get the car low enough without running into interference with the A-arms in the front.
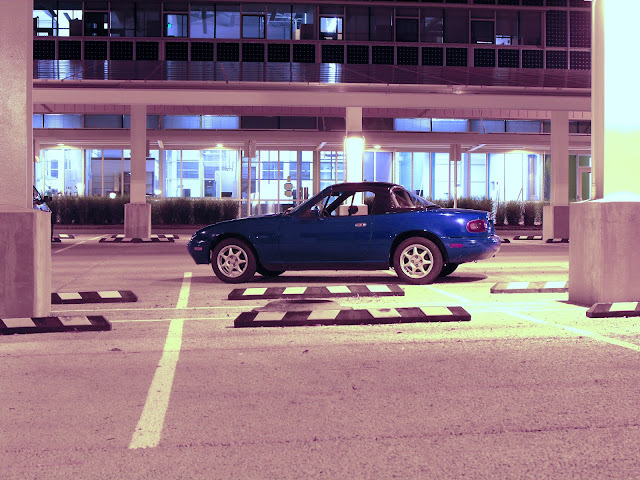
Here's how the car sat with this setup. It's not terrible, right around stock height, but this wasn't going to cut it for track use.

I ended up autocrossing with the car like this anyway so that I could get some testing in.
Since the rear springs were pretty soft, I removed the front sway bar before the event. I managed to post some good times at the Atlanta Region SCCA event. Ended up being the third fastest miata at the event (out of 17 miatas) and 1st in class (CSP) and that was on a set of $70 R6's that have been through hell and back and with a bone stock engine/intake/exhaust.
Despite the good results, I was pretty unhappy with the car. It was understeering in some place and oversteering in others. I think part of this was the tires warming up. I also set the dampers to full stiff at the recommendation of a friend who runs a nearly identical setup, but that was definitely WAY too stiff for the springs and really unsettled the car.
Overall, it gave the car a good workout and gave me some good feedback on the setup.
During the event I lost a piece of my bar padding (the adhesive didn't hold it in place) and a small coolant leak developed in the water plug on the back of the engine. These were exactly the issues I want to sort out before taking this to the track, so I didn't mind at all, and have since fixed both of those issues.
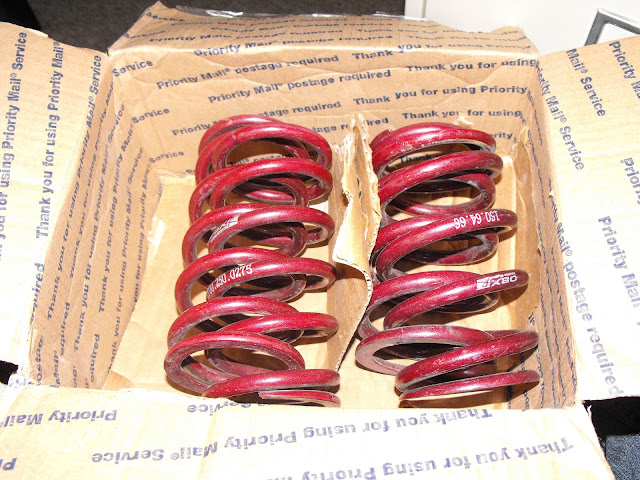
With the rather disappointing performance from the suspension, I decided that I should just bite the bullet and get some real springs that were sized for the car. Fortunately, I almost immediately found a great deal on what I was looking for on Miata.Net. A member was selling a set of OBX-R springs with 375F 275R rates and perfect length and diameter for the shocks and perches I have (6"x2.5" front, 7"x2.5" rear). I picked them up for $65 shipped.
I've got them installed now and still need to adjust the ride height and do the corner weights, but this setup is much better. With the stiffer rear springs I could get the front sway bar back on and the car is really neutral in the corners now (on street tires anyway). I'll be taking it back to autocross again this Sunday, so we'll see how things turn out then.
You might notice in the picture of the car sitting on the old springs that the car has some new shoes. Before the autocross I had to get my R6s mounted on the Enkei's I use for racing (see previous posts). I also got the 7-spoke OEM wheels swapped on while I was at it. I prefer them a lot over the daisies, which always struck me as rather effeminate, despite the fact that I love minilites.
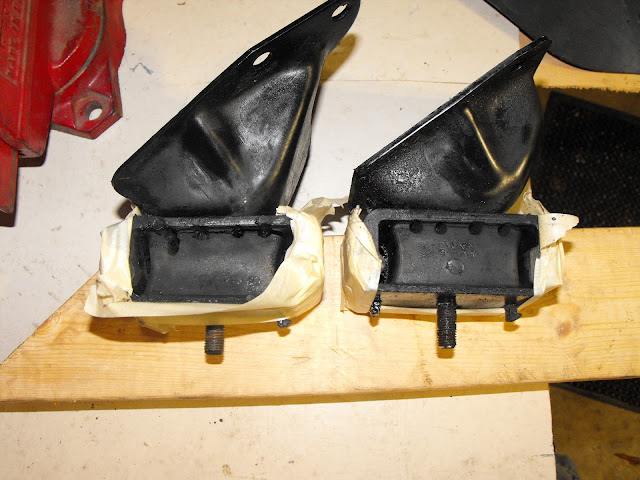
While I had the car on jack stands to swap the springs/shocks back and forth I decided to pull the motor mounts which I suspected to be in bad shape based on the driveline compliance.
Sure enough, they were both torn.

 The replacements are pretty pricey (~$50 ea.) so I decided to fill these with urethane instead. I had some lying around that I picked up for just this type of thing. It's Shore 80A harness and was something like $35 from McMaster.
 First, I cleaned out the mounts with some carb cleaner. Then, in order to facilitate repair of the cracks, I drilled them out in several locations so the liquid urethane could better penetrate the cracks.
 After that, I taped up the back and sides of the mount so the urethane wouldn't all drain out when poured in. Take some time with this to try to ensure a liquid-tight seal. Aluminum tape would probably be best for this, but it's a little pricey and the masking tape worked pretty well.
 Here are the two mounts ready for urethane.
 This particular product needs to be mixed very precisely by weight. The two parts come pre-measured, so if you want to use it all in one go, you can just use up all of both and end up with the right ratio. I only wanted to use half of it, so I used a small postage/cooking scale to measure out the two parts to the correct ratio, then mixed them.
 I guessed pretty much perfectly on the amount and used almost all of it with little waste to fill the two mounts.

After about two or three hours, I removed the tape from the back and sides and let the mounts cure for another two days. I would have had no problem putting them in the car after 24 hours, but I didn't have time to anyway. They fully cure in about a week, but the spec sheet said they would reach 80-90% full strength in about 24 hours IIRC.
The results? Definitely reduced driveline compliance, though some remains (I think it's probably in the diff, u-joints or axles). Engine noise is only slightly higher, and I would say is only just barely louder than before. Definitely a good deal at $17, vs. $100 for replacements.
While reinstalling the mounts I noticed that the alternator/WP belt was pretty beat so I replaced that ($5.39 from the local Advance - what a bunch of bone heads). Here's the old one.

With that all out of the way, I reinstalled the underbody tray as well. I've read that this can help improve engine cooling on track, which I find very feasible as it probably keeps the pressure in the engine bay lower, thus facilitating air flow through the radiator. It also helps aerodynamics obviously.
 The tray is actually in remarkably good condition considering it's only a few years younger than I am.
So, what's next?
Well, I need to set the ride height and corner weights. I'll run another auto-x on Sunday and see how things go. Next week I'll probably go in for a custom alignment at Gran Turismo East and get things set up for the track. Then, next Saturday I'm hoping to put down a few laps at Atlanta Motorsports Park.
Between now and then there are a few other minor things I'd like to do including wiring the A/C fan to come on with the engine fan for some extra cooling. I'd also like to make a radiator plate to improve airflow through the radiator further. I picked up an OEM plate at the JY and will use this as a template to make a nicer aluminum one.

I'll need to brake in (haha get it) my DTC-60s before heading up to AMP.
Finally, it would be great to make a block-off for the OEM radio mounting location, as well as some mounting tabs for my race radio and intercom but we'll see if I can find the time for that.
Last thing for now - a quick update on the budget.
Originally, I had planned out all the replacement/upgrade costs that I expected and came up with a number around $2100. After that, I decided to get the hardtop, which really blew the budget, but I'm happy with it just the same.
As it stands now, I have $2729.24 invested, including the car itself as well as things like oil, fluids, and replacement and upgrade parts, and only plan to spend another $25-50 for an air filter and adjustable brake proportioning valve.
So other than the hardtop, I'm pretty much right on my original budget. We'll see how long I can keep it that way once I get on track...

noddaz
HalfDork
6/8/13 12:48 p.m.
Good job and a sharp little car you have there...
In reply to noddaz:
Thanks. Yeah, I'm pretty happy with how it's turning out.
Couple more updates from the weekend.
Spent a little more time setting the ride height and got it about where I want it (~12 1/4" hub to fender lip in the front and ~12 3/4" in the rear). Then took it to the shop and put it on the scales to set the corner weights. I have miss-placed my notes on that, of course. But, I got the cross weights set to within about 5 lbs of each other (with me in the car and 1/4 tank of gas). The total weight without driver was 2085 lbs(!), which was a pleasant surprise considering I haven't removed any sound deadening or really any of the interior (other than the soft-top and armrest), and it has the beefcake 1 3/4" OD roll bar.
...and one more little thing that was on the list; wiring up the A/C fan. There are some good write-ups on this on Miata.net and probably elsewhere. It basically just involves splicing together the wires for the two fans. Make sure to leave the original positive lead for the A/C fan disconnected though (or it will short if you don't have the A/C button on). Not much to see except some electrical tape on the connectors, but you get the idea.
 With this setup you dramatically increase the amount of cooling you get with the car sitting, which should be really helpful when coming off the track after a session. Cooling at speed is probably not significantly affected.


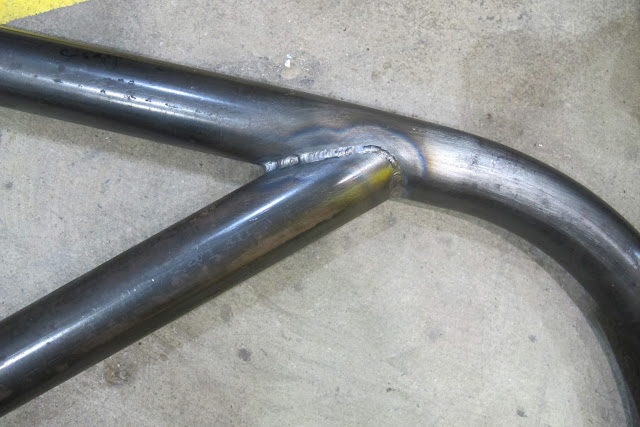
 And welded it up:
 ...I finally got it all put together and tacked up:
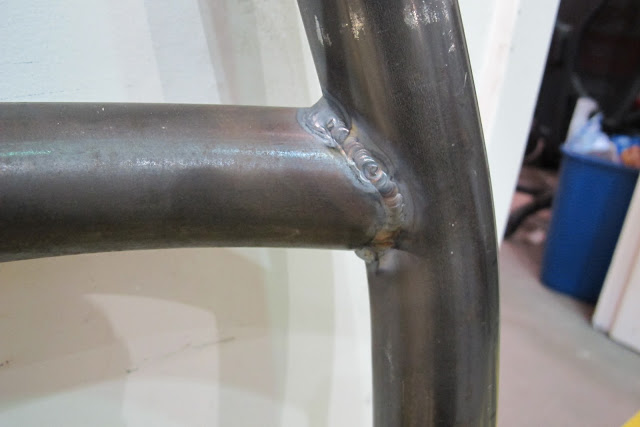
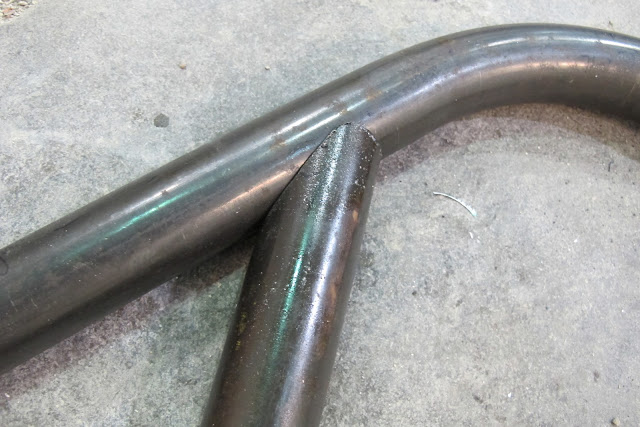
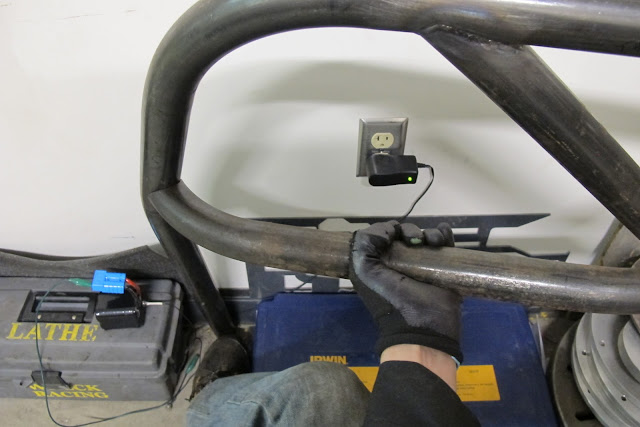
 With it out of the car, I could complete the welds to the plates and between the braces and the main hoop with really nice 360 degree welds, which would have been extremely difficult or impossible with the bar in the car.
 At this stage, I also made up a rear horizontal to connect the rear braces and provide some additional rigidity and welded that in.


 I only use 4 low for pulling stumps.
 At some point since the last update I got sick of having my feet slip around on the pedals when wet, so I put some grip tape on them (the clutch pedal cover was gone and the brake pedal cover was starting to come off). The tape is used for coating stairs and such in industrial facilities. We have a roll of it at the shop for some reason so I used a couple little pieces for the pedals - worked awesome and has held up for a month or so with no sign of wear. Skateboard grip tape works well too, but I like the warning stripes on this stuff. The picture is from a while ago when I had the sills out and the carpet partially out for the roll bar work, so that's all been tidied up since then.


 I'll probably replace them with thinner black ones later, but the GF had this material kicking around in her sewing stuff and it works great for now.


