1 2 3 4 5
AngryCorvair
AngryCorvair MegaDork
3/13/18 3:47 p.m.
Mad_Ratel said:

It's been 10 years since I graduated college. Studying for the PE now...

Not sure It will be enough to pass... lol

If you can remember (generally) the governing equations and identify the boundary conditions for each question, you'll do just fine.  

Jerry From LA
Jerry From LA SuperDork
3/13/18 6:33 p.m.

Not sure if the machine shop will be paying attention to your rusty cams.  If not, use crocus cloth instead of emery cloth.  You won't end up with a bunch of scratchy cams.

wae
wae Dork
3/14/18 7:49 a.m.

I actually wound up going with WD-40 and 1500 wet/dry sandpaper.  The rust is gone and the lobes have remained very smooth and don't have any visible scratches.  

Last night,  I went out for a little bit and didn't do a whole lot, but I did get the new water pump bolted up:

ooh!  Shiny parts!  An observation that I had, though:  See that coolant hose over there to the right of the water pump?  There's that little bit of hose that goes into a hardline which dips down along the inner fender where it meets up with another short hose that goes to the radiator.  If you look at the angle of the top of that hardline, it sort of heads to about an 11 o'clock position, maybe 10 o'clock.  Meanwhile, the water pump inlet is there at about 9 o'clock.  Would it seriously have been that difficult to put a slight bit more of a bend in the hardline and just make it a straight shot across?  Also, the hose that Rock Auto specifies for that isn't really a great fit.  There was much lube required to get it to fit and the molded section isn't quite the right curvature.

I also took the exhaust manifold off the rest of the way.  This was for two reasons:  I wanted a little more room in there to work and to inspect things a bit, plus I knew that I needed to replace that flange gasket anyway.  The Fel-Pro gasket from Amazon matches the gasket I pulled off, so I'm good there (the package indicates the years and engines that it's supposed to be good for and "1997" isn't anywhere in the list).  For some reason, the final bolt that was on the flange had to be loosened all the way -- the other two just popped out after the nuts were removed.  And, of course, our friends at Mazda put the steering column right where my hand needed to be, so some acrobatics and contortions were required.

That was pretty much where I stopped things last night.  My brother was out there at the workshop doing an arts and crafts project so I sort of wandered off to spectate on that for a while.  This morning, however, I took a drive in search of more shiny things:

The head is finished and back in my possession!  They milled it, cleaned it up, and put the valve seals in.  Not sure how much I'll get done in the next couple of days, but as far as I know the only parts I have left to acquire are a PCV valve, the grommet for the PCV valve, a couple oil filters, and fluids.  Other than that, everything I need should already be ready to go.

wae
wae Dork
3/16/18 11:39 p.m.

Tonight I spent about an hour or two at the workshop and made it look a little bit more like a car:


I did a little more cleaning up of the block and rinsed out the intake with mineral spirits to get the goop out of there. 

Before dropping the head back in, I also made sure to replace the hoses for the heater and the oil cooler:

I bolted the intake to the head on the bench before dropping the whole thing onto the block:

Once the head was in place, I got it torqued down and put the plugs in to seal it up.  Things should be pretty much straightforward from here.  I still need to get fluids, PCV valve, PCV grommet, and the little o-ring that goes in the thermostat housing where it bolts to the head.  I've also received a new OEM trunk seal from Atkins Rotary and I should have a new OEM cup holder assembly coming in the next couple days as well.  With any amount of luck, I should have this thing running again by the time the weekend is over.

wae
wae Dork
3/17/18 10:15 a.m.

...and suddenly the whole thing comes crashing to a halt for want of a five dollar hunk of rubber.

When I took the old PCV valve out, the rubber grommet was just a cracked and crumbling mess, so it is now in several bits.  In fact, it might be working on fulfilling its life-long dream of being a ski slope right now, buried under half-a-ton of garbage over at Mount Bavarian.  Regardless, it can't go back on the car.  No big, I figured, there are always a ton of grommets and such hanging around the FLAPS places.

Special order from the O'Zone, and only available about 16 miles away from Advance.

I'm just whining.  I should have put those things on one of my Rock Auto orders.  And I haven't gotten ahold of the local dealer's parts counter yet to see what they have.  And for all I know, there might be a Dorman HELP! product on the shelf that will fit enough.  I think it's time to shower, pack up the two kids that didn't have soccer today, and do some shopping.

Cousin_Eddie
Cousin_Eddie Reader
3/17/18 10:44 a.m.

Standard Motor Products GV29. It's $2.52 plus shipping at Rockauto or you can Amazon it for $7.71 Prime.

I RockAuto'd mine...

wae
wae Dork
3/17/18 10:51 a.m.
wae
wae Dork
3/18/18 10:00 a.m.

It took a little longer to get out than I expected but I started out with some coffee:

A little bit of sticker really classes up those $8.99/$6.99/$4.99 mugs from The Hammer Store!

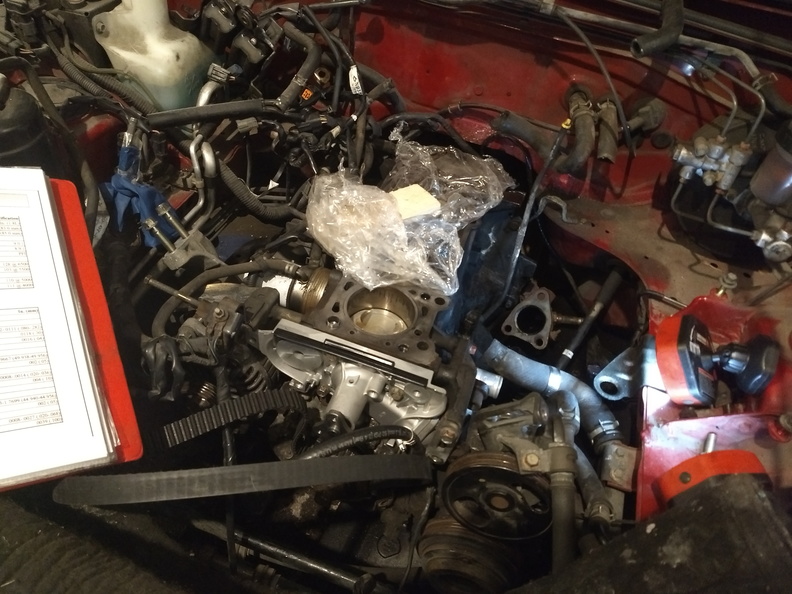
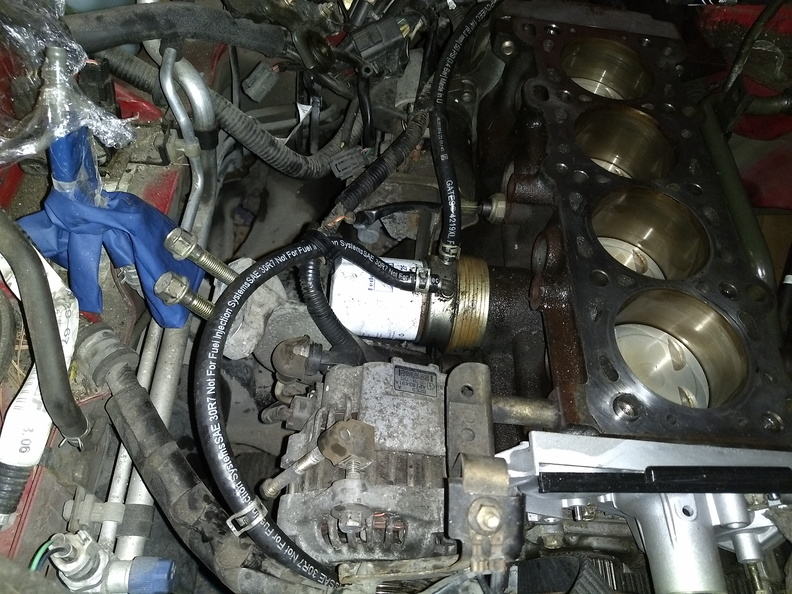
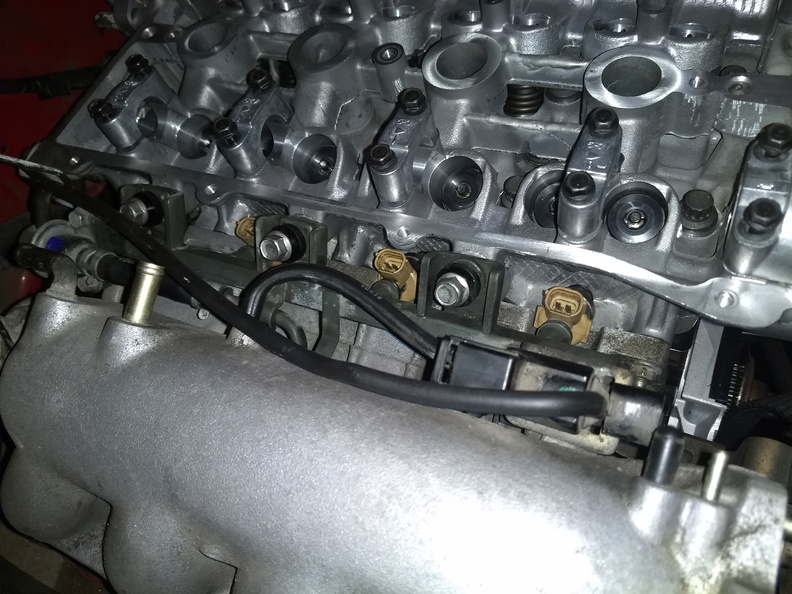
I spent the afternoon making sure that I had a good list of everything I needed to obtain yet.  I knew about the PCV and the grommet, and of course I would need some coolant, oil, and an oil filter.  The goal, however, was to have everything I needed to run to completion.  Part of that was getting things out of my way, so I put the fuel rail back on:

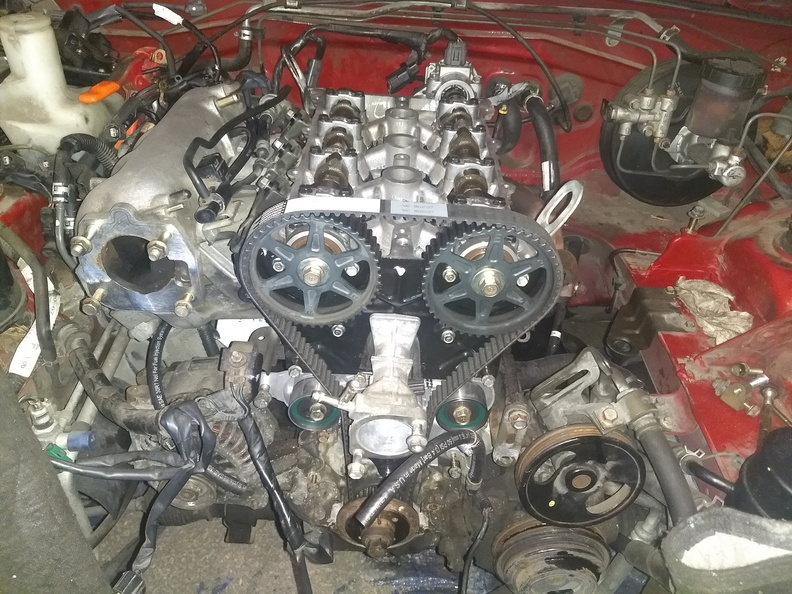
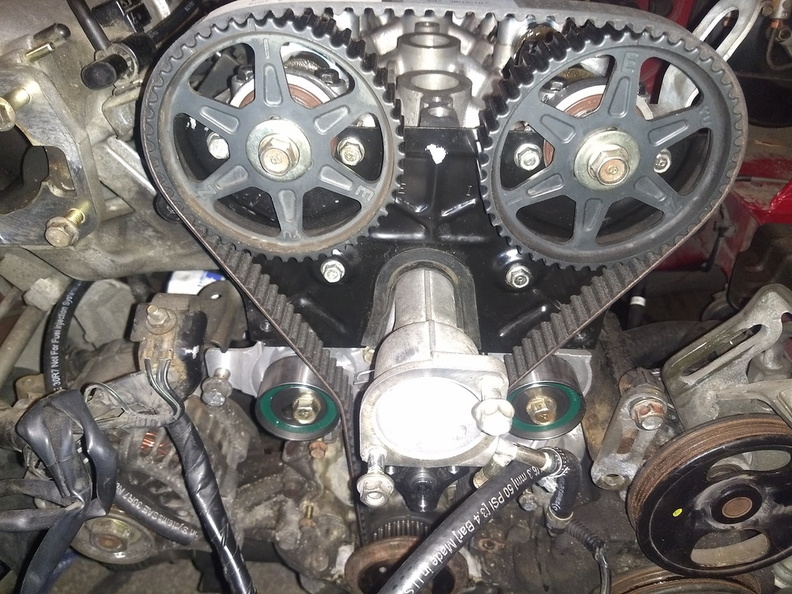
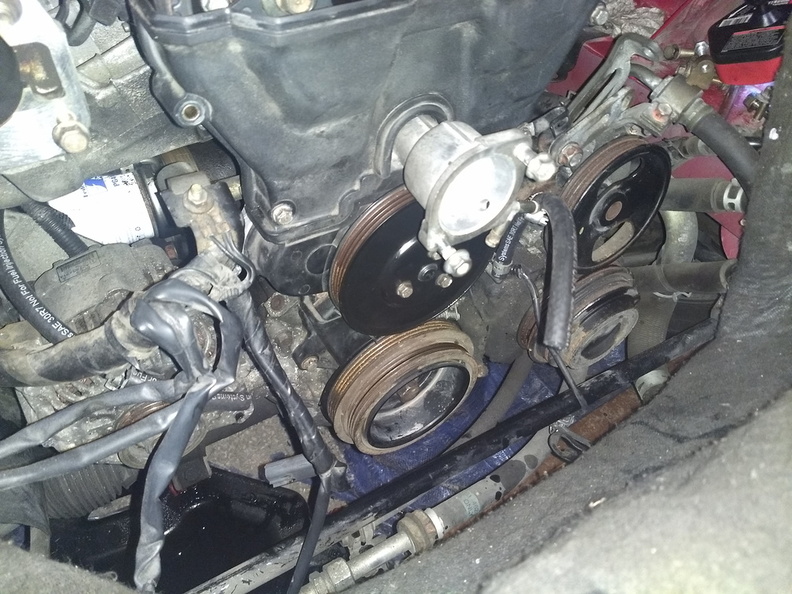
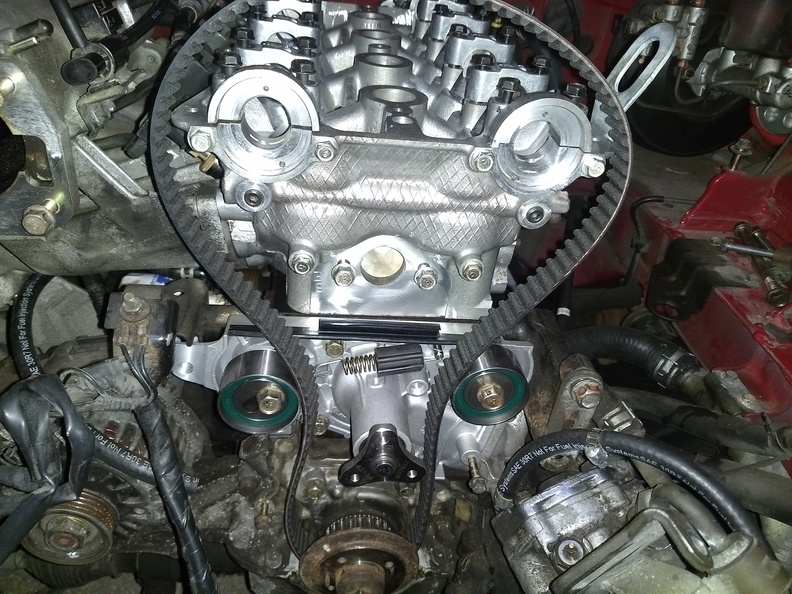
Moving around to the front side, I also got the idler and tensioner set up for the timing belt.  

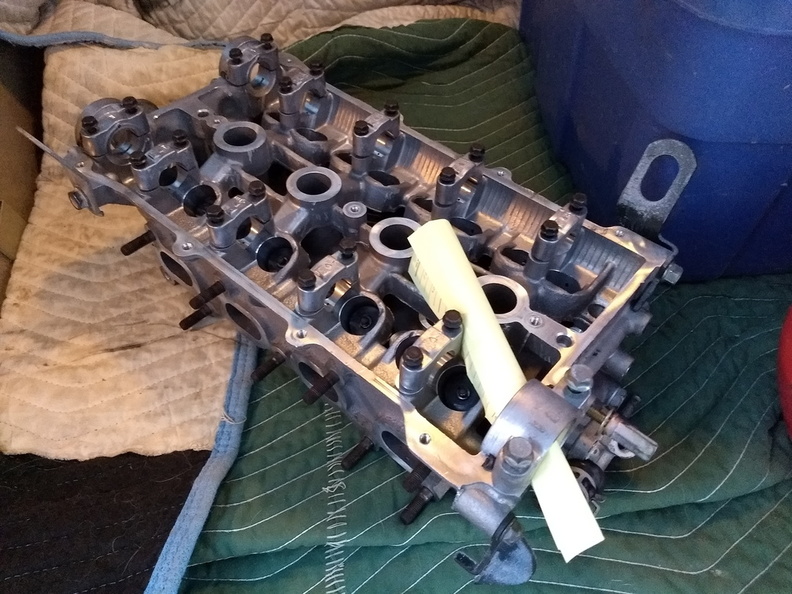
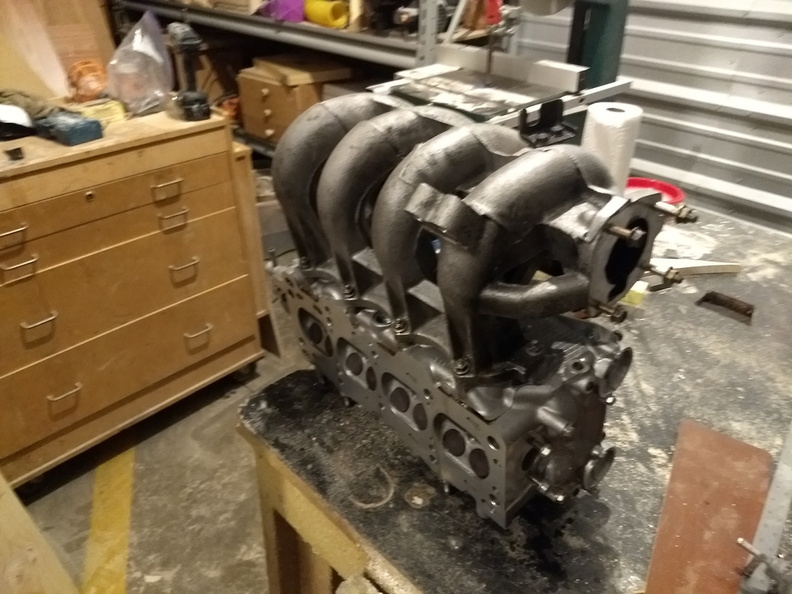
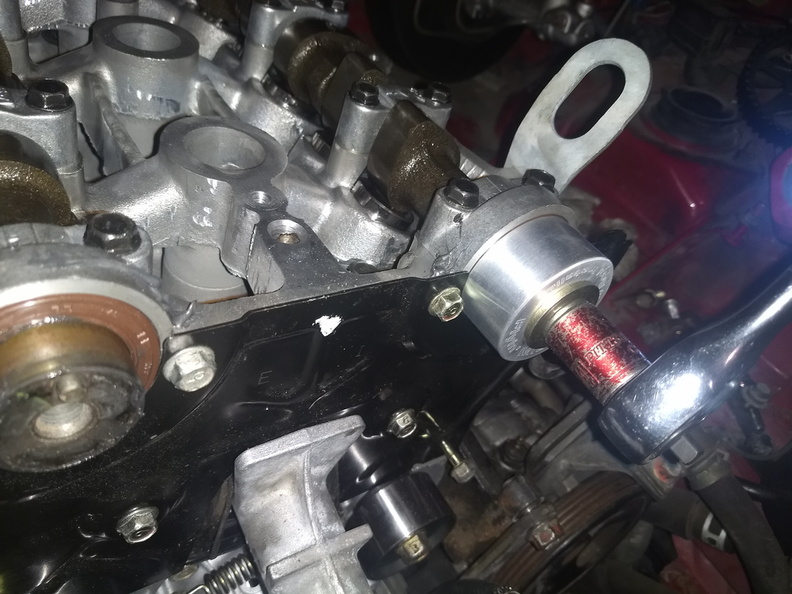
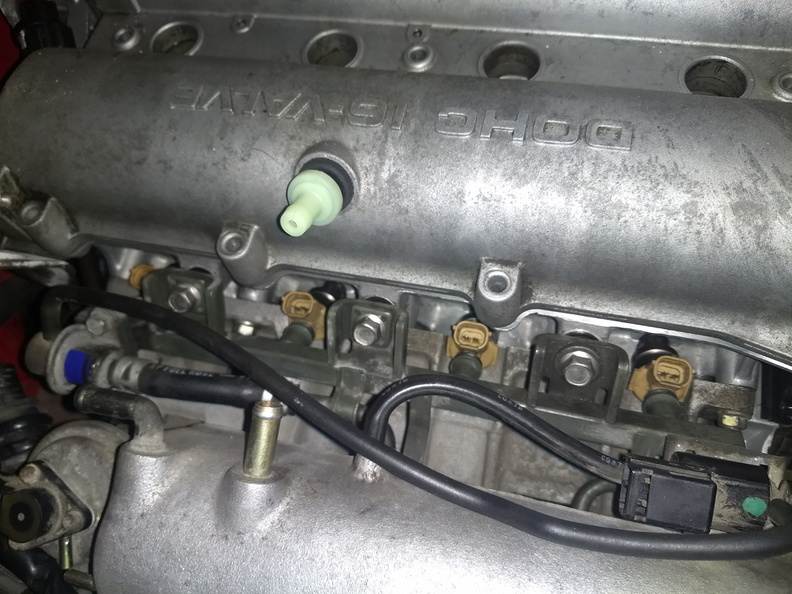
I came up with two (more) parts that I needed that were not included in the gasket set.  I lacked a gasket for the EGR tube and the little o-ring for the thermostat neck.  In the picture above, notice the hole in the head right above the water pump.  The "lower" thermostat housing bolts on there and uses an o-ring in a groove.  The old one was flattened out a bit and I'm not really interested in re-using seals, so I needed to find a new one.  

I took a trip to O'Reilly to see what they had and wound up with a almost-but-not-quite-too-large O-ring, some red RTV, the fluids, a PCV valve, and Dorman HELP! part number 42339:

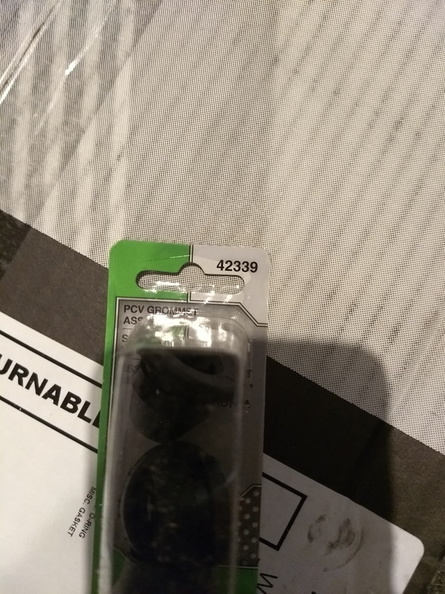
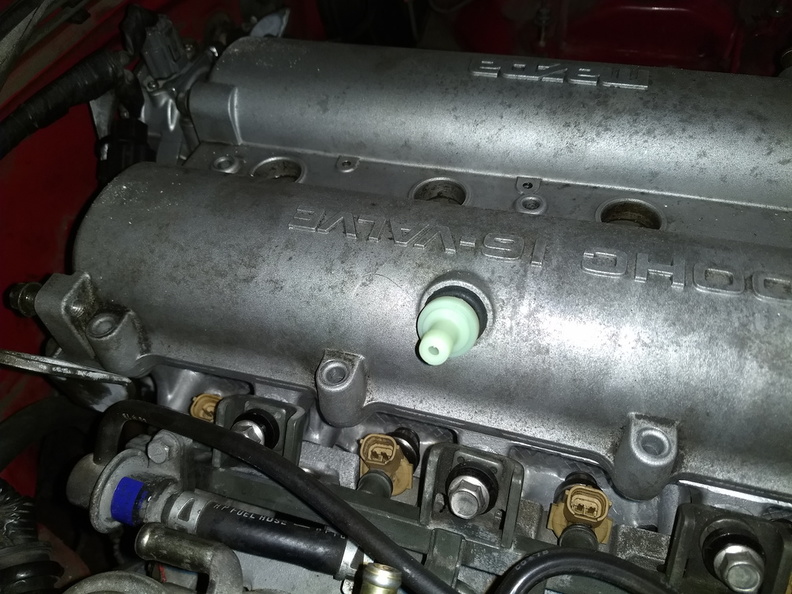
It just so happens that one of the grommets in that assortment is the perfect size for the Miata valve cover:

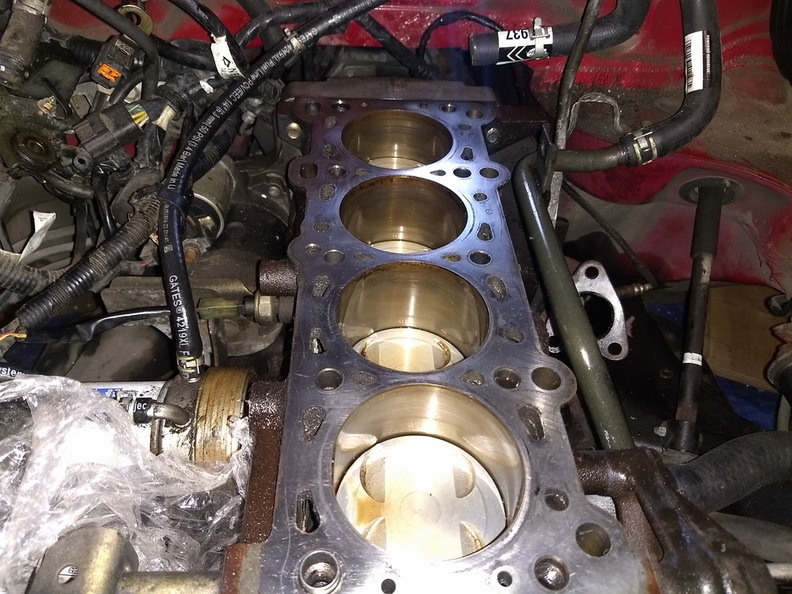
The o-ring wasn't a perfect fit unfortunately, but it was pretty darn close, so I gave it a little bead of RTV around the outside and torqued it down.  I'll have to watch it for leaks, but it should be good.  The EGR tube used a metal gasket, so I put some of the red sensor-safe, high-temp RTV on each side and bolted it up.  It isn't that hard to get to so if there are exhaust leaks there, I can always try to run down the right gasket.  I guess that's part of the different between the different gasket sets -- apparently the Fel-Pro set does include that gasket, but the one I got from Rock Auto, not so much.  Long run, I'm not really worried about it, again it should be fine.

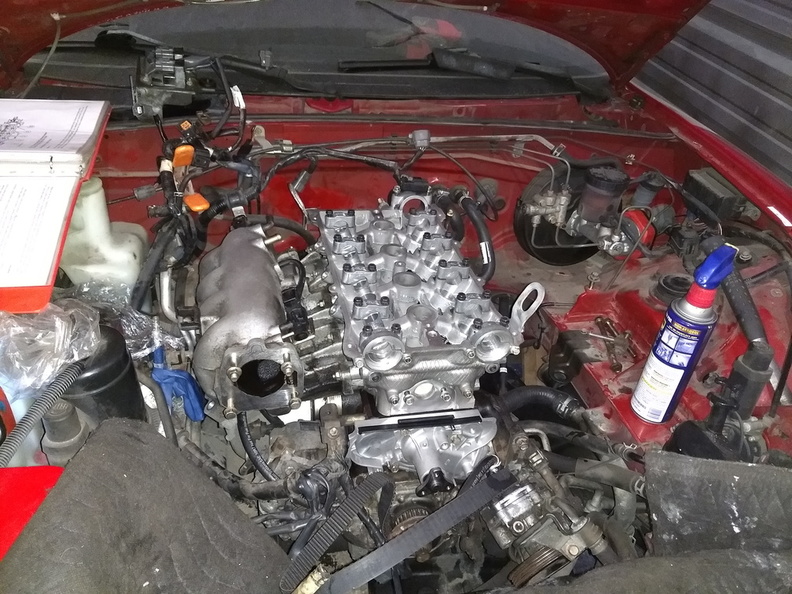
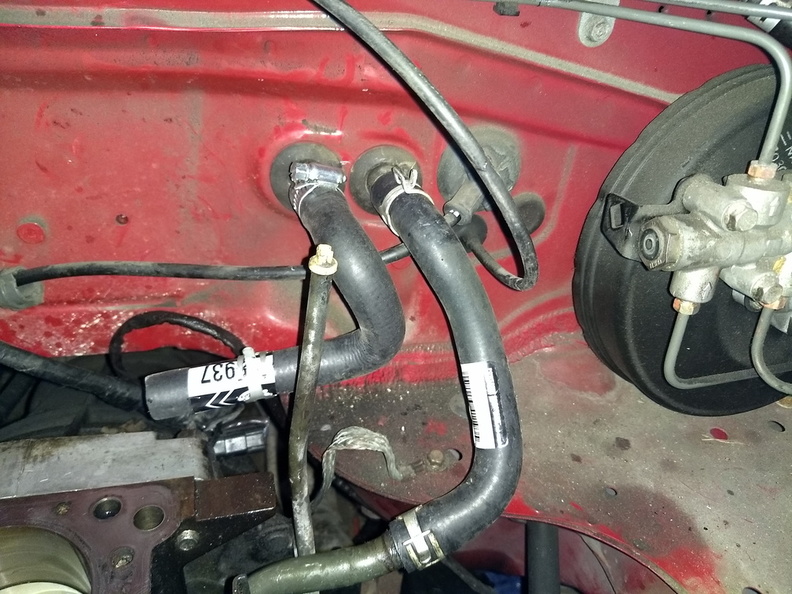
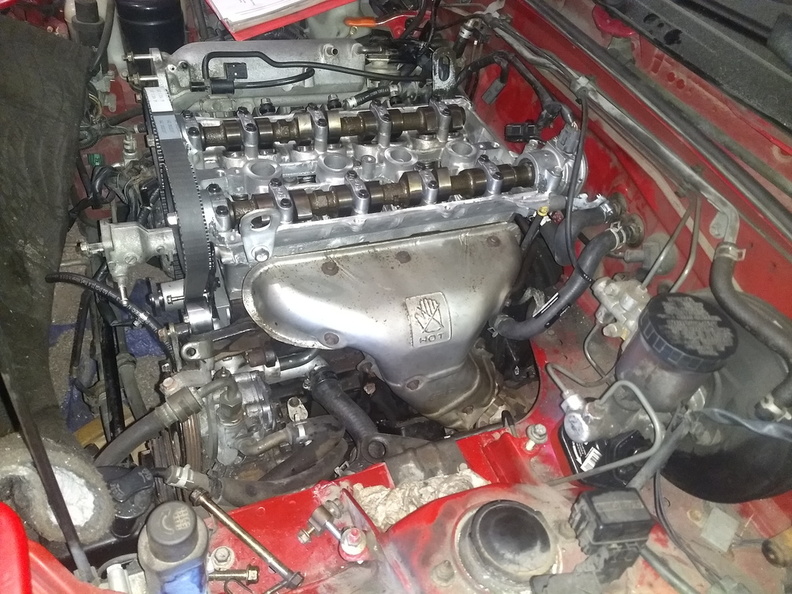
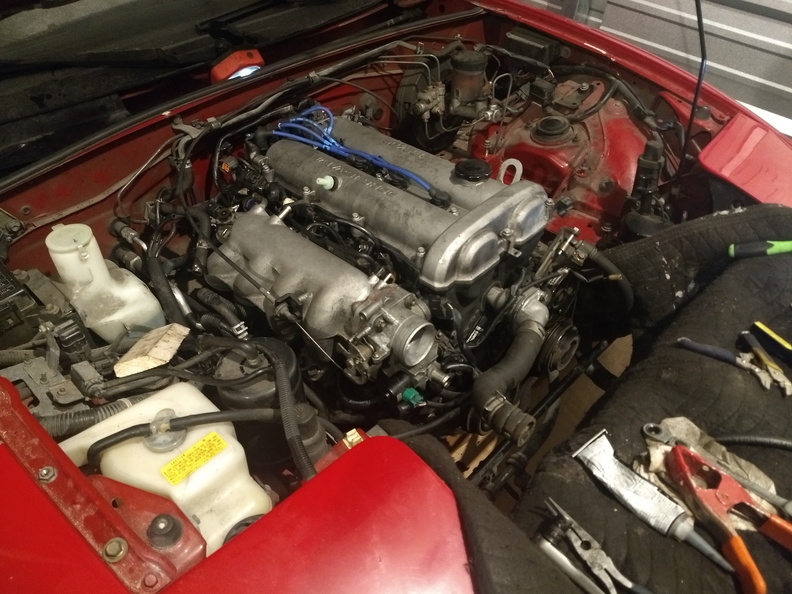
By the end of the night, I had the heater hoses connected, the cams installed, the fuel rail installed, and the exhaust manifold bolted to the head (still need to attach the exhaust pipe and put the heat shield back on). 

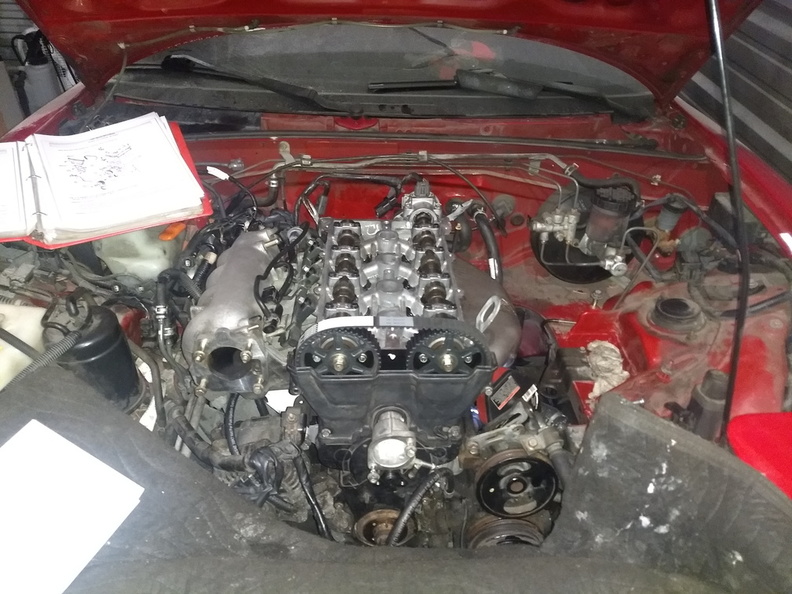
Today is another soccer game (at least it's just cold and not cold and raining this time...), but I hope to get out and pull the cam gears so I can replace the cam seals, get the timing set, and continue putting parts back on the car.

In retrospect, I really don't know why I didn't do the cam seals before.  Or at least cut the old ones off while they were out of the head.  I'm counting it as a win that I actually remembered to put the HLAs in before I torqued the cam caps, though, so let's just keep expecations low, right?

Cousin_Eddie
Cousin_Eddie Reader
3/19/18 8:25 a.m.
wae said:


You have your fuel rail installed incorrectly. Those black spacers go beneath the rail, not above it. You'll notice a counterbore in the head where the spacers index down into it.

My car

Service manual (kind of hard to make out I know)


wae
wae Dork
3/19/18 1:39 p.m.

In reply to Cousin_Eddie :

Oh shoot, you are 100% correct!  I didn't even notice that I had screwed that up.  Thanks for the catch!

wae
wae Dork
3/19/18 1:52 p.m.

In the realm of other things I screwed up:

I spent probably about two hours screwing around with the timing belt when it dawned on me that I had put the lower portion of the thermostat housing on upside-down.  The only way to remove it is the take that black plate off.  The only way to take that black plate off is to get the cam sprockets out of the way.  So, undo all my work and start over.

The good news is that it took me a long time to figure out that the FM sprocket tool wasn't the right tool for the job to set the timing initially.  It does a very good job of holding things together once it's set, but I just couldn't get it to hold the gears in just the right spot - putting the tool in would result in just enough movement to leave me needing about half-a-tooth.  But then, maybe it's just me.

Anyway, the cam seal tool is the business!

And now that I'm really good at it, it didn't take too long to get back to:

I also got the rest of the plastic bolted on to the front - although I called it quits when it was time to play "where the berk did that bolt go that I literally was holding in my hand 30 seconds ago" so I've got to crawl around and find that one still.

I also hooked up the exhaust pipe with a new gasket and got the heat shield reattached.

Almost there...

Ashyukun (Robert)
Ashyukun (Robert) UltraDork
3/19/18 3:31 p.m.

Sheesh, you're making me feel awful lazy with how much you've accomplished on this while I've hardly gotten anything done on the Rampage! Looks good though- will be interesting if we all end up with individual entries at the Challenge this year!

wae
wae Dork
3/21/18 8:34 a.m.
Ashyukun (Robert) said:

Sheesh, you're making me feel awful lazy with how much you've accomplished on this while I've hardly gotten anything done on the Rampage! Looks good though- will be interesting if we all end up with individual entries at the Challenge this year!

Well, when you consider that book hours on a job like this are probably something like 7 or 8 hours, I'm moving at a snail's pace!  I try to go over to the shop at least once every couple days after the family is settled in for the night with a goal of having a brew, listening to part of a podcast, and crossing at least one item off my list.  I brought the car home on Feb 23rd with a goal of having it back under its own power in a month, so I have until Friday.  Of course, February is a short month so I could give myself the full 30 days and have until Sunday (but that just sounds like cheating!)

wae
wae Dork
3/21/18 9:33 a.m.

Speaking of getting items checked off my list, I skipped out on Monday night since I had some Bingo prep to do and then last night I wasn't able to head over to the shop until late in the evening because kid sportball practice kept getting moved around on us.  Once I was over there, I started off with fixing the fuel rail:


Much better!  Thanks, Cousin_Eddie for pointing that out.  

Moving forward, I went ahead and got the pullies re-attached.  The Flyin' Miata cam holder was helpful for this step as well:  I used that to hold the crank still so I could tighten those bolts and then once I had the belts on, I used it again to tighten the water pump pulley.

Due to an error on my part, I had to put the belts on twice.  After getting the belts on, I put the thermostat and its housing on but I found that the water line that came up from behind the PS pulley and into the thermostat housing wasn't routed properly.  Also, I had bought a molded hose that would route better and avoid getting cut by the belt, so I took the belts back off to remove the hose I put there and replaced it with the molded hose.  That would be Gates P/N 18010 and it requires just a slight bit of trimming to fit perfectly in that spot.  Make sure you don't toss the little wire-holding bracket that bolts in there via the timing cover bolt -- it has a holder on it that will assist in keeping the coolant line out of the path of the power steering belt.

From there, I put the RTV around the humps on the head and applied the gasket to the valve cover and got it torqued down.  Then I put the coil pack back on and started to re-attach electrical connections including the new plug wires.  The throttle cable is reconnected and the coolant lines to it are reattached.  There are still a few connectors that need to be sorted out and the various brackets that hold the harness in place still need to be bolted on, but by this time it was about 2330 and I was just wiped out.  I also need to hook up all the vacuum lines.  They all seem in okay-ish shape so I'm not planning to replace them just now but if any of them look "that bad", I'll source some replacement hose.  When I left for the night, it looked something like this:

By golly, it's starting to look like an actual car, huh?

Tonight I plan to finish the electrical connections, hook up the vacuum lines, and get the new radiator installed.  I'm not really sure that there's anything wrong with the existing radiator - the coolant came out very clean and it was the heater hose behind the head that appeared to have failed.  I guess I'll hang on to it just in case I ever need one.  Once I have the radiator in, I can get the airbox reinstalled and then fill it up with fluids.  Hopefully I'll remember to put the oil pan drain plug back in before I start dumping in oil.

wae
wae Dork
3/22/18 5:37 a.m.

Well the good news is that I got it together last night.  I had a hard time getting it started because despite hooking the plug wires up exactly the way they were when I got it, it shook and made terrible noises and barely ran.  After moving the plug wires to the correct order, however, it is nice and smooth.  I gave it a quick zoom up and down the parking lot but brought it right back in after a cloud of oil smoke.

Left side, rear of the engine I've got oil coming from between the block and head.  I've got 145-150psi in each cylinder, but something is definitely not sealed up.  There didn't seem to be a way to install the gasket upside down, but that's certainly a possibility.  The two head bolts in the rear of the engine (#9 & #10) both seemed to go to torque funny - not sure how to describe it but they made creaking noises and seemed to want to turn more even though the torque wrench said stop.  I suppose it's possible that the block needs to be decked.  It's a bit of a disappointing setback.

EvanB
EvanB MegaDork
3/22/18 6:48 a.m.

It's definitely not coming from the CAS seal?

wae
wae Dork
3/22/18 6:53 a.m.
EvanB said:

It's definitely not coming from the CAS seal?

I'm not going to absolutely rule anything out, but the head felt dry all the way down, so I'm pretty sure it's not the CAS.

EvanB
EvanB MegaDork
3/22/18 7:00 a.m.

Well that sucks. 

wae
wae Dork
3/22/18 7:22 a.m.

Yeah, I was kind of thinking the same thing.

EvanB
EvanB MegaDork
3/22/18 7:36 a.m.

Maybe try removing the head bolts, chasing the threads and cleaning them out then retorquing? I don't know if that would help but it's easier than pulling the engine. 

wae
wae Dork
3/22/18 8:22 a.m.

I'm thinking that's probably a good next step.  It's not going to break anything that isn't already broken and it won't require tearing much of anything apart.

Jerry
Jerry UberDork
3/23/18 7:05 a.m.

Off the site a few days traveling for work, hoped to come back to video of you doing donuts in the snow.

wae
wae Dork
3/23/18 4:53 p.m.

Okay, I pulled each head bolt out one at a time, cleaned the bolt and the hole, then retorqued.  I used a metal stick to cram a rag down into each one until it came out dry and I've got some pretty soaked raglets over here.  When I retorqued each one, I did not get any creaking or popping this time.  Originally there was a fair amount of that going on.

Now I'm waiting for my wife to bring me jumper cables so I can try to start it and see if this Hail Mary move does anything for me.

The suspense is killing me...

EvanB
EvanB MegaDork
3/23/18 6:24 p.m.
wae said:

The suspense is killing me...

You're telling me! Is it running yet?

wae
wae Dork
3/23/18 6:29 p.m.

There may or may not have been a bolt that fell into the valve cover.  Either that or things are very bad.  Pulling the cover now...

1 2 3 4 5

You'll need to log in to post.

Our Preferred Partners
u269EN3prADl2Z7U8mEkUDIcuQBS8E7DZ6tZ70XZvircfgH0MB4WtPqNpmRDO5Z4