
wae
UberDork
2/12/21 3:43 p.m.
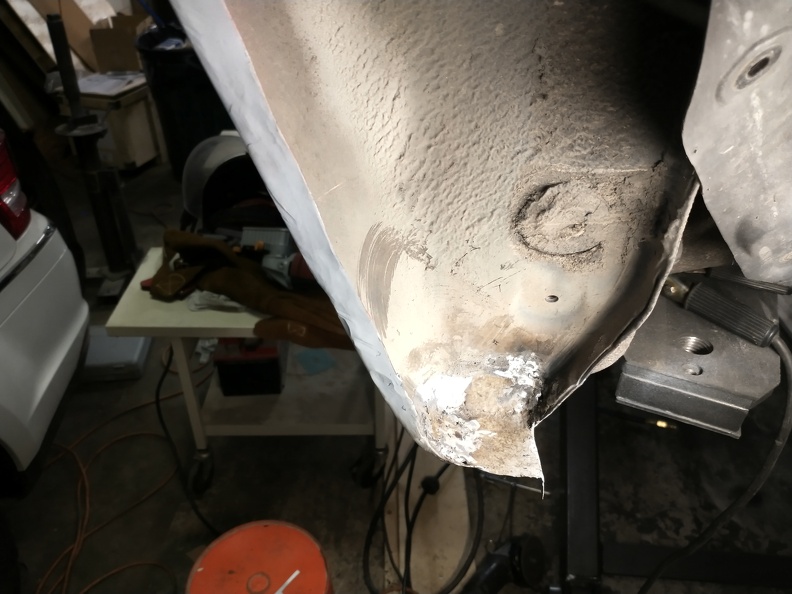
I lied. I broke out the camera-on-a-wire and went looking some more:
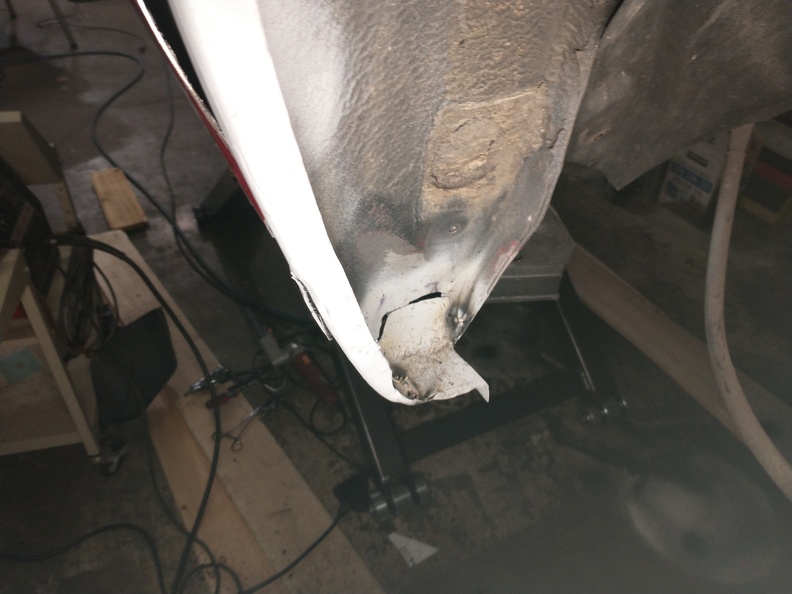
Left side, inside the unibody channel closest to the rocker:


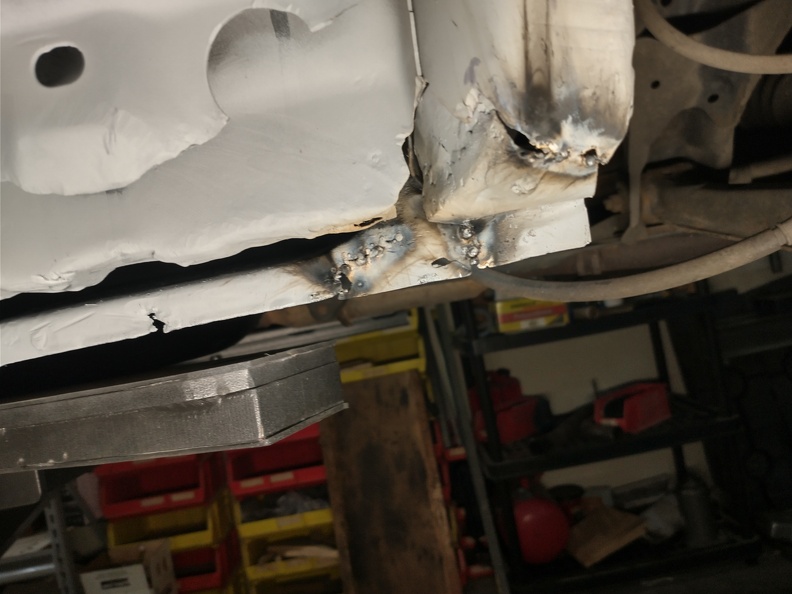
Right side, same basic place:


There's not a good way to get in to that without chopping a hole, but "in theory" Eastwood says that the Internal Frame Coating will encapsulate that.
I also went ahead and ordered up the two quarter panel patches from Mill Supply. I think I may wind up needing the inner wheel arch as well, but I'm going to wait to see how much the quarter is supposed to cover because I might be able to make the bit I need instead of spending $150 for a 2x3 bit of metal.
Can you get in there with any kind of wire brush or tool to get the scaly stuff out?
"In theory" it should be encapsulated but if there is any loose scale the coating will sit on top of it and it can still rust from the inside and then flake off and continue rusting.
wae
UberDork
2/12/21 4:47 p.m.
In reply to EvanB (Forum Supporter) :
I was going to hit it with my shop vac-to-vacuum-hose adapter to try to pick up what I can - including that nut that's apparently rolling around in there. As I think about it, though, I wonder if I could get a flex attachment for a Dremel through there. That might be able to knock the top layer loose. I wonder if I could somehow put a hose between the body of the spot blasting gun and its nozzle and feed that in there....

noddaz
UltraDork
2/12/21 4:51 p.m.
ISMA style box flares. That would fix it.
wae
UberDork
2/18/21 4:04 p.m.
New metal arrived today! Haven't had a chance to really examine it yet, but they look pretty decent.

In reply to wae :
You bastard. Those look nice.
I'm trying this as a hose attachment to a pressure washer for inside my frame rails when the weather gets better
it should peel up any scale and let you paint better.
wae
UberDork
2/19/21 8:49 a.m.
I am pretty impressed with the quality of the panels at first glance. I'm planning to get out there today to do some measuring to make sure, but I held them up to the car and they seem pretty right. I picked these up from Mill Supply out of Cleveland, but weirdly they were $174.90 inclusive of tax and shipping for the pair by buying off of eBay. Ordering from their website, however, they wanted $129.20 for the panels, ten bucks in taxes, and $42 for shipping, bringing the total to $181.26. I would think that eBay would add more in overhead than their own website, but whatever. Unless somehow their shipping calculator is all out of whack and it can't comprehend shipping two stampings in one box. I still might need the "Inner Rear Wheelhouse Lower Front Section" for the left side, but I'm having a hard time visualizing what gap will be left once the quarter panel is back in place. That might be something I can easily fabricate a patch for as opposed to spending $128 (plus the shipping and tax, of course!) for a panel that I'll need about 4 square inches of.
That spray nozzle actually looks very similar to what Eastwood put on their internal frame coating hose! I've been giving it some thought and it looks like a Dremel flex shaft won't fit, but I've been looking at jewelers' tools as well as dreaming up ways to make tiny medieval torture devices out of small diameter steel rods that would work as a kind of scraper to get the scaling off.
I haven't had much time to give this a ton of thought, though, and since the heater was on the fritz, it would just take way too long to get the place up to a comfortable temperature. But now the heater is working again and I've got some time tonight so I'm hoping to make some progress.
wae
UberDork
4/1/21 2:31 p.m.
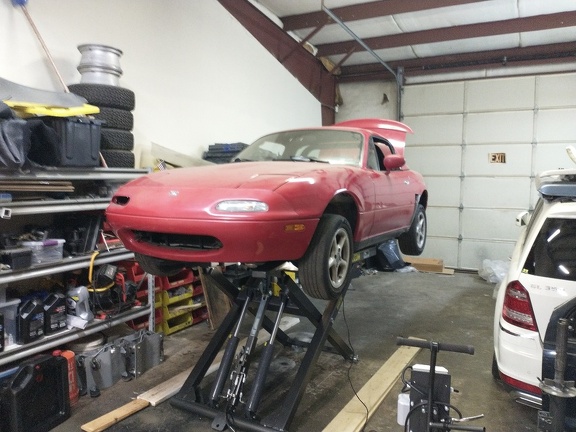
Finally had a chance to get back to this for a bit. First I had to discover that an inch and a half of ramp isn't really enough to get the Miata on the lift. Long term, I'm going to stack three 2x6s on each side which should be plenty. For now, though, I just used some scrap wood and the floor jack to get it in the right spot.
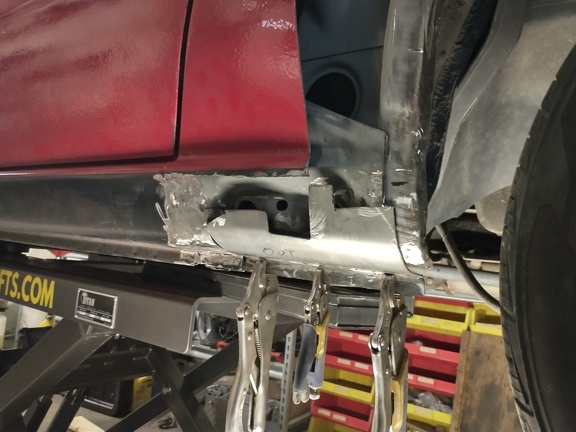
After some cutting, welding, grinding, cutting, and more grinding, the patch for the rocker is about 75% complete.

Jerry
PowerDork
4/2/21 7:14 a.m.
I missed when you got the lift? Woulda made my exhaust easier. I still would have just stood there like a dolt, maybe handing you the gasket.
wae
UberDork
4/2/21 7:26 a.m.
In reply to Jerry :
I went up to Indy last Friday to pick it up, so you haven't missed much! What's really funny is that while I was working on my patch panel there I was thinking about how much easier doing your muffler would have been. Honestly the worst part of the lift is having to live with the knowledge that I spent so many years of my life without one.
In reply to wae :
Two 2x12's screwed together and staggered with an 2x4 on the end to stop things rolling off is what I use on the exact same lift. My miata is about as low as you get.

wae
UberDork
4/12/21 3:19 p.m.
When I was making my final decision having seen yours is one of the things that pushed me in that direction actually! That's good to know that a pair of 2-bys will give me enough room to swing the arms around, though. I haven't gone out and gotten any lumber yet, so you just saved me about 33%!
What is that you're using on the pinch welds, though? Hockey pucks just sitting on the rectangular pads?
In reply to wae :
Hahaha - having a lift is just the best isn't it?
I got these pucks on the little sliding rectangle pads, but they seem to have gone up in price again. Maybe ebay has them cheaper?
https://smile.amazon.com/gp/product/B074TBZMLZ/ref=ppx_yo_dt_b_search_asin_image?ie=UTF8&psc=1
I might've messed up the name of the lumber - I is not so smart with the wood stuff .... here's the board dimensions.
https://photos.app.goo.gl/Ab4CPxkuwc8BeEG17
/\ Album of wood dimensions /\
wae
UberDork
4/13/21 8:29 p.m.
Awesome! I'll have to get a set of those. I also got myself an oil drain pan that fits under the lift - most of them are designed for full-rise lifts and don't go low enough. Doing an oil change and tire rotation on the wife's Mazda 5 was so much easier! I feel like a moron for not buying one of these sooner.
Since it's still up there, I finished up the patch panels that I had to make and put some weld-through primer on them. Also ran the inside frame rust encapsulator into the rockers on both sides. Next I'll get those welded on and then I can start cutting up the quarter panels to weld them up. The inside frame coating is really messy...


wae
UberDork
4/16/21 3:51 p.m.
It was quite fiddly to get all the bits in there, but the inside of the fender is back. Problem number one that I'm having is that rather than cutting out more of the car to make good straight lines, I tried carving my patch panel to match the funky shape of what I took off the car with the grinder. Compounding that, I'm using a flux core welder and it's just too hot so I keep making new holes that I didn't want. I've finally got the technique down, but the learning process took a while.
I gave it some grinding after that to smooth it down and filled in the little pin holes that were left with some JB Weld. It's not pretty, but the inside part will be covered by another panel and the outside part will be hard to see and covered with some of that rocker panel chip-preventative paint, so it wasn't going to be smooth anyway.
I need to take a little break from this project to get the Neon ready for the first rallyx, but I feel like now that I've kind of figured this out I've got some momentum.
You are still welcome to borrow my MIG welder for the outer fender work, at least once the Sierra is out of the garage (hopefully tomorrow).
You need anything off this miata? This one has a bent front end, but otherwise was really nice body wise.

wae
UberDork
4/16/21 6:21 p.m.
In reply to accordionfolder :
Actually..... Both doors and the trunk lid are really rippled and dinged on mine. If those are clean, I'd be very interested. Also, how's the right fender? I was thinking about trying to patch in the lower 2 or 3 inches' worth of a good fender to replace the rusty part on mine and so I could keep the VIN tag the same. I don't imagine the top is still there or in good shape? Oh, and the battery - is it goodish?
If I come down to buy parts off you part of the deal is you're going to have to show off the rollback, you know that right? 
In reply to wae :
Lol - I hope my BFF truck is back home soon. He's off getting some surgery - the previous owners weren't kind!
I'll PM you pictures and info. The body is perfectly straight all the way around, it's just the subframe that's crooked - though the way it's been sitting probably hasn't helped.
*Edit, actually here's some pictures of when I picked it up here, but I'll go get some as it sits today.
https://grassrootsmotorsports.com/forum/build-projects-and-project-cars/miata/170843/page1/
wae
UberDork
5/5/21 12:21 p.m.
I had a couple minutes to put the Miata back on the lift and do a touch of welding. I wanted to get the patch for the rocker welded in, but the way I had the car on the lift obstructed the spot where the patch panel needed to be. I'm going to have to re-think that and I don't have time for thinking today! I did go ahead and re-attach the rocker to the inner wheel well structure, though. So a modicum of progress.

wae
UberDork
9/23/21 12:52 p.m.
I've been putting in a few minutes here and there. Left side patch panel is mostly trimmed down. Best tool for this that I've found is the little finger sander with the 60 grit 3M belt file paper on it. I cut it close with the deathwheel and then bring it in close with the file. I got a little too excited with the angle grinder on the bottom, so I'll need to fill that in. I also need to trim the front at the bottom a tiny bit, but otherwise I think the only thing left to do is get a cylinder of gas and start welding.

wae
PowerDork
3/11/23 7:37 a.m.
Well fuuu....
I got distracted with getting der Scheißwagen running and a few other things and the Miata sort of got shuffled around. It wound up spending a little toouch time parked outside waiting for me to come back to it. I'm not sure if that was a mistake or a mitzvah. While I had sprayed it with primer before sending it to the outside to be rained on (for a longer period of time than I'm comfortable discussing), when I got it back in finally there was a bit of rust re-forming around my previous repairs.
I thought I had pictures of that, but I don't. At any rate, I had to sand and grind a bit to get that rust removed again. This time for the inside bits that won't be seen, I brushed on a fairly heavy coat of Rust-Oleum Rusty Metal Primer. I've had really good luck with that as a protectant for trailers and things like that where the epoxy protection of POR isn't needed, but encapsulation of any unseen rust is.
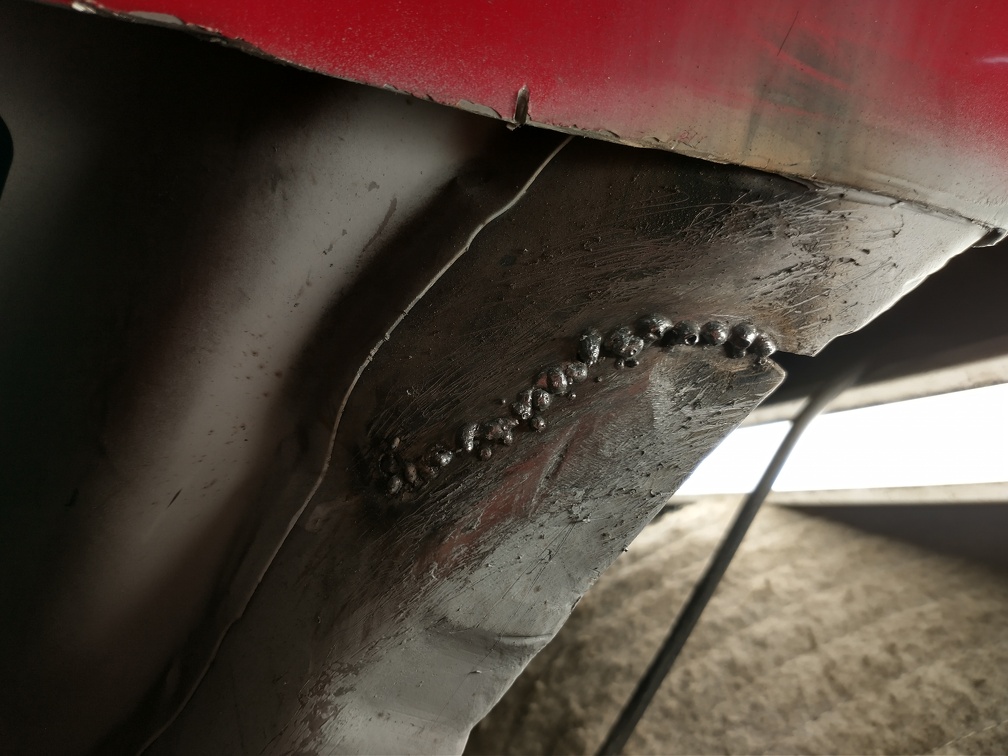
Yesterday I finally hit the edges of the cut out with a flapwheel, got a little bit of weld-through primer on there, and got to work. I've got gas now, so it's not as hole-makey as before. Using the technique of holding the torch up to the joint and giving a little blast of weld to tack a spot, then blasting it with compressed air to cool it down, I put a few tacks on before I ran out of shop time for the day. It's looking not bad so far.


wae
PowerDork
3/11/23 3:12 p.m.

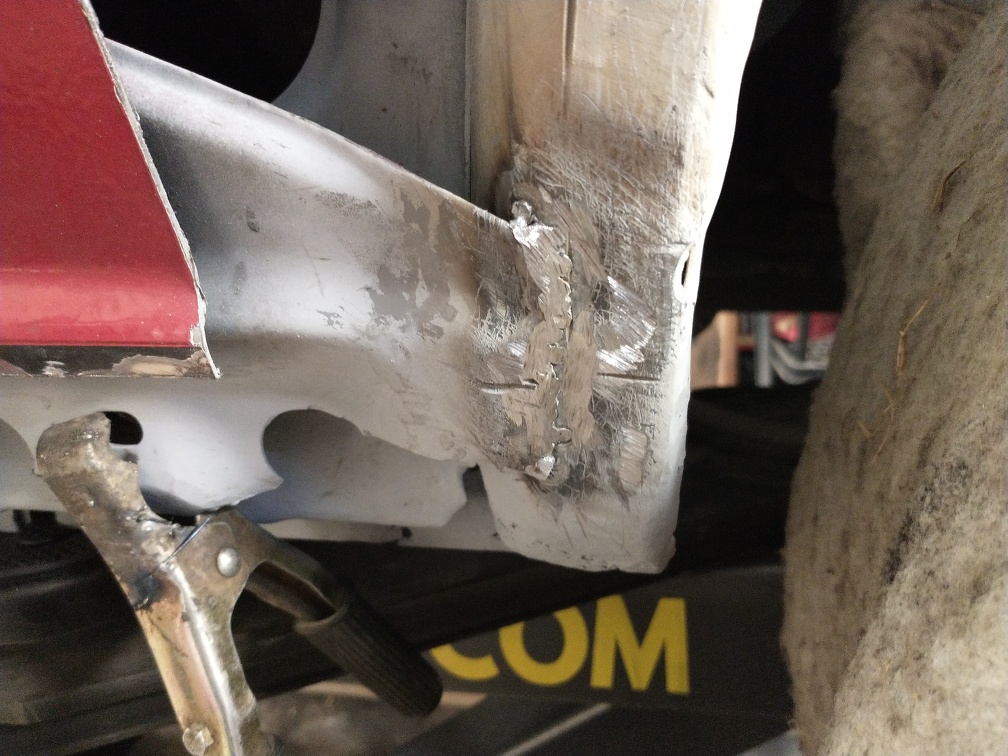
So far, there doesn't seem to be much warping of the metal, if any, and it's moving along. Slow going... And I kind of wish I had the Miata on the lift instead of the Saab, but that's okay. After I got a lot of the welds in, I decided to grind it down and put some weld-through primer on it just to see what I had. If you ignore the running primer (oops), it's starting to look pretty okay.

If you can adjust your feed speed any slower, I would do it, those welds are bubbled up higher than they need to be. With sheet metal, you don't want more power, but adding less metal can help the result. Panels look pretty straight though and that's what counts!


