Rodan
Rodan Dork
7/10/20 11:06 p.m.

Finished primary construction on the tow bar today.

As a reminder, these are the clevis adapters I'm using:

First step was mocking things up on the bumper and making sure everything was going to work.

Next was modifying the coupler to remove some weight and get access to get a good weld on the tubing.  First time I've fired up the plasma cutter in a while.

Then everything got mocked up again before tacking it all together.

I added two crossbars for strength.

Here's how the tubing fit over the clevis adapters:

All welded up...


And of course, it rained again... 1st time since the day swapped the transfer case, so I had to take a few rain breaks...


I have a couple of minor things left to add, and I need to pick up a new hitch bar for the truck so I can test it out, but at least the basics are done.

Rodan
Rodan Dork
7/11/20 3:36 p.m.

More progress on the tow bar details today... working on a latch to secure the tow bar to the bumper hoop for when it needs to be driven briefly with the tow bar attached.

Started with a piece of 2" tube, cut in half... 

... which will nest around the 1 3/4" bumper tube.

Next I added hinges and a tab for securing it shut.

On the bumper tube:


It will get welded onto a short piece of tubing off the crossbar of the tow bar, so when the bar swings up, it can be secured with the above latch.  I stripped out the threads on the hole saw arbor on my notcher, so that's got me stalled.  Also need to get a bolt and wing nut for the latch... 

And it's raining again... cheeky

Rodan
Rodan Dork
7/12/20 12:37 p.m.

More progress on the latch.  I ditched the wing nut idea, and went with a clevis pin.

Shortened and re-drilled pin:

With washer and clip:

Mocked up in place:


I've got to got to work in a few hours, so I didn't break the welder out this morning.  I hope to get everything welded up tomorrow morning before work.

Rodan
Rodan Dork
7/13/20 1:00 p.m.

Got the latch welded up today.


The lens on my phone distorts things a bit, so it looks a little out of proportion.  Safety chain mounts are on the way, so I just need to weld those on when they arrive.  New ball mount, ball and wiring supplies are also inbound.  Hope to be doing some testing pulling the Bronco around next weekend...

Rodan
Rodan Dork
7/18/20 5:03 p.m.

Drove the dually and Bronco to a local shopping center with a large, usually empty parking lot this afternoon to do some testing.  Everything is working exactly as intended. 

Now that I knew where they needed to be, when I got home, I welded on some loops to anchor the safety chains.

And with that, the fabrication stage of the tow bar build is done.  

Next step is to get started on the wiring.  I also have a 'Brake Buddy' I borrowed from a friend, so I'll see about getting that set up.

Professor_Brap (Forum Supporter)
Professor_Brap (Forum Supporter) SuperDork
7/19/20 12:25 p.m.

Looking good! I need to flat tow more things. 

Rodan
Rodan Dork
7/22/20 3:49 p.m.

While I was waiting for electrical components to arrive for the towing harness, I got to work on another project.  If anyone has ever sat in a Bronco rear seat you know it's about the most uncomfortable seat ever designed for humans.  It's even worse for dogs...  I wanted to build a platform at a height that would allow our dog to see out the windows while sitting or laying down, and still have room to stand.  This would also allow for some storage under the platform.  Broncos don't have a whole lot of extra space, and I wasn't using what I had efficiently.  This project could kill two birds with one stone.

The rear seat attaches with two pins (pivot points) in the front, and a big latch in the back, so it can fold/tumble forward.  With the seat removed, I was left with these three anchor points.

I started with the front anchor points by drilling some 1/4" flat stock for the pins.

These got some 1" square tube 'legs'.

In place:

I built a basic frame for the platform the width of the cargo area, tieing in the front and rear anchor points and adding a couple of legs in the rear corners to spread the load.

I removed the bar the stock seat latch attached to and used some flat stock for a rear mounting point.


Next up was the 'seating' surface.  I cut a piece of 1/2" birch ply to the proper dimensions.

Added some 1/2" foam padding.

And some indoor/outdoor carpet.

Finished...


Still needs paint... I'll paint it when I paint the tow bar.

Rodan
Rodan Dork
7/22/20 3:58 p.m.

Satisfied customer... laugh

Rodan
Rodan Dork
7/26/20 12:58 p.m.

The other day, someone backed into our mailbox...

I built the post a few years ago, and we share it with the neighbor across the street.  Unfortunately, her driveway is perfectly lined up for a careless backer to hit the mailboxes.  People often use her driveway to turn around (must look inviting, I guess...?), so this isn't the first time.  This is the first time anyone has hit it hard enough to bend the 1 3/4" steel tubing... hope they did some serious damage to their car.

So, today, instead of doing other things that need to get done, I spent the morning fixing the mailboxes.  I basically just sectioned out the bent portion and insterted a 1 1/2" sleeve and welded it back together.  I also changed the mounting of the boxes a bit, as I'd never really been happy with that.  Anyway, good as new, and a morning wasted...

Rodan
Rodan Dork
7/27/20 11:50 a.m.

About a week ago, when I was starting on my 'Doggie Deck', I went to open the tailgate and the handle broke.  Upon examination, the linkage rod had oblonged the hole, and eventually the retaining clip and spring broke and the whole thing pulled apart.  I didn't have time to deal with it right then, so I pulled the access panel and have been pulling on the linkage rod to open the tailgate for a week.

After researching alternatives, I bit the bullet and bought a NOS Ford handle off eBay.

The old handle had been marginal for a while, and you can see the condition of the rod compared to the new one...

While I had things apart, I removed the operating arm for the 'window down' safety.  This prevents the handle from being pulled unless the tailgate window is fully down...  all it really accomplishes is extra drag and stress on the mechanism.   While I had the latch out, I cleaned everything up and shot some grease into the pivot point.

Got everything re-installed and it's working great.

I also noticed that the striker bushings were gone, so I dug through my pile and came up with a couple and installed them and adjusted the strikers.  Tailgate was nice and tight again... but the window wouldn't go up.  The driver's side striker latch on a Bronco has a safety switch that prevents the window from being moved unless the tailgate is latched shut.  After some fiddling, I determined the striker bushing was too large a diameter to allow the latch to close to the point where it closed the connection on the safety switch.  They were door striker bushings, so I just pulled the driver's side bushing and the window works again.  I ordered the proper part number for the tailgate striker bushings... I'm hoping they're a slightly smaller diameter.  If not, I may have to find a way to turn one down.... or I may just make one out of delrin stock.

Rodan
Rodan Dork
8/2/20 5:03 p.m.

Got most of the electrical done for flat towing the Bronco today....

Dedicated 7 wire cable that will remain attached to the tow bar:

Labeled, because I'm pretty sure I'd screw up which end was whice when attaching it.

Speaking of which, it plugs into a permanently mounted plug under the Bronco's bumper...


I made a set of brackets/magnetic mounts for temporary tail lights which will plug into the harness permanently mounte in the Bronco.

Once everything was mocked up, I made up the harness for the taillights, which plugs in at the rear bumper.  I think I've got some nice wire sheathing around I can use to clean everything up a bit.

Everything is powered from the tow vehicle, so the Bronco's battery isn't used for anything while being towed.  Hook up process is just a few minutes.  

Rodan
Rodan Dork
8/5/20 11:28 a.m.

Tow bar is done... I think.  cheeky

I tested the Brake Buddy I borrowed from a friend, and everything worked in the driveway the other day.  Planning a full systems test/ around town tow this weekend to confirm, then I need to get the camper ready and loaded in the truck.

Rodan
Rodan Dork
8/9/20 12:40 p.m.

Second test went well, got the rig up to highway speeds and pulled smooth and straight.  Drove it around 10 miles, no issues.

The only problem was the Brake Buddy wasn't working.  After some experimentation, I determined the power lead from the 7 wire trailer harness wasn't supplying enough juice.  The Brake Buddy wants 15A, and since that circuit was fused for 30A on the truck I just assumed it was good to go.  Apparently not.  I'm working on an alternative power source while trying to avoid it pulling down the Bronco's battery over a full day of driving.

Oh, it's a little weird being tailgated by your own vehicle... cheeky

Rodan
Rodan Dork
8/9/20 12:42 p.m.

In other news, our neigborhood hawk family was having a hearty breakfast on the neighbor's roof this morning.


Mama Hawk didn't seem all that happy about me taking pics of the kids...

solfly
solfly HalfDork
8/9/20 3:39 p.m.

MRW I popped in expecting Miata stuff.

Rodan
Rodan Dork
8/9/20 4:37 p.m.

We actually have our first track event in a while coming up in September.  Assuming it doesn't get cancelled... 14 drivers signed up for the two-day weekend so far...

I'll be getting the NA out of the trailer for a pre-event inspection next week.

Rodan
Rodan Dork
8/16/20 8:23 a.m.

Final systems test with everything loaded up and hooked up.  All good and ready for our upcoming trip.

Rodan
Rodan Dork
8/17/20 12:28 p.m.

How 'bout a little Miata content for those that are tired of the Bronco...?  cheeky

Hung out in some pretty good company the other morning at our 'pre Cars & Coffee' Cars & Coffee...

Then brought the NA home for its usual pre-event inspection.

Checked everything over, swapped in the track pads, and it's all ready to go.  For all my gripes about Wilwood brakes, changing pads isn't one of them!

Rodan
Rodan Dork
9/2/20 5:25 p.m.

Rolled in today from an epic 10 days in Colorado.  laugh

It's going to take a while to get through all the pics, but I might as well get started...

Our first base camp was at Matterhorn Campground, near Ophir, CO, a 416 mile tow.  The Bronco followed obediently as we chugged down the highway...

Matterhorn is just past the summit of Lizard Head Pass, on CO Hwy 145 at 10,222 feet.

I was surprised at how hazy it was, even at that altitude.  Apparently the smoke from several fires further north was being blown into the area.  We had also had a number of large dust storms in AZ that were contributing.

We rolled into the campsite, unhooked the Bronco and got things organized.  Campsite was at 9,500 ft.

This shot is a little better for scale...

That evening, we just relaxed and went over the plans for the next day's routes...


Rodan
Rodan Dork
9/2/20 5:51 p.m.

The next morning we took off for Ophir Pass, intending to head into Silverton, and then had a couple of other side trips planned, then a return over Ophir to the campground.

The first part of Ophir Pass, climbing out of Ophir is a pretty easy climb through the woods.  Things get interesting when you hit the shelf road above the treeline.  Here's a shot I took looking back down from the top.

The road is very narrow, and mostly loose shale.  My wife was more interested in hanging on than taking pictures during the climb, so I found this pic on the 'net which is a pretty good representation.

The consequences of a misstep were extreme, and to emphasize that, there was something white, very flat, and about the size of a jeep around 500 feet downslope from the road.  

We reached the top without any gravitational mishaps...  11,789ft.

Heading down the other side is a pretty easy dirt road, with some fantastic views.

We rolled into Silverton and had a late breakfast at the Coffee Bear.  Fantastic food, and not unreasonably priced!

Next, it was off to Clear Lake, an alpine lake at 11,984ft.  The first part of the drive is easy dirt road, but then there are several miles of steep switchbacks, a good portion of which was shelf road with extreme drops.  The reward is worth it, though...

After Clear Lake, we went back to Silverton for a visit to the Rocky Mountain Funnel Cake Factory.  It was also worth it! 

Interestingly, our mileage for the day was right around 30 miles (!) but it was already around 2pm.  We had already decided not to retrace our steps over Ophir Pass, and elected to take the highways back to our campground.  What was ~ 13 miles became 80 miles through Ouray and Telluride, but we didn't know, at the time, how fortuitous this decision would turn out to be....

docwyte
docwyte UberDork
9/3/20 8:24 a.m.

That's an awfully wide vehicle to take on Ophir pass.  Most of the passes in that Ouray area are super scenic but really narrow trails...

Rodan
Rodan Dork
9/3/20 5:51 p.m.

In reply to docwyte :

It would seem so (and it definitely felt like it at times!), but it's only 5" wider than a 2020 Wrangler Rubicon.

Rodan
Rodan Dork
9/3/20 6:06 p.m.

As I noted above, we had decided to return to our campsite the long way 'round, via highway.

Everything was great until we turned the corner on CO 145 at Telluride, and pulling out of the round-a-bout, the Bronco died.  At first I thought it was just running rich due to altitude, and the long climb up to Telluride had loaded it up.  After sitting for a few minutes it would start up, run briefly and die again.  I could hear the fuel pump priming, and the pitch was definitely off... like it had low voltage, so I figured the pump was going out.  I gave it about a 30 minute break, and it fired right up, but died a few miles down the road... 6 miles short of camp.  And right on the edge of cell service....

With 6 miles to go, an hour of sunlight, and right on the edge of cell service I decided discretion was the better part of valor and called for a tow.  We got towed back to the campsite (where it fired right up again), and retired for the evening.  The tow probably paid for our roadside assistance for the year (Good Sam), and the tow driver was a nice gentleman who let our dog ride in the cab with us.  He got a good tip... wink

The good news is we didn't have to get towed off Ophir Pass, which would have been significantly more expensive, and probably not covered by roadside assistance...


Rodan
Rodan Dork
9/3/20 6:15 p.m.

We spent the next day hiking the area around the campsite and generally relaxing.


The following day, we would be moving to Ouray, and the plan was to take a detour into Montrose and try to pick up a replacement fuel pump.

Rodan
Rodan Dork
9/3/20 6:46 p.m.

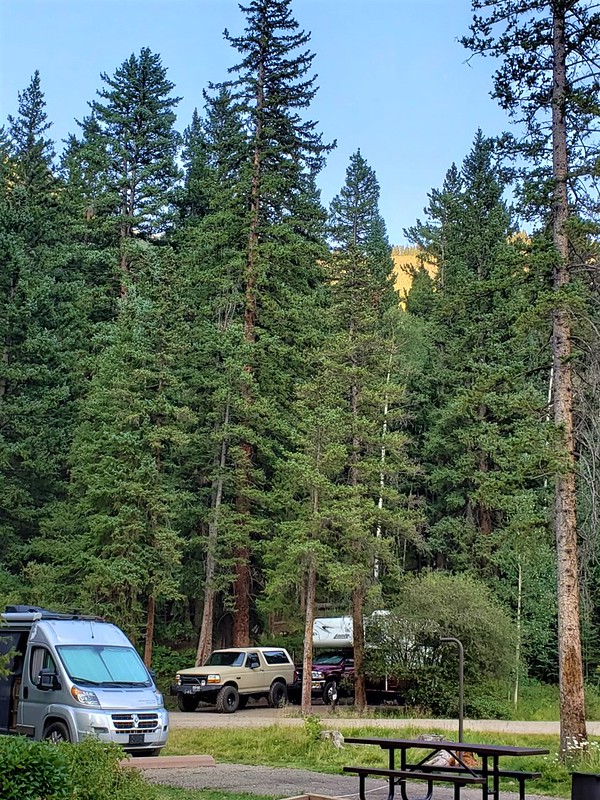
In the morning, the Bronco fired right up, so we hooked up and headed down the mountain.

One of the complications in our plan was a total lack of cell service or internet at our campsite, so I was unable to source a pump, or research the replacement job.  So, while my wife was in Walmart picking up the things you inevitably forget on a camping trip, I sat in the camper and planned out the swap.

First stop was NAPA to pick up the only in-stock fuel pump in town.

Fortunately, Montrose is big enough to have a Harbor Freight, and I stopped there for a couple of tools since I had a limited selection in my road kit.

Finally, we hit the Home Depot for a few more supplies that the other two didn't have, and I parked us in the far corner of the lot for the operation.

On a Bronco, you have two choices when it comes to swapping out a fuel pump.  One is to drop the tank, a heavy, steel, 33 gallon bastard, which was about 3/4 full.  This choice usually involves a couple of broken bolts and was not something I wanted to tackle 500 miles from home.

Choice two is to cut an access hole in the rear floor and change it from the top.  This is what most people choose to do, as it makes future access much easier.  There are even a few vendors that sell cover panels to fit over the hole you have to cut.  This was the method I chose, but how to cut the hole?  Most folks use a 4 1/2" angle grinder with a cutoff wheel, and try to be very careful not to cut too deep.  They also keep a fire extinguisher close by...

The reason I ran by HF was to pick up one of these...

No sparks, no worry about cutting to deeply and getting the tank.

After laying out the measurements from my online research, and carefully using a 1" holesaw to establish the 'corners', I laid into it with the shears (powered from the camper's generator...) and exposed the pump.

And hit a brick wall...

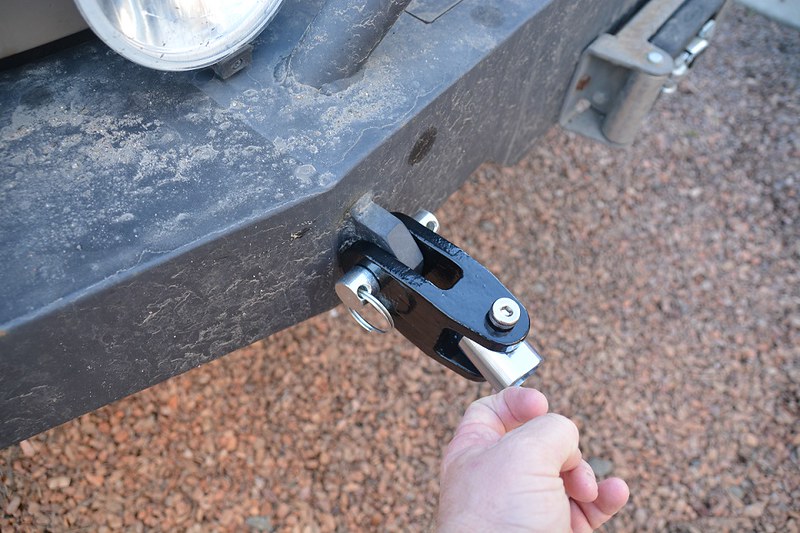
I had picked up a set of fuel line disconnect tools at HF, and the return line popped right off, but I couldn't get the feed line to release.  I tried everything I could think of, and it wouldn't budge.  After an hour or so of fiddling with it, I threw in the towel...

You'll need to log in to post.

Our Preferred Partners
oMw59vRIJa2o1NgSb126R5IwXe5cS8nbHIS80vECGAFWzFNffa0sCElWJPR3Q2uy