


Took a couple of days, really enjoyed catching up on this thread. Great documentation and lots of photos.
Looking forward to more, including the mustang.

Took a couple of days, really enjoyed catching up on this thread. Great documentation and lots of photos.
Looking forward to more, including the mustang.

Thanks, guys.
The brakes do squeal on the street. I'm willing to live with it because it's rarely street driven. I just have to give it a good hard stop every once in a while, and that minimizes the noise.
I did not have any problems with the rears locking on the track, in fact I never got a wheel to lock. Still working on finding the limit.
I'll keep posting Mustang updates as well... ![]()
Yesterday was a tough day. ![]()
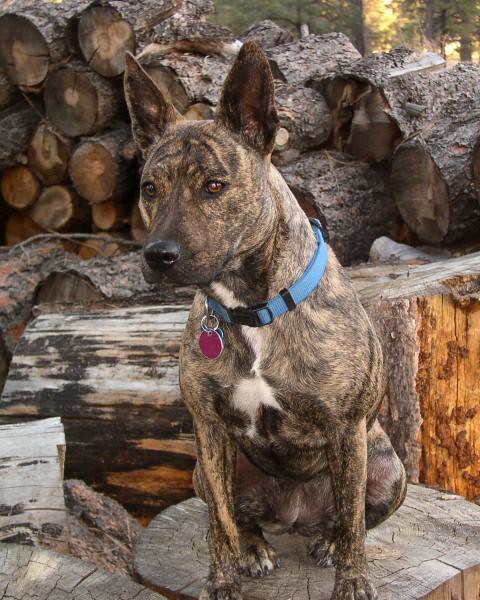
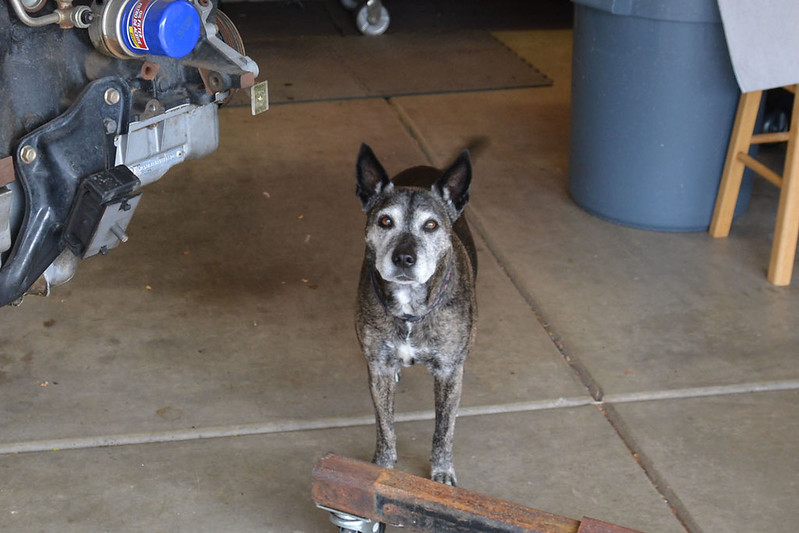
We had to say goodbye to our dog, Mocha. She had been my buddy and shop helper for 14 years. Time catches up with all of us, and it had been gaining on her rapidly over the last couple of months. Over the weekend, we knew the time had come.

Godspeed.
Today, life goes on...
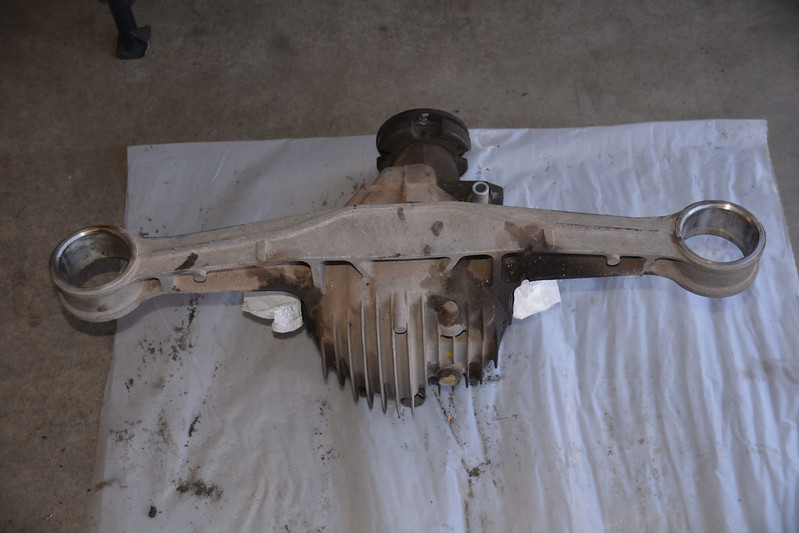
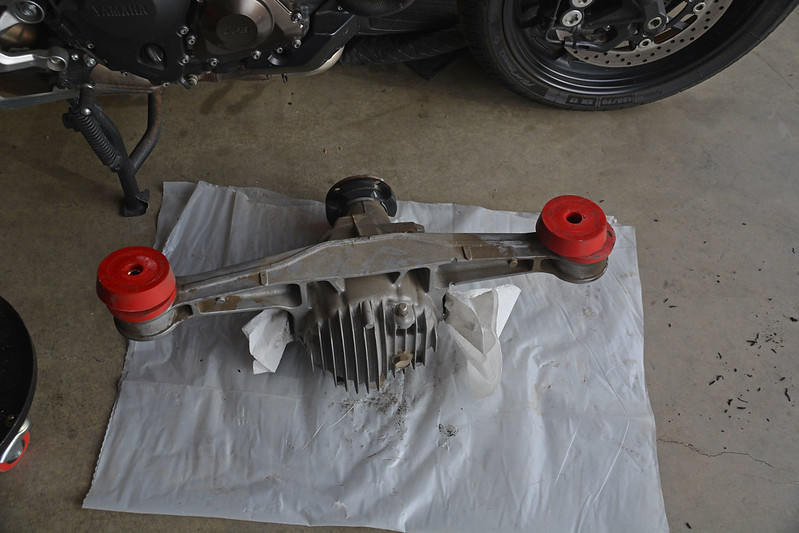
Several years back, I had swapped a Torsen LSD diff into the NA. Stock 1.6 gearing is 4.30, but the Torsen I had found a the time was a 4.10. It's been working great, but being naturally aspirated, a little more gear wouldn't hurt. My parts NB came with a 4.30 Torsen, and I pulled it when I pulled the drivetrain for the black NB.
Today I drug it out to start preparing it to go into the NA.
All I accomplished today was knocking the stock bearings out.
Sorry I didn't take more pics, but once I got rolling, inertia took over.
The process is pretty simple: use a drill to cut the rubber part of the bushing and knock out the center. Use a hammer and chisel to get the bushing halves separated along the split, which will start to take the tension off, then use a sledge and punch to knock them out. I've seen others use a three jaw puller with a large socket or ball joint tool piece to press it out, but to me it's easier just to knock it out.
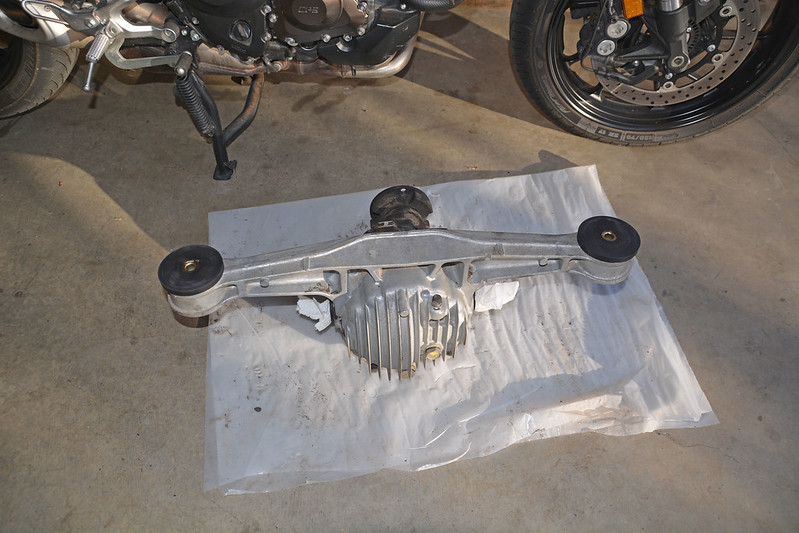
I already have poly diff bushings in stock, I just need to pick up some diff lube, and get it cleaned up and it'll be ready for install.
I'm very sorry that you have lost Mocha. Everyone loves puppies, but old dogs have a special dignity, and actually are my favorites.

Sincere condolences for you and your family. RIP Mocha.

So sorry about Mocha; losing family is hard.
However, what a great thread! Thanks for sharing all the hard work!
damen
Thanks, guys!
Cleaned up the 4.30 diff, and installed the urethane bushings. Plan is to install it in the NA tomorrow.
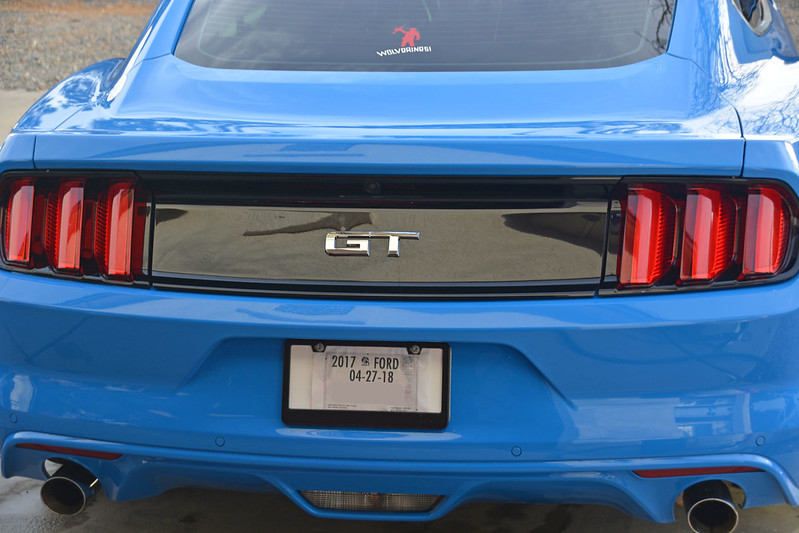
Also, another minor, but IMHO effective, cosmetic change on the Mustang...
Before:
After:
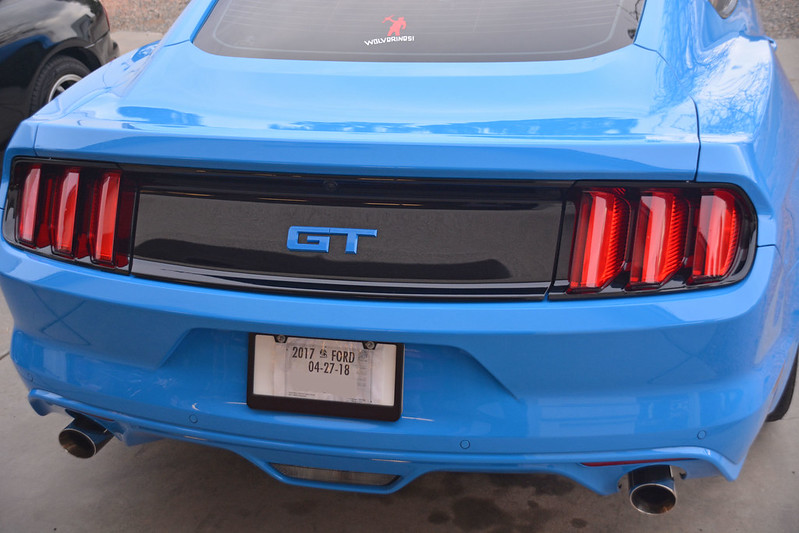
The chrome emblems just didn't go with the look of the car... I've got a couple more things planned, should have one done tomorrow.

Rodan said:Yesterday was a tough day.
We had to say goodbye to our dog, Mocha. She had been my buddy and shop helper for 14 years. Time catches up with all of us, and it had been gaining on her rapidly over the last couple of months. Over the weekend, we knew the time had come.
Godspeed.
Damn man... Sooooo sorry to hear about this. It sucks something fierce.
Thanks, Mr. Lee.
Today I swapped out the Torsens in the NA... 4.30 went in, and the 4.10 ended up on the floor...
When I originally swapped the Torsen into the NA, a 4.10 was what I could find. The 4.30 should give it just a bit more oomph.
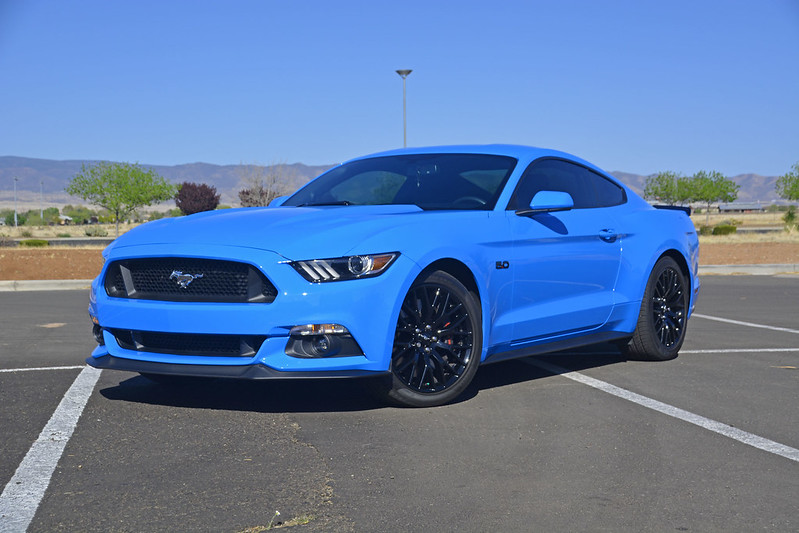
Also played with the Mustang a bit today. I finally got it out for a drive on our local 'fun' road.
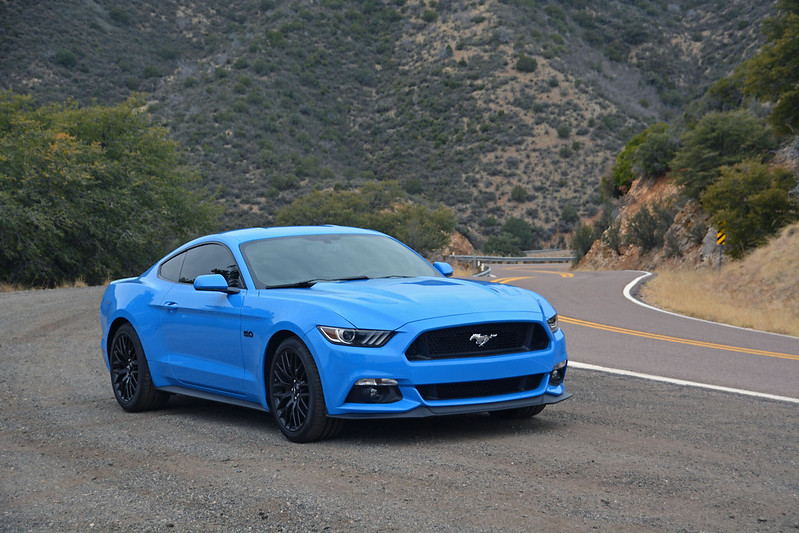
While lacking the precision of the NC it replaced, it's brutally fast! Actually, I was quite impressed with it overall. The stock suspension is very composed, right up to the limit, where it gets a bit overwhelmed. It's got loads of grip, and decent steering feel. The brakes are more than sufficient for street speeds. Seats are comfortable and well bolstered for spirited driving. And it's hard to argue with 435hp and a great soundtrack!
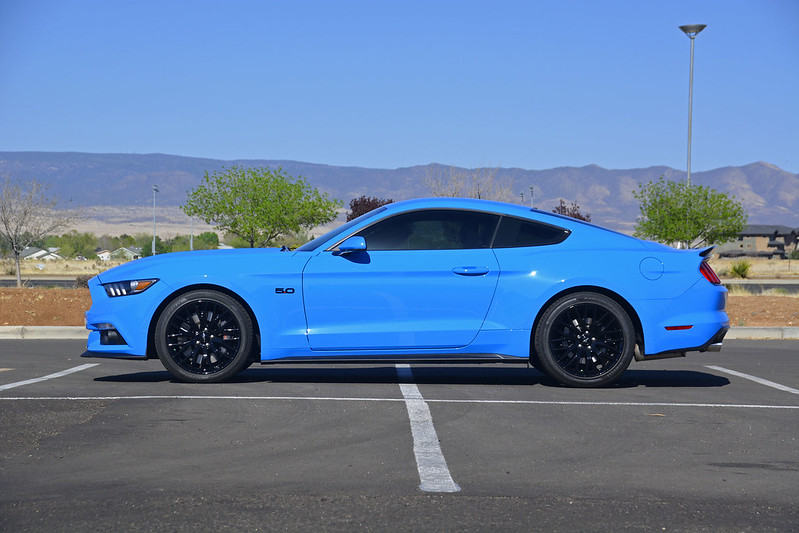
Also did another cosmetic mod. The solid blue bumper cover had been bothering me since we bought the car. Base GTs come with body color bumper covers, and GT Premiums have a black valance with body color "diffuser" panels. I don't really like either, but do like the solid black valance of the GT350. Of course, the Base GT bumper cover is one piece, so there's no easy solution. Plasti-Dip to the rescue! I supposed I may someday get around to buying a Premium GT bumper cover and GT350 style valance, but this will do for now.... To me it looks much better, and ties in with the splitter and side skirts.
Masked up, spraying in progress...
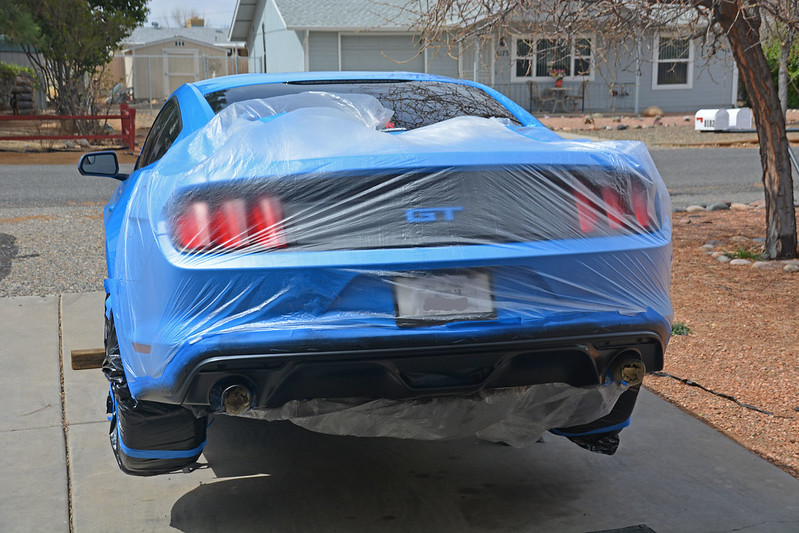
Before:
After:
I've got one more part on the way, and that will be it for a while for the Mustang.
Have some work planned for the trailer tomorrow...

Condolences for Mocha.
If I may ask, what kind of dog was she/he? Beautiful.
In reply to Mad_Ratel :
Thank you.
She was a Cattle Dog / American Staffordshire (pit bull) mix according to our vet, but we adopted her from the local shelter, so we really don't know for sure.
Today I started on the workbench for my trailer, which will double as an anchoring structure for the roll out tool cart I posted about a few weeks ago. This will be my first big TIG project, as I'm making the frame out of aluminum to save weight. First stop was the metal supply to pick up my trailer workbench starter kit:
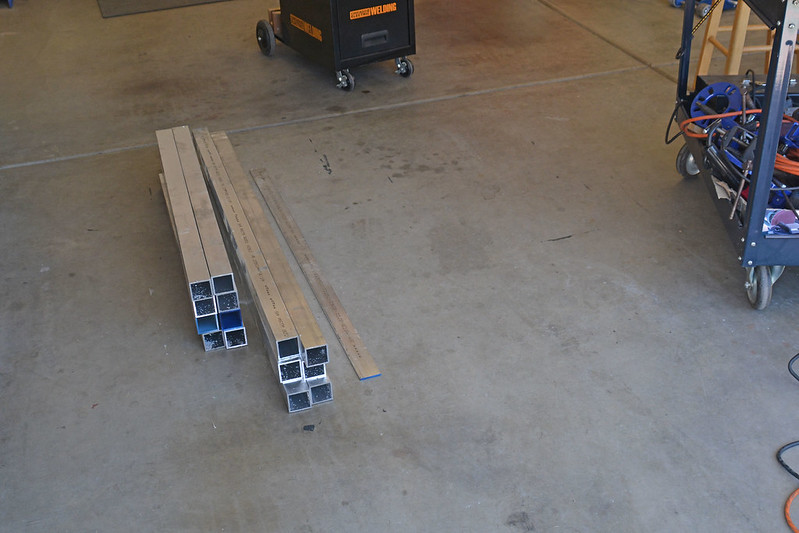
Doesn't look like $228 worth of aluminum, does it? Holy E36 M3 materials have become expensive!!
I also picked up a 'Bauer' bandsaw at HF on a $99 coupon. Works very well, but hard as hell to get a square cut with a hand held saw.
After a bunch of measuring, head scratching, cutting, grinding and welding... I finished 3/4s of 1/2 of the bench. ![]()

The good news is all the material is cut for the 4th leg and supports, and for the whole other half of the bench, so all I have to do tomorrow is weld it all up, and bolt it in the trailer. Stay tuned...
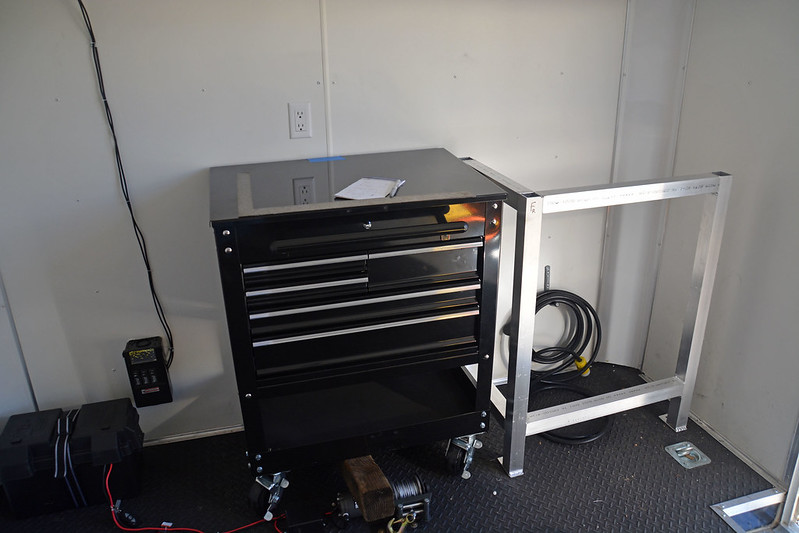
Managed to finish the bench frames today, and got them bolted in the trailer.
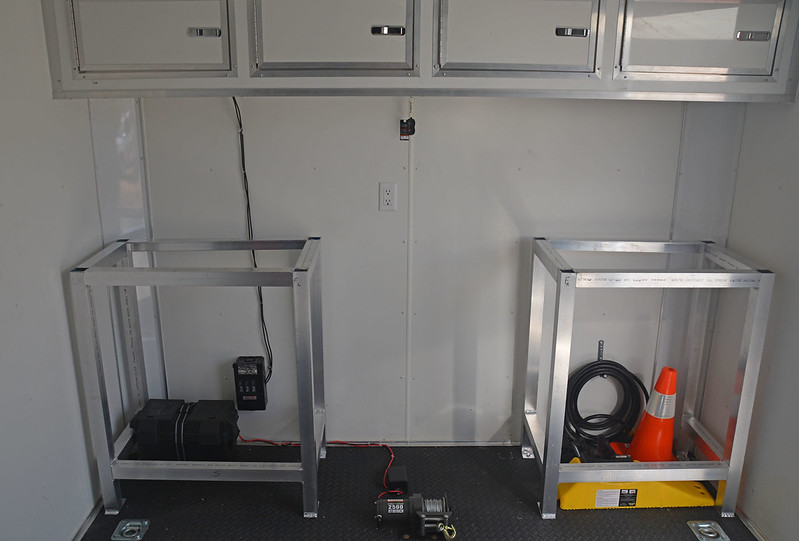
They're super sturdy. The last time I built a bench in a trailer (a 6x12 enclosed back when I was racing bikes), I built it out of wood, and it eventually got wobbly from all the movement going down the road. Not gonna happen this time! And the good news is the total weight of both frames is less than 50lbs. I'll eventually put a worktop on them, and skin the fronts. Maybe even add cabinet doors.
Here's the tool cart rolled into place.

My benches are square, so apparently the HF cart is not! ![]()
When I shortened the legs, I cut all four at once, so I know I didn't change anything. I still need to work out a system to lock it into place. I've got some ideas, but I'll probably just use tie down straps for our trip to Willow Springs later this month.
Next up is finishing the N2 bottle cart, and figuring out a 'docking station' for it in the trailer.
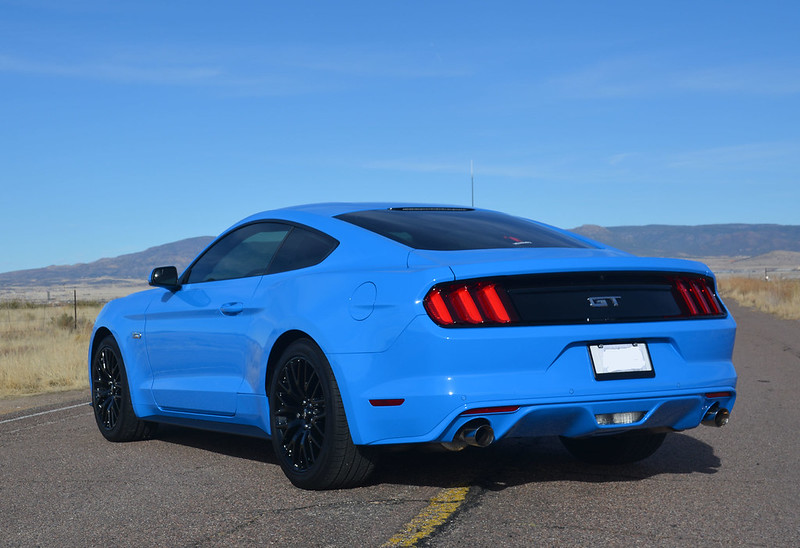
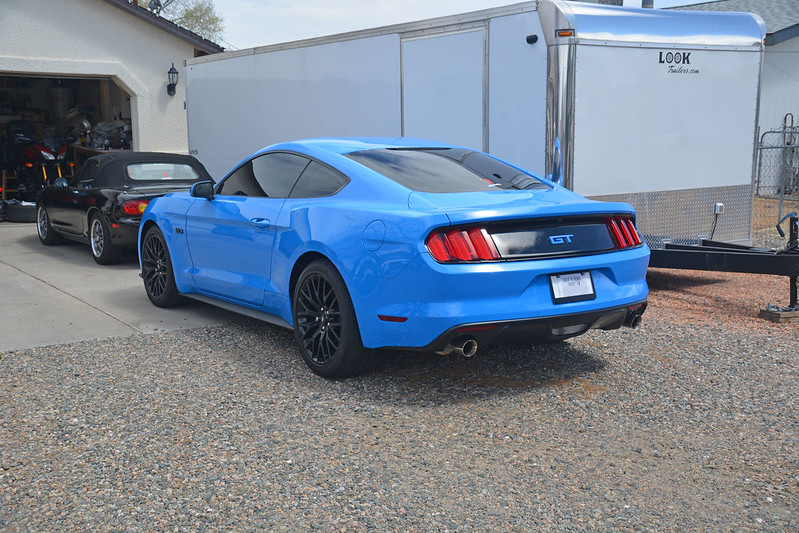
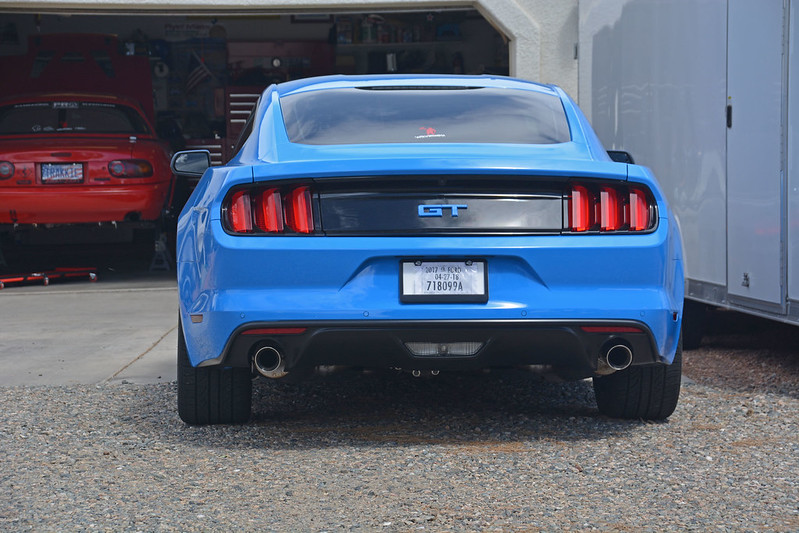
Minor Mustang update, for a final cosmetic mod...
I always liked the lines of the S500, but the front always seemed to over power the rear to me. The final mod is a Roush style spoiler, which, to me, seems to help balance things out. Combined with the blacked-out valance, the rear now looks finished.
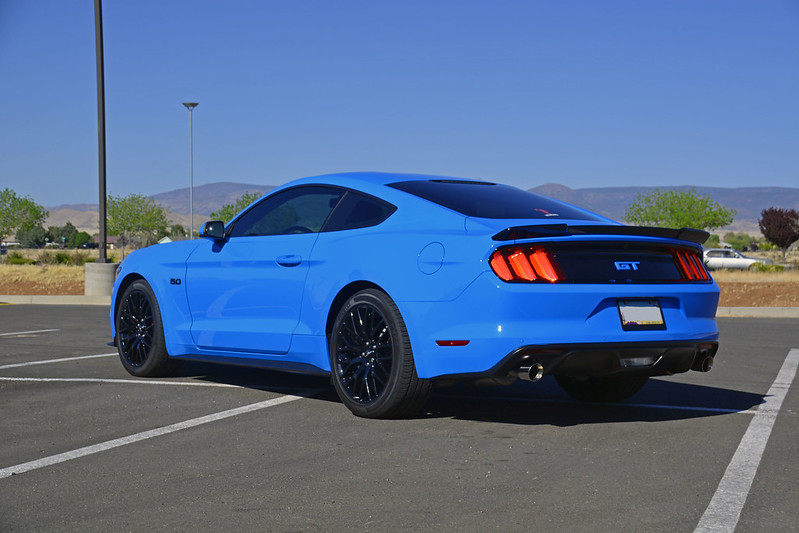
Before, for comparison:
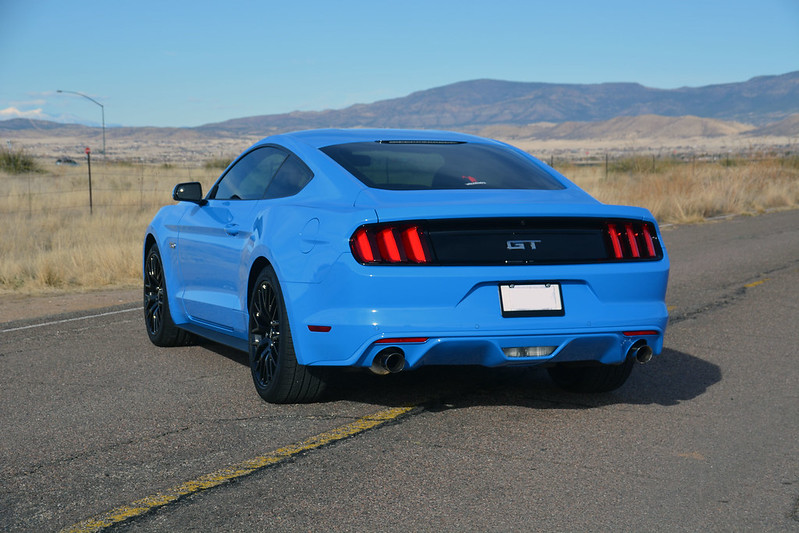
Couple more...
Now, it's time to get ready for my wife's driving school at the Streets of Willow next weekend... ![]()
Did some more work on the N2 bottle cart... I made a support for the bottle out of 3/8" brake line, so it can't go anywhere but straight up.
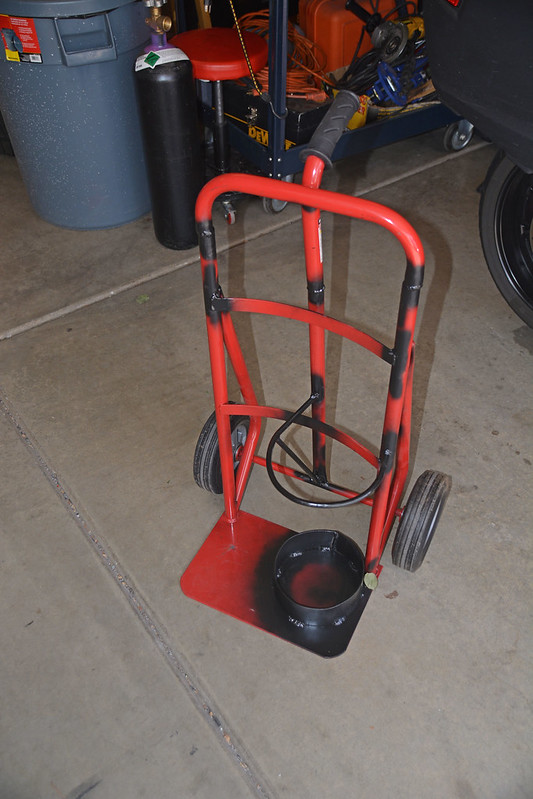
Welding brake line tubing onto chinese "steel" is, well, interesting... ![]()
I squirted some rattlecan black on there to prevent the weld areas from rusting in the short term, and used a bungee to lock down the bottle.
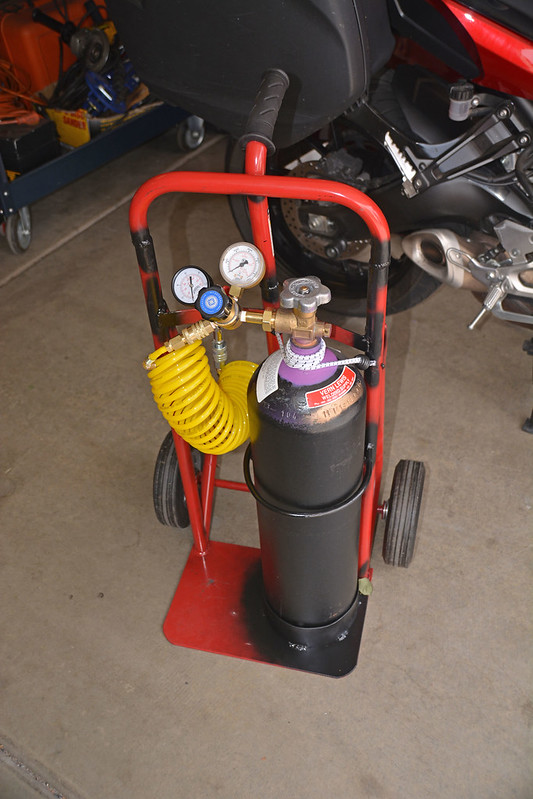
I'd still like to build a protective cage for the valve, but for now, I'll just transport it with the valve uninstalled. I'm out of fabrication time for now.
I also loaded the camper in the truck in preparation for our upcoming departure for Willow Springs.
I mentioned in my last post that we were getting ready for a weekend at Willow Springs, but looking back, I can't see that I ever mentioned what for...
While my wife has done a number of track days at this point, she had never been to a 'school'. Most trackday organizations have 'instructors' and provide basic 'instruction', but the quality can vary greatly. I wanted to get her to a performance driving 'school' that would actually teach vehicle dynamics and performance driving techniques in an organized format. While we live in reasonable proximity to the Bondurant school, their pricing is not very reasonable! I asked on several forums, did some research, and finally settled on the So Cal Alfa Club (AROSC) driving school at the Streets of Willow, and that's where we spent the weekend.
I got everything loaded up Thursday night, and we pulled out Friday morning. Willow is ~450 miles for us, so it's a good drive, but easily done in a day. We rolled in around 3PM and were the first to arrive. Shortly after we arrived, the event coordinator arrived and we got to chatting. He asked me why I wasn't signed up, and I told him we had just brought one car. He said that wouldn't be a problem, and there was still room in my wife's group (Street Performance), and asked if I wanted to sign up! No need to twist my arm, so it looked like we would both be driving... ![]()
The only real speedbump for the weekend was when I went to unload the car and it didn't want to start... I'd never had any battery problems, but it was suddenly cranky (or not cranky as the case would be...). We ended up borrowing a jumper box (which I had forgotten to pack) for Saturday, but on Sunday it was working fine.
Other than that, it was a great weekend. Weather was warm, but not unbearable. It was also windy, but not so bad we couldn't grill our dinner each night.
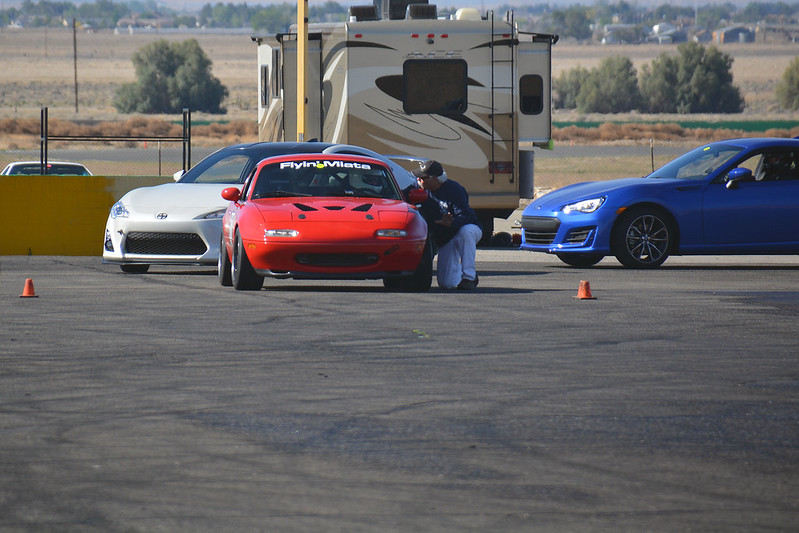
Our pit:
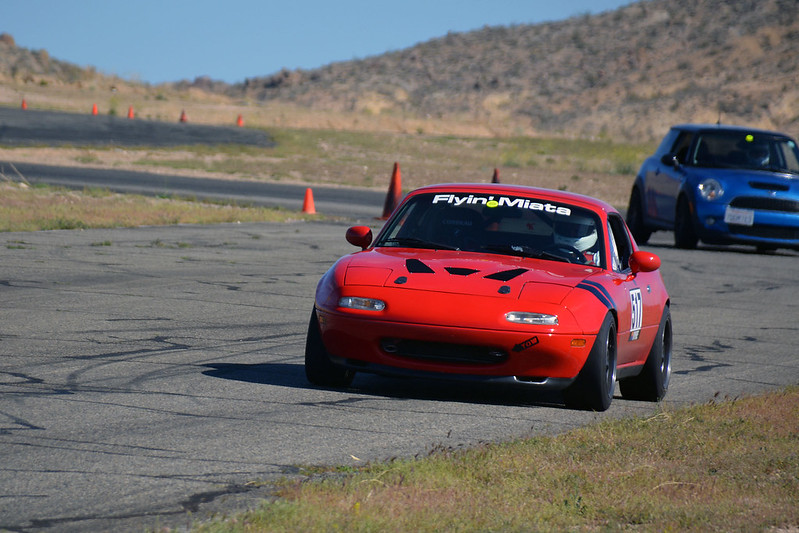
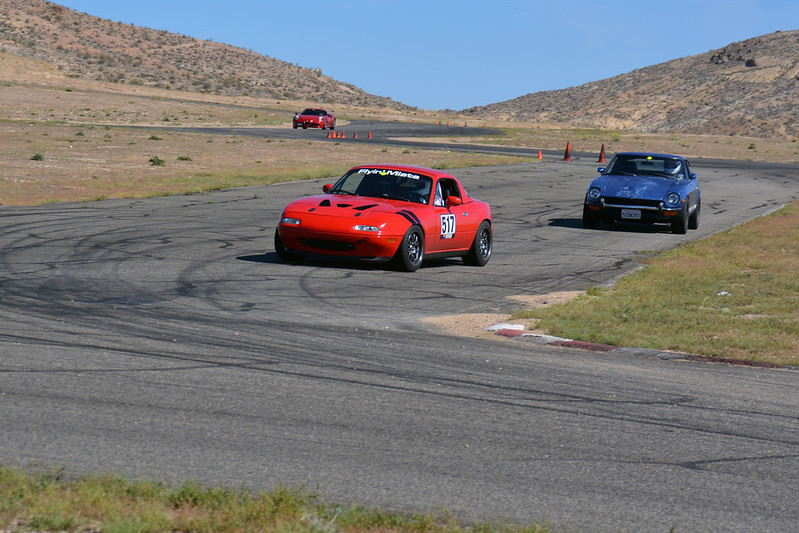
Saturday morning, the cars started to roll in. Everything from stock cars to race cars, Miatas to a Ferarri 488GTB. We got put in the more experienced of the two Street Performance groups. Our group consisted of an Alfa Giulia (the new one), 4C, and a GTV6, our NA, an NB, two FRS/BRZ twins, a couple of Minis, a ZL1 Camaro, a BMW, an STI and a 240Z. We had three instructors for the group and as result, neither of us got any seat time with an instructor in the car. I was a little disappointed by that, but the individual attention on the skidpad was pretty good. And they had their hands full with a couple of the other drivers.
Speaking of the skidpad, that was one of my primary reasons for picking this school at this location. IMHO the skidpad is one of the best ways to learn car control. Here, we ran a number of exercises, and they brought out a water truck to wet down the pad, so we got to play in both wet and dry. For me, it was an opportunity to really chuck the car around, and intentionally spin it, something you can't really do on course. And I didn't waste the opportunity! ![]() My wife also got a lot out of the skidpad sessions, and that alone made the weekend worthwhile.
My wife also got a lot out of the skidpad sessions, and that alone made the weekend worthwhile.
My wife getting some pointers:
In the wet:
We did a rotation... class, skidpad, track, class, lunch, repeat; then the same on Sunday.
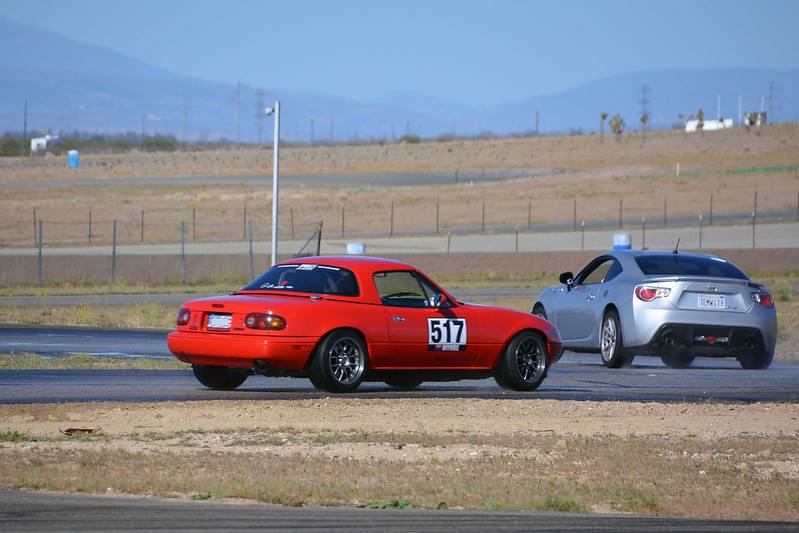
For the track, we were out on the Streets, but it was an abbreviated course. This was another minor disappointment, as my lap timer app didn't have that configuration in its library, so I wasn't able to get times. Also, due to the hectic schedule, and sharing the car, I wasn't able to record any tire temp/pressure data. Unfortunate, but not a big deal. It was still fun!
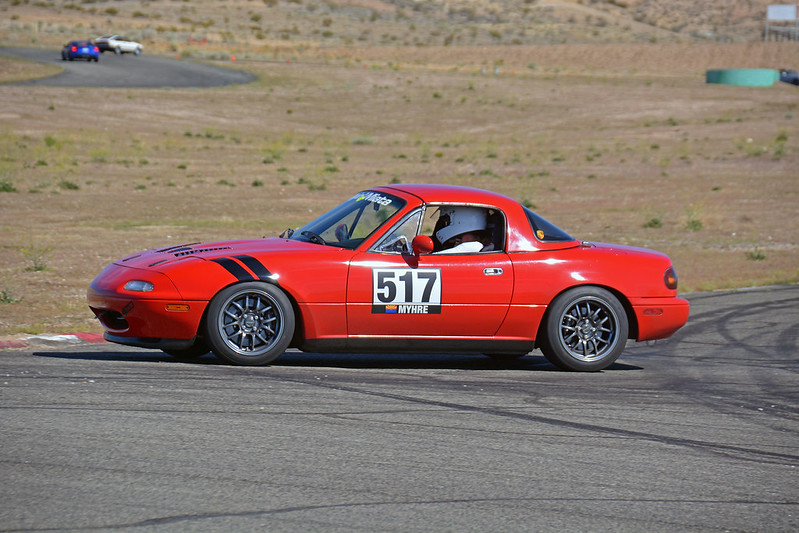
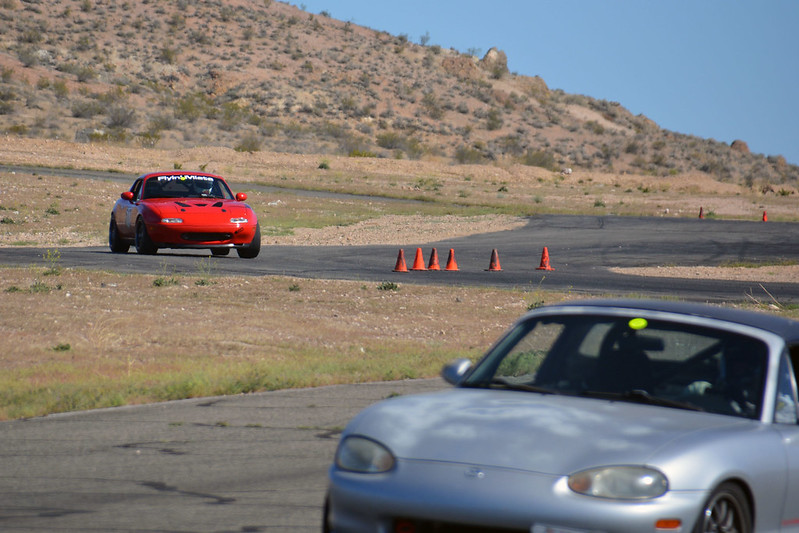
On track:
Overall, it was a great weekend, and well worth the very reasonable price. We both came away with new things to think about and try on the track, and more experience in the car under conditions that are hard to replicate. On Sunday, there were some very fast cars running on the big track, so it was fun to listen/watch them going by at high speed across from our pit area.
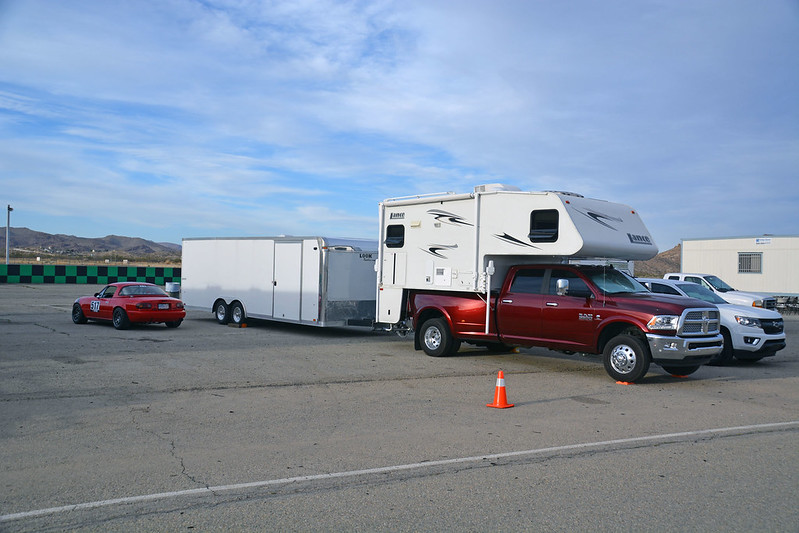
By dawn's early light on Monday, we were once again the only rig in the pits.
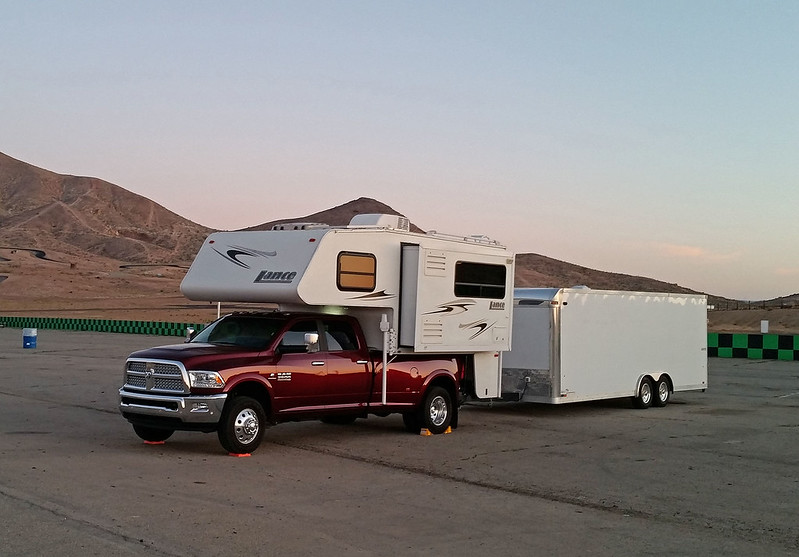
The rig performed perfectly, and returned ~9.5 mpg for the trip. The work I had done on the trailer helped quite a bit with organization, though I obviously have some more work to do, including creating a laminated checklist!
Our next event is Flyin' Miata's Summer Camp in June, so I've got a couple of months to finish up the workbench in the trailer. I've also got a few things in mind for the car, but nothing major.
Not a lot going on in Miataland lately.
I spent some time going over the NA after our Willow Springs outing, making sure all was good. No significant issues to report. I'm still seeing some weeping from the brake line fittings on the Wilwood calipers. Not even enough to drip, but enough to annoy me. I wish they would have just used a banjo fitting like the rest of the world.
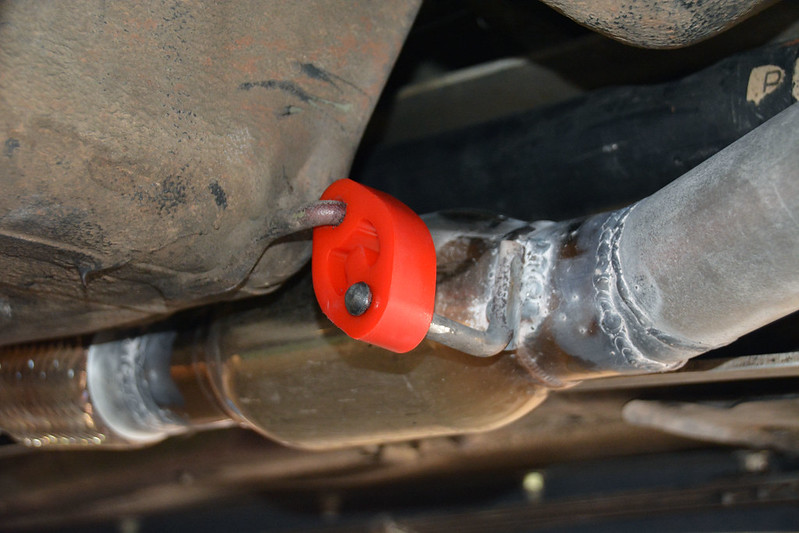
I swapped out the floppy exhaust hangers for some urethane items, something I've been meaning to do for a while, but finally got 'round to...
I was looking at ordering a lightweight hardtop, but with the insane cost of shipping, I may just put a lexan window on my current top. It would probably end up ~12-15lbs heavier than the lightweight, but the weight savings just isn't worth the cost or effort. I'm considering some other weight saving projects before FM Summer Camp, and have some parts on the way. Stay tuned....
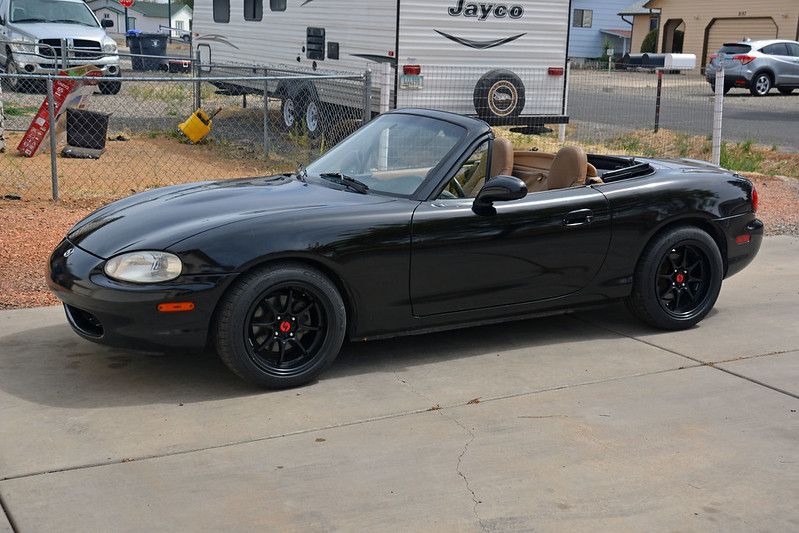
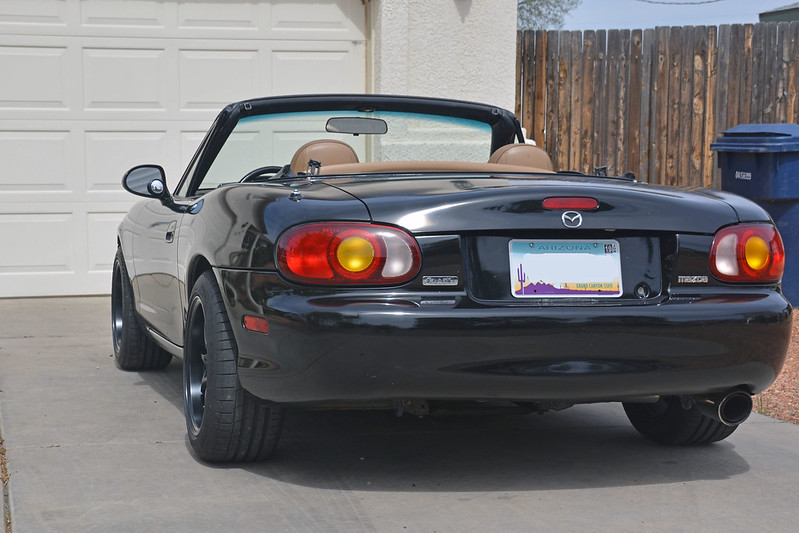
I swapped the old 'street' wheels/tires from the NA onto the NB, now that spring appears to have sprung. 205/50 Conti ECS on 15x8 Konigs... they definitely fill out the wheel wells a little better.
Our NC also returned home today... sort of. I got a phone call from the guy who bought our NC from the dealer where we traded it in. I guess we have several acquaintances in common, and one of them recognized the car and gave him my number. He was looking for info on the history of the car and the mods I had done. Turns out he's a long time gearhead and racer, so he came by for a bit, and I gave him the lowdown on the car, and a service manual and the stock parts I still had hanging around.
Good to know our NC went to a proper home... ![]()
I finally got around to doing a "Bosectomy" on the NB yesterday. The factory Bose stereos are known for crapping out, and this one has been non-working since I got the car. Fortunately, it's not a big deal, but you do have to remove the entire system, as the speakers are incompatible that most commercially available units.
Fortunately, car audio is pretty cheap these days. I picked up a JVC digital audio (no CD) head unit and a pair of Polk speakers off Amazon. $79 and $69 respectively. I'll run it without an amp for now.
Getting the stock head unit and cassette deck out is easy, and just like most cars. Unfortunately, getting the amp out requires pulling the dash. Well, this car's dash has already been out twice... no big deal to pull it again! Retaining the factory speaker wires to the doors requires a bit of rewiring on the connector between the head unit and amp. Basically, you just jumper some wires to bypass the amp that's no longer there. Fortunately, all of this has been well documented on the Miata forums.
Here's the connector, and a diagram of the connections from one of the threads there:
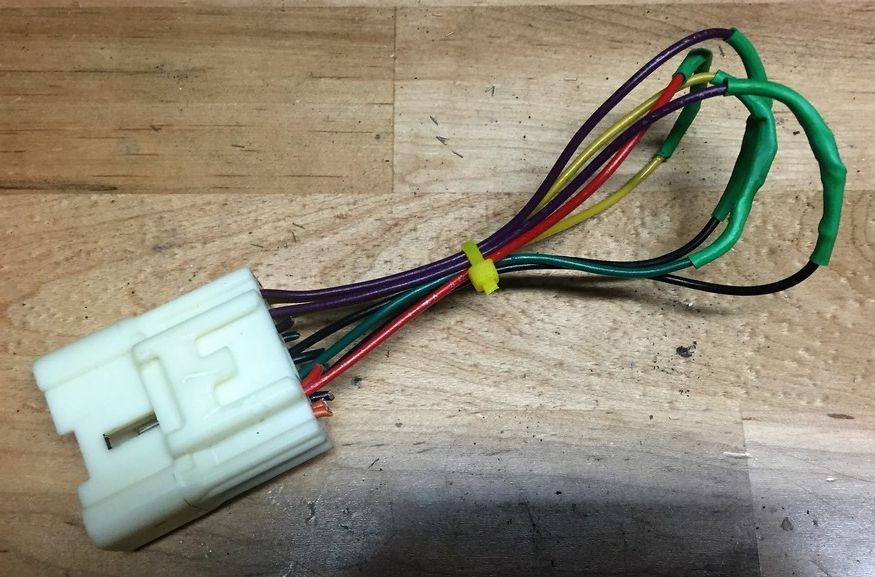
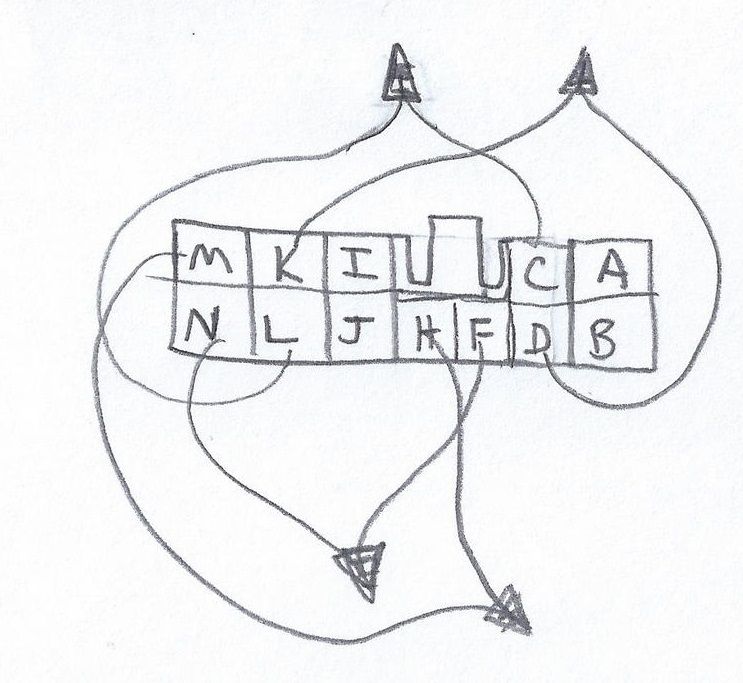
Once that was done, everything went back together with a Metra harness adapter, easy peasy. Remember when you had to actually cut/splice/wire everything? It's all so easy these days!
New head unit installed:
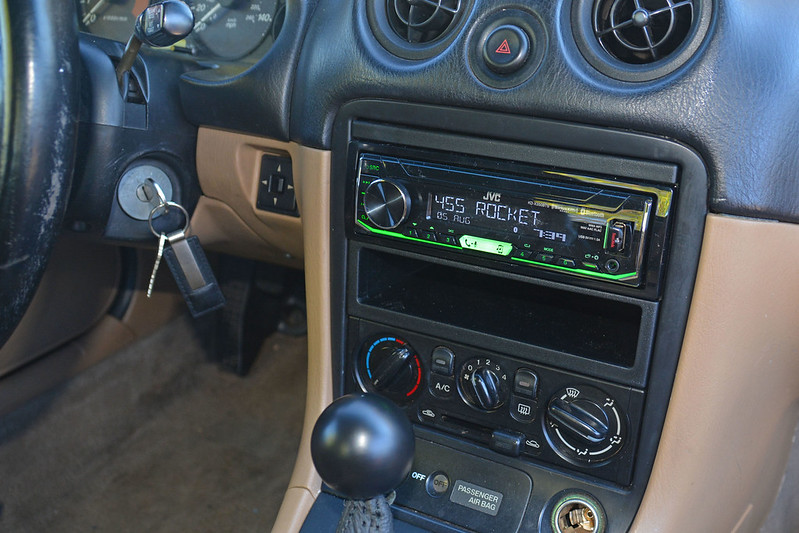
One nice by product was getting a small cubby with the adapter bezel. Very useful in a Miata!
It's nothing special, but sounds fine... better than the crackle and static I was getting from the Bose. I do have powered compact subwoofer that I'm going to try to fit behind the passenger seat. If I can fit it in there, it'll fill out the low end a little bit. I'll probably also add a satellite receiver down the road. For now, I can stream it from my phone, but the App isn't that great...
For now, it's just nice to have some tunes.
Well, since we're only a month away from FM Summer Camp, why not start a new project on the NA? ![]()
The underhood space on an NA Miata is pretty tight, and a lot of that real estate is taken up by the pop-up headlights. As much as I love the pop-ups, I've been planning to get rid of them for a while now. Back in April, I ordered the lynchpin parts for the project, and they finally arrived today.
Singular Motorsports headlight door brackets:
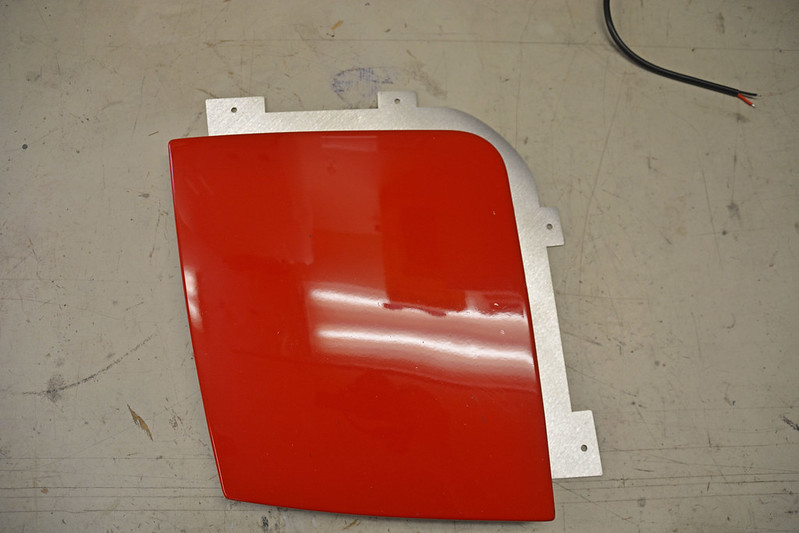
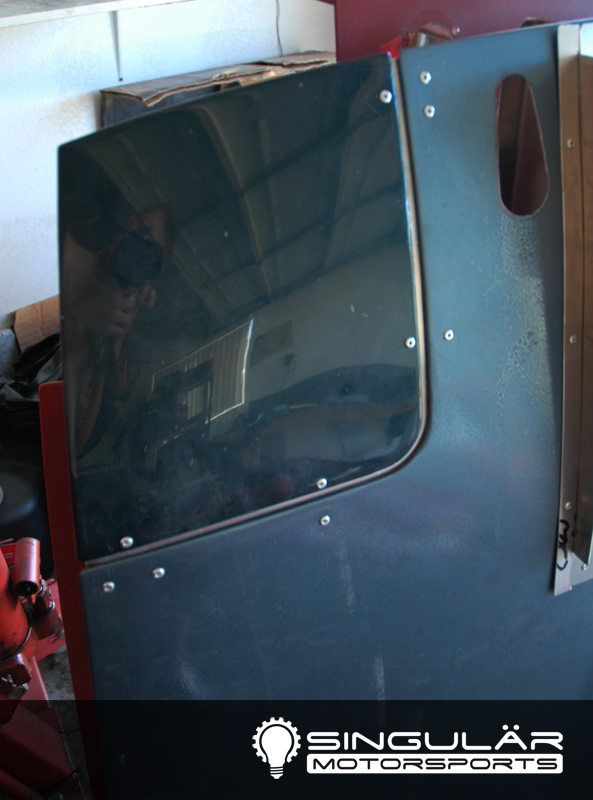
These brackets allow the headlight doors to be attached to the hood, so the entire headlight mechanism can be removed.
Example (not my pic):
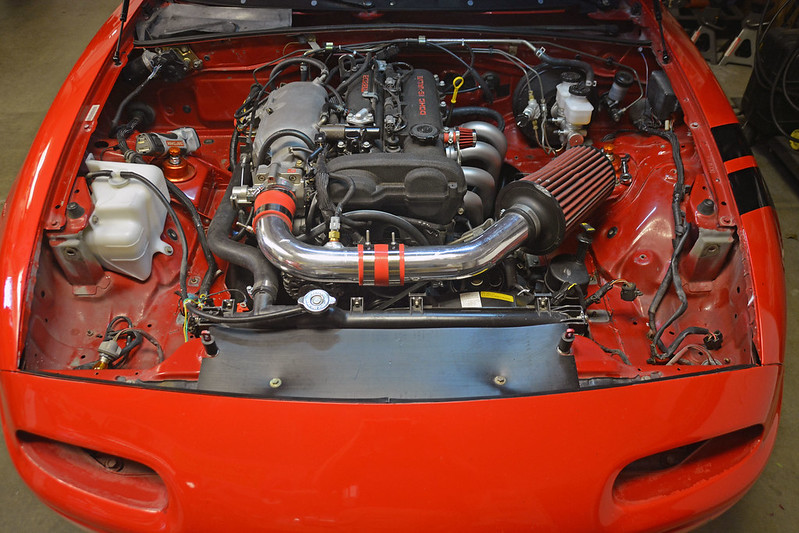
Removing the headlights both frees up room, and removes weight from the nose of the car. I weighed all the junk that came out, and it totalled 17lbs. Not a lot, but not insignificant...
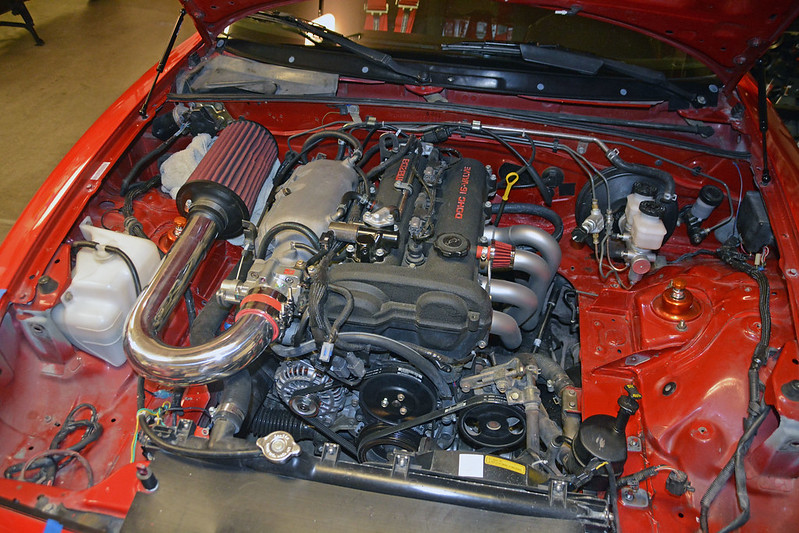
The engine bay without the lights:
Of course, this begs the question: what do you do for lights?
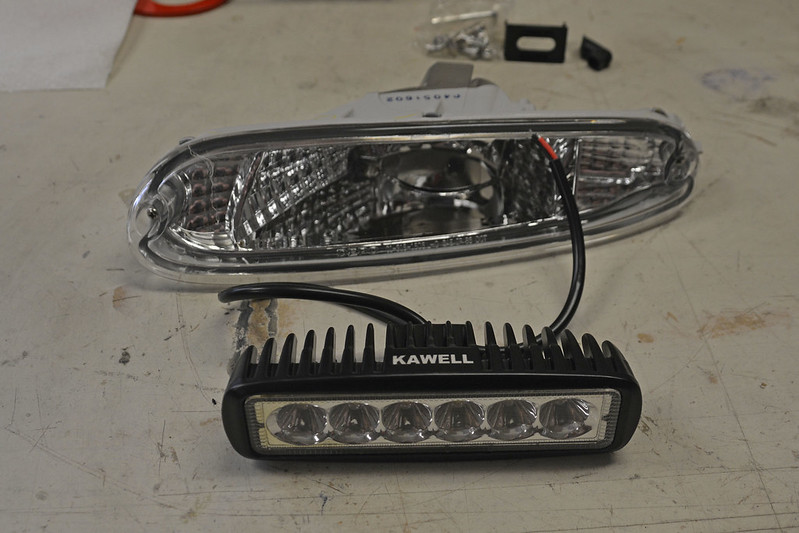
Since the car rarely gets driven on the street, and almost never at night, I'm not all that concerned about having wonderful headlights. Over the years, folks have used a number of different solutions. I will be using LED lights behind new turn signal housings.
You can see what a wonderful job the painter did when this car was repainted (sometime before it came into my possession)...
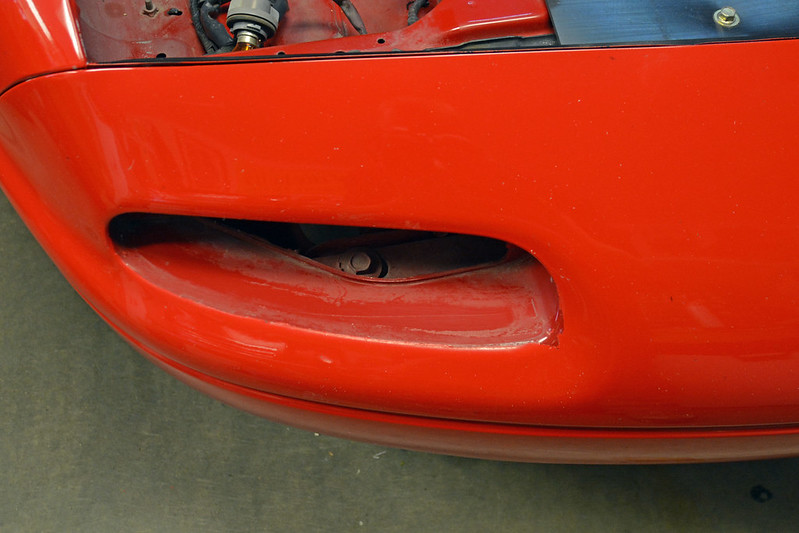
The new lenses are clear, and I will cut out the back to accommodate the LED lights, which will mount to the sheet metal behind the bumper cover.
I don't expect great light output, just enough to putt home after dark if necessary. I do plan to make some sort of 'baffle' to create a decent cutoff to avoid blinding oncoming cars. I also plan to move the turn signal bulb outboard in the housing. Fortunately, a boss already exists for this purpose thanks to the Euro cars.
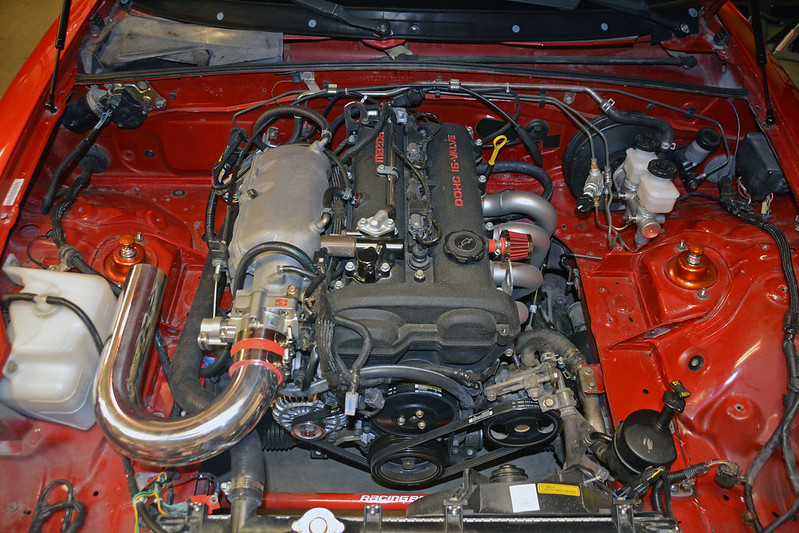
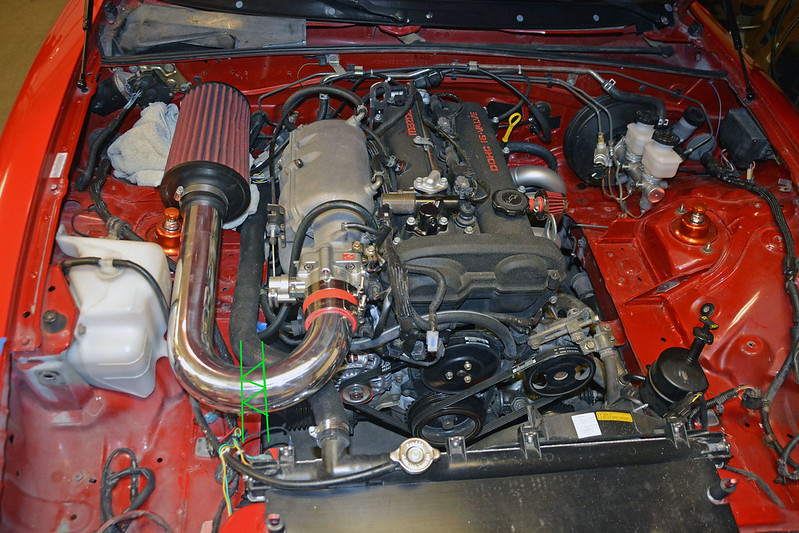
A secondary benefit from this project will be improving the air inlet for the engine.
I posted previously that when doing the VVT swap, I compromised the inlet, routing it to the hot side of the engine because of packaging restraints. Here's why:
180* piping for the inlet simply wouldn't fit in either radius I could source...
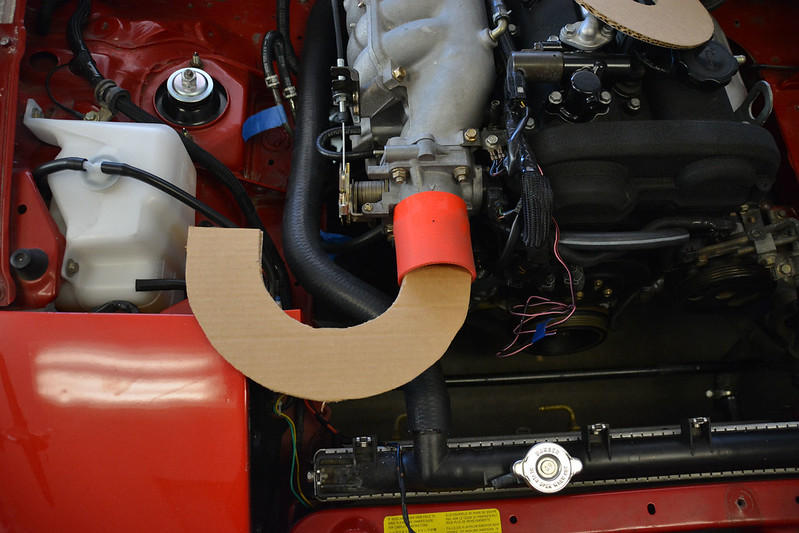
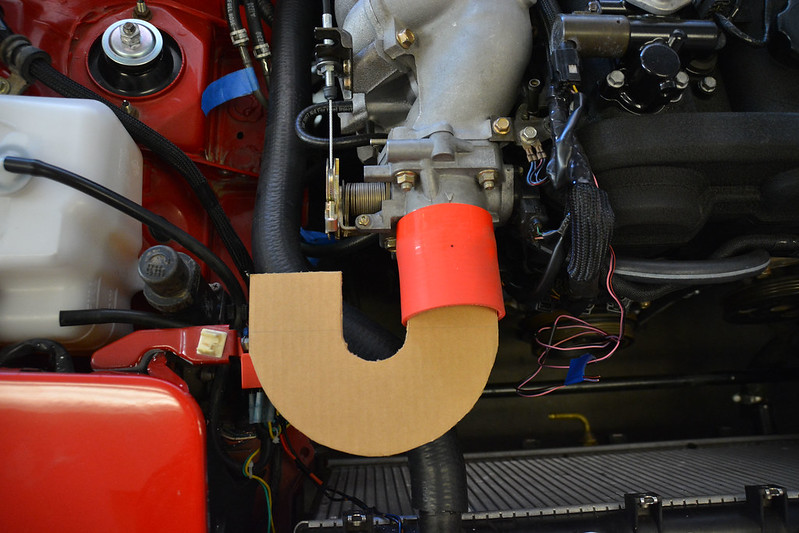
Now that the pesky headlight motor and frame is out of the way, the routing is no problem...

It will be nice to get the air filter away from the header, and there's plenty of room for the ideal intake length of 22-24" from the throttle plate. An aluminum 180* pipe is on the way, and I already have another IAT bung to weld in.
Oh, also a quick tool report:
I'm always looking for better light when working in the garage, and I recently picked up a rechargeable LED worklight from HF:
Has a magnet and hooks at each end. Perfect size for hanging from the NA's hood. Works great, and has flats on the ends so it won't roll across the floor.
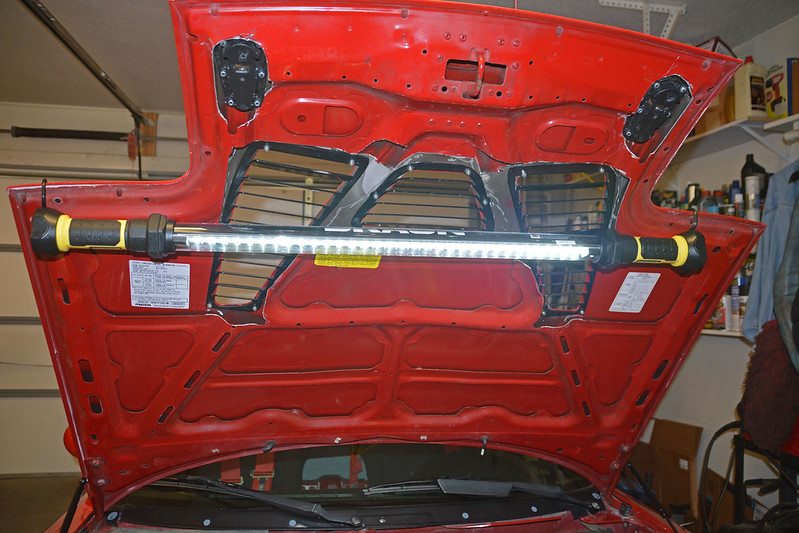
IIRC it was ~$30 with a 20% coupon.
Phase 1 complete... headlight lids are mounted to the hood.
Step 1... my poor hood! More hackage, not that it isn't already hacked up from the hood vent and Aerocatch installs...
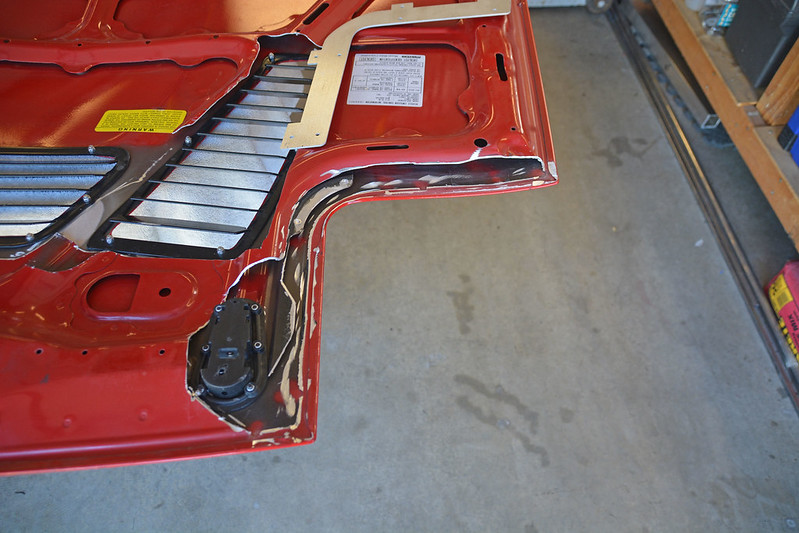
Removing the inner support structure is required to have the bracket fit flush against the inner hood surface.
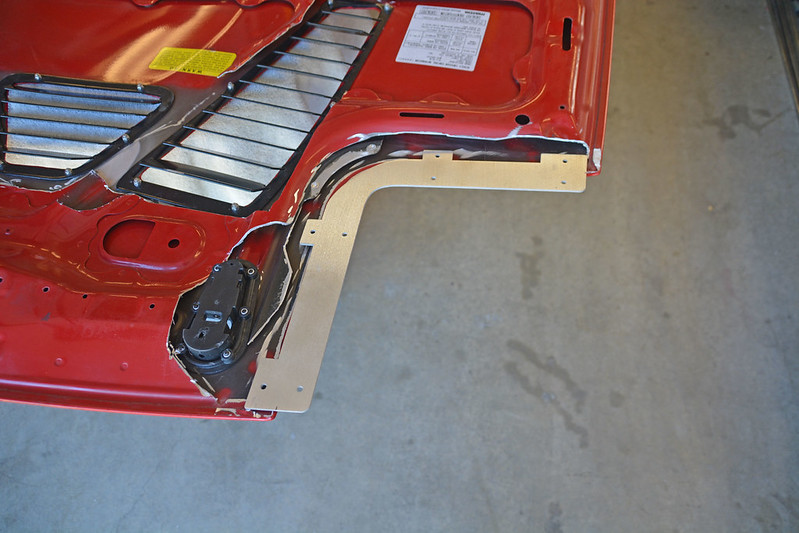
Once I had the position adjusted where I wanted, I riveted the bracket to the hood. Then it was a question of positioning the headlight lids, and fitting them to the brackets. First I had to remove material from the inner edges of the lid so it would sit flush with the hood. Then I had to position them with the hood on the car, tape them in place, and remove the hood to drill and rivet. A little tedious, but it's done...

Back on the car...

Note that the stock headlight lids do not sit flush with the bracket because of the lip around the perimeter of the lid. As a result, I used some plastic washers as spacers so as not to deform the brackets. The stock lids are steel and weigh almost 1.5lbs each, so they will eventually get replaced with aftermarket carbon or FRP. In my excitement, I forgot I was going to leave the passenger side lid off until I installed the NACA duct for the air intake... oh well, more work for me later. ![]()
The other day, the intake piping came in, so I started doing a little mockup...
Unfortunately, the top of the shock is now in the way of where the filter needs to go. I have a couple of options... First option is to extend the inlet pipe past the shock.
However, this puts the inlet about 5" over the 'ideal' length, so I'm considering sectioning the 'U', which would move it over enough that the filter would fit between the shock and intake.
Either way, I will also need to build a bracket that bolts to the intake to support the inlet pipe and filter, and I also need to weld in the bung for the IAT sensor, and extend that wiring.
You'll need to log in to post.


