8 9 10
Keith Tanner
Keith Tanner MegaDork
7/18/19 10:32 p.m.

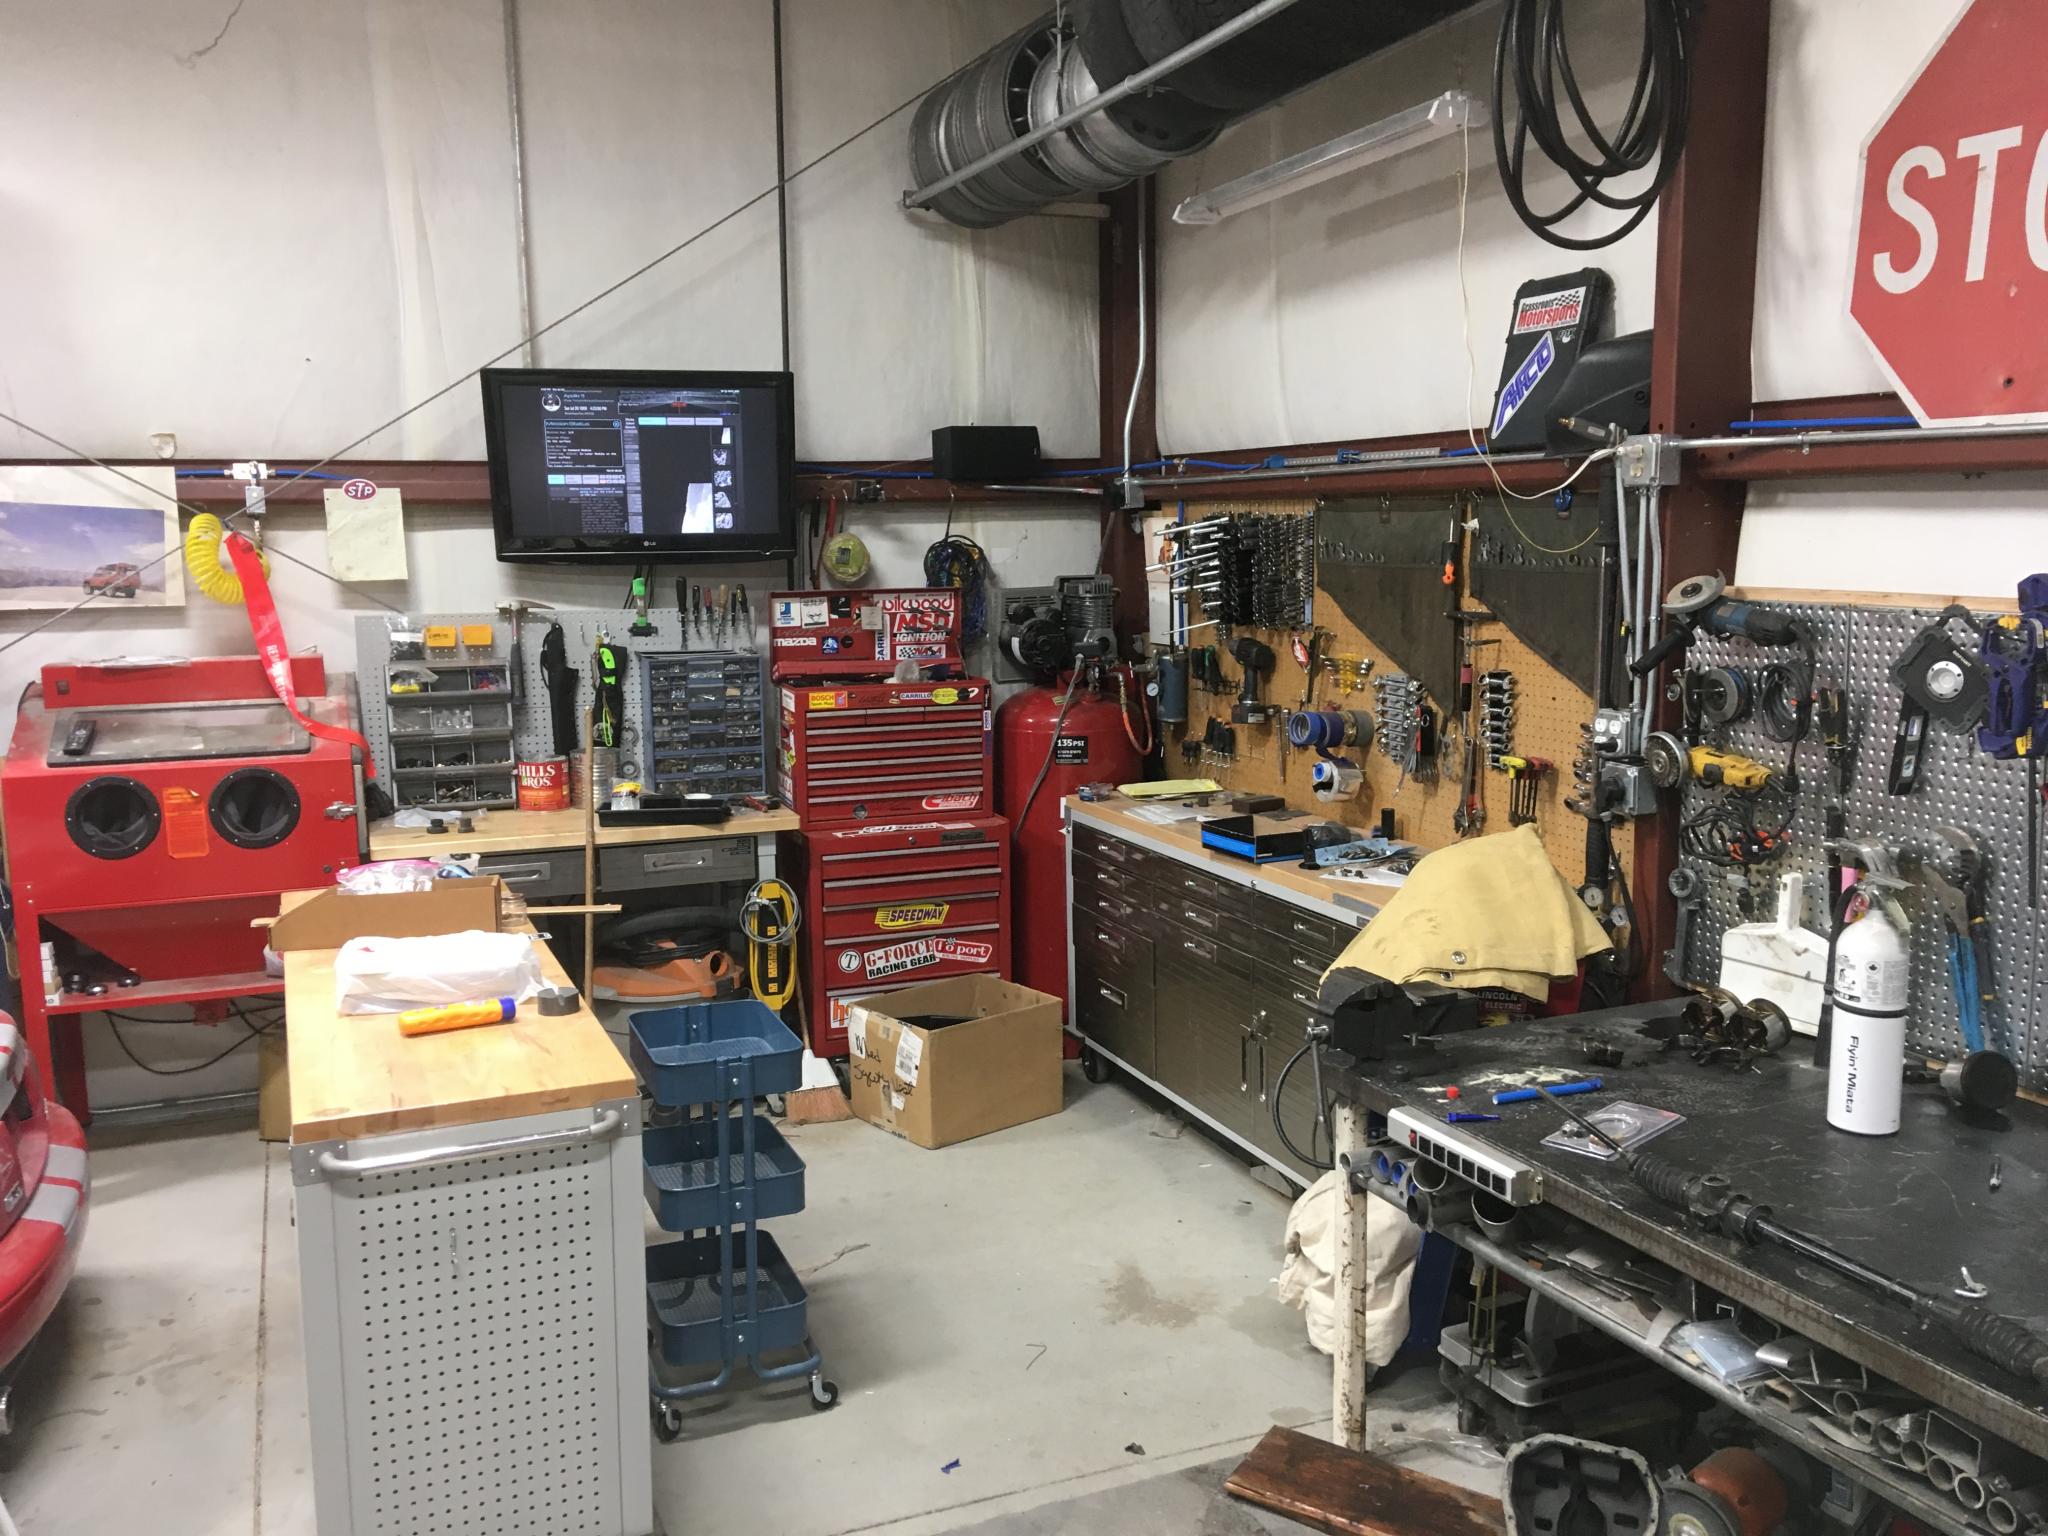
I have a transmissionectomy to do this weekend, so it's time to do some work on the air lines. I'll beef this up with more pictures in a bit.

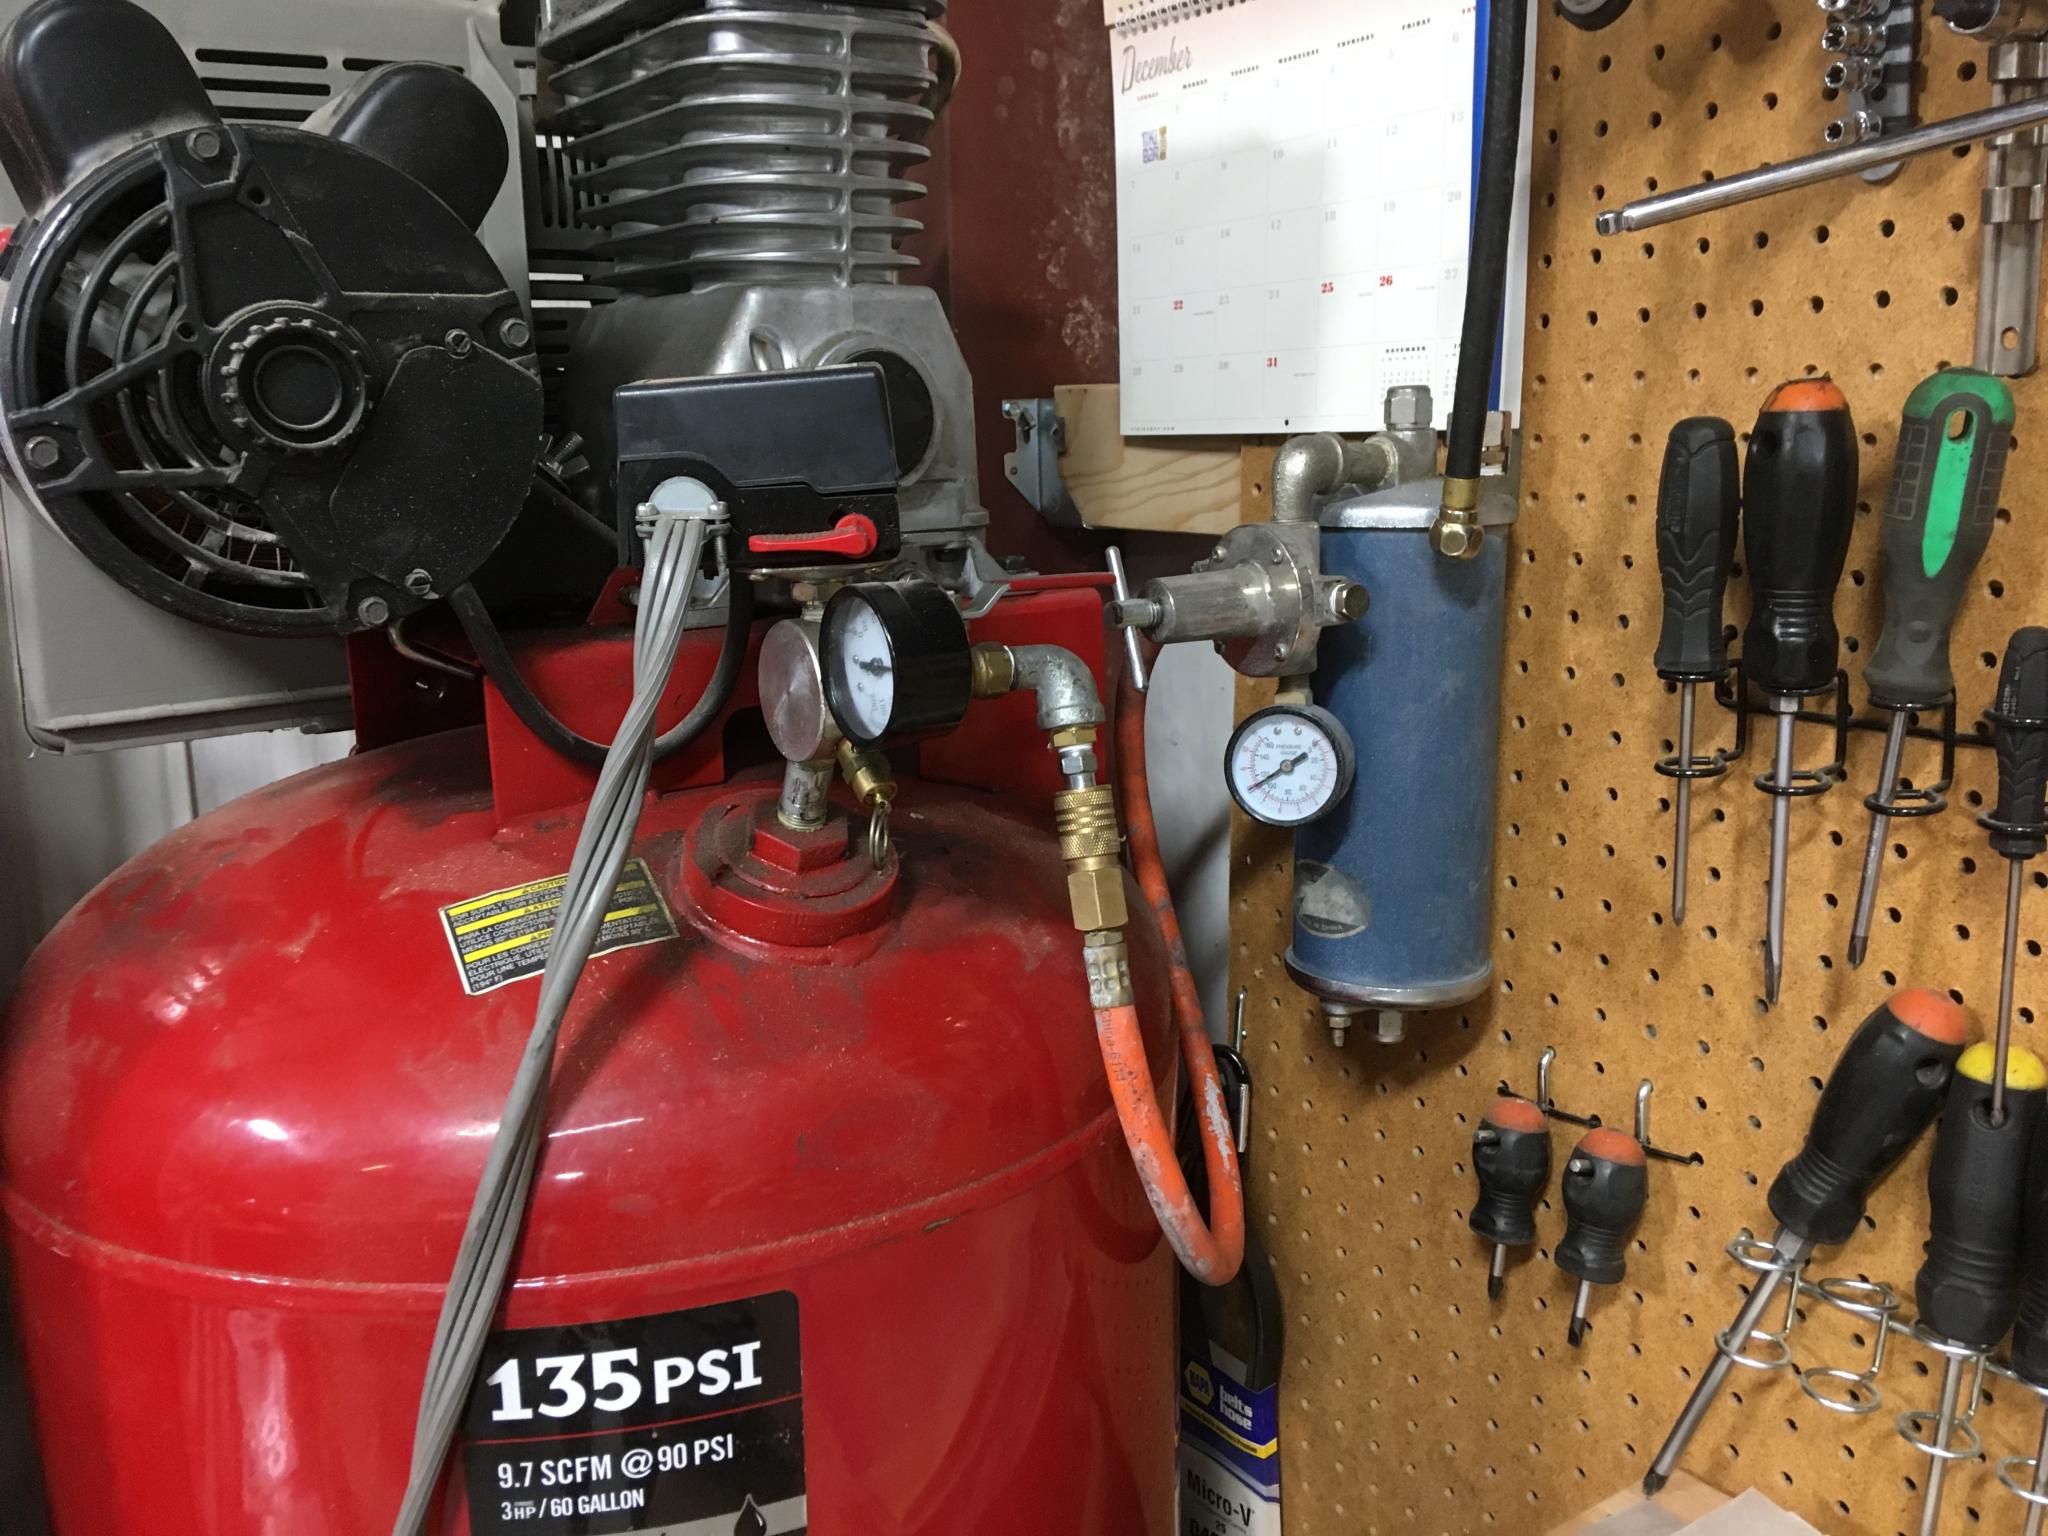
The compressor sits in the back corner of the shop - despite all the original plans earlier in this thread, that's where it ended up. The lift is about 20' away, and I want air at the big doors too. Plus the bead blaster. At my last place, I got a roll of rubber air line from HF and just attached it to the ceiling. That's not going to work here.

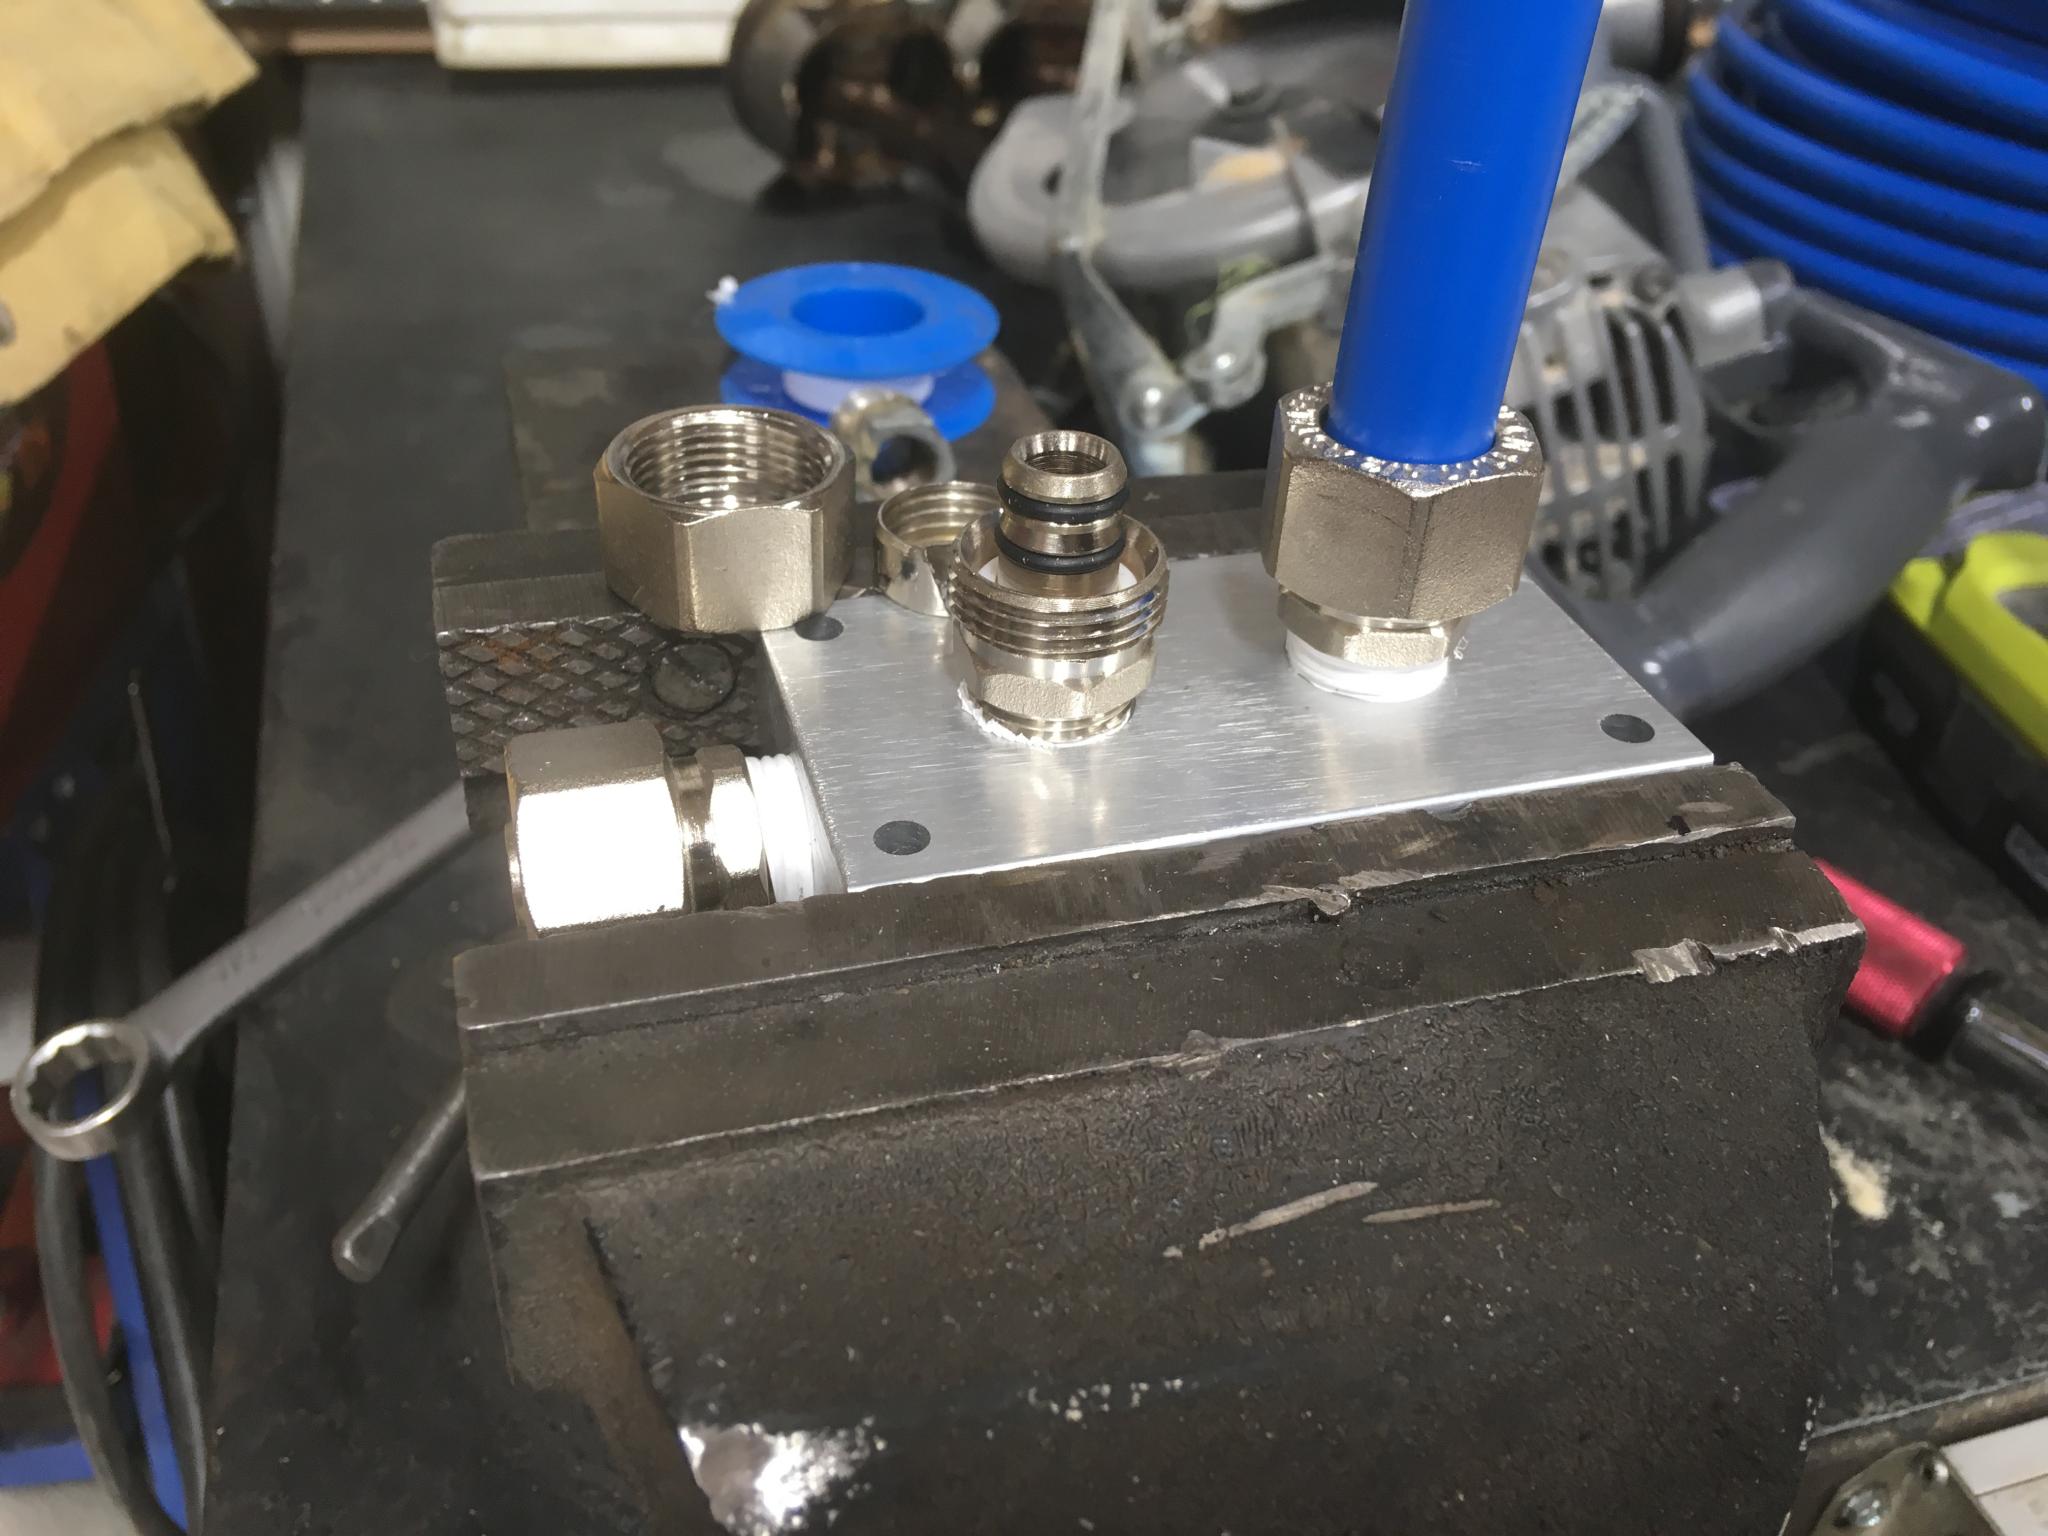
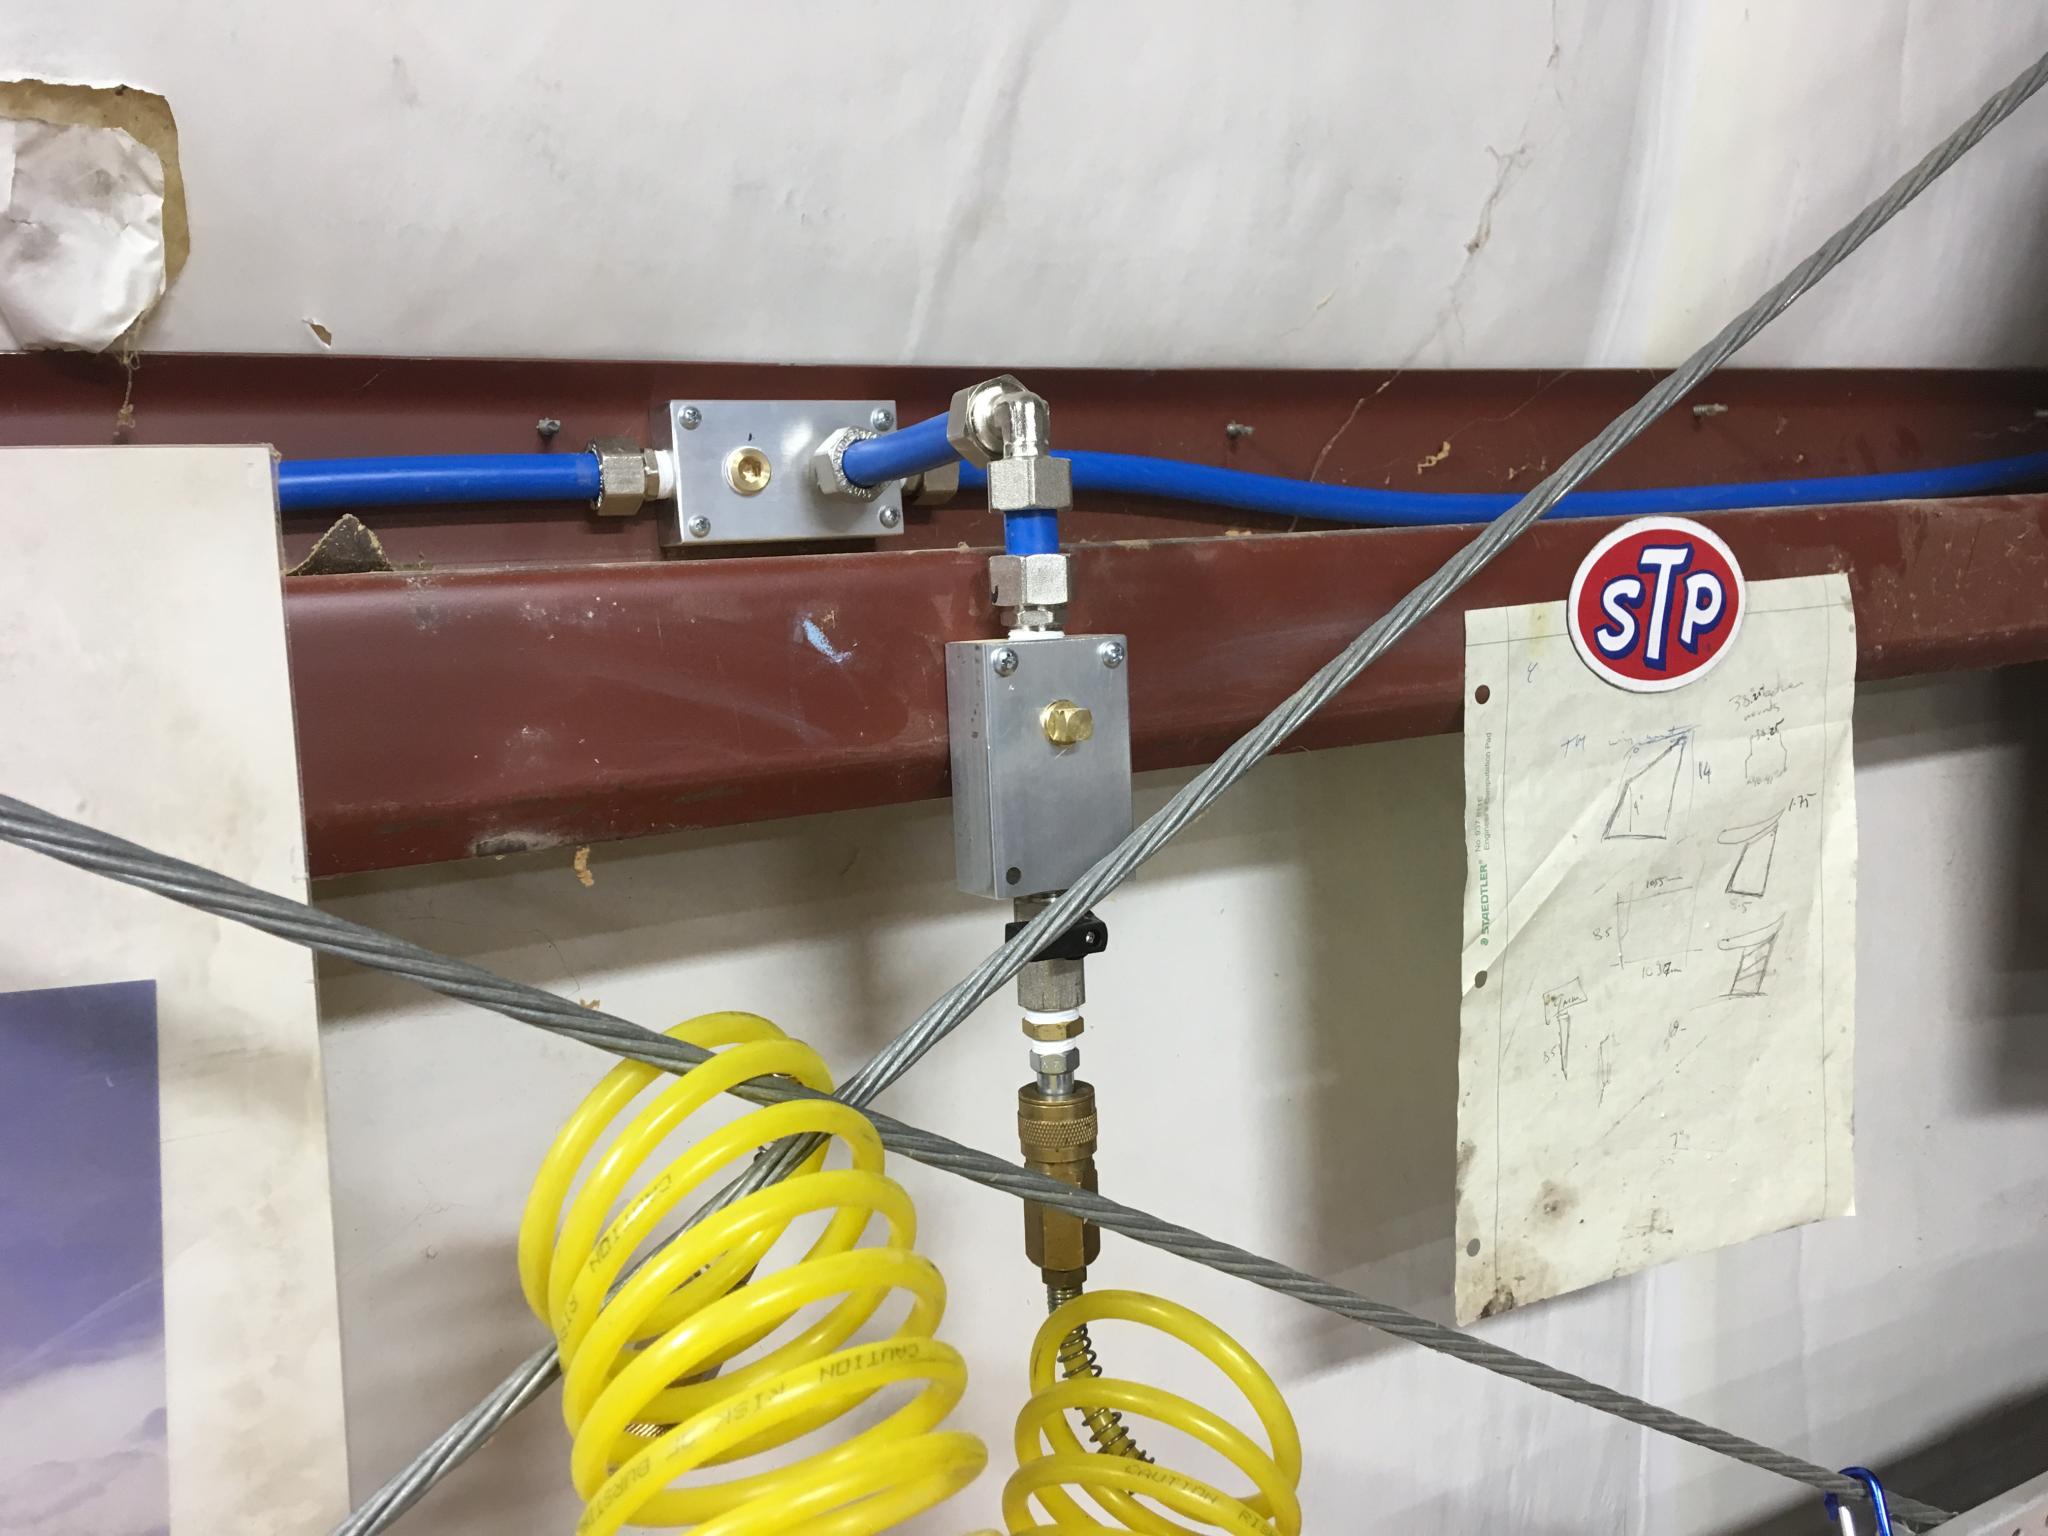
So I picked up a "master kit" from Maxline. Basically, plastic-covered aluminum tubing, a bunch of connectors, a distribution block and three drops. A bit of planning said it was perfect. I spent a couple of hours puttering around the shop thinking about the perfect way to lay it out and where I wanted everything, then started cutting.

It's really easy stuff to use. The piping is just the right combination of stiff and flexible, allowing you to shape it with your hands. The connectors are all compression fittings with double o-rings. It came with a cutting tool and a deburring tool. 

This is the primary distribution block getting assembled.

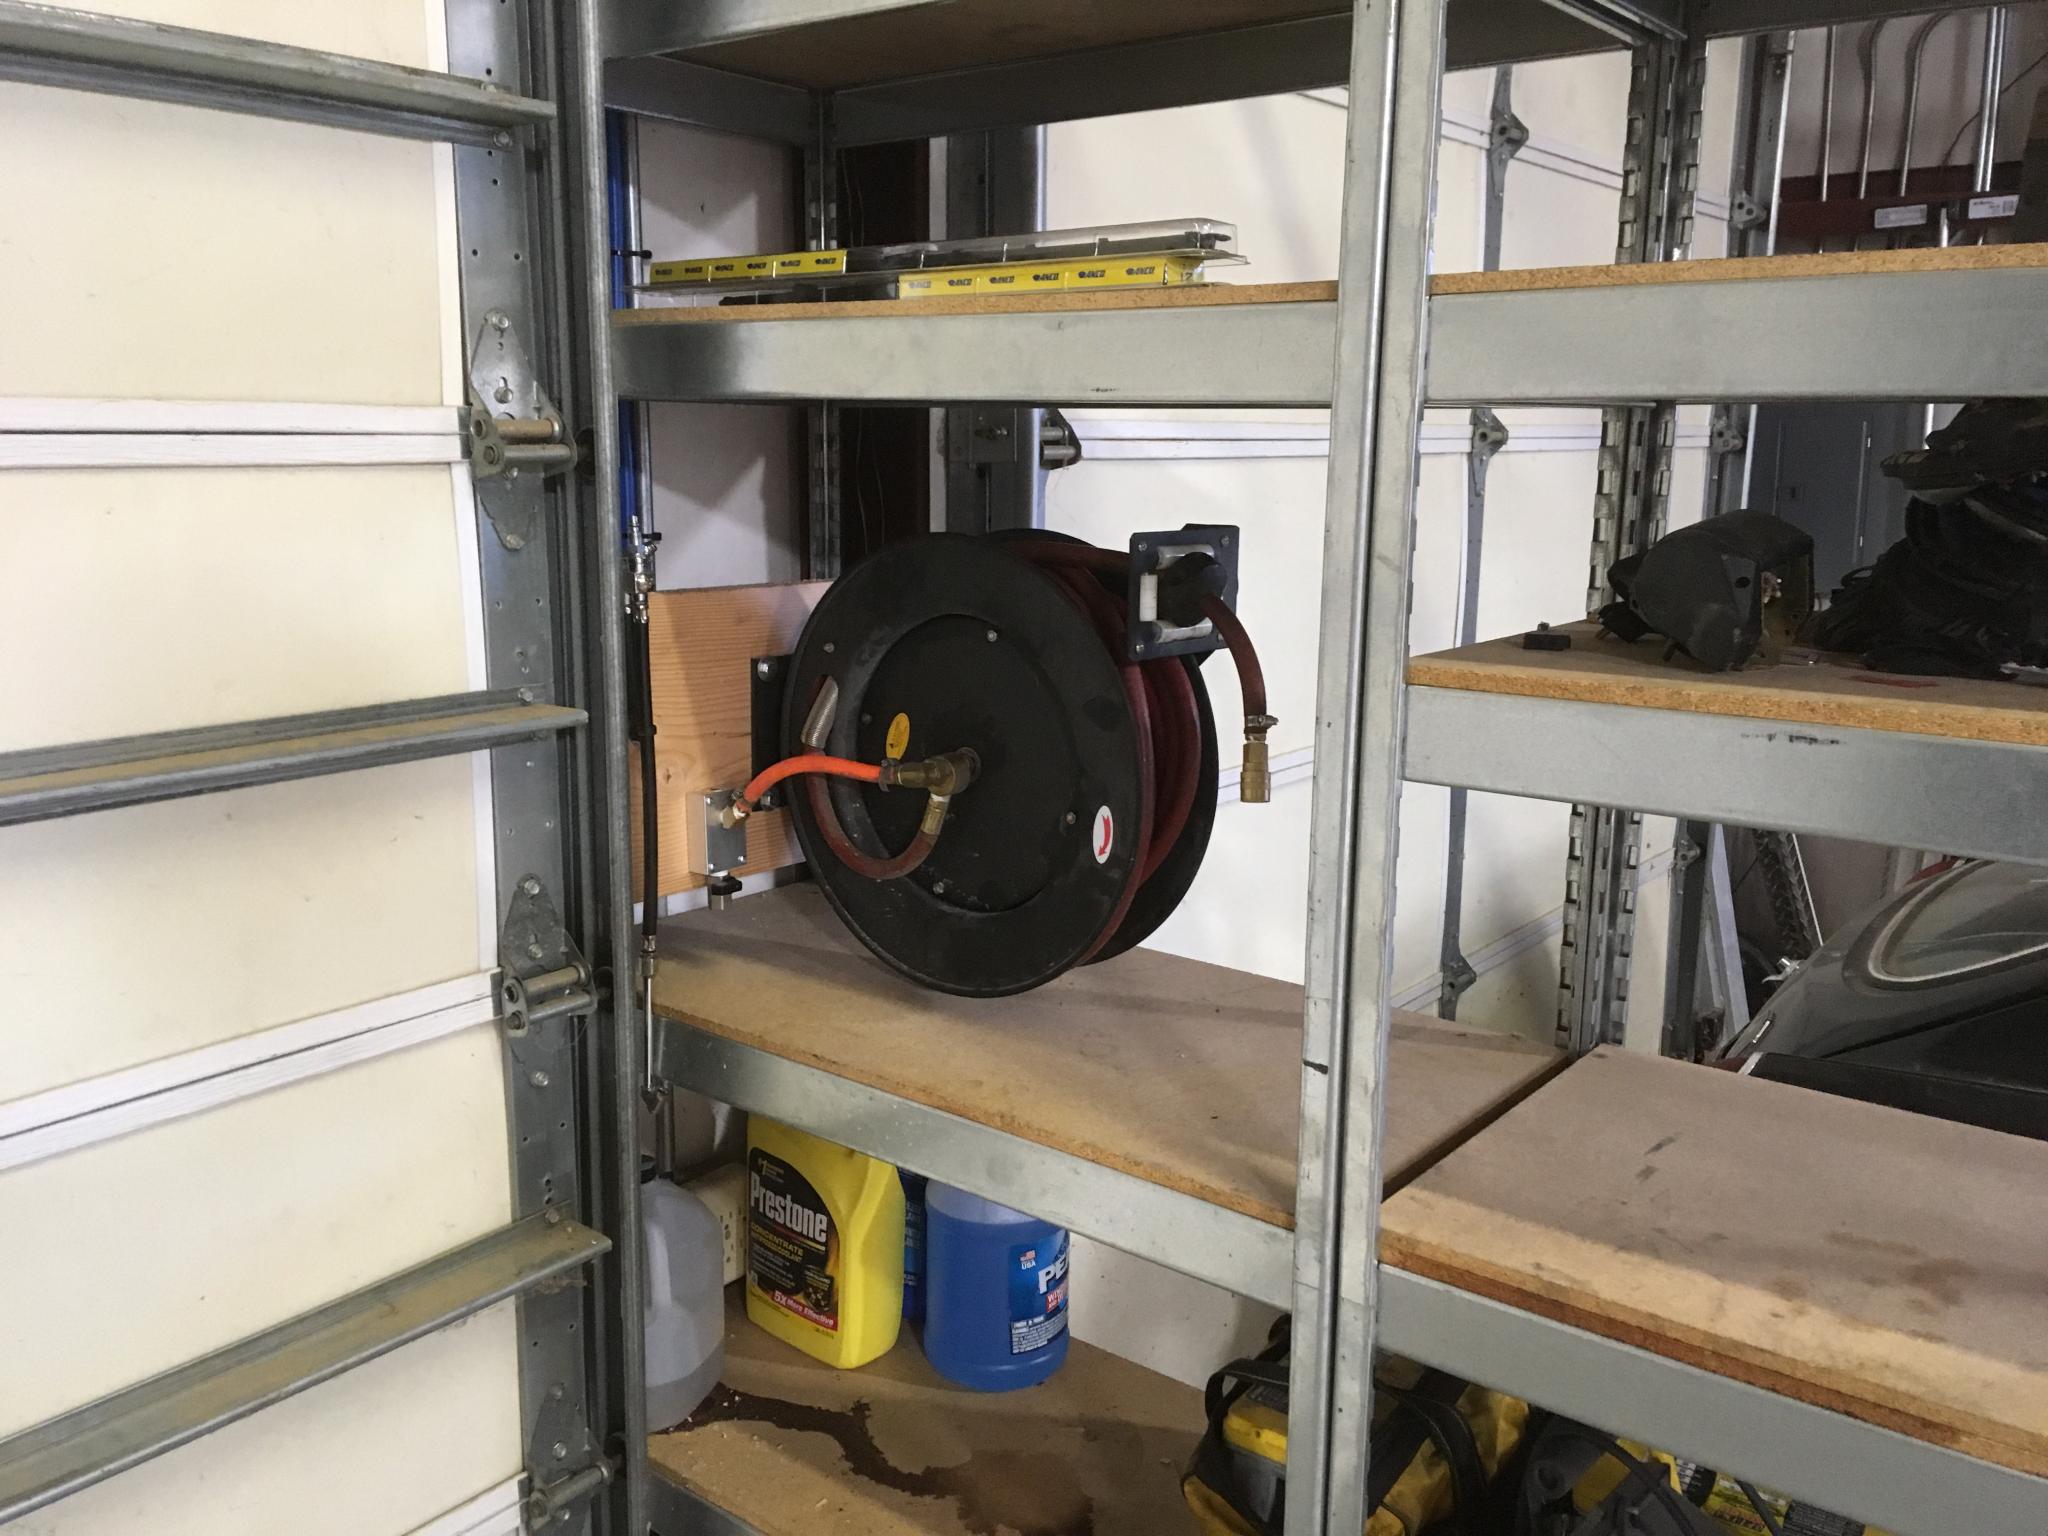
I'm using a 25' hose reel at the workbench right at the end of the lift and a 50' one at the main door. If I drag them towards each other, there's something like 35' of overlap smiley Here's the one over the workbench. The drop has a drain on it.

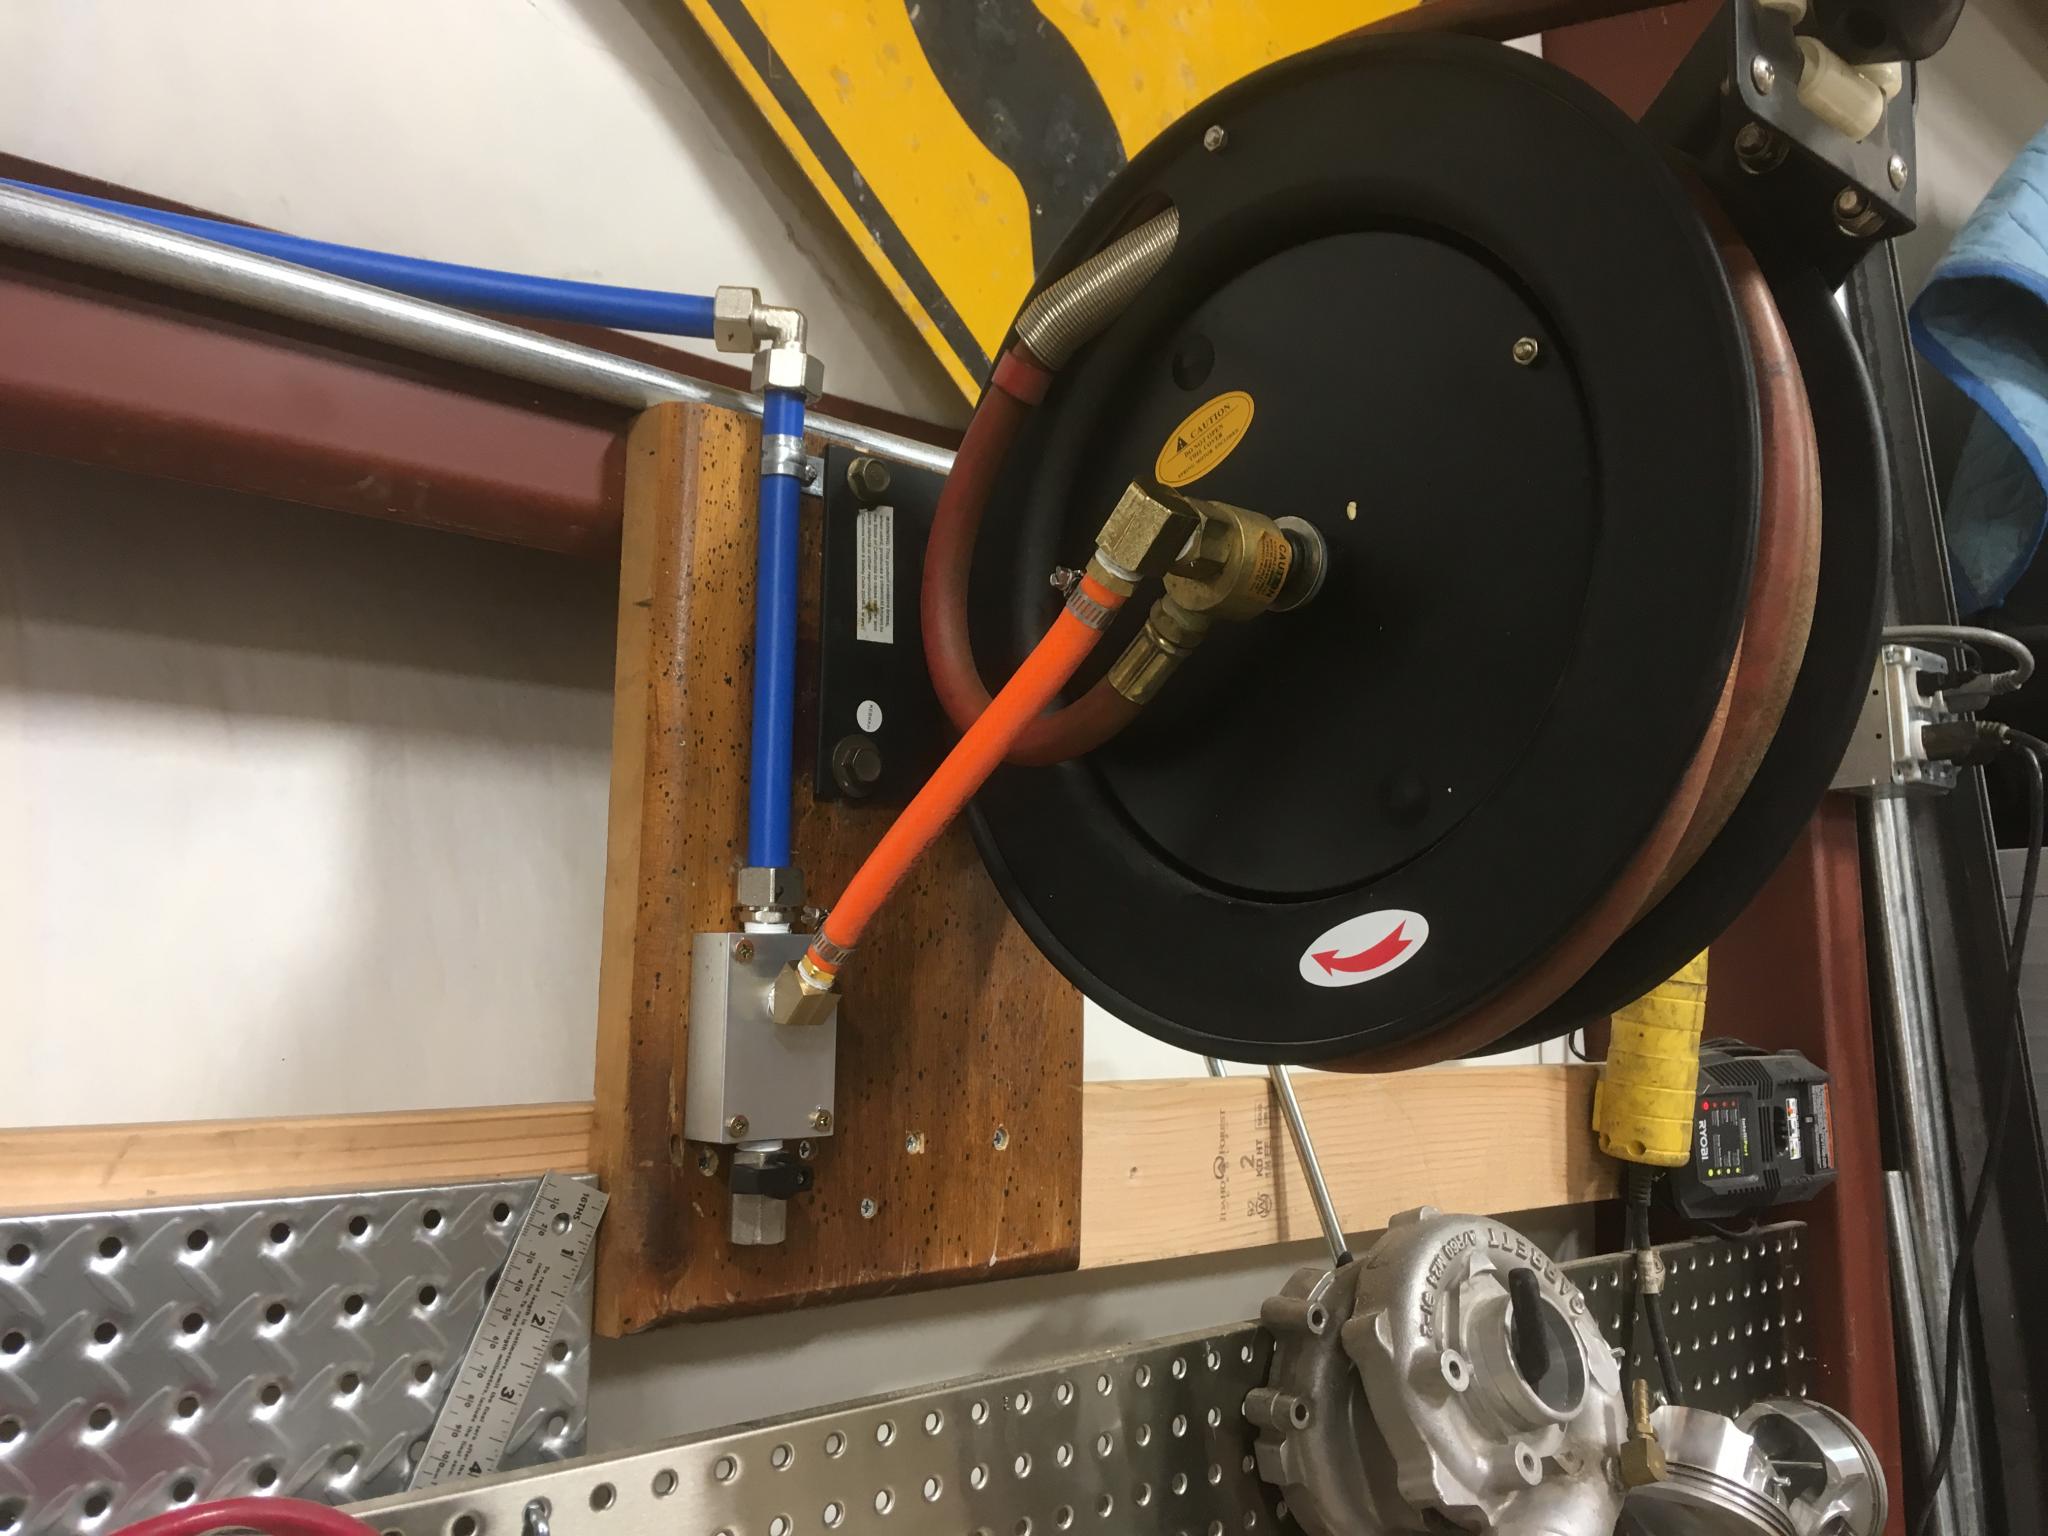
The last leg was more difficult to install as I ran it up by the tall ceiling and around a couple of corners and through a little obstacle course, so I just plugged off the distribution block and filled the rest of it. Not a single leak first try. I could get to like this stuff.

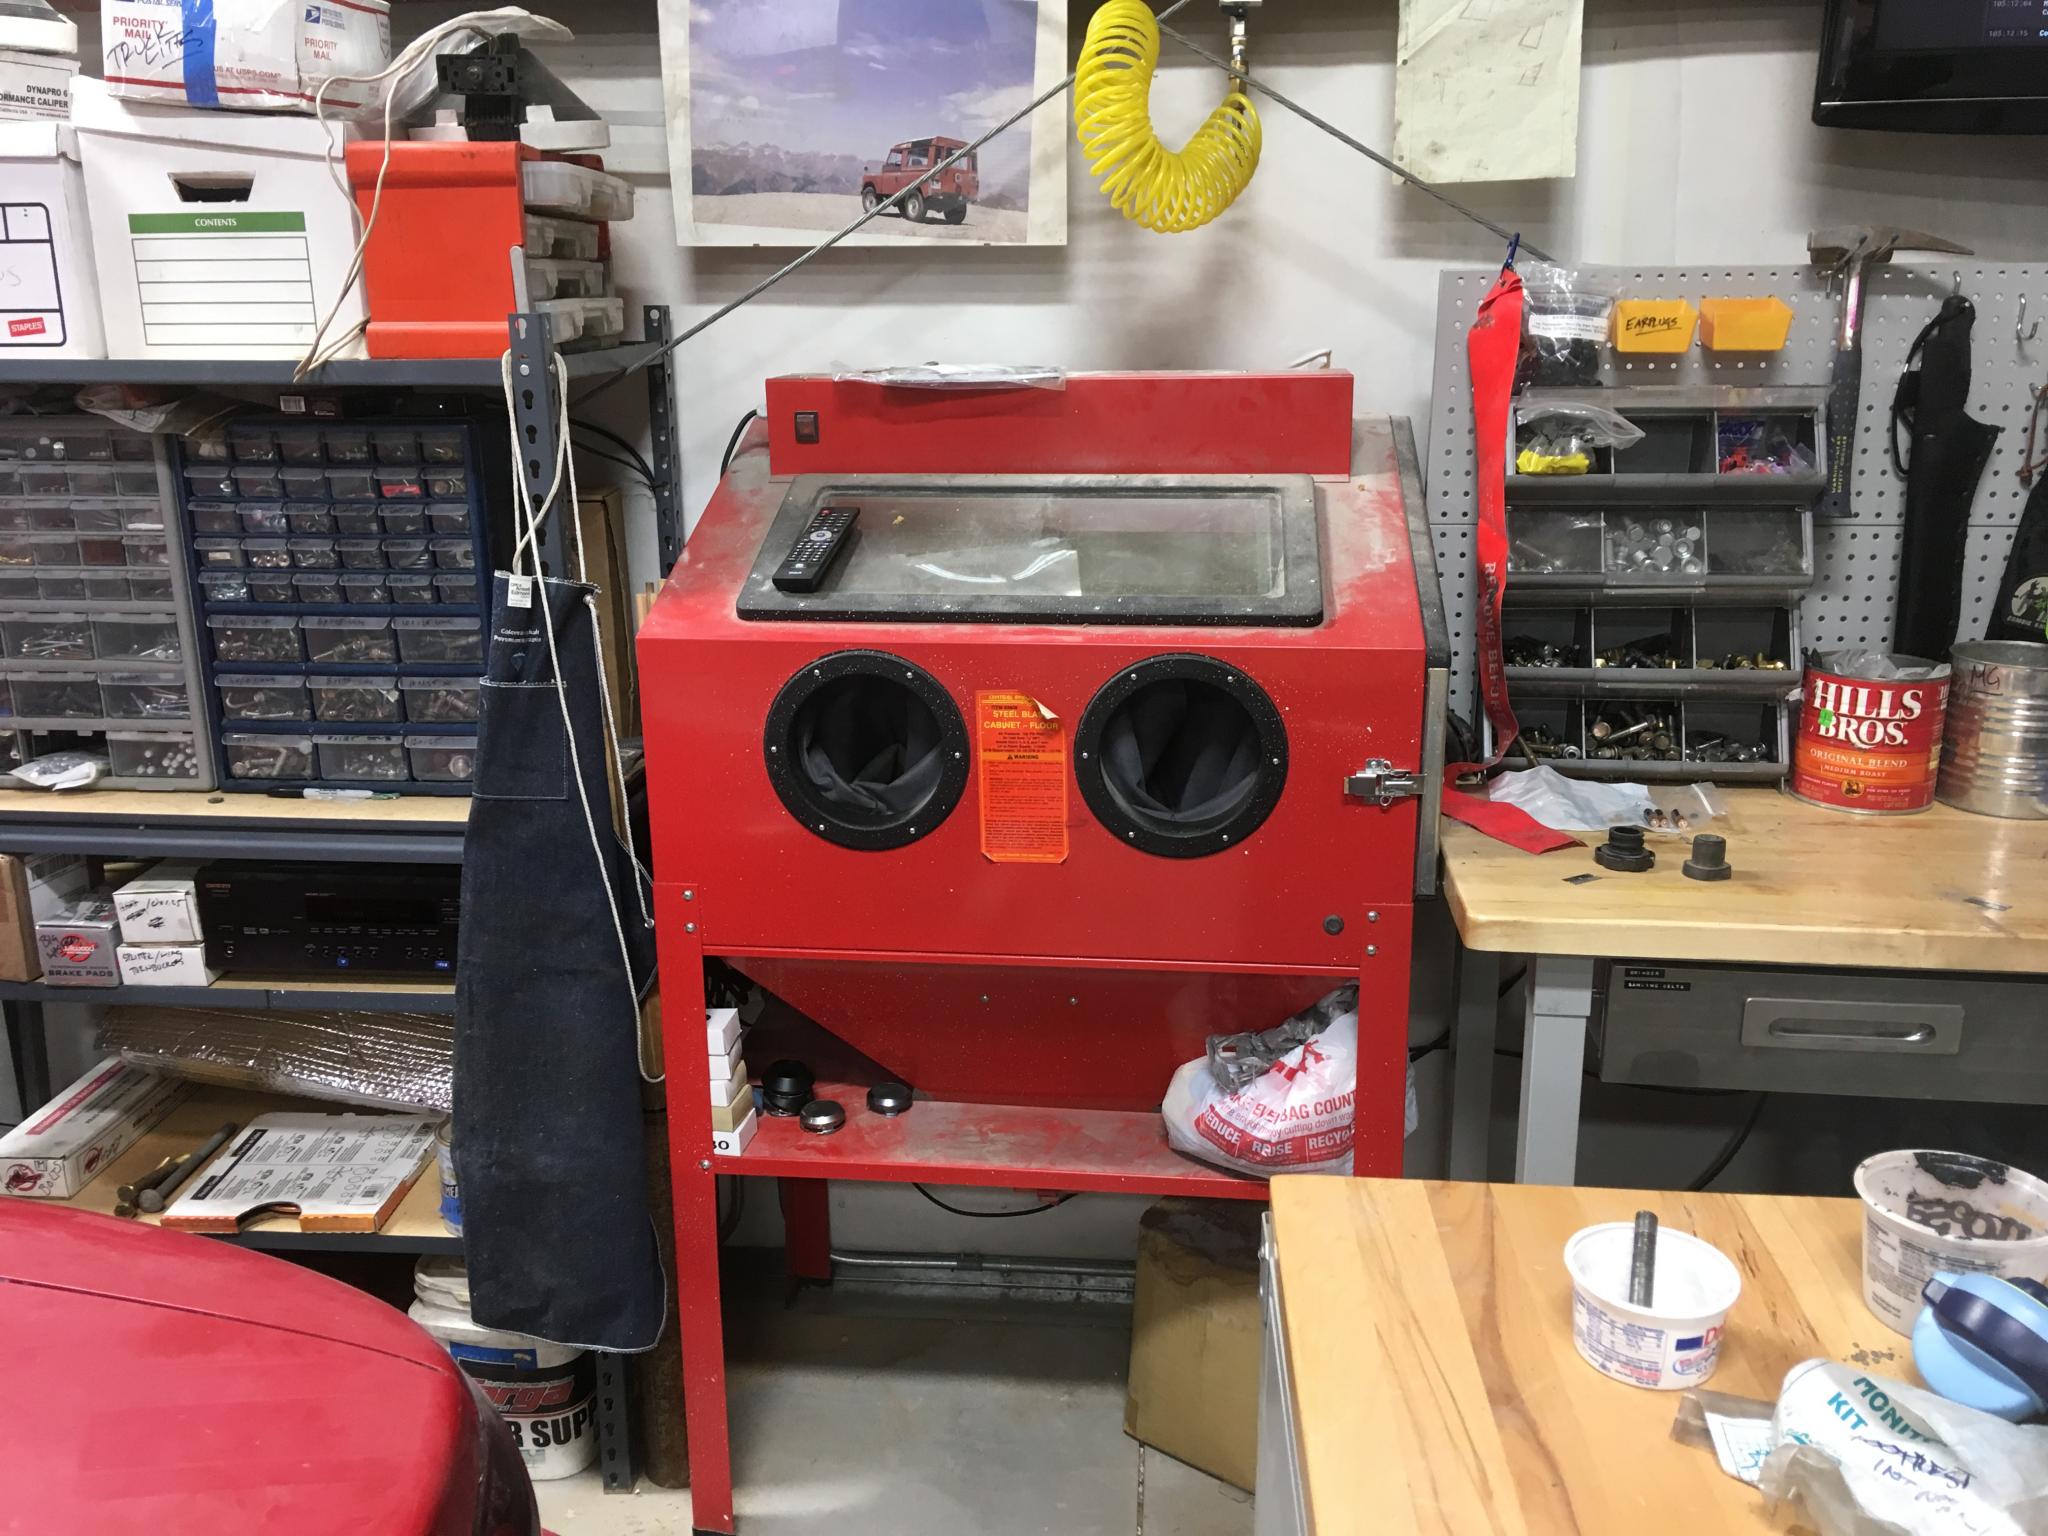
More pictures later, including how I'm dealing with the blast cabinet.

Keith Tanner
Keith Tanner MegaDork
7/24/19 7:06 p.m.

Air is done! Here are some details. I've used this for a clutch change, a suspension change and some general maintenance already. It's good. Electric impacts are convenient, but sometimes you just need 100+ psi of air pressure on your side.

A filter/dryer/regulator doodad lets me dial the pressure up and down. You can just see the blue feed line heading up from there. I put a quick release air fitting on the tank outlet just because I'll want to disconnect it someday. There's a ball valve there as well so I can shut down the system when I'm not in the shop.

A 50' hose reel by the garage door so I can do...things...to cars that are outside. I found this useful in my last shop. I've got a place to hold a tire pressure gauge and an inflator there. You already saw the 25' reel that's on the back wall in the previous post. On this one, I ran the air line into the back of the manifold for a cleaner install. I could have done that on the other one if I'd wanted to use another 90* fitting.

A drop partway along the side wall that isn't quite according to the instructions. Normally, that ball valve is just a drain and you take air off the tapped hole on the side. I decided to make the outlet "switched". If I want to drain it, I can just unplug the hose. This drop has a specific use, it's for the bead blaster. More on that later.

Overall, the Maxline kit was really easy to work with. Not a single leak when I pressurized it the first time and it was flexible enough for me to change plan a couple of times. Parts are not easily available in my small town, though, so make sure you know exactly how many fittings you're going to need. I found that the blue line has a minimum radius of about, of, 9" so take that into consideration when you're going around corners. 

Keith Tanner
Keith Tanner MegaDork
7/24/19 7:16 p.m.

I think we can call this basically finished. I'll be tweaking things for a while, but I'm spending time working in the shop instead of on the shop, and that's a good thing. A recent trans change, a engine build and swap, a suspension swap, hunting down noises on the M5, and some upcoming rust repair have all contributed to the setup.

So here's how things worked out. Some of these pictures were taken while I was still doing cleanup after the engine build, don't mind the mess particularly in the second photo when I had a big pile of empty boxes.

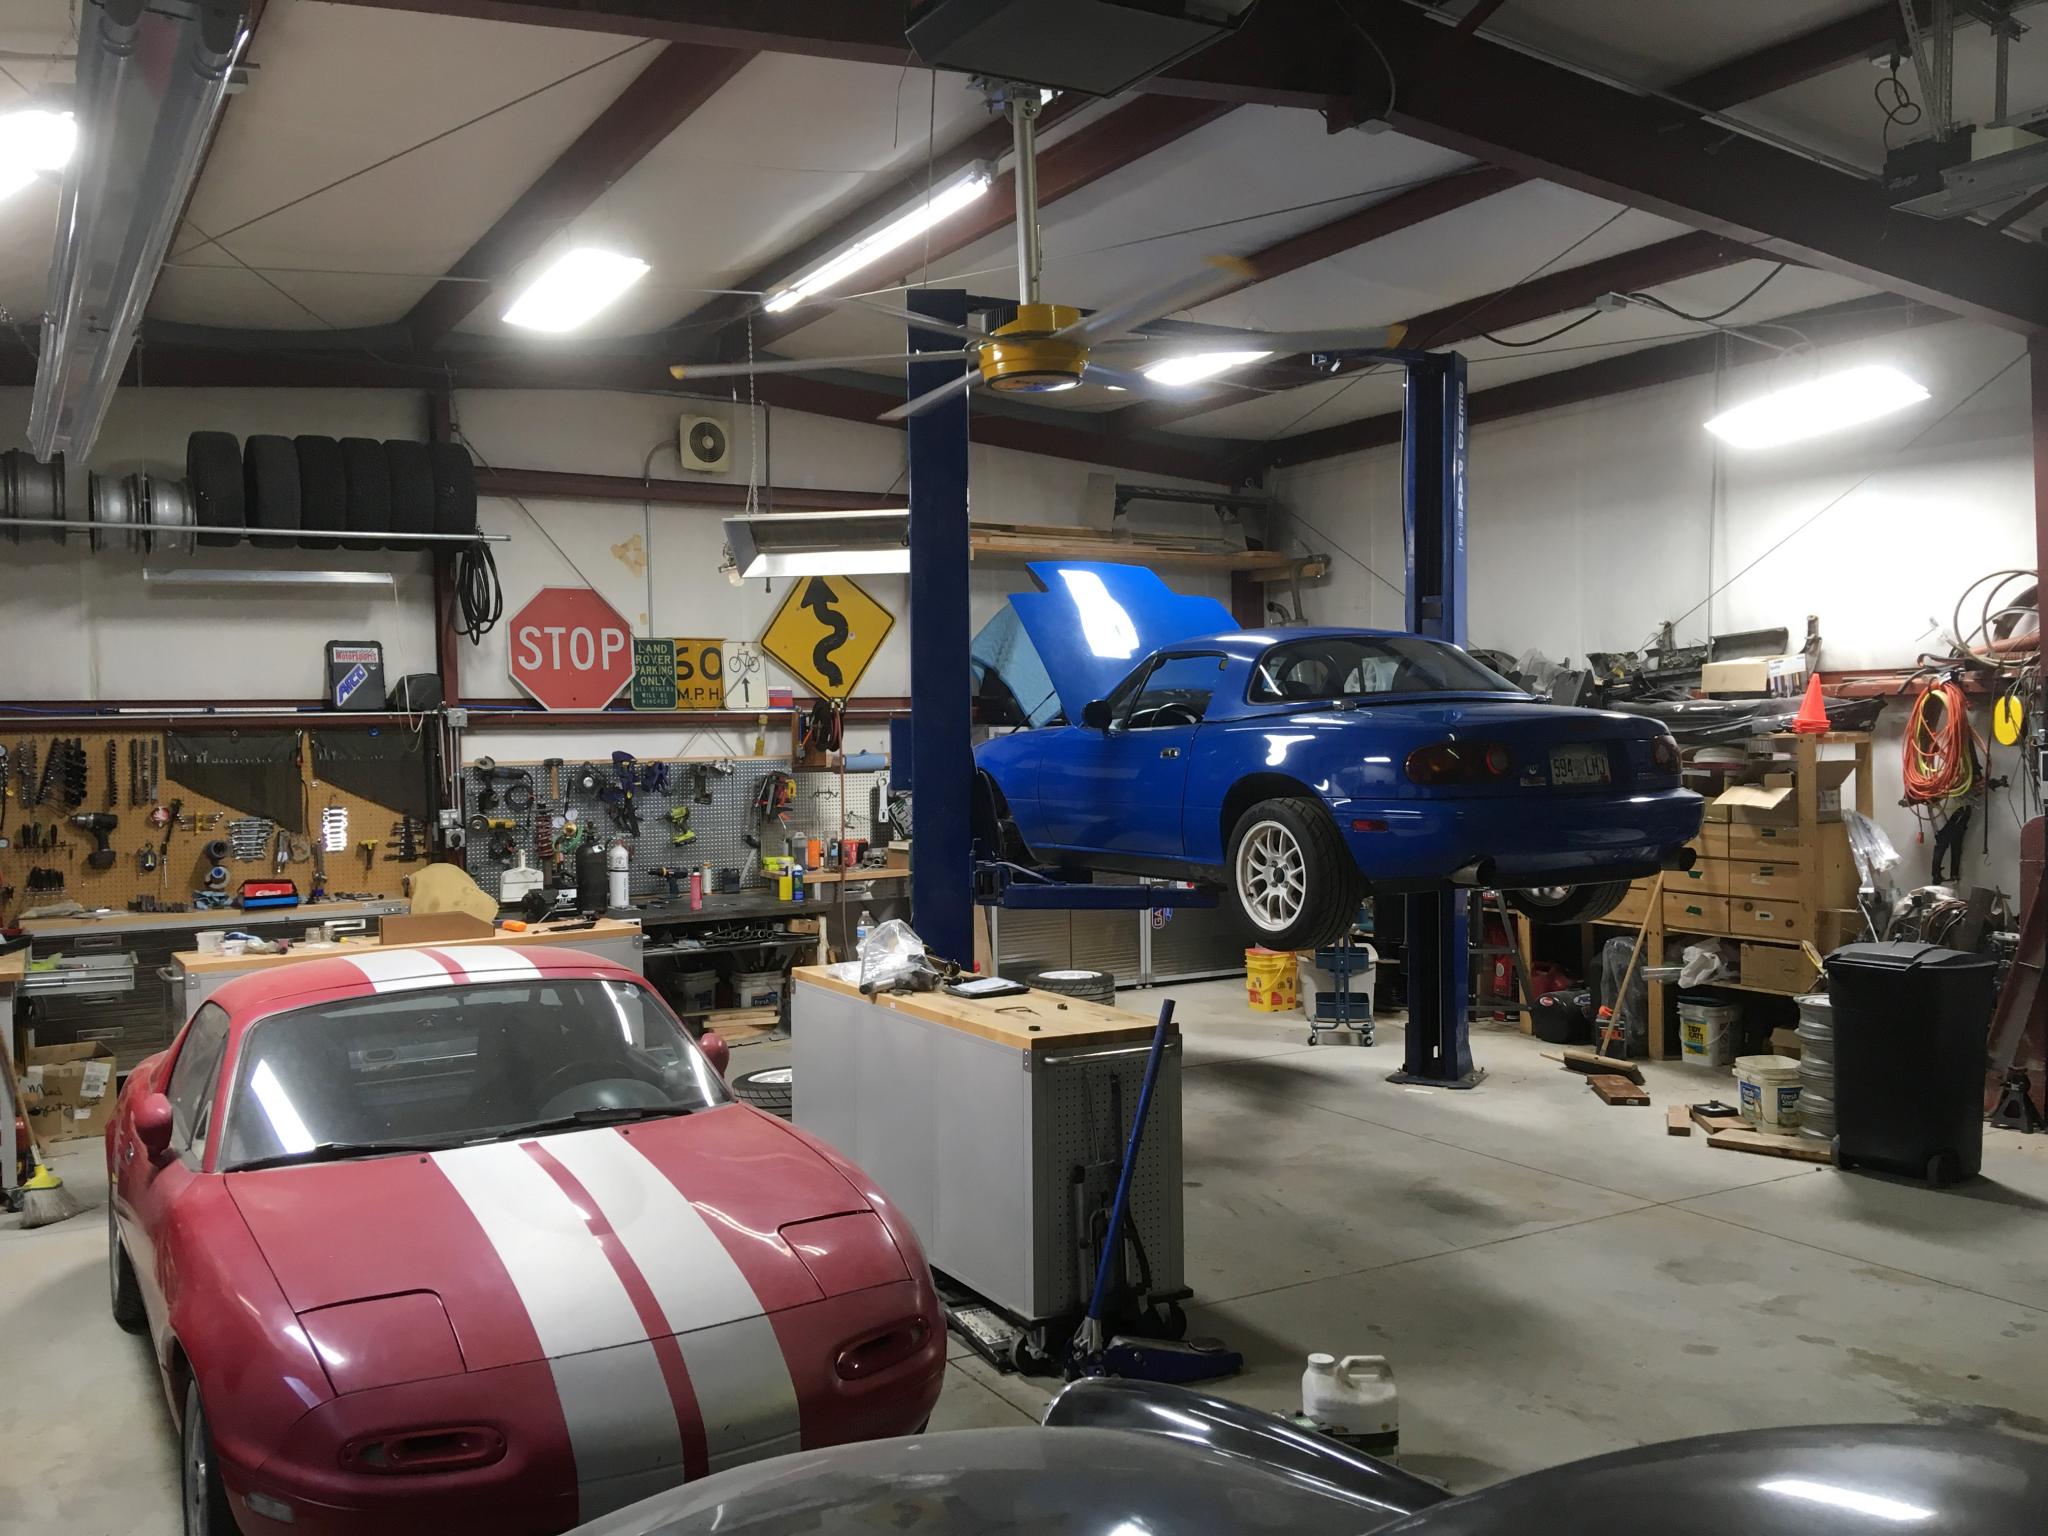
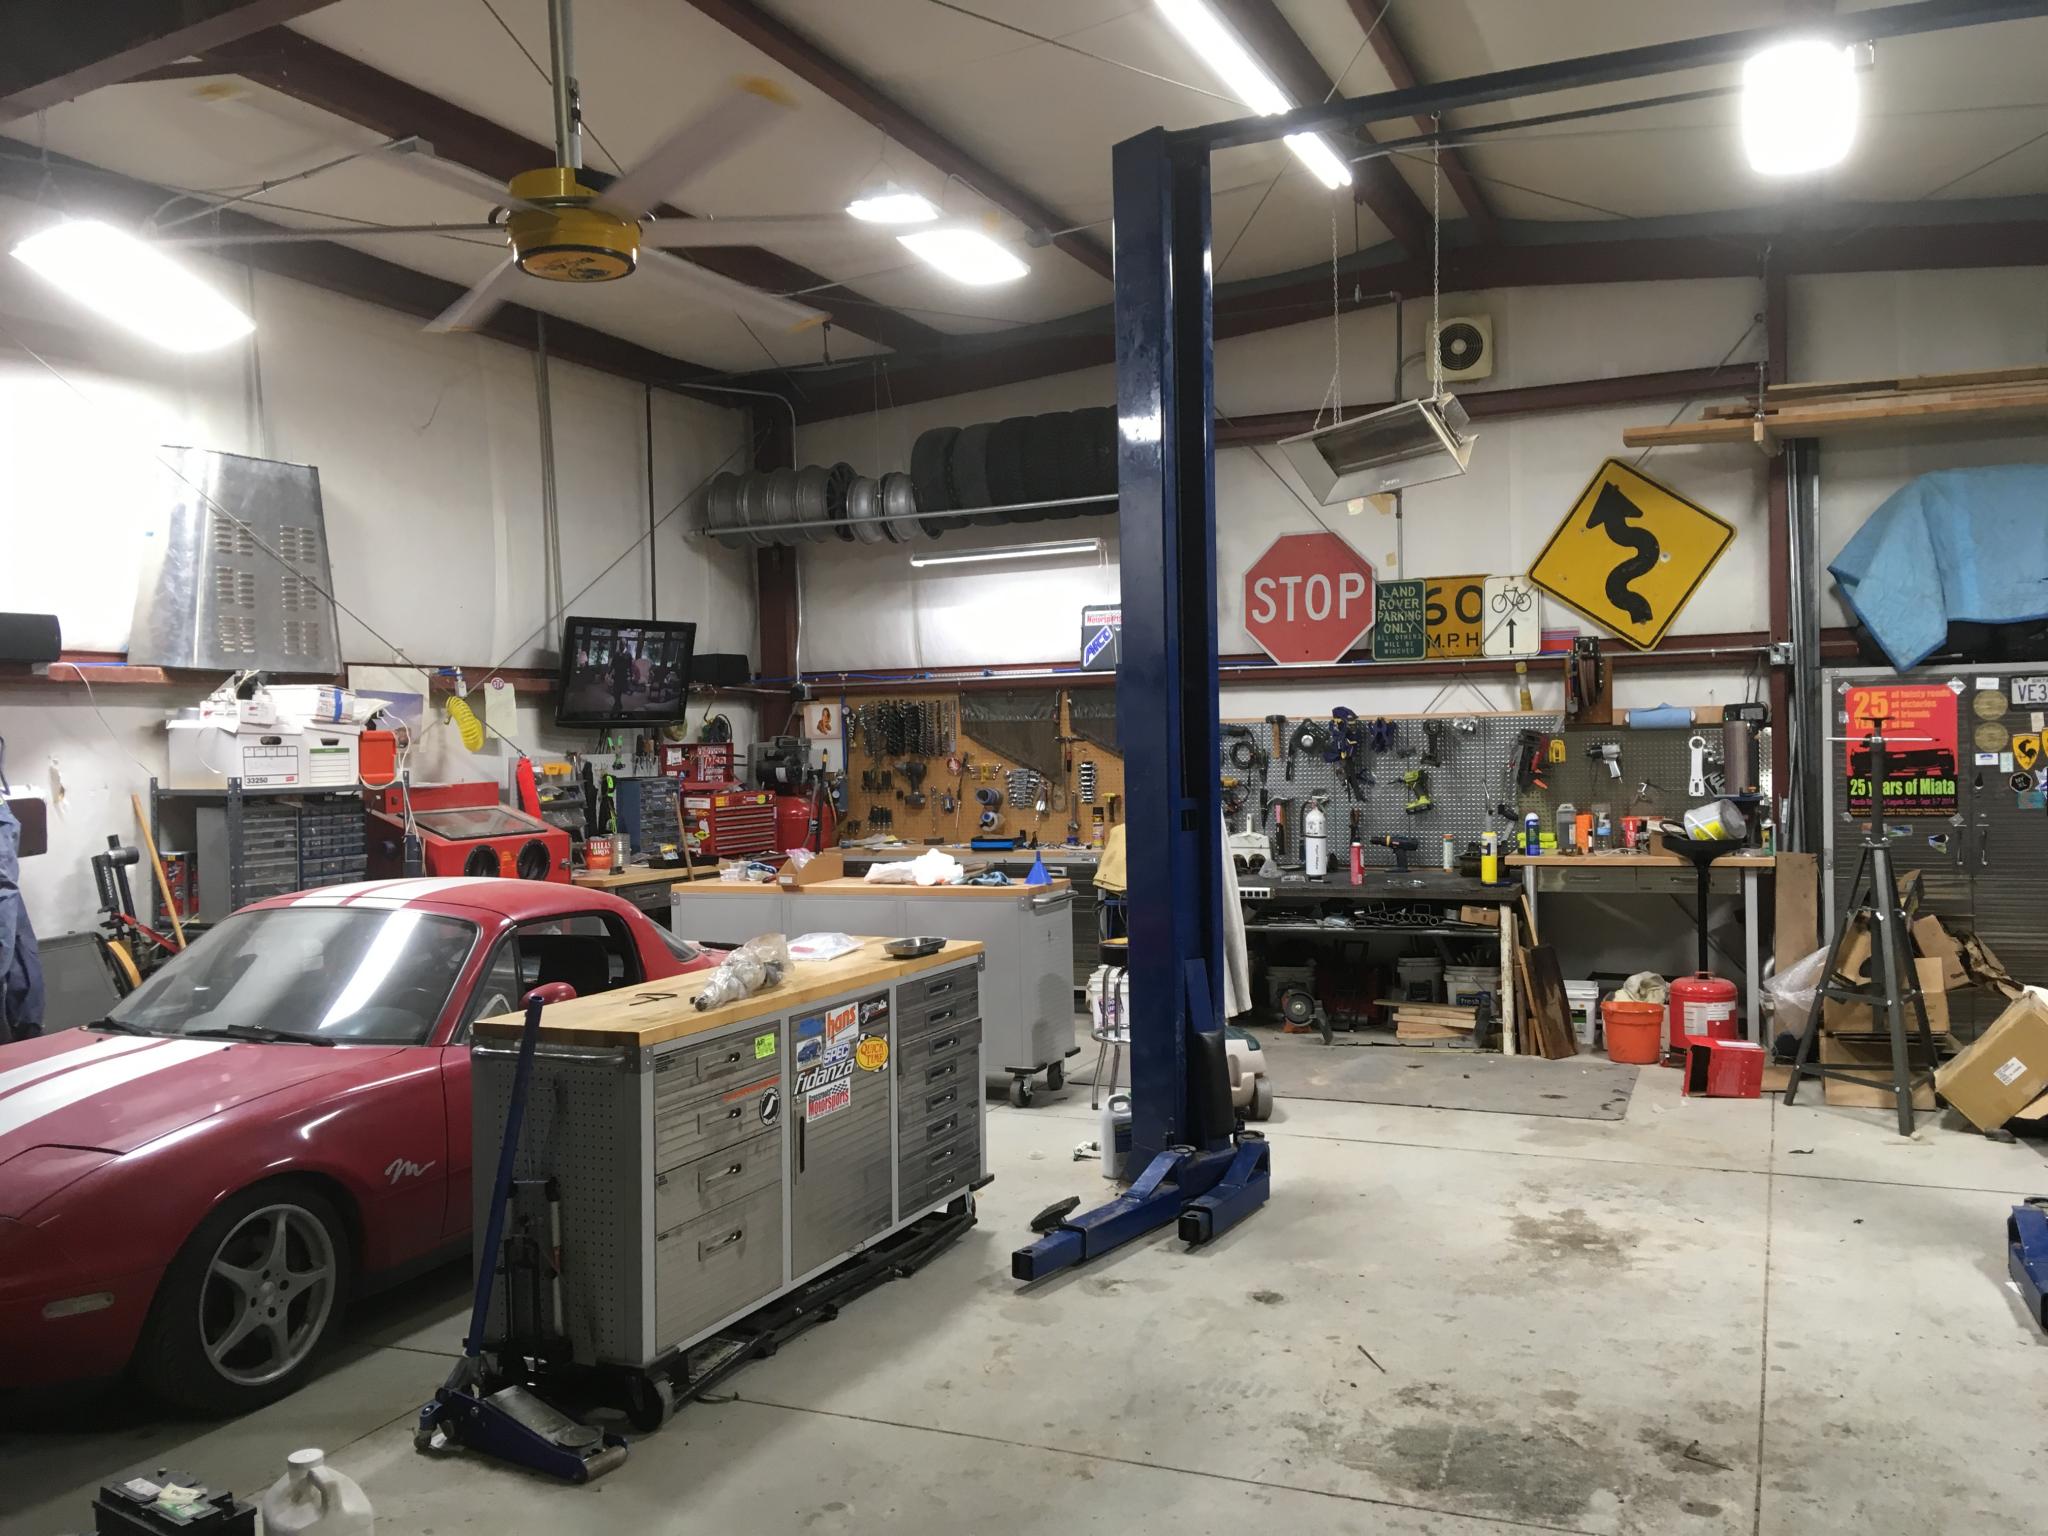
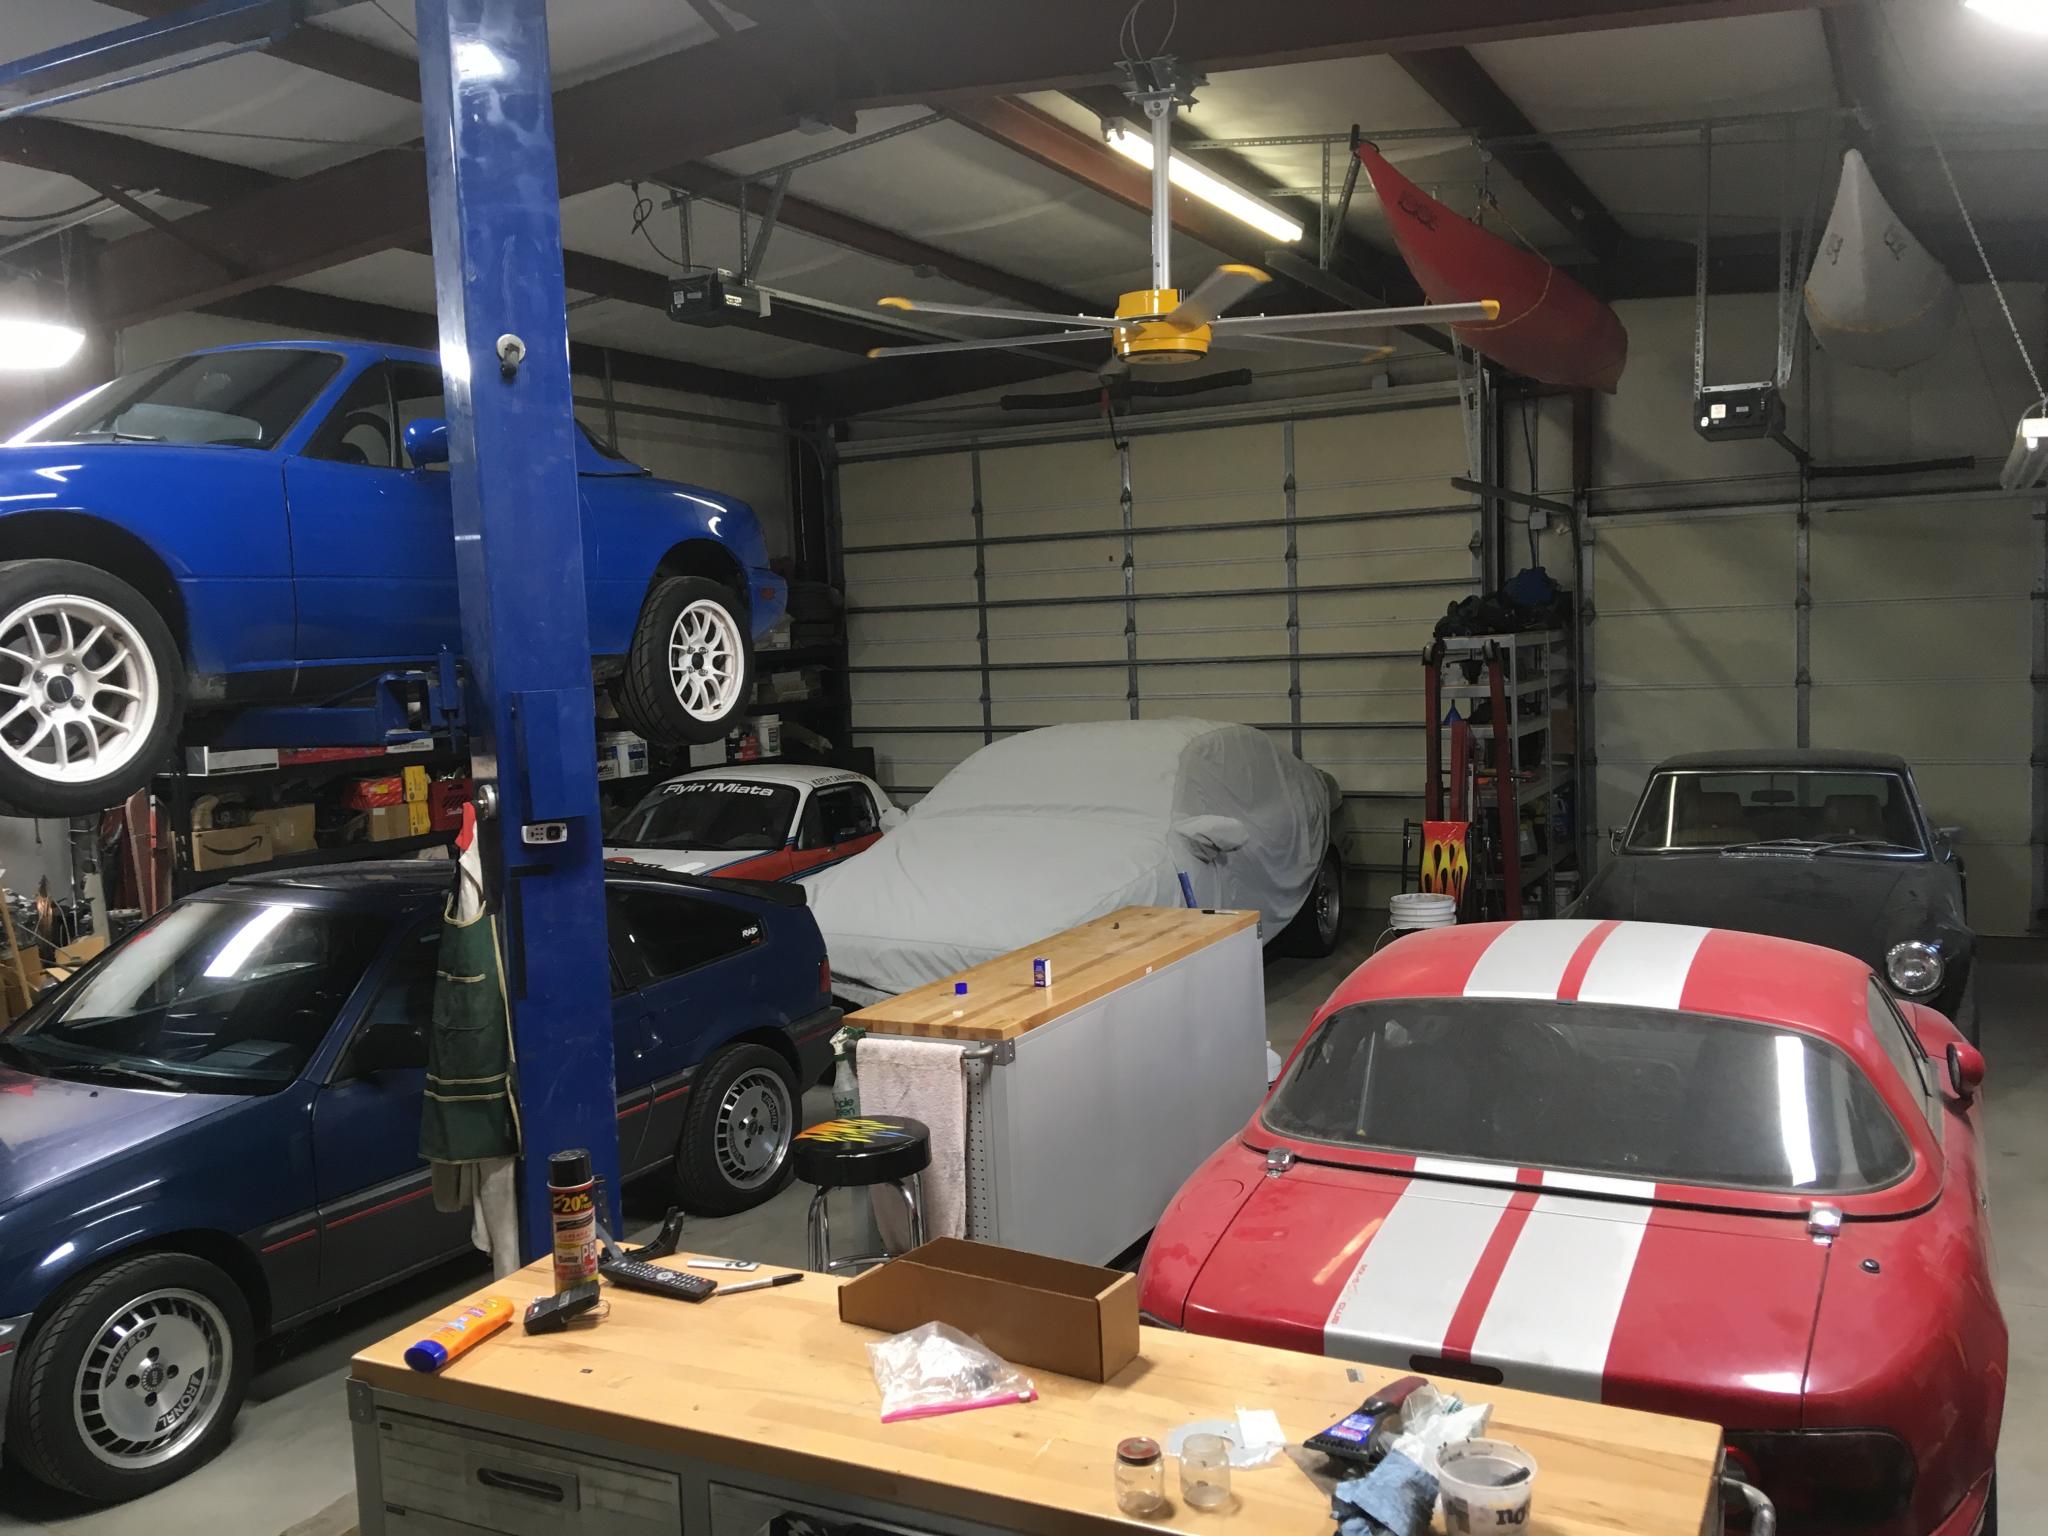
We'll call the part of the shop that has the big doors the front. The front 20' is basically parking. Behind my small door (on the left in these pics, like the red Miata) we have long-term parking, behind the big door is the entry to the lift and cars that move in and out more often.  There's a wall of shelves separating the first 8' of those two parking areas (basically, extending from the piece of wall separating the two doors) and the wall on the right side is heavy-duty shelves with all of the long-term parts storage.

The back half of the shop is where the work takes place. My big steel welding bench is in the middle and it's where most of the greasy work gets done. You can see the welder with a welding blanket sitting on top in the last pic.  There's a solidly mounted vise there so I can, umm, encourage compliance. Pegboard holds all the sockets, wrenches, air and electric drivers/guns and various things I use all the time. The sockets are on rails so I can grab whichever ones I need, and the blue wheely bin thing gets run over to whatever job I'm doing at the time. Makes it easy to put tools away when I'm done. There are three power bars mounted to various workbenches for convenience.

These guys make the workspace configurable. I've got three, one of which is fairly static and two of which I can move around. Sometimes they're back to back, sometimes, they're between the two areas of cars (long term and active), sometimes they're being used to define a more compact workspace (as now). They're from Sam's Club and you assemble them with about a thousand screws. Since I took this picture, I've mounted a fire extinguisher to the end of this one. We'll see how that works out.

The blast cabinet is not ideal. As it is, I can't put anything inside. The bench to the right of it is on wheels, so I can just pull that out of the way when I need it.  I may also put the cabinet on wheels so I can pull it out instead - that's why the air line is not permanently attached but instead can be plugged in when required.

I've mentioned that I also have an 8x11 work area in the attached garage up in the house. I've been using it for electronics work (lots of soldering!) and a base for house maintenance. Lots of lumber has been sacrificed to the house gods of late so that garage is set up to double as a woodshop when needed. Once the last bit of kitchen cabinet debris is out of there I'll take a few pics.

Keith Tanner
Keith Tanner MegaDork
7/26/19 4:34 p.m.

Because pictures are so much more valuable than words, here's what the front of the shop looks like. I'm at 6 cars right now because I wanted to get as many inside as possible for the next week. I suspect I could put the Mini in here as well, where I was standing at the time I took the picture.

You can see the shelving between the two doors as well as the heavy-duty shelving by the big door. It could be extended without too much trauma. Also two levitating kayaks that are on a rope and pulley system.

wheelsmithy
wheelsmithy SuperDork
7/26/19 6:28 p.m.

Magnificent! 

8 9 10

You'll need to log in to post.

Our Preferred Partners
a4RpcKj0sezzGidXSivwTixQsFtyr5qByp54Igc03vZZUYhhKVySffLccEF68hbs