Oh hey, actual progress for the first time in almost 2 years!
To move forward, I must first move backward and disassemble the entire car.

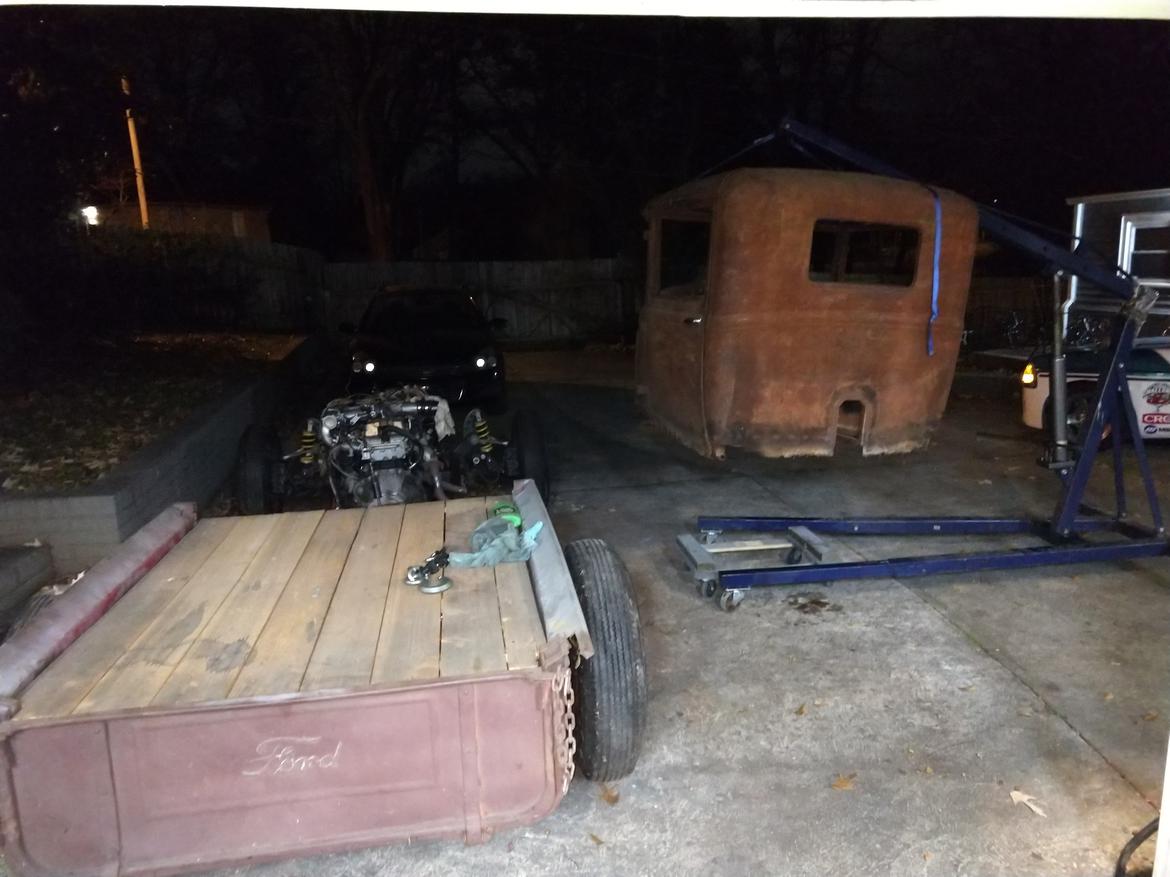
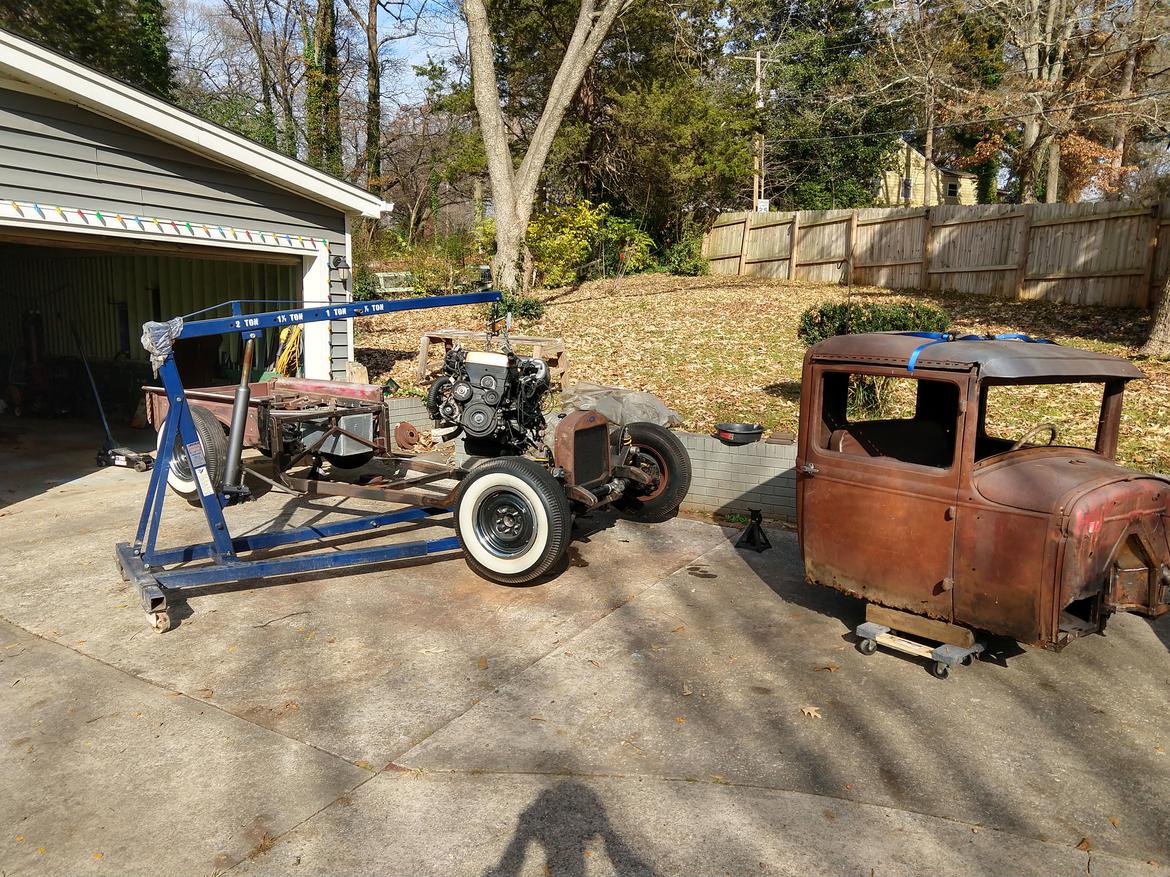
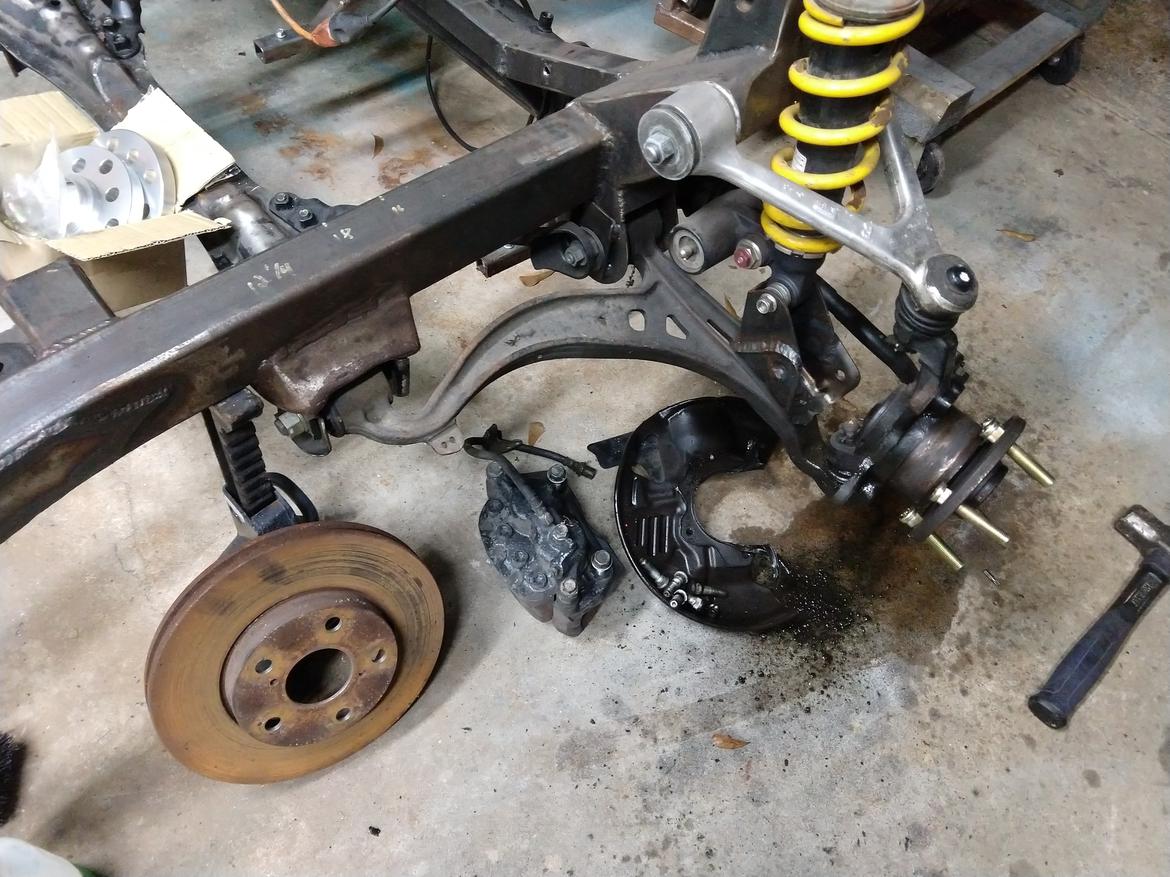
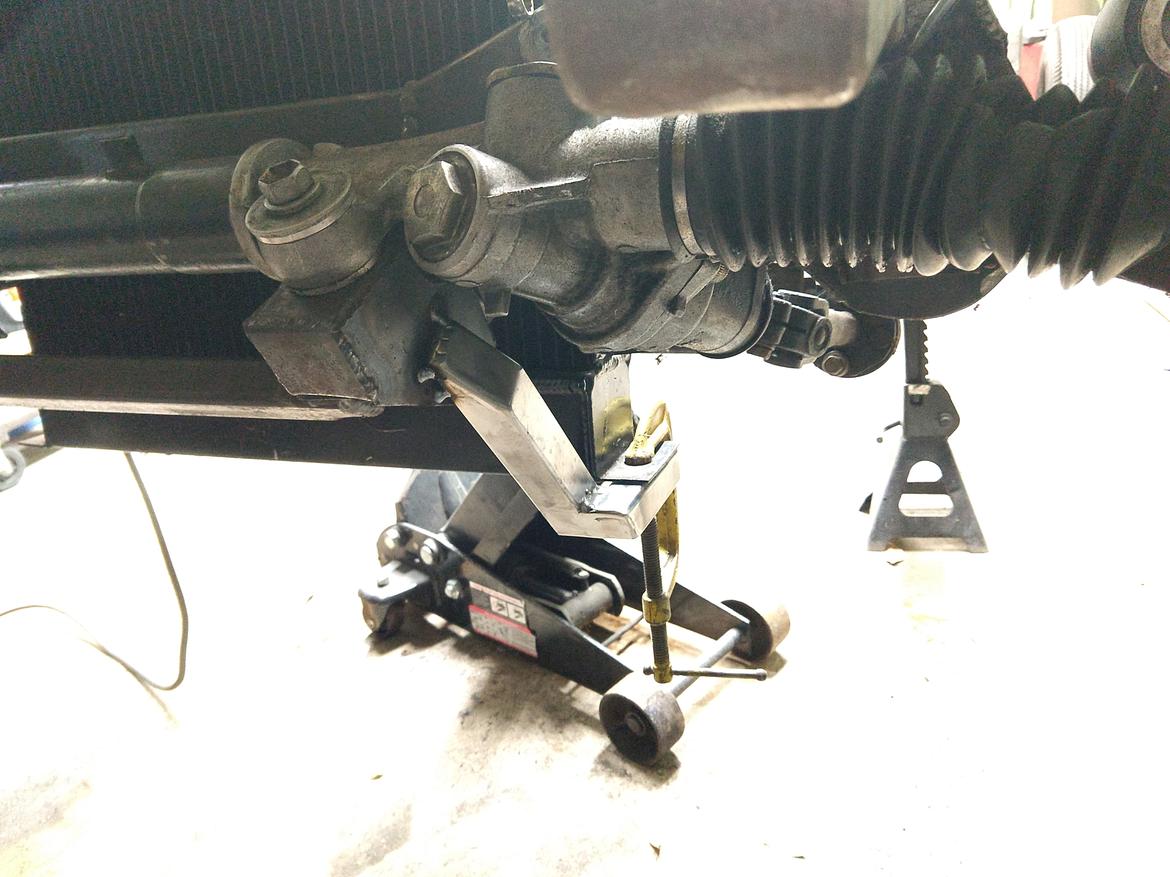
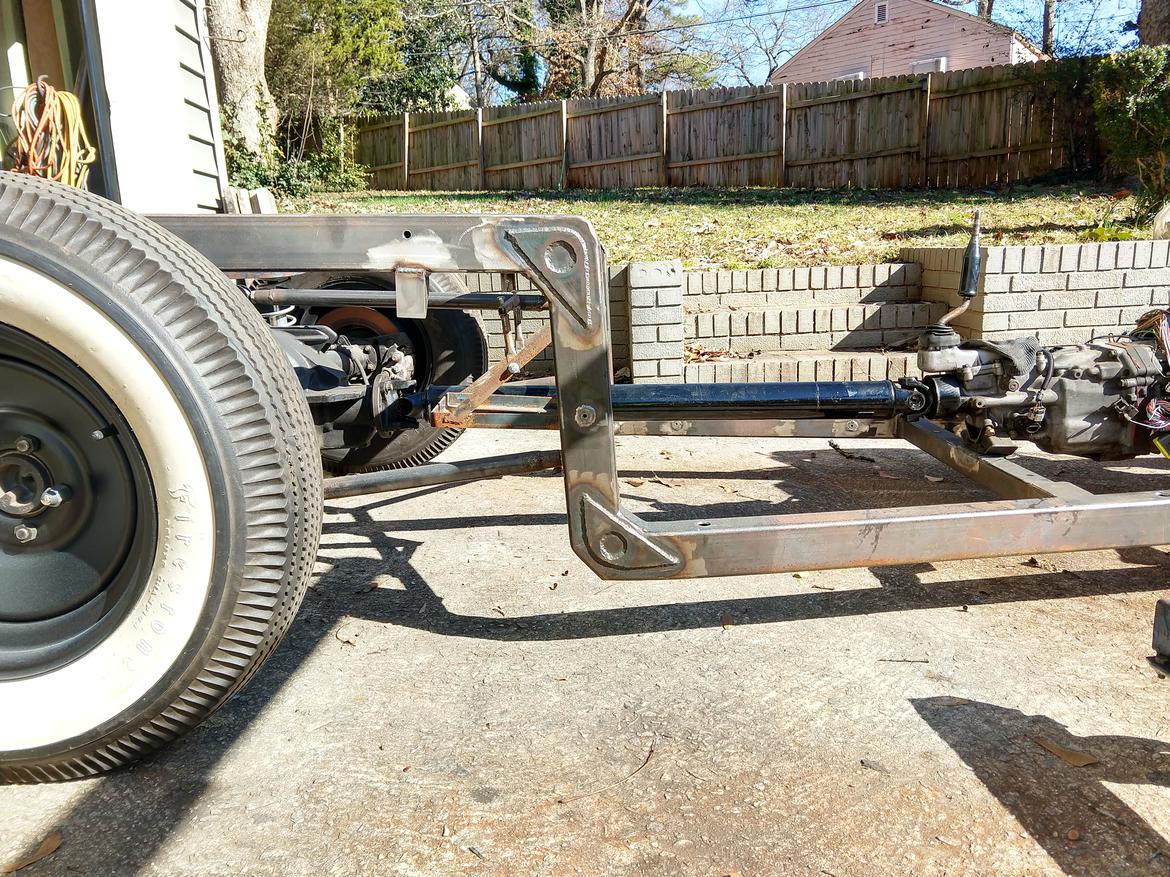
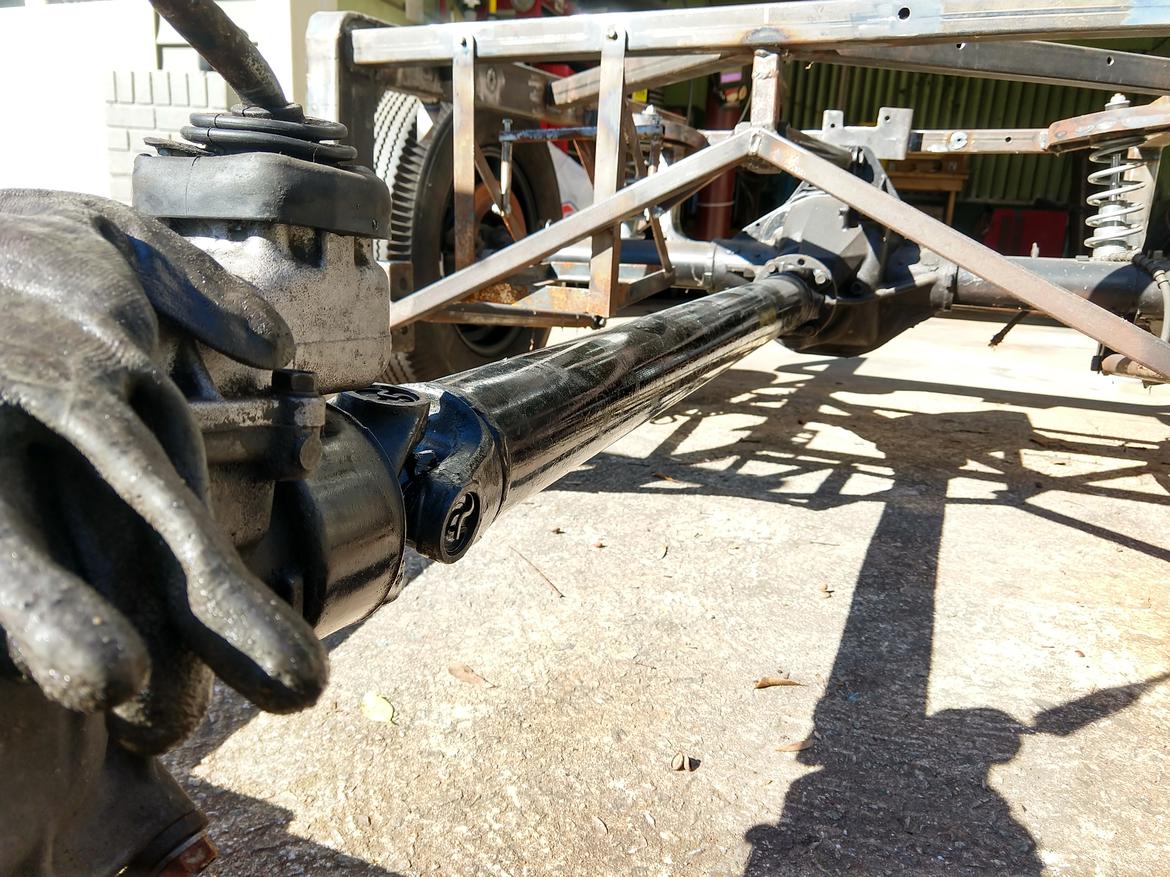
With the cab off, and the engine and rear-end still in, I aligned the rear axle to match the trans angle and took some measurements for the driveshaft.
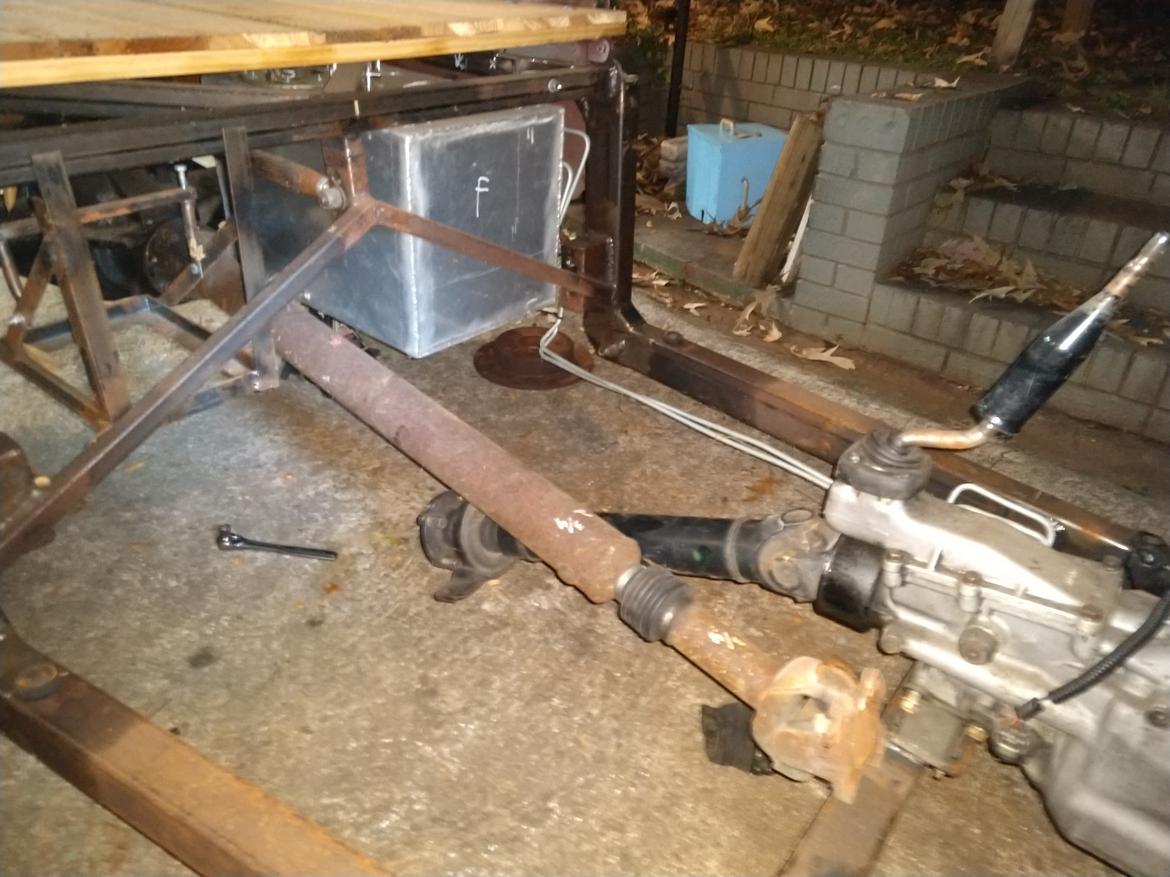
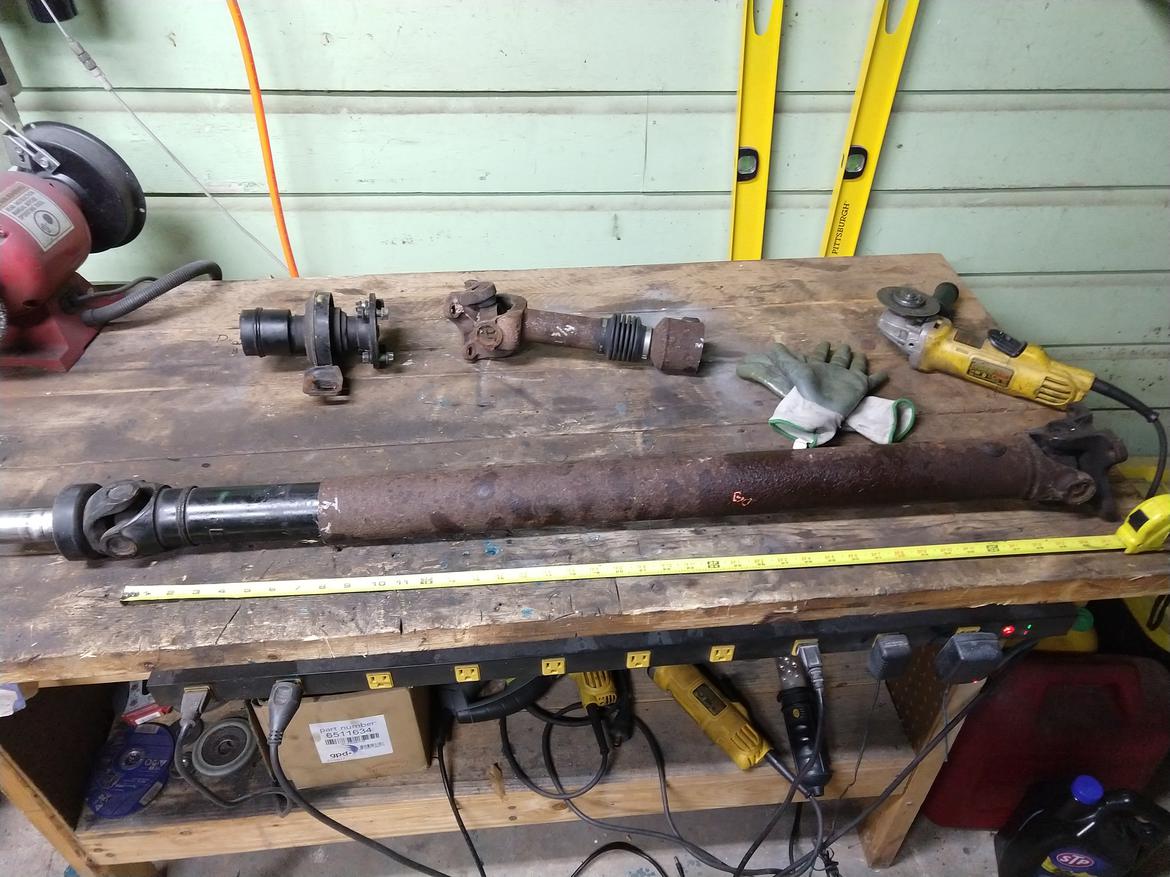
39 3/4" from center to center of each yoke. I'll let the driveshaft shop figure out the rest.
Next up: remove everything else
Love to see it. Looking forward to the next update - your updates are always substantial happenings.

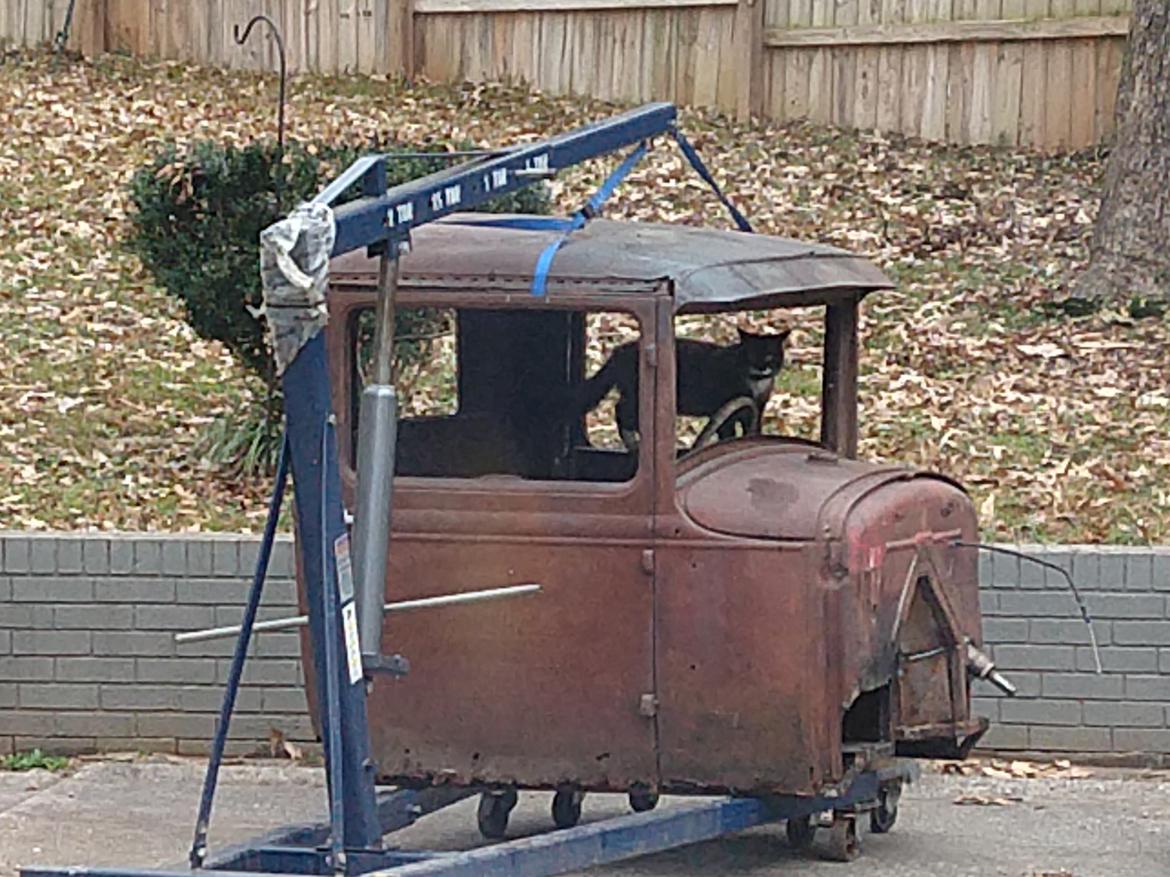
This cat is proving more difficult to evict than the engine. This long-reach hoist makes everything easy, but it's a heavy bear to move and doesn't fold up.
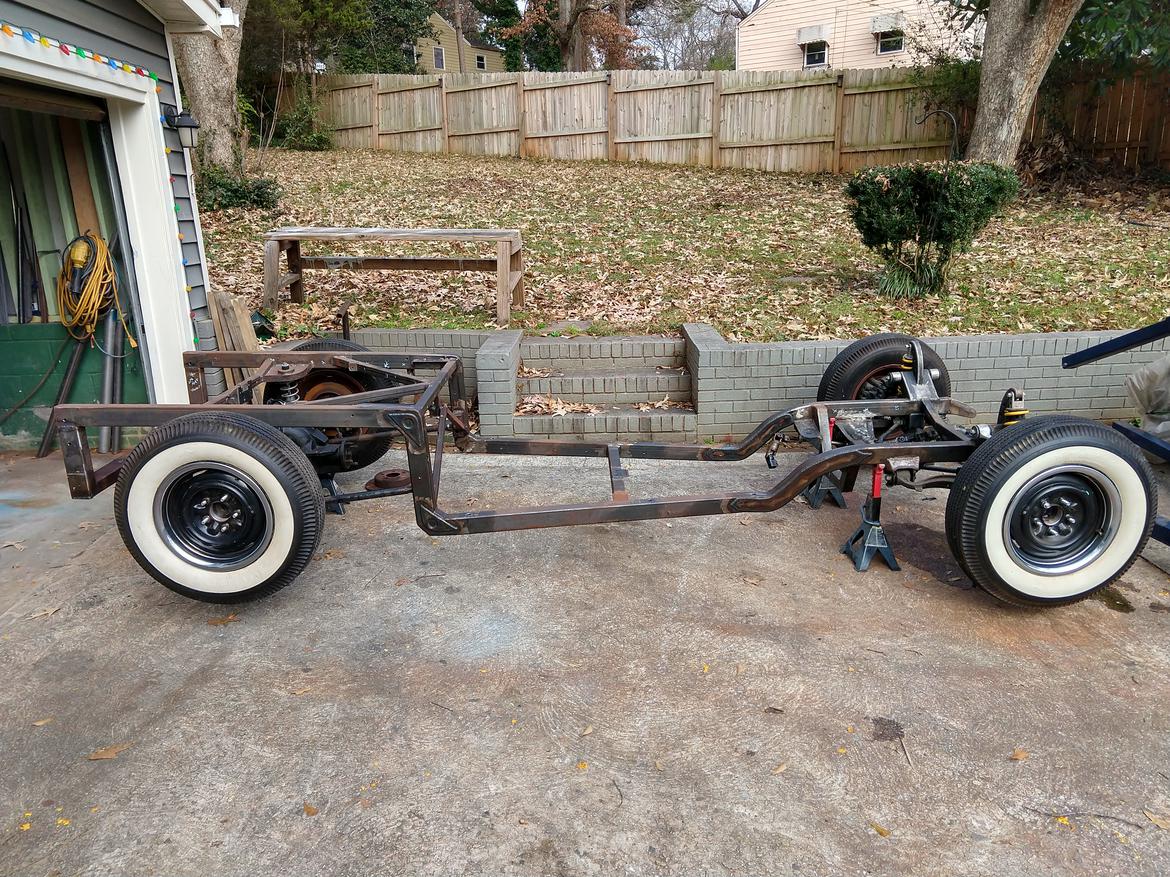
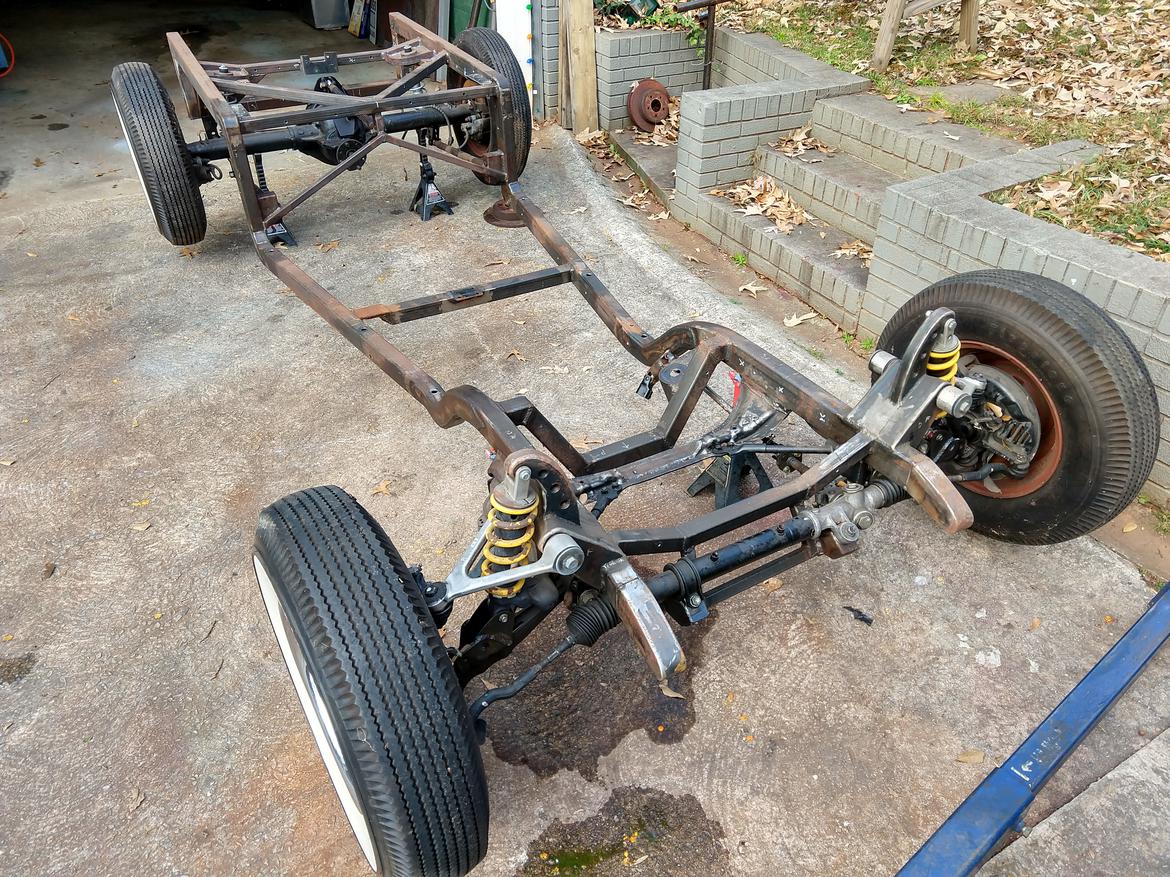
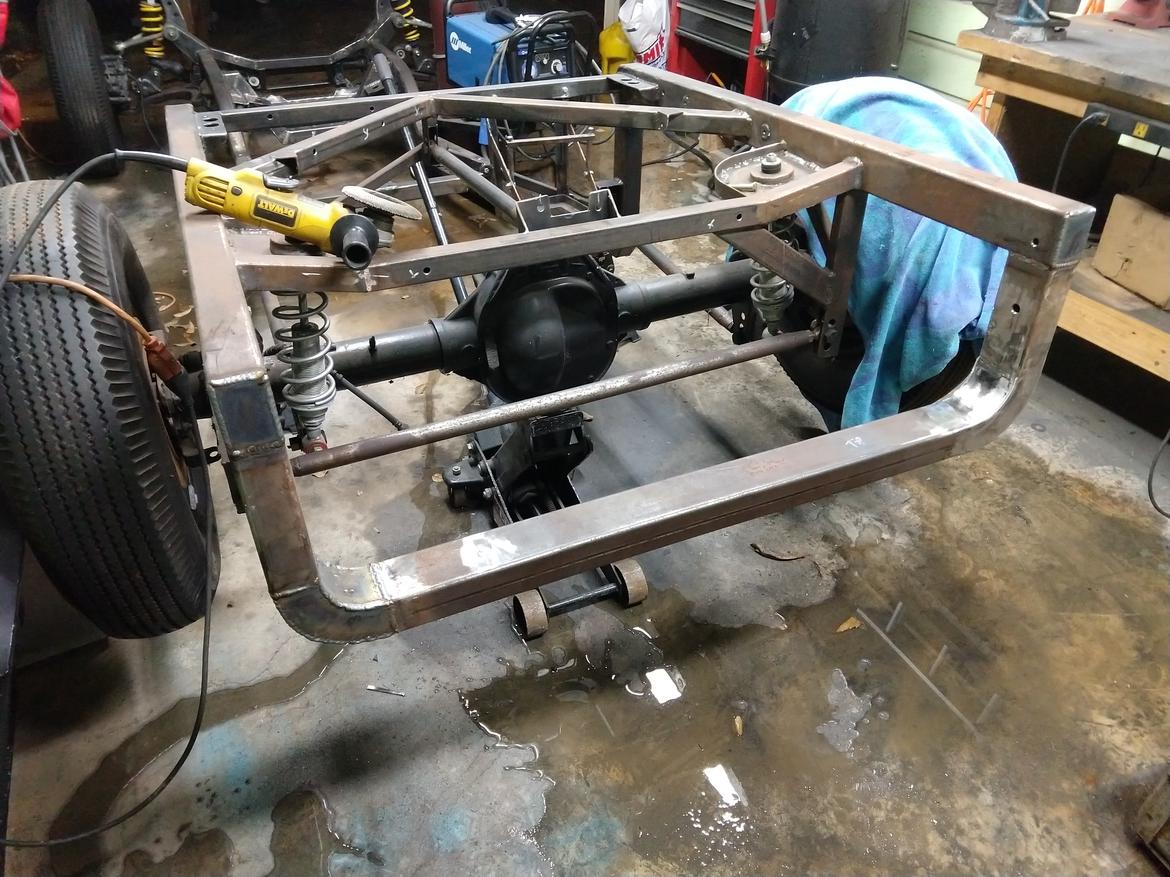
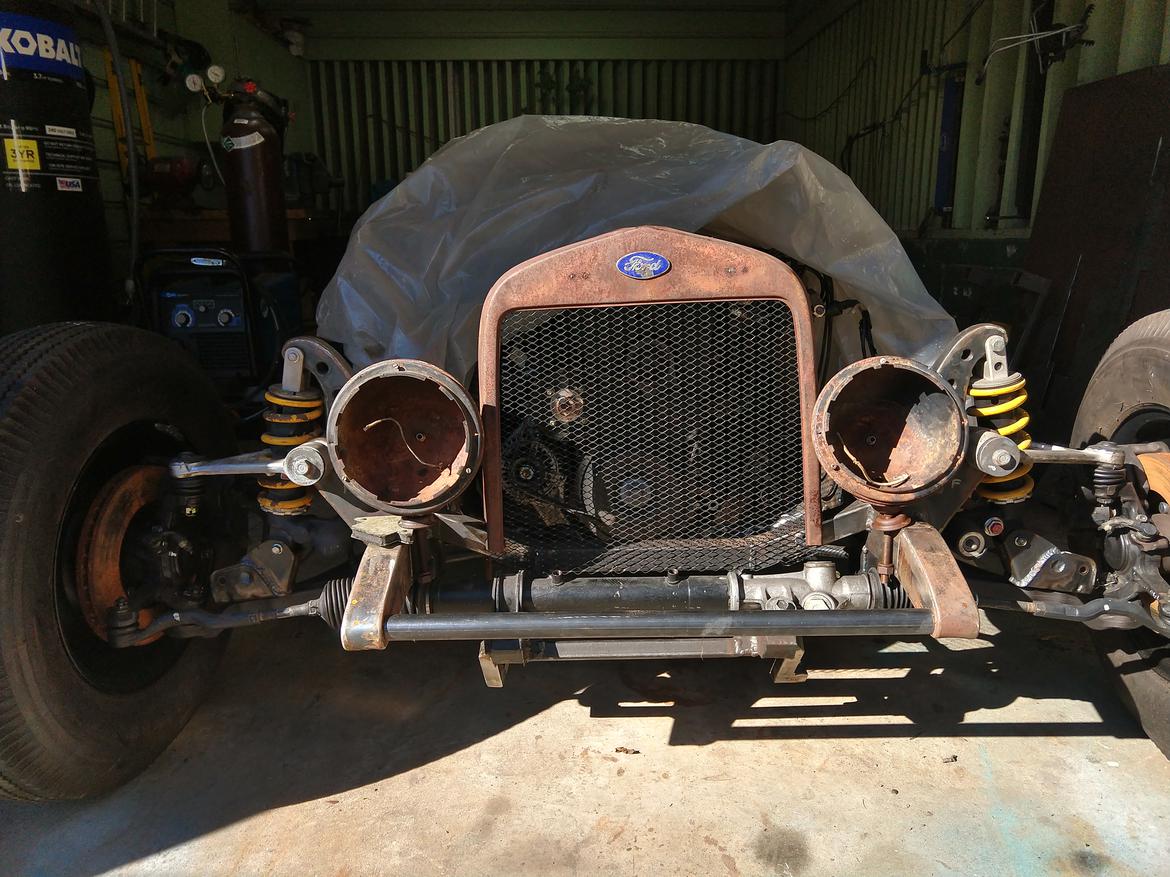
In case you forgot, here's what the bare roller skate looks like. It's okay, I forgot too.
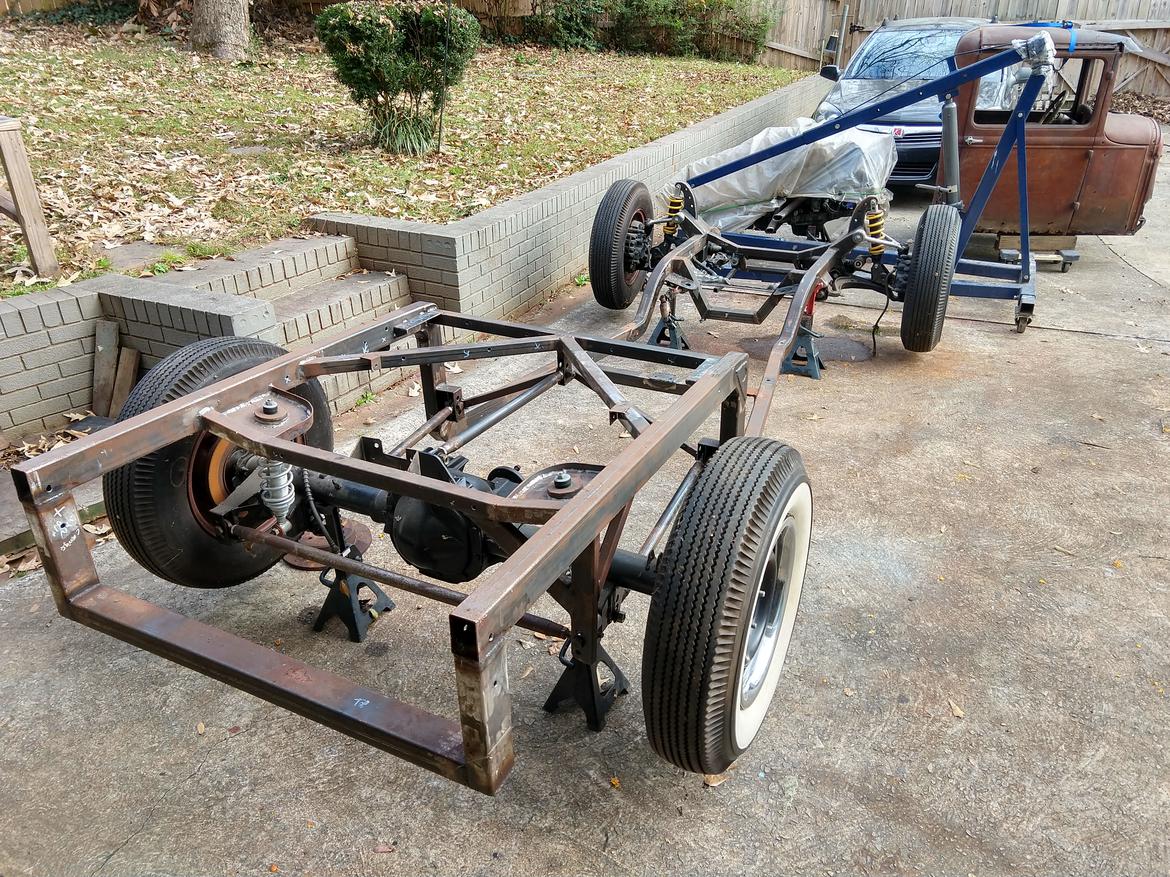
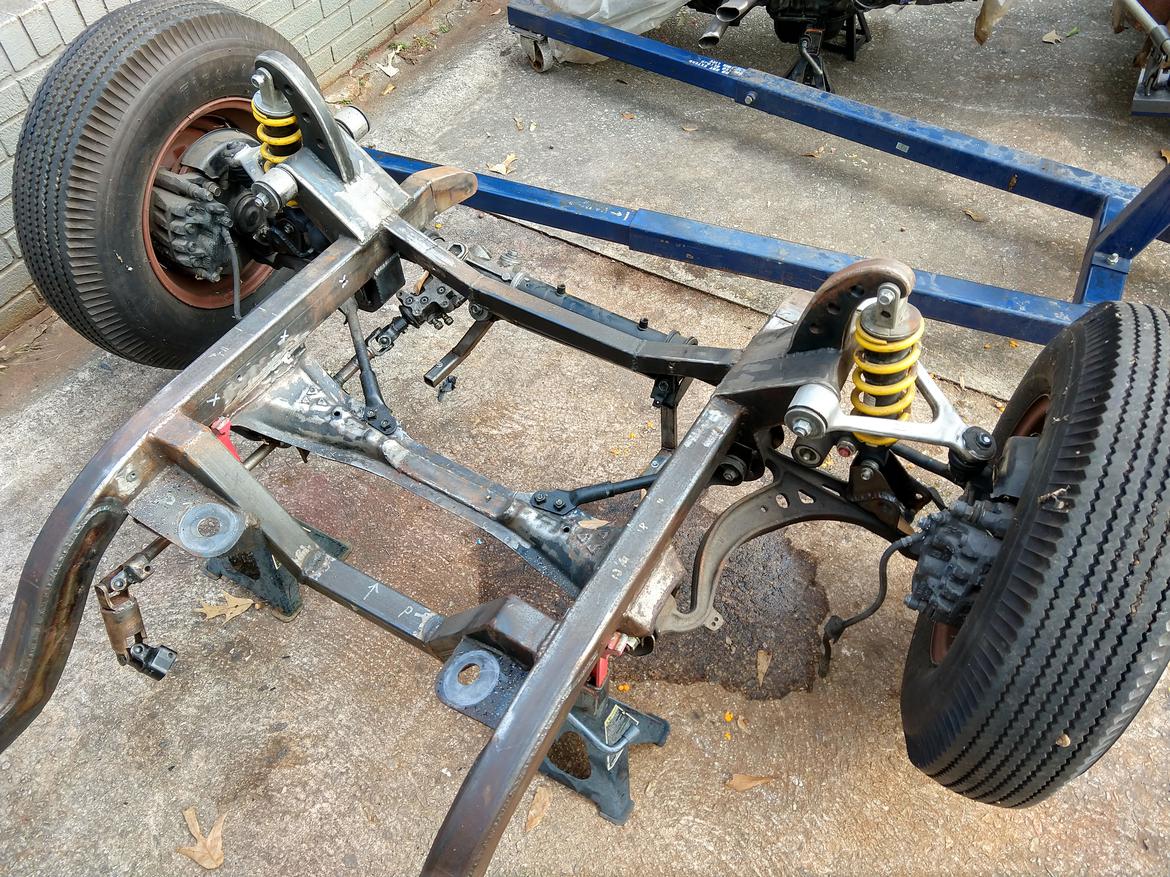
Here's a list of needs for the bare frame off the top of my head:
- Weld nuts, 1/4-20 weld nuts everywhere. For mounting lines, wires, brackets I haven't yet foreseen, etc.
- Drain holes on frame rails
- Sleeve the cab mount bolt holes - I keep loosing hardware inside the frame rails
- Re-do the radiator mounts. I hate them.
- Raise the driver side engine mount 1/4". Currently using a stack of washer to level the engine, which means the mount doesn't have enough thread engagement. This will be a doozy, a lot of weld to cut.
- Rear frame cross-member corners need to be tucked inward. I don't like how they jut out from the bed side panels. This is also a doozy.
- Lot of unfinished brackets and welds. Etc, etc...
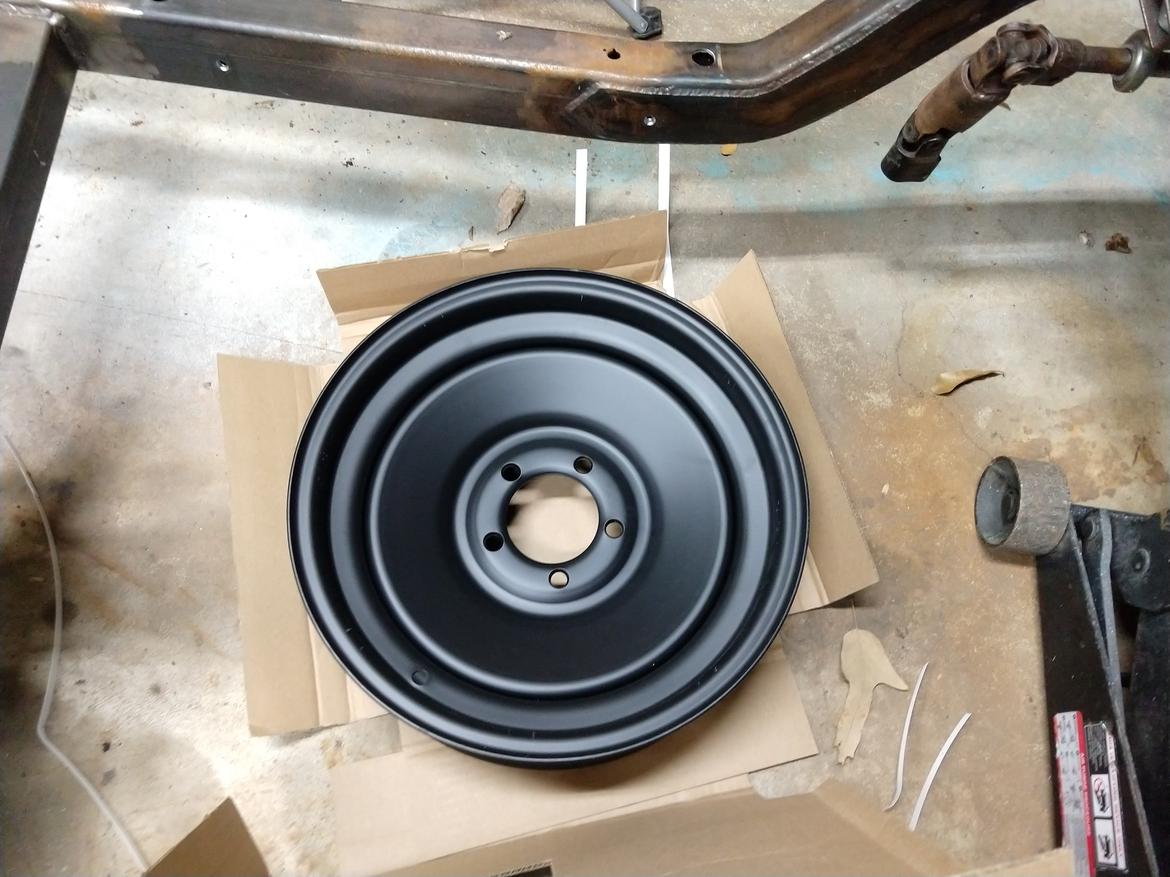
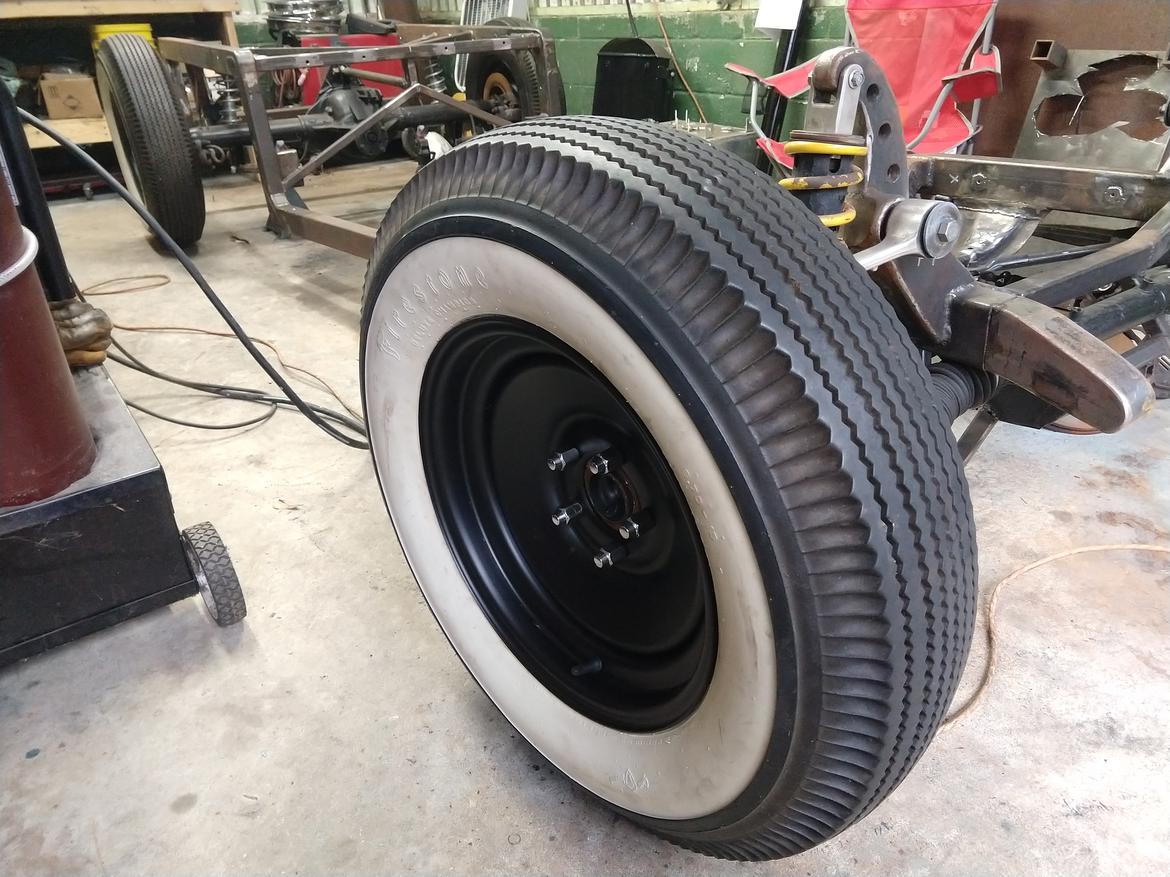
I'm also looking at new wheels. These tires and size are the perfect look, but the wheels are actually Chevy with adapters because that's the tires came on. I want to ditch the adapter and use a proper 5x4.5" lug pattern (Ford rear axle and Lexus front hubs use the same pattern). I ordered a US Wheel Series 68 15x5 to see if it'll clear the calipers, which these OE style wheels won't do. Fingers crossed.


NOHOME
MegaDork
12/8/19 4:26 p.m.
Happy to see this on the front burner again.
Pete

Stampie
UltimaDork
12/8/19 4:34 p.m.
In reply to maschinenbau :
Doubt you want to run skinnies but I have some Model A wire wheels. I think 10 or so.
Edit. NM they're not 5x4.5. SC education so my reading ain't so good.
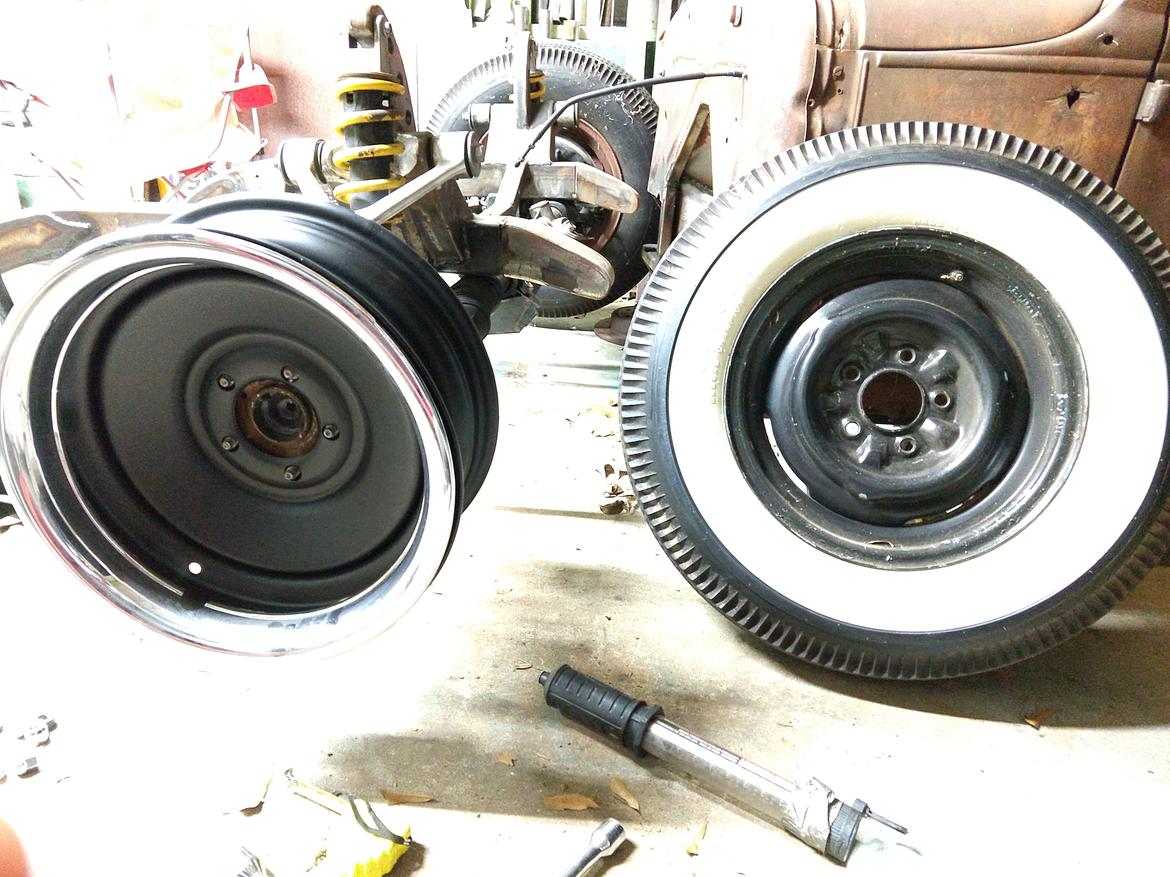
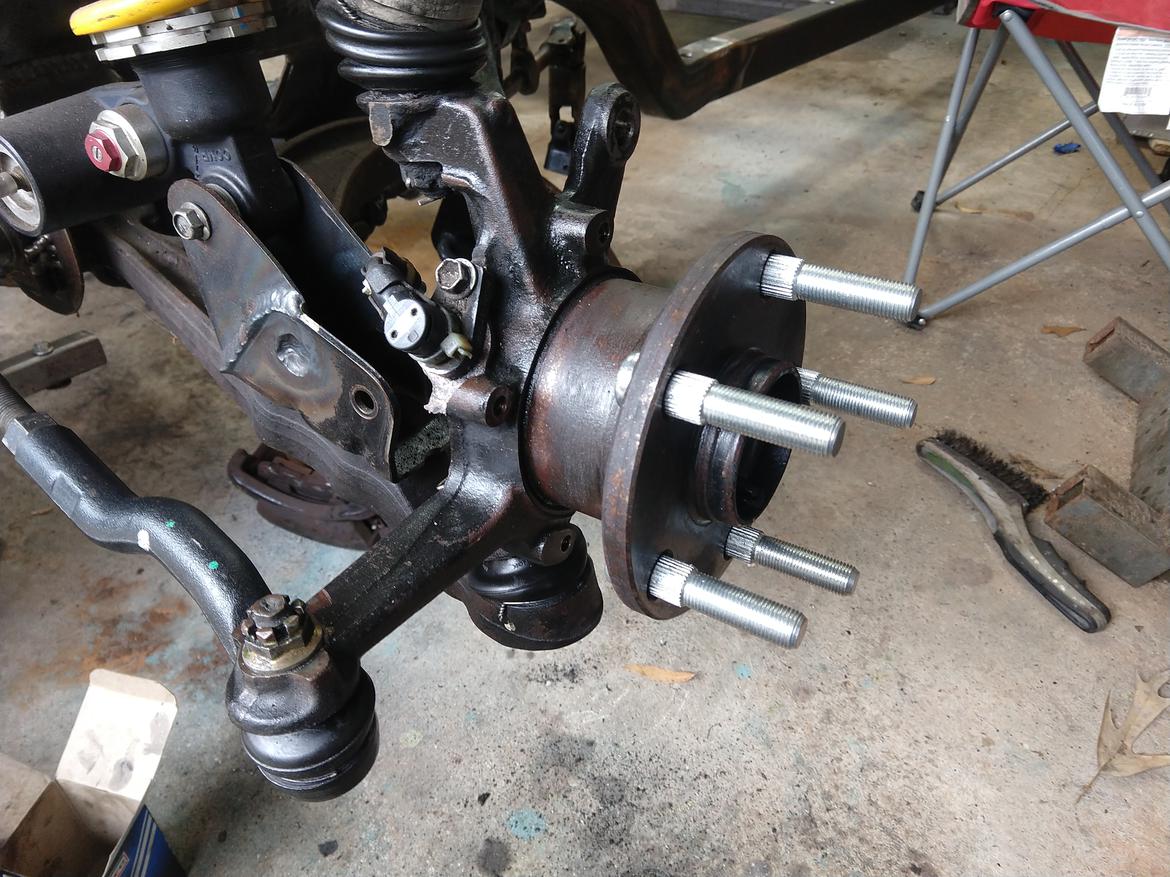
The test-fit wheel came in. I like the style, and the fact you can mount the trim rings as an option. They fit great over the Ford rear axle, but up front they foul against part of the caliper. Looks like a 5/8" to 3/4" spacer will do the trick, which means I also need longer wheel studs. Luckily all I have to do is search for mk4 Supra parts and I get what I need.
Why not a hubcentric spacer/adapter in .75 thickness? Should be 50 bucks for a pair on eBay
In reply to Dusterbd13-michael :
At this modest spacing, I'd prefer longer studs over those adapters with the extra set of studs in them. There are plenty of hubcentric spacer kits for the SC300/Supra that include the longer studs, and it's not a hard job on these hubs. I'm going with 15mm.

java230
UberDork
12/11/19 9:35 p.m.
I've been eyeing those wheels for the IH. looking good.
These US Wheel Series 68's look awesome in white walls. The normal acorn style nuts work too I think. Just need some sort of center cap, but it works for now. The front spacers I ordered came with the longer studs, but they are M12-1.50 which is correct for Lexus. But the Ford axle is 1/2-20, and I don't want two set of lug nuts on the same car, so while I'm in here I converted the front from metric to standard. I found some "universal" lug studs with the same knurl diameter as the Lexus ones.
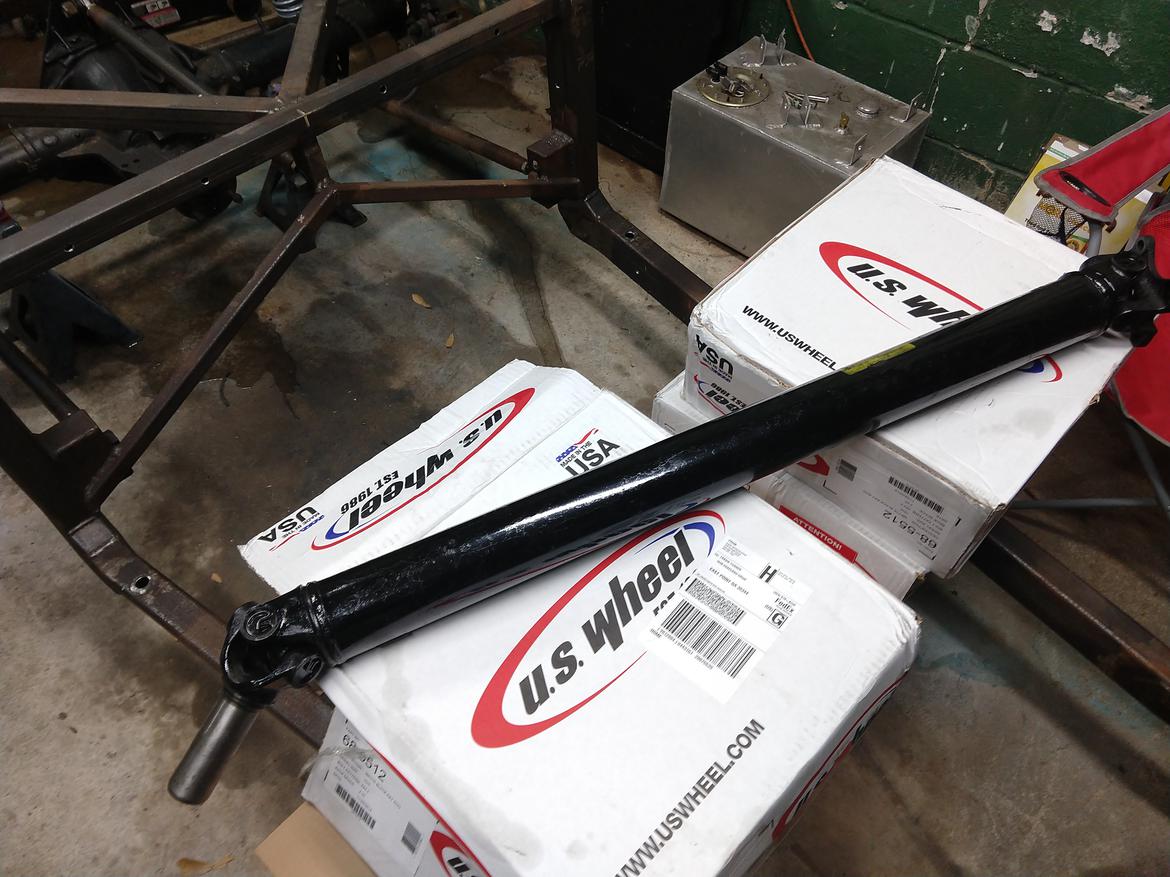
Also got the driveshaft made. I brought the front chopped half of the Lexus driveshaft and the rear chopped half of a Ford Ranger driveshaft. They said the Lexus slip-yoke joint wasn't rebuildable, but they just happened to have a stash of discontinued OEM Toyota truck driveshafts, with greasible, rebuildable u-joints, that happened to have the same spline. And the Ford u-joint I brought wasn't greasable, so they replaced that too. Basically they didn't use any parts I brought them, but now I have a brand new custom Toyota-to-Ford driveshaft with 1310 front U-joint and 1330 rear U-joint, both greasable, with beefy 3" tubing, for $220 out the door. And they did it in one day. I gotta plug Driveline Service of Atlanta. Great shop to work with.
On the frame, I got all the 1/4-20 weld nuts welded in. These will make good mounting holes for things like fuel lines, brake lines, electrical, etc.
Also finish welding and grinding some other various brackets, like for the lift-up wooden bed floor.
And I revisited the battery tray. It just need a few things finished up, like the mounting strategy which uses more 1/4-20 weld nuts.
Next up: radiator mounts, driver side engine mount, then it all comes apart so I can flip the frame over.
I got a little side-tracked over the holidays, building a Christmas gift and putting a lift kit on Datsaniti...finally got time this week to focus on the Rod. Below is about 6 hours spread over a couple weekday evenings.
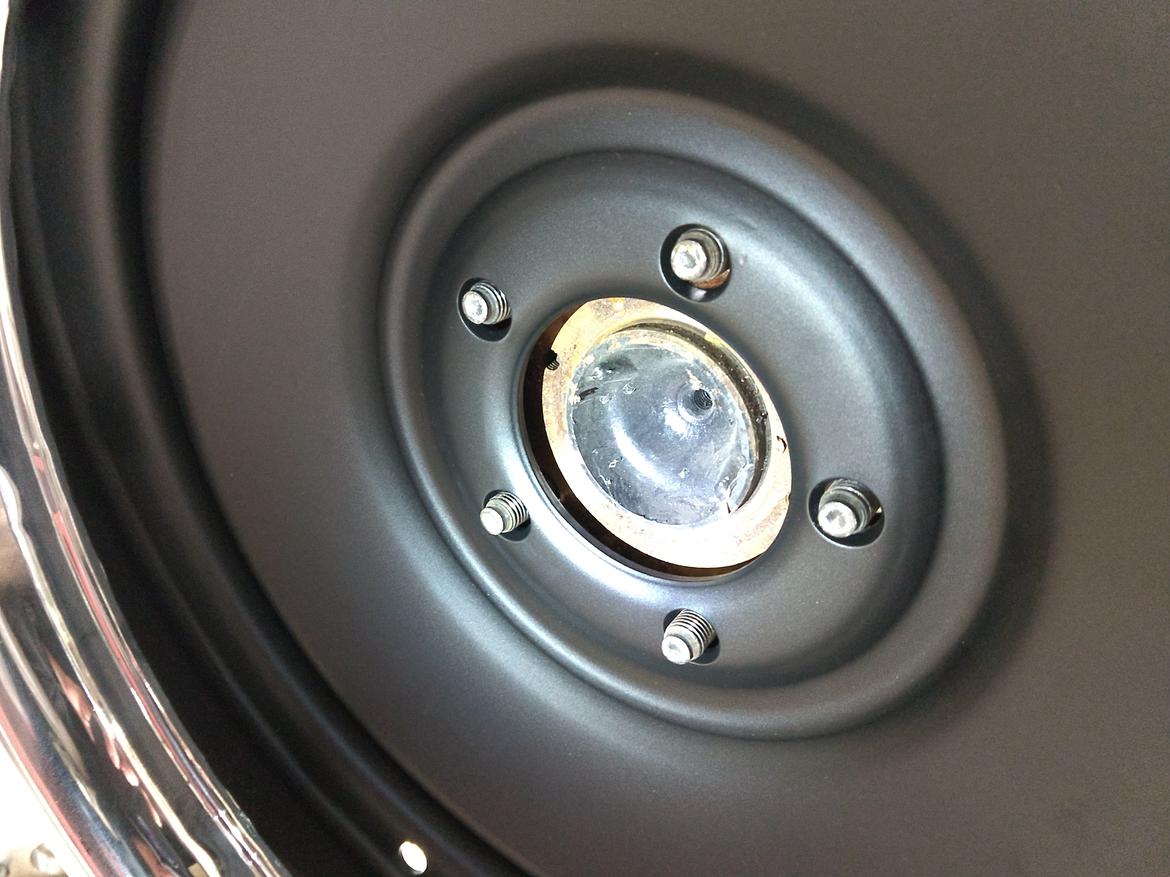
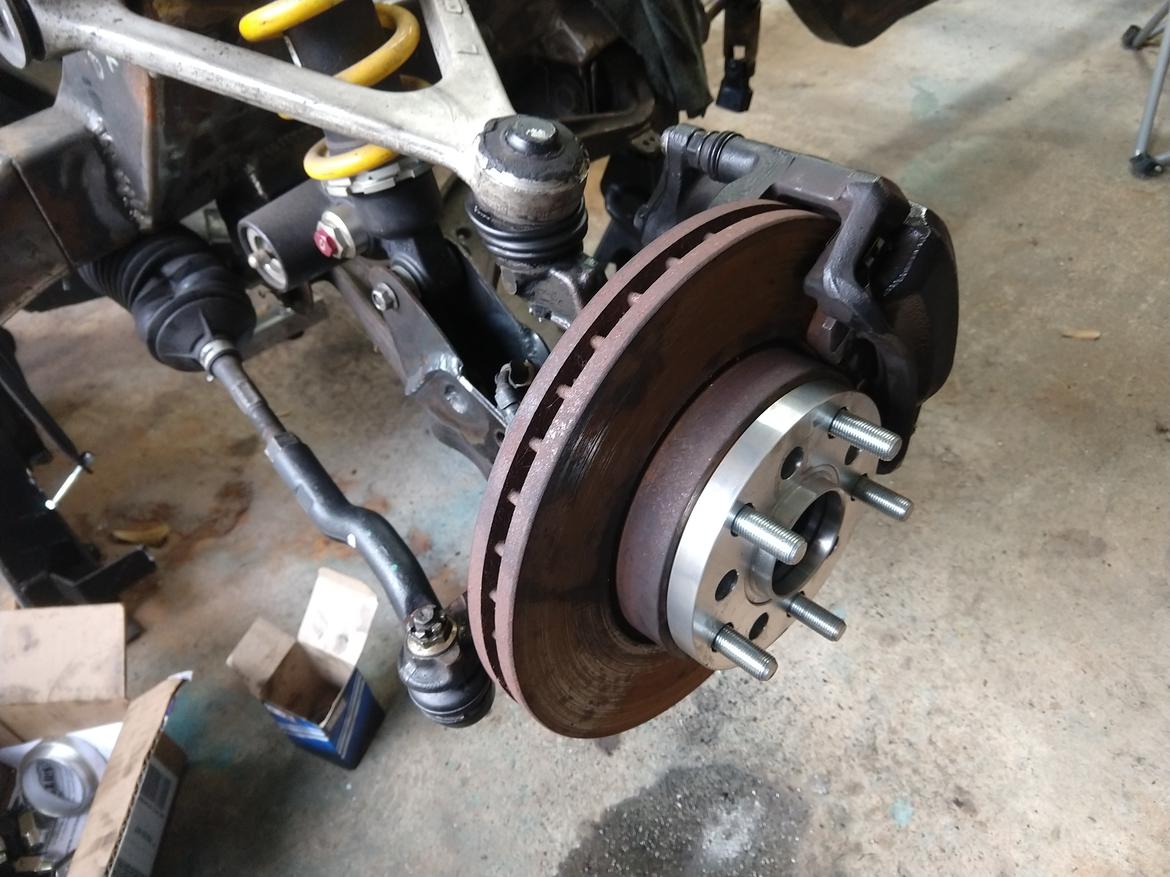
Another look at the hubs. These are the final lug studs and spacers I settled on. 15mm aluminum spacer. The studs are from Rockauto universal parts - 1/2-20 thread, 2-3/8" thread length, .560" knurl diameter (perfect match for Lexus 14.2mm). The extra bit of splines help grip the spacer.
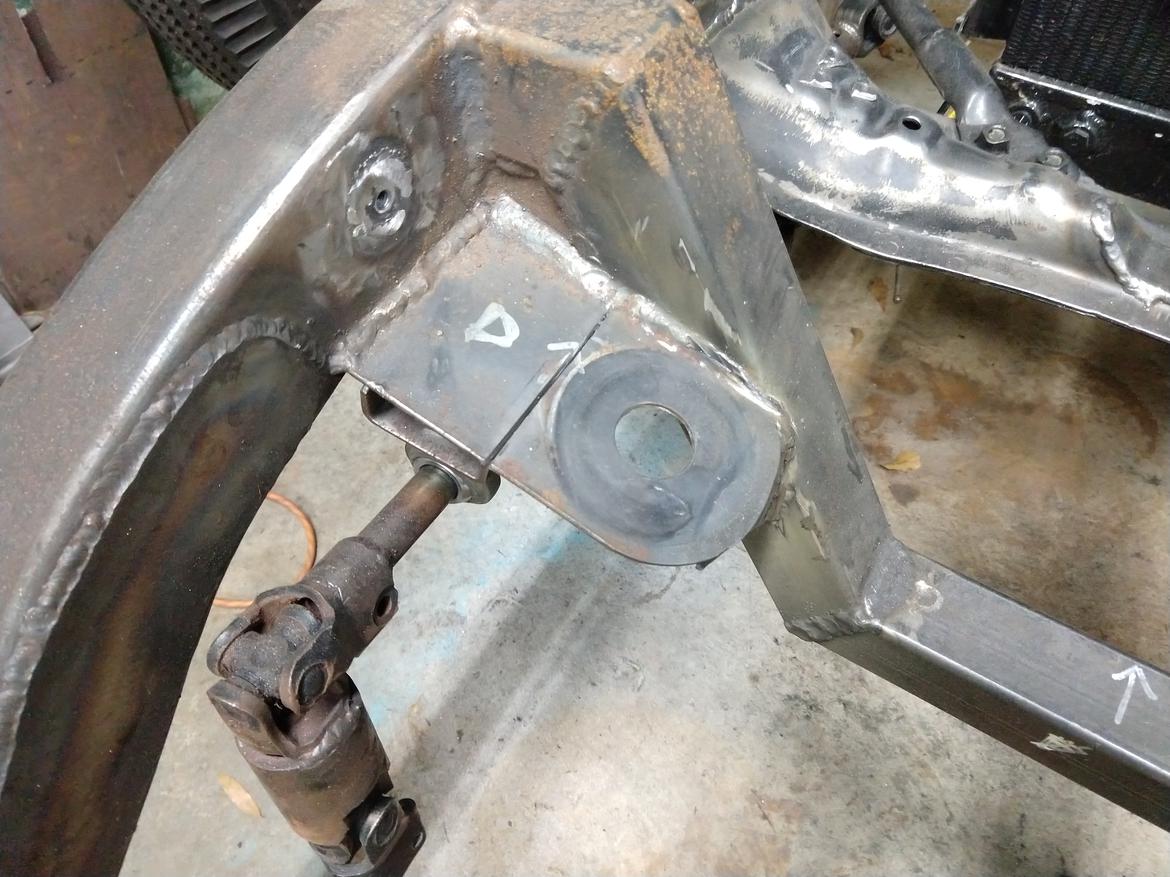
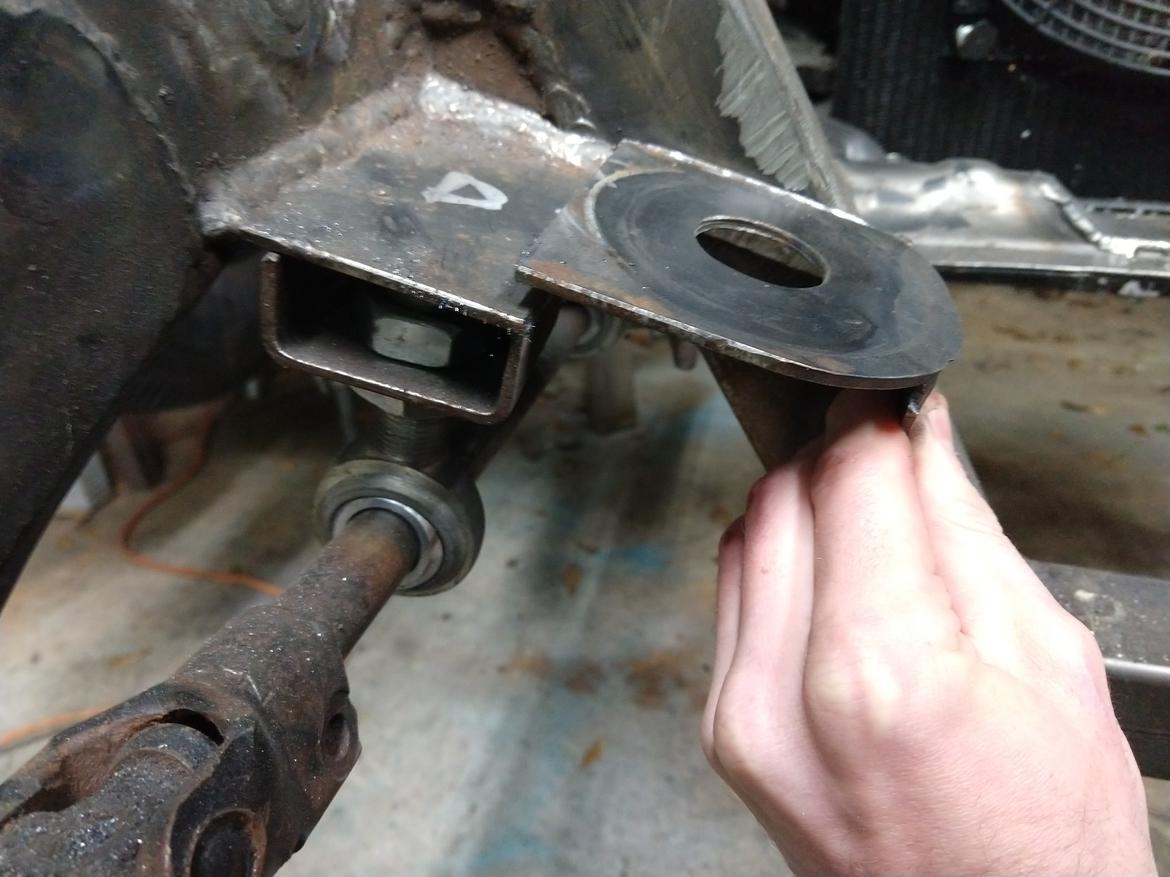
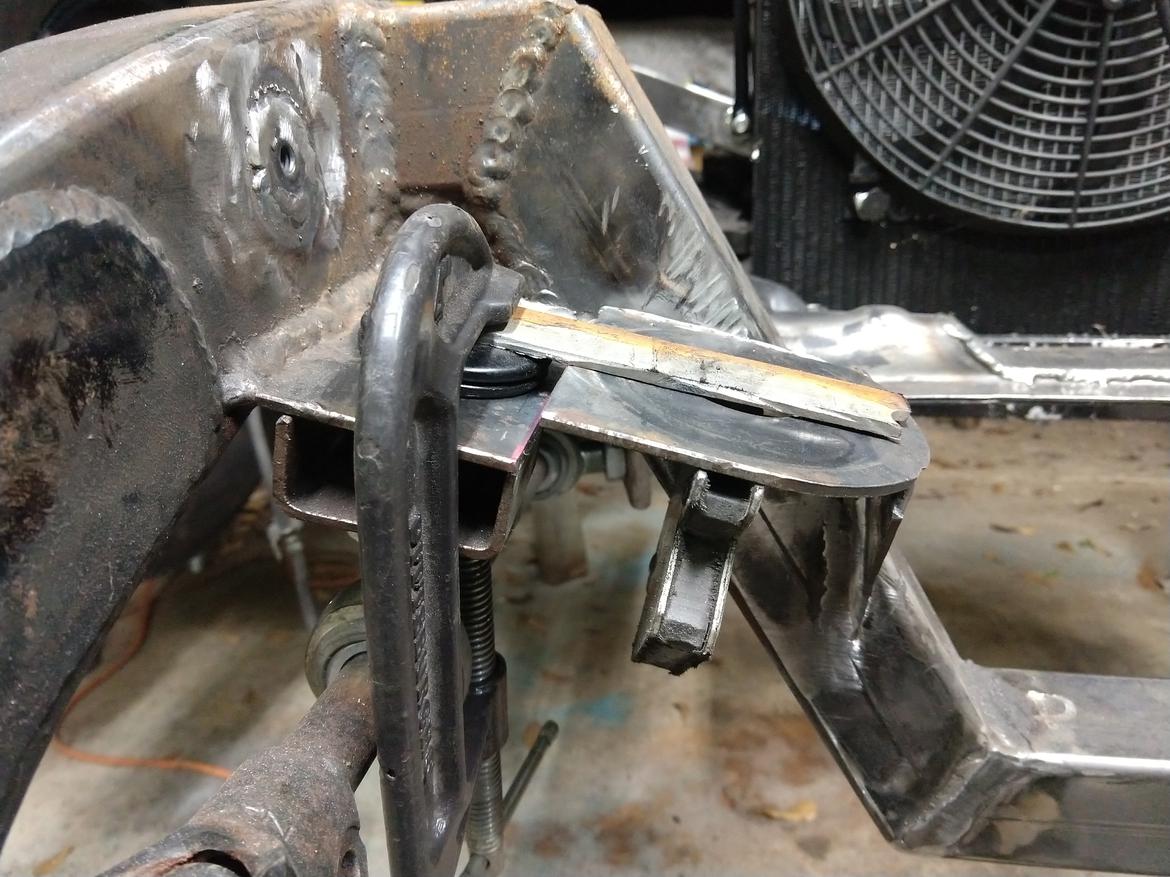
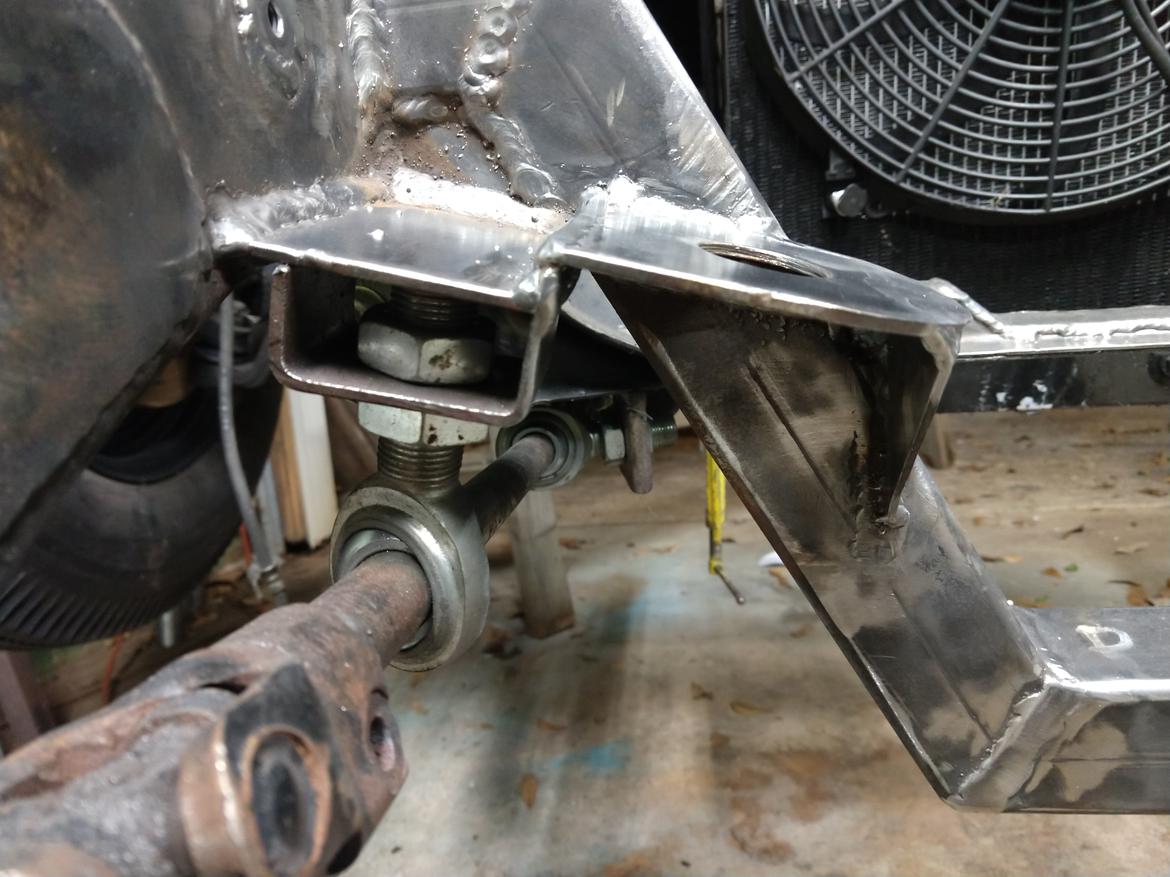
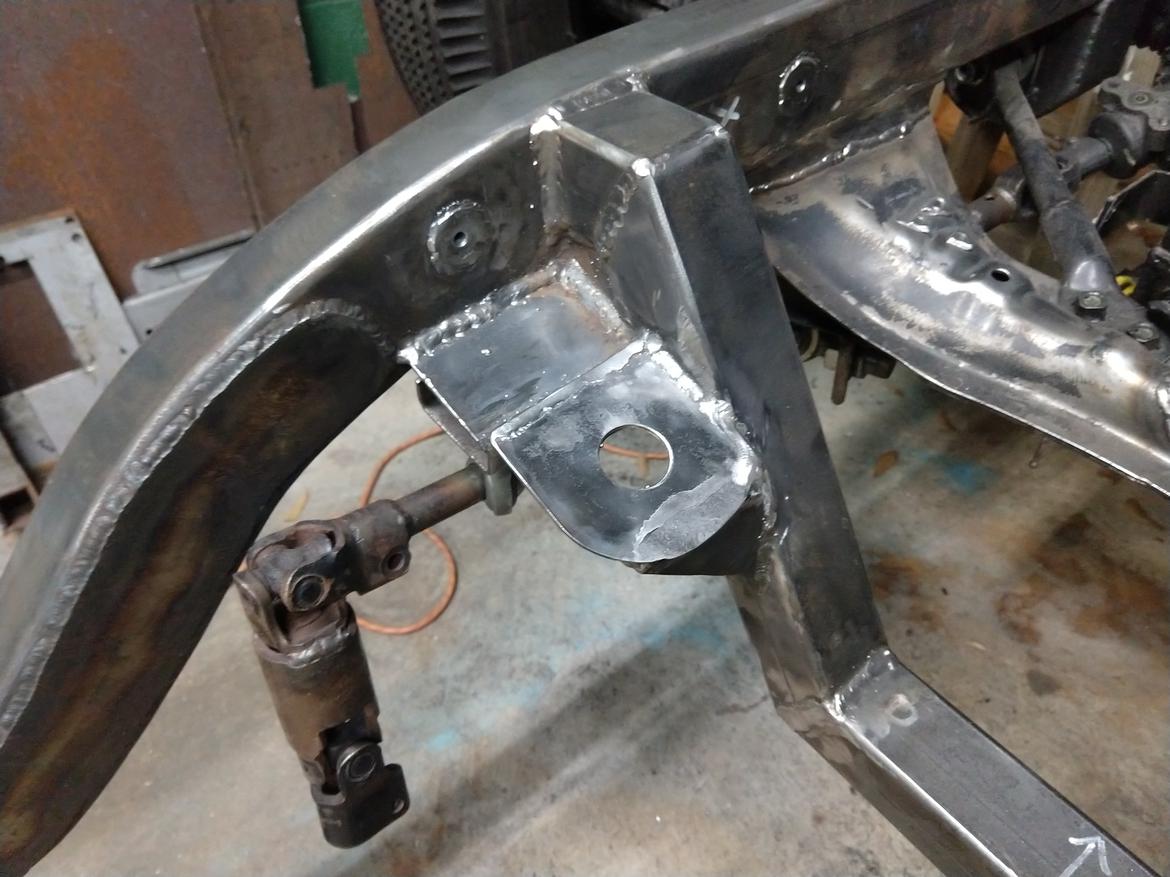
Back to the fab work. The old radiator mounts I disliked, so I made them better.
I filled and ground all faces to make them smooth.
And tied them into the steering rack mounts. They are about level with the lowest part of the engine cross-member, which is the lower part of the car.
I'll finish welding/grinding everything once the suspension is removed.
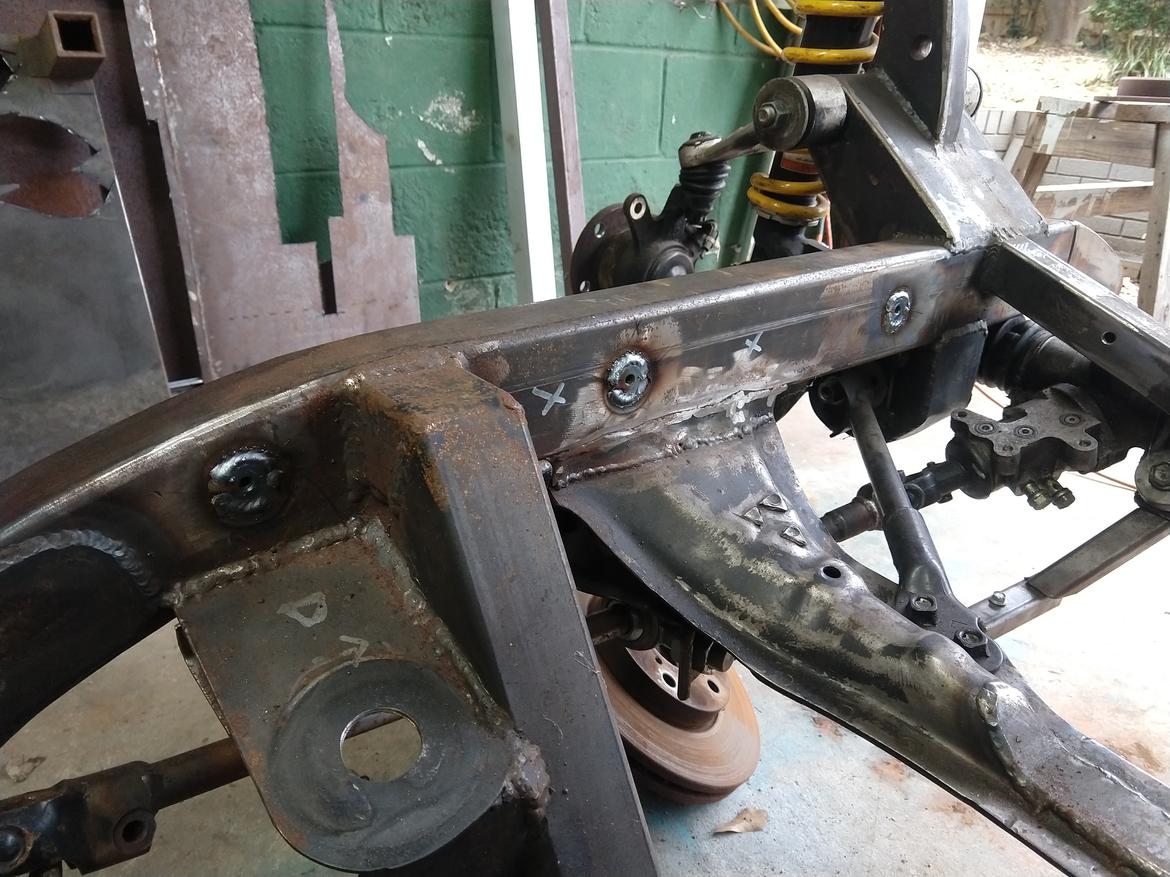
On to the engine mounts...the driver side had to be wedged up with a 1/4" of washers to make the engine level with the car. To fix that, I need to relocate the driver side mount upward 1/4". I've been procrastinating this one. So much grinder...
I used the stack of leveling washers as a height gauge.
Had to add a small piece of 1/8" to space it up, then welded everything back again.
One more major frame modification, then I'll test-fit the engine and driveshaft, then tear it all apart down to bare frame.
In reply to maschinenbau :
you do nice work, kid. definitely skills beyond your age.
maschinenbau said:
I got a little side-tracked over the holidays, building a Christmas gift and putting a lift kit on Datsaniti...finally got time this week to focus on the Rod. Below is about 6 hours spread over a couple weekday evenings.
You cannot just slip this little tidbit in here without going into more detail! Sounds amazing, and I want to know more!
I'll update that one soon once I finish cutting up the front fascia.
ah, I wasn't aware there were more than one thread for that fine machine and just (stupidly) assumed it was in the build thread for it!
Makes sense now, and that sounds pretty awesome!
I love that you're back to working on this project again! Glad to see it off the back burner.
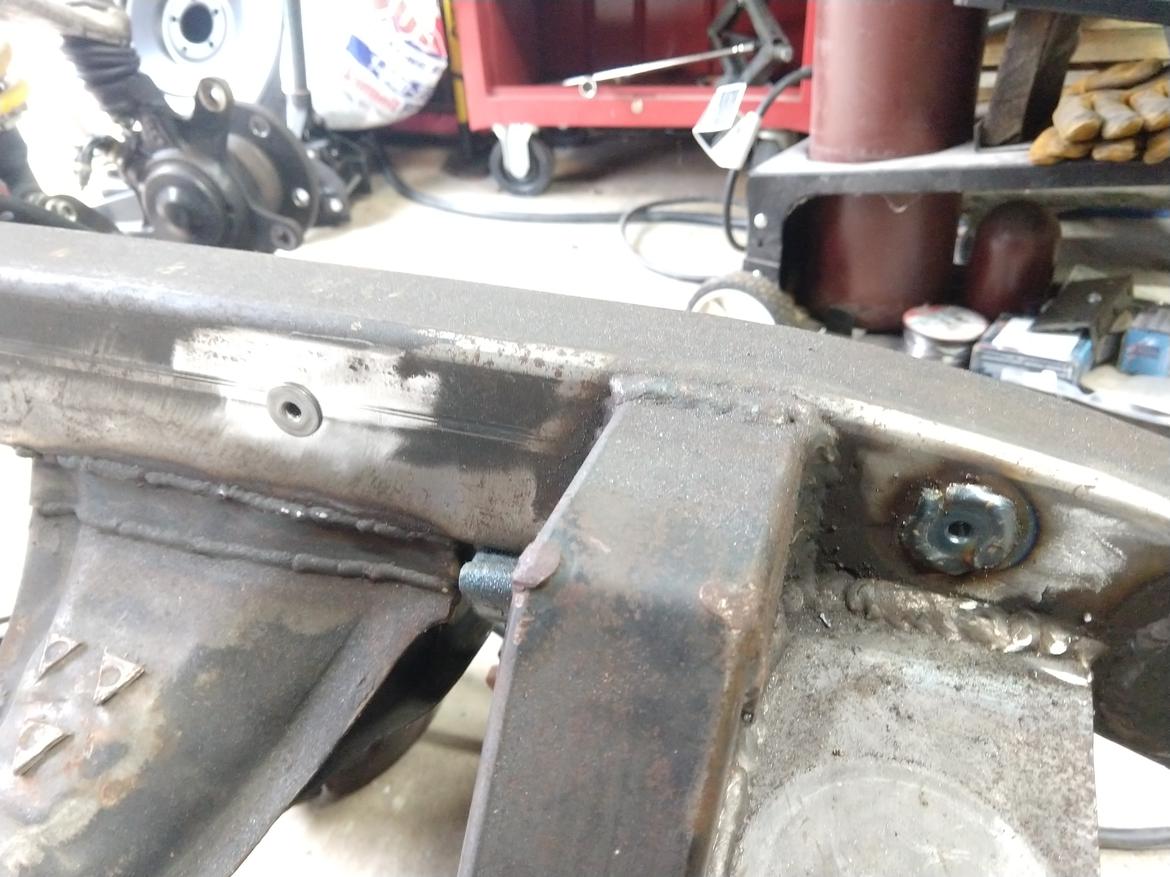
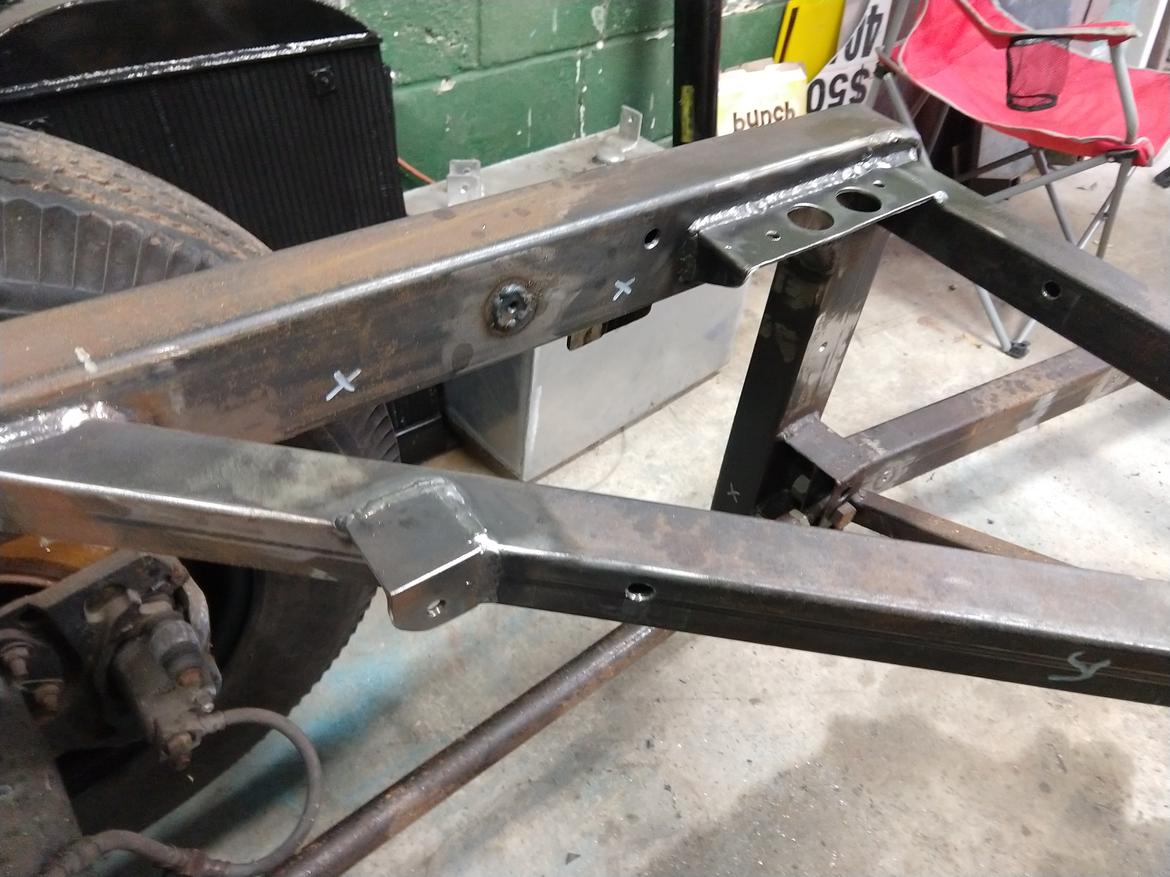
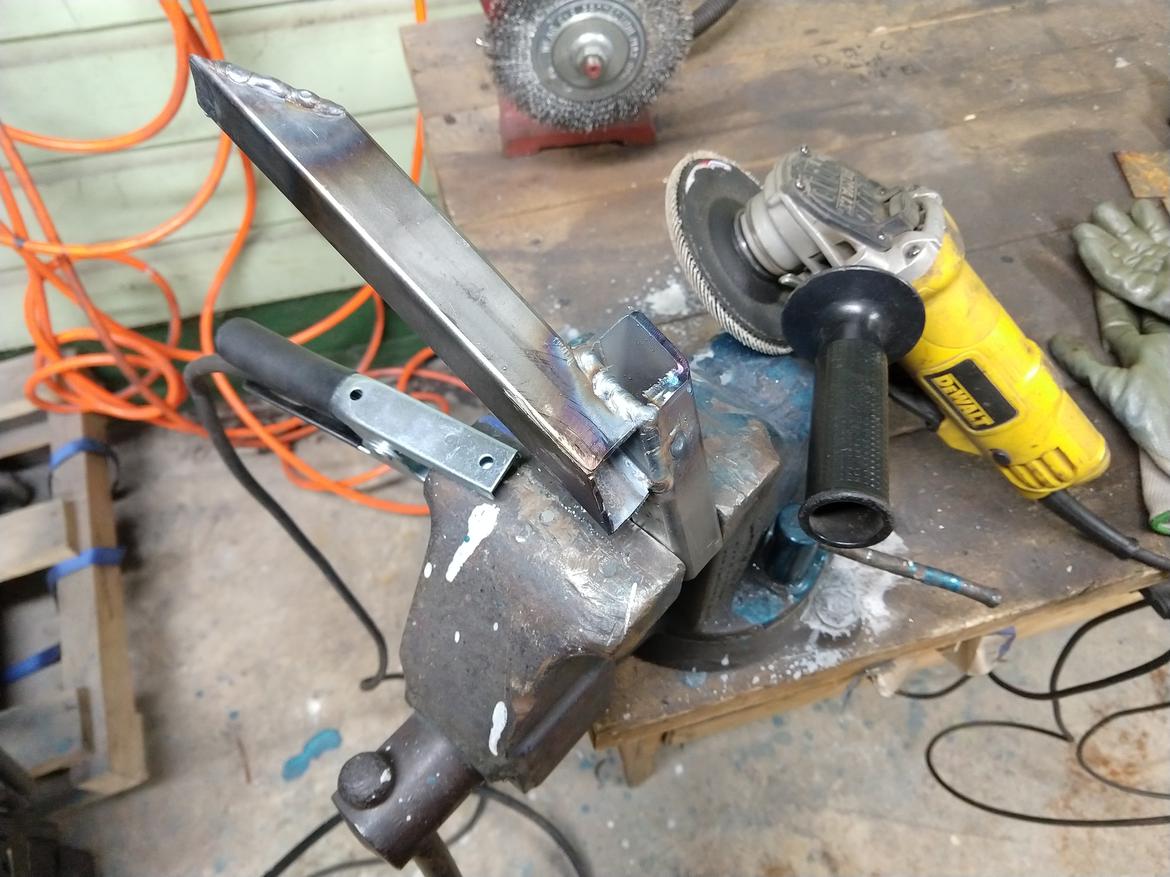
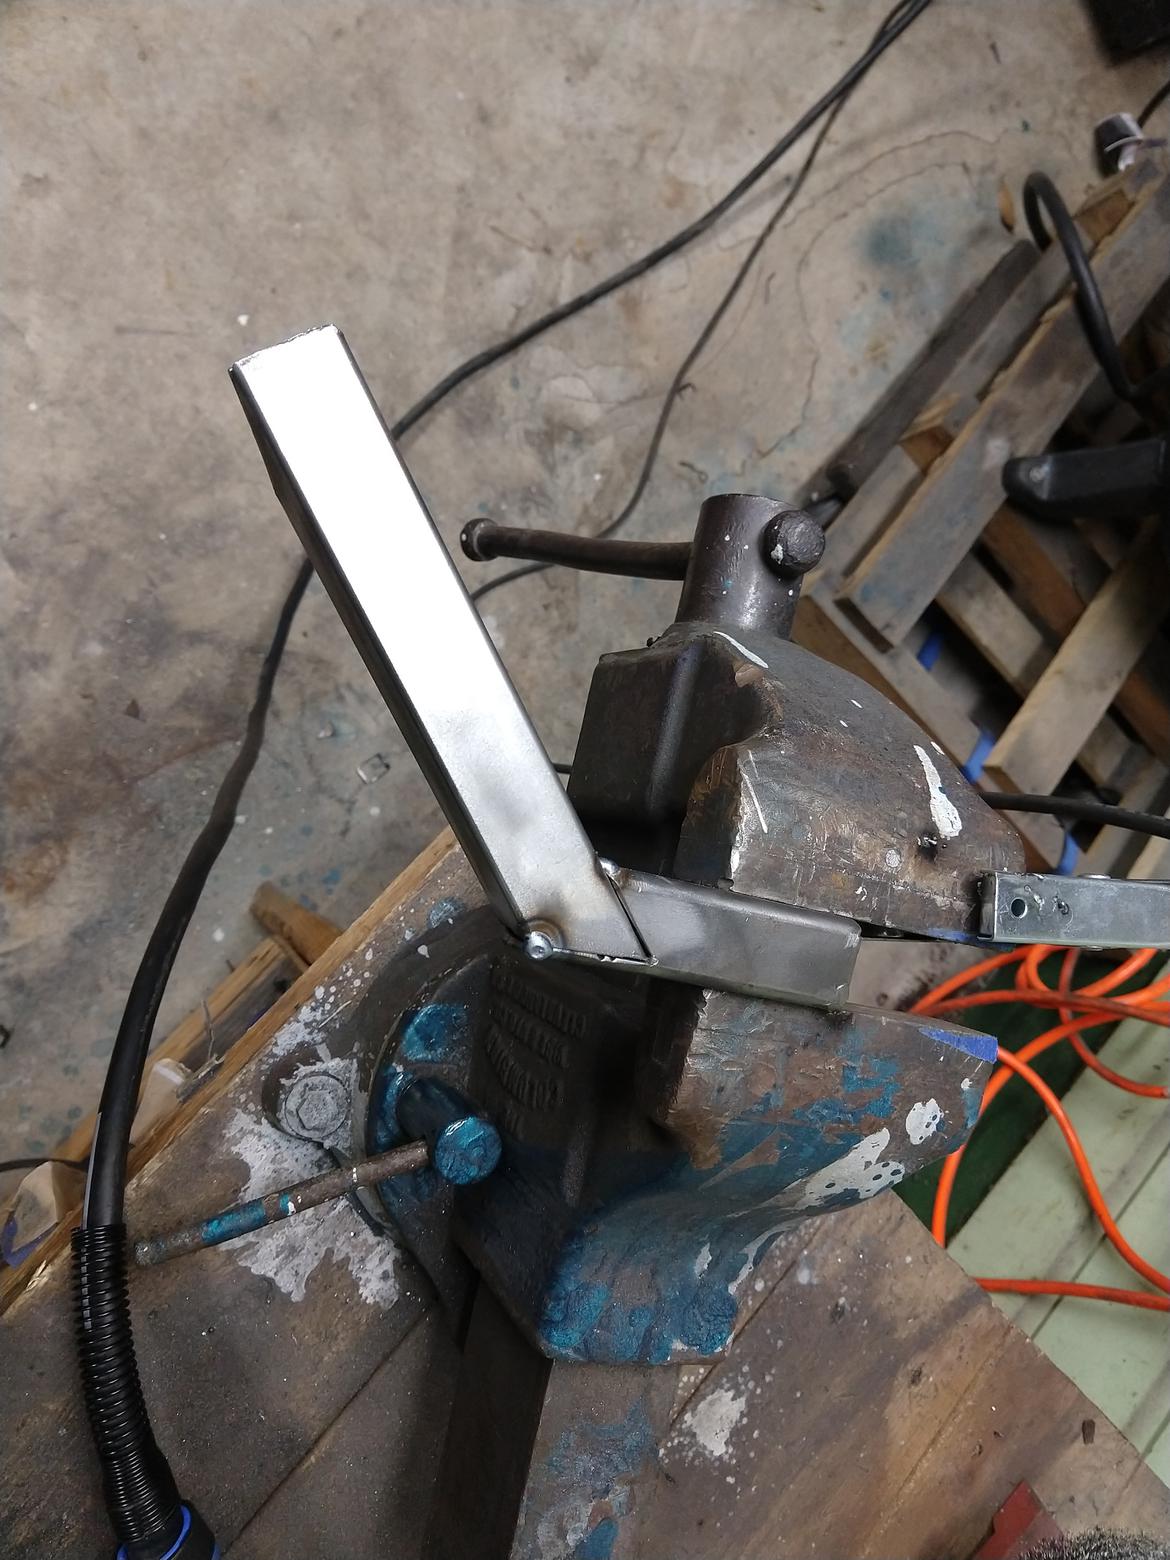
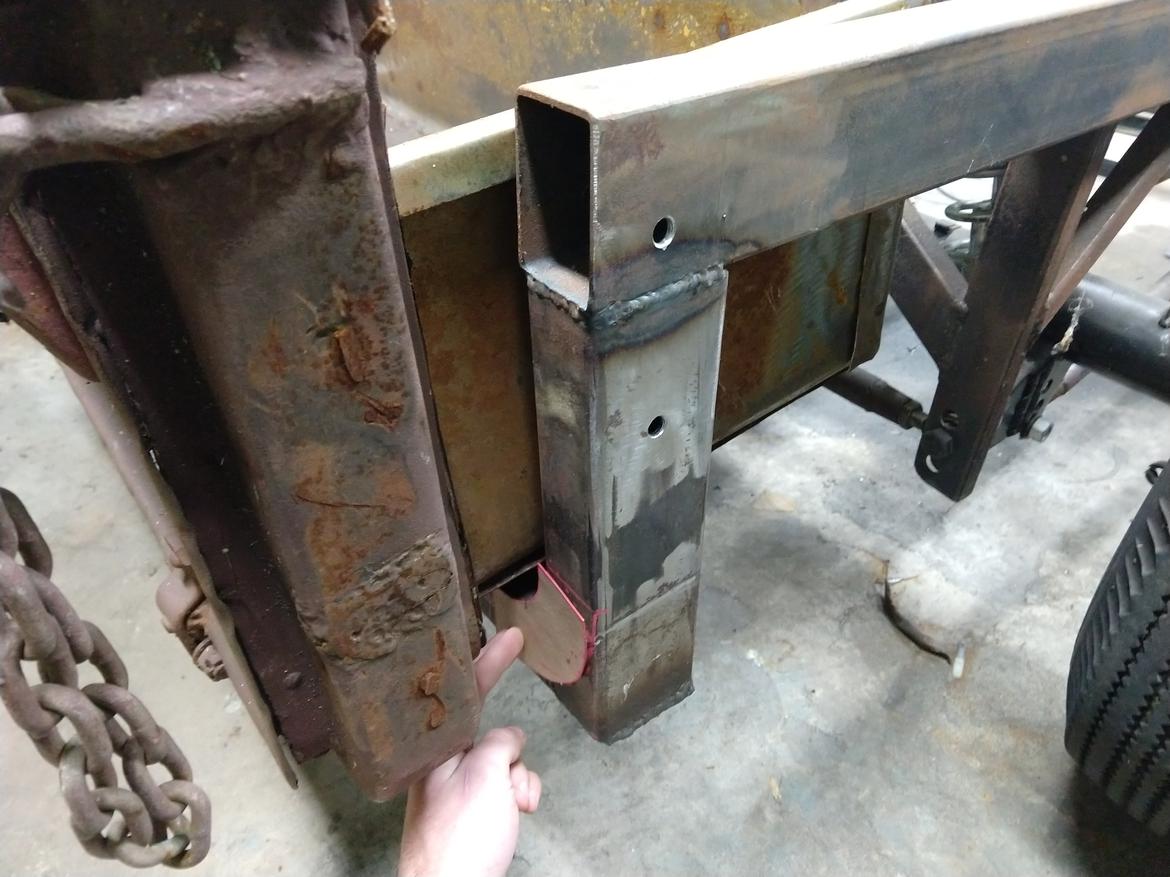
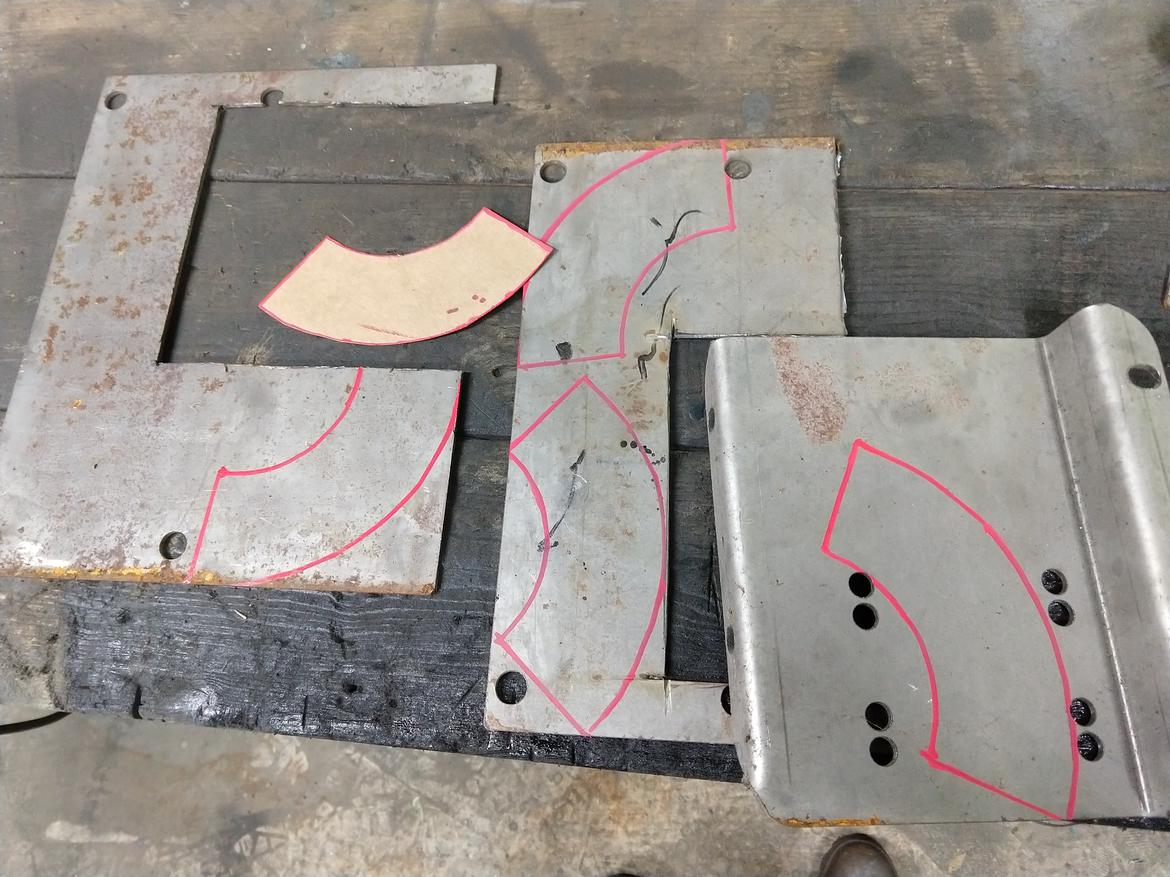
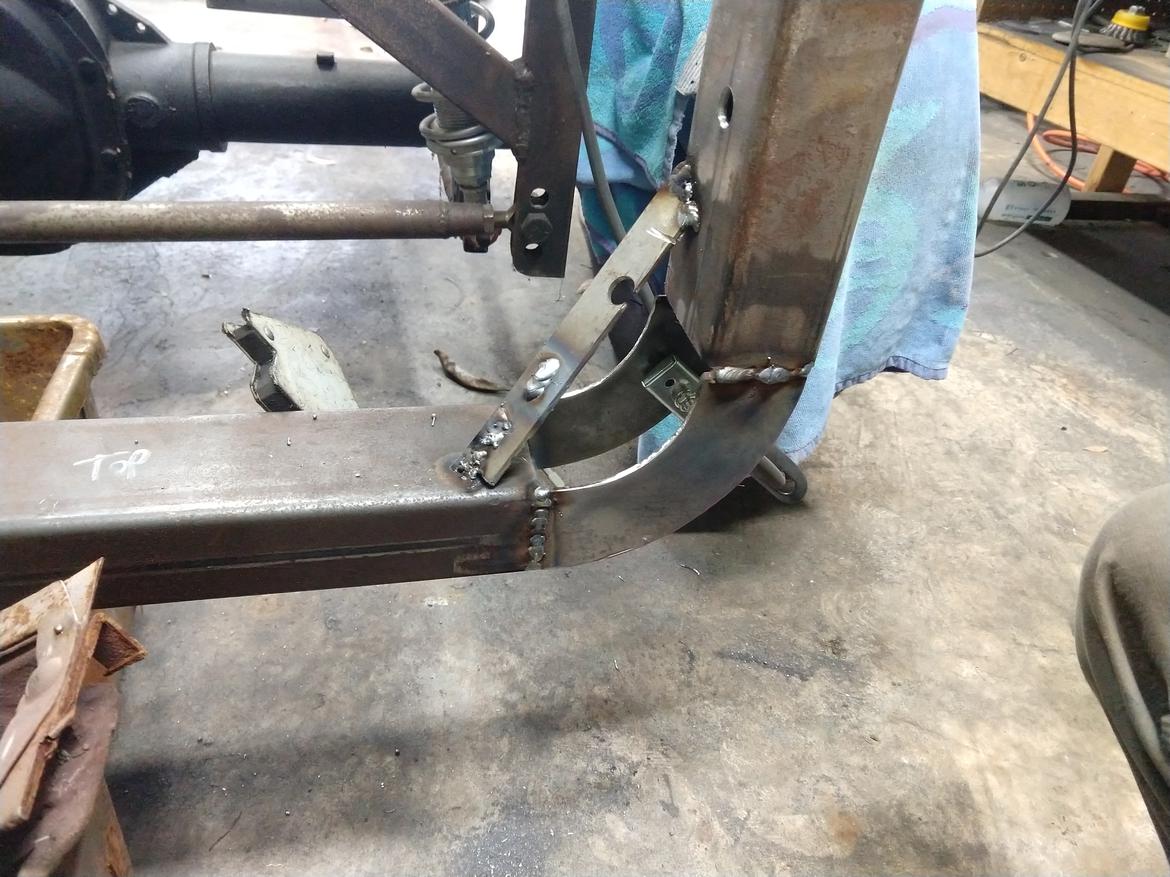
This is what 10 hours of purely aesthetic decision making looks like. Last time I had the body and bed panels on, I didn't like the way the lower rear cross-member corner juts out from the body in stark contrast to the curvature of the bed. So I did something about it.
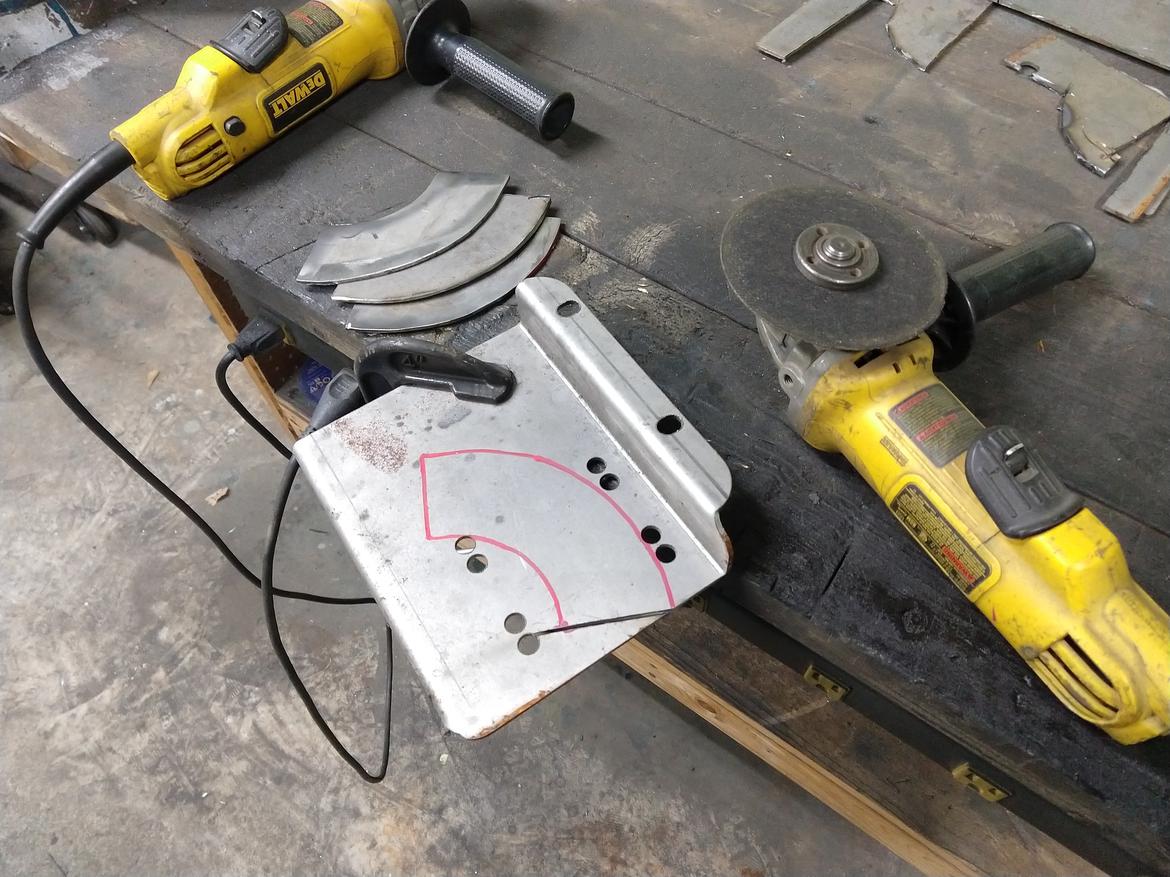
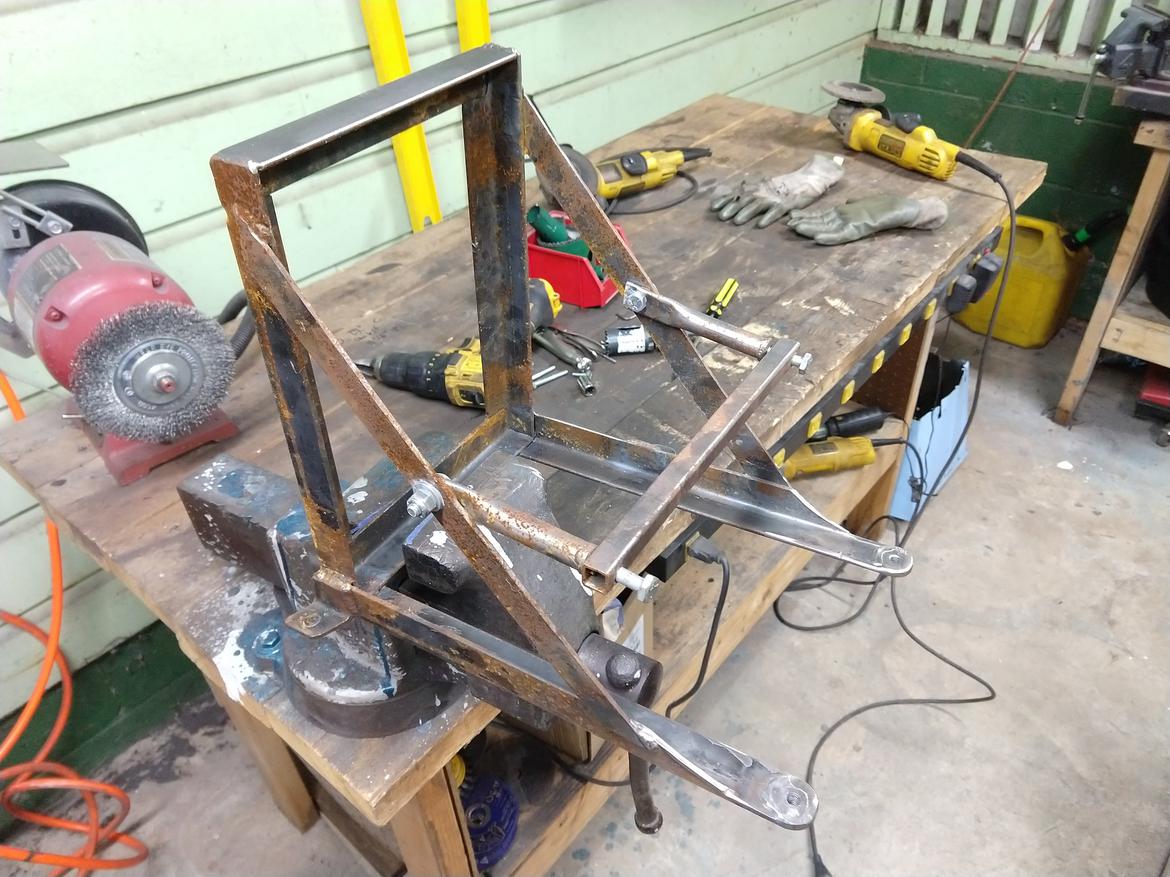
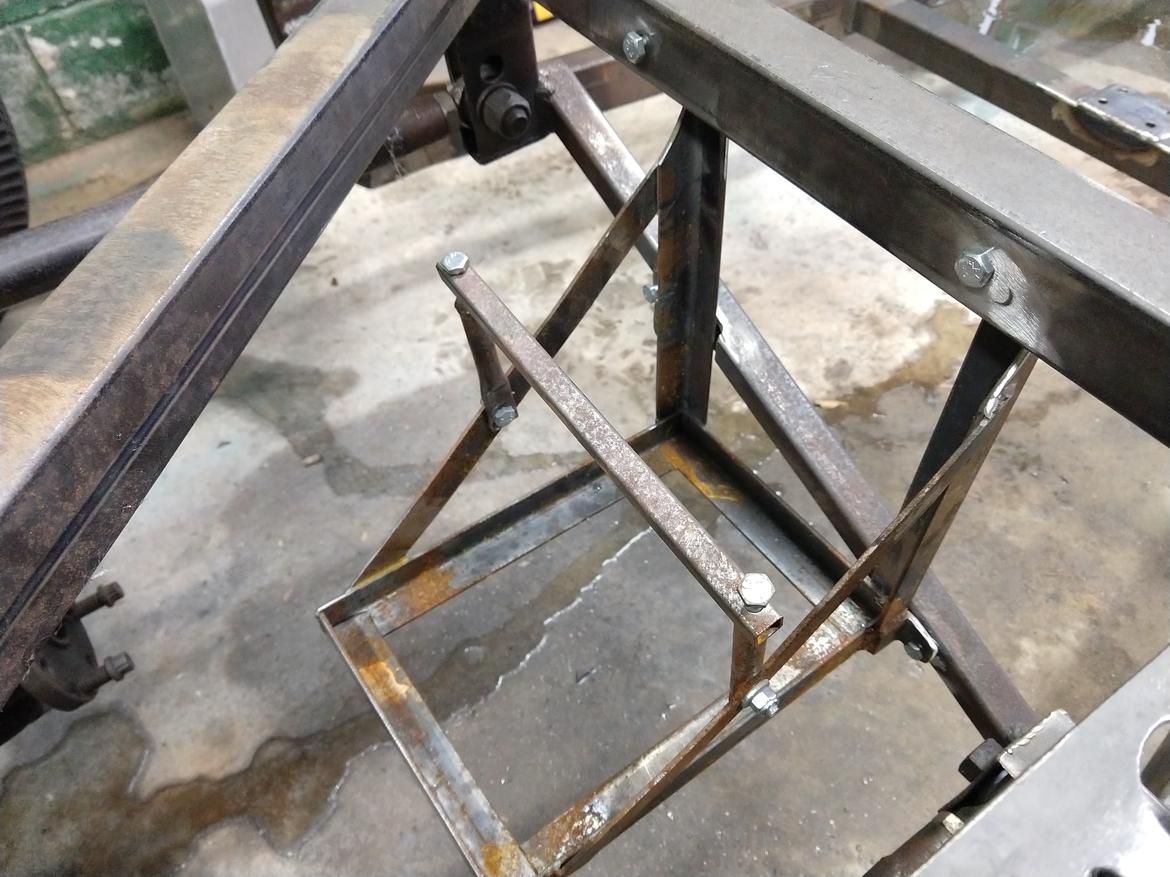
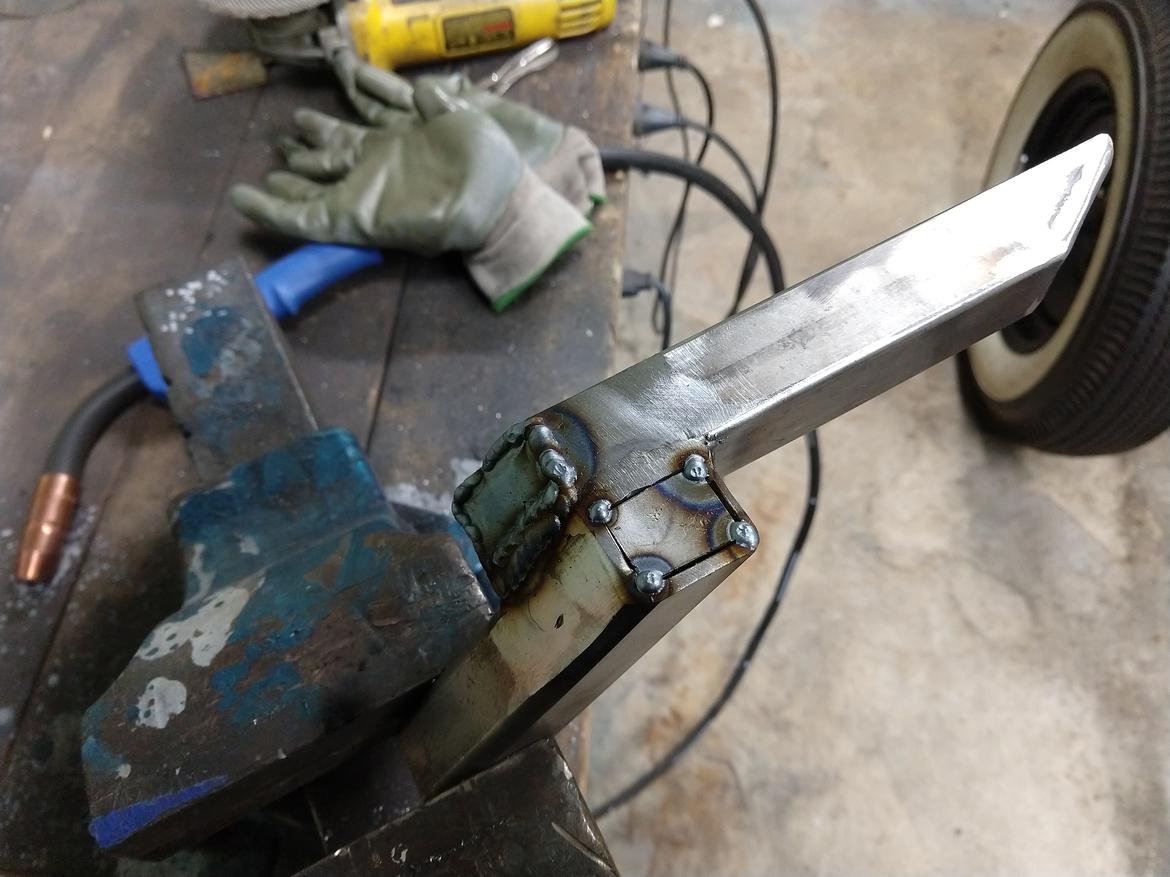
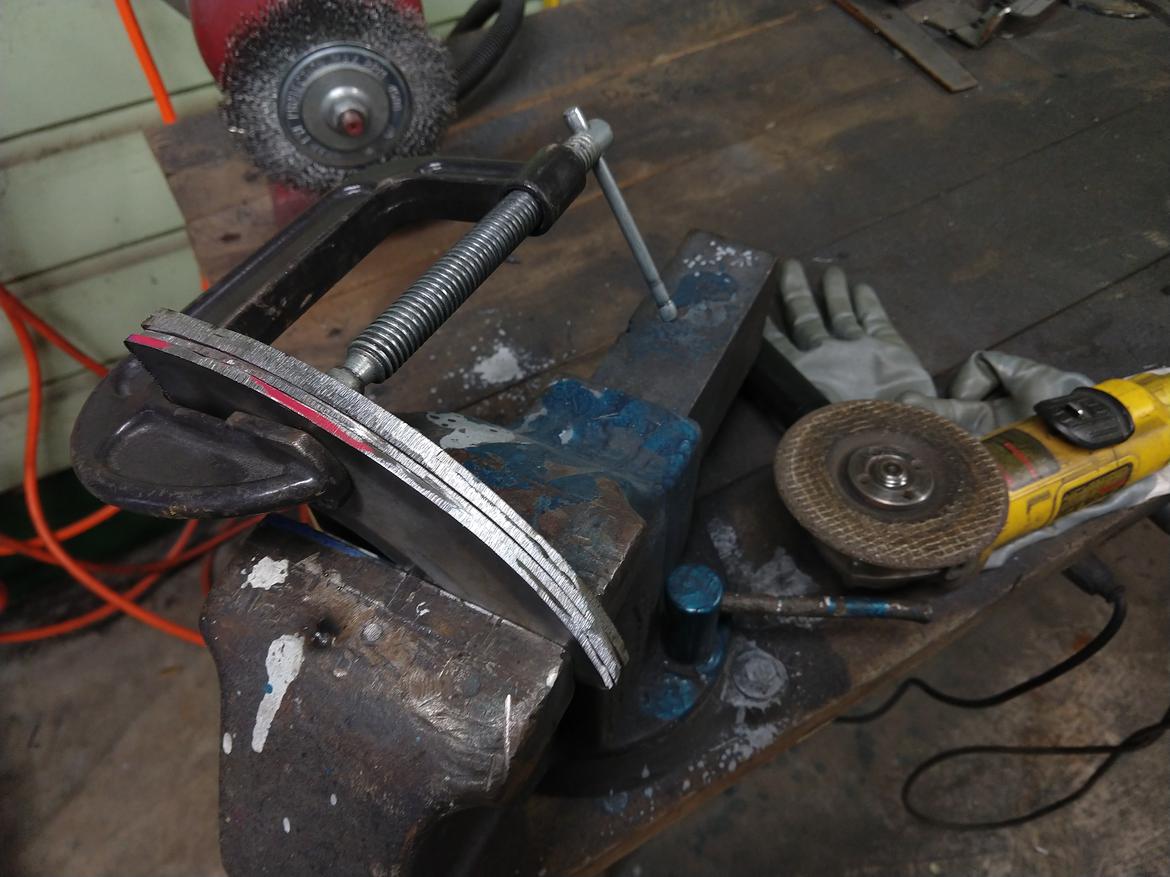
When you're cutting multiples by hand, you can grind them all into the same shape by clamping them together.
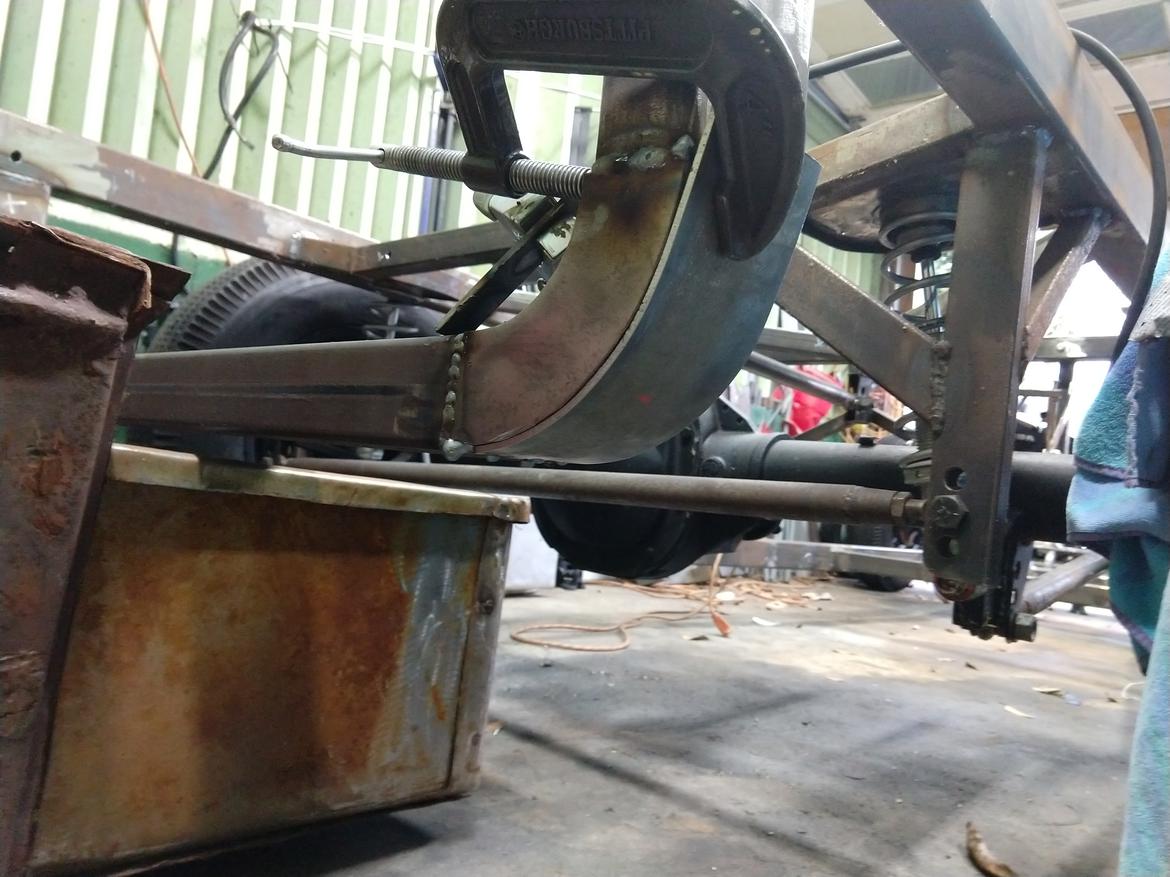
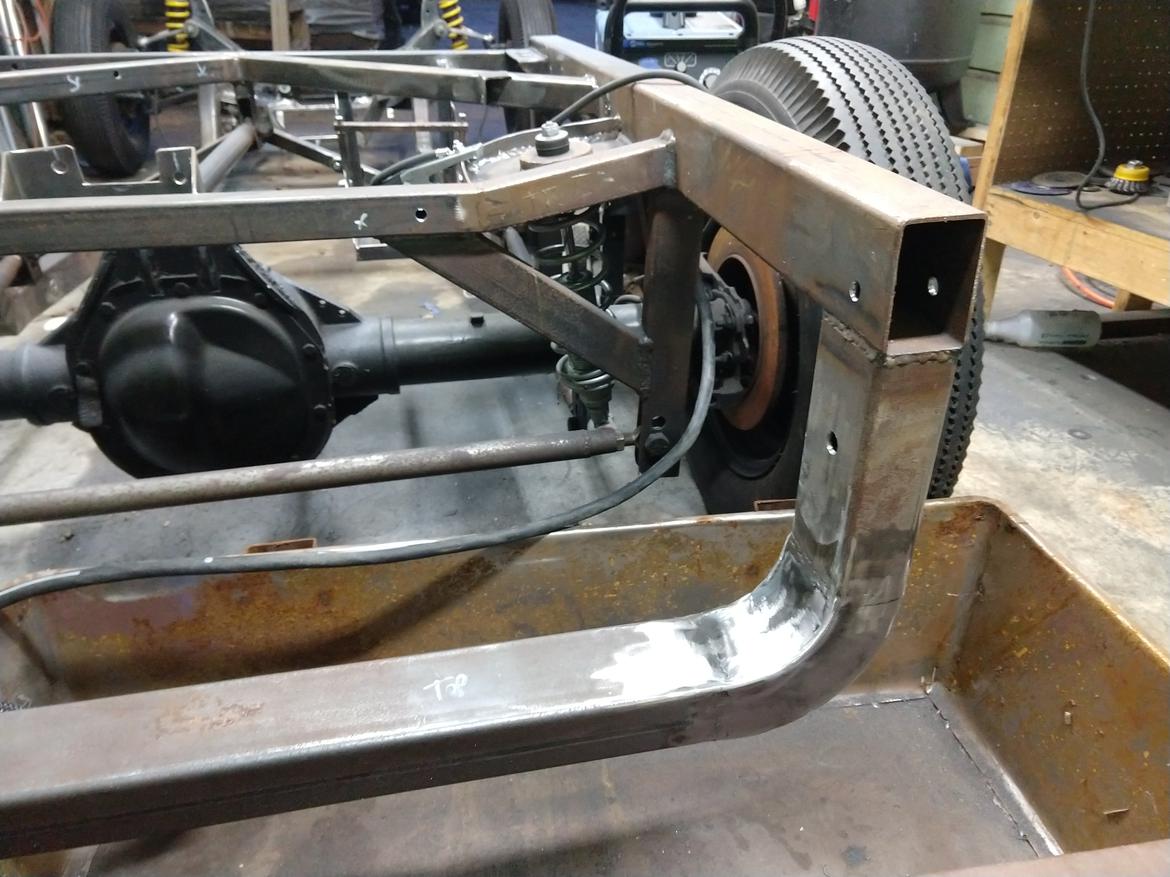
Then I capped the open ends of the frame rails.
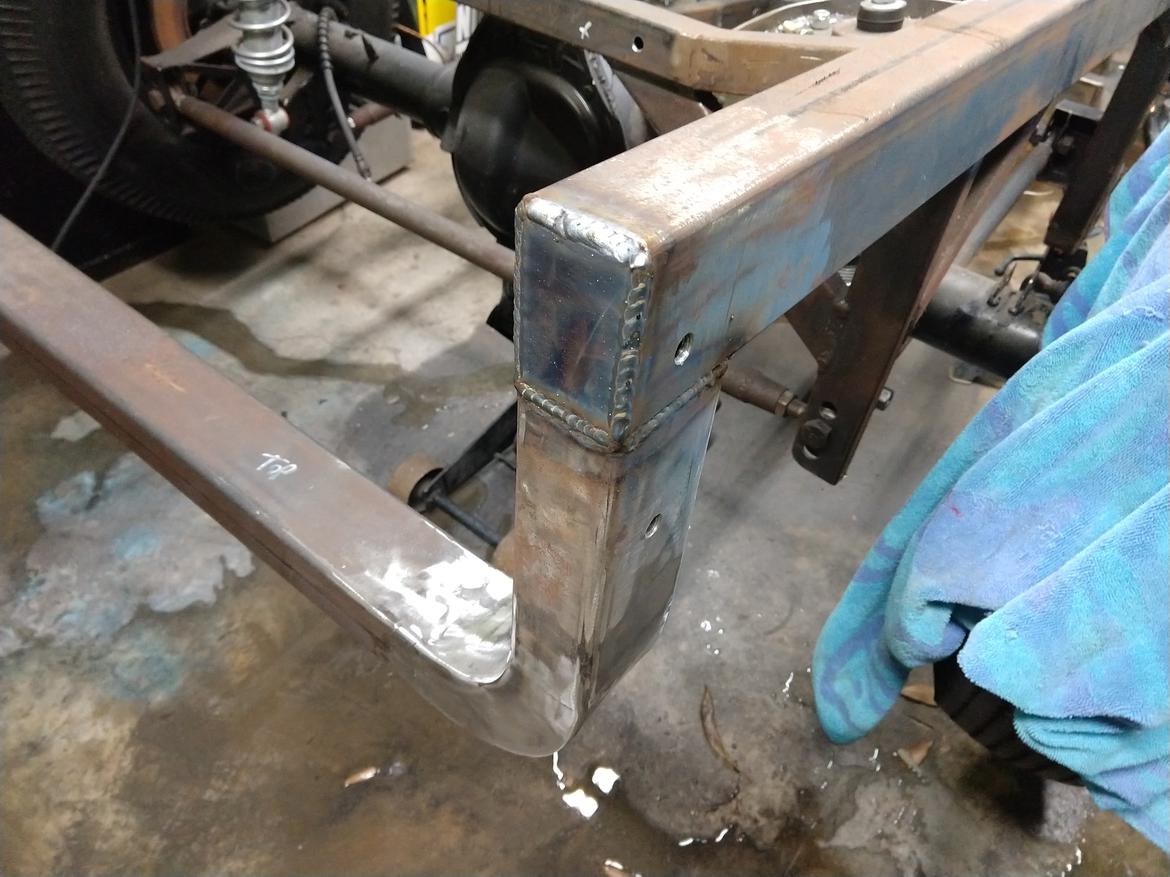
I can't say enough good things about my Challenge first prize Miller 211. It's so much more machine than my old little 175, and I'm happy to put it to good use.
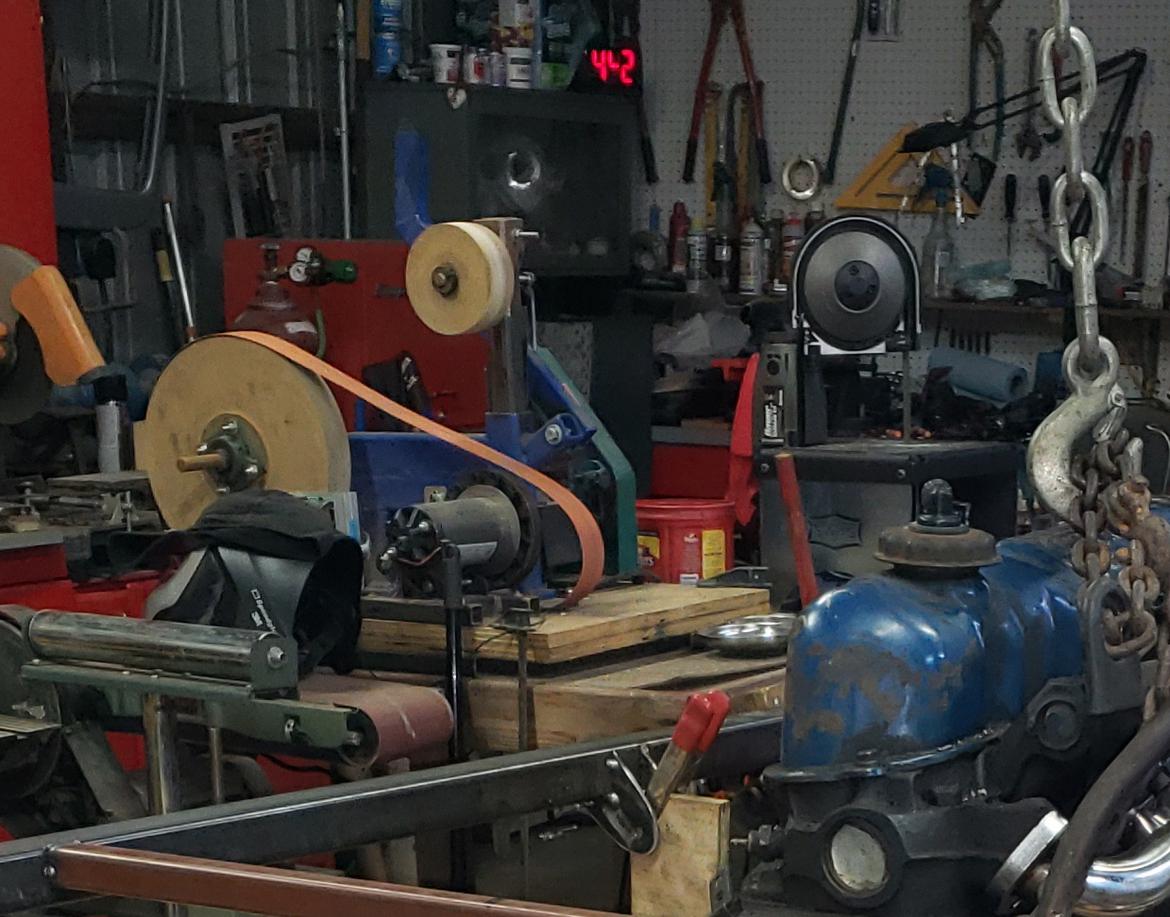
I'm not implying that you can't, haven't, or aren't doing fantastic work without them, but I can't say enough good things about my little HF portaband with a footswitch and SWAG table, and the 2x72 belt grinder I built. Together they have really cut down the time to make nice pieces, and improved my accuracy as well.
Love your build!
Yeah I really should get a band saw. Or start using the lasers at work, but that doesn't help me on weekends when I want parts now.
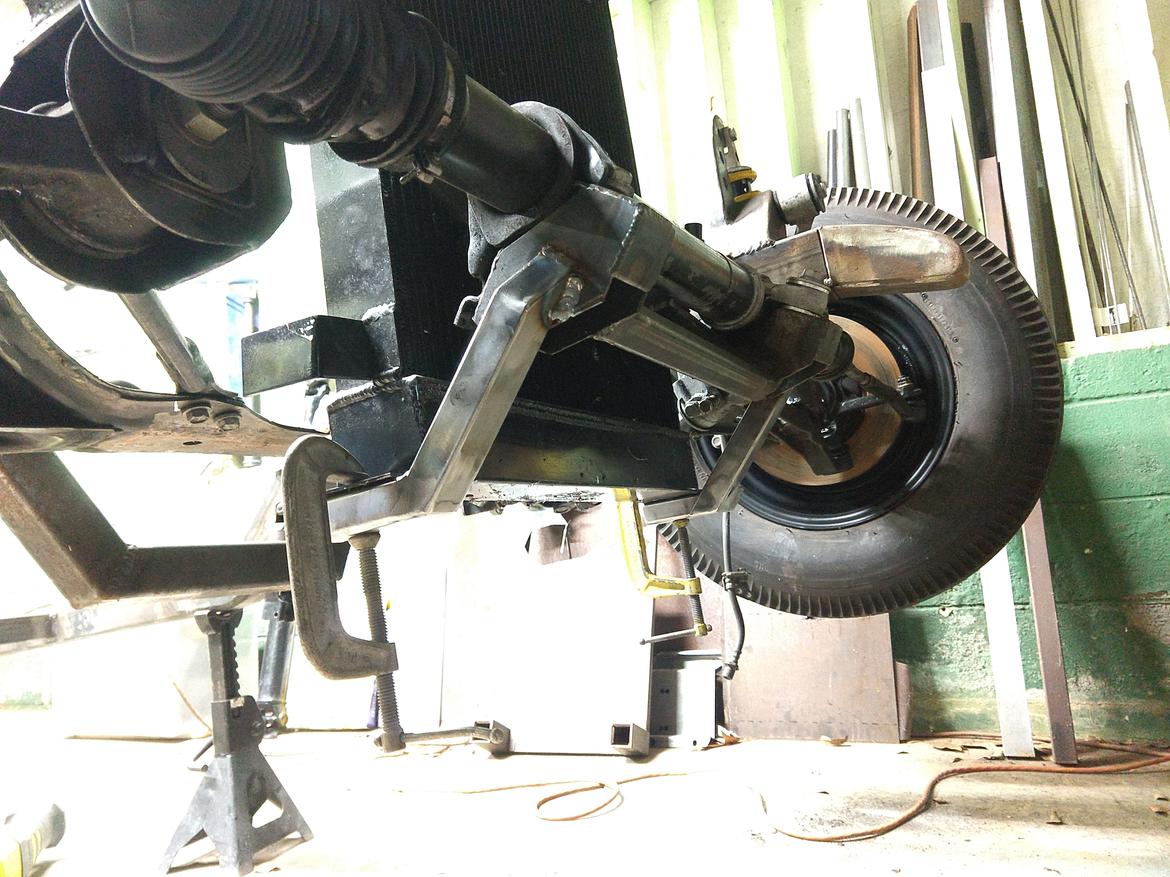
All that time spent fixing the engine mount was worth it. Engine sits level enough.
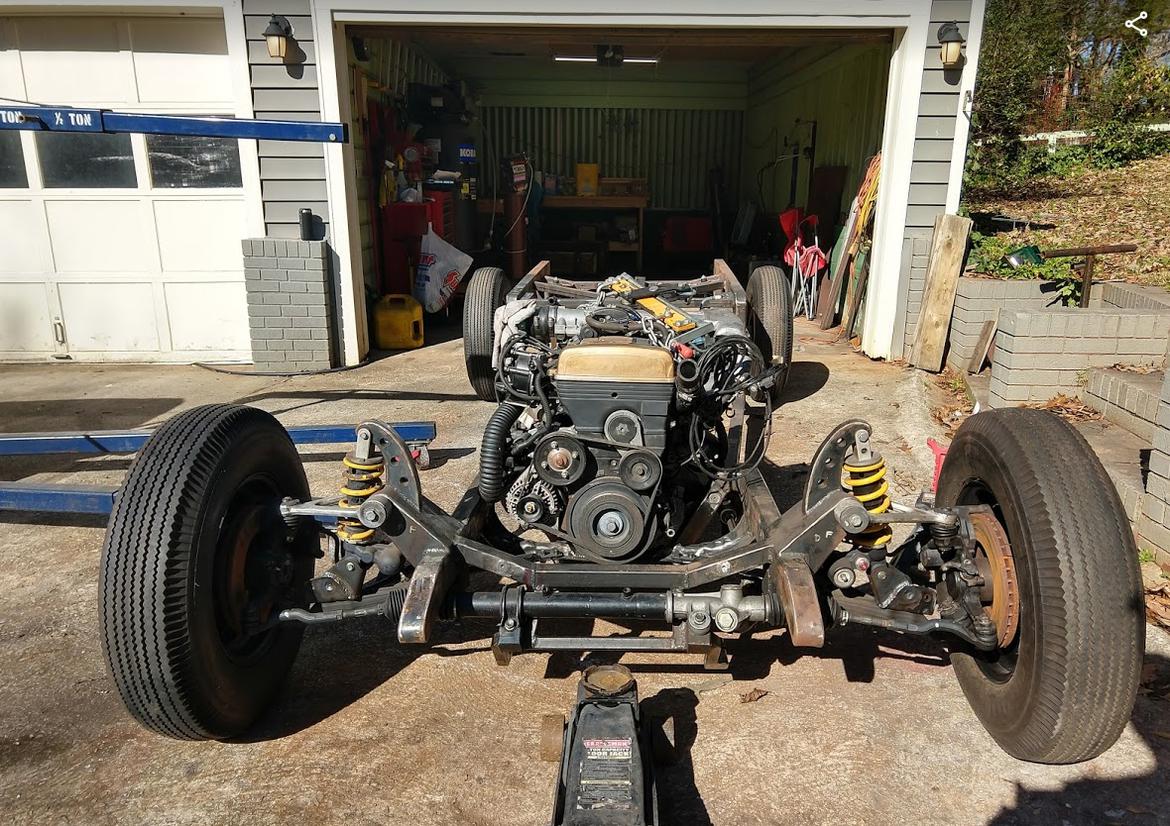
And the custom driveshaft fits perfectly.
Now I'm playing with headlight mounts and the bumper tube thing (frame rail spreader? bash bar?). I also forgot about fenders, running boards, and how to mount them, so the frame painting is pushed back even further.
maschinenbau said:
This is what 10 hours of purely aesthetic decision making looks like. Last time I had the body and bed panels on, I didn't like the way the lower rear cross-member corner juts out from the body in stark contrast to the curvature of the bed. So I did something about it.
Awesome project, keep those updates coming!
I'm not sure what value you put on 10 hours of your time, but I thought that I'd just leave this here:
https://welderseries.ecwid.com/Frame-Curves-p49939496


