
I used to be cool. I used to have the big equipment and the space for it. These days, what with the small children and the job and all, space is tight and the allowable volume level is way lower. So I started shopping for small guitar amps and couldn't find anything that fit what I was after in my budget. So I started looking at kits to build my own. There are a bunch of outfits that sell kits and components and whatever you need to build any number of "classic amp" clones at a fraction of the cost of the real thing.
In my searches I stumbled across a company called Trinity Amps based out of the great white north and decided that their "Tramp" kit should fit my needs quite well.
The kit

Now, I don't understand electricity. I took a basic electronics course in high school and I've done a bit of soldering over the years, mostly switch out guitar pickups. Never attempted anything this involved or complex. Can't be any more difficult than building a super 7, right?
Anyway, I'm very fortunate to have my maternal grandparents just a few blocks away. Add to that, grandpa is a semi-retired computer engineer with a full workshop set up in the living room and I see this as a great excuse to spend more time with my grandparents in their waning years.
Fast forward to today and I'm still amazed that my order could be filled, shipped, zipped through US customs and arrive at my door in SW Utah in 9 business days. Today was the day and I received a very well packaged box of electric bits on my porch. Hopefully over the next couple weeks I can make time to put it together and learn something new.
The kit as I bought it is chassis and components, fully functional, but bare. Lumber prices what they are, I'm not sure yet what I want to build to house this thing. I like the idea of a maple cabinet because it's from Canada, but maybe I make the grille out of denim? Wrap the whole shebang in denim? Idk. Prolly not. I have some cedar planks that I can likely make work.
Ideas are welcome.
This will be fun! I built a tube amp from BuildYourOwnClone a few years back and put it on the forum. It's just one wire at a time, and I wish I'd built it with my grandfather.
https://grassrootsmotorsports.com/forum/build-projects-and-project-cars/building-a-tube-guitar-amp/131152/page1/
For the cabinet, it would be fun to find an old console radio and slide this inside. They show up in garage sales, Craigslist, estate sales, etc. They're usually too big to ship so you have to find one locally.
In reply to Keith Tanner :
That's not a half bad idea. I'll have to keep an eye out.
My master plan is to rewire my 2x12 so I can plug this and my little orange into each speaker and run an A/B/Y switch. Should make for a very versatile and compact rig. So some enclosure either small enough to sit next to the orange terror or sturdy enough to sit under it. So many options.
Where are all the big vacuum tubes?
In reply to Snowdoggie (Forum Supporter) :
Just one big tube (6V6) and one small one. She weighs in at a whopping 6watts of class A grunt. Supposedly there are other tube options that can make it run at a screaming 12w, but for bedroom playing I think it'll be hot enough.
In reply to ish_da :
I'll be running it through an 8ohm 12" eminence speaker. I'm not concerned about it being too quiet. I generally run my orange through 16ohm worth of speakers at only .5 watts. It's loud enough.
The difference between a stereo and a guitar amp is that the amp only gets interesting when it's struggling :)
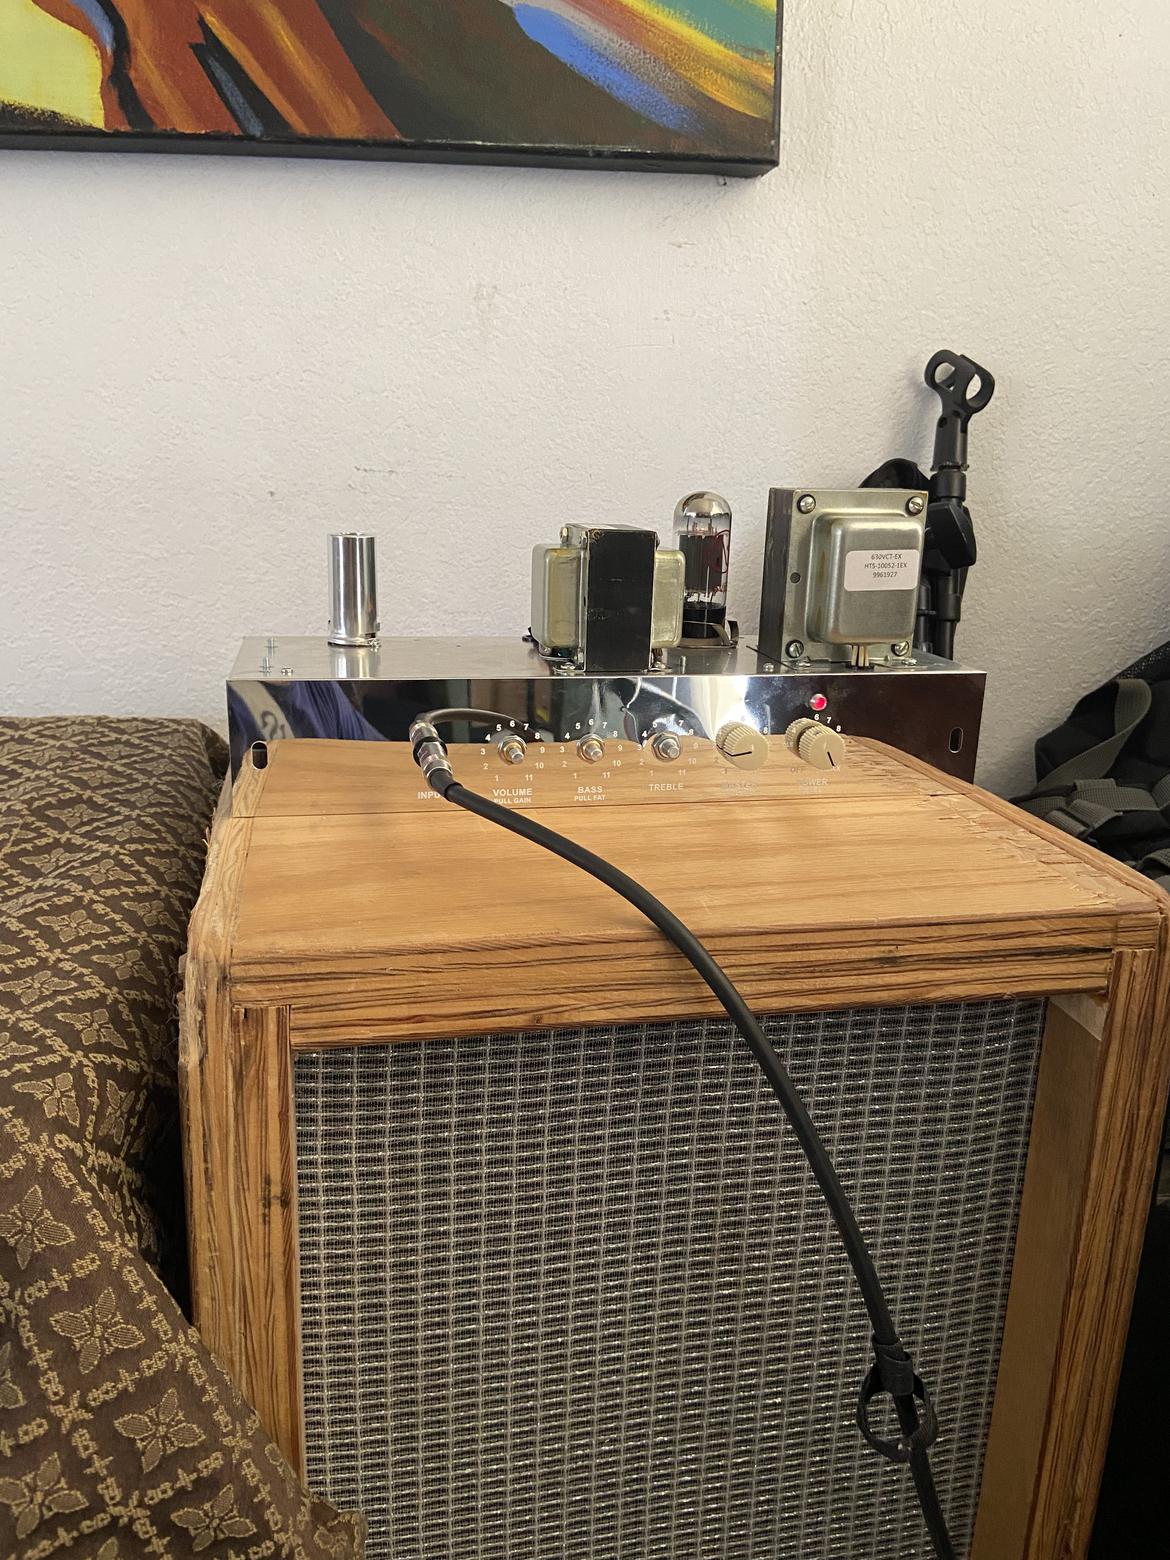
There are two basic layouts for this amp. As a combo, where the control panel is on the top of the amp with the chassis in what I'll call a vertical position, or as a head with the chassis horizontal. I'm building a head. The chassis comes set up for the more common combo layout and there are holes which have been laid out and marked but not actually drilled/punched out for the tube sockets. So I need to actually make these holes. I don't have the tools here at home.
So I started reading the instructions a bit and got to assembly directions:
Step 1- install tube sockets.
So no progress tonight. Eh. There's always tomorrow.
Big step drills acquired. Chuck em up and press em down and I remember why I hate working with aluminum. Noisy, chattery, and unpleasant. But at least the edges chamfer easily. Anyway, holes drilled and step one is mounting the tube sockets and some terminal strips.

Then some grommets and grounding points, then it's time to start soldering. These wires come pre-twisted.


I haven't tried to read resistors in 18 years. And it's hard to tell if the stripe is brown or black, or purple or whatever, so I went ahead and just started testing them to find what I needed. more heat and tedium later:

and we're starting to get somewhere. Then the transformers go on and start to get sorted and attached.


starting to get crowded. Then I realized the hour and decided to stop there. More when I can.
More progress. Got the impedance selector installed and wired, as well as the output jacks.

then finished wiring the main power into the switch/fuse/big transformer.

Then the destructions said to assemble the circuit board. Thus far, I thought I knew tedium. Thought I was familiar. Thought I was experienced.
If the board was Roman, it would be called Tedious Maximus and it would be the source of all aneurisms.


those photos represent 4 hours of my life. I'd say it's about 75% complete.
I just hope I'm following instructions correctly and it works right. I'd hate to have to troubleshoot this thing.
I really like point to point wiring like that. It's obsolete for a very good reason but it's kinda fun to build.
In reply to Keith Tanner :
It is fun in a way. Seeing progress. Doing things cleanly. Checking off my progress as I go. Also I'm getting better at reading resistor codes.
I don't know much about electricity. I know what a capacitor looks like, but not how it operates. The two big black ones on the left are 47uf 450v. Whatever that means. The diagram calls for 50uf. But thats what was in the bag and I figure it's 6% of whatever and the resistors are all about 5%+-
Stuff's voodoo.
Like you, I have trouble distinguishing colors like orange from brown on a blue resistor. I usually double-check with a multimeter :)
If you want to learn about electronic components, places like SparkFun or Adafruit often have good guides. You'll never completely figure this thing out though!
Great project. I have built a few tube amps myself. Seeing this thread is motivating me to dust off the soldering iron again.
Friendly word of caution if you are not aware, the plate voltages on the tubes can be very high. Be careful with your hands if the amp is powered up with the enclosure open. Also, the power supply capacitors can still be dangerous if not discharged after powering down the amp. Be safe and have fun. These projects are great learning experiences.
In reply to dlmater :
I was the guy who got kicked out of class for taking the dare to grab both sides of the jacobs ladder when the teacher wasn't looking. That's all the electricity I need to know it's a bad idea. Caution will be taken.
Circuit board finished, on to the next step, which is to make sure the board is actually finished. Lots of checking and double checking. I had missed a few things.
Then it's wiring the two push/pull potentiometers. The first is the power control which has a tweed/'tude function, and the bass control which has a "fat" mode.

These were done outside the chassis because easier. Then the input jack which was pretty easy. Lots of shared grounds. Lots of redundant grounds. I think both are probably good.
Mount the board!

Which has two grounds to the chassis. Then I started wiring the front side of the board to the controls

It was at the point that I realized I may have made a mistake. The pictures and the instructions don't always jive. The picture shows the mosfet mounted to the board and two chassis wires are clearly running underneath the mosfet. The board is standing off of the chassis so I mounted the mosfet directly to the board. The directions say to mount the thing straight to the chassis and use 3 short pieces of wire to make the connections. I'm not sure if it's worth trying to redo. Anyway, soldier on. Trim, strip, solder, trim, strip, solder, trim, strip, solder. It's almost soothing.
There is a big part of me that thoroughly enjoys the step by step process, seeing things happen, the steady repetition. I can shut out outside noise and influence and just bury myself in what I'm building. It's a great escape. Until the wife calls me home to help put kids to bed. But that's enjoyable too.
Progress today. A figure I'm about 15 hours deep at this point.

Very cool, I wanted to build a TMB 18w years ago but after building a few pedals.....I don't think I wanna screw with something bigger
In reply to Antihero (Forum Supporter) :
I thought about building some pedals a few years ago. Then I remembered I don't really like to use pedals. This is a little intimidating though, no doubt about it.
I wanted to put the control knobs on to get a glimpse of glory, and I discovered that 3 of the 5 are missing their grub screws. A trip to the hardware store is in order I think.
I have about as much as electronics knowledge as you but they may have mounted the mosfet to the case so the case will act as a heatsink. I believe it depends on how many watts are going through them? Hopefully someone who knows more will chime in.
Carefully reading through the directions again, there are allowances for mounting the mosfet on the board as I had done. That said, there are optional mods to allow the use of bigger tubes to double the output, so in an effort to future-proof as much as possible, I mounted the thing directly on the chassis using the supplied silicon insulator.
The last few wires run, the directions says to double check all the component connections against the diagram. So I did. Twice. Then I'm supposed to apply power, watch for smoke, and start checking voltages. The first couple check out. Then I'm supposed to check a couple ac readings, but I can't figure out if the meter I've been using can read ac. So I wait until grandparents get back from lunch. Actually, I go home because wife requested I be home by 3.
Close. So close. Two more readings I need to verify before I'm at "install tubes and connect speaker" so hopefully this afternoon. That'll hopefully complete the functional part of the build. Then I need to decide on how I want to build the enclosure to protect the tubes from my toddlers.
finished wiring:

And I noticed something rad:

the controls go to 11!

barefootskater (Shaun) said:
Carefully reading through the directions again, there are allowances for mounting the mosfet on the board as I had done. That said, there are optional mods to allow the use of bigger tubes to double the output, so in an effort to future-proof as much as possible, I mounted the thing directly on the chassis using the supplied silicon insulator.
The last few wires run, the directions says to double check all the component connections against the diagram. So I did. Twice. Then I'm supposed to apply power, watch for smoke, and start checking voltages. The first couple check out. Then I'm supposed to check a couple ac readings, but I can't figure out if the meter I've been using can read ac. So I wait until grandparents get back from lunch. Actually, I go home because wife requested I be home by 3.
Close. So close. Two more readings I need to verify before I'm at "install tubes and connect speaker" so hopefully this afternoon. That'll hopefully complete the functional part of the build. Then I need to decide on how I want to build the enclosure to protect the tubes from my toddlers.
finished wiring:
And I noticed something rad:
the controls go to 11!
I read all of the way through this thread to ask that very question!
I dug my cheap hf multimeter out at home and checked everything. It has a convenient ac voltage setting. Power on, check voltage here, here, and there. Roll the power up, watch the voltage climb. Without an instrument plugged in, turn the power all the way up as well as the pre- and main volume. Check for anything making any noise or getting hot. Plug a cable in and see if you can induce hum by touching the lead.
By some miracle it appears that I got it right the first time.
I need to get the grub screws for the rest of the control knobs so I can really see what I'm doing, but it works great and sounds as good as I hoped. Operation is pretty basic, with the main exception being the power knob. Every amp I've owned has switches: power and standby. This has a knob: off, idle, and a graduated scale up to max. Idle acts as a sort of standby for the tubes to warm up.
Cleans are bright and clear, and with the pre- volume in the higher end it has a nice sensitivity that starts to have a warm breakup when you get aggressive on the strings. Pull the pre- knob and it gets very British. Great tone, a good level of gain (not enough for me personally, but that's what my other amp is for) and great sustain.
The low eq knob pulls to "fat" mode and fills everything out like a much more powerful amp. The high eq knob gives a nice bright clarity to the sound.
Next step is to separate the Eminence speakers in my cab so I can choose between them (swamp thang, Texas heat) and see what I can see. Then I can get an a/b switch and run both of my amps on the fly.
All in all, I think it's a great amp for the money (class A, real tubes, effectively two channels). And for all my complaining and self doubt, it was a lot of fun to build.
on to lumber!


