1 2 3 4
Rabbit Farmer
Rabbit Farmer New Reader
2/22/19 9:12 p.m.

Day 6

Only 3.5 hours today... mainly because I was having a hard time getting the transmission lined up.  Finally got it.  I also noticed some other differences between the 5 and 6-speed transmissions (see below)

I still have a few items 'do to list' before it gets together 100%:
1. Get long bolt on front of transmission
2. Get 12pt/17mm drain plug socket to tighten filler plug (channel lock tight right now)
3. Get bolt and coolant hose (see questions below)

I'll make sure to get the driver's axle in, exhaust together, etc. on Sunday.  Getting there.... so close.

It seems that the top transmission bolt should have a stud at the end for the cable shifter... [b]is this a correct assumption?[/b]  I hope to get a Bentley that includes the 6-speed on Sunday to answer some of these questions.

Is the coolant hose different on the 6-speed or so I just need to bend this out of the way?  I am unable to slide the shift cable vertical-oriented mount to where I believe it belongs.

FYI for those doing a swap... this seems to be the correct routing for the power steering line.  What is the purpose of the stud on one of the transmission mount bolts (near PS line)?

Another difference... the bolt (where the screwdriver is located) is much longer than that of the 5-speed.

Rabbit Farmer
Rabbit Farmer New Reader
2/22/19 9:13 p.m.

Day 7

99.9% completed.  I need the bracket that goes from the starter to the PS hardline and the long bolt in the front to call it 100%.  

I drove it around last night (25 miles) to start the clutch break-in process and make sure everything works.  I did notice that the starter was struggling a bit with the larger flywheel (I have the really small Odyssey batter located in the rear of the car).  During the drive, I kept shifting between the highest gear and the next two below... did that for 3 miles before I realized that I have forgotten about 6th gear (I was doing 5th, 4th, 3rd).  Duh.

I didn't do anything over 3/4 throttle since I was breaking it in.... also, once it hit full boost, both tires lit up.... I guess 205 wide studded snow tires weren't meant to be good on a 300 wHP FWD car on dry pavement.

Working on ordering rims (Diamond Racing 15x9) and tires (Hoosier R6 or A6 245-50-15) this week.  I think I will pick up a set of 235-40-17 Toyo 888 as the second set of tires (more for track use).  I also need to get the A/F gauge sorted out; more than likely this means sending it back to Autometer for diagnosis.

Researching hydro clutch setup on the Cabriolet.  I see that it is a lot more involved that I expected.  Darn it.  I figure I'll have the transmission out anyway so installing what I need in the engine bay should be easier.  www.eurospeed.ca seems to have the parts I need for this swap.  More to come on that later.

Anyway, for those of you that have Internet ADD (too much text, man, show me some pictures), here are the latest pictures.

The fluids and parts needed this weekend....

Transmission drain tool, timing hole cover, bolt with stud for transmission to engine with shift linage bolt down, and the clips for the shift linkage.

The tool....

Some more differences.... first up, the starter (as expected).

And the bolts (02M are longer)

Rabbit Farmer
Rabbit Farmer New Reader
2/22/19 9:14 p.m.

Day 8

99.73% complete. 

I brought the car down to Ralph's Foreign Auto in Colchester, Vermont (his 1970's BWM CSL in full race trim is sweet!) to get an alignment, verify that I adjusted the clutch cables correctly (something that is new to me... I know how to do it now), and a general shakedown to make sure everyone on the car is tight.  All good.

Toyo 888 tires have been ordered; same size as I have now (235-40-17) to ensure that I have tires for the first hillclimb of the season.  Great deal, excellent service, and good prices at [b]www.TreadZone.com[/b].  I also hope to get going on ordering 15x9" Diamond Racing steel rims so that I can pick up the super sticker and little wider (235 vs 245) tires with the same diameter as the current 17's.  More tread width, sticker tire, same diameter.... I like.

Last thing that I need to do is install the skid plate.... not something that will prevent me from doing the event, but something that I feel must be done.  Julie is also driving the first hillclimb of this year with the Golf.  She drove the Bolton Valley hillclimb back in 2004 with her stock 2004 Jetta 1.8t (hmmm, I just realized that I let her drive an event with a new car), but Bolton is more like an interstate with very few turns (only 2 over 2 miles) and wide as heck.  Ascutney (first one this year) has 30 turns over 3 miles.  Woo-woo!

So, next weekend, she will be 100% done.  Time to get the Cabriolet out for my daily driver (haven't been driving the Jetta due to the water pump leaking) and then focus on the turbo Rabbit.

Steve

Nothing spells "race car" like "cup holder".... with a Capt'n and Coke.  Putting the center console back together.

I was driving the car to work for three days straight (20 miles each way) to help break in the clutch and shake things down.  Thankfully it had snow tires on it on Wednesday as we had the last (I hope) snowfall of the season; 4-5 inches at our house.  The snow didn't stick to the road so they weren't salting (good for the body of the car).

Rabbit Farmer
Rabbit Farmer New Reader
2/22/19 9:14 p.m.

Day Eleventeen

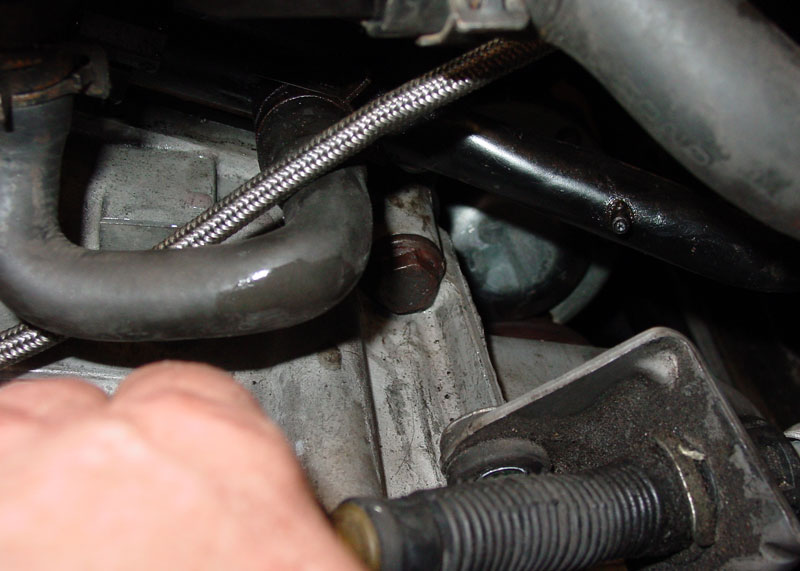
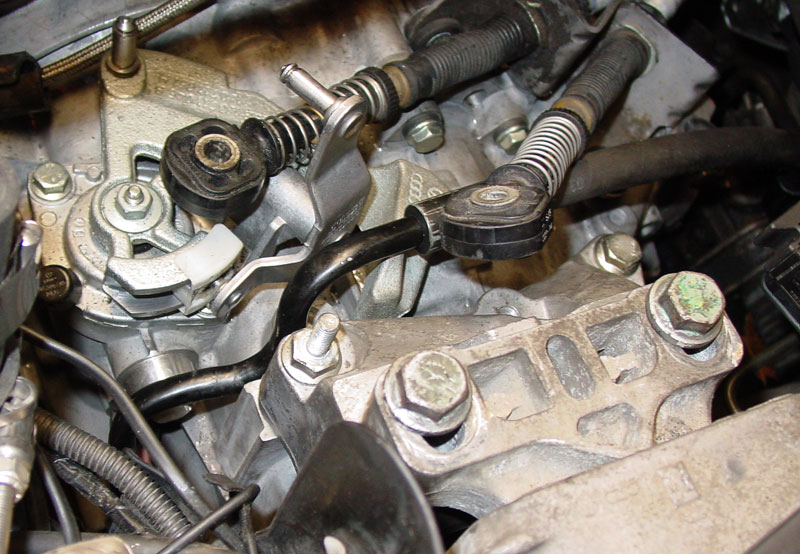
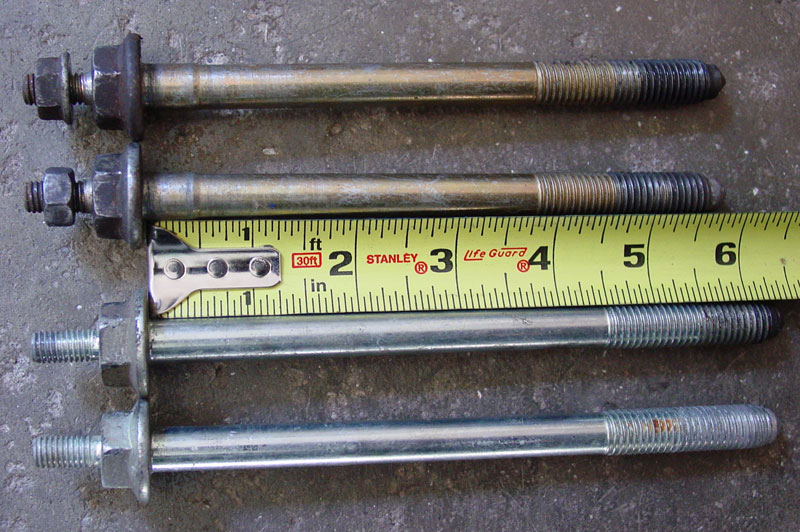
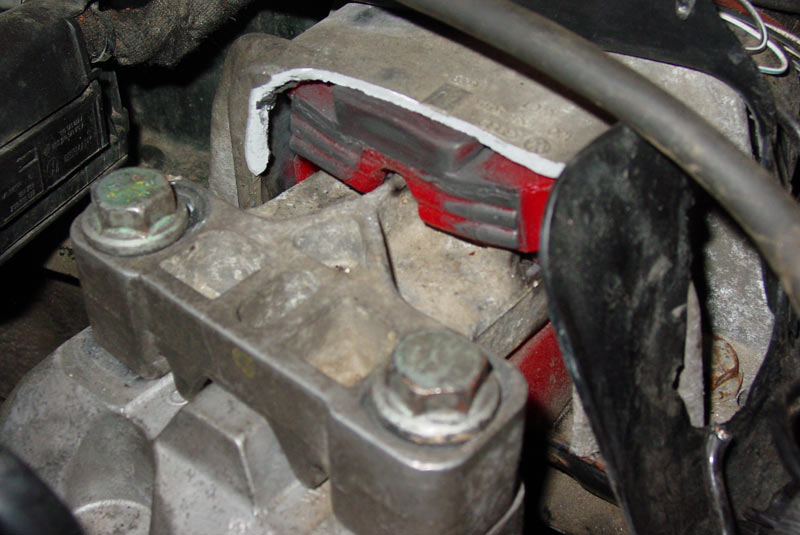
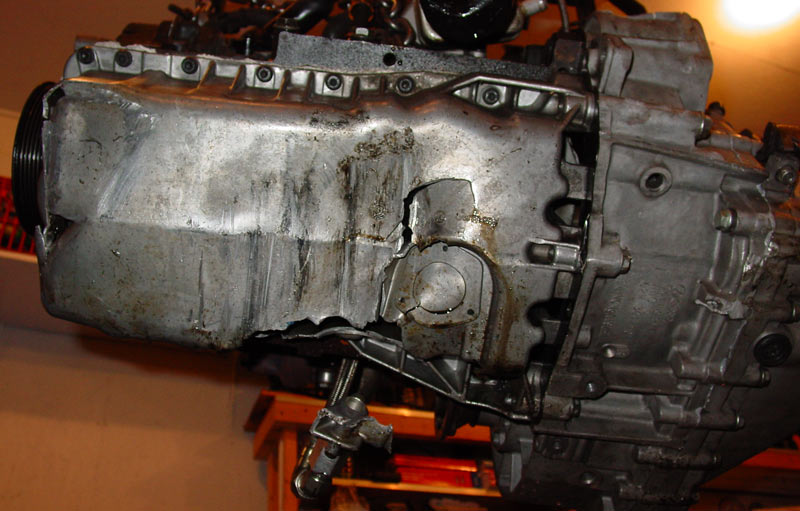
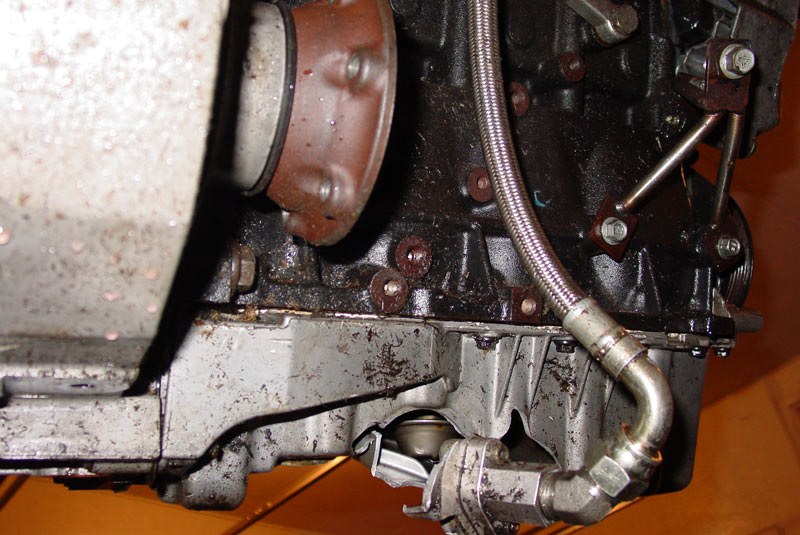
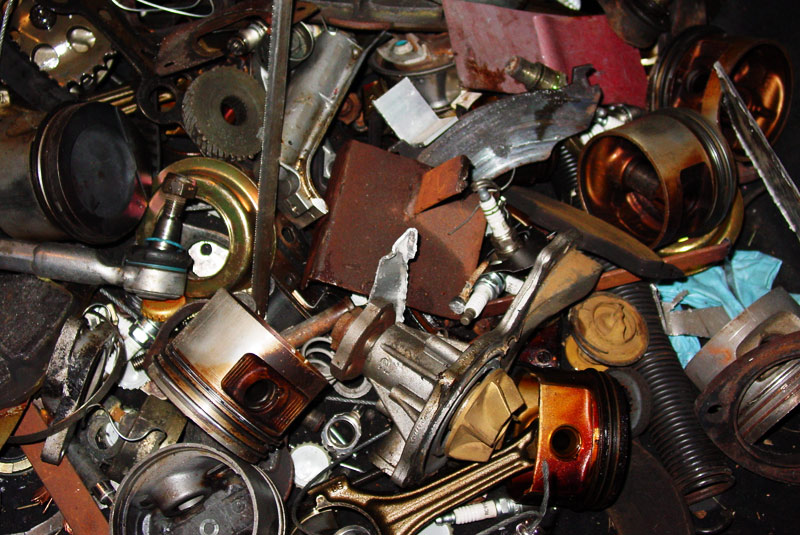
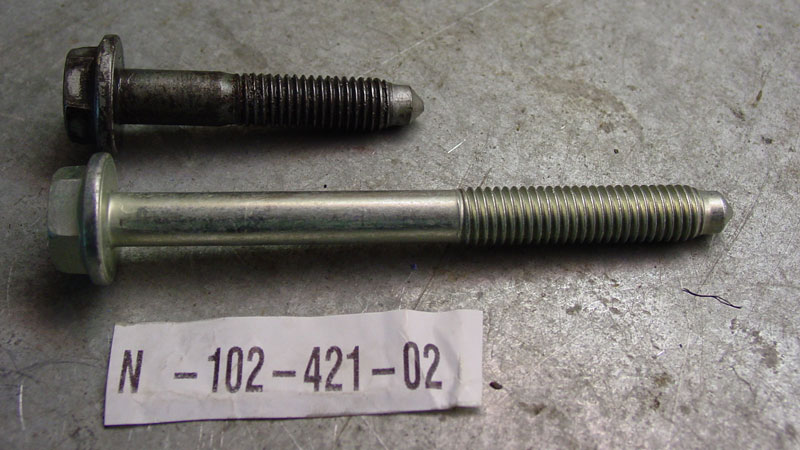
The elusive front transmission to engine bolt for the 6-speed that is much longer than the 5-speed.

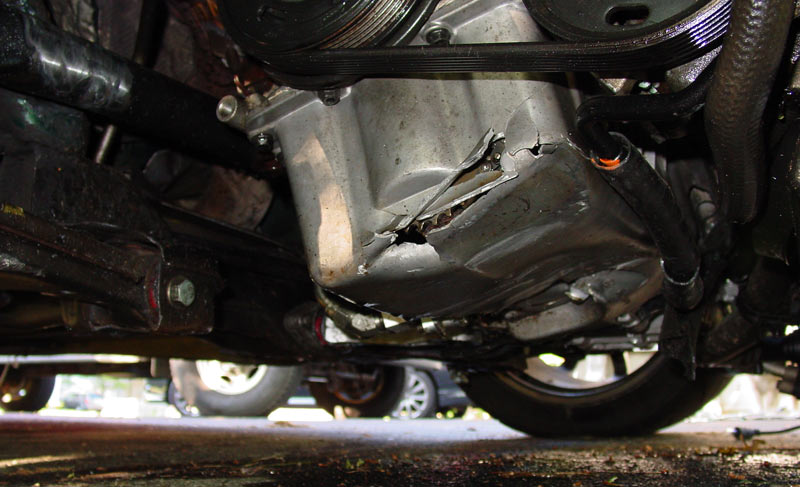
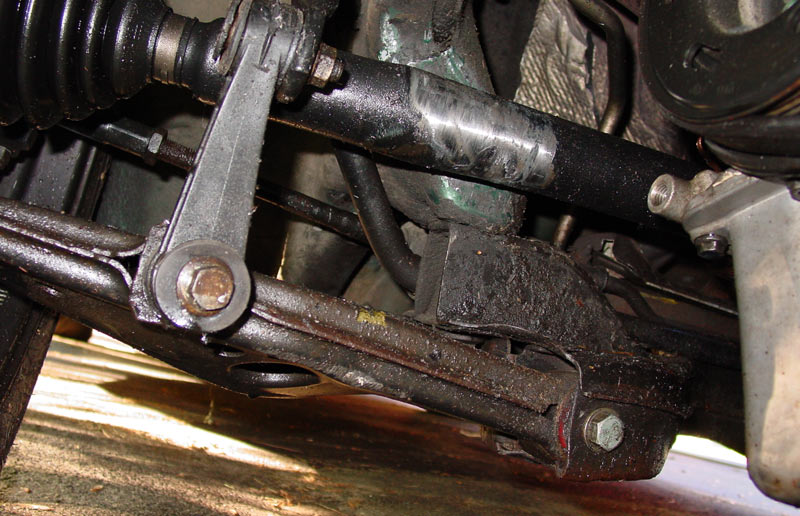
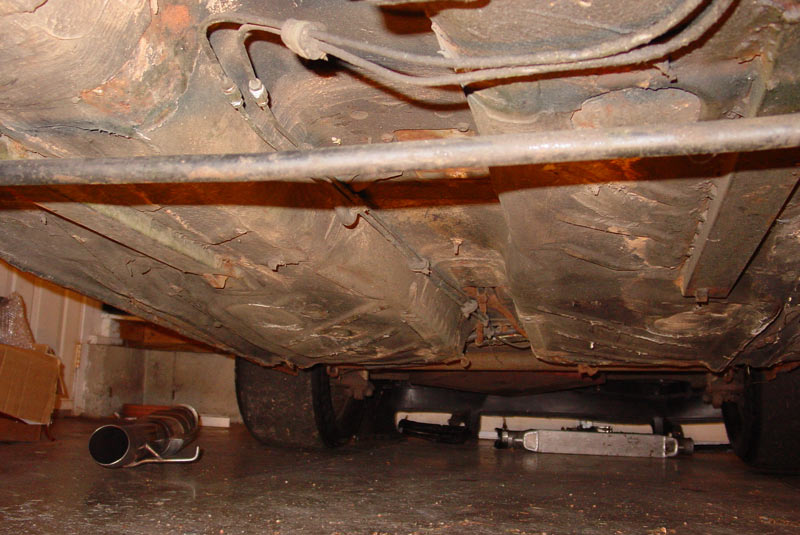
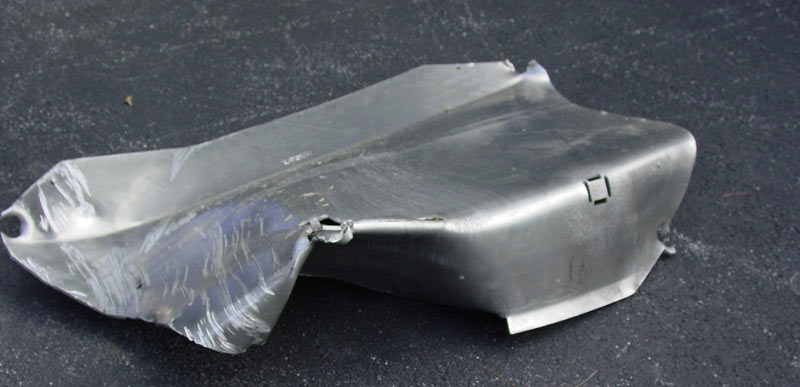
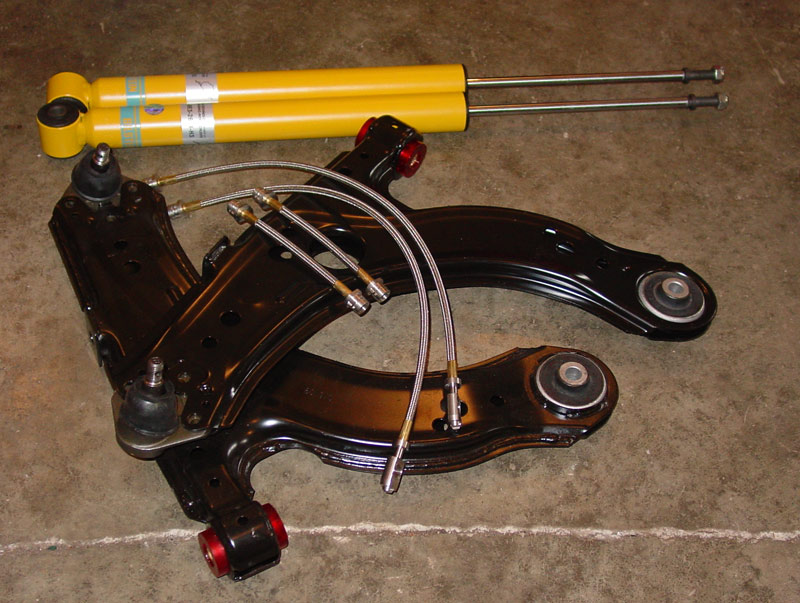
DieselGeek.com Panzer skid plate.  Easy enough to install, but glad they included the extra rivet nut.  I had two issues with the install.... the driver's side frame rail mounting point was blocked by the custom intercooler tubing and the two mounting points where the control arms mount to the subframe were missing.  The points were missing since we had to cut a hole in the subframe to access the previously captured nuts to get them back in captivity so that we could remove the bolts to replace the control arm bushings.  Directions and parts....


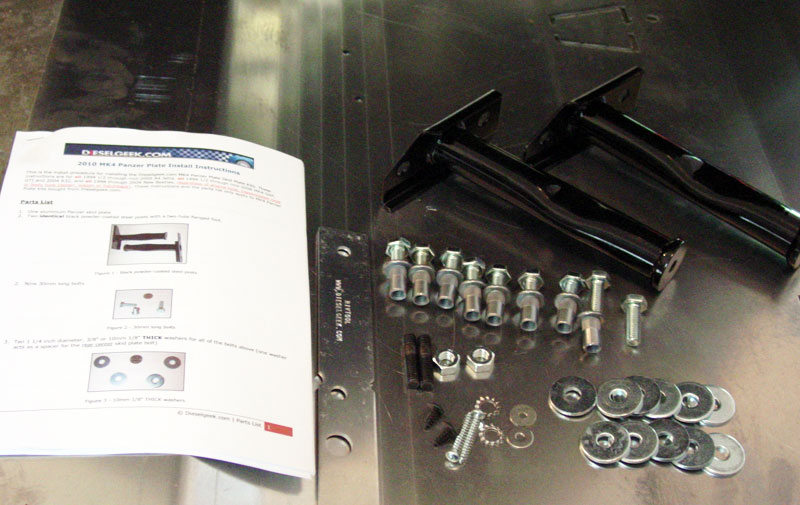
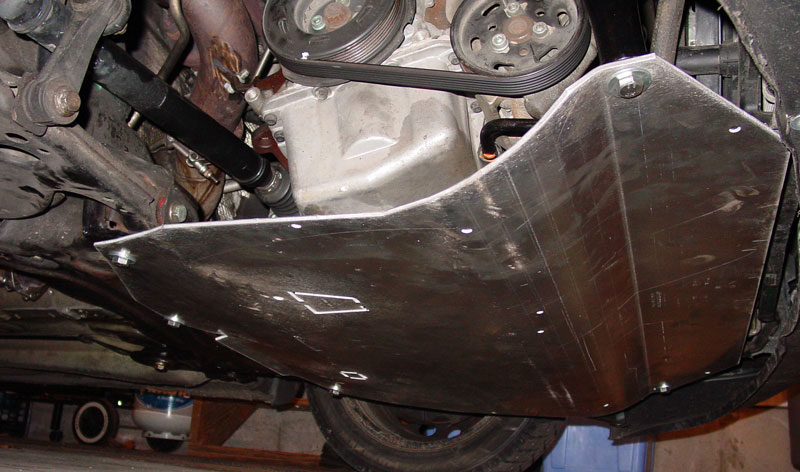
Plate installed.  Cyrus modified the front mounting point to circumvent the IC tubing and patched the two rear holes to install the rivet nuts in the correct location.  Protected!  (a small price to pay to save an engine or transmission from sudden death).


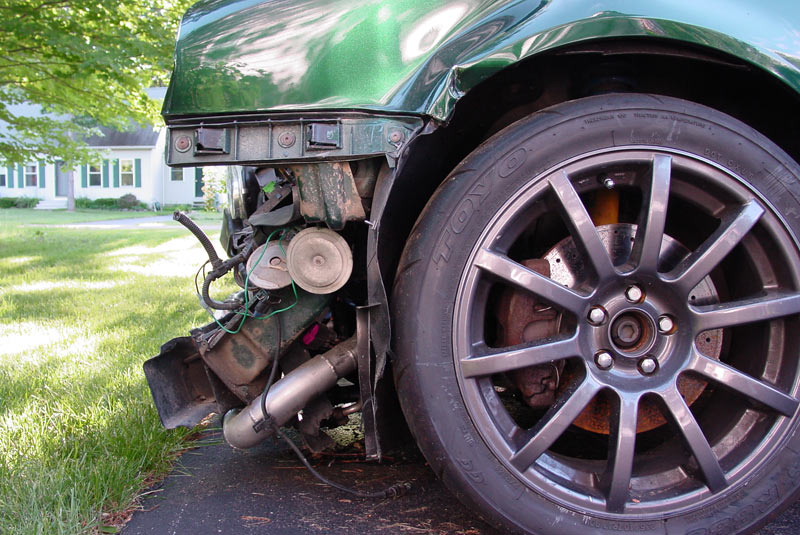
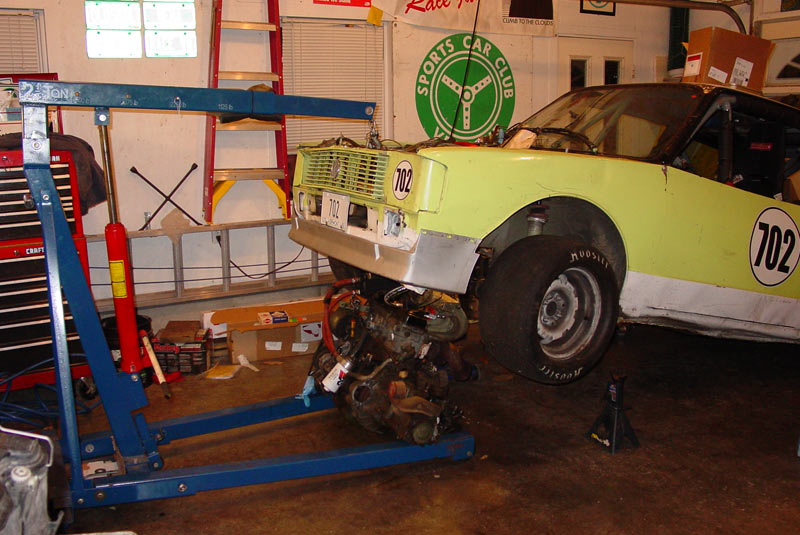
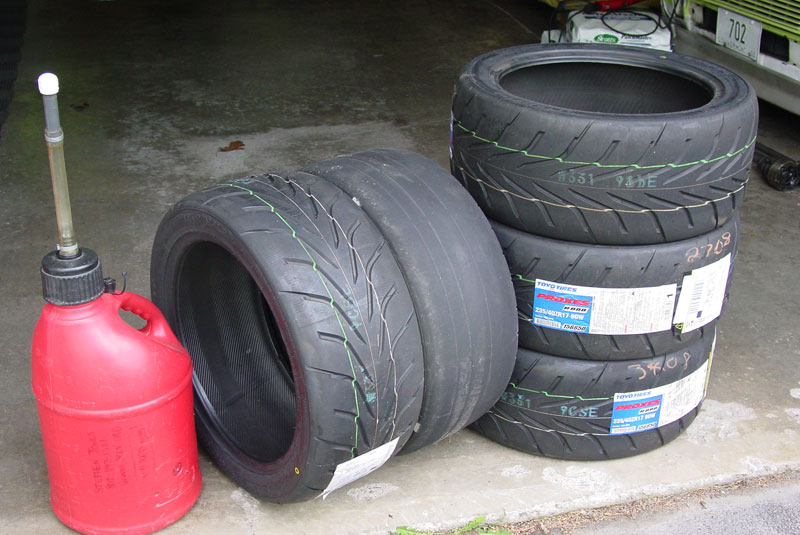
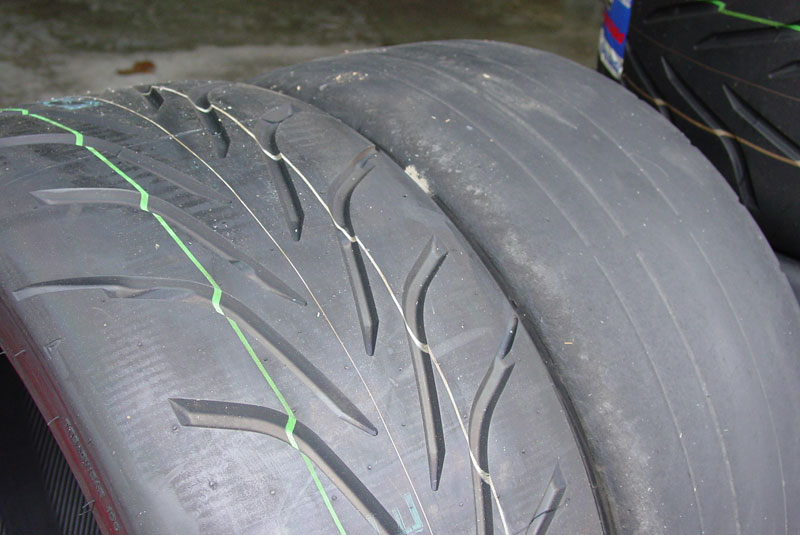
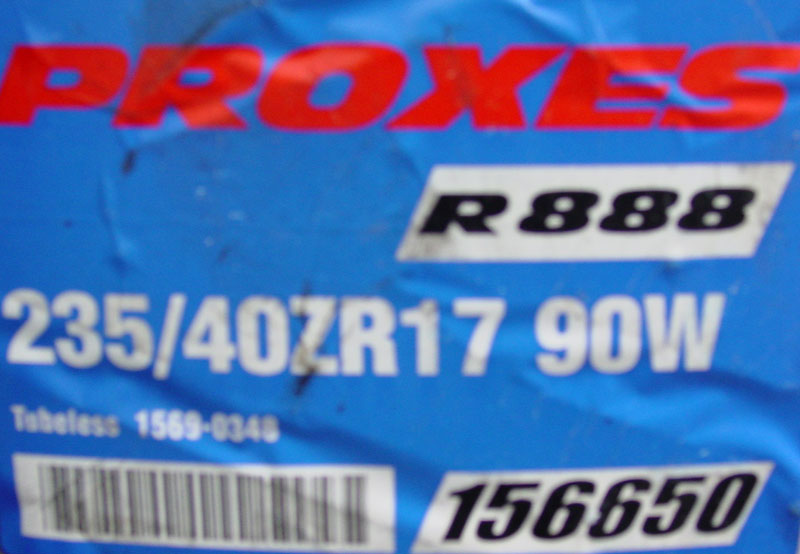
New Toyo 888 in 245-40-17; same size as the much older Toyo RA1's that they were replacing.  I hope to be able to get a lot more grip with these this year.... plus the (hopeful) added benefit of better gearing with the 6-speed and, more importantly, the 6-speed better stay together.

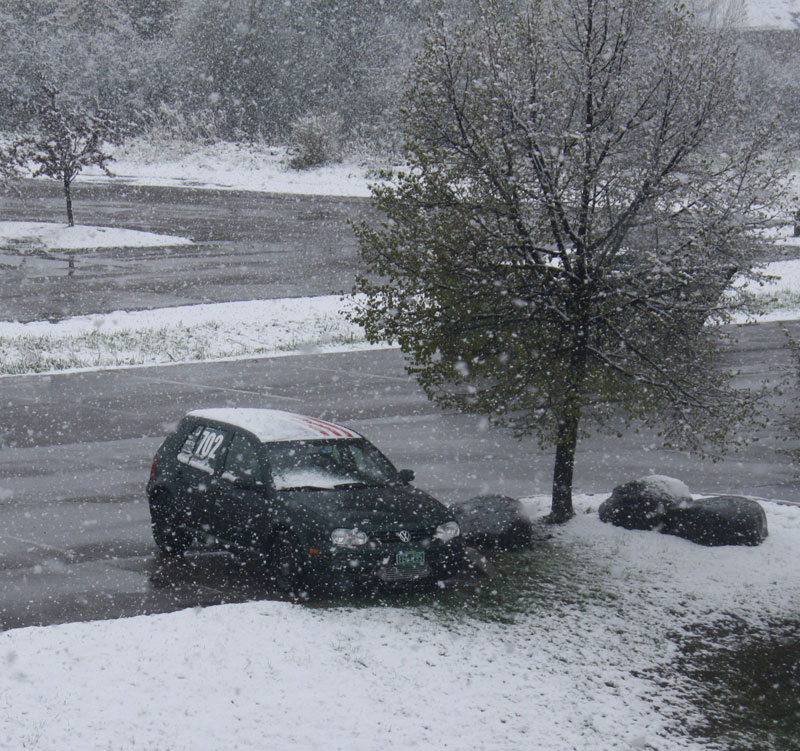
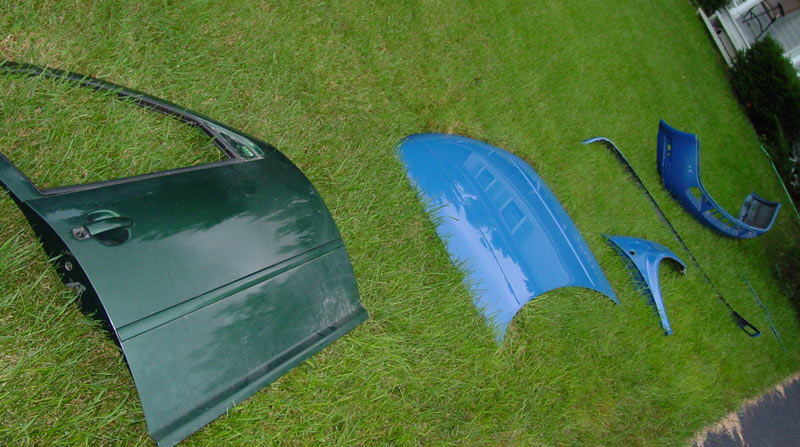
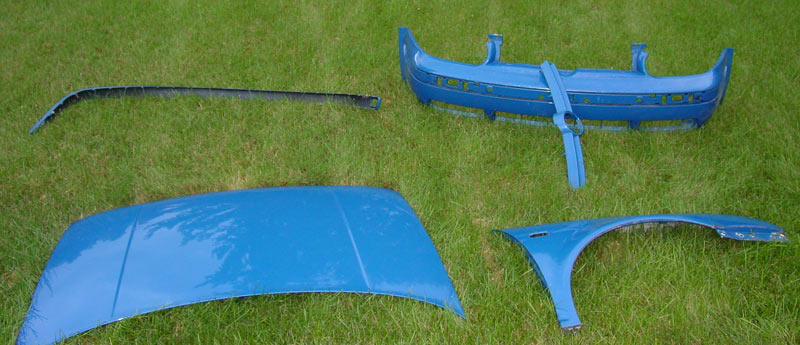
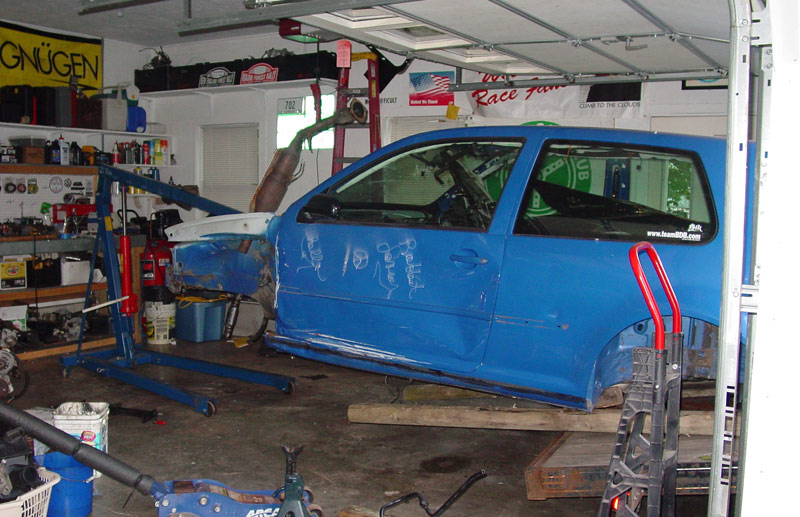
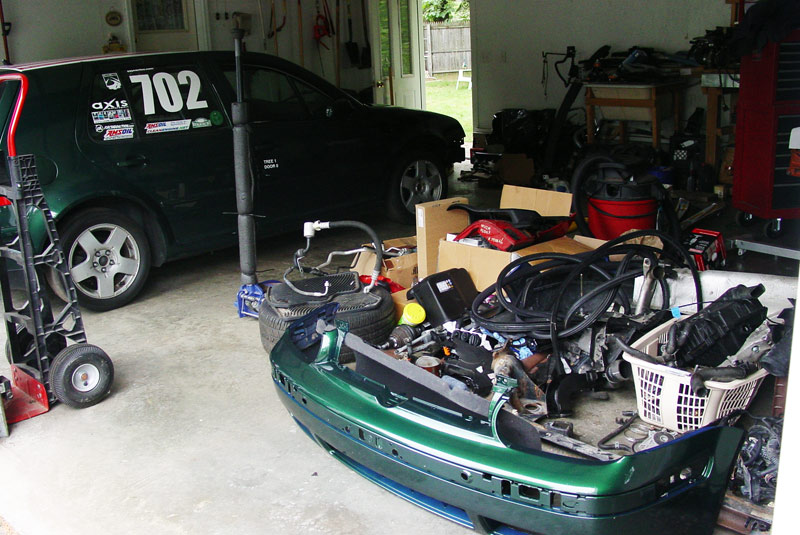
Well, summer is here so it was time to get the snow blower out of the garage and replace it with the lawn mower.... plus, get the turbo chick car out of the garage... for 3 days until it died.

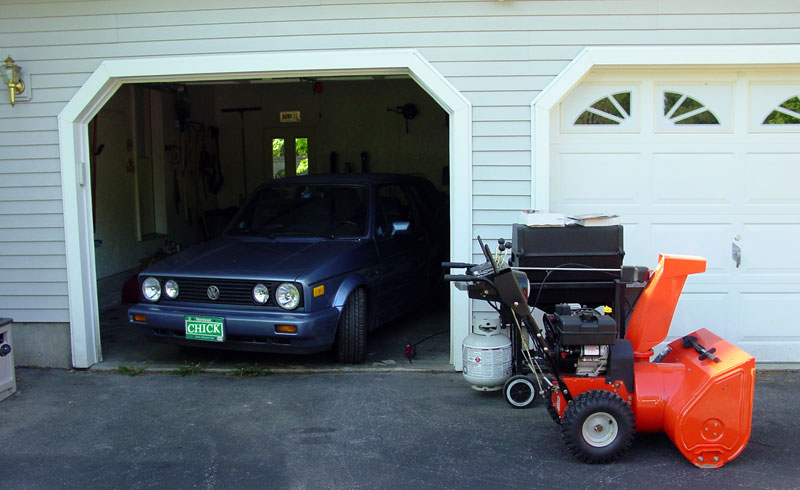
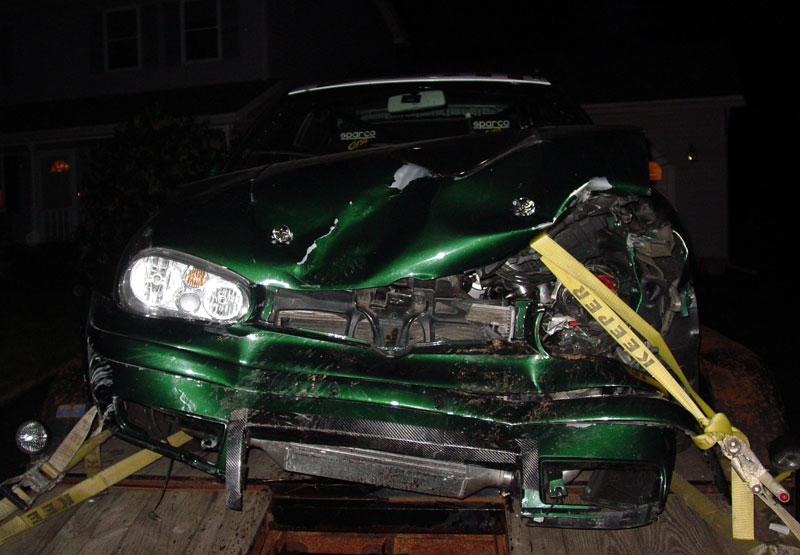
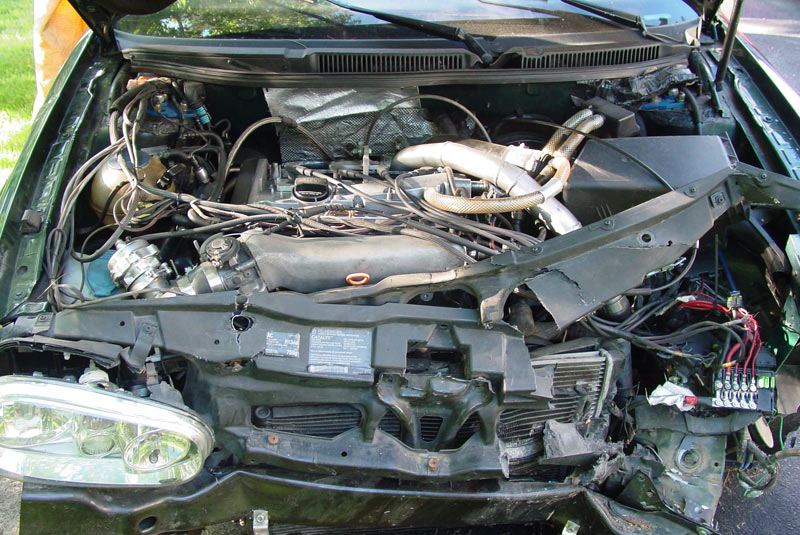
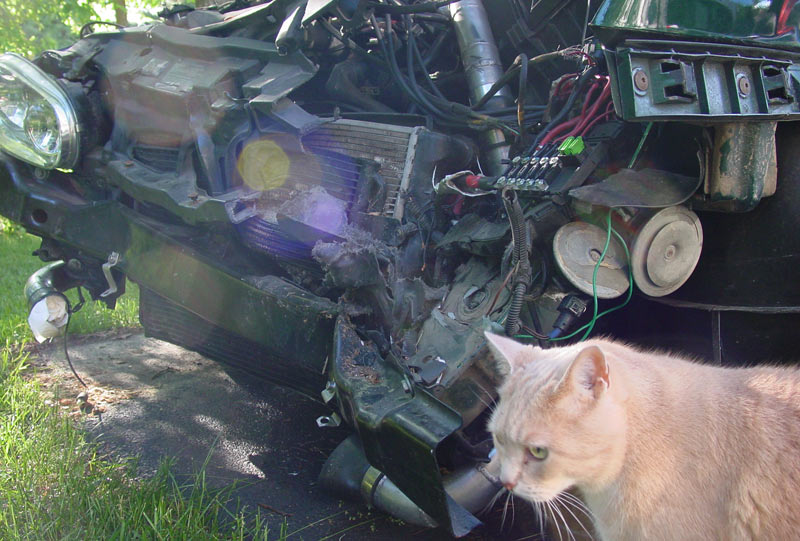
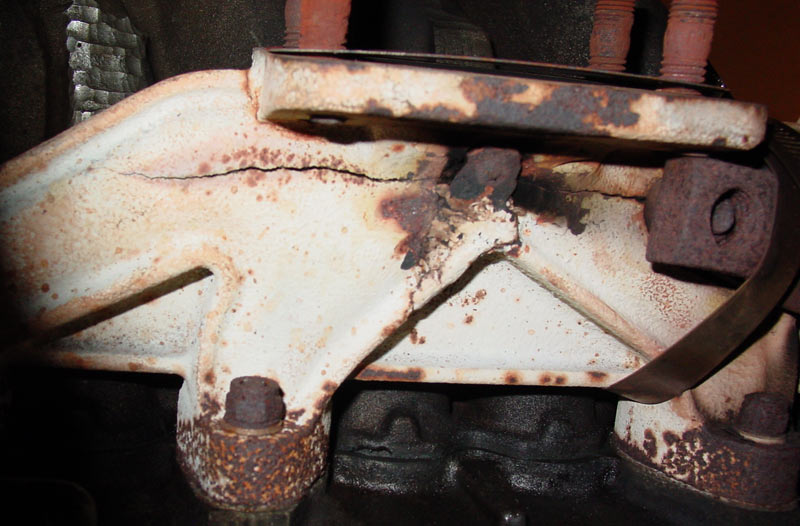
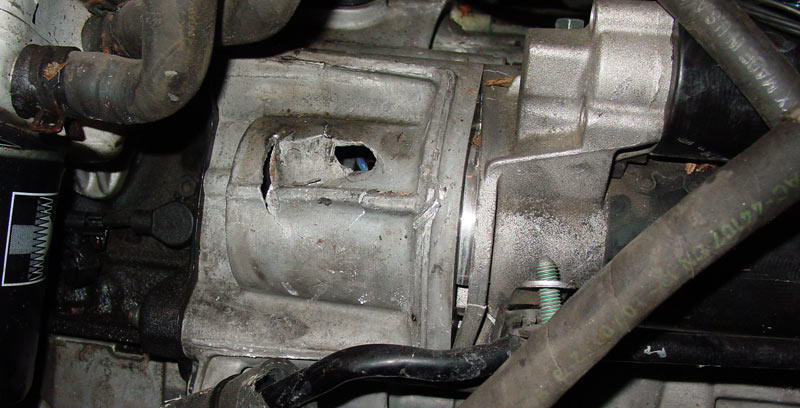
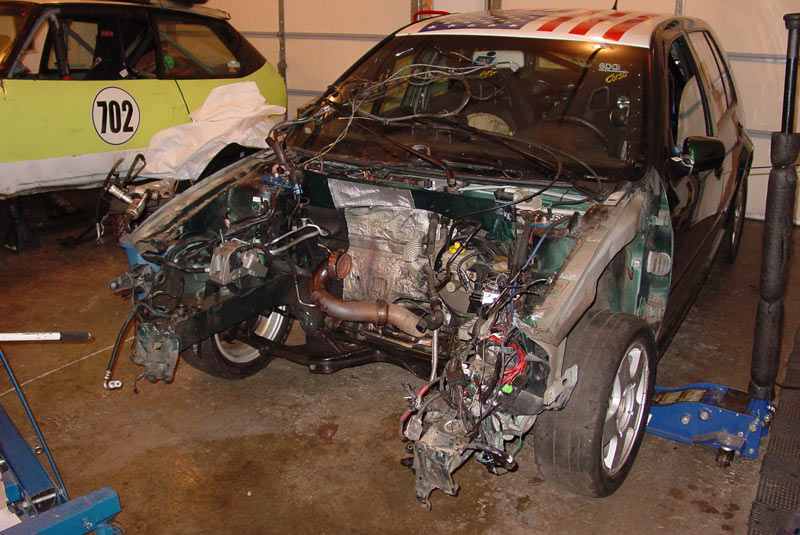
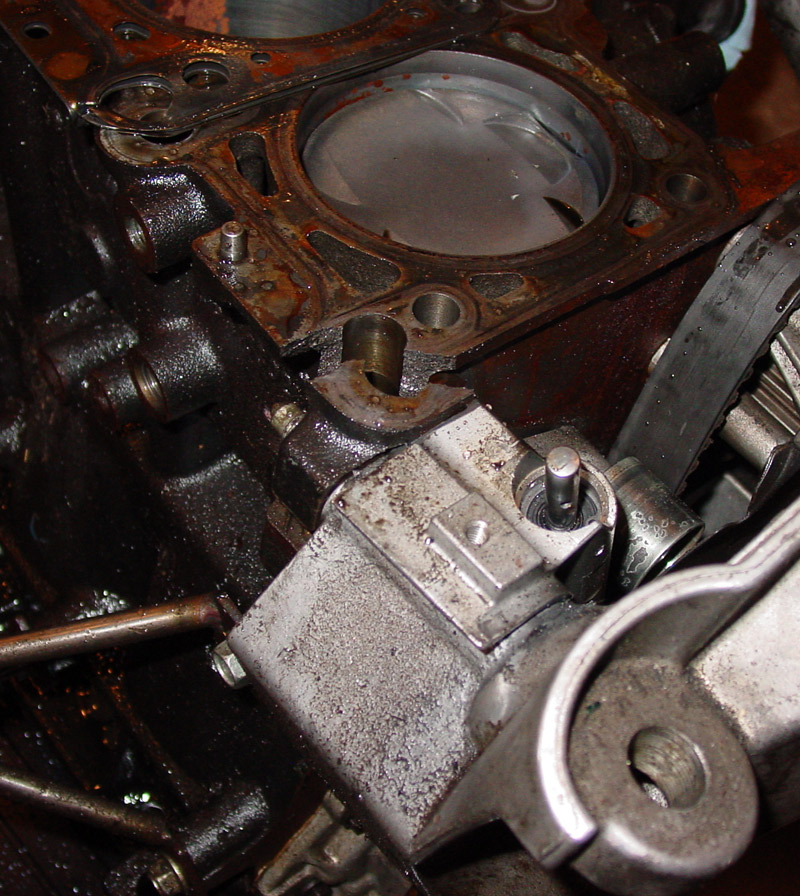
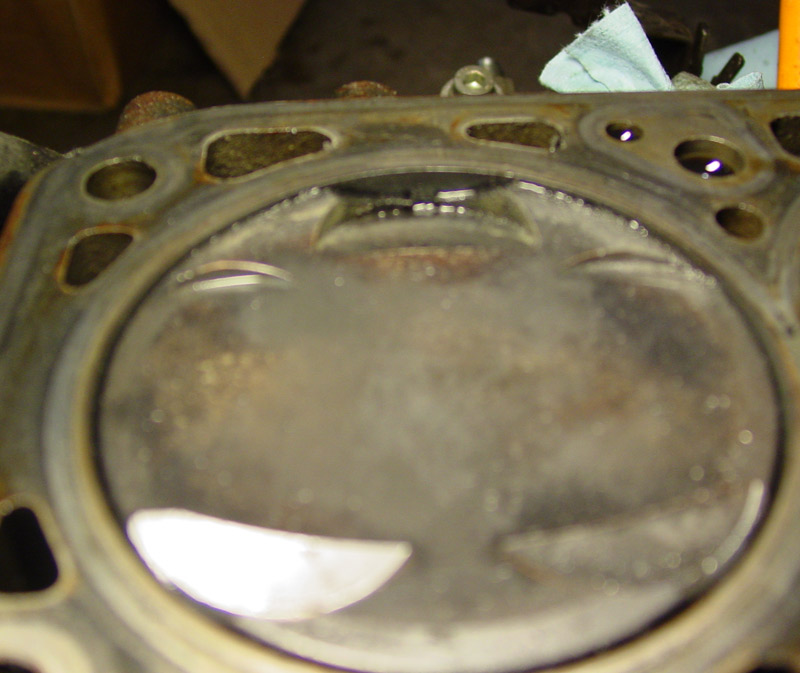
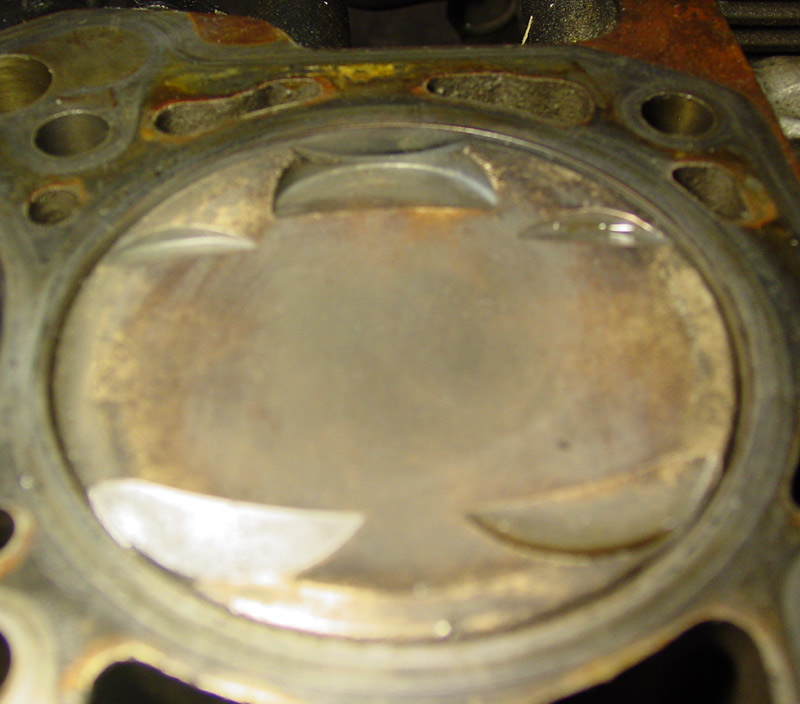
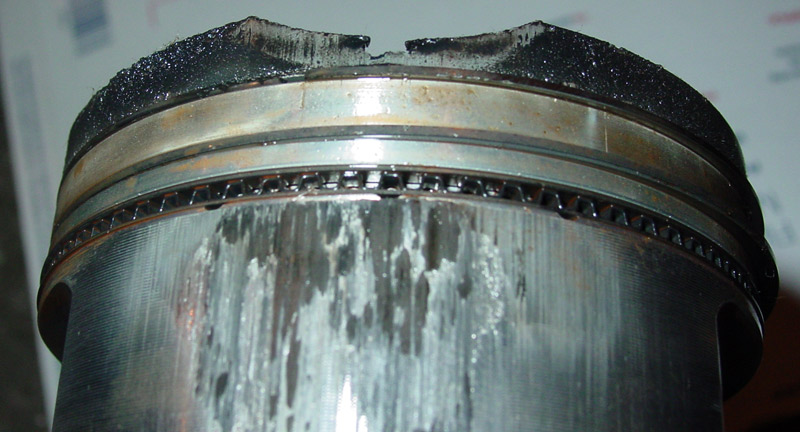
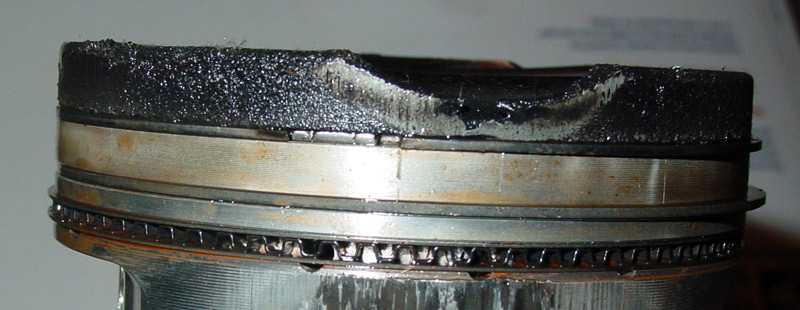
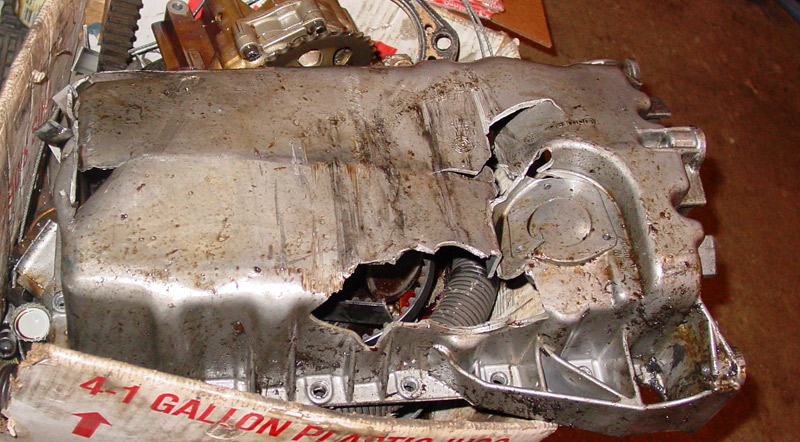
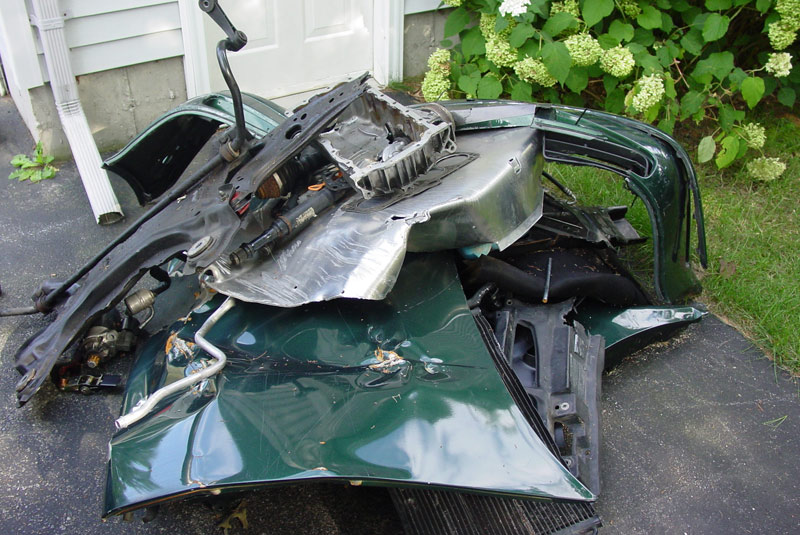
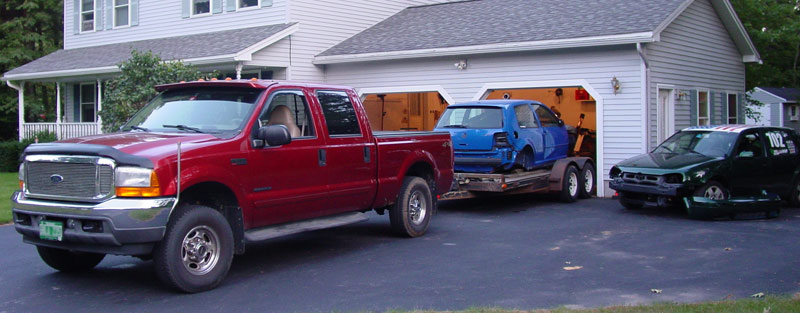
The bad news is that the Cabriolet had an internal engine issue (that is what is sounds like) that sidelined it on I-89 this morning and required a flatbed. I wasn't planning on working on that again under AFTER the Jetta's water pump leak was fixed.

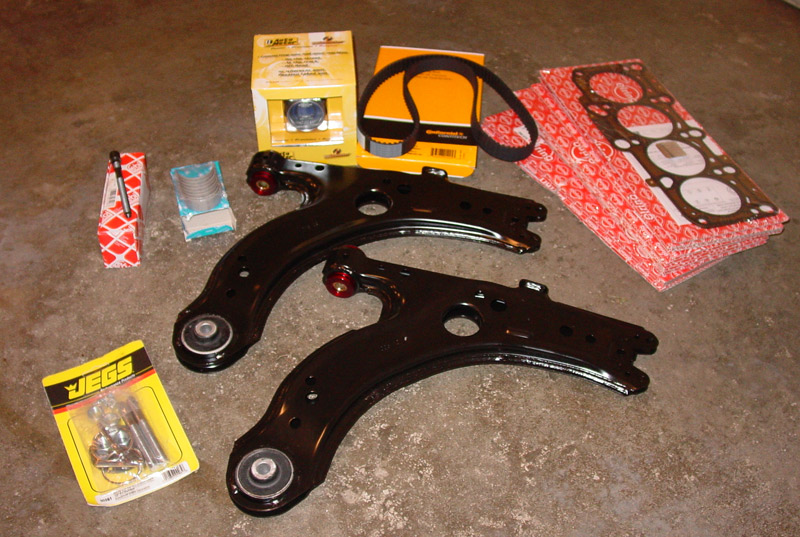
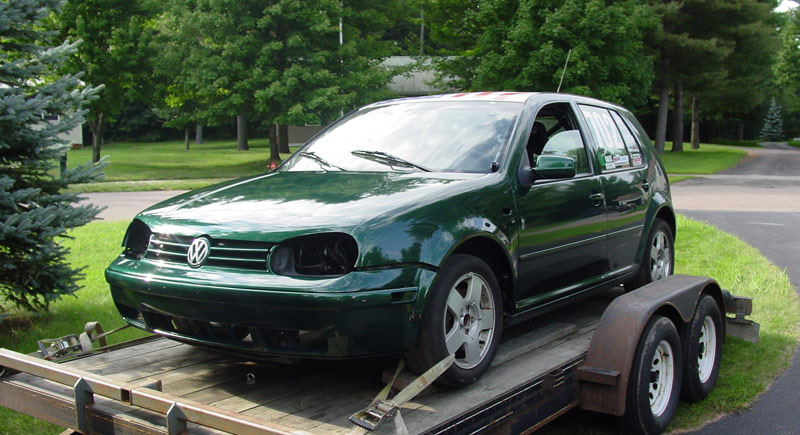
The Jetta just got advanced up the project food chain to #2 (#1 will be the 30 minutes spent on the turbo Rabbit to see if the battery or alternator is realted to the running issue) so that I can start driving the Jetta to work again.

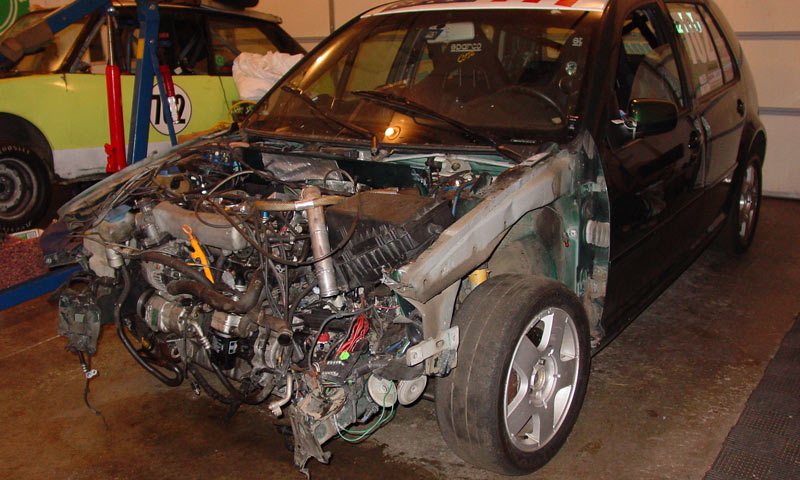
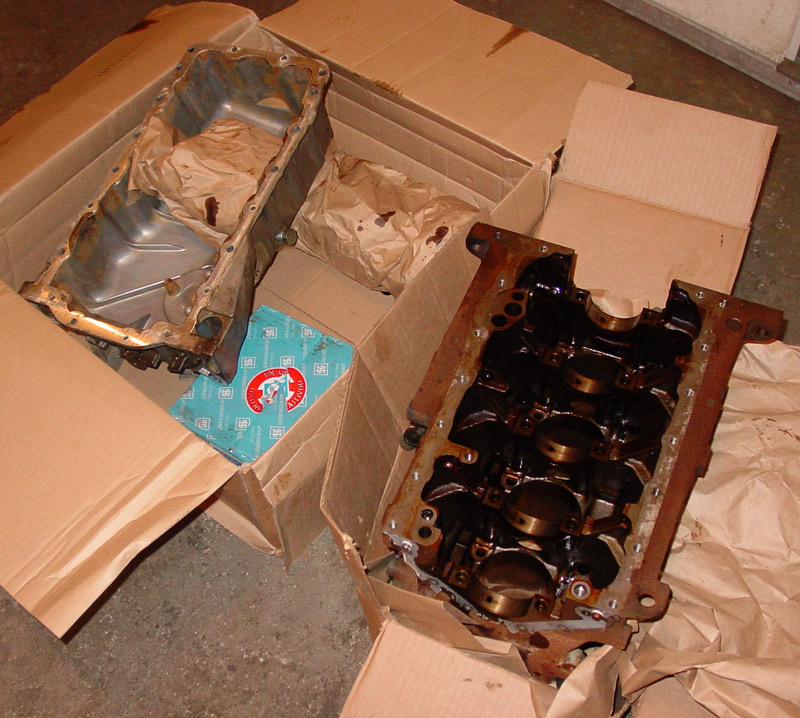
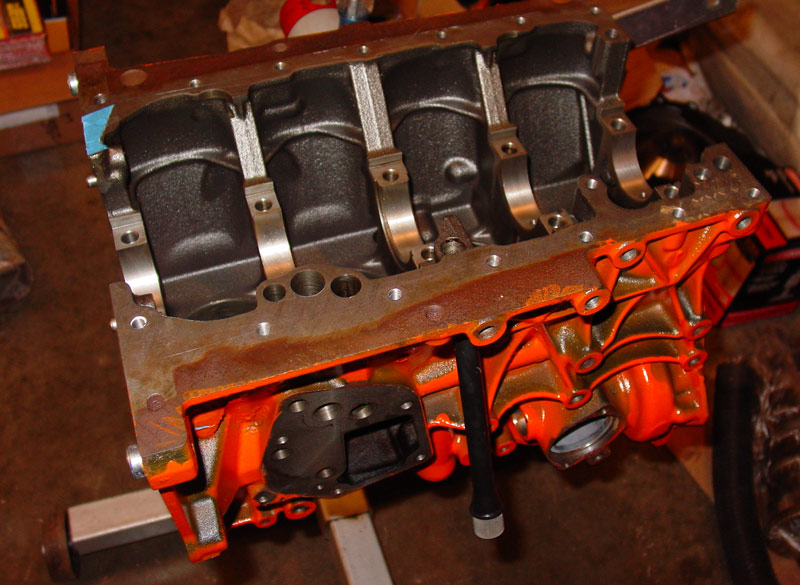
Then, the Cabriolet will get the complete make-over... (most important being the engine mang) remove the Mega-crap engine management and replace with VEMS, install the 5-speed with LSD, hydro clutch (reverse lights will now work!), better intercooler and intercooler piping, clean up the crappy under hood wiring job, hook up the power seats and correct the mounting issues (seats are very loose in the tracks), raise the shifter up 6 inches so that the seat can go forward and not interfere with going into reverse when Julie is driving, alignment, wheel balance, etc. It will be a fun car to drive when I am done.

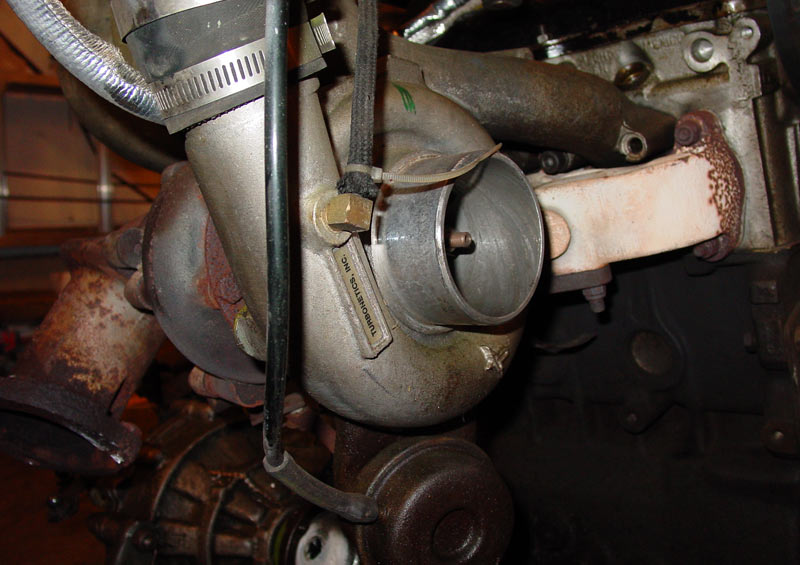
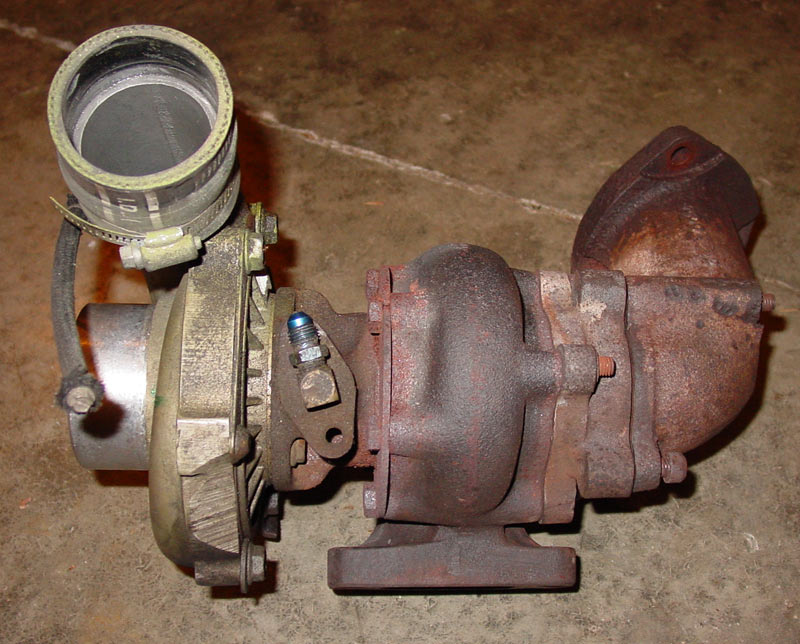
I'm actually looking forward to doing the Cabriolet, but I was hoping it would be a late June project and that I would be able to drive it the whole time while I'm building a different engine for it (as I have other blocks, good pistons, etc.). Hmmmm, different turbo? Maybe.... GT2871R? Hmmm..... I think the car is T3/T4 so I will figure out what I want to do later.

Too many projects and not enough time (my next free weekend is July 24th).

Rabbit Farmer
Rabbit Farmer New Reader
2/22/19 9:15 p.m.

May 23, 2010


----I'll stop here for tonight on catching up GRM ----

vwcorvette
vwcorvette SuperDork
2/22/19 9:32 p.m.

Bout time you got on this board. Welcome. Where's the Scirocco. Must see Scirocco. Needs Scirocco. 

Rabbit Farmer
Rabbit Farmer New Reader
2/22/19 10:17 p.m.
vwcorvette said:

Bout time you got on this board. Welcome. Where's the Scirocco. Must see Scirocco. Needs Scirocco. 

Geo

I have been here, just not in the projects section.  Lurking in the background.

Scirocco updates coming...

rattfink81
rattfink81 New Reader
2/23/19 1:07 p.m.

That was a lot of reading! But worth it(the pictures helped) looking forward to more updates. 

Captain Nemo
Captain Nemo New Reader
2/23/19 4:43 p.m.

A good story always needs a cliffhanger. Wonderfully written, and you have some slick cars

Rabbit Farmer
Rabbit Farmer New Reader
2/23/19 8:15 p.m.

Unsure how to embedded videos without them taking up the whole window. So... you get a link.

Ascutney #1 hillclimb (2010) Video

June 8, 2010

Well, I'm a glutton for punishment, a complete idiot, goal oriented, project minded, won't give up that easy, or can’t think of a better way to get back into racing this summer.  I would go with idiot.

Turbo Rabbit (aka Tub II)…. Review of the wiring harness and components points to the HPV-1 board being bad.  It is not communicating advance to the engine (hence no power or quick revving).  Replacement for the actual HPV-1 board isn’t possible (unless I find a used one online) as they have upgraded a bit since 1990’s.  It was also noted that the ‘Magic Box’ only runs the extra injector based on boost levels.  That’s it!

Sooooo…. I believe that we are going to install VEMS to get it working.  Jason Russell (VEMS) needs to bench test the Magic Box to see what boost levels prompts the injector to fire to tie it into the VEMS setup.  The VEMS ECU will work with my future plans to build a hillclimb Rabbit (1.8T with 6-speed with ‘crazy high’ final… right now 4.25 with the current Rabbit 5-speed)

Turbo Cabriolet (aka Chick Car)…. I need to fix the engine (unsure of the issue right now) to get it running and then we are going with VEMS.  Are you noticing a theme?  Jason Russell to do the install and then off to KTR in Ayer, MA for Marc Swanson to tune (someone I’m used to working with and who Jason recommends for the tune).

Golf 1.8T (aka Tree 2, Door 0)…. I will know tonight if I’m going to fix it.  I have found a donor car already that I will pick up next week if I feel that I can fix the current car.  Buying a complete car, using what I need, selling the rest, I think I will be ahead of the game.  I hope….

I won’t give up that easy!!!!!

Then, over the winter…. Build a second hillclimb Rabbit to replace the Tub II and either sell the Golf and start my AWD project car or just leave it along for another season.  My goal for the next project car is 2 years from now. (<-- 2019 newsflash... this was a pipe dream)


Rabbit Farmer
Rabbit Farmer New Reader
2/23/19 8:18 p.m.

I tested out some other items today on the turbo Rabbit.

I added another ground wire to the coils.  No change in performance.  Still not revving up really quickly.  Don Taylor mentioned that there was a knock sensor on the car that acted up before (he remembers helping the previous owner with it before).... I couldn't find one.  Perhaps buried on the back side of the block where I can't see it.  I noticed that after I revved up the car for the video clip that my eyes were burning.  Hmmmm, that isn't normal.  Must be an exhaust leak.  Got me thinking that the leak could be BEFORE the turbo.  More investigation on that, I hope, this week.   

[youtube]http://www.youtube.com/watch?v=yEWDRDgsMYs[/youtube]

Chris Putzier (Jct Motorsports) came over tonight to determine if the front end can be straightened out.  Good news!  So, I'm removing everything under the hood; getting a parts car to replace the sub-frame, cross beam, body panels (still need one fender), etc.; getting it to him in about 3+ weeks for the straightening and possibly painting again at that point.  In the interim, I need to determine what engine/transmission parts need to be replaced/fixed/rebuilt.  Off to Joey Kale's (he doesn't know it yet) for the IC piping and some other stuff.  I need to have my silver rims painted black to match the (now) 3 rim set.  She will be back on the road.

Hood pins did their jobs....

Front end is a bit bent.  I already have replacement A/C condenser and radiator.

The big part of the damage is the frame rail.

Hmmm..... hoping the engine is okay.  I have spare blocks.

Bent control arm and axle.  Shiny axle is from it hitting the unibody as a drove it down the hill to the trailer (thud-thud-thud)

More front end.... looks like the starter is damaged.  Surprisingly, there seems to be zero damage to the intercooler!

Vern, again, involved with the cars....

Rabbit Farmer
Rabbit Farmer New Reader
2/23/19 8:18 p.m.

June 13, 2010

Donor car.... long drive to upstate NY from RI (was down in MA for the Eagles concert for 5 hours in the pouring rain... had a good time as we had full rain gear) and then back up to VT.  Left RI at 7AM on Sunday to arrive at car by 2PM.  Back on the road by 4PM to arrive at home in VT by 10PMish.  Whew.

The donor car (only had cell phone for photo in tow):

I have seen pictures of these before... first time in person.  Pretty sweet!

Rabbit Farmer
Rabbit Farmer New Reader
2/23/19 8:20 p.m.

July 6, 2010

Slow progress, but progress none-the-less.  Went to the movie A-Team tonight.  It was non-stop action, but if you got at least a C in physics, you will have a lot of 'yeah, right!' scenes.

Anyway, goal tonight (with the limited amount I had after the movie) was to get everything 100% disconnected from the engine so that I could drop it out on Wednesday night.  I ran into a couple of interesting things.

1. I have no idea what the clutch cable is from.  The end on the transmission arm is a large metal ball that doesn't fit through the hole in the rectangular cup that goes against the rubber fitting.  Again, I'm sure there is a technical name for the part.  I then decided to remove it from the end of the clutch pedal instead.... hmmm, that end was a much smaller than stock sized metal end that required the removal of the clutch pedal to be able to swing it off the end.

2.  Have you ever seen square nuts on a car.  Yep, first time for me also.  There were square nuts that connected the flex joint (ball joint style.... non-VW) between the downpipe on the turbo (part of the turbo) and the actual exhaust pipe.  Rusty and hard to remove... ended up cutting one out.

3. Dang... it was hot and humid today.

Whew, I only need to drain the power steering and the engine comes out on Wednesday night.

I was almost distracted with the Golf that was sitting next to the Rabbit.... so tempting to dive into that tonight and remove the entire front end.  But the CFO is coming up from DC on Wednesday so an early(ier) night to bed is a much better idea.

Some photos for those of you that are forum-ADD (show me the pictures, man; who reads all this text crap?)

Wishing there was more power in the free AC unit.... even my attempt at Spinal Tap on the volume didn't help.  Guess I should get a new unit in the fall when they are practically giving them away.

Two of the project cars are now sharing space in the garage..... say hello to my crack.

For those of you who are electronically motivated (e.g. the opposite of me), here is the inside of the "Magic Box" that is used to fire the extra injector mounted just slightly before the throttle body.

Rabbit Farmer
Rabbit Farmer New Reader
2/23/19 8:20 p.m.

Engine is out.  Turbo seems to have a lot of play in it.  Exhaust manifold has cracks all over it; cracks that have been around for years as the previous owner tried to reinforce it with a large metal hose clamp to keep it all together.  We'll see what we can weld on it to make it less "cracky".  Also going to bring the turbo to the hillclimb this weekend to get folks' opinion on the condition of the turbo.

Blah-blah-blah... here's some pictures.

Laying underneath the car..... I thought it was an interesting view as most Rabbits do not look like this.  The only thing that is underneath the car along the floor or tunnel are brake lines going to the rear; everything else runs inside the car.

How is this for the rear motor/transmission mount?  Beats a poly bushing handsdown!

Sometimes out the bottom is easier.....

Interesting.... this is the line that goes to the waste gate... it isn't a hole in the line, it is actually an indention.  I wonder how that worked when trying to dial in the boost.  The car currently runs at 28psi. (when it ran properly)

The Turbonetics turbo....

Say no to crack.  The nut and hose clamp seems to be present to help keep the manifold together.

Rabbit Farmer
Rabbit Farmer New Reader
2/23/19 8:21 p.m.

July 11, 2010

The turbo Rabbit is going to cost more that $300 as the turbo needs to be repaired.  Play in shaft is about a 1/2 inch.  Gotta figure out if I want to fix the turbo Rabbit or sell everything and start my next Rabbit project sooner instead of later.

Spent the entire weekend working at the Okemo I hillclimb (lots of video and photos coming).  A bit tired when I got home tonight so I only spent 1.5 hours start to finish working on the car.

Pretty straight forward... remove all the body panels, A/C condenser, and radiator tonight.  Remove engine, etc. on Monday night and get the car to the frame machine by Thursday.

Car before... notice the proximity of the driver's side frame rail to the ground.

The condenser and radiator were pushed against the starter.

Overall frontal damage...

Hmmmm...... getting a little worried.

Even the PS pump took a hit.

Hard to tell in this picture, but I put the floor jack underneath the framerail and pushed it back closer to where it belongs.  I mainly did this to make it easier to put it on the trailer.
Finished for tonight.

Rabbit Farmer
Rabbit Farmer New Reader
2/23/19 8:22 p.m.

July 13, 2010

Power was out last night so I wasn't able to do any work.  Tonight involved a long day at work, mowed 1/2 the lawn, ate dinner with my lovely wife so that she can remember what I look like (for better or worse, they say), and then removed the engine.  (simple stuff like that)

Anyway, I just need to swap out complete sub-frame, passenger side control arm, and tie rod and it will be ready for the frame machine.

On with the pictures!

Removing out the front of the car is actually quite easy.  Perhaps I'll figure out a way to install the front end wherein parts come off really easily.

And more carnage... driver's side mount.

Passenger side mount....

Dog bone mount....

Bent passenger side axle...

Bent passenger side control arm and tie rod...  Sub-frame is also far from pretty.

The engine.  I have a spare block that I hope to be able to transfer the rods and pistons and everything will be good.  I also plan to install a functioning A/C this time around.

Done! (well, for tonight anyway)

Rabbit Farmer
Rabbit Farmer New Reader
2/23/19 8:23 p.m.

July 19, 2010

And some progress.....

Front end of the Golf is 100% apart in terms of the frame rails and body work.  I have not touched the subframe and control arms yet... I'm hoping to be able to wait on the swap to the new parts.

For sale... cheap.  One skid plate.

Frontend off the 20AE.  I removed the AC condenser and radiator.

About to wash the fender, hood, front bumper/rub strip, grill, and replacement door (from the last shell that I stripped for the roof).  I had to purchase one fender new (yep, from the Ford dealership)

Rabbit Farmer
Rabbit Farmer New Reader
2/23/19 8:24 p.m.

July 27, 2010

I am pooped....

Well, the Okemo hillclimb isn't looking good as I am now at the mercy of the local machine shop.  I have no idea what his schedule is, but experience shows that 1-2 weeks is the minimum.  I want to get the block, crank, end caps, and pan cleaned and the block decked.  I was tempted to put it together "as is" but with this much time into it, I'm not cutting corners just so I have to do it all over again.

Car is at Junction Motorsports (Chris Putzier) to get the front end straightened out and painted.  Since I was pushing to be ready for Okemo on August 7-8, 2010, I told him to get it straightened out so that I could put it together and race it, even with all the multi-colored parts.  Seems like painting it now is the way to go.  (sigh)

Presents arrived.  I have been ordering stuff based on my original build receipts.  I don't recall why I got certain things from FastAddiciton.com and others from axismotorsport.com. (and then others directly from Autosport, 034, Jegs, etc.)

Regardless... the toys.  Timing belt, rod bearings, head bolts, hood pins, new control arms with poly bushings already installed (surprising cheap as compared to buying just the bushing and then having them installed), Autometer A/F gauge (replaced under warranty), and 14 head gaskets.  Huh?  Should have been 1.  Funny thing is that Joe (Axismotorsport) was telling me that he accidentally ordered 44 instead of 4 of something else recently.  His new nemesis is the number 4 key on his computer.

I was looking at the timing belt tensioner and trying to figure out why the hydro pushrod was not centered where it should be on the swing arm.  A "slight" crack was discovered to be the culprit.

And a questionable part.  The #4 piston looks like it experienced some pre-detonation.  The edges are a little rough (porous) and one noticeable flaw is the very edge of the piston on one of the intake valve cutouts.  Is it enough to scrap the piston?  (last I checked, they weren't selling single pistons).  Also pictured is the perfect #1 (same as #2 and #3)

Engine block completely disassembled and boxed up with the crank, oil pan, end caps, etc.

Rabbit Farmer
Rabbit Farmer New Reader
2/23/19 8:25 p.m.

July 27, 2010

Some progress.... with most goals obtained tonight.

Spent a lot longer at an organizational meeting for Wolfsgart tonight and didn't get started on the car until 9ish.

My goals:
Disassemble old Golf race engine to get the pistons/rods out and scrap the rest
Clean up Julie's half of the garage in preparation for cleaning and preparing the 20AE engine for the Cabriolet
Remove the engine from the 20AE
Put the Cabriolet in the garage

Three out of four ain't bad.  I didn't bother moving the Cabriolet inside as it was late.

Close up of the questionable piston.  She is a goner.  It looks like the top compression ring failed (second image) and started to breakdown the piston.


And all the other pistons and rods are perfect.... doh!


Engine is out and ready for disassembly to match the same setup as what is currently in the Cabriolet.


The dreaded aluminum oil pan.  Even it is was all steal or the hybrid pan (metal bottom with aluminum top) it would not have survived.  On the other hand, it might have protected the oil pump (seems to be the only damage).


Soooooo tempting, but I didn't want another late late late night.

I don't think it will wash out.  Oh well... can't keep things forever.

Rabbit Farmer
Rabbit Farmer New Reader
2/23/19 8:26 p.m.

July 28, 2010

Not happy with the Cabriolet.  I figured out that the timing belt became loose (Rabbit style tensioner) and crashed cylinder #1 valves.  Figured I would remove the head to see what I was dealing with... either swap just the head (easier); or the head and pistons; or worse case scenario, the whole engine from the 20AE.  I plan to rebuild 100% over the winter to make it all pretty.  Well, I cannot remove the valve cover without removing the turbo.  @#%@@#$@#  I even tried removing the long studs in the back of the valve cover to no avail.  Trying to remove the four bolts that hold the turbo to the manifold, but that is very frustrating also.

Giving up for the night... planning to drive the Jetta to Wolfsgart.  Bah!

Rabbit Farmer
Rabbit Farmer New Reader
2/23/19 8:26 p.m.

Aug 14, 2010

From a large pile of twisted metal....

She's home! (panels are just hanging on the car)

84FSP
84FSP SuperDork
2/23/19 9:31 p.m.

Looking good - great read sir.

Rabbit Farmer
Rabbit Farmer New Reader
2/24/19 8:37 p.m.

Aug 16, 2010

Removing the rear brakes from the donor car turned out to be extremely laborious.  (ack!)   Almost done stripping the parts car so I can bring it to the scrap yard on Friday.... I need the garage space back to start putting the Golf back together.  Painted the block.  Cleaned up the garage.  Called it a night at 11:30.  Noticed my white ex-white shirt was closer to the color of my black pants... did laundry.  (I'm so domesticated)  Being stupid uploading pictures for you to stare at while you are at work instead of going to bed. (moron!)

Some assembly required...... okay, lots of assembly!!!!

Rabbit Farmer
Rabbit Farmer New Reader
2/24/19 8:37 p.m.

Aug 23, 2010

A bunch of non-exciting pictures of non-exciting stuff that actually took me a long time to do, BUT was great progress towards the goal of getting the car together.

Think I have had a lot of different projects over the years?  Some of the random scrap metal parts that I threw in the parts car before it went to the yard... got $100 for the scrap and $50 for the cat.

Loading the car... made ramp out of landscaping timber + engine lift + come-a-long to get the car on the trailer.  The trailer only had an inch on either side when backing in the garage (no assistance from wife... I know better).  Whew!

Out with the old....

On my way back from the scrap yard I stopped at a local side-of-the-road snack bar to have a couple of Michigans.  For those of you from Rhode Island, I think this is an attempt (and not a good one... they didn't even have celery salt) at New York System Wieners.  My favorite being Olneyville, School Street (I think) in Woonsocket, and Park Ave in Cranston.  Link for those who don't know what they are.... http://www.olneyvillenewyorksystem.com/sauce.html

And in with the new....  plus all the parts that I am selling.

Okay, the good news is that I am now putting the car TOGETHER!!!!!!  My goal tonight was to remove the old and install the new; rear shocks, front control arms with ball joints, and stainless steal braided brake lines all around.  The rear lines provided difficult to remove just because of the space limitations around the parts.  I managed to get most of it done, but stopped with the front brake lines as I needed new metal o-rings.  Progress.

Rabbit Farmer
Rabbit Farmer New Reader
2/24/19 8:38 p.m.

Aug 24, 2010

Thanks to Pete (Lewis... uh, Volkswagen of South Burlington), the left front hard brakeline will be in on Friday; that is the last part I need for the car to be 100% on the ground.

So.... since I couldn't work on the car (read: didn't feel like installing the A/C tubing or messing with the damaged wiring harness), I spent about 1.5 hours with the engine.  

If you have been inside a Rabbit engine.... just add some oil squirters and call it the same.  Some pictures of the assembly for those of you that haven't seen the inside of an engine.  (I gotta make sure those crank caps are oriented right before I bolt it together... something is bothering me about the orientation)

Start of tonight's project....

The oil squirters...

Yes, I did install the thrust bearings (not pictured)

I'm famous!

The new JE pistons for Axismotorsport.com (Joe) (close or at normal compression ratio.... I think that is 9:1 or 9.5:1)

1 2 3 4

You'll need to log in to post.

Our Preferred Partners
0Yg4BwUWFJdJ7ER7pA1WZPYS2p6cv6XARH7dcuRXv6pCyHznZqCZUXjiIcFi7H4o