2 3 4 5 6
Rabbit Farmer
Rabbit Farmer New Reader
2/24/19 9:05 p.m.

Aug 04, 2011

Well it has been a while since I posted… been busy with the cars as have some other people.

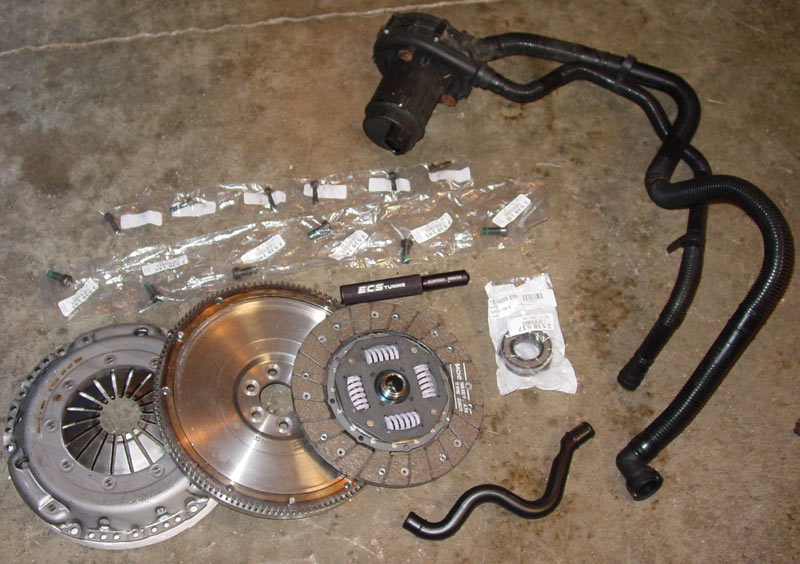
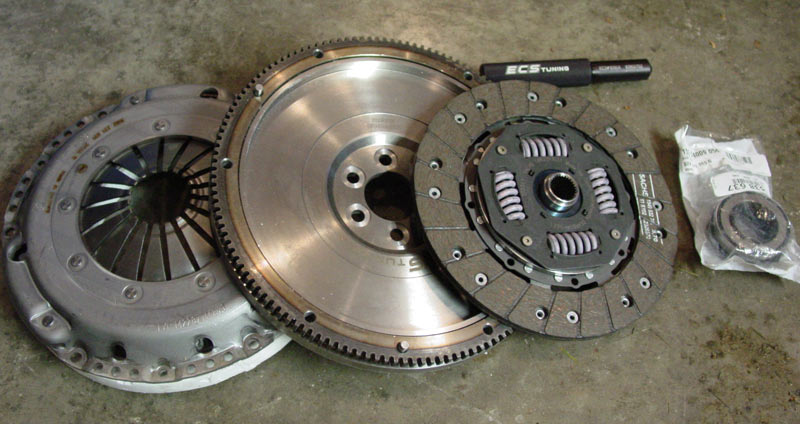
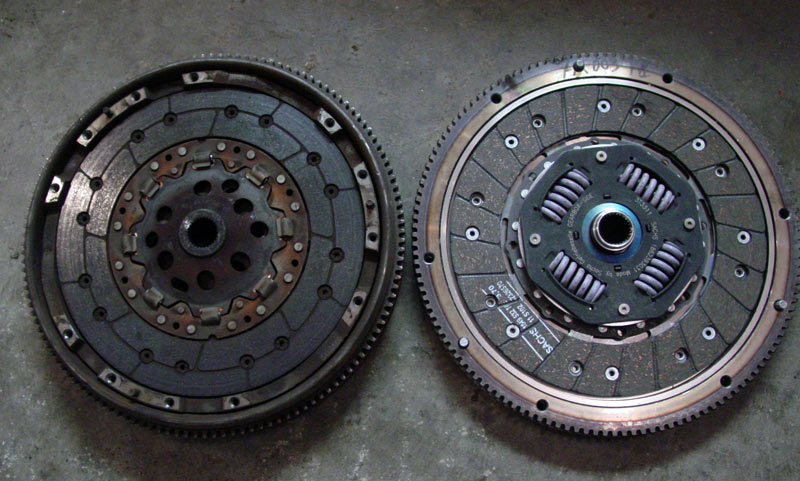
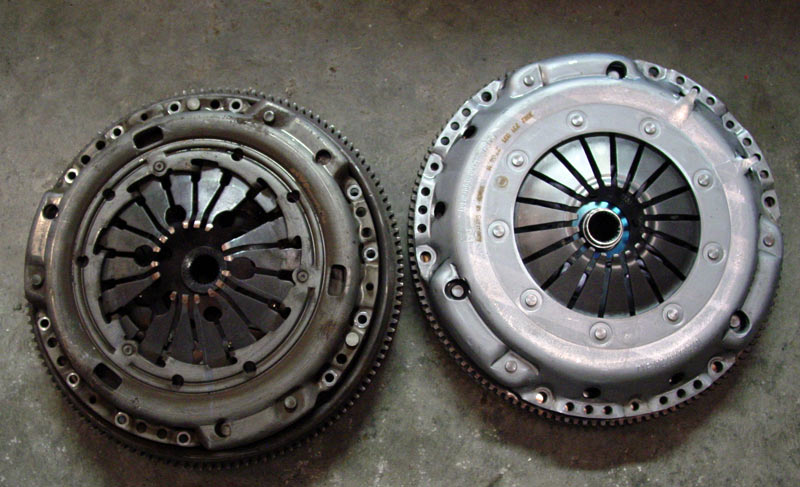
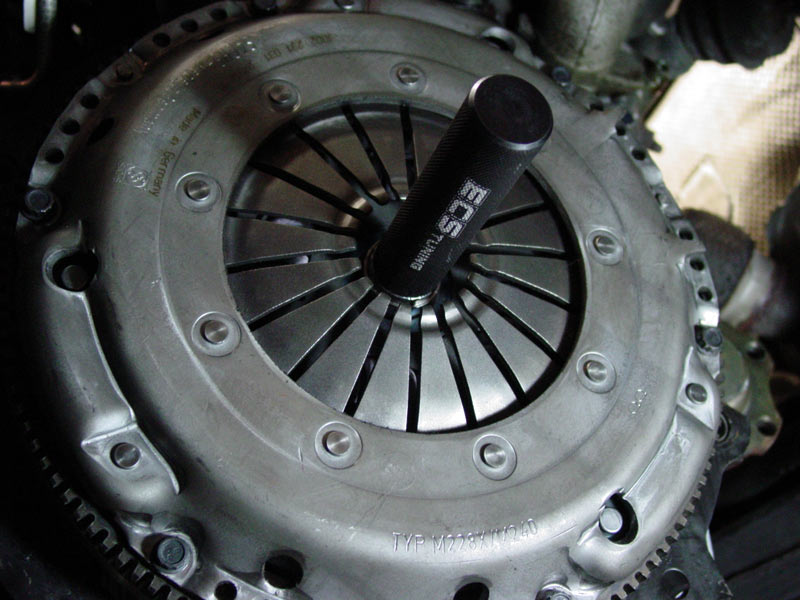
I need to back up a little to bring you up to speed with the hydraulic clutch setup.  I finally received the photos so I could share the clutch fabrication pictorial with you.

Since I cannot fabricate to save a sheep from a redneck farmer, I have to rely on a number of friends that are really good at what they do (enough so they have their own business); chicken vs. the egg… I knew them long before I let them touch my car.

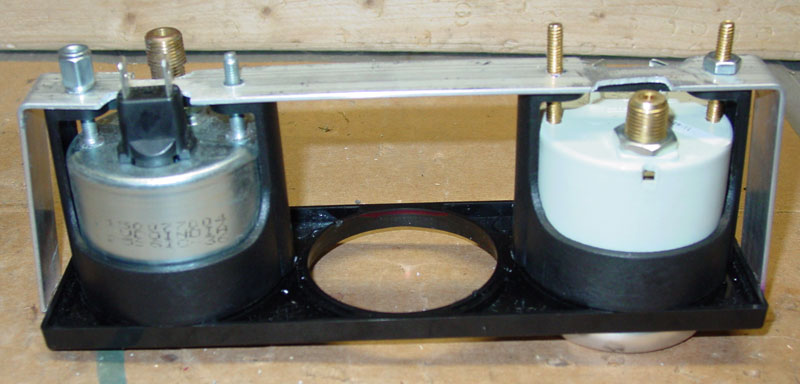
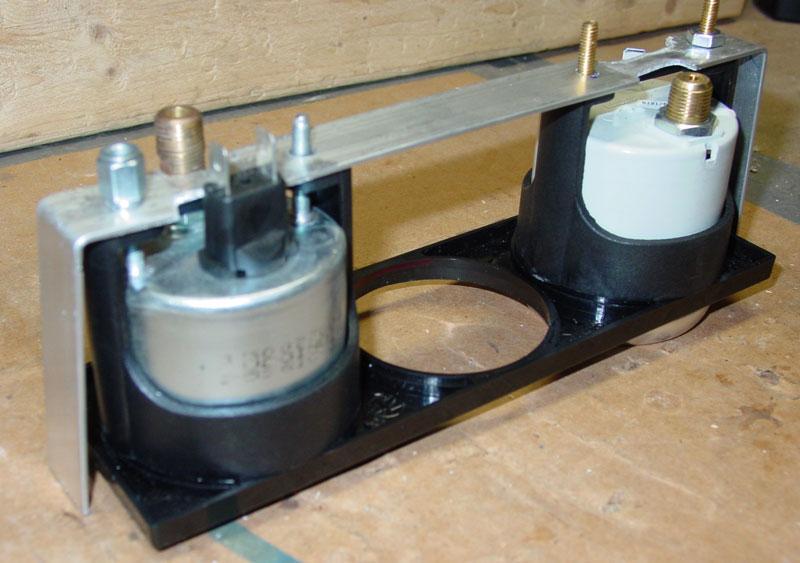
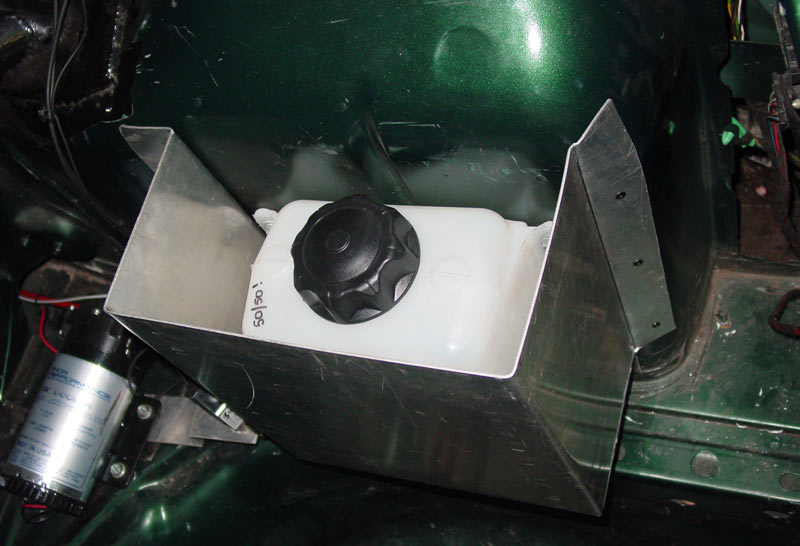
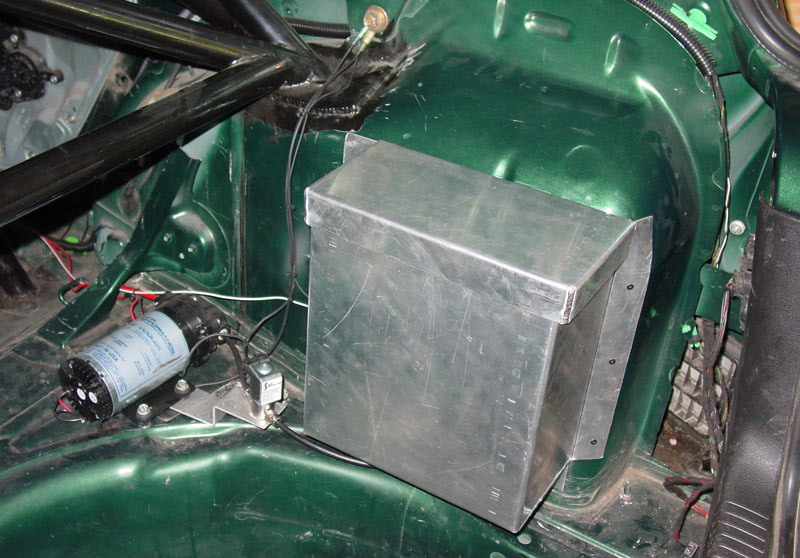
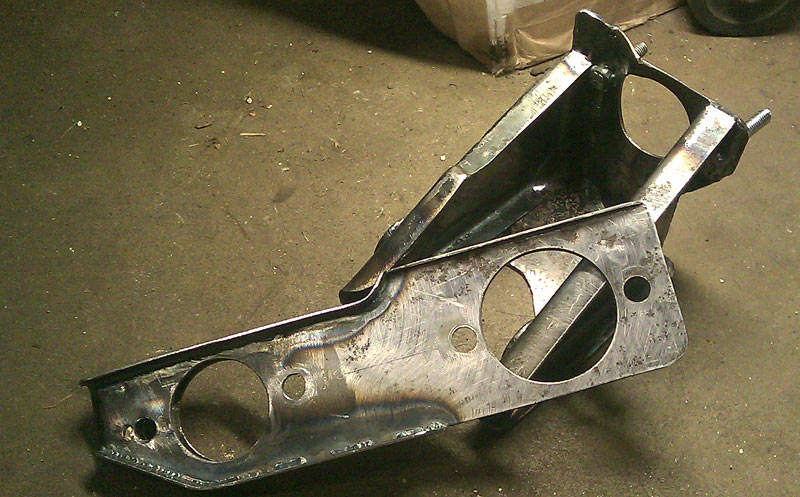
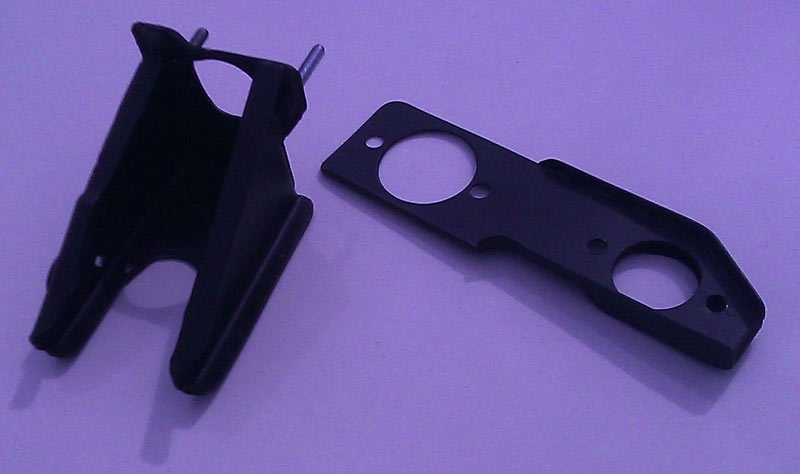
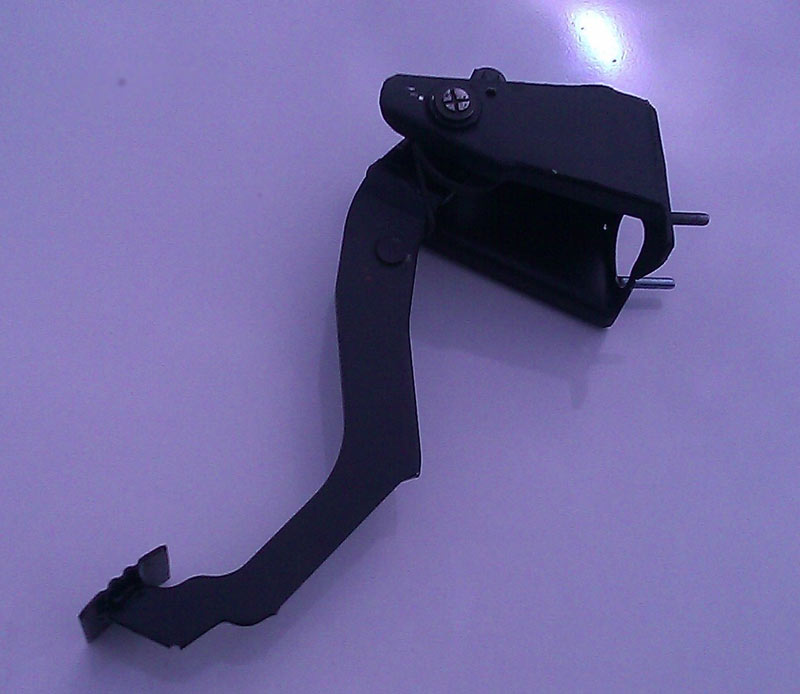
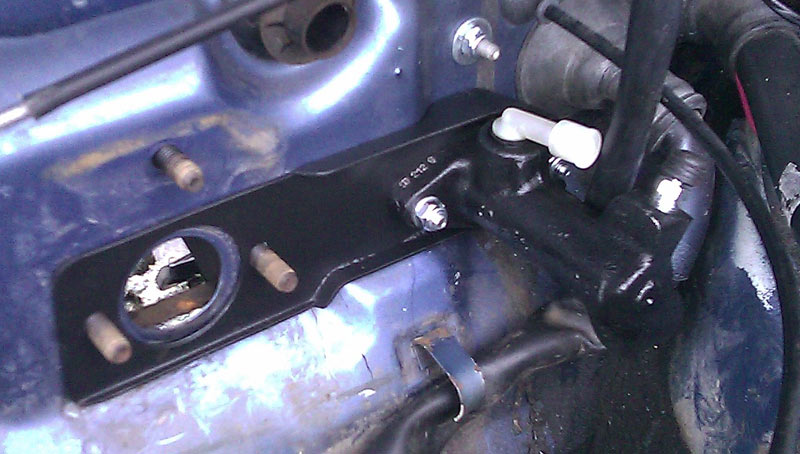
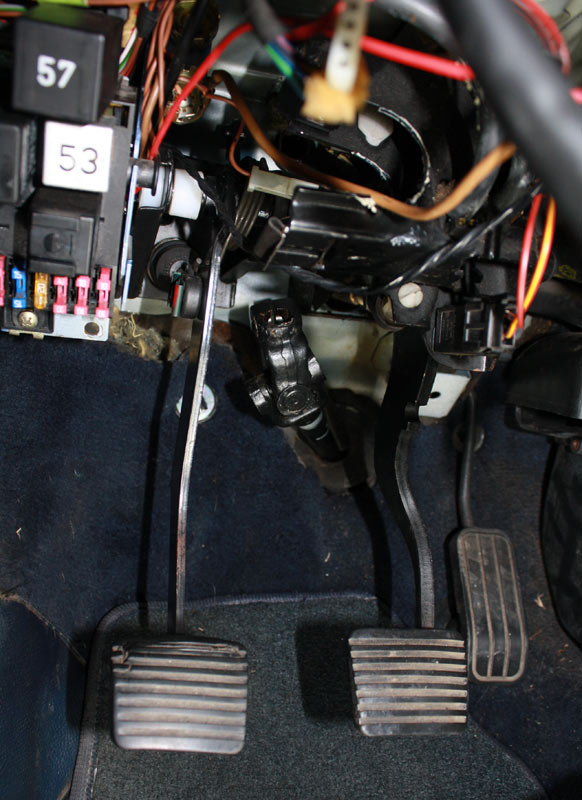
Cyrus (male prostitute and expert cat herder) made custom brackets and clutch pedal so that we could enjoy a hydraulic clutch engagerator as opposed to the mechanical hard-to-push-erator.  All custom, powder coated, etc.  Used a Corrdado brake reservoir.

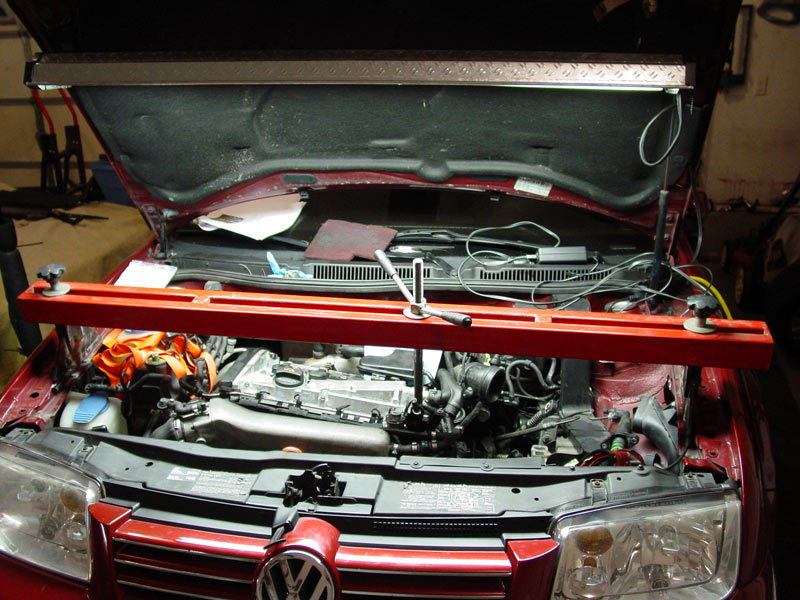
Well, we are all caught up.  Car back from Cyrus’, engine in the car (see previous posts), and then the story continues…

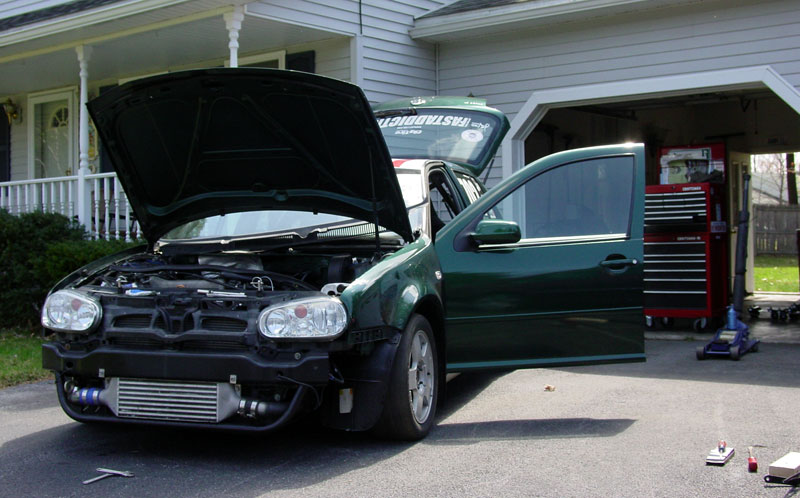
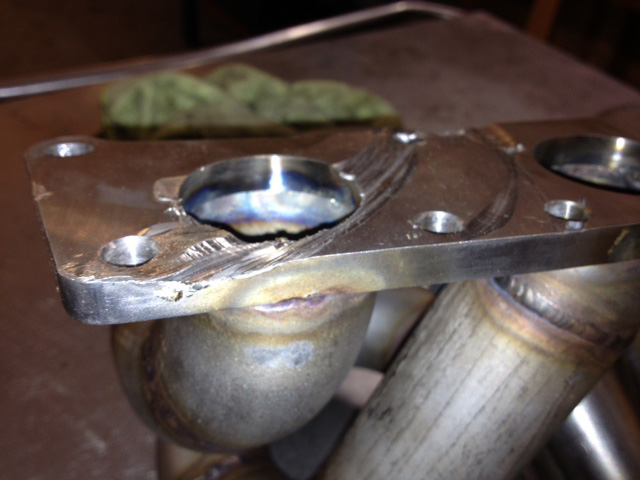
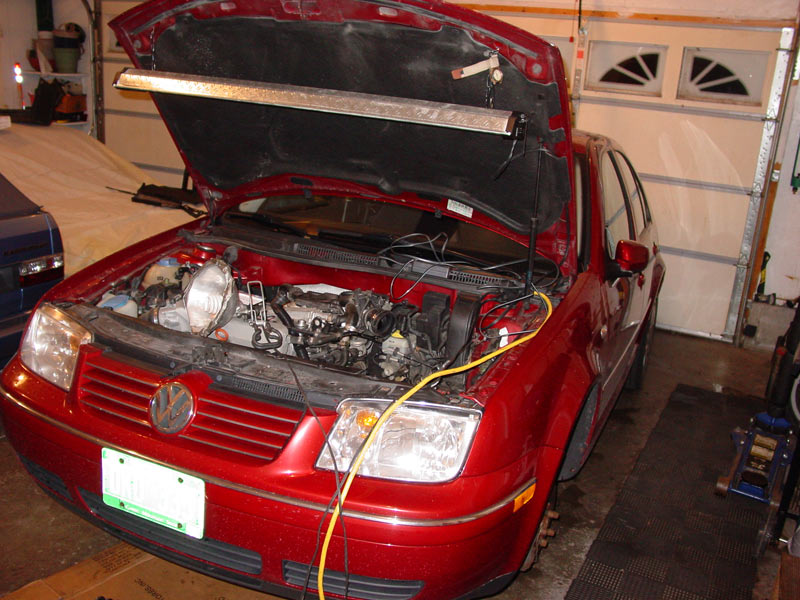
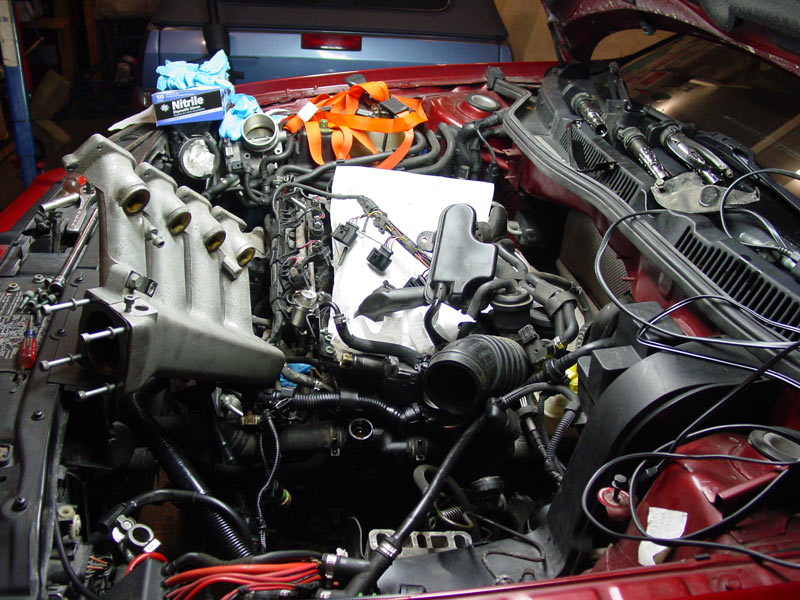
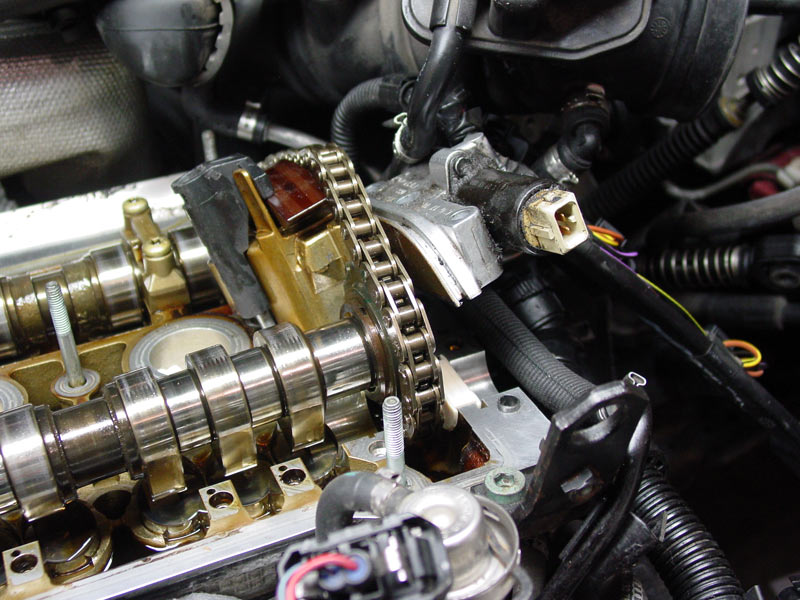
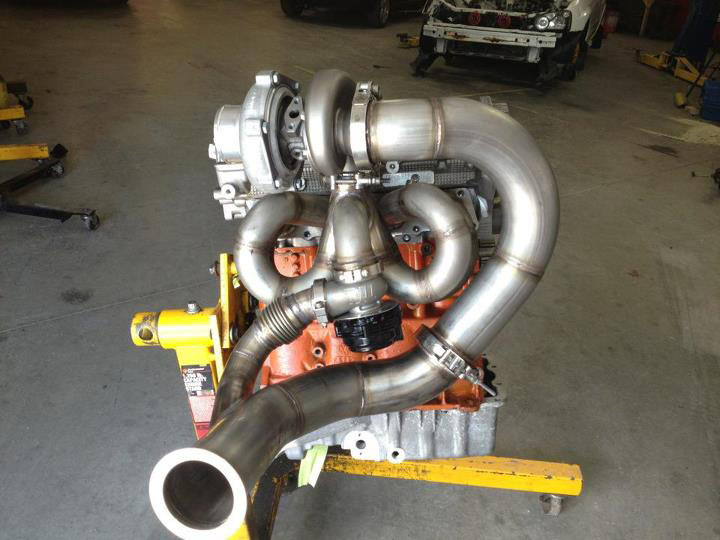
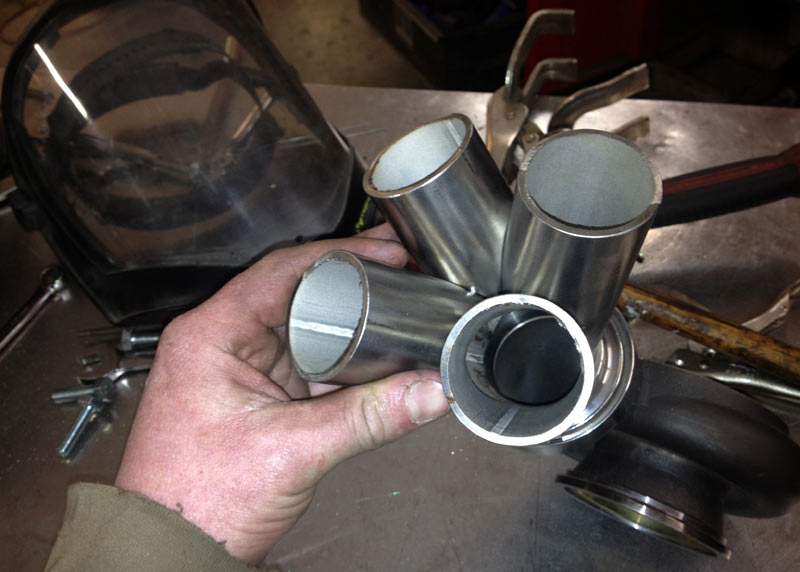
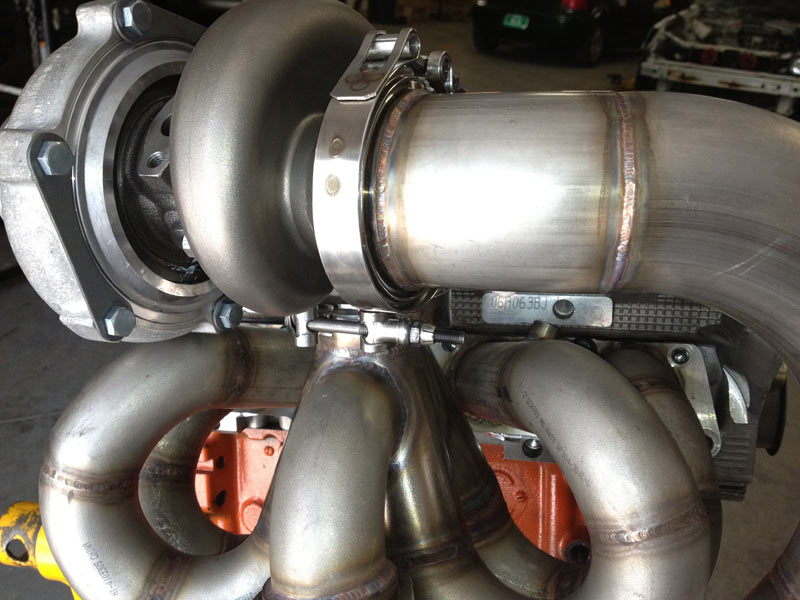
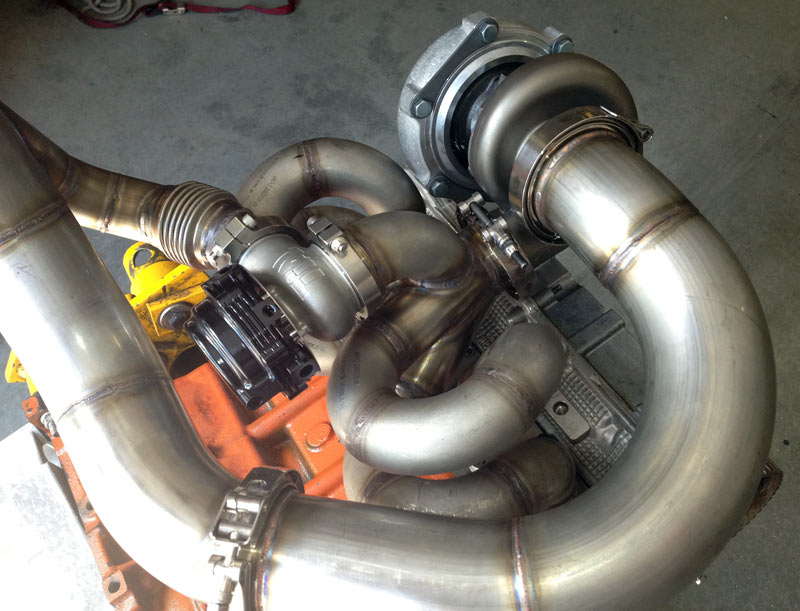
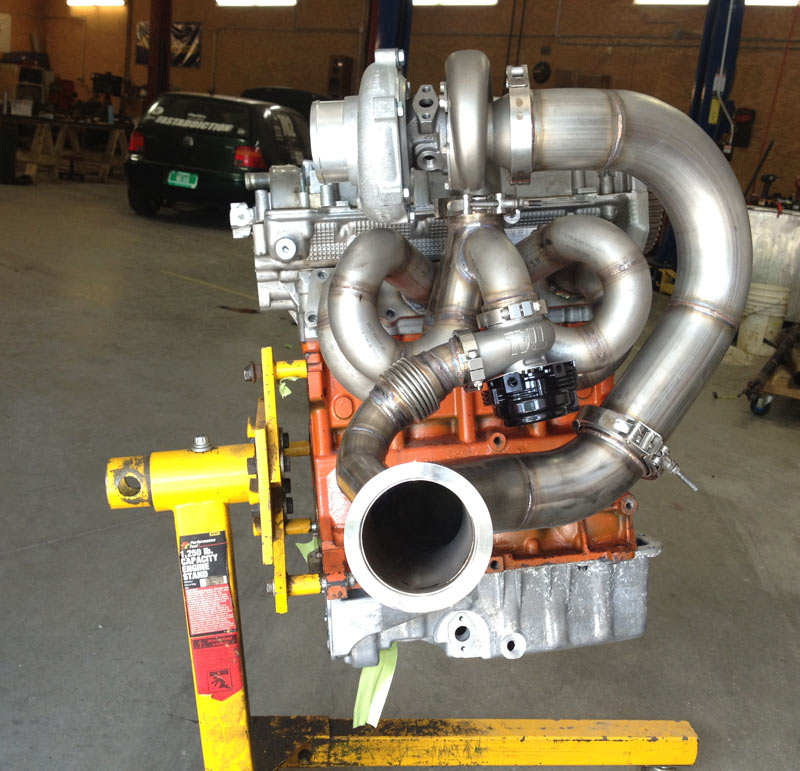
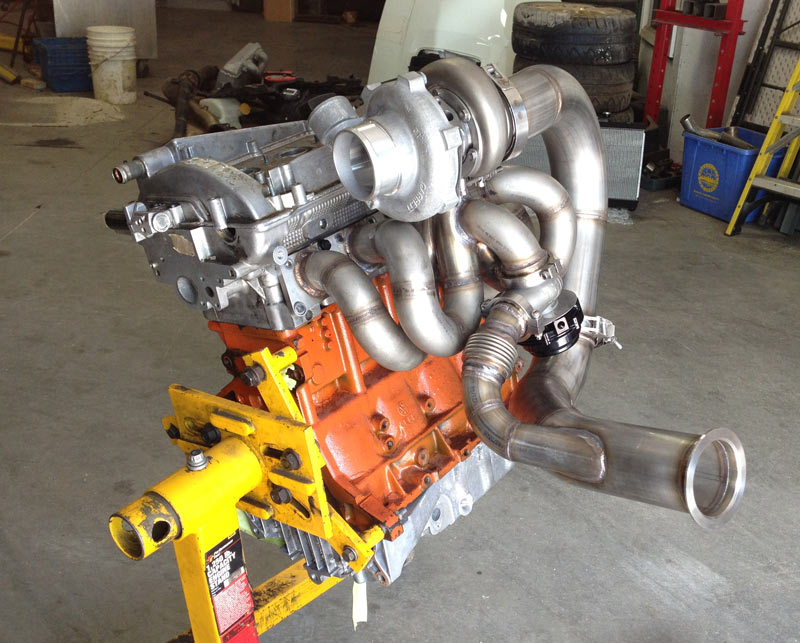
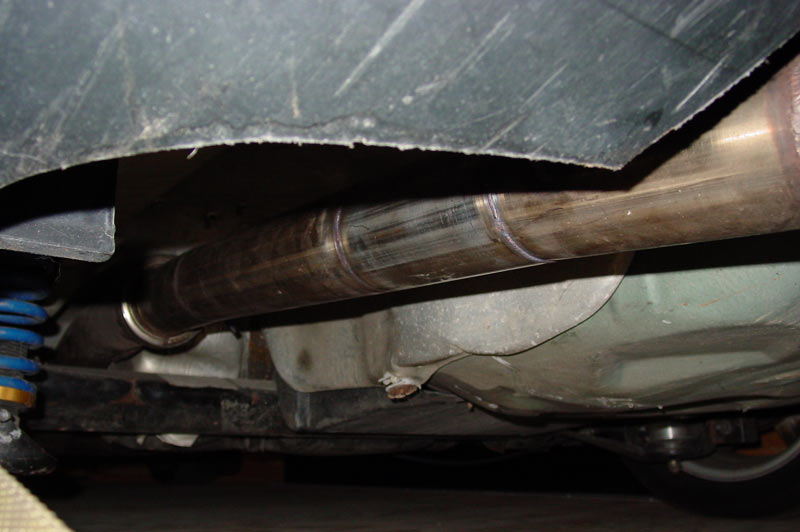
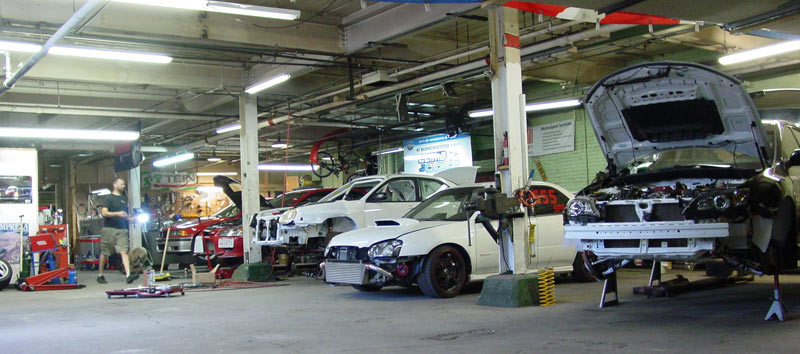
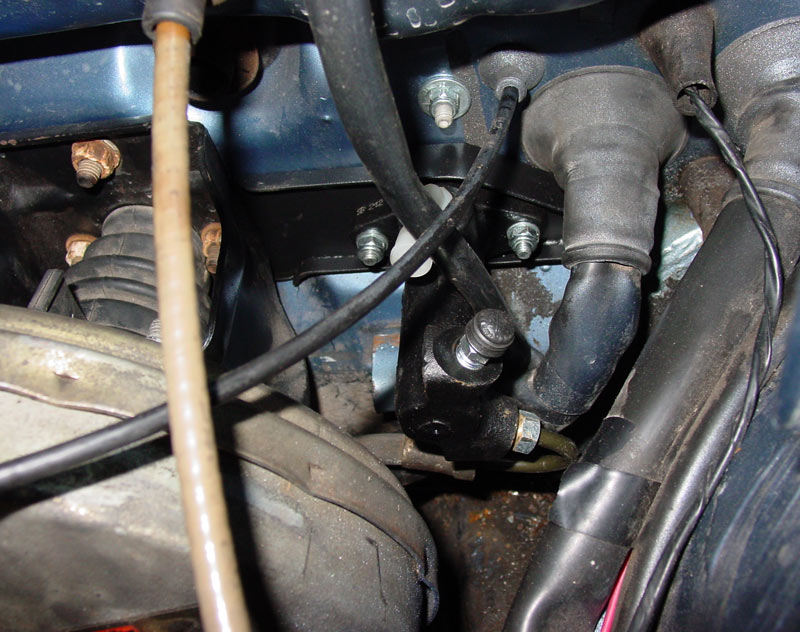
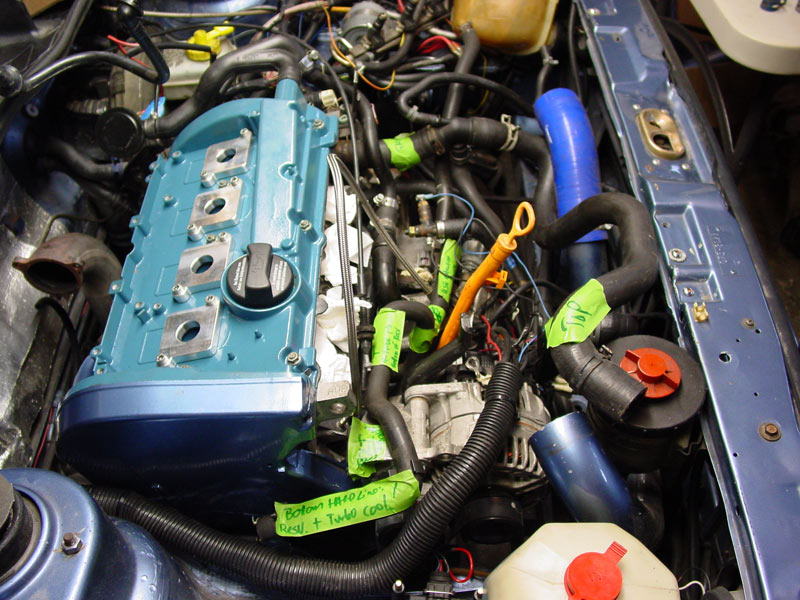
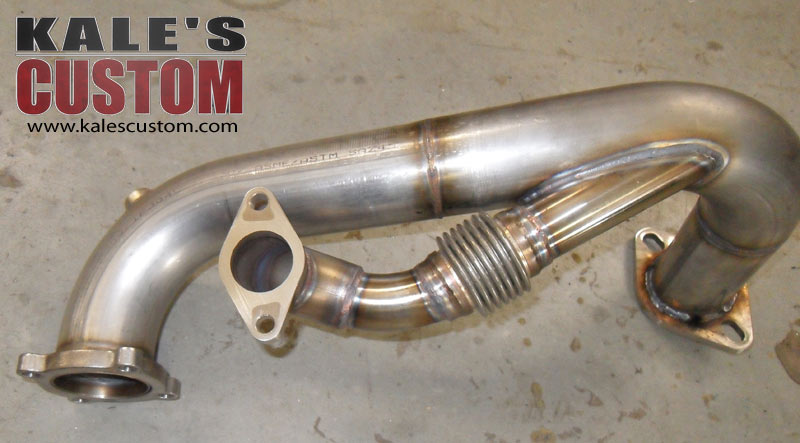
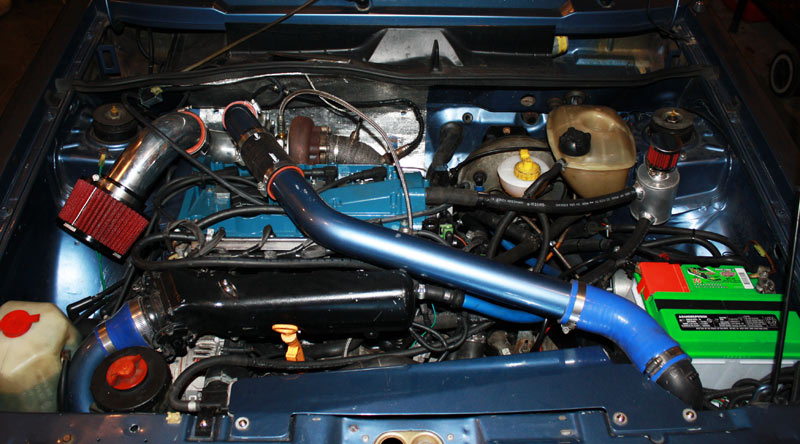
Engine 100% in (as far as I can go) and heading to Joey’s shop (http://www.kalescustom.com) for turbo inlet and exhaust fabrication, fix the front motor mount (the nut that was supposed to be connected to receive the front motor mount is not there), fix the errors on the exhaust, hook up oil and coolant lines, etc.  In the center of this picture you will see the coolant temp sensor (blue wire is connected to it) that I mention in a little bit.

The setup:
1.8T AWW/AWP engine
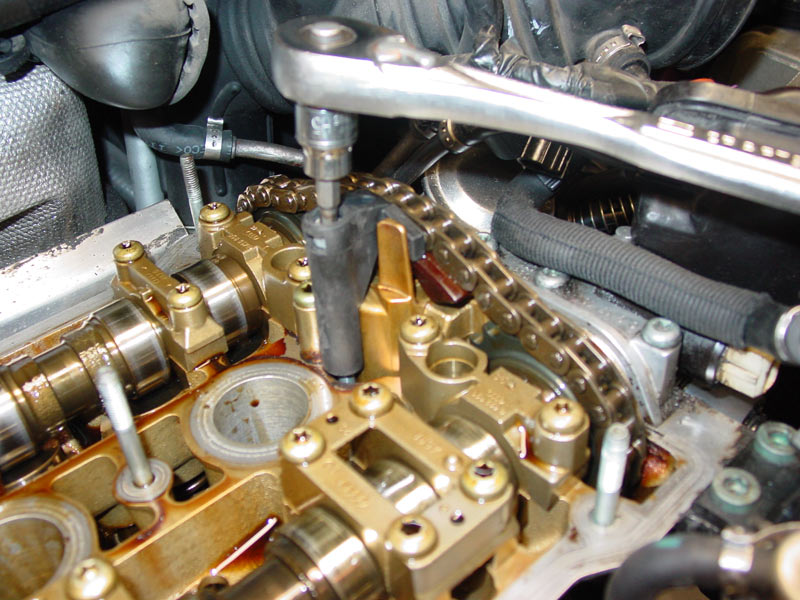
Stock head, cams, crank, intake manifold, etc.
JE Pistons 81mm 9.25:1 CR
Scat Rods / 20mm Wrist Pins
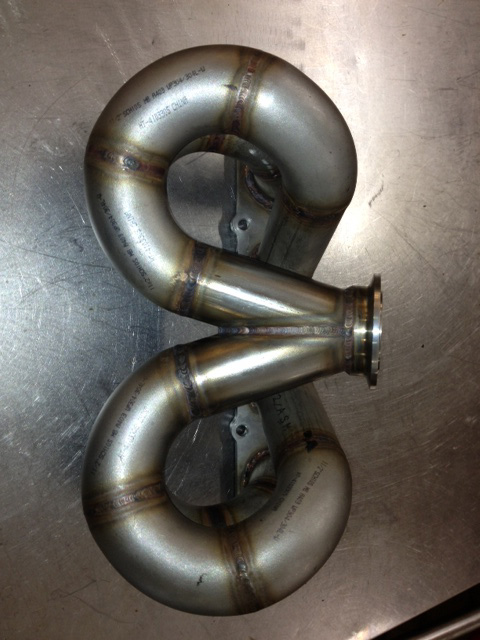
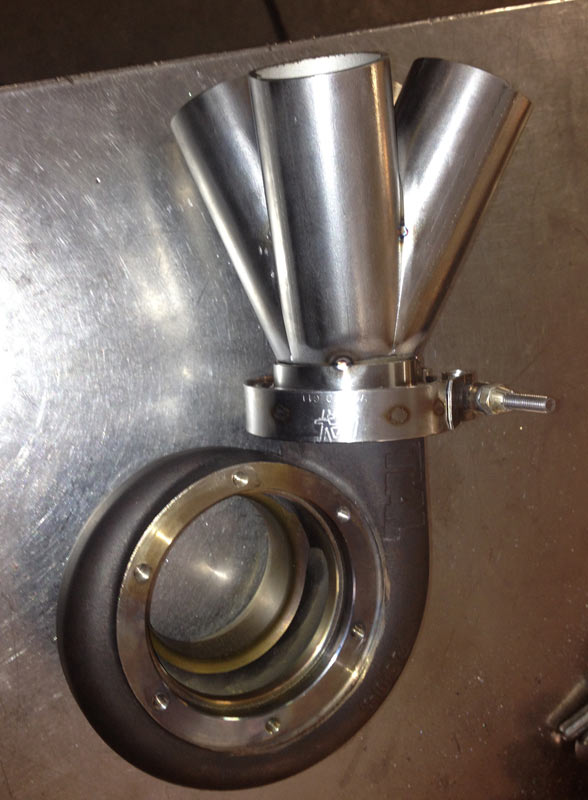
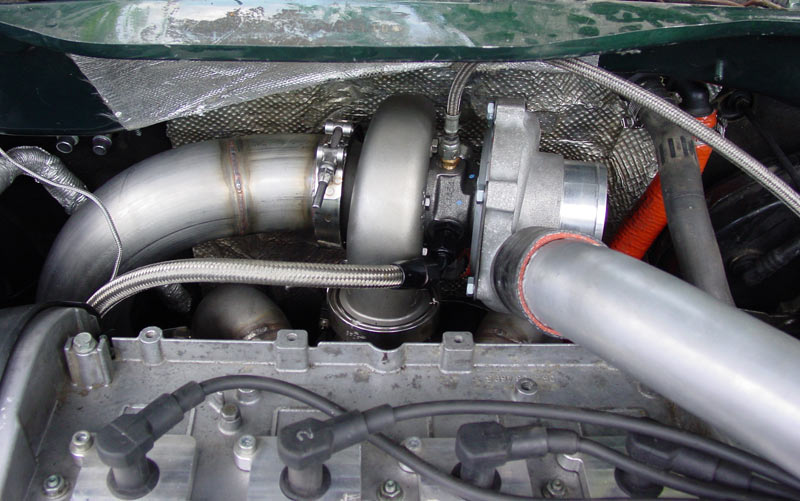
ATP Exhaust Manifold (T3 Flange)
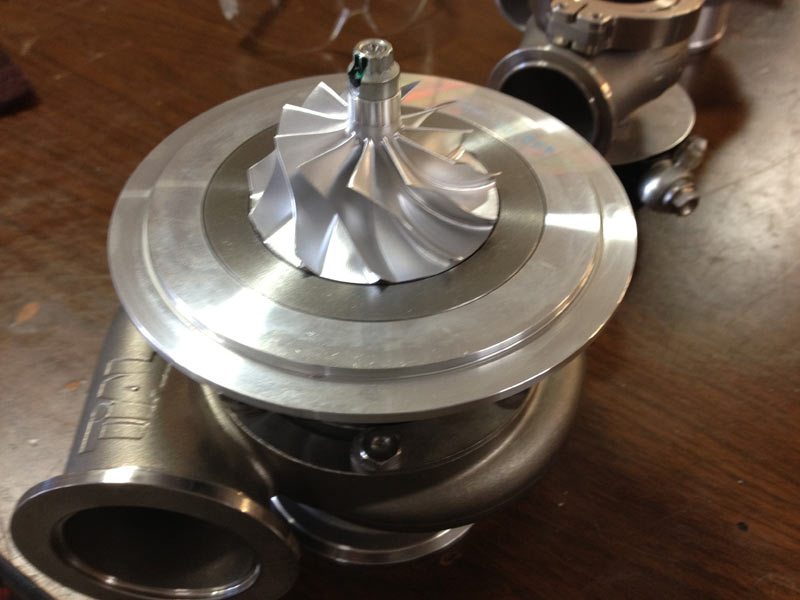
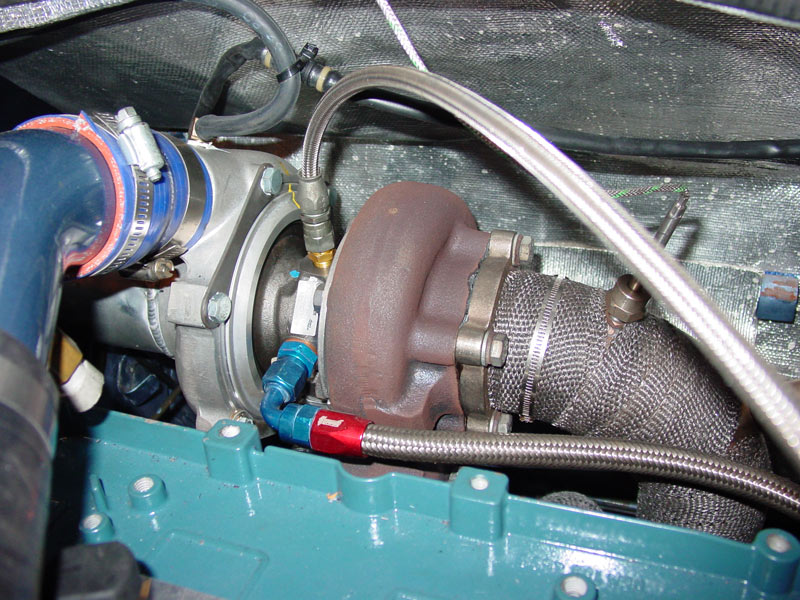
Garrett GT2860RS “Disco Potato”
Tial 38mm External Wastegate
Bosch 044 Fuel Pump
Saab 93 intercooler (might go with FMIC in the future)

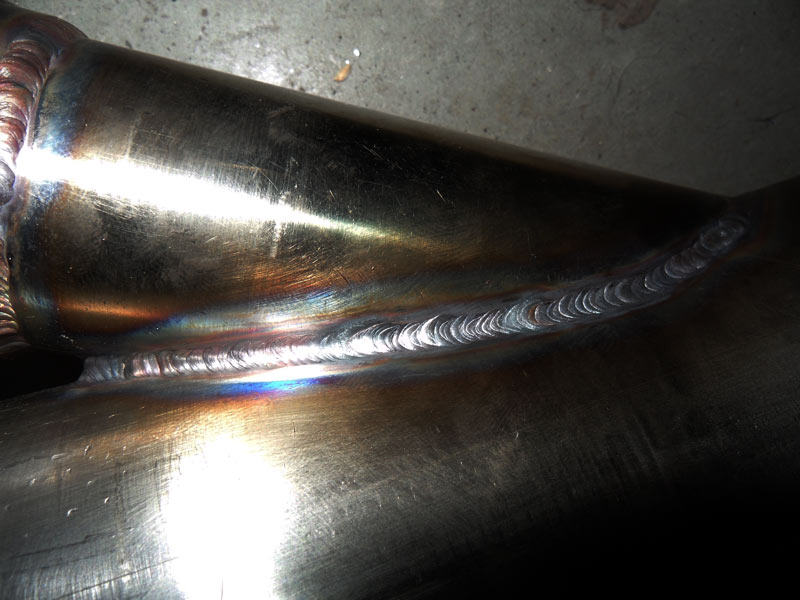
Naturally, all of that requires some fabrication…

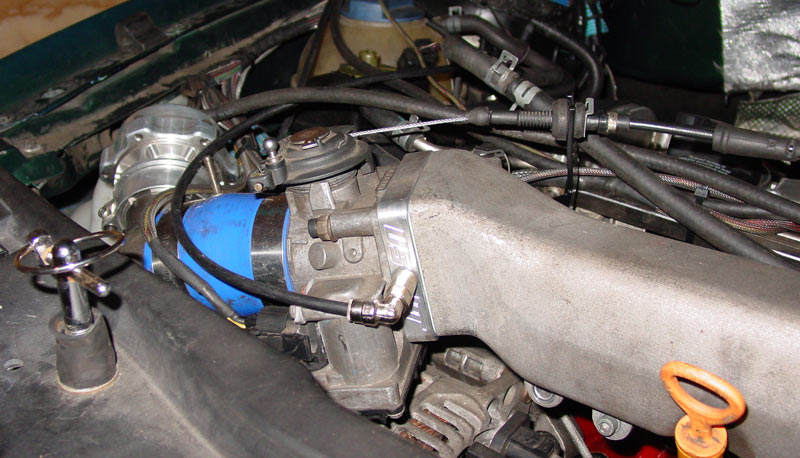
EGT and oxygen sensor are immediately after the turbo; both go to the VEMS ECU.  We will install a gauge next week that picks up a lot of data and displays what I want on a single gauge… I am really liking the options available with the VEMS setup.

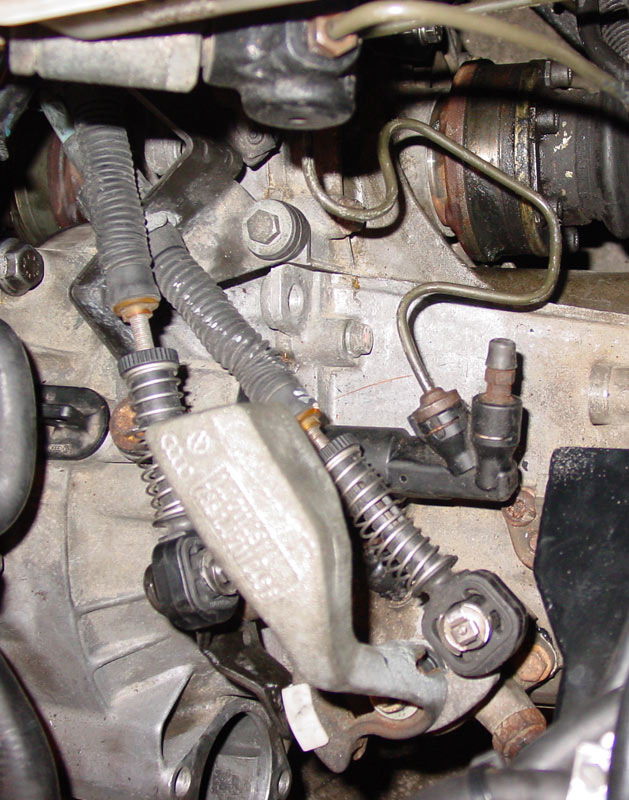
Custom oil breather… they even made the fittings.  Cool.

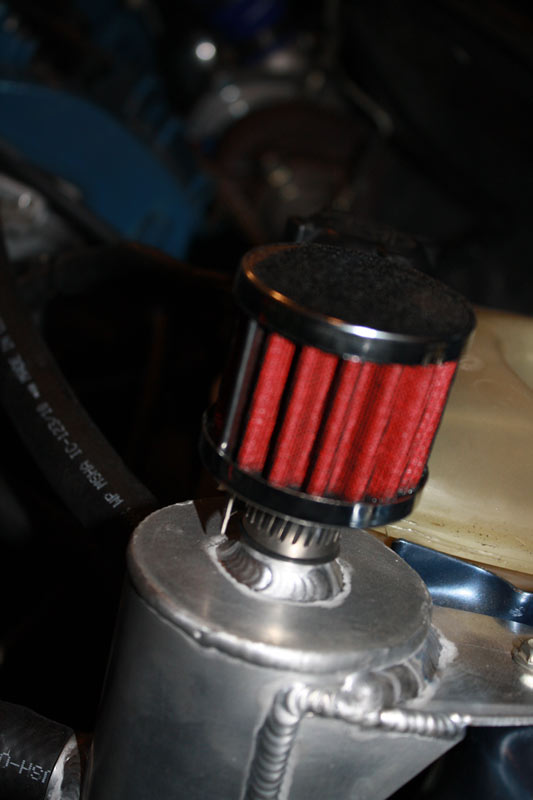
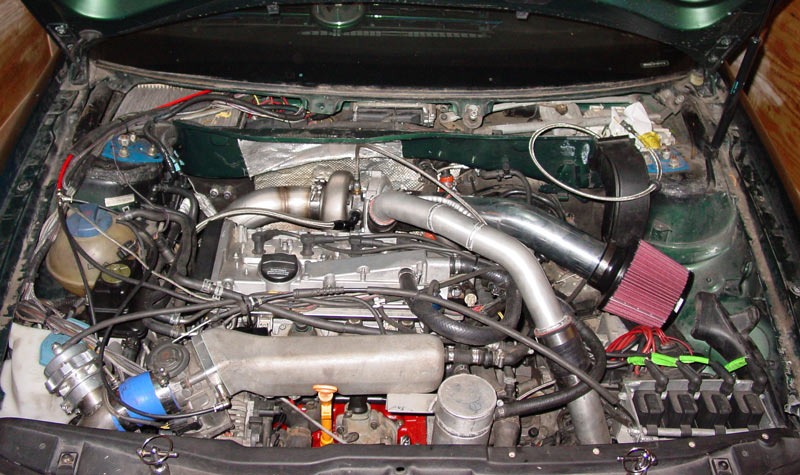
All together…. Much bigger air filter as the old one had the breathing capacity of a Q-tip.

Meanwhile, back at the ranch…

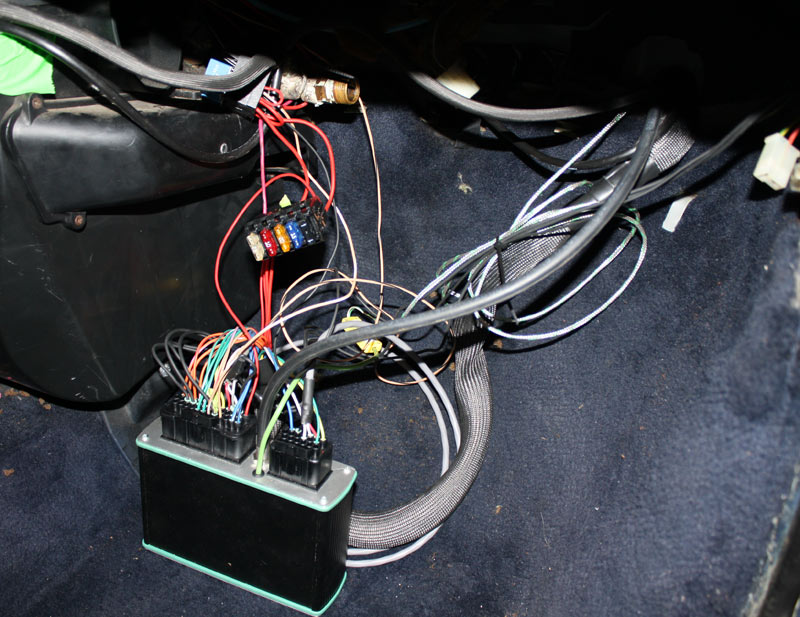
Some of the VEMS wiring harness.  In this picture you see the connections to the coil (uses waste spark), cam sensor, air temp, throttle position sensor (TPS), and each of the injectors.  We had to get much bigger injectors as the original set was way too small for this turbo.  (Megasquirt ECU, turbo, injectors, etc. are all for sale!)

VTEC, yo! (another input for VEMS)

The Brains of the operation (Abby something… Abby… Abby-normal)

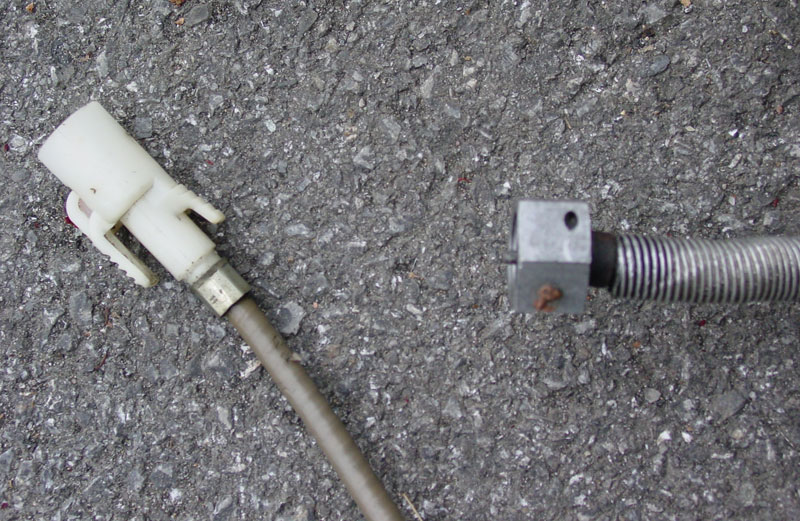
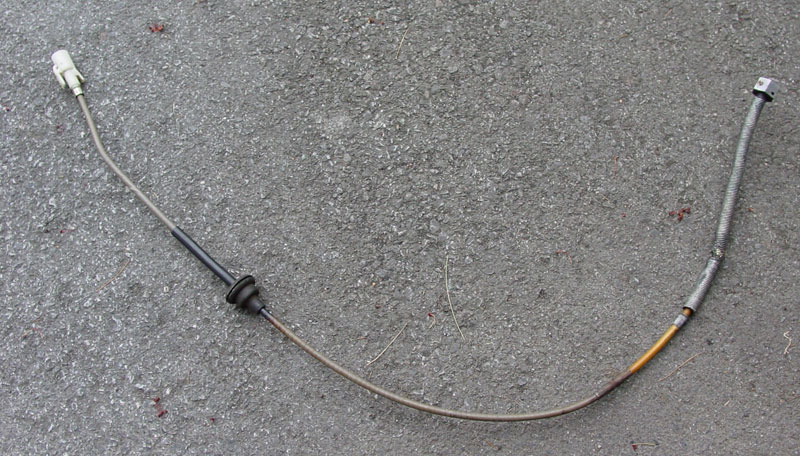
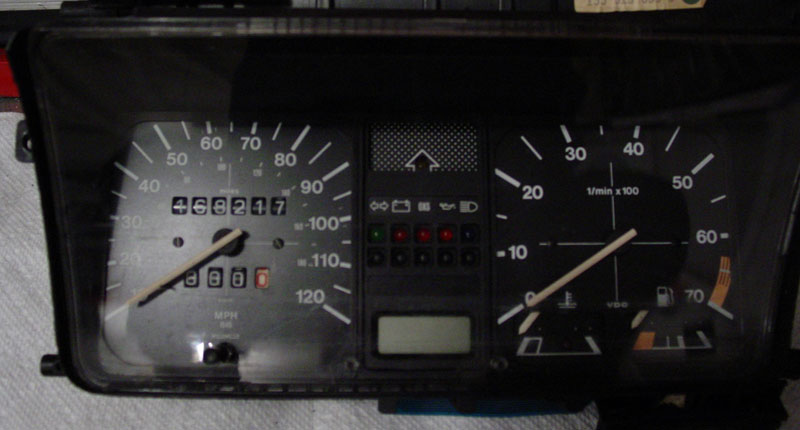
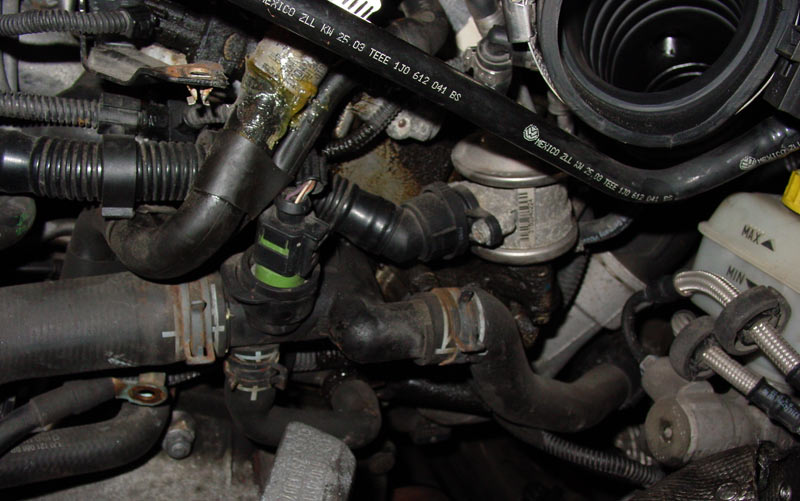
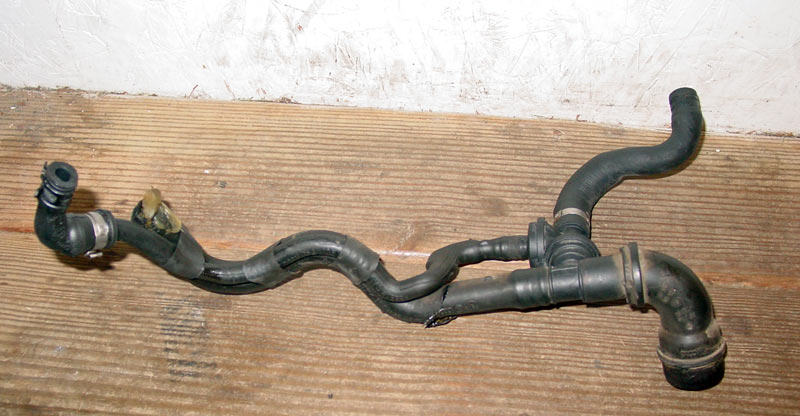
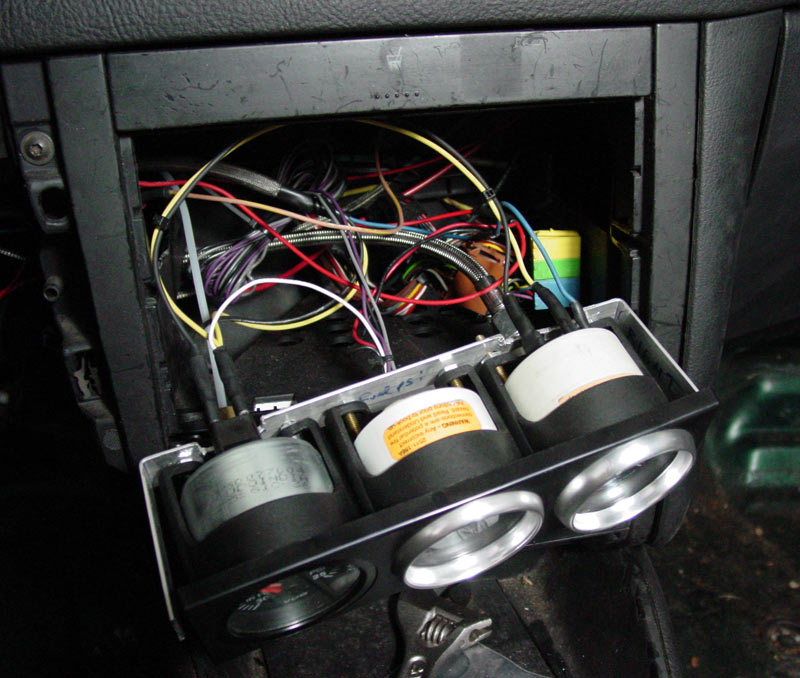
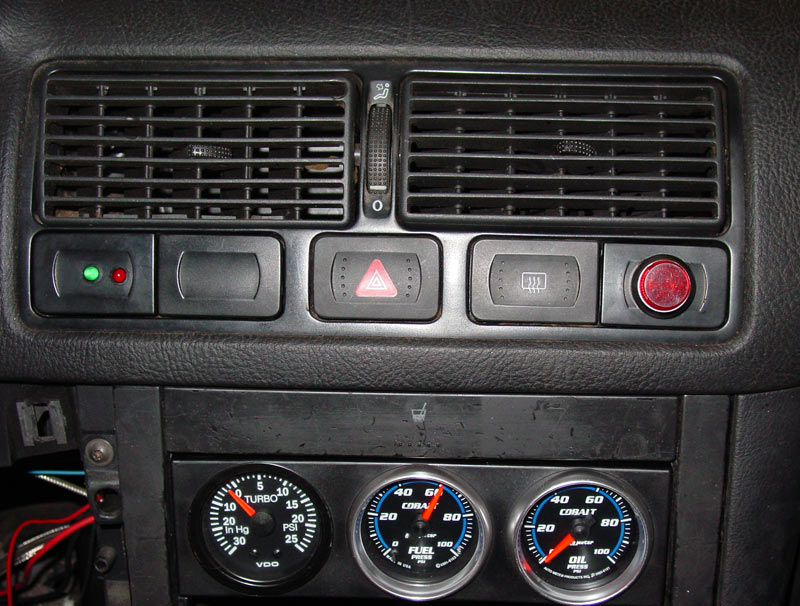
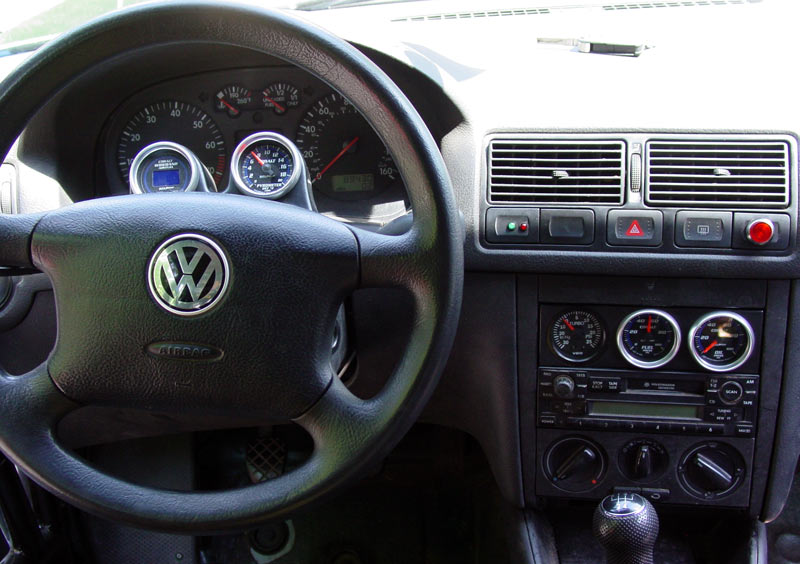
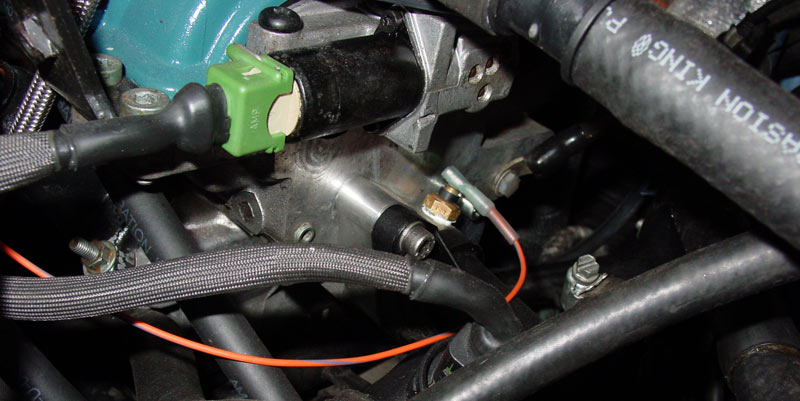
034 “bling” that I didn’t need, but I wanted it.  Covers the hole on the side of the head (air pump/emissions?).  I also picked up water temp adaptor from 42draftdesigns to give me a much better place to mount the water temp sensor that goes to the gauge in the car (center console).  The original setup for the water temp gauge had the sensor at the end of a dead end pipe.  No wonder the damn gauge didn’t function properly; it never received any flow.

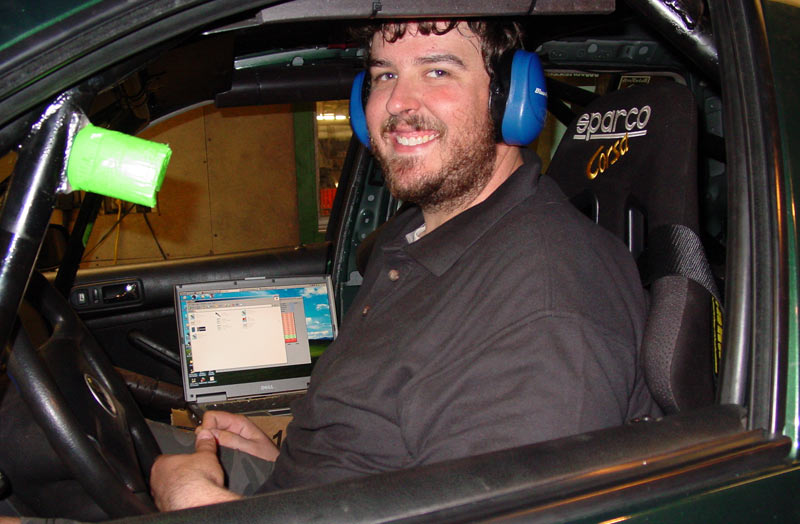
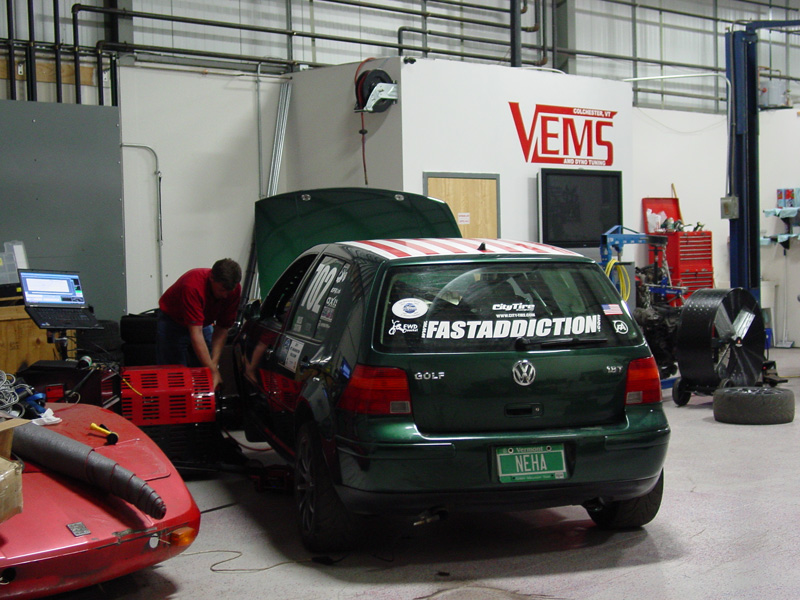
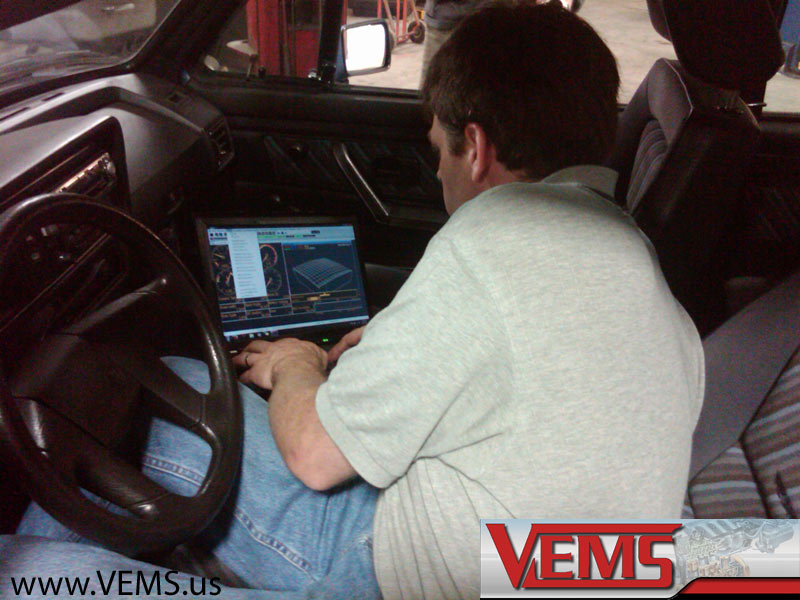
Jason (http://www.VEMS.us) setting up the base maps so that we can get the car started (2nd easiest starting car he has ever tuned).

A bunch of stuff that I don’t understand.

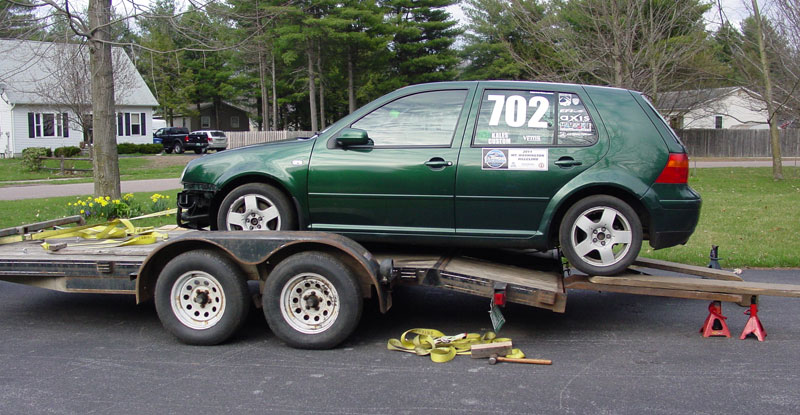
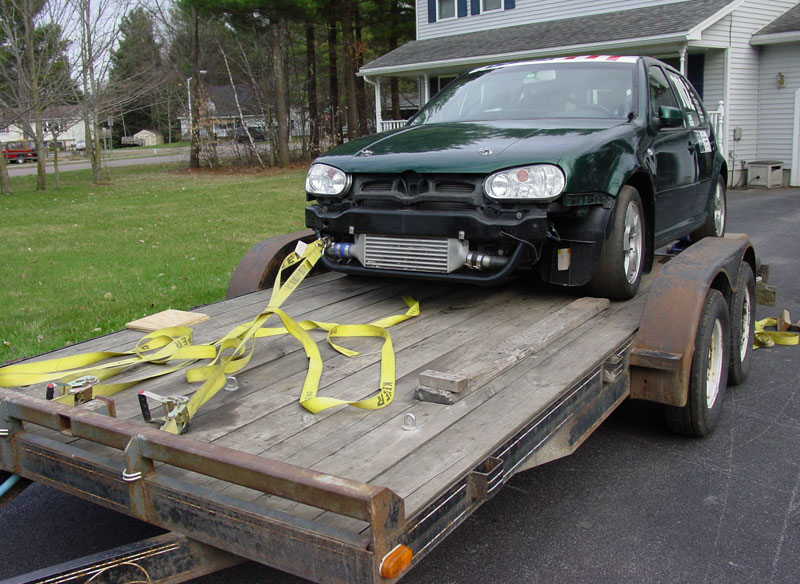
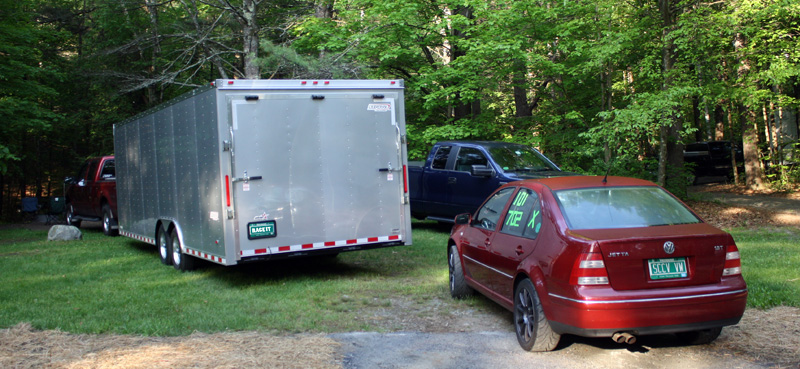
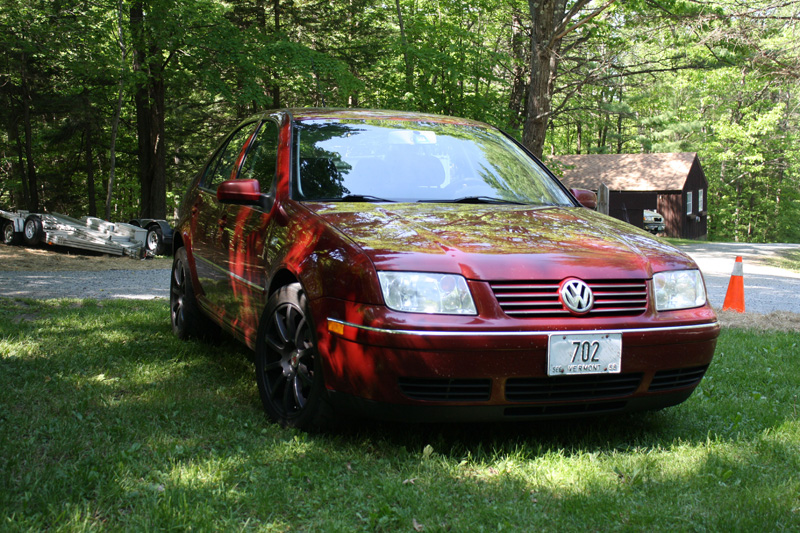
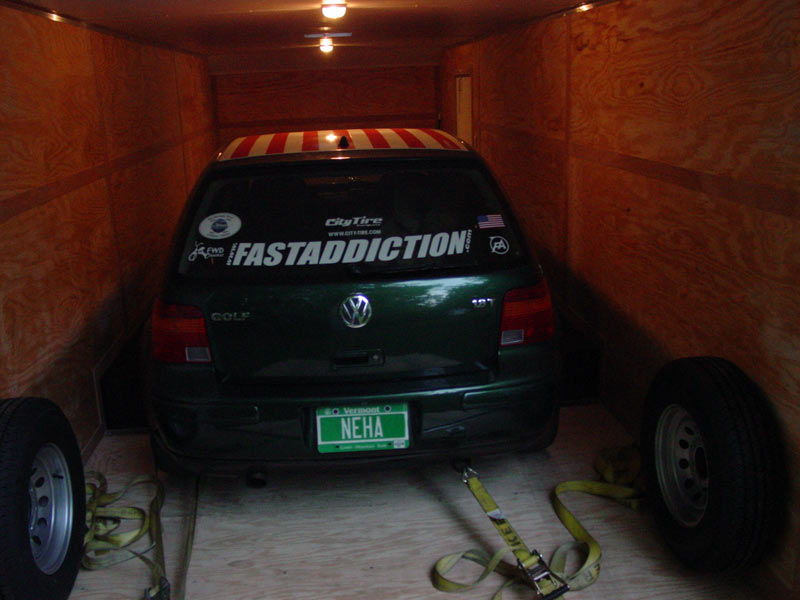
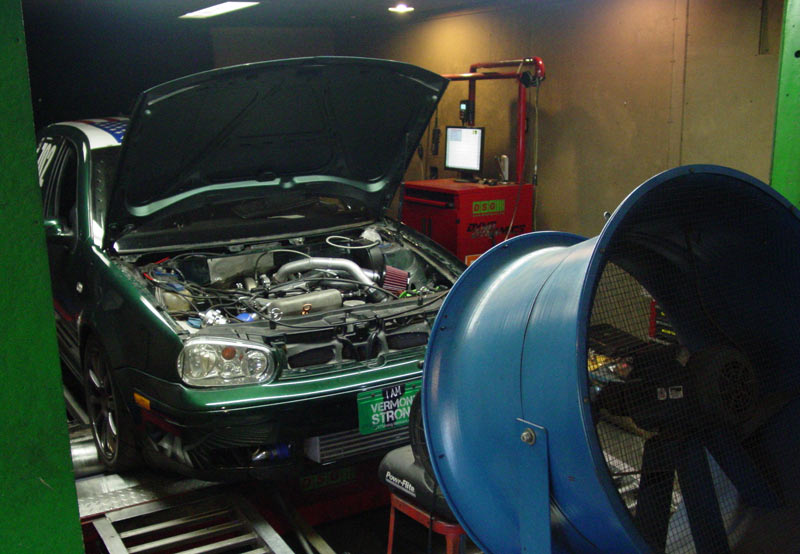
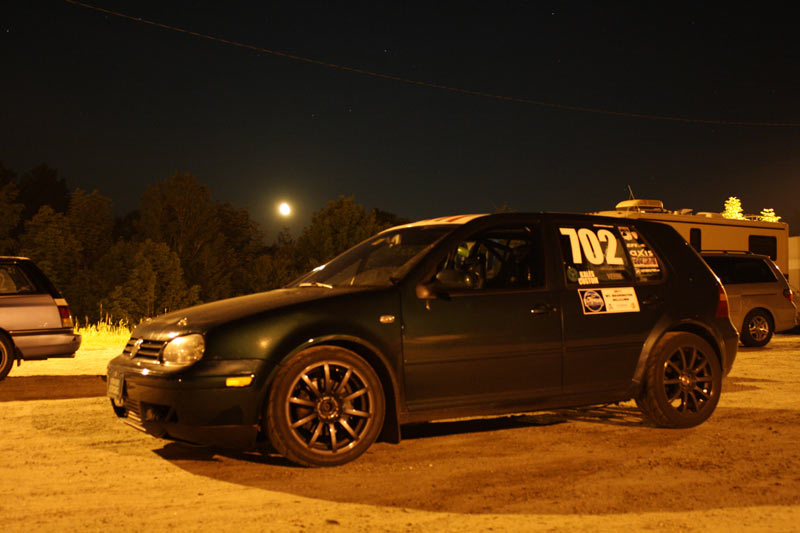
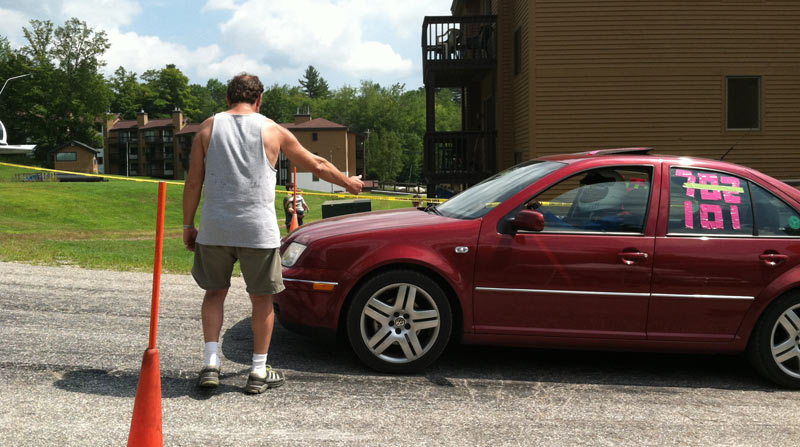
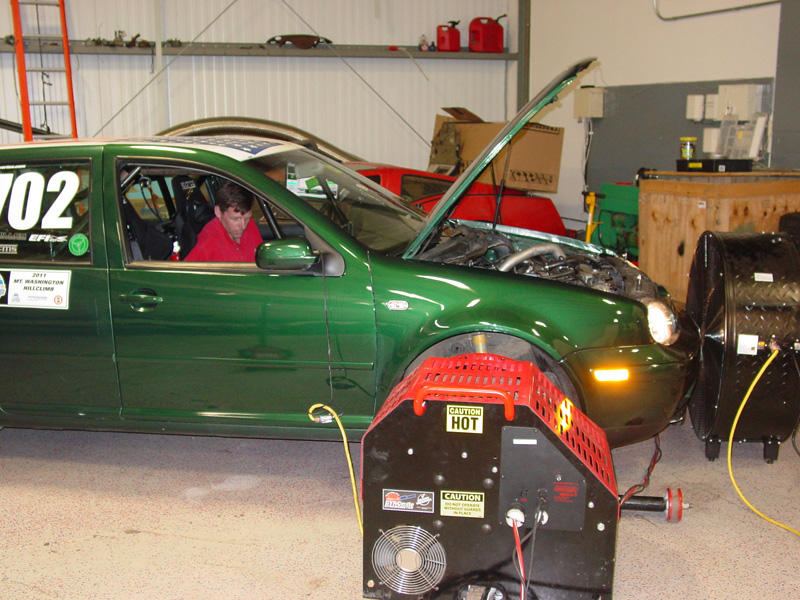
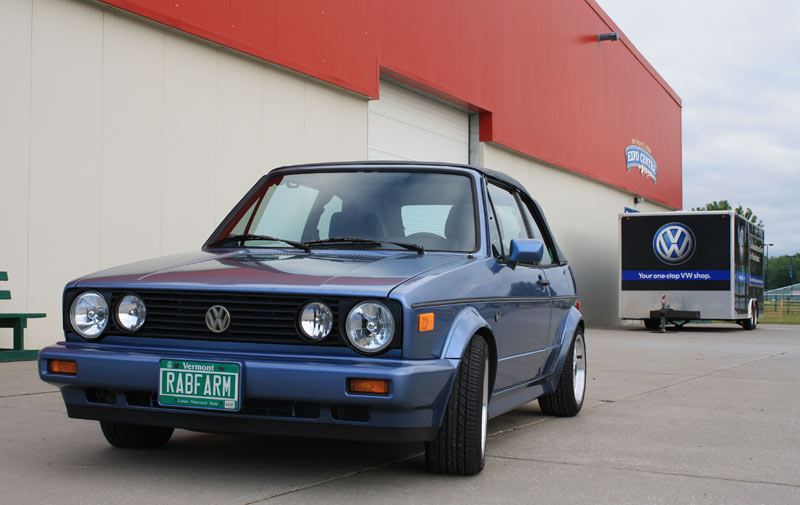
Trailed the car to the http://www.Wolfsgart.com car show in Essex Jct Vermont as it was not inspected nor did it have a tune.  Drove it to its spot at the show… looks pretty.

Meanwhile, Kim has just told Ken that she is pregnant from Jed who has been dating her mother.

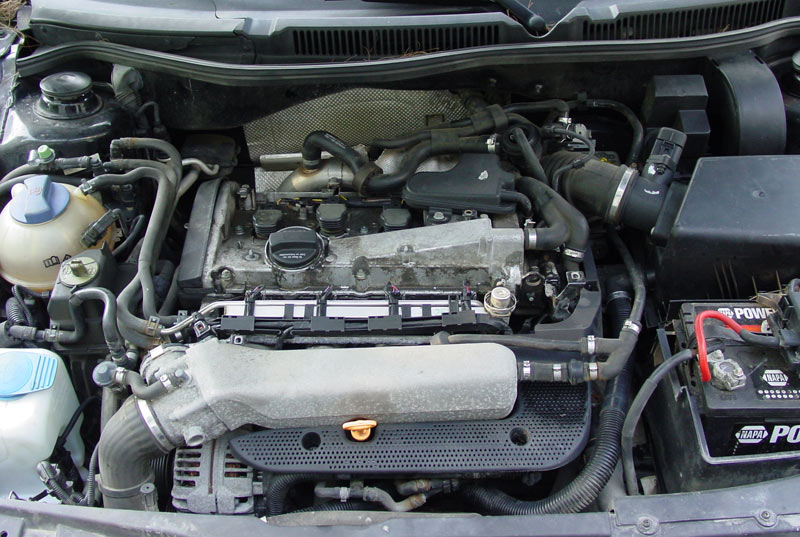
Since I needed some 1.8T parts, I purchased a 4-door 1.8T Golf… what are the olds of me finding a 1.8T four door again… in the same neck of the woods that I purchased the green Golf that I have been racing?

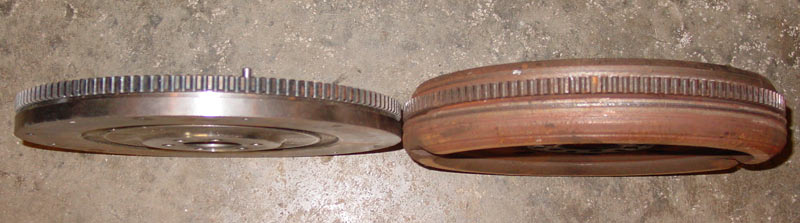
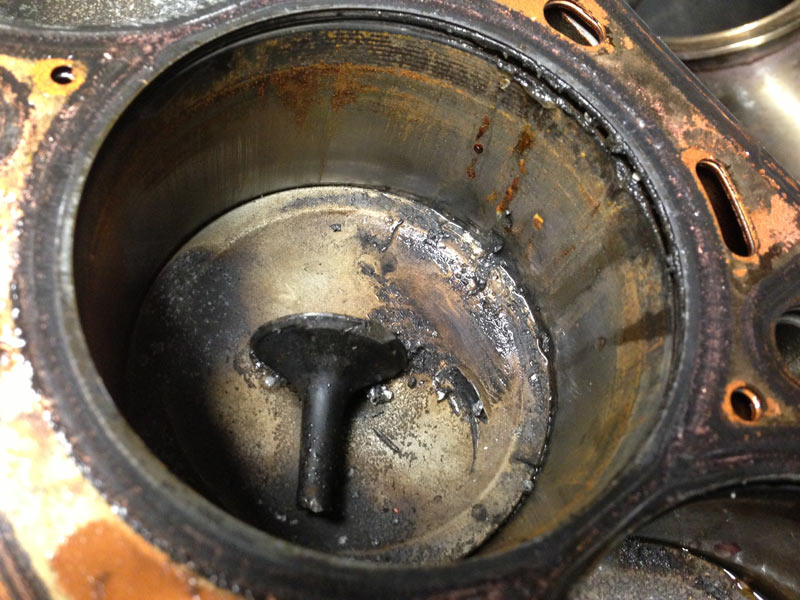
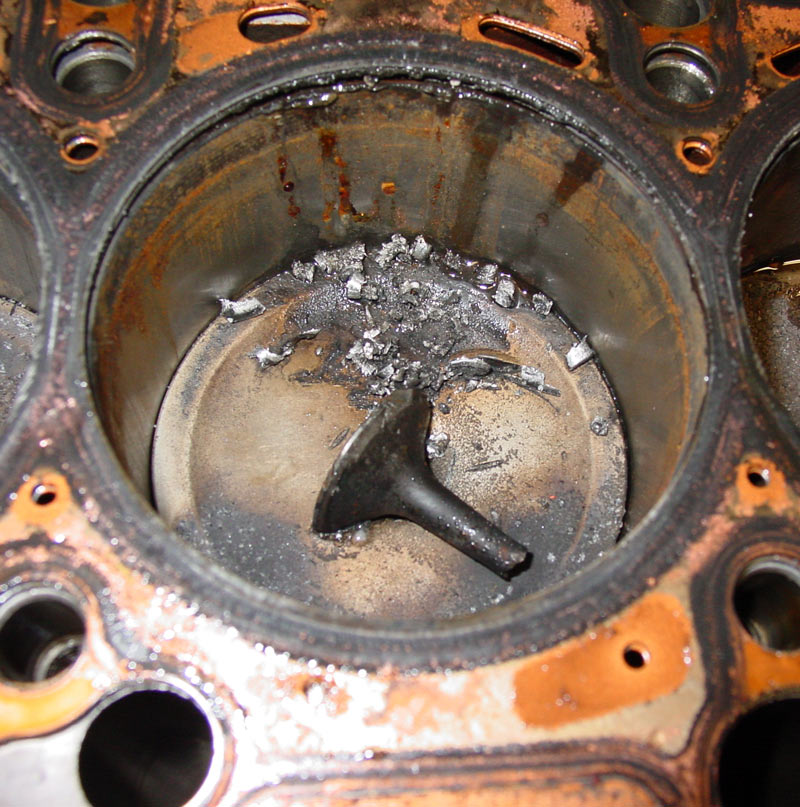
I purchased it because it had this…

Sold it because it had this…

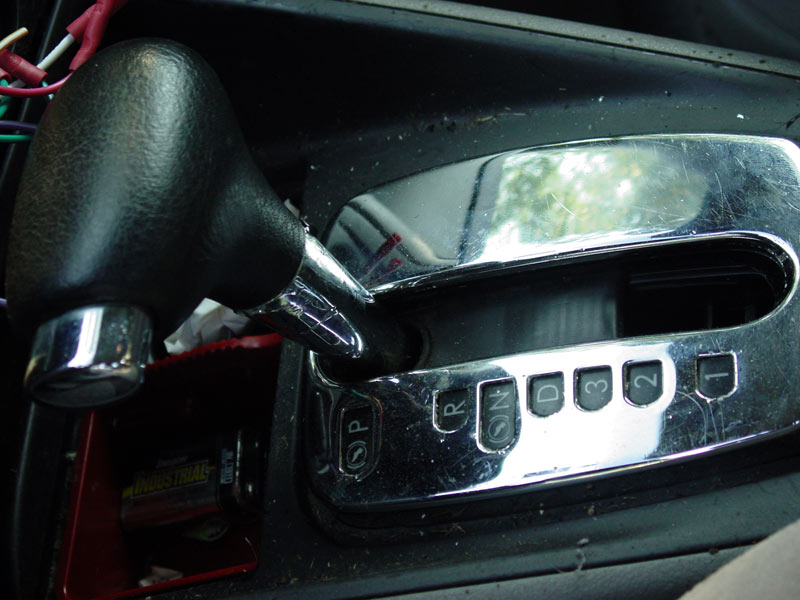
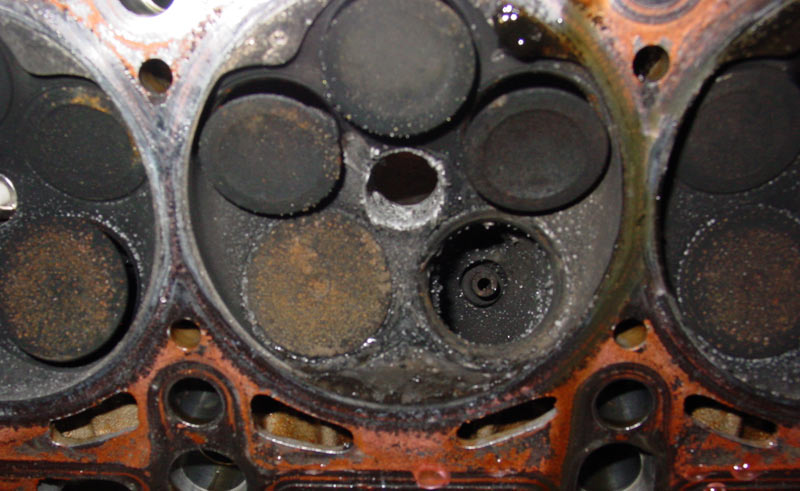
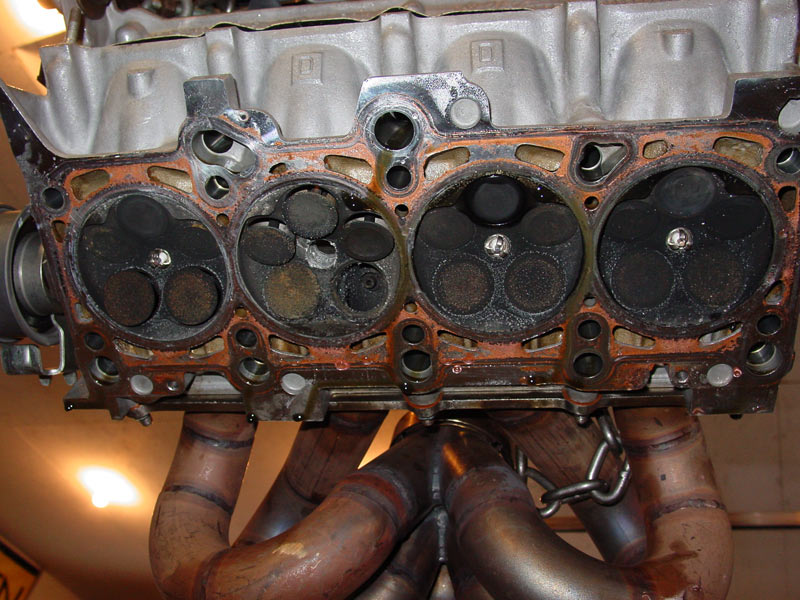
I purchased the car for a few parts with the intent of parting it out and bringing the shell to the salvage yard.  To prove that the engine and transmission were good for perspective buyers of the parts (sans head), I video taped me driving the car around.  I was actually very surprised how peppy the car was with an bor-o-matic.  Anyway, turns out someone was interested in the whole car and he had a spare head.  A little bit of trailering, cash + head, and both parties are happy.  I did not have to take the time to disassemble, wait, sell, wait, ship, wait, etc. to recoup my investment.  The new head went to the machine shop (complete head job), gap the piston rings, deck the block, resurface the head, etc.... I can always use extra engines.

That was the past few weeks, so what happens now?

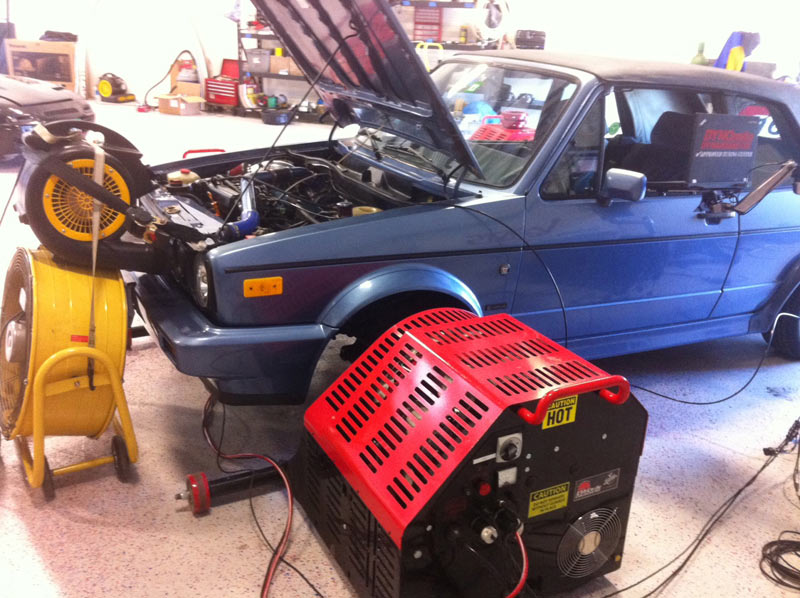
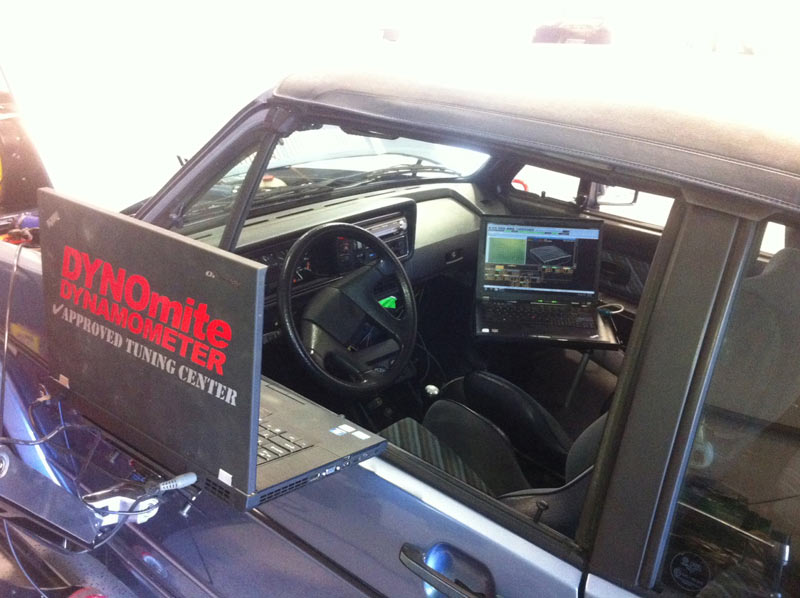
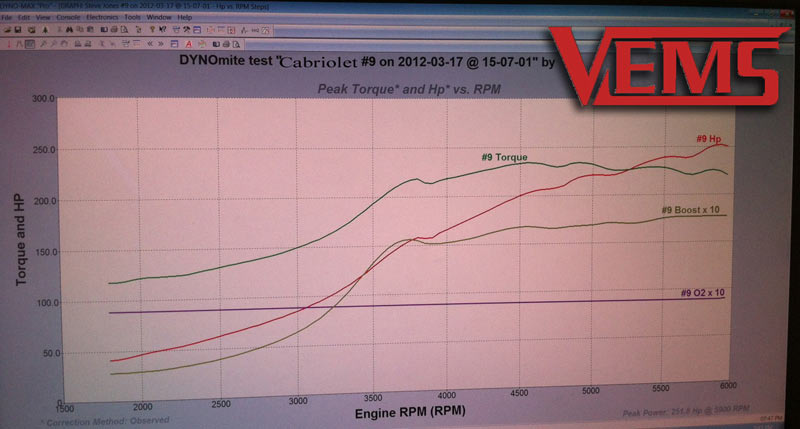
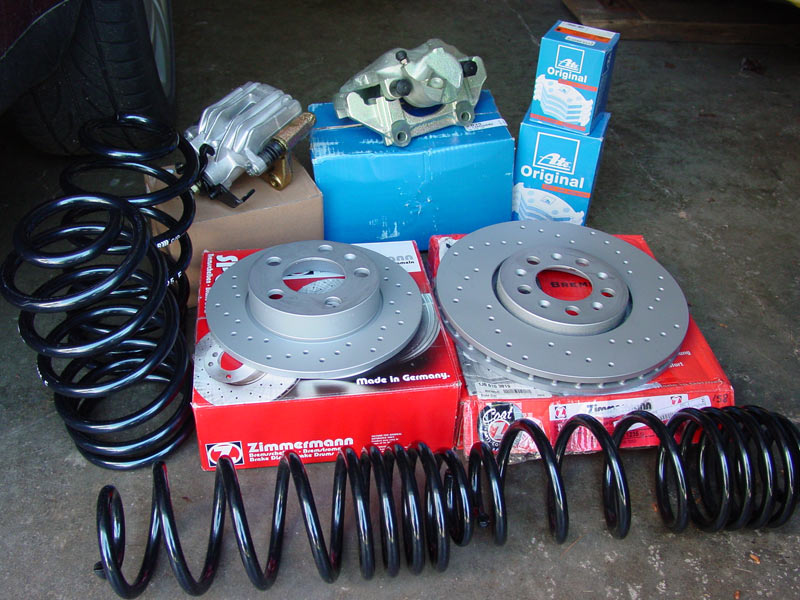
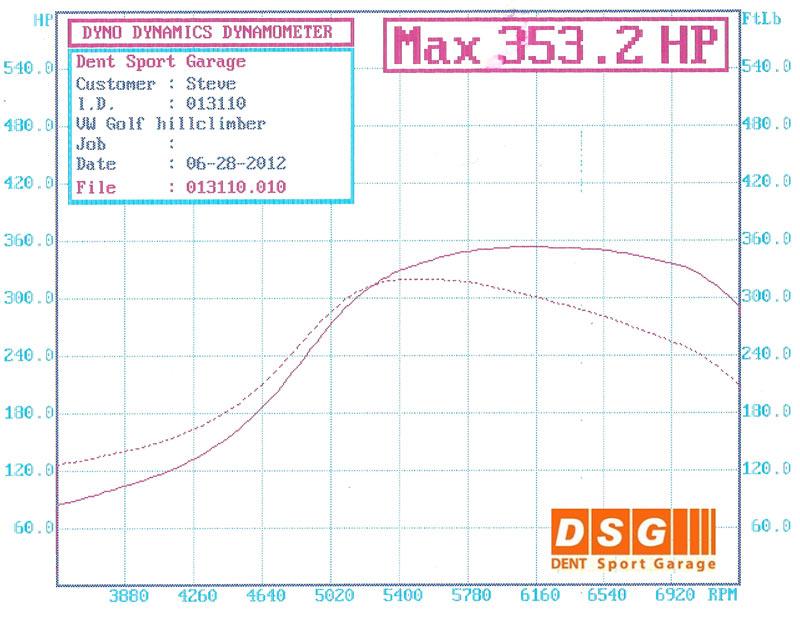
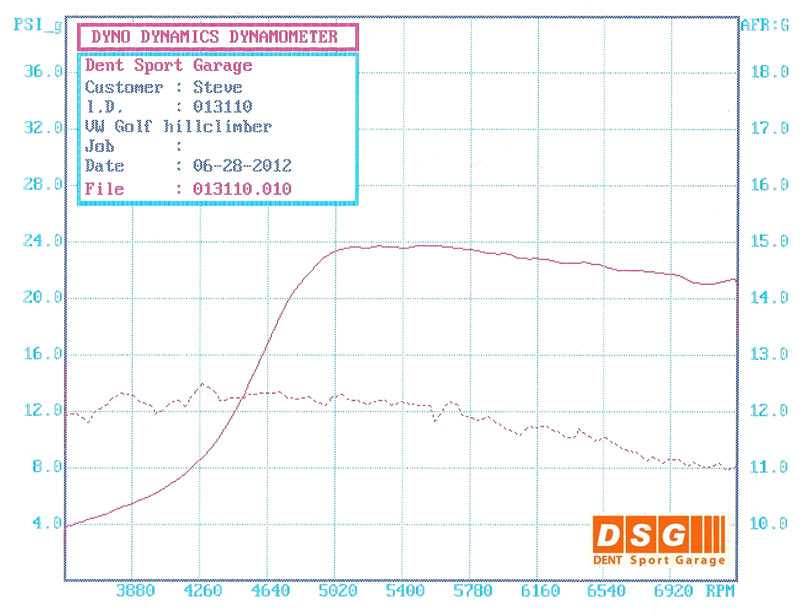
Finish the Cabriolet.  I need a bearing for the bottom of the steering column (should pick up parts at VW on Friday; if that does not work, I will use an old Rabbit steering column and use a gear puller to swap over the ignition).  I also need a new throttle cable… also in on Friday.  Next week means a tune for the car.  We also plan to install a magnetic pickup on the axle so that VEMS can calculate what gear I am in (RPM vs. MPH) so that we can reduce the boost at the lower gears.  Did I mention I really  really really like the options that VEMS has?!?!

That’s it for tonight…

Steve

Rabbit Farmer
Rabbit Farmer New Reader
2/24/19 9:05 p.m.

Aug 29, 2011

Worked on the Jetta on/off today to fix one of the SAI hoses (short piece located on the head), replace the dogbone and transmission mounts with BFI stage 1 (yellow), replace the engine mount with a good condition stock mount (did not use the BFI as it did not have a place to mount the PS reservoir).  I was going to replace the SA pump and the e-brake cables, but did not have time.

Running around getting parts together for the Golf.  I built the engine (sans head) yesterday.  Charlie (ex-Swedish Pit, ex-Twisted Wrench) at www.6starmotors.com (next to John Buffum's shop in Colchester, VT) is helping with the engine install as I did not feel like climbing around on the ground installing another engine right after finishing the Cabriolet.  I'm sore enough as it is.

And.... finally.... I figured out why the Cabriolet steering column is so messed up.  Unsure how it happened, but my best guess is that the steering column was from a car that was in a front end impact.  The column had collapsed about 1" (as compared to the Scirocco II with power steering column that I got to replace it).  This would explain why the steering wheel was so tight against the controls and the horn was touchy when leaning on the steering wheel.  I dropped off the columns (bad and good) at Ralph's Foreign Auto in Colchester, VT to swap the ignition/controls to the good shaft.  Once I get that back in the car, I will be able to start driving it.  I still haven't mounted the ECU under the dash, but I'll get there.

Whew.

Ascutney hillclimb is getting closer.

S

Rabbit Farmer
Rabbit Farmer New Reader
2/24/19 9:06 p.m.

Sep 10, 2011

Small update.
Tuned Golf today. 342.xx HP at the wheels.

Getting ready for Ascutney hillclimb next weekend (been a while)

Driving Cabriolet around on 5 psi of boost while breaking it in; tune will be soon.

Rabbit Farmer
Rabbit Farmer New Reader
2/24/19 9:07 p.m.

Oct 11, 2011

I’m alive! Haven’t been going much with cars as I have been getting the house ready for winter (the wife seems to enjoy starting projects by spending an hour doing something leaving me with 2 weeks to finish each project…. She has more hours than I have weeks).

Did a little street tune on the Cabriolet. Originally, the ECU had the boost limited to 5 psi (very low) to break in the engine. The issue with this is that the boost would hit 5 psi instantly and the ECU would shut everything down. 5 psi was below the limits of the wastegate so everything was very violent at 5 psi when the ECU said “enough!”.

So, enter a street tune session on Monday night where we started with 11 psi and worked to 14 psi (or so… unsure of the final number). Drove down the interstate at 55 mph (speed limit is 65), floored it in 5th gear up to 75 mph, and Jason (VEMS.us) modified the map from the passenger seat. After adjustments to the coil dwell, fuel map, boost settings, etc. it seems to be running great. We do plan to tune it on the dyno over the winter to fine tune everything, but this will get me through the rest of the summer. Engine runs great. Though, I did notice a lot of smoke when getting on the interstate last night… From both tires. (accidental)

Mt. Philo (http://www.hillclimb.org) hillclimb is this weekend. I will be there with our rental 650 wHP Daewoo Lanos*…. Should prove to be the fastest Daewoo in the New England Hillclimb Association history (also the first)

Rabbit Farmer
Rabbit Farmer New Reader
2/24/19 9:07 p.m.

Dec 04, 2011

Well, as usually, I have not done anything with the cars yet.  I normally start in January or February (break from October to that time).  That means I have nothing new to report, but I did do a little back tracking to put together a video from the Ascutney II hillclimb from this year.

Since I didn't drive this car at a hillclimb for 1.5 years, I took it easy all weekend.  My time for Saturday 2011 was one second faster than Saturday 2010, which meant I was on track with my knowledge of the hill (memorizing the corners) and the car.  There was definitely a lot more potential for improvement in 2011 that I won't get a change to test out until 2012.  There was a bit of smoke on the practice run on Sunday morning so I parked it.  I have not checked it out yet.

Video from the Ascutney event... available in full 1080i HD / full screen looks good.  Added some music (not too loud) to make the video seem more seamless.  Various camera angles.  I still like the wheel shot the best as you can see the suspension working over all the bumps and corners.  Next year I'll move the camera down a bit to catch more of the wheel.

Let's see what next year has in store.  

Video: http://www.youtube.com/watch?v=4ZS_xfXLrSE

Rabbit Farmer
Rabbit Farmer New Reader
2/24/19 9:08 p.m.

Feb 29, 2012

Have to do something in the winter as the lakes haven't frozen over yet (need some ice time trial events to get my racing fix over the winter), so we did a winter autocross with the Sports Car Club of Vermont (my home club!).  

720HD version: http://www.youtube.com/watch?v=rxIgBKqB2BY&HD=1 (there is also a 1080i version that you will have to select manually)

Enjoy.  Add music to make it seem more interesting and flow together.

http://www.youtube.com/watch?v=rxIgBKqB2BY

Starting to work on the cars this week to get ready for the summer race season.

S

Rabbit Farmer
Rabbit Farmer New Reader
2/24/19 9:09 p.m.

Mar 18, 2012

Well, time to get things going.

Since it was really, really warm in Vermont (i.e. 30 degrees above the norm, no snow, dry, etc.) I drove the Cabriolet a few miles down to Vermont's first AWD dyno at VEMS in Colchester, VT (http://www.vems.us).  To catch you up since the last exciting episode of Rabbit Farmer entertainment, VEMS is the stand-alone engine managemetn that I am using on the Cabriolet.  With VEMS, a new GT28R turbo, custom intake/exhaust/IC tubing work by KalesCustom.com, and now a fresh tune, we were quite happy to see 250wHP out the the car (running on 93 octane).

There is still a lot to do with the car to make it 100%, but I do plan to drive this entire week as the temps are mid to high 70's all week.  Sweet!

Started working on the Golf to get it ready for the Mt. Ascutney hillclimb in May.  Rebuilding everything, swapping out the ATP log manifold for a custom on (KalesCustom.com) with v-band, new turbo (GT2871R is a little tired), and running a water/meth kit.

Scirocco is sleeping at the moment as I want to have the Cabriolet and Golf 100% done before I dive into it.  Jodi (vwJodi) and I spoke today regarding the body work on the Scirocco... we are shooting for May 2012.  I also plan to run VEMS on the Scirocco for the plethora of tune options and the locality of the dyno.

Steve

Rabbit Farmer
Rabbit Farmer New Reader
2/24/19 9:10 p.m.

Mar 28, 2012

Some progress....

Drove the Cabriolet all last week as the temps were high 70's (almost 80!).  Had a good time on the current tune.

We did discover that the turbo was blowing out the spark so Jason (VEMS.us) turned it down just a little bit.  Solution will be a more powerful coil (waste spark) or do coil on plug (COP).  Unsure which option, but it is good enough for now.  Chris (vtGTI) was nice enough to build a battery bracket.  I was going to purchase something online to hold my Odyssey battery in place (didn't like the full size battery... that ended up in the Golf)... this came out great.  I will install it this weekend (car is back in storage as the weather turned more seasonable... you know, winterish).  It uses the stock mounting parts to hold down the bracket.  Pretty cool.

Figured out how the stock ECU tray mounts under the dash by looking at my brother's Cabriolets (he is selling one of them soon).  This will help me come up with options to mount the VEMS ECU.

Replaced the glovebox cover (old one was falling apart at the seams and had a broken arm that normally attaches to the spring).

Tested a replacement gauge cluster to see if the tach and speedo worked.  Tach never worked in the car even with the MegaSquirt; speedo did work, but broke when driving it last year.  This means that the cable is the issue.  We figured out that the tach just needed a converter (digital to analog); Jason at VEMS is getting what is needed to make that work.

This weekend... replacing the taillights and trying to hook up the electric seats.

Progress!

Golf... engine is almost done.

.40+ pistons this time around.
 
Ordered new Garrett turbo to replace the GT2871R / T25 (small) flange; GT2863R is the replacement with Tial V-band flange and 44mm external waste gate.

Also replacing the ATP log manifold / T25 flange... that is now for sale!  Custom tubular manifold is going in!  Turbo purchased at, and tubular header being made by, http://www.KalesCustom.com.

Naturally, this will require changes to the exhaust and turbo-to-intercooler tubing.  We are also going to find a better way to get unrestricted air to the turbo... bu-by stock airbox.

You can read about KalesCustom in the latest issue of Subaru Performance magazine....  http://www.driveperformance.subaru.com/dp91_hillclimb.aspx

I hear the Scirocco calling me from the garage late at night.... "Build me and I will go!"

Rabbit Farmer
Rabbit Farmer New Reader
2/24/19 9:10 p.m.

Apr 15, 2012

Haven't updated in a while... mainly because the Golf has not been at my place.

Let's start with the Cabriolet.

Installed the Odyssey battery thanks to a bracket made by Chris Achilles (vtGTI).  I added some hollow aluminum tubing cover the threaded rod.  I think it looks good and is functional.

I have been moving the Cabriolet into place next to the Scirocco with the use of my floor jack.  I put the jack in the middle of the rear beam, lift the rear off the ground, and then push it sideways.  I figured I have been pushing my luck thus far; sooner or later the car is going to fall off the jack and I would end up with some expensive damage.

Enter a set of Jegs heavy duty auto dollies.  This should help me avoid a "hindsight 20/20" situation when moving the car.  Very sturdy construction.  I like.

The Golf has been at a buddy's shop (Charlie / http://www.6starmotors.com/) for an engine rebuilt to get ready for the season.  I just didn't feel like working on the Golf as I was busy with the Cabriolet.  One project at a time (well, that's a first!).

Charlie is a very good mechanic and his attention to detail (i.e. doing it right the first time) is the biggest reason for having him work on the car.  Plus he knows racing as he has been racing his turbo poop colored flying brick Volvo for years.

We got rid of the valve relief pistons and used JE dish style pistons.  The GT2871R and ATP log style manifold (for sale!) were not reinstalled.

Enter a three day weekend with some time for me to work on the car.

The Odyssey battery was removed from the Golf (it went into the Cabriolet) as it wasn't cutting it at the events. The full size battery in the Cabriolet was the donor... I used a full metal tray and modified J hooks (turned them into tight 180-degree loops so it fit in the box).  I could not find a battery box that was wide enough for the metal tray that was not really long.  The box is longer than I wanted, but it saved another trip to the store.  Good enough.

I ordered a Snow Performance II water/meth injection setup from USRT along with the optional dual nozzle setup.  This means that I have a 175cc nozzle mounted right after the intercooler and a 100cc on the throttle body (after the butterfly valve).  The pump will run at 275psi to make sure everything is properly atomization.  I will run windshield fluid (need to make sure that it is 50/50 mix).

Why run the injection system?  So that I do not need to spend $10+ a gallon on race fuel.  It is hard to bring enough fuel (plus the cost of it) for a long weekend at the track.  I haven't had problems with hillclimbs yet.  I will tune the car on 91 octane (or whatever the highest is around here.... I forget) and the water/meth setup.  Then, at events, I will mix in 20% race fuel for some added pre-detonation insurance.

So far I ran the tubing from the B pillar to the throttle body.  That was it for tubing.  I haven't figured out a mounting solution for the pump and tank (mainly because I didn't have enough tubing to get to where I really wanted it).  Reading through the literature, it seems that I need a check valve if I am running the tank in the rear... seems like a good thing to use as a connection to add more tubing.

General maintenance... the latch on the rear hatch was not... well, latching.  I used a bungee cord at a few events last summer (you can see the hatch opening a little during acceleration at Ascutney) to hold it close.  

I finally decided that it was time to fix it. I did not fix it in the past as I had a hard time figuring how how to remove the lower plastic cover that goes across the inside of the hatch.

Broke out the Bentley... as with most MK4 content, it simplifies things a bit too much.  If the transition from MK1 (they told you sizes of wrenches, how to do things step by step, etc.) to MK4 says anything about the future, the MK7 Bentley will have "To remove engine from the car, remove the engine".

Anyway, after removing the two screws in each of the interior grab handles and prying the cover to disconnect it from the 10 very tight clips, it was free!  The transition from upper and lower plastic covers (I did not have to remove the upper) required a little work as they were clipped to each other.

Removed the latch and spent 30 minutes working the rusted part (lots of WD-40) until it worked properly.

If you look at the pictures below, it is the black rectangle that is to the right of the silver/gold arm.  The first picture shows it in the closed position (latched) and the bottom is in the open position.  When you shut the hatch, the springs pull this back into place (bottom image position to top image position).  Because this was rusted, it did not move.  I did notice an access hole that on the side (right side of image... you can't see it) that allows to you spray lubricant into the latch and push on the part that was rusted for me.

Anyway... blah blah blah... general maintenance.

I picked up a oil pressure gauge and warning light.  The light was mounted in one of the blank switch covers on the dash and the gauge was installed on a plastic part with three holes in it that I fabricated.

I took a 3-3/8" by 2-1/8 piece of polyvinyl chloride acetate (PVCA) to start this project.  I then supplied the 16 numbers printed on it to 42 Draft Designs and then sent me their "Mk4 Triple Gauge Panel" (link to product).  You know I can't fabricate!

I removed the boost and fuel pressure gauges from the A-pillar cage pods (they were getting in the way of my line of sight for left turns) and mounted them along with the new oil pressure gauge.

The issue I had with this setup is that 42DD expected me to have metal legs to mount my gauges.  The instructions had me bending one of the legs so that it mounts to the dash (outside the panel)... this is what holds this setup in the dash.  The problem is that my gauges some with a round pod type mounting solution.

So, break out the flat aluminum stock and make a huge bracket to hold the entire panel in.  Seems to work!

I did not drill holes/make relief cuts for the center gauge as it is missing the mounting posts.  I had to cut them off to mount the gauge in the A-pillar pod.  Darn it.  Contacted Autometer so see if I can replace the studs.  If not, I have two options... get a bolt with the same threads/cut off the head/connect it to the very short remaining studs using long nuts; or put this gauge on the pod over the steering wheel and demote the A/F or EGT gauge to the center console.  I don't like demoting the A/F or EGT as I think those are very important when racing.

Working on the car I heard something fall on the roof... and then walk around!?!  Strange wildlife spotted on the roof... Vern is starting to look old.

Time to load the car on the trailer to bring it down to Joey's (http://www.kalescustom.com) for the install of the new GTX turbo and custom header.

Because the car is missing a method of self motivation (mainly a functioning engine) it requires some persuasion via a come-a-long.  Naturally, something had to go wrong.  Always does.  The car was half way up the ramp when the cable broke.  Watching the car roll down the ramps with come-a-long, chains, and almost me was quite a site.  Hmmmm, I hope it stops soon as the house seems to be in its path.  Adrenaline must helped communicate something to my surprised brain that the car was heading towards the house... naturally, that is where it started.  And, thankfully, it stopped before it.  Whew!

How do I get it on the trailer now!?!?  Daylight isn't here much longer and I do not want to waste an hour getting a new come-a-long.  Well, I do have these fancy tie down ratchet straps. Hmmm.

I pushed the car as far up the ramps as I could (running start) and left it there with the e-brake holding it in place.  For those of you playing the home game, the good news is that this is not foreshadowing this time.  Connecting the ratchet strap to the tow hook, I started to pull the car up the ramp.  Good god... a six inch handle (lacking any real mechanical advantage) and being only able to hold about 8" of webbing on the spool at a time... this would take forever.  And it did.

I ended up jacking up the car via the rear beam and then braced the ramps.  This allowed for a flatter surface to pull the car on the trailer (that fixed the lacking mechanical advantage).  The car was at the end of the wood ramps when I started.  Switching back and forth between two ratchet straps (one to hold it in place with the other to pull... then switch) I was able to get it on the trailer in about 40 minutes. I think I worked off lunch.  A few more lunches to go before bikini season.

Dropped car off, went home... and typed all this nonsense sans caffeine this time.

My original plan was to head down to DSG (http://www.dentsport.com/) for the tune this time, but I ran out of time.... not enough days between now and Ascutney (May something-ah-rather).  I instead plan to go to VEMS.us (same guy that did the Cabriolet).... back when I was planning to go to DSG, Jason (VEMS) did not have a dyno.  VEMS is about 3 miles from my house.  Regardless of the distance, I still wanted to head down to DSG for the tune and to hang out as I race with these knuckleheads.  The calendar dealt a different hand for me.

I hope this all comes together for Ascutney... it is still my favorite hill.  If not, I might have to drive the 2004 Jetta 1.8T... 140K miles and original clutch.  We will see.

That's it for now... next chapter will be post-Kales followed by post-VEMS... and then hopefully post-Ascutney with a lot of positive news!

Rabbit Farmer
Rabbit Farmer New Reader
2/24/19 9:13 p.m.

May 01, 2012

Since the Golf is still over at KalesCustom (he will give me an update on Friday), I have been working on the Cabriolet.

I determined that the speedometer cable broke and needed to be replaced.  Since it was a custom setup, I sent the broken cable to http://www.speedometersolutions.com/; $65 later there was a new cable on its way to me.  Should be here some time this week.  Sweet.

Broken cable...

I was able to mount the VEMS ECU in the stock location.  I fabricated a bracket... "fabricated" means took some flat aluminum stock and made various bends in it and drilled a hole... that holds the ECU into the stock bracket.  Came out pretty good, IMHO.

I brought the car down to Jason at VEMS.us to take a look at a few magical things (magic = electrical) and hook up the tachometer to VEMS.  It would be great to drive this car with a working speedometer and a working tach.  Zero out of two at the moment.... thank the Apple and Blackberry gods for "speedometer apps".

Turns out the tachometer does not work on the cluster.  Darn.  I tried another cluster where the tach and speedometer does work, but all the other lights and other tidbits don't work as it was a different model than expected.  Selling that cluster if interested (the one that works) and looking to replace the full cluster or just the tach for the one that doesn't work.

Original cluster that I need to replace the tach:

Note bolt pattern around the tach and orientation of the tach...

Tach I picked up locally thinking that I could use it... speedometer and tachometer both work. (this is the one for sale!)

Not a lot to report on the Golf.

I ordered a braided line for the oil pressure gauge since I did not want a plastic hose with pressurized oil in the cockpit.  Again... picked it up from Jegs.  Fittings are -4.

Every package that Jegs sends me (regardless how little I order), it always seems to have a hat in it.  I gave away about 4 of them so far and still have 4....  I did notice that they were trying to sell them for $6 each per the sticker on the brim.  Riiiiiigggghhhhtttttt.

I have had so much positive experience with Autometer in the past.  

One sales person (per my recollection... if I was a betting man, I would not bet on my memory) at Autometer told me to get a certain oxygen sensor to replace the one that failed from running leaded race fuel.  Turns out that sensor was wrong so they sent me one for free.  Sweet.

After replacing the sensor, the wide band A/F gauge was still not working so I sent it in to be checked out.  They were not sure what was wrong (it could have been shorted) so they sent me a new one for free.  Sweet!

And the trend continues...

As I mentioned earlier... I cut the studs off the fuel pressure gauge to make it fit into the A-pillar pod.  Now I needed the studs to mount it on the flat dash panel.  I sent the gauge into Autometer with a request for new studs (they are pressed in) and a new plastic mounting ring (black part in the image below).  $12 and 7 days later I had my gauge in hand with new studs, new thumb screws, and a new plastic mounting ring.  Sweet!!!  Love this company!

PS - Even the Earth is bi-polar.

Rabbit Farmer
Rabbit Farmer New Reader
2/24/19 9:14 p.m.

Jun 02, 2012

Not a lot to share.  The Mt. Ascutney #1 Hillclimb was a great time.  Weather was perfect.

Because the Golf was not ready, I drove the 2004 1.8T Jetta (100% stock with the exception of Bilstein Sport struts/shocks... yes, even the springs are stock) and the 2001 Daewoo Lanos.

First event with the new shed on wheels.

The Jetta that both Julie (wifey) and I drove.

Would you believe that is it factory sponsored?  Would you believe it has 650 wHP?  Do you think Elvis is still alive?

Me getting ready to be slammed into the back of the seat with incredible acceleration during one of the runs.

Incredible fast video of the Daewoo in action (I did say fast video, not fast car).
http://www.youtube.com/watch?v=0xG4mFfOQ4M

Back to the Golf.... where is it?  Well, how about this fancy header from KalesCustom.com?

And how about an error made by the machine shop that he brought it to to level out the flange?  Guess he won't be going there again.

Expect some really nice pictures of the turbo/header soon.  Getting closer.

Next hillclimb (http://www.hillclimb.org) is Burke.... unsure if I am driving the Jetta, the Daewoo, or a lawn chair.  We will see.

Steve

Rabbit Farmer
Rabbit Farmer New Reader
2/24/19 9:15 p.m.

Jun 05, 2012

I figure I should have the Golf back any day.... very soon!

What a perfect time to jump into a new project.  Just in time to have to get working on the Golf. (what a moron!)

I decided that it was time to change the clutch/flywheel/pressure plate in the 2004 VW Jetta 1.8T.  It was having zero issues (even at the Mt. Ascutney hillclimb last month), but I did not want to push my luck as it is the original clutch with 150,000 or so miles on it.  Laying underneath the car and slowly rotating a wheel, I can hear the clutch making a little noise.  Normal?  Don't know....  curious what it looks like after I remove it.

Enter John at FastAddiction.com.  I now have a VR6 clutch/pressure plate and 14# flywheel.  I did not want anything really expensive (i.e. Spec 2) as this is my daily driver.  The upgraded clutch will provide me with some options in the future should I ever want to flash the ECU for more power.

I also plan to address the starter (makes noise in the winter after the car starts), replace the secondary air pump (again, in the winter, sounds like a jet very infrequently), and replace a hose that is part of the crank case ventilation. (turns out I have the wrong part, but I will bring the old part down to VW so they order the correct one); I temporarily fixed it with a piece of PVC (see picture).

The stuff...


At the Mt. Ascutney hillclimb, I did notice some oil smoke from under the hood.  I figured it was related to the turbo oil return line and oil pan that I just replaced (residual oil), but it seems it is a new leak on the side of the head.  That will require a little investigation.

Anyway, decided this will be a three night event so that I don't wear myself out.  First night, disconnect everything from the transmission.  Next night, remove the transmission.remove old clutch assembly/install new clutch assembly, reinstall the transmission.  Finally, night three is to hook everything to the transmission.  Of course, I'm sure this plan will change as I may have to wait for the correct crankcase breather tube and addressing the oil leak.

Rabbit Farmer
Rabbit Farmer New Reader
2/24/19 9:15 p.m.

Jun 08, 2012

Stock dual mass flywheel/clutch/pressure plate vs. the after-market.  The clutch was getting very thin.  It will be nice to not have to worry about flooring it through corners, racing up hills, etc. thinking that the 150k mile clutch might die.... of course, it was running 100% with zero issues so it was a good time to attack it.

It took all this.....

To get out this @#$%@#$%$ part!

I still have more to take apart to get the replacement part back in (easier to get a broken part out of a tight space vs. getting a new part in there that you don't want to break).

Crazy Germans.... they make it so difficult to work on these cars.  I especially HATE the various plugs.  I found it easier to take more of the car apart than mess around with some of those plugs.

Oh, and I think I found the source of the oil leak on the head.  It was actually a part of the valve cover (a flat, straight part, surprisingly) that gave up the ghost. I also noticed some leaking from the valve cover seal around the spark plug hole.  The whole gasket was pretty brittle.  The oil was hitting the cold side of the turbo.

That's it for a few days as I need some parts to continue AND there is hillclimb this weekend.  Hoping for good weather.

Rabbit Farmer
Rabbit Farmer Reader
2/24/19 9:16 p.m.

Jun 14, 2012

Was very, very busy last night... busy enough that everything seems to hurt.

I replaced the seal and half moon under the cam chain tensioner (you know, VTEC Yo!).  Thanks to a PassatWorld.com thread on this topic, I was able to easily replace the seals.

I compressed the chain tensioner thanks to Chris Cheeseman who gave me the simple, yet effective, tool.

It required removing the intake side camshaft (though, I never removed it from the chain so everything was still aligned).  Pretty easy from there.  Thankfully I did spend the extra time replacing these seals as it was also the half moon that was leaking.  The entire valve cover gasket (even around the spark plug holes) was wasted.

I ordered new intake manifold allen head bolts as the originals were rounded; this means they were rounded from the factor as this was never removed before.  The local VW folks gave me hex head bolts.  Strange, the EKTA image showed what I had (allen head bolts) while the description stated hex.  Every single 1.8T that I have ever taken apart has had the allen head bolts.  I guess this was an update… whatever, they worked.

Borrowed this engine carrier from Chris Cheeseman… one stop visit made my life soooo much easier as the floor jack and engine lift are no longer competing for floor space.  In addition, it made it a lot easier to do the clutch assemble.  I need to get one of these for my garage. Oh… and a lift.

A few detail pictures of the flywheel, clutch, and pressure plate installation. Pretty straight forward.

Those uppity fingers!

Fingers bowing to the ECS clutch alignment tool… all hail the pretty tool that I hope to never need again.

This means that the Jetta engine is 100% together with the clutch assemble installed.  I just need to install the transmission so that I can get it out of the garage to make room for the Golf.  

The what?!??!?!?

Oh… and the Golf is home as if 10:00 tonight.  Hopefully buttoning up all the loose ends by Saturday.

Teaser picture of the work by Joey at http://www.KalesCustom.com

Rabbit Farmer
Rabbit Farmer Reader
2/24/19 9:16 p.m.

Jun 21, 2012

Since the transmission and engine on the Jetta are all buttoned up (just need to bleed the clutch), it was time to jump into the rotors, pads, calipers, and lowering springs.

Christmas in June....

The rear rotors looked terrible.  The right rear caliper was definitely bad (would not release parking brake).

Pretty... new rotor, pad, caliper, and lowering spring.

Stock vs. H&R Sport Lowering Spring (rear)

The front rotor, pads, and calipers looked okay.  I know I am changing the rotors and pads... no question there.  Unsure if I will replace the caliper.  I'll know once I get both sides apart.  Right now just the right is apart... I spent 45 minutes trying to fish out the driveshaft from between the subframe and the engine.  It seems it got stuck in there when I was pushing the car back into the garage... I removed it to get the Cabriolet out this past weekend.  Surprised a Subaru on the interstate.

Stock vs. H&R Sport Lowering Spring (front)... I'm also replacing the strut bearings while I'm in there. I replaced them a few years ago when I installed the struts, but figure I'm in there anyway, might as well do them.

Stock ride height before the project.  I'll make sure to get an after picture also for comparison.

Meanwhile, back at [url]http://www.KalesCustom.com[/url] (Joey), the Golf is hidden in with a bunch of Subarus.  I guess Subaru has the opinion that you can get any color car you want as long as it is blue.

Next are a number of shots of Joey making the header... looks really nice to me!

Pretty turbo... and quick spooling!

Heading home for Joey's....

He even fixed the section of tailpipe that was crushed in the 2010 off road experience.

Shots of the engine bay....

Meth injection sprayer #2 / post throttle body.  Joey also had to change the mounting point of the throttle cable bracket as the spacer pushed the adjustment ability of the cable outside its normal operational range.... you know, the cable was now too short with the spacer.

Meth injection sprayer #1 / post FMIC.

All done.

The car now sits at [url]http://www.VEMS.us[/url] (Jason) who is looking through the 034EFI wiring harness to make sure everything is proper and functioning.  With the issues we have had over the years, we are looking at everything.

Next, the car is off to a fellow hillclimber at Dent Sport Garage ([url]http://www.dentsport.com/[/url]) for tuning.  I'm hoping to be able to make the Okemo hillclimb on July 7... might be cutting it close.  At least I have the option of driving the Jetta.

Steve

Rabbit Farmer
Rabbit Farmer Reader
2/24/19 9:18 p.m.

Jun 25, 2012

Almost done.  Need to bleed the brakes again due to the four new calipers.  There is a clunk in the front with quick turns to the left (sway bar hitting something?).  Unsure if clutch feels correct... seems like it doesn't have a very long throw.  It seems to work fine.

Strut assembly with new H&R spring and bearing....

Driver's side together. Don't get excited.  While that is an axle bolt for the 6-speed transmission, it is just there to make the car mobile while the normal 5-speed axle is out of the car.

I replaced all the plastic rain/dirt shields under the car.  This includes that short piece that goes from the lip back (the shield you need to remove to do an oil change) and both side pieces.  I actually purchased them for the Golf, but most everything matched up for the Jetta.   I did have to drill a few extra holes for the mounting points to match it perfectly.

Speaking of that belly pan. It really seems to me that there should be another plastic shield that covers the entire remaining opening under the car.  I have highlighted the mounting holes that are presently built into the side shields.  Unsure if the holes in the front could be mounting points, but clearly the sides are.  So.... why the mounting points but not shield?  I do see that European TDIs have the metal skid plate, but that wouldn't be mounting to these plastic side shields.  Buller?  Anyone?

Tightening the axle nut. (148ft/#, 180-degree loosen, 37ft/#, then plus 60-degree)

How the car sits after a few mile drive to bed the brakes, test out the clutch, and settle the suspension.  End product should be around 1.5" lower.  I definitely like how these springs feel with quick turns.

Rabbit Farmer
Rabbit Farmer Reader
2/24/19 9:18 p.m.

Jun 28, 2012

Yawn.....

Up at 6AM, left the house by 6:20, fought crazy traffic on I-93/I-95 in Massachusetts, got to Dent Sport Garage (DSG) at 11:15.  

http://www.dentsport.com/

There isn't a lot to report... I went there to tune the Golf (034EFI IIc with 4 bar) with the new turbo setup.  Here is the children's book version of the day.

It wasn't too hard to find.... I'm guess it is to the right.

Very cool old mill...

Knock knock... I think this is unit number 26.  Could be....

Well, hello!  Lot's of very nice projects.

Let's get mine in there.

Added some fans and stuff...

Can you spot Waldo?

Matt from DSG who did all the tuning.

The unit that removes exhaust from the dyno and brings it outside.  I would guess some small animals also made a quick exit if they got too close to the sucking end.

Heading home.... went from cold and rainy in the morning to hot (switched to shorts on the way home).  Got home by 7:30PM.  Stupid GPS was trying to send me down some very questionable roads on the way home, though it did help me avoid some really bad traffic on I-95 north.

For those of you with forum ADD, that is the pictorial version.  It is okay to stop here and go watch videos on youtube.  Now with words... small words as it is late and I really need to head to bed as it was a long day.

Old setup
GT2871R
25psi of boost (if I recall correctly)
Internal 36mm waste gate (I don't recall the exact size)
Race fuel
350 wHP

New setup
GTX2863R
New sweet header
External 42mm waste gate (larger than before)
Race fuel (didn't have time to swap out the race fuel for pump gas... maybe later... and then retune)
Meth/water injectors
353.2 wHP

Matt determined that the timing advance was very high.... I think he said 28 degrees at full boost.  He brought that way down.  He also changed the rev limiter so that there was a softer limiter at 6800 RPM (someone in there) and then the hard one at 7200 RPM.  I will enjoy this change as whenever I hit the hard limiter, I have to wait a few seconds for the computer to recover so I get get in it again.  Now I get a warning!

Water/Meth starts spraying at 8psi and continues through boost range (22psi max).

I will post up the dyno chart after I get it from Matt.

Big thanks to Matt at DSG.  He did a very thorough job before jumping into the tune and was professional with my baby.  Plus, he races with me so he understands the demands on the car.  I love the old mill shop and the guys down there are building/working on some seriously cool performance cars.

Looking at where I am now, it seems that I should not have purchased a turbo kit as everything ended up being custom anyway.  Just needed injectors, FMIC, turbo, wastegate, pump, EBC, BOV, etc. and everything else could have been built by Joey at http://www.kalescustom.com

I just need to finish installing the gauges (thanks to Jason at VEMS.us, all the lights in the gauges work and are working off the dimmer switch), change the oil, install the skid plate, and put some miles on it.  Okemo hillclimb in July.... I think I'm ready for it!

I brought the Cabriolet down to Jason (VEMS) to take a look at a running issue.  It happened once before.  Car runs 100% perfectly and then has 0% power (literally, it can't get over a speed bump) when it gets hot.  He was able to determine that the fuel pump was losing pressure when the engine gets hot. Or more specifically, the pump itself gets really hot.  Unsure of the reason.  This is a new Bosch 044 pump that I purchased at the end of last summer.  He is poking around to determine the cause.

Rabbit Farmer
Rabbit Farmer Reader
2/24/19 9:21 p.m.

Jun 30, 2012

Some graphs.

Dyno Dynamics Dynaometer at DSG.... say that three times at any speed.
353.2 wHP at 22psi

Boost pressure and air-fuel ratio.

Rabbit Farmer
Rabbit Farmer Reader
2/24/19 9:21 p.m.

Jul 02, 2012

More on the Cabriolet running issue.

In a nutshell, I drove it and everything worked perfectly.  About 20 miles into the trip the car stopped running properly.  It would idle fine, but zero power like there was a huge leak in the intake system or zero fuel getting to the engine.  I could free rev it, but as soon as I tried to move the car did not have enough power to get over a pebble in the road.

The first time it happened, Jason at VEMS.us replaced the O2 sensor; that fixed it.  When it happened again, we determined that the only reason the O2 sensor seemed to fix the issue is because the next time we drove it (and it ran perfectly again!) it was actually running properly because everything cooled down.   We have the effect, but not the cause at this point.

Jason was able to determine that the new Bosch 044 fuel pump was getting hot.  This could be an issue with the pump (bad pump) or a restriction in the line pre or post pump.  Jason mentioned a second fuel filter next to the fuel pump; that ended up being the fuel accumulator.  He then mentioned the in-tank pump… didn’t know these had in-tank pumps.  Well, guess what… it does have an in-tank pump and it had some issues.  The real issue was that the hose in the tank was deteriorated so bad that only the webbing was left.  Since he was in there anyway, he is going to replace the in-tank pump.  This means we will have the in-tank feeding the external pump.

Hopefully everything will be golden after this.  It is hard to find all the issues with dealing with an old car (1989) and one that was owned by someone else (you never know the history of the car).  At least when I get around to selling the Cabriolet, the buyer will know exactly what we did to the car based on the lovely internet.  Big brother is watching.

All Volkswagens are created equal but some are more equal than others…

Rabbit Farmer
Rabbit Farmer Reader
2/24/19 9:21 p.m.

Sep 01, 2012

Just realized that I was way behind on the post.  Nothing exciting going on with the projects as we have been working on the house.

Okemo #1 and Okemo #2 hillclimbs have come and gone... still need to put together the video.  

2012 Wolfsgart car show in Essex Jct, VT was fun.

Brought the turbo Cabriolet on Saturday...

And the Golf on Sunday.

Prior to the Okemo #1 (2012) hillclimb, I had to get everything buttoned up for its first event this year.  All that was left to do after the dyno was to install all the gauges in the center console.  Jason ([url]http://www.VEMS.us[/url]) did the wiring as that is not by area of expertise.... I don't think I have an area of expertise, but I know where my limitations lie.  

Little green light is when water/meth on (8psi+), red light is low level sensor on water/meth tank, large red light is low oil pressure warning.

Looks pretty.... plus, this setup gets the gauges out of my field of vision that was previously blocked by having them installed on the A-pillar.

I still need to put together the video for Okemo #1 with the Golf.... lots of interesting camera angles this time including a view of the console gauges during the run.

Artsy fartsy... and a little blurry.... Golf in parking lot at midnight.  That is the moon in the background.  3 second shot.

Photo during bring down at Okemo #1.

Okemo #2 (2012)... Julie at the starting line with the Jetta.

New bulkhead, thanks to [url]http://www.KalesCustom.com[/url], around the water/meth tank as required by New England Hillclimb Association (NEHA) rules.

Rabbit Farmer
Rabbit Farmer Reader
2/24/19 9:22 p.m.

Sep 07, 2012

I wanted to do a little tweaking to the tune on the Golf based on Okemo I experiences, so off to VEMS I went.  It is really nice having a dyno so local (3 miles-ish from the house) so it doesn't have to be a day trip when tweaking is in order.

Jason was able to squeeze me in between 7:30pm and midnight.  I installed a new set of plugs that were two steps cooler than stock and one step cooler than what I was running at Okemo I and we put it on the dyno.

Tune.tune.tune.tune....

Water.water.water.water....

All dynos are a little different in terms of the numbers that are produced from one to the next.  The VEMS DYNOmite dyno showed that I started with approximately 346wHP prior to making any changes vs. DSG's 355wHP.  Pretty much the same.  We ended up with 333.8wHP by the end of the night.

I did notice that at Okemo I, my mechanical boost gauge said that we were hitting 30 psi of boost; the tune is good to 22 psi.  So, we have to figure out the reason and a solution for Ascutney II.

We also noticed that there is a boost leak between the Snow Performance intake manifold (#2 injection nozzle) and the intake manifold... I will address that sooner or later.  All the bolts are tight so it is a matter of either a bad paper gasket or imperfect mounting surfaces.

The modifications to the tune included:
1. Changed the overboost safety from 30 to 25
2. Changed the voltage to the wastegate (based on RPMs and manifold pressure) from 22% to 0% to avoid overboost situation
3. Jason made some preference changes to the timing advance

So, I consider this a very good year for the Golf between Matt (DSG) getting the car to run great and Jason (VEMS) doing some tweaking in preparation for Ascutney II.

Will post dyno charts when I get them.

And.... still need to do the video of the Golf at Okemo I.  Been a bit busy with life (paint, carpet, digging holes, etc.).

Until the next update.

Steve

Rabbit Farmer
Rabbit Farmer Reader
2/24/19 9:23 p.m.

Sep 09, 2012

The final dyno chart.....

Somehow we got 234,000 ft/lb of torque at almost 0 RPMs.  Not bad for a non-diesel.....
(must have been running Microsoft's BS Dyno Tuning Software for this run)

Rabbit Farmer
Rabbit Farmer Reader
2/24/19 9:24 p.m.

Oct 17, 2012

Finally completed the Ascutney II (2012) video....

http://www.youtube.com/watch?v=qWduwFKXD94

Oct 18, 2012

And Philo....

http://www.youtube.com/watch?v=qyerDvRpKbI

Rabbit Farmer
Rabbit Farmer Reader
2/24/19 9:25 p.m.

Oct 19, 2012

I had a request on another forum to post just the BUMPER view from the Ascutney hillclimb video.

No long intro.  Get's right into the timed run and stays on the single camera angle.  I still included the row of cars at the end of the run plus the folks that helped make everything possible this year.

Here is the wide screen 720HD view: http://www.youtube.com/watch?v=-ZklDEi_ln8&hd=1
(you can select the 1080HD option... unsure how to link to it)

Enjoy.... or whine about it.  Don't care either way.

Steve

http://www.youtube.com/watch?v=-ZklDEi_ln8

Rabbit Farmer
Rabbit Farmer Reader
2/24/19 9:29 p.m.

Mar 03, 2013

Still trying to get the Golf ready for Ascutney. Seems it did not like to be started in the cold and a valve broke off.

I had an electric heater in the trailer on high for 24 hours. Might have made a dent. The day was much warmer than most (i.e. 40F). Two back fires and the car started. I shut it down after 15 seconds as the trailer was still closed to keep the heat in. Opened the door. Tried to start the car but it wouldn't turn over (I don't think it was the battery as it is now a full size battery and I charged it earlier in the week). Put 50amp starter charge to the battery and turned the engine over. It made a gear grinding noise... a noise that I now know was the valve turning into 15 small pieces.

The valve is stuck sides in the piston and split the spark plug... the spark plug was cross threaded due to the impact, but it came out.

Sigh....

She is stuck....

I believed this is all caused from not blowing out my water/meth injection system.

2 3 4 5 6

You'll need to log in to post.

Our Preferred Partners
YFJMvwDYRgkX8Zm8W0QAFUTW3HlBG1jZWsceIlycIzWDljQb0u6YiViMxIxtYM8L